# Daniel's 2nd build

**URL:** https://foil.zone/t/daniels-2nd-build/19956
**Category:** Build, Repair & Mod
**Tags:** wing, board, xps, cfk, mast
**Created:** [January 7, 2024, 11:07pm UTC](https://foil.zone/t/daniels-2nd-build/19956 "2024-01-07T23:07:43Z")
**Posts on this page:** 20
**Page:** 1

<div class="post-metadata">

### Author: ![sat\_be](https://foil.zone/user_avatar/foil.zone/sat_be/32/35523_2.png) [@sat\_be](https://foil.zone/u/sat_be)
#### Post date: [January 7, 2024, 11:07pm UTC](https://foil.zone/t/daniels-2nd-build/19956/1 "2024-01-07T23:07:43Z")

</div>

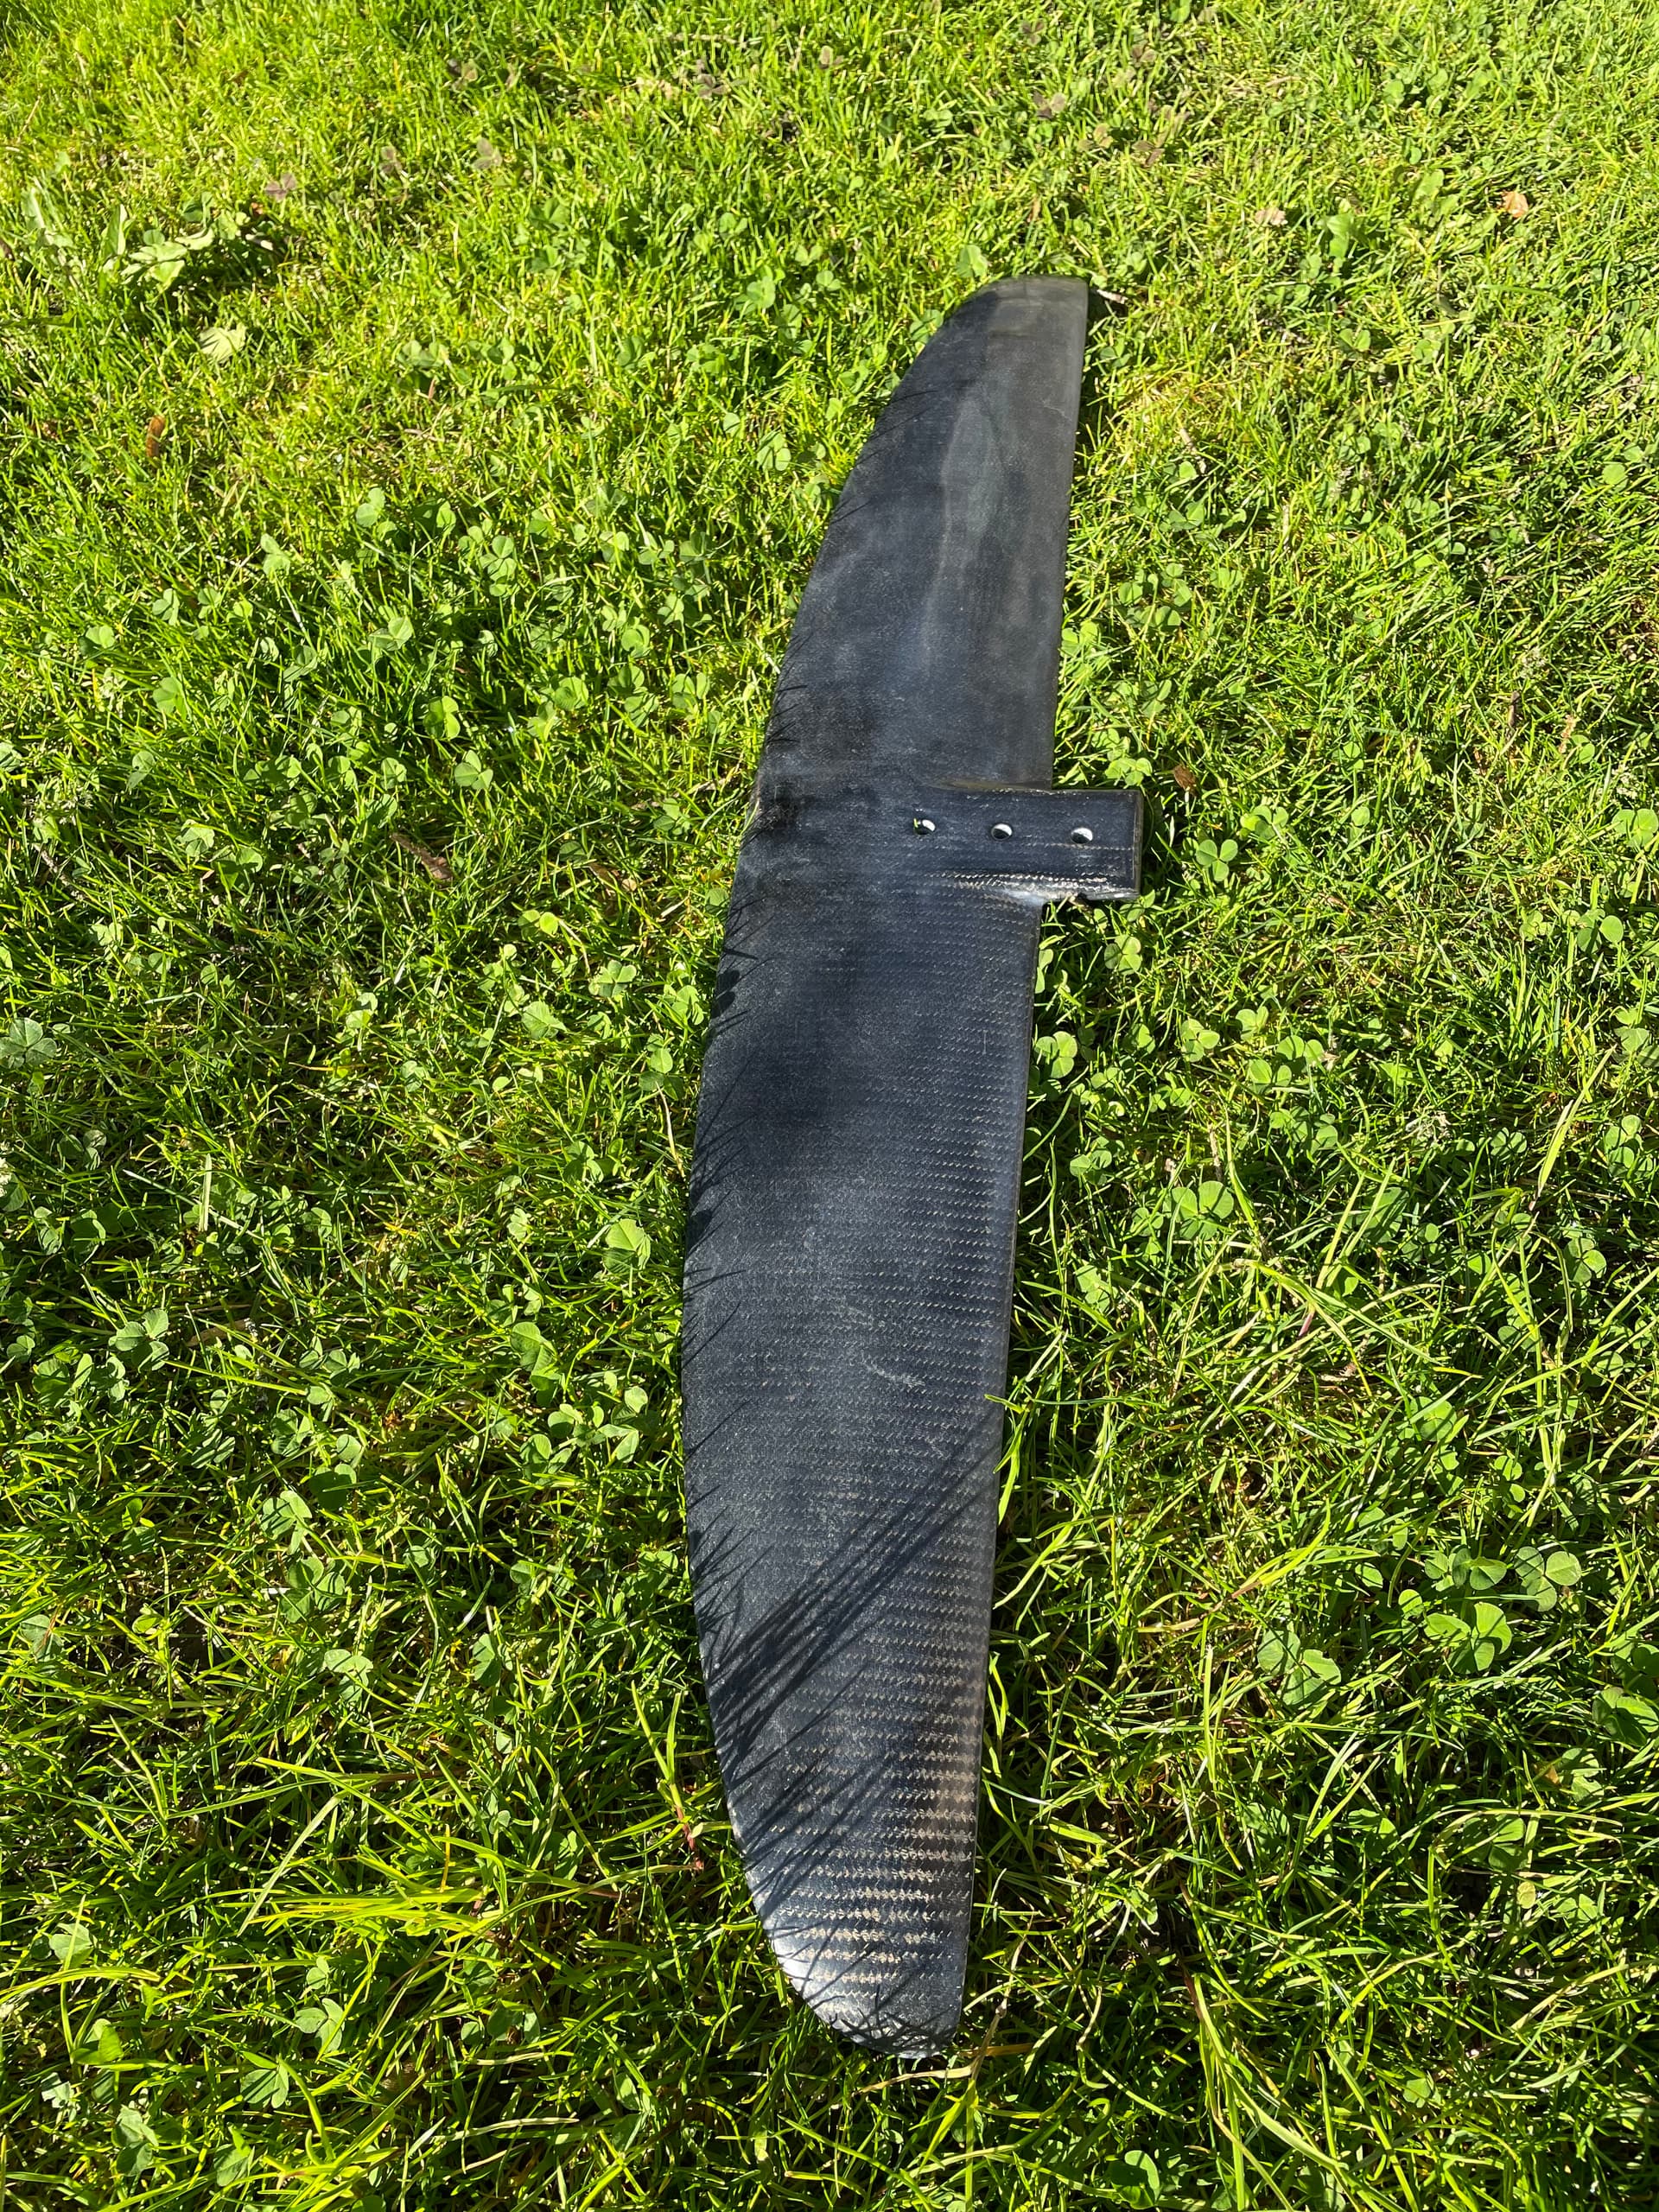
Started almost 3 years ago with my 2nd build. I started with some wings (rear and main wing) to test molding with 3d printed molds.

Rear wing:  
the printed mold was glued together and coated with gelcoat, then sanded.  
after treating with release agent, gelcoat was applied with a brush. Next 80g glass, when the gelcoat is sticky. Then twill and biax layers.  
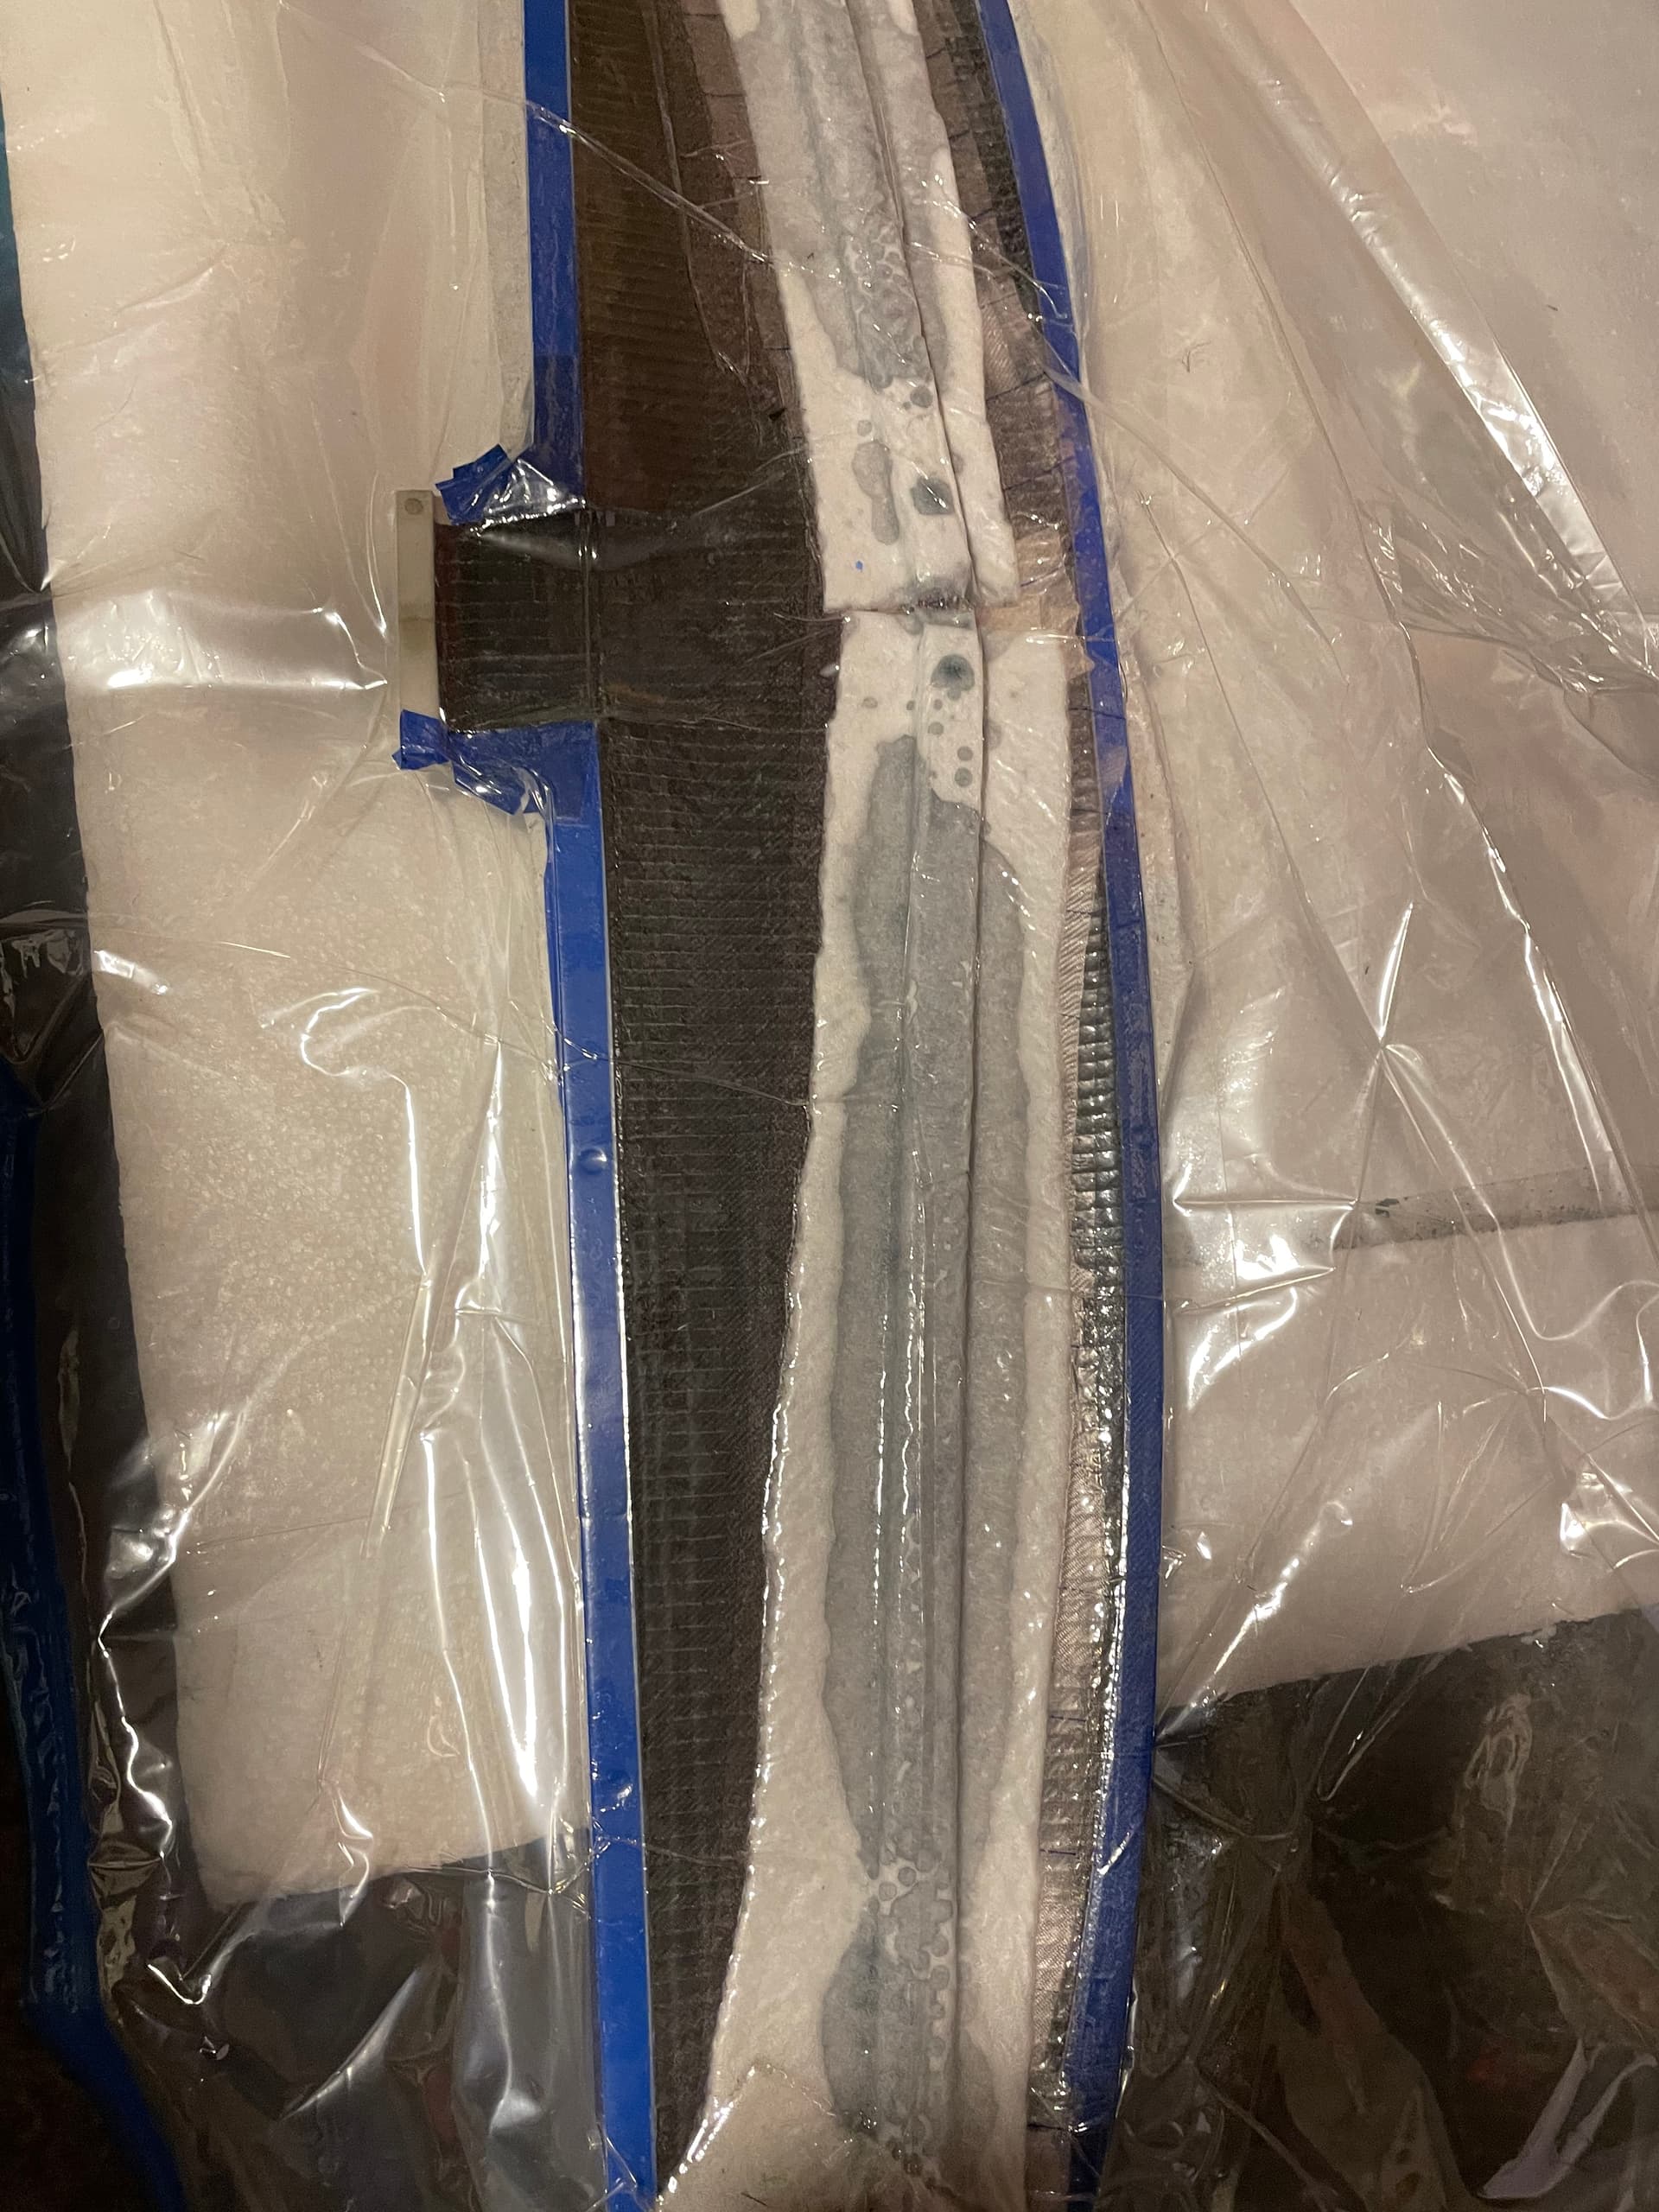
Each half shell was vacuum bagged (-0.6 to -0.8 bar) with peel ply. Be careful with heat (like heating blanket), pla with 15% infill will deform under pressure, if it gets above 50 degrees C.  
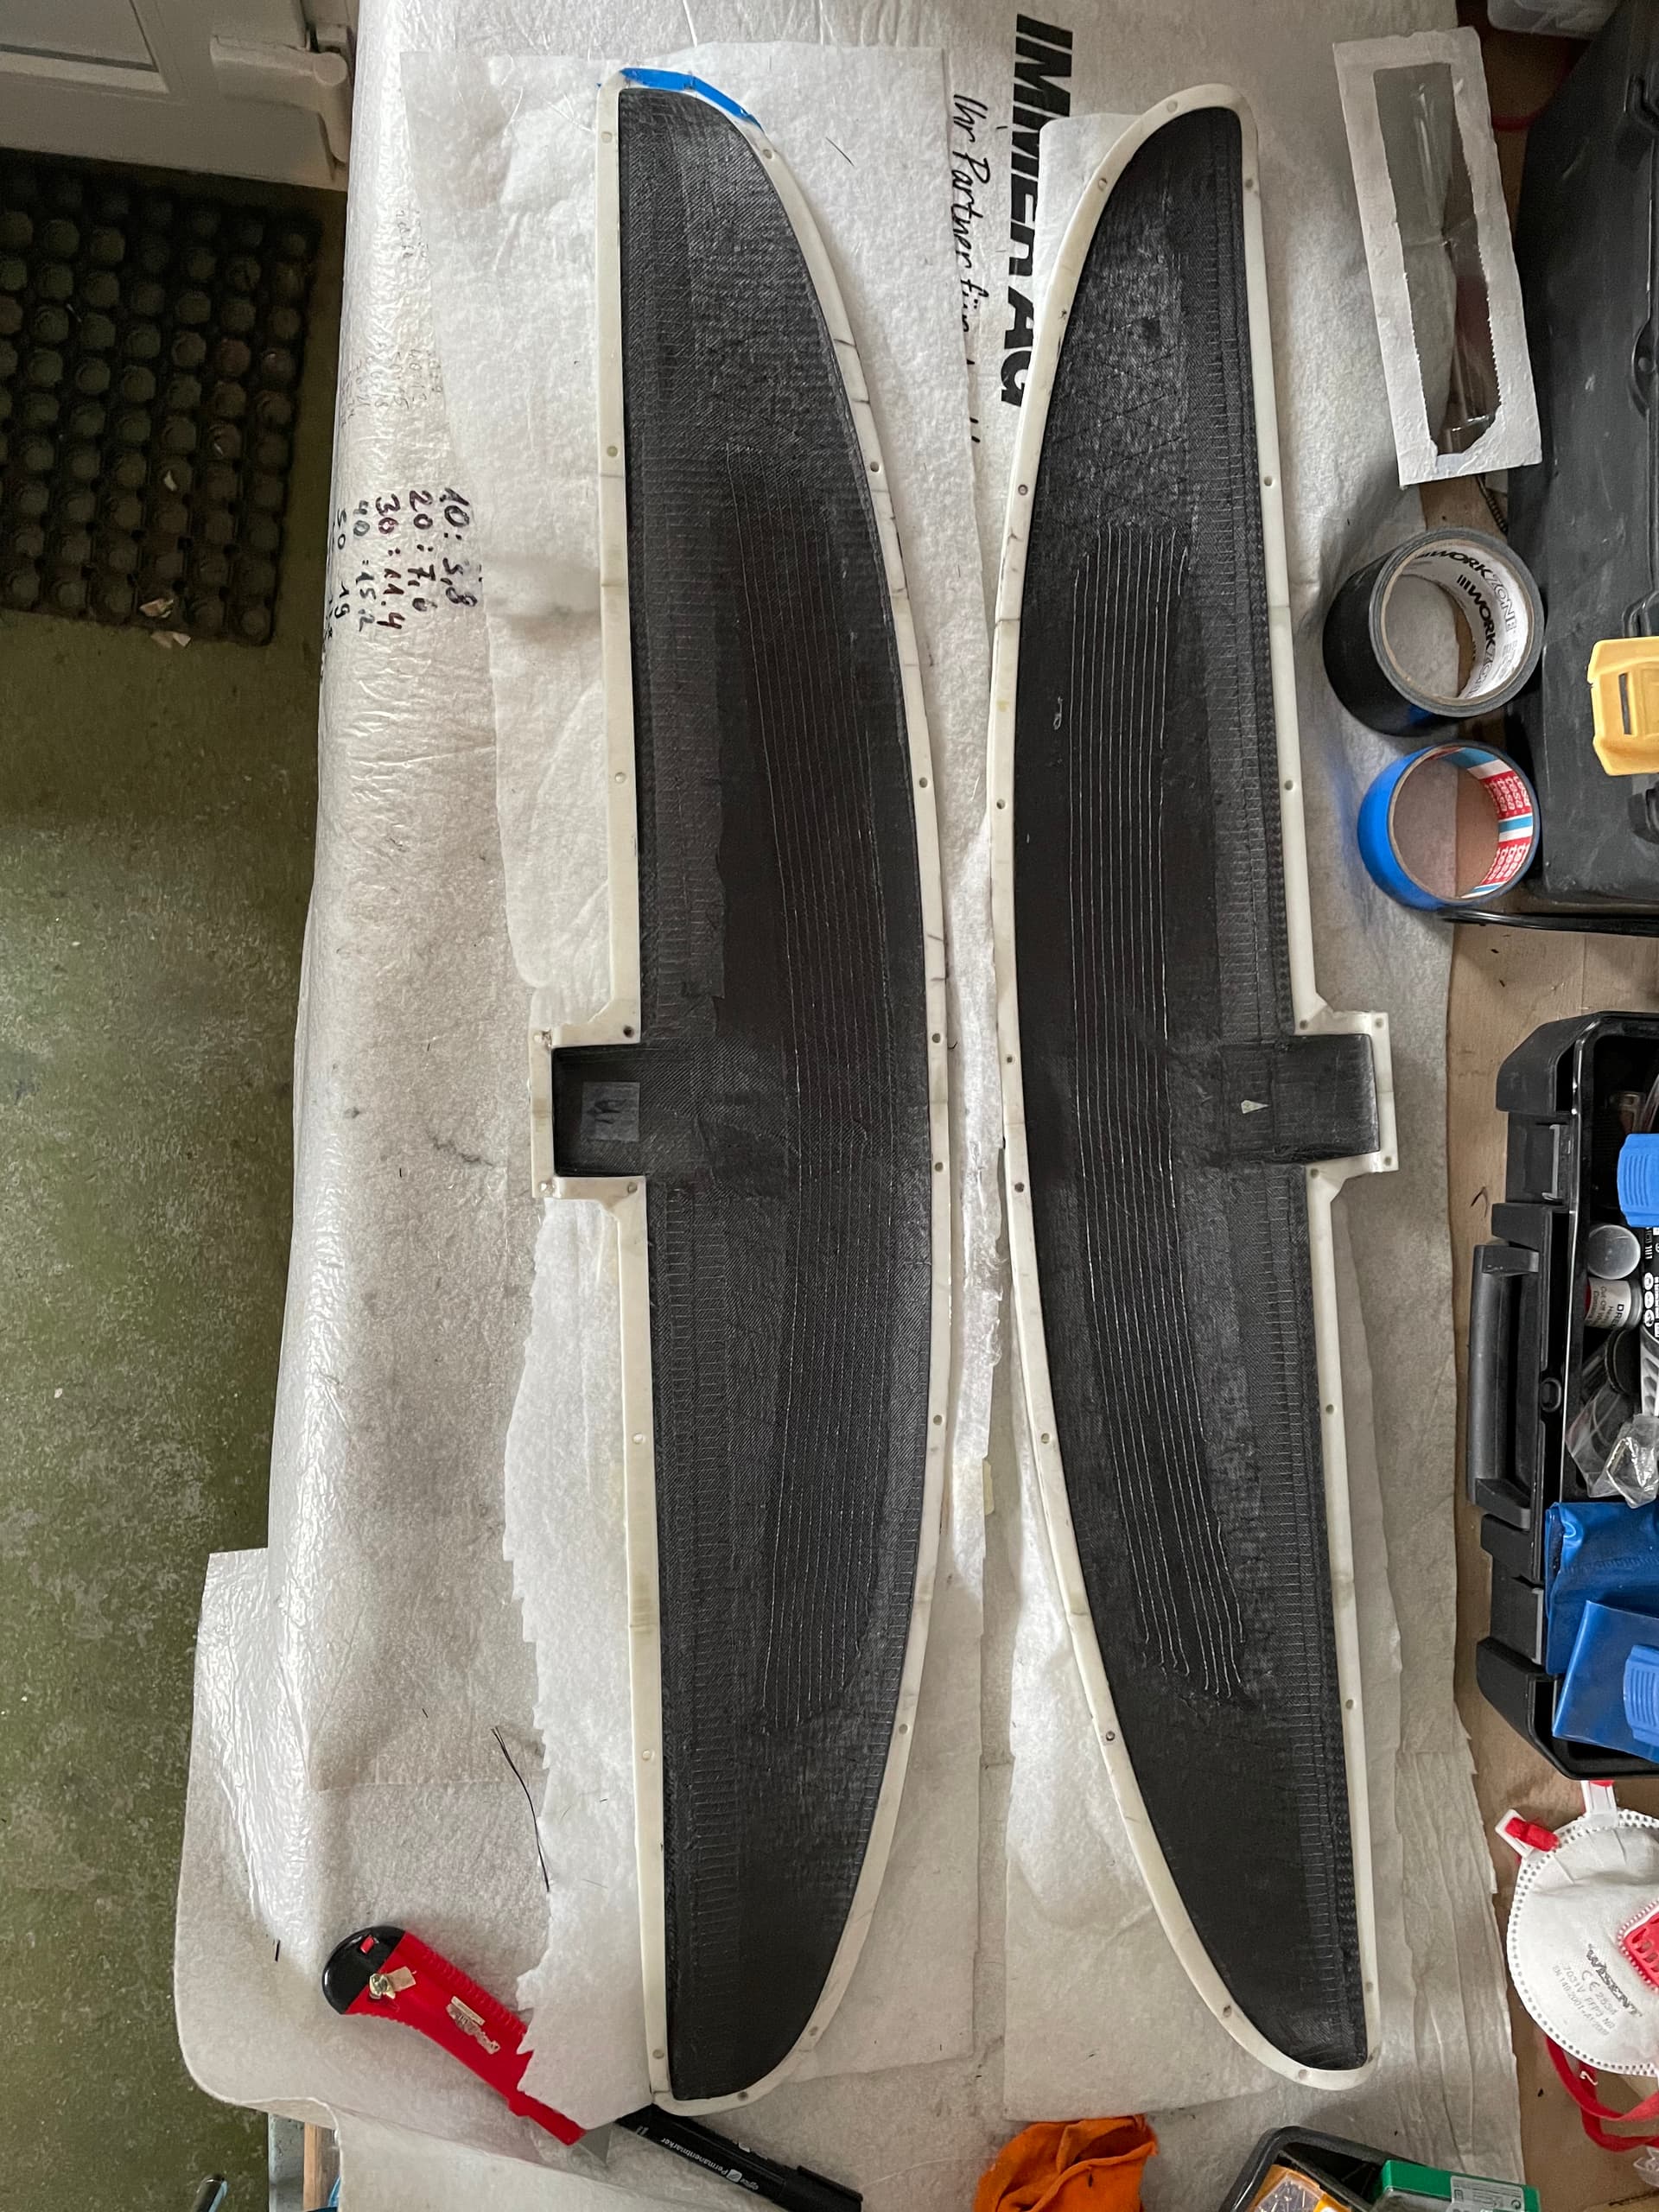
The two cured halves need to be trimmed until they fit into the mold again.  
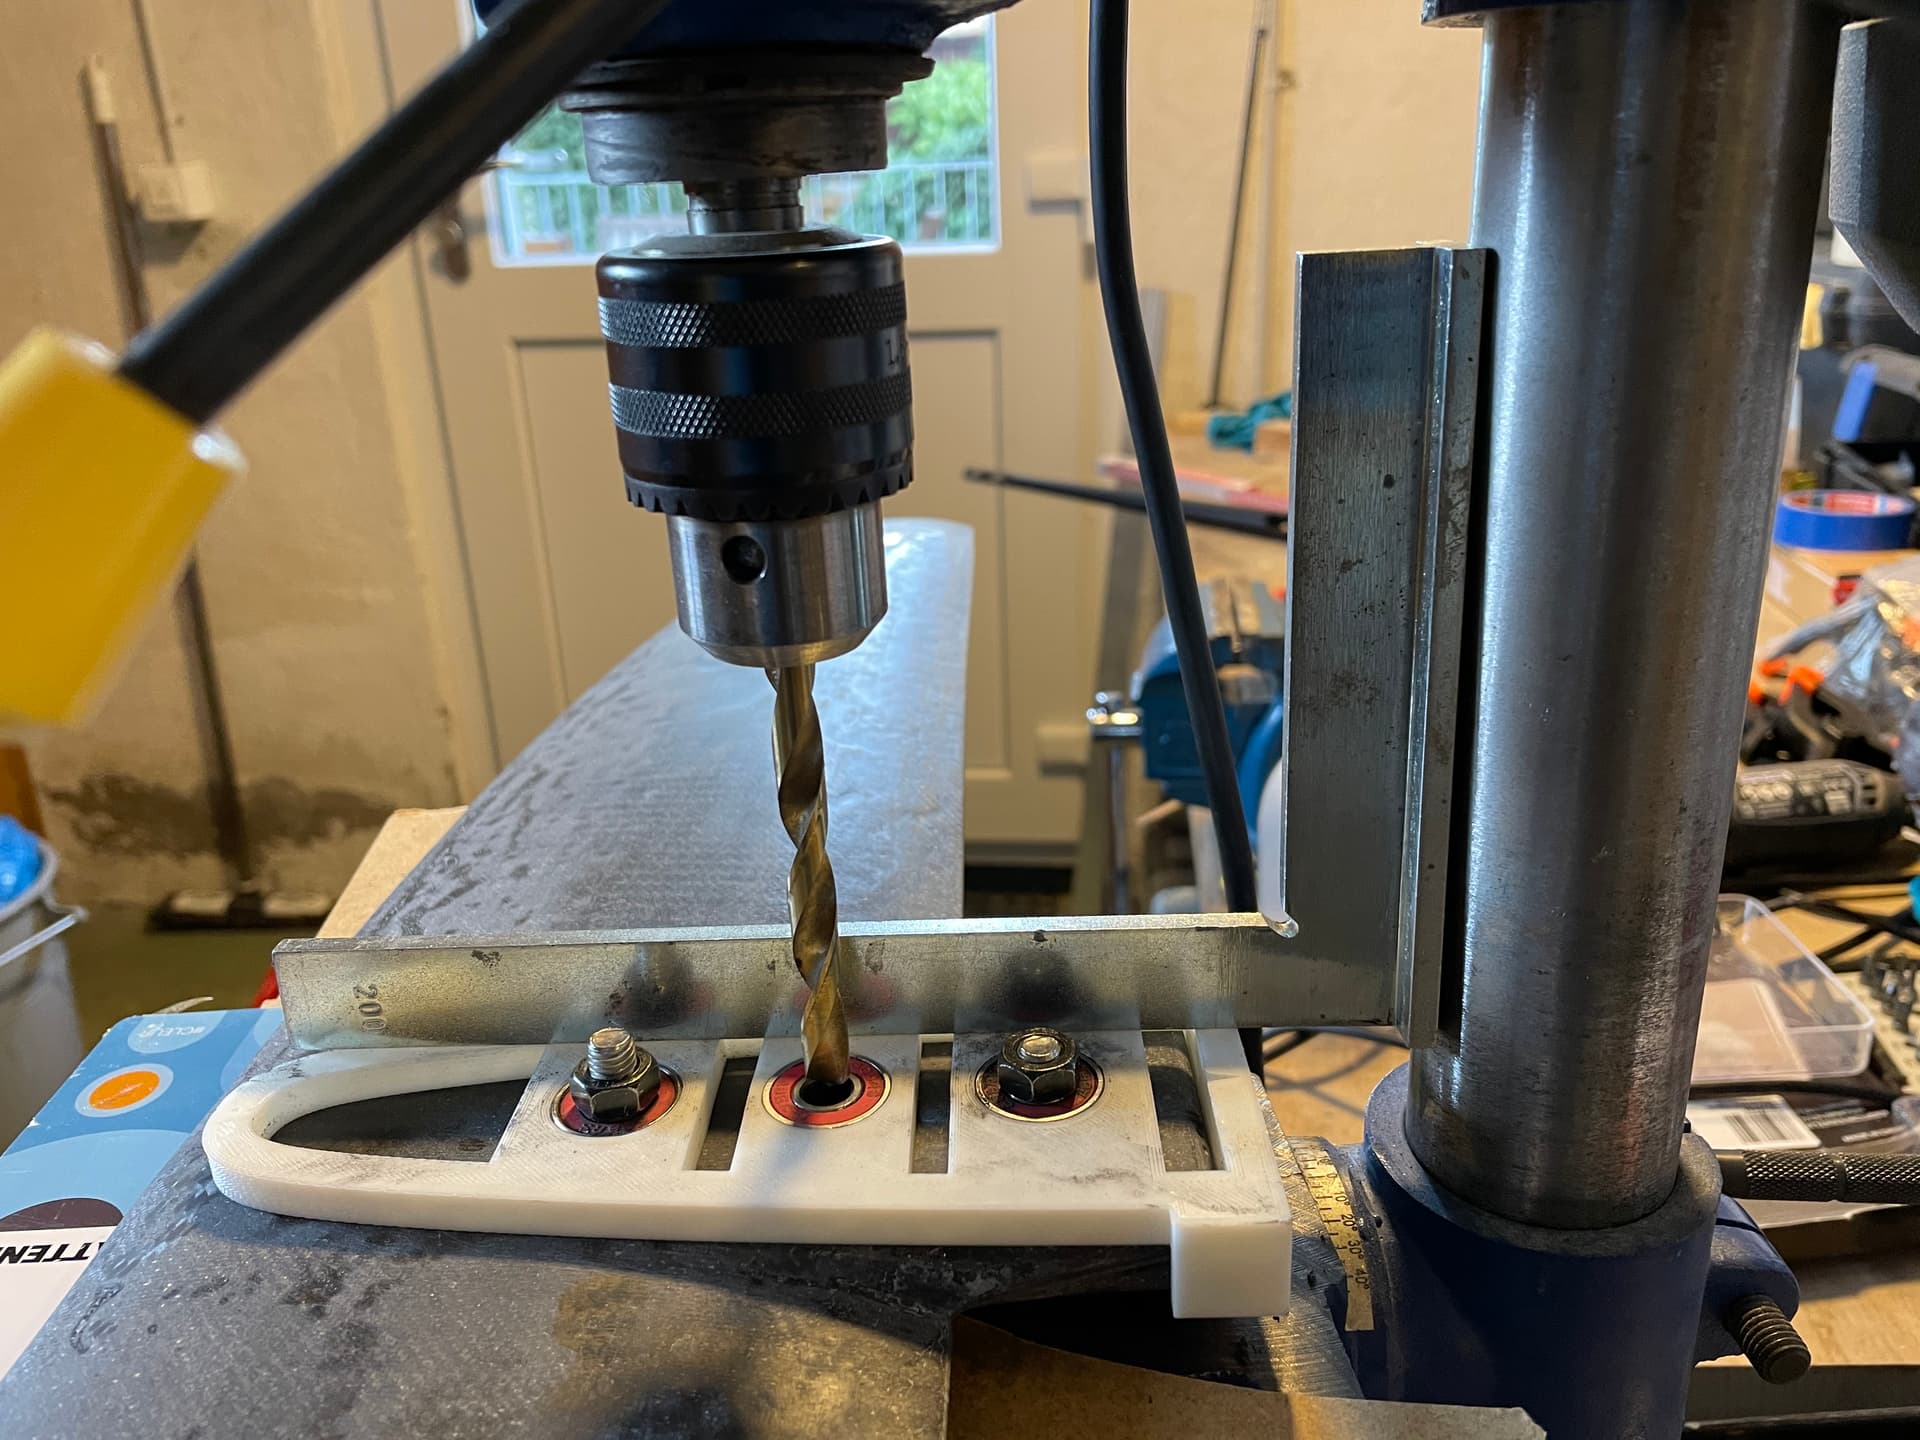
Last step is to fill the mold with a mixture of cfk flakes and thickened epoxy with micro balloons and thickener. Trimm again. I made a 3d printed drill jig to drill the holes.
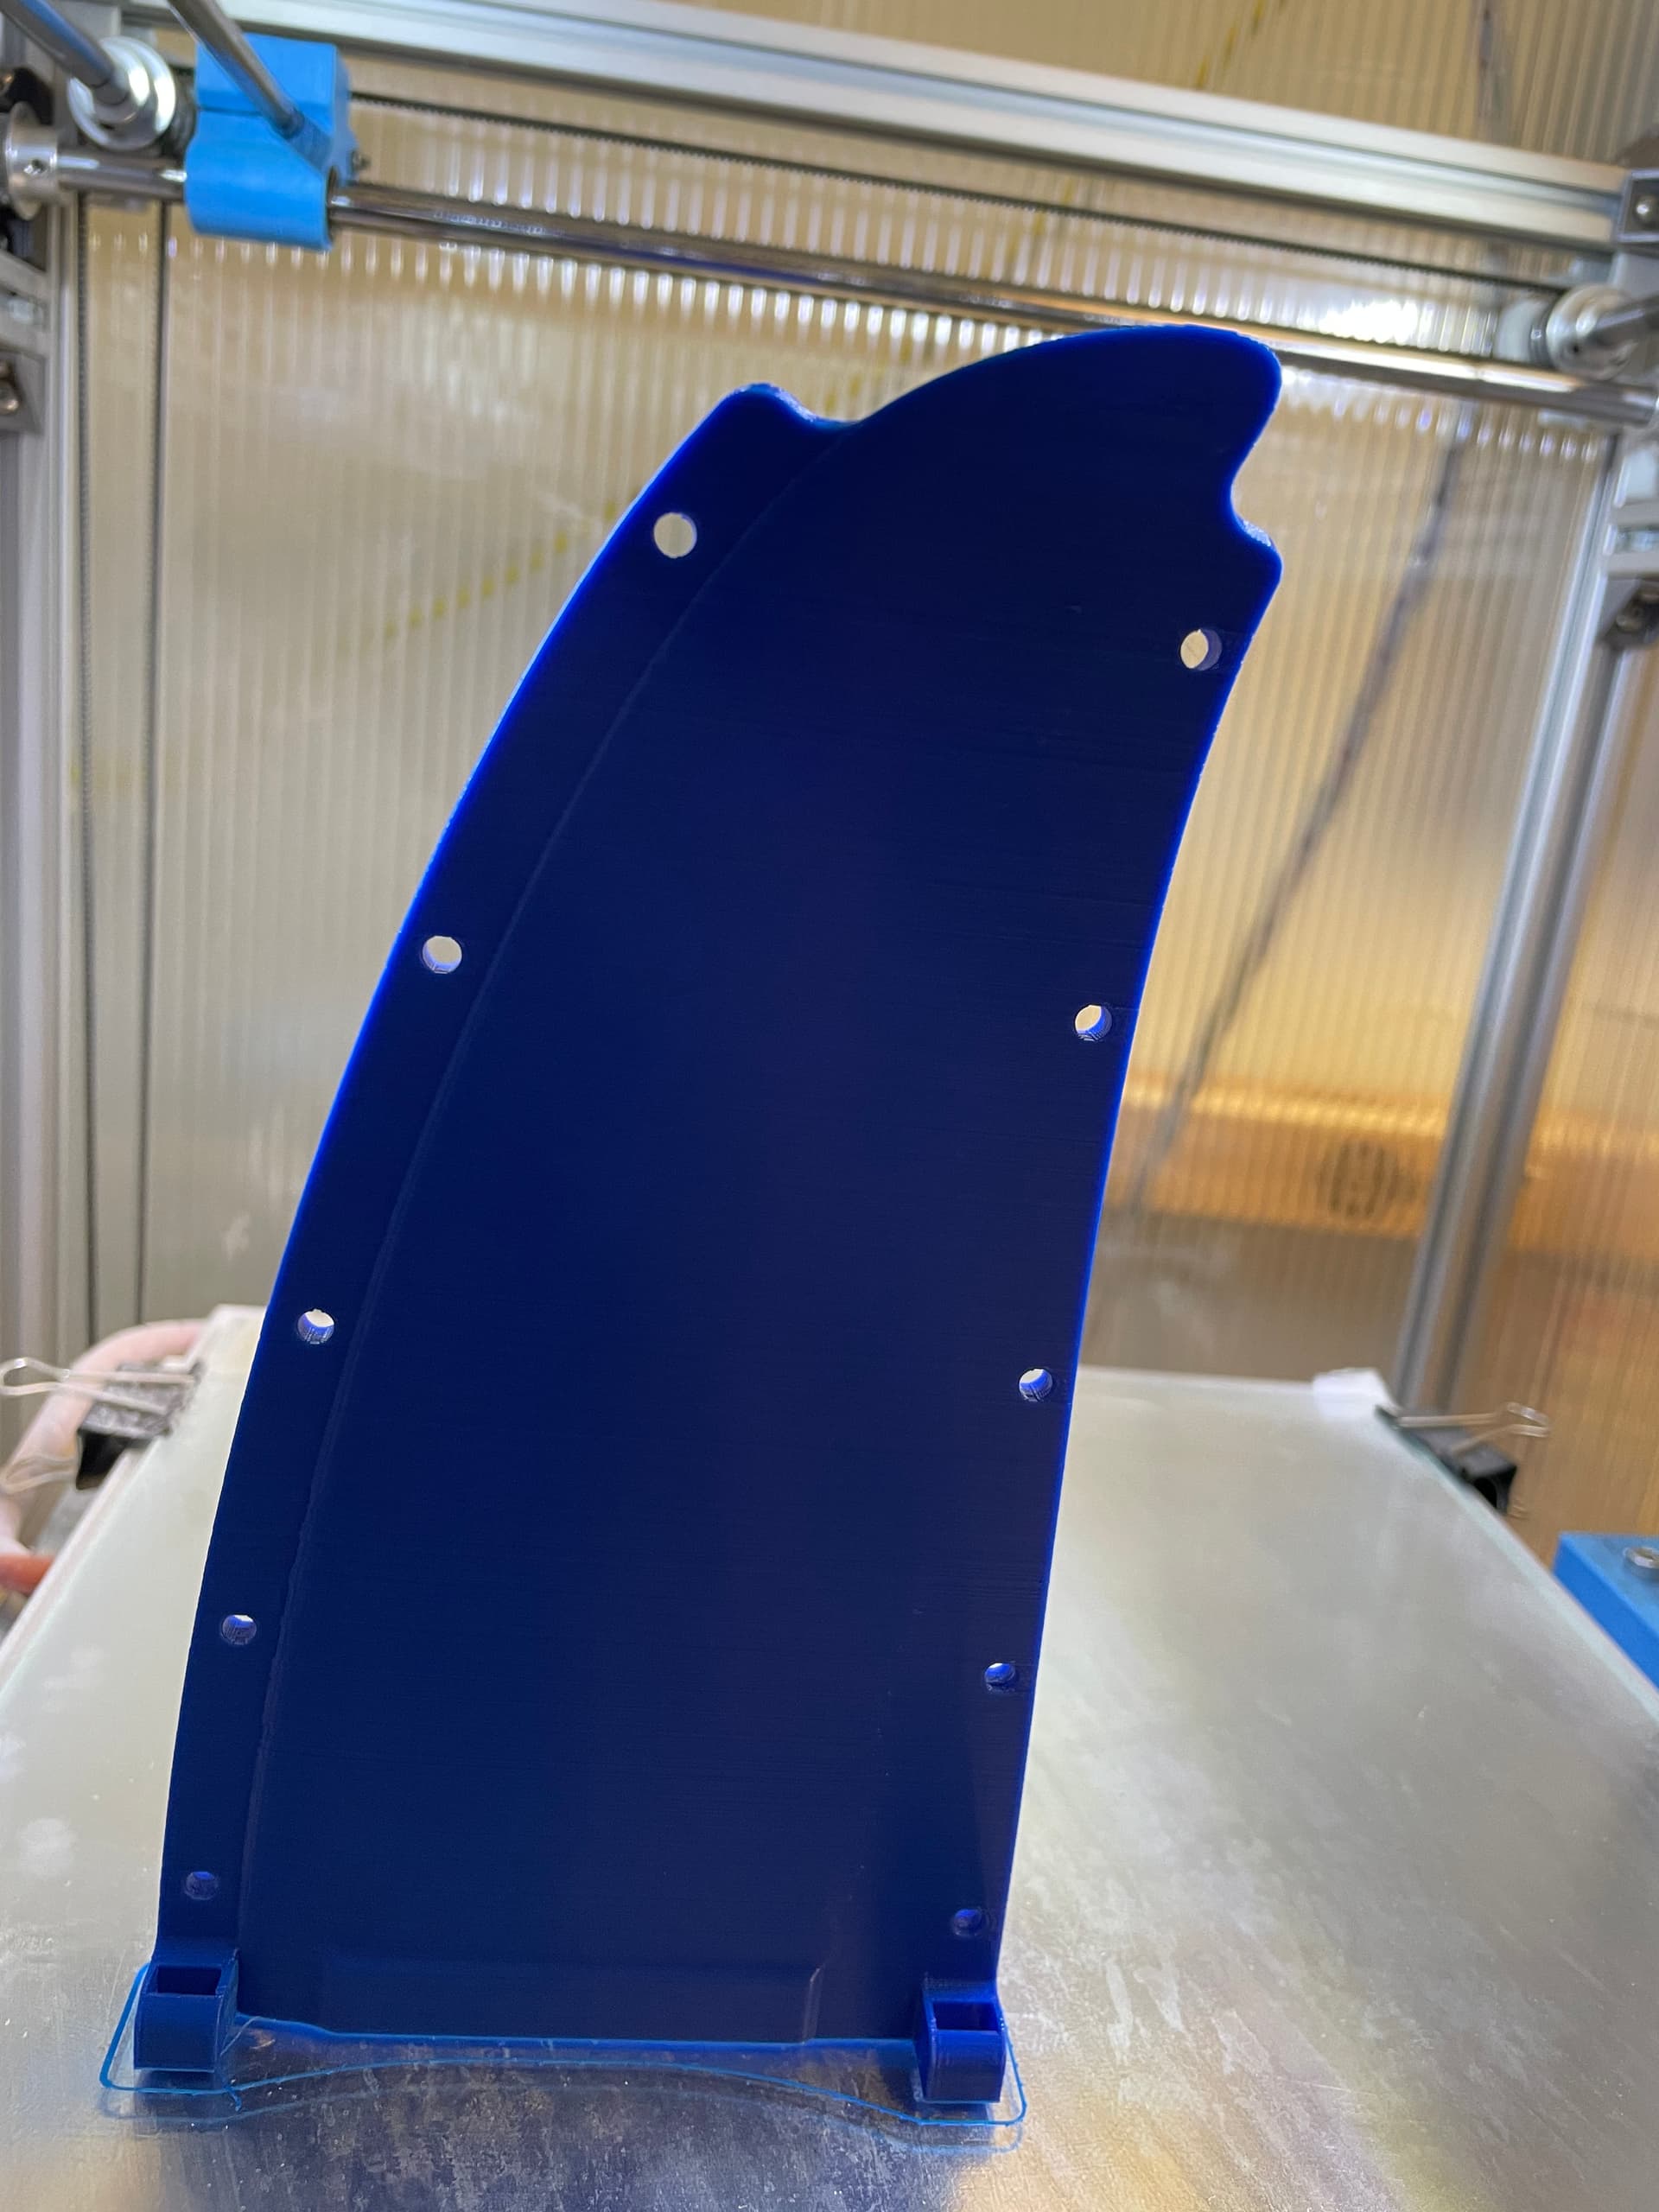
 ![IMG_0432](https://foil.zone/uploads/default/original/3X/5/d/5d3d9d9db5d76d7ea4e6fa009cd93ad447b41282.jpeg)  
printed in esun pla+, 15% infill gyroid  
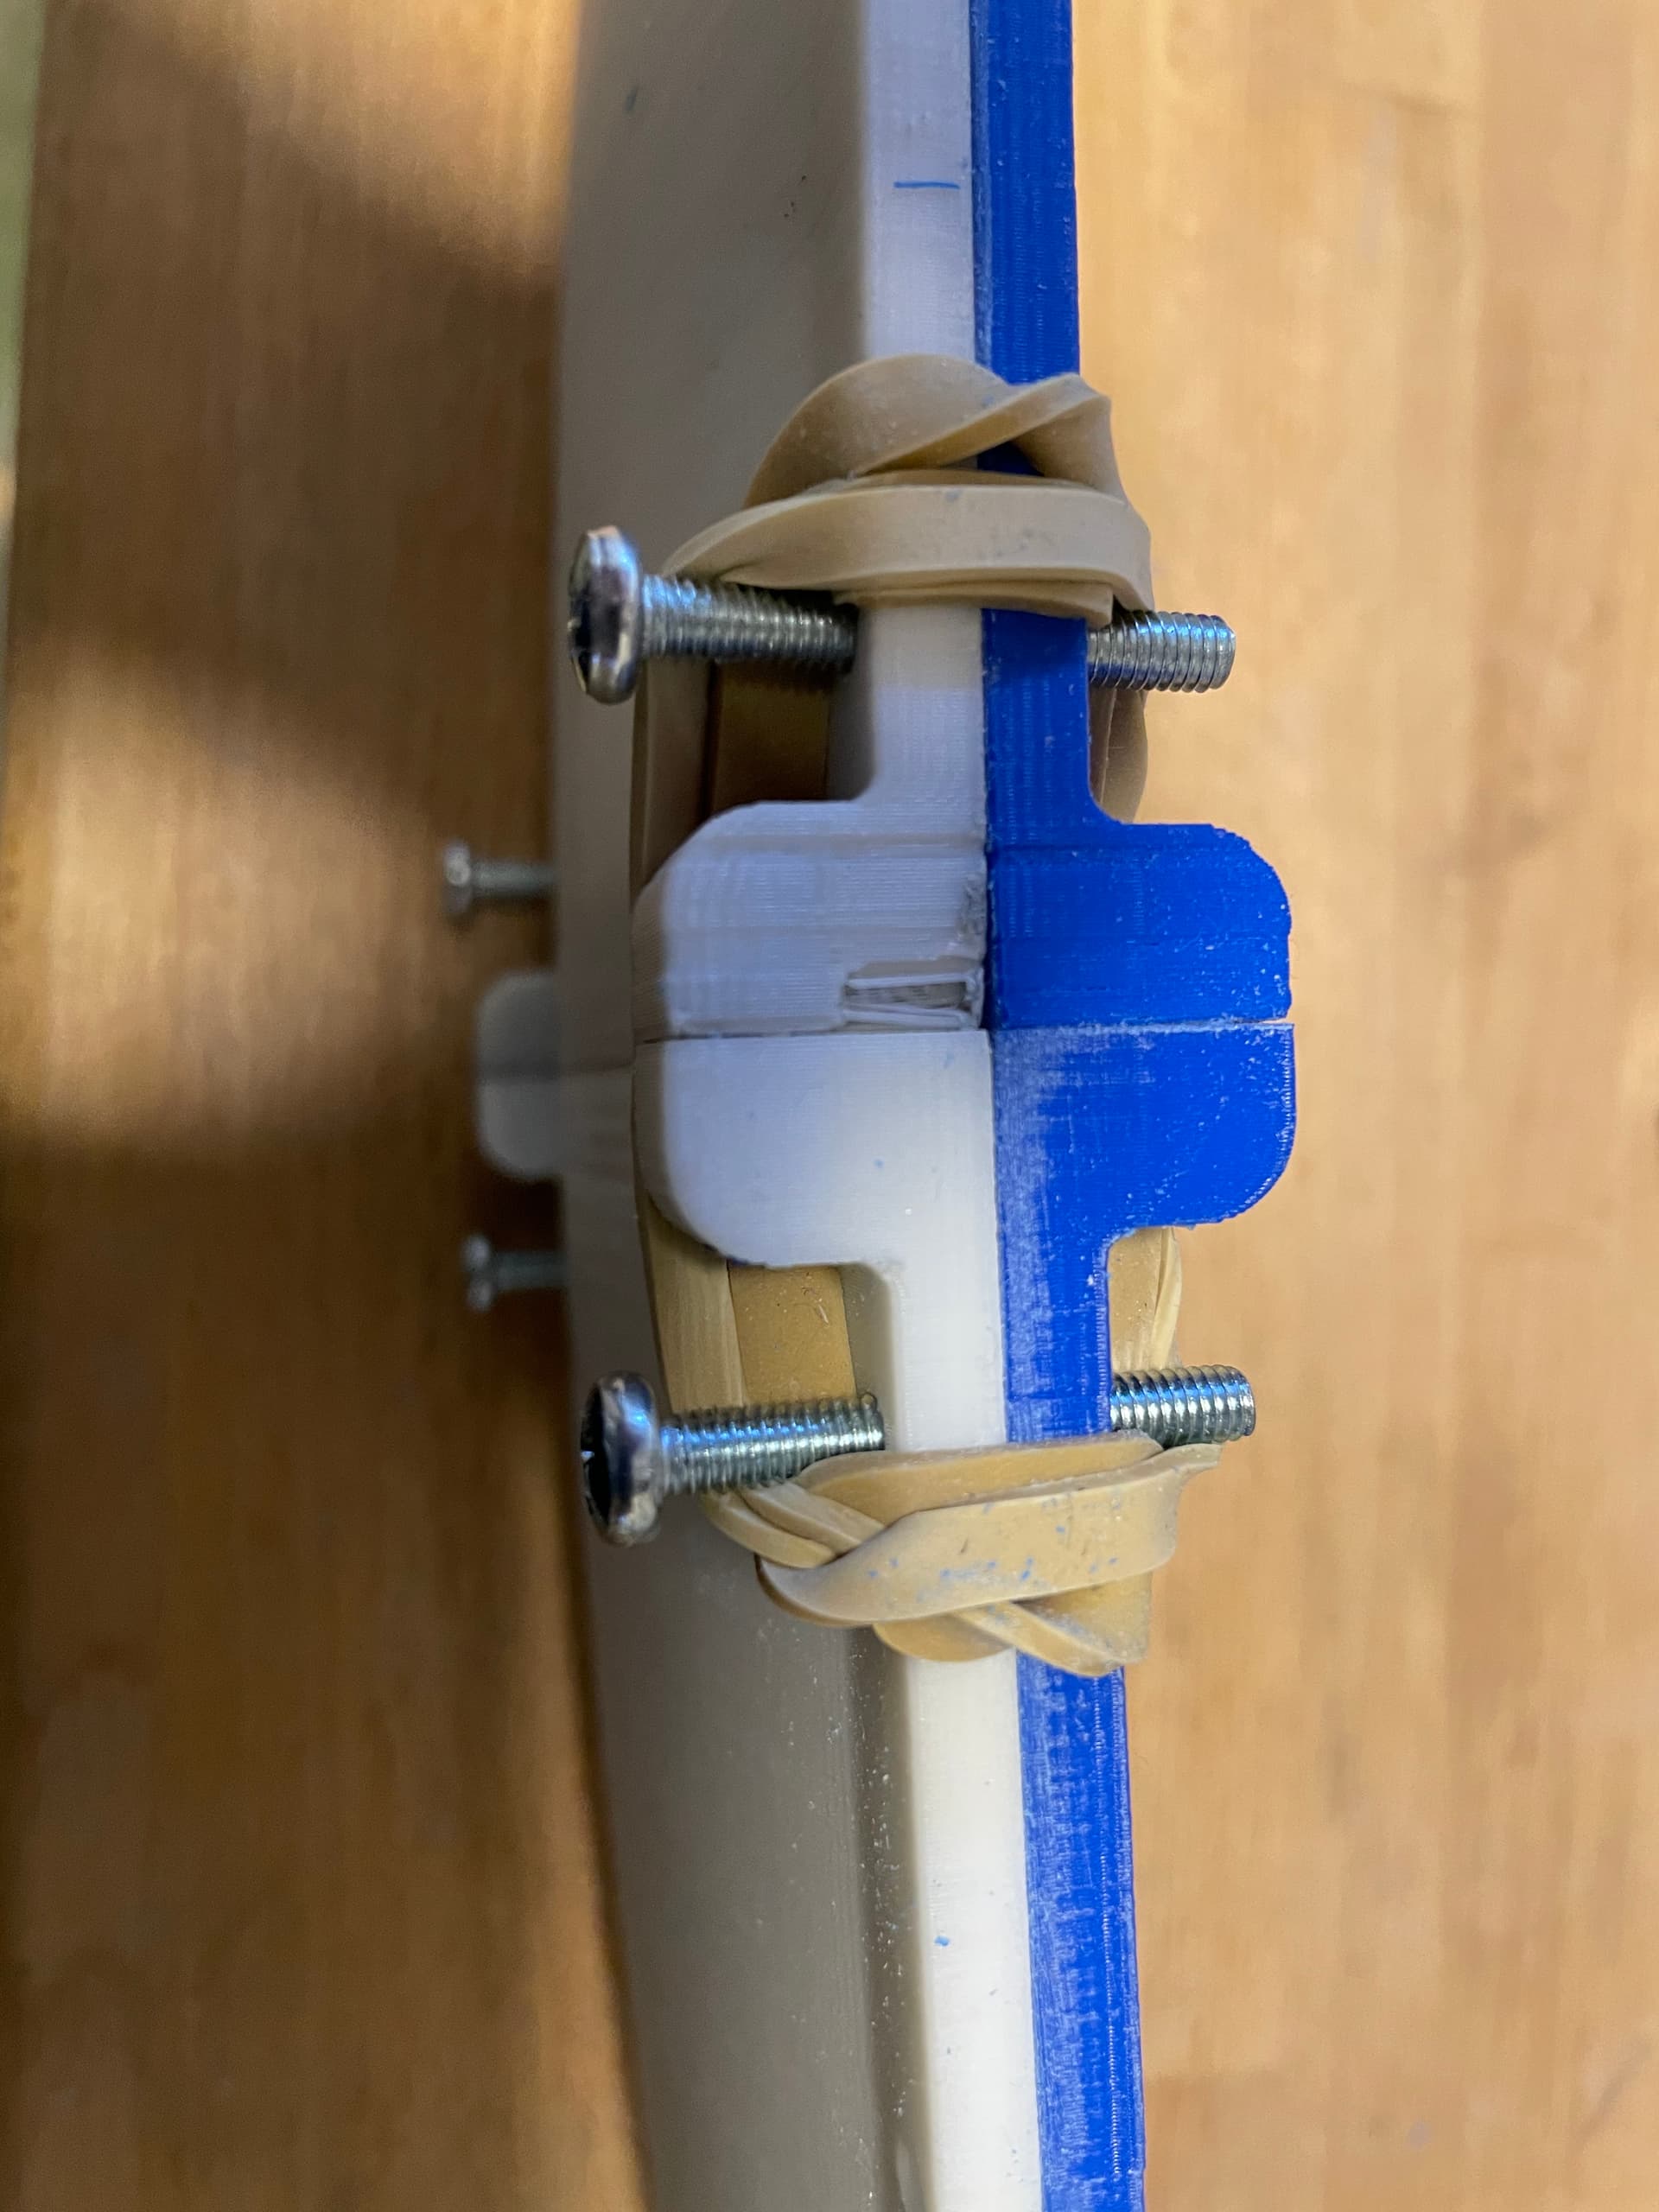
 ![IMG_0434](https://foil.zone/uploads/default/original/3X/a/e/aed8ea777307e83056f39d671c4409cc6f9eb828.jpeg)  
glued the two halves with 2k epoxy glue  
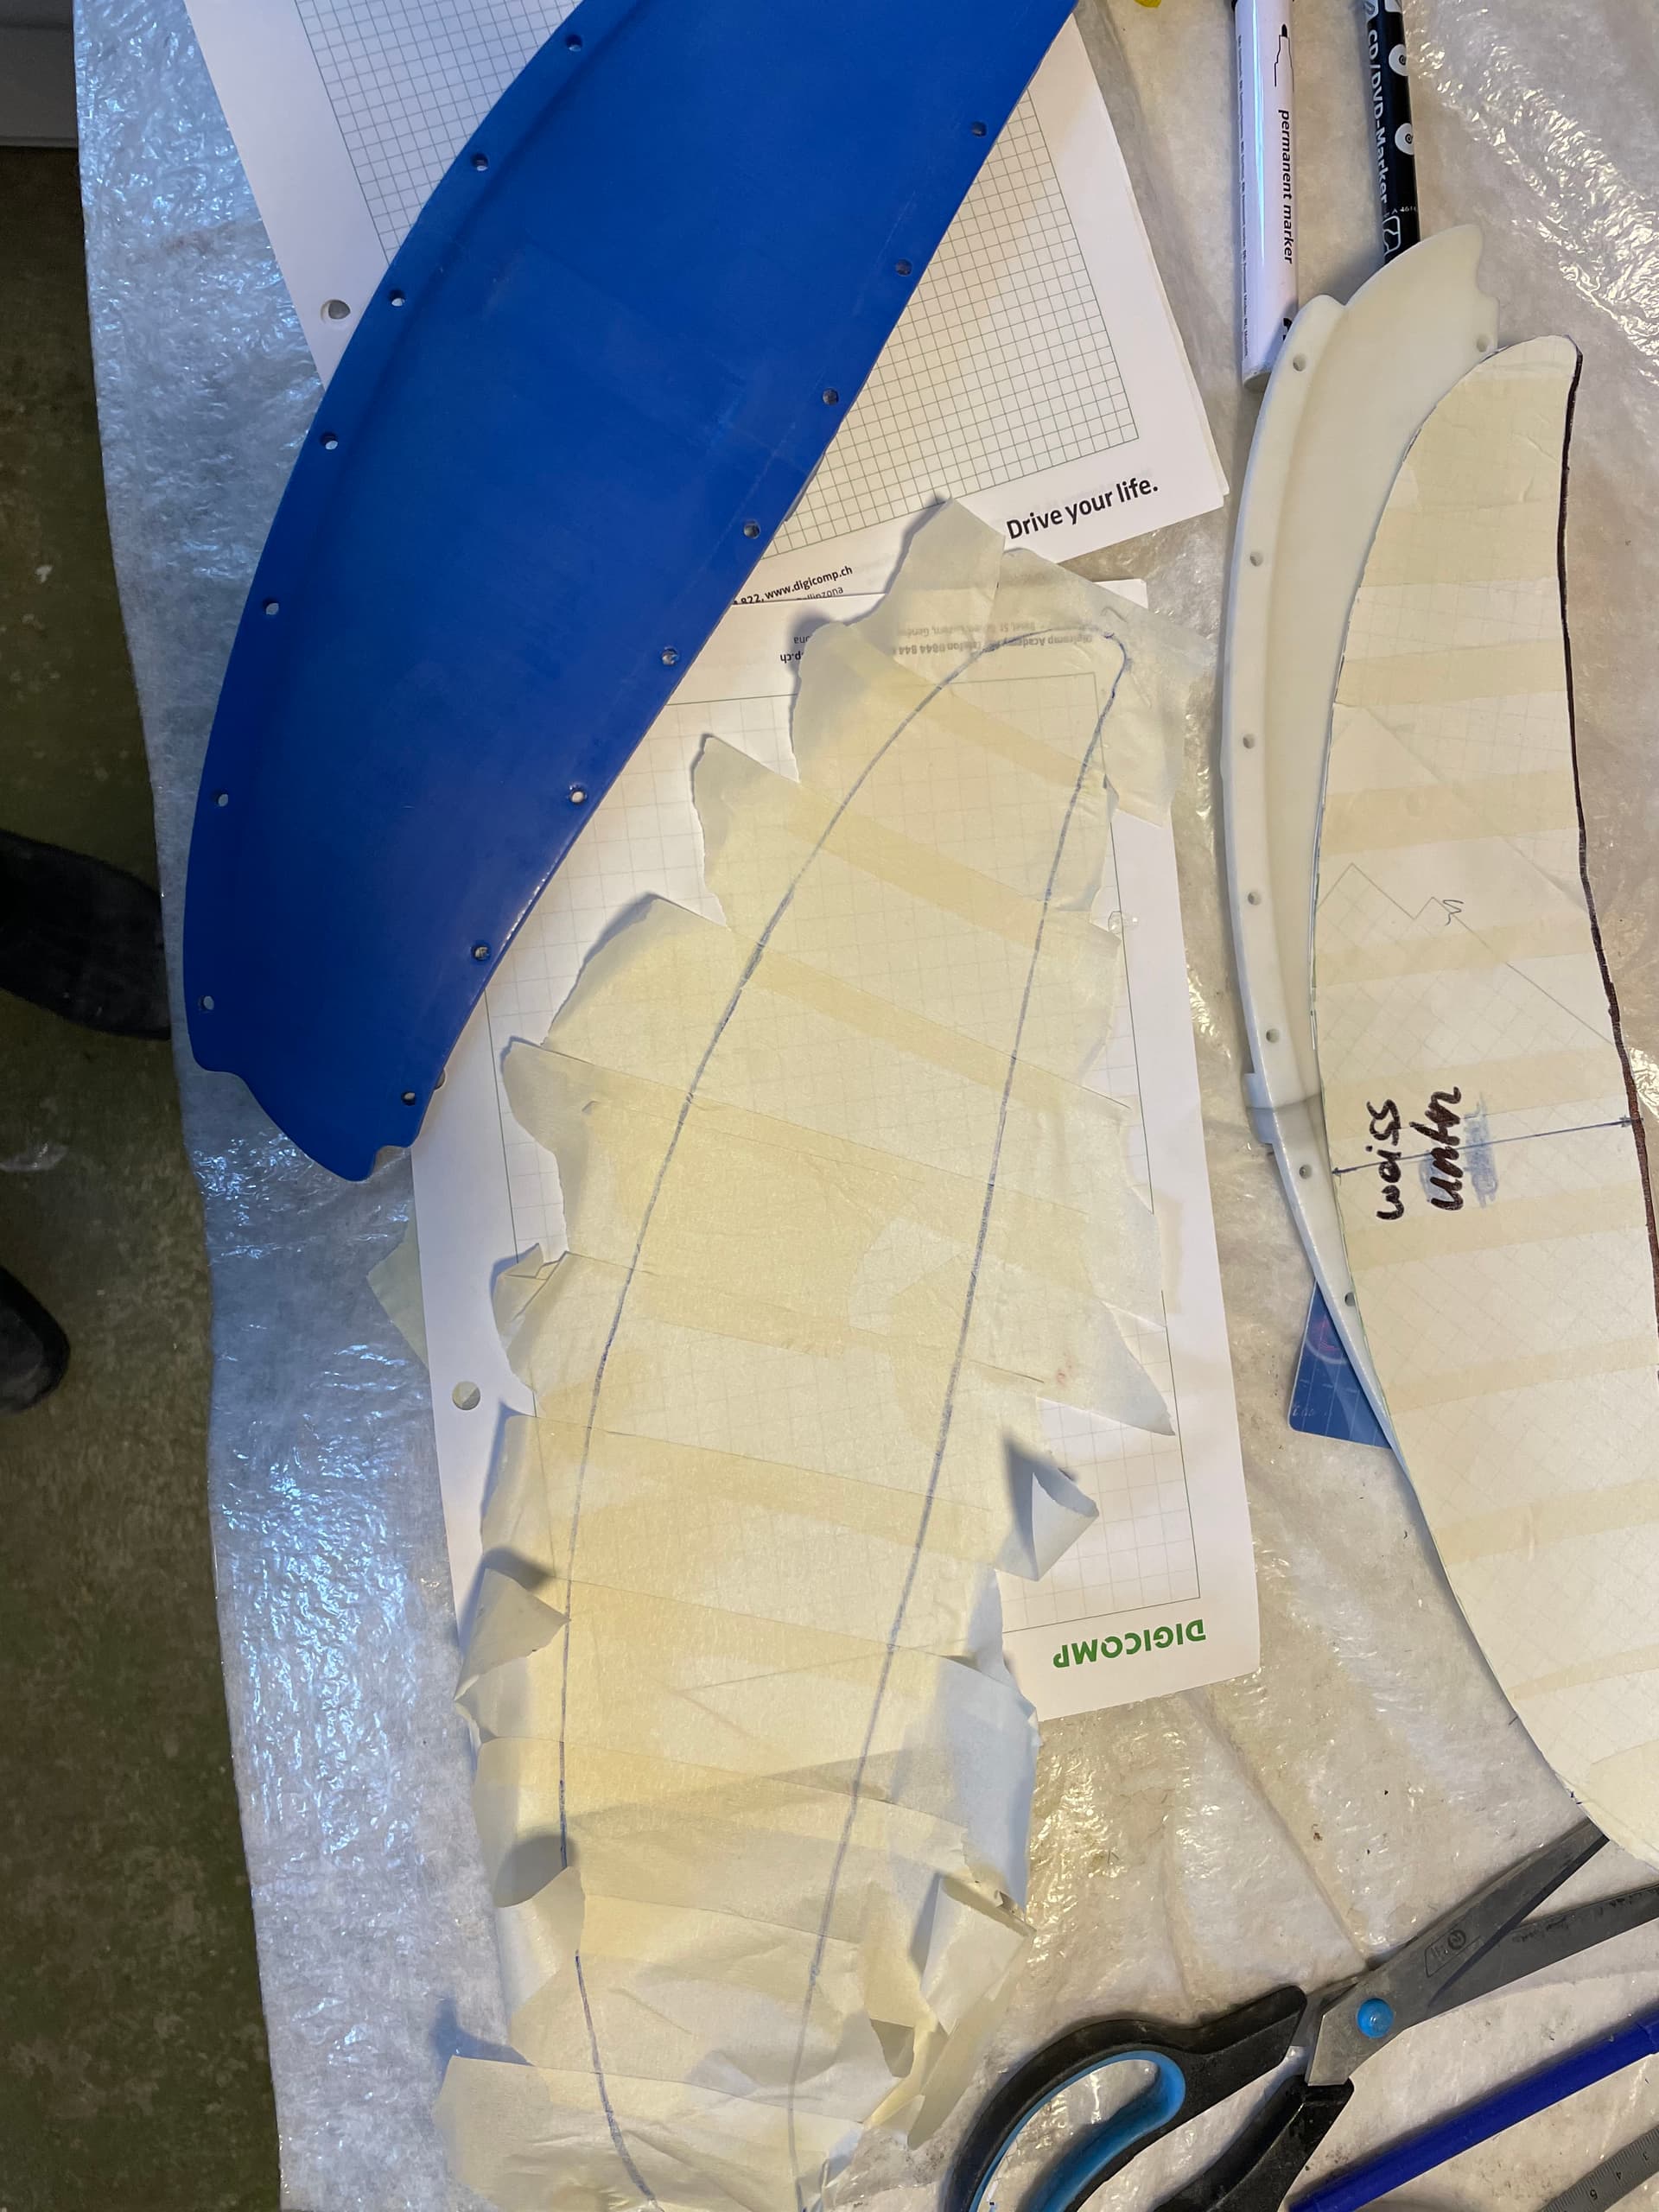
 ![IMG_0491](https://foil.zone/uploads/default/original/3X/1/5/15cb53b063c4048b5e99113790085a7b4dafb31d.jpeg)  
Templates from masking tape  
 ![IMG_0496](https://foil.zone/uploads/default/original/3X/0/c/0cc6b82b7350fe0299f57c211227f8fff44e5f16.jpeg)  
a little bit of spray glue helps to keep the cfk edges nice  
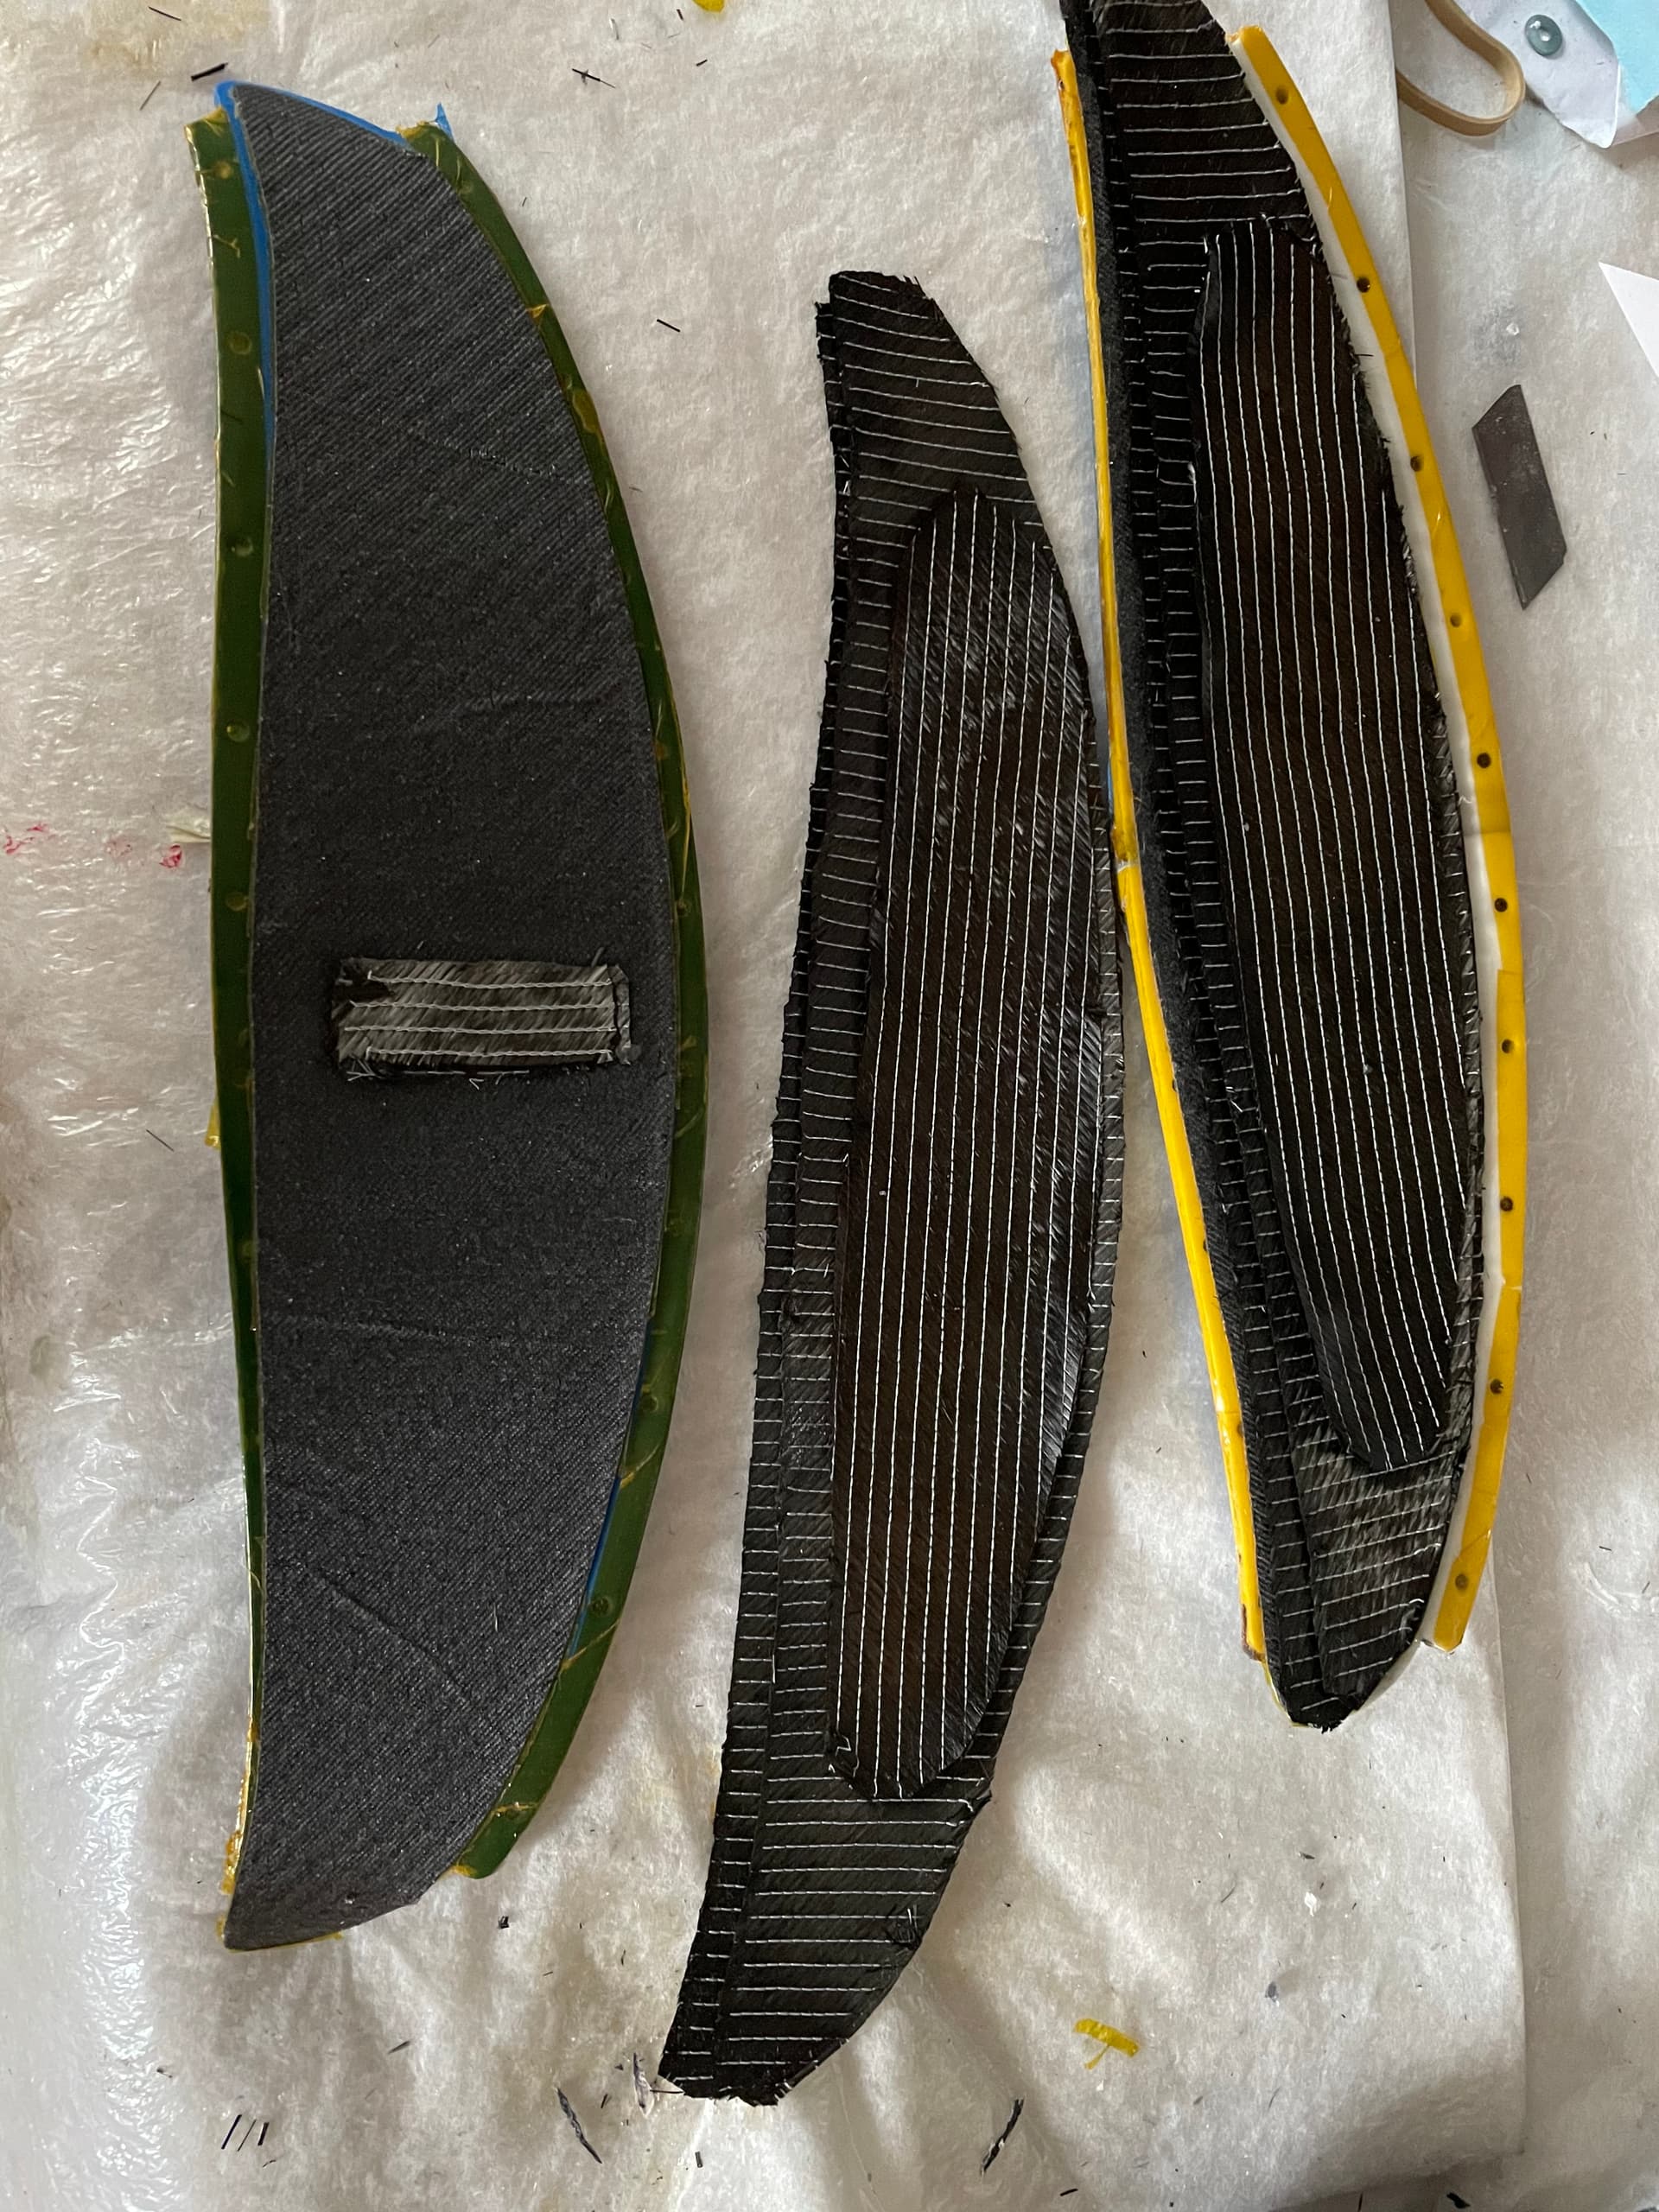
 ![IMG_0503](https://foil.zone/uploads/default/original/3X/f/8/f80369819c267e2064bac1cec625af1b607ae50c.jpeg)  
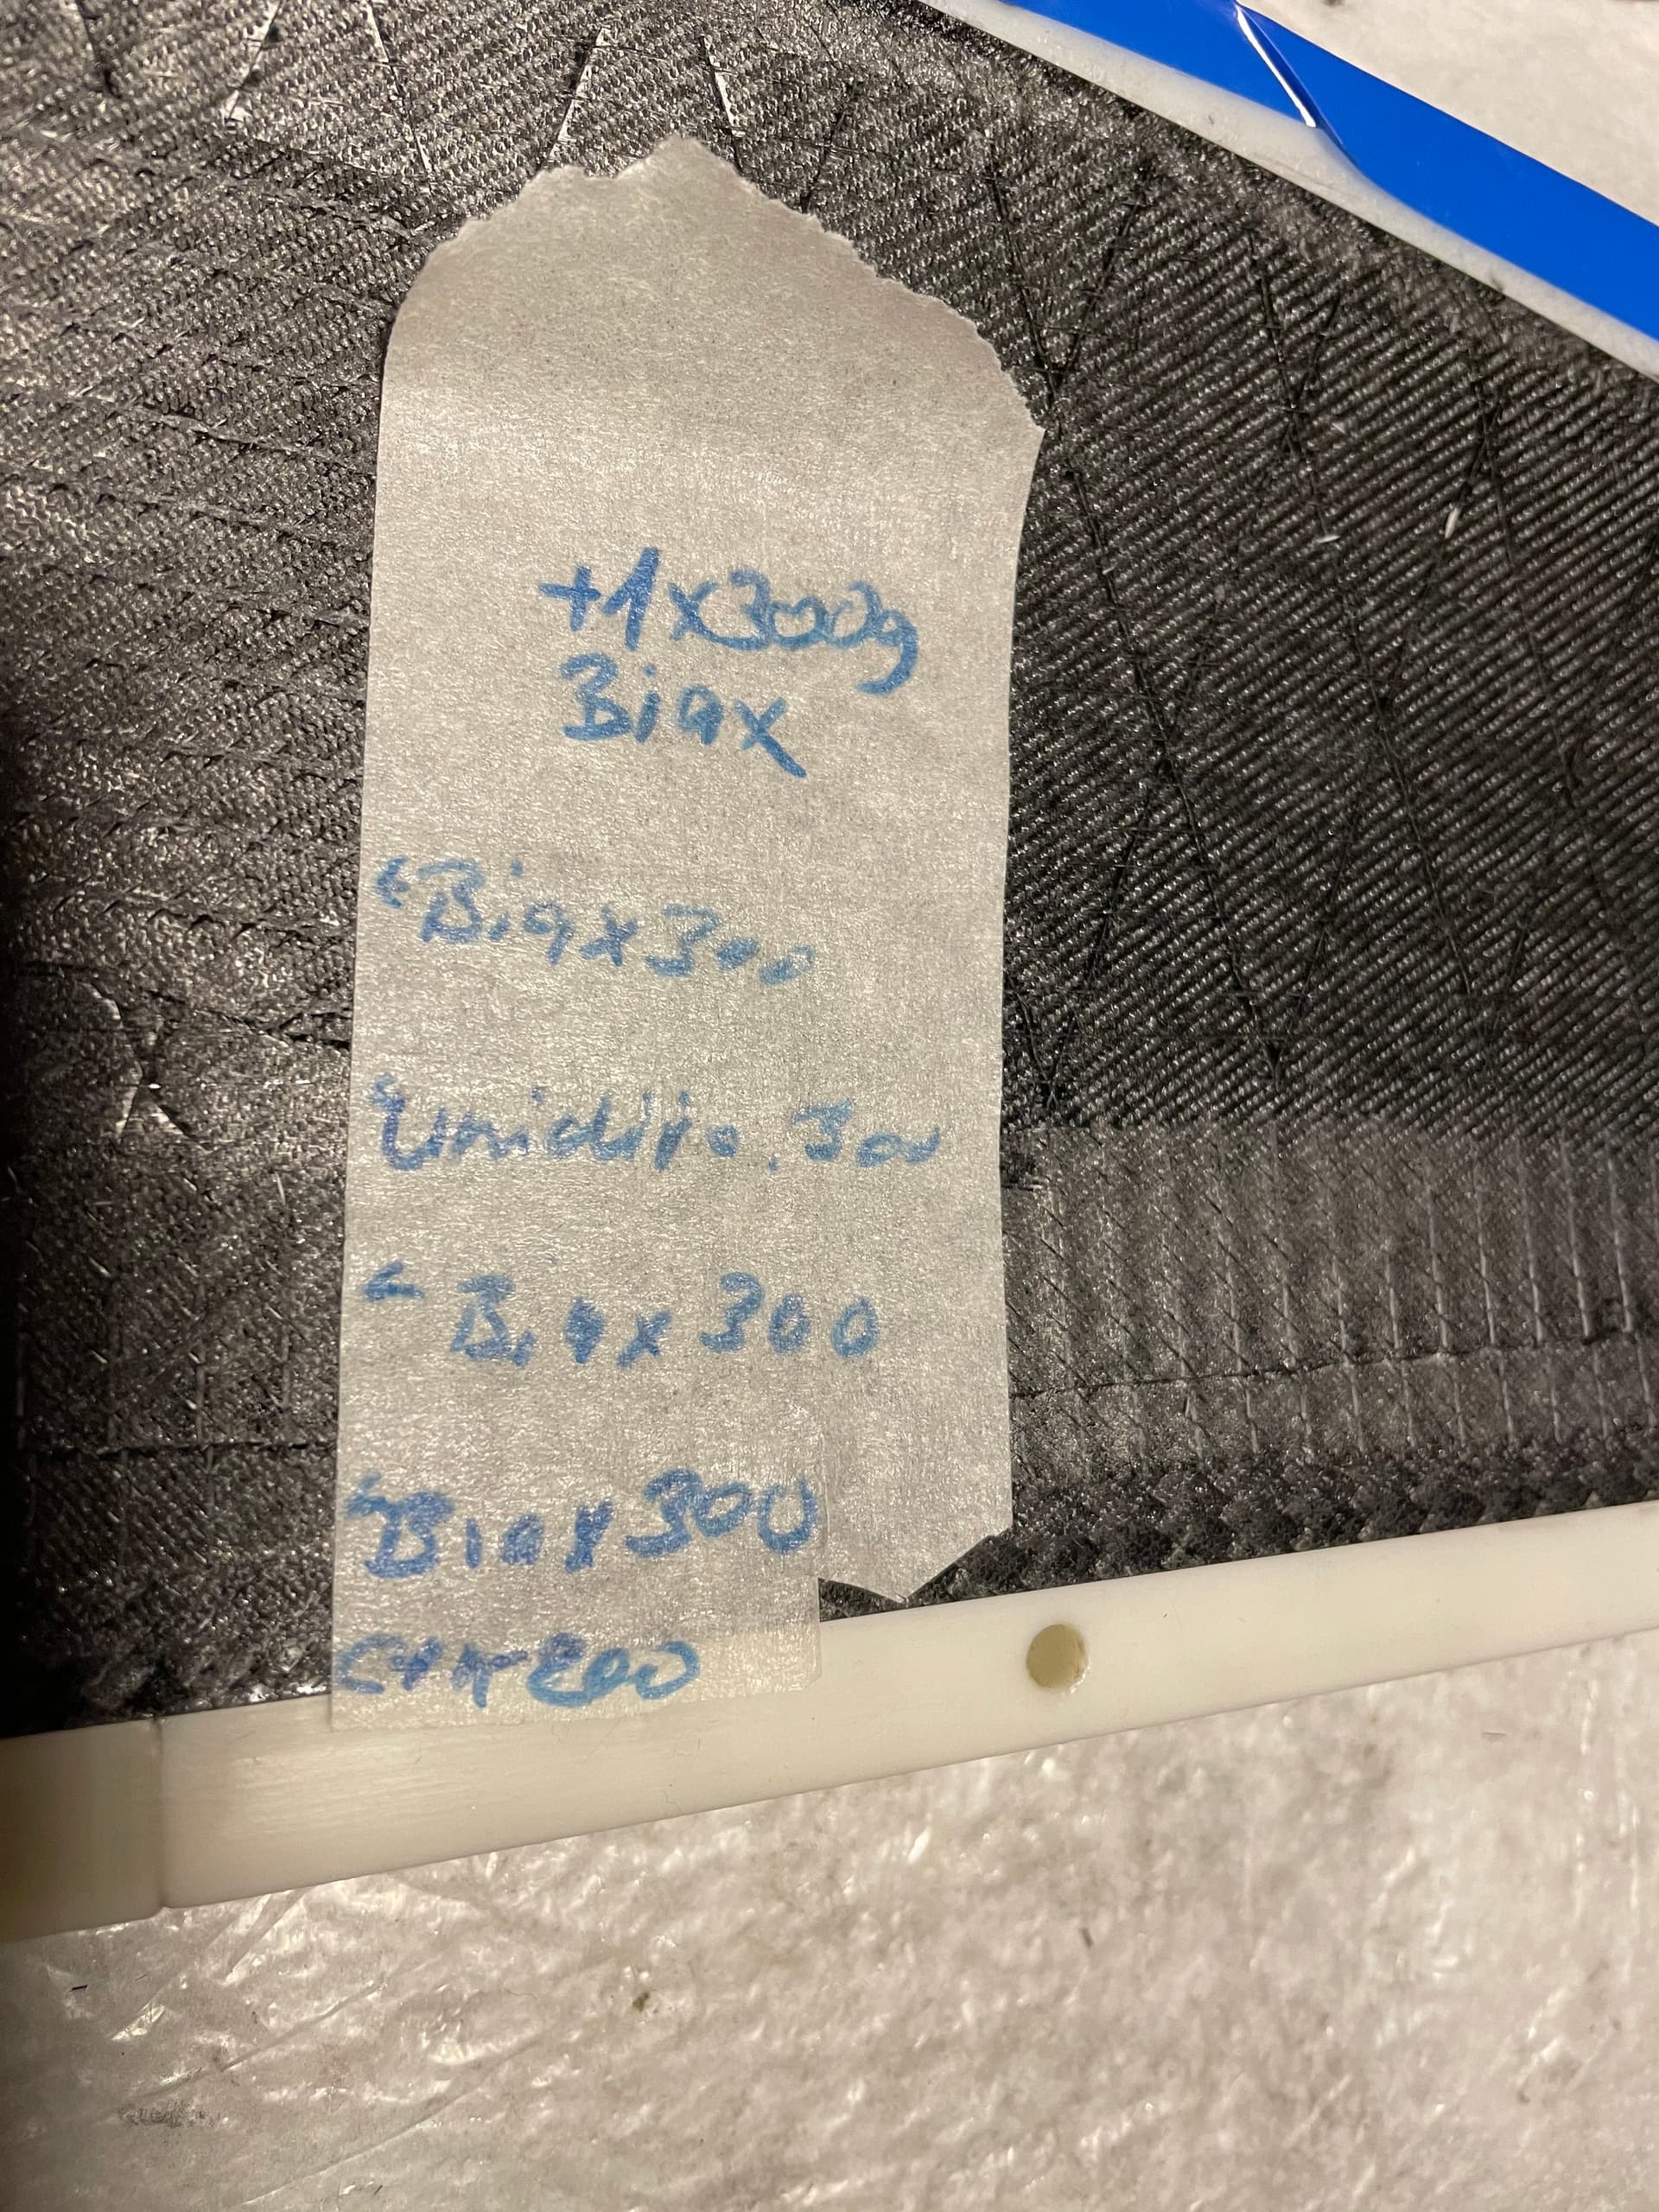
200g/m2 twill and some layers of 300g/m2 biax
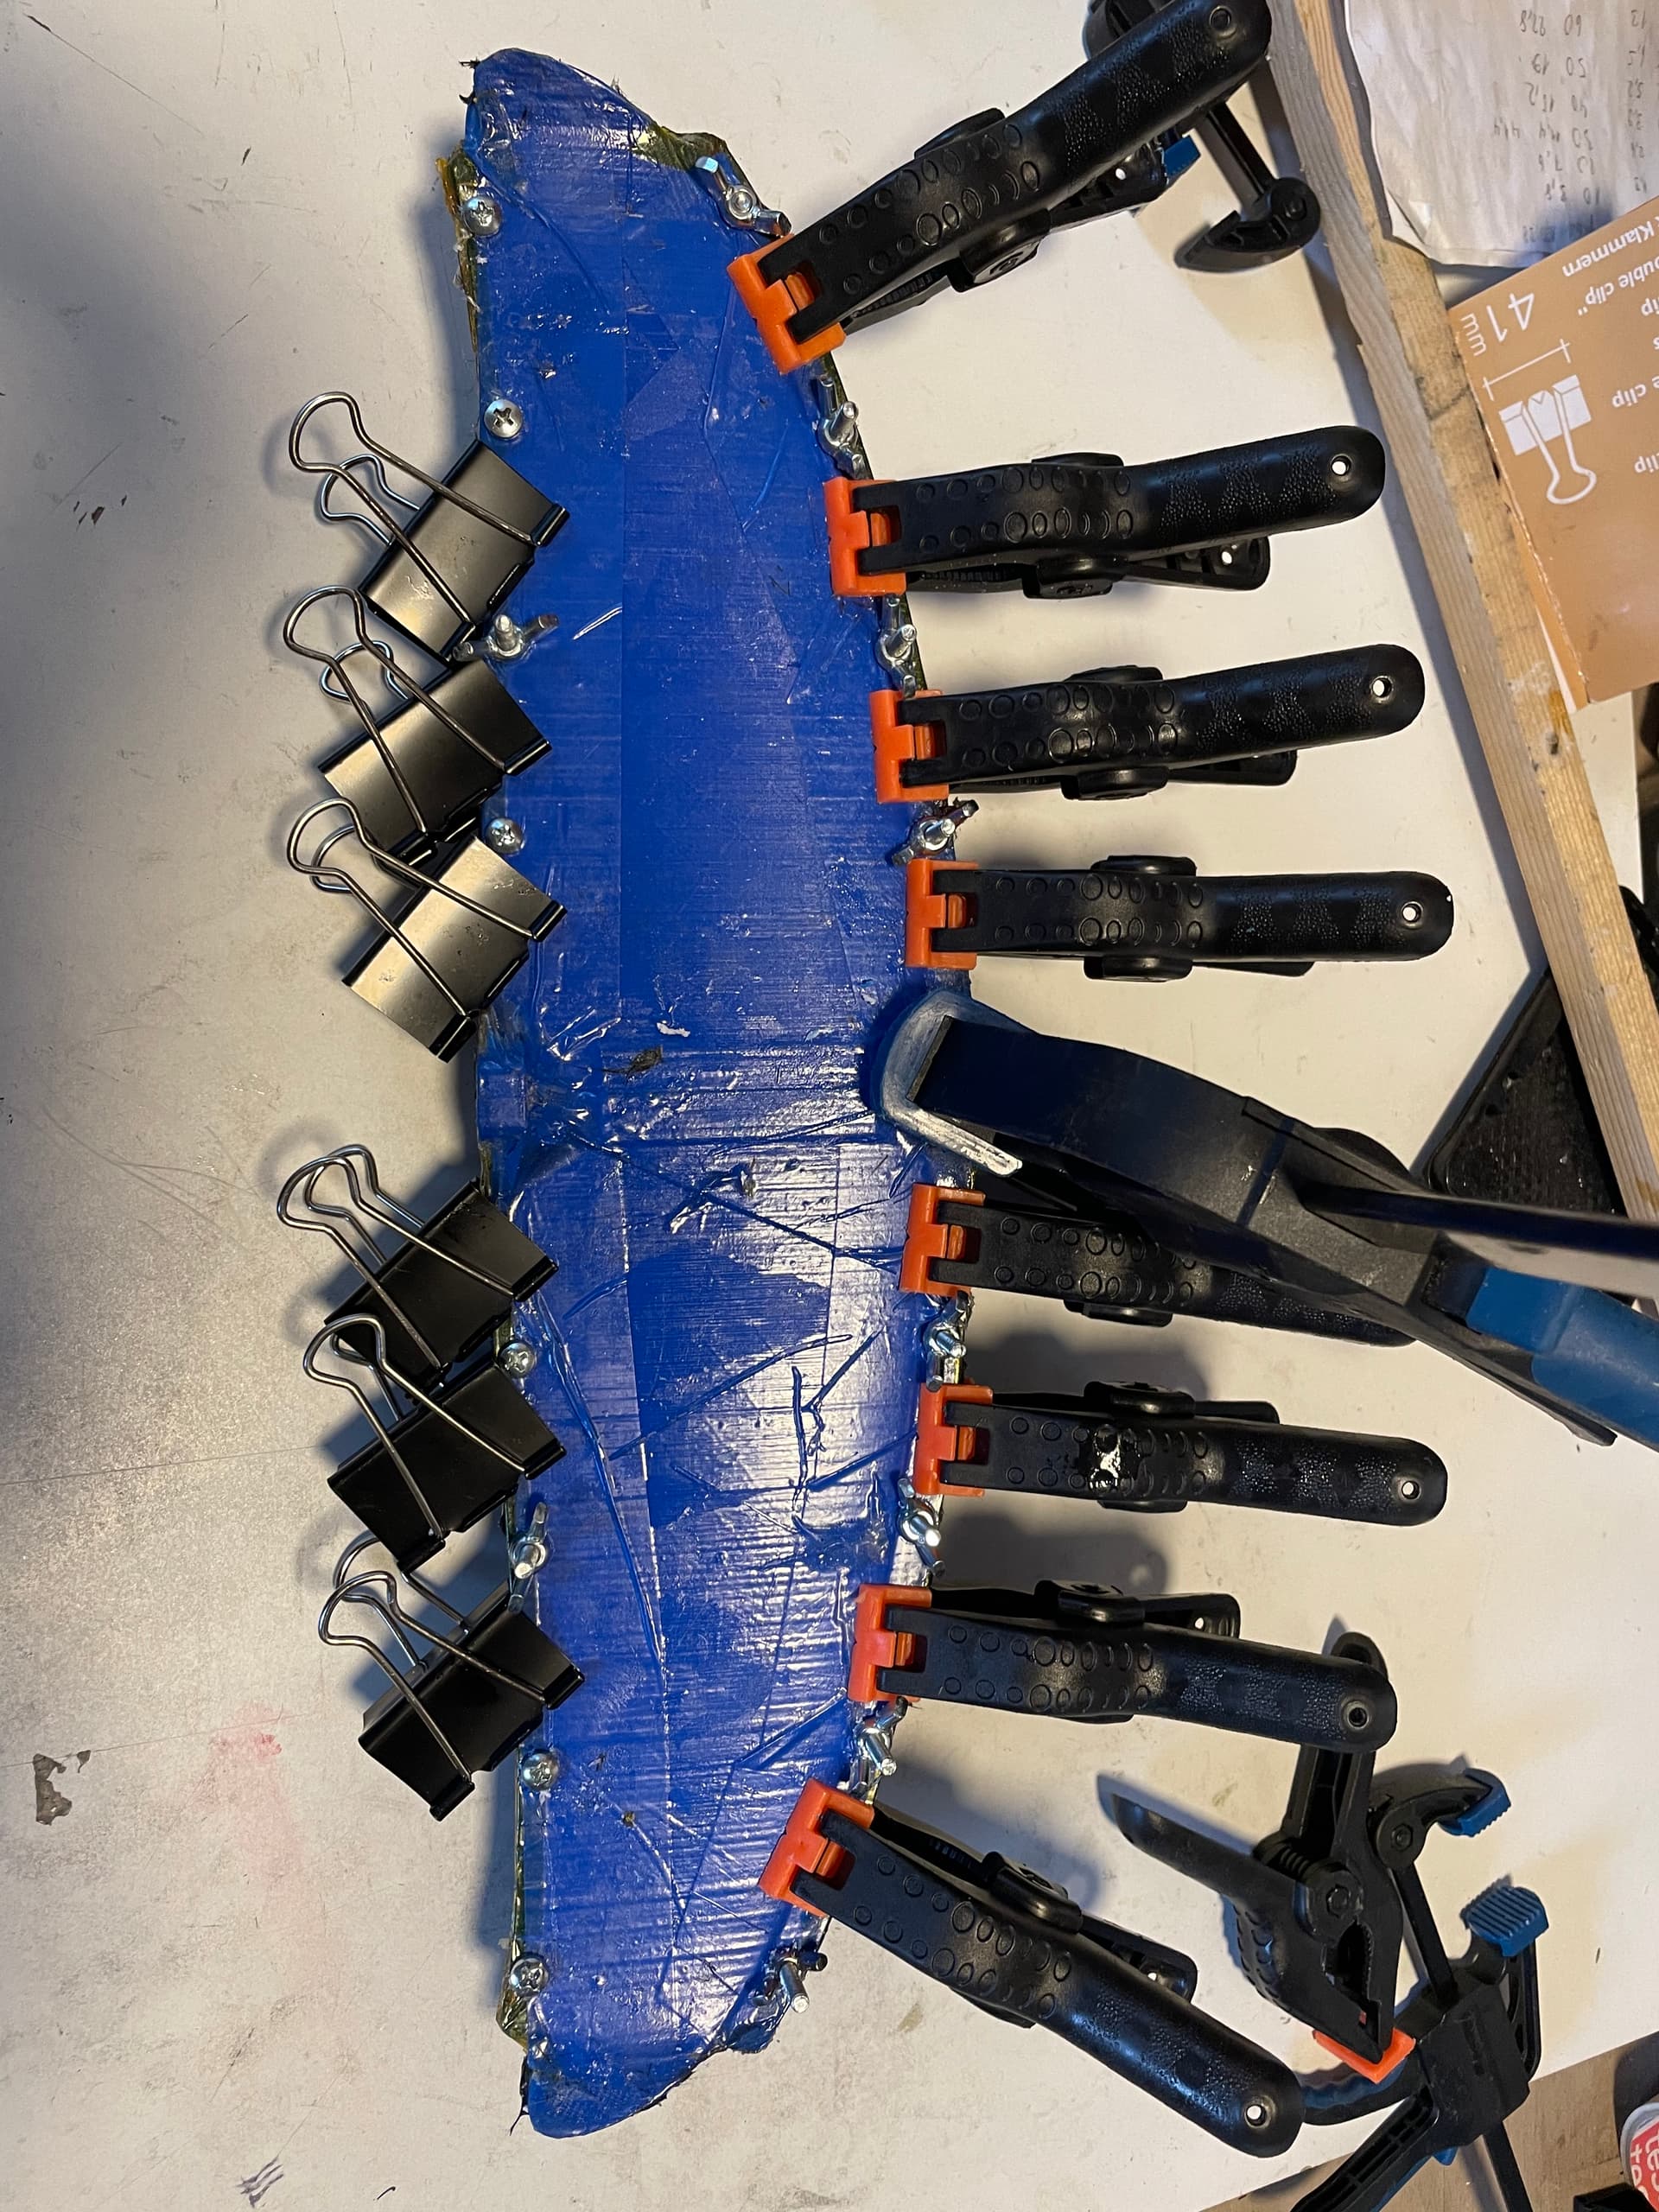
 ![IMG_0516](https://foil.zone/uploads/default/original/3X/7/7/7753763568948c0e7705e625e0f8f444a958644e.jpeg)

 ![IMG_0518](https://foil.zone/uploads/default/original/3X/7/6/761e29bd94993364eca584cbf526905ce1210c7b.jpeg)

 ![IMG_0524](https://foil.zone/uploads/default/original/3X/f/5/f5022b39f3a419968959591ea5cb25f3df71bb9d.jpeg)

reserved for link to thingiverse:

link to another backwing I designed: [Hydrofoil rear wing mould by dfi - Thingiverse](https://www.thingiverse.com/thing:5168338)

 ![IMG_3842](https://foil.zone/uploads/default/original/3X/1/6/16186a270fedc616e3838f2638e7f46090eab560.jpeg)

backwing collection:  
from top: 320cm2, 280cm2, 220cm2

Front wing:  
Front wing was built the same way but with a strut from cfk covered balsa.
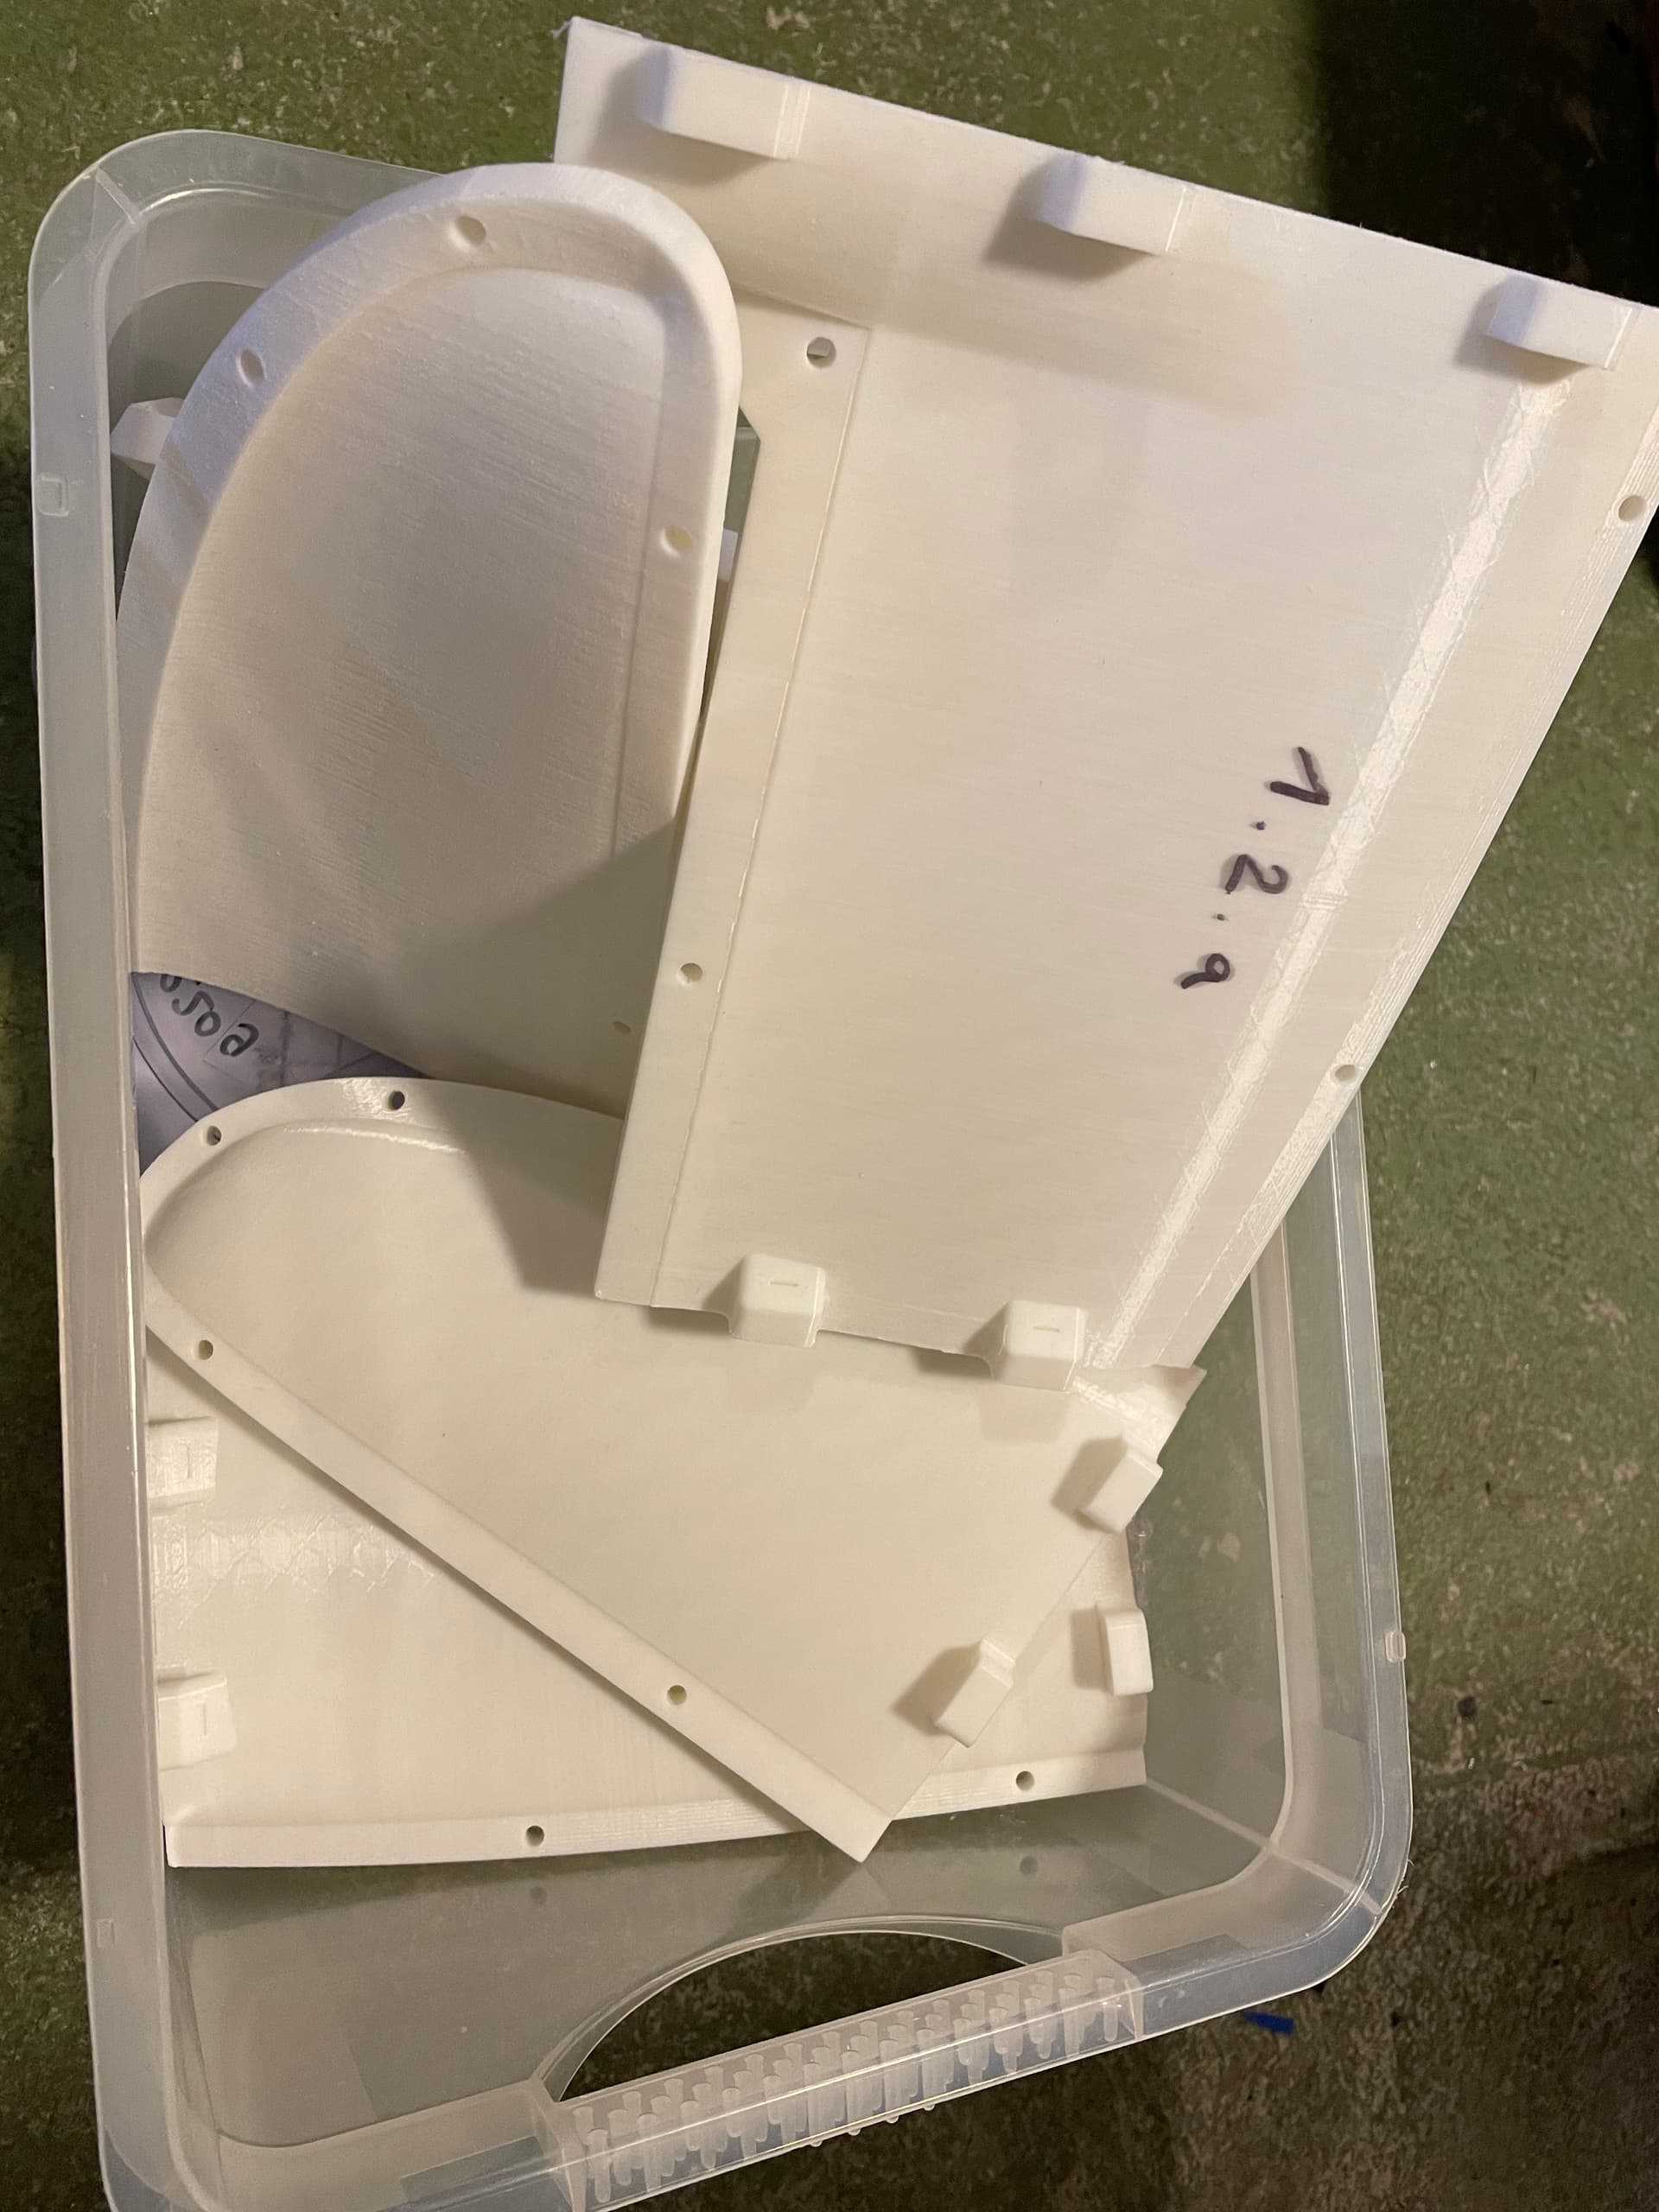
 ![IMG_8896](https://foil.zone/uploads/default/original/3X/7/3/73a2472133764a871818fa3226deac028d46ab6e.jpeg)  
the mold consists of 2x4 segments that need to be glued together

 ![IMG_8903](https://foil.zone/uploads/default/original/3X/5/f/5f3827852b8146e808bc111d7816d0f68331f733.jpeg)

 ![IMG_9019](https://foil.zone/uploads/default/original/3X/3/e/3ef424430483042f8f89d09febffbdd4e4c7e14f.jpeg)  
spray glue to keep a sharp edge

 ![IMG_9045](https://foil.zone/uploads/default/original/3X/7/f/7f4e2157739b1f2a168170355479fee57df77a8a.jpeg)  
Layers from outside to inside

 ![IMG_9034](https://foil.zone/uploads/default/original/3X/8/5/85ff364f380be23c3712e63e426001f246a85009.jpeg)  
trim the cured halves to fit the mold

 ![IMG_9059](https://foil.zone/uploads/default/original/3X/c/5/c58adbeac328ab3d004ba91e6a3a38f588deab15.jpeg)  
balsa wrapped in cfk

 ![IMG_9063](https://foil.zone/uploads/default/original/3X/6/5/6530a2c3fe2ab8887e3a3b76115b057af13cf742.jpeg)  
vacuum in position with film between the shell and the strut
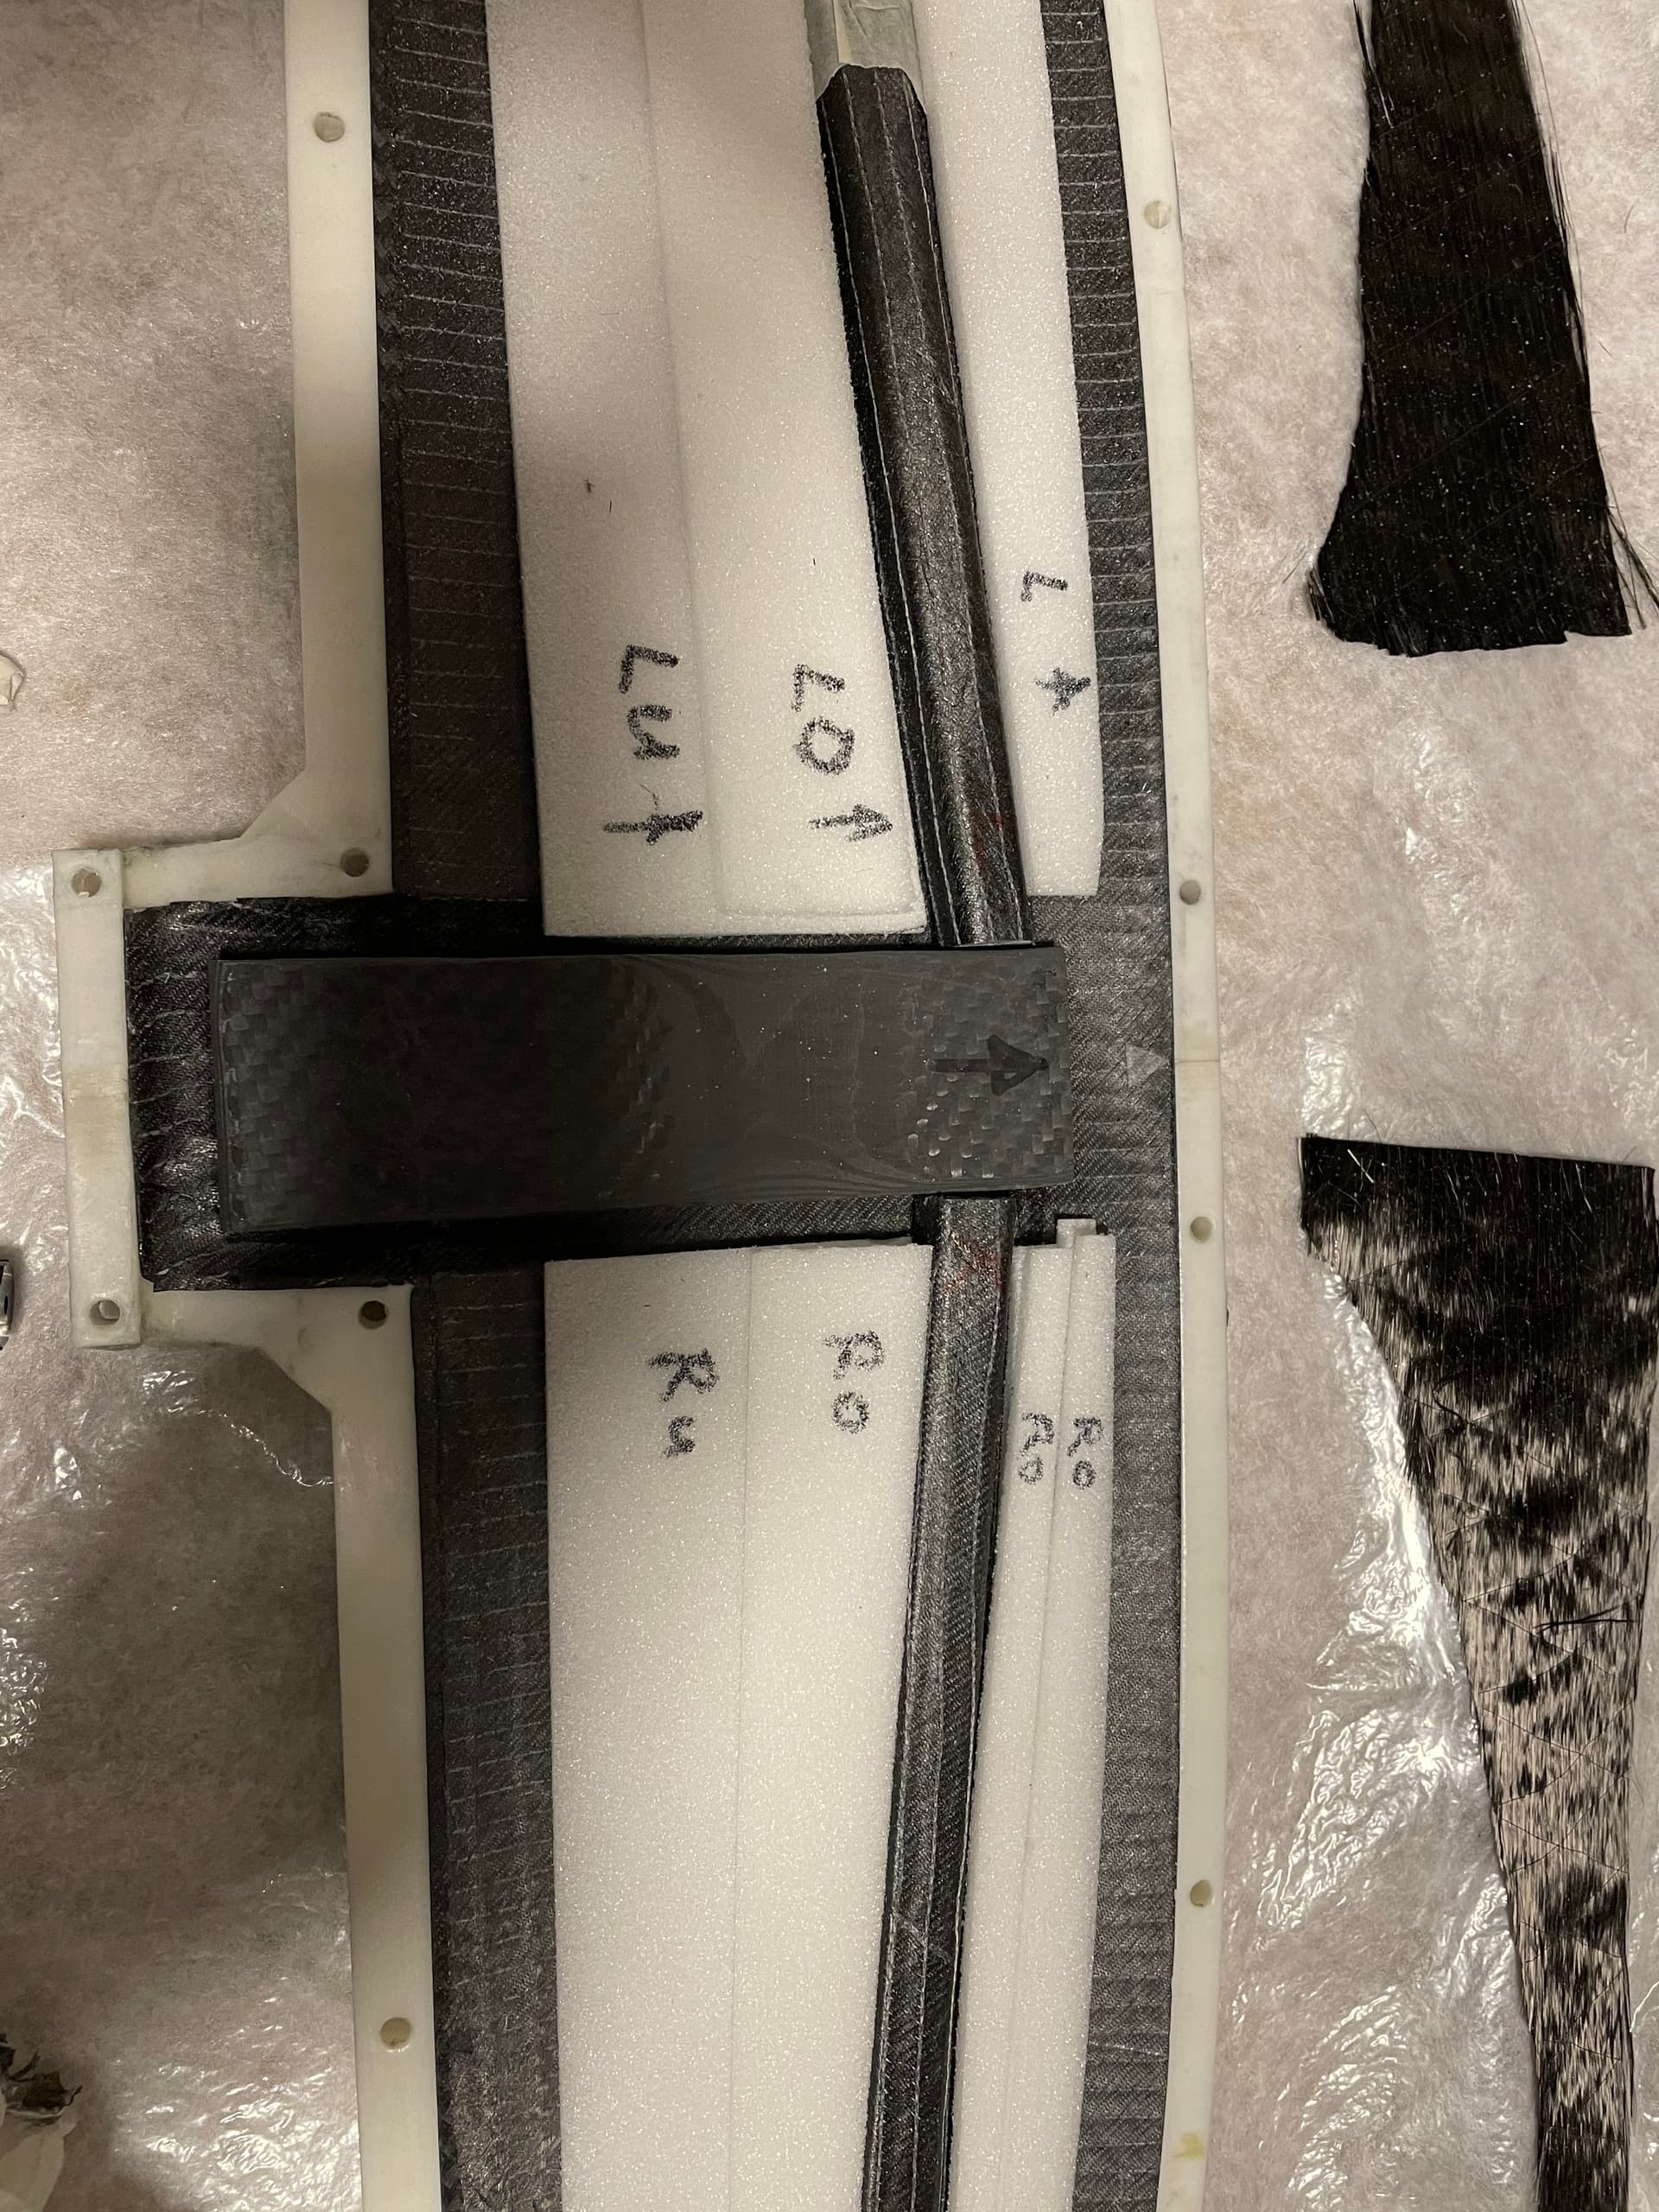
 ![IMG_9077](https://foil.zone/uploads/default/original/3X/3/b/3b6bbadfbc42ad5d5adc62b1edede2ec0e695758.jpeg)  
add some 50g/m3 foam, sanded to fit

 ![IMG_9080](https://foil.zone/uploads/default/original/3X/d/1/d1253baebb7273d0d3fdc99e2e50b80c5c7c69e8.jpeg)  
fill with thickened epoxy mixed with micro ballons and cfk flakes
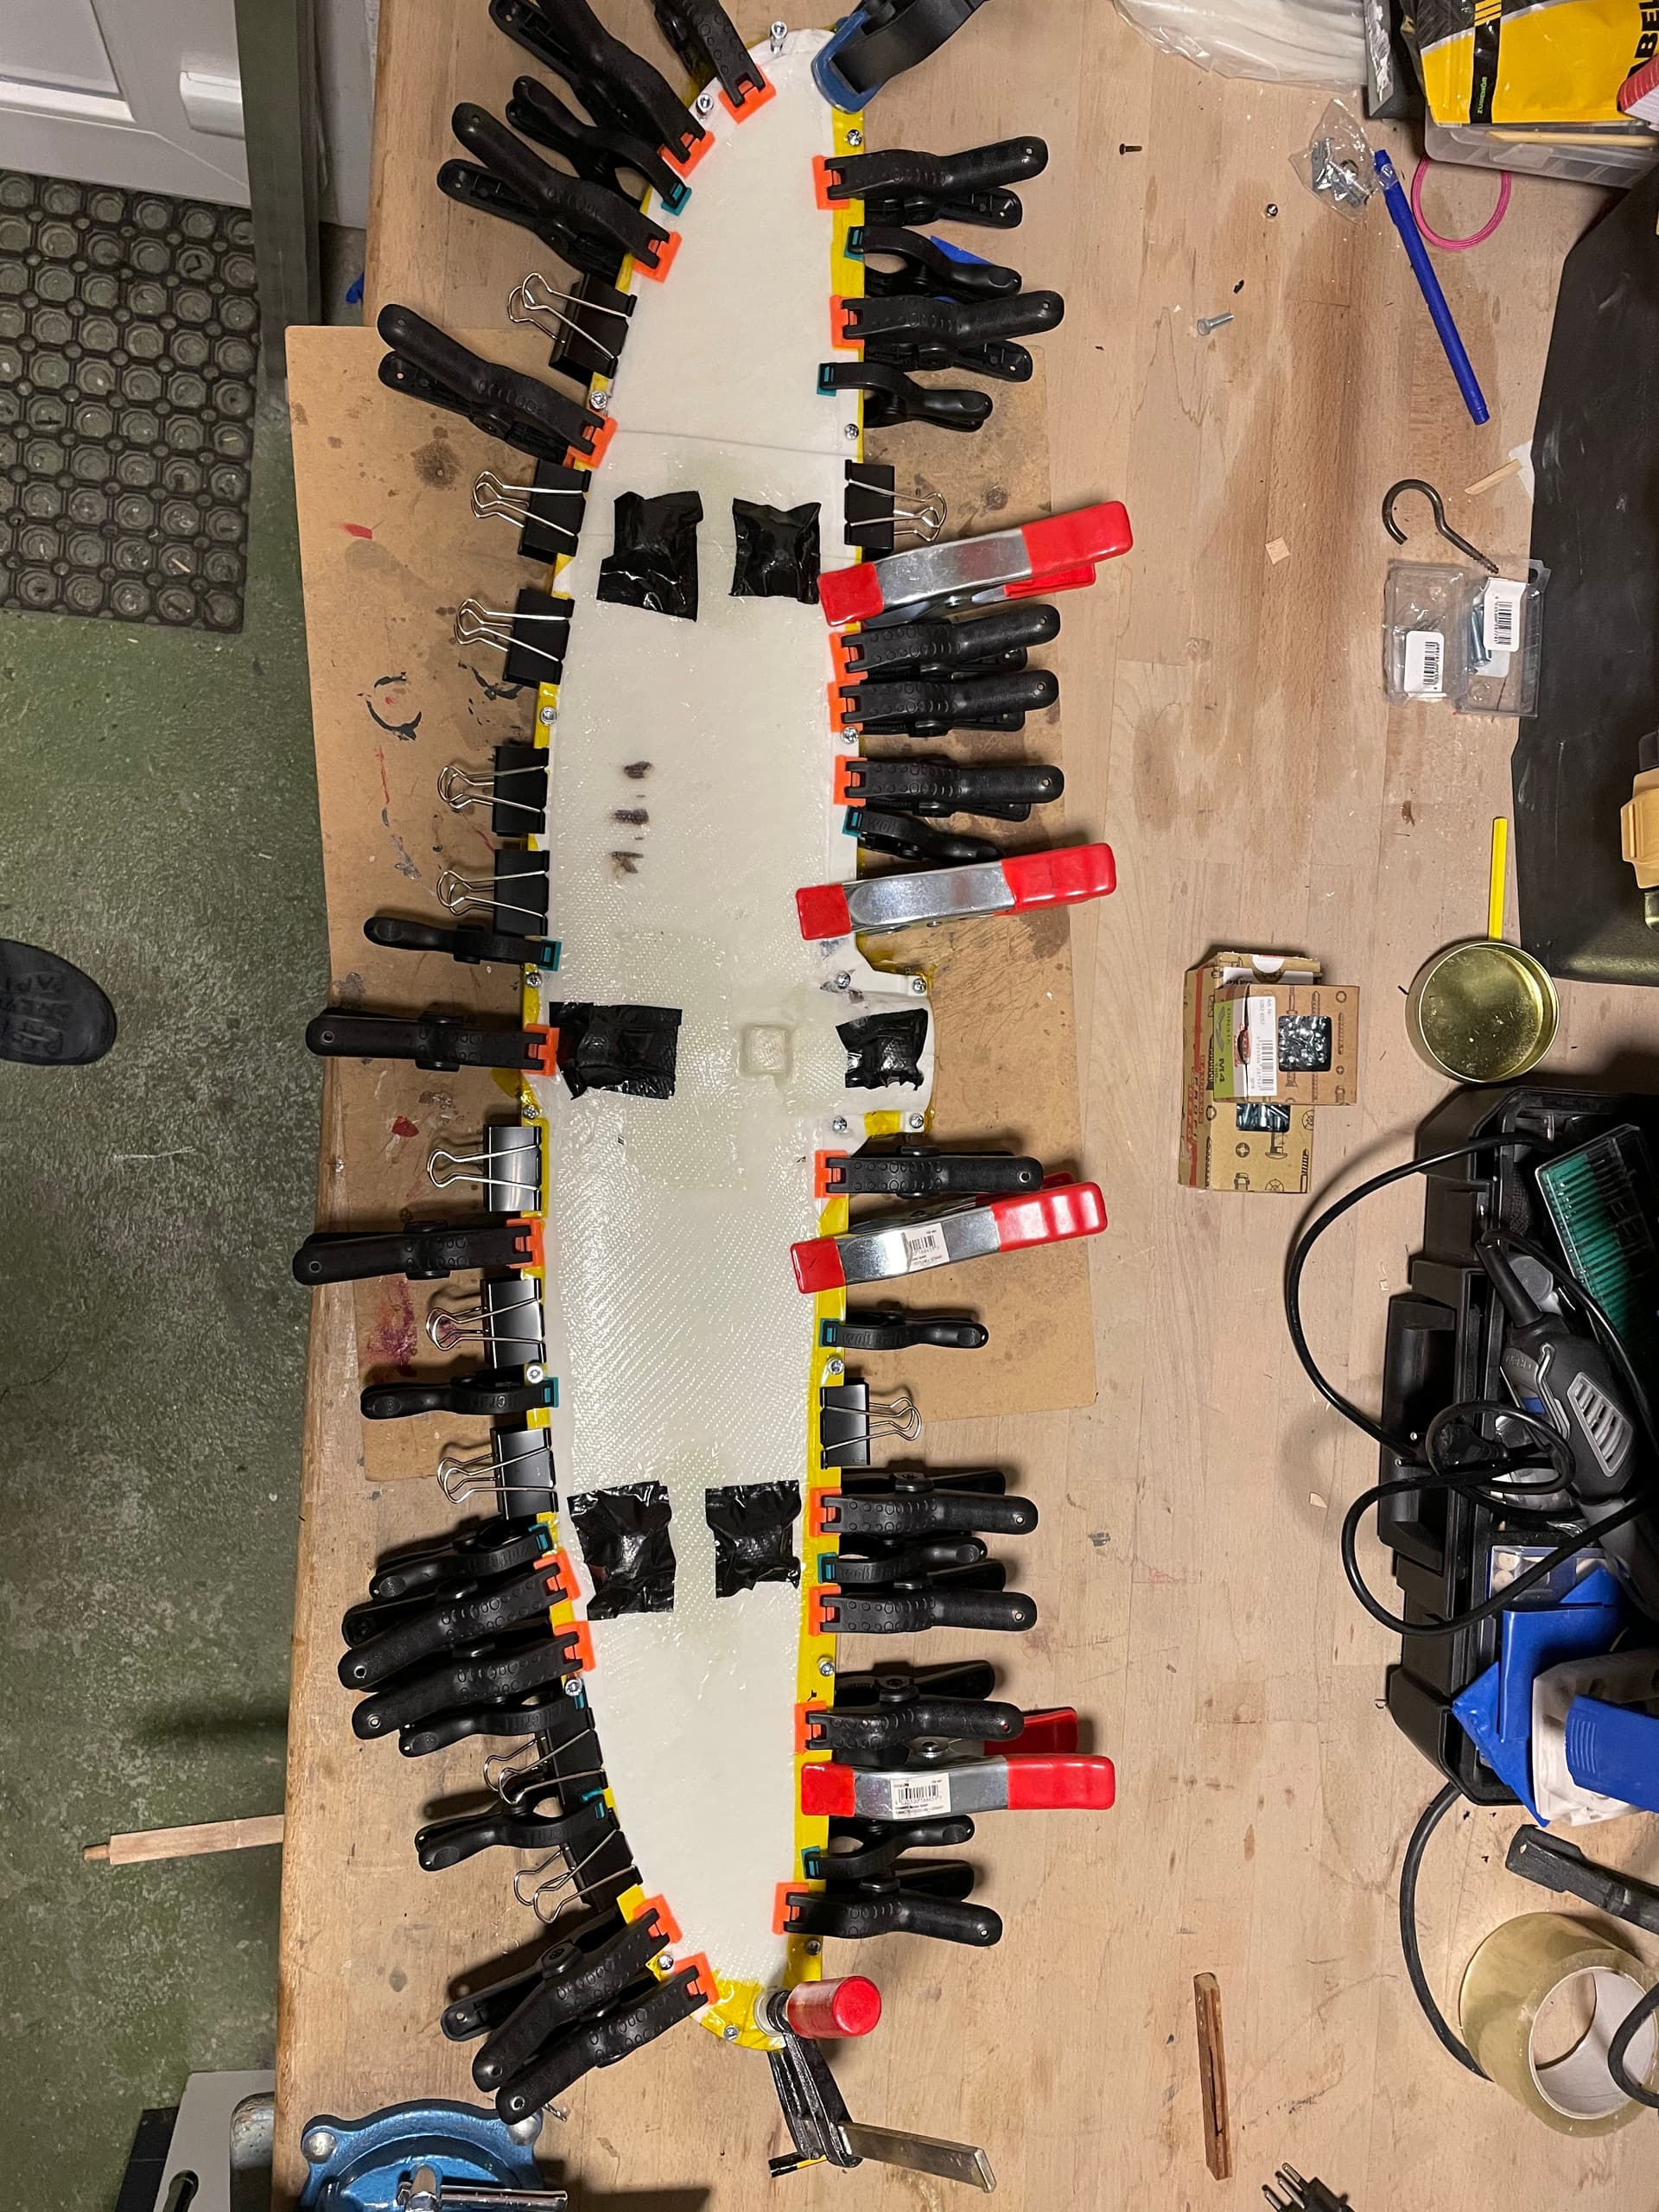
 ![IMG_9082](https://foil.zone/uploads/default/original/3X/b/2/b271abc512db28dd0bc26d017694076be8eaeb88.jpeg)  
close an cure with camps

 ![IMG_9090](https://foil.zone/uploads/default/original/3X/e/6/e6448c2a3e464d2d26022c7803c715d85b54bb41.jpeg)  
drill jig

 ![IMG_9167](https://foil.zone/uploads/default/original/3X/7/6/766a0c256f2f409b93e4be5f7be1d19bebdd0c25.jpeg)  
end result

---

<div class="post-metadata">

### Author: ![sat\_be](https://foil.zone/user_avatar/foil.zone/sat_be/32/35523_2.png) [@sat\_be](https://foil.zone/u/sat_be)
#### Post date: [January 7, 2024, 11:42pm UTC](https://foil.zone/t/daniels-2nd-build/19956/2 "2024-01-07T23:42:49Z")

</div>

Mast:  
The mast was built the same way as the wings. The mold is slightly more complicated as it consists of more than two parts. Design is from @visor360.

 ![IMG_9140](https://foil.zone/uploads/default/original/3X/a/3/a3b3da2261e0183bf4751f9802a6e0ef2dd6fc3d.jpeg)  
Glued the pieces and aligned them to be straight/90° respectively

 ![IMG_9142](https://foil.zone/uploads/default/original/3X/c/7/c7b5641d901a3cf5f432617cc5c768b5229a48a7.jpeg)  
Reinforced it with wood and glassed it over on the outside
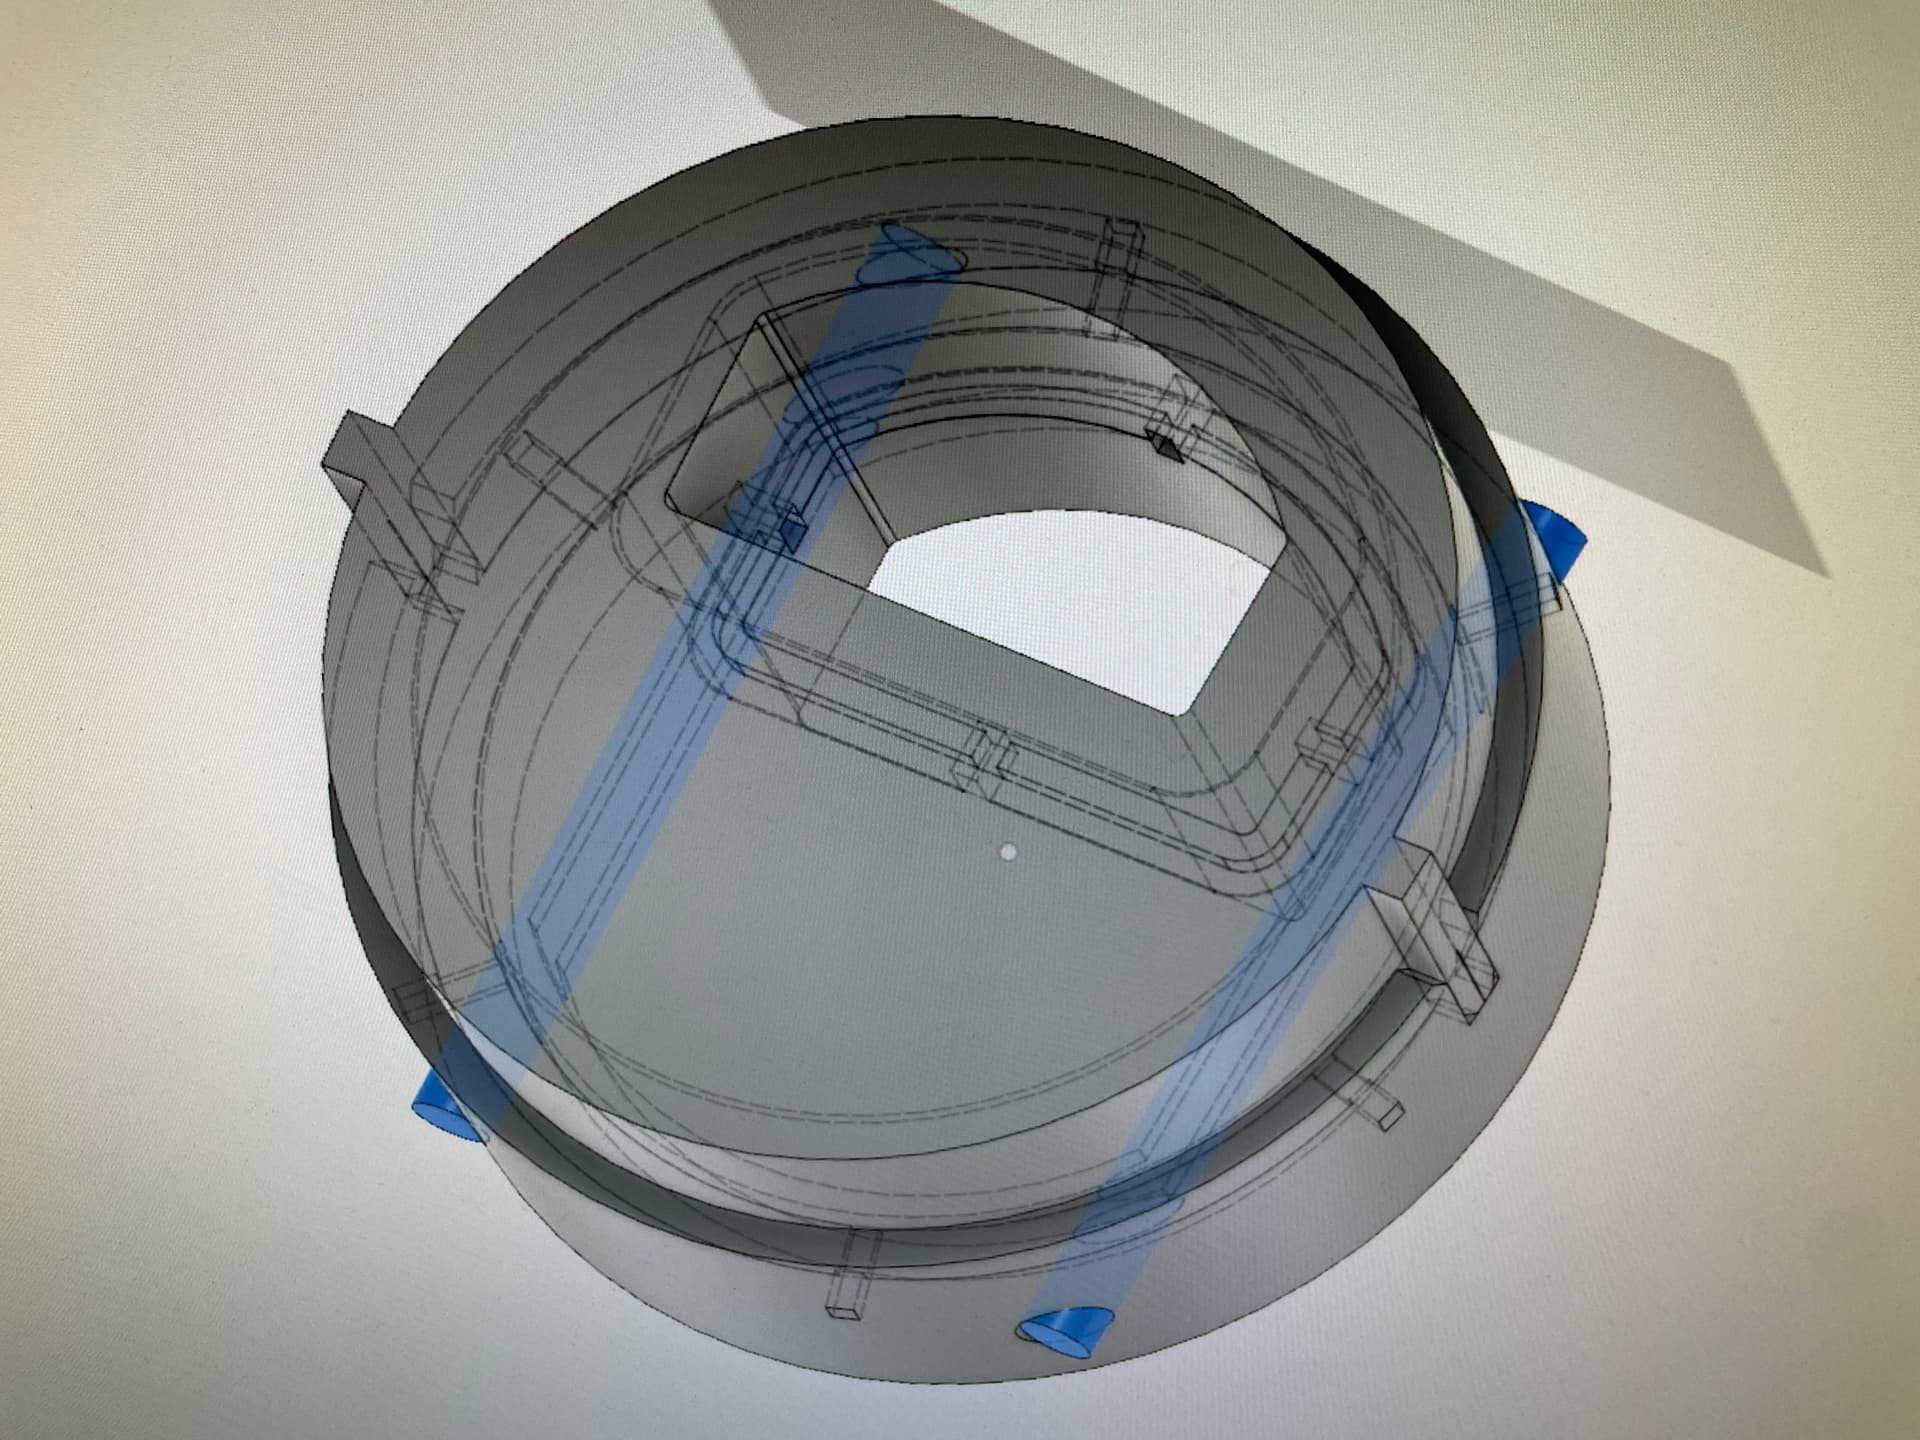
 ![IMG_0850](https://foil.zone/uploads/default/original/3X/0/9/0916d50c2a2c3e5cfbe1556c71b6faae775fbaaf.jpeg)  
Built an insert from forged carbon to hold the FR motor. The insert was built with a 2 part mold, filled with epoxy and cfk flakes pressed together. Pin holes to fix the motor were kept with two 5.5mm alu rods.

 ![IMG_0878](https://foil.zone/uploads/default/original/3X/5/3/534e1ea6ef57a0fbbe336ada1648c4a960841dcc.jpeg)  
Finished insert

 ![IMG_0882](https://foil.zone/uploads/default/original/3X/f/1/f1871f9279fd01a8a882f8a153035357e73b93c1.jpeg)  
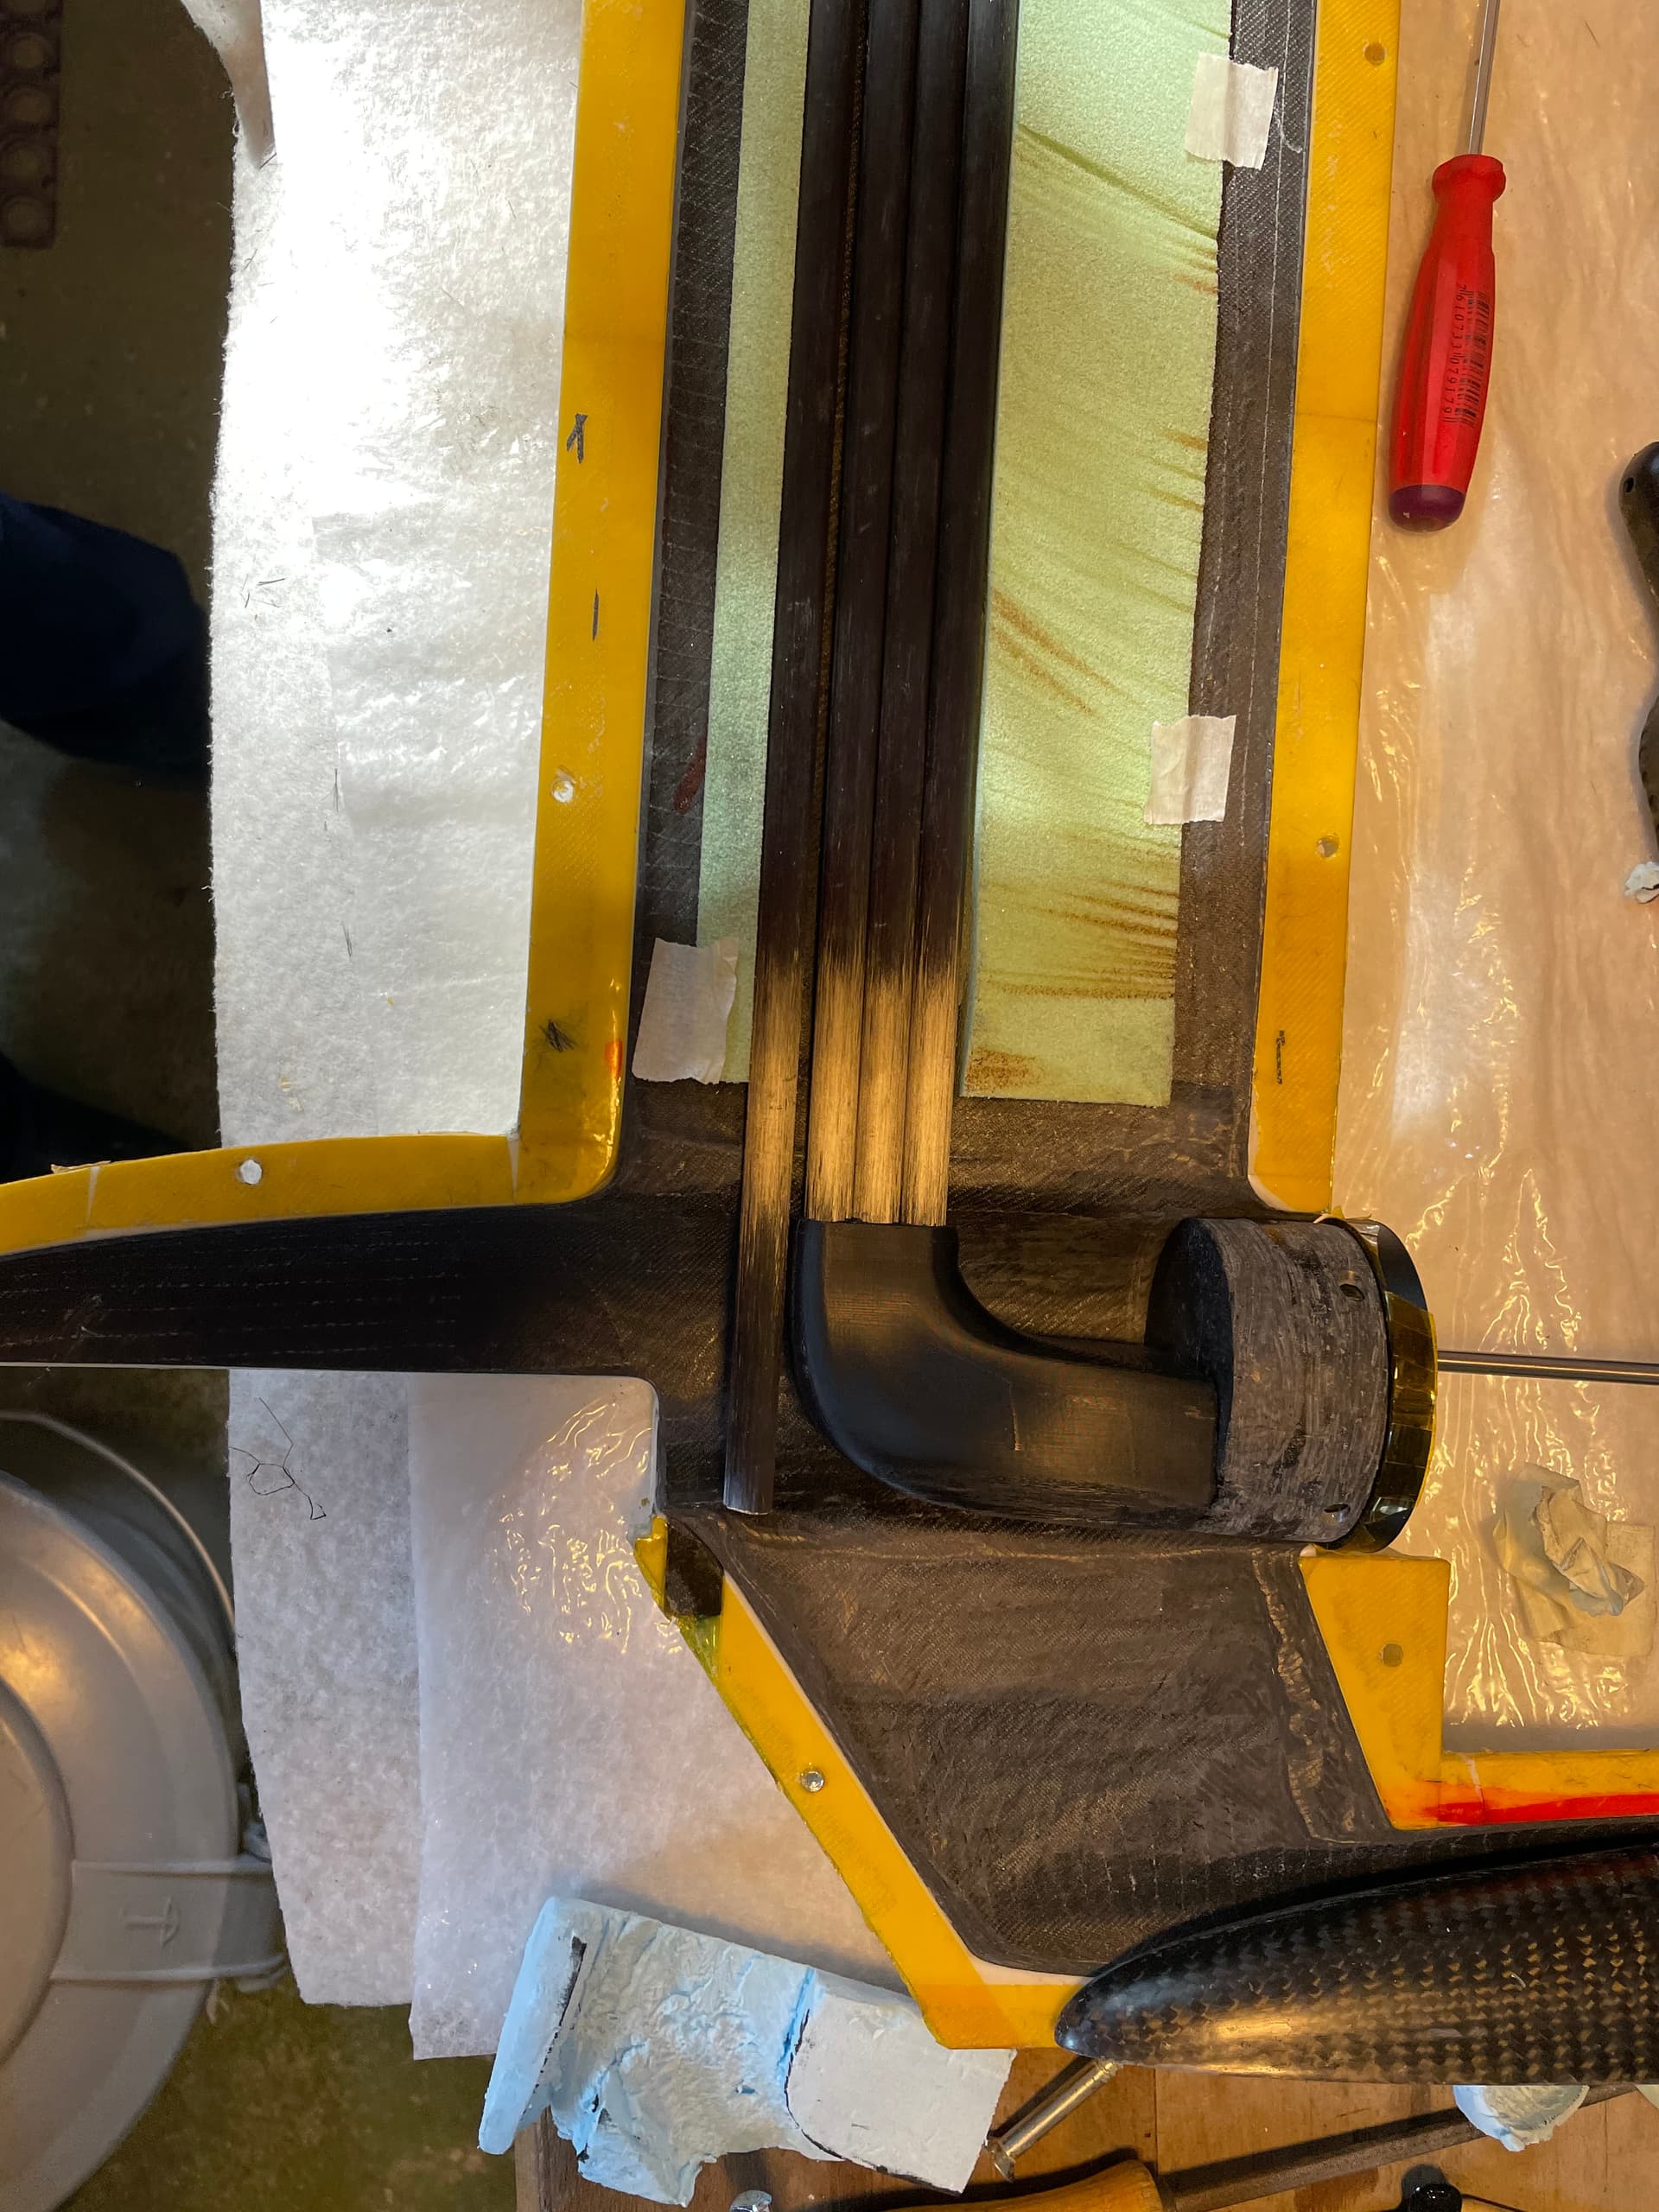
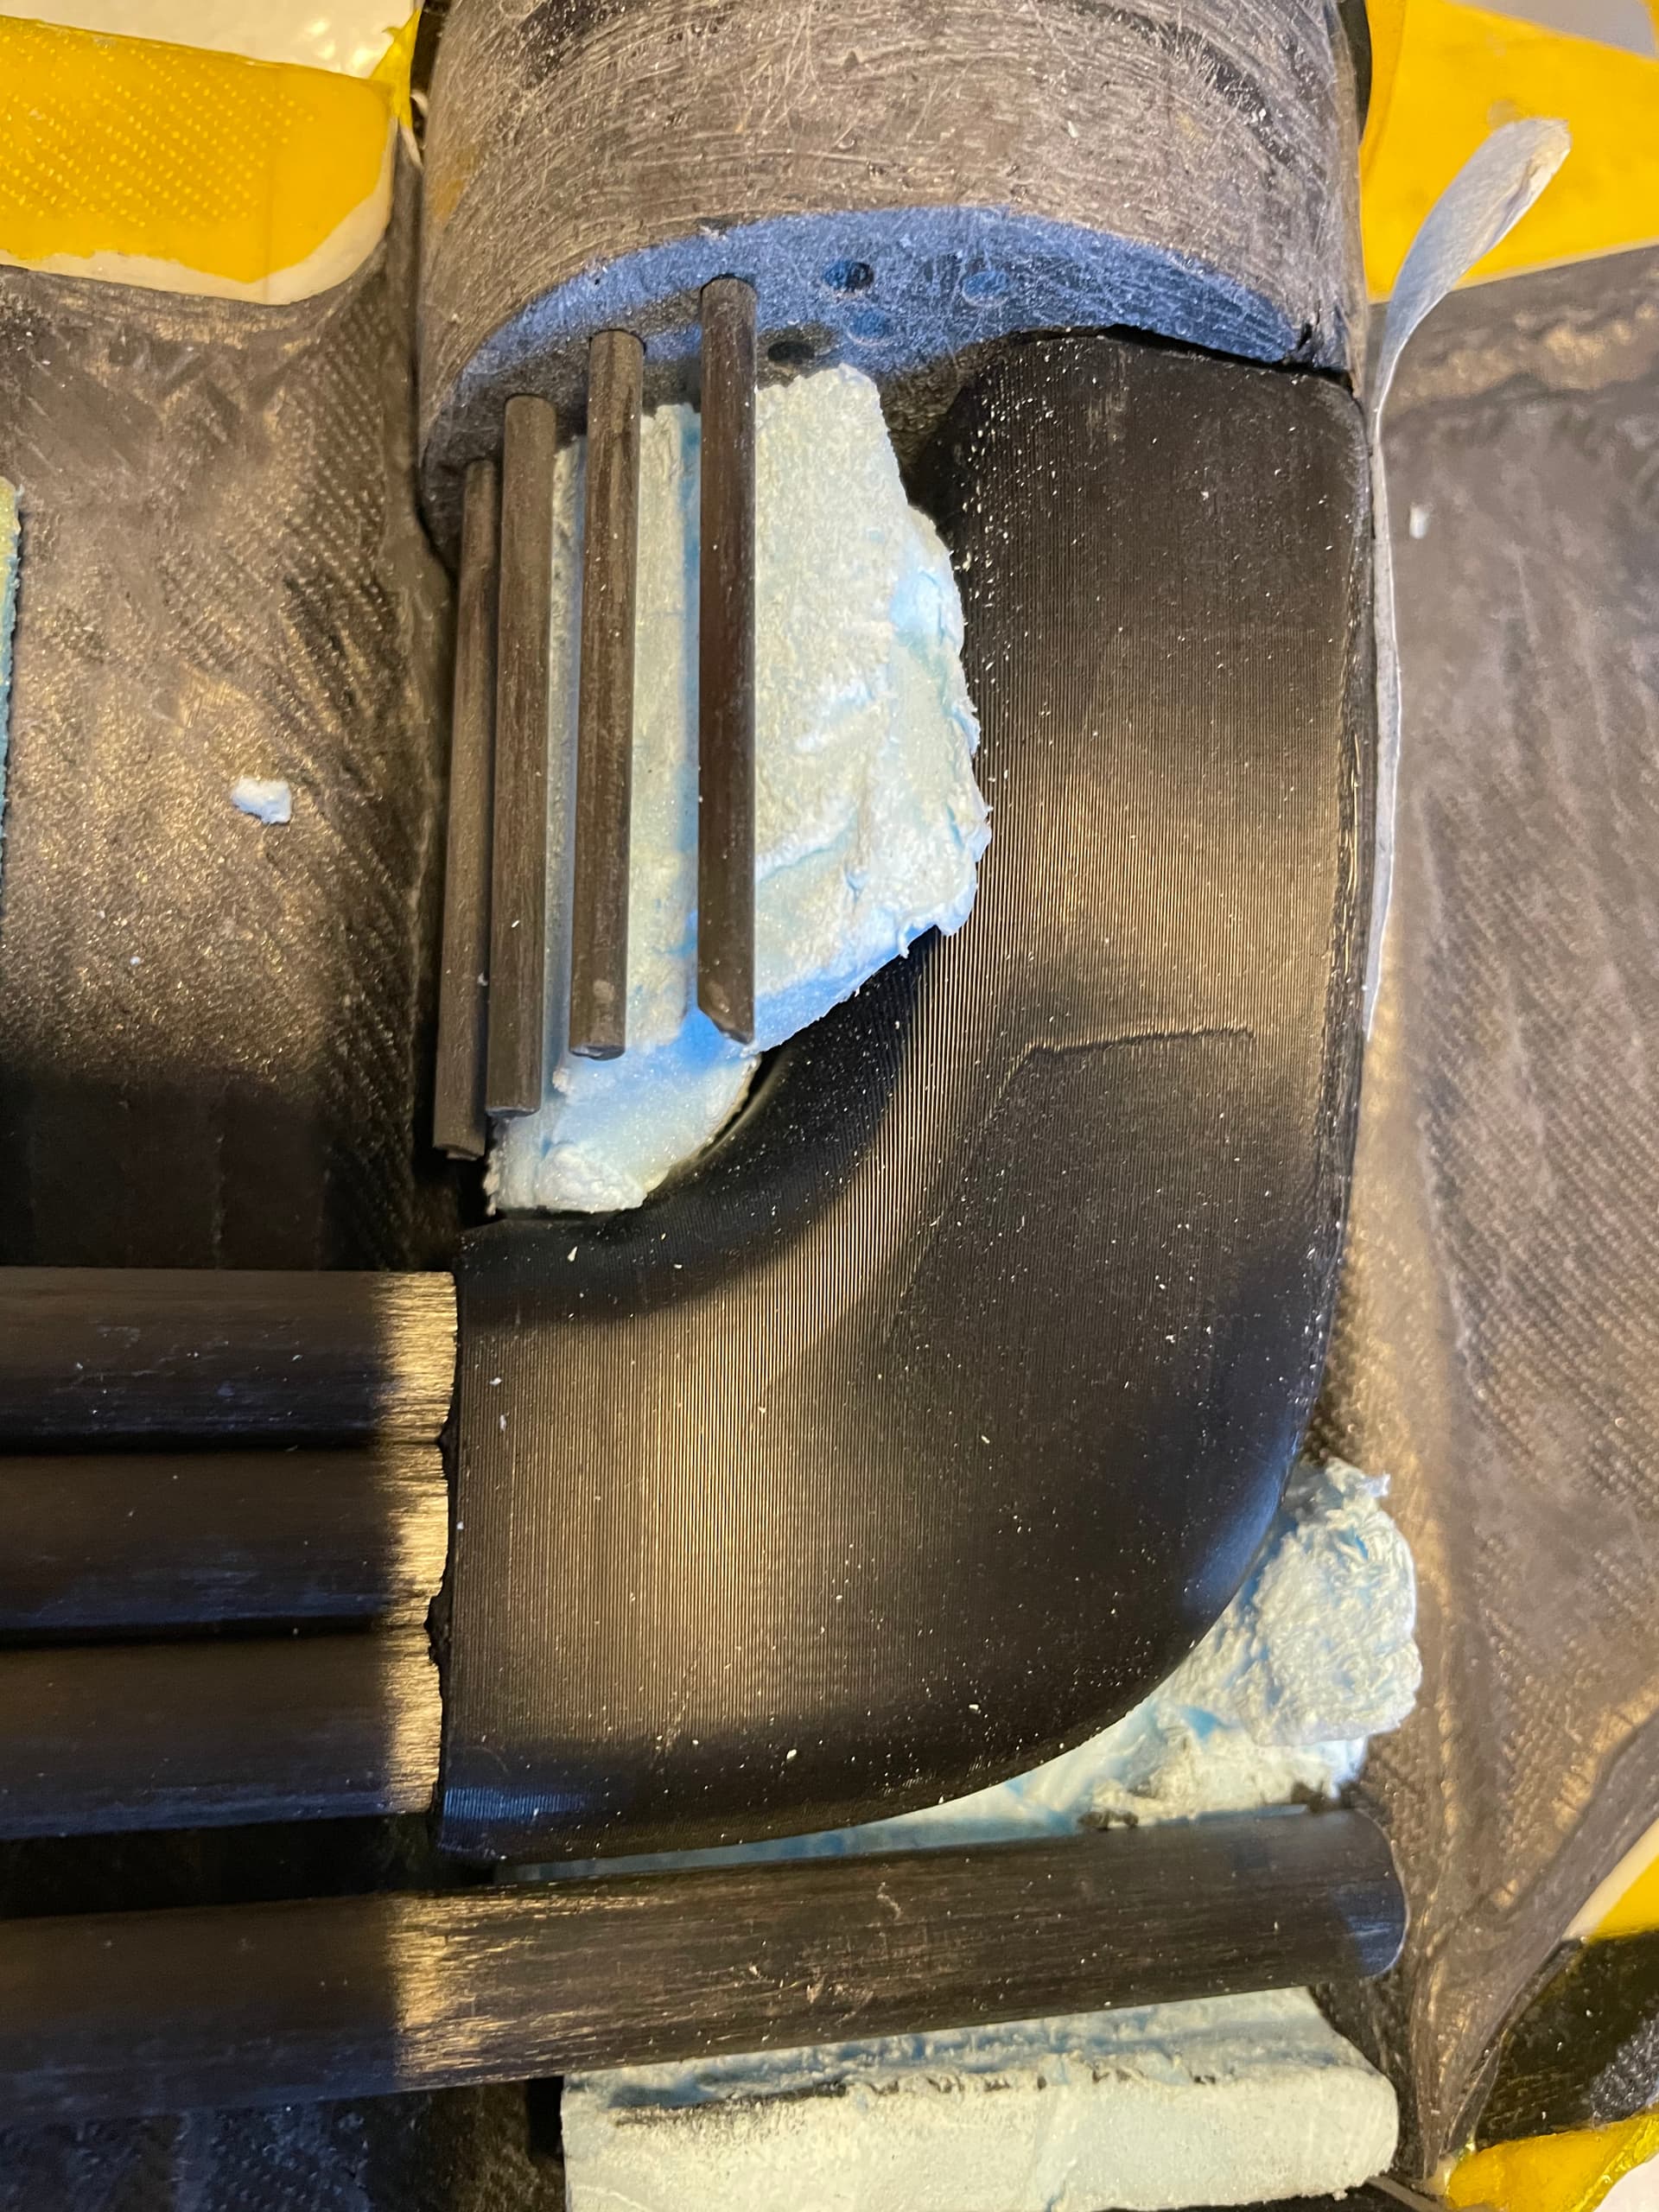
3 cfk tubes 10x8mm serve as cable channels. I put a 4th in front that could be drilled open later for passive water-cooling if necessary. The tubes just fit between the two halves. 60kg/m3 foam core sanded to fit the rest of the core.
 ![IMG_0887](https://foil.zone/uploads/default/original/3X/5/f/5fb6e30d68f7a6cfef3be8821bb071124a139c14.jpeg)  
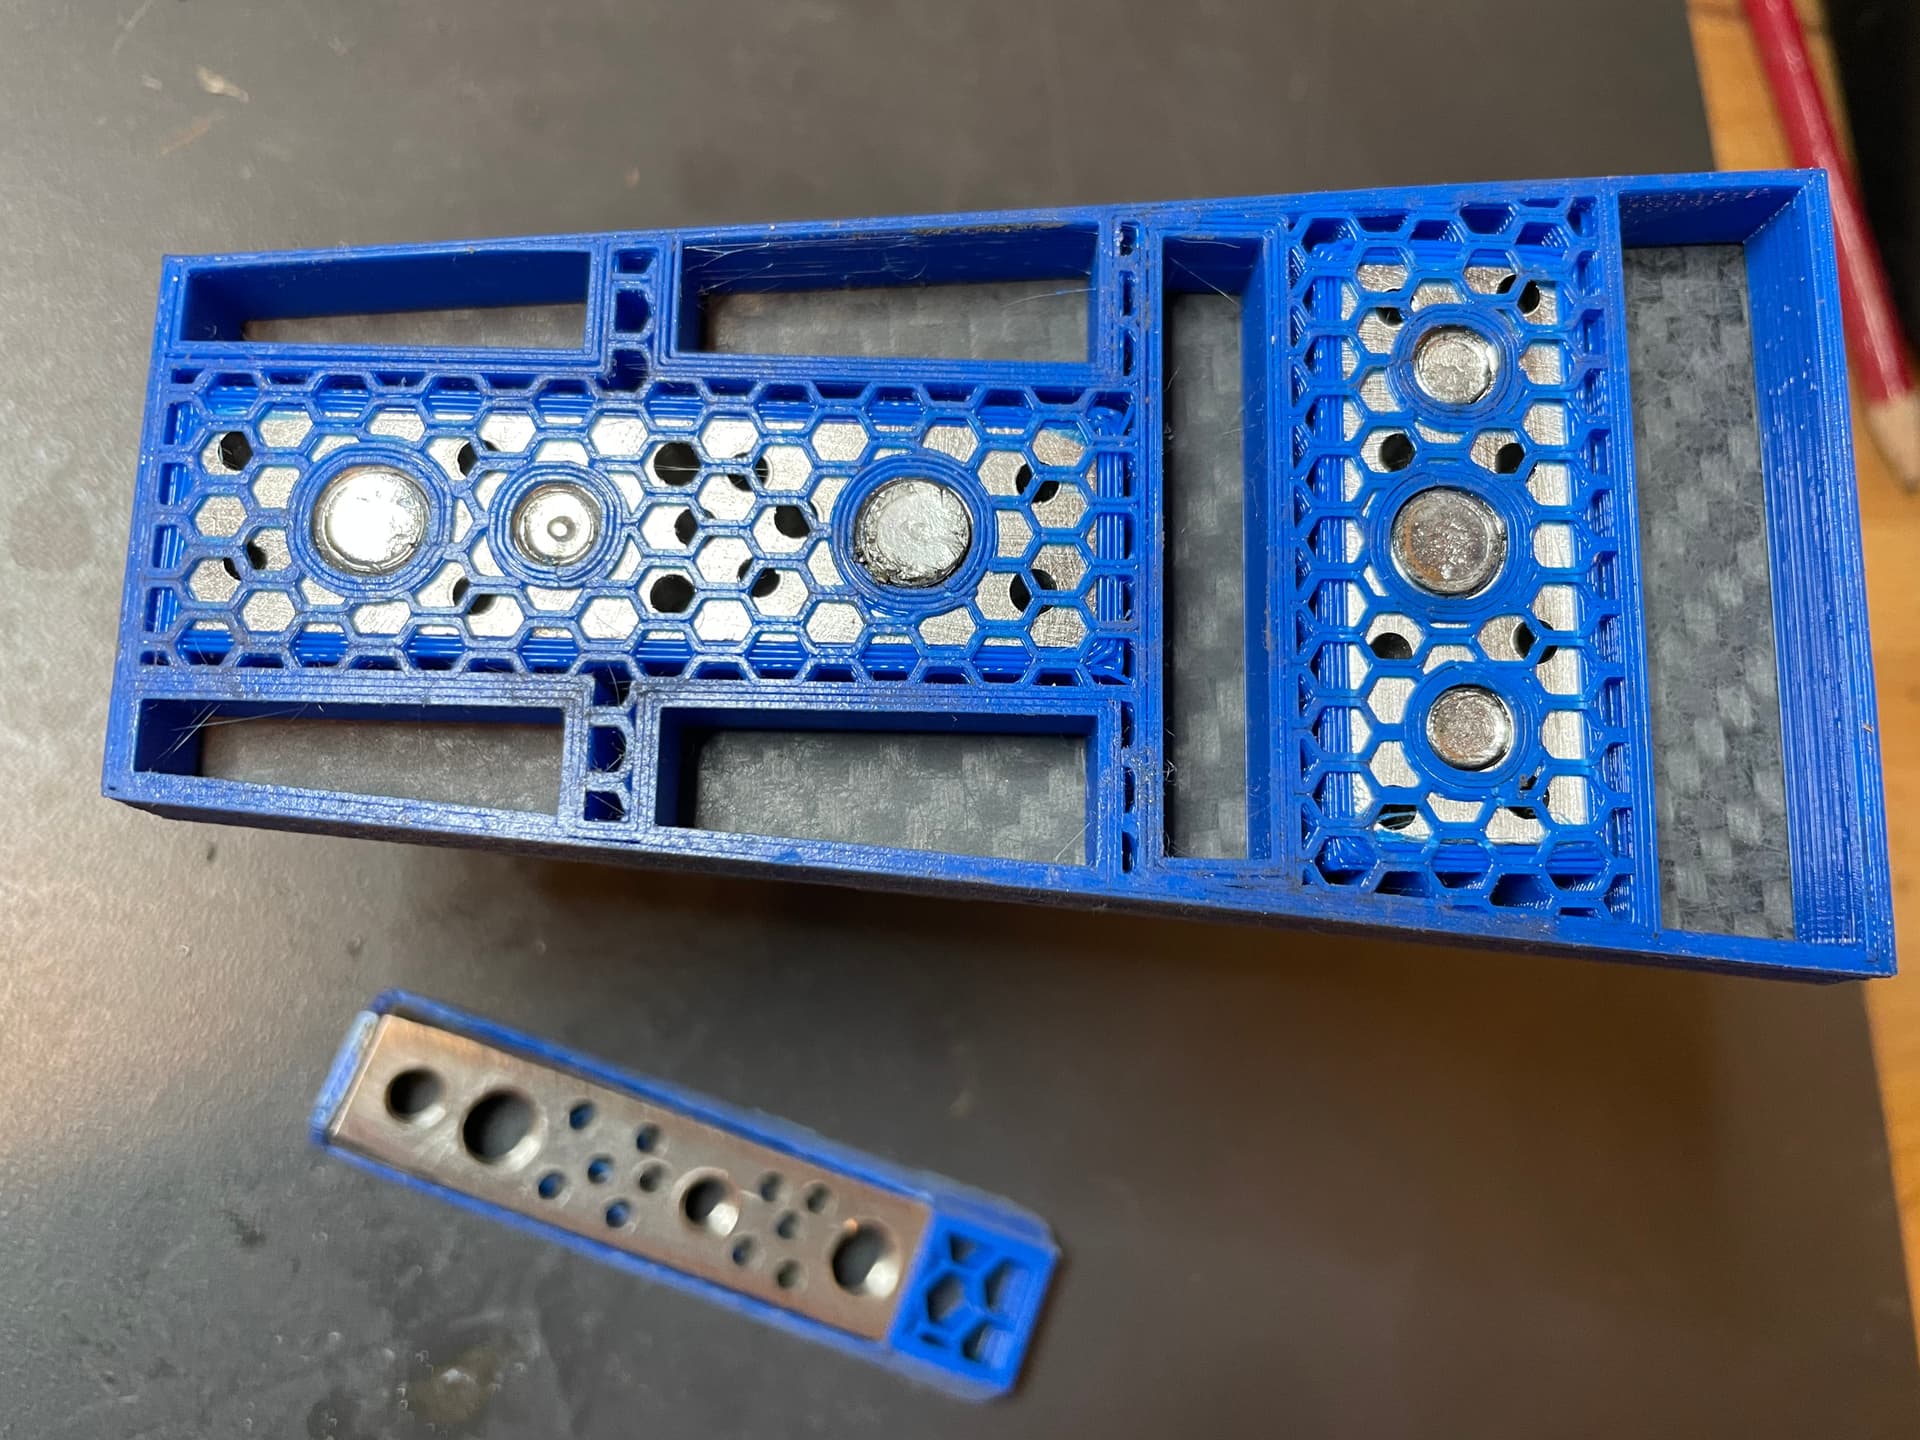
Glued in 3mm cfk rods for better bonding
 ![IMG_0880](https://foil.zone/uploads/default/original/3X/b/9/b93af9af138fd32018d27b87b576b106ce988e9f.jpeg)  
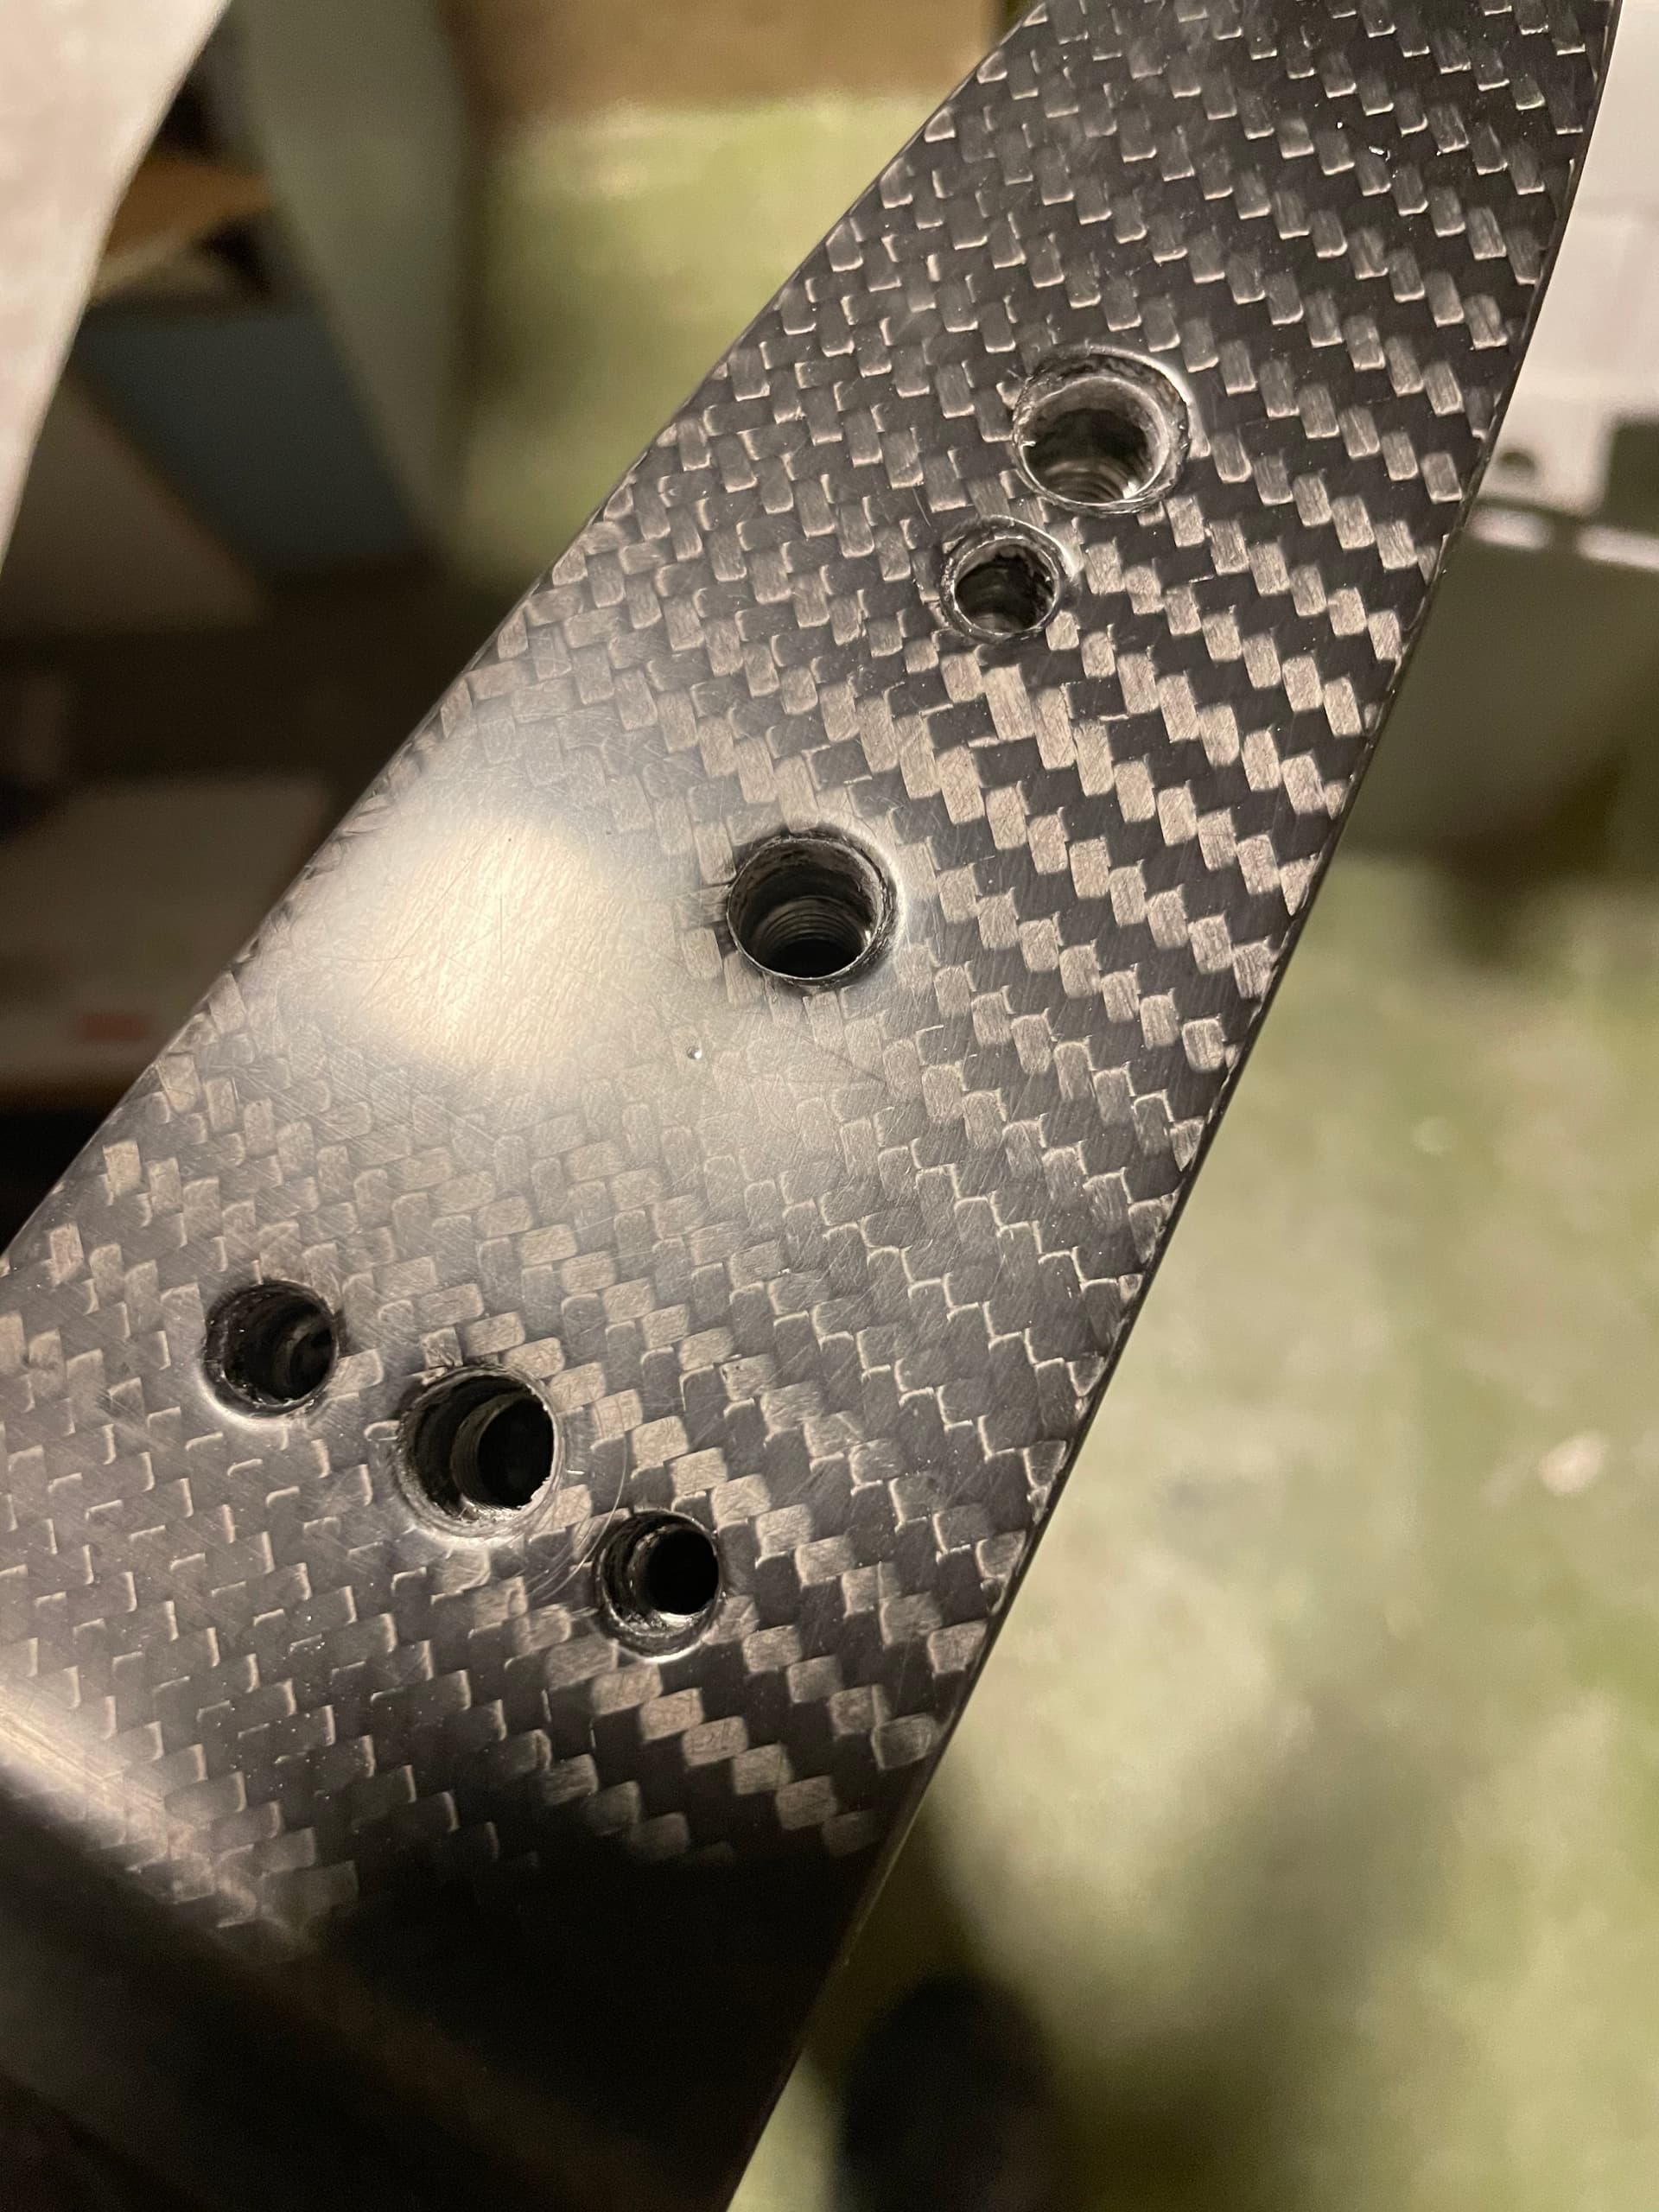
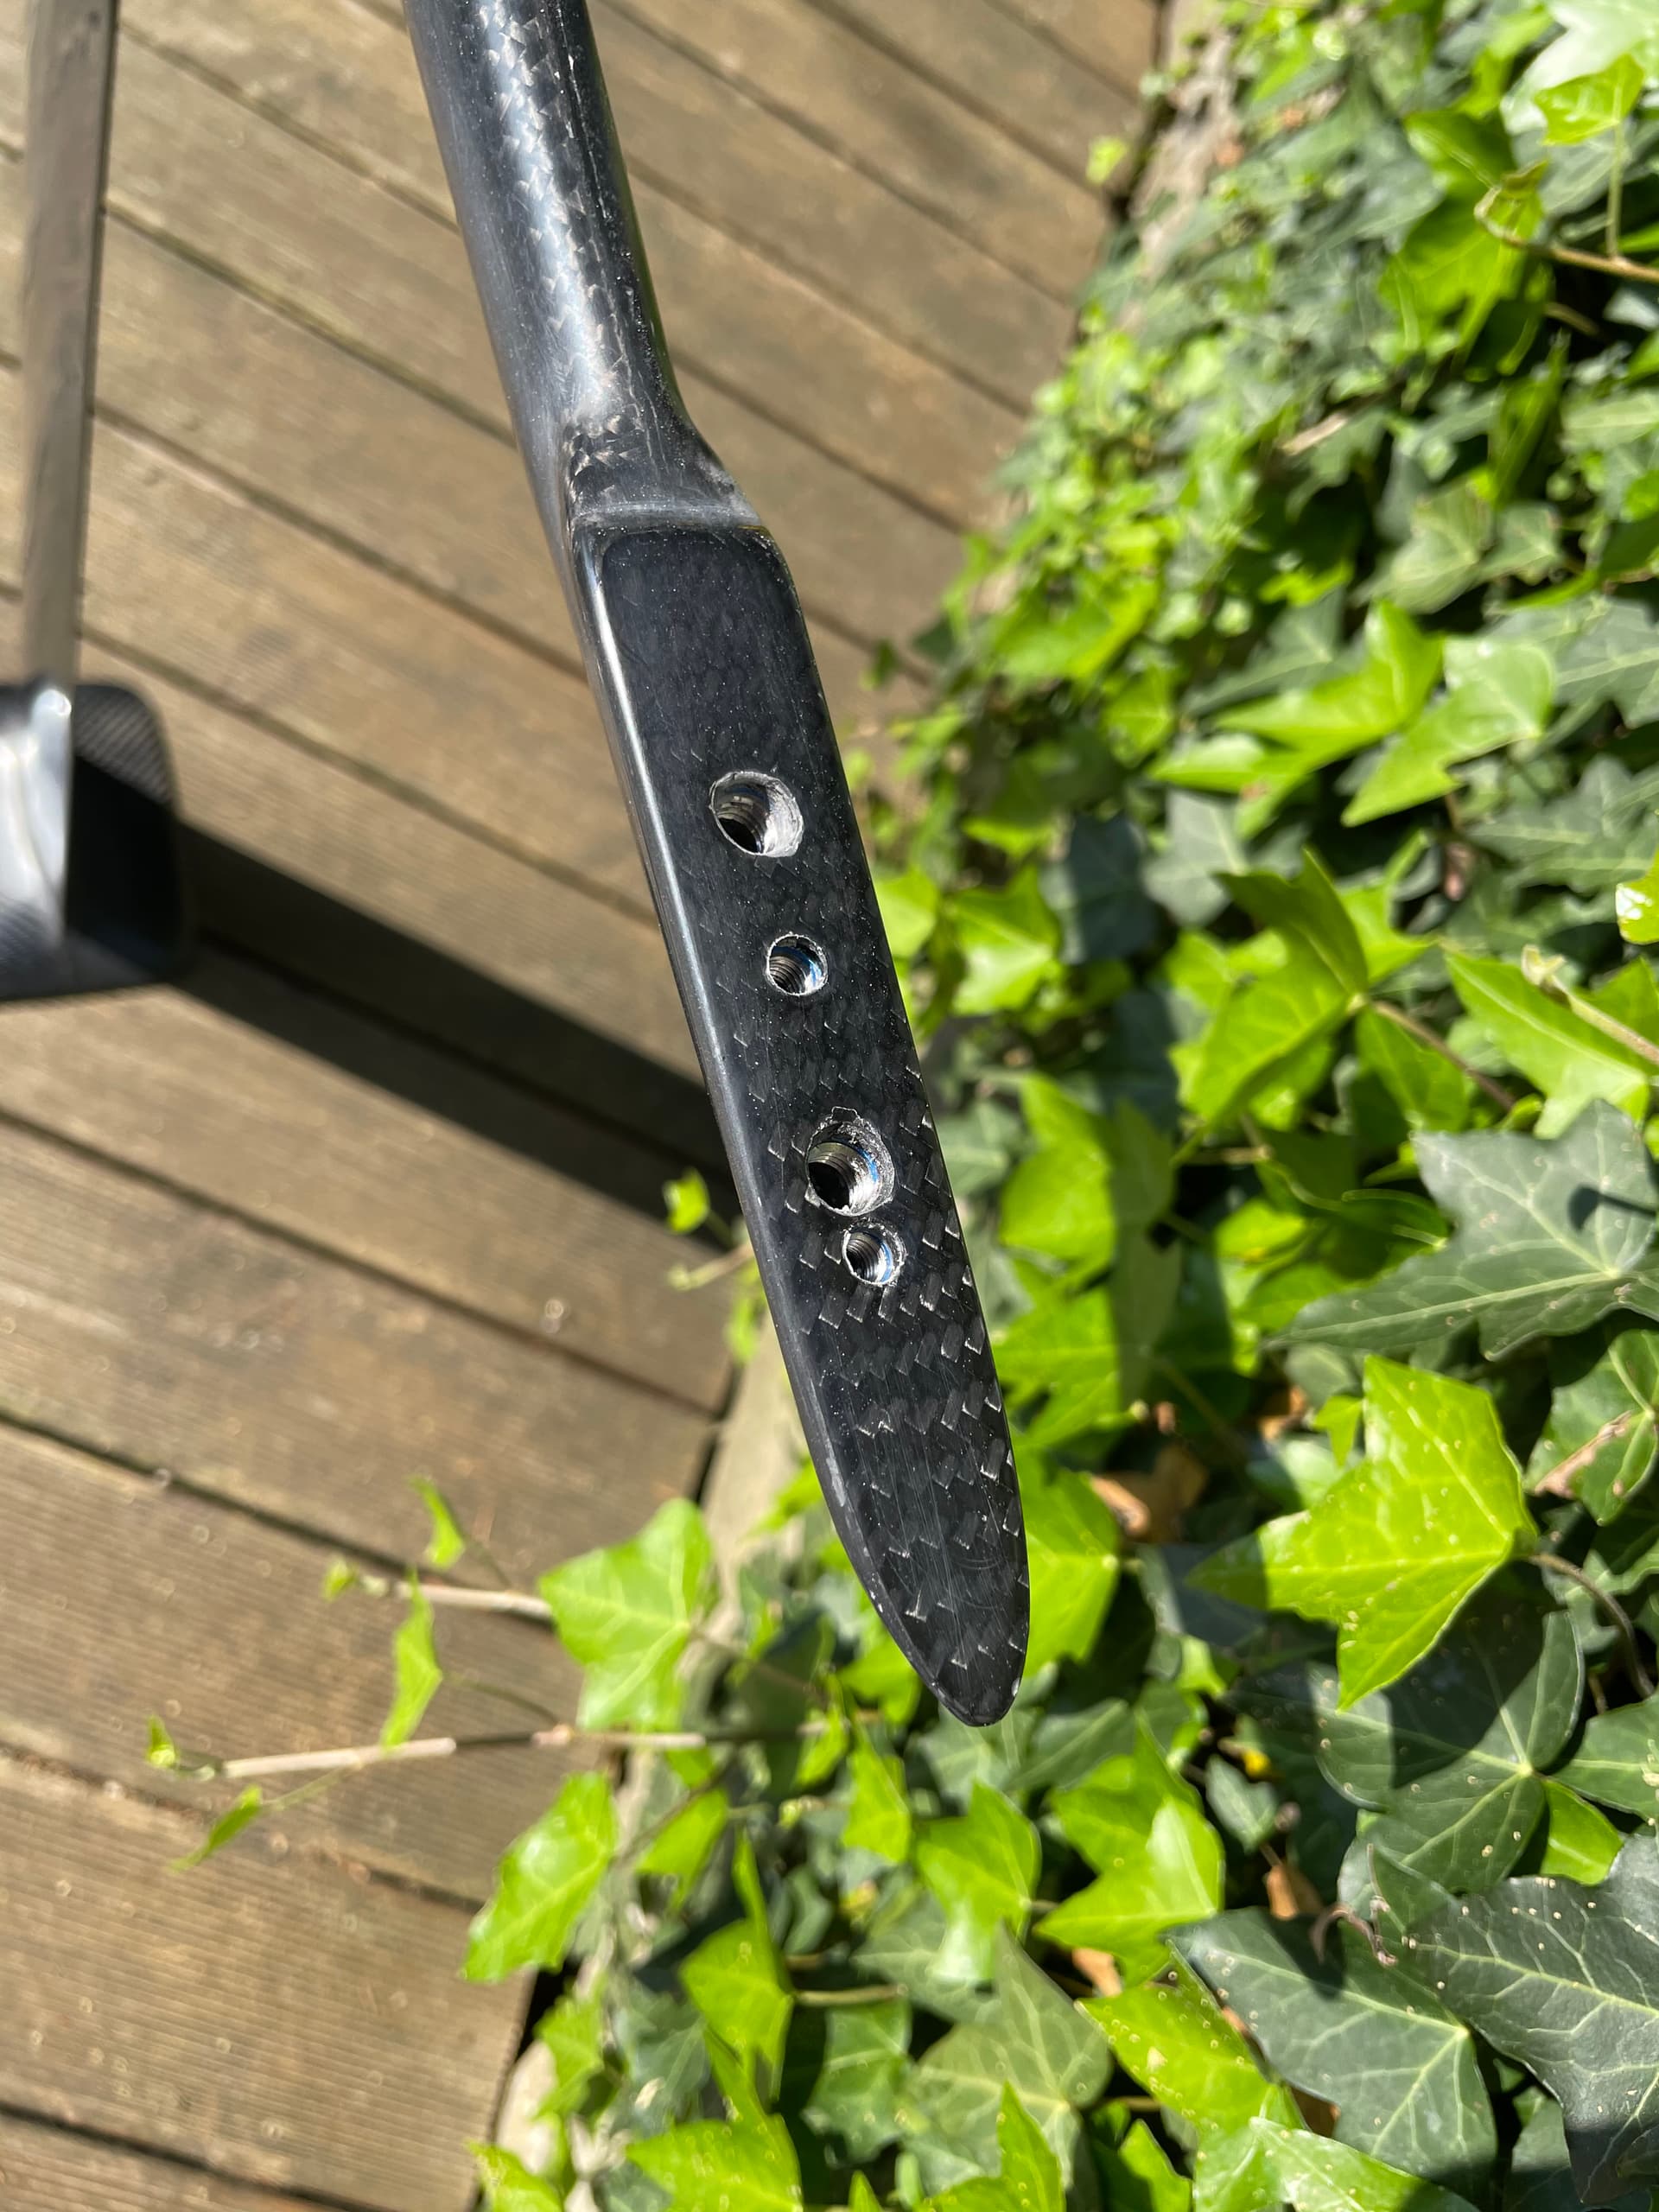
Inserts from stainless steel 1.4301. It was a pain to cut threads into this material, especially M6. I broke 2 tappers and had to drill the core a bit bigger and order some special tappers for stainless steel. Hole pattern is for RL and Flite

 ![IMG_0881](https://foil.zone/uploads/default/original/3X/c/5/c5f3beb90924be2eba073b5f3c07ab61b6f30faf.jpeg)  
Put some caps to the end of the threads to get space for the screws and covered it with epoxy and cfk flakes.

 ![IMG_0888](https://foil.zone/uploads/default/original/3X/4/8/48fab17adc074a792a6c0be111672d5a8820425c.jpeg)

Added some grease to the screws as a “release agent”

 ![IMG_0876](https://foil.zone/uploads/default/original/3X/4/6/46ae27f9ea6061c059a771686e8a3dde99b340da.jpeg)  
Printed a tool for alignment of the motor insert when putting the halves togetter

 ![IMG_0906](https://foil.zone/uploads/default/original/3X/a/c/ac4e34bad832821bbec5b778169d4a96c11b0a45.jpeg)  
There are many layers of 300g/m2 biax bent around the edge at the top of the mast (@ the inside, not visible here)

 ![IMG_1239](https://foil.zone/uploads/default/original/3X/2/6/26f4e54216081fec22ef704b8b5c7f584f73f5f9.jpeg)  
3d printed tool to drill the fixing pin hole into the shell

 ![IMG_1258](https://foil.zone/uploads/default/original/3X/3/c/3c1ebcbb54e7d64109c457f396035c624bd5d0ab.jpeg)  
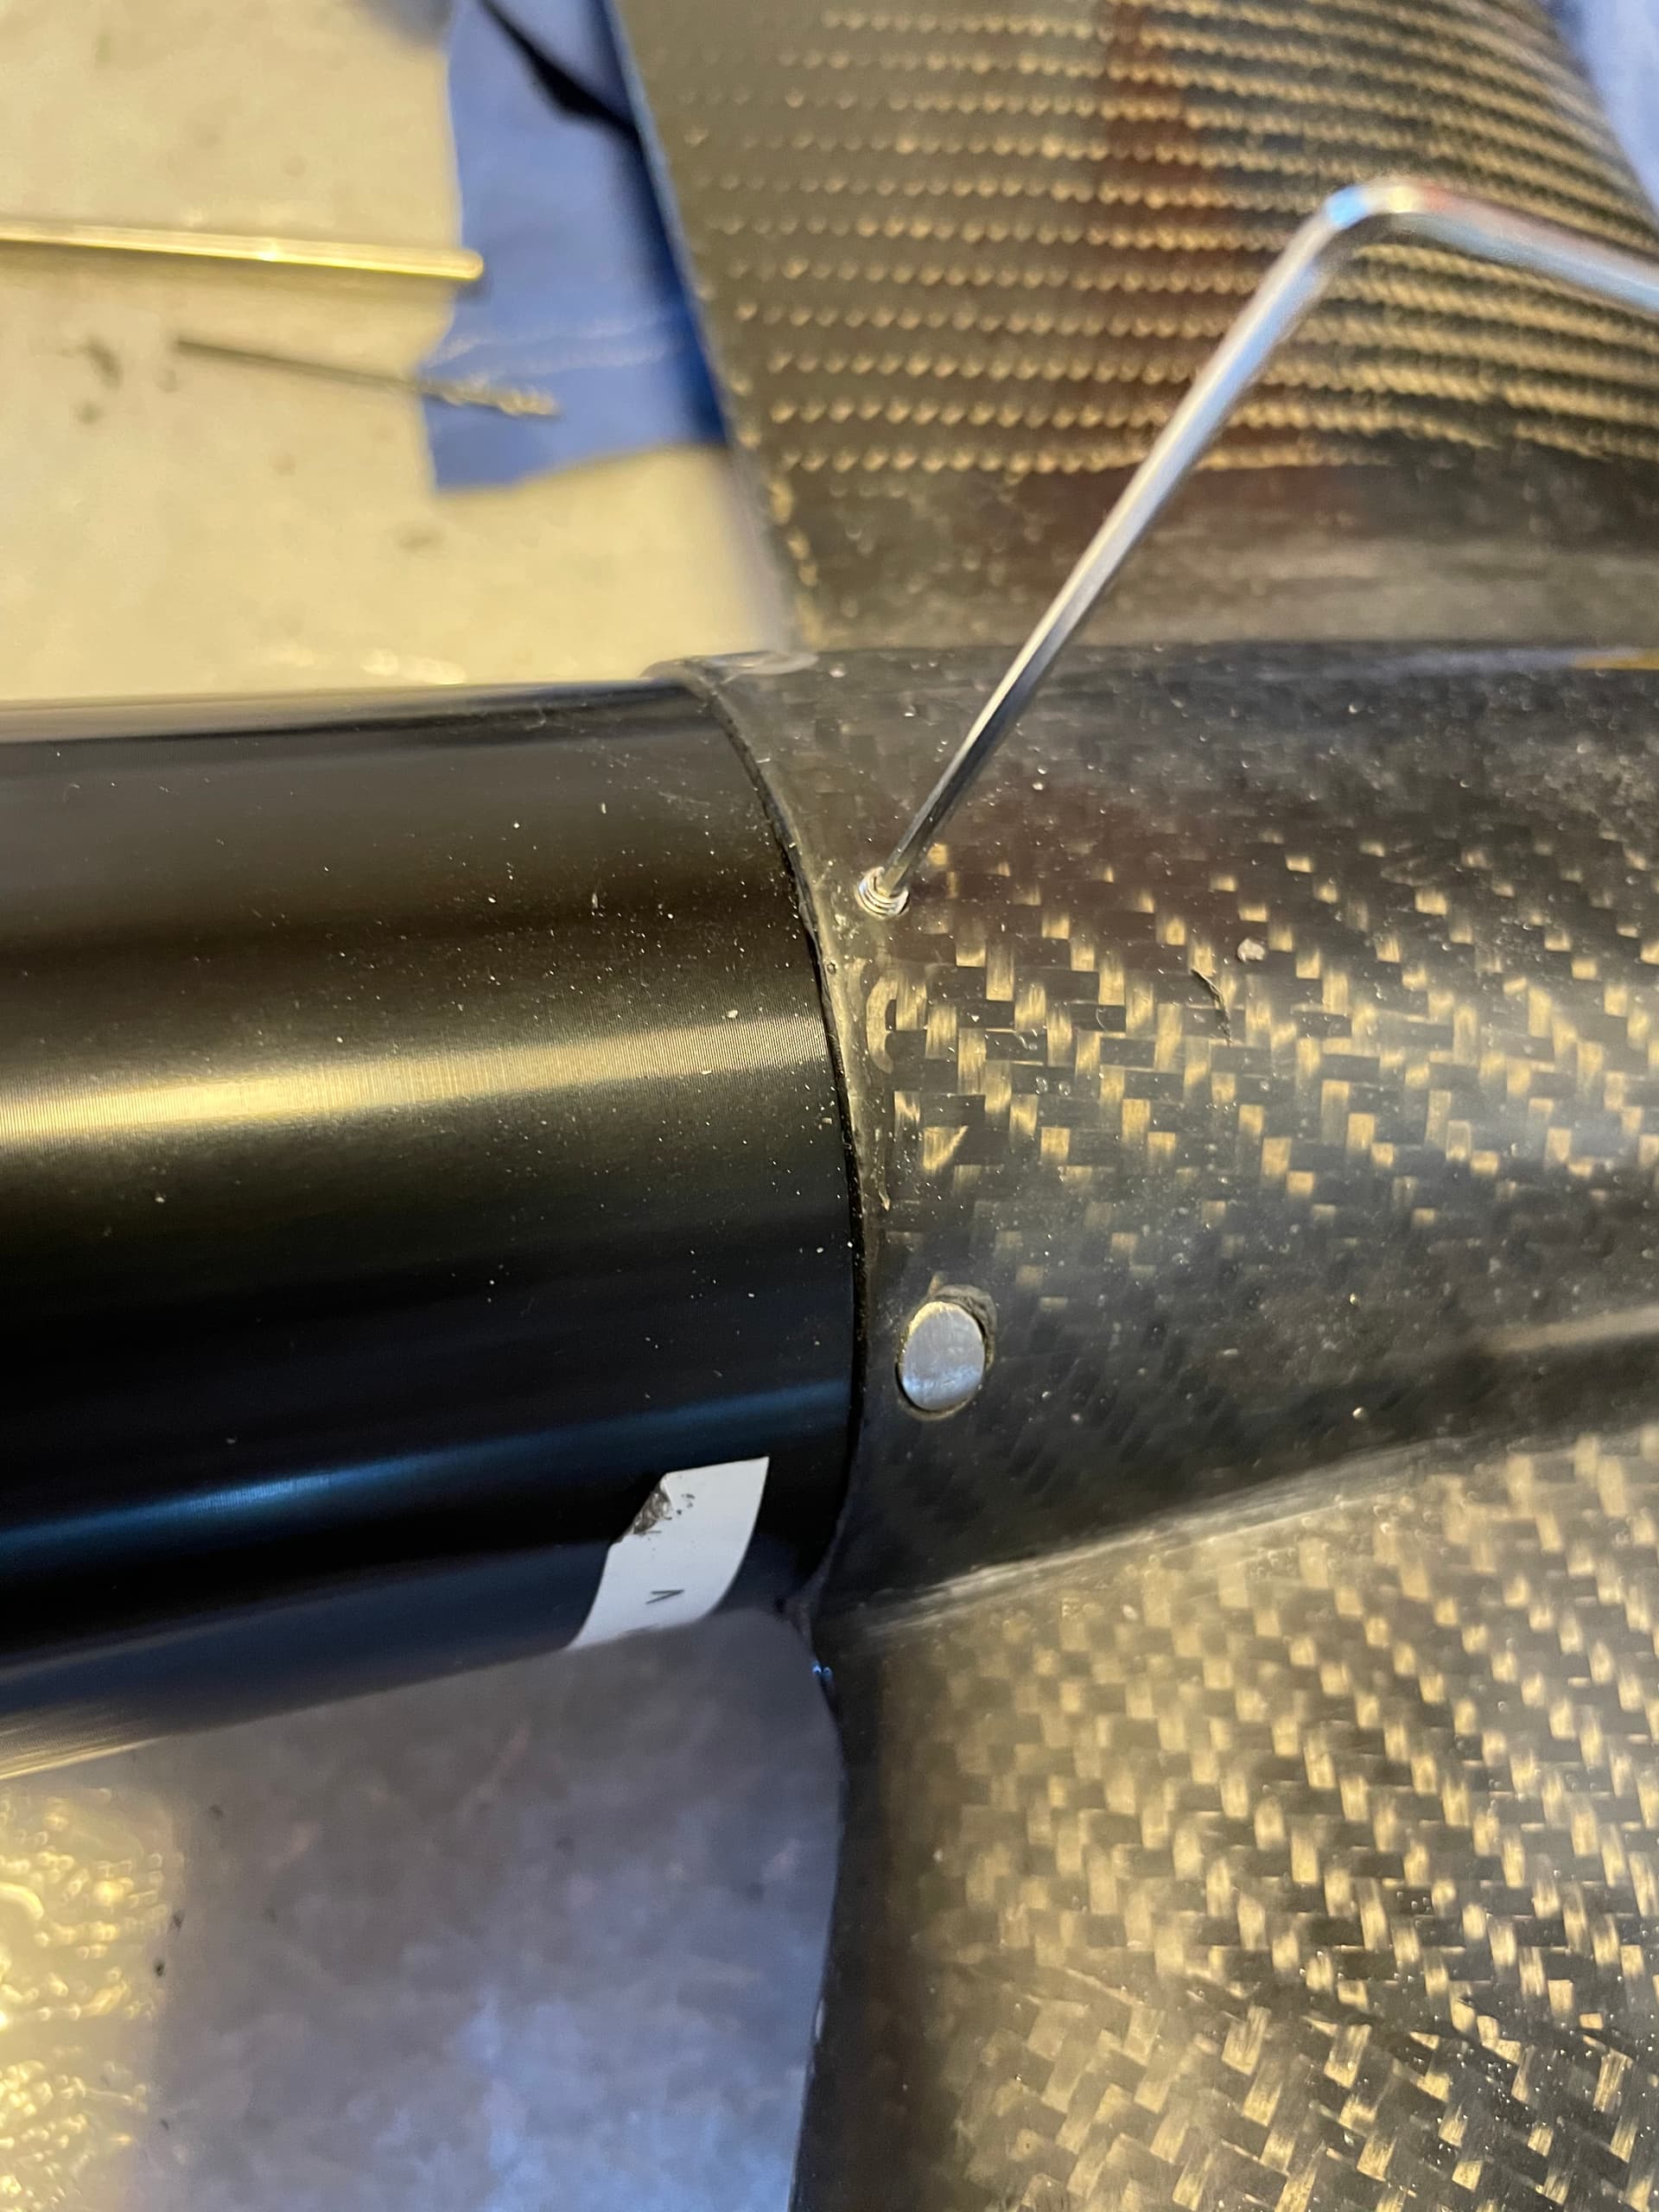
Made the pins from titan to prevent corrosion and because I had never worked with it an wanted to try it. Quite easy to lathe, drill and even cut threads. Sanding/grinding it is really hard!
 ![IMG_1284](https://foil.zone/uploads/default/original/3X/9/7/97d8cdf7e6ef32f2bf54795a0b50cedacd2dd3ac.jpeg)  
The 5.5mm pins are held in place with an M3 grub screw
 ![IMG_1292](https://foil.zone/uploads/default/original/3X/e/5/e56fd3a0dc87a79506143089296e659ada2114ac.jpeg)  
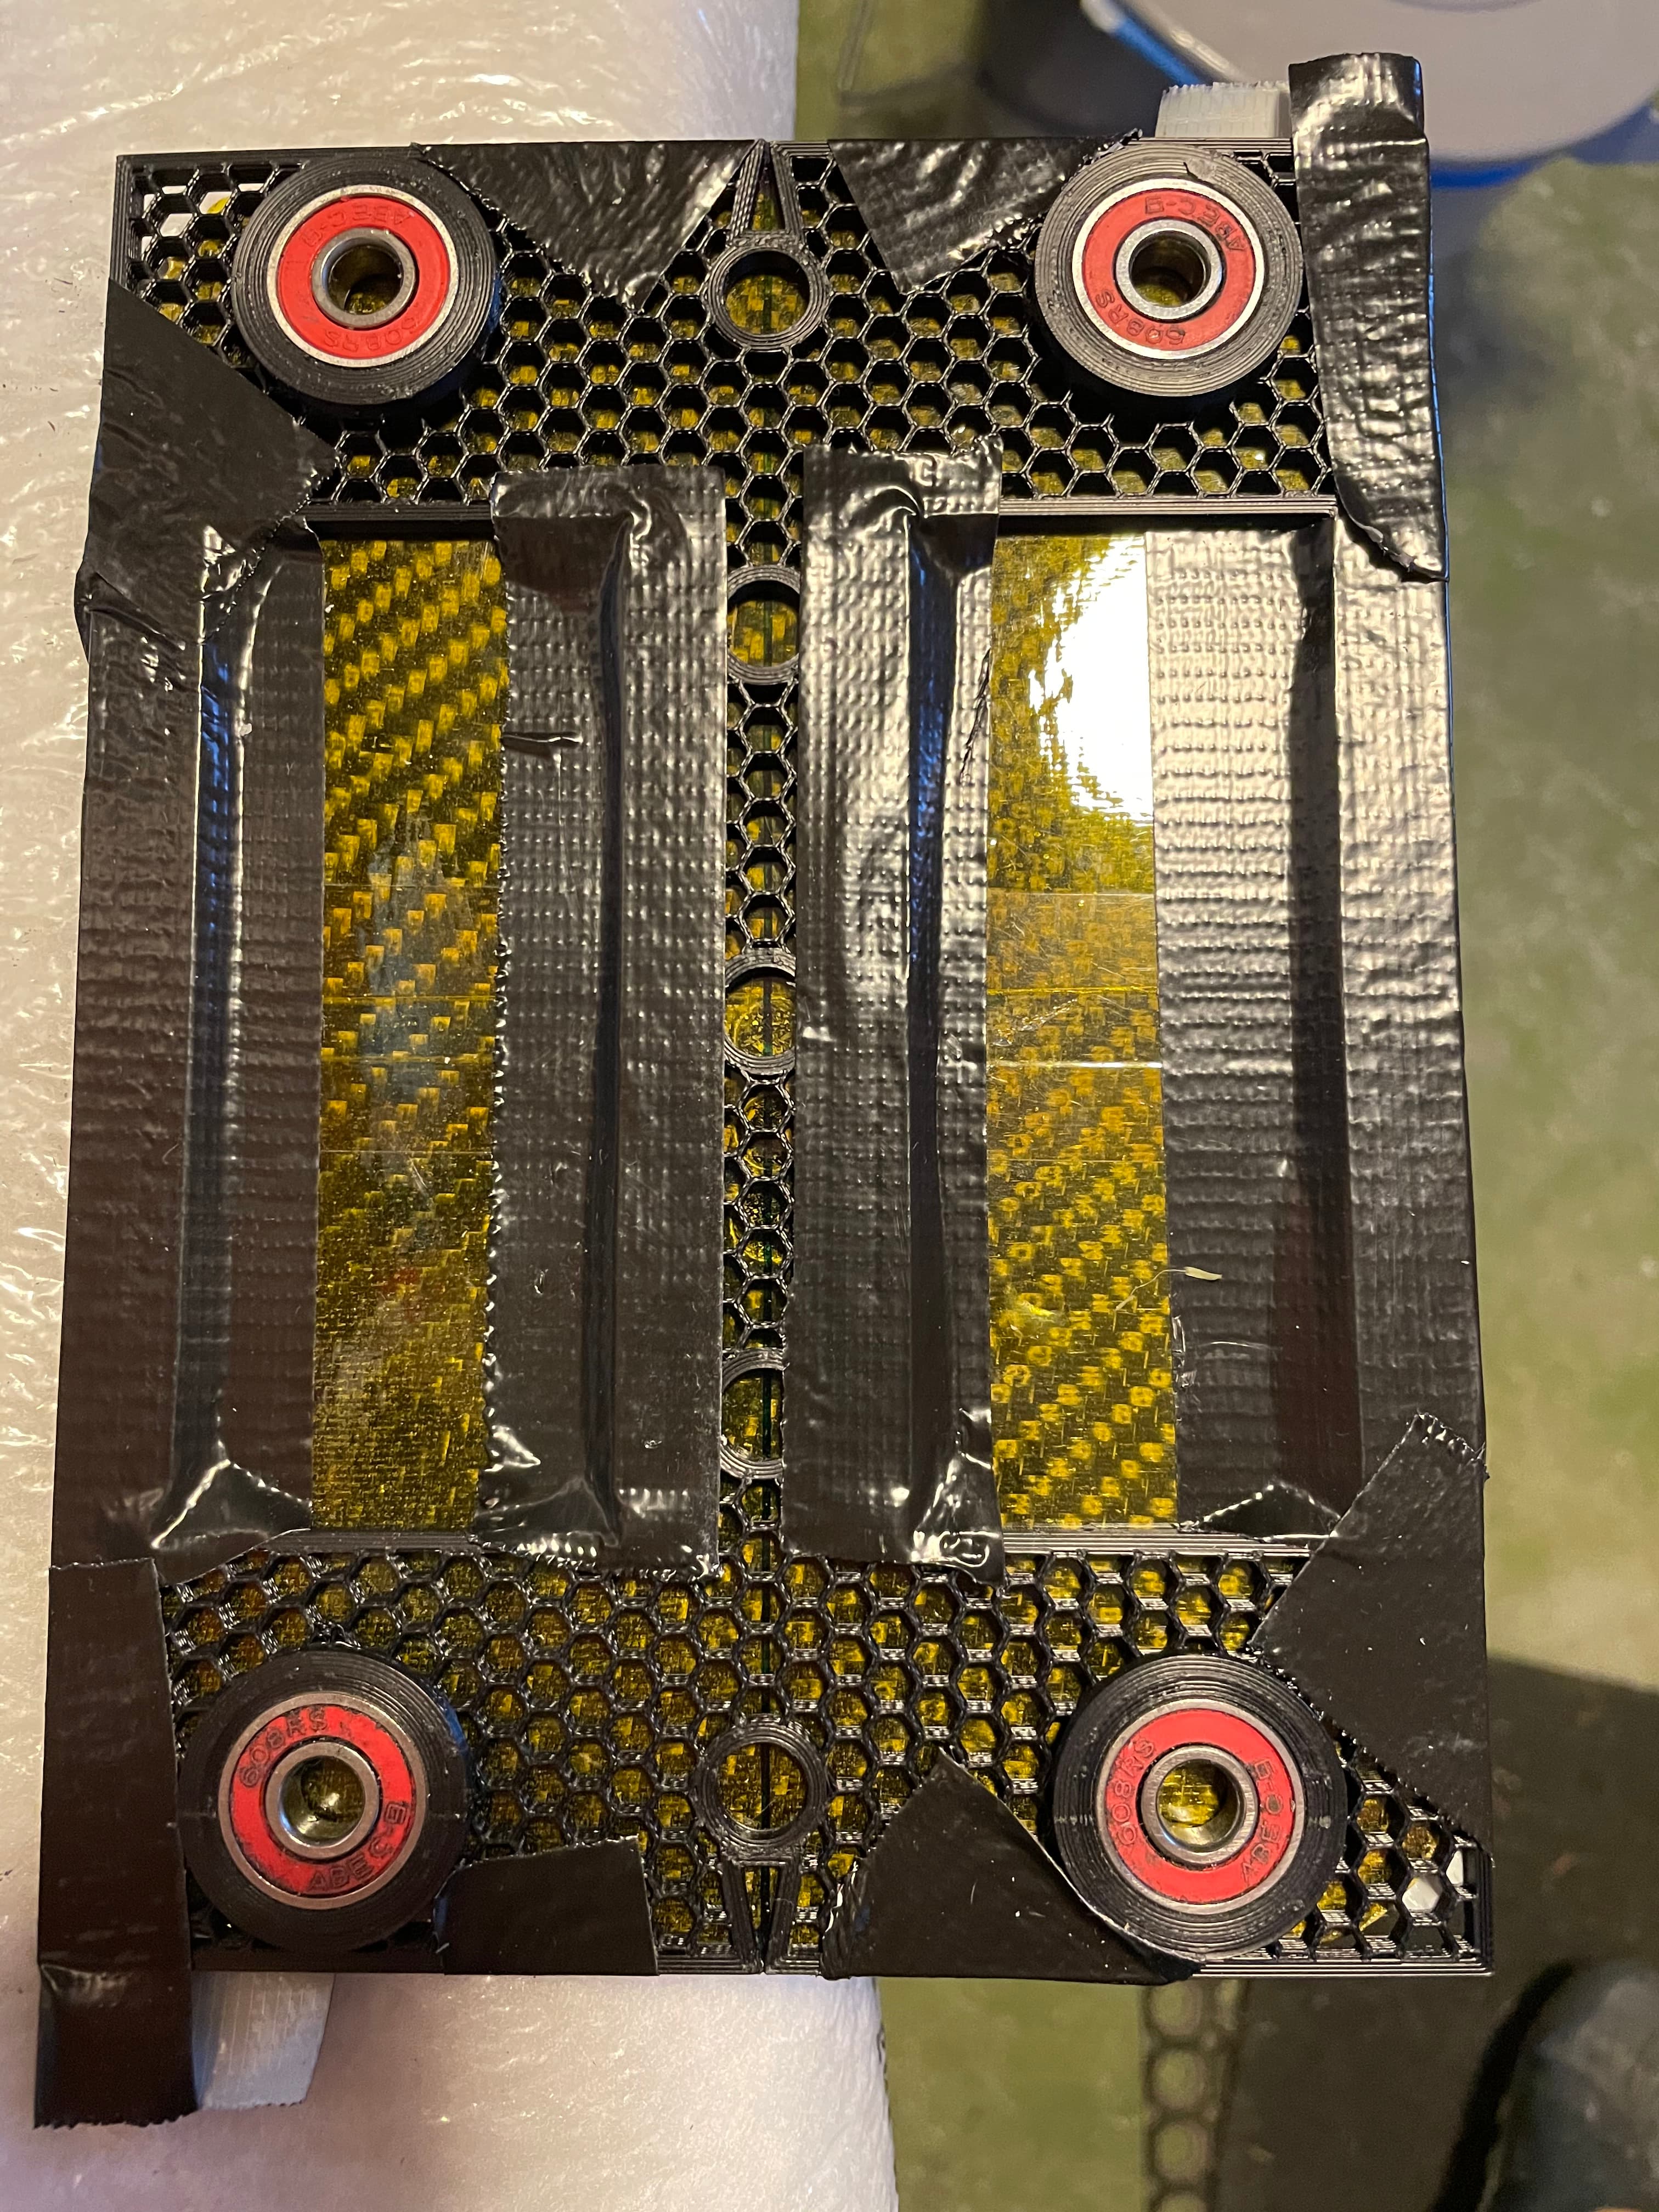
Drill jig for the mast mounting holes (90x165) with bearings as drill guides. Arrows should point to the seam
 ![IMG_1003](https://foil.zone/uploads/default/original/3X/c/1/c1c47a97625238db689a40dd279b756404c71e5f.jpeg)  
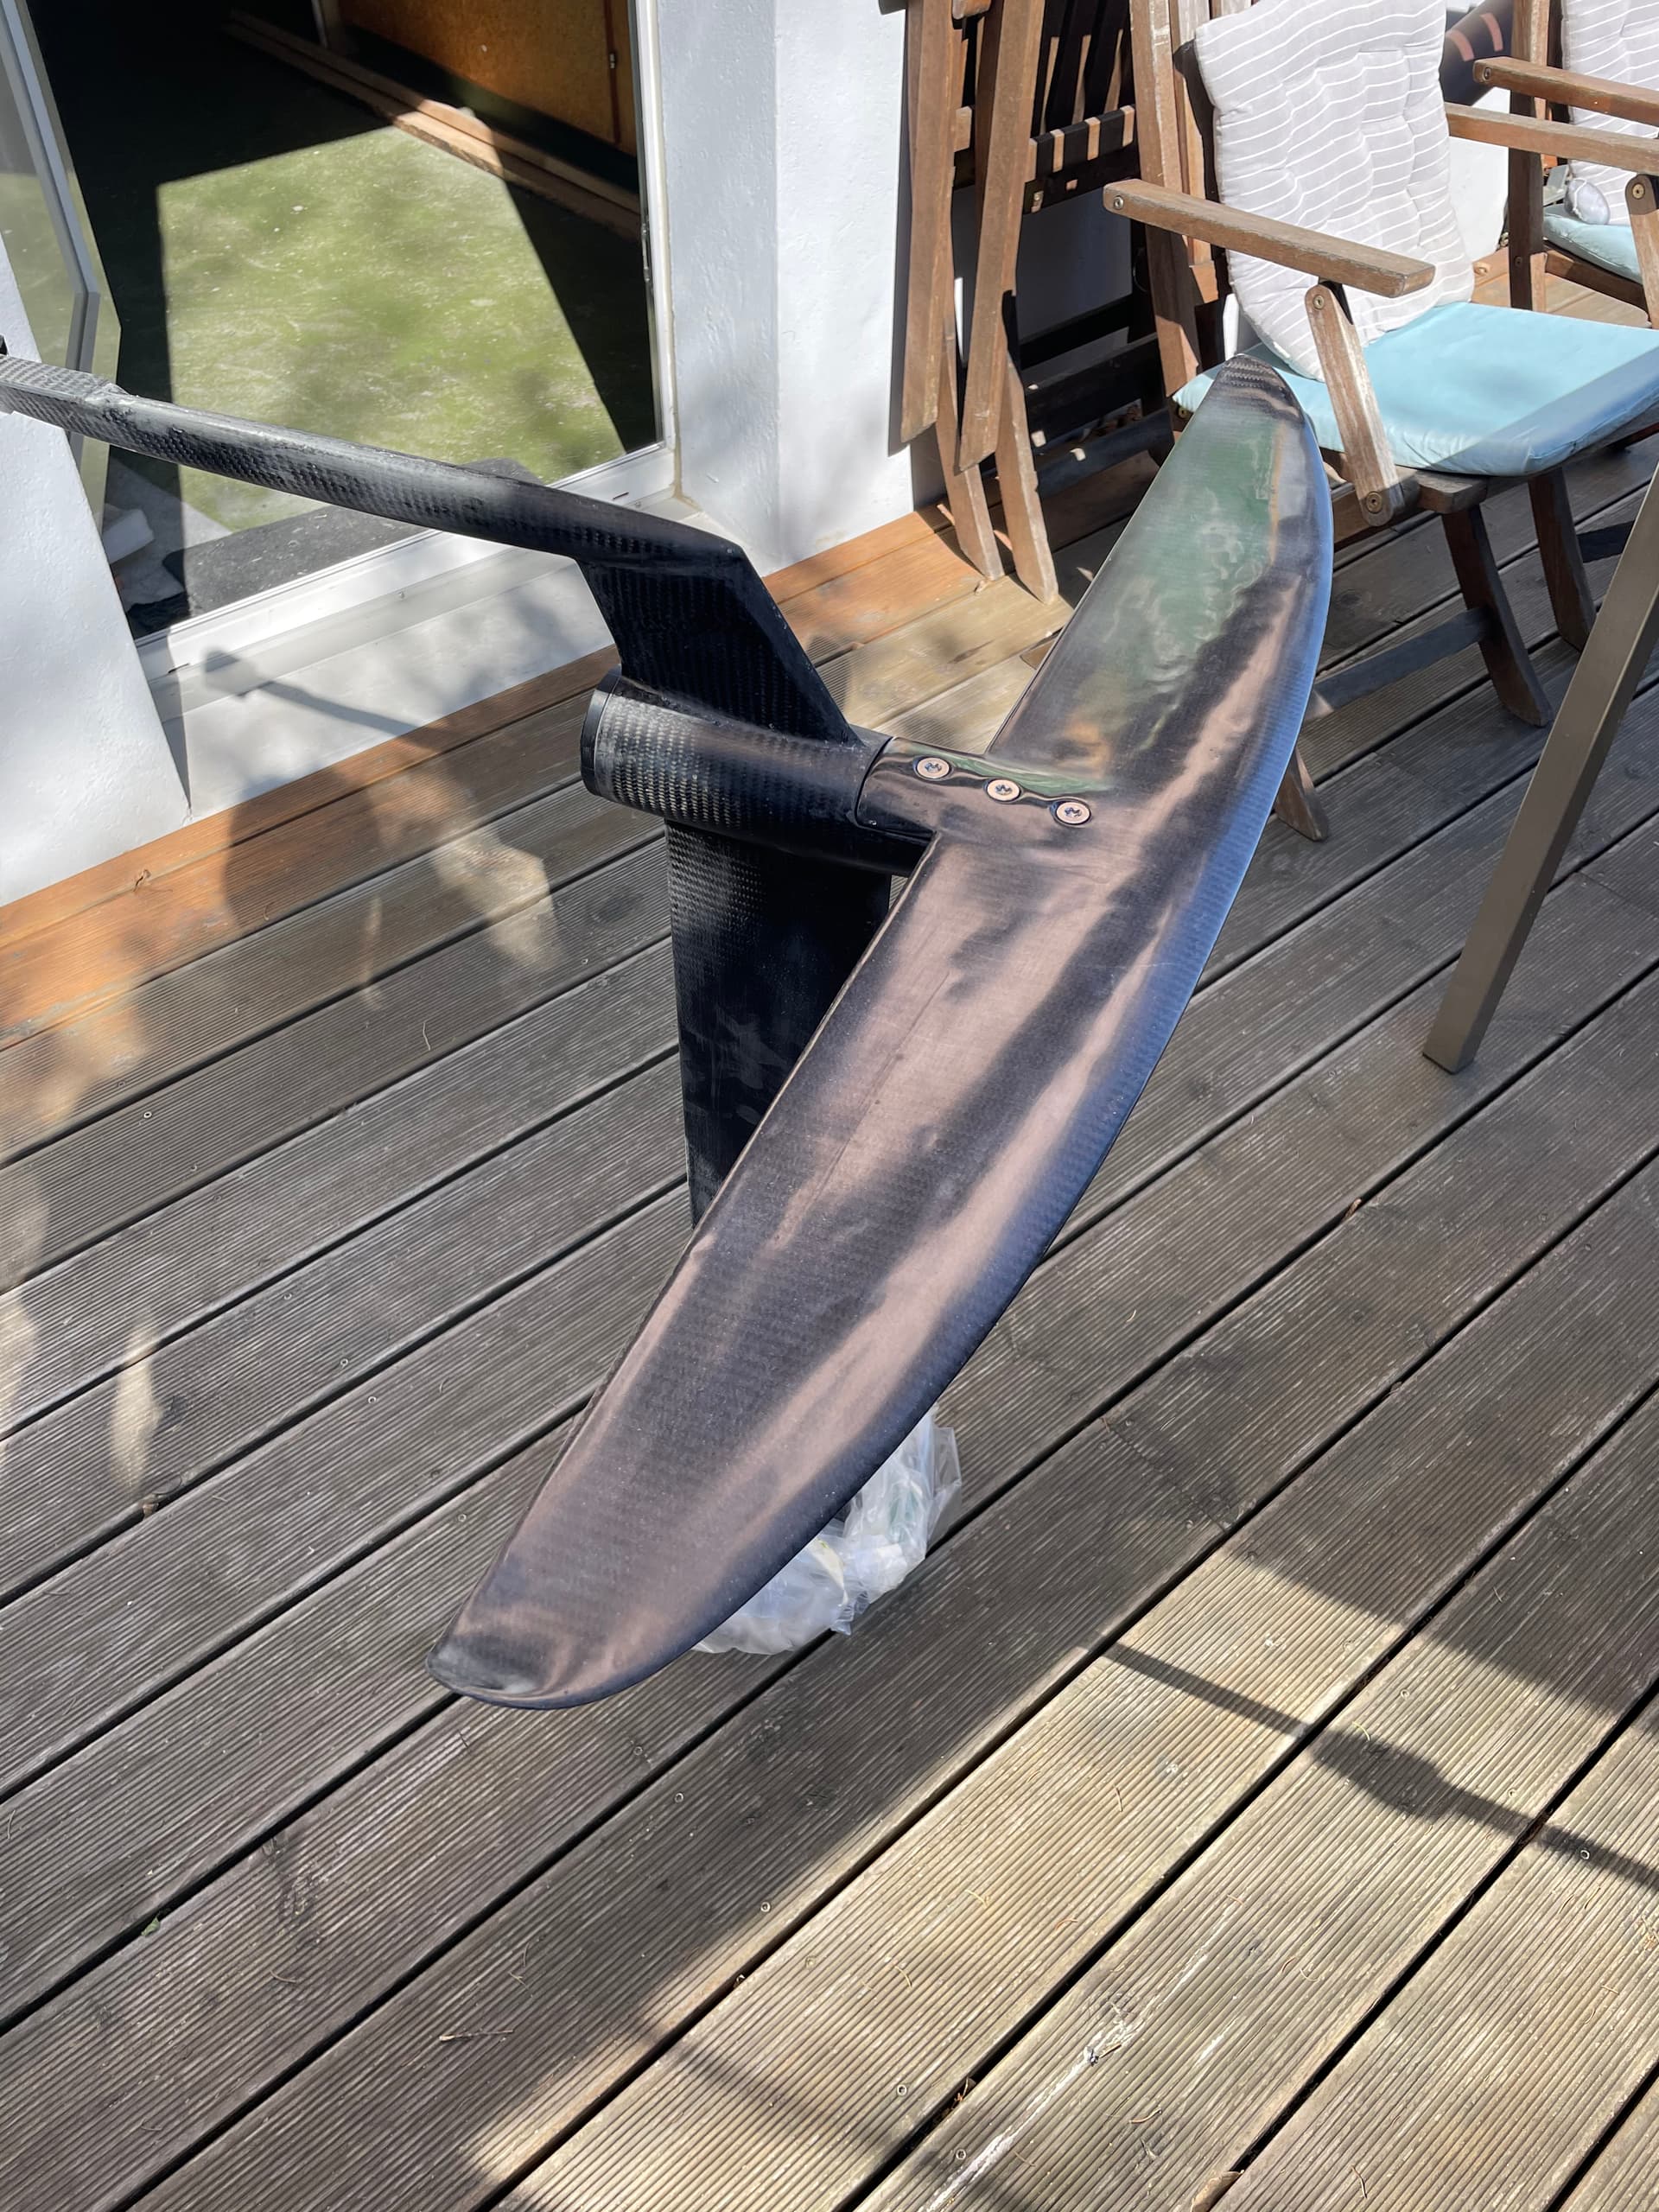
HA wing from post above

 ![IMG_1224](https://foil.zone/uploads/default/original/3X/4/a/4ae8380609ebb3374074c2306f4da46b247d483c.jpeg)  
RL and Flight hole pattern

 ![IMG_1230](https://foil.zone/uploads/default/original/3X/e/b/eb1171e089539e1346c88d89339a82d8492e88ab.jpeg)  
RL and Flight hole pattern

 ![IMG_1006](https://foil.zone/uploads/default/original/3X/8/1/8124b0ed5cbd33c948c04447a19e3fc83649408b.jpeg)  
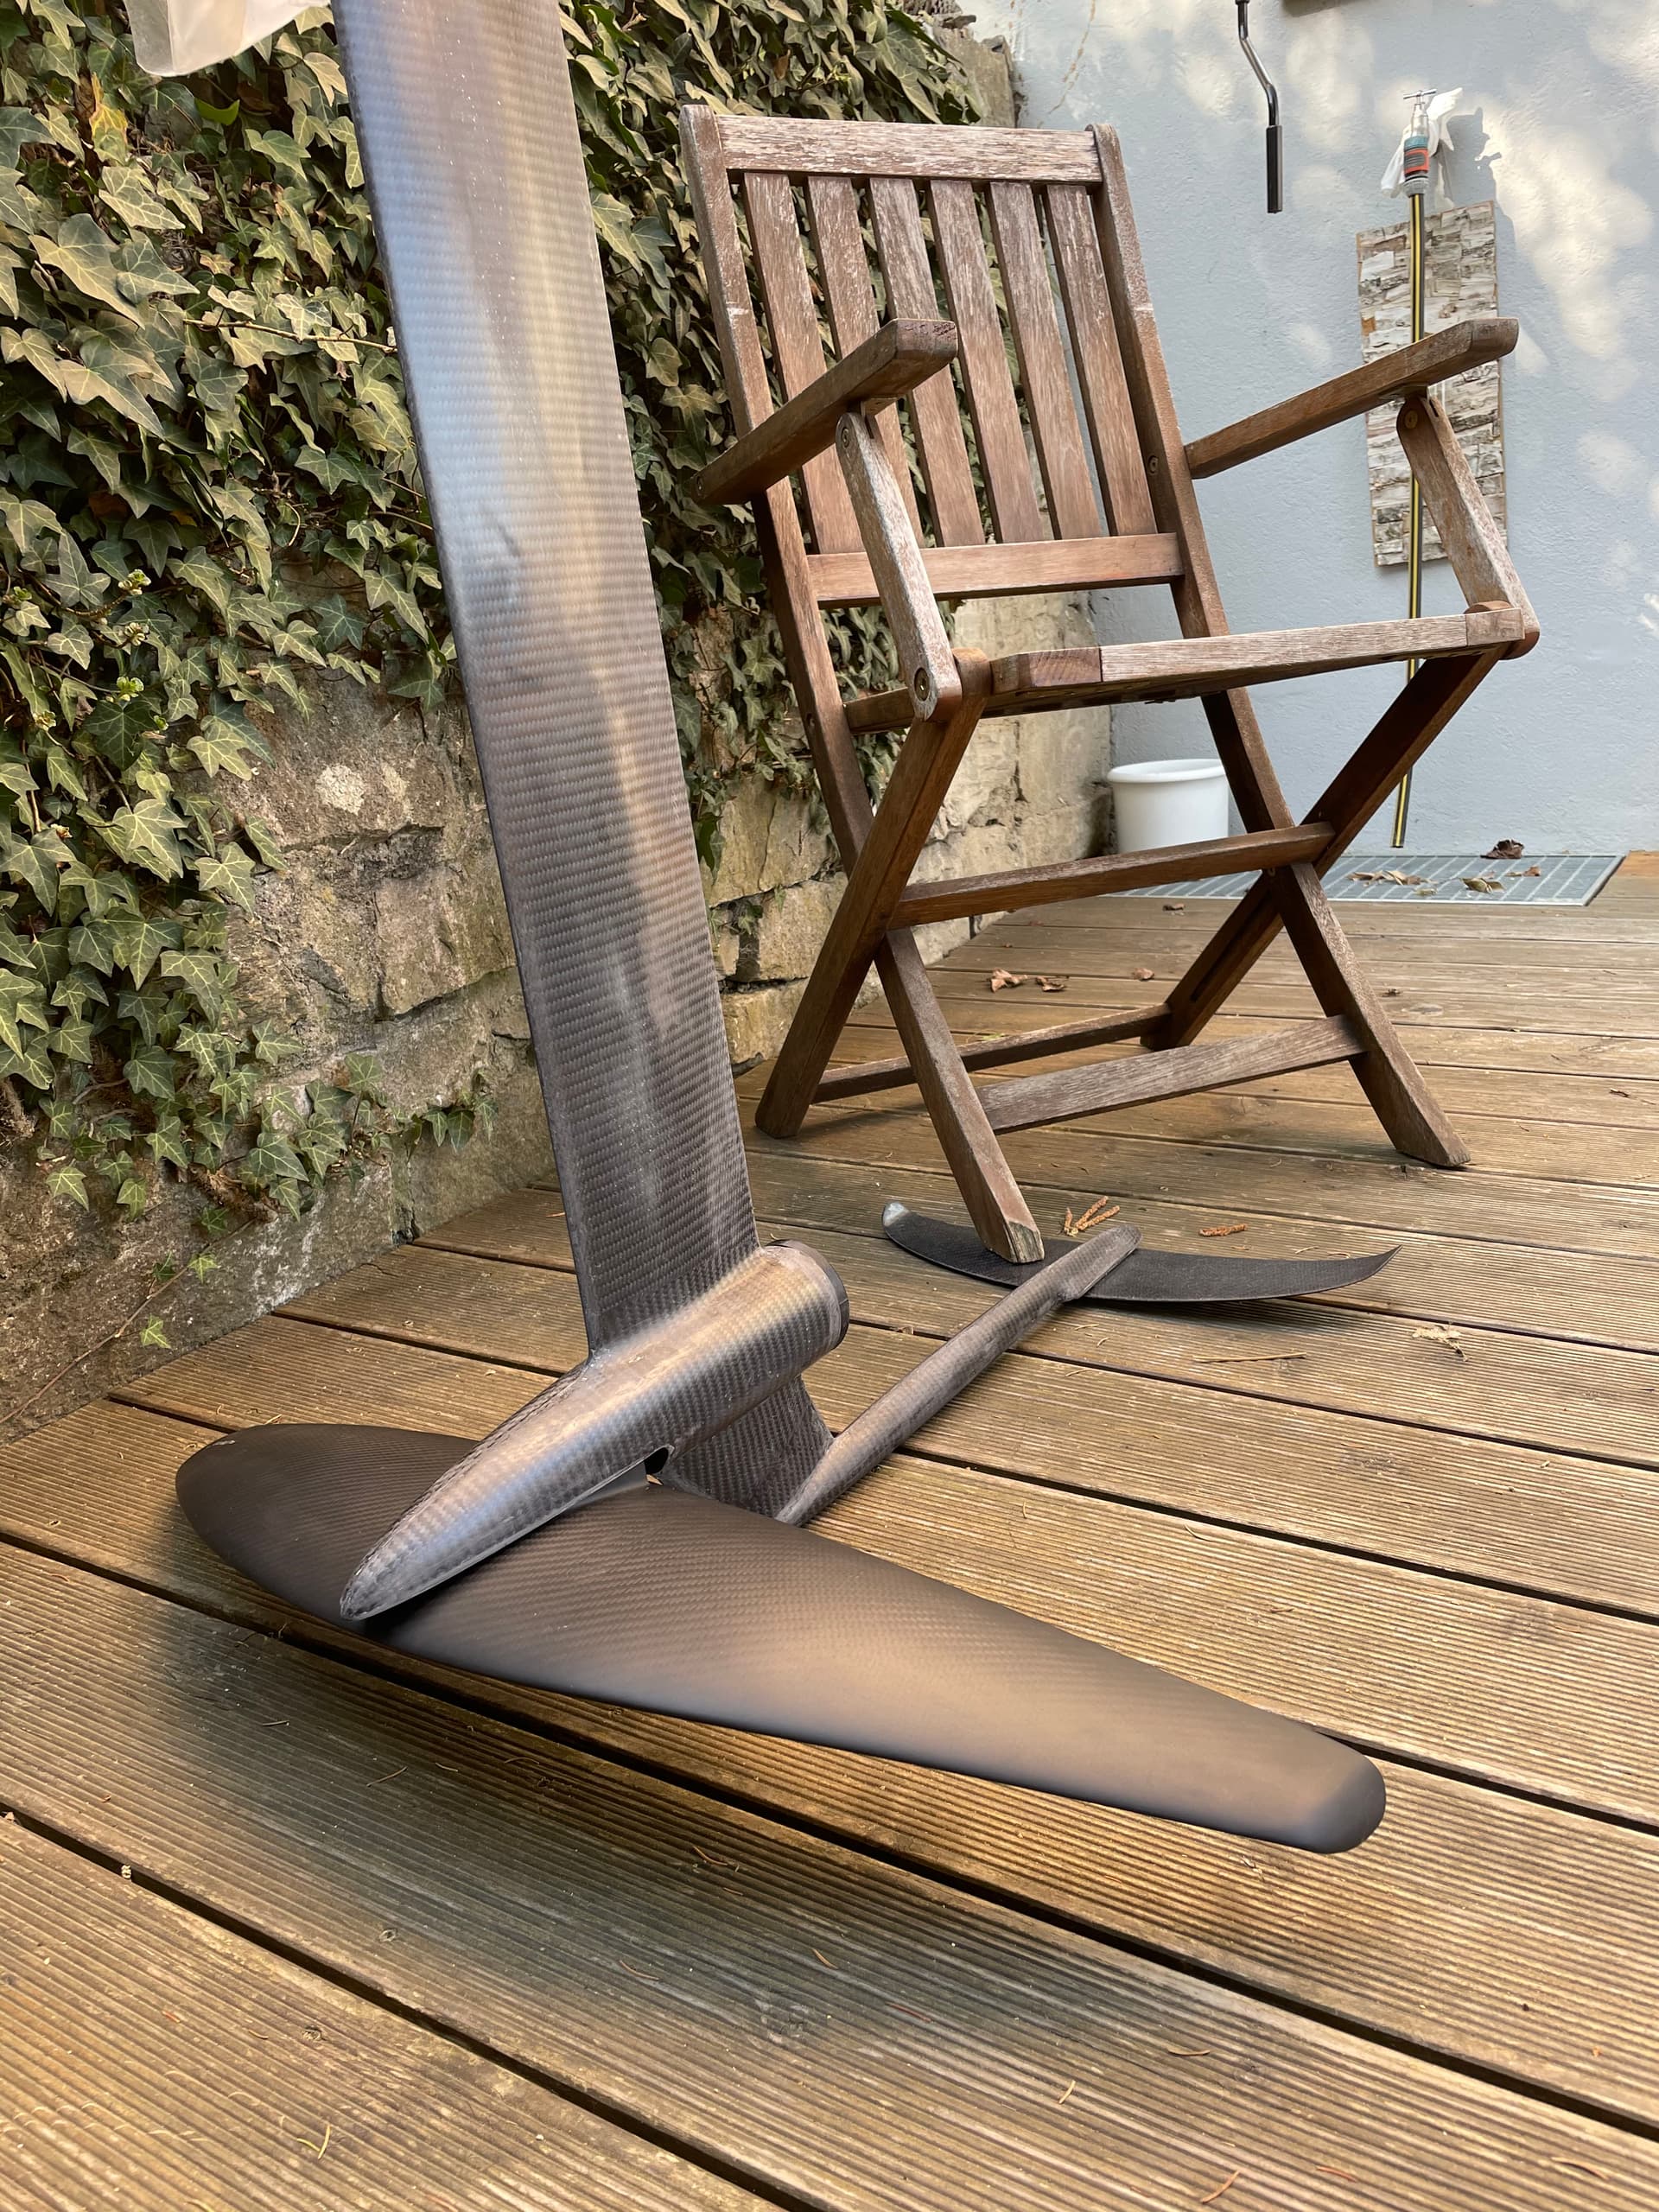
Flight copy with Flyer800 wing and diys rear wing (needs an adapter to make it fit better)

---

<div class="post-metadata">

### Author: ![sat\_be](https://foil.zone/user_avatar/foil.zone/sat_be/32/35523_2.png) [@sat\_be](https://foil.zone/u/sat_be)
#### Post date: [January 9, 2024, 12:35am UTC](https://foil.zone/t/daniels-2nd-build/19956/4 "2024-01-09T00:35:01Z")

</div>

Board:  
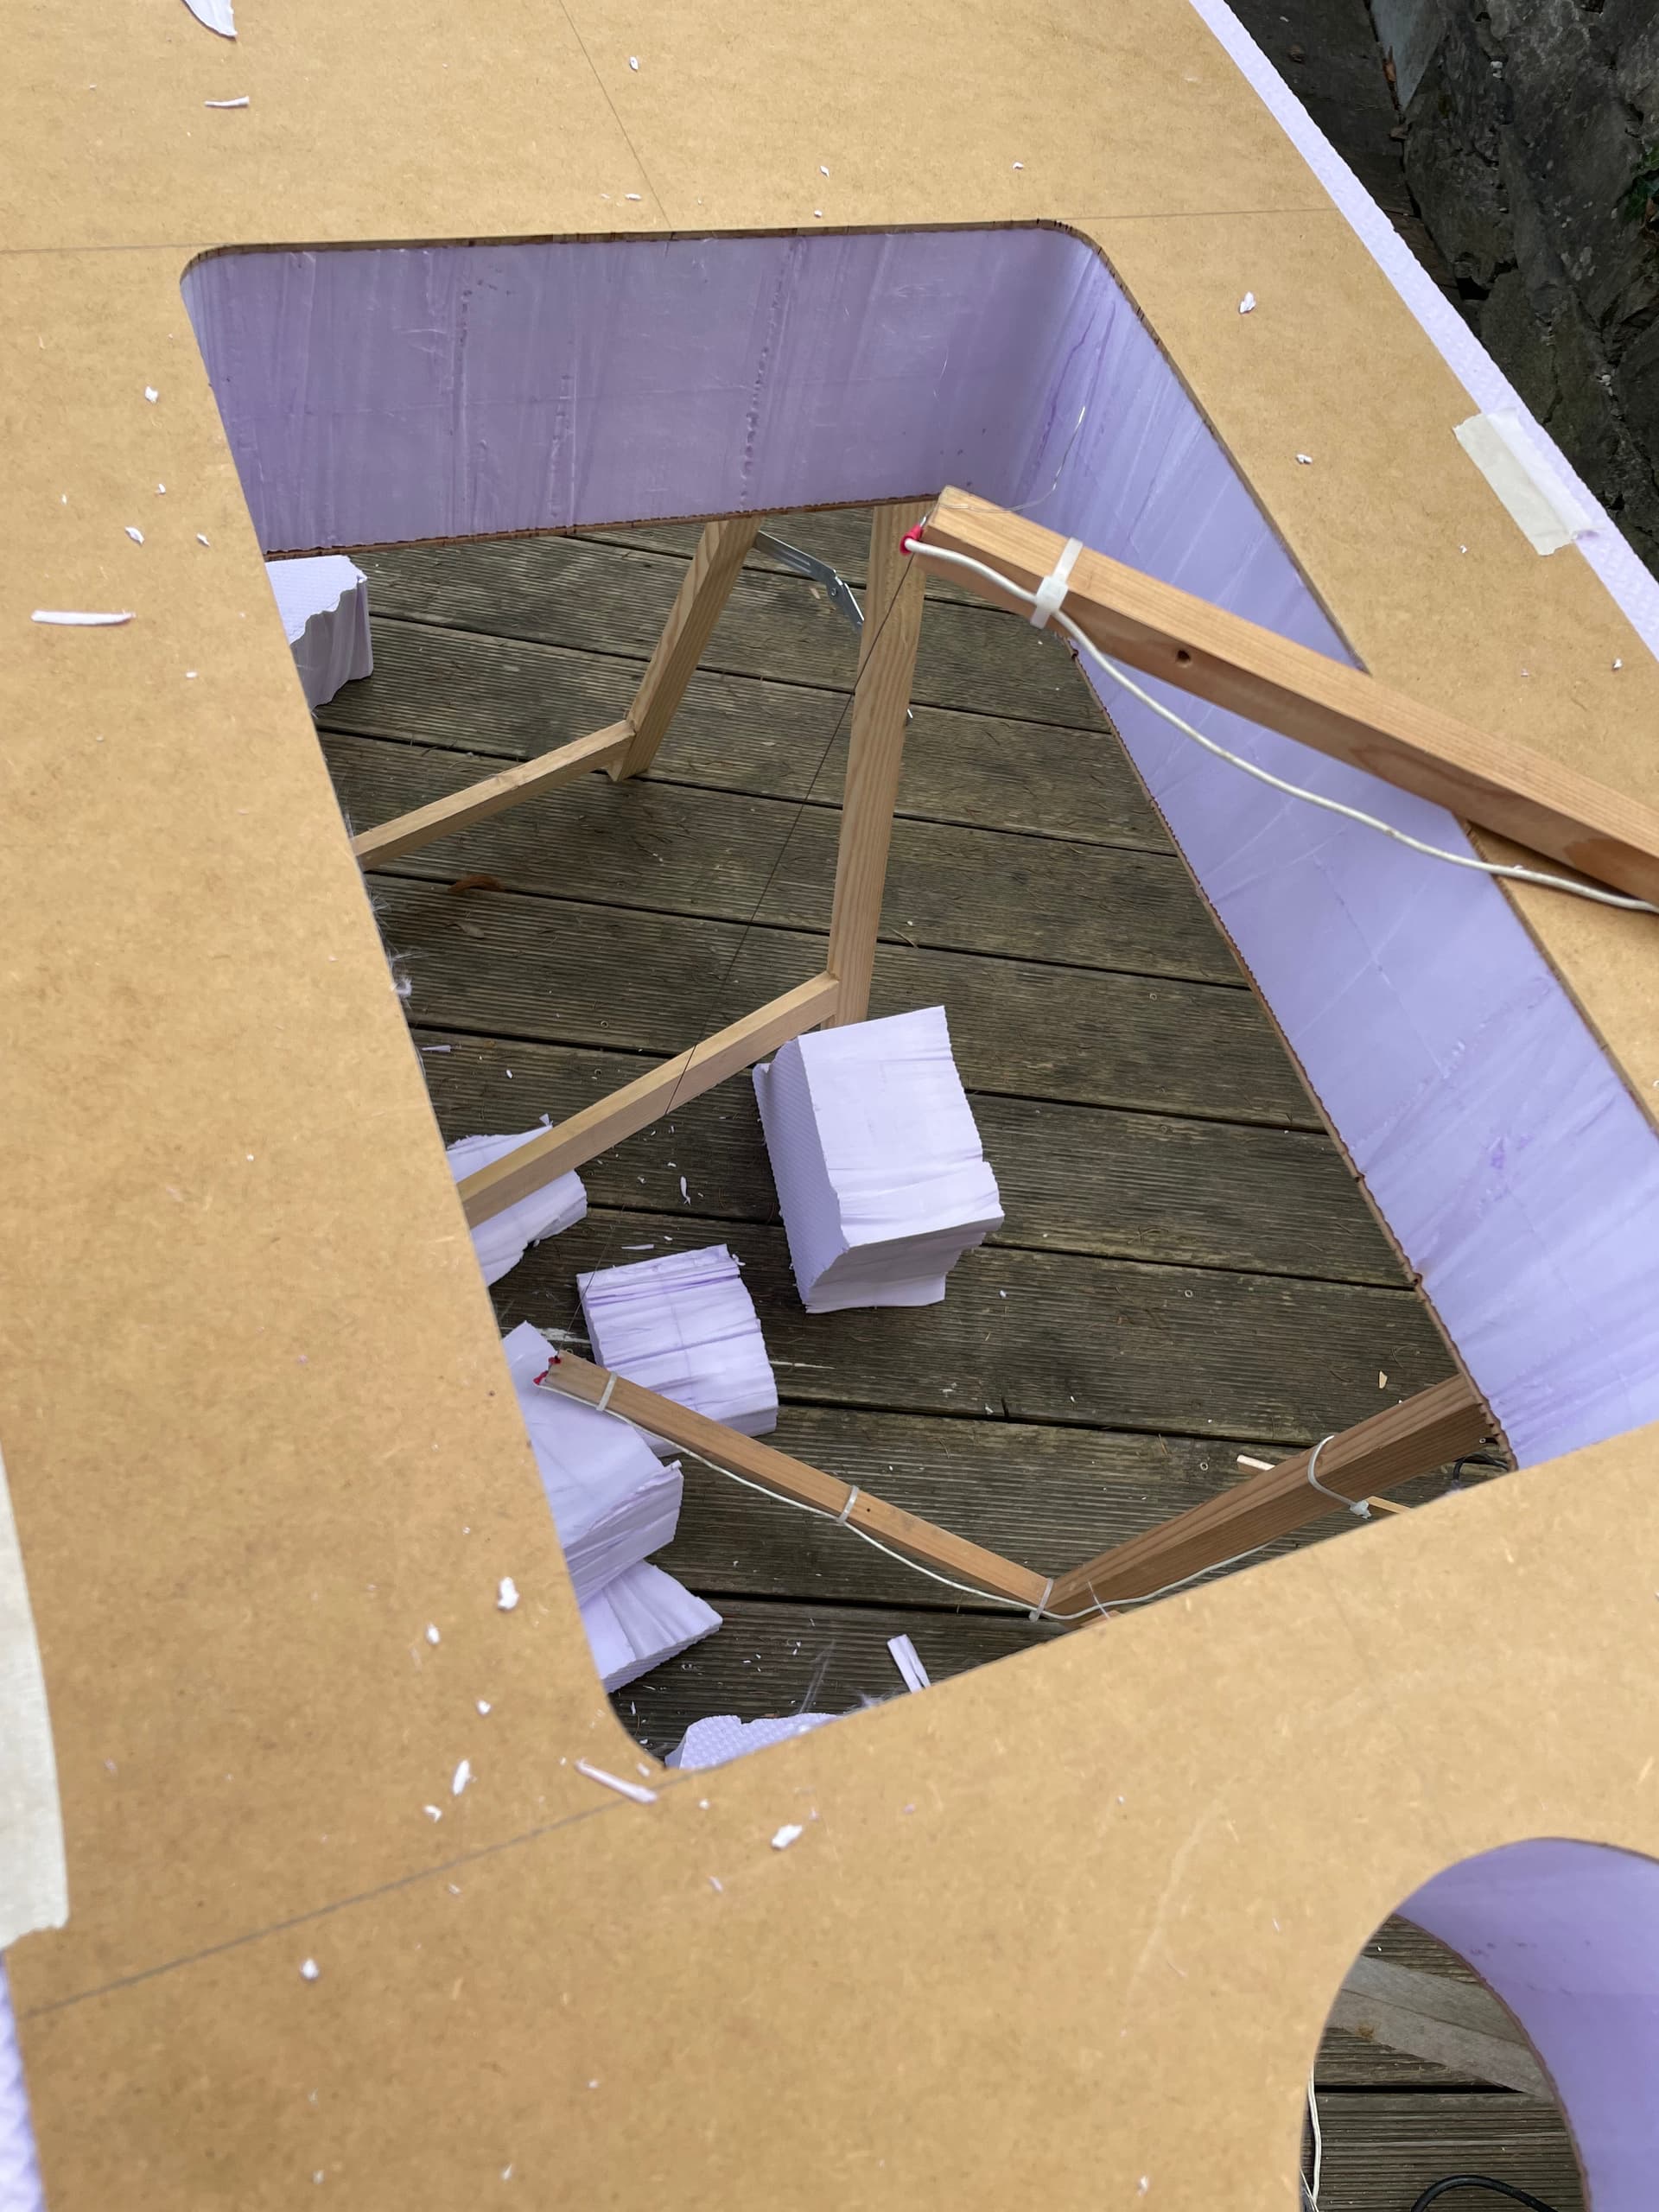
The board is from 30kg/m3 XPS with Airex75kg/m2 Top and bottom (flat part). It is shorter than the first one, length is 133x55x13.5cm.
 ![IMG_2541](https://foil.zone/uploads/default/original/3X/8/6/86541df90dc8272f512787caa56f03df6a033828.jpeg)  
The main compartment was cut with hotwire (nichrome 0.5mm)

 ![IMG_2542](https://foil.zone/uploads/default/original/3X/7/b/7b5acf6ae3106ebee0e1dd414bf79b02d78878ad.jpeg)  
same for the “connector” compartment
 ![IMG_2612](https://foil.zone/uploads/default/original/3X/b/e/be97e6e23b9313cbf9686fab0612ab2dfefd9172.jpeg)  
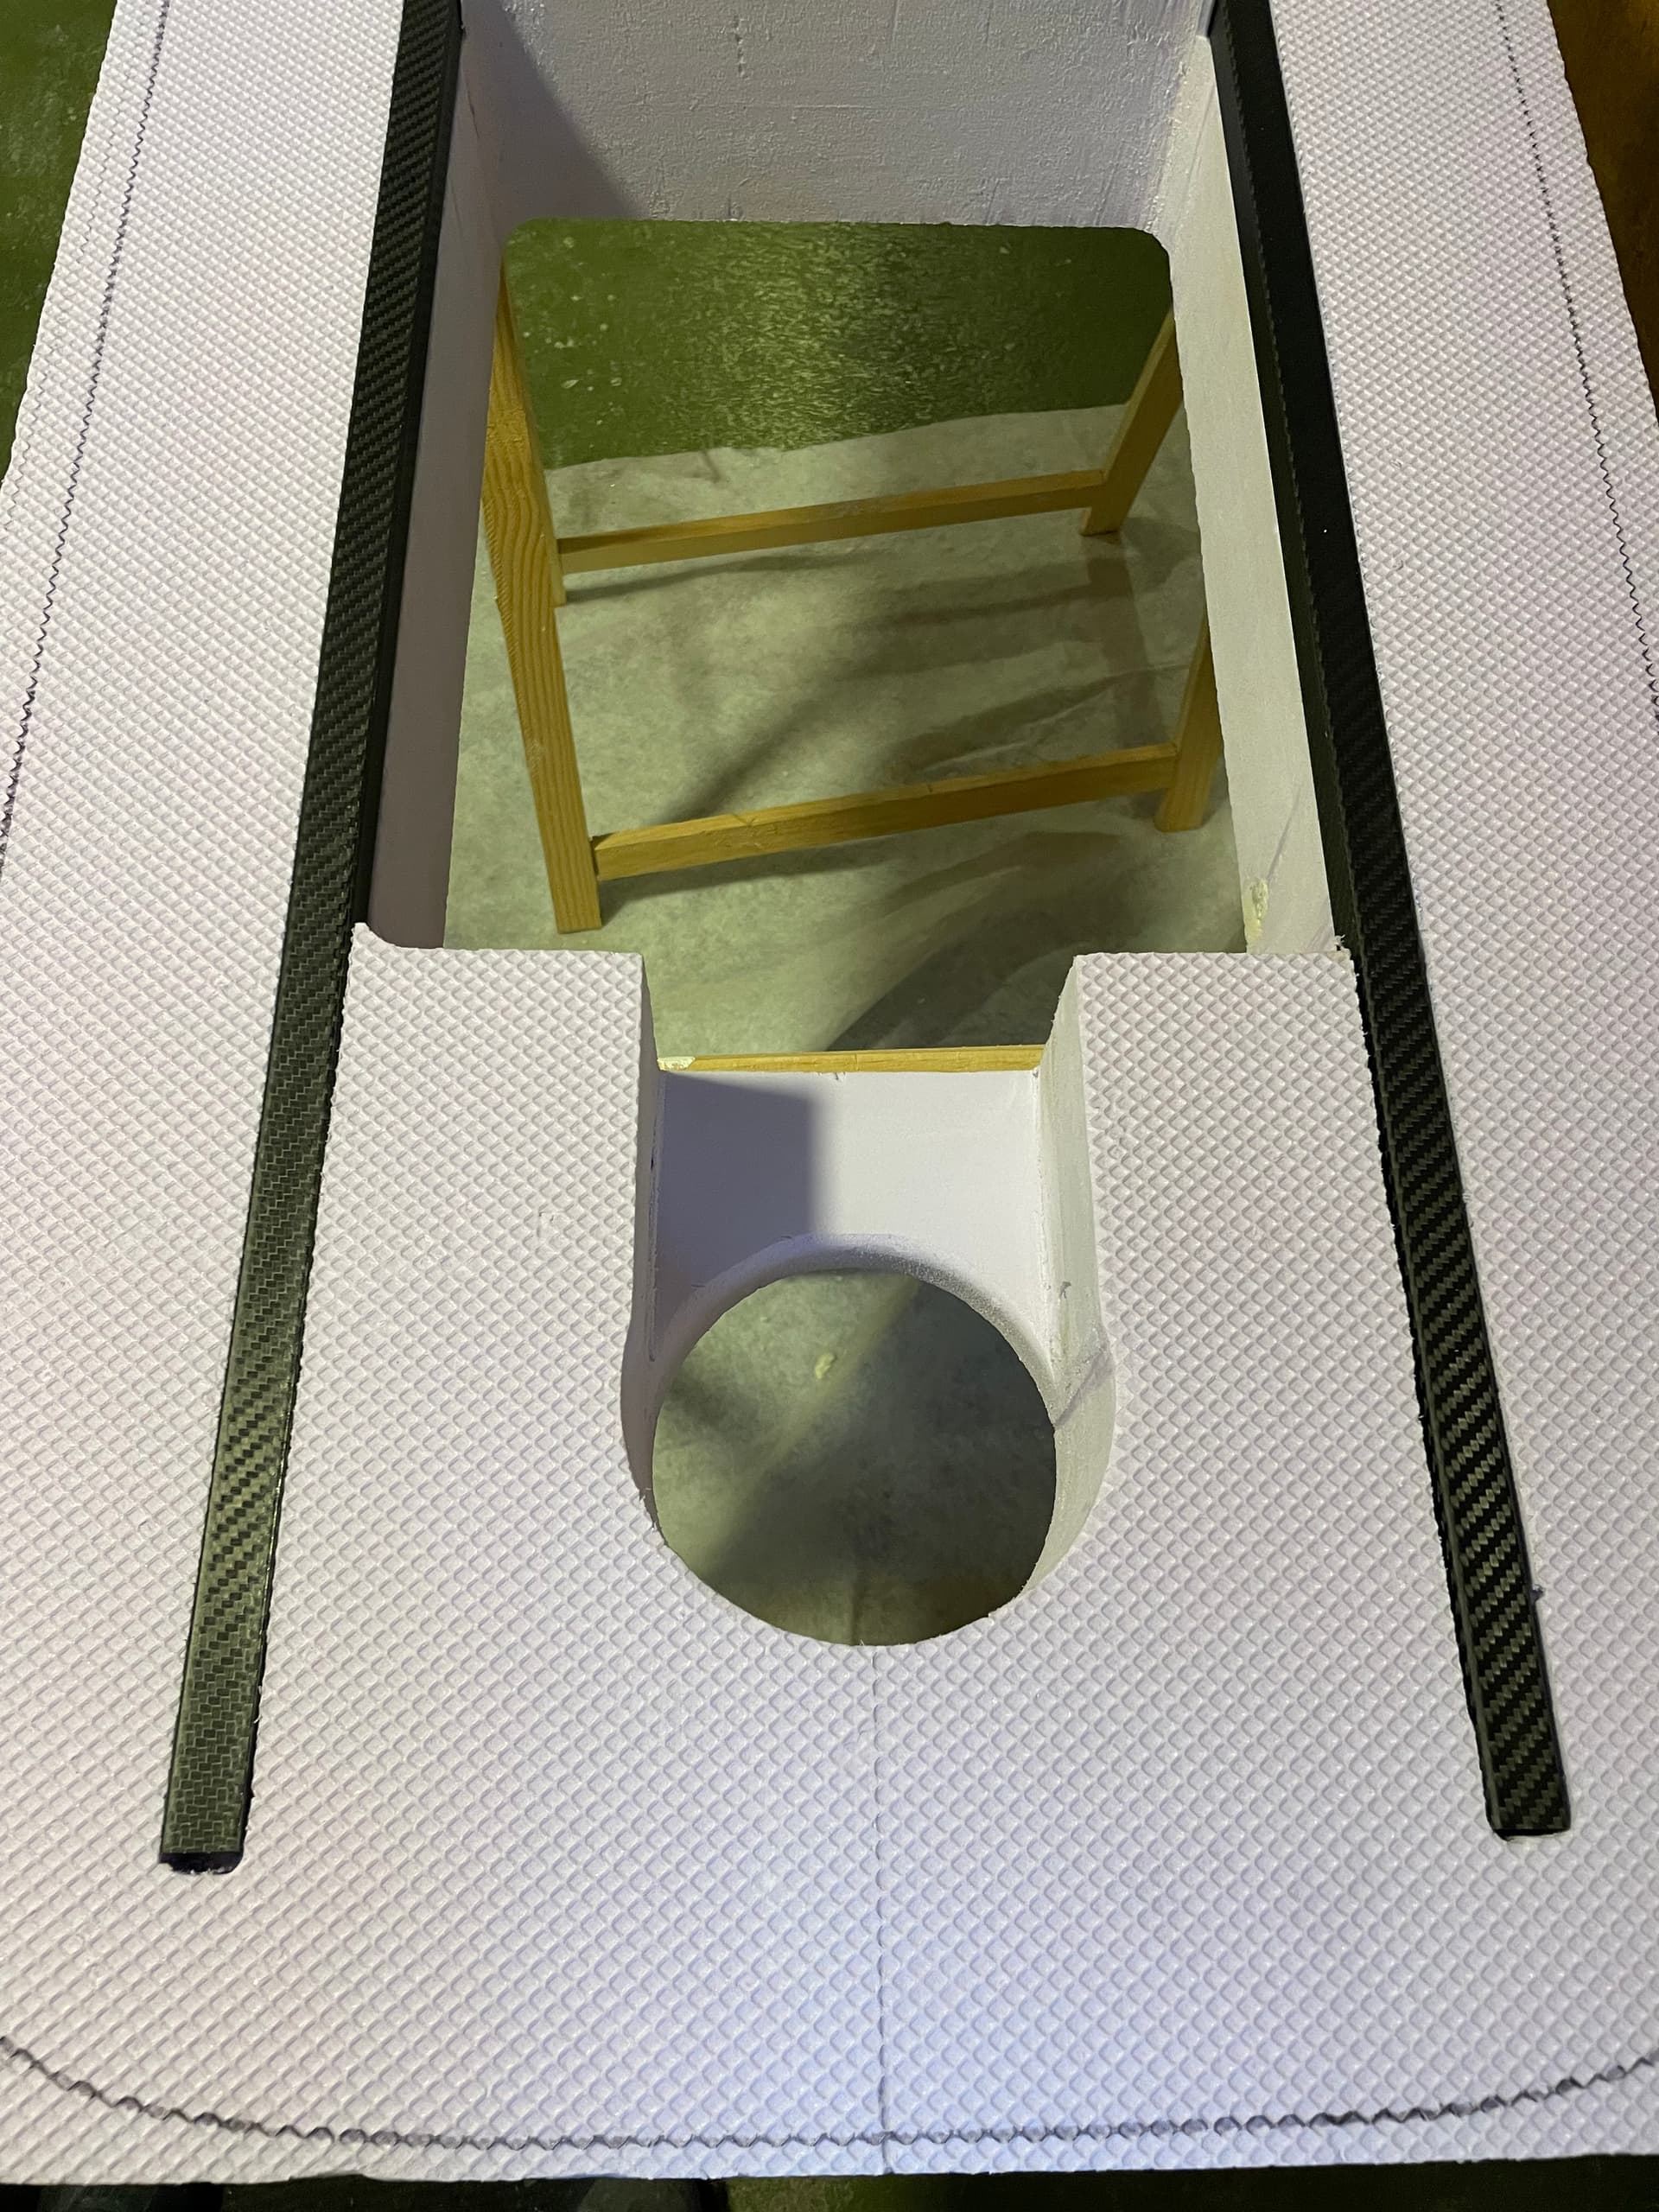
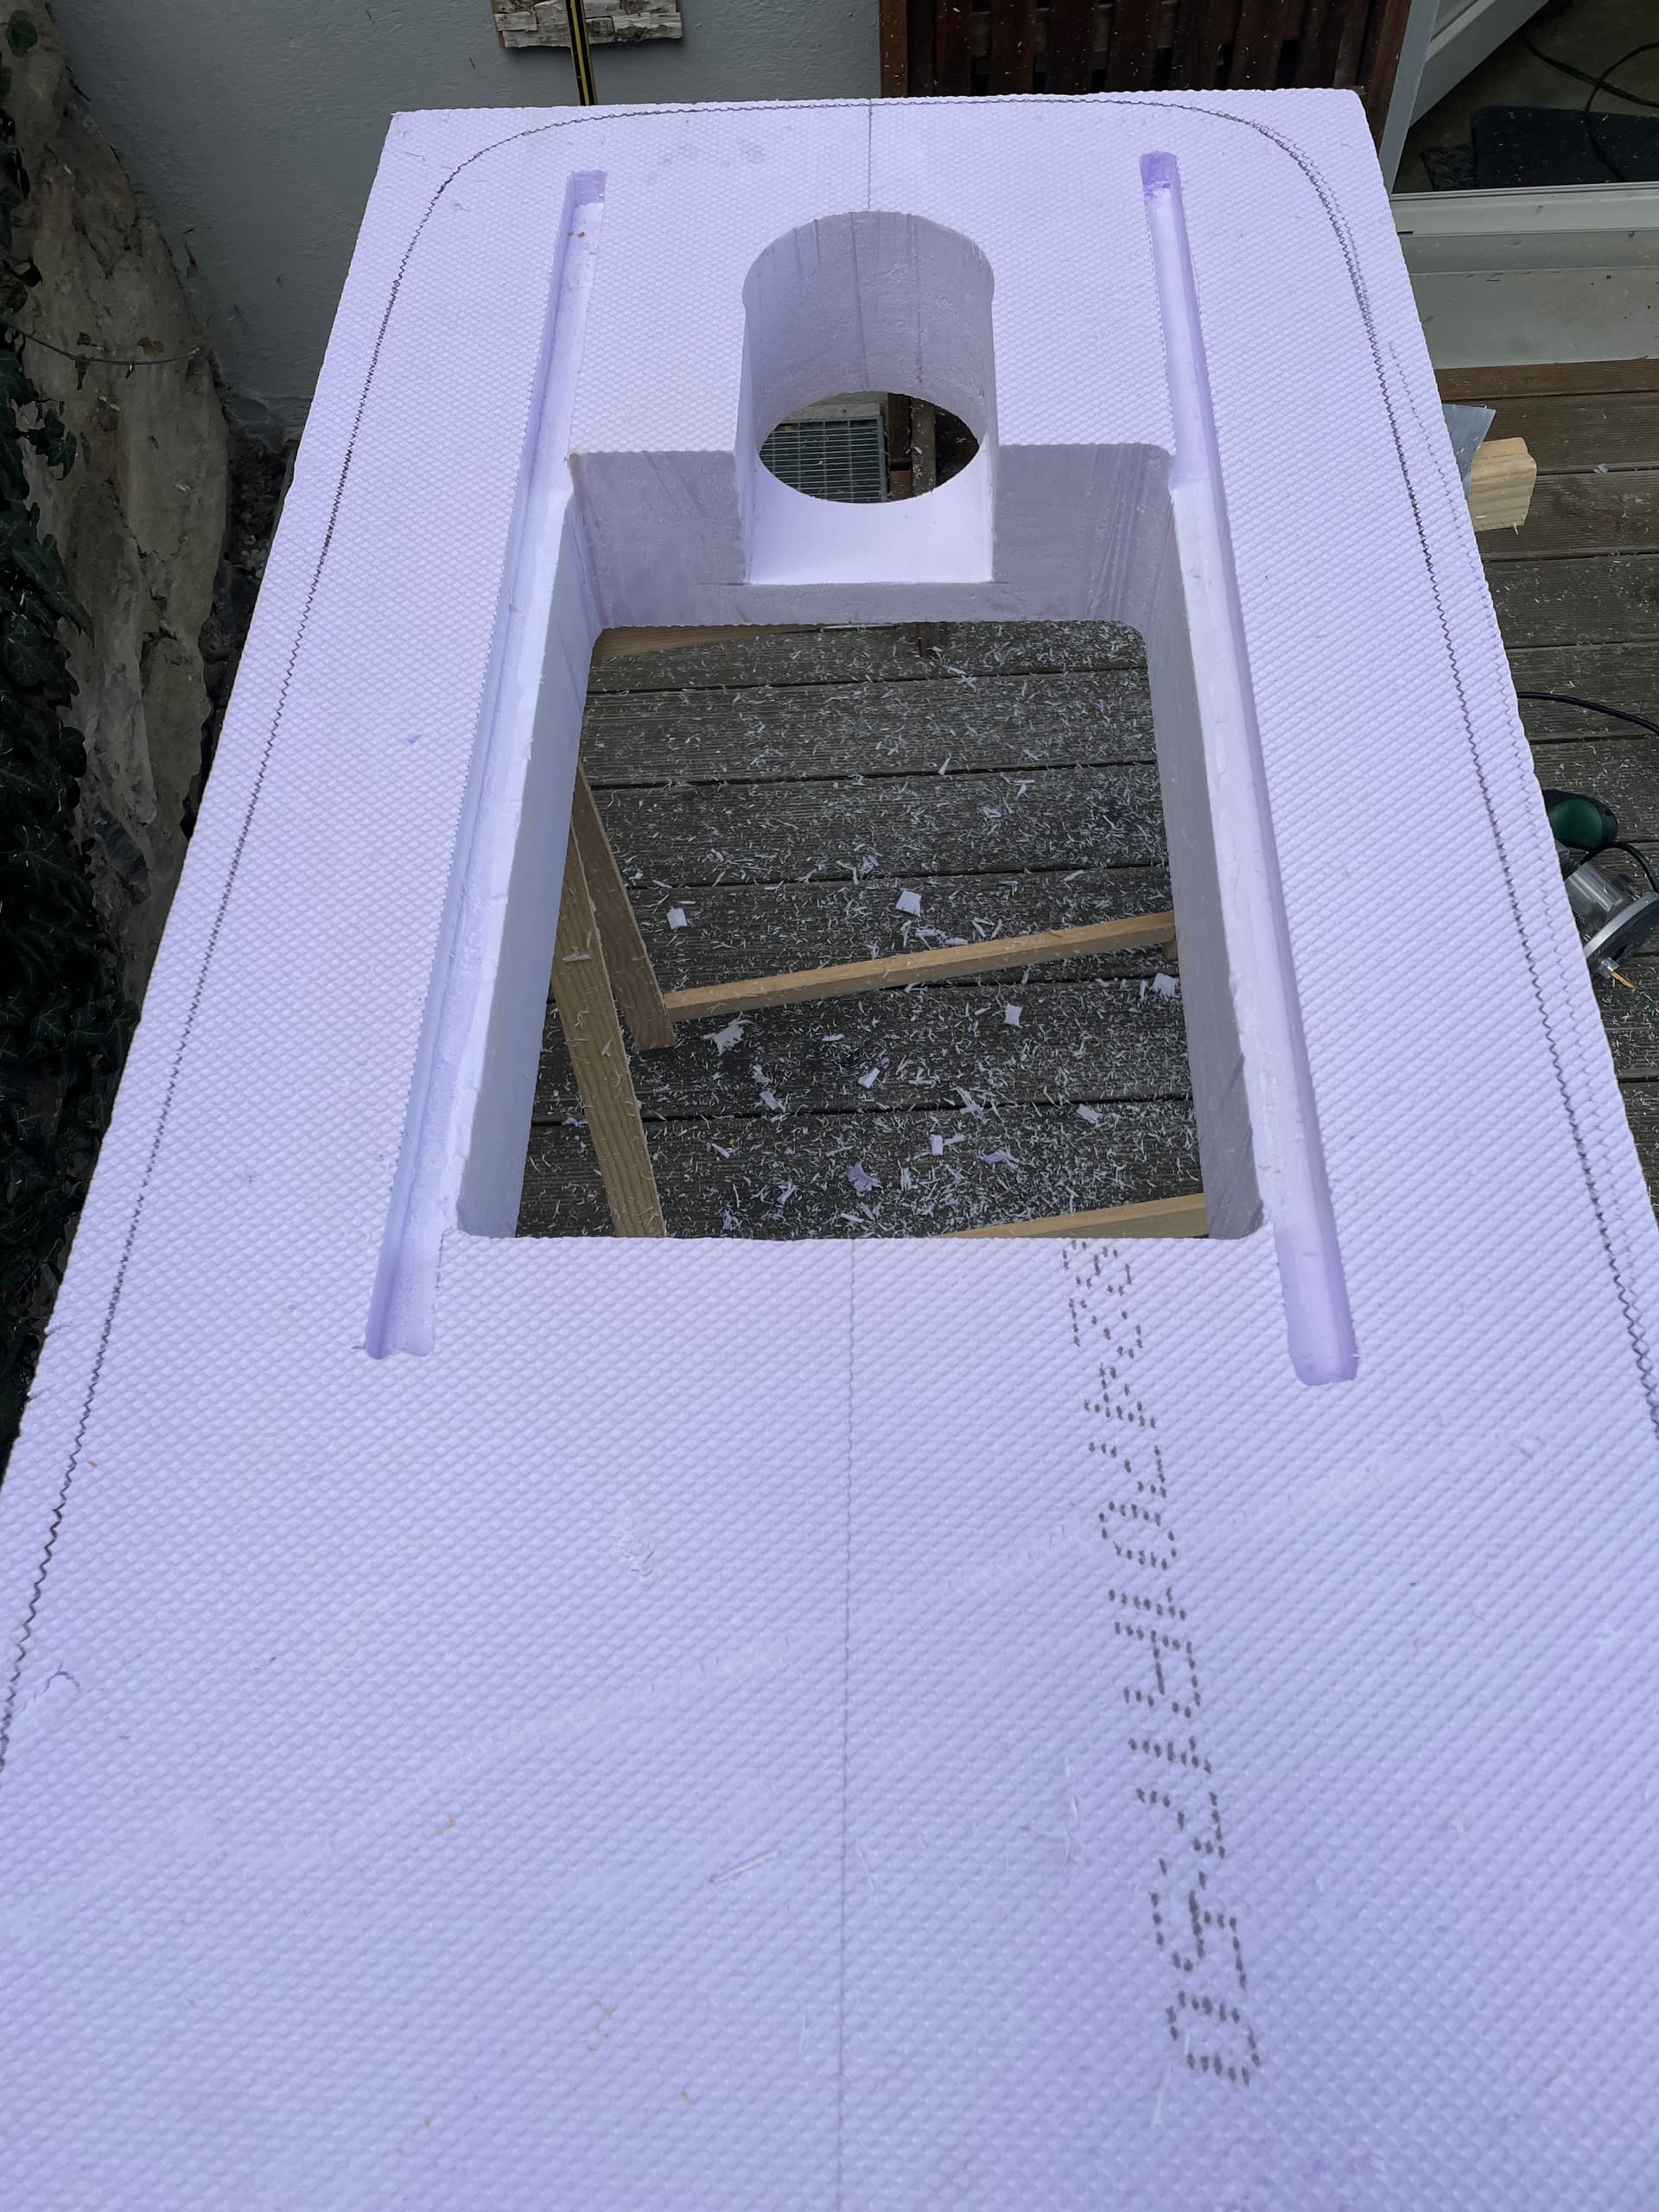
The slots for square cfk bars and the connection to the main compartment were made with an over router.
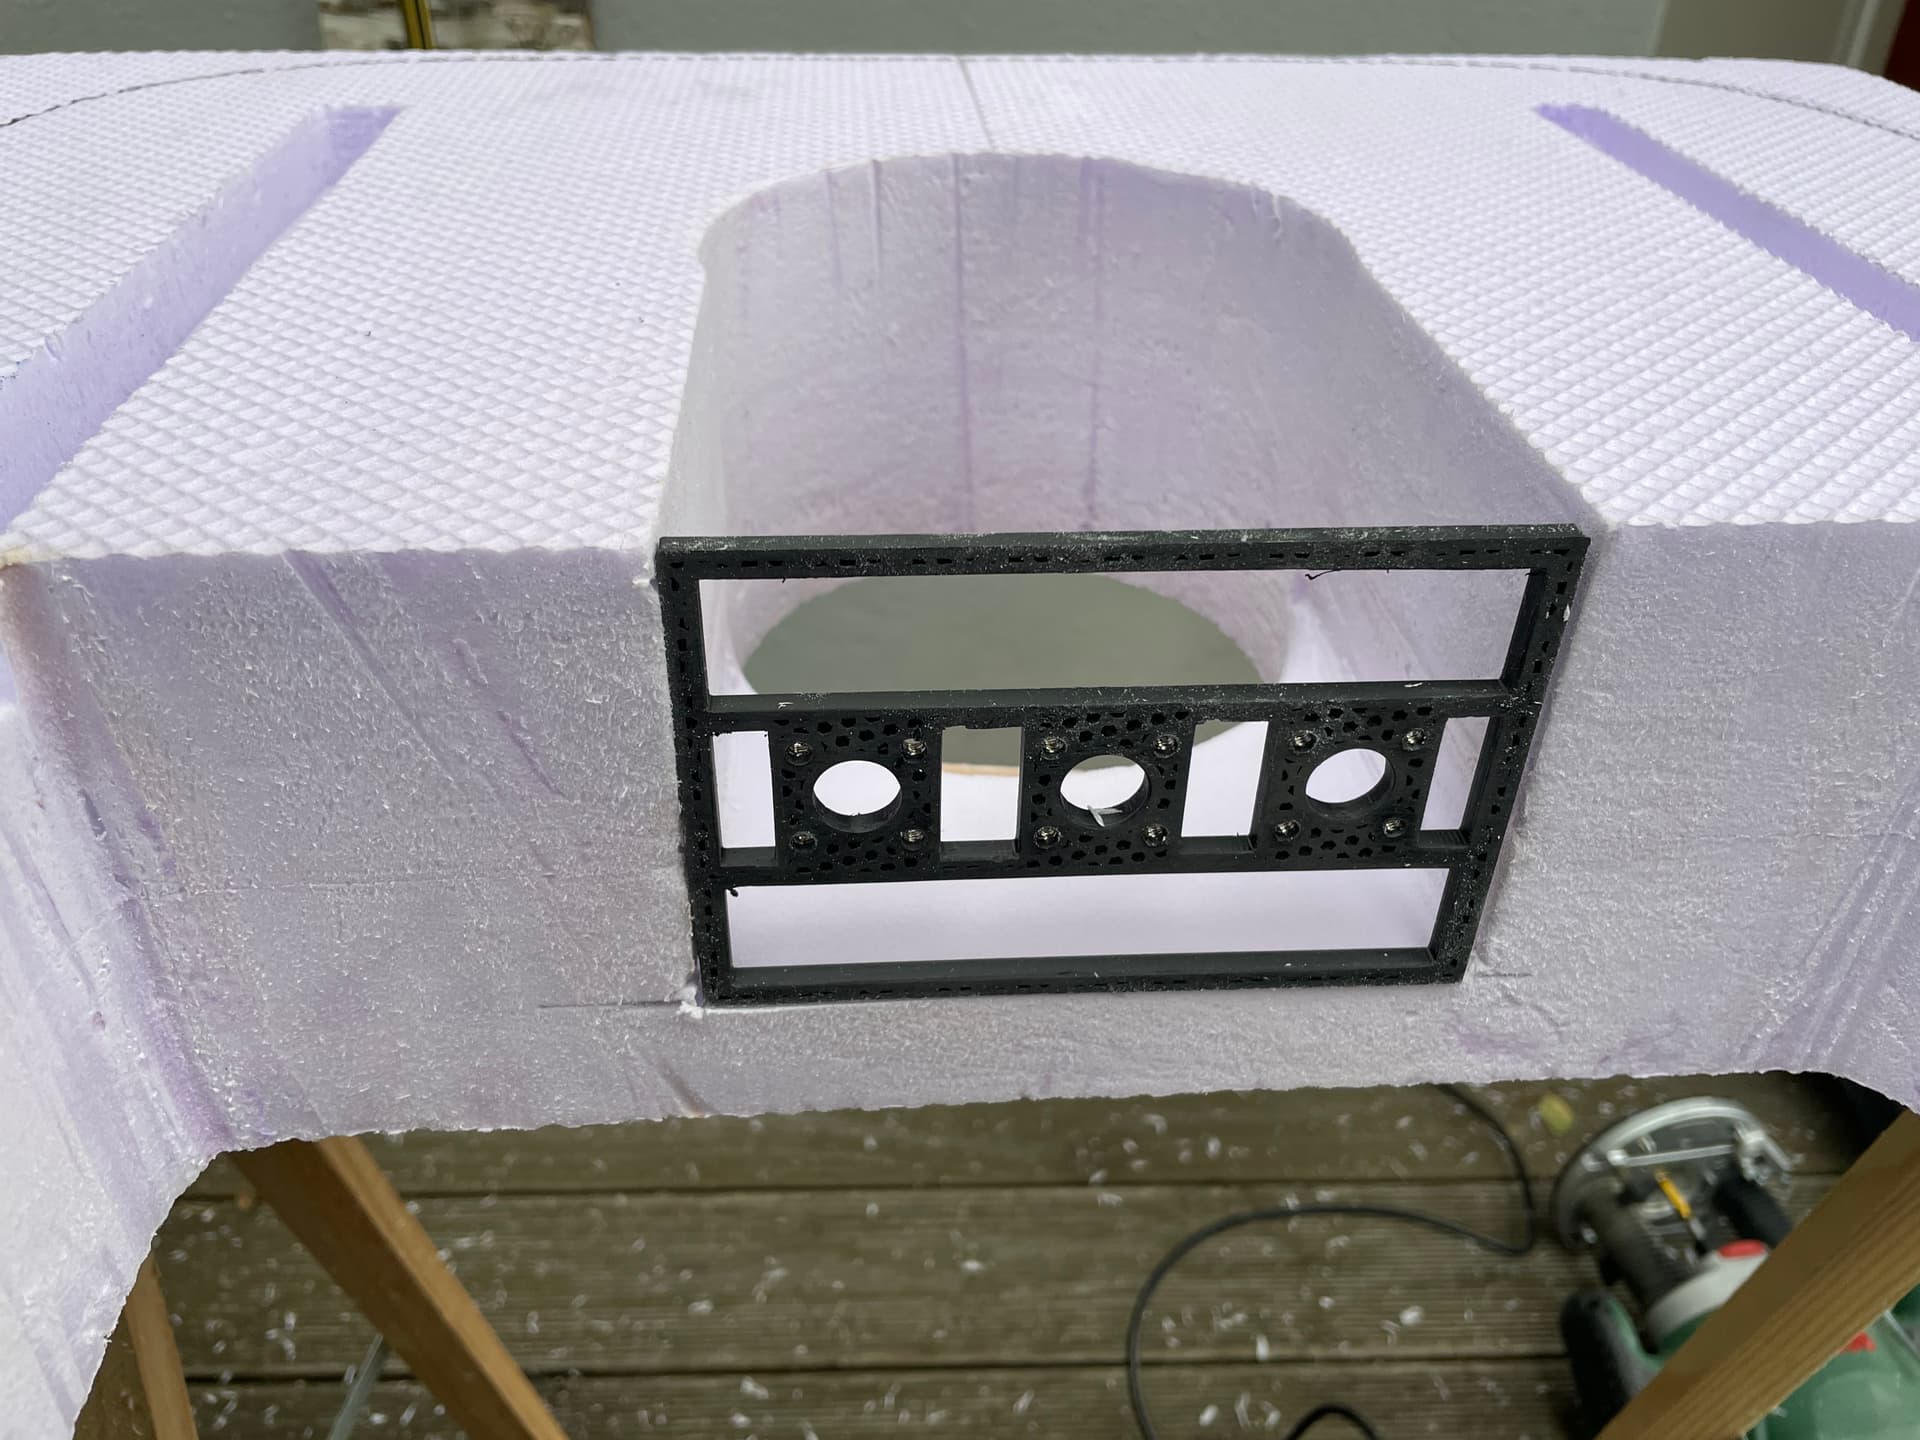
 ![IMG_2621](https://foil.zone/uploads/default/original/3X/5/b/5b09198b38380700928c9378576997c90954bf66.jpeg)  
Connector plate

 ![IMG_2635](https://foil.zone/uploads/default/original/3X/f/6/f6cf5b7e4a89a574685615b993f974d12cd48f50.jpeg)  
Square CFK tubes

 ![IMG_2657.PNG](https://foil.zone/uploads/default/original/3X/7/1/71b31090c75dcb608af407b783c249d933712ffd.jpeg)  
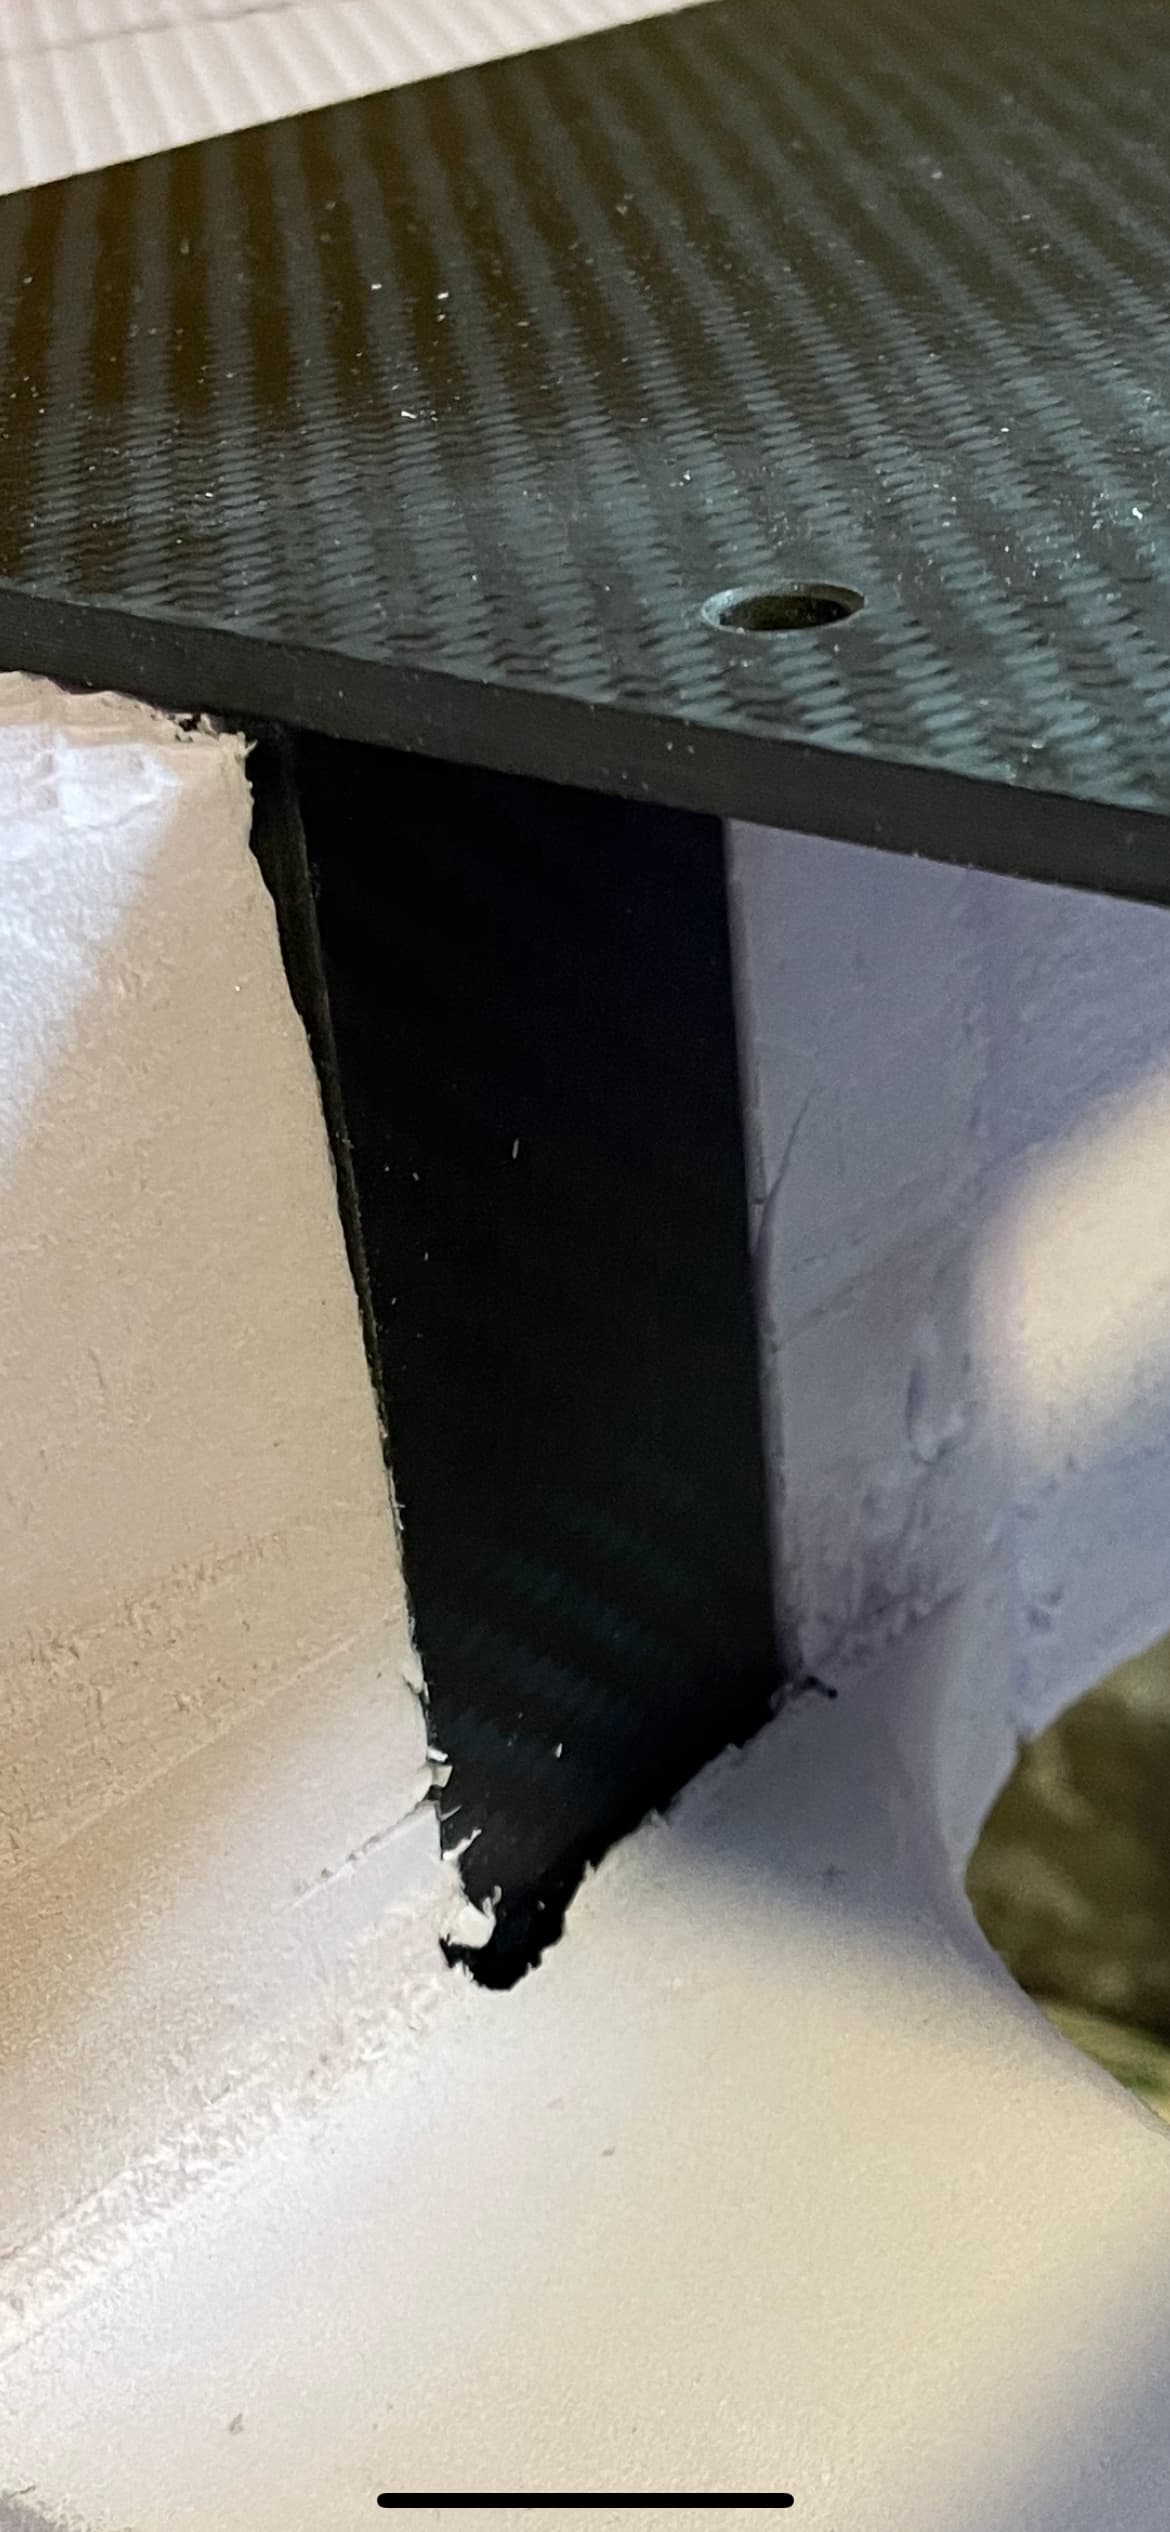
connecting piece of 5mm cfk to spread load to the board and to the top
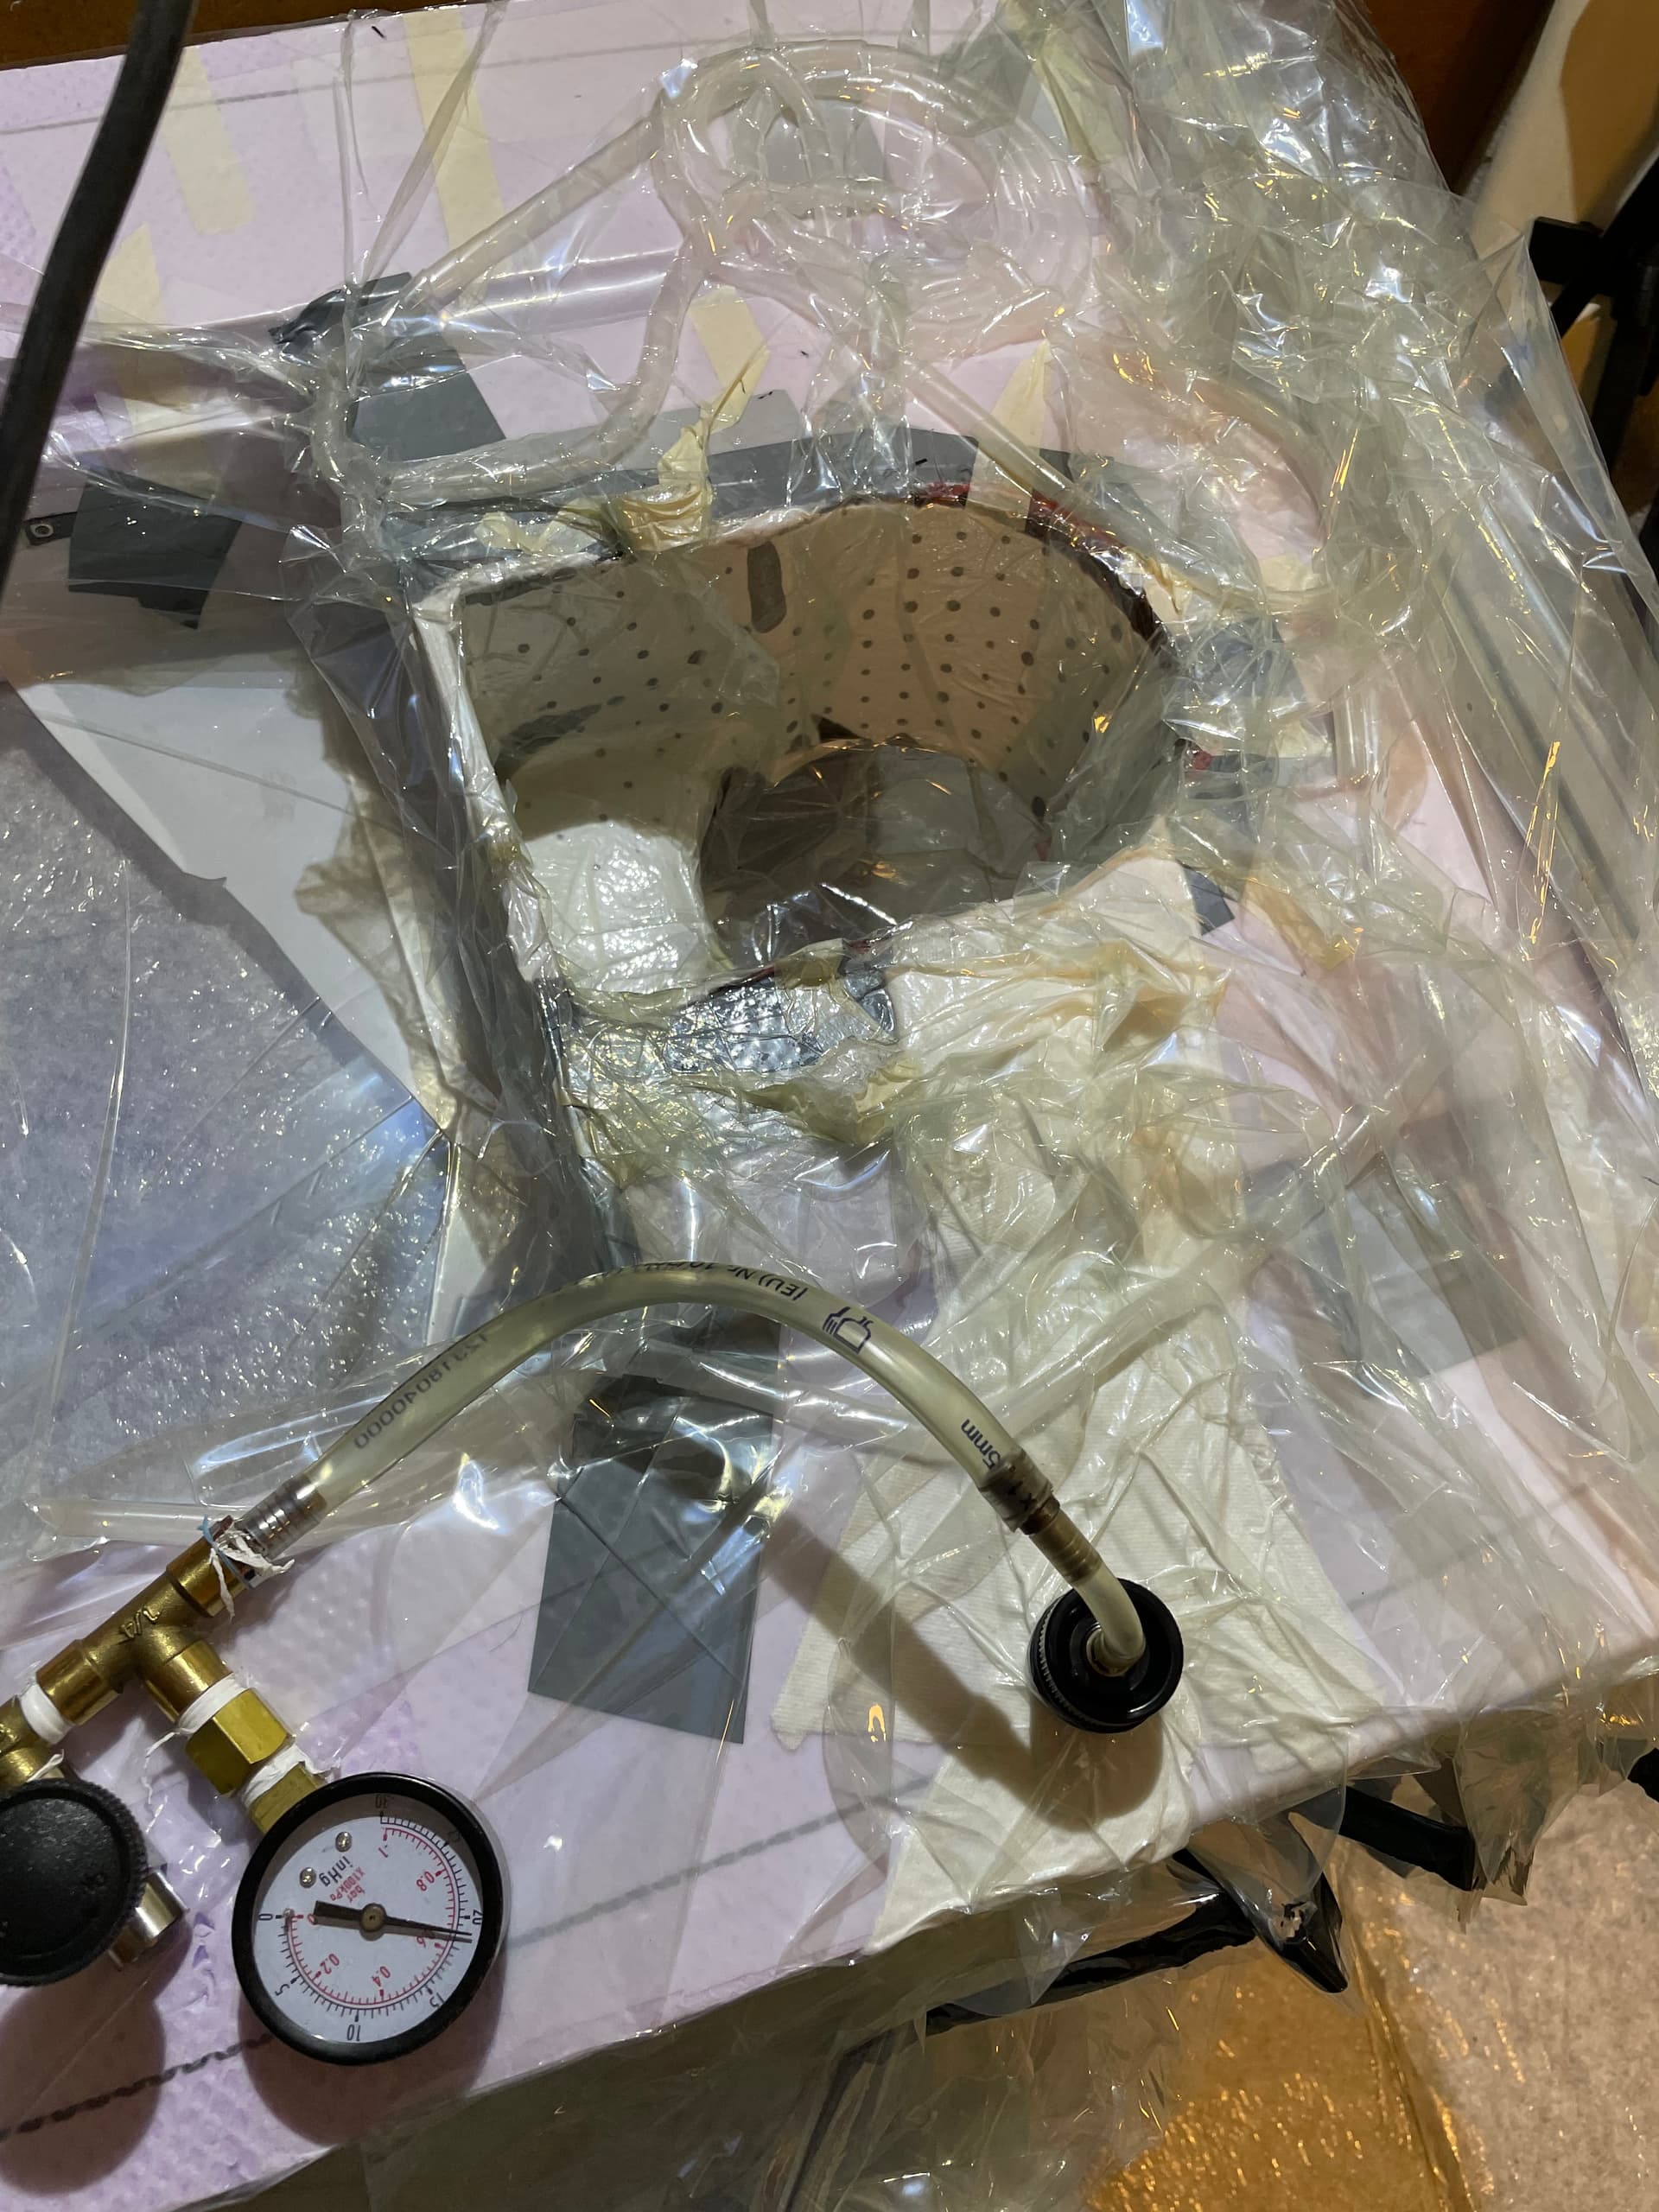
 ![IMG_3750](https://foil.zone/uploads/default/original/3X/8/f/8f94261af157549e1b2c80ff59d3e6e104113900.jpeg)  
Vacuum bagged the connector box, 2 layers of cfk 200g.
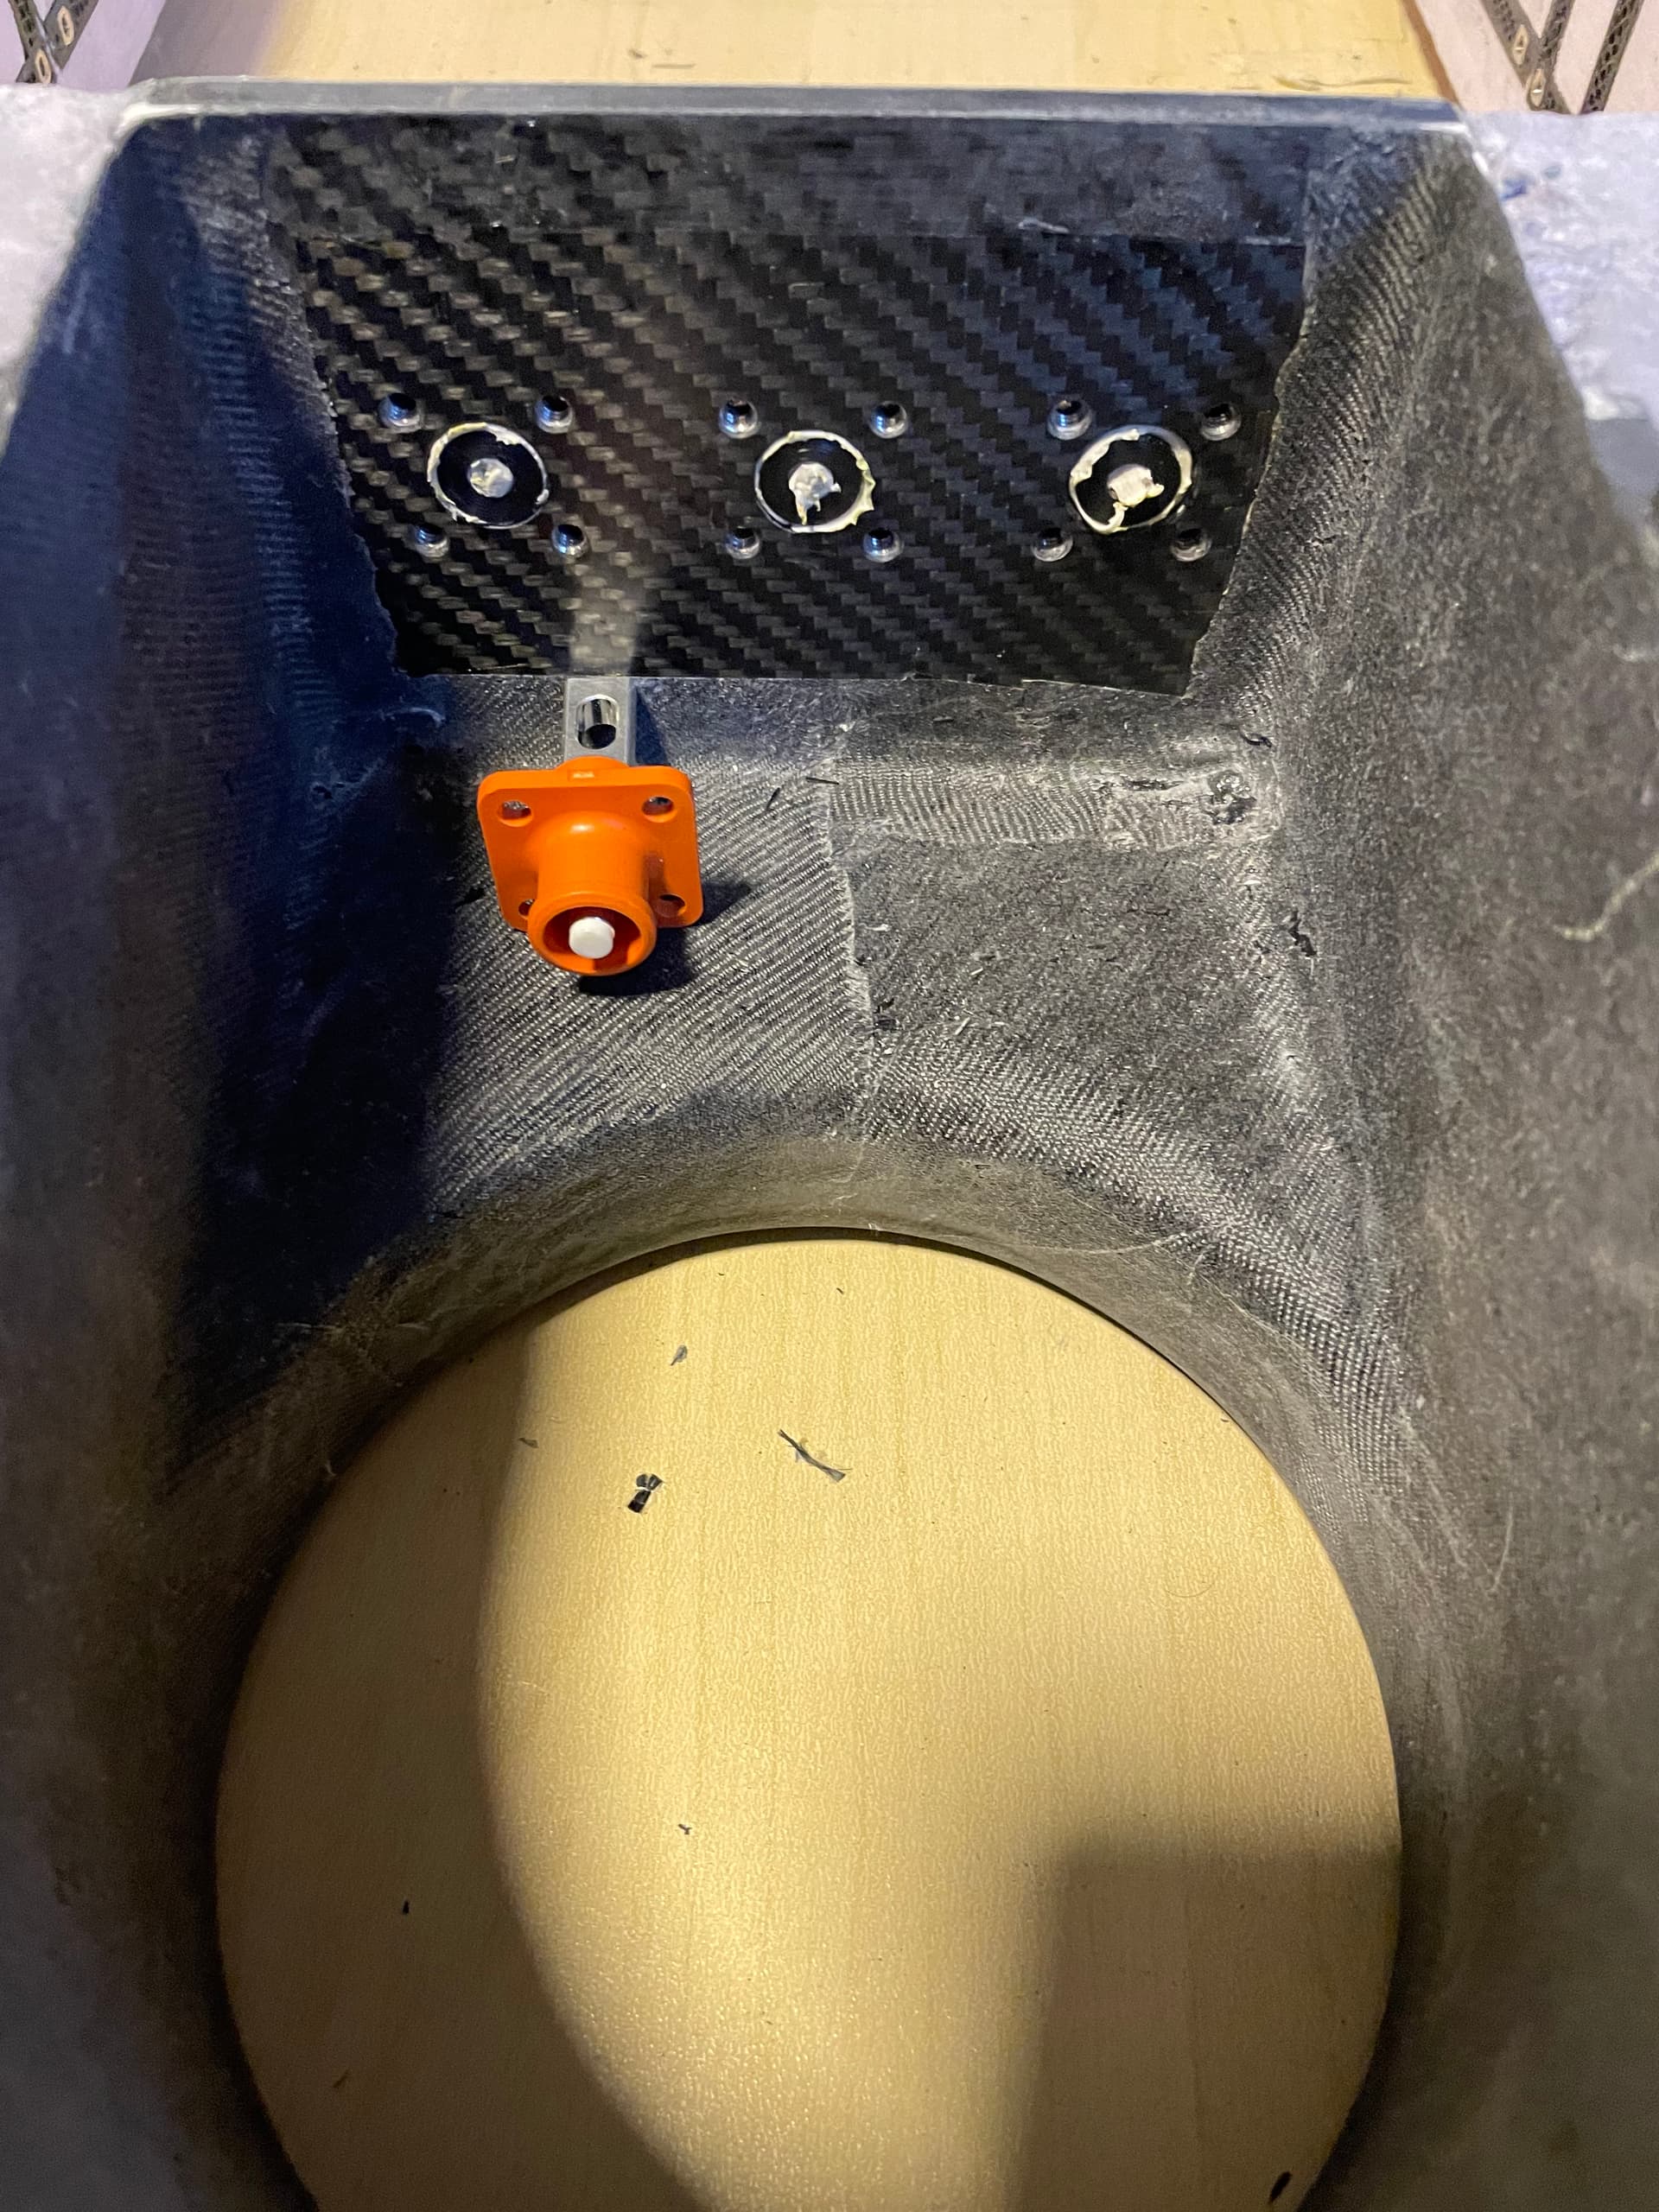
 ![IMG_3772](https://foil.zone/uploads/default/original/3X/4/6/460c1a2077b18ffad793500b6f0e4c603d77cad9.jpeg)  
connector plate with inserts was laminated into place to be flush with the main compartment,
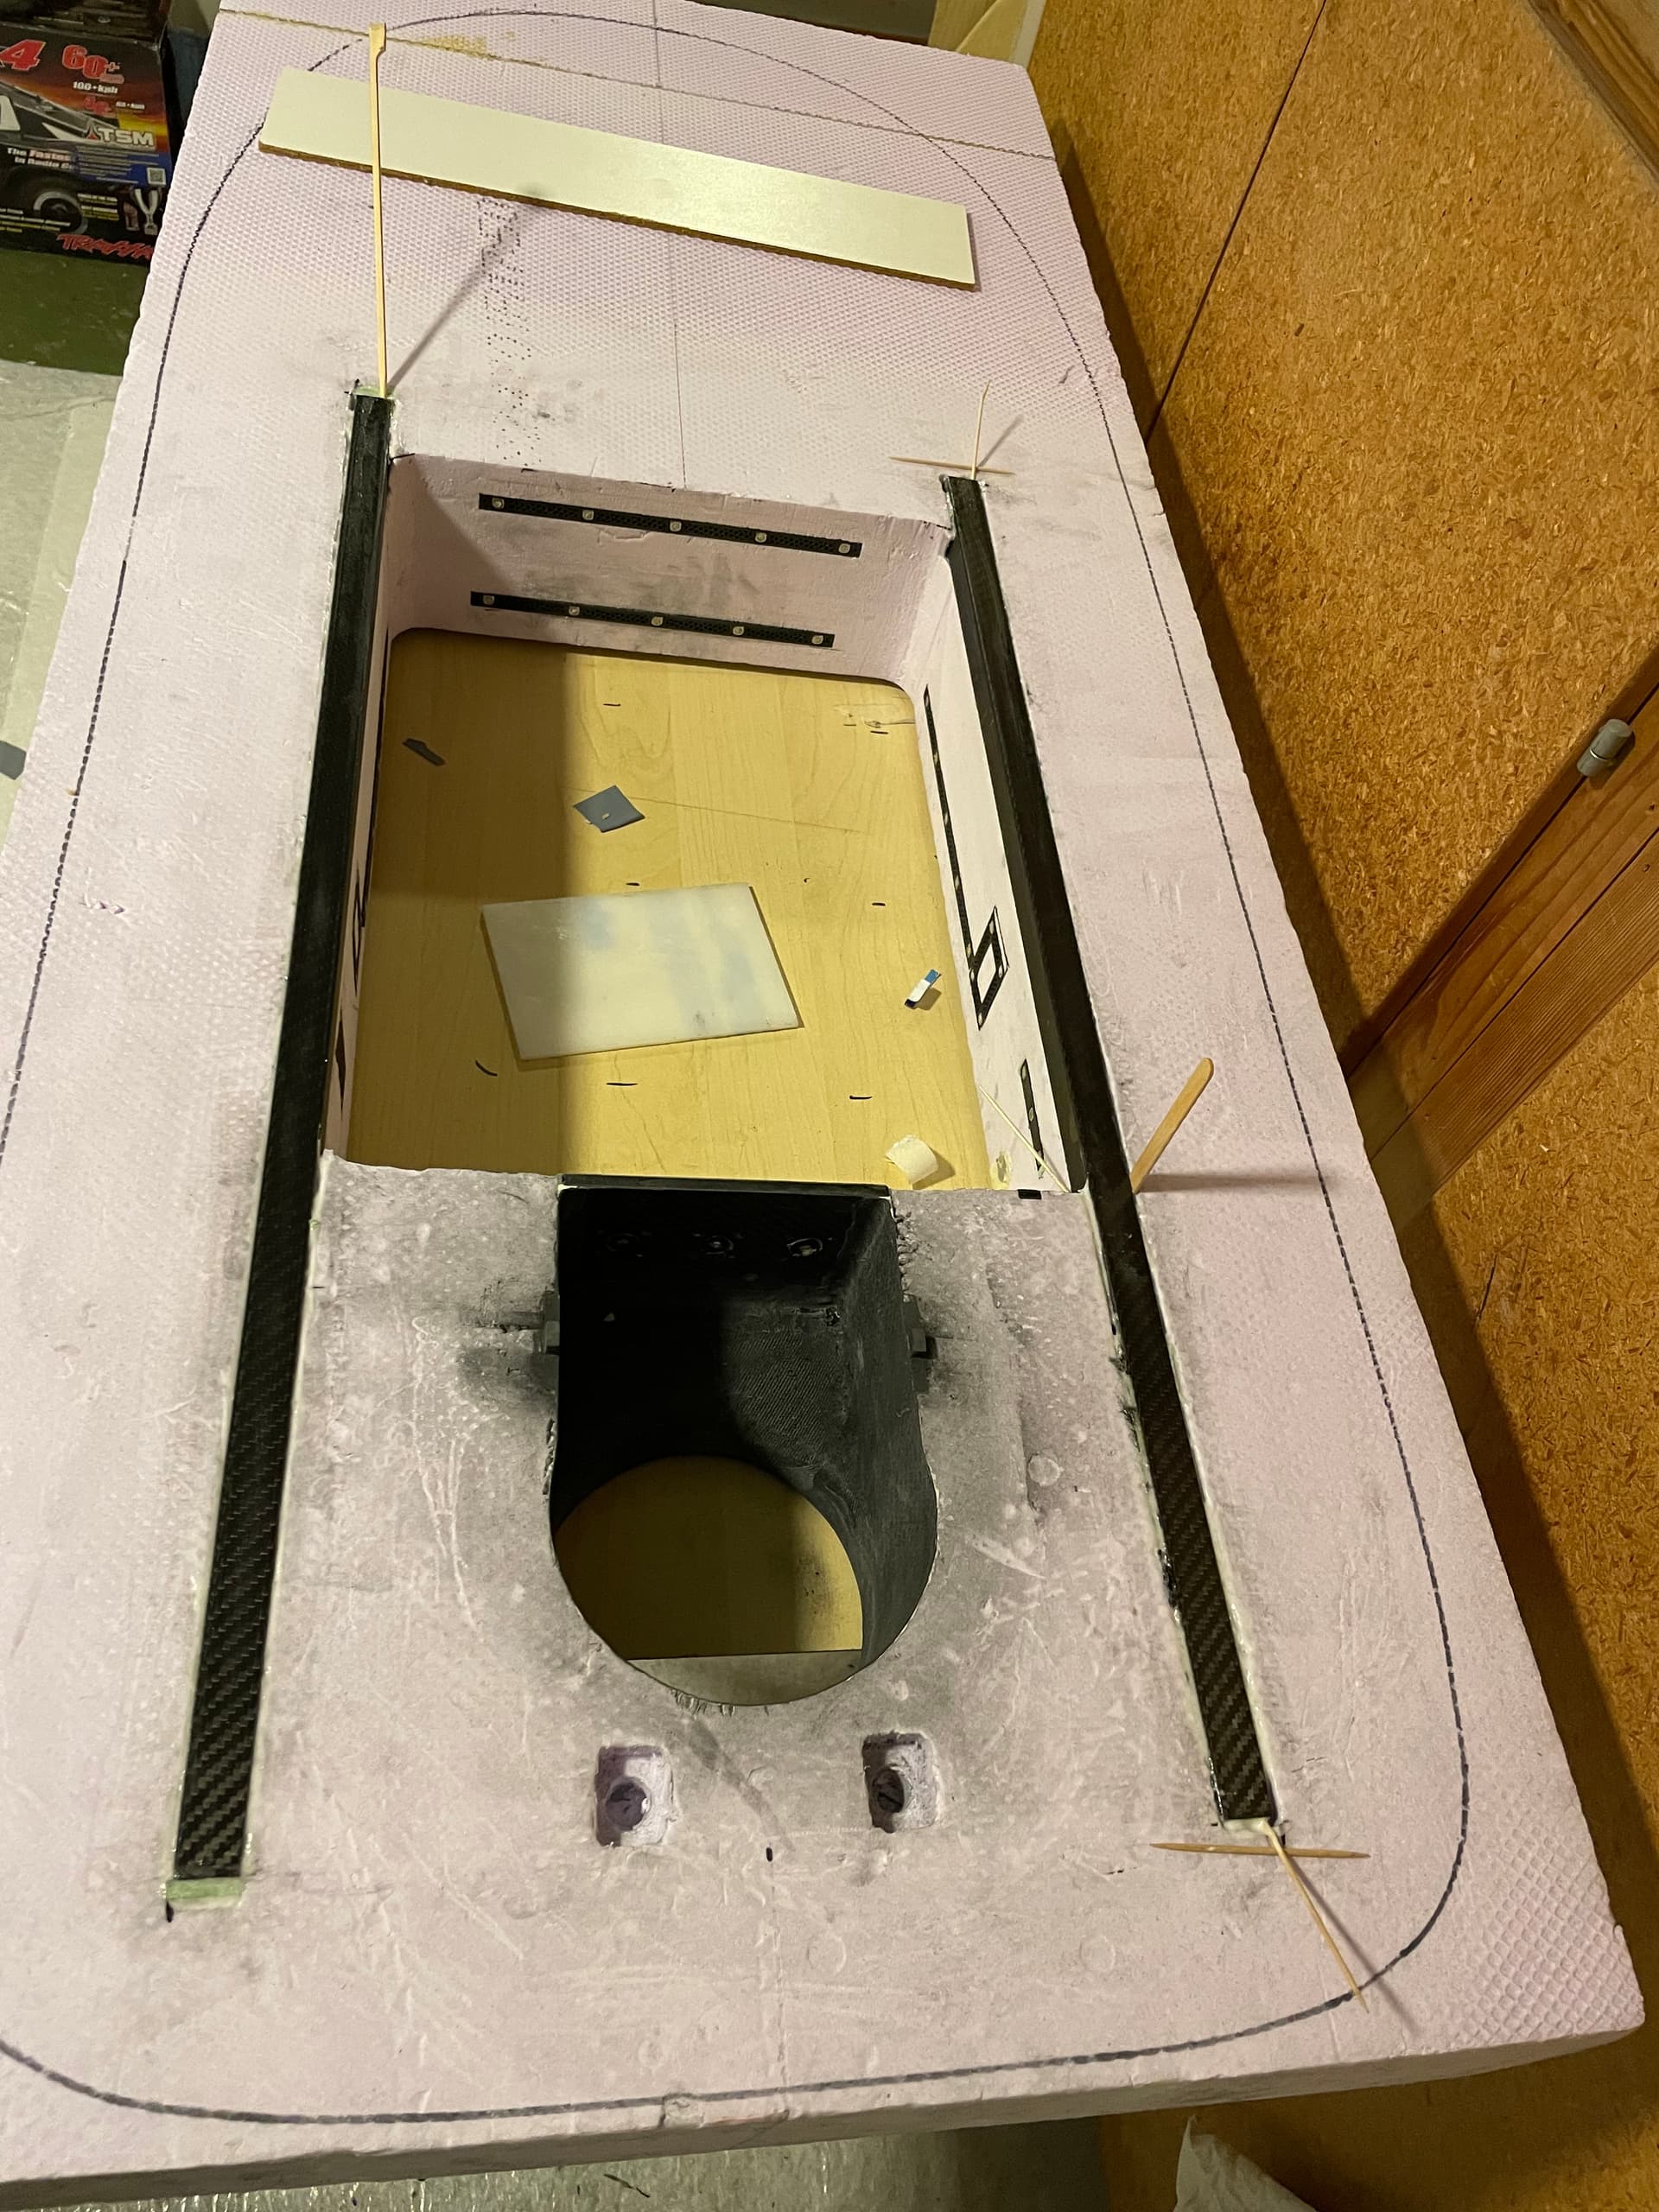
 ![IMG_3777](https://foil.zone/uploads/default/original/3X/2/f/2f044cb408833d9f5ec1bbb3aeb0bd0f6eac7076.jpeg)

 ![IMG_2630](https://foil.zone/uploads/default/original/3X/5/7/57b9d614fd6c9560401f581dc4953eafcedf9add.jpeg)  
Stainless steel inseerts to hold the mast

 ![IMG_2634](https://foil.zone/uploads/default/original/3X/e/d/ed133349fd647e587920911fec216050cf741510.jpeg)  
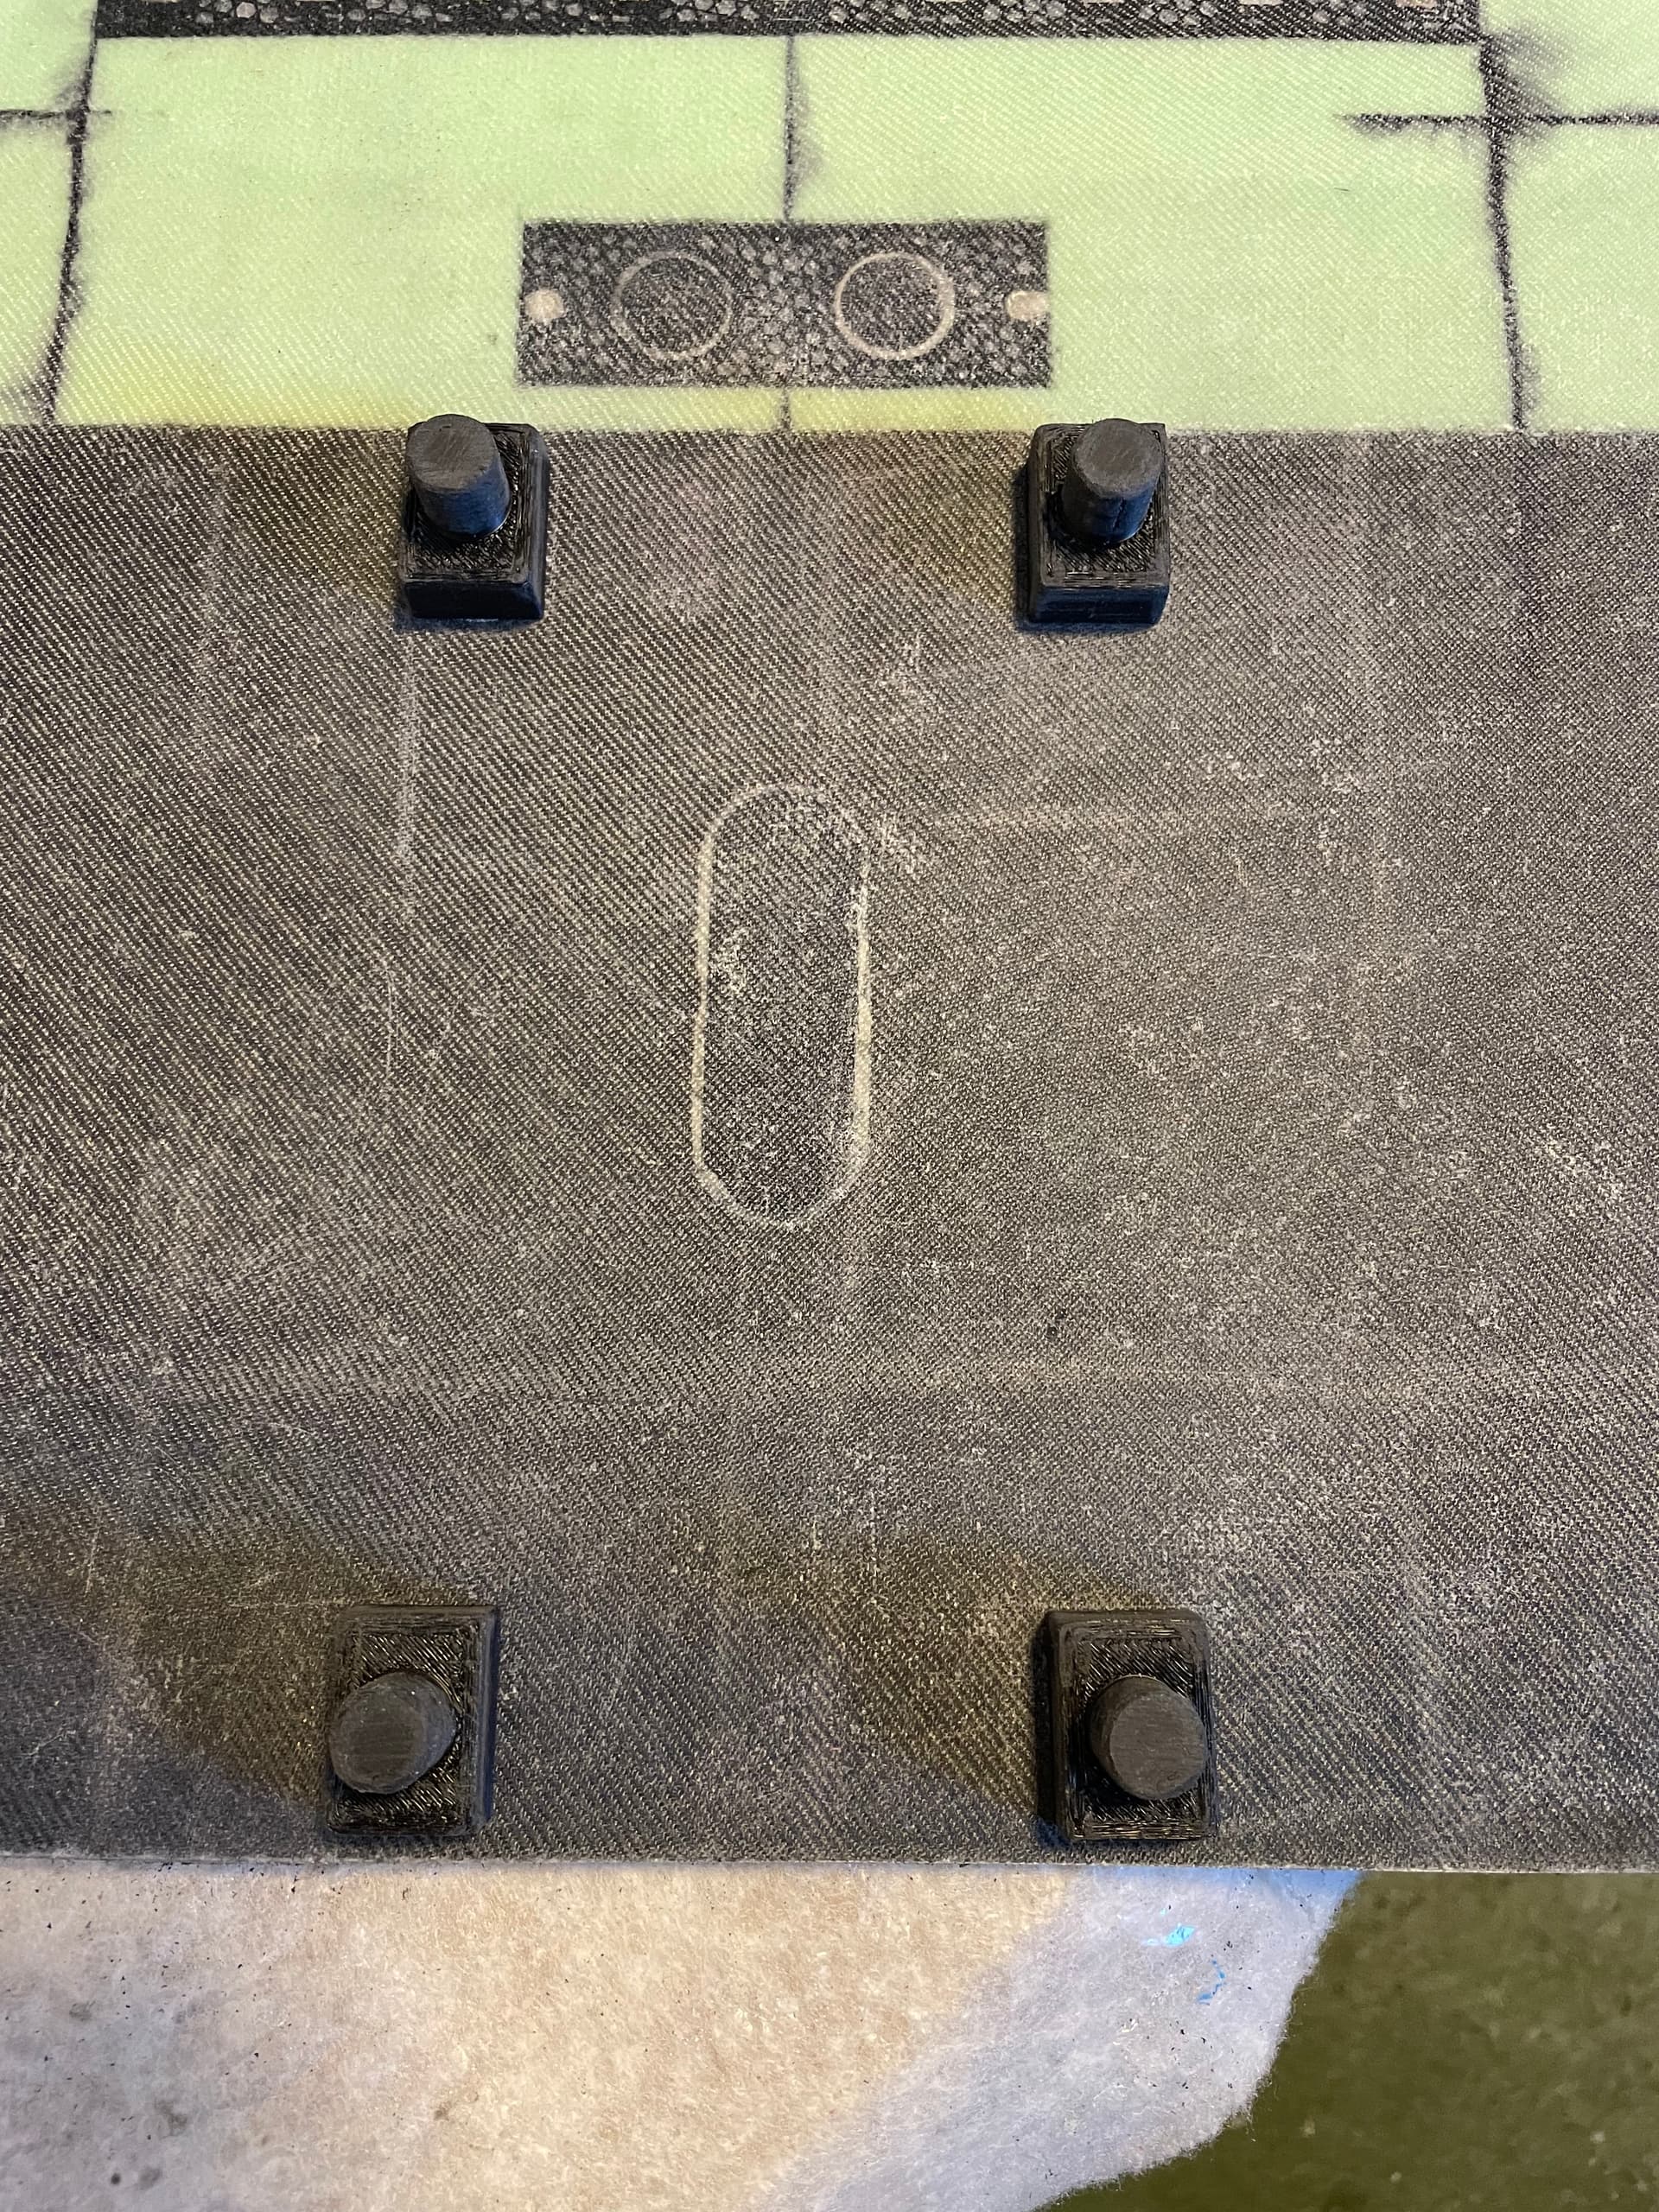
5mm full carbon board to fix the mast (is a bit overkill an heavy but strong)
 ![IMG_3665](https://foil.zone/uploads/default/original/3X/b/5/b59a40bccc6e8145ff9c72e4612076deef84f94b.jpeg)  
Sandwich from 5mm CFK board an 5mm and Airex75kg/m2. Inside 1 layer of glass 280g/m3, outside 200g/m3 CFK. 3d Printed caps to cover and hold mast nut inserts in place

 ![IMG_3806](https://foil.zone/uploads/default/original/3X/d/a/da5b4f24a63f5d1bf12fff2400ef408bb79fade2.jpeg)  
Glued in bottom plate and laminated the edge of the inside

 ![IMG_3807](https://foil.zone/uploads/default/original/3X/f/7/f721dd05dc284371ee51231ed77ae0642741a115.jpeg)  
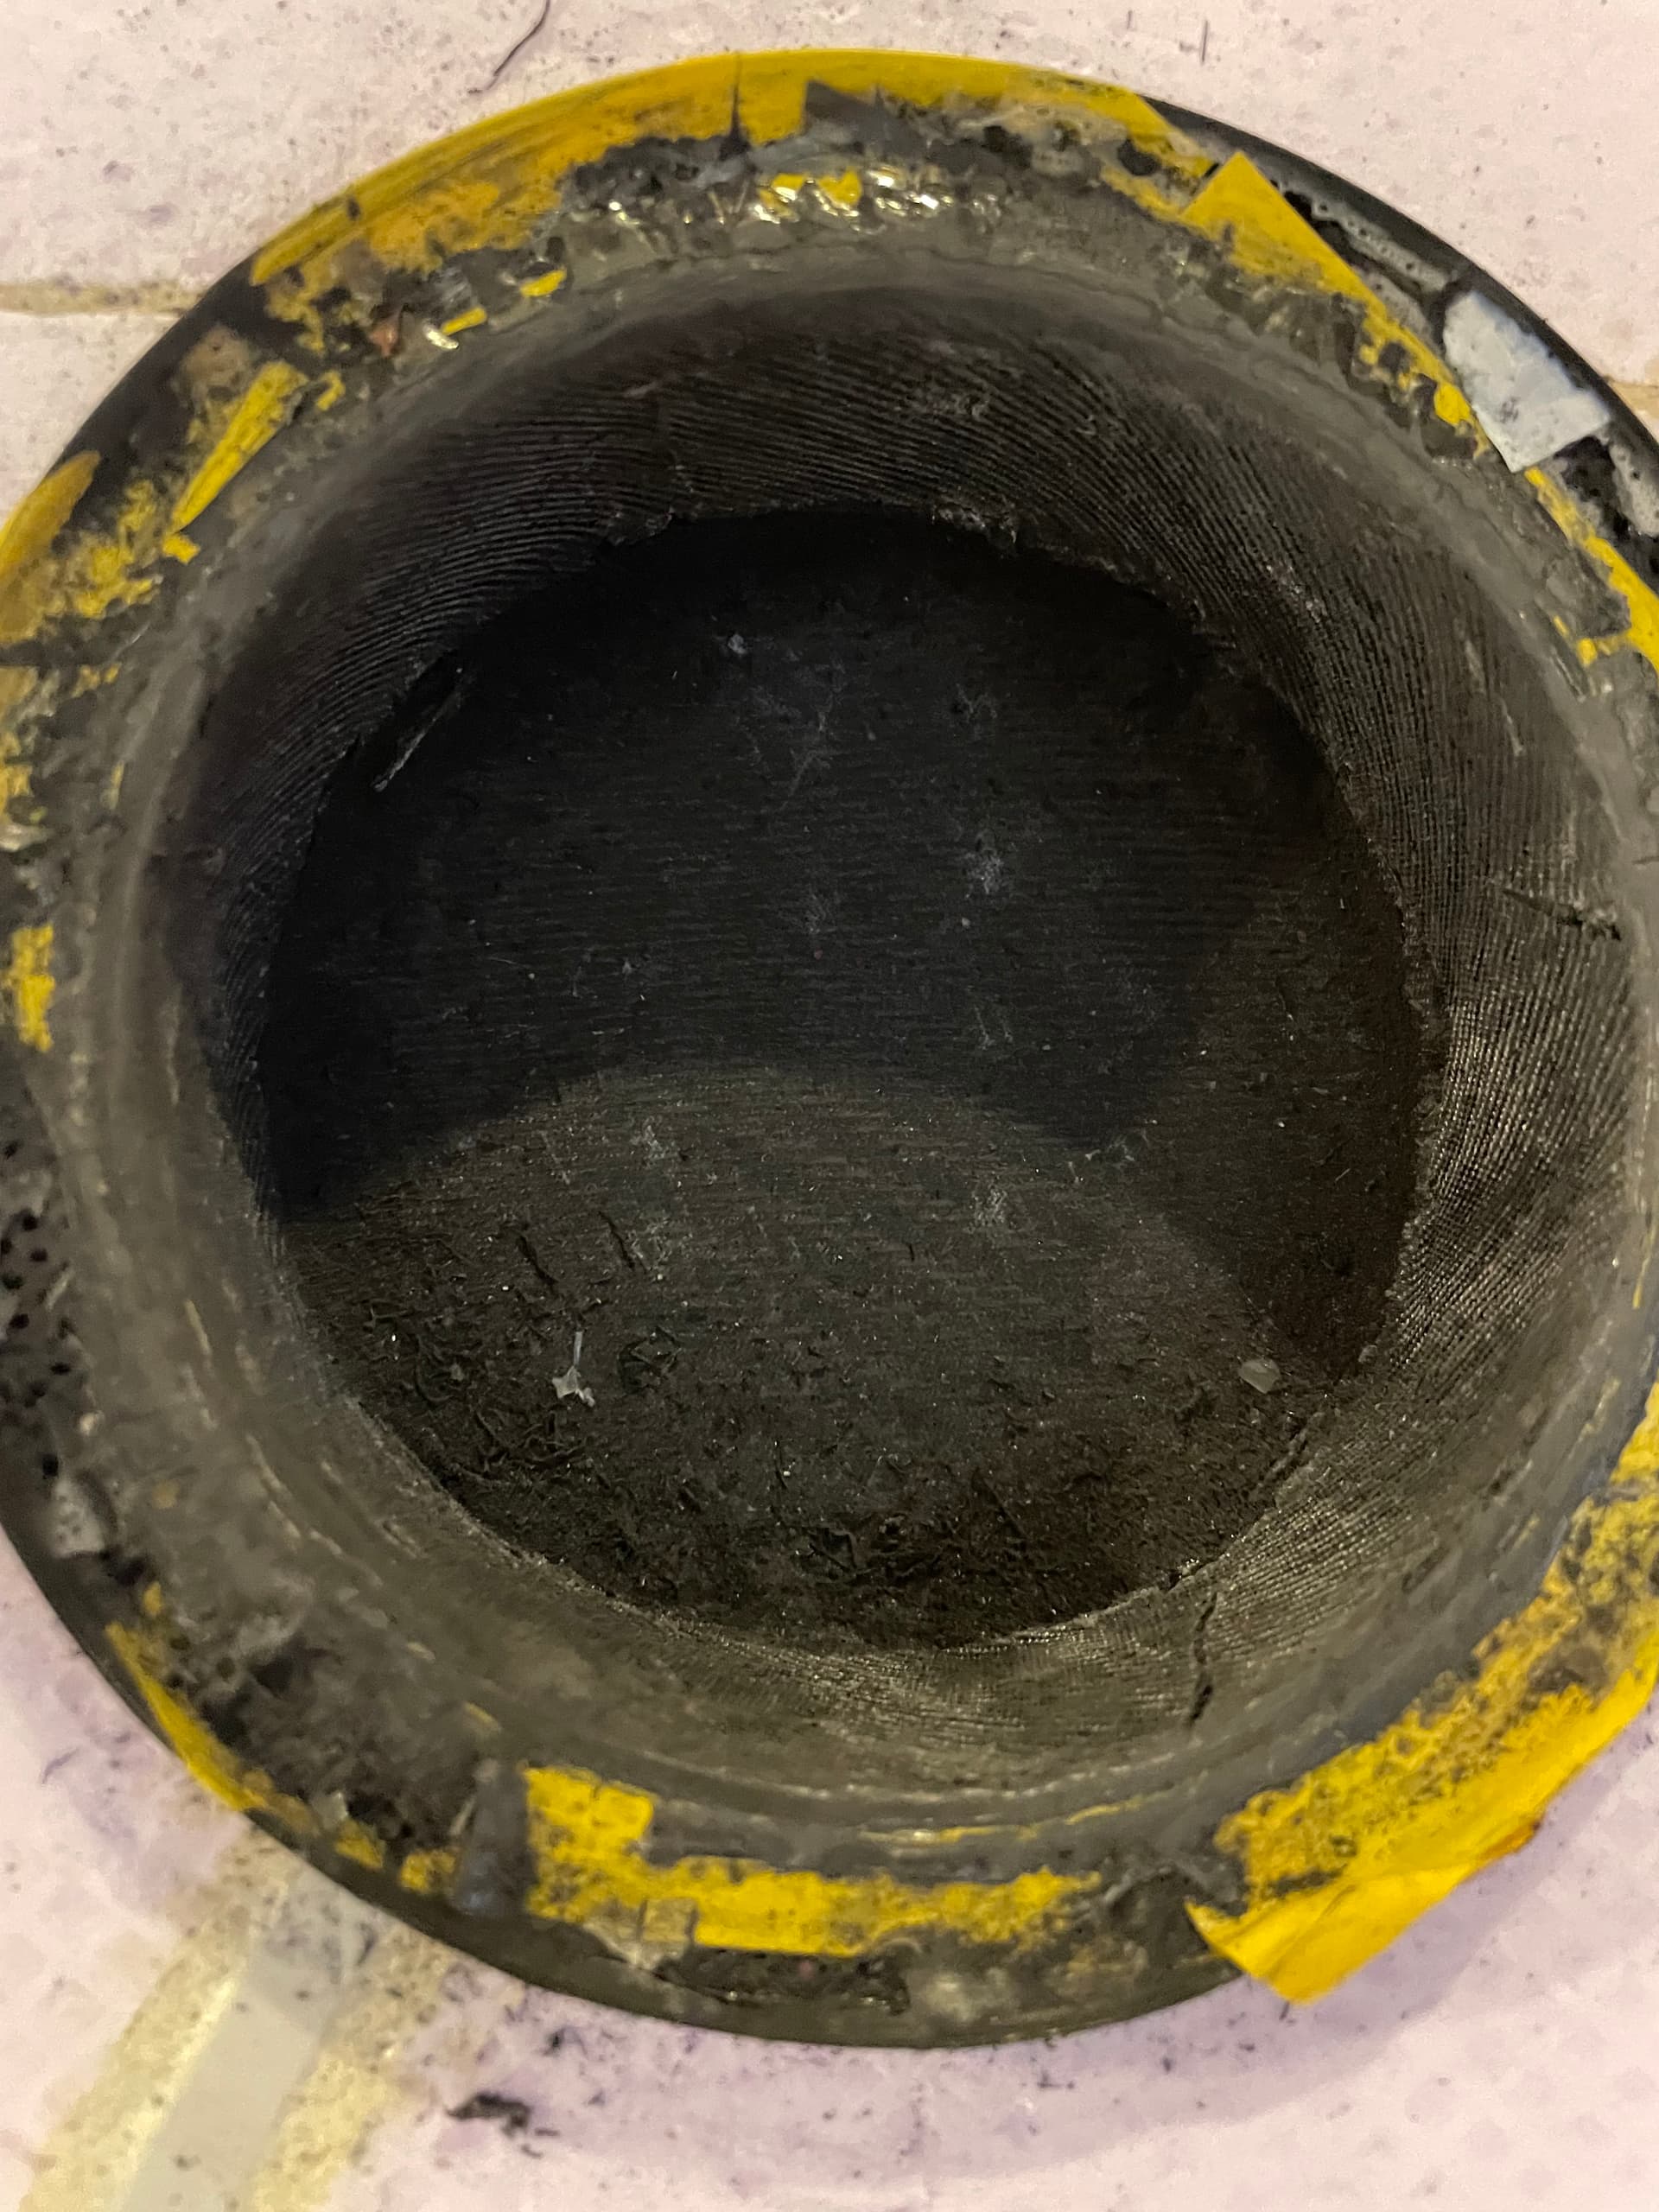
Laminated front compartment for receiver and GPS. The hatch is connected through a 16mm electrical tube to the main compartment.
 ![IMG_3808](https://foil.zone/uploads/default/original/3X/a/f/af1dae623b667ded90381d828cabfee15f27f58a.jpeg)

 ![IMG_3817](https://foil.zone/uploads/default/original/3X/4/6/467c42ccd6b1dedd3e22907cb8883fee265f0ef9.jpeg)  
12mm Airex board glued on top. The4 cutouts on the side are for handle inserts.
 ![IMG_E3982](https://foil.zone/uploads/default/original/3X/0/3/03d3ec8907ead0f0e5f3f01e2022271a2244dc5d.jpeg)  
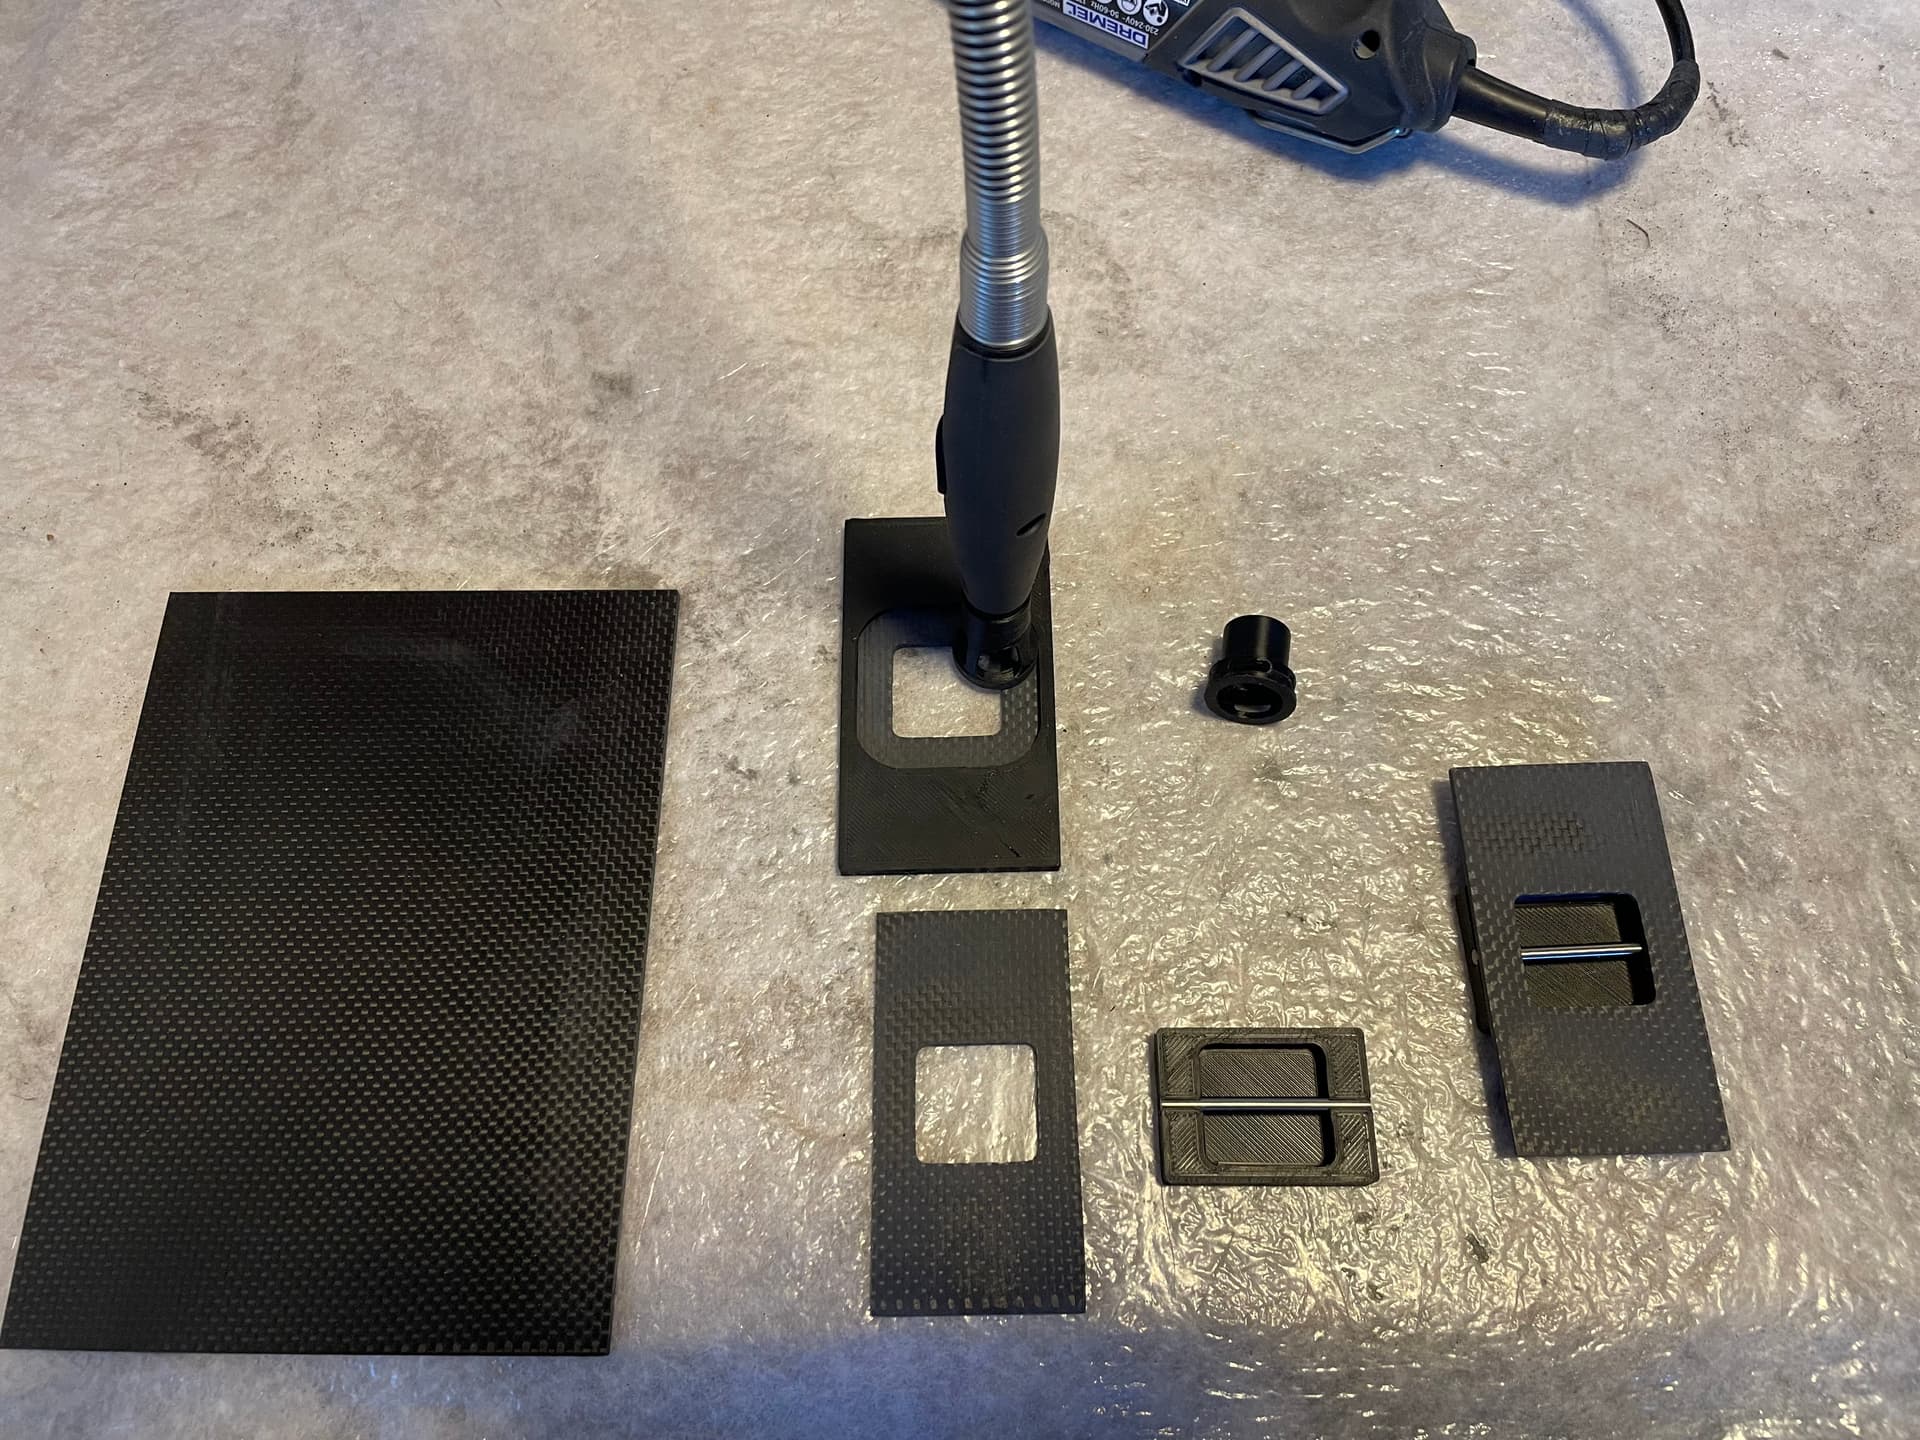
3d printed hadle inserts, covered with 3mm CFK Board. 4mm Stainless rod to hold a Velcro loop covered with neoprene
 ![IMG_4043](https://foil.zone/uploads/default/original/3X/8/e/8e4ee874c20c7949cd2abfe15c3917b18bf49526.jpeg)  
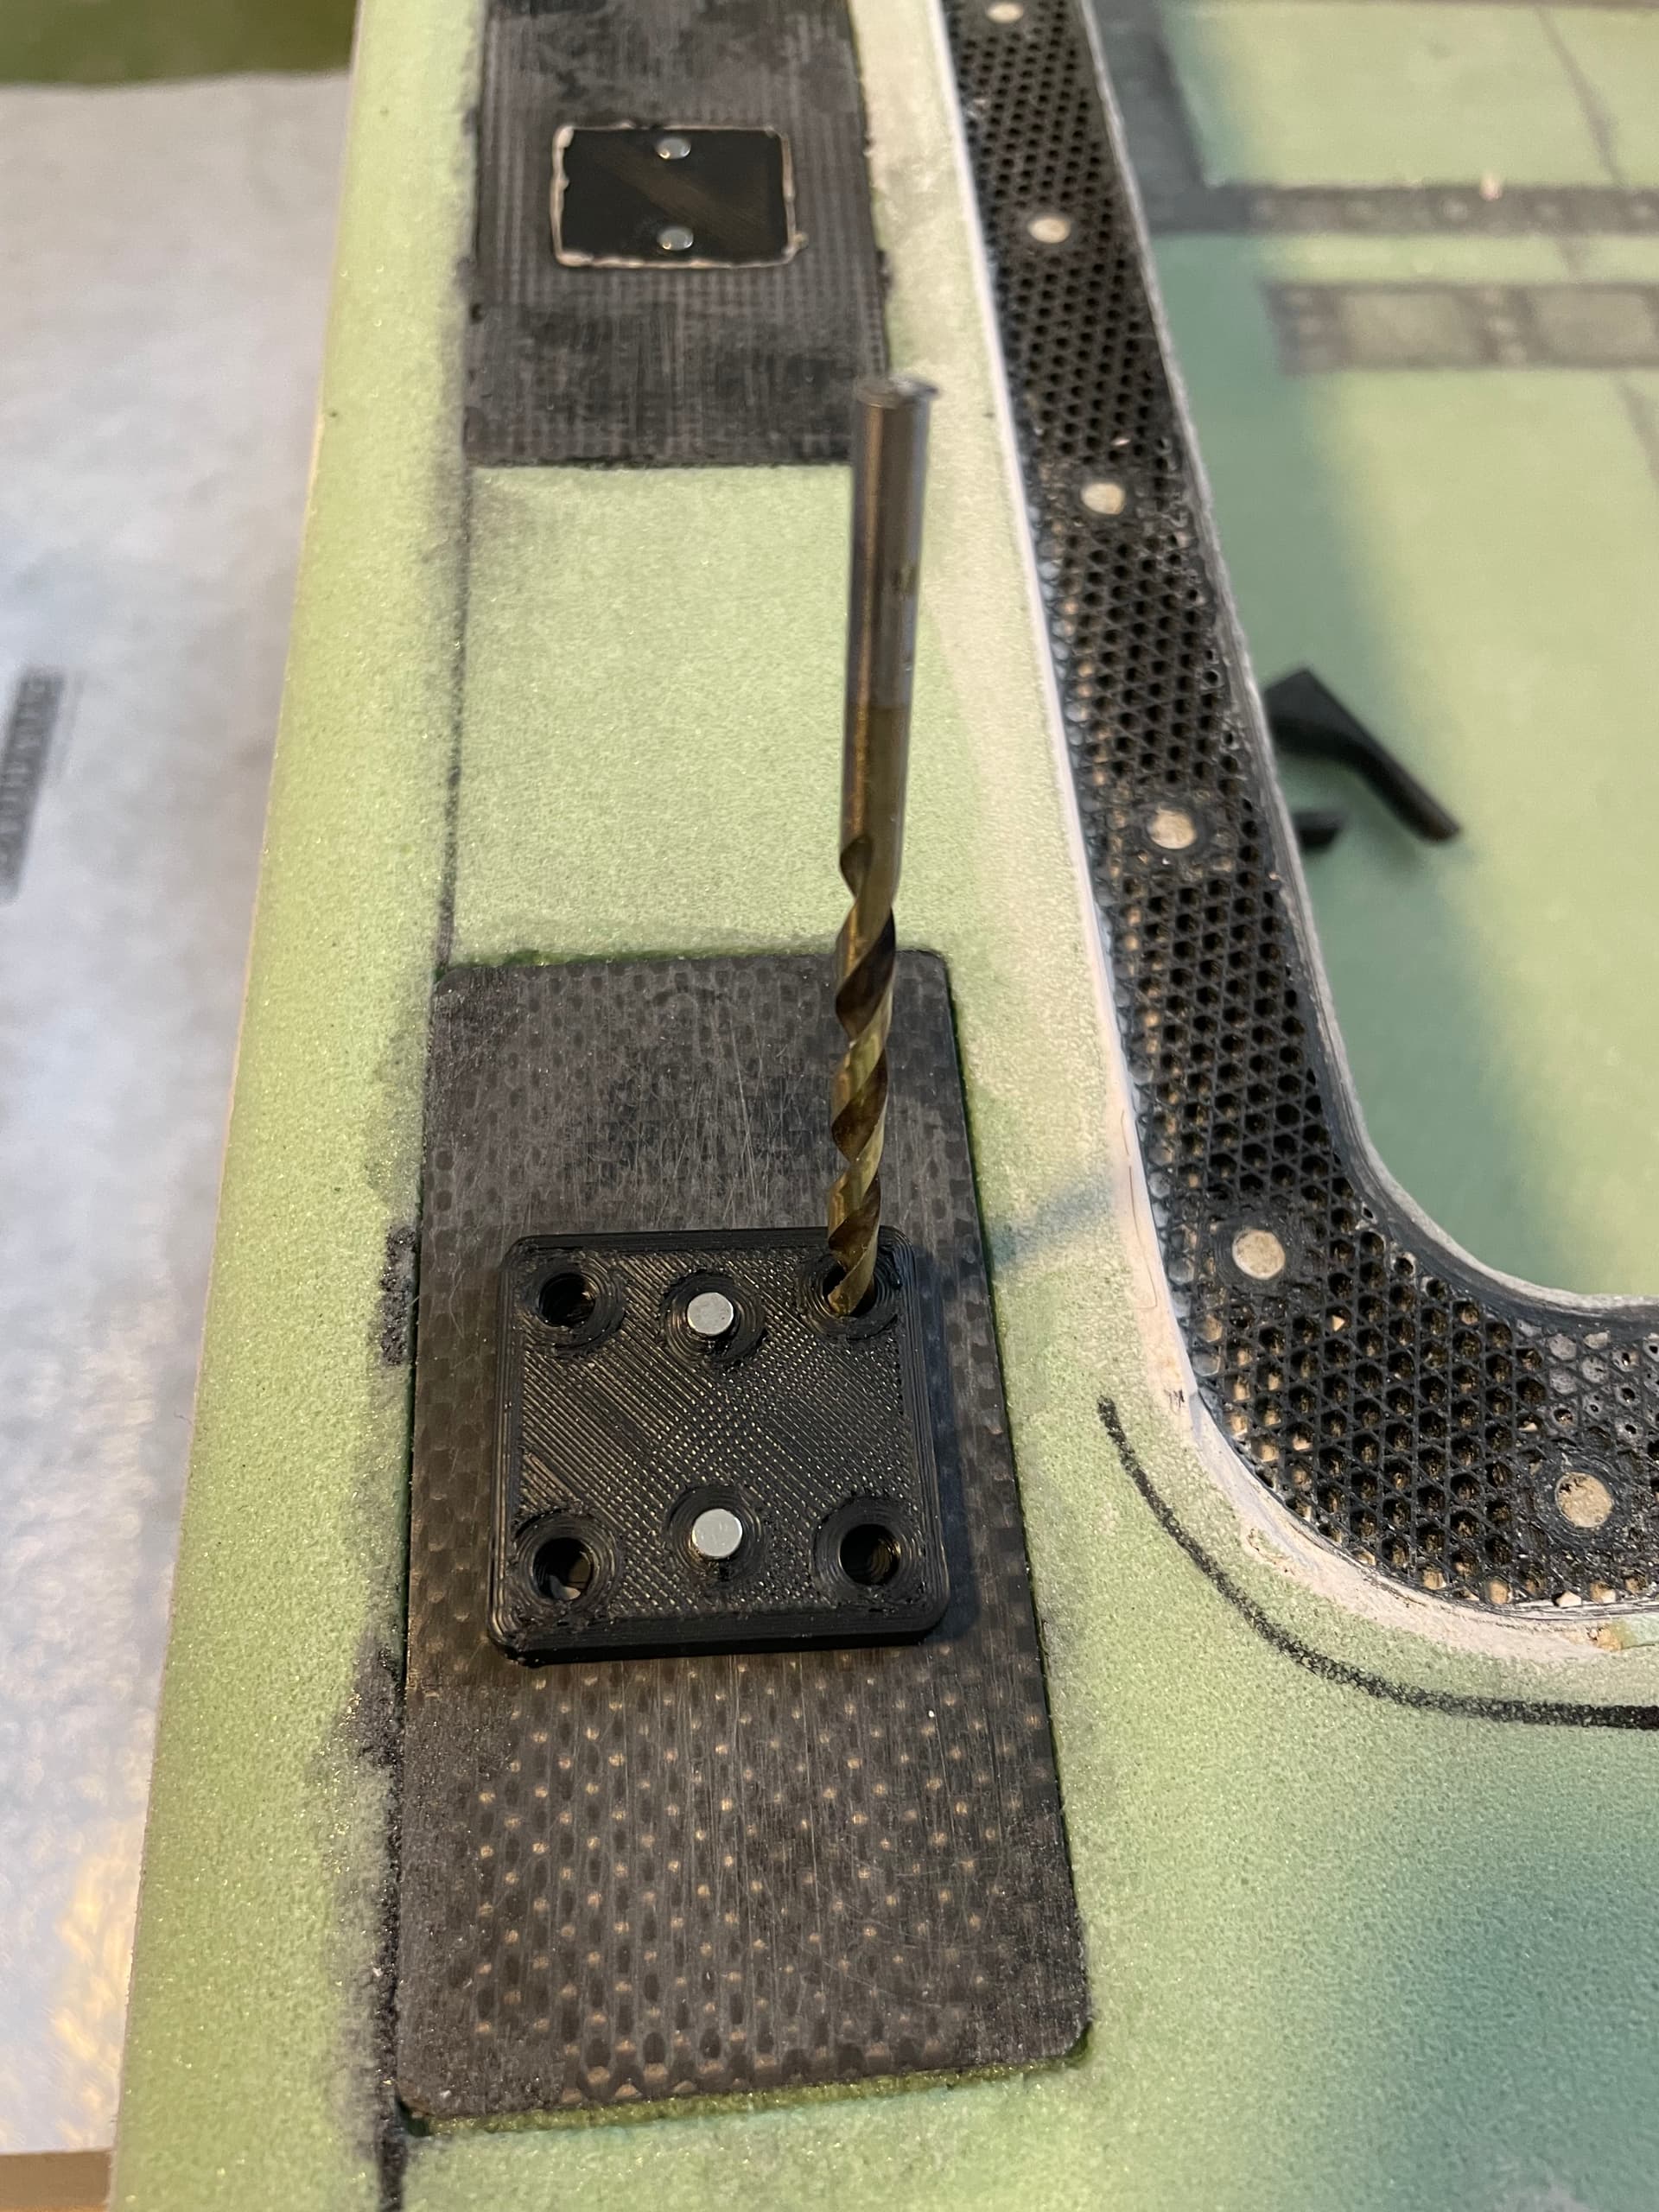
Magnet cap with magnets to find the insert after laminating

 ![IMG_3674](https://foil.zone/uploads/default/original/3X/3/8/389cb183bdce70d16fa8669b9010db29ae475892.jpeg)  
Made a screw router addon for the Dremel flex wire extension

 ![IMG_3695](https://foil.zone/uploads/default/original/3X/2/5/25dcbbddde338b4f2e9866024581329500ad0ad3.jpeg)  
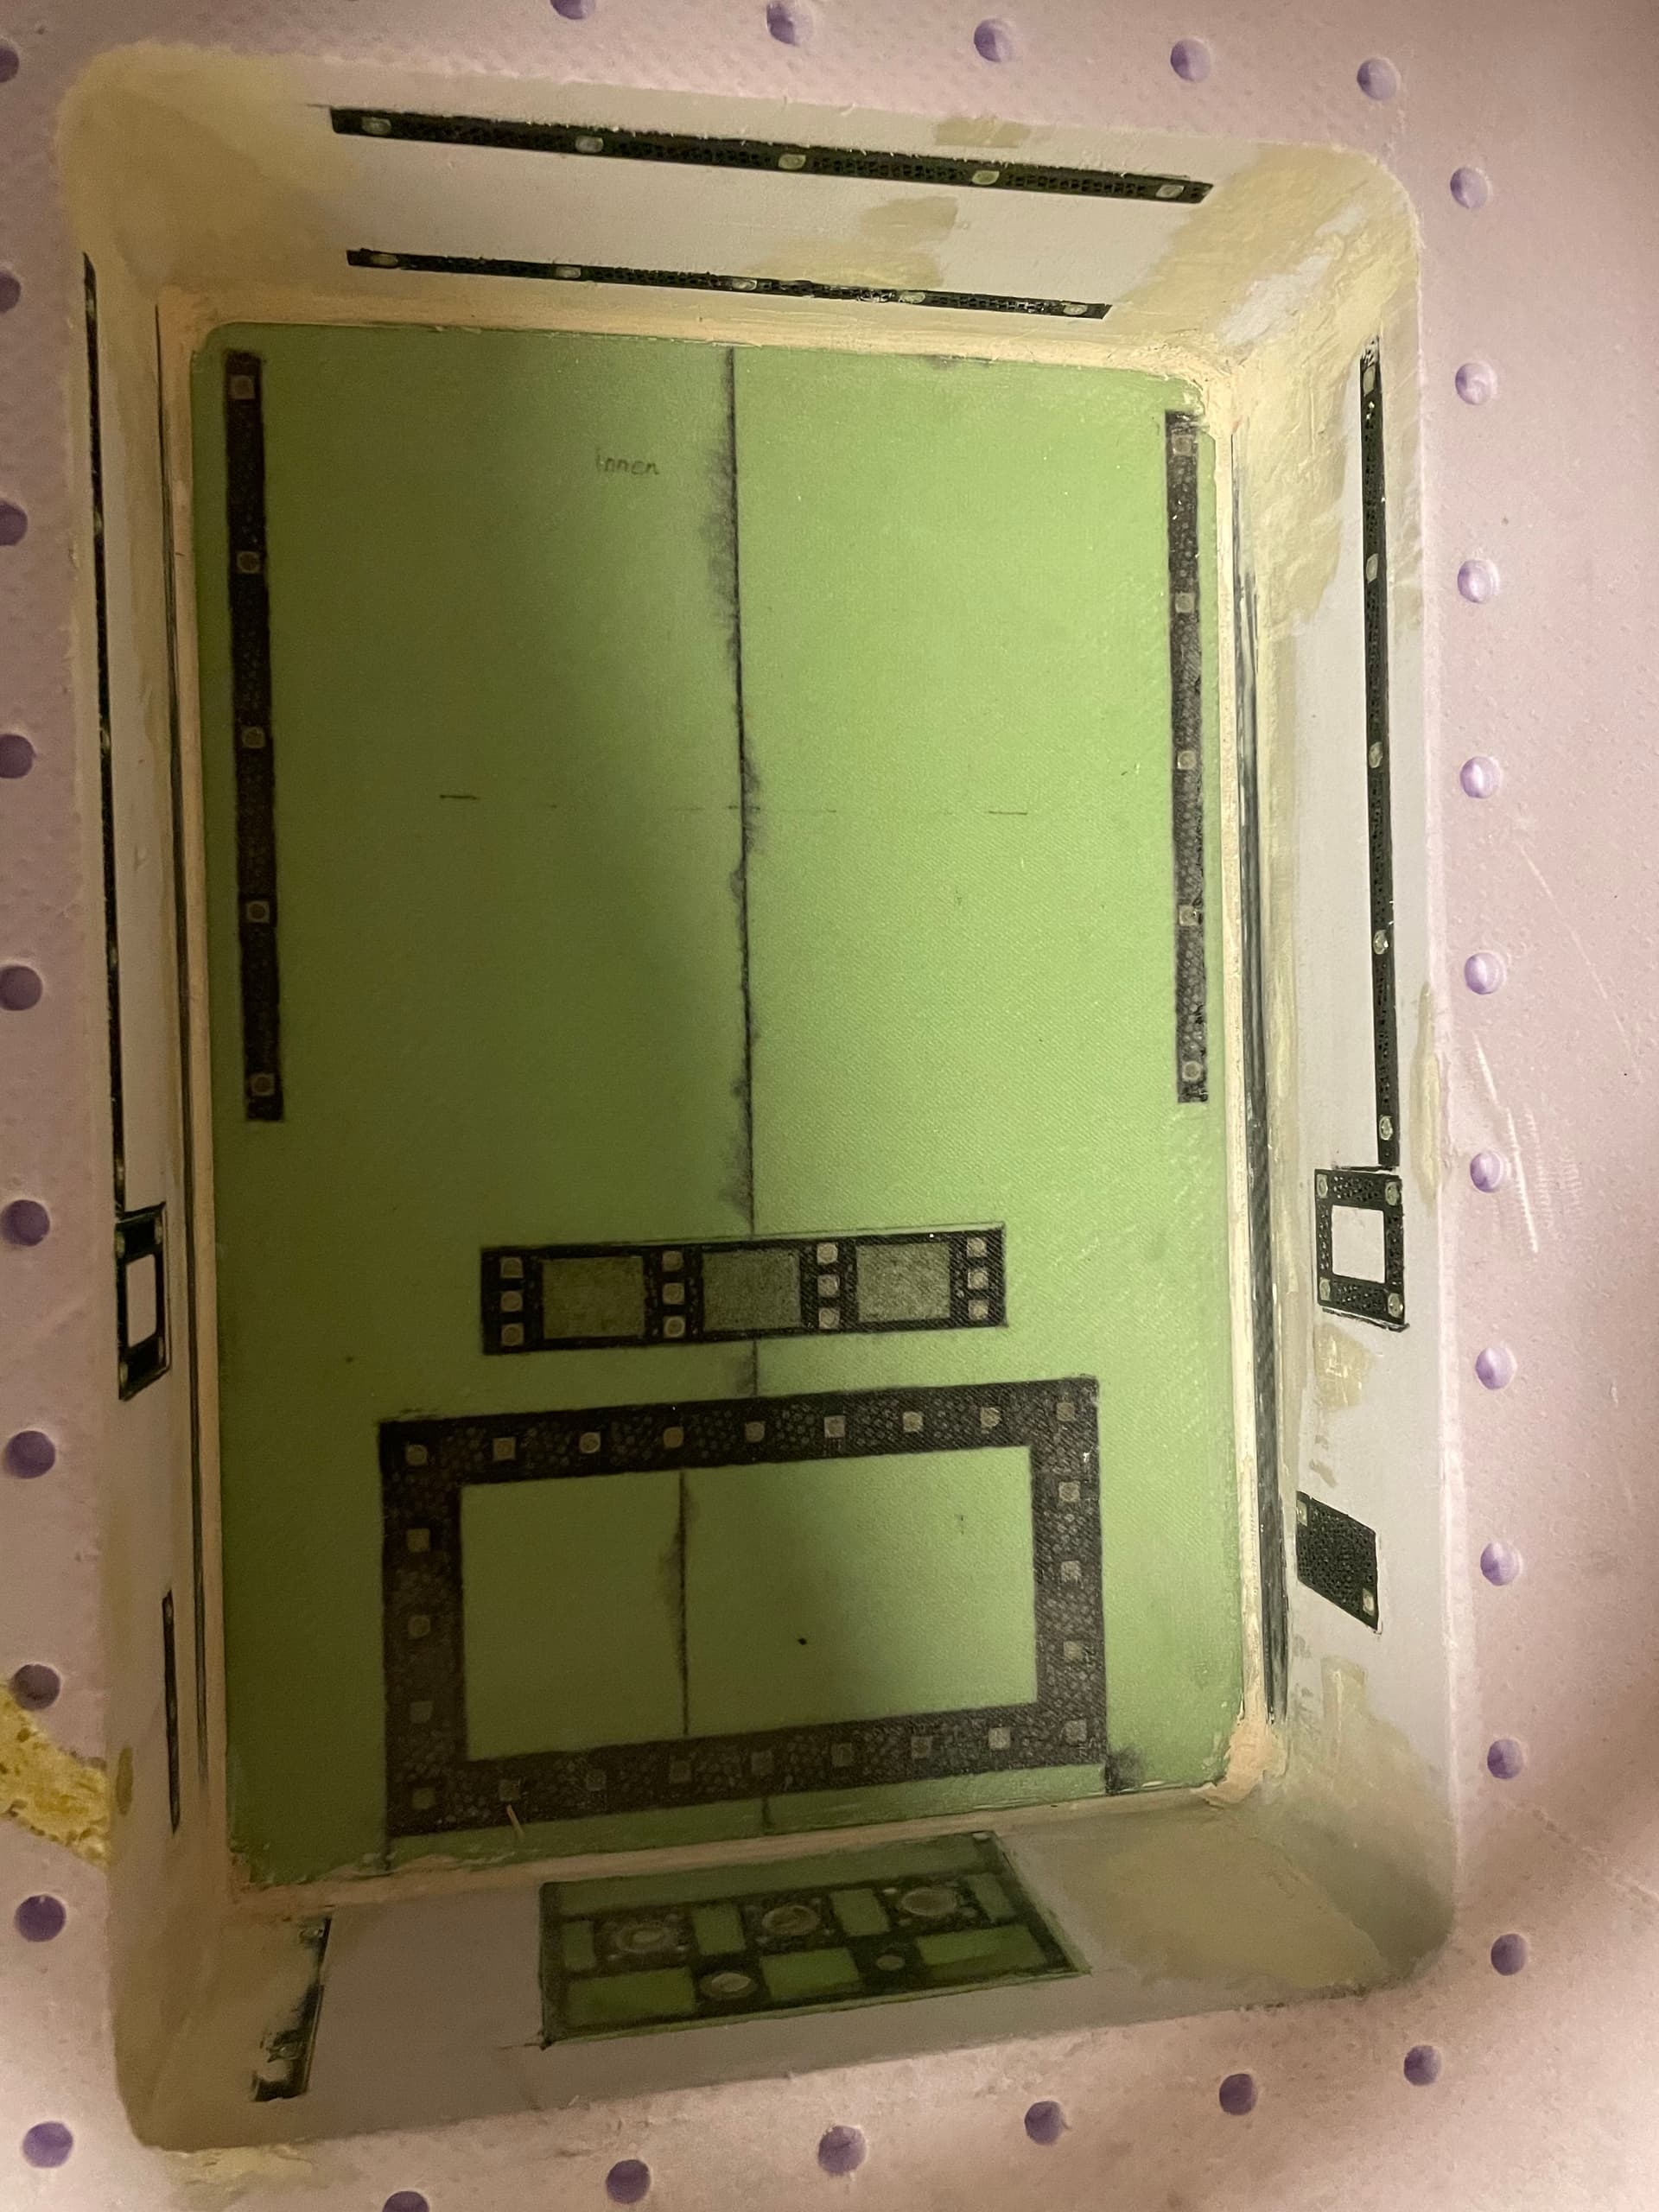
Routed slots for printes inserts with nuts to fix stuff later. Nuts were filled with play doh like sealing called “Coltogum”
 ![IMG_3789](https://foil.zone/uploads/default/original/3X/8/3/835f66965a4d870b8a54c9b759360104c798986a.jpeg)  
Flatened the walls with filler.

 ![IMG_2864](https://foil.zone/uploads/default/original/3X/3/d/3db426df725f2be467d5d3aae7f54e55cd8e2745.jpeg)  
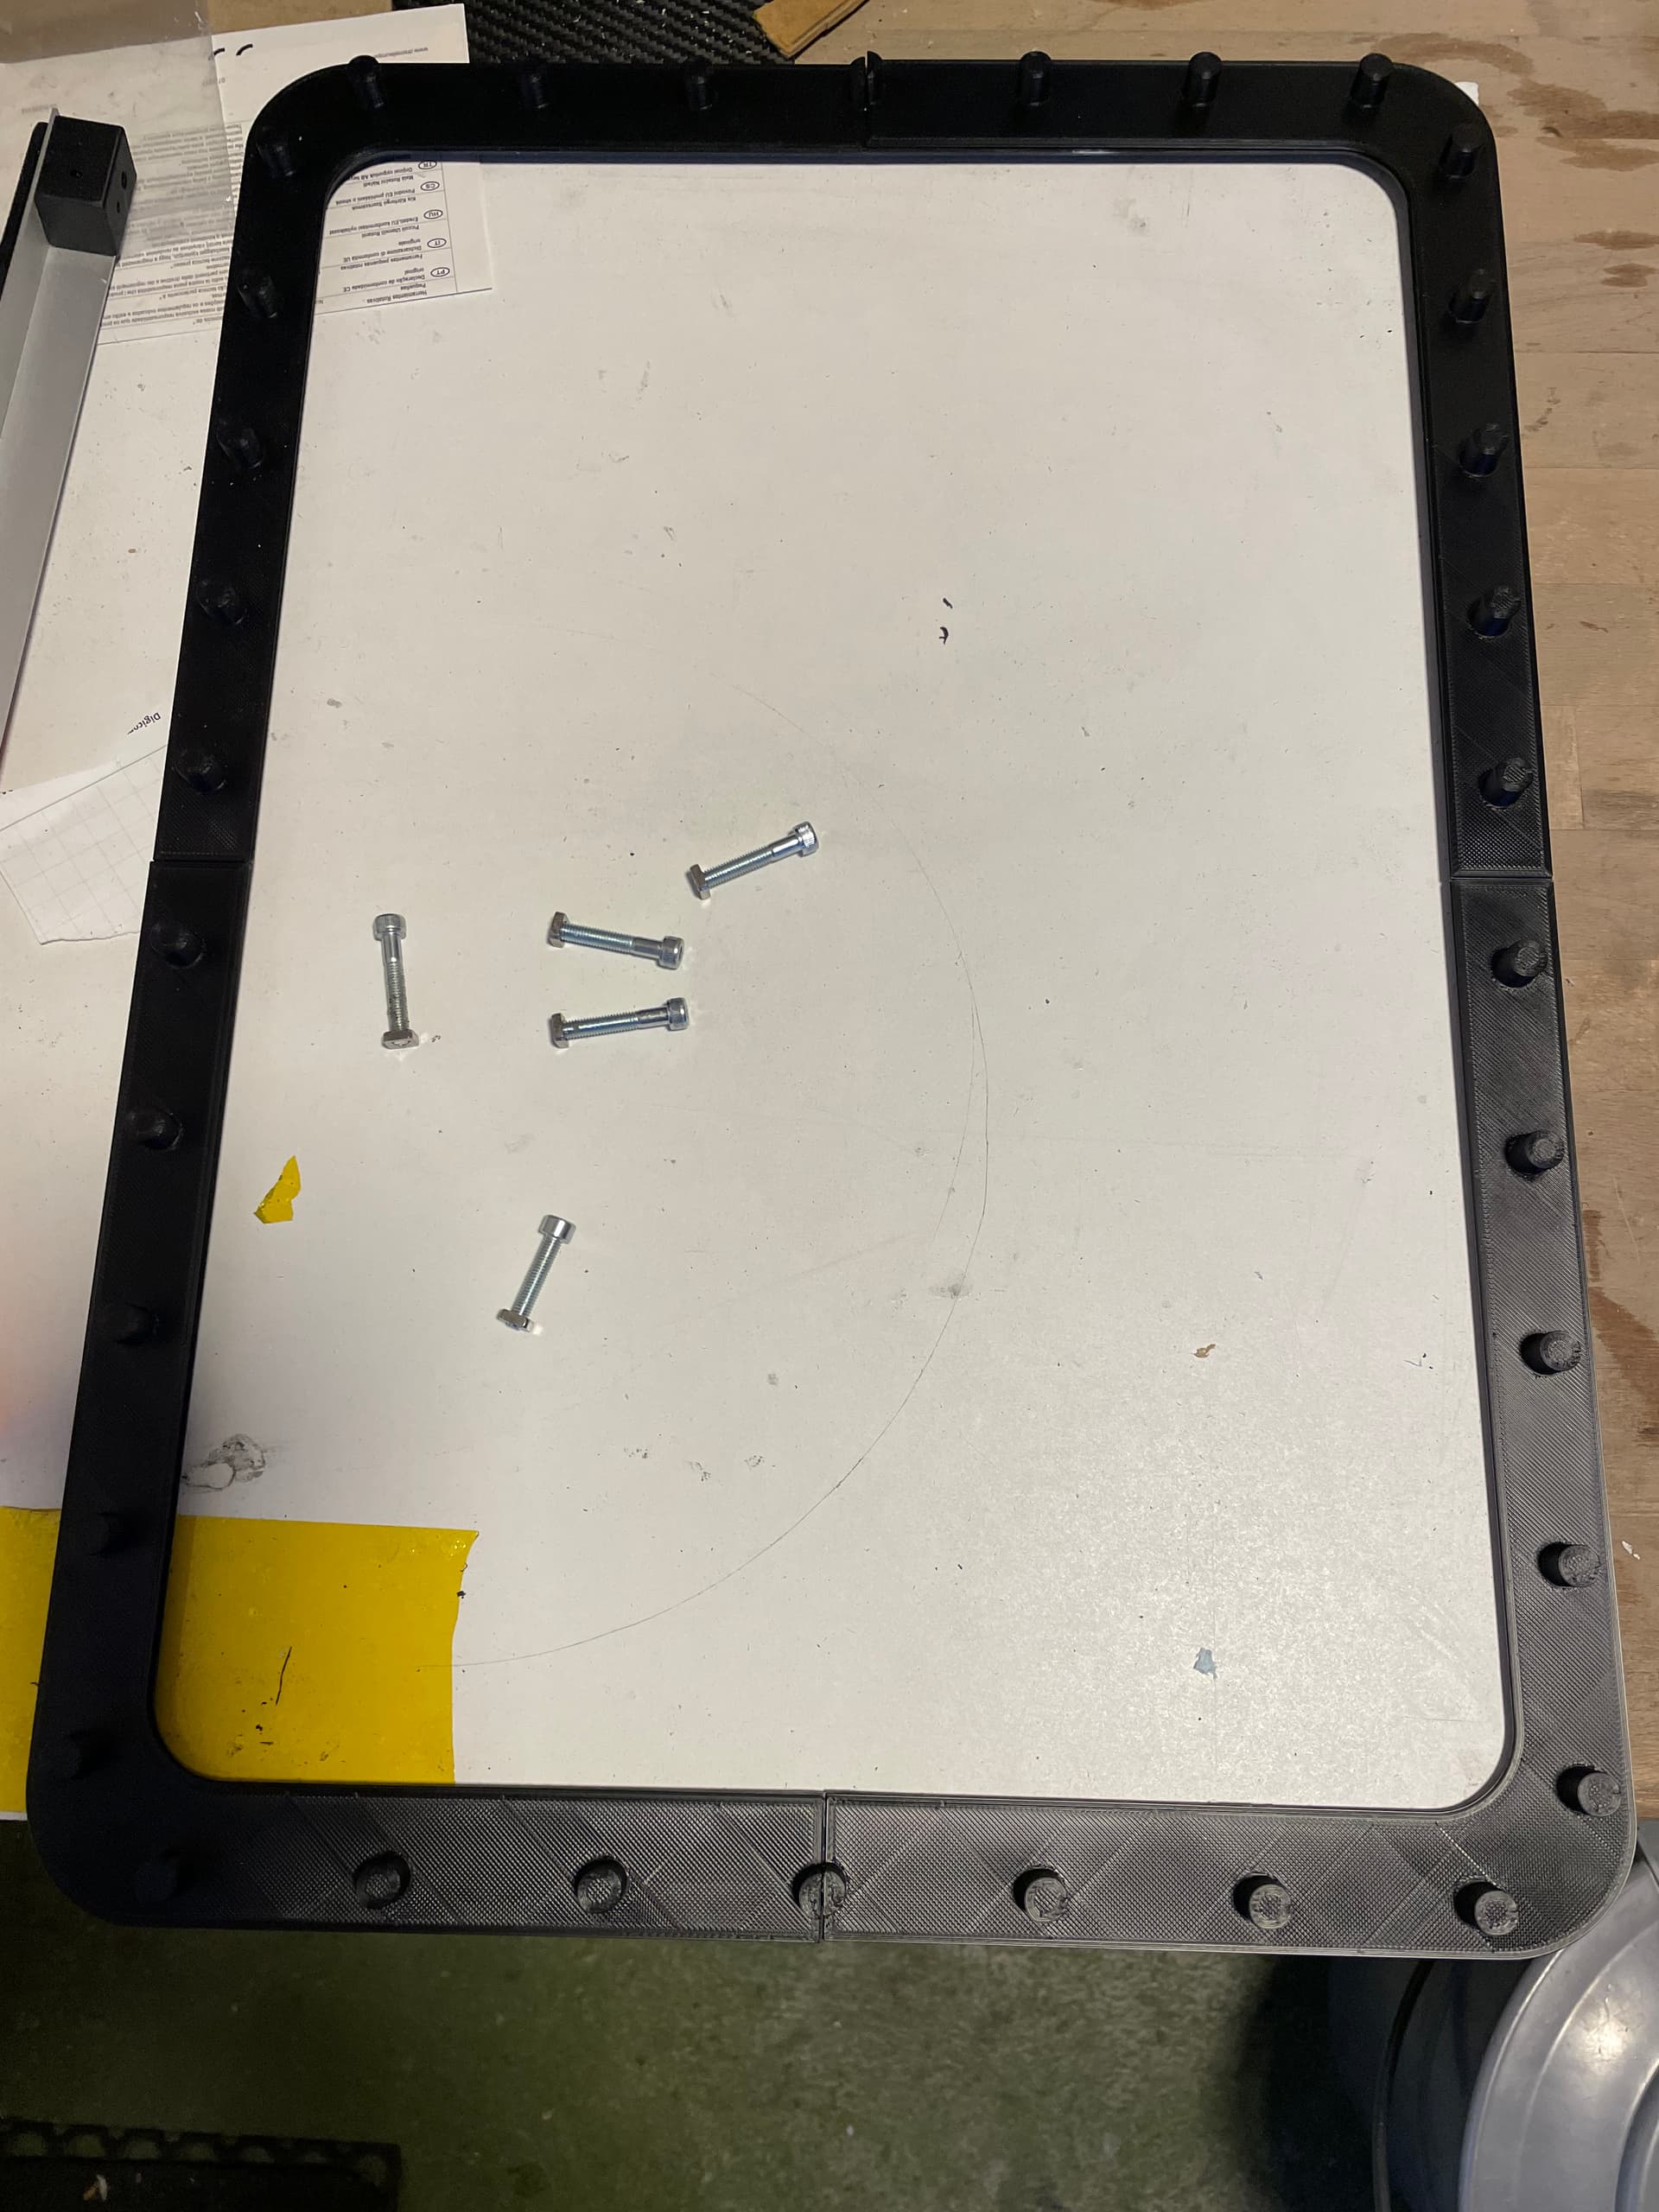
Frame with M5 square nuts to screw the lid

 ![IMG_2868](https://foil.zone/uploads/default/original/3X/5/1/5118fb503075ec1e1500225b2ececeb8e2ee2af4.jpeg)  
Consists of 2 parts, frame an screw cover
 ![IMG_2935](https://foil.zone/uploads/default/original/3X/1/e/1efe89eaf1e56fa36ea9ac2020ce708add4fadcf.jpeg)  
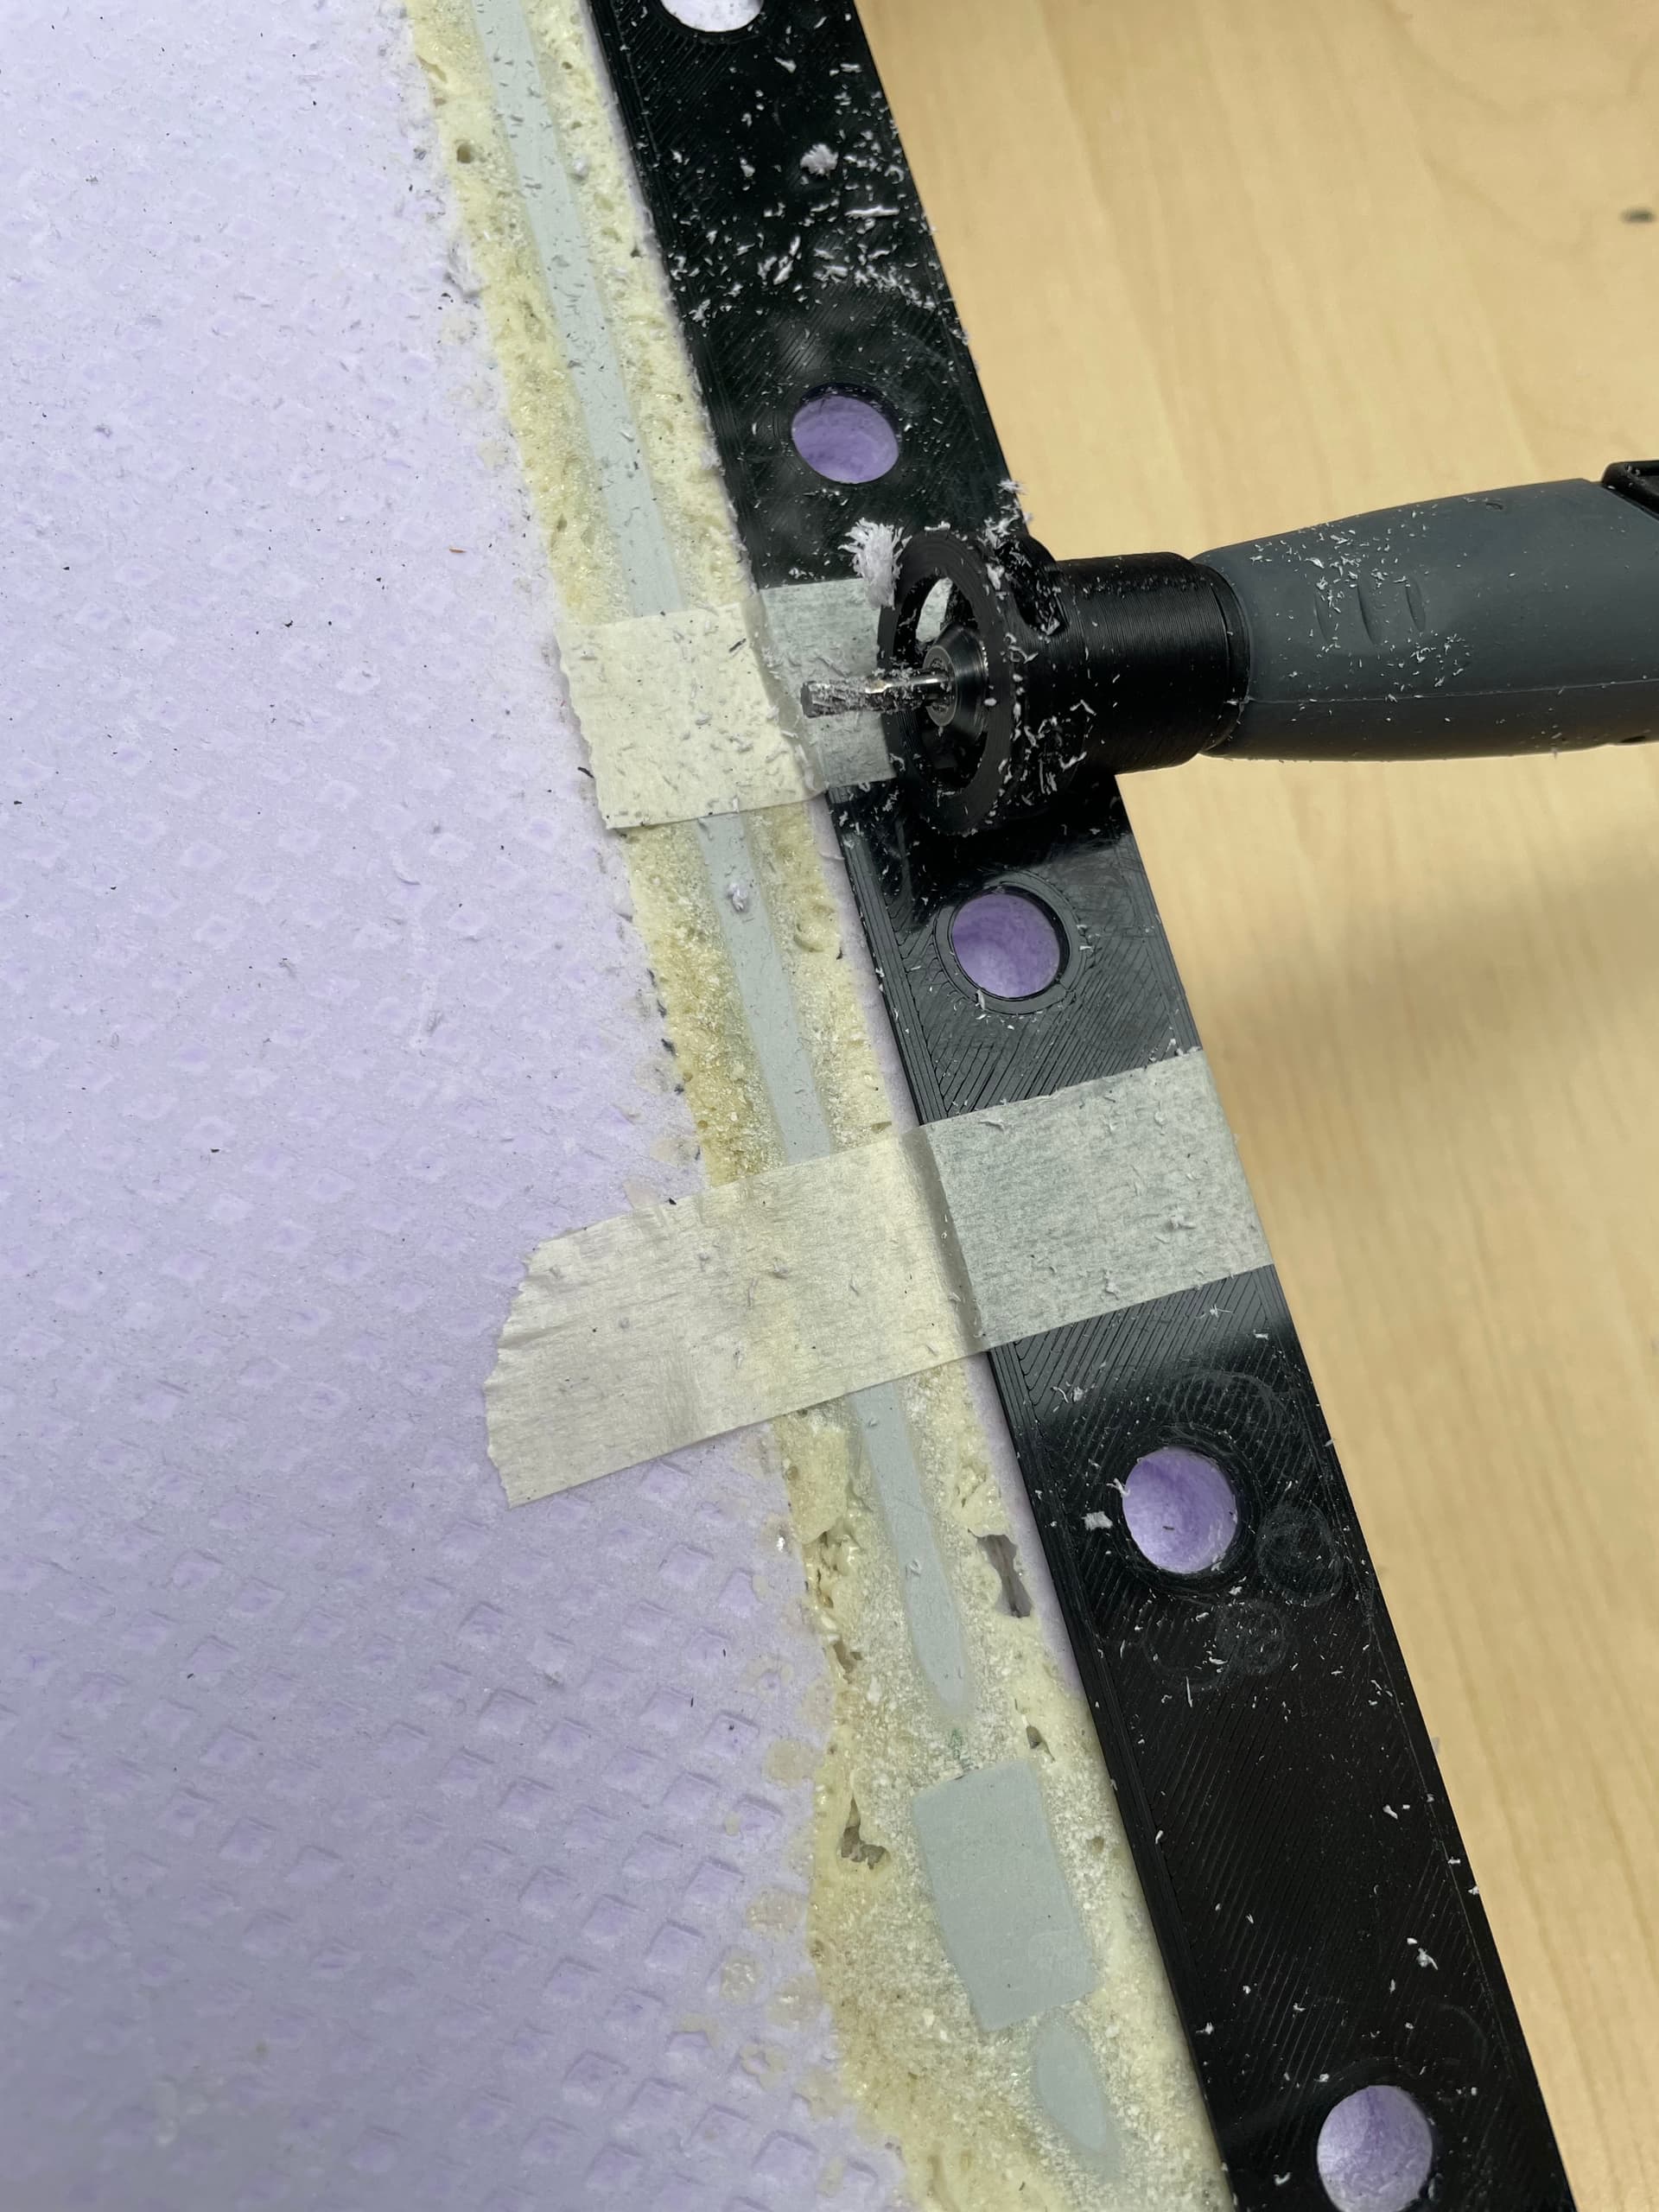
Routed holes for the frame with a template and Dremel

 ![IMG_2937](https://foil.zone/uploads/default/original/3X/b/4/b4e41ea026eb40efd039afc84157042f9bddd22a.jpeg)  
Glued it in

 ![IMG_3794](https://foil.zone/uploads/default/original/3X/f/a/fa3c17a7bf00085372cc17dca5c25a785f0c2426.jpeg)  
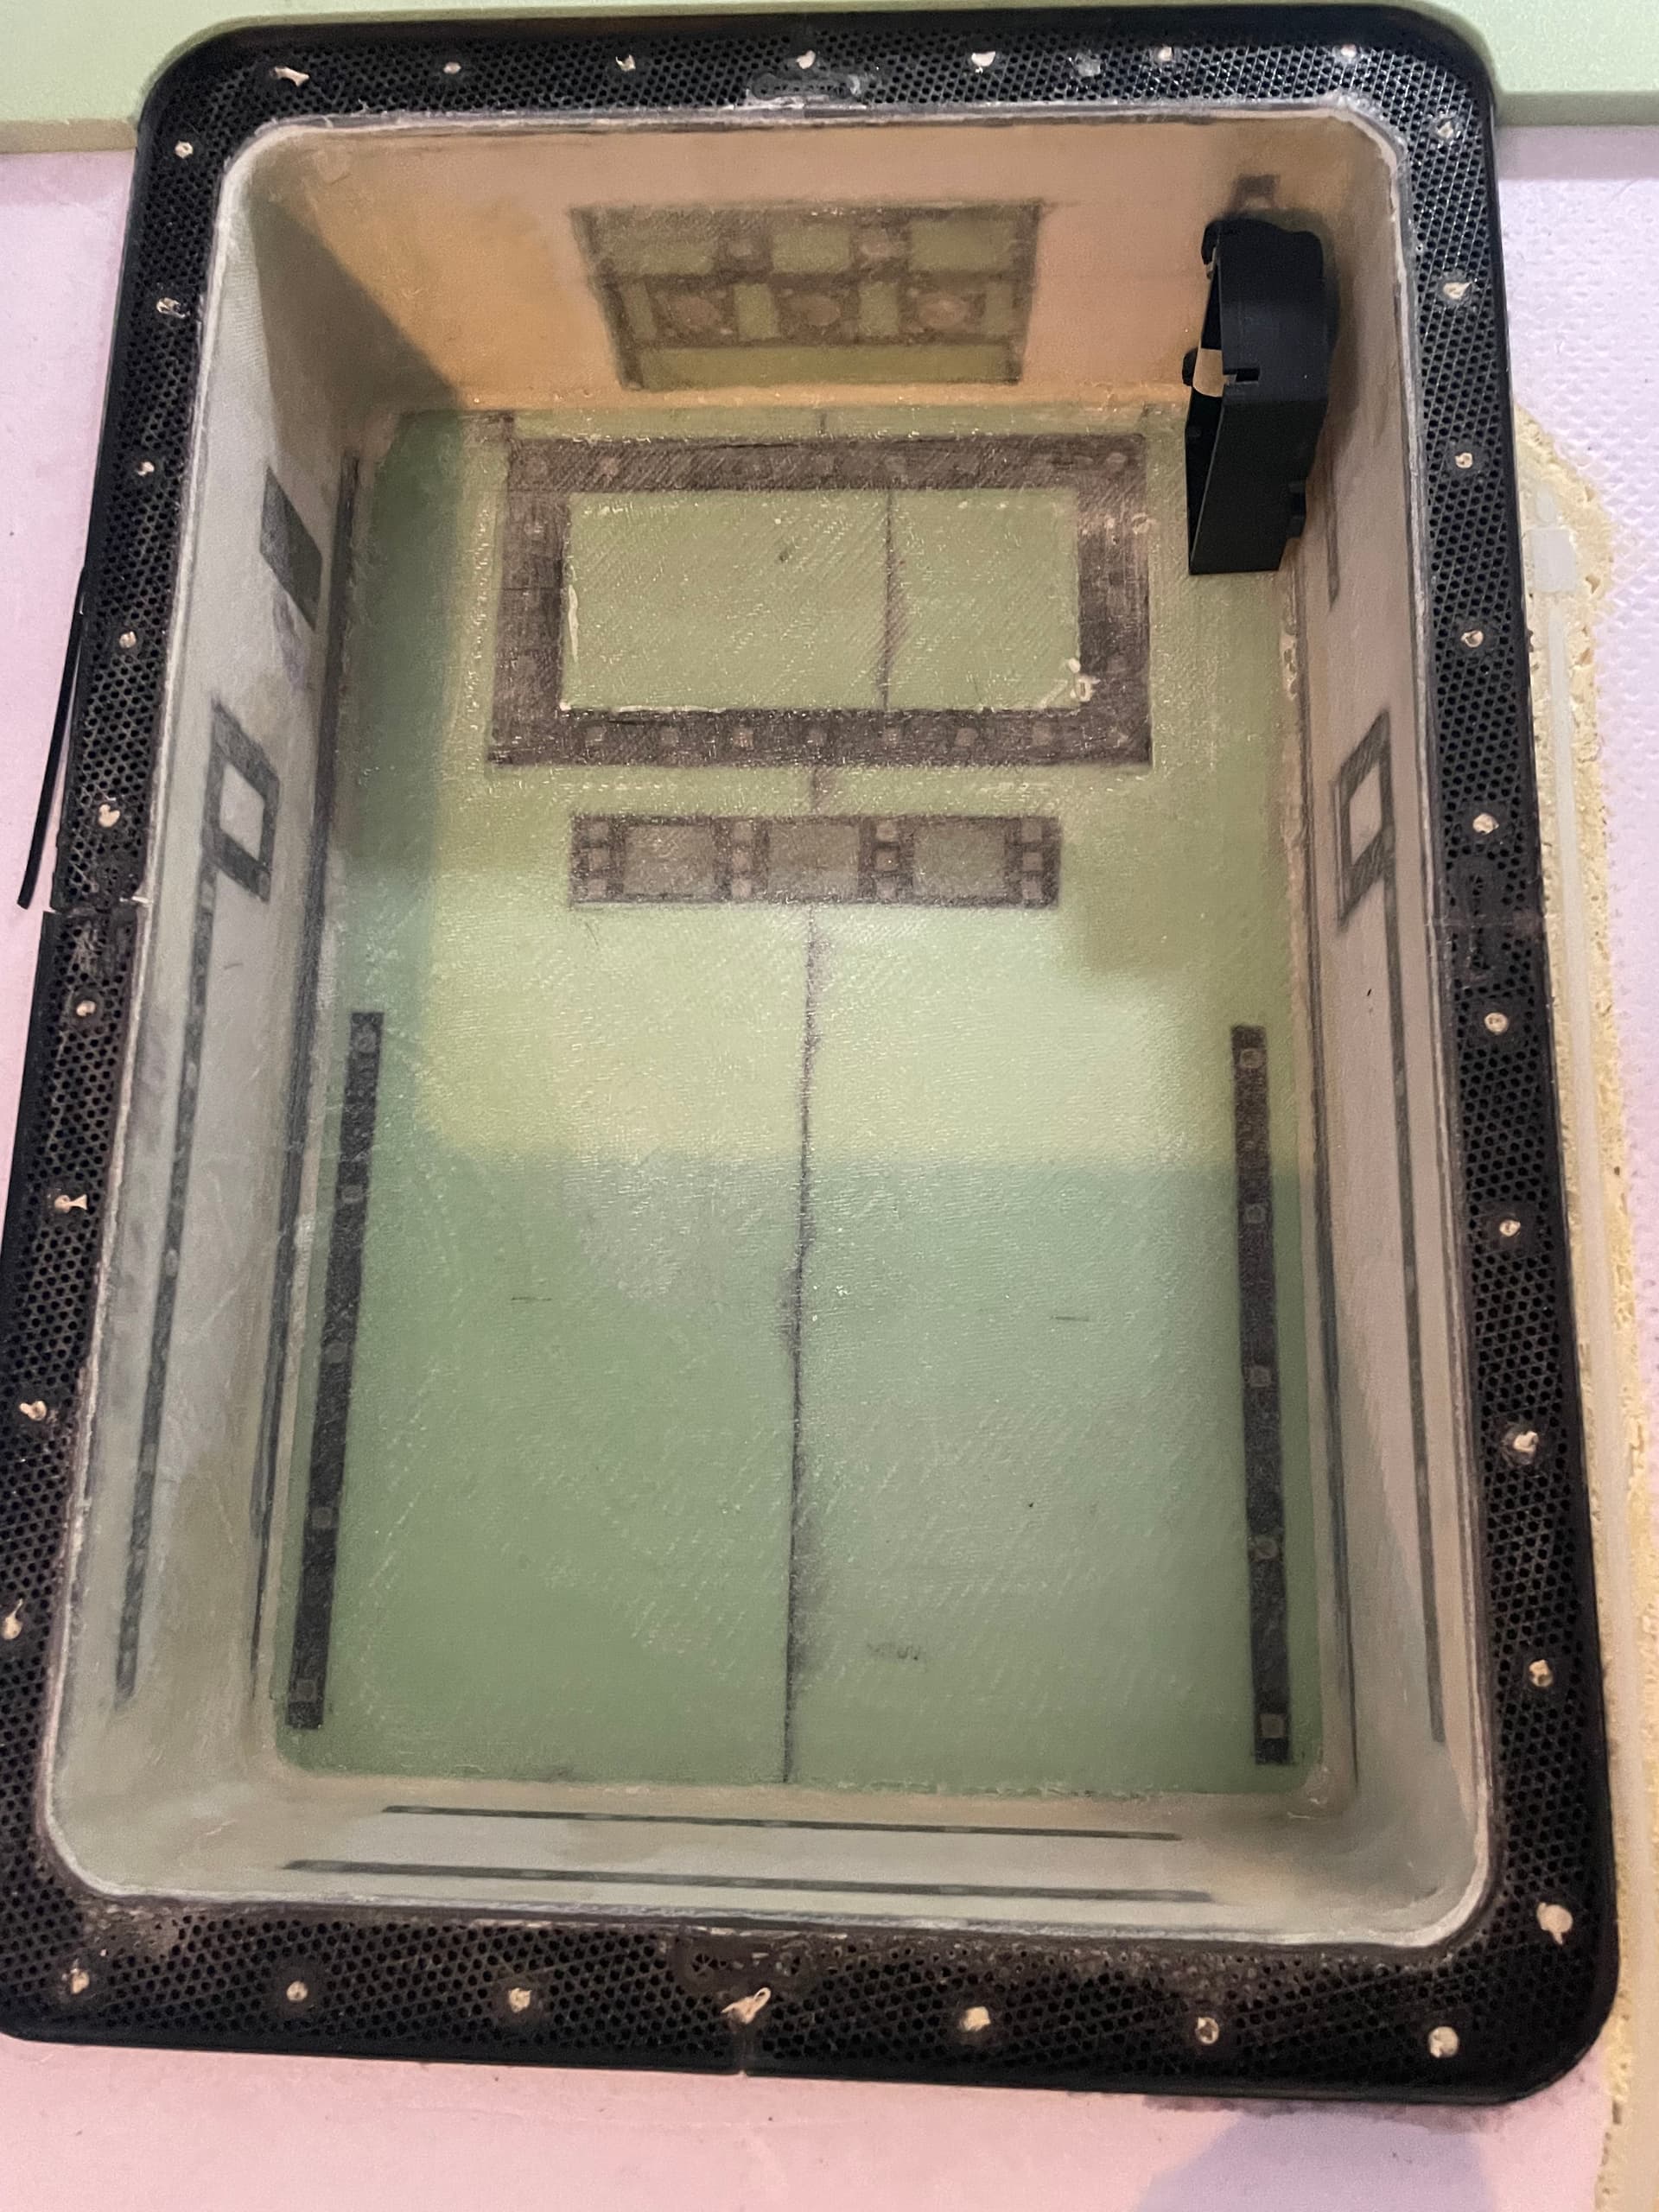
Laminated the inside of the compartment with 2x 280g glass. Reason for glass is transparency to find the inserts!
 ![IMG_3943](https://foil.zone/uploads/default/original/3X/0/c/0cb80f9f8661bcb3512ae96ea37020adff88e4e6.jpeg)  
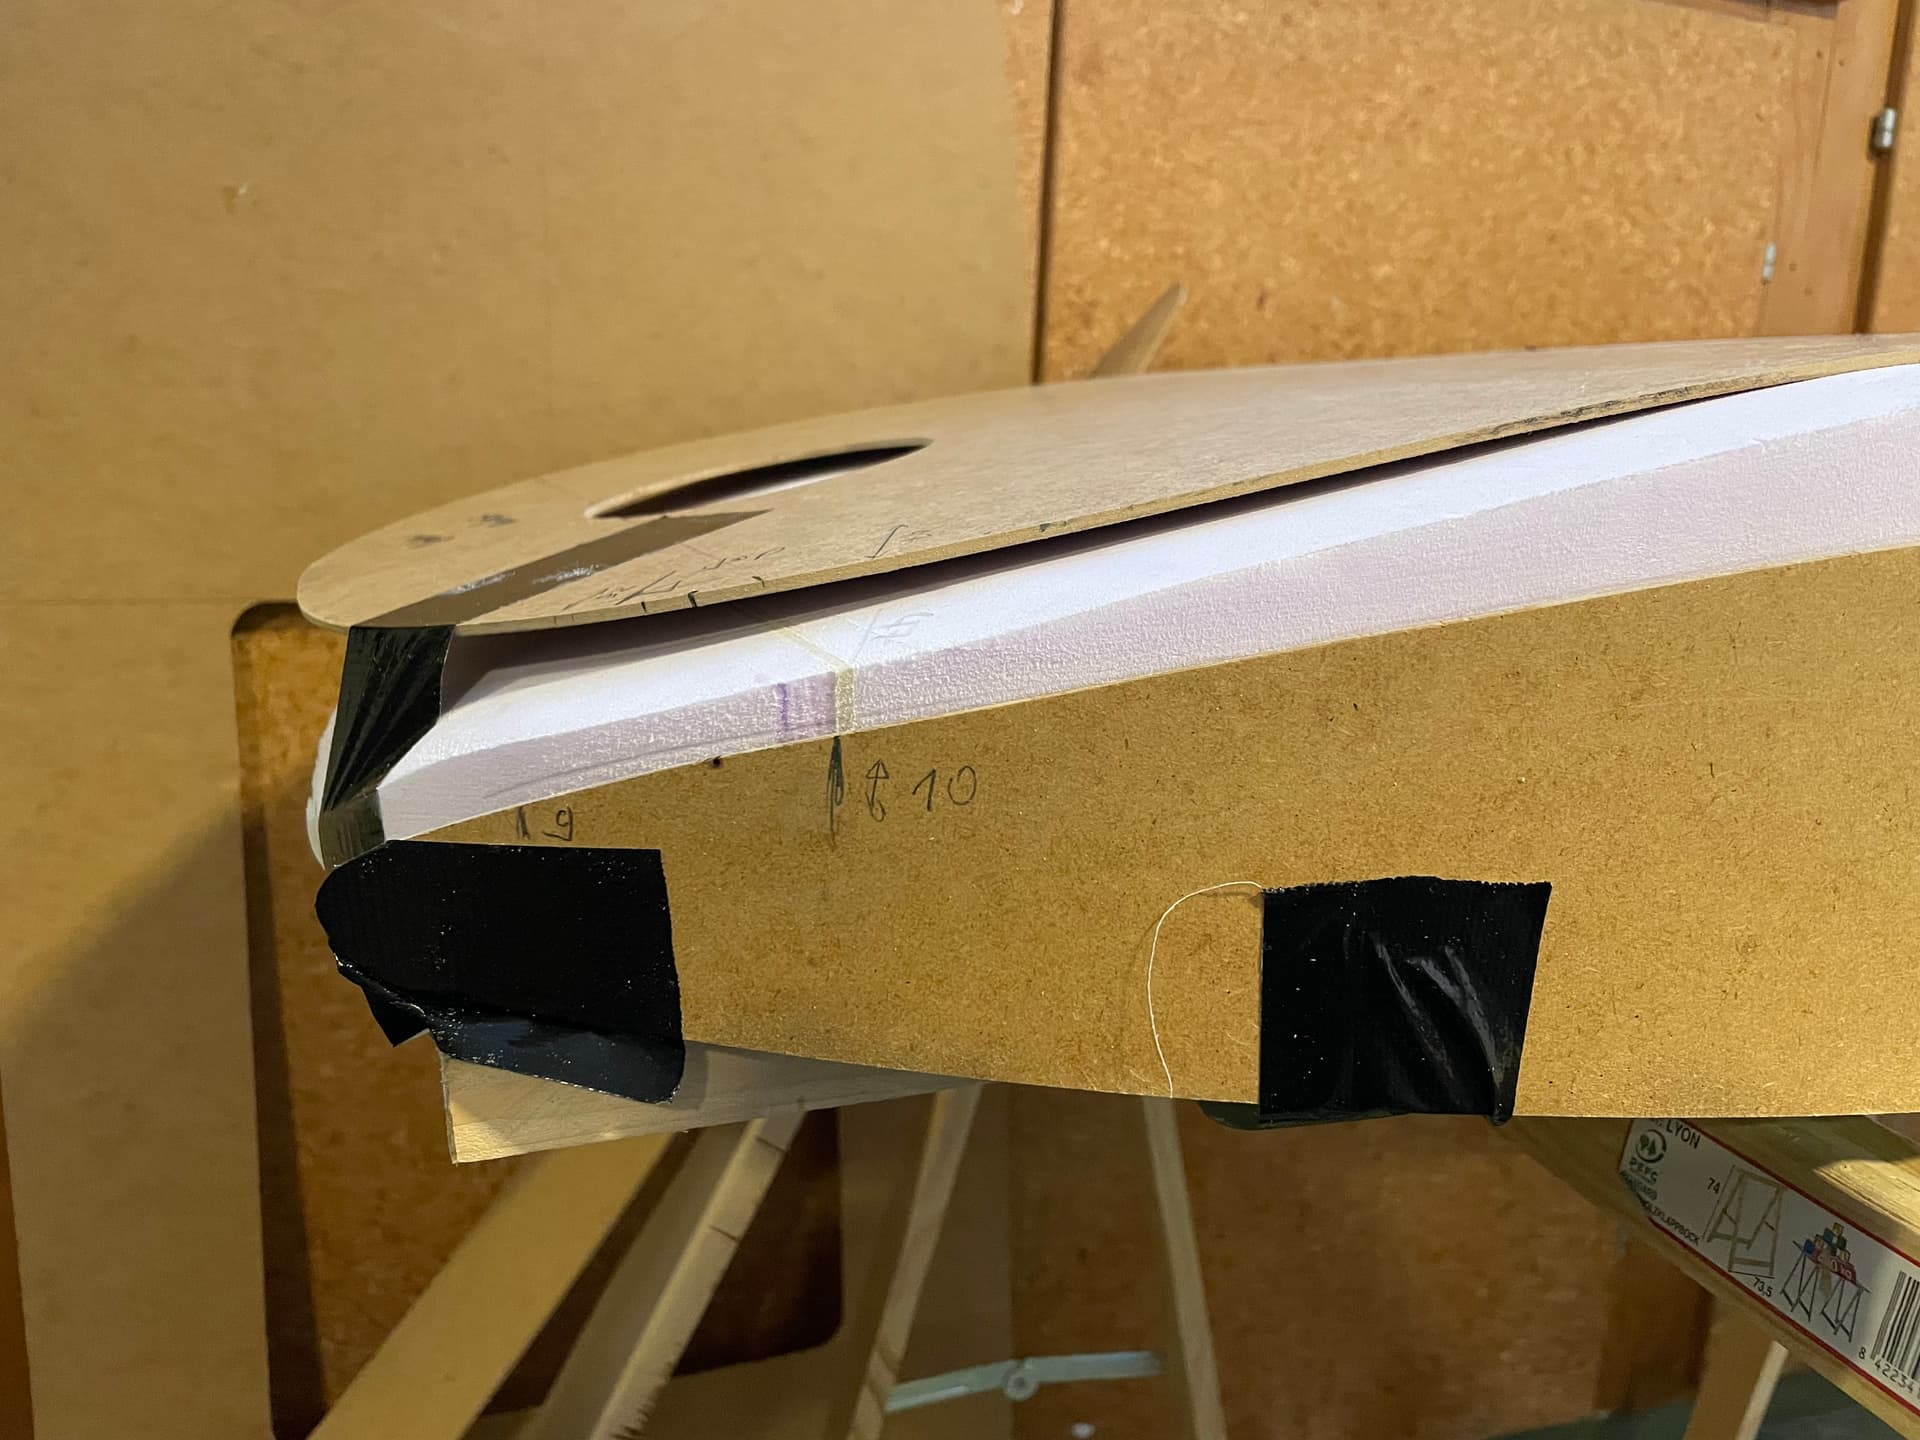
Cut the outline with hot wire

 ![IMG_3953](https://foil.zone/uploads/default/original/3X/2/8/2883e6521244210386e7dd76108a17112c94c57c.jpeg)  
Shaped the rails (cut and sanded)

 ![IMG_3954](https://foil.zone/uploads/default/original/3X/d/9/d9873b64c001d597091bc40751468f28931d77c0.jpeg)

 ![IMG_3955](https://foil.zone/uploads/default/original/3X/d/9/d9a2ac43b6989a05e31d1bc673145ac5307ba540.jpeg)

 ![IMG_E3972](https://foil.zone/uploads/default/original/3X/6/a/6a856cdcc0cd4c7b937734879c30f5ec9f151631.jpeg)

 ![IMG_E3966](https://foil.zone/uploads/default/original/3X/1/e/1eb27b9f18502e20fcc96ca780b823caaff364ac.jpeg)  
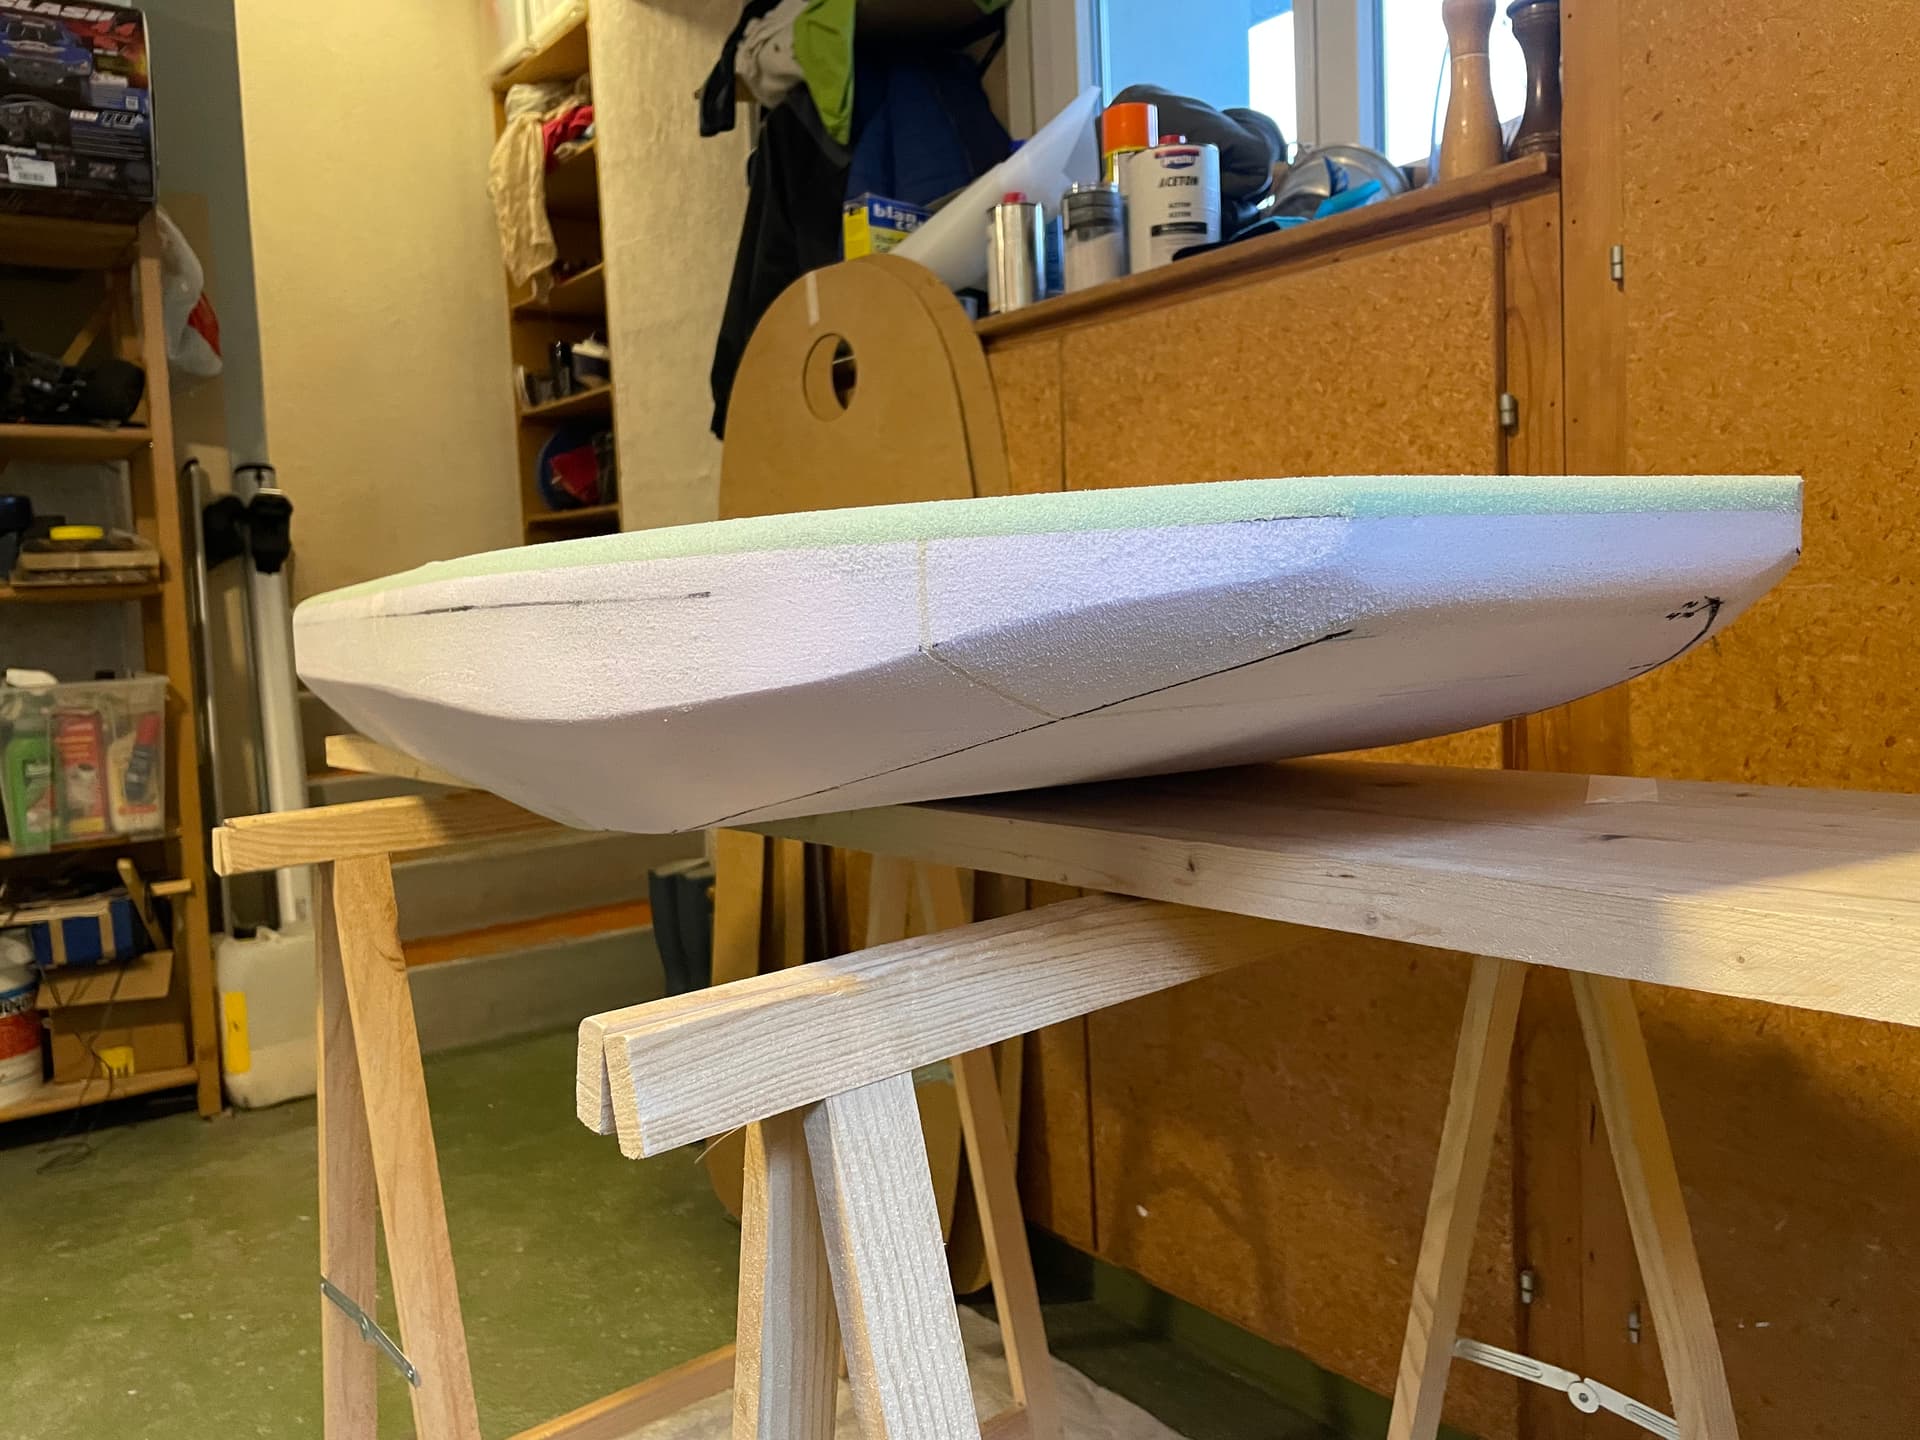
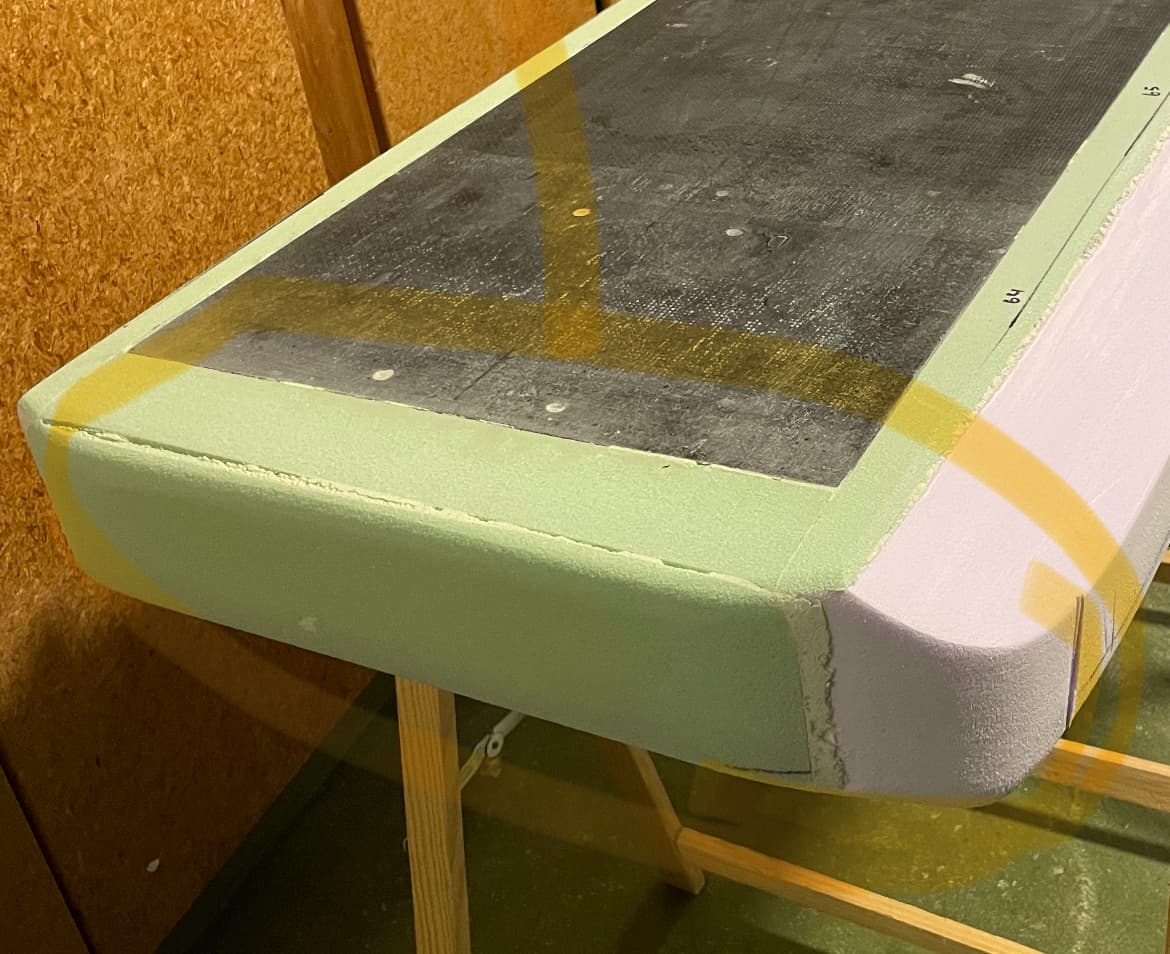
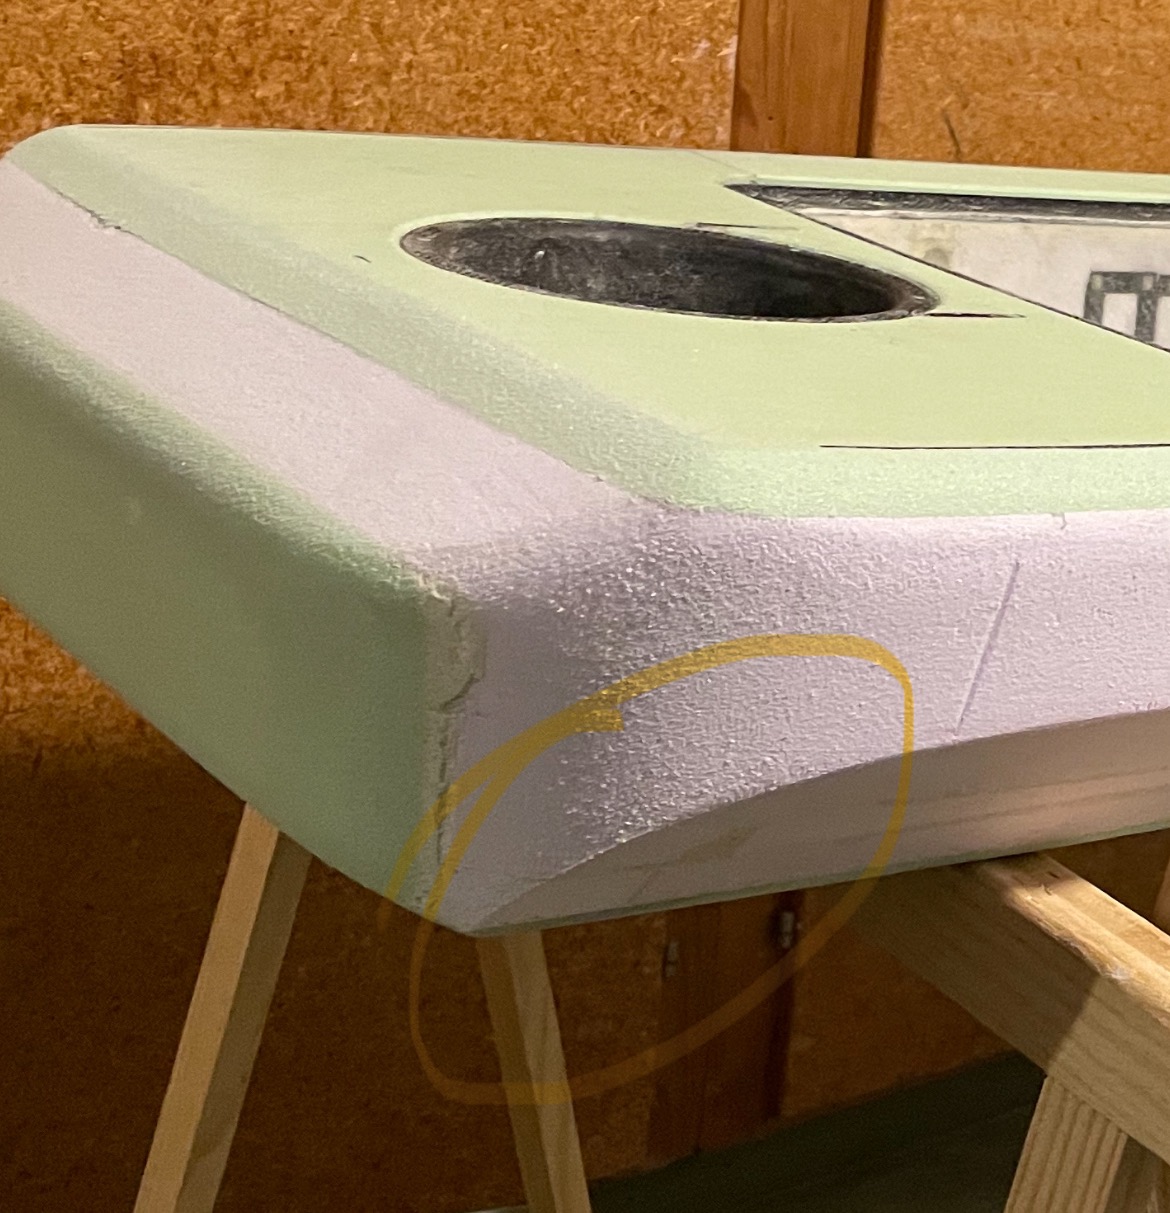
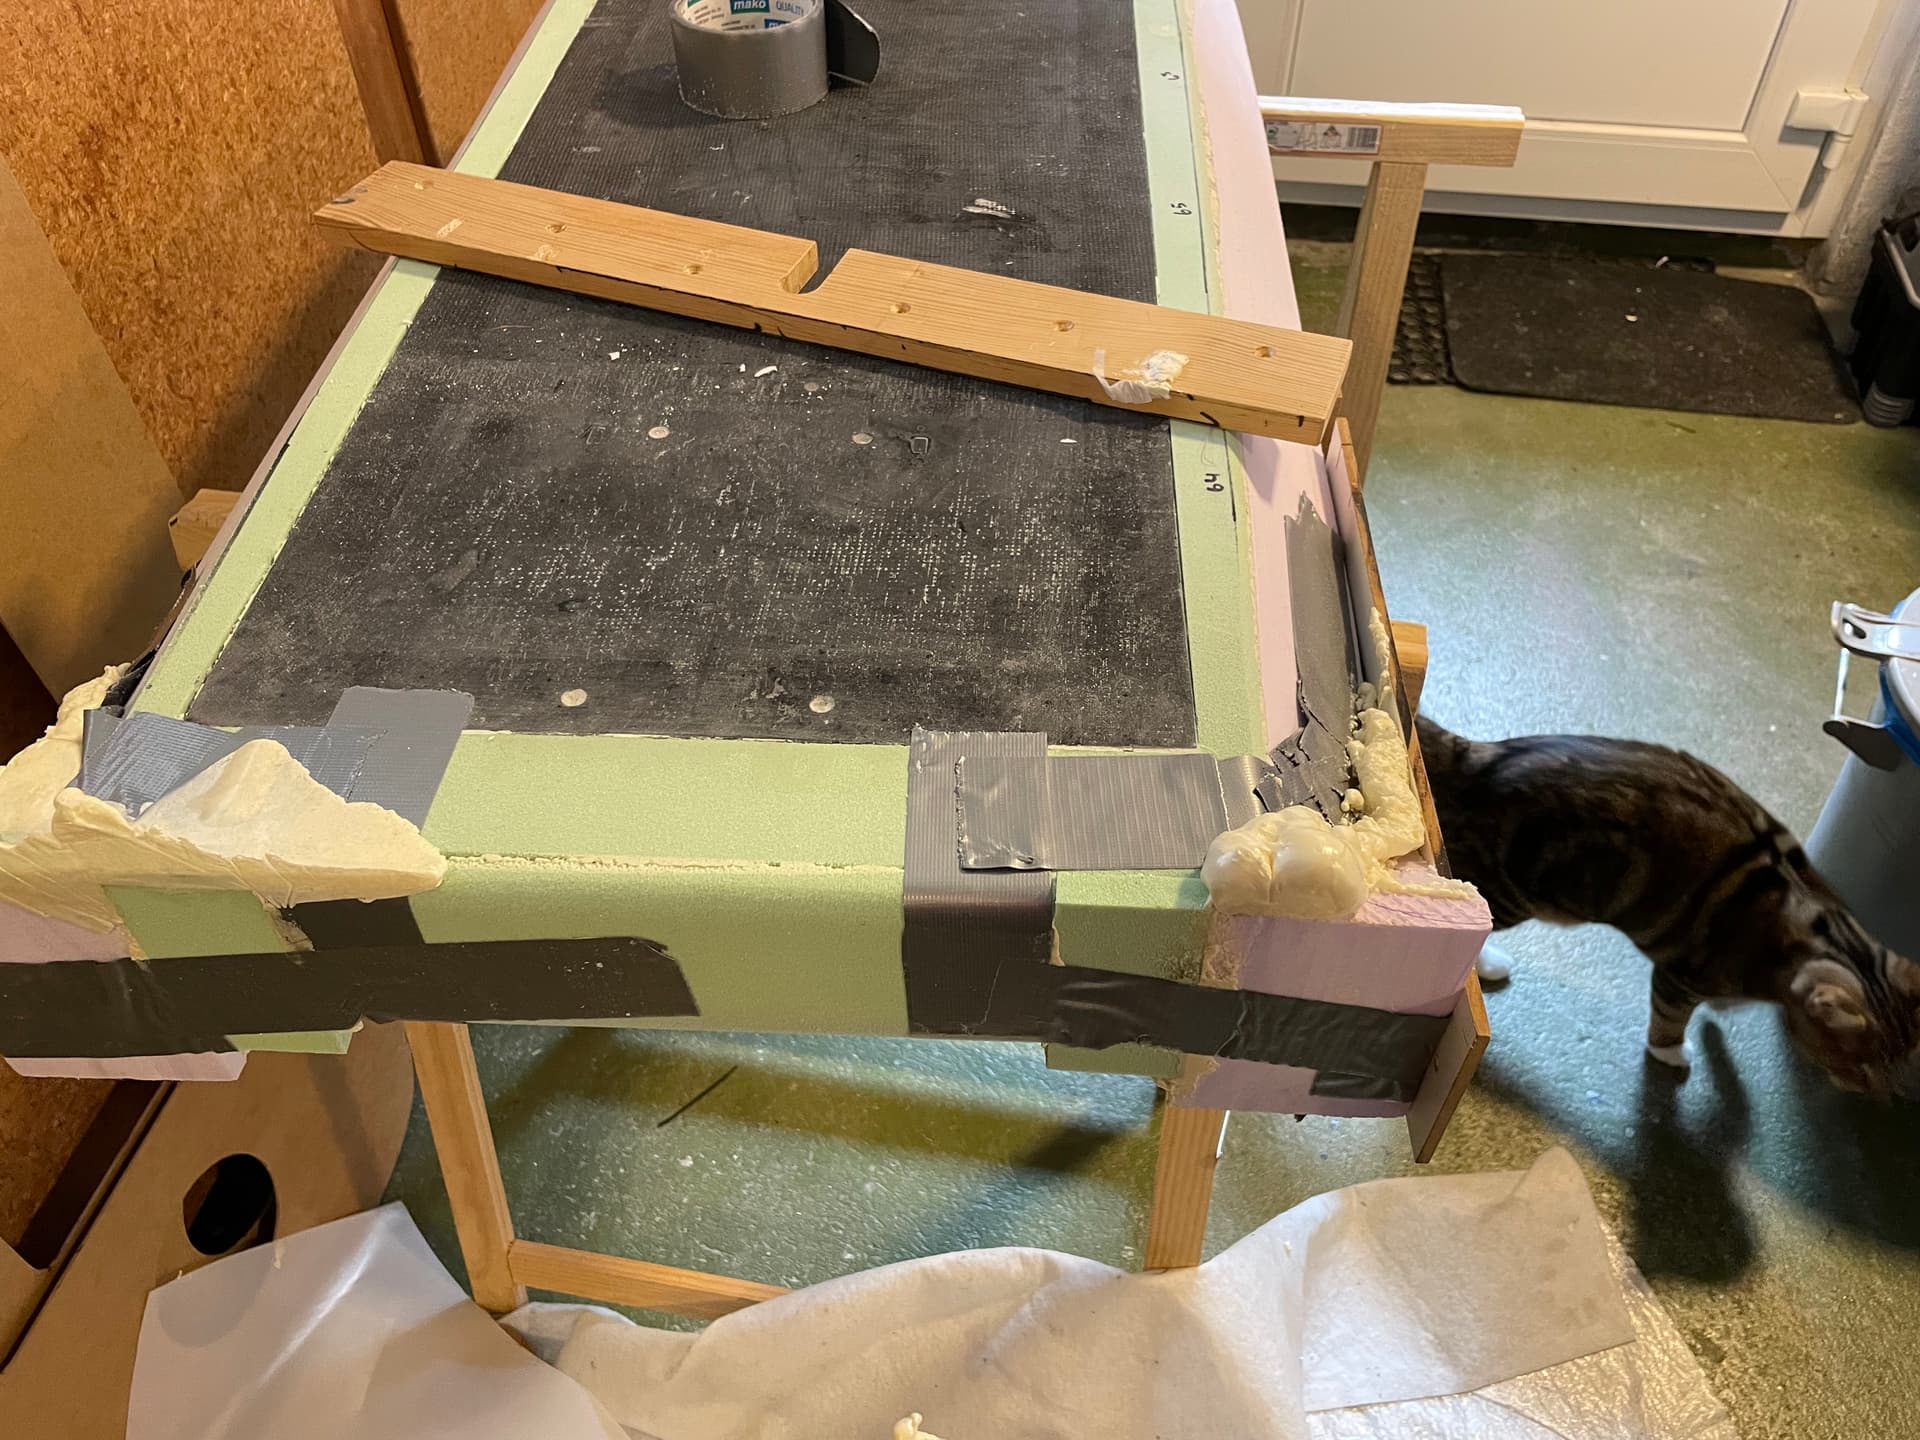
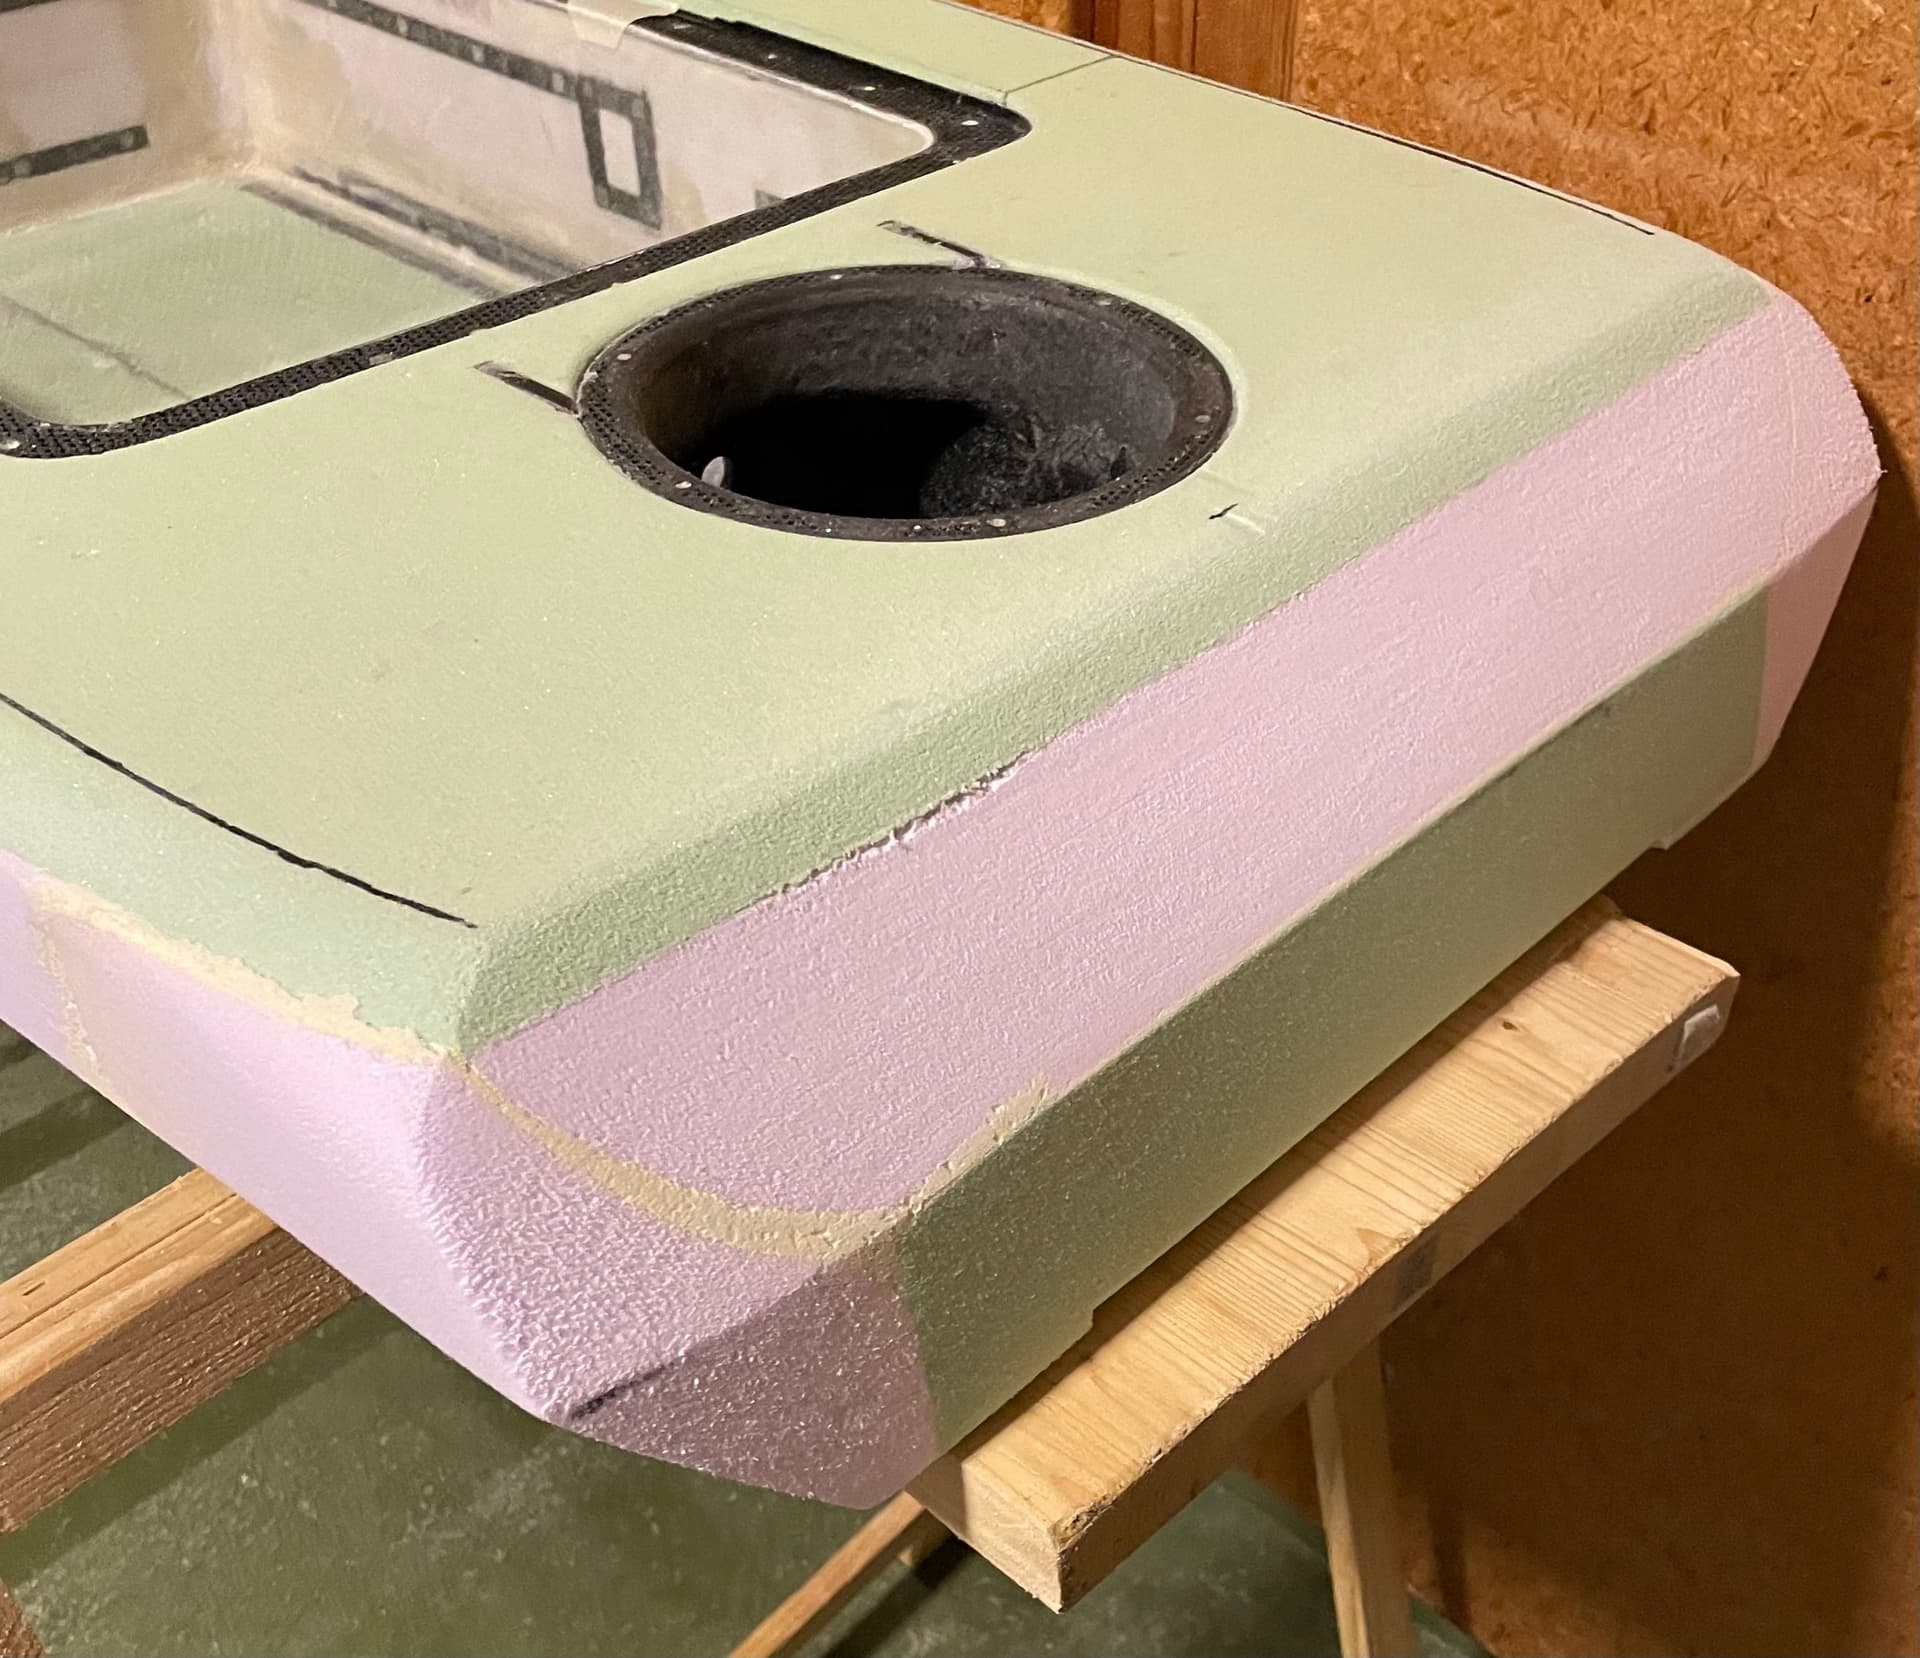
I did not like the shape of the back, the round corners of the template were a mistake
 ![IMG_3987](https://foil.zone/uploads/default/original/3X/9/3/938bb26b422d3dbf07f7d03d7e9facfe0b65729d.jpeg)  
I had to change it! glued some pieces with 1k foam
 ![IMG_E3993](https://foil.zone/uploads/default/original/3X/8/5/856844e5d67b1649c54dd8c0dd7ce0d6549509a5.jpeg)  
better

---

<div class="post-metadata">

### Author: ![Windigo](https://foil.zone/letter_avatar_proxy/v4/letter/w/9e8a1a/32.png) [@Windigo](https://foil.zone/u/Windigo)
#### Post date: [January 14, 2024, 2:20pm UTC](https://foil.zone/t/daniels-2nd-build/19956/5 "2024-01-14T14:20:29Z")

</div>

Wow your building everything from scratch that deserves respect!

---

<div class="post-metadata">

### Author: ![WeightShift](https://foil.zone/user_avatar/foil.zone/weightshift/32/42931_2.png) [@WeightShift](https://foil.zone/u/WeightShift)
#### Post date: [February 6, 2024, 6:31pm UTC](https://foil.zone/t/daniels-2nd-build/19956/6 "2024-02-06T18:31:41Z")

</div>

Amazing. Awesome detail - thanks for sharing!

---

<div class="post-metadata">

### Author: ![sat\_be](https://foil.zone/user_avatar/foil.zone/sat_be/32/35523_2.png) [@sat\_be](https://foil.zone/u/sat_be)
#### Post date: [May 6, 2024, 11:18pm UTC](https://foil.zone/t/daniels-2nd-build/19956/7 "2024-05-06T23:18:18Z")

</div>

Update:  
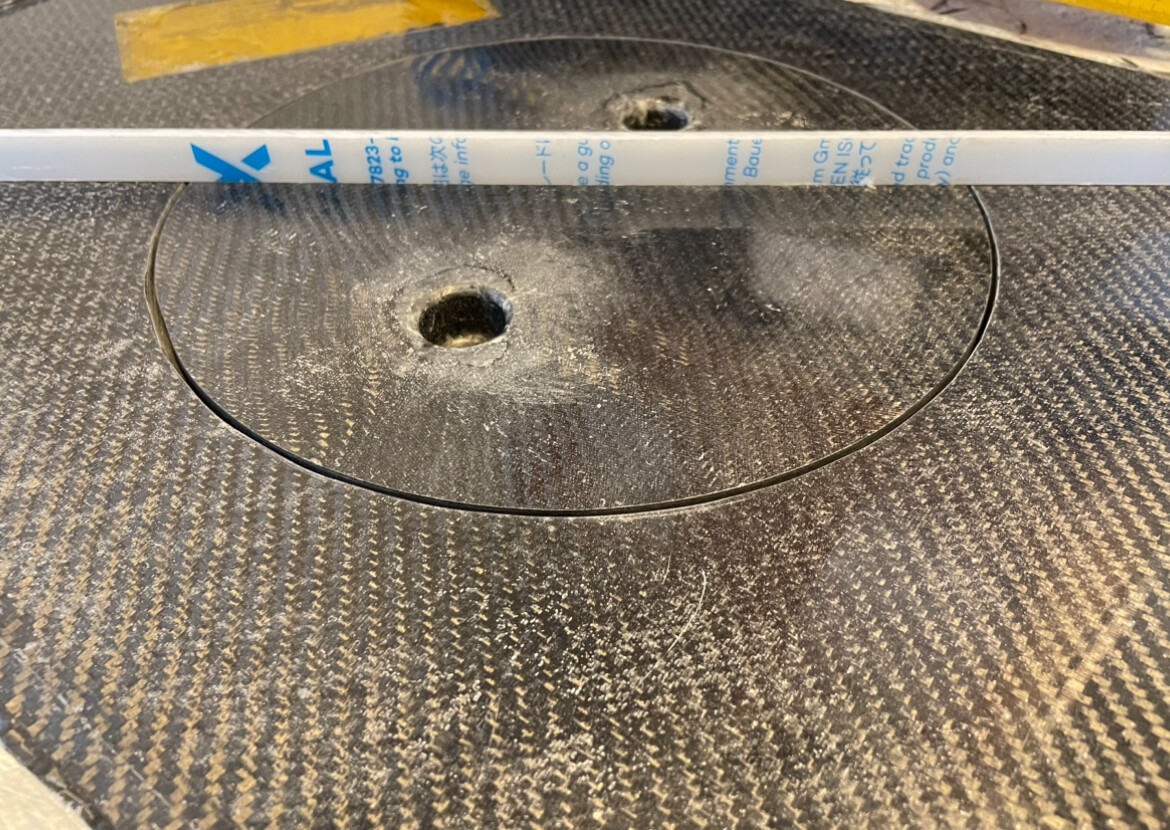
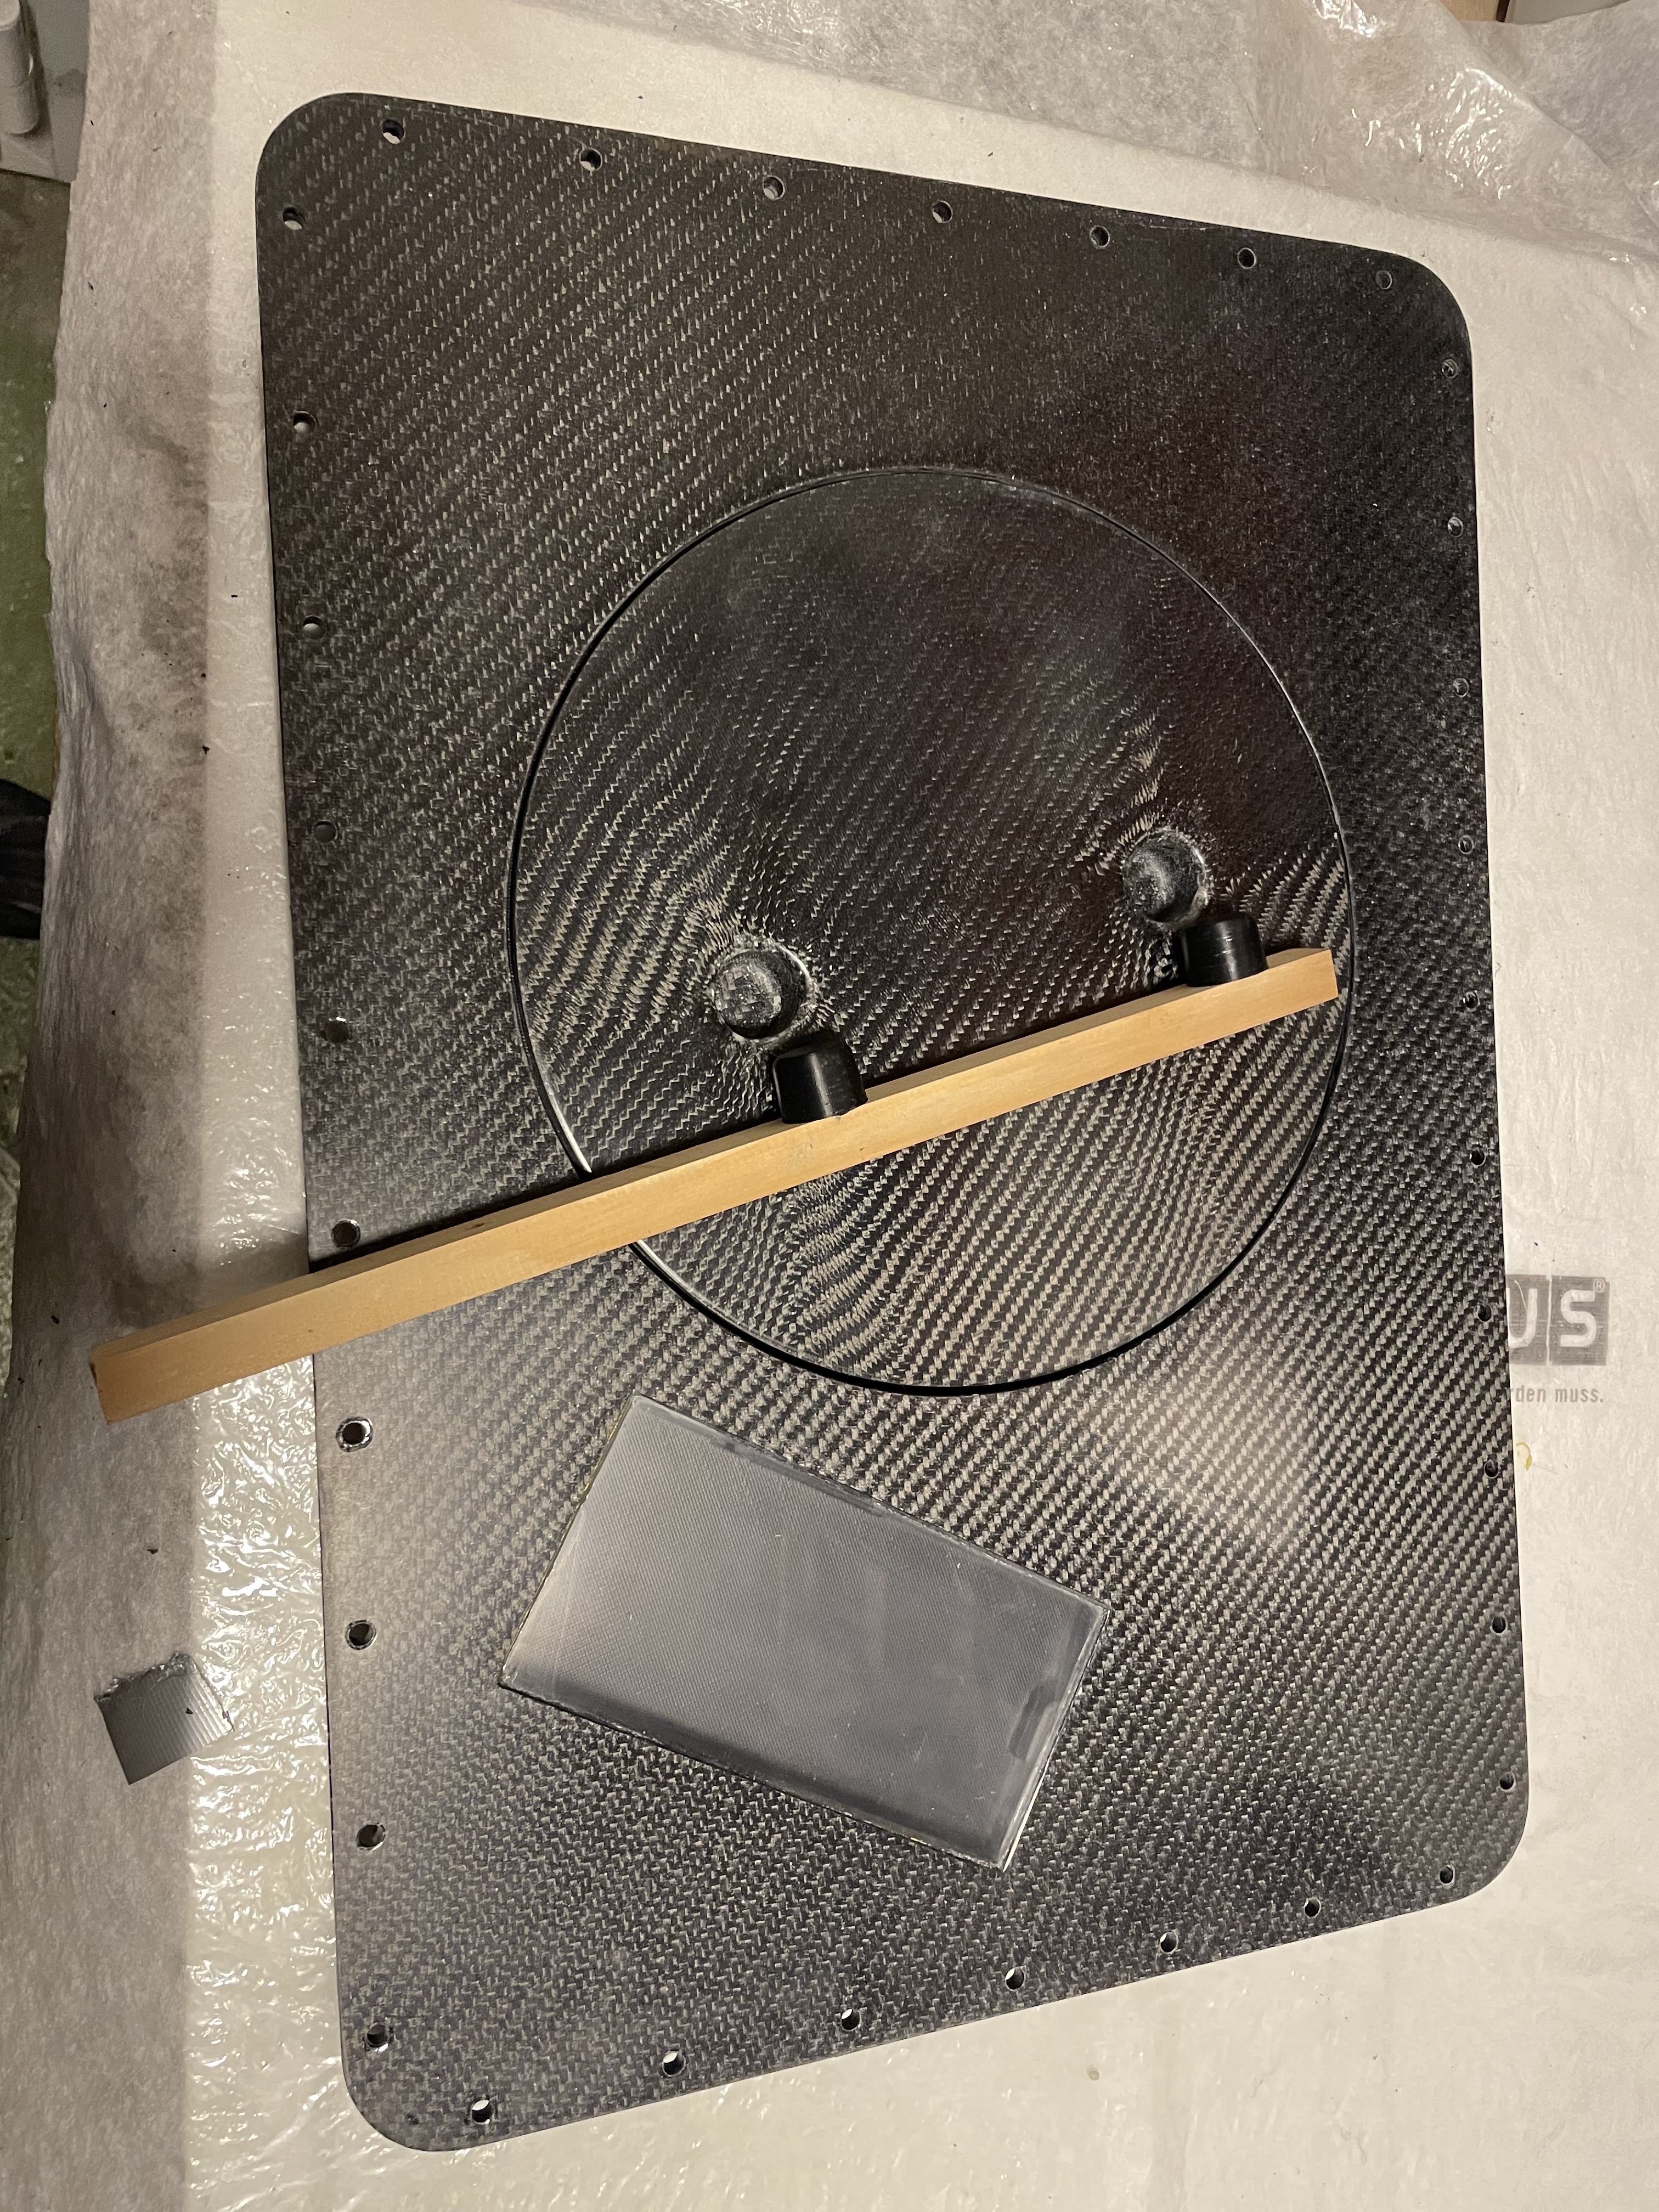
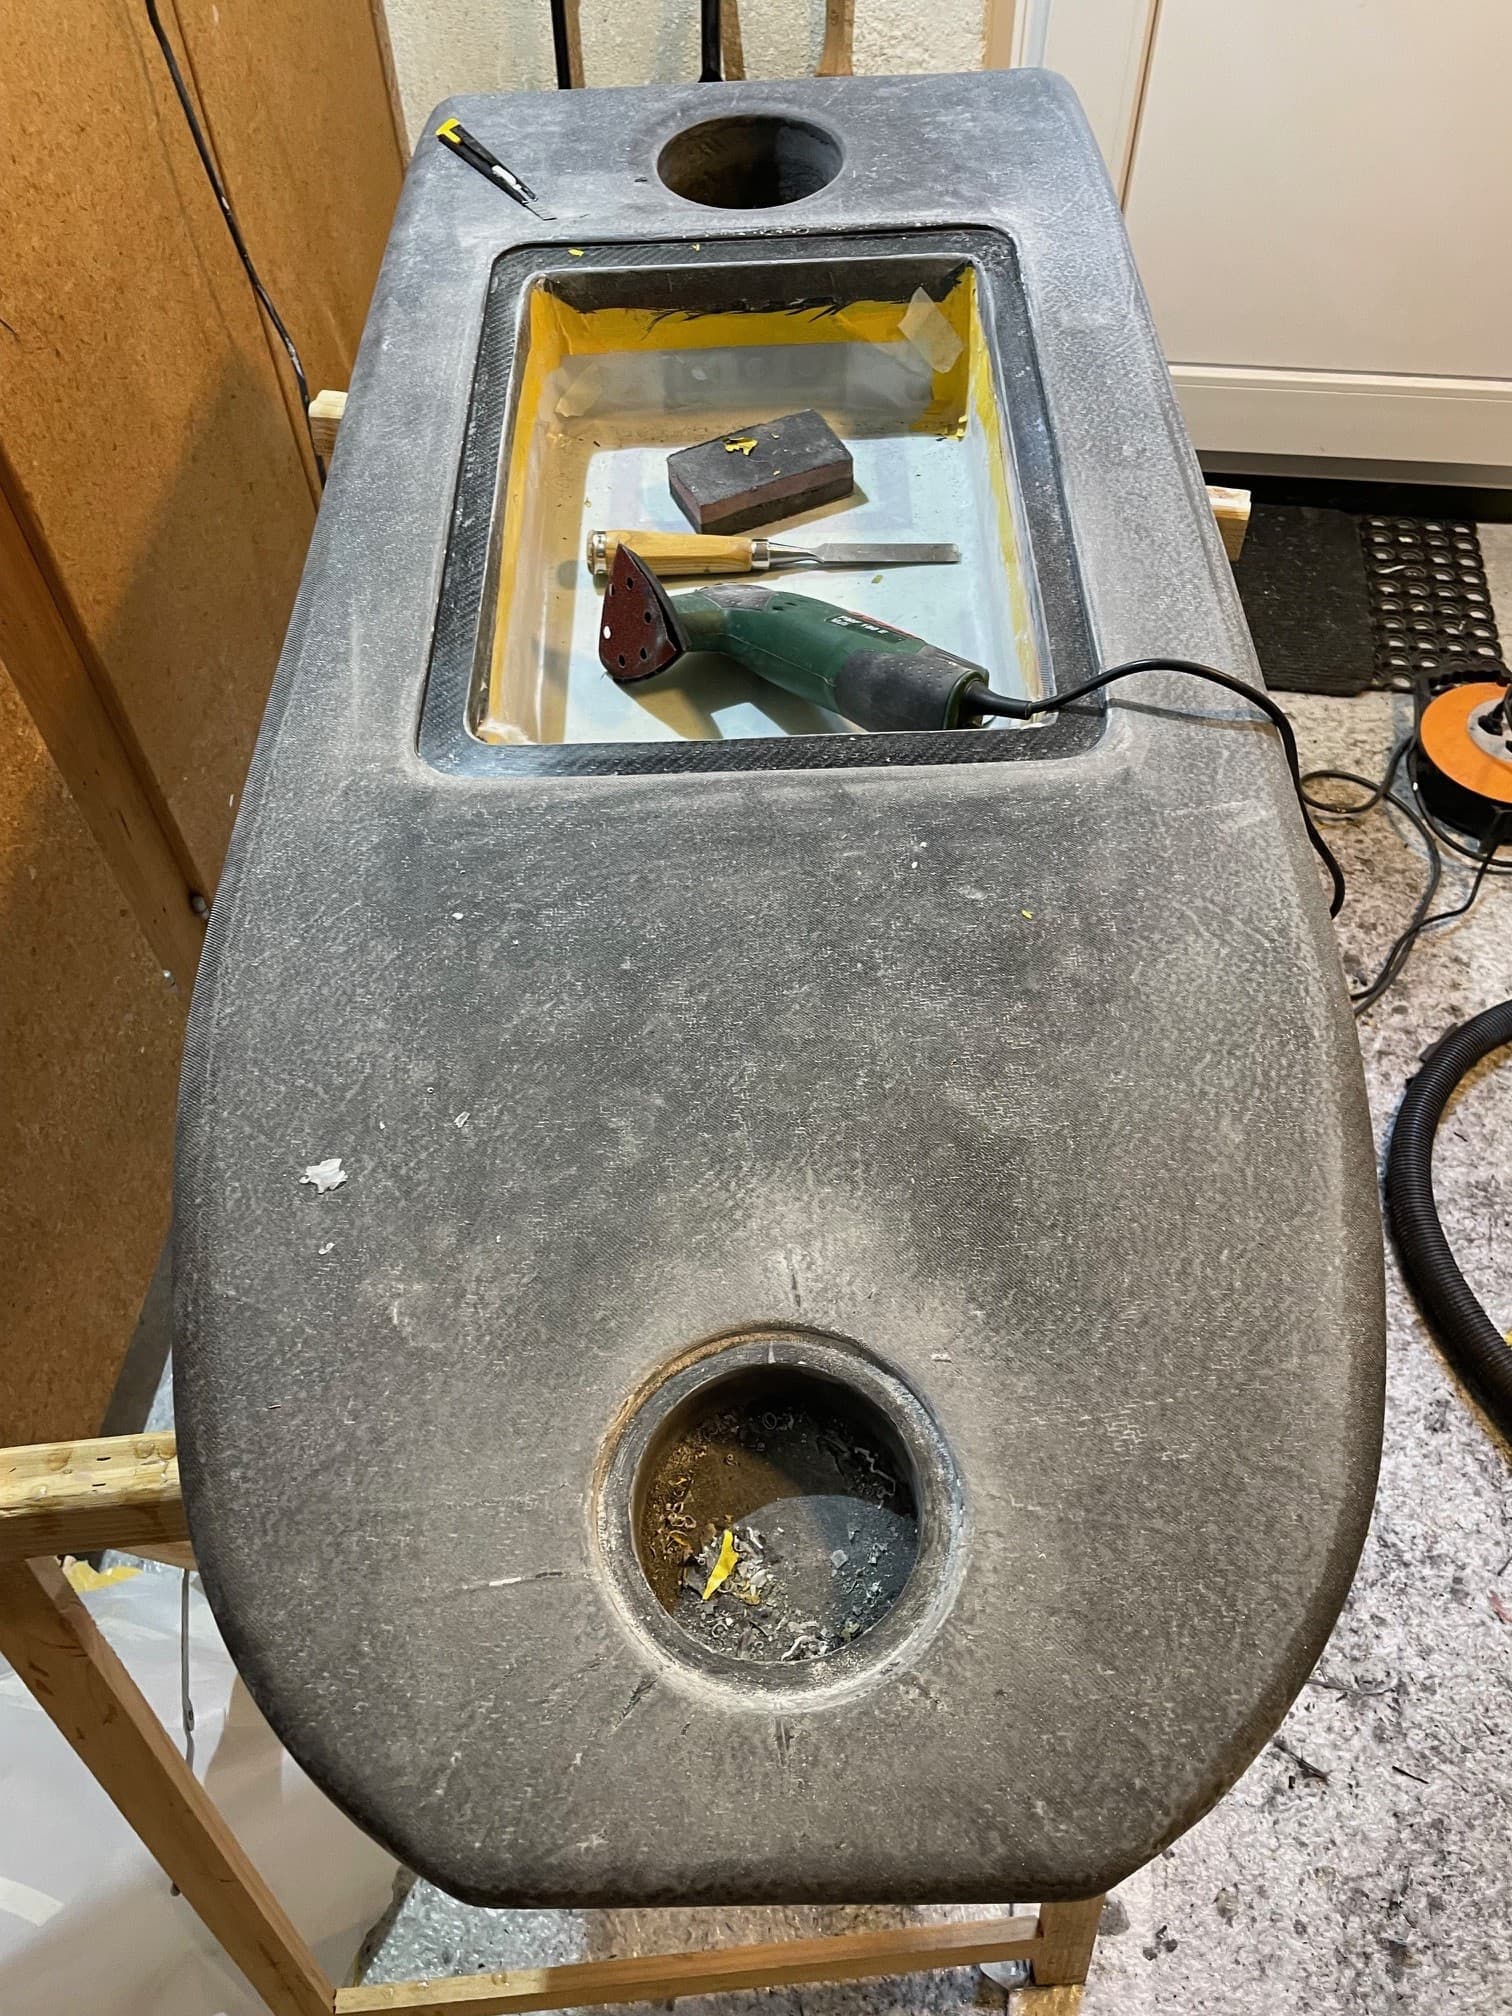
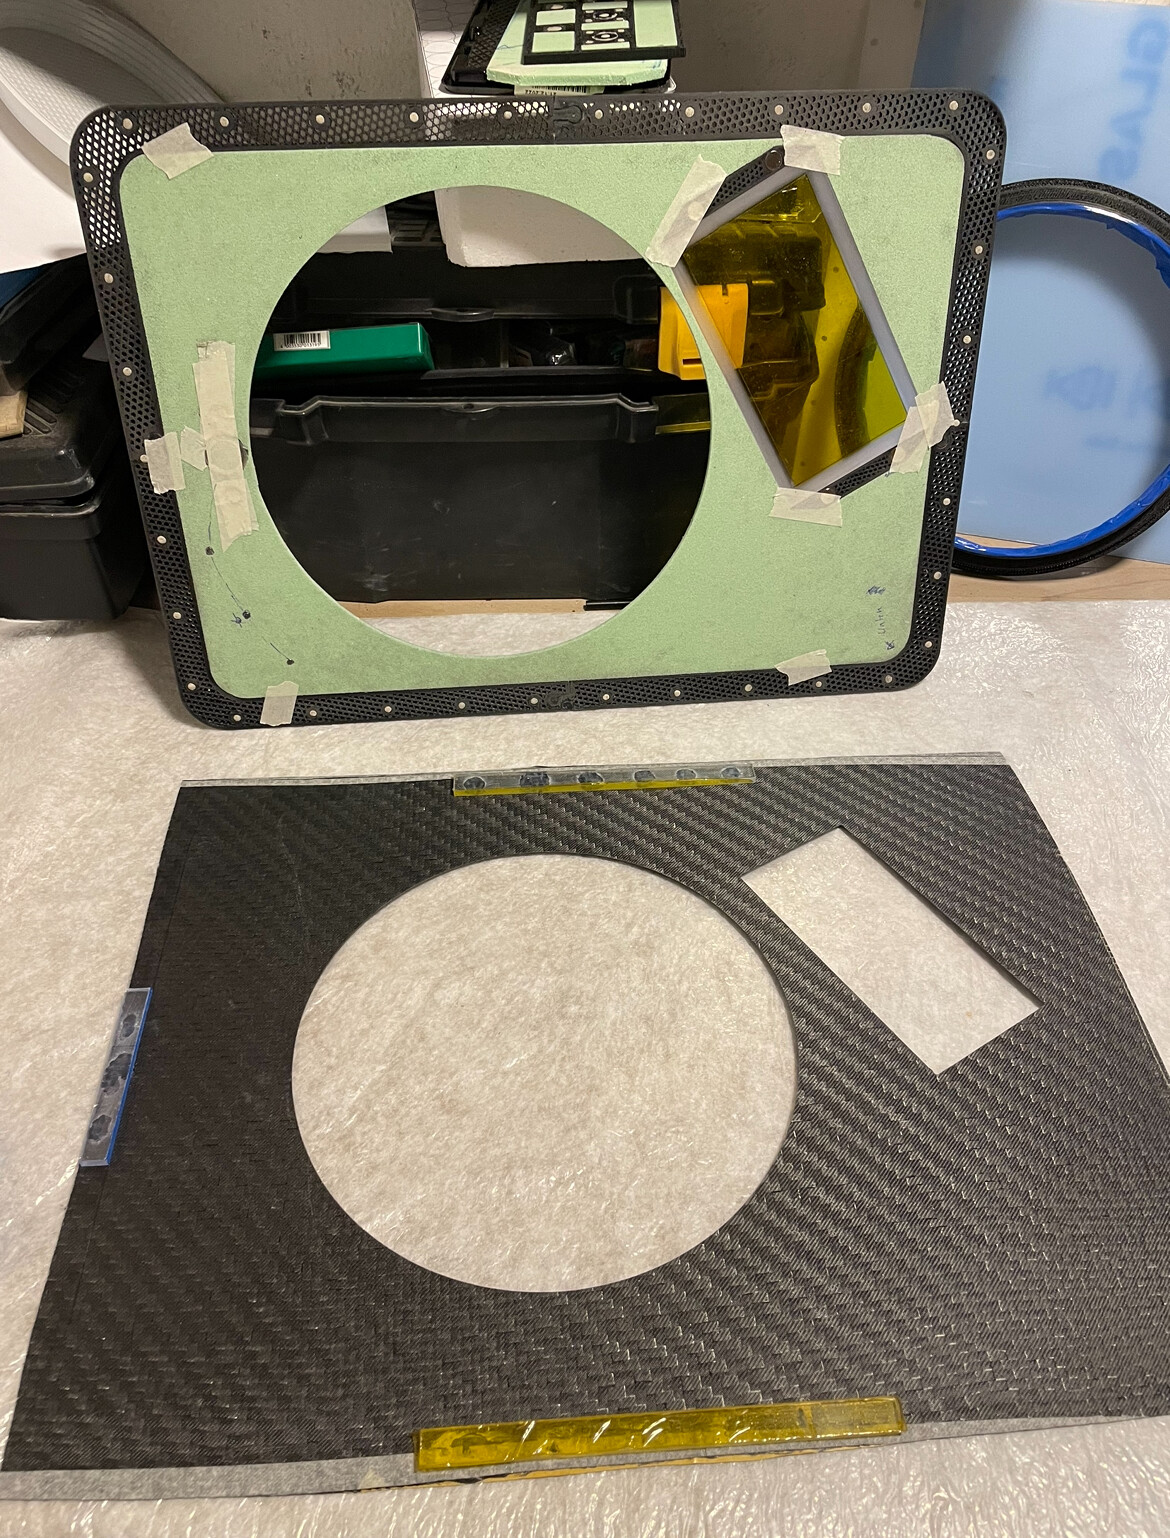
I like the screw hatch design from my first build but there is a limitation in size of the commercial ones available. Therefore I built my own screw hatch. It has an M240x6mm thread with an opening of 234mm. printed in ASA-X

 ![IMG_4846](https://foil.zone/uploads/default/original/3X/f/0/f0c9669e63d2b8c4cd6fe02e6f3e1723f9b3aa62.jpeg)  
 ![IMG_4849](https://foil.zone/uploads/default/original/3X/8/e/8ee7b0497cc48e00e3938ccb25f4a35fb75e51f7.jpeg)  
 ![IMG_4851](https://foil.zone/uploads/default/original/3X/1/e/1ee1cdb9e112b84e8af5d21780e2c8c4691a5f59.jpeg)

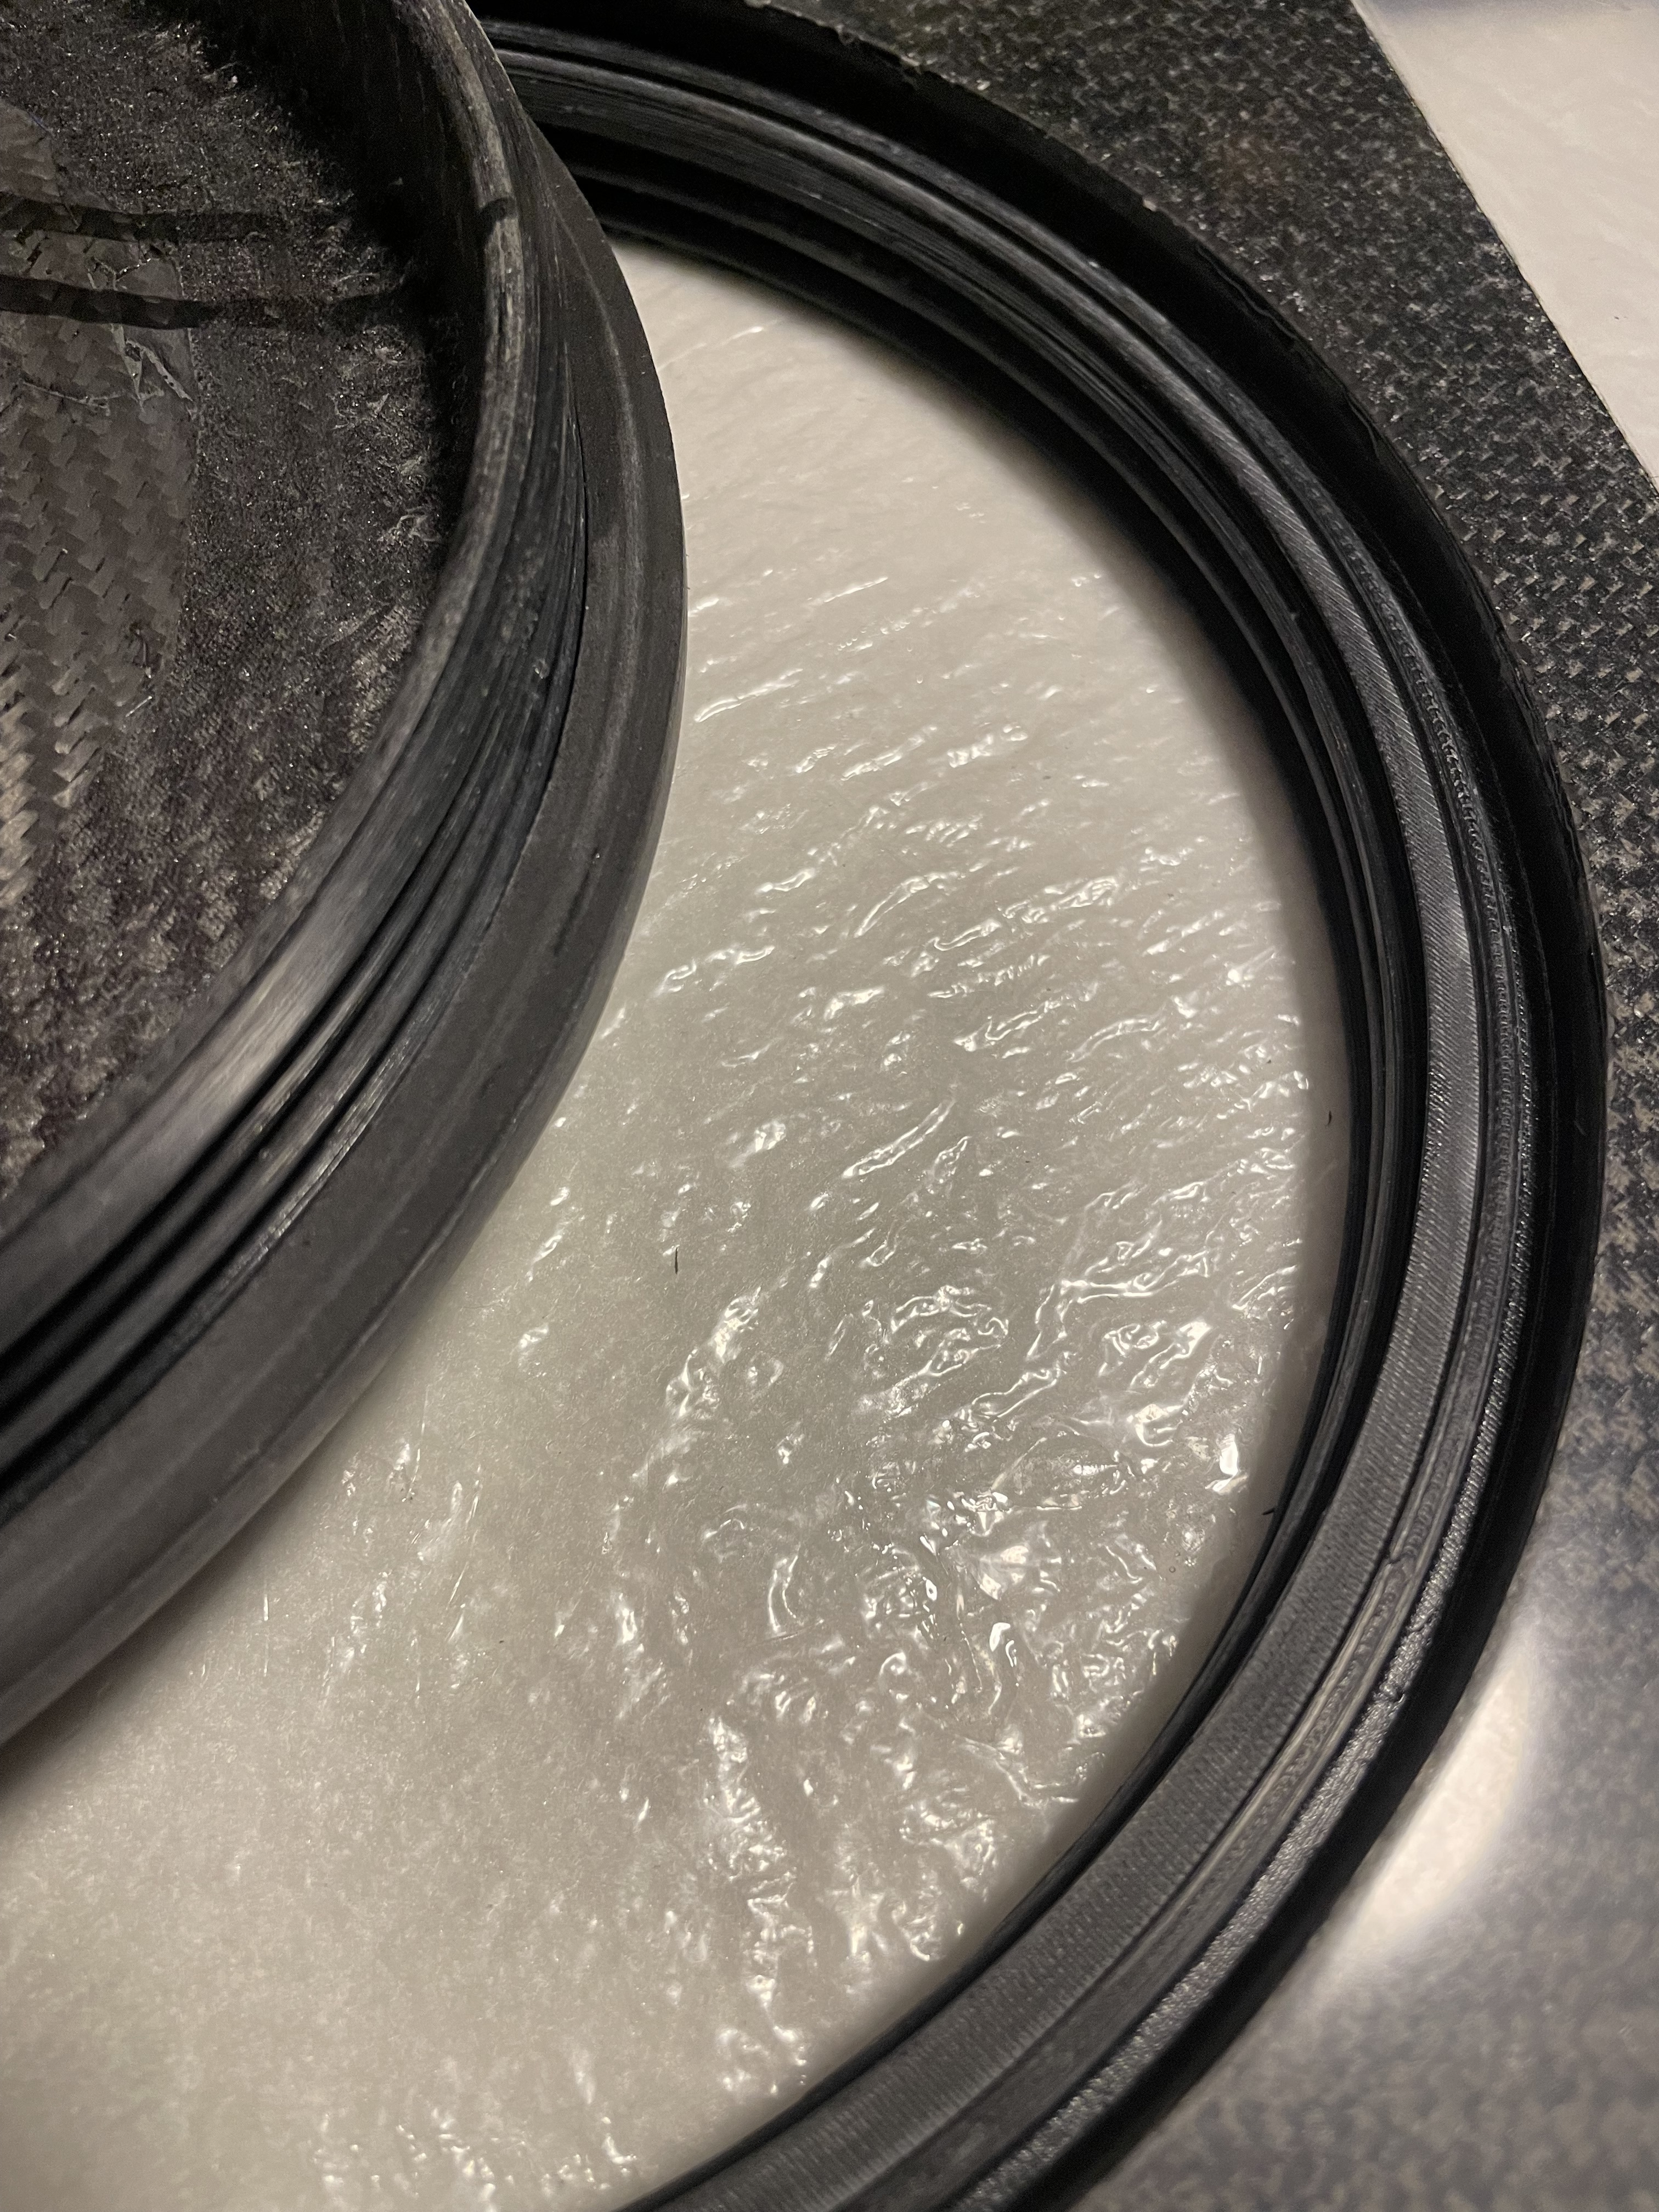
The epdm seal sits on the bottom side of the lid.
 ![IMG_4786](https://foil.zone/uploads/default/original/3X/9/c/9cd54d280f550717ae5a76bdd2ebb80b69af3383.jpeg)  
 ![IMG_4789](https://foil.zone/uploads/default/original/3X/0/b/0b9484cb388a54fb754a18635300a0cf6c85ce2a.jpeg)

Magnetic phone holder

 ![IMG_4787](https://foil.zone/uploads/default/original/3X/2/f/2fed475e39eb8558d8bee4da28b7de3f6b528cce.jpeg)

The result is a screw hatch that is flush with the deck.

---

<div class="post-metadata">

### Author: ![sat\_be](https://foil.zone/user_avatar/foil.zone/sat_be/32/35523_2.png) [@sat\_be](https://foil.zone/u/sat_be)
#### Post date: [May 8, 2024, 10:40pm UTC](https://foil.zone/t/daniels-2nd-build/19956/8 "2024-05-08T22:40:19Z")

</div>

Some more pictures of my progress:

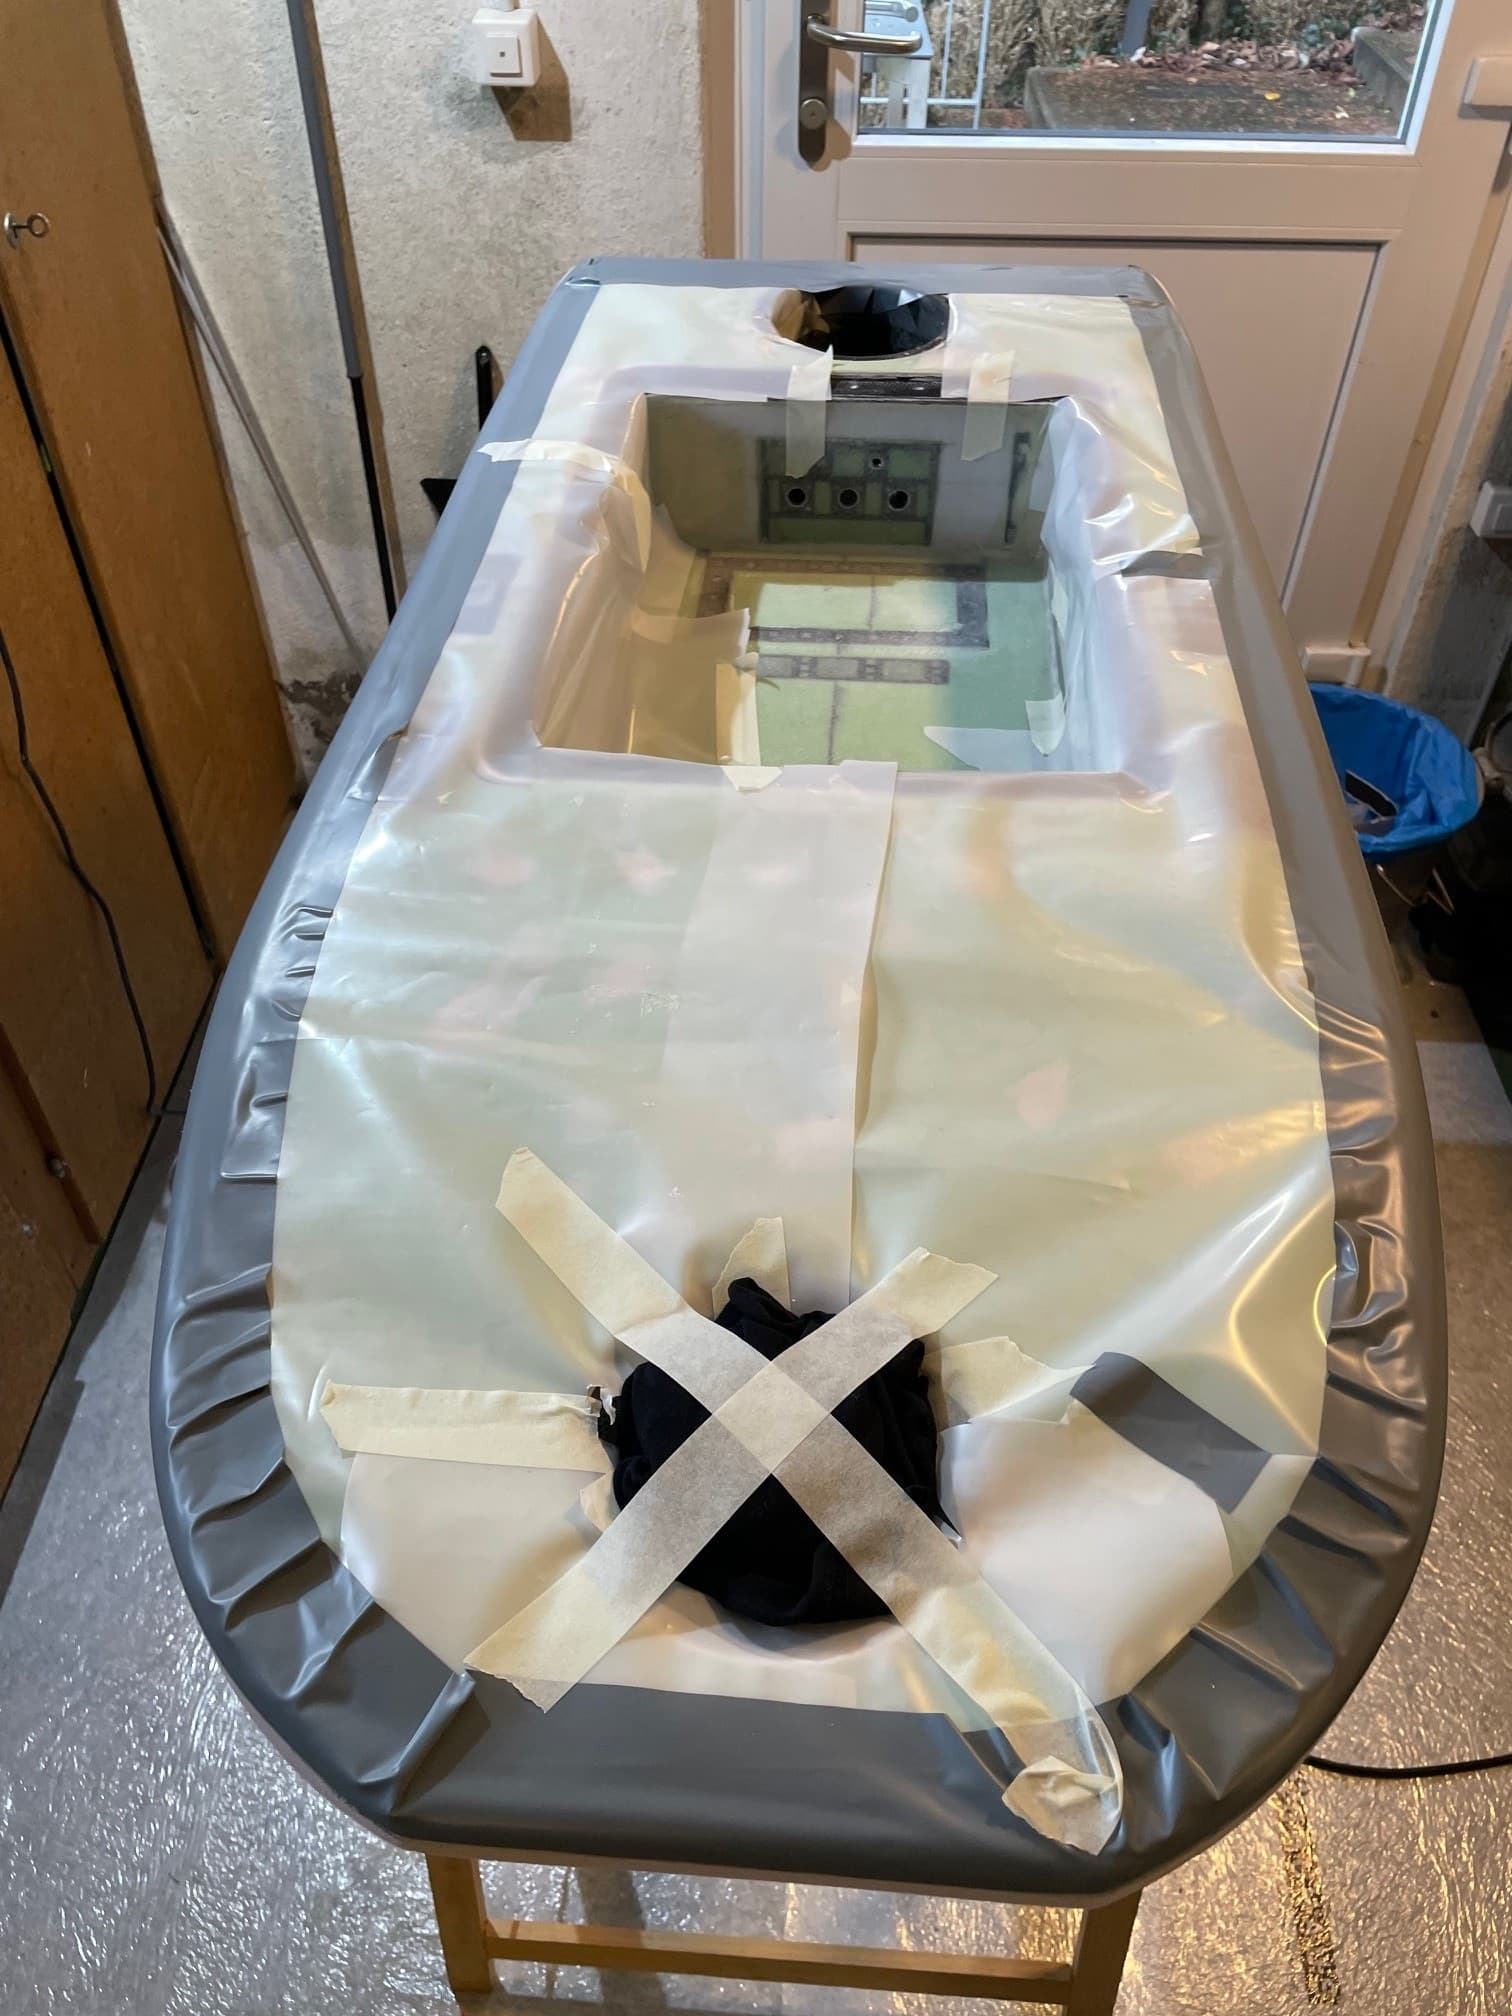
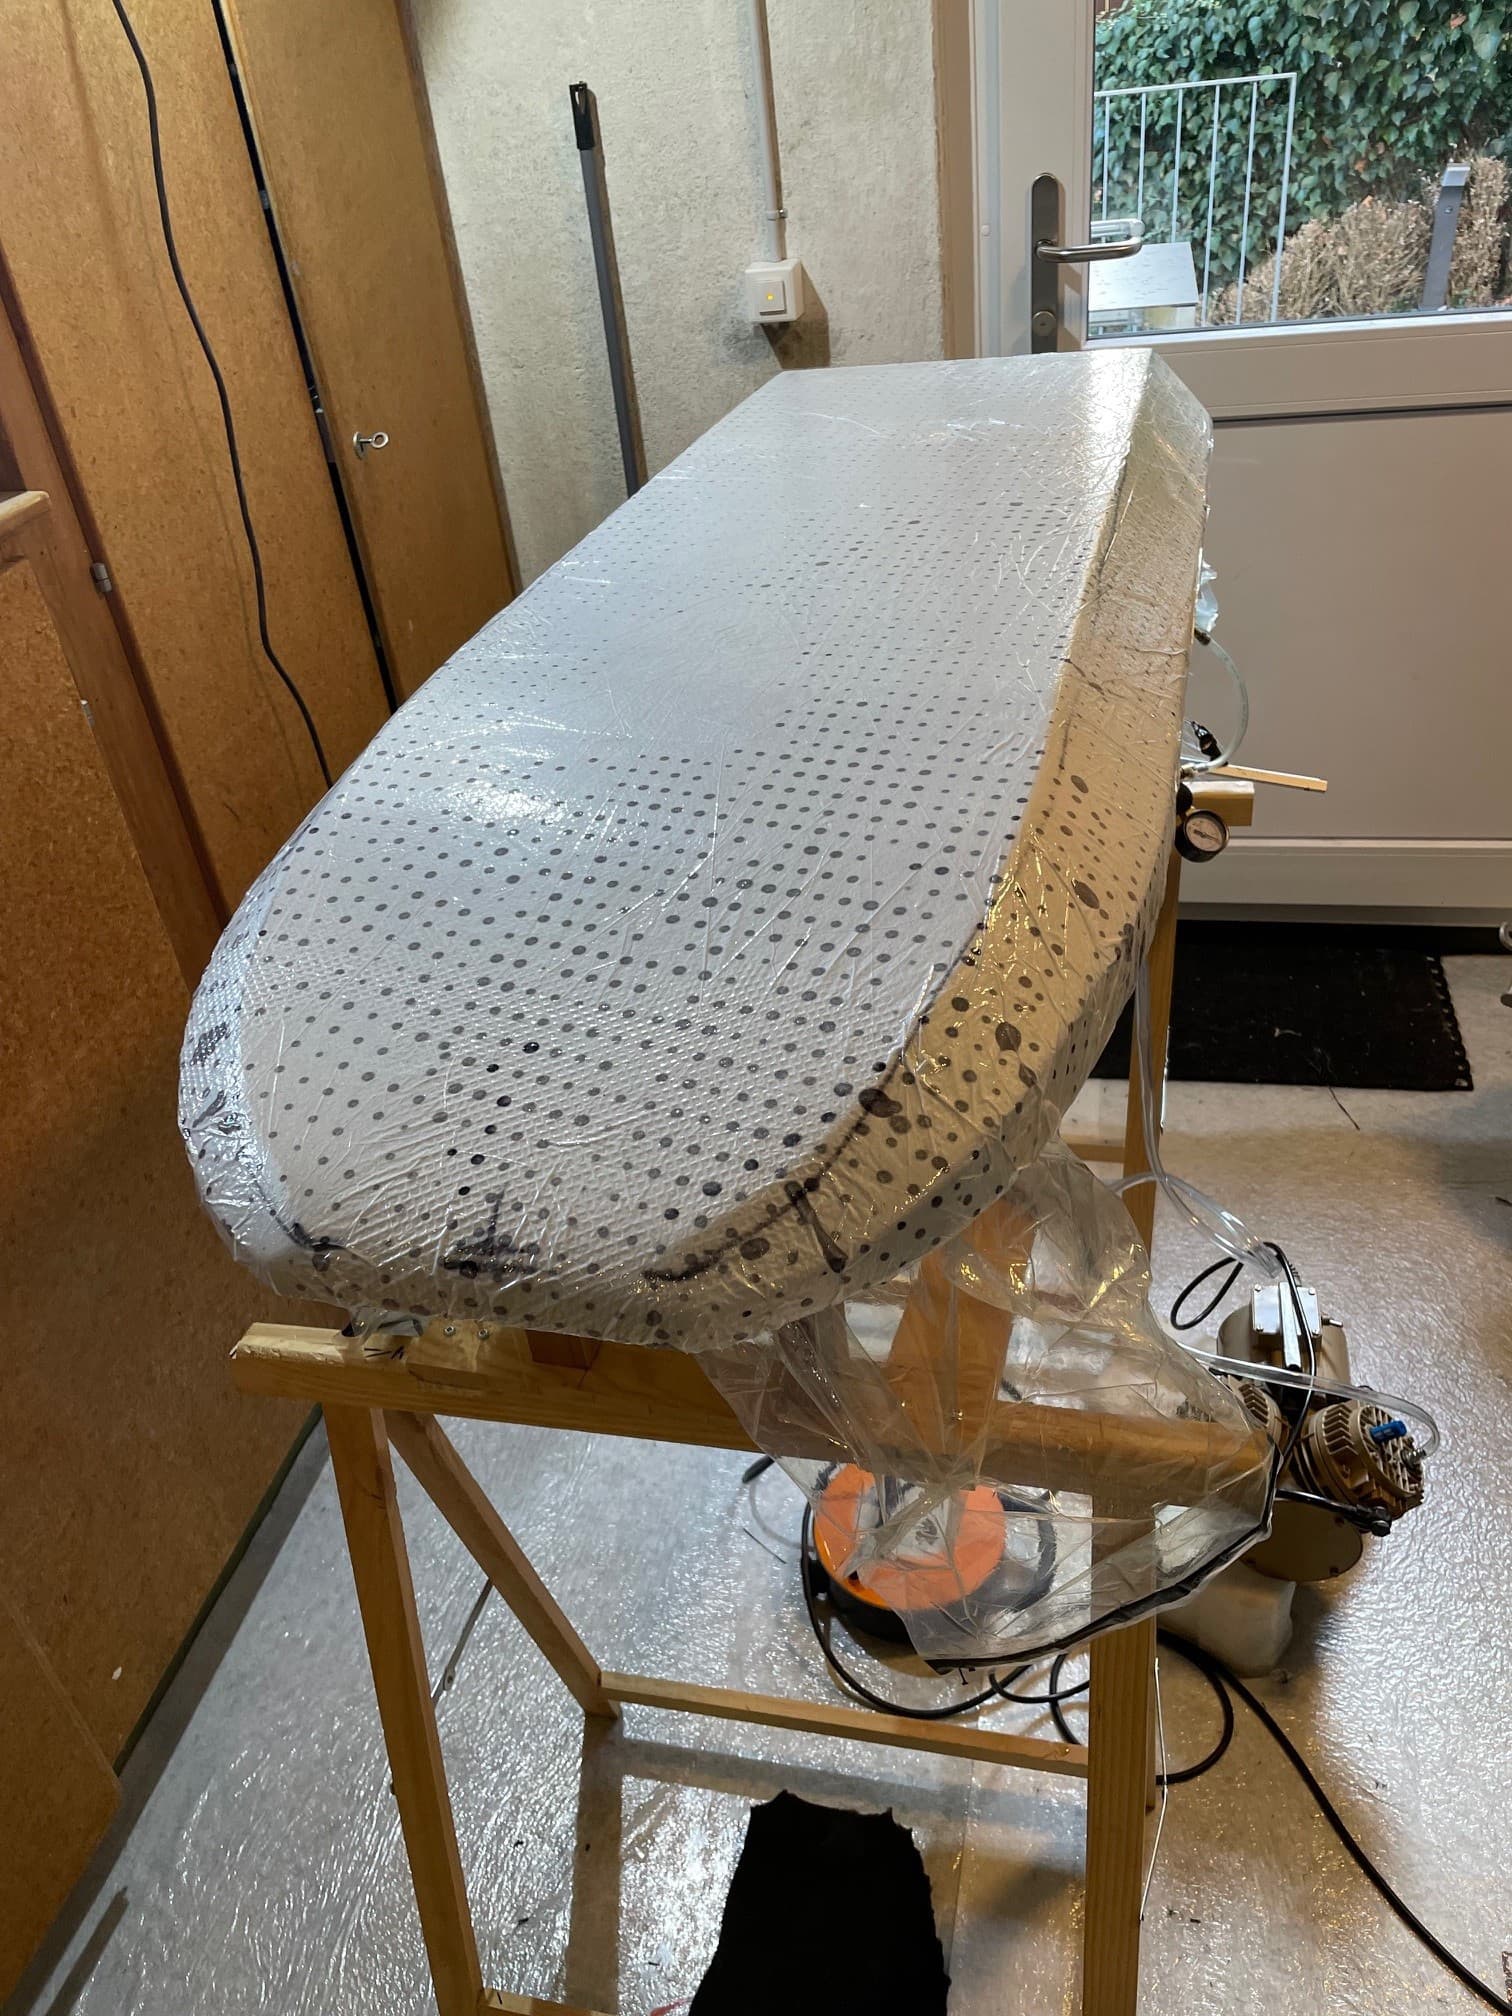
Vacuum laminated the board,  
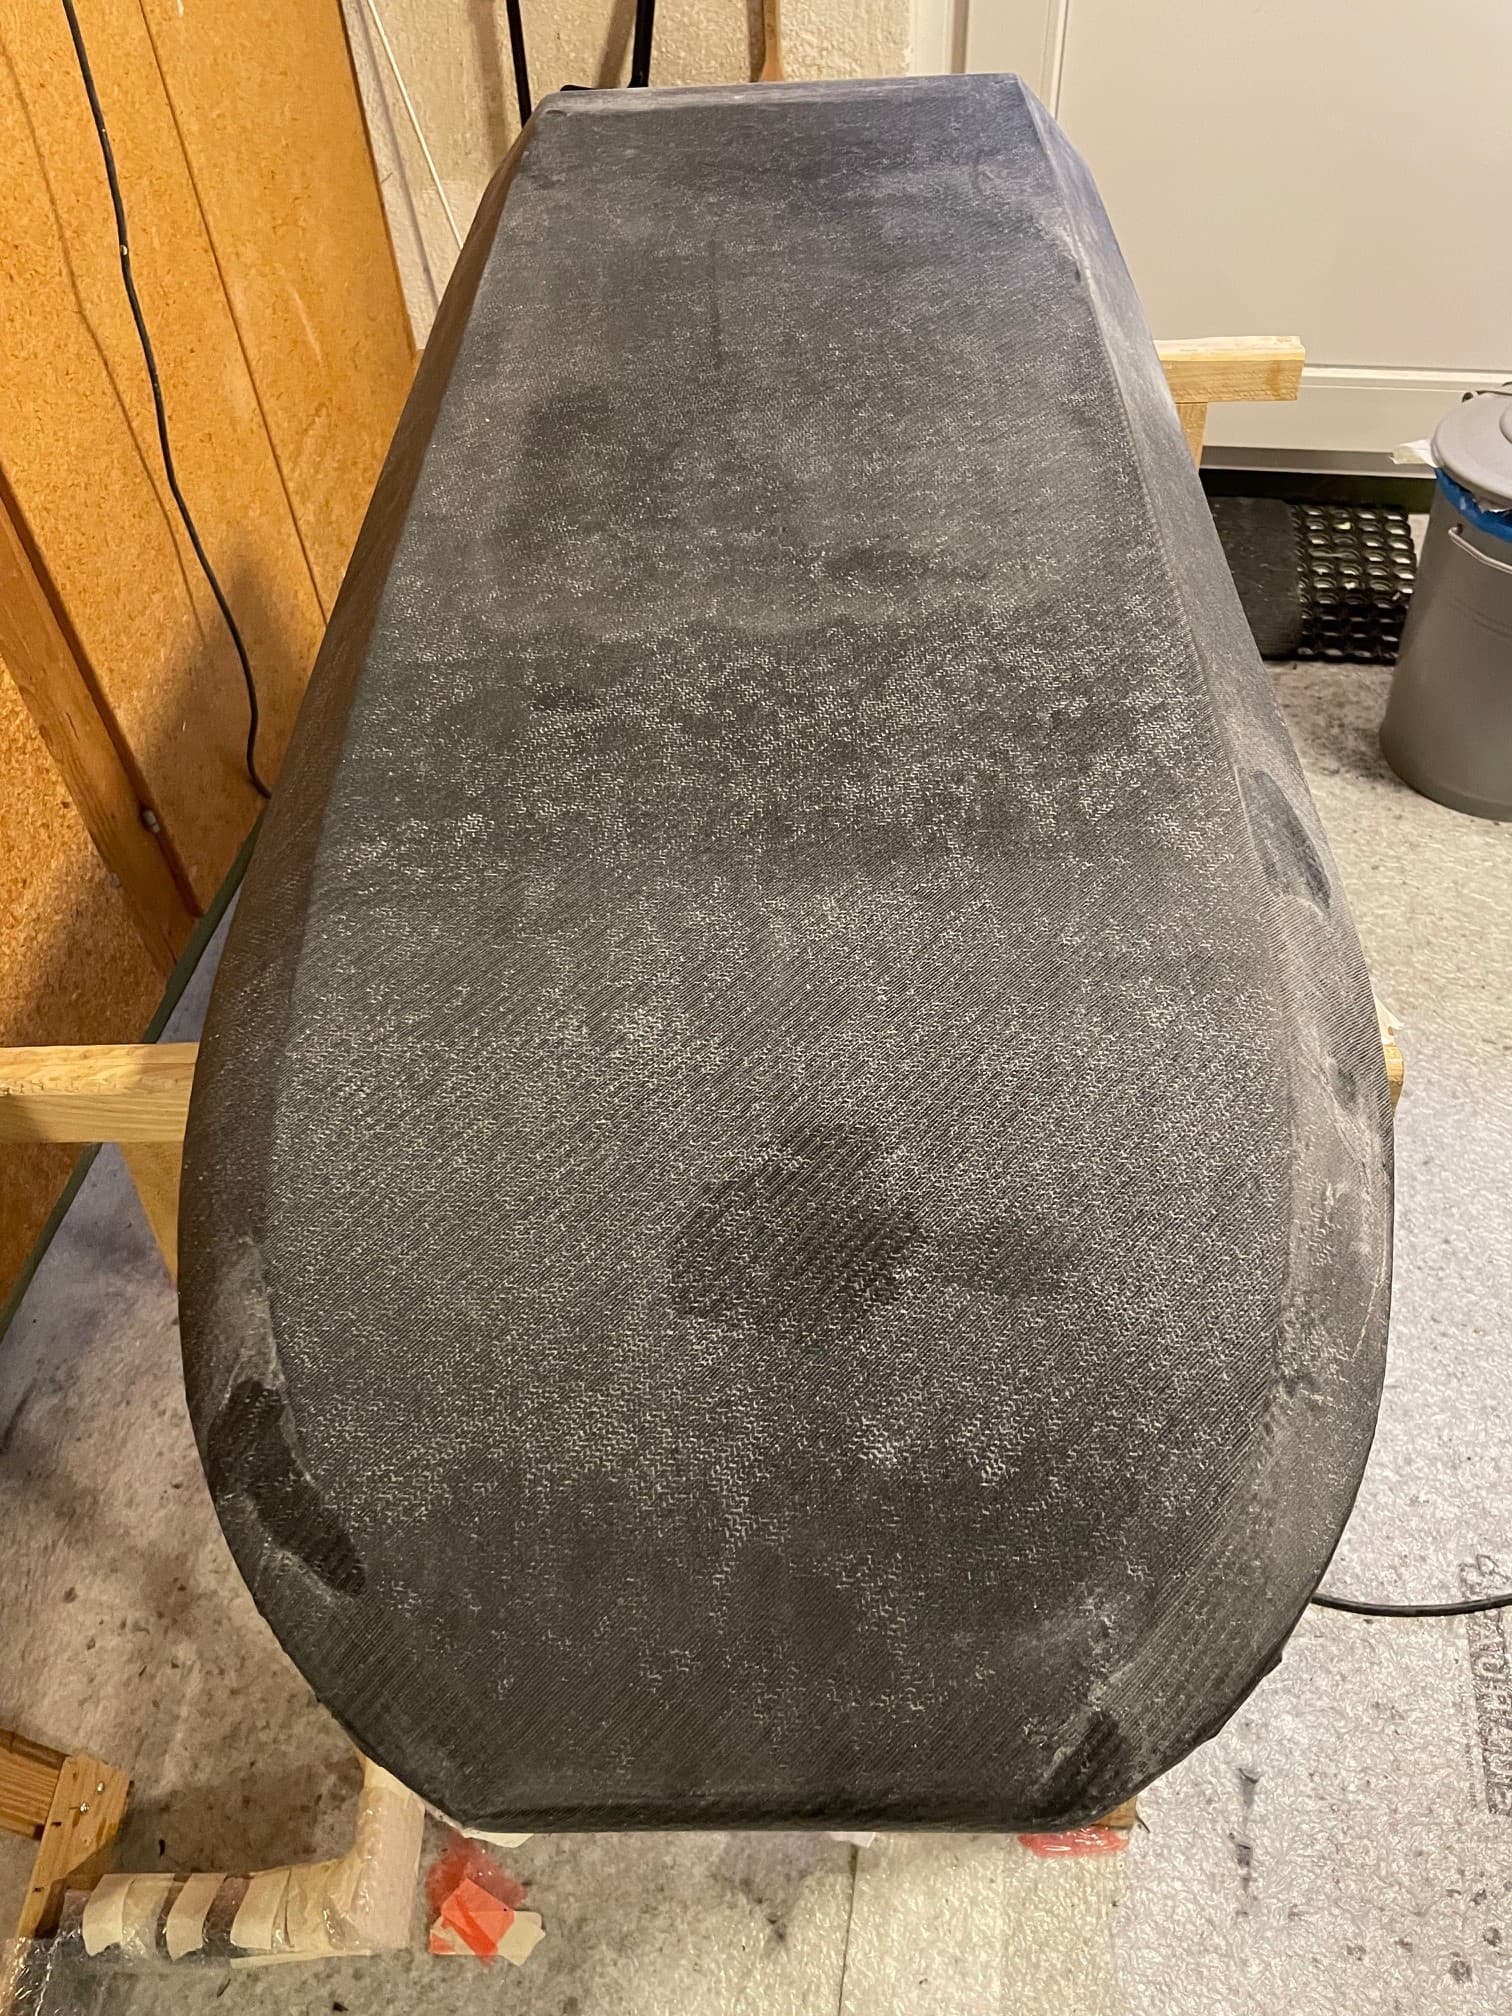
3x200g cfk plus 1x100g glass on the top side. 2x200g cfk plus 100g glass on bottom side. The bag needs to be big enough to go into the cavities on the top side, otherwise the pressure from the bottom is too hard and bends the bottom plate. Applied 0.6bar vacuum.
 ![tape](https://foil.zone/uploads/default/original/3X/6/0/605461e6370b8ce0a6c277450689f2ab490957ae.jpeg)

 ![vacuum](https://foil.zone/uploads/default/original/3X/e/4/e4efd14f3f614eb75cdc47924d2e21cb1cee689b.jpeg)

 ![filler](https://foil.zone/uploads/default/original/3X/e/d/ed7ed09f154b5872ed9f9a8e96e81be9e38c9122.jpeg)  
Filler plus sanding before the last layer of cfk. I used a light 2k filler and colored it with black pigments.  
 ![cut](https://foil.zone/uploads/default/original/3X/8/1/812cb648ed90ddc867f66548e360eea743615ea4.jpeg)  
Taped the edge and sanded to the tape, this is a painfull process. When the remaining cfk layer was thin enough, I cut it.  
 ![top](https://foil.zone/uploads/default/original/3X/8/f/8fbbd0e3f889f2d2d9a6a11538bc60f50c0b6035.jpeg)

 ![final_layer](https://foil.zone/uploads/default/original/3X/9/2/92a47f8f0b16371e6814364553a9b93c823aa3c1.jpeg)

 ![bottom](https://foil.zone/uploads/default/original/3X/9/4/949778a169721e0d6302ef33294e427bee6bc432.jpeg)

 ![topCoat](https://foil.zone/uploads/default/original/3X/1/1/11d0f518ba84e33c435c631bba4ce054286ae9ae.jpeg)  
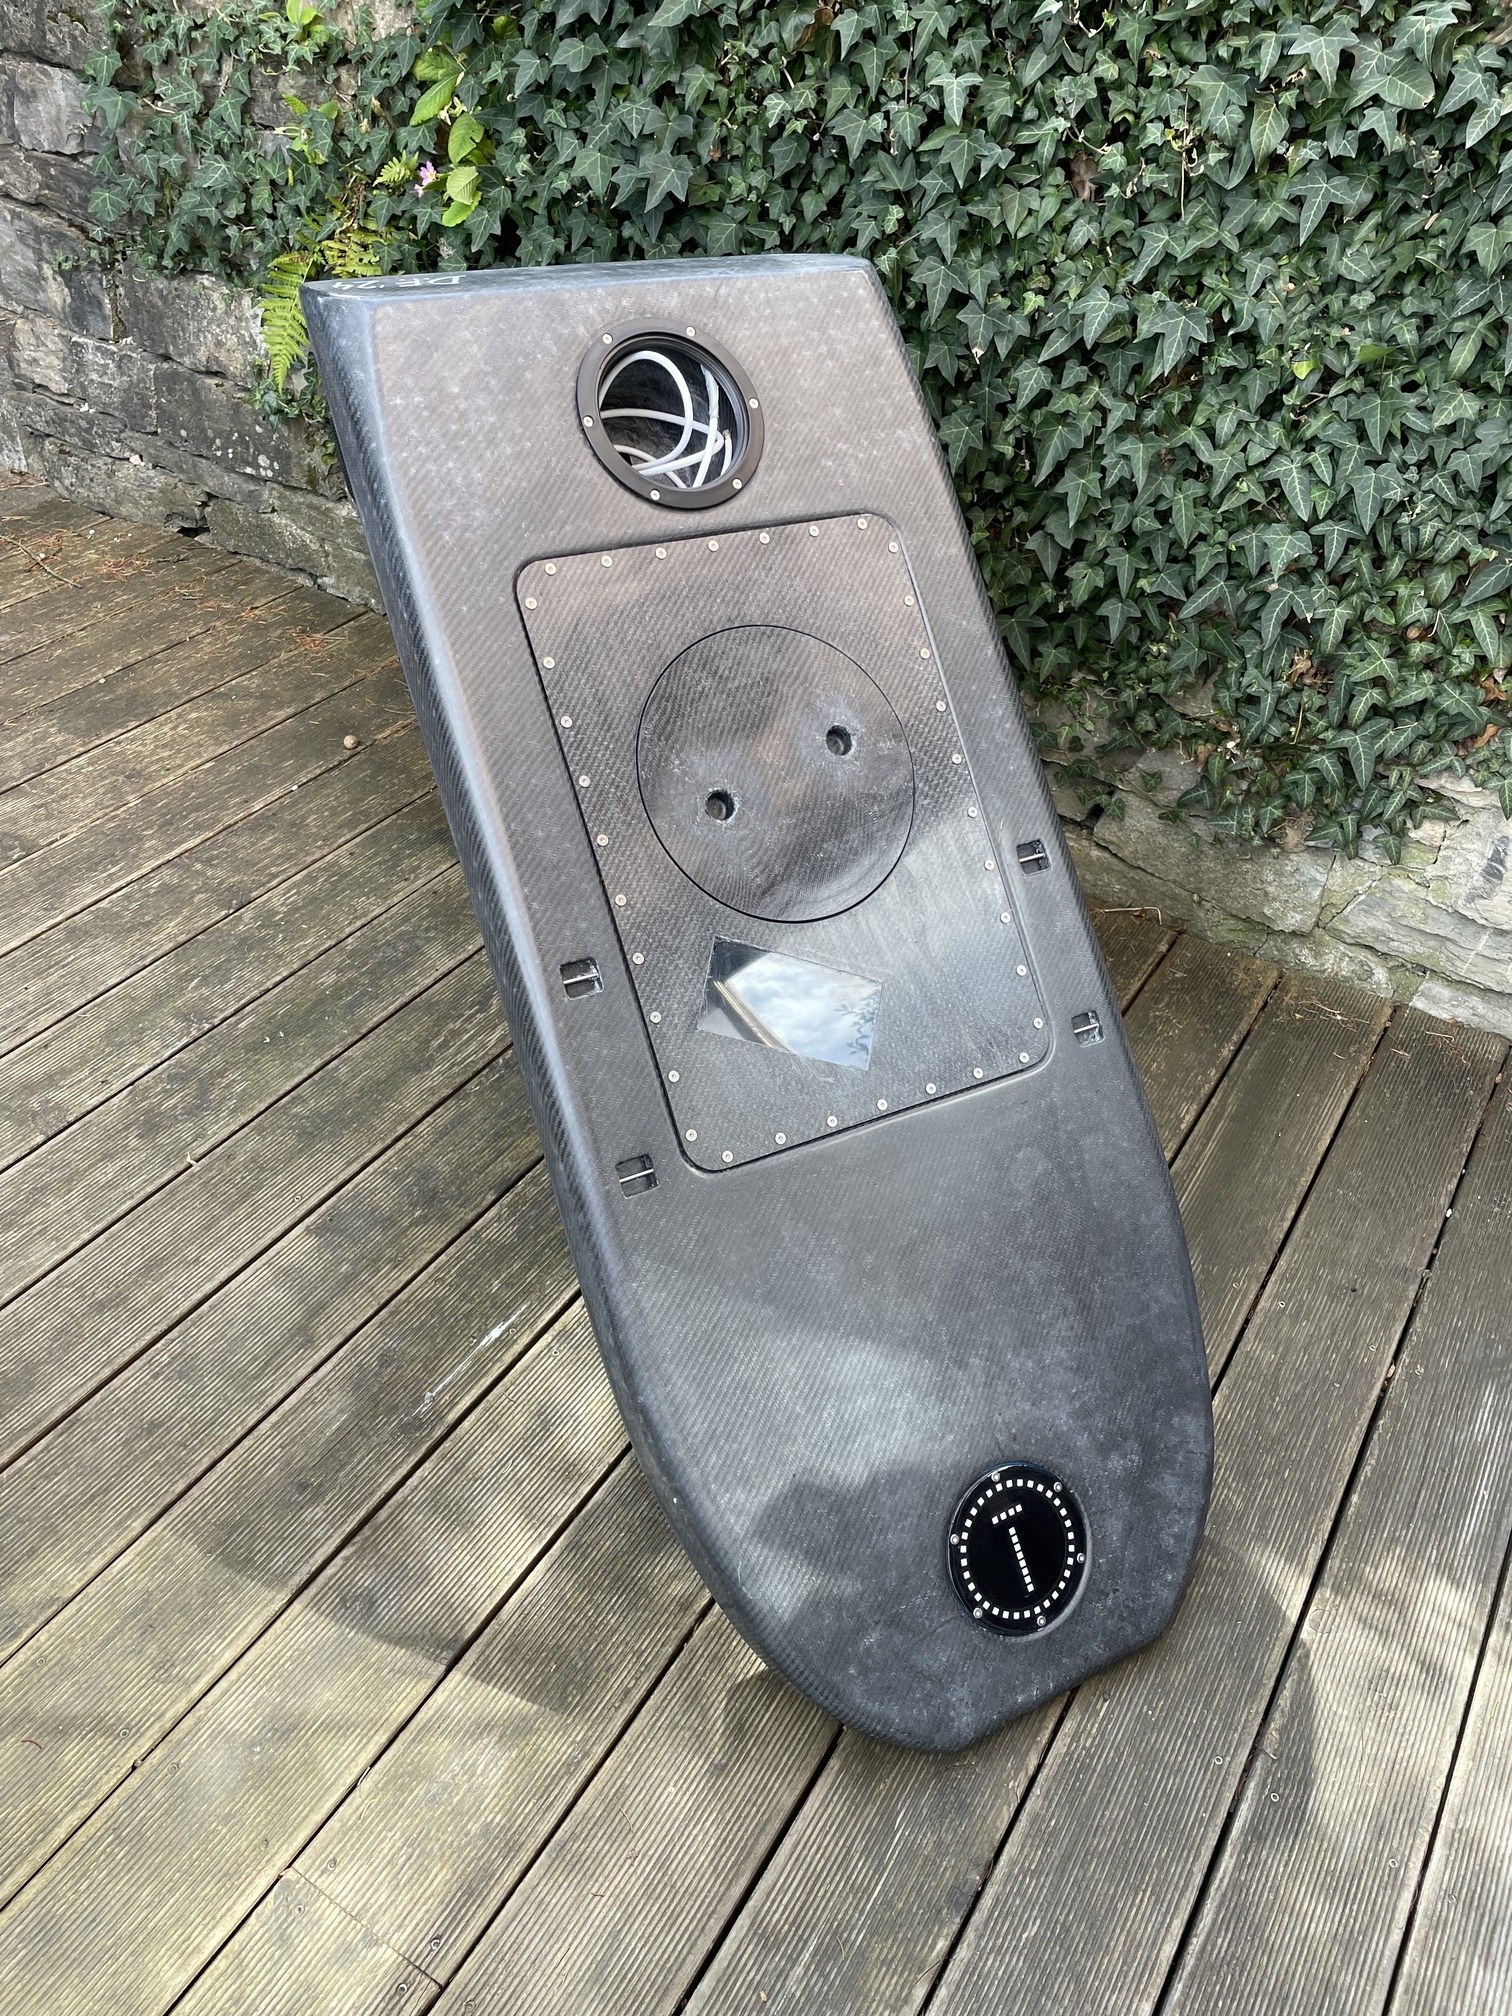
3 layers of top coat, with sanding (120 grit) in between. Then sanding with grit 120, 200, 400, 800, 1200, 1500, 2000 and polishing paste.
 ![IMG_4661](https://foil.zone/uploads/default/original/3X/f/5/f52a81798c995ee21f60d82f86f53b6e7b4954f2.jpeg)

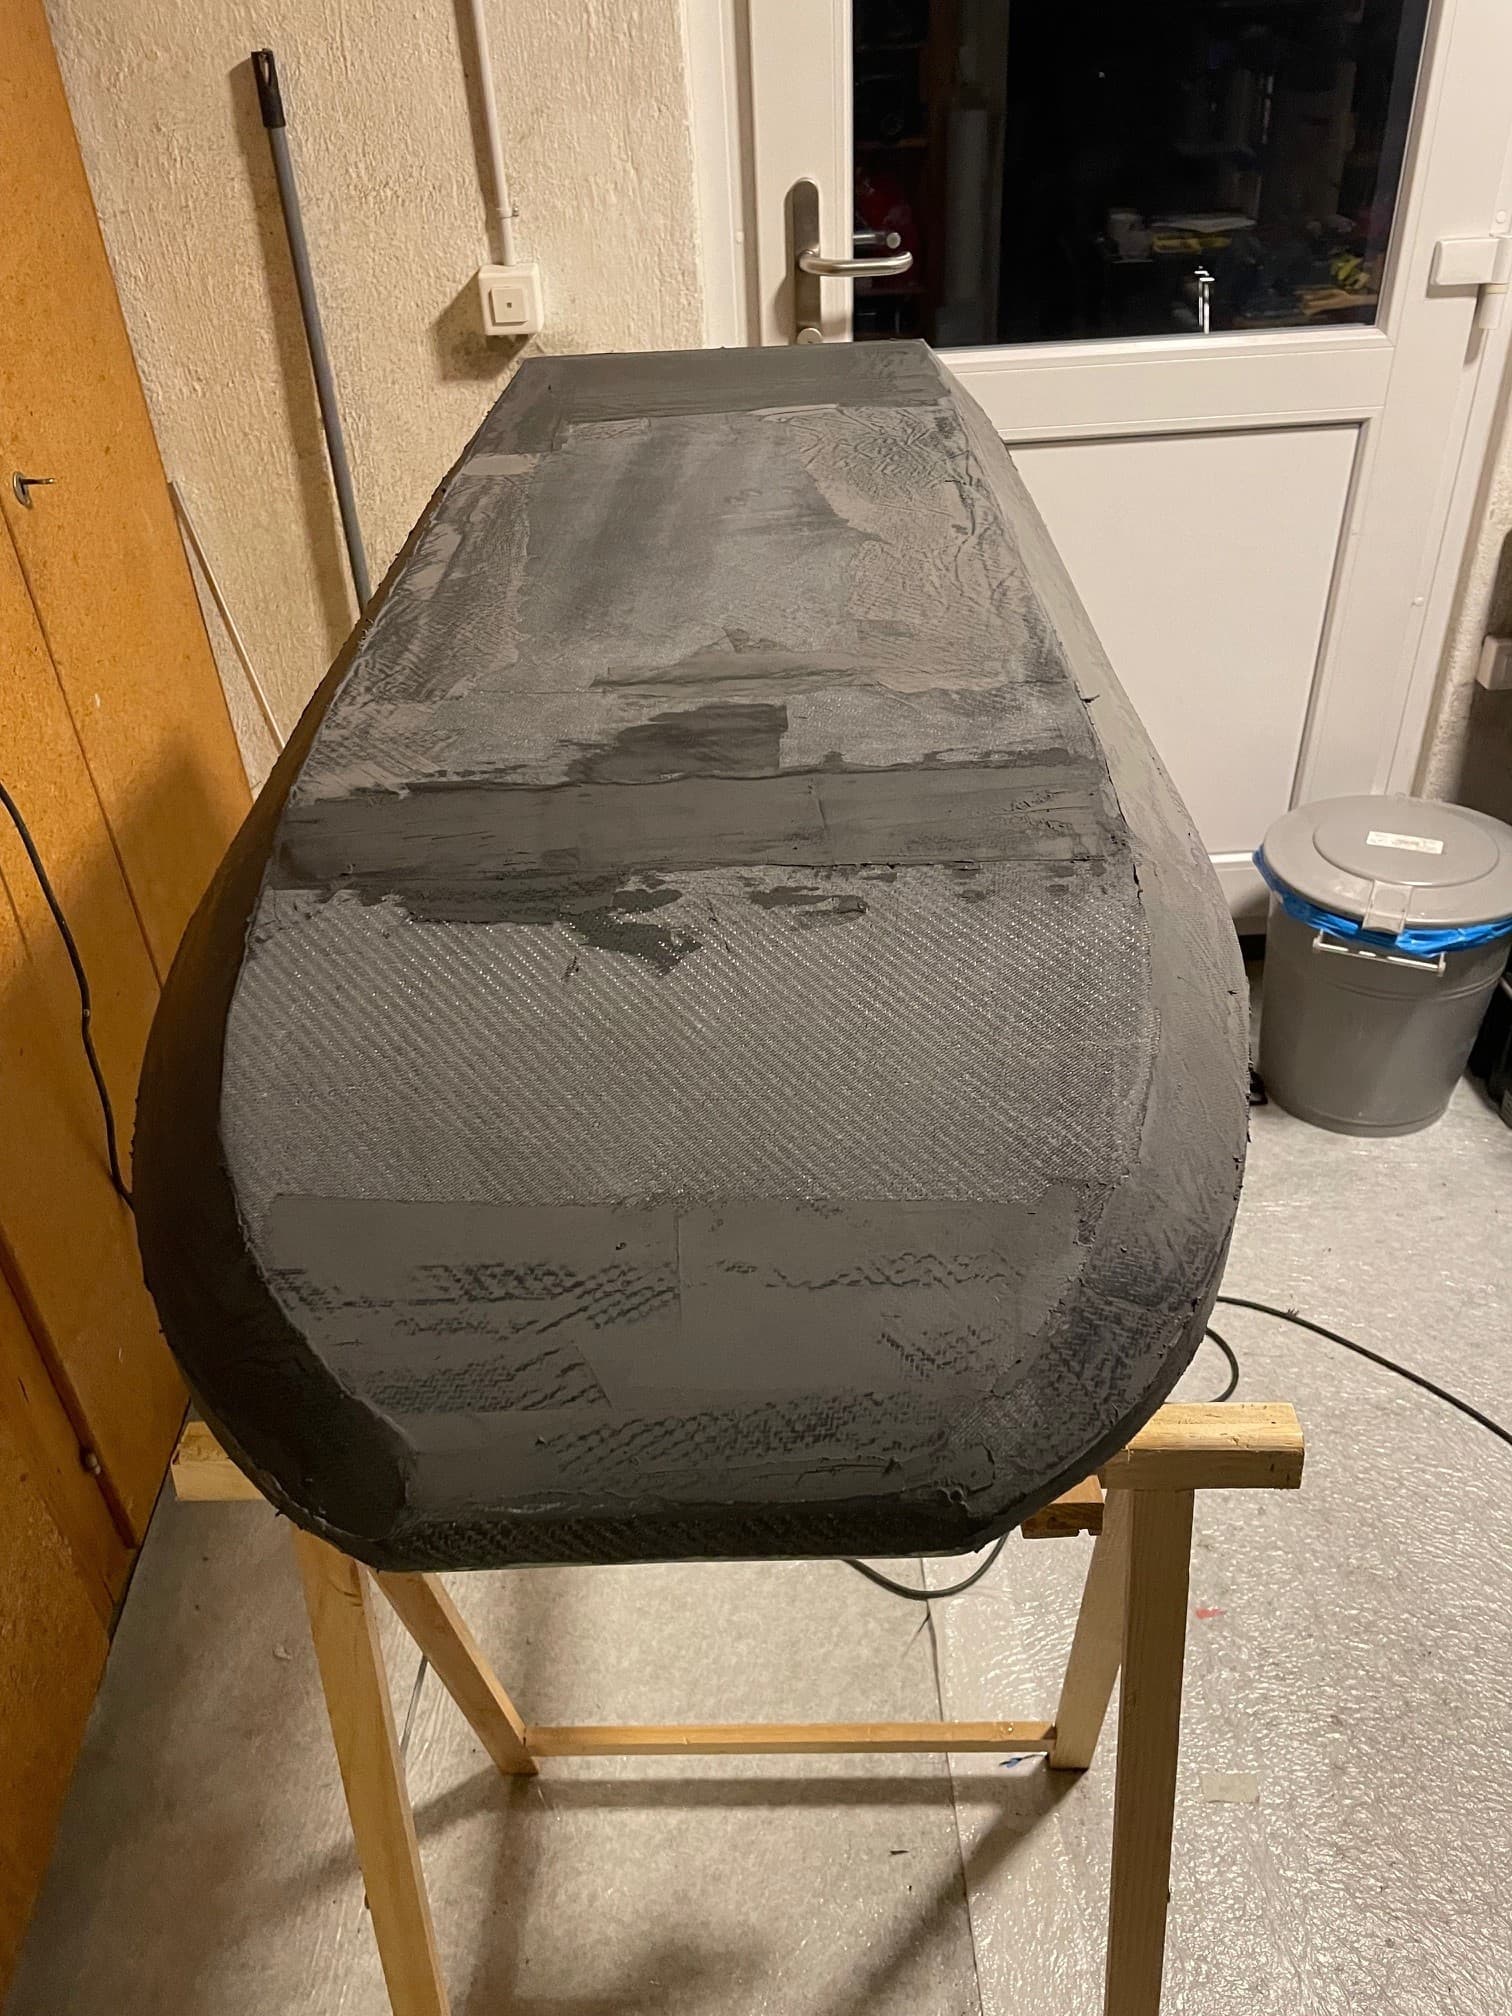
If I would do it again, I would not put the last layer of glass on top as this caused some visible spots where it is not transparent. It protects the cfk but without I would have got a cleaner cfk finish.

---

<div class="post-metadata">

### Author: ![WeightShift](https://foil.zone/user_avatar/foil.zone/weightshift/32/42931_2.png) [@WeightShift](https://foil.zone/u/WeightShift)
#### Post date: [May 9, 2024, 6:43am UTC](https://foil.zone/t/daniels-2nd-build/19956/10 "2024-05-09T06:43:17Z")

</div>

Great to be following your build Daniel, nice progress 👍

Hey I don’t think your hatch panel is going to fall off in a hurry, one or two fasteners holding that cover in place 🤣

---

<div class="post-metadata">

### Author: ![sat\_be](https://foil.zone/user_avatar/foil.zone/sat_be/32/35523_2.png) [@sat\_be](https://foil.zone/u/sat_be)
#### Post date: [May 9, 2024, 6:50am UTC](https://foil.zone/t/daniels-2nd-build/19956/11 "2024-05-09T06:50:03Z")

</div>

Yes it‘s 36 screws, but it needs to be 100% waterproof. A bigger distance between the screws would probably have been ok too.

---

<div class="post-metadata">

### Author: ![FoiledBySpoil](https://foil.zone/letter_avatar_proxy/v4/letter/f/b5e925/32.png) [@FoiledBySpoil](https://foil.zone/u/FoiledBySpoil)
#### Post date: [May 9, 2024, 8:21am UTC](https://foil.zone/t/daniels-2nd-build/19956/12 "2024-05-09T08:21:15Z")

</div>

So. Impressive!

20characters

---

<div class="post-metadata">

### Author: ![sat\_be](https://foil.zone/user_avatar/foil.zone/sat_be/32/35523_2.png) [@sat\_be](https://foil.zone/u/sat_be)
#### Post date: [May 15, 2024, 10:06pm UTC](https://foil.zone/t/daniels-2nd-build/19956/13 "2024-05-15T22:06:10Z")

</div>

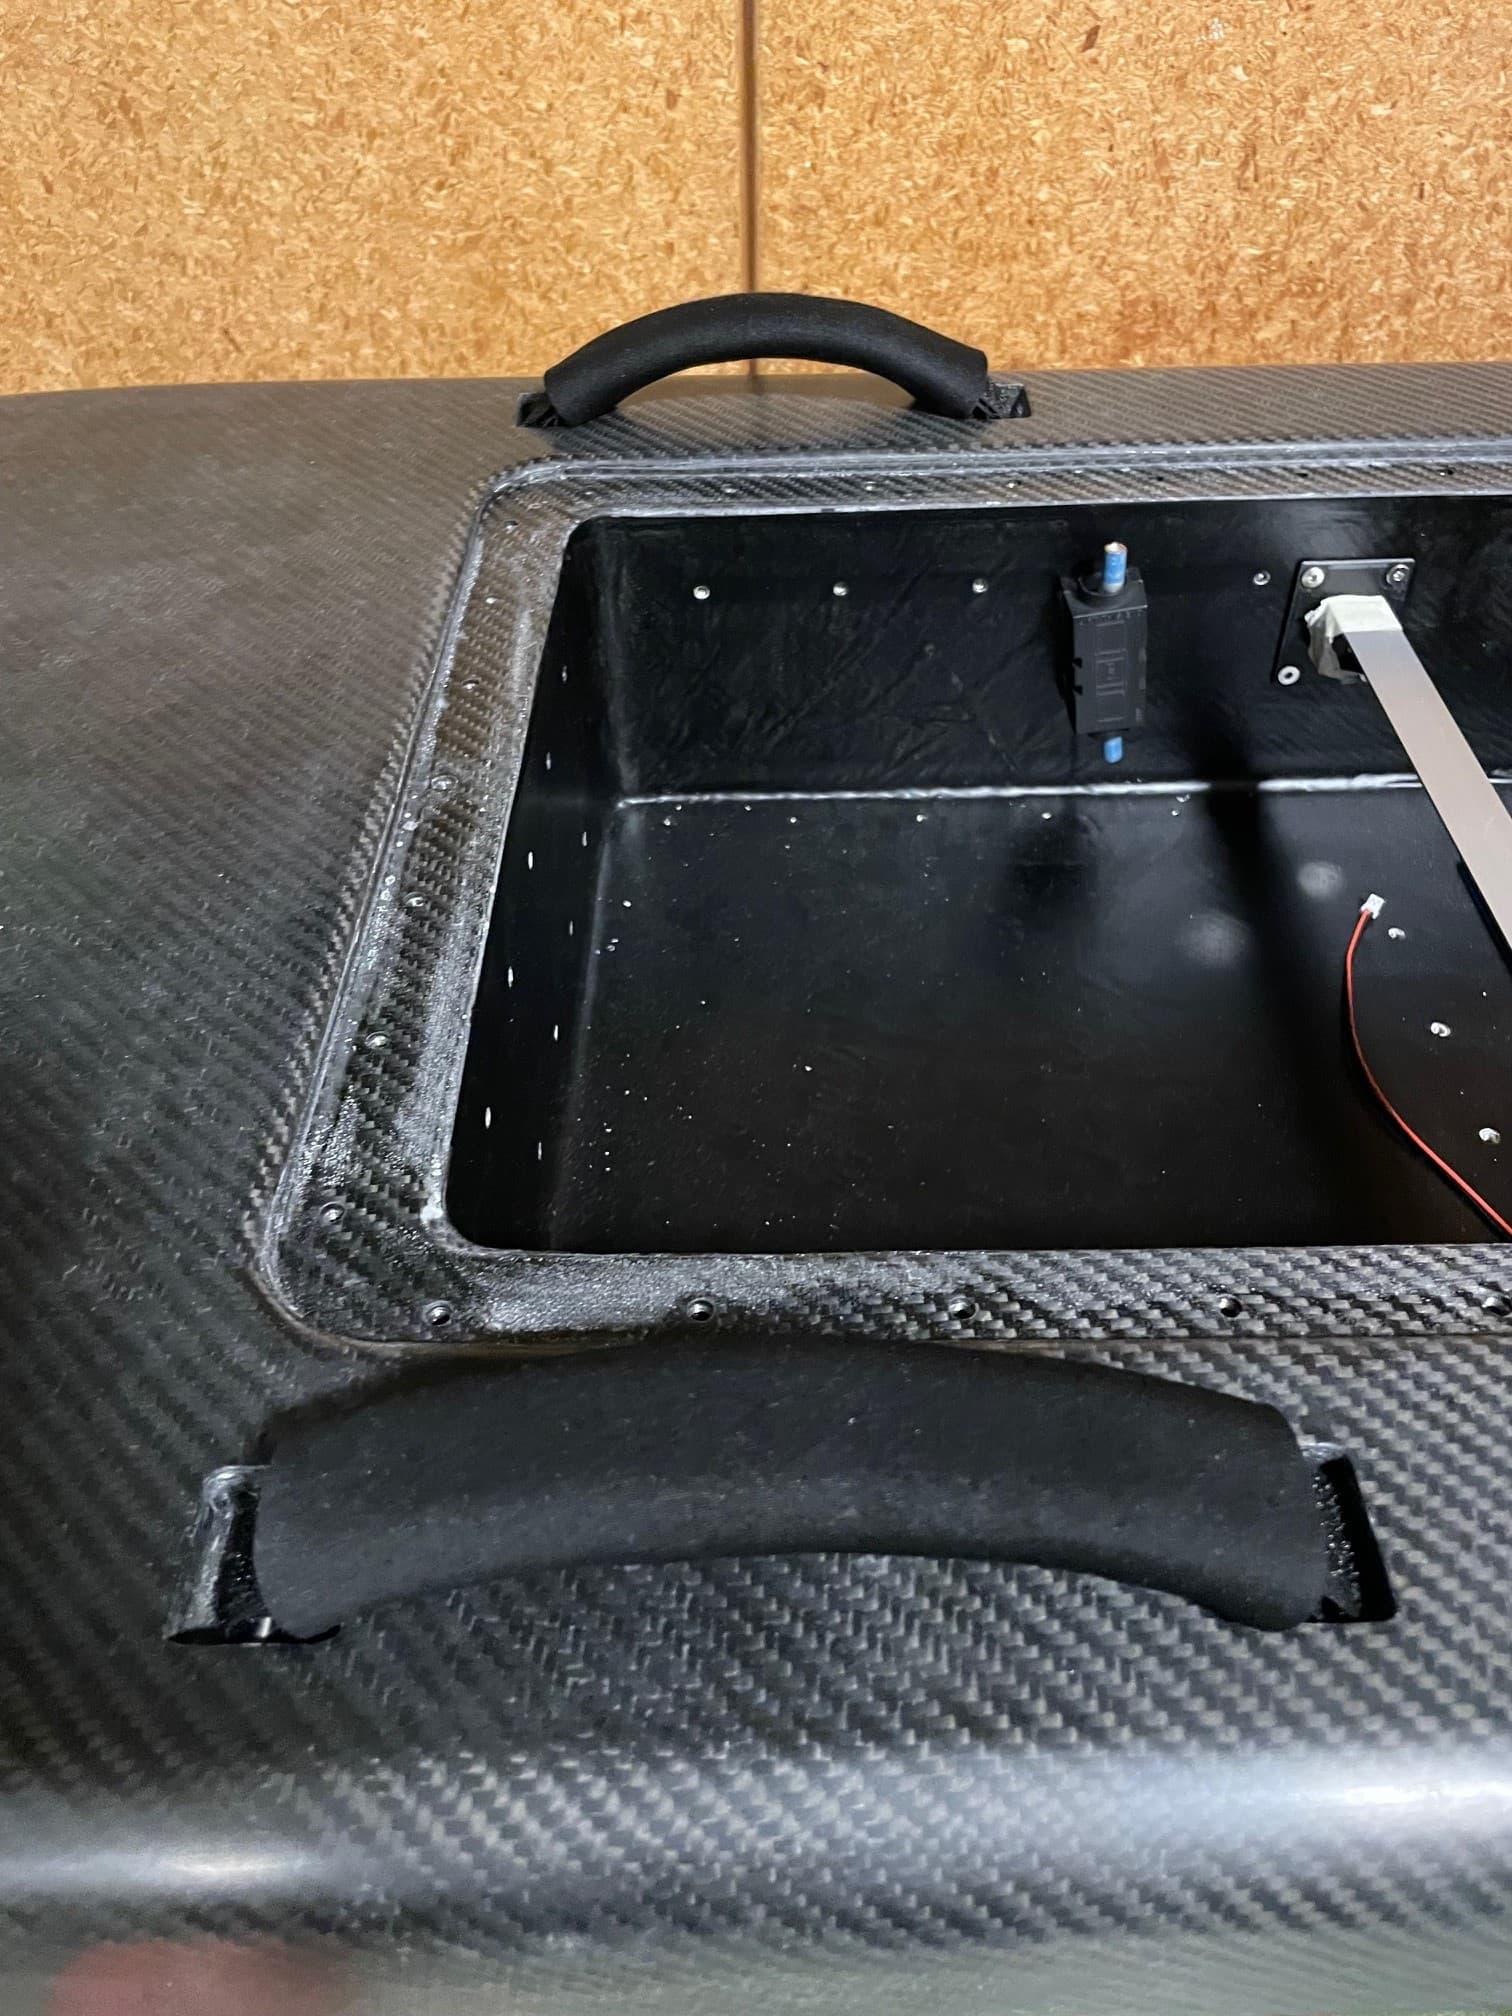
Installed handles, they consist of hoock and loop bands sewed together and a neoprene cover.

 ![handle1](https://foil.zone/uploads/default/original/3X/7/b/7b140c0e2d906859606f7914de3bbca52832a0df.jpeg)

 ![handle2](https://foil.zone/uploads/default/original/3X/3/0/30caf53b4f6db6ad8a7abd5cba850cb1bbe613b2.jpeg)

 ![handle3](https://foil.zone/uploads/default/original/3X/a/7/a718ee344db2bdfc16da345055085535f2232ffb.jpeg)

 ![handle4](https://foil.zone/uploads/default/original/3X/a/4/a4dea9eb8256a68b8bfea3ae36a70dd361987462.jpeg)

---

<div class="post-metadata">

### Author: ![sat\_be](https://foil.zone/user_avatar/foil.zone/sat_be/32/35523_2.png) [@sat\_be](https://foil.zone/u/sat_be)
#### Post date: [June 4, 2024, 7:31am UTC](https://foil.zone/t/daniels-2nd-build/19956/14 "2024-06-04T07:31:52Z")

</div>

Seals  
In my first build I used a self adhesive EPDM seal. It works well but it is not reusable. As it compresses and stays compressed, it needs to be replaced each time the box is opened. It is also annoying to remove the remainig adhesive with acetone.  
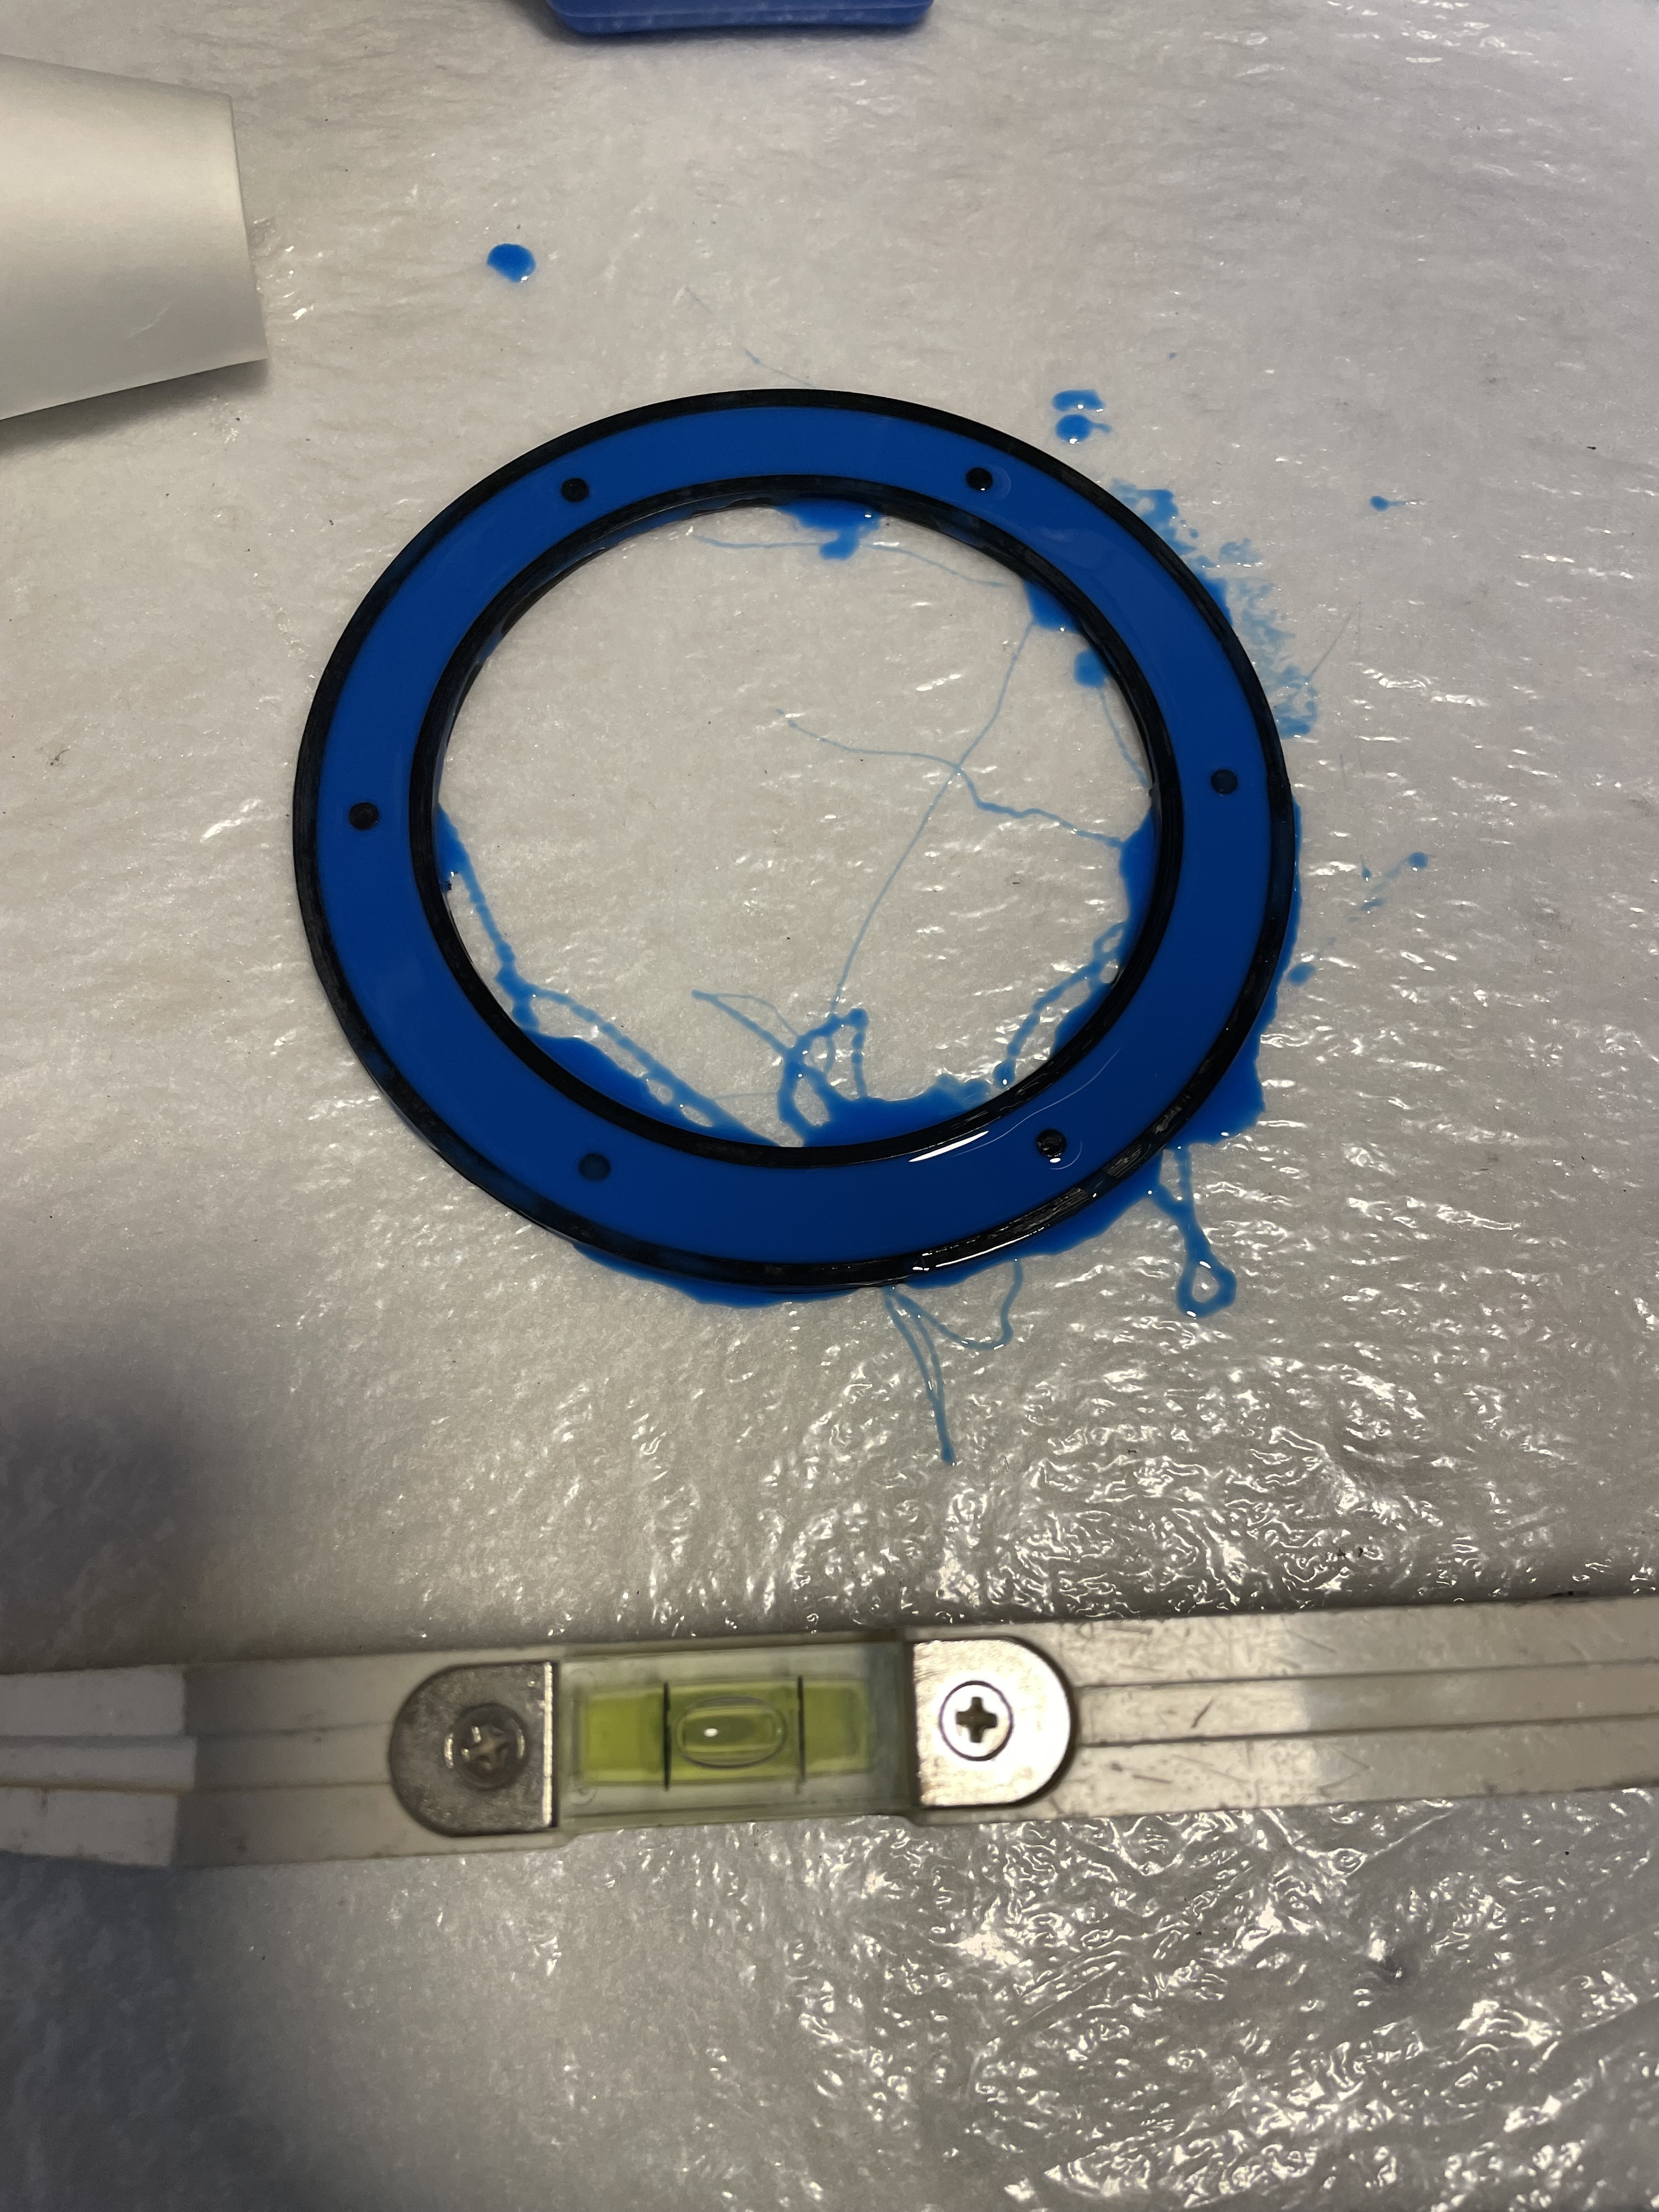
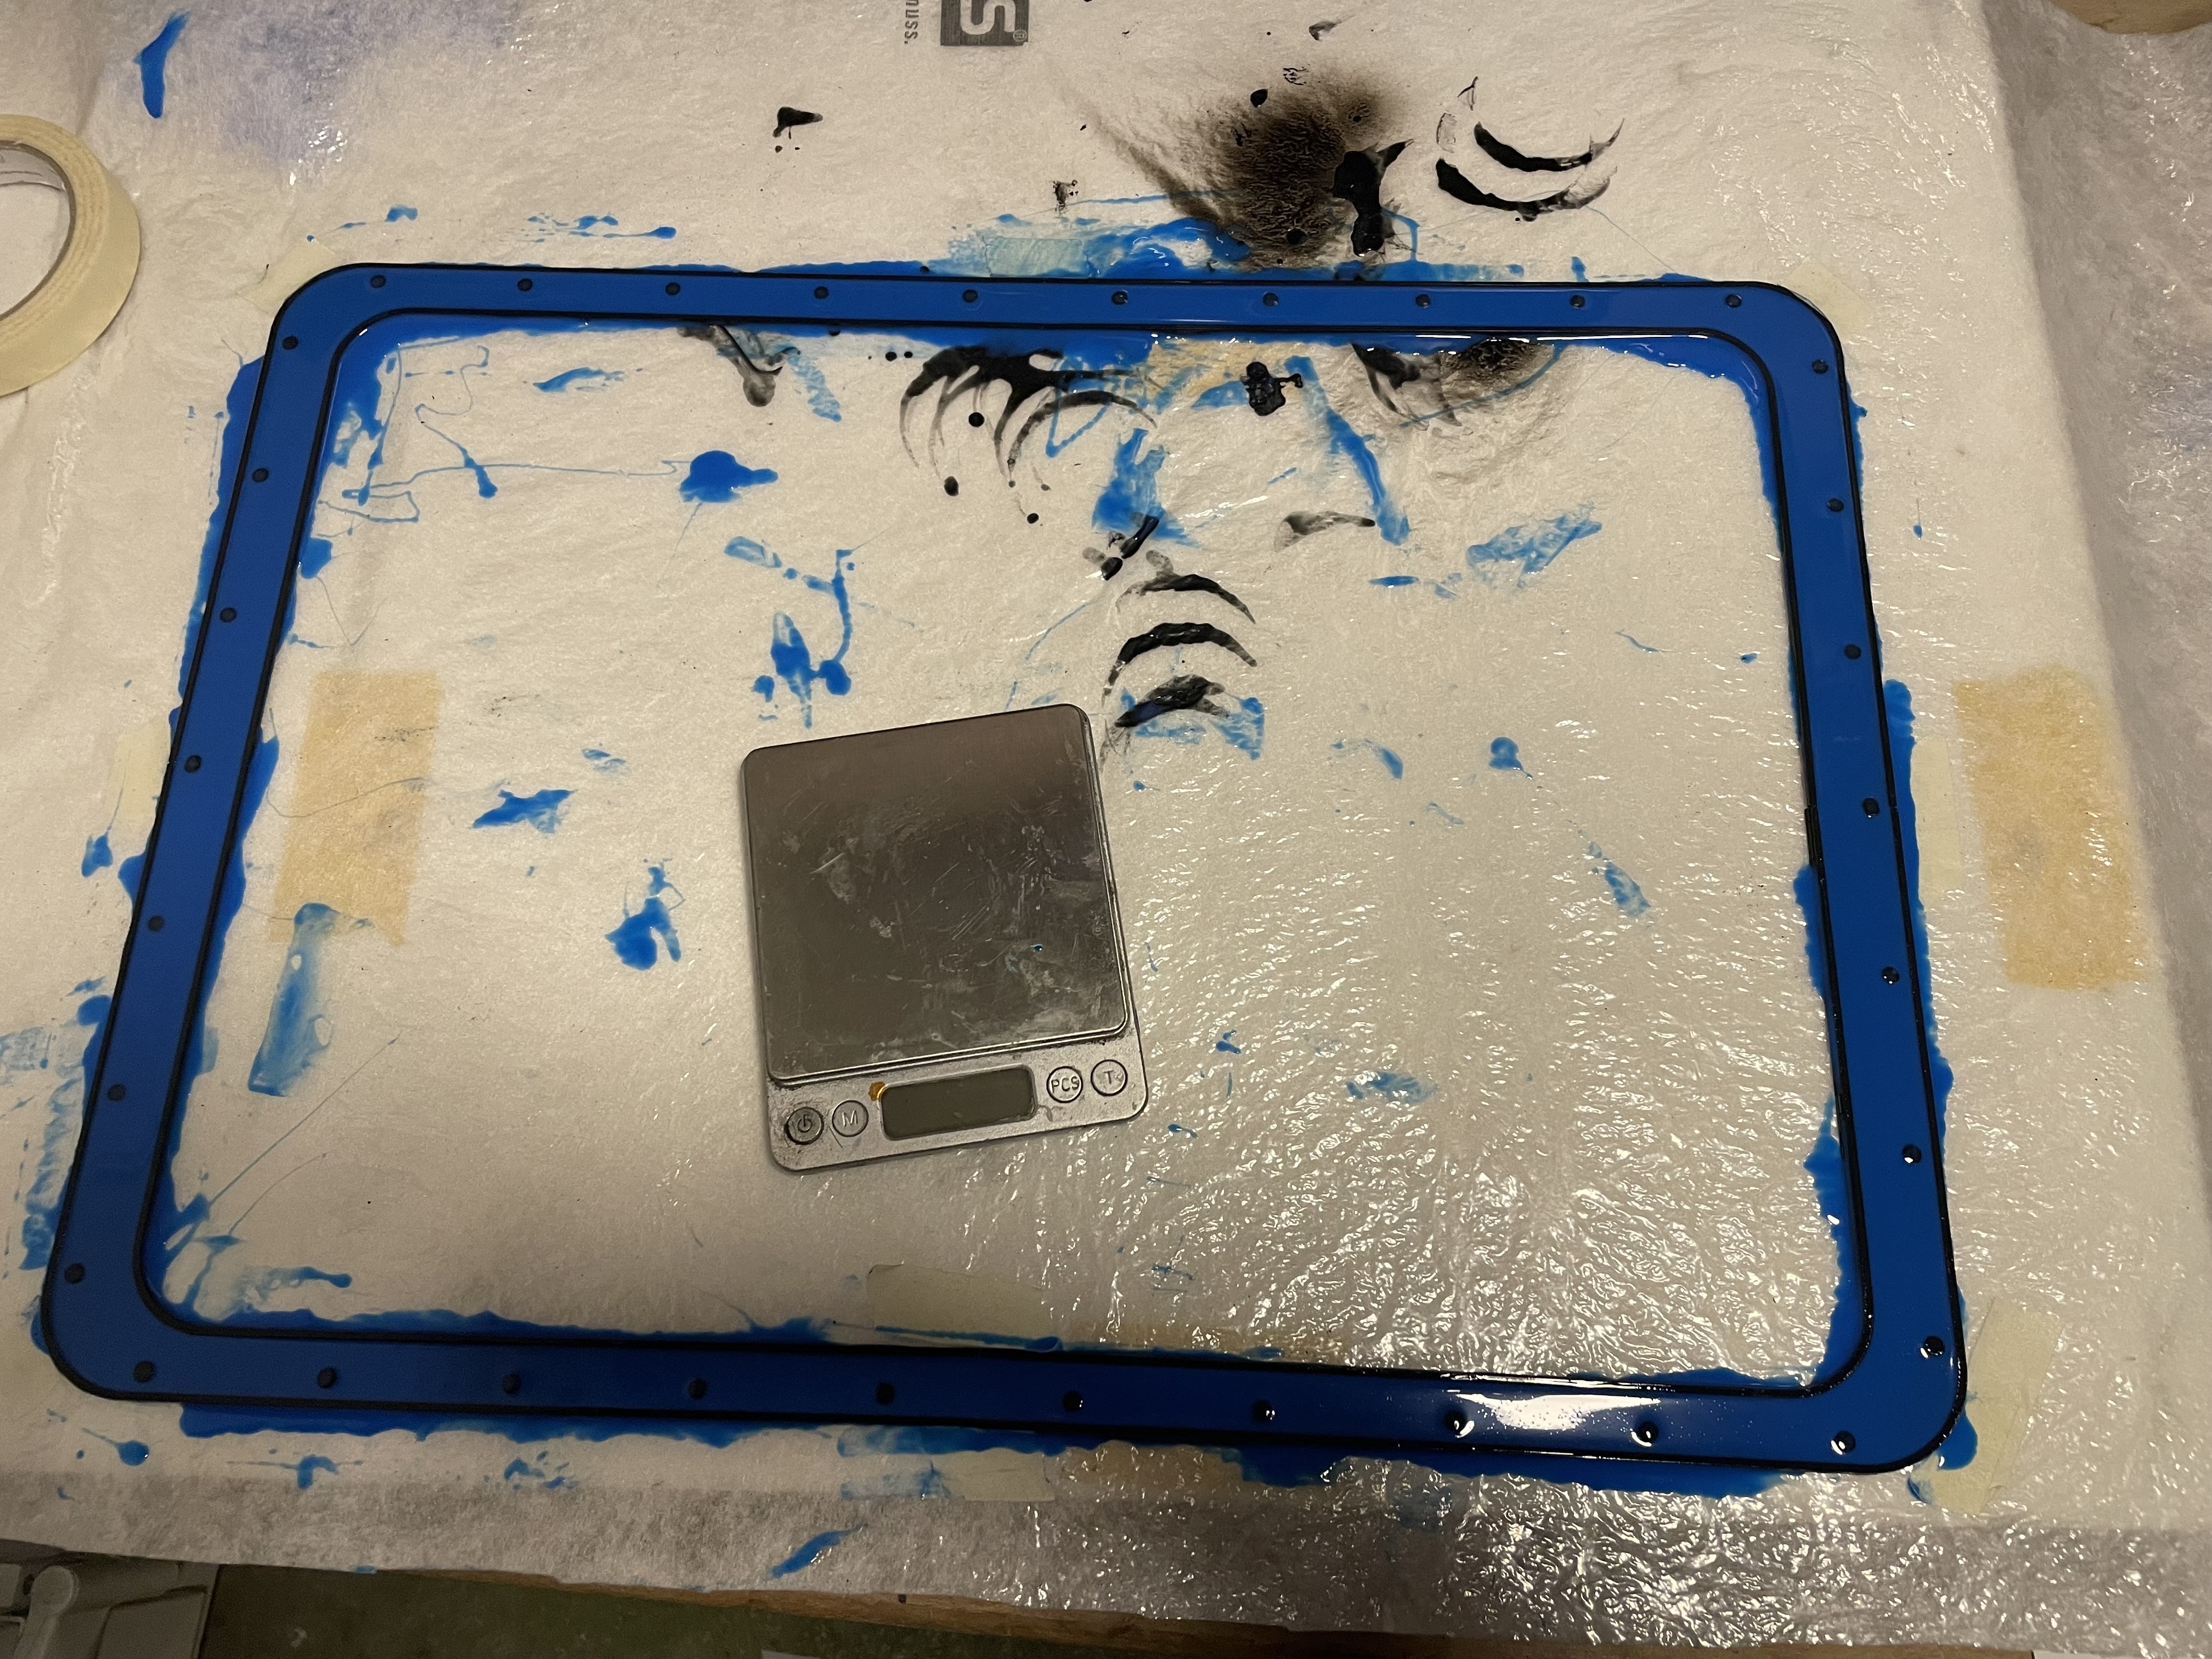
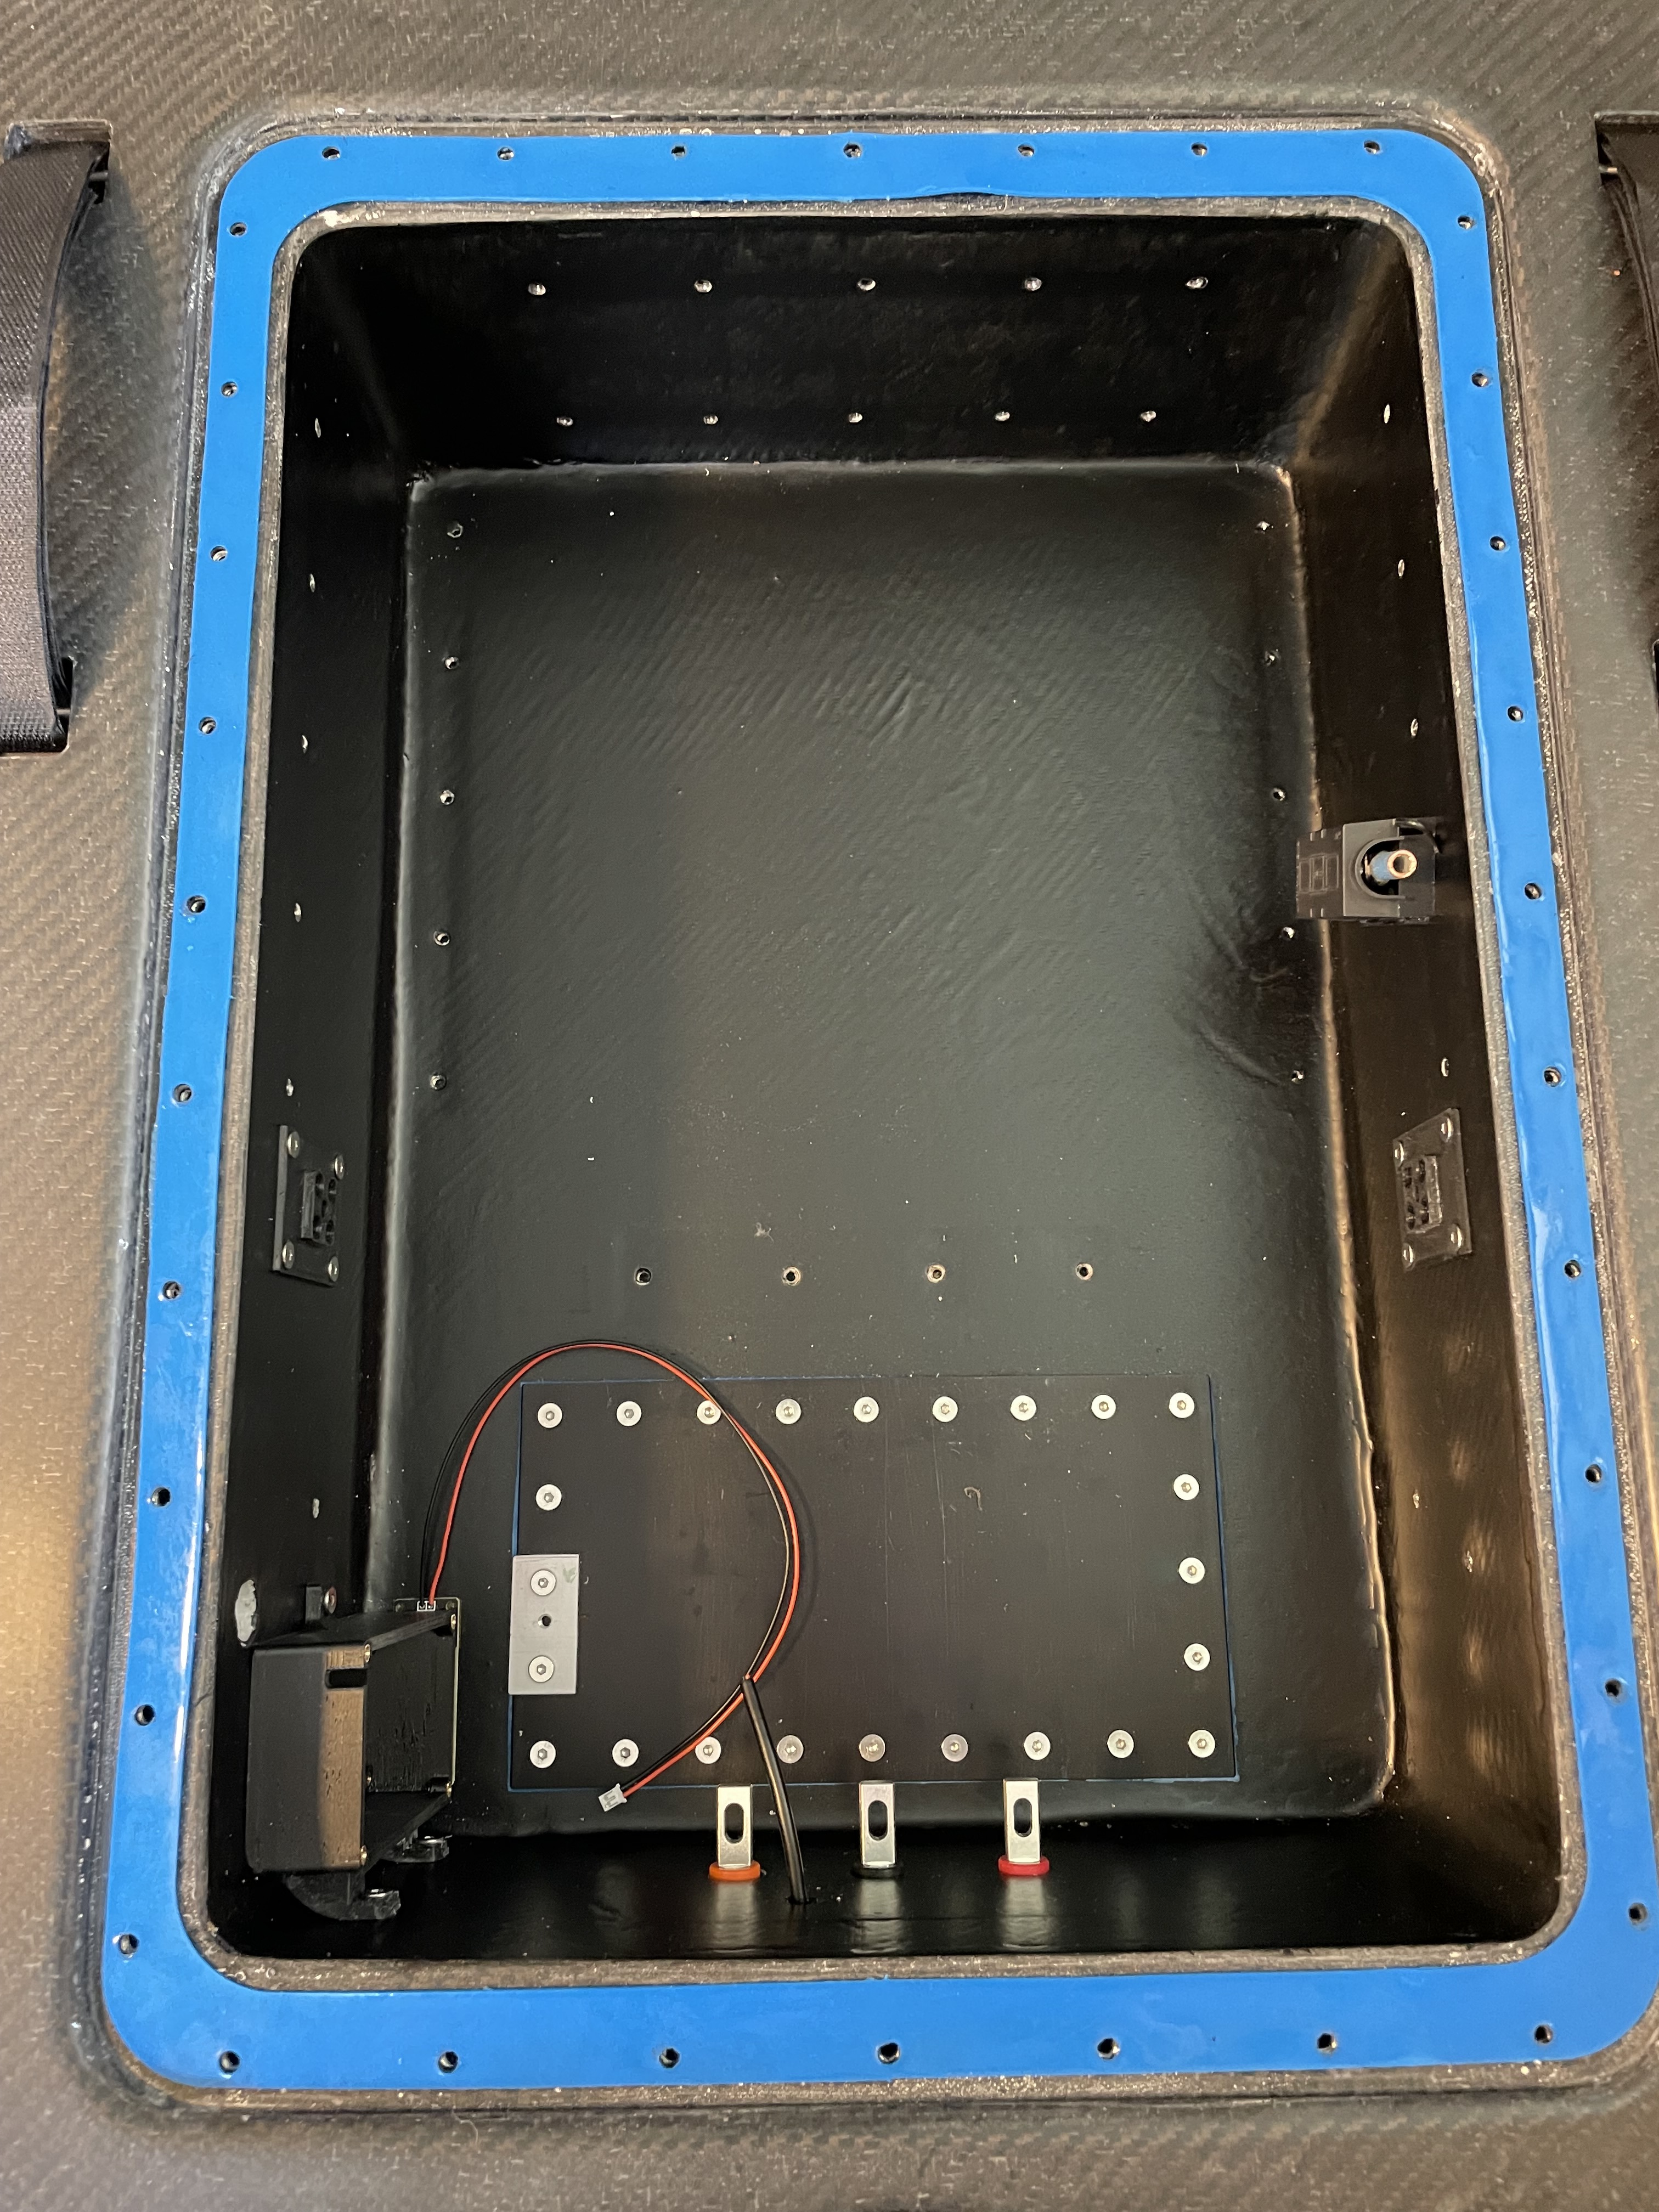
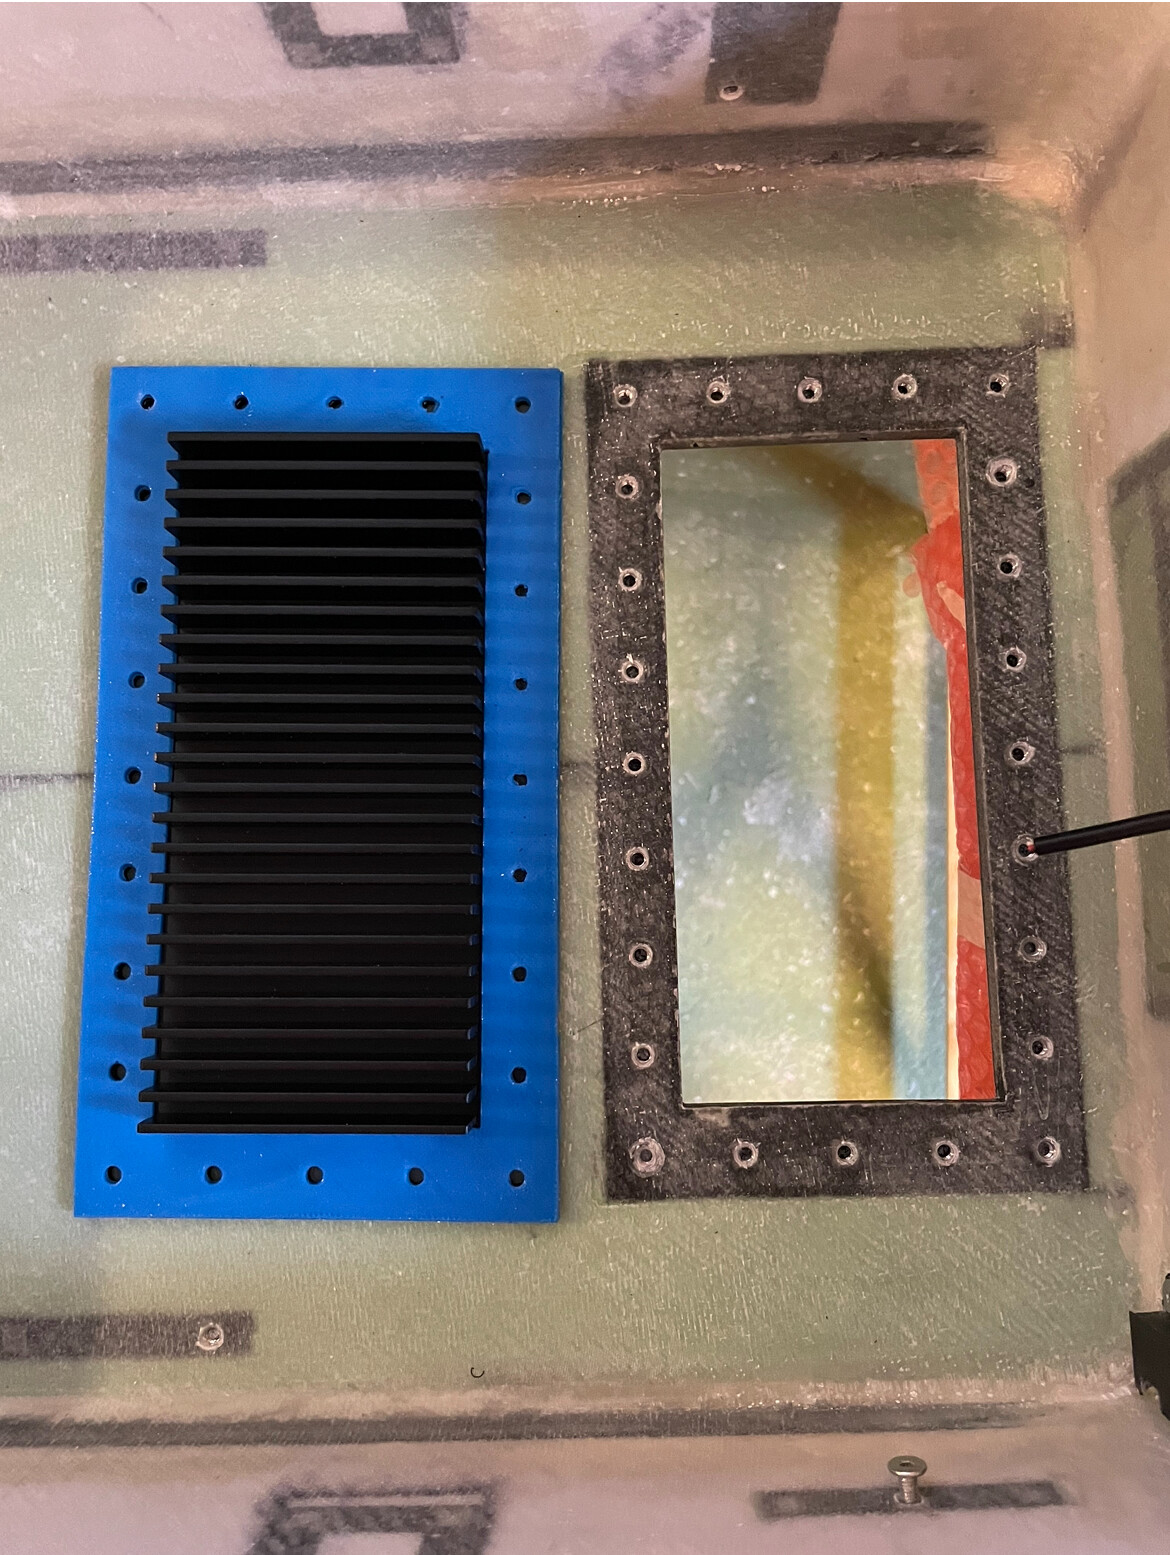
As my new board has many seals, they need to be reusable/easily replaceable. Therefore I made them from Wagnersil 32N 2k silicone. The moulds were 3D printed.

Heat sink:
 ![IMG_4642|666x500 IMG_4684|375x500 IMG_5100](https://foil.zone/uploads/default/original/3X/7/3/73dfa6b54619d85b3d5bec166d8bcd27b58a8b44.jpeg)  
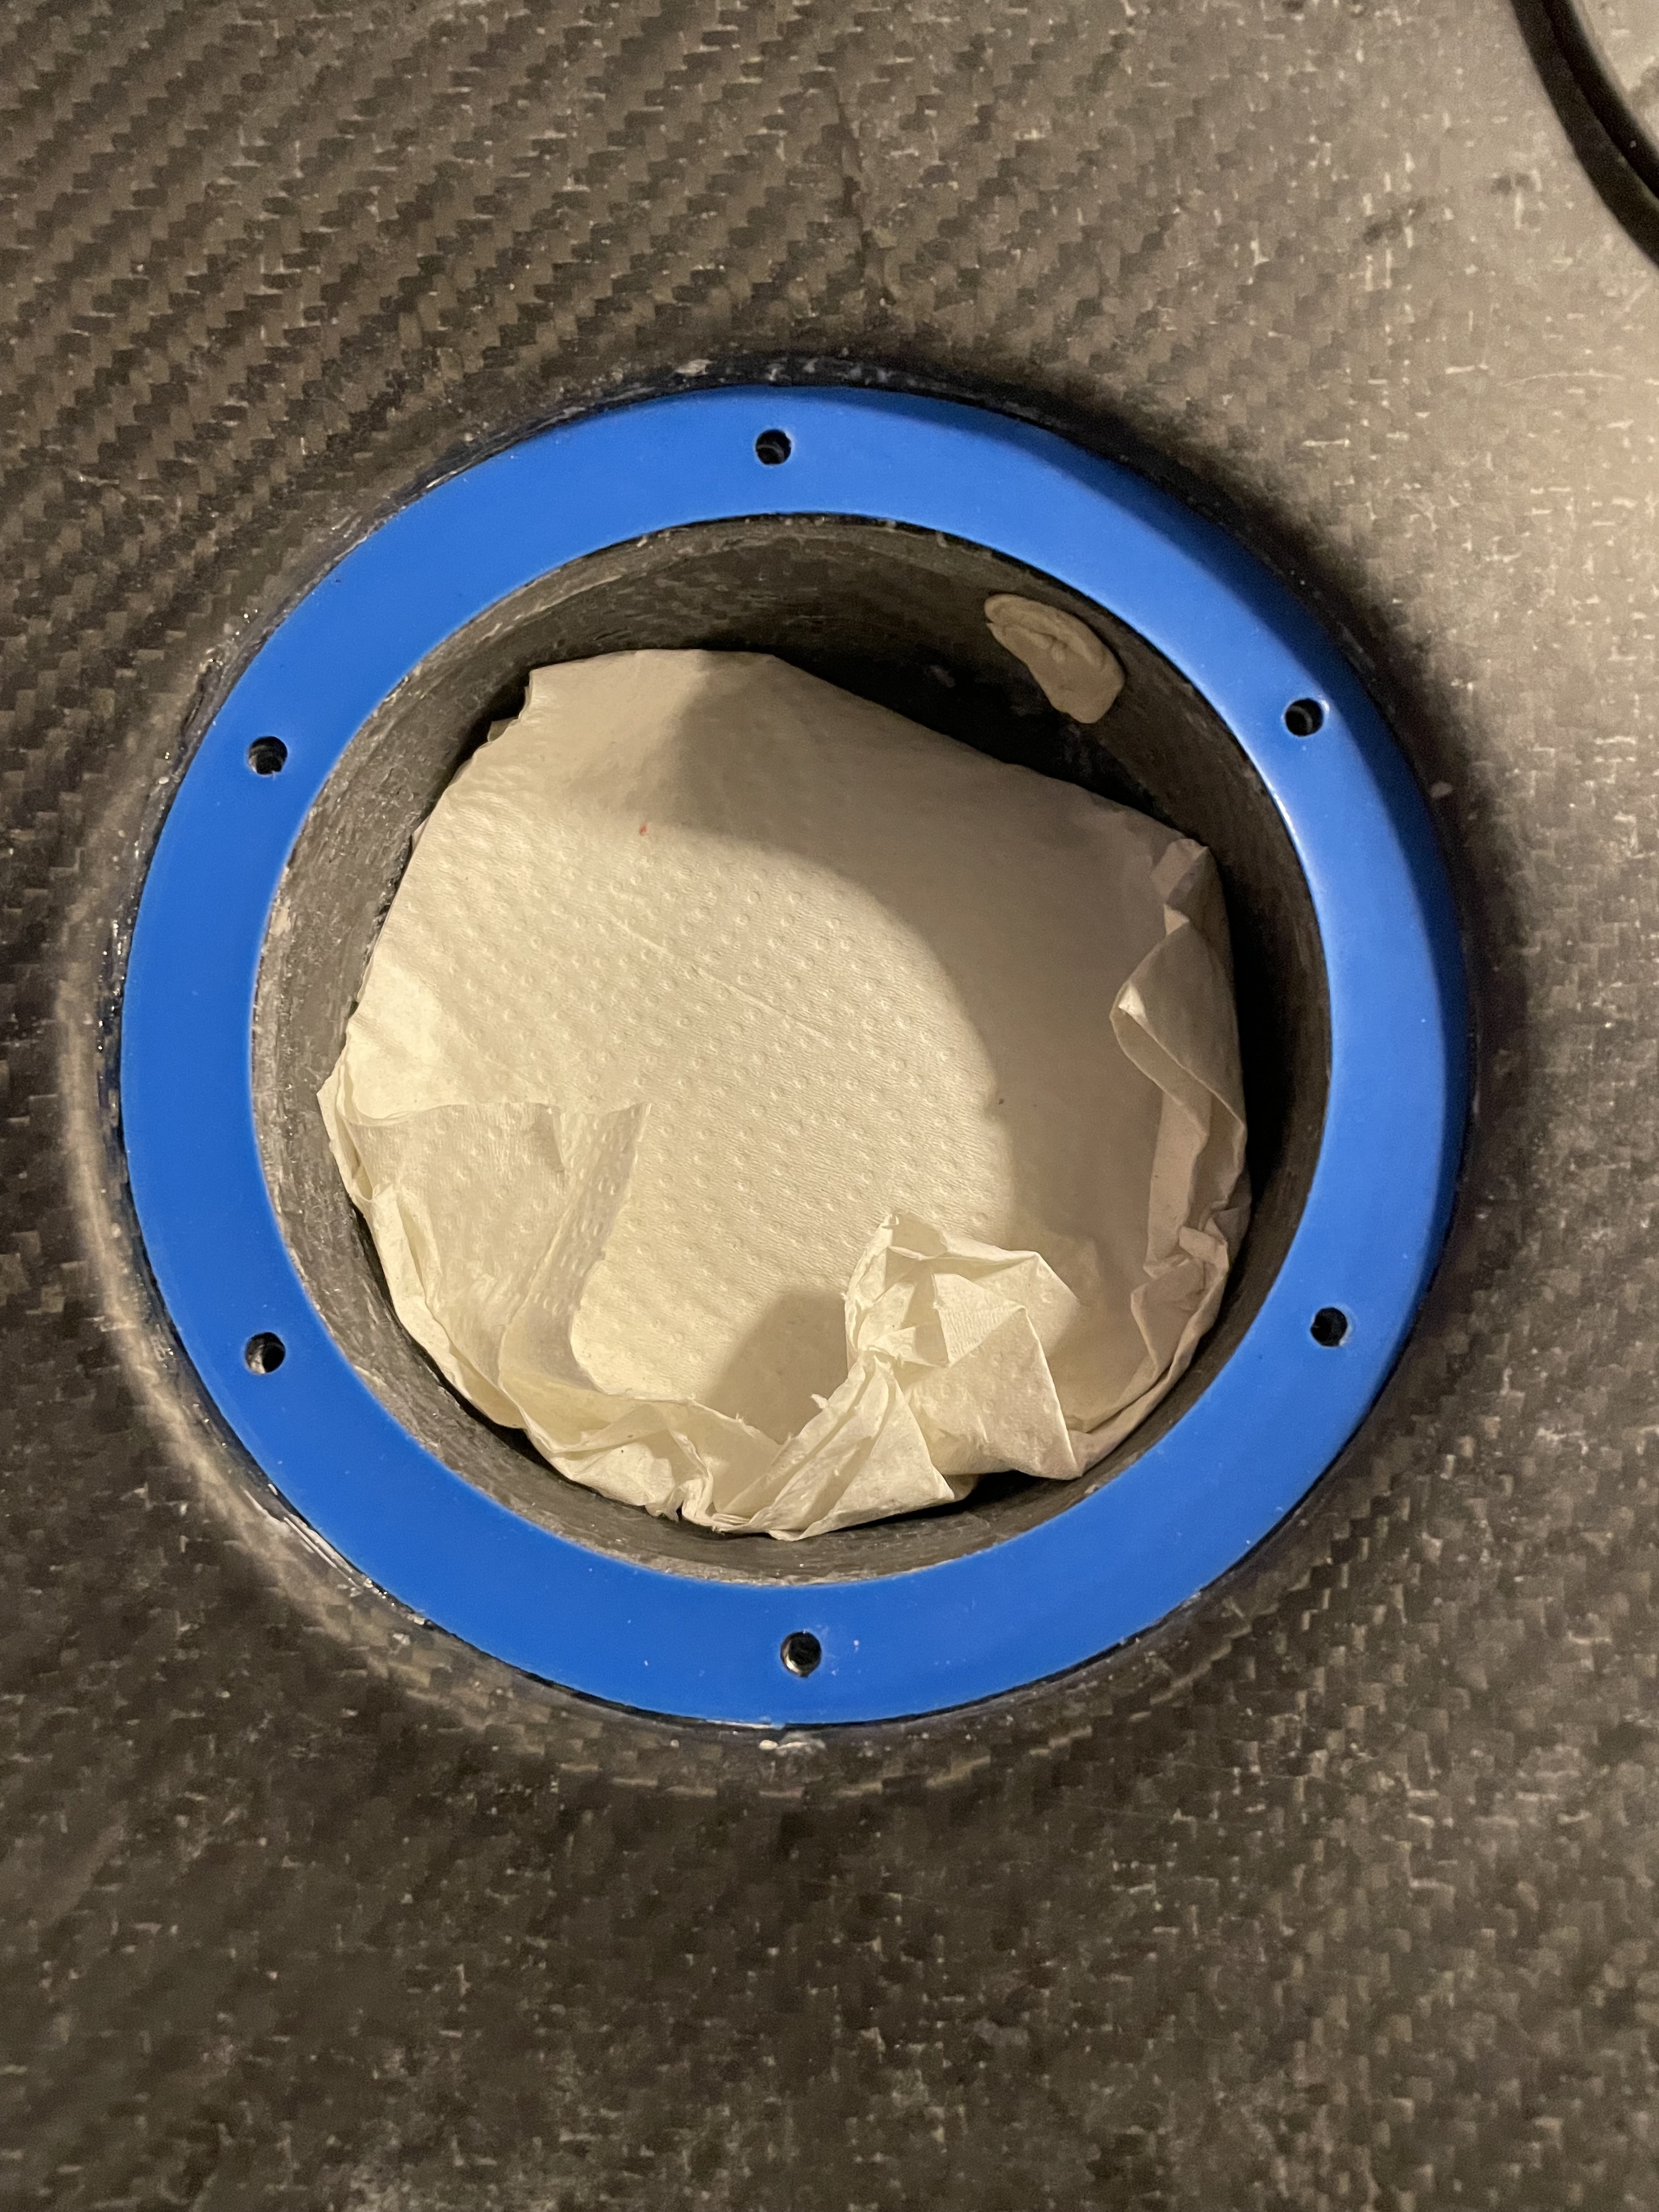
To prevent leakage from underneath the board, I chose a low spacing between the screws that hold the heat sink.

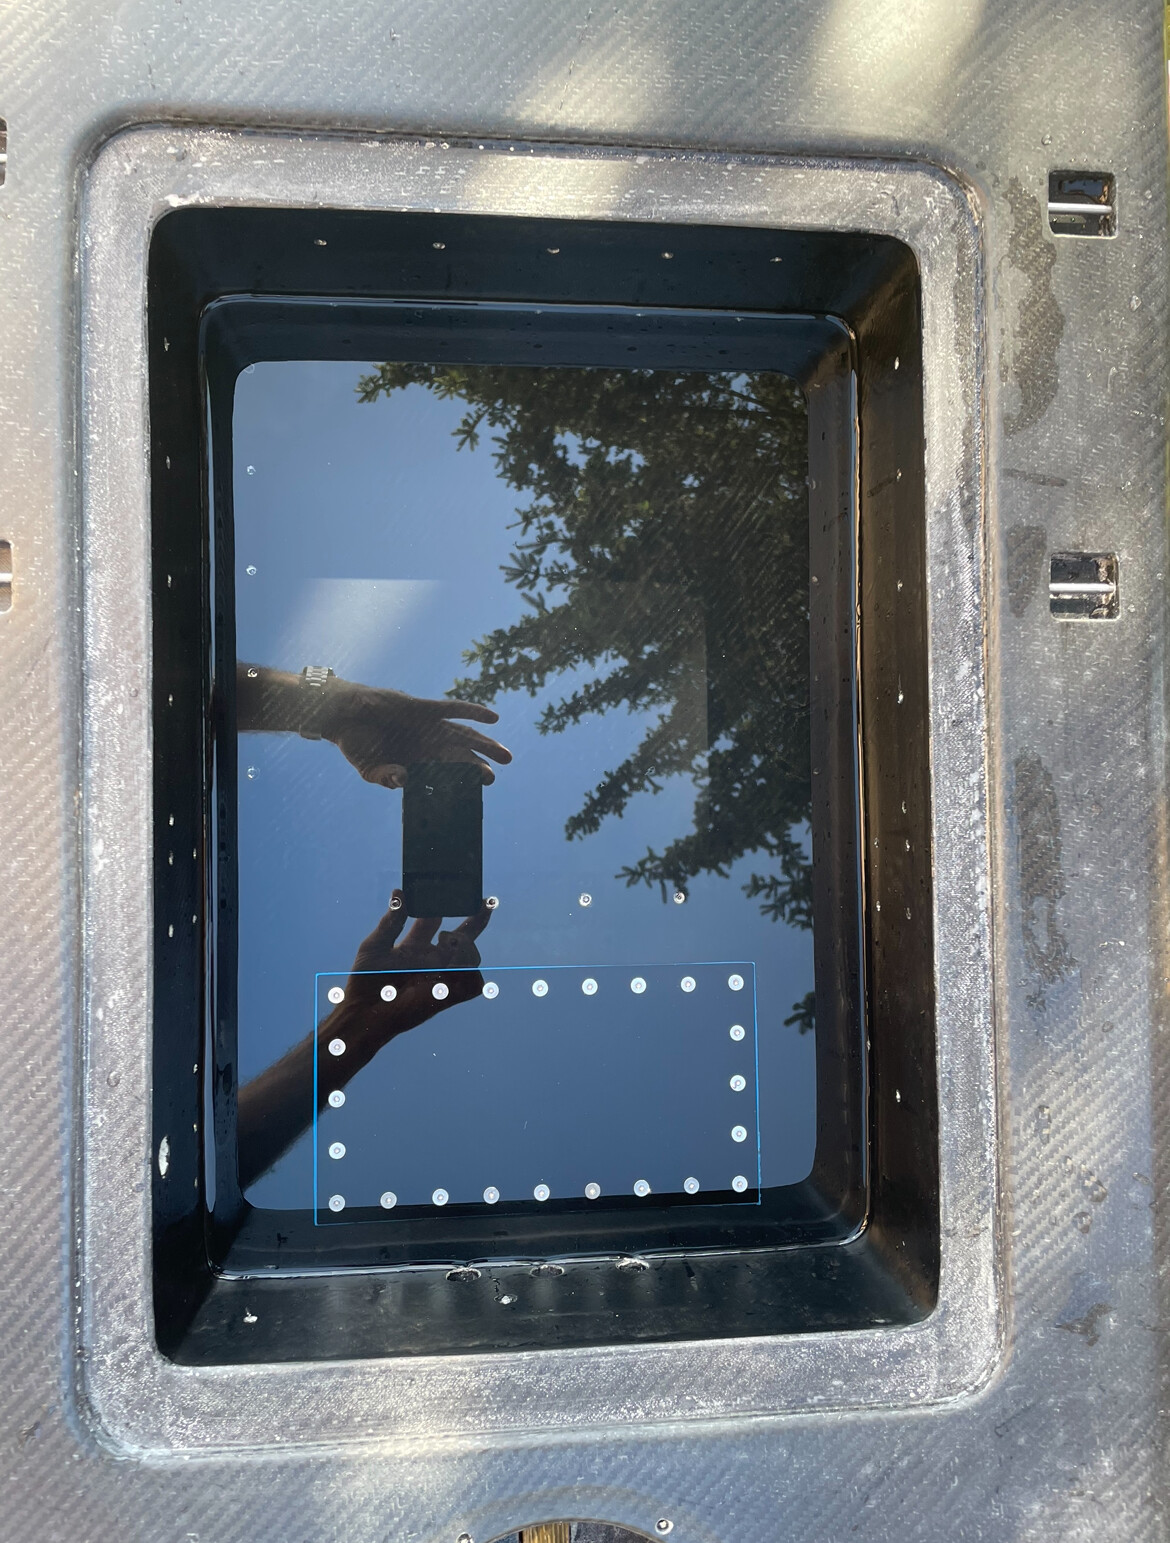
Waterproofness test
 ![IMG_5101](https://foil.zone/uploads/default/original/3X/3/b/3b973db9f6bd28a66339010151b2519c3f57befd.jpeg)

Receiver compartment

 ![IMG_4314](https://foil.zone/uploads/default/original/3X/3/0/303cfd8dc2e219771aafe0977c5c0f9ccd0ef2c6.jpeg)  
 ![IMG_4683](https://foil.zone/uploads/default/original/3X/e/6/e678a7eb50f470473a30a53c617646bca310c65c.jpeg)  
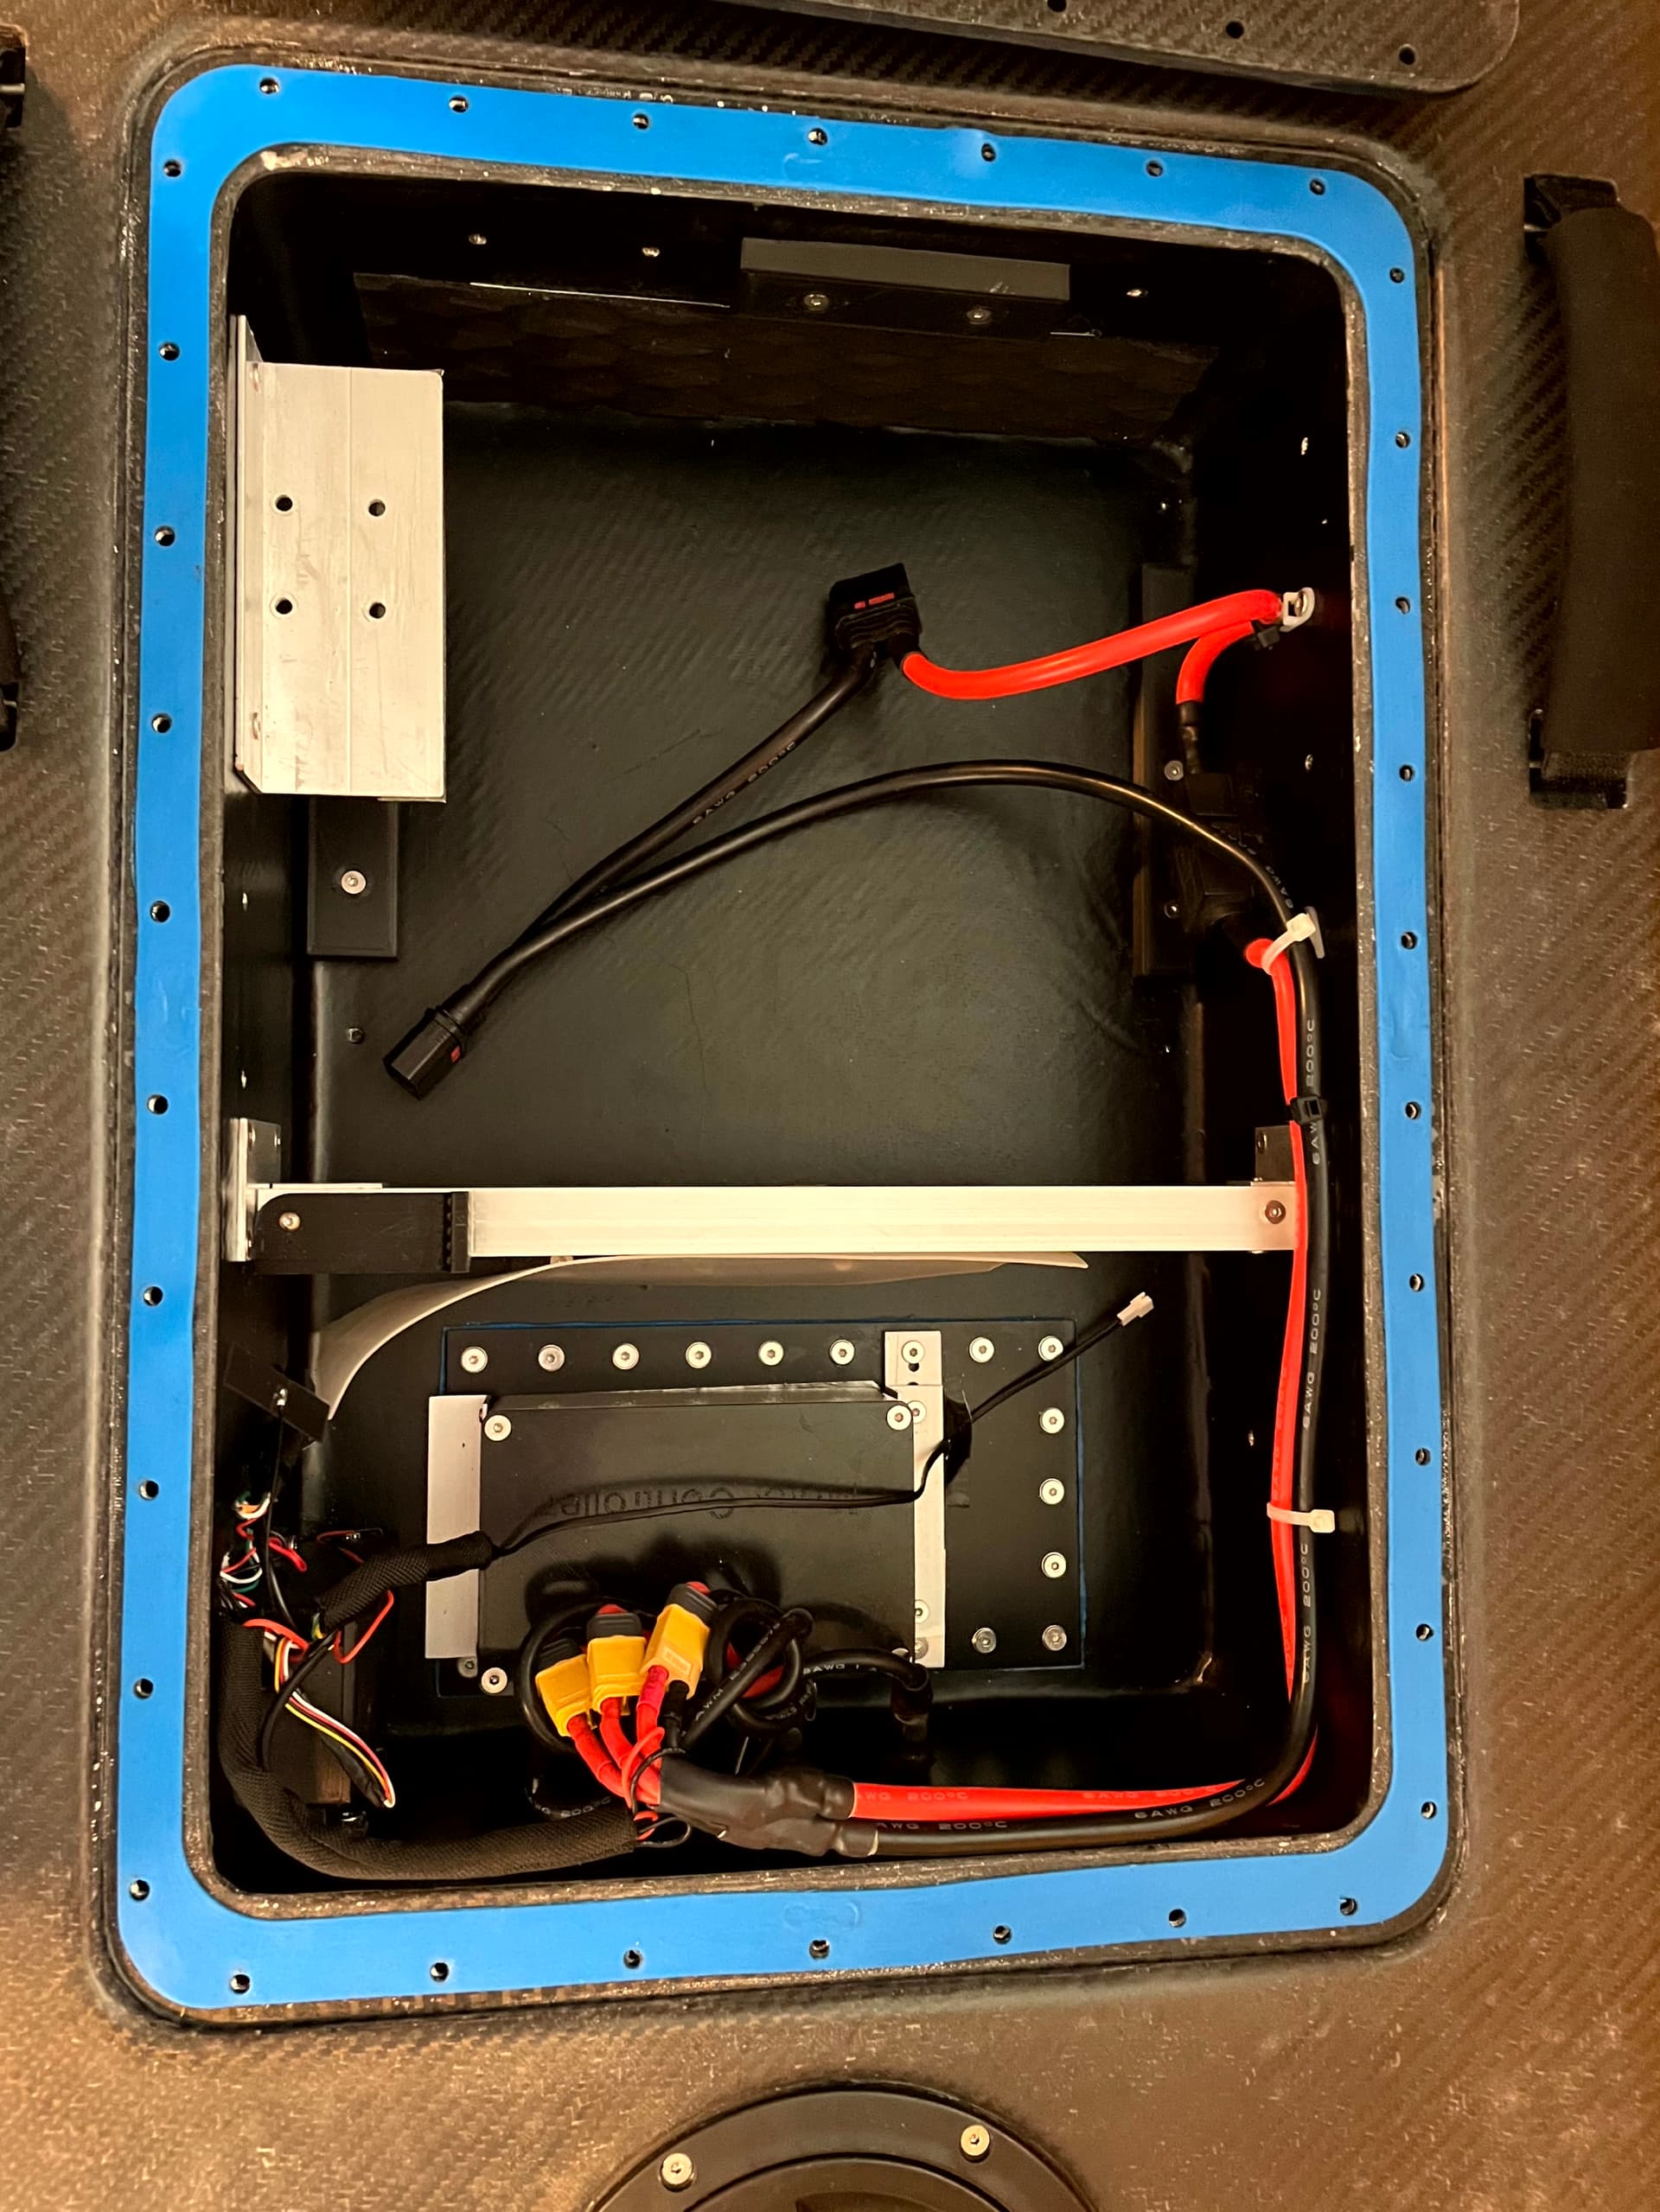
Main compartment

 ![IMG_4642](https://foil.zone/uploads/default/original/3X/5/f/5fc5f57abb4f90c323a51ac6cddb206817ec7778.jpeg)

 ![IMG_4684](https://foil.zone/uploads/default/original/3X/0/d/0dfe6bf0300d08d5b0de8655c07588c83d2b9d76.jpeg)

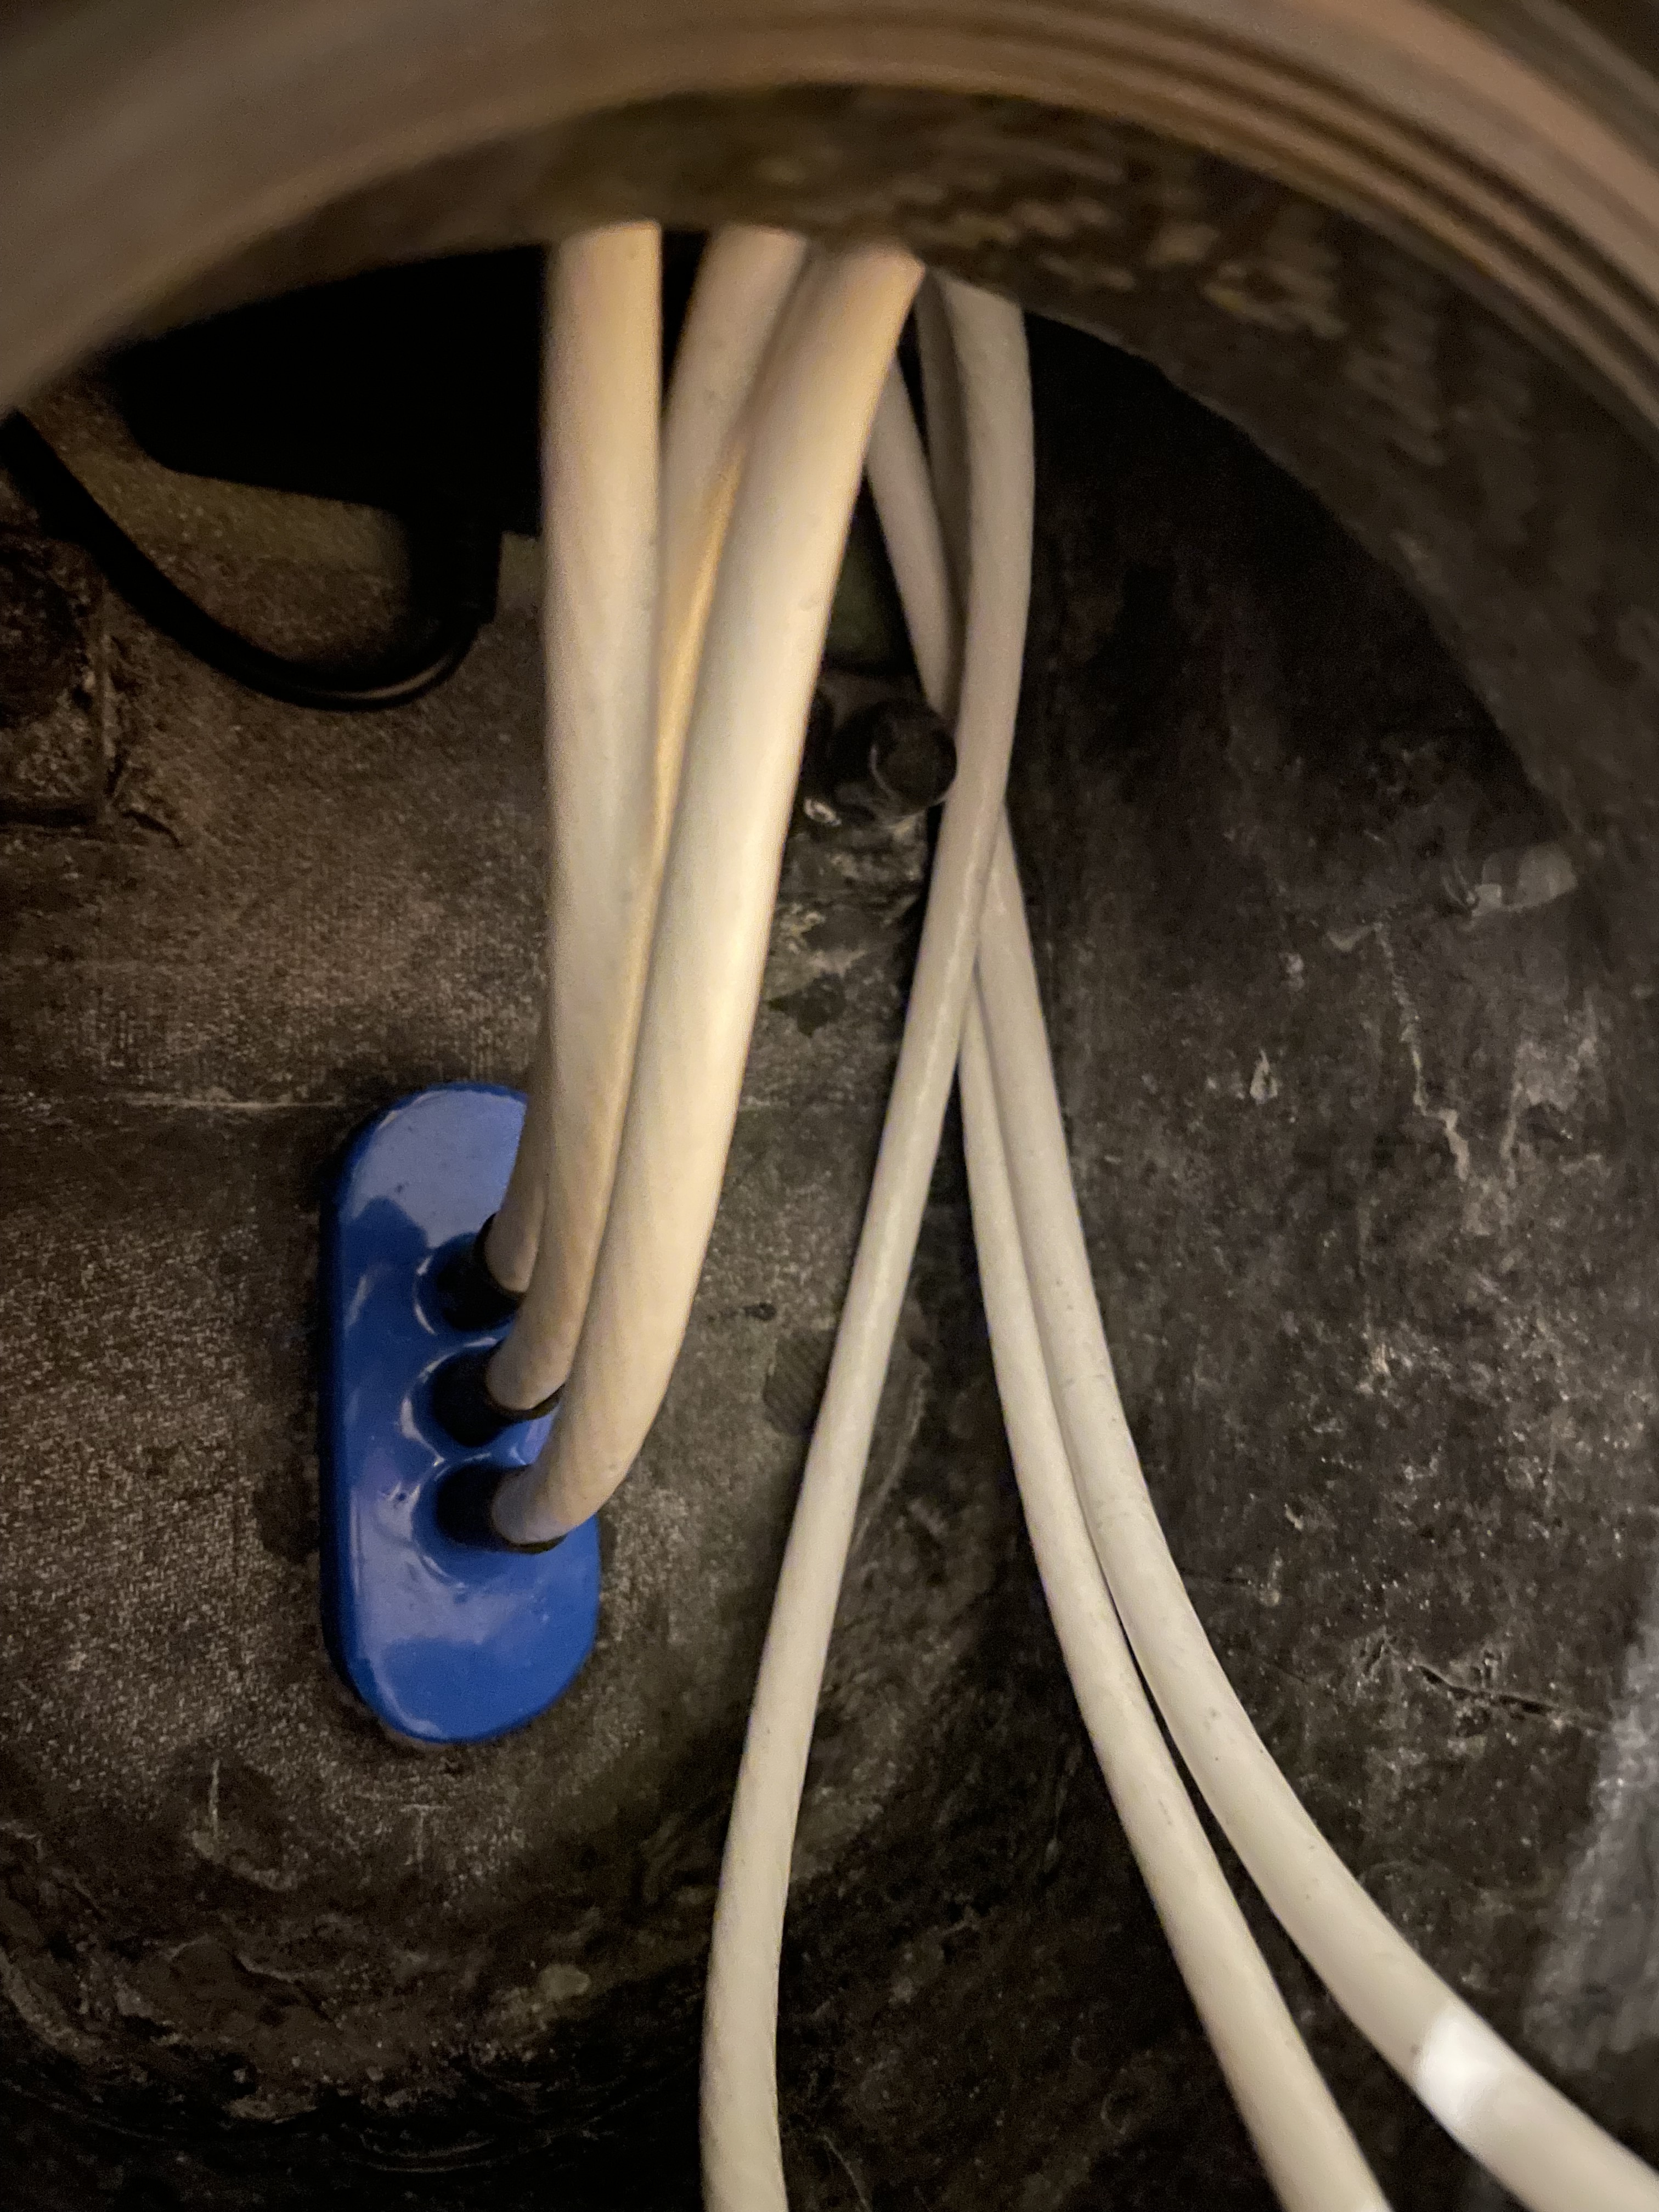
Motor cable compartment

 ![IMG_4594](https://foil.zone/uploads/default/original/3X/1/3/13f5f95545932a993ac304964b661a0fc981a37e.jpeg)  
 ![IMG_4832](https://foil.zone/uploads/default/original/3X/e/1/e12866e72091edd85d07bf2a5fc85f450a7d7009.jpeg)  
 ![IMG_4833](https://foil.zone/uploads/default/original/3X/3/4/34d6a7ac3b35655128fb1992503c09dcc9422ac3.jpeg)

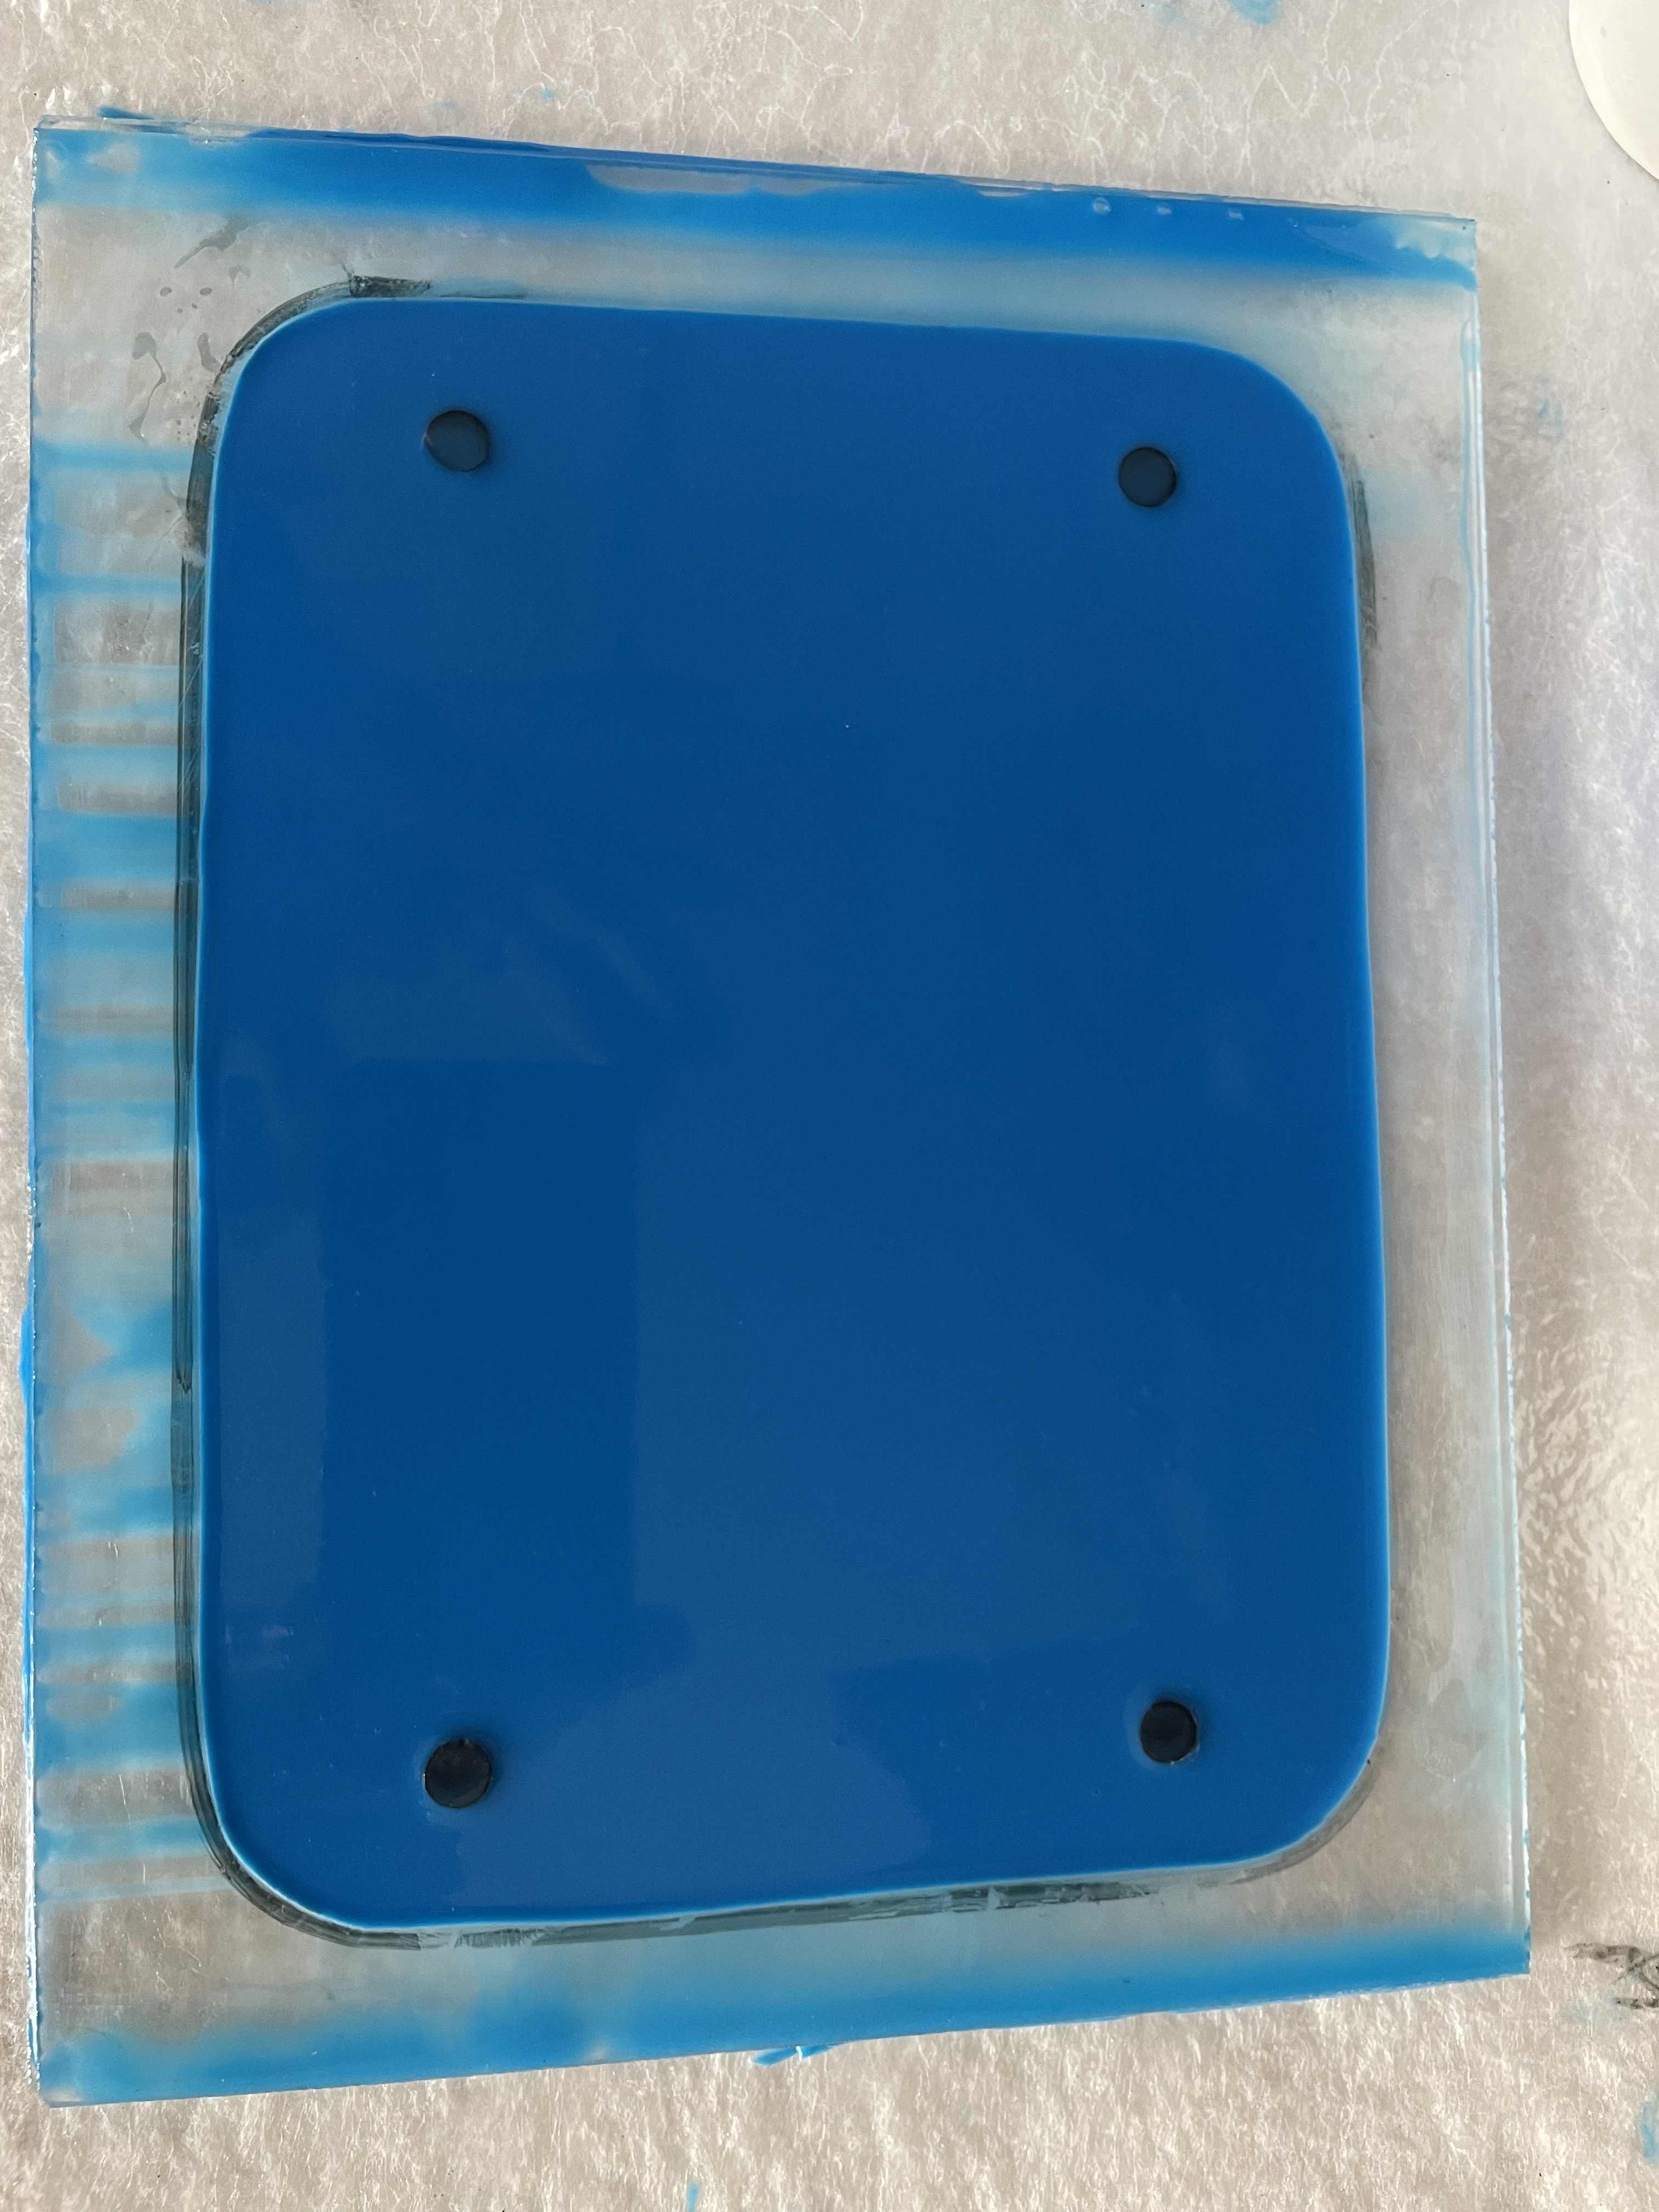
I made this seal in two parts. First I made a flat 2mm thick seal on anacrylic glass plate with a frame cut from 2mm acrylic. Glued 4 3d printed space holders for the screw holes on that mold plate. This way you get a smoother surface than entirely 3d printed.  
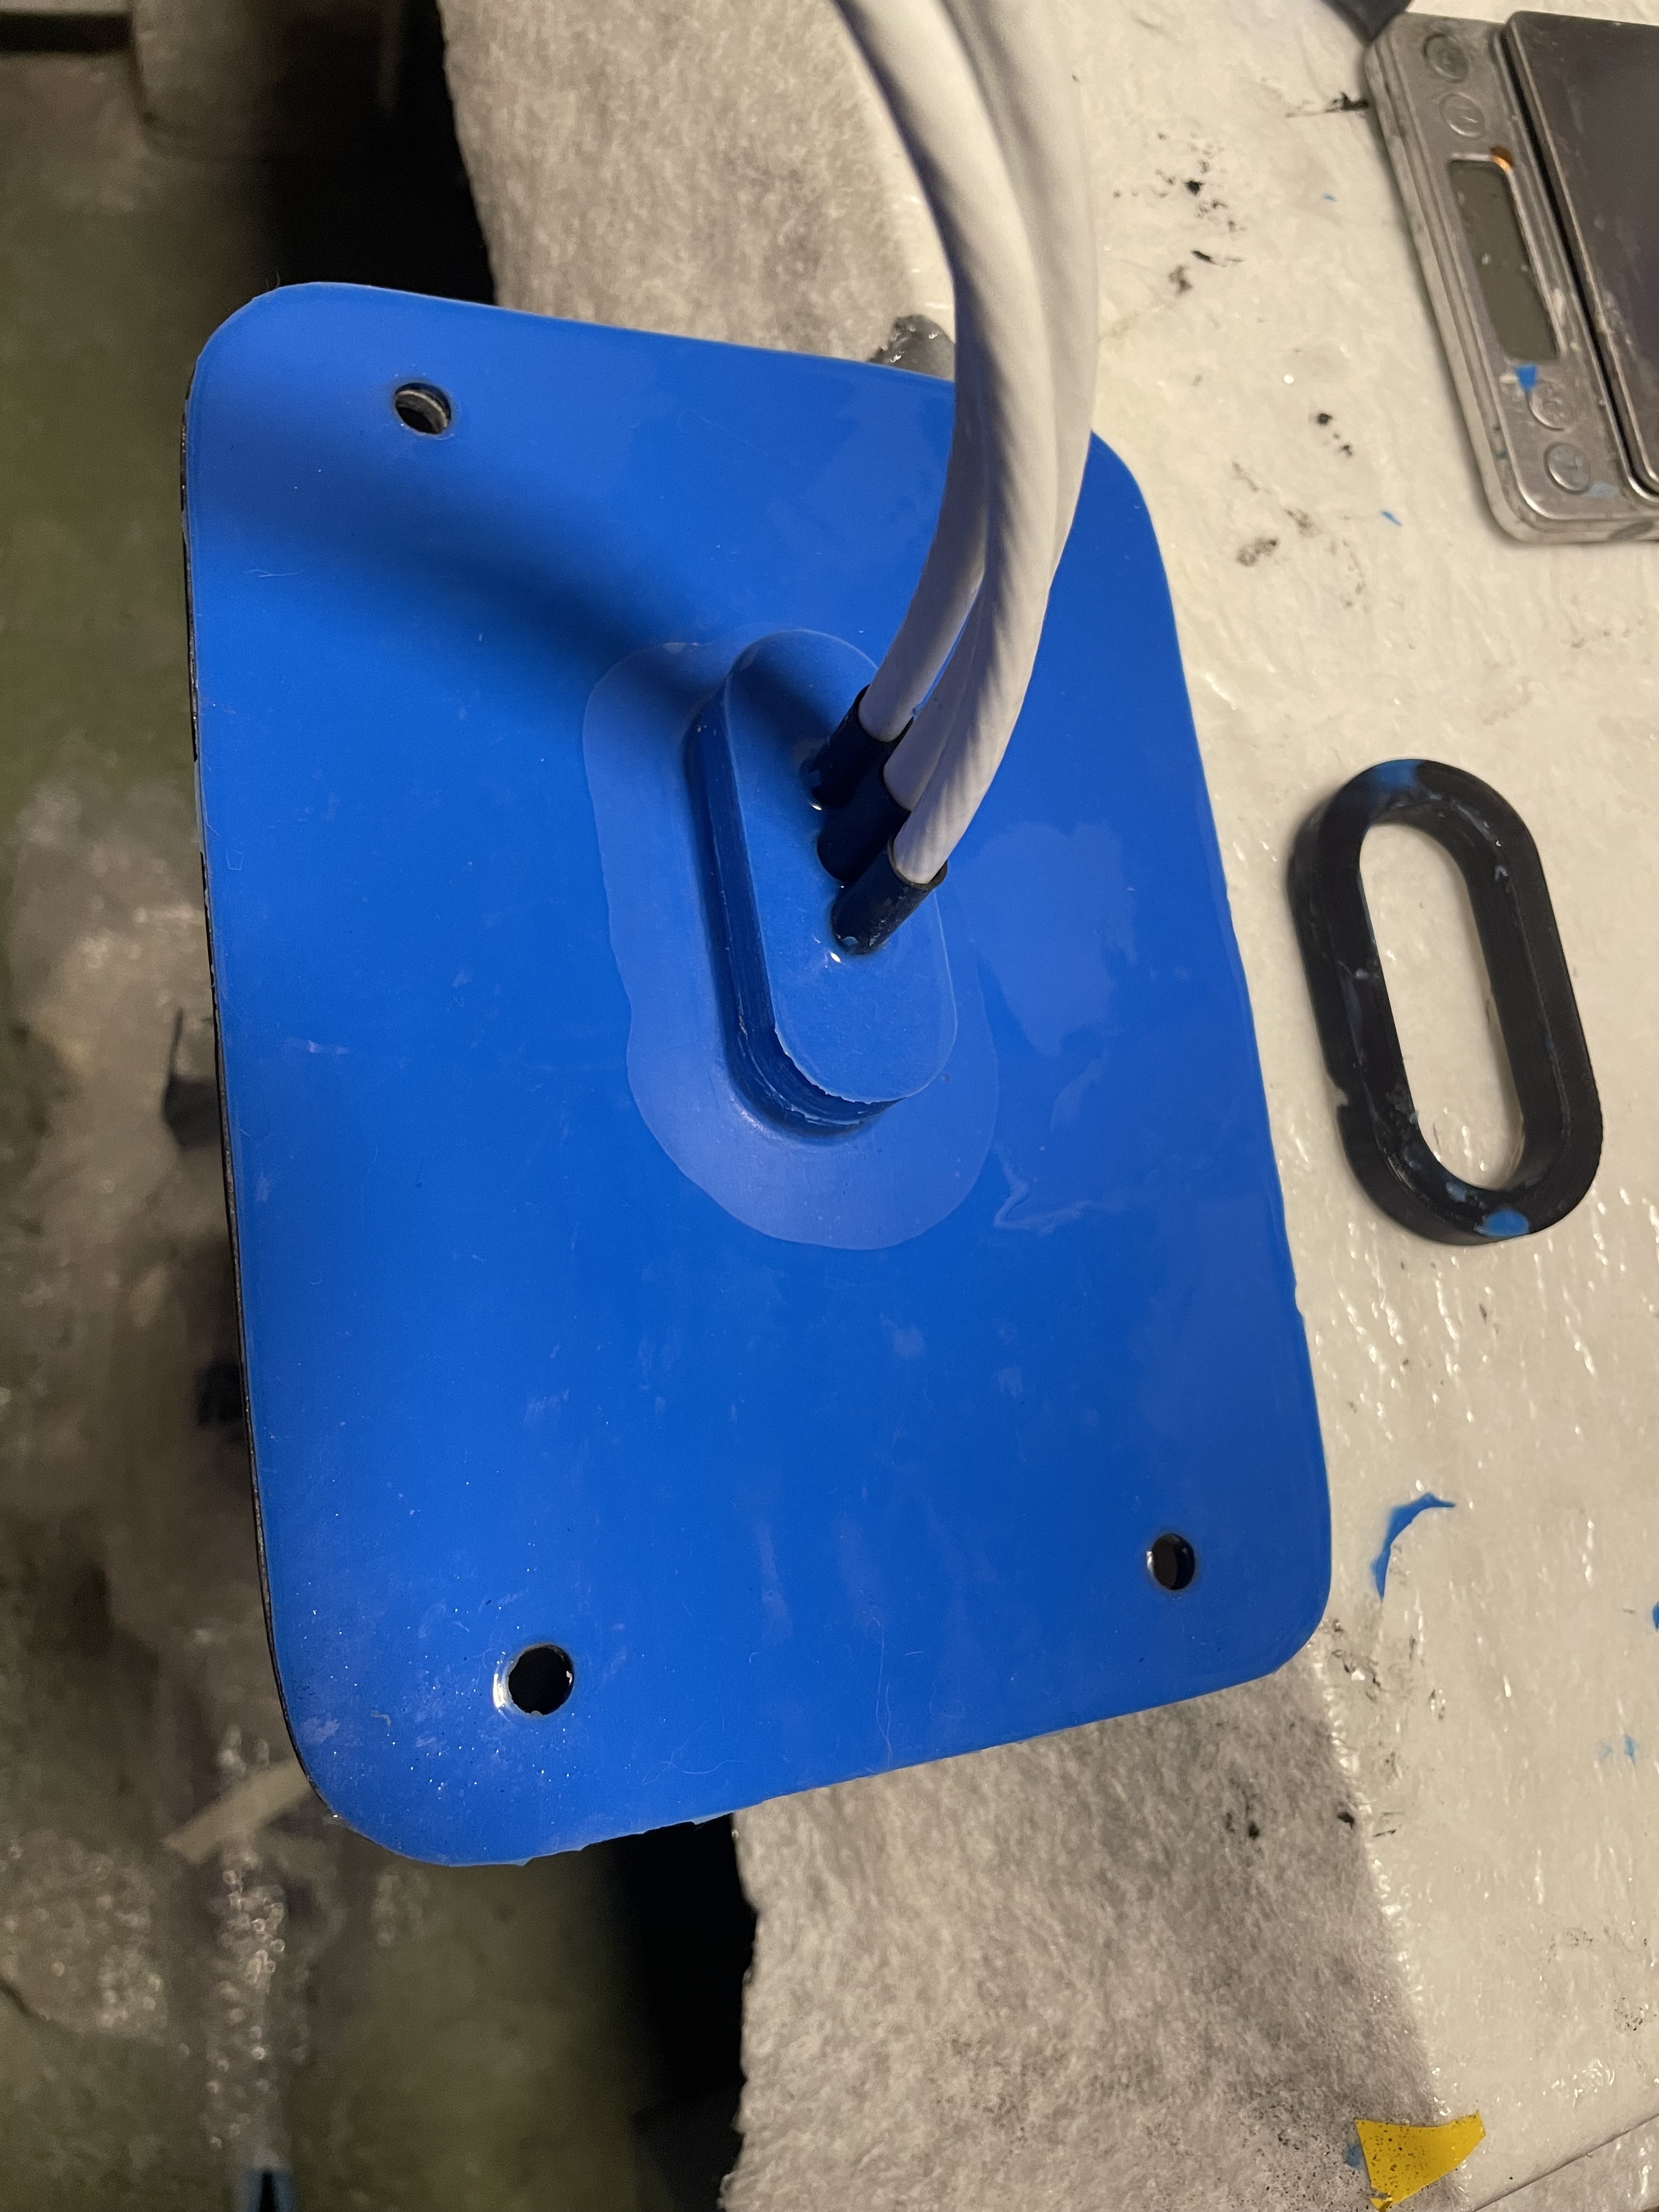
2nd step was to cut out the center opening for the cables. I cut it bigger than the opening in the board, installedthe seal, added a 3d printed mould part from the inside and poured silicone from the inside.  
To my surprise the added silicone sticks to the premade part.

Connectors  
Seals were not available when I ordered the Amphenol connectors, therefore I had to build them too.
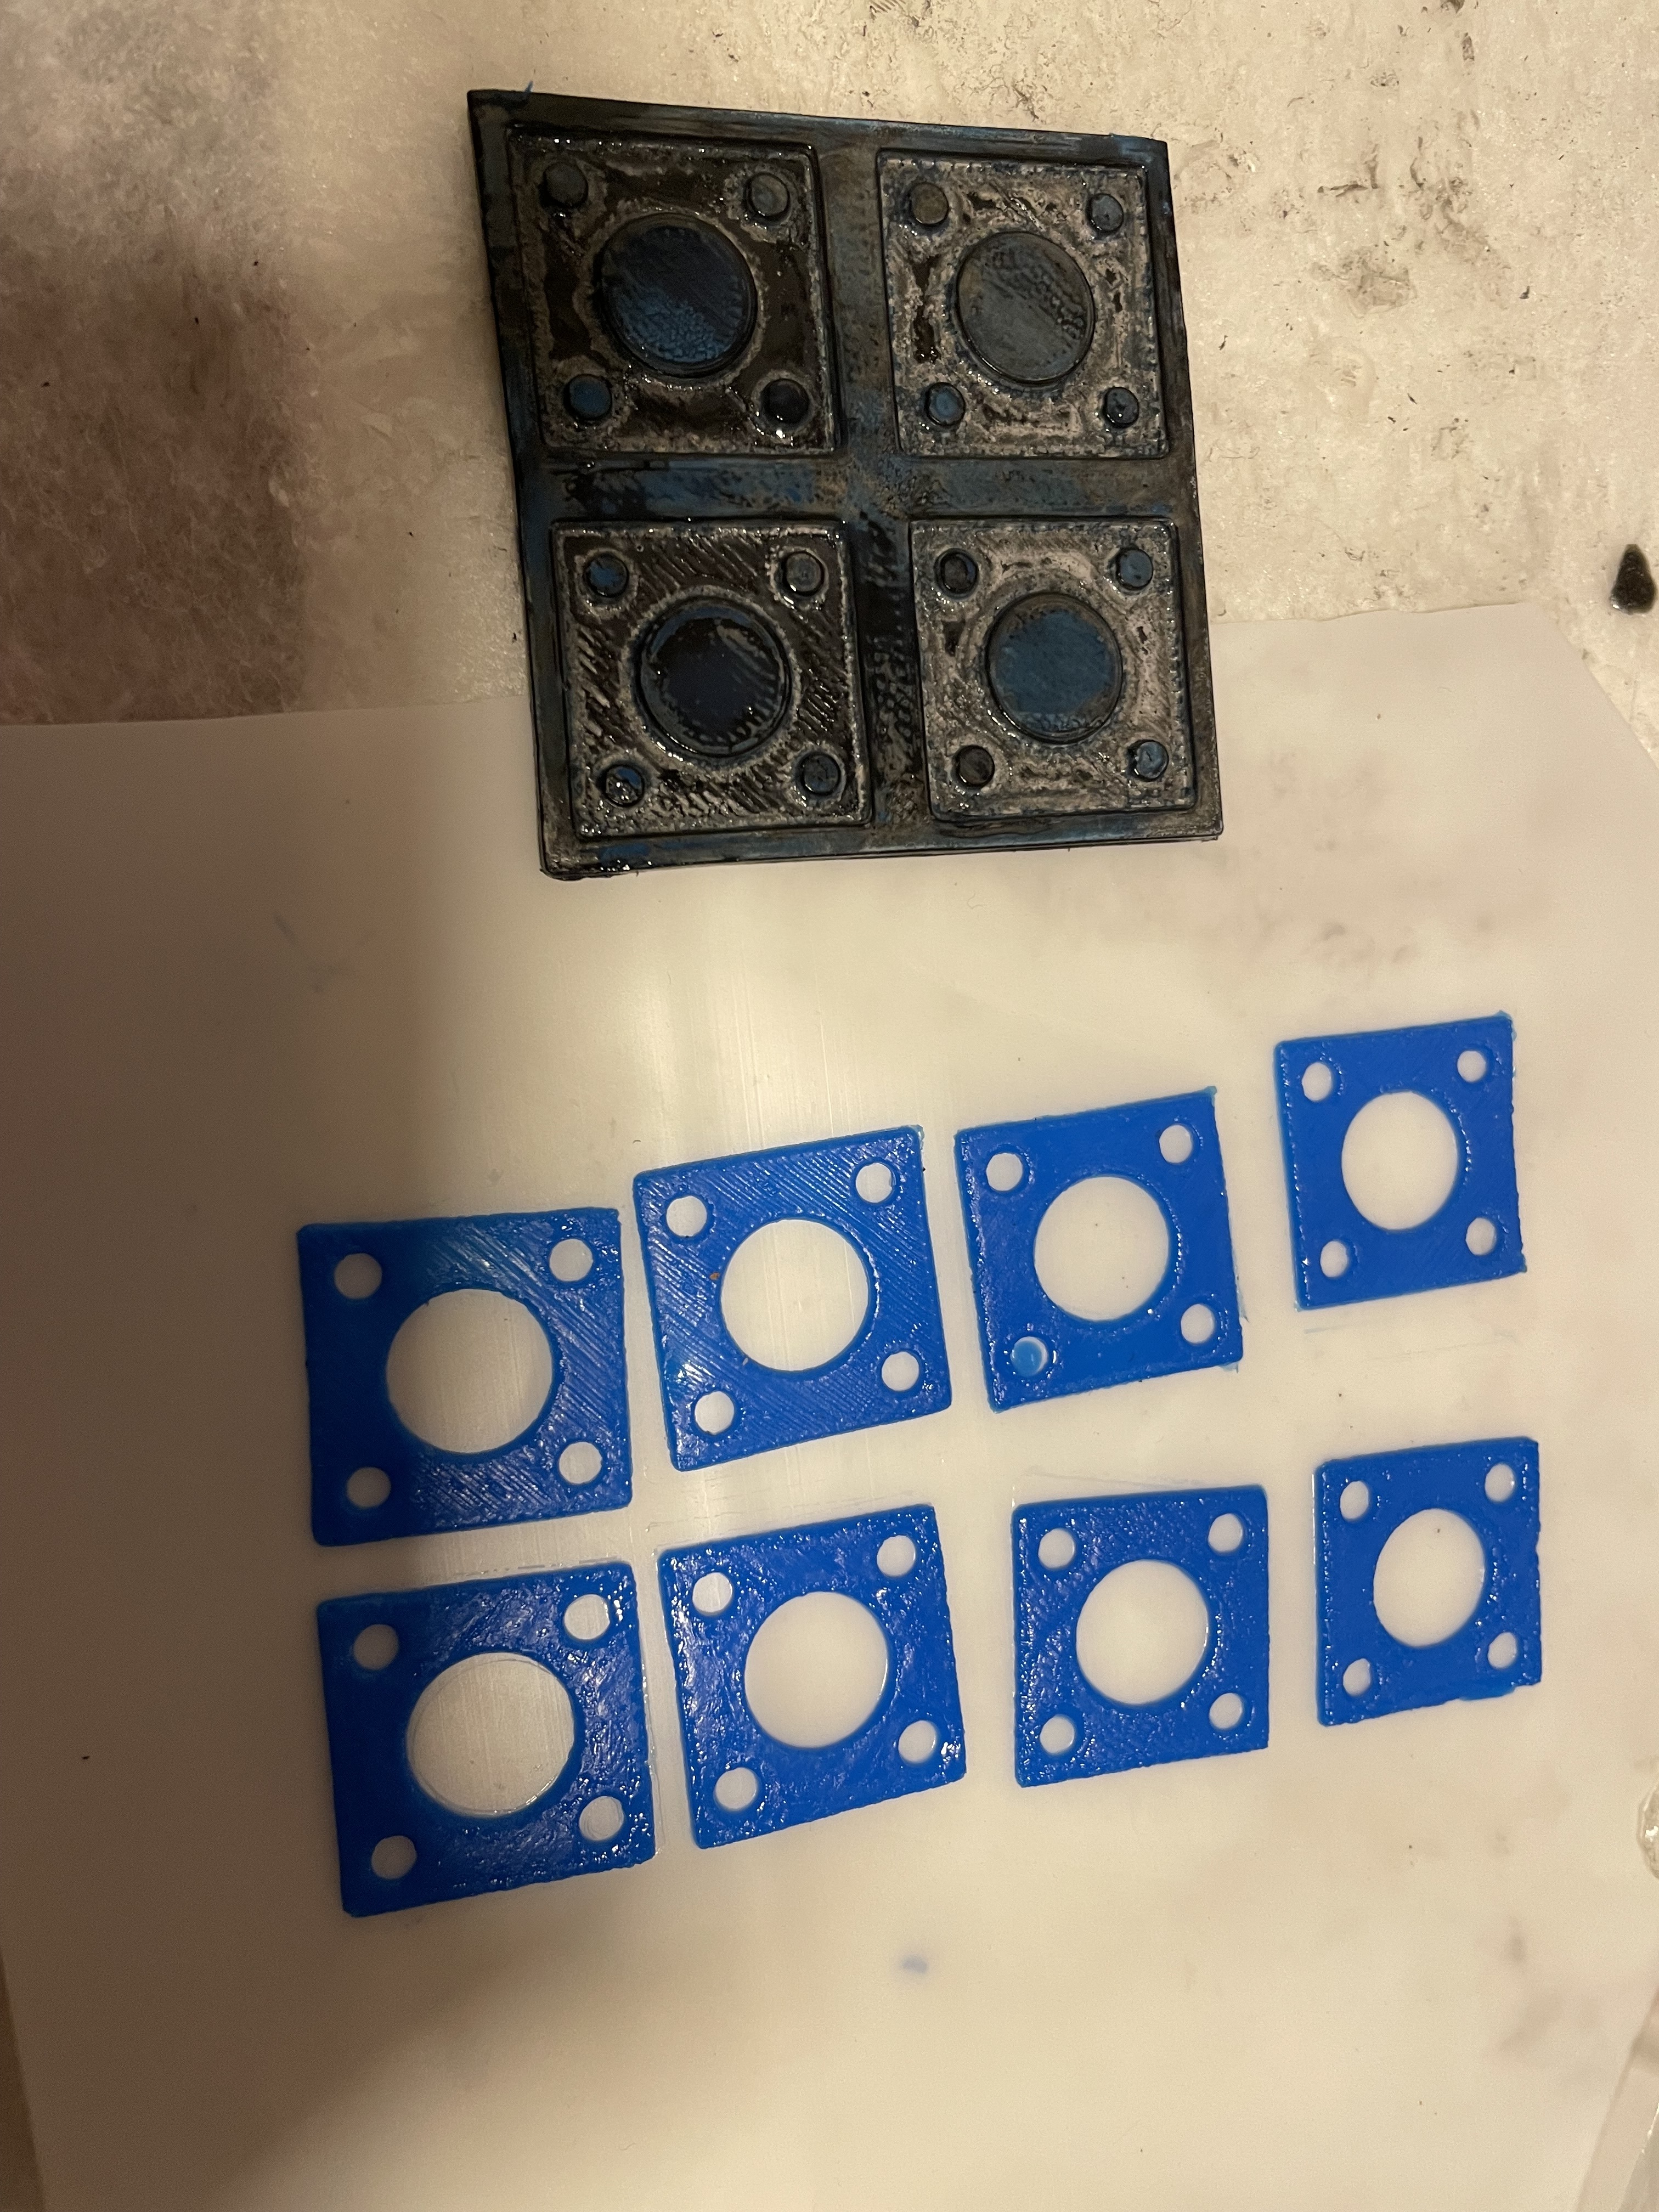
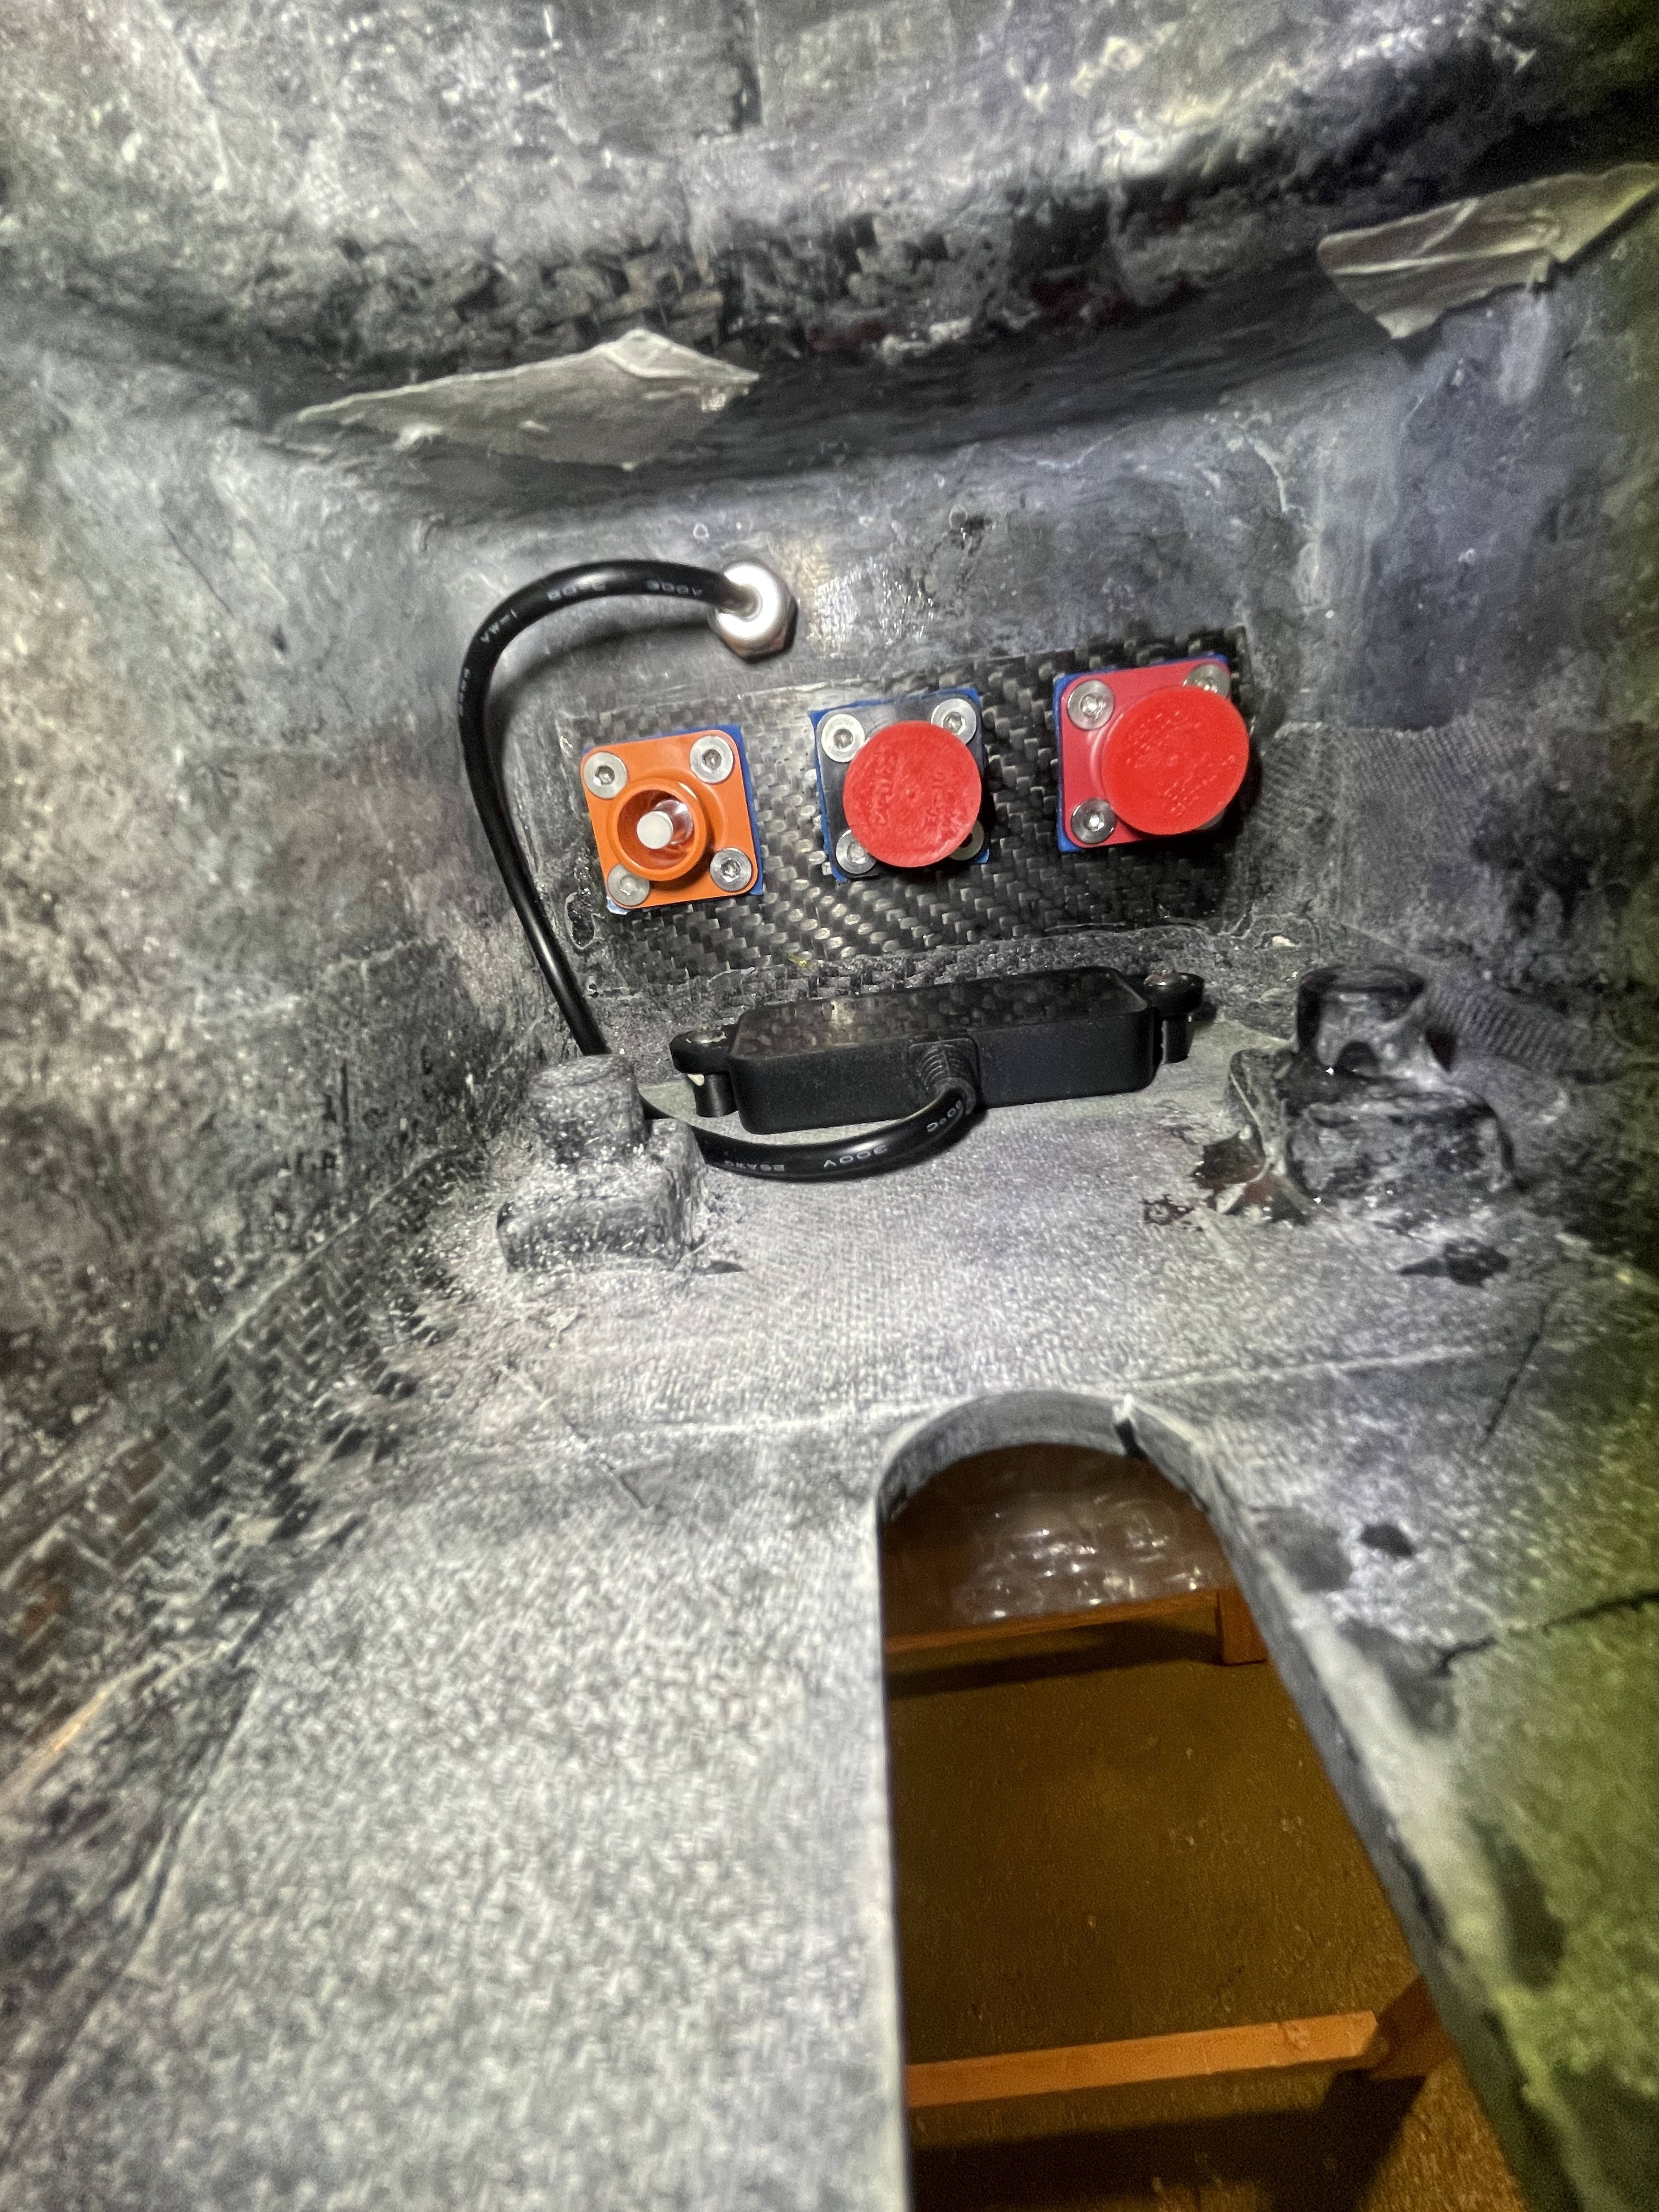
 ![IMG_4560](https://foil.zone/uploads/default/original/3X/e/6/e60bc29cf7391fe0982d3cc95c3135cc670c68ee.jpeg)

 ![IMG_4651](https://foil.zone/uploads/default/original/3X/a/f/afa3ac0fcaedefaf5c55a9b5f8fce2121197dfba.jpeg)

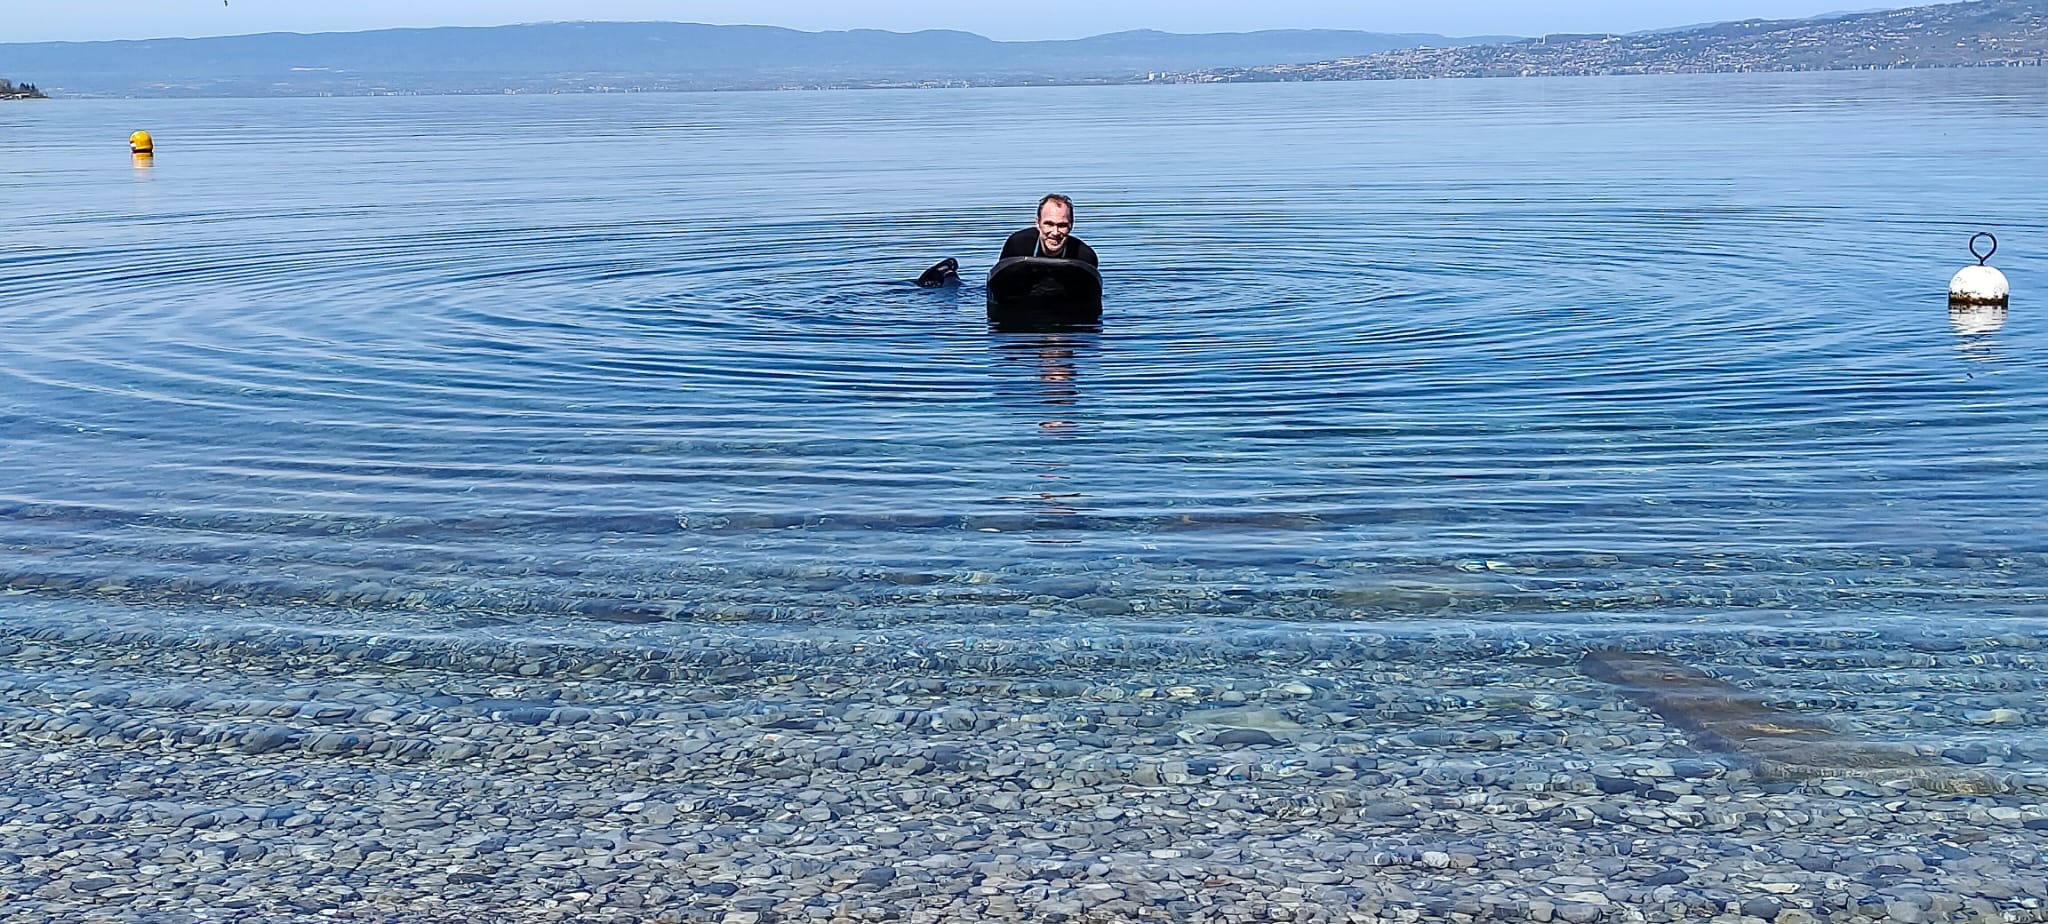
Water Test

 ![image](https://foil.zone/uploads/default/original/3X/f/c/fcbf644b3e072ba4c2c0e738d418279e17af8750.jpeg)  
Took it to the lake and put it under water.  
Main compartment and receiver compartment are 100% waterproof but here was some leakage in the motor cabling compartment at the back. Not a desaster as the connectors and ultrasonic sensor that sits in there are waterproof. Need to troubleshoot, I guess either the round screw hatch or (more likely) the seals around the ultrasonic sensor leak.

---

<div class="post-metadata">

### Author: ![sat\_be](https://foil.zone/user_avatar/foil.zone/sat_be/32/35523_2.png) [@sat\_be](https://foil.zone/u/sat_be)
#### Post date: [July 10, 2024, 9:37pm UTC](https://foil.zone/t/daniels-2nd-build/19956/15 "2024-07-10T21:37:12Z")

</div>

ESC and elctronics  
For the ESC I used a VESC A200Sv4.1, a replacement I got from a faulty v3. Not the cheapest option but it is well made and runs cool. To protect it from water, I put it in an extra aluminum case. The case is not 100% waterproof as I could not bother with cable glands. The compartment is waterproof, it is just an extra safety measure if some drops should get in. There is a 0.5mm heat pad between the ESC and the case. Between the case and the heat sink, there is only a thin graphite heat transfer foil, as the surfaces are flat. I lathed down the painting on the outside of the case. On the inside I just “machined” it on a drill press. The passive cooling works well, the VESC temp never exceeded 40°C so far.  
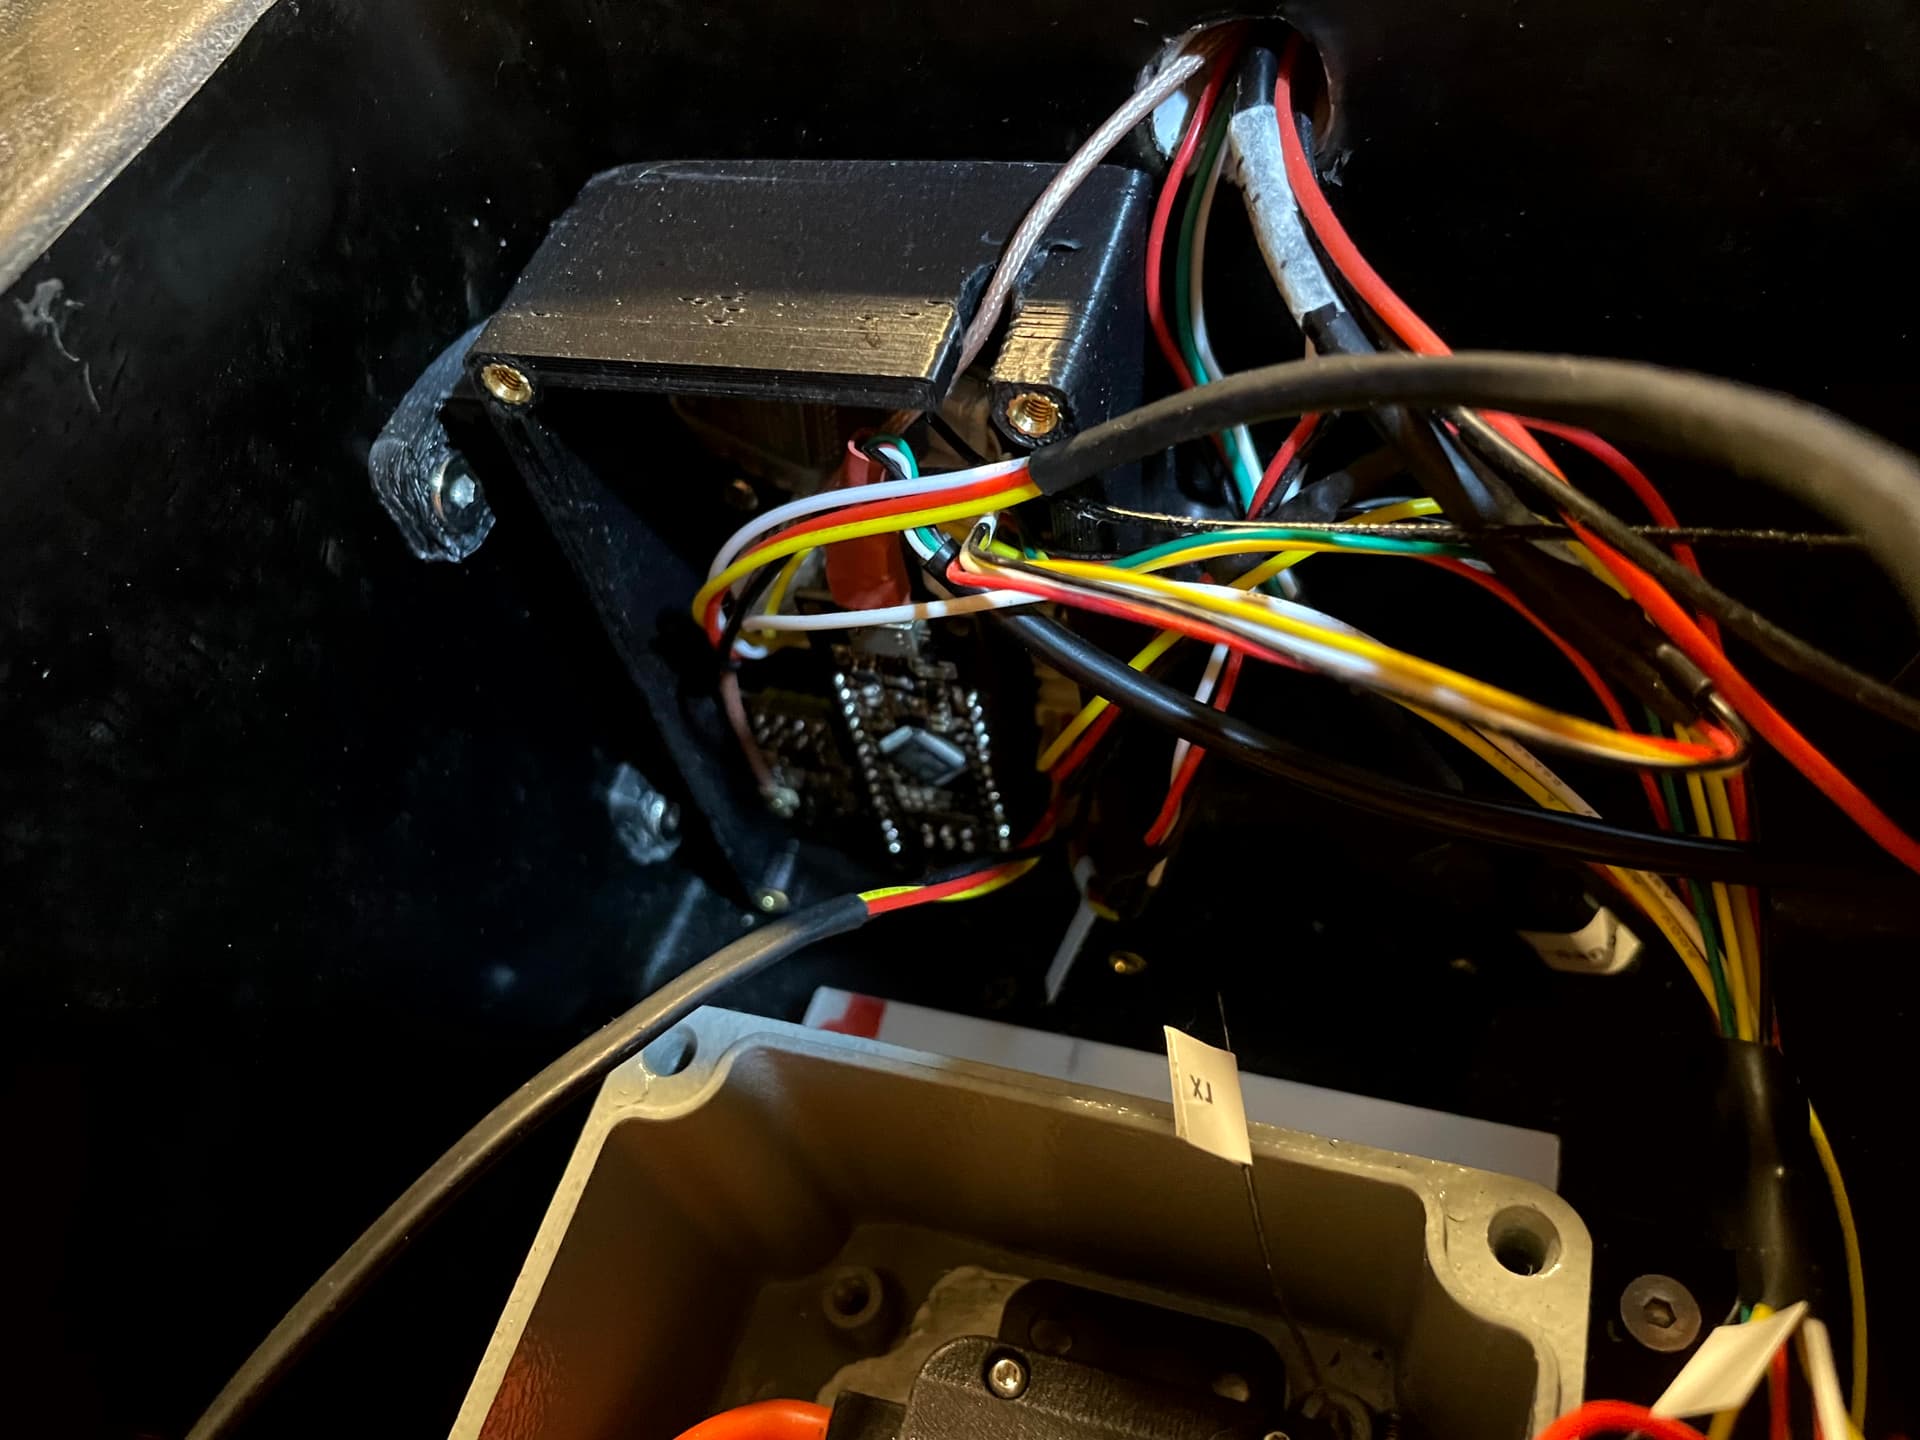
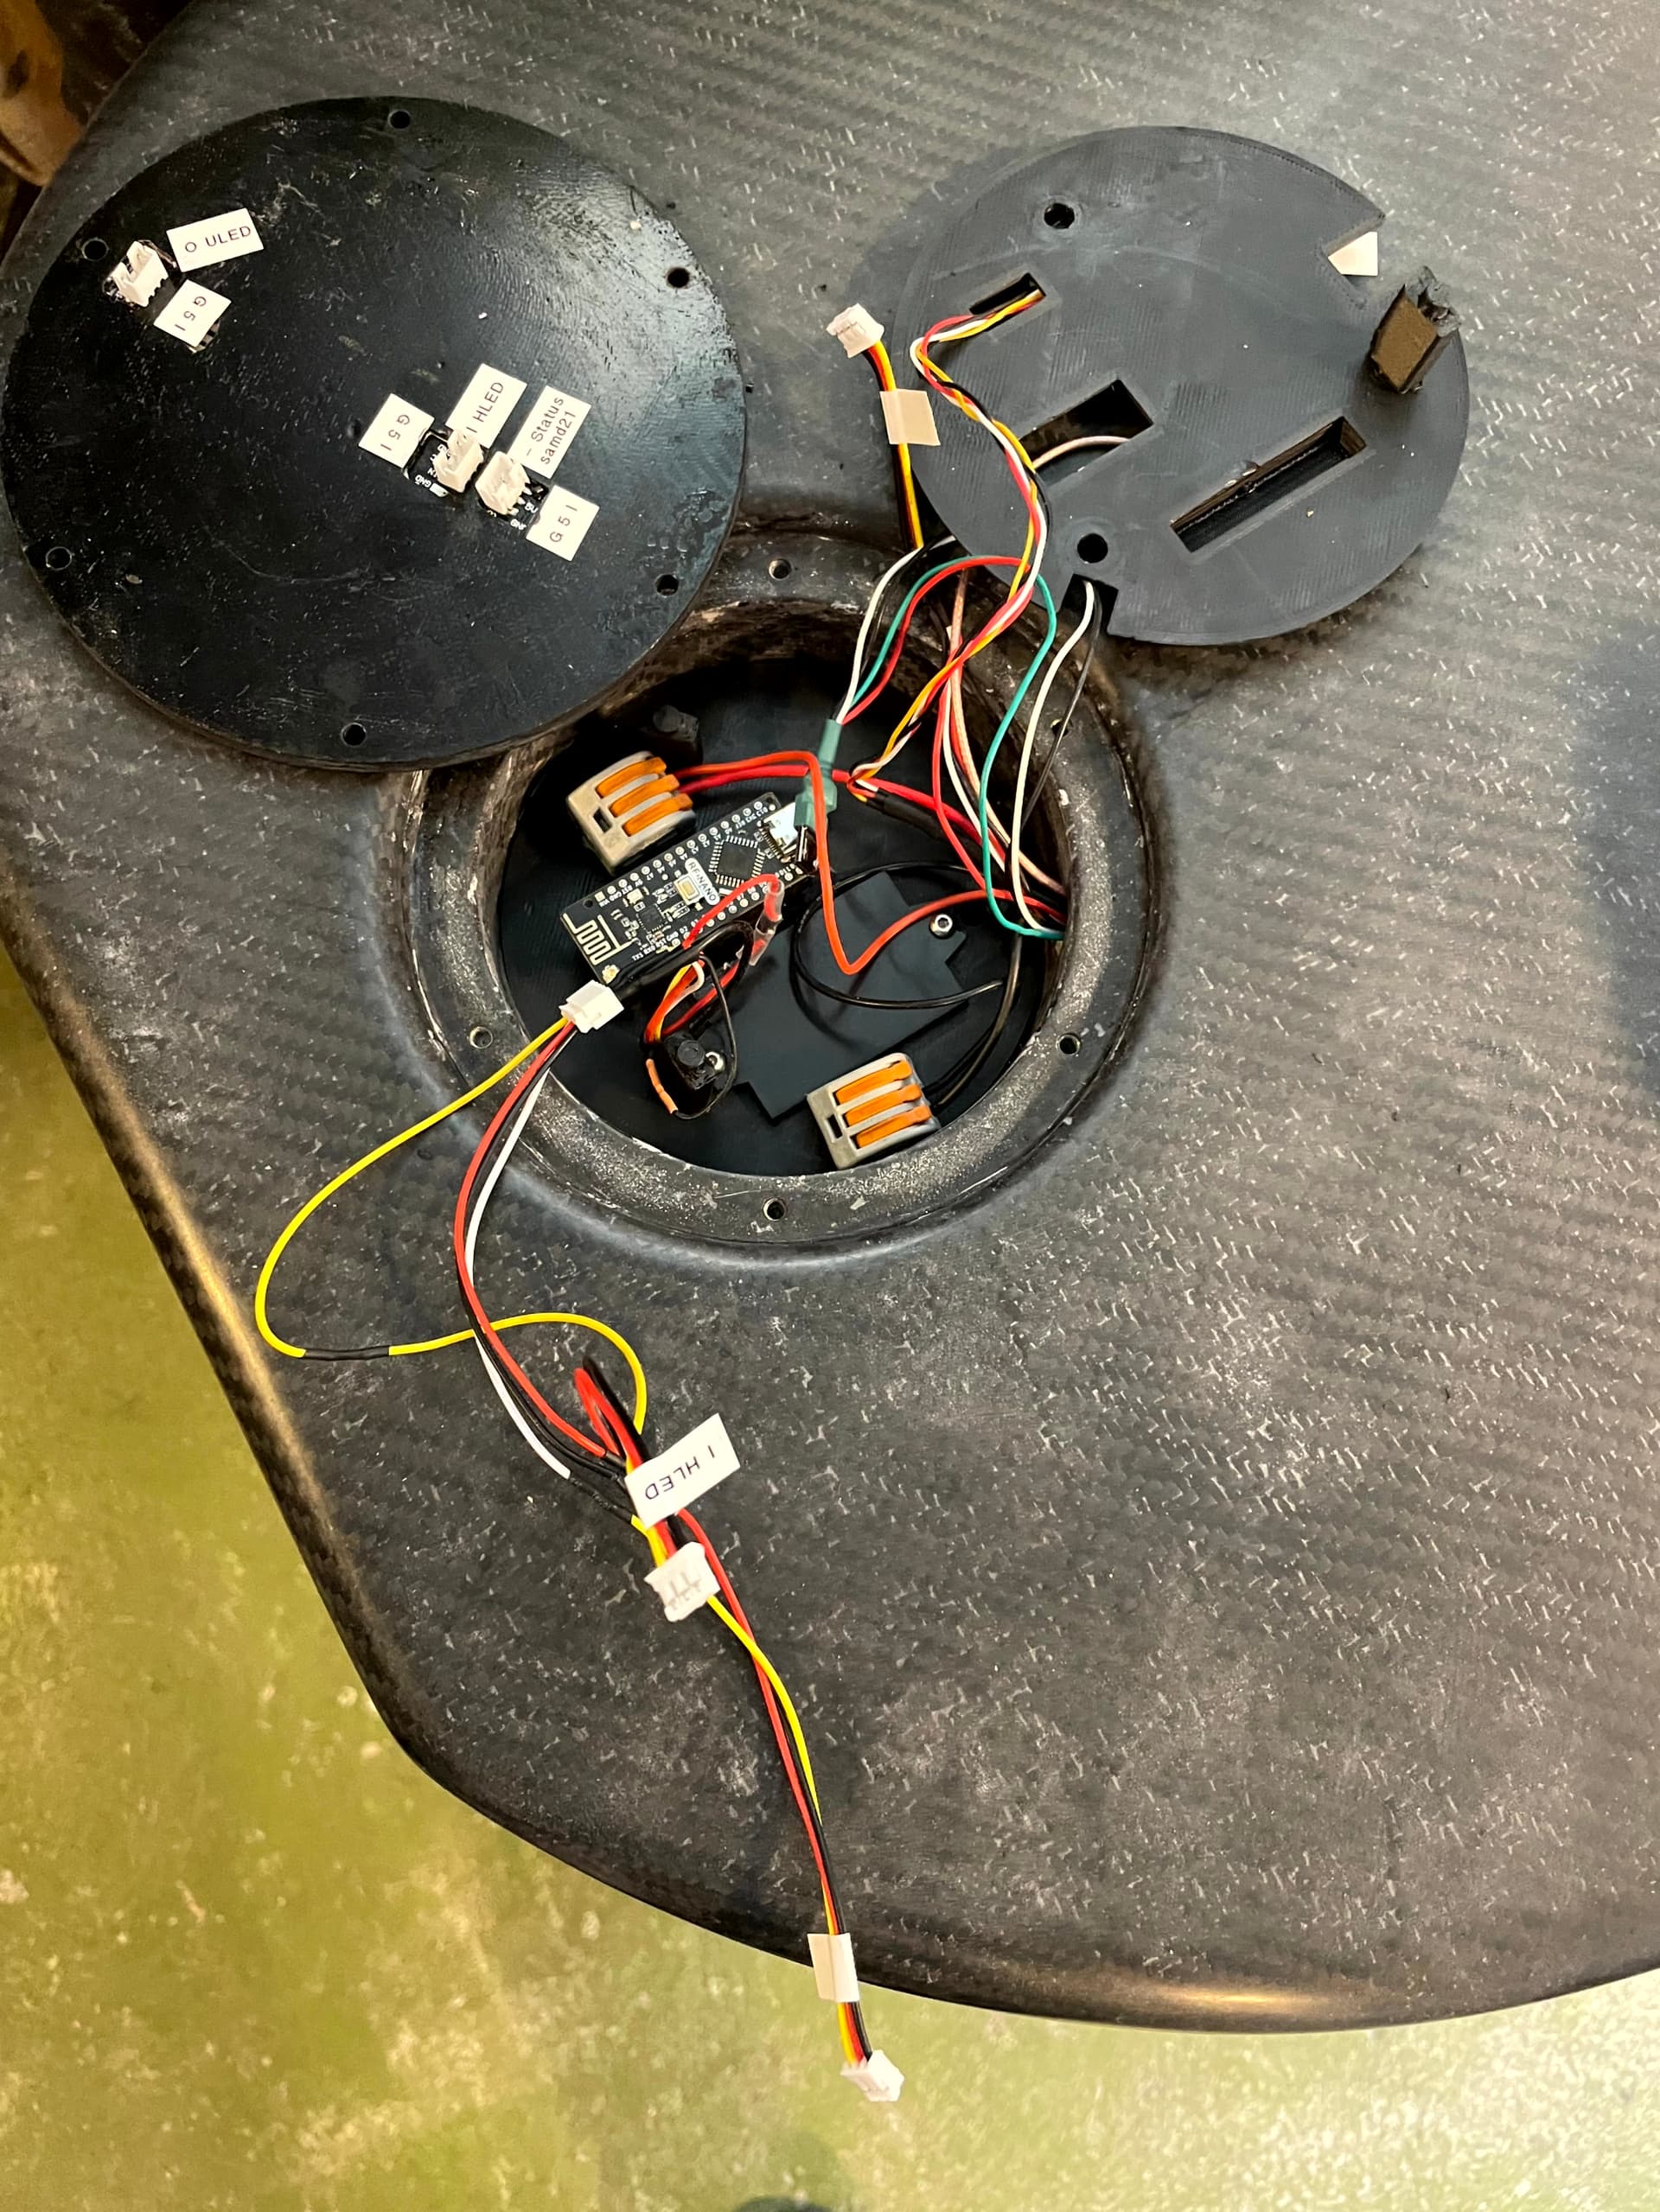
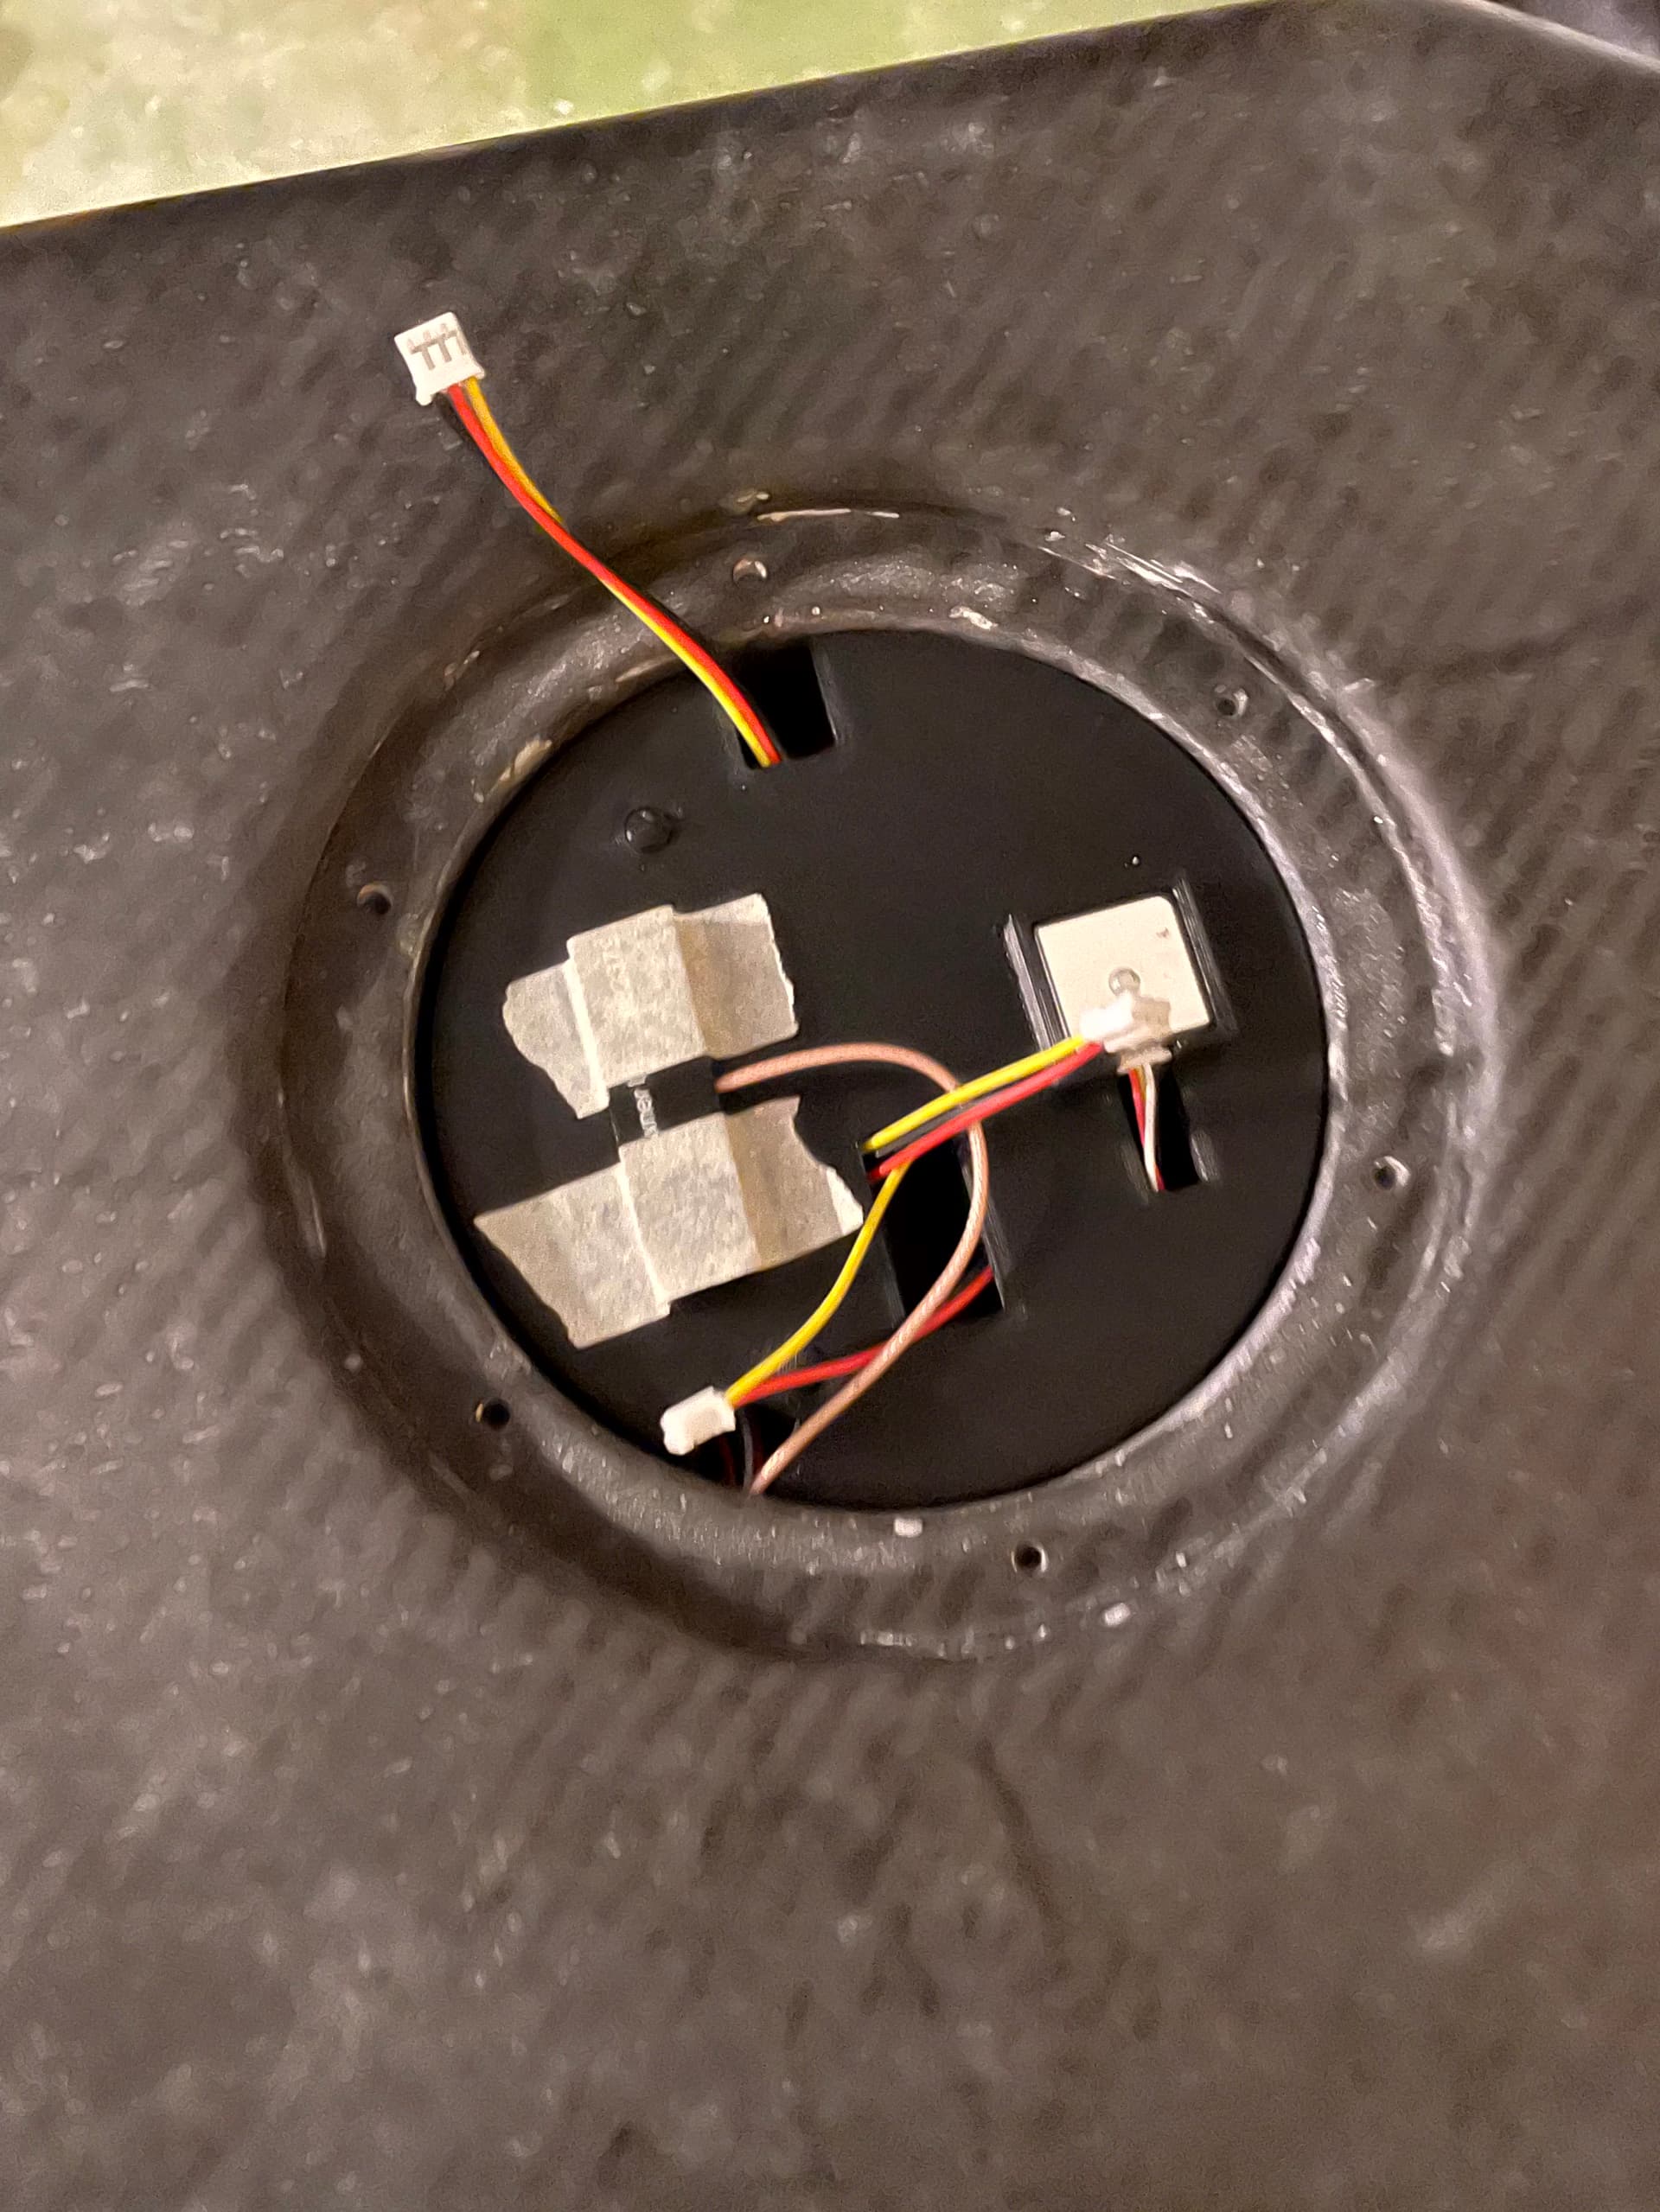
Receiver and Minnie Logger are in a small box below the tube to the front. The loggers GPS module as well as the receivers antenna sit in the front of the board. Minnies BT/WiFi antenna sticks out of the box as it is only needed to transfer log data. I also added NTC temp sensors to the battery packs to log battery temp, it is connected to the motor temp inut of the vesc and logs unter motor temp in metr log.
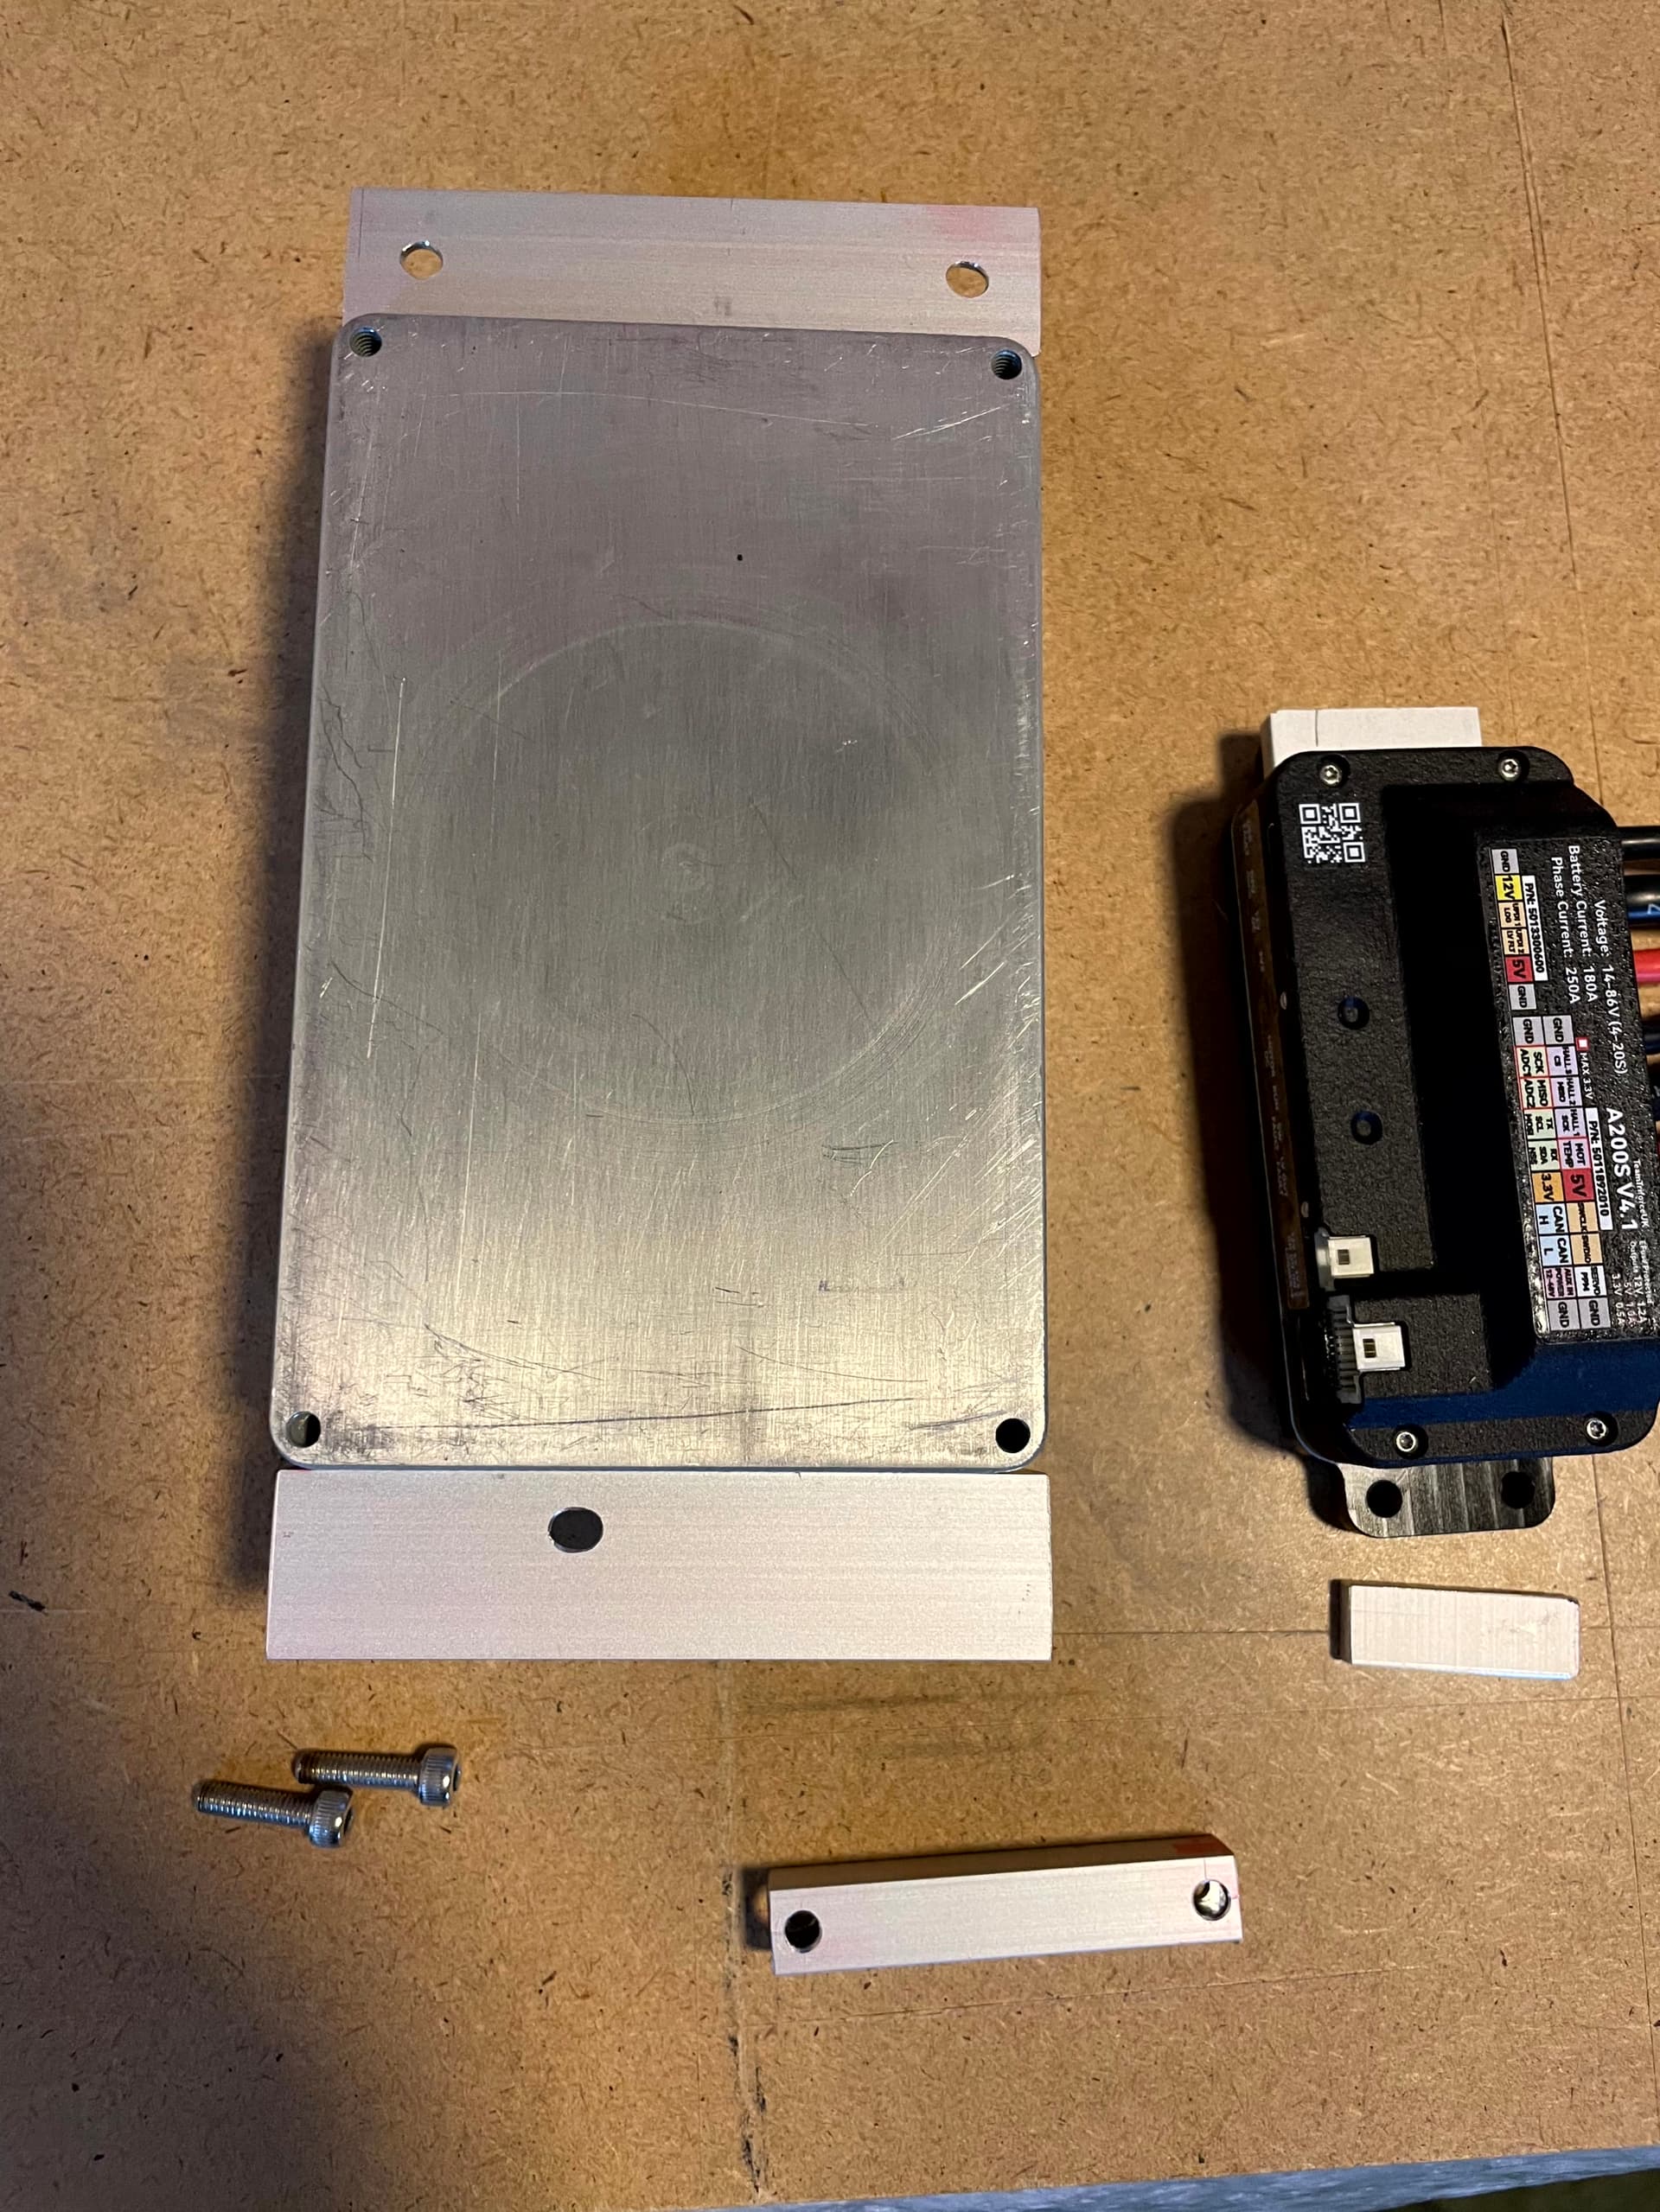
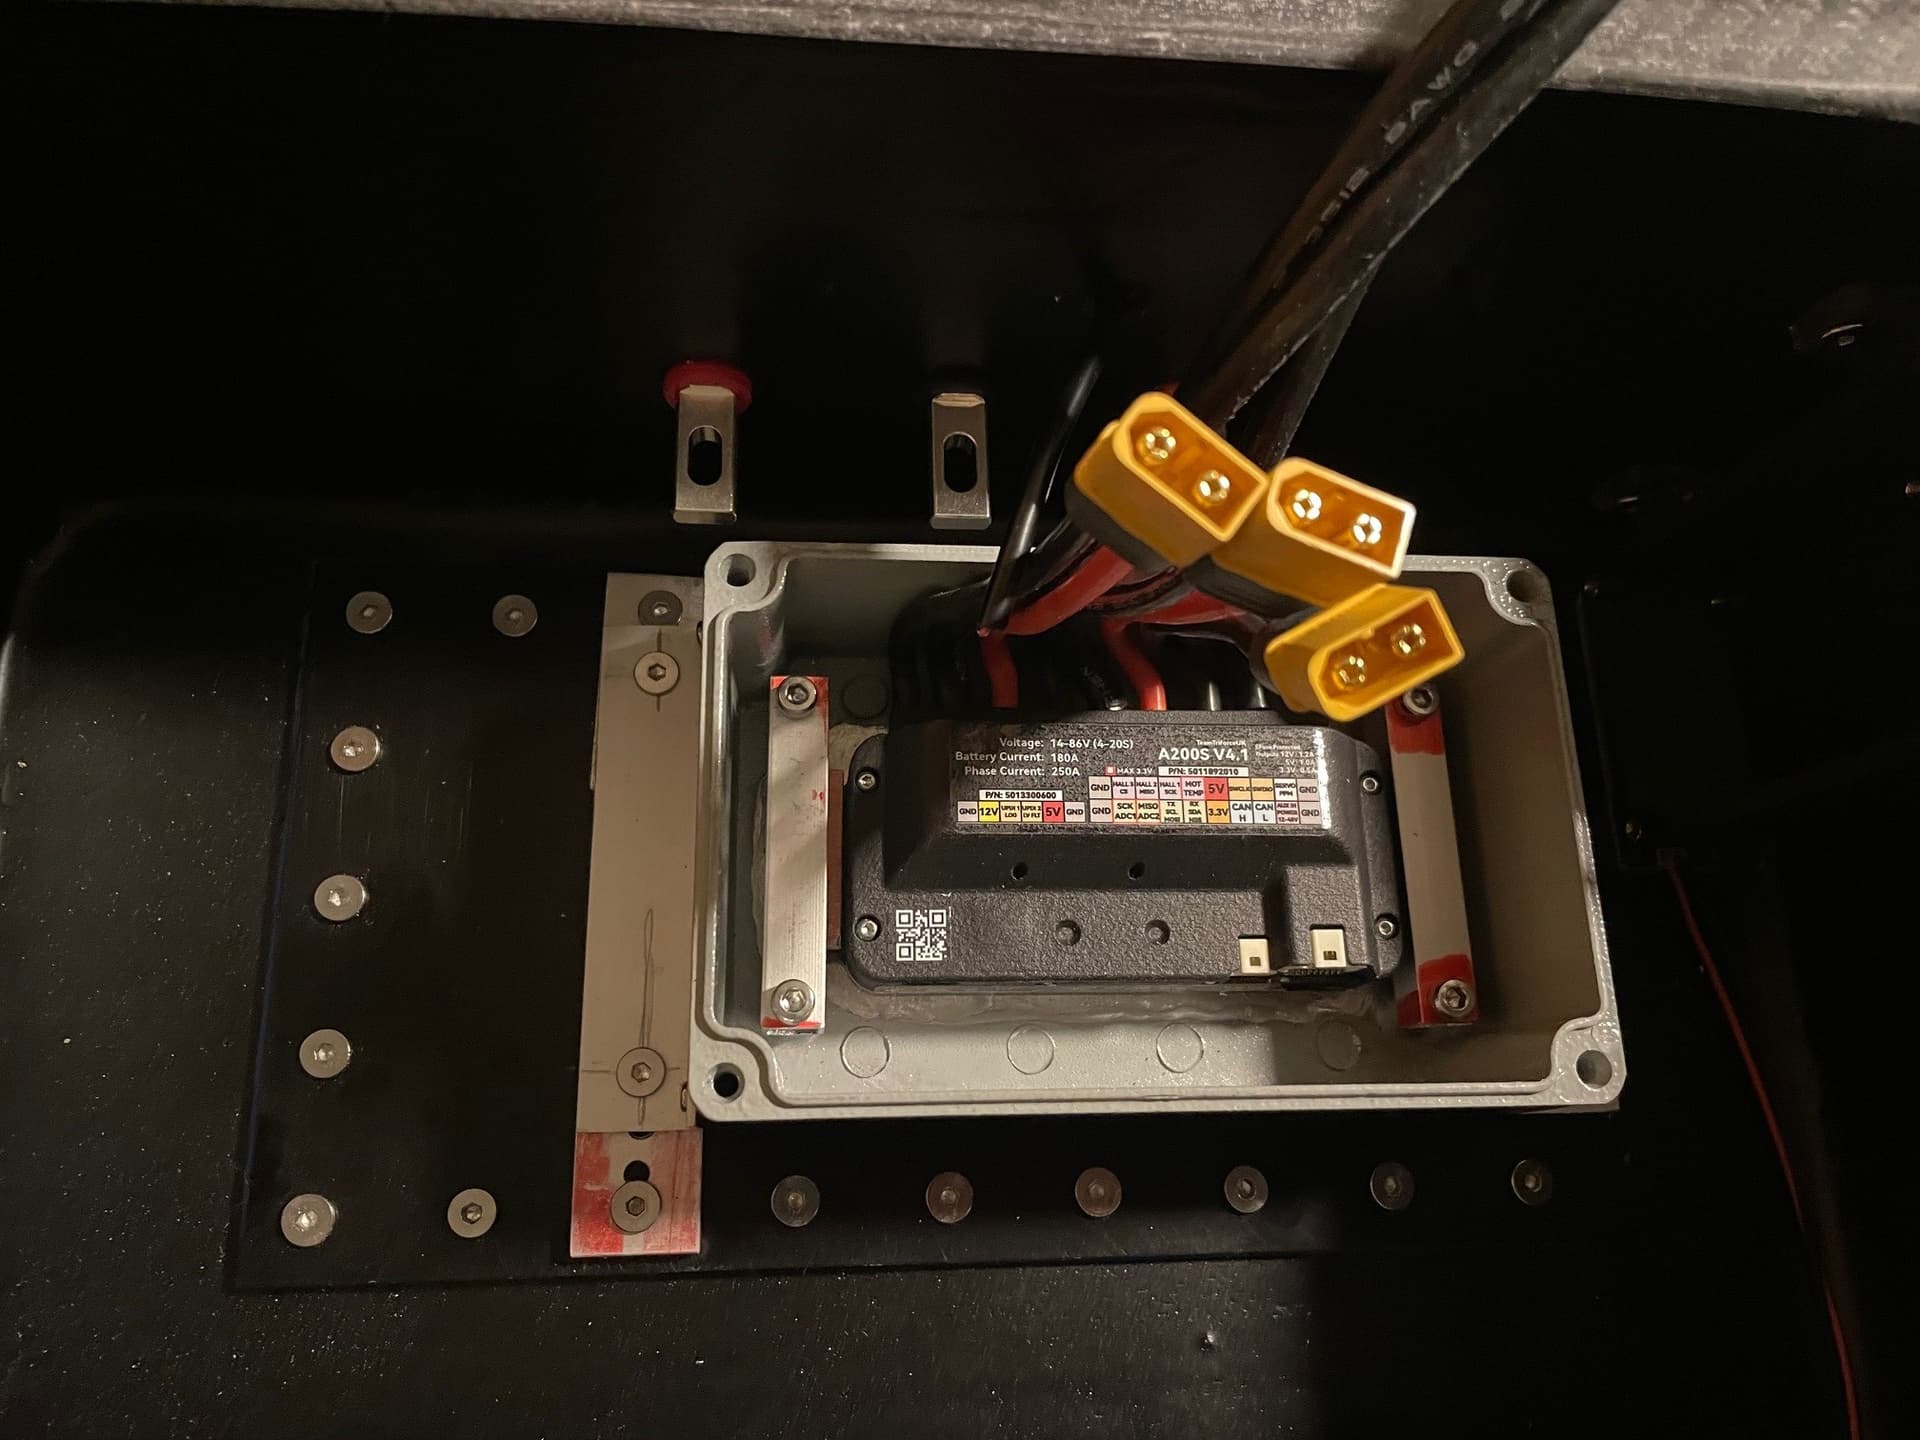
 ![IMG_5052](https://foil.zone/uploads/default/original/3X/1/6/16da22b3f760c4cef14e180e23a06f6d8c056901.jpeg)

 ![vesc](https://foil.zone/uploads/default/original/3X/9/0/90e568d6f85ba42425378e600995dbf1e10a746d.jpeg)

 ![IMG_4827](https://foil.zone/uploads/default/original/3X/4/7/47ab9a22ddca8edb0936c1123cec3d18a0a1cfac.jpeg)

 ![IMG_5168](https://foil.zone/uploads/default/original/3X/6/9/6910fc29b7b4d30cfa5d30b4ace3cea06f12d16f.jpeg)

---

<div class="post-metadata">

### Author: ![sat\_be](https://foil.zone/user_avatar/foil.zone/sat_be/32/35523_2.png) [@sat\_be](https://foil.zone/u/sat_be)
#### Post date: [July 10, 2024, 9:53pm UTC](https://foil.zone/t/daniels-2nd-build/19956/16 "2024-07-10T21:53:42Z")

</div>

Gadgets  
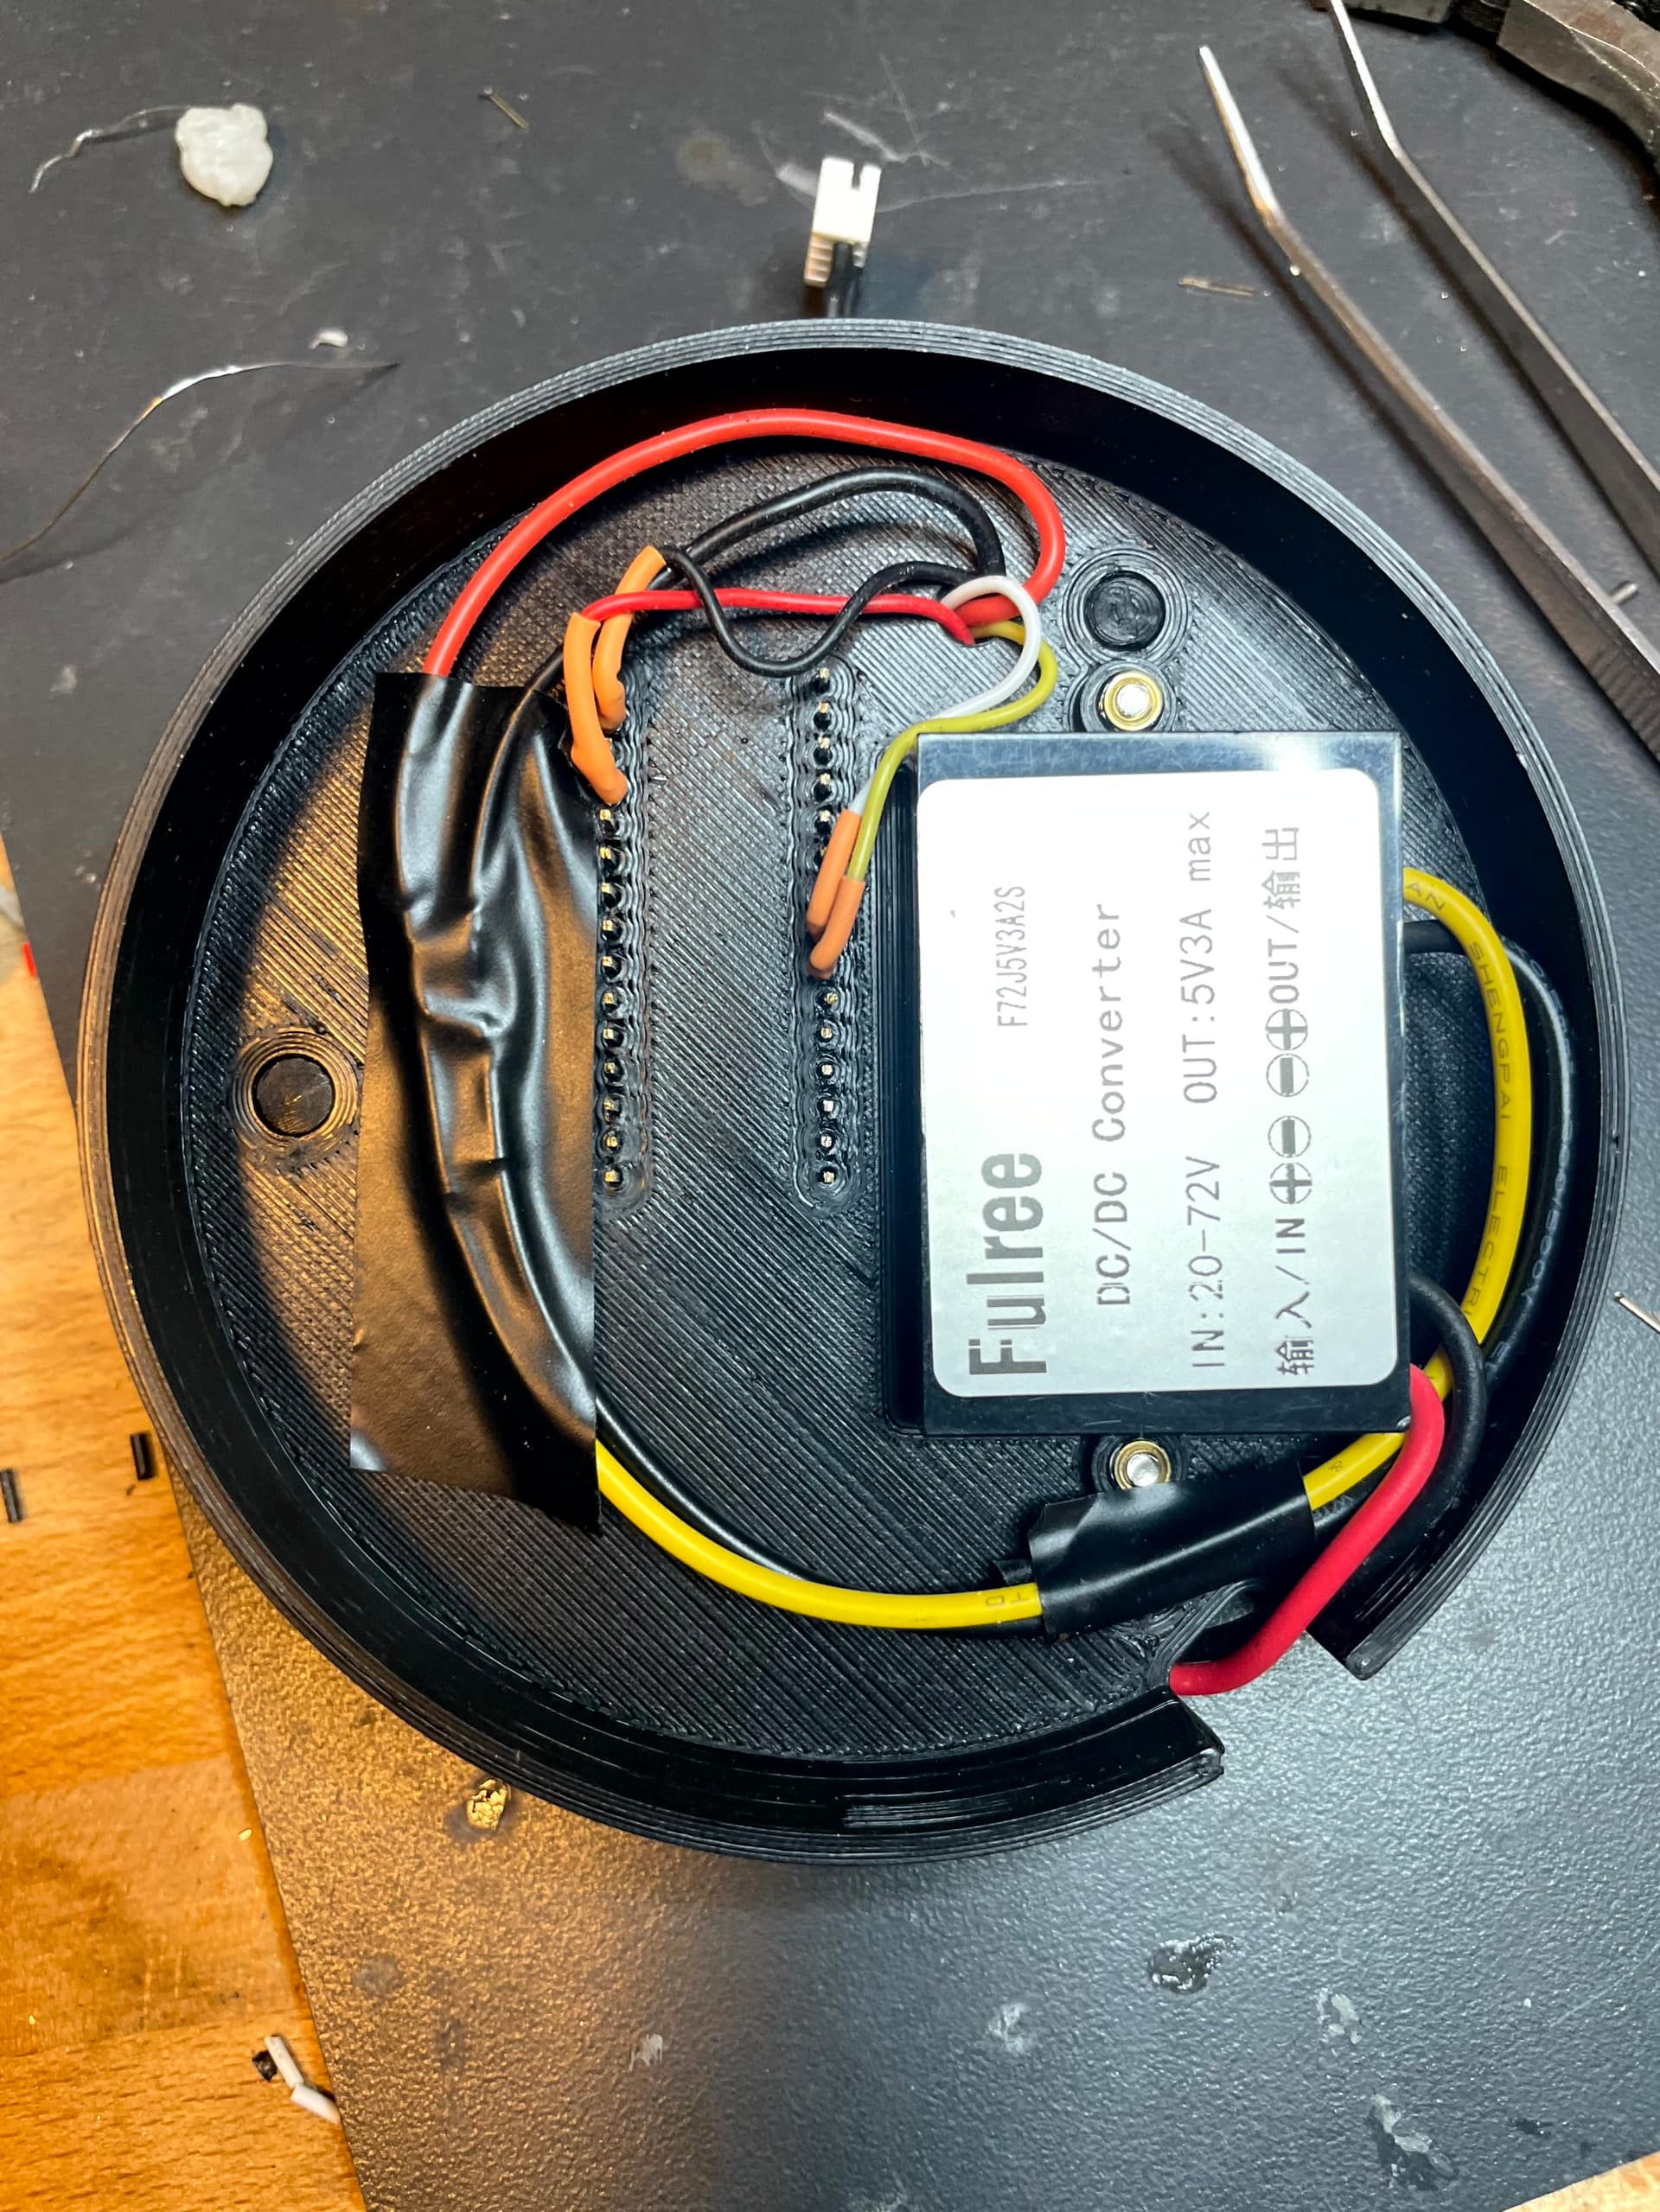
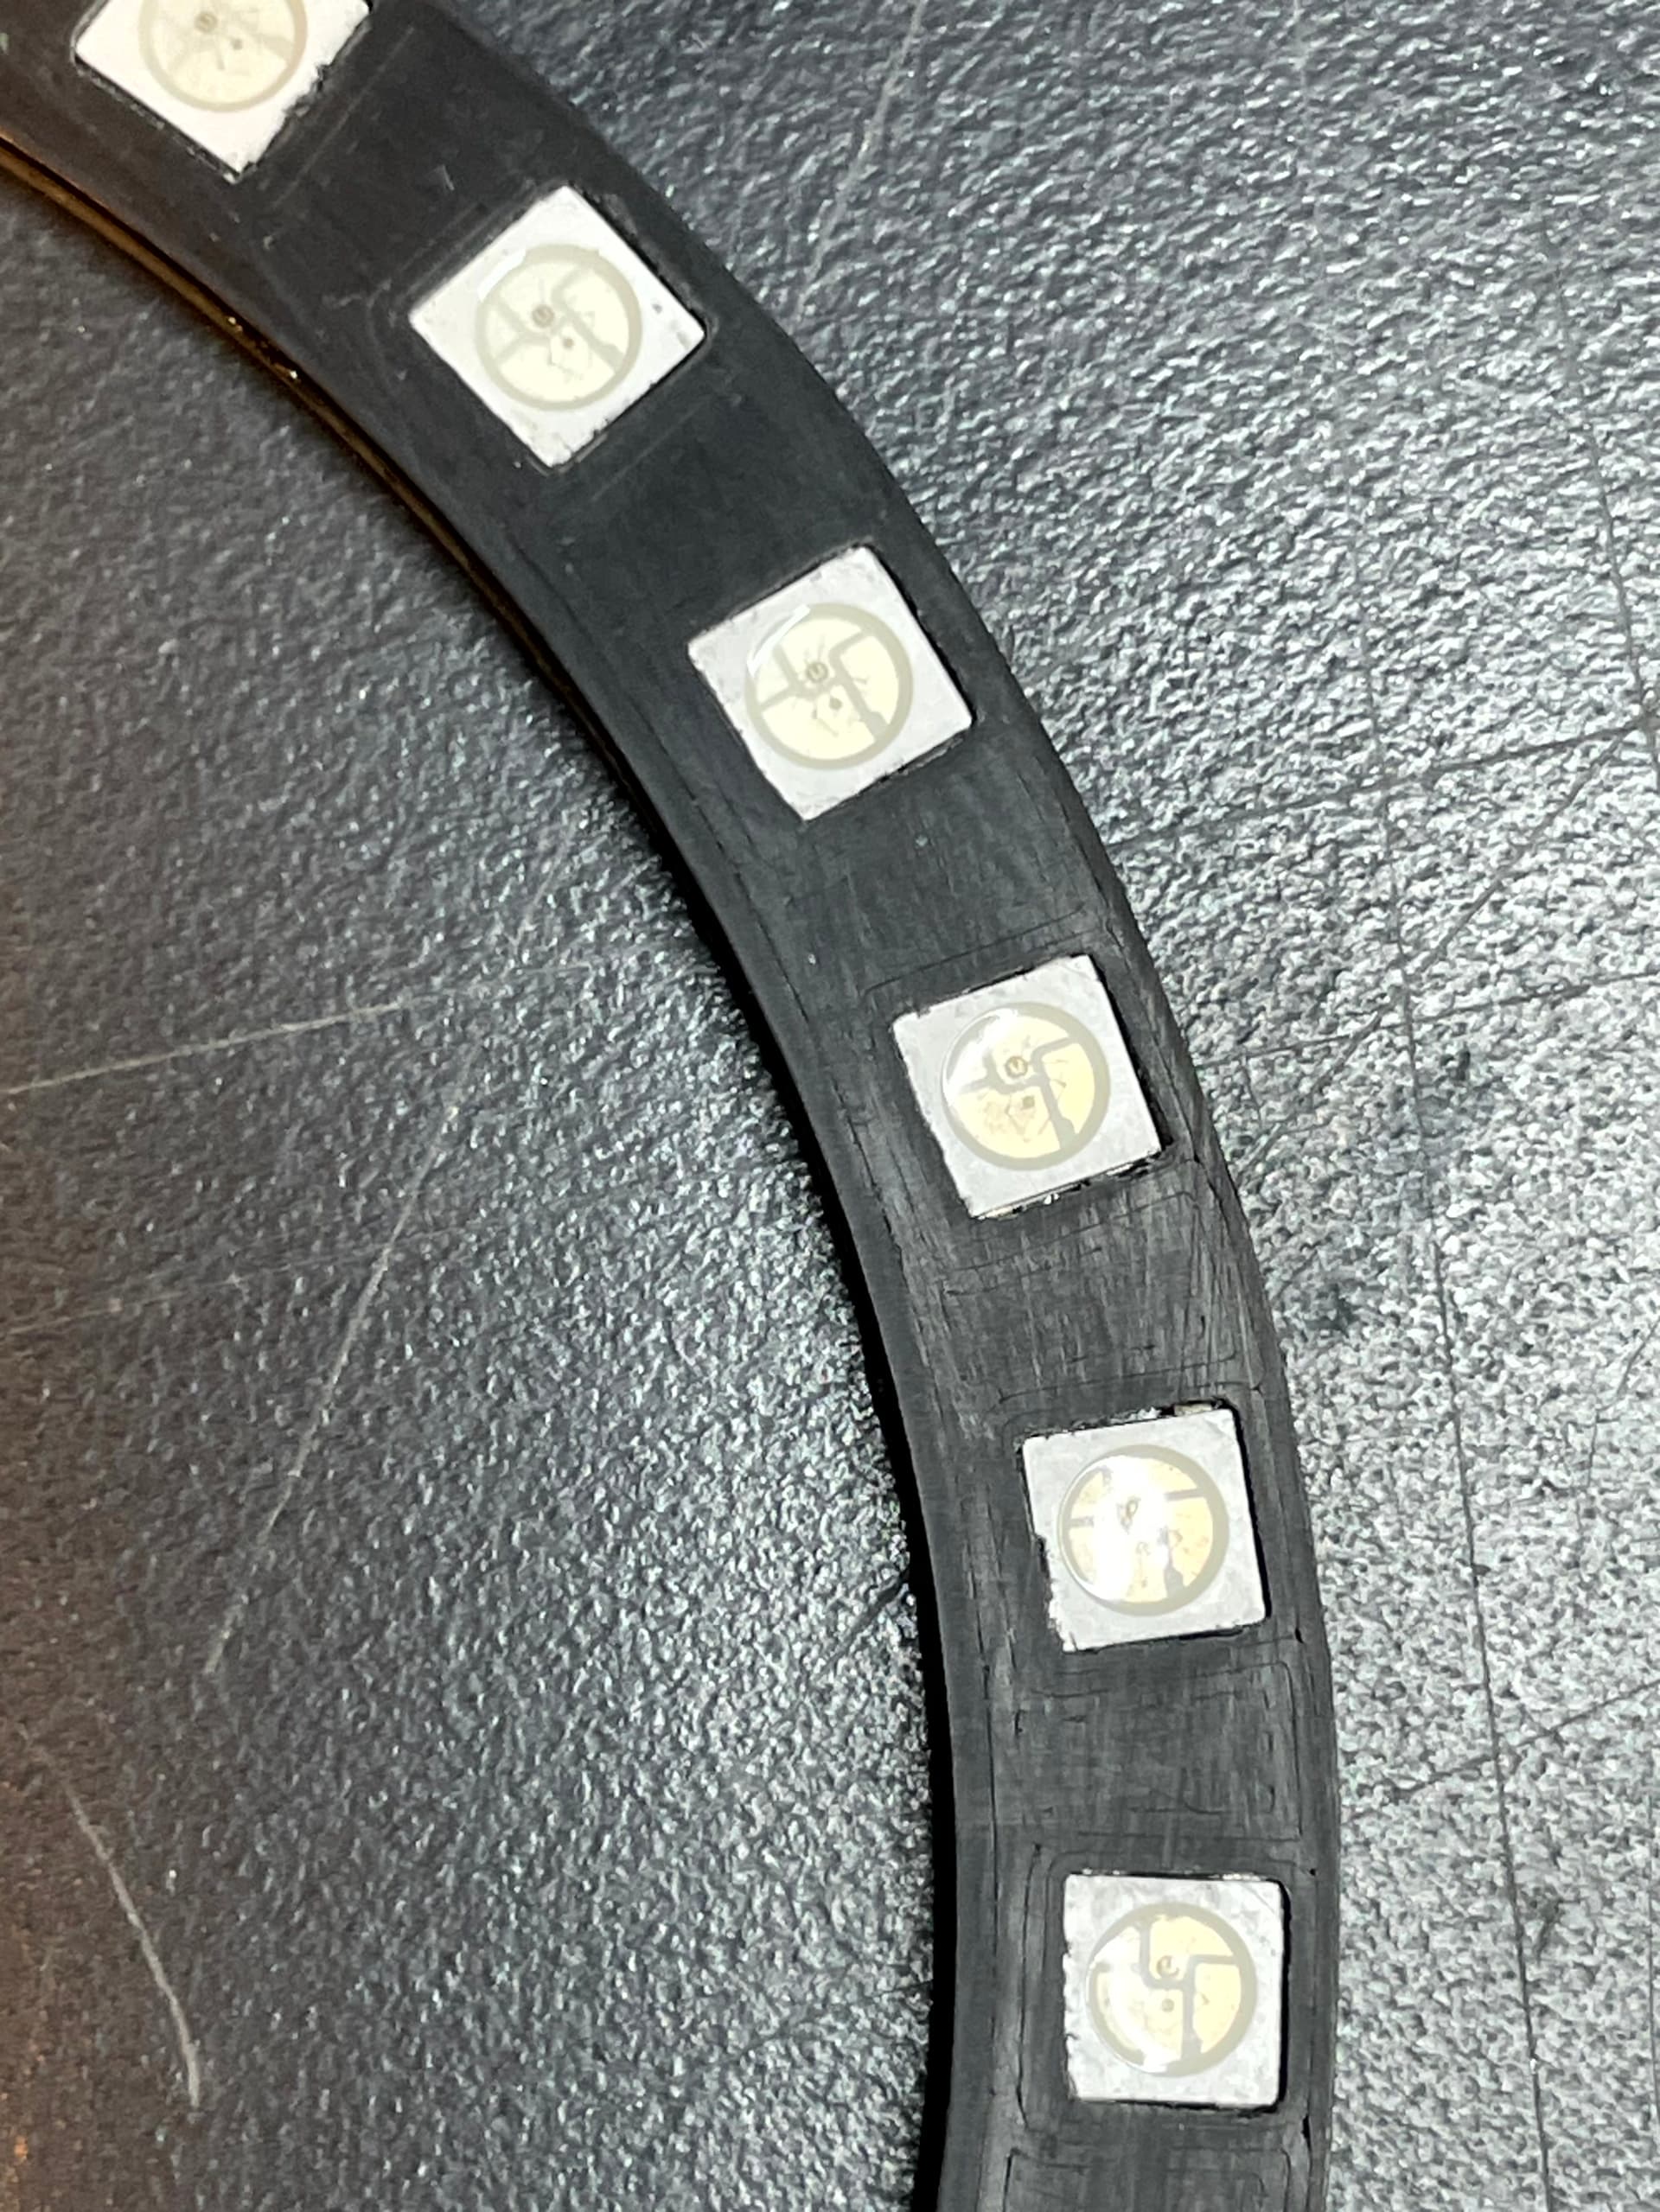
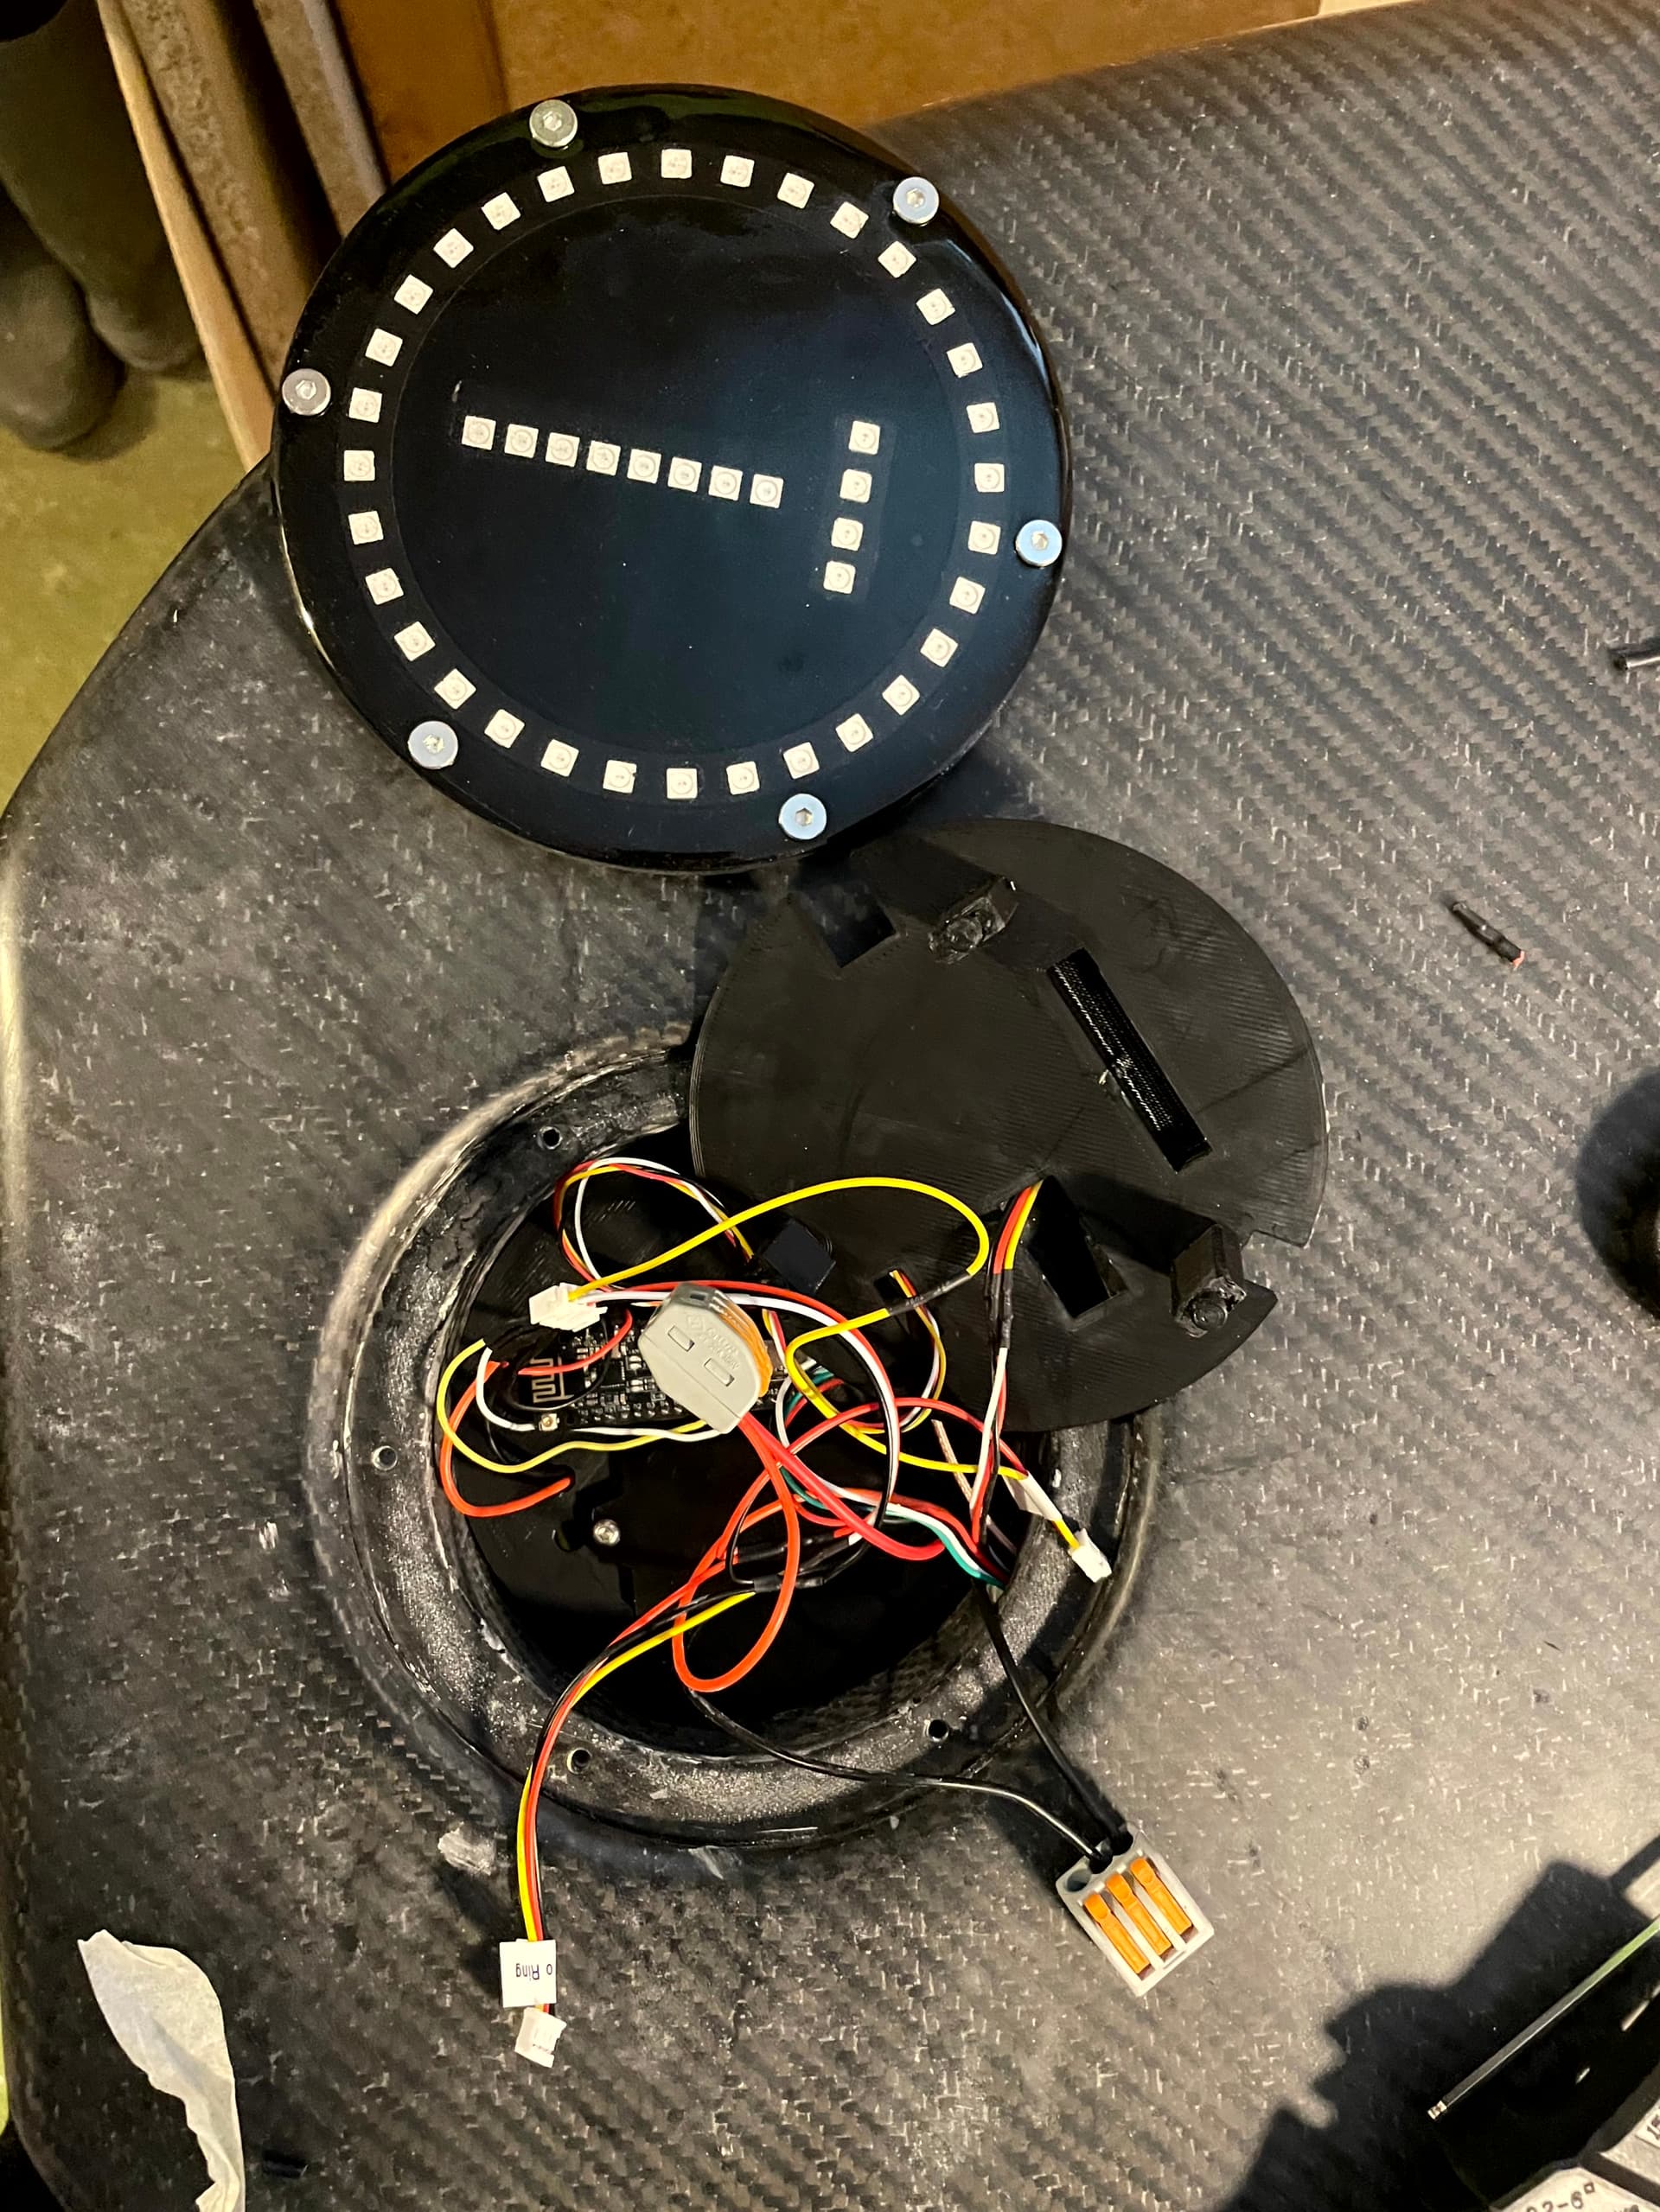
As it is hard for me to read the display of the remote, I added some LEDs to display the voltage level of the battery. I built it into the lid of the receiver antenna compartment in the front of the board. I is made from a 32 segment 2812b RGB LED ring connected to an arduino.  
The second feature is the flightAssis height measurement system. The vertical 8 LED bar indicates the height from the water level. There is an extra 5V 3A DCDC converter to supply the LEDs.  
The horizontal 4 LEDs are status indicators. The lid is made from a sandwich covered with dyed fiberglass to allow radio signals to pass. The LEDs are really bright and readable in sunlight.
 ![IMG_4474](https://foil.zone/uploads/default/original/3X/4/c/4c05c443123531ac6f73afc54a8af310a74f4305.jpeg)

 ![IMG_4744](https://foil.zone/uploads/default/original/3X/2/1/213c179fe67cc2b8fb937c7fc48c28b5e69e9b0a.jpeg)

 ![IMG_4748](https://foil.zone/uploads/default/original/3X/b/1/b16c2ca88cc6b631f093b8923794a2482799f7d3.jpeg)

 ![IMG_4750](https://foil.zone/uploads/default/original/3X/a/1/a16f283f1811590391e2b489be187f5c29790874.jpeg)

 ![IMG_4743](https://foil.zone/uploads/default/original/3X/6/8/688fa743d582d195647b94977f2bef891939492a.jpeg)

 ![IMG_5161](https://foil.zone/uploads/default/original/3X/6/d/6dfed0ccf439df2001d11e347022a9699a3ebb3b.jpeg)

---

<div class="post-metadata">

### Author: ![Foilguy](https://foil.zone/letter_avatar_proxy/v4/letter/f/7cd45c/32.png) [@Foilguy](https://foil.zone/u/Foilguy)
#### Post date: [July 10, 2024, 9:56pm UTC](https://foil.zone/t/daniels-2nd-build/19956/17 "2024-07-10T21:56:02Z")

</div>

Holy High Tech Batman!! 😉😀

---

<div class="post-metadata">

### Author: ![sat\_be](https://foil.zone/user_avatar/foil.zone/sat_be/32/35523_2.png) [@sat\_be](https://foil.zone/u/sat_be)
#### Post date: [July 23, 2024, 9:04pm UTC](https://foil.zone/t/daniels-2nd-build/19956/18 "2024-07-23T21:04:06Z")

</div>

Batteries  
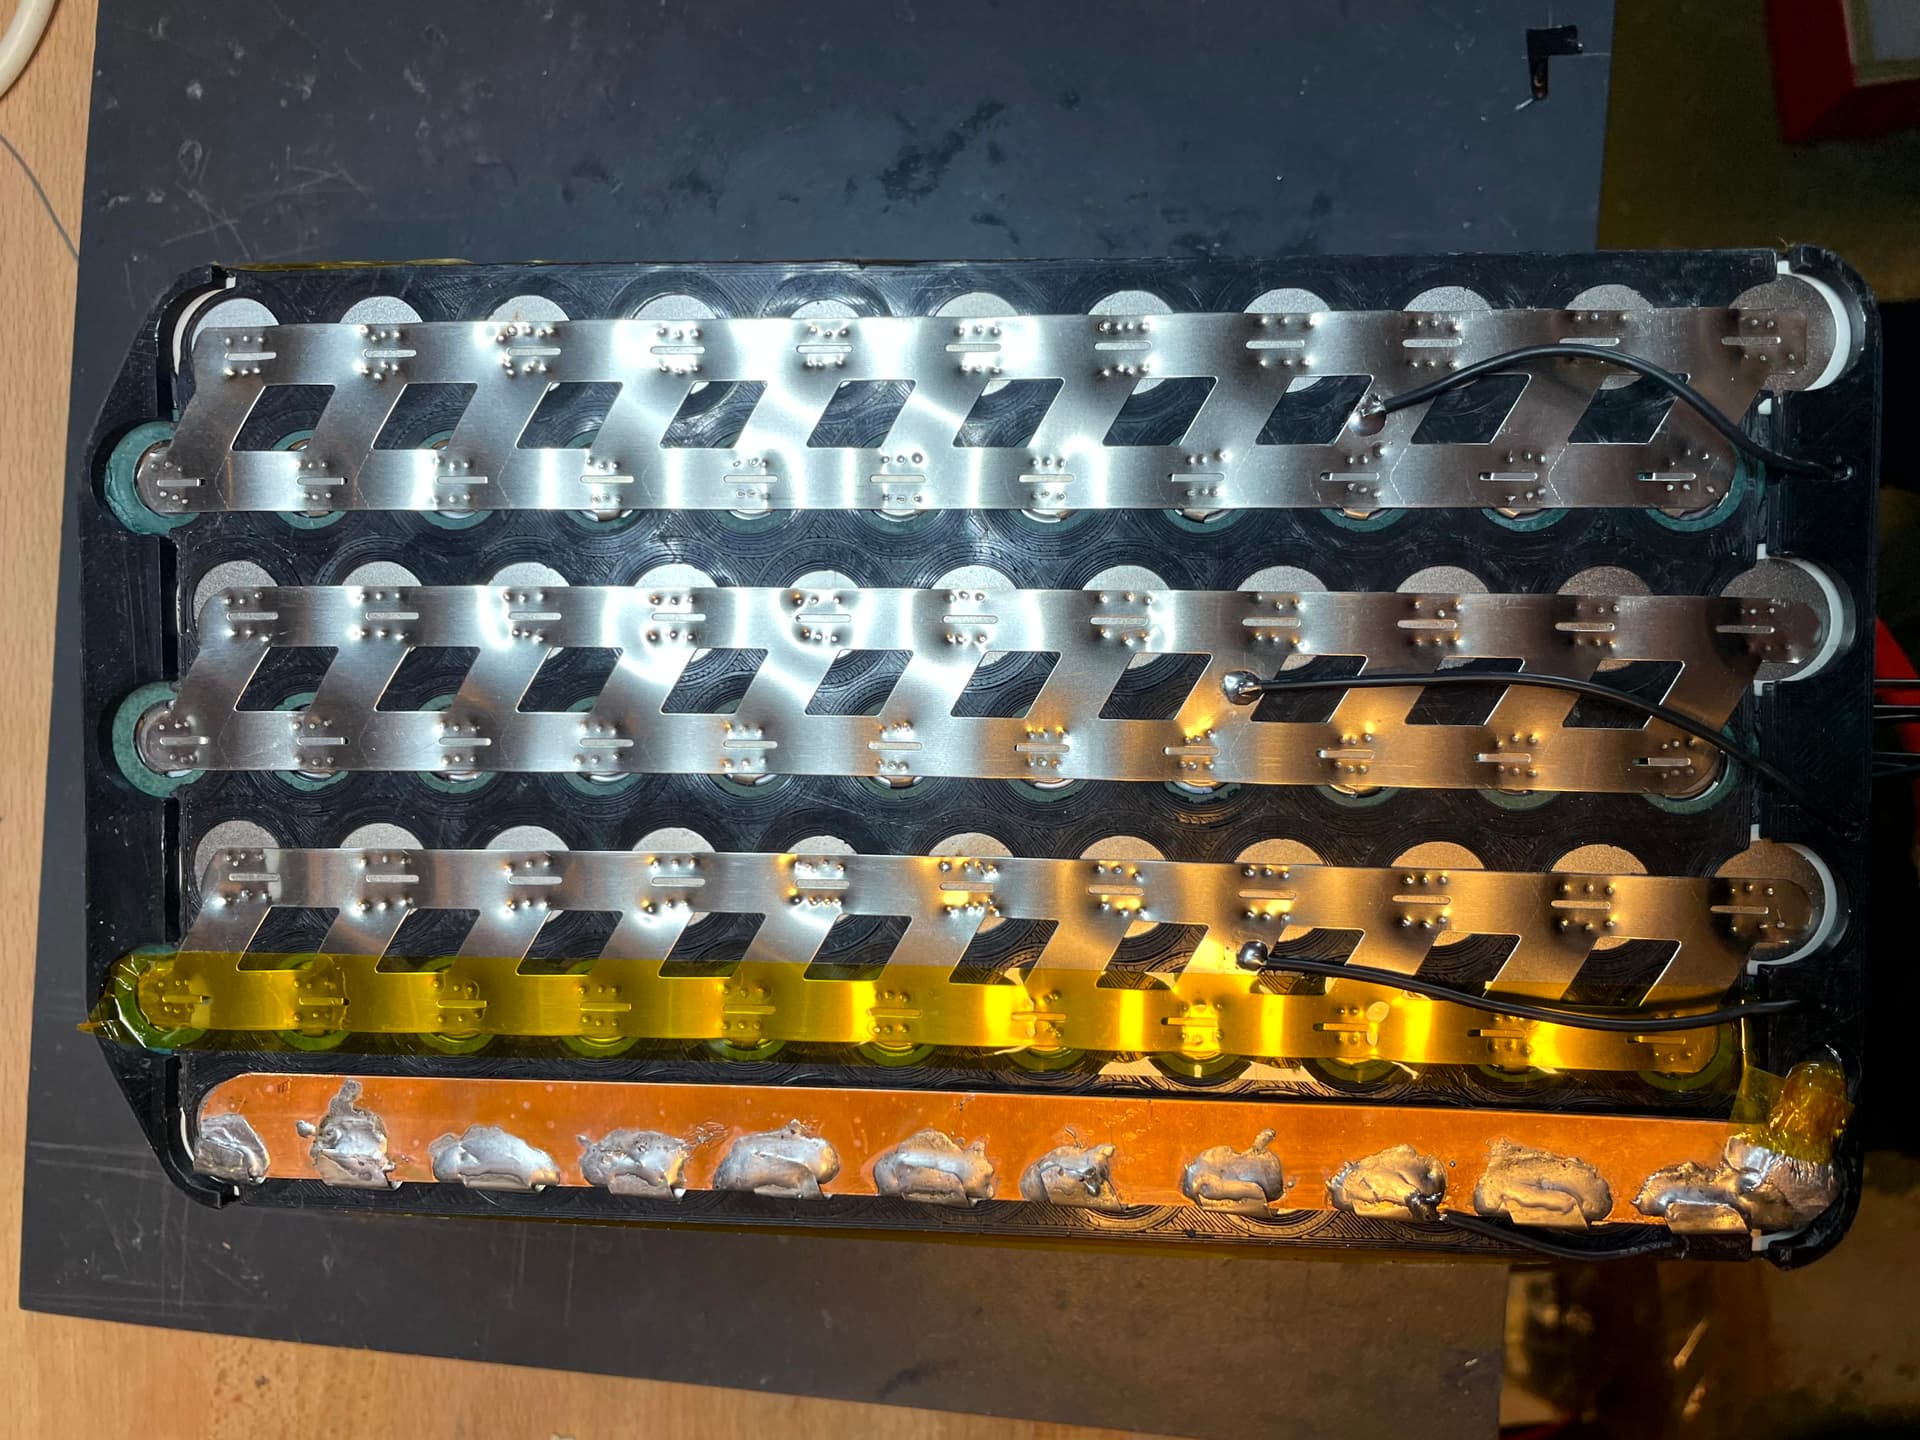
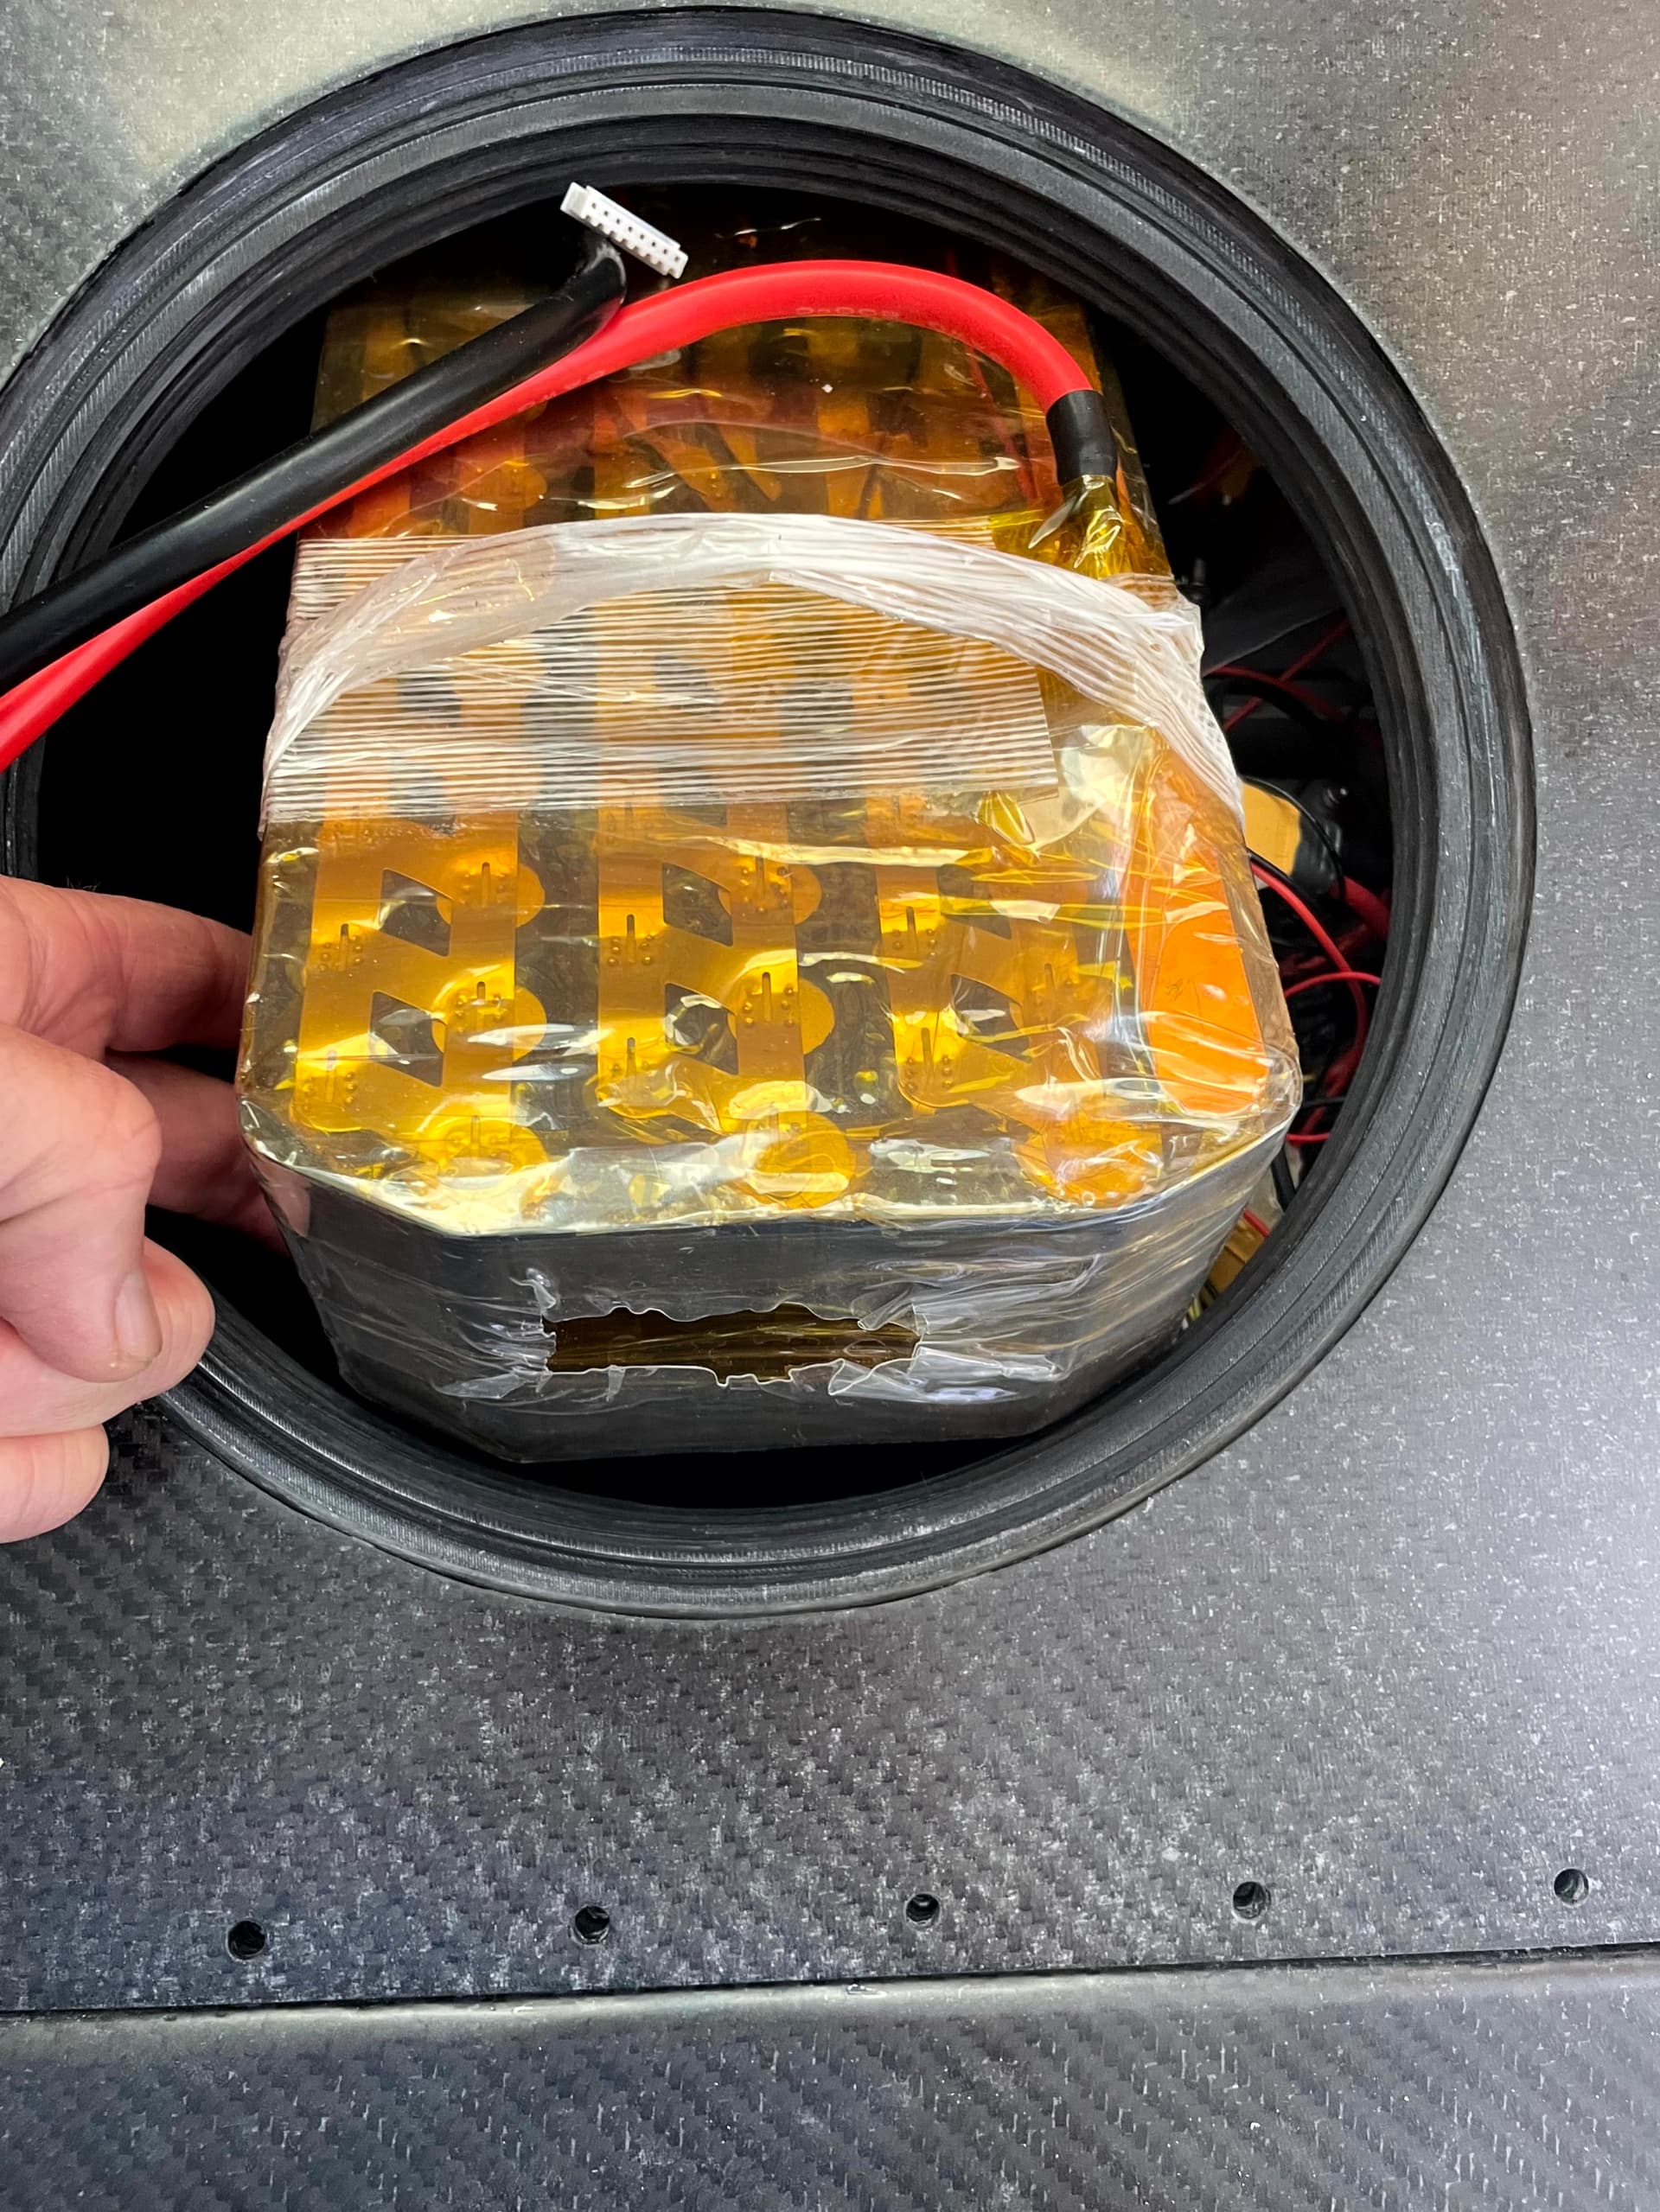
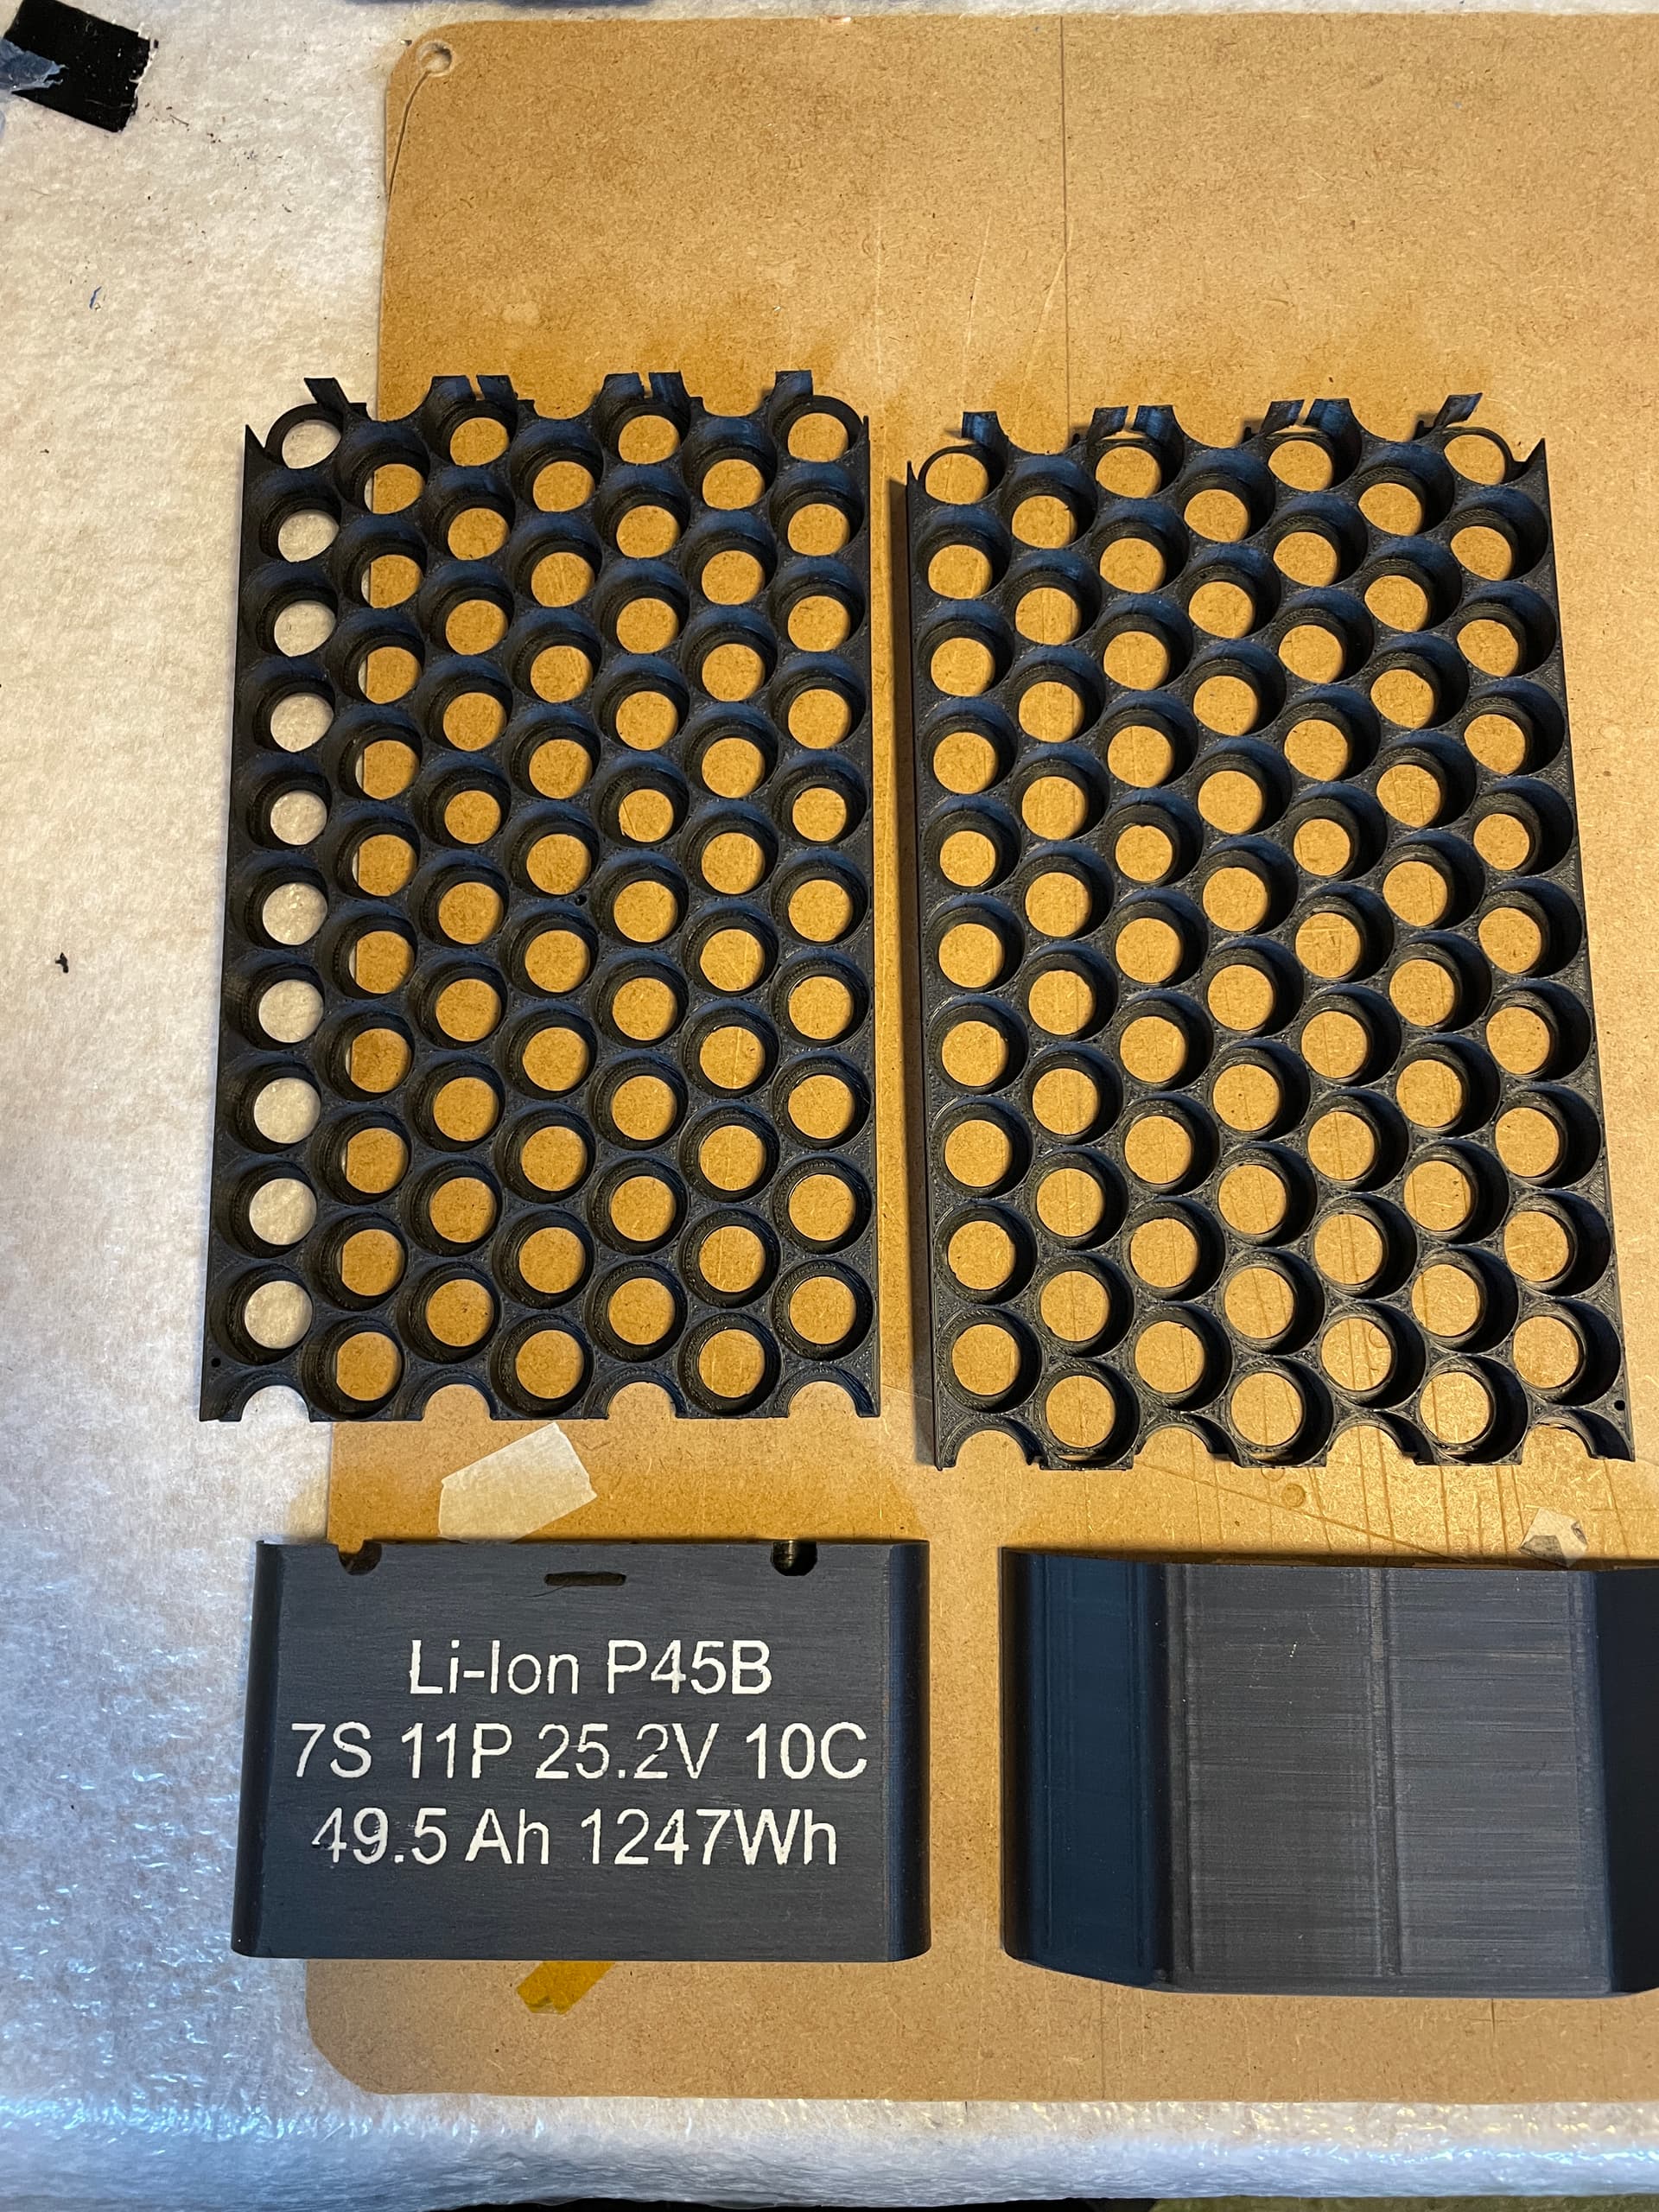
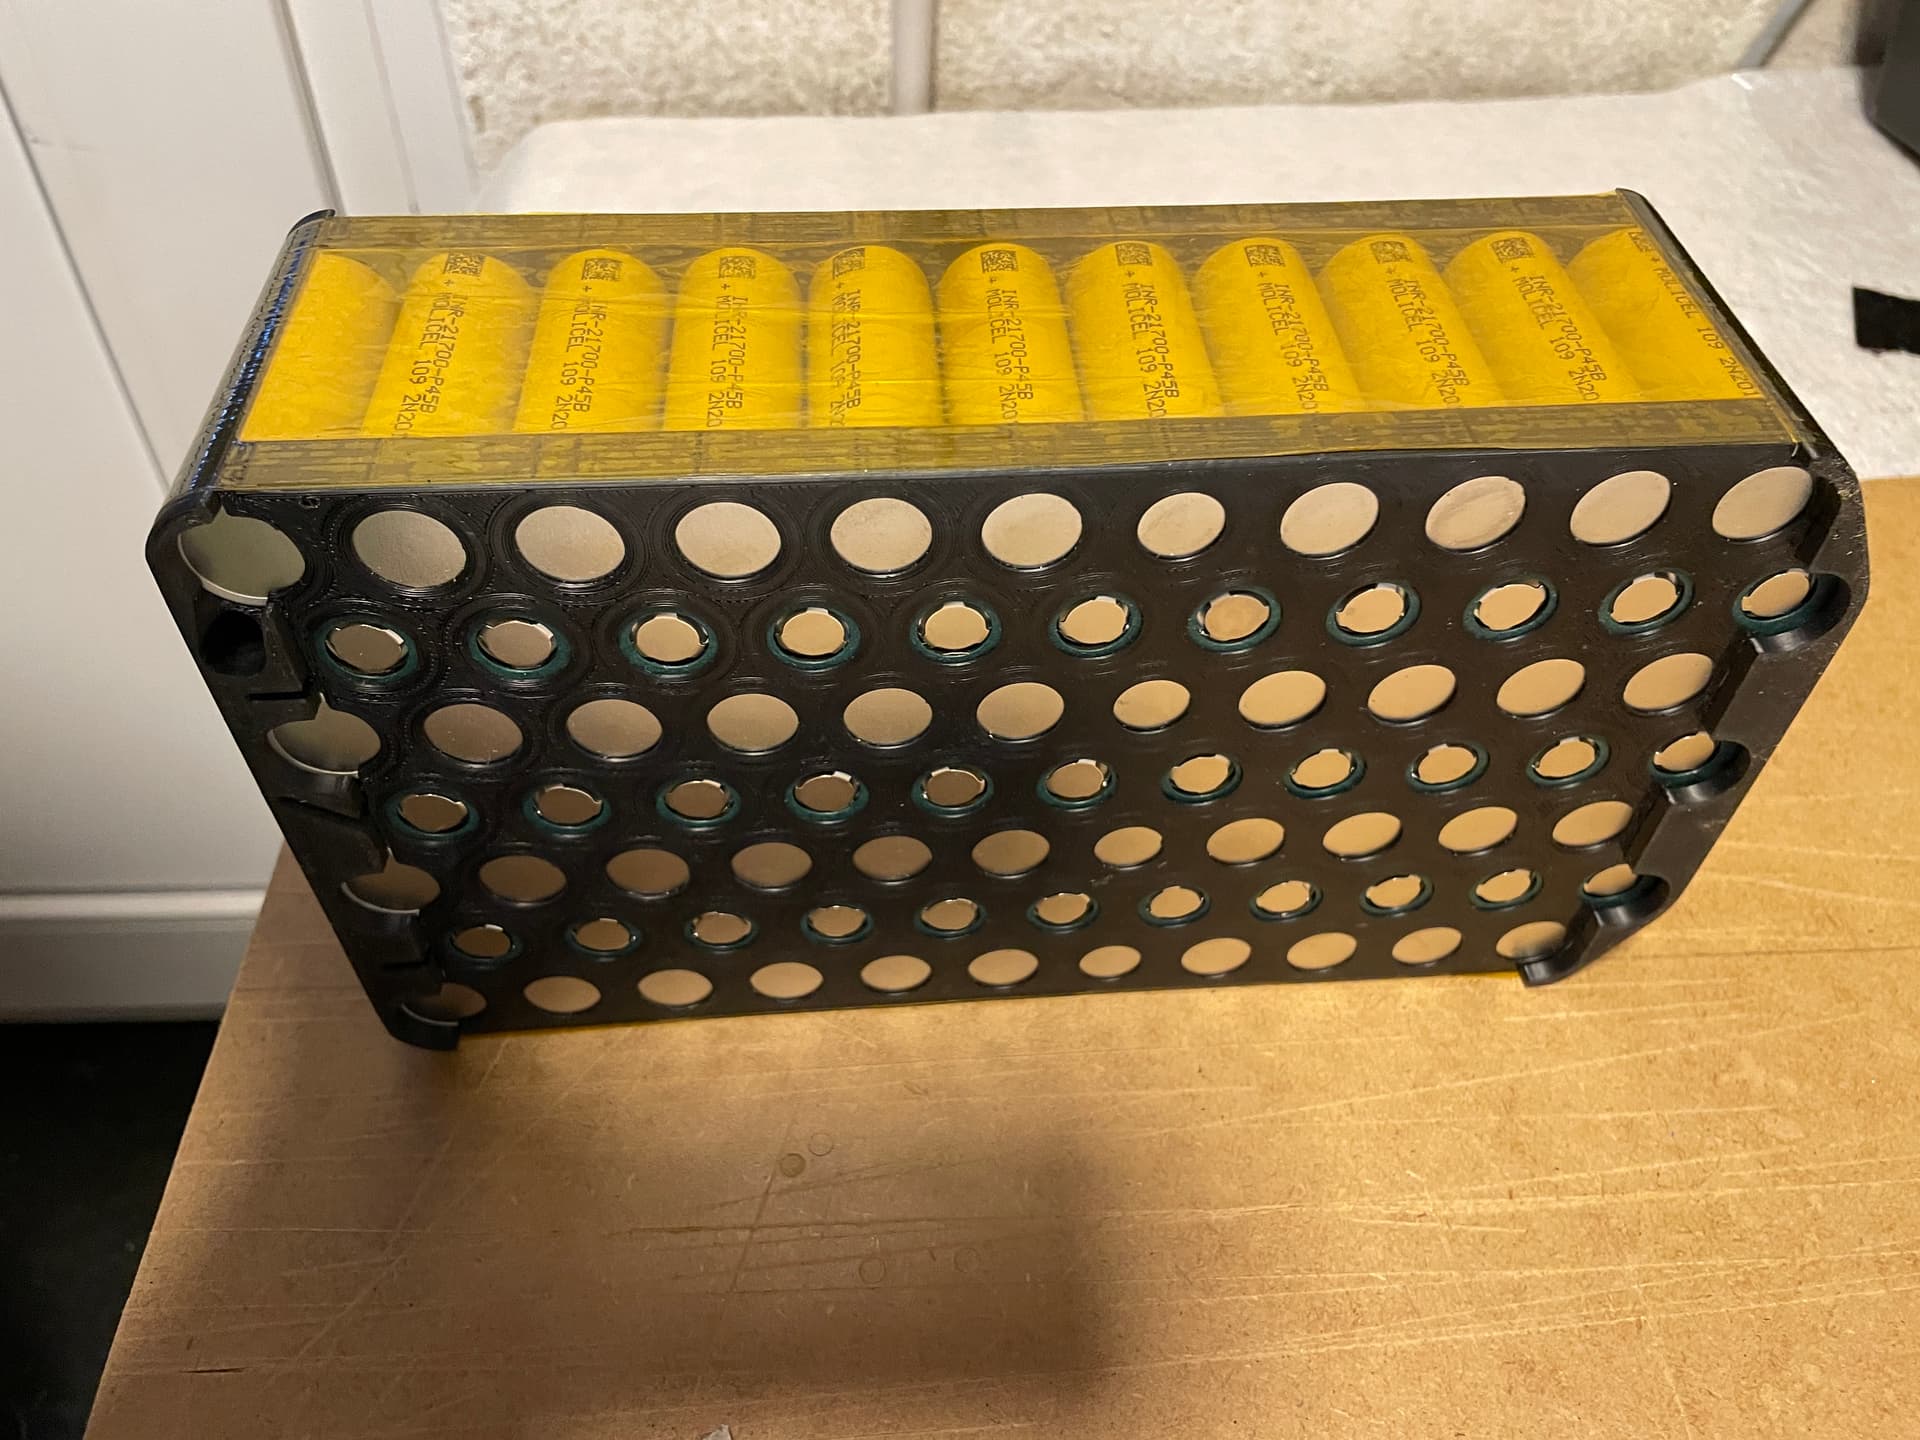
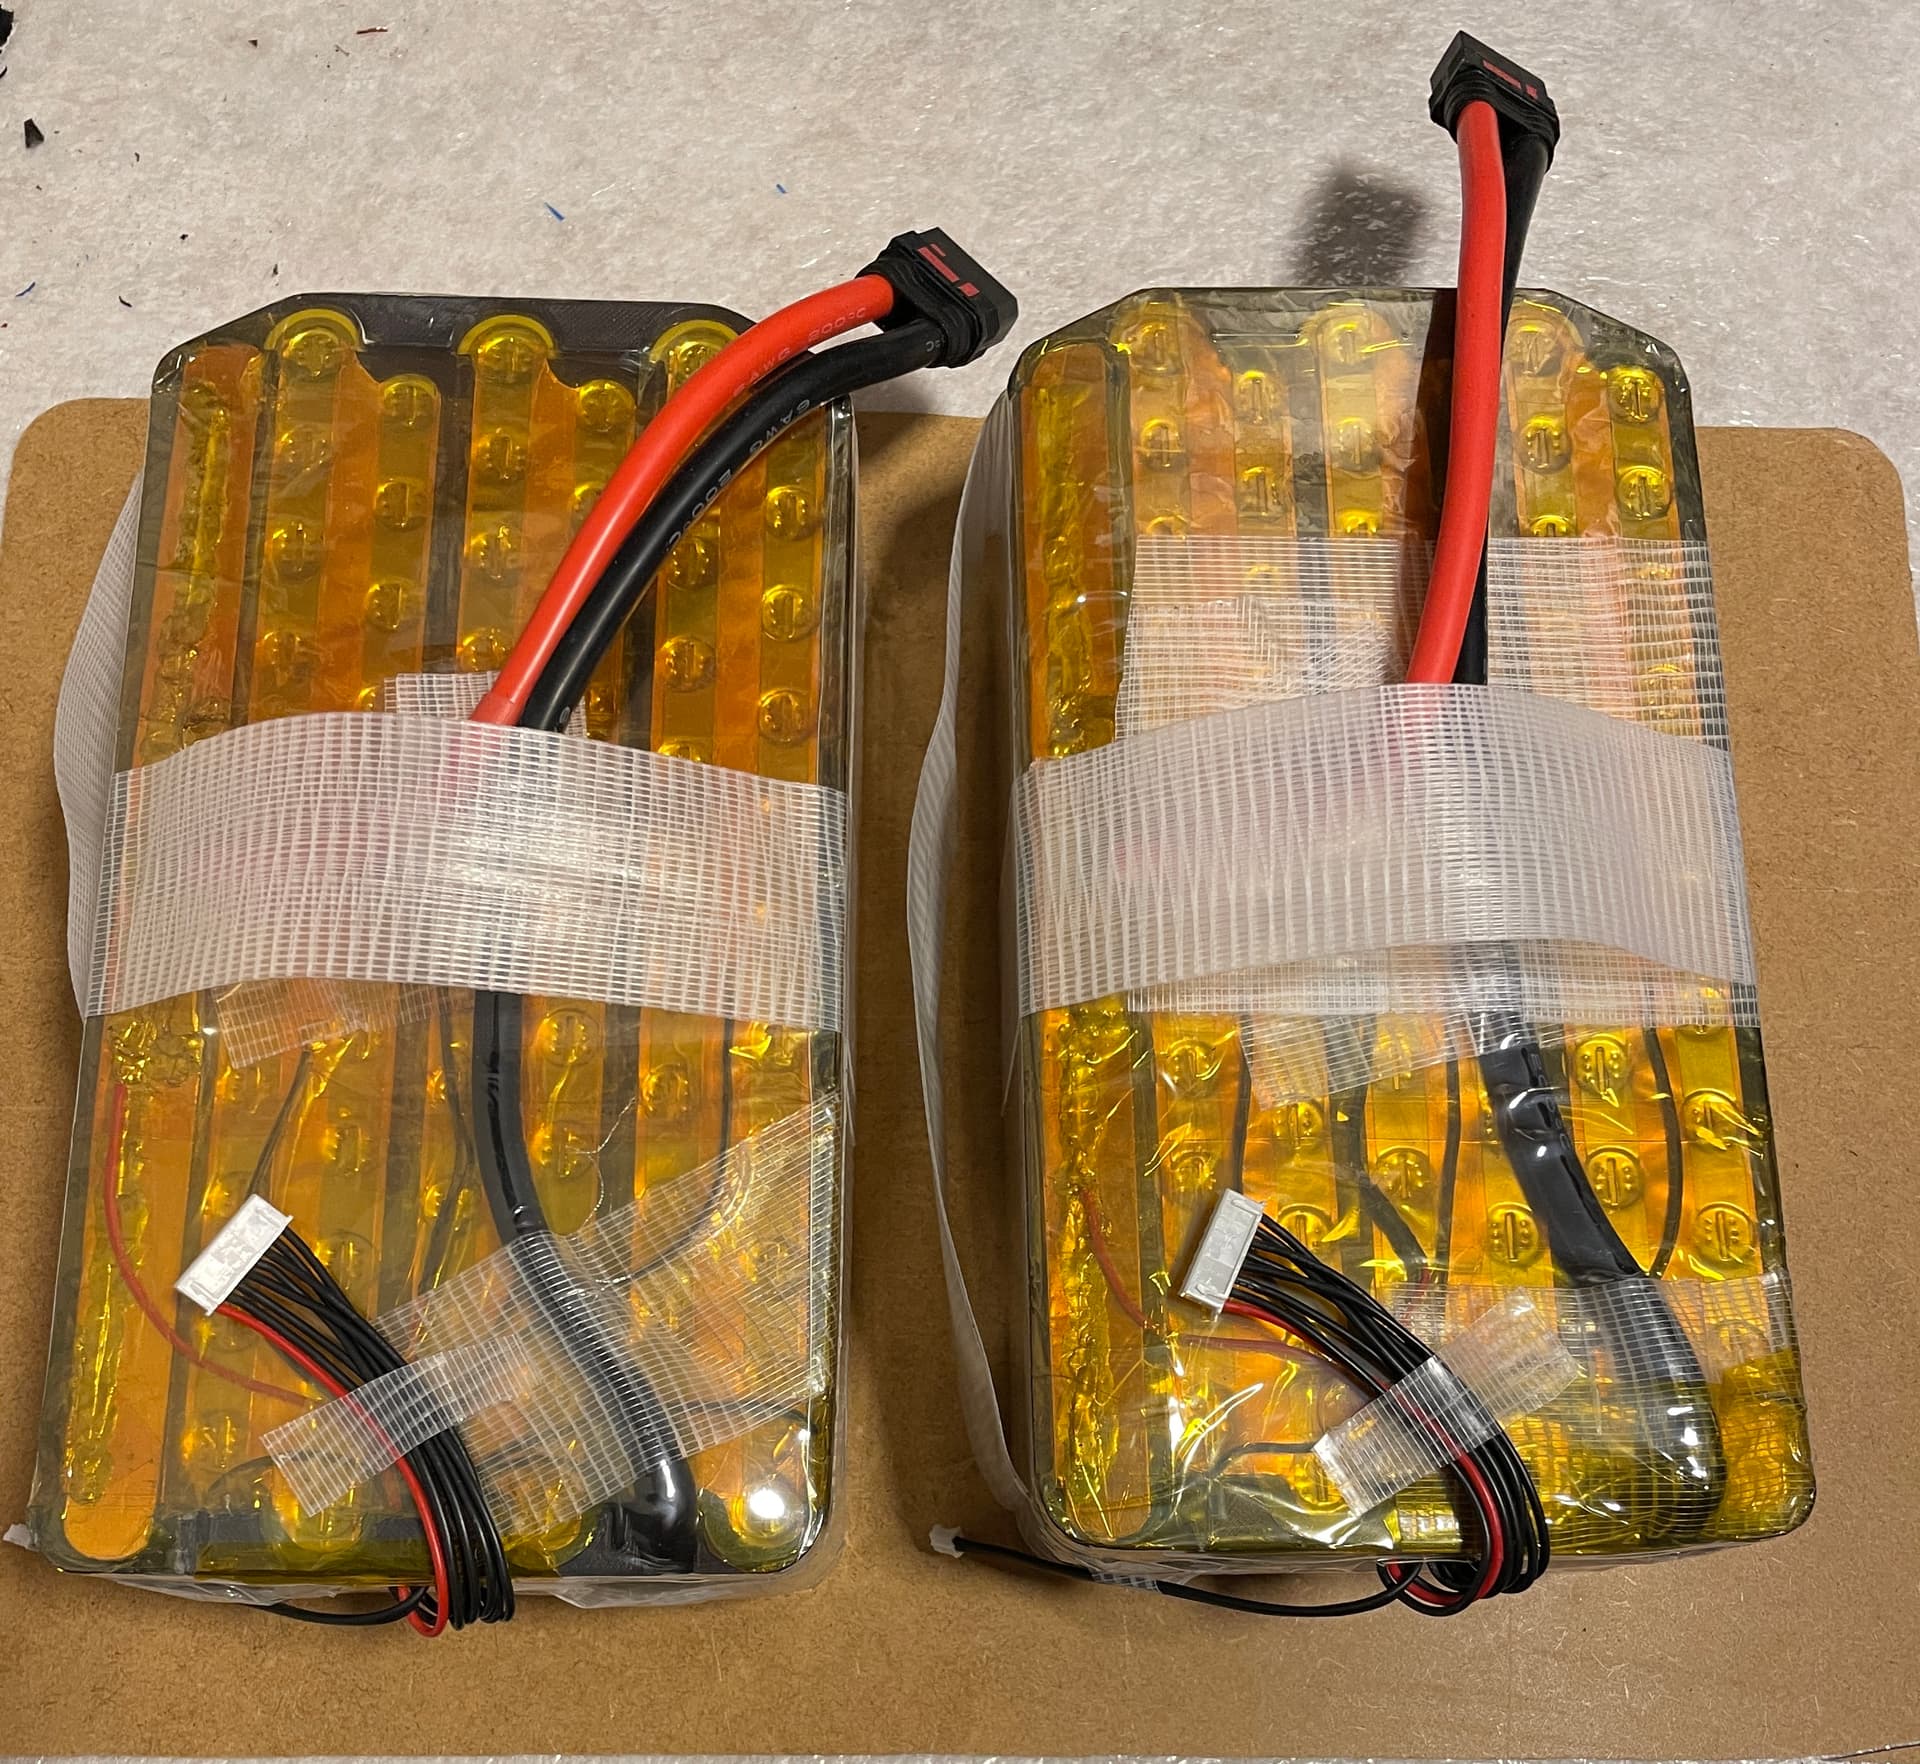
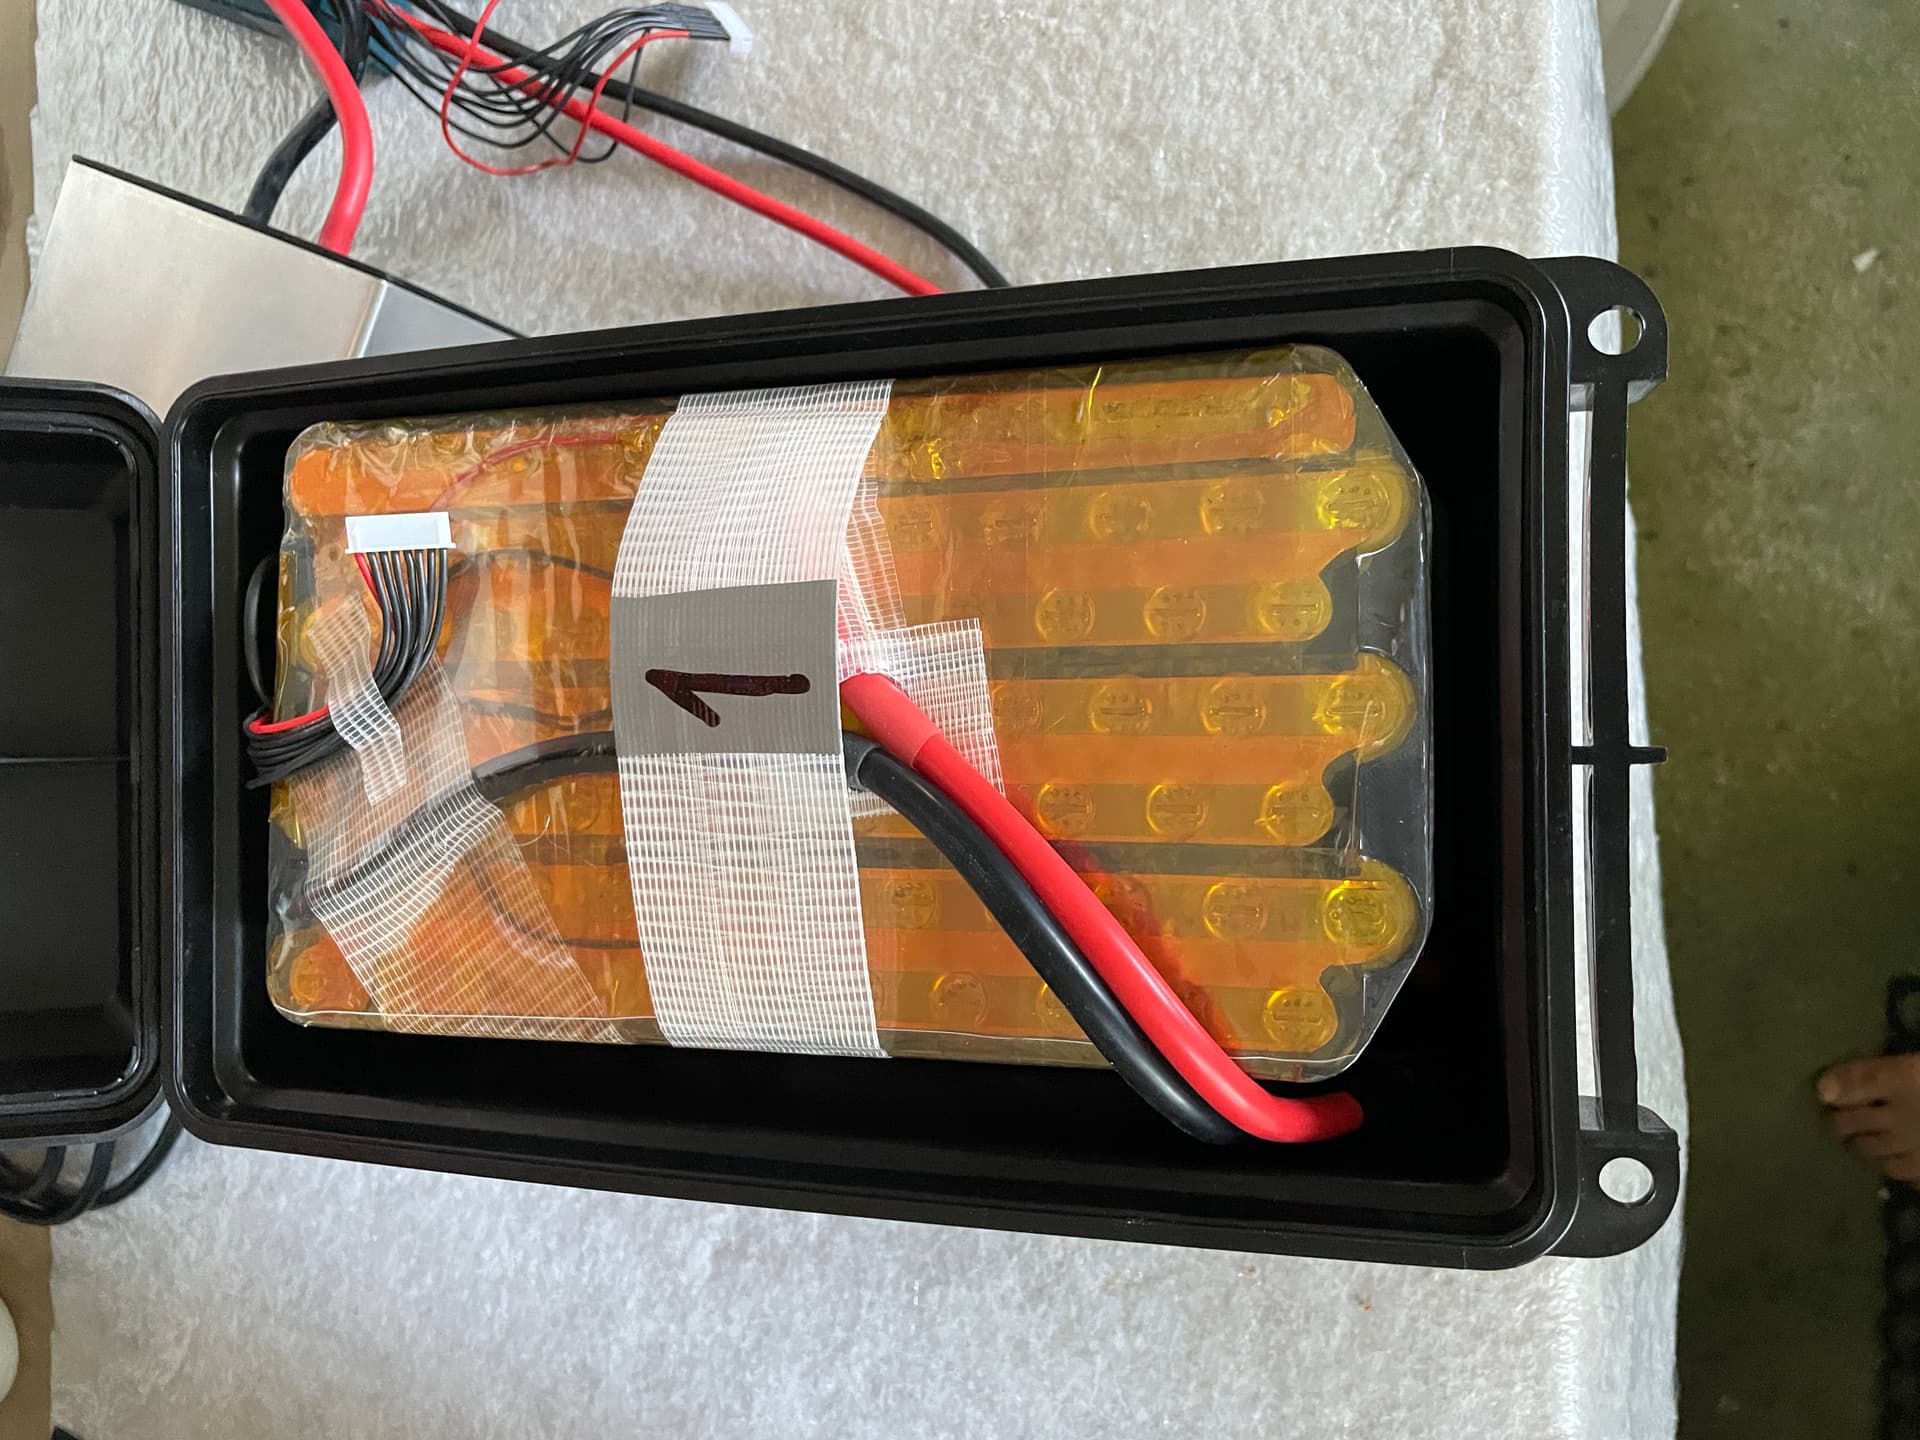
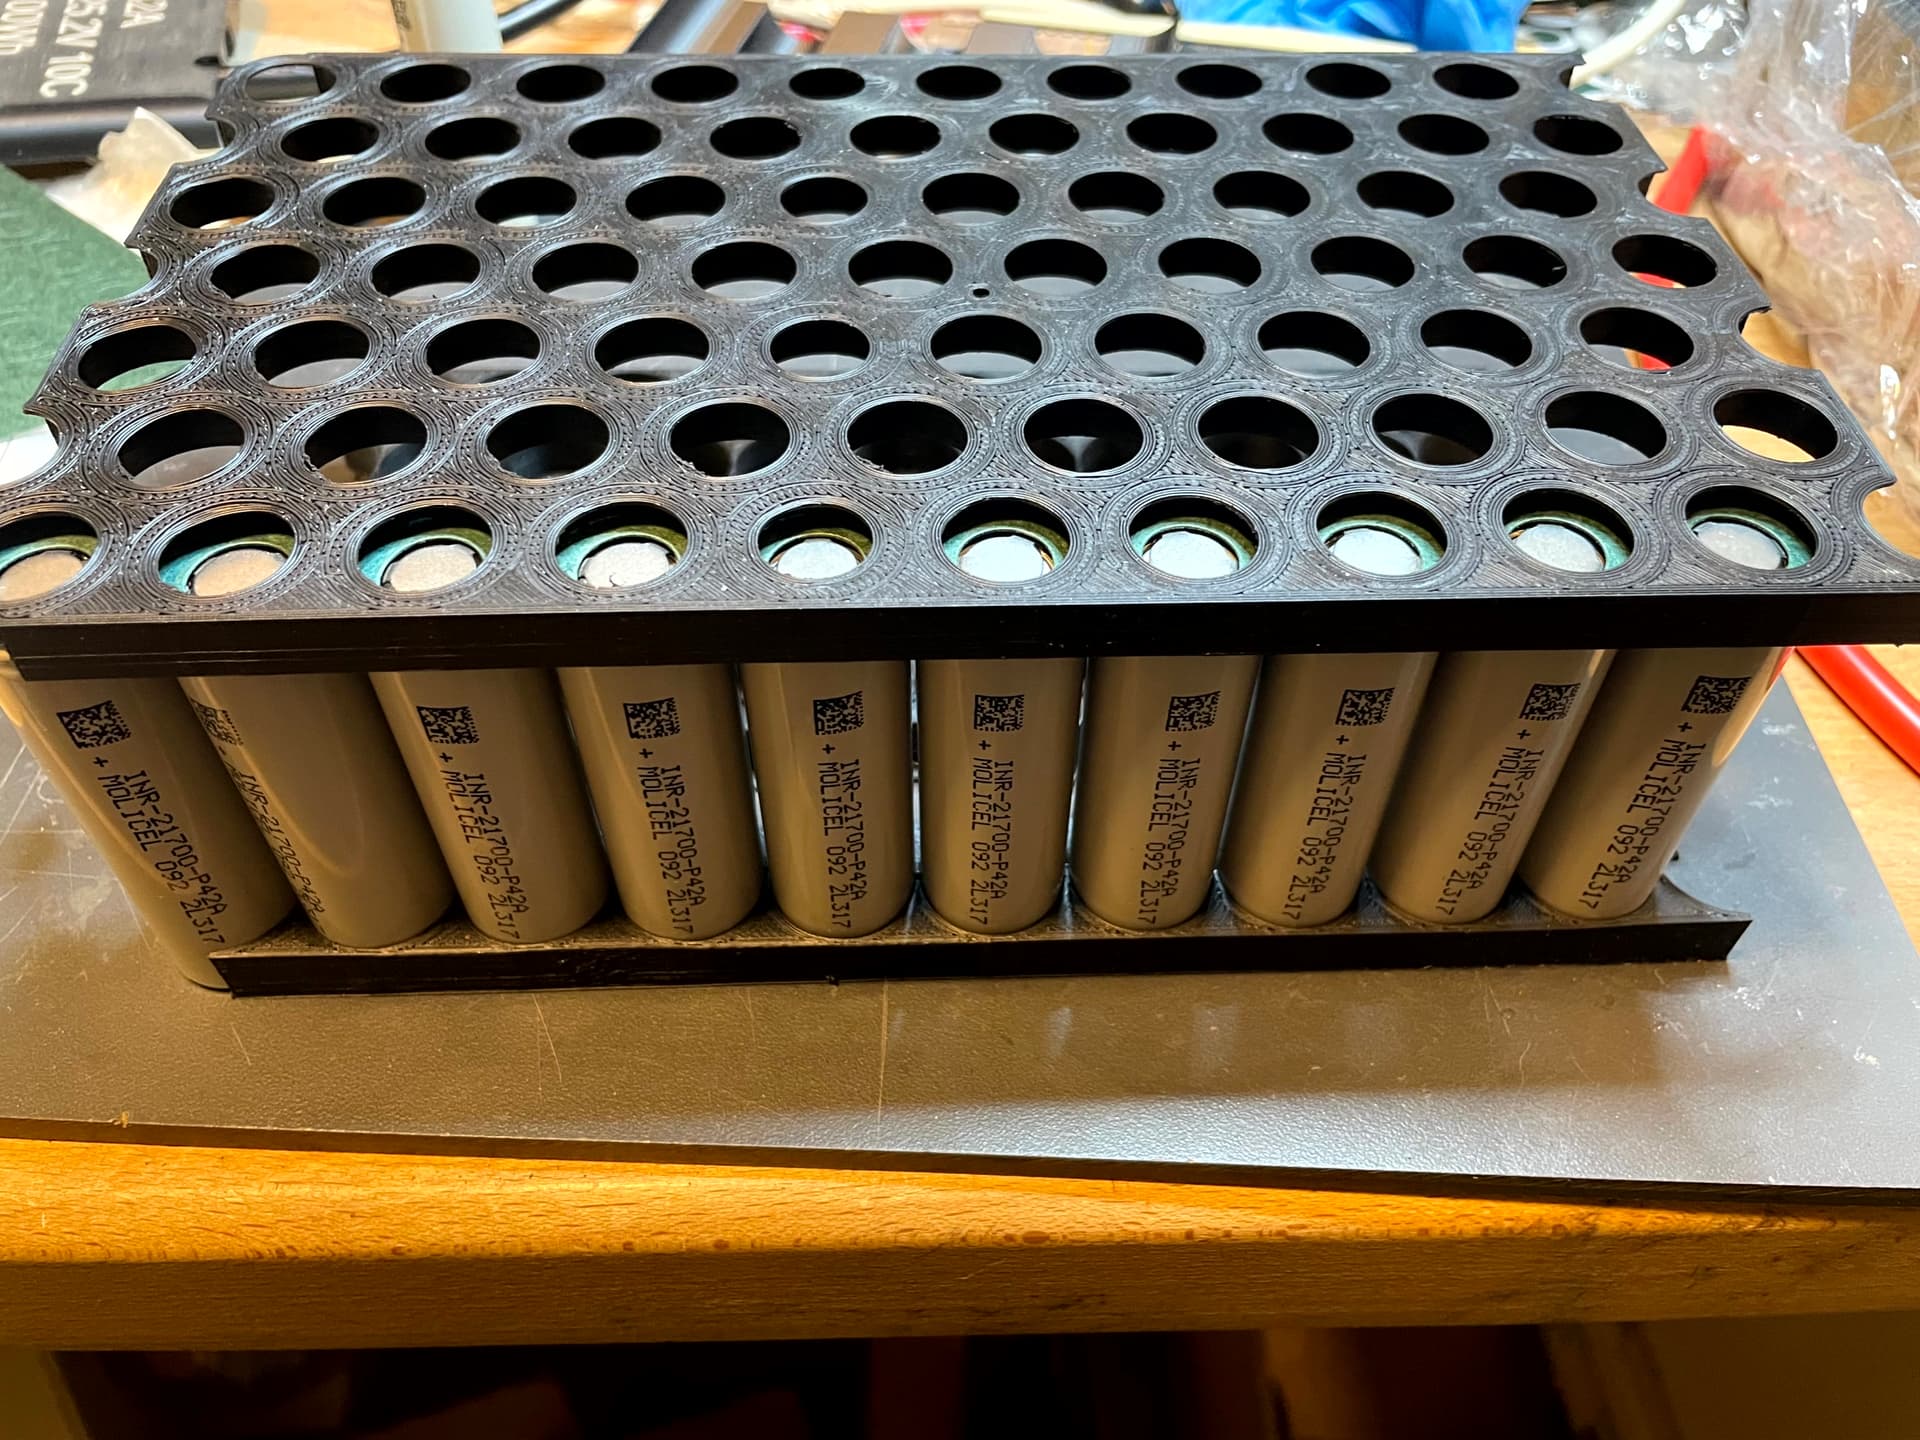
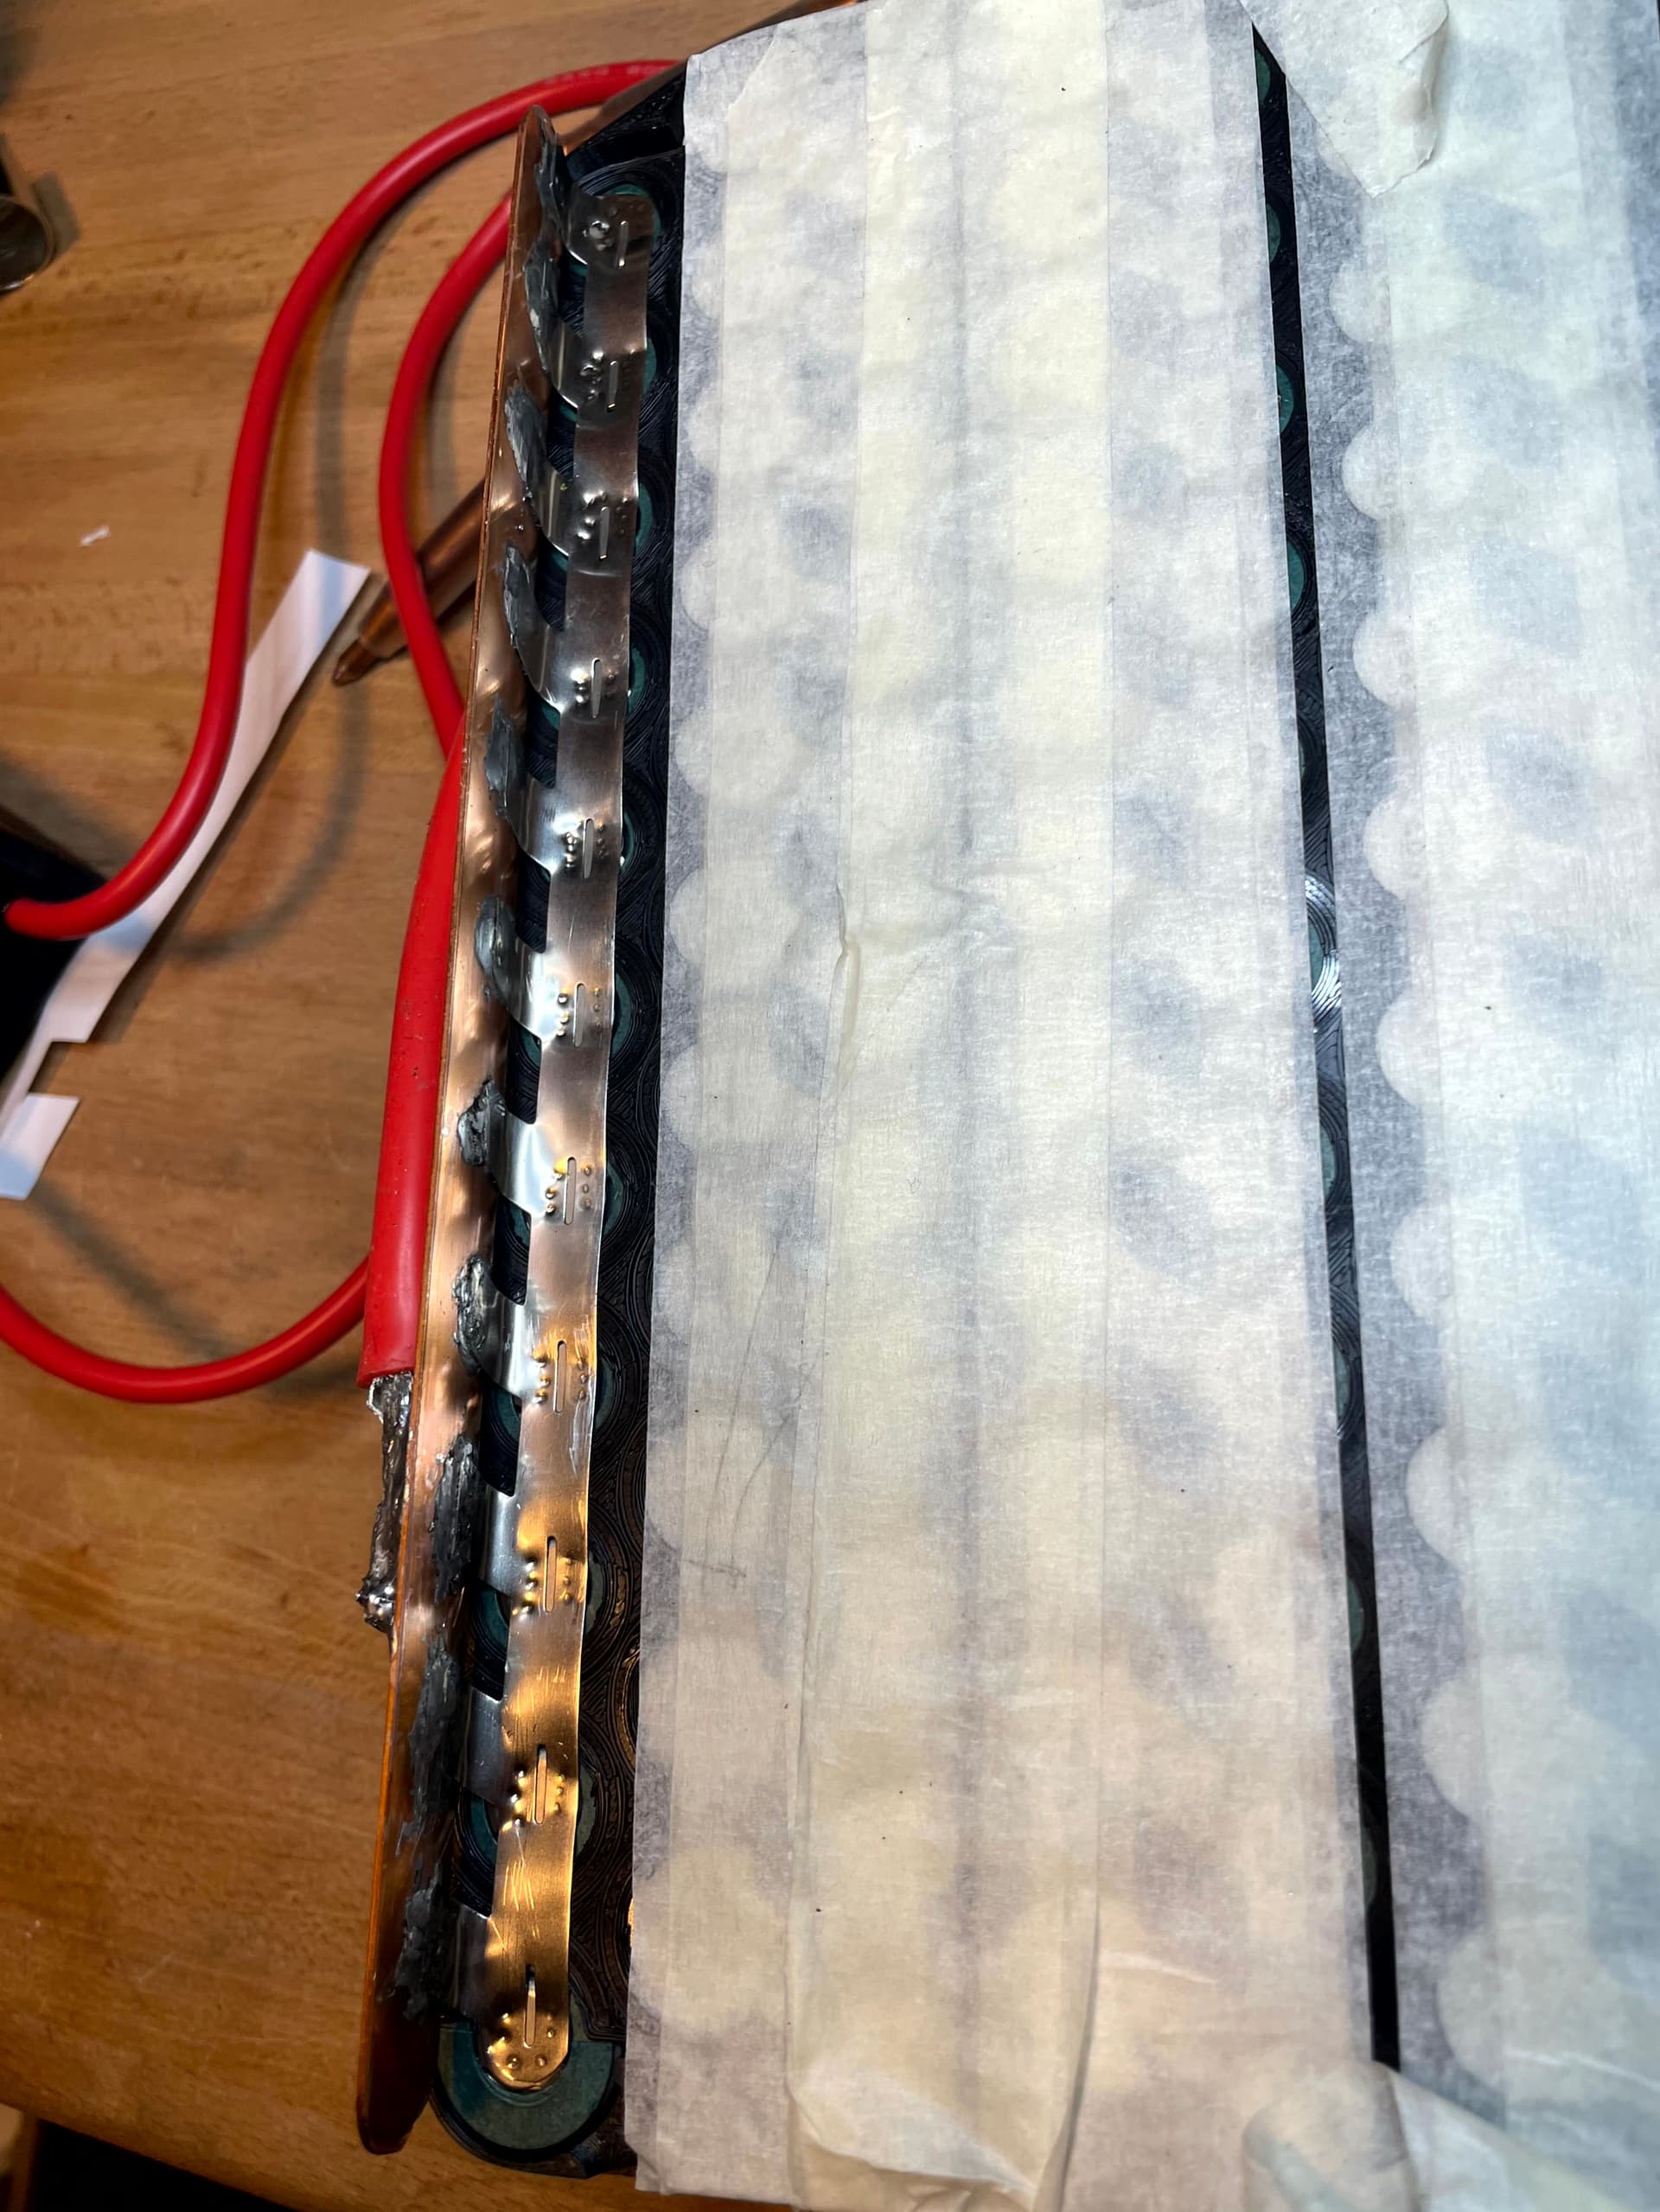
I built two 14S11P Split Packs, one with Molicel P42A and one with P45B. To make them fit the through the screw hatch, I used a offset pattern for cell arrangement. I designed an Printed the cell holders and end caps. 7S is a bit more tricky than 6 (or 8S), as one of the busbars has to be at the bottom of the pack. I used 0.2mm nickel strips to spot weld the packs. Terminal leads are 6AWG with QS8 antispark connectors. I also put an ntc inside to log the battery temp (connects to motor temp input of vesc and logs as motor temp in metr).
 ![IMG_4854](https://foil.zone/uploads/default/original/3X/e/0/e0dd78672e8e15ad78c6d10f4e94fb91cd960b2f.jpeg)

 ![IMG_4930](https://foil.zone/uploads/default/original/3X/7/2/727f9557b6a6584345aeb18cebe028cd5083dd9d.jpeg)

 ![IMG_4928](https://foil.zone/uploads/default/original/3X/5/c/5c810717fd6eb5c70d9a9b35c4af7da3b9b13465.jpeg)

 ![IMG_4939](https://foil.zone/uploads/default/original/3X/1/4/141e55d15a3340449c12f177478e788ac6db1ac0.jpeg)

 ![IMG_4943](https://foil.zone/uploads/default/original/3X/2/8/28007726a659ae3d2e5dab827c4ddbaafd6d5303.jpeg)

 ![IMG_4948](https://foil.zone/uploads/default/original/3X/b/6/b6a76d4f5fc712b50b82c751bfd8cbcca0ed0b72.jpeg)

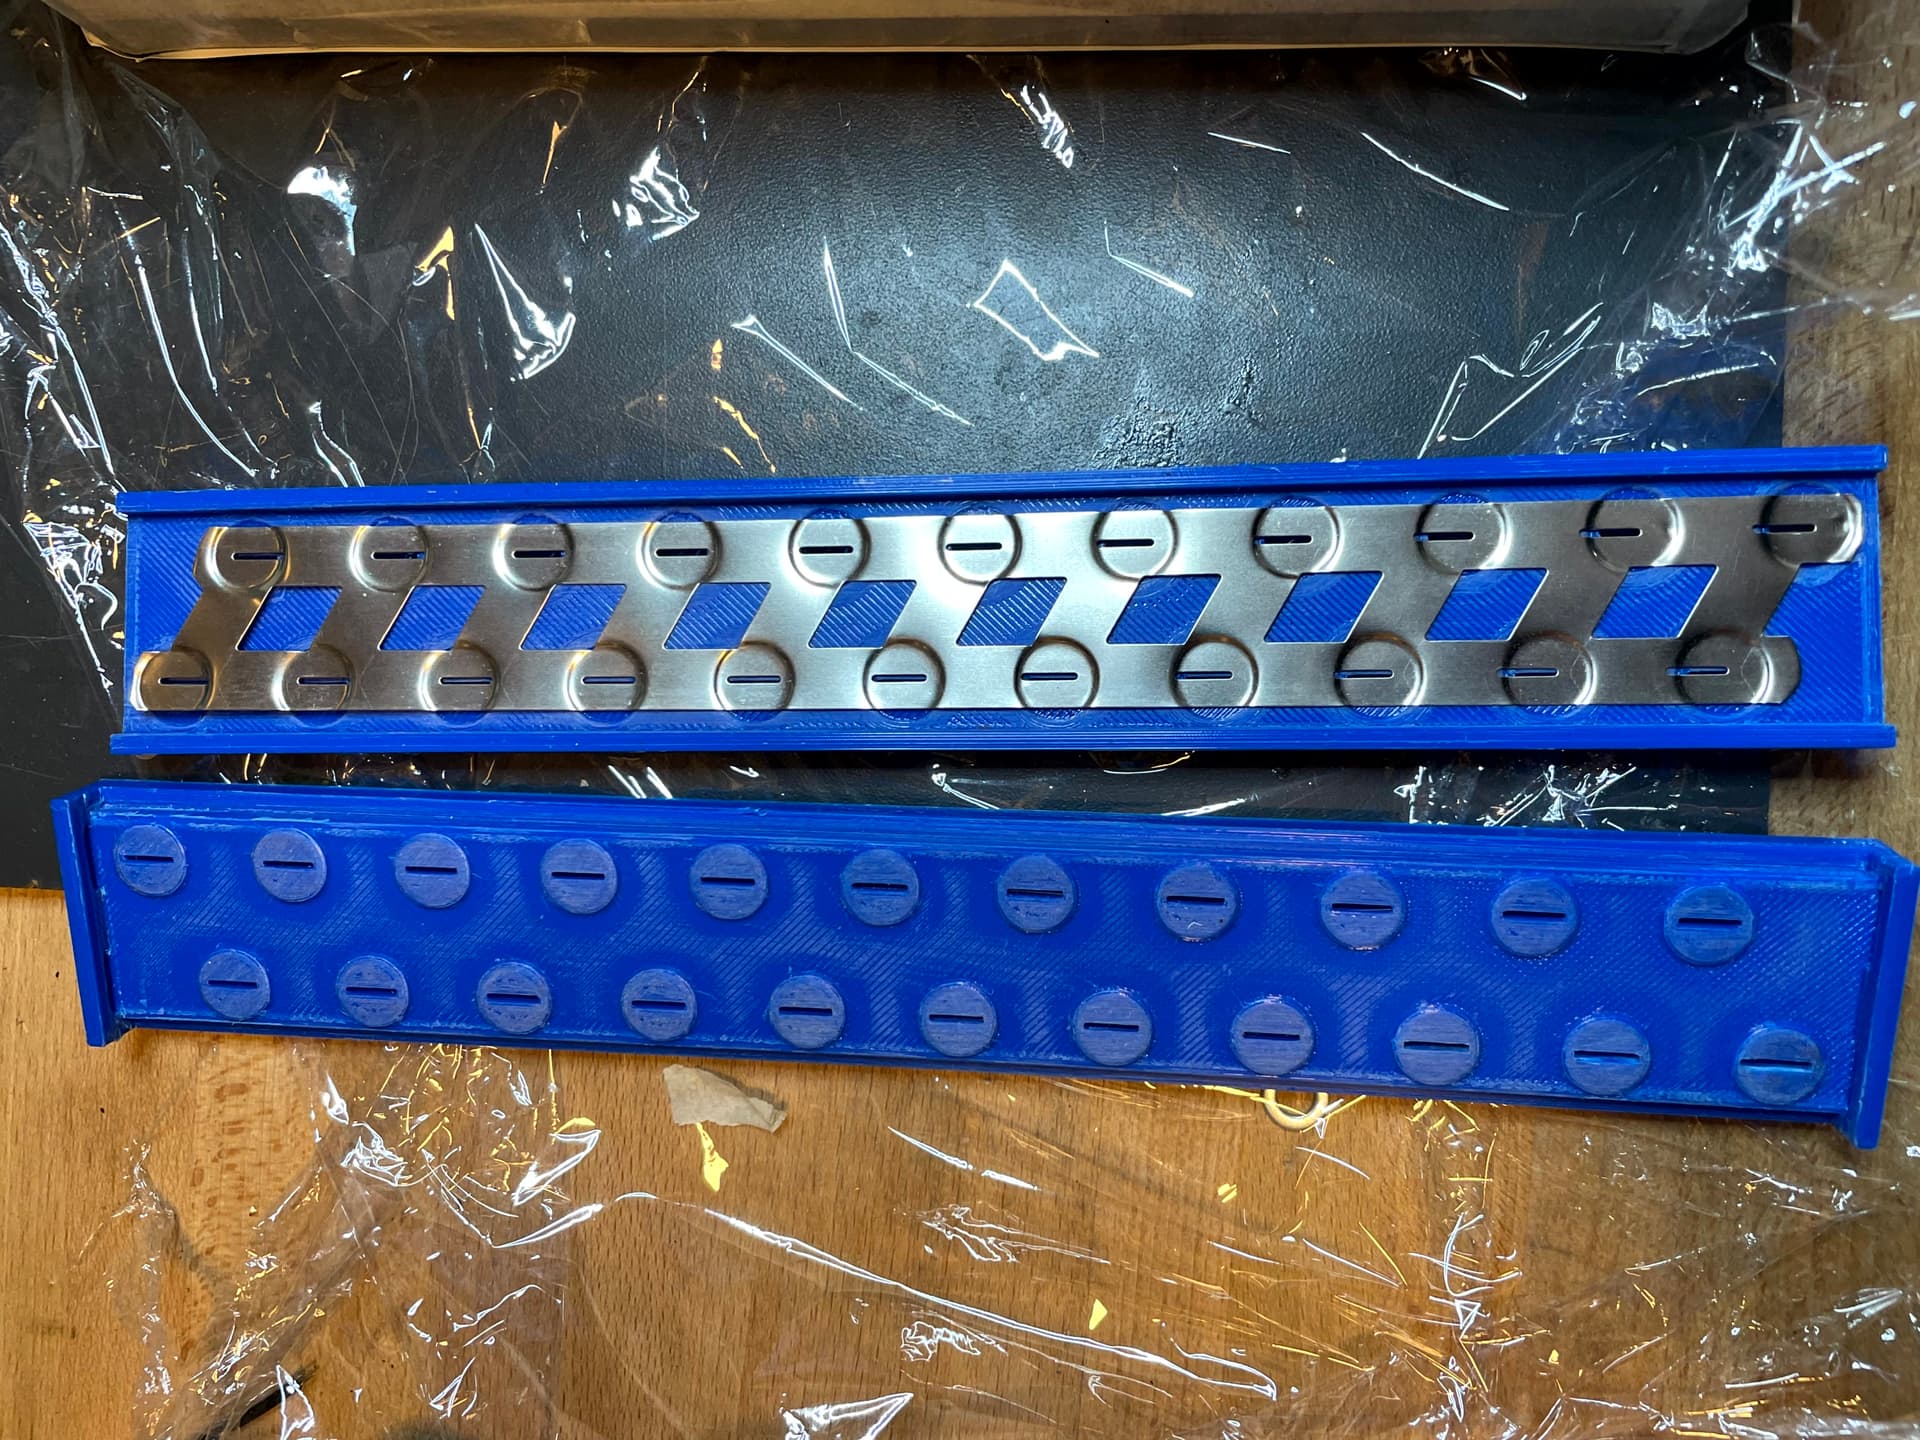
I didn’t like the way the strip got bent to the poles of the cells so I built a 3D printed press template to create a recess.

---

<div class="post-metadata">

### Author: ![sat\_be](https://foil.zone/user_avatar/foil.zone/sat_be/32/35523_2.png) [@sat\_be](https://foil.zone/u/sat_be)
#### Post date: [July 23, 2024, 9:27pm UTC](https://foil.zone/t/daniels-2nd-build/19956/19 "2024-07-23T21:27:55Z")

</div>

2nd set of Batteries  
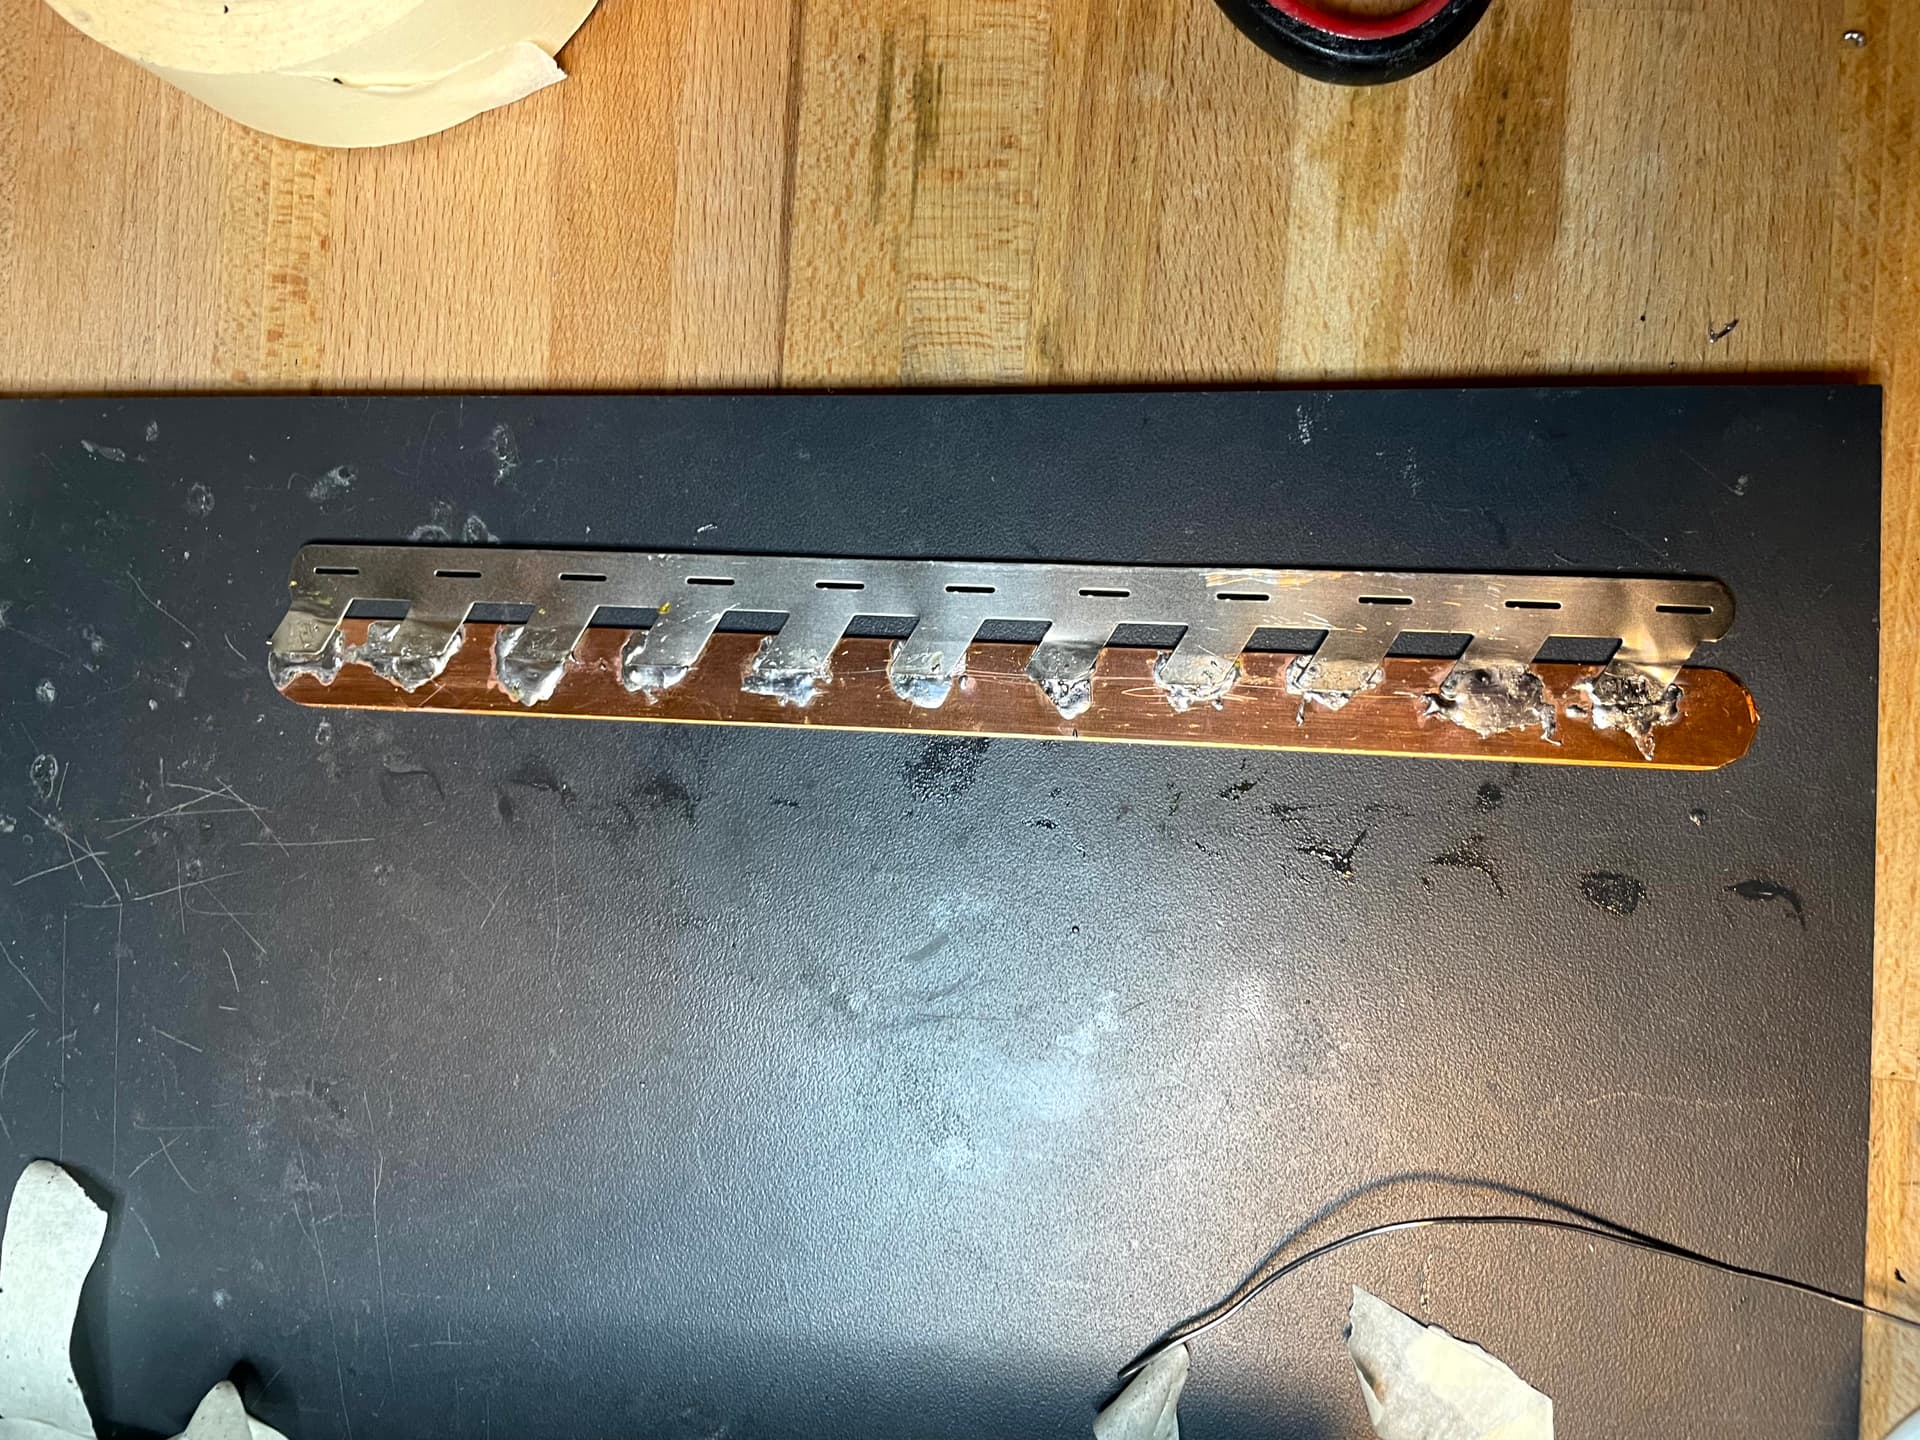
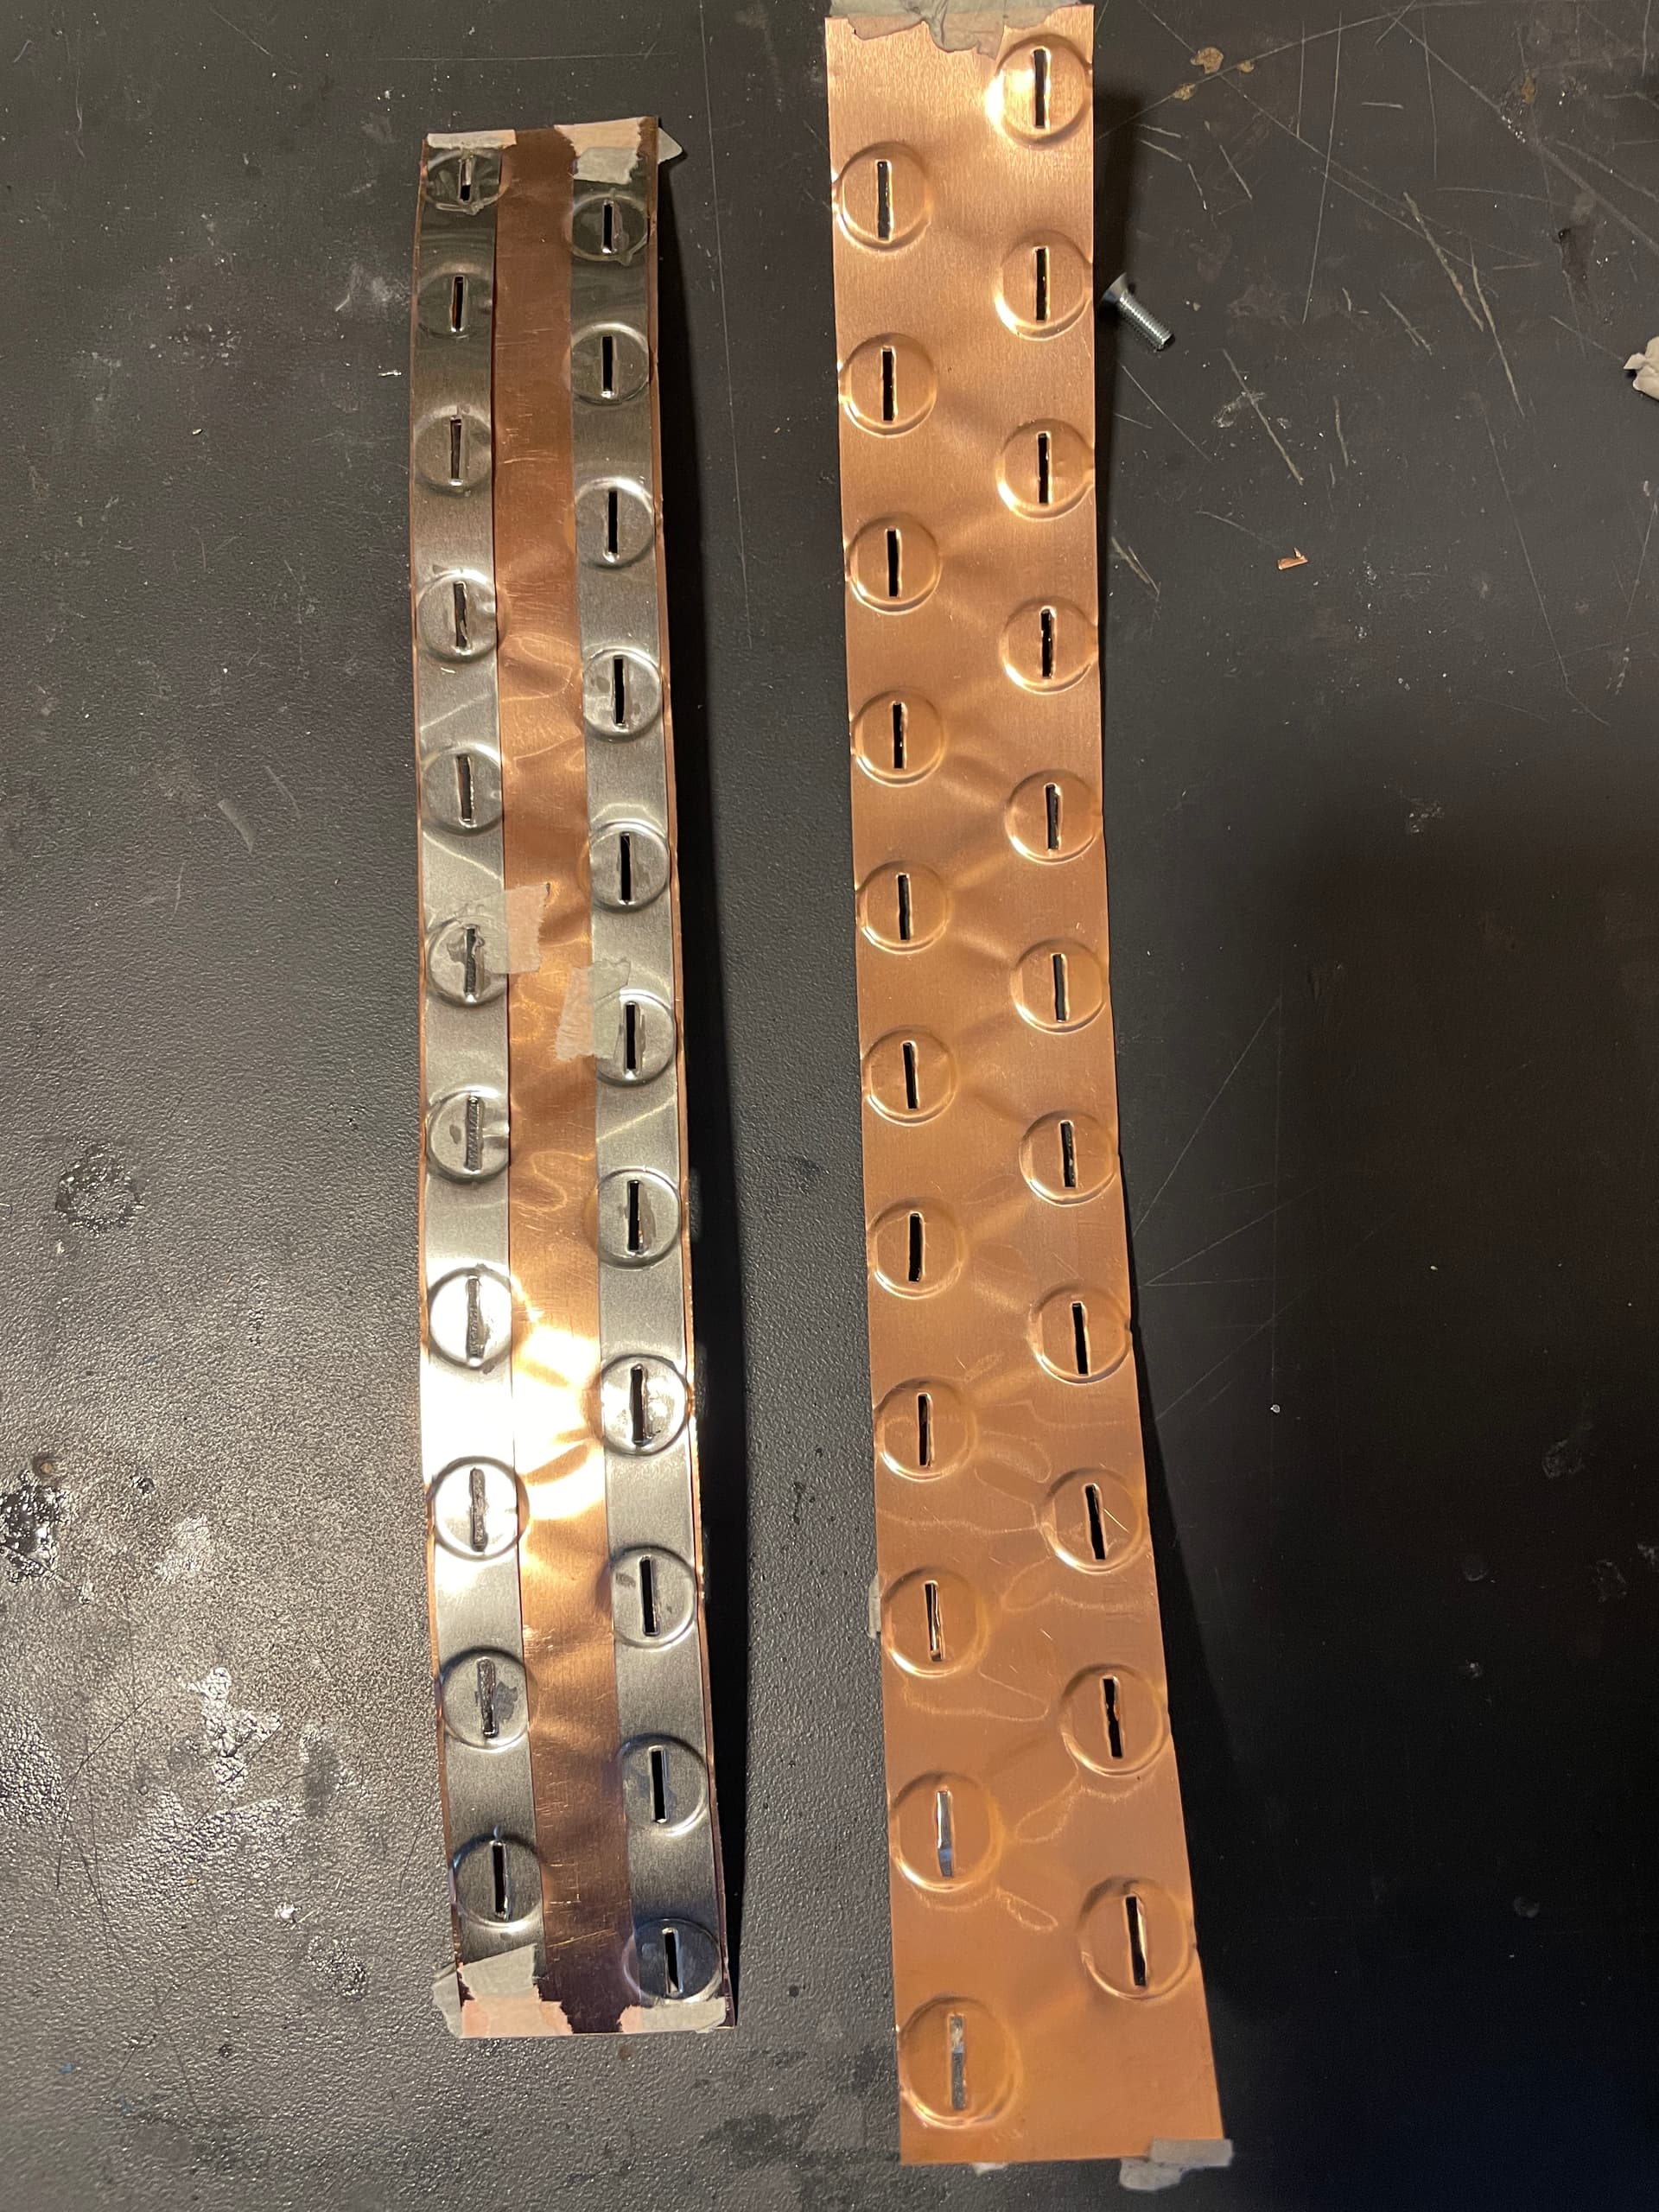
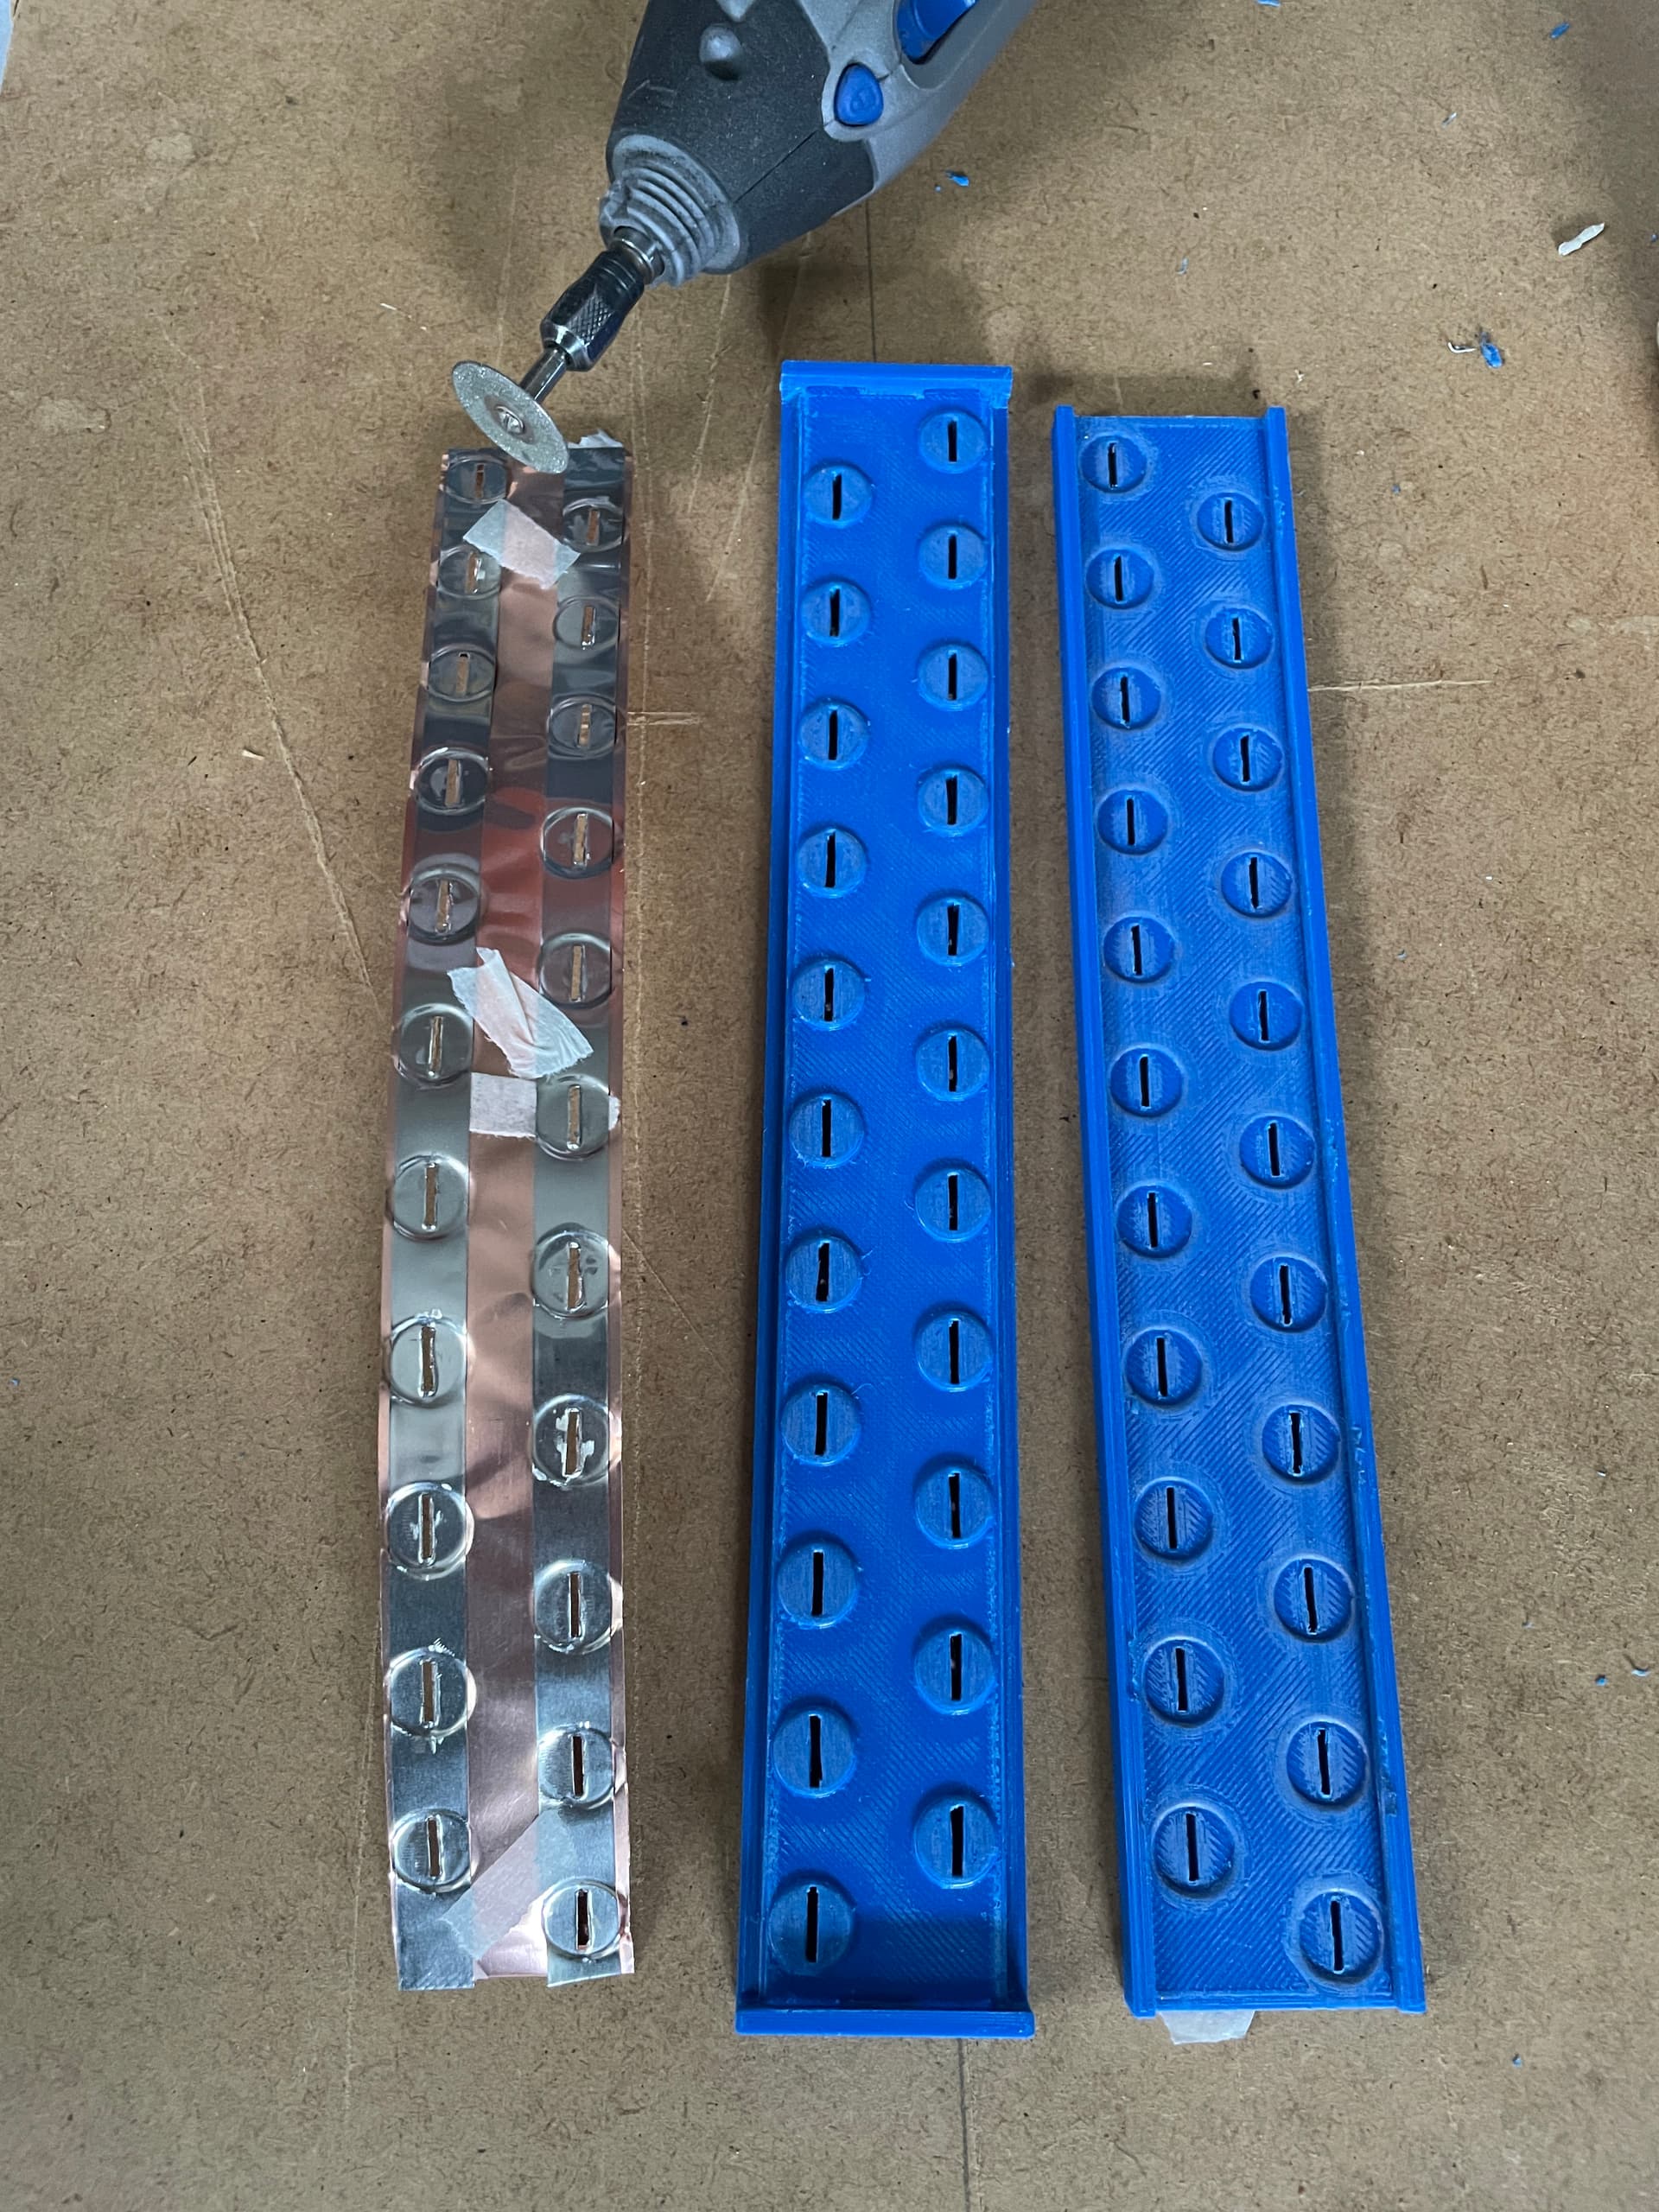
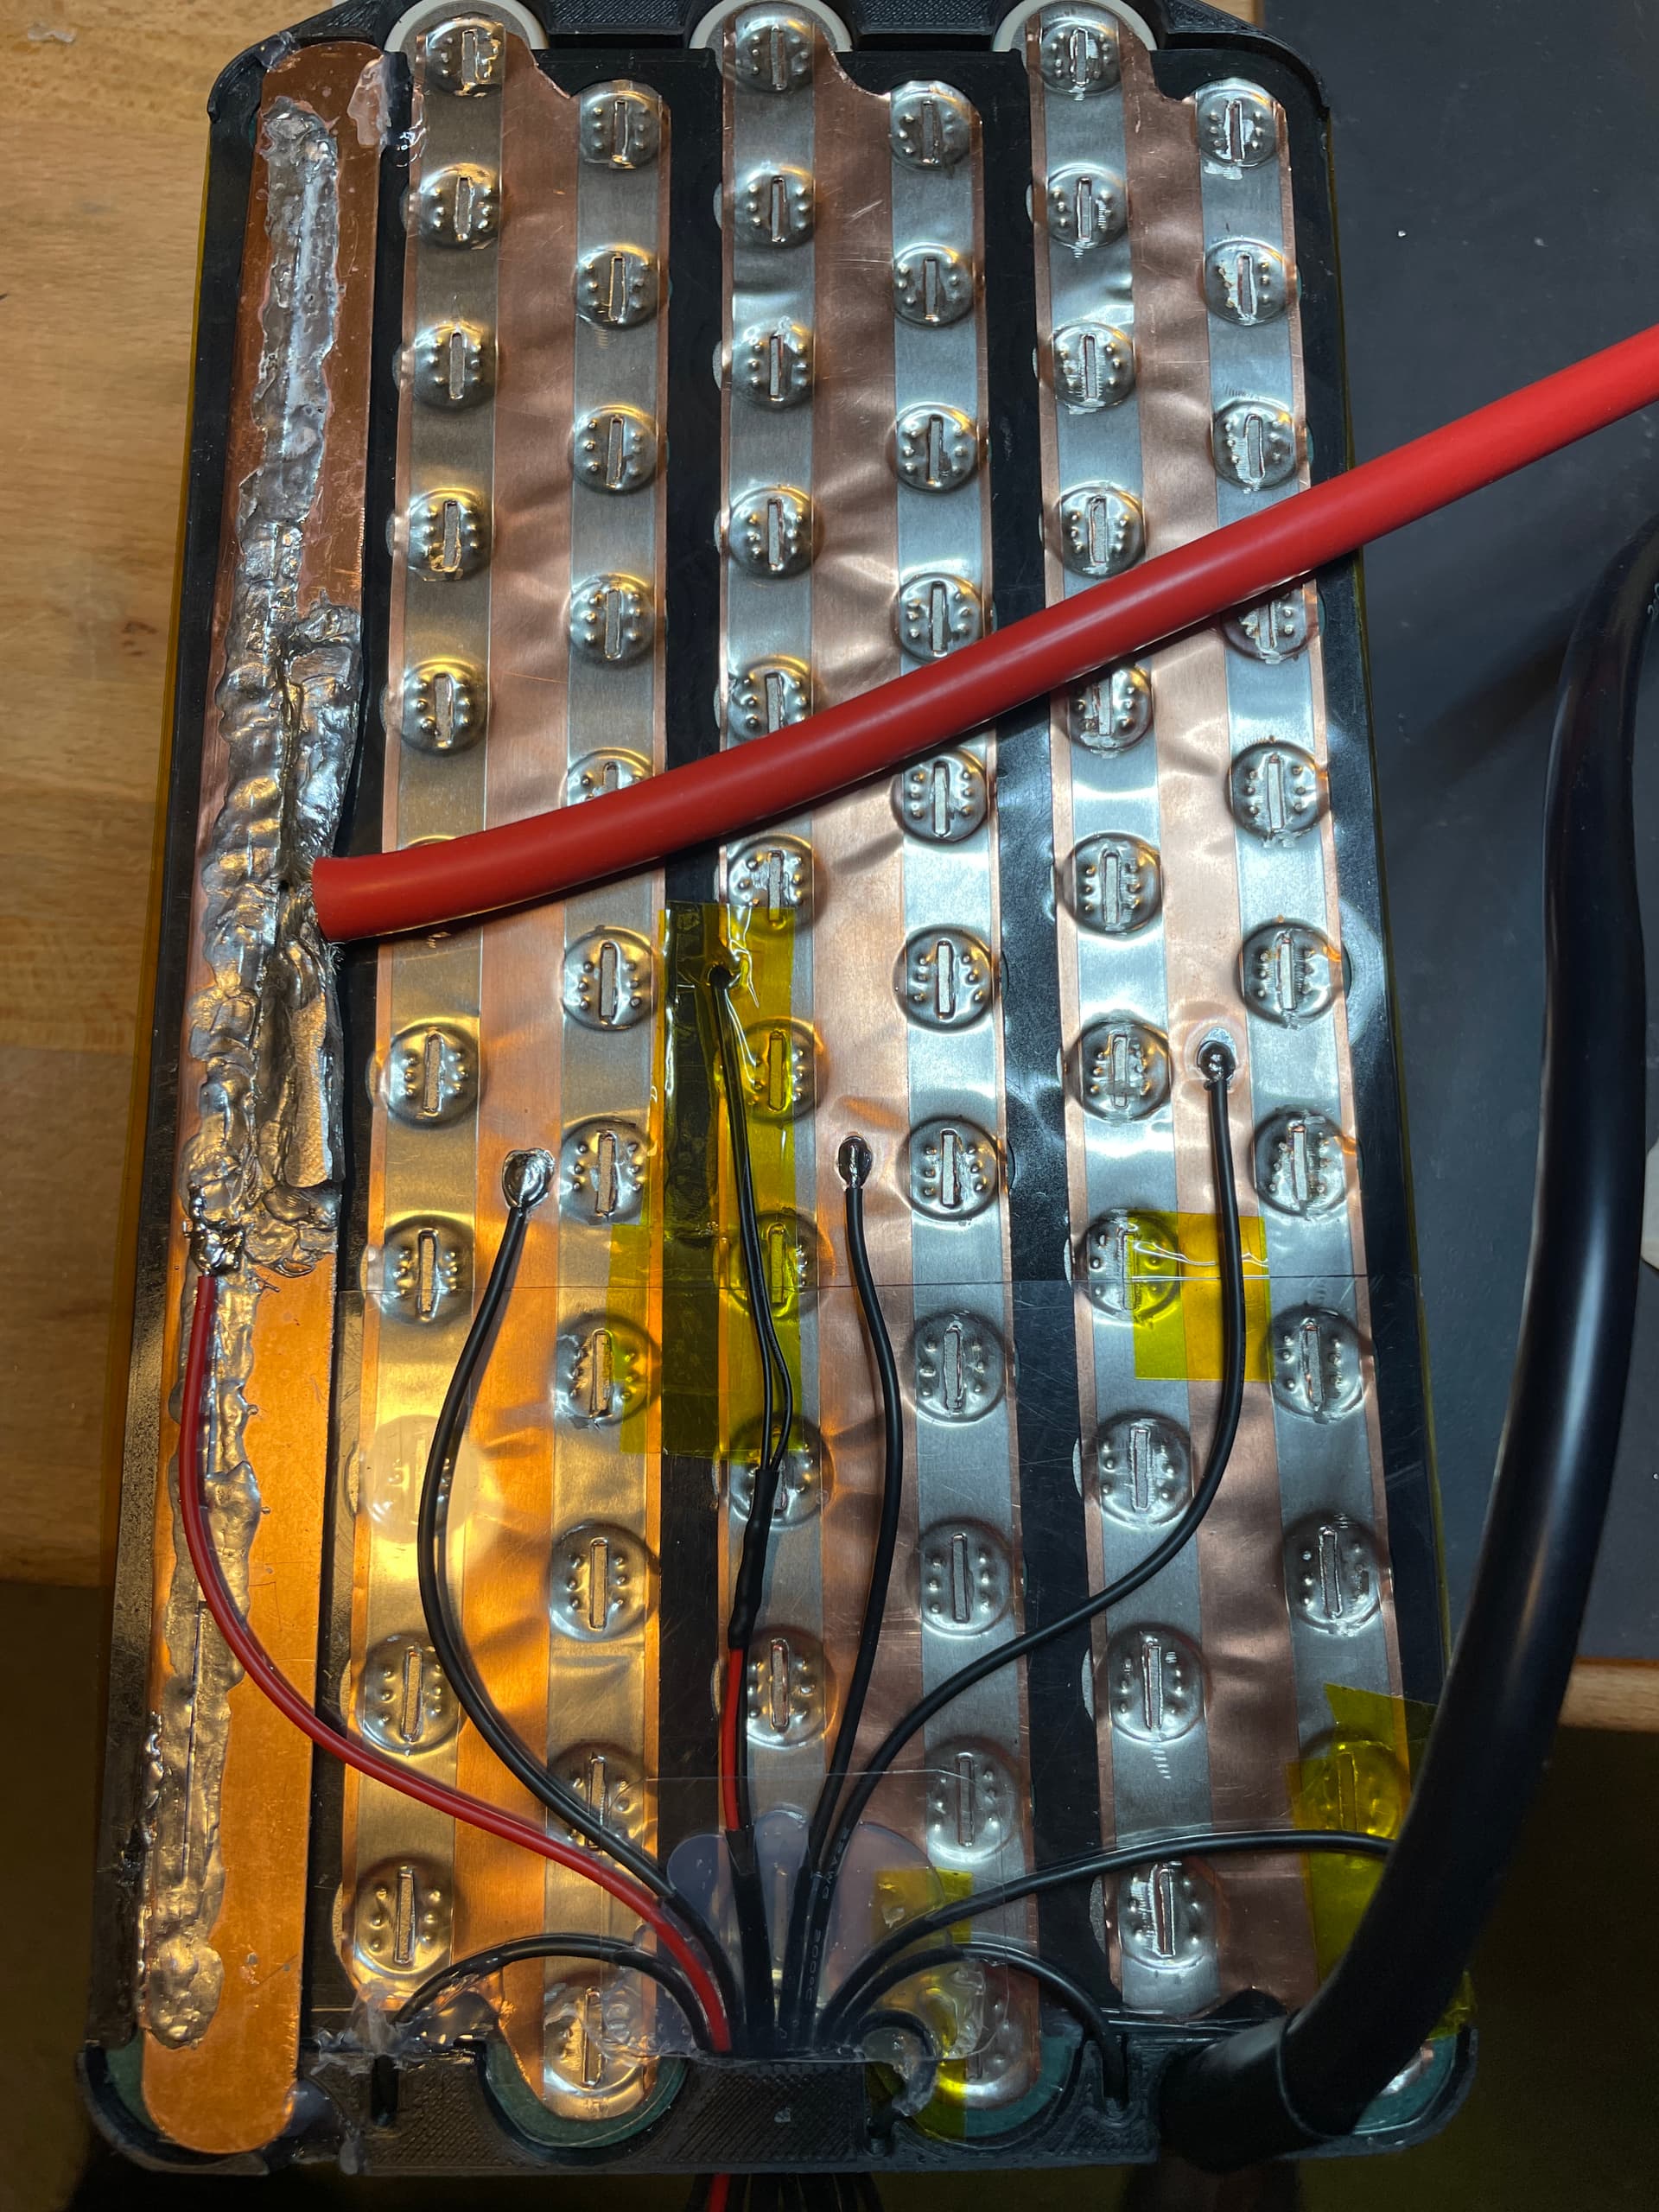
For the second set I wanted to try something new, a copper nickel sandwich. It consists of a 0.1mm copper strip and 0.1mm nickel on top. I used a 3d printed template to form the strip and guide the stamp to stamp out a slot. Conductivity of copper is aprox. 4 times better than that of nickel.
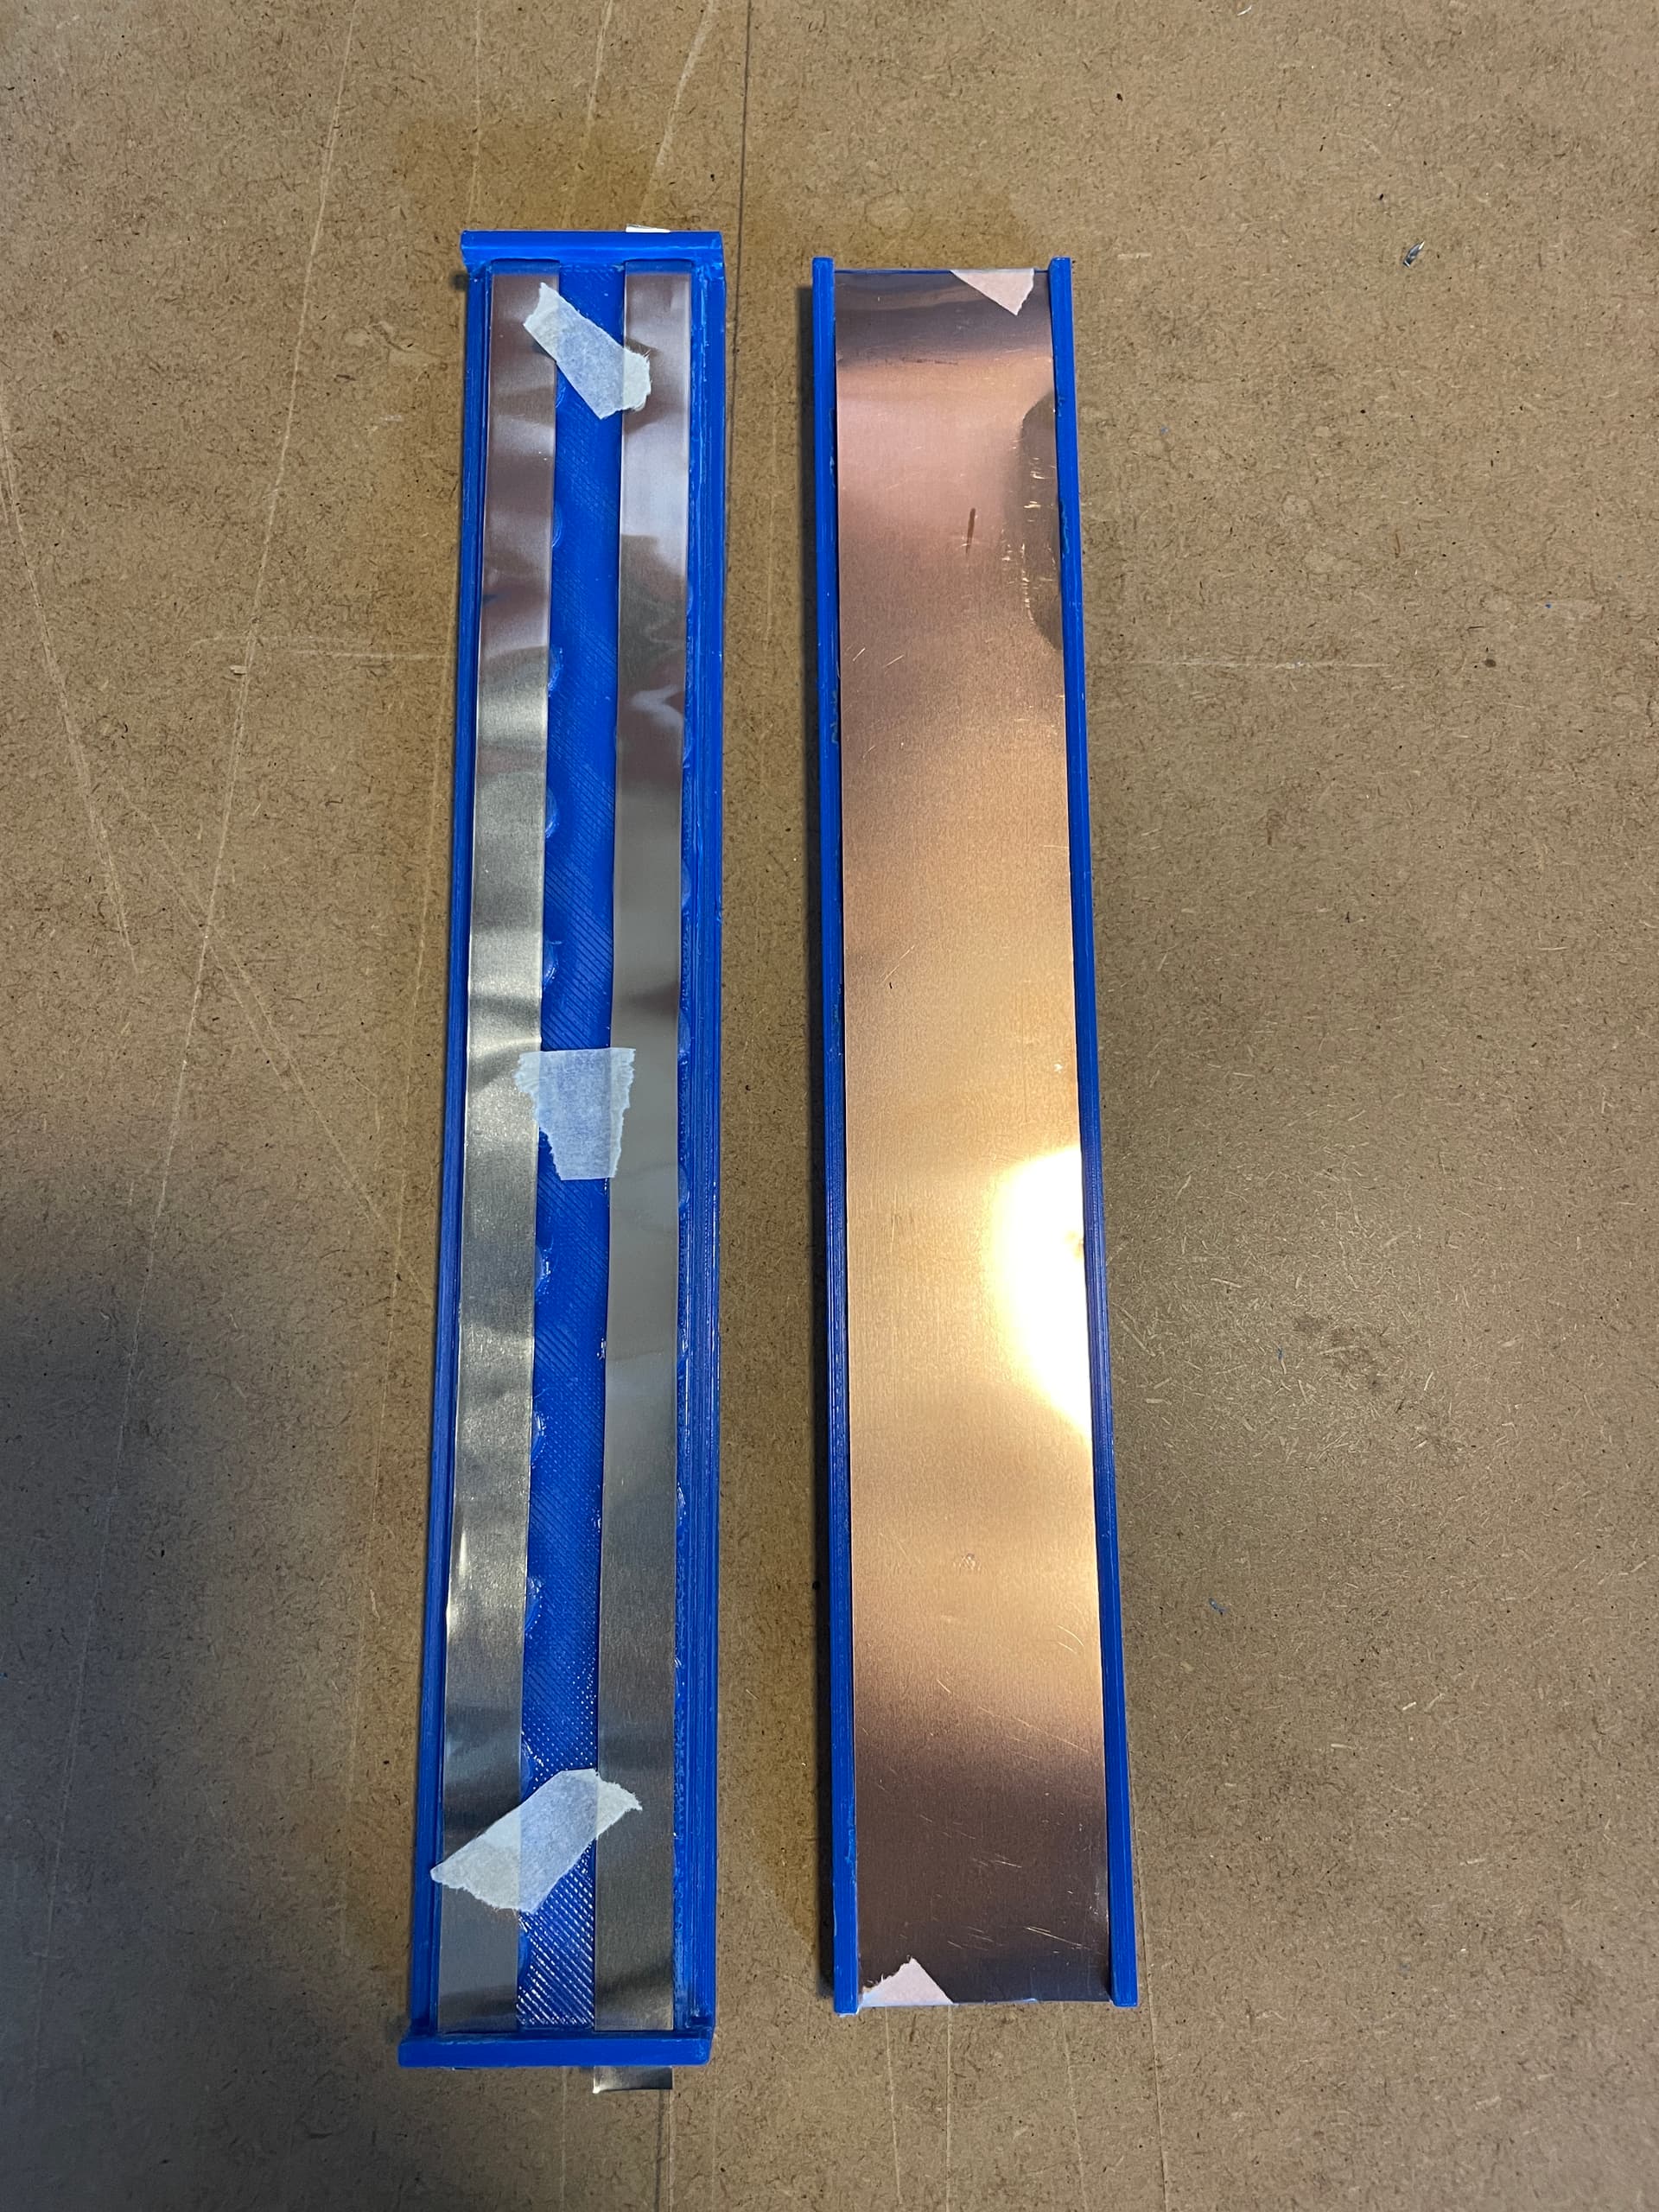
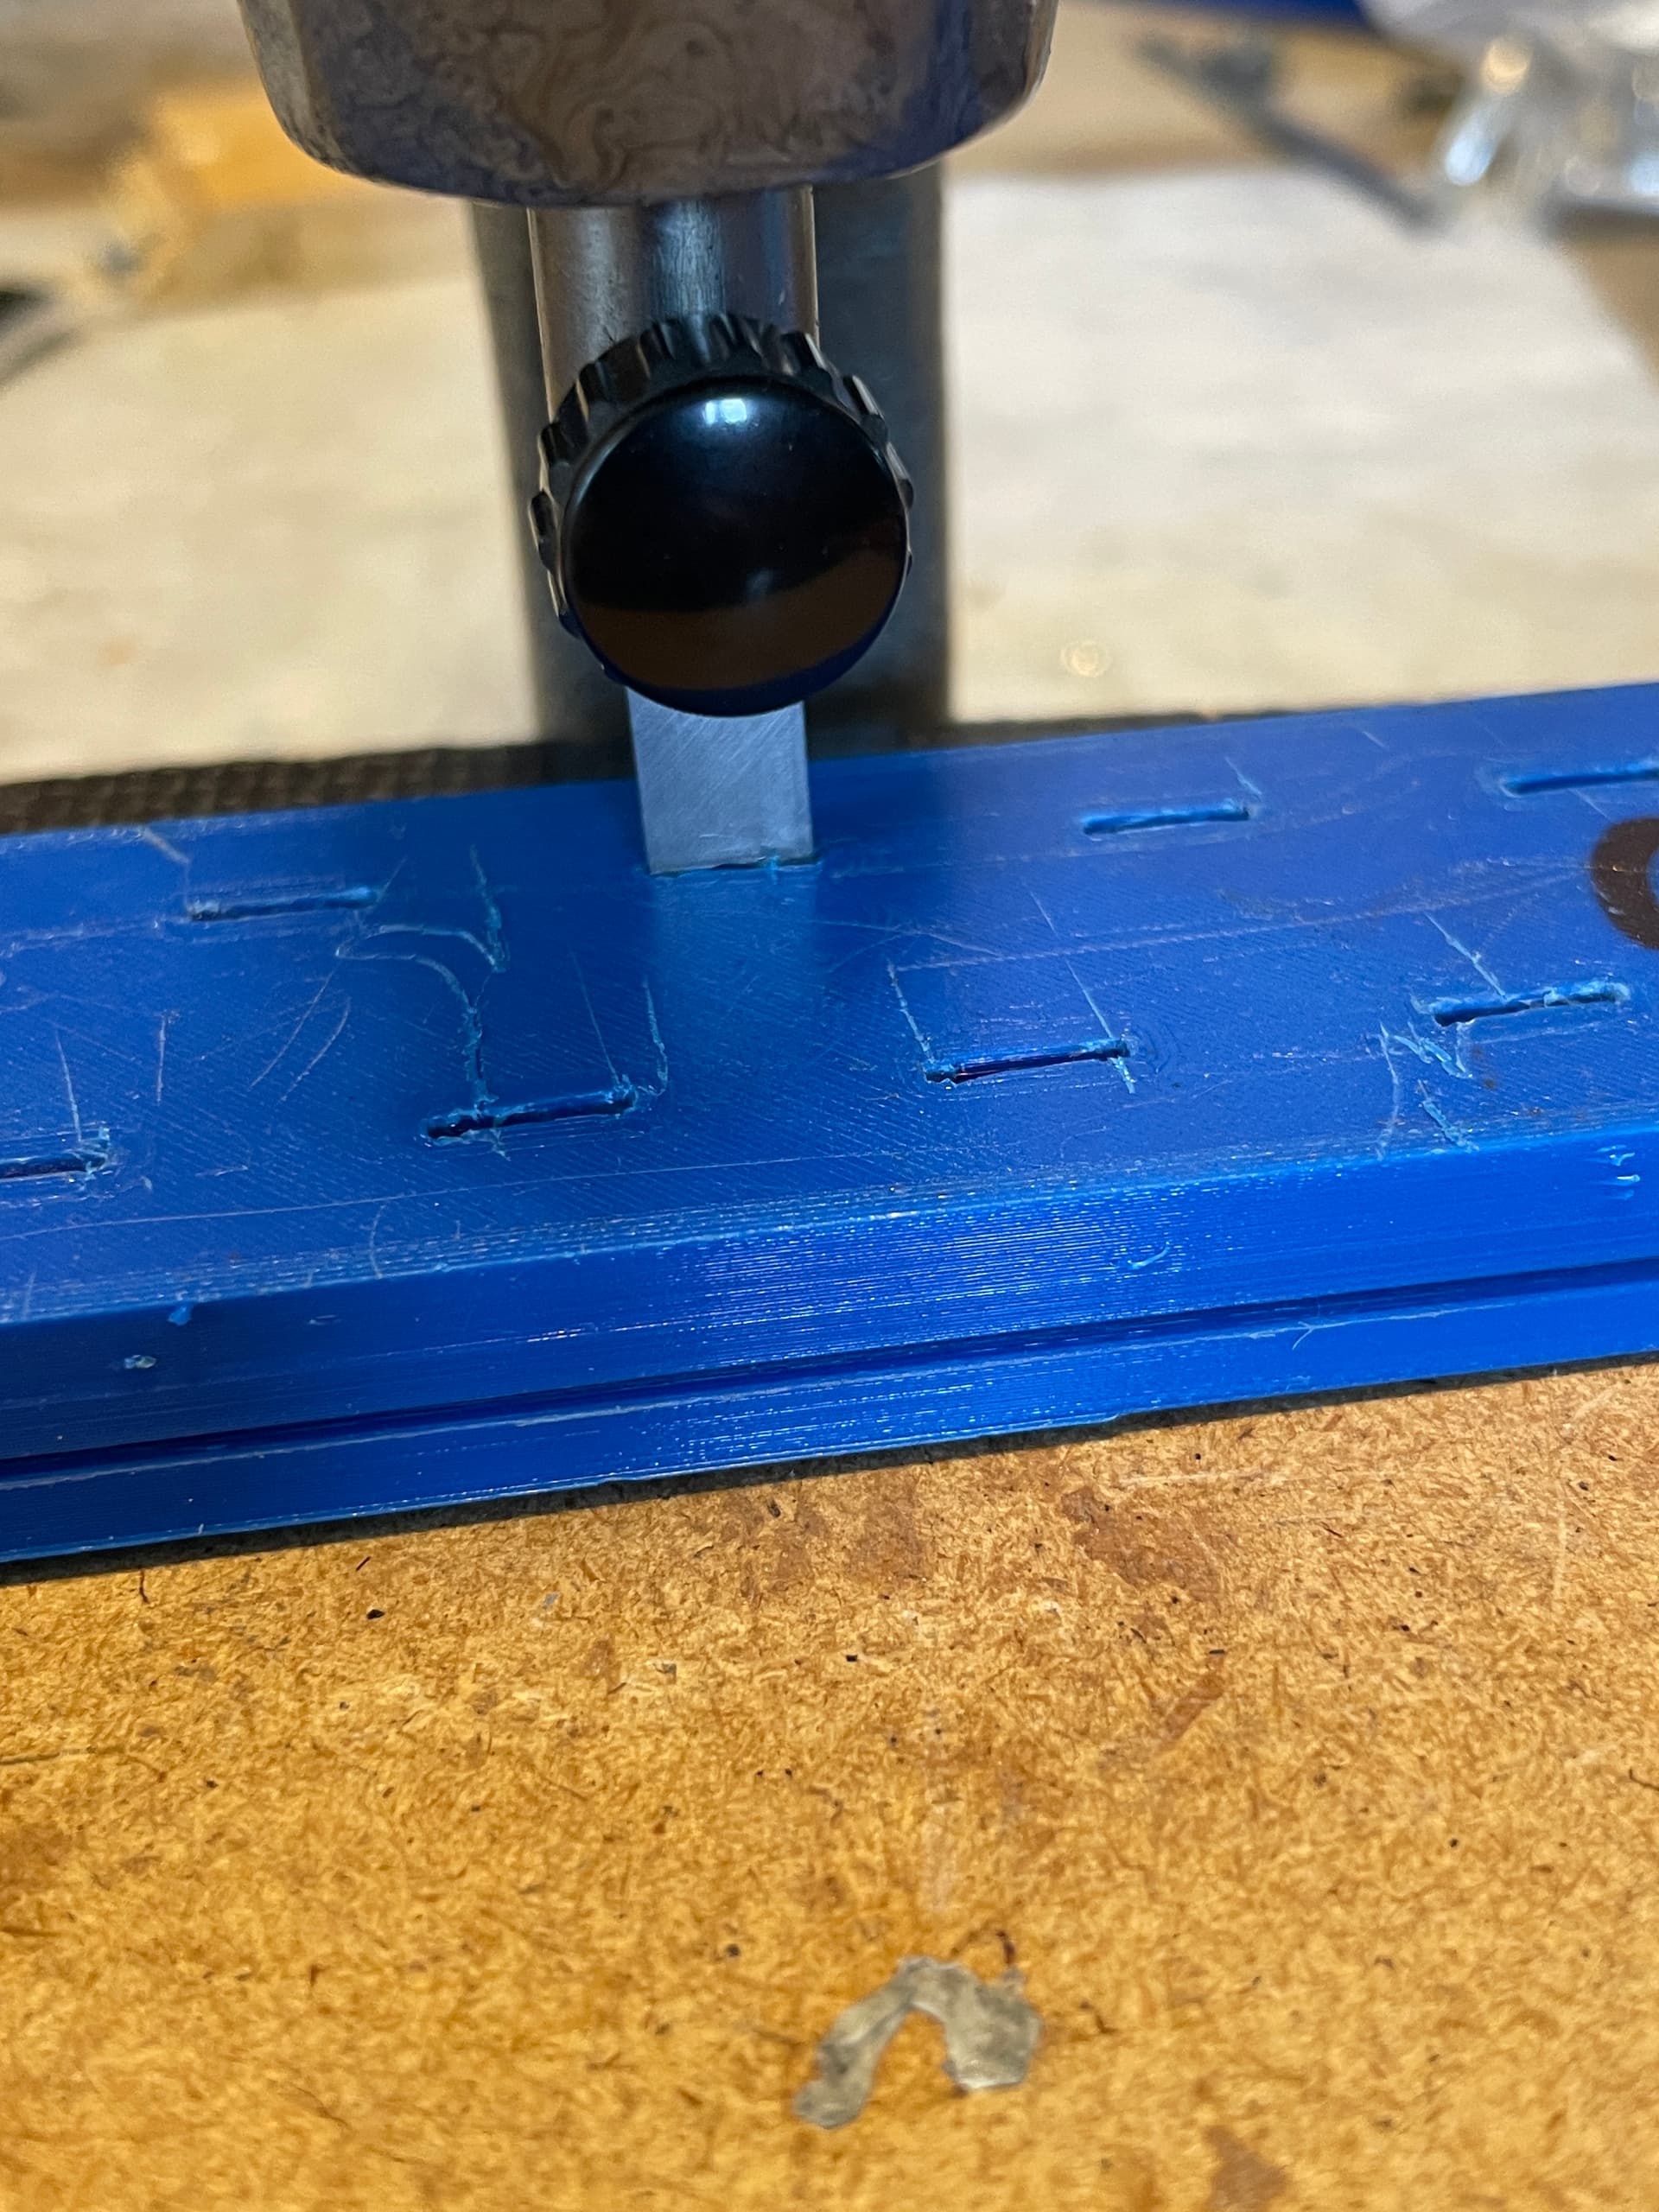
 ![IMG_5233](https://foil.zone/uploads/default/original/3X/3/4/342c1646d24003376e5c2d72cba952edde38c3ad.jpeg)

 ![IMG_5229](https://foil.zone/uploads/default/original/3X/5/c/5cafd2e701ef3c894a3b98d5cf9ecb26f1777ef5.jpeg)

 ![IMG_5217](https://foil.zone/uploads/default/original/3X/3/9/39728b1e40b6a3b086e593953c50228d7bdd4769.jpeg)

 ![IMG_5232](https://foil.zone/uploads/default/original/3X/e/2/e22765563c0874de2200d39afe46bd310575141c.jpeg)

 ![IMG_5260](https://foil.zone/uploads/default/original/3X/d/2/d2cf3e89d2a9edaf9eb44f72fd2ea7806d38443e.jpeg)

 ![IMG_5268](https://foil.zone/uploads/default/original/3X/3/5/35f4b7377b0b4c2550919fb2a21e570e74da8d93.jpeg)

 ![IMG_5270](https://foil.zone/uploads/default/original/3X/4/4/44a42e9c6f839aa83e21f65c37b9c27606005c85.jpeg)

 ![IMG_5290](https://foil.zone/uploads/default/original/3X/4/e/4e3153ad480dfa5b9df9b4b80c8649371c8d3c24.jpeg)

 ![IMG_E5294](https://foil.zone/uploads/default/original/3X/b/e/bec24c1a19f91ebdb51420bb4f65785b719e7a49.jpeg)

 ![IMG_5311](https://foil.zone/uploads/default/original/3X/b/e/be6b23d97072b0f5e7bb51154e3e6abd2e2ebe92.jpeg)

 ![IMG_5088](https://foil.zone/uploads/default/original/3X/f/6/f6b51bcb725dc3e76f97d0dbbc6cd2a7289fb730.jpeg)

---

<div class="post-metadata">

### Author: ![sat\_be](https://foil.zone/user_avatar/foil.zone/sat_be/32/35523_2.png) [@sat\_be](https://foil.zone/u/sat_be)
#### Post date: [July 23, 2024, 9:37pm UTC](https://foil.zone/t/daniels-2nd-build/19956/20 "2024-07-23T21:37:19Z")

</div>

I tested both battery sets and they work well, the P45B has slightly more capacity but not much, only 10% more. For a pack of this size it is not really worth the extra cost. For a configuration where you need high current per cell there might me an advantage to use the P45B.

---

<div class="post-metadata">

### Author: ![sat\_be](https://foil.zone/user_avatar/foil.zone/sat_be/32/35523_2.png) [@sat\_be](https://foil.zone/u/sat_be)
#### Post date: [July 23, 2024, 9:43pm UTC](https://foil.zone/t/daniels-2nd-build/19956/21 "2024-07-23T21:43:35Z")

</div>

Battery fixing system  
I was tired of hock an loop bands so I chose a different way to fix the batteries. There are 3d printed thresholds on the side and at the back to keep the packs in position. The edge of the pack in the back is secured with a angled lever with 5mm pins. The pin locks with a spring on one side. It can be removed wit a 3d printed slider. All parts under load are made from aluminum, the 5mm pins are from stainless steel.
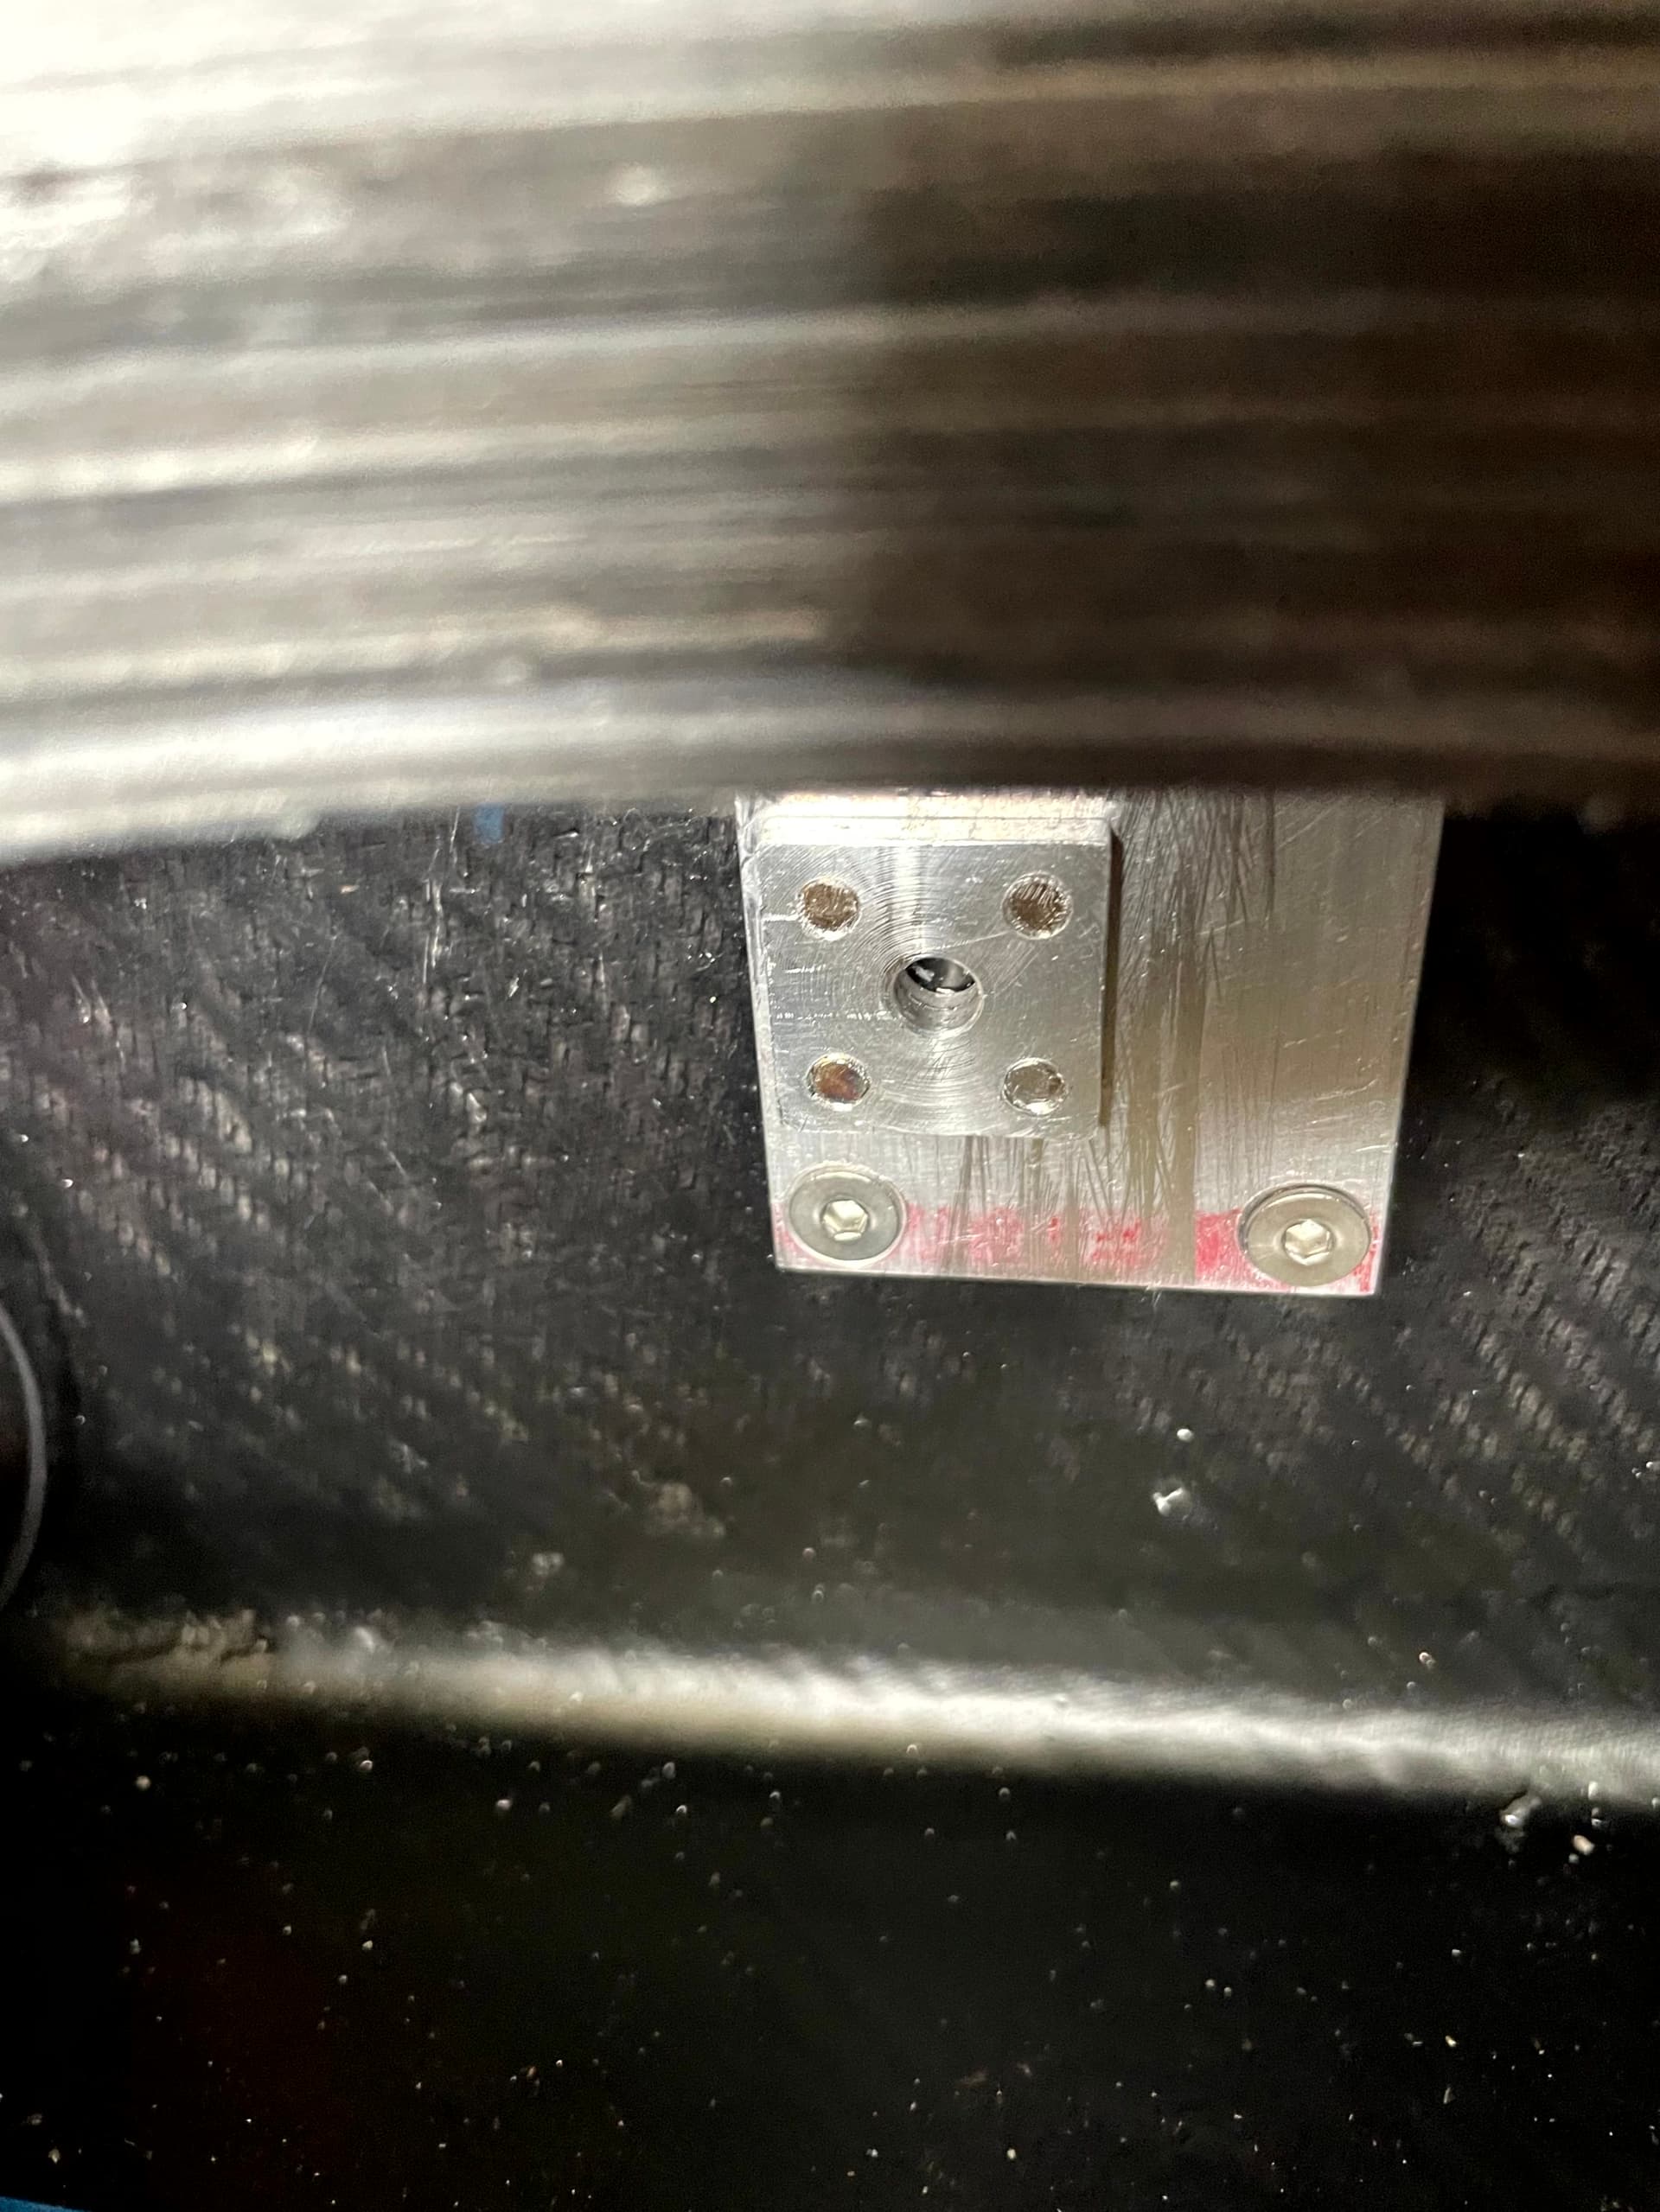
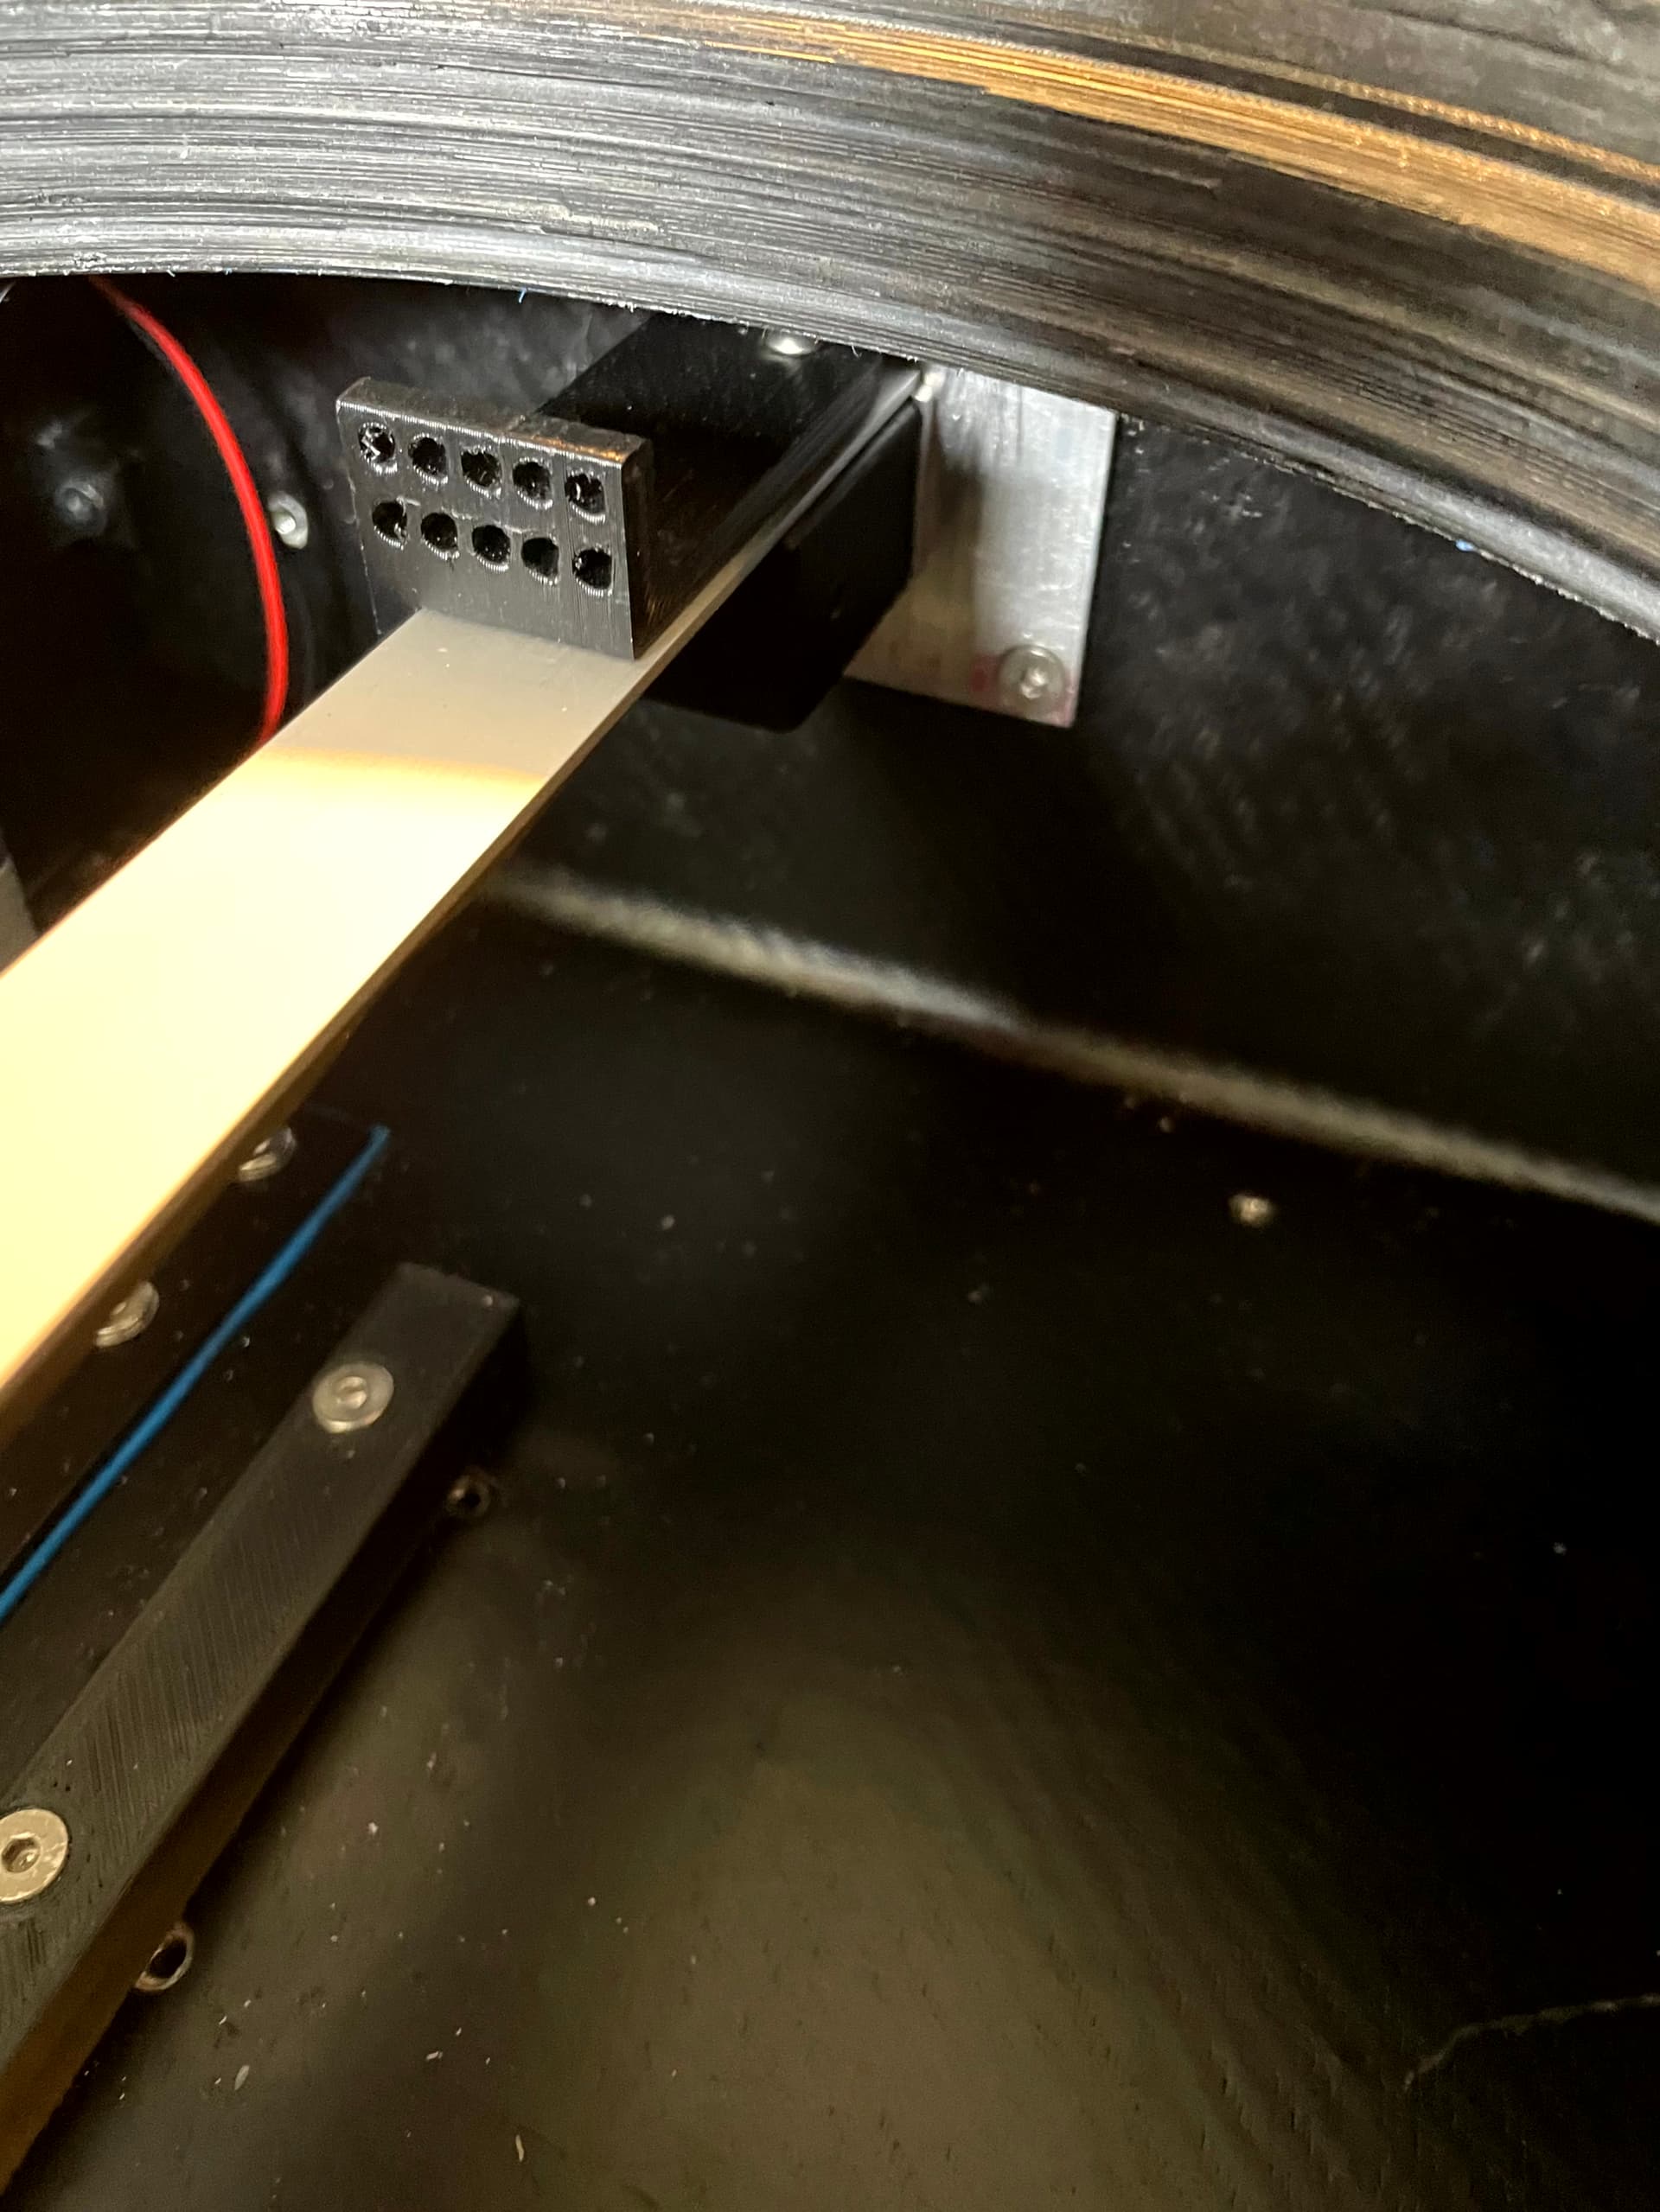
 ![IMG_5090](https://foil.zone/uploads/default/original/3X/7/c/7c8595b15c499732a80f9ac664d0c11bc41de530.jpeg)

 ![IMG_5091](https://foil.zone/uploads/default/original/3X/3/8/38e5cd7ad30780cf2fa56c2d05ce4f73524b5b24.jpeg)

 ![IMG_5092](https://foil.zone/uploads/default/original/3X/b/d/bd1854420e1e02c53b6595e0b0a5782a8c8a4d67.jpeg)

---

<div class="post-metadata">

### Author: ![gazlinux](https://foil.zone/letter_avatar_proxy/v4/letter/g/6f9a4e/32.png) [@gazlinux](https://foil.zone/u/gazlinux)
#### Post date: [August 2, 2024, 6:48pm UTC](https://foil.zone/t/daniels-2nd-build/19956/22 "2024-08-02T18:48:02Z")

</div>

Impressive and artistic build!

On your RL mast have you had the need or considered bonding the RL mast to RL mast plate? I find that there is a tiny bit of flex there using only the two mount screws and was thinking to inject epoxy or JB weld cement and steel bonding agent into that connection to remove flex and lock it tighter.

[Next page](https://foil.zone/t/daniels-2nd-build/19956.md?page=2)