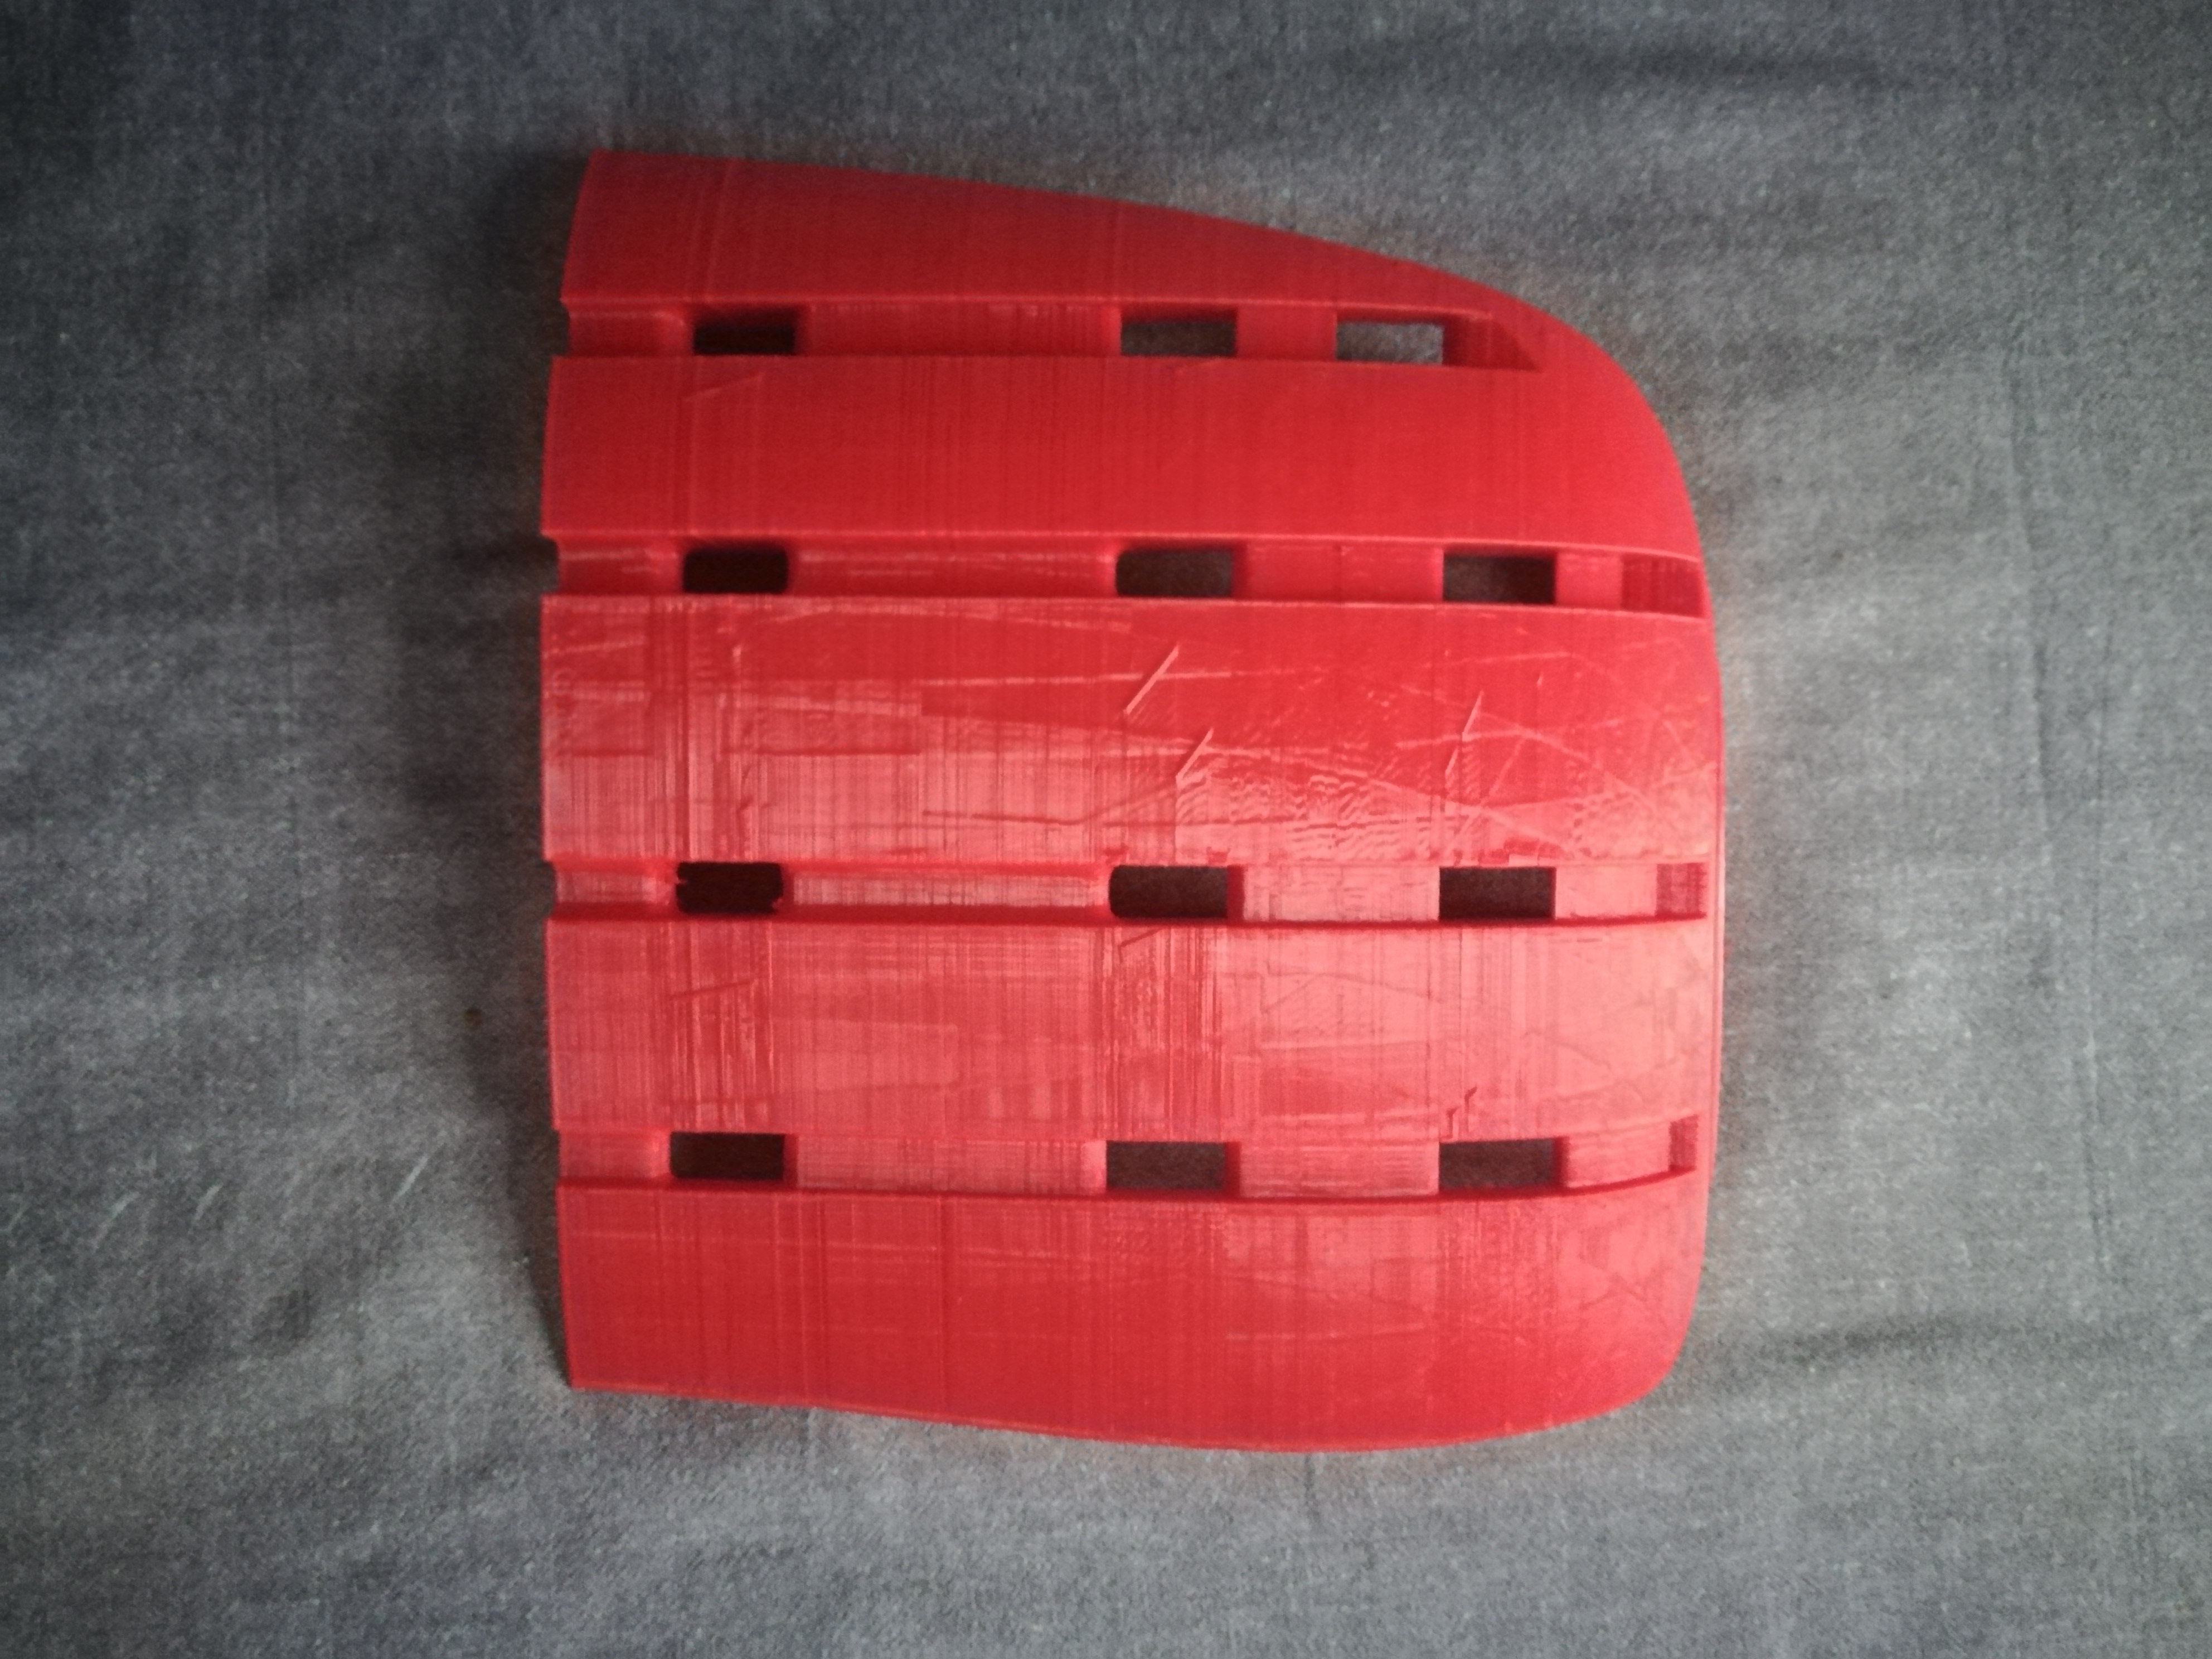
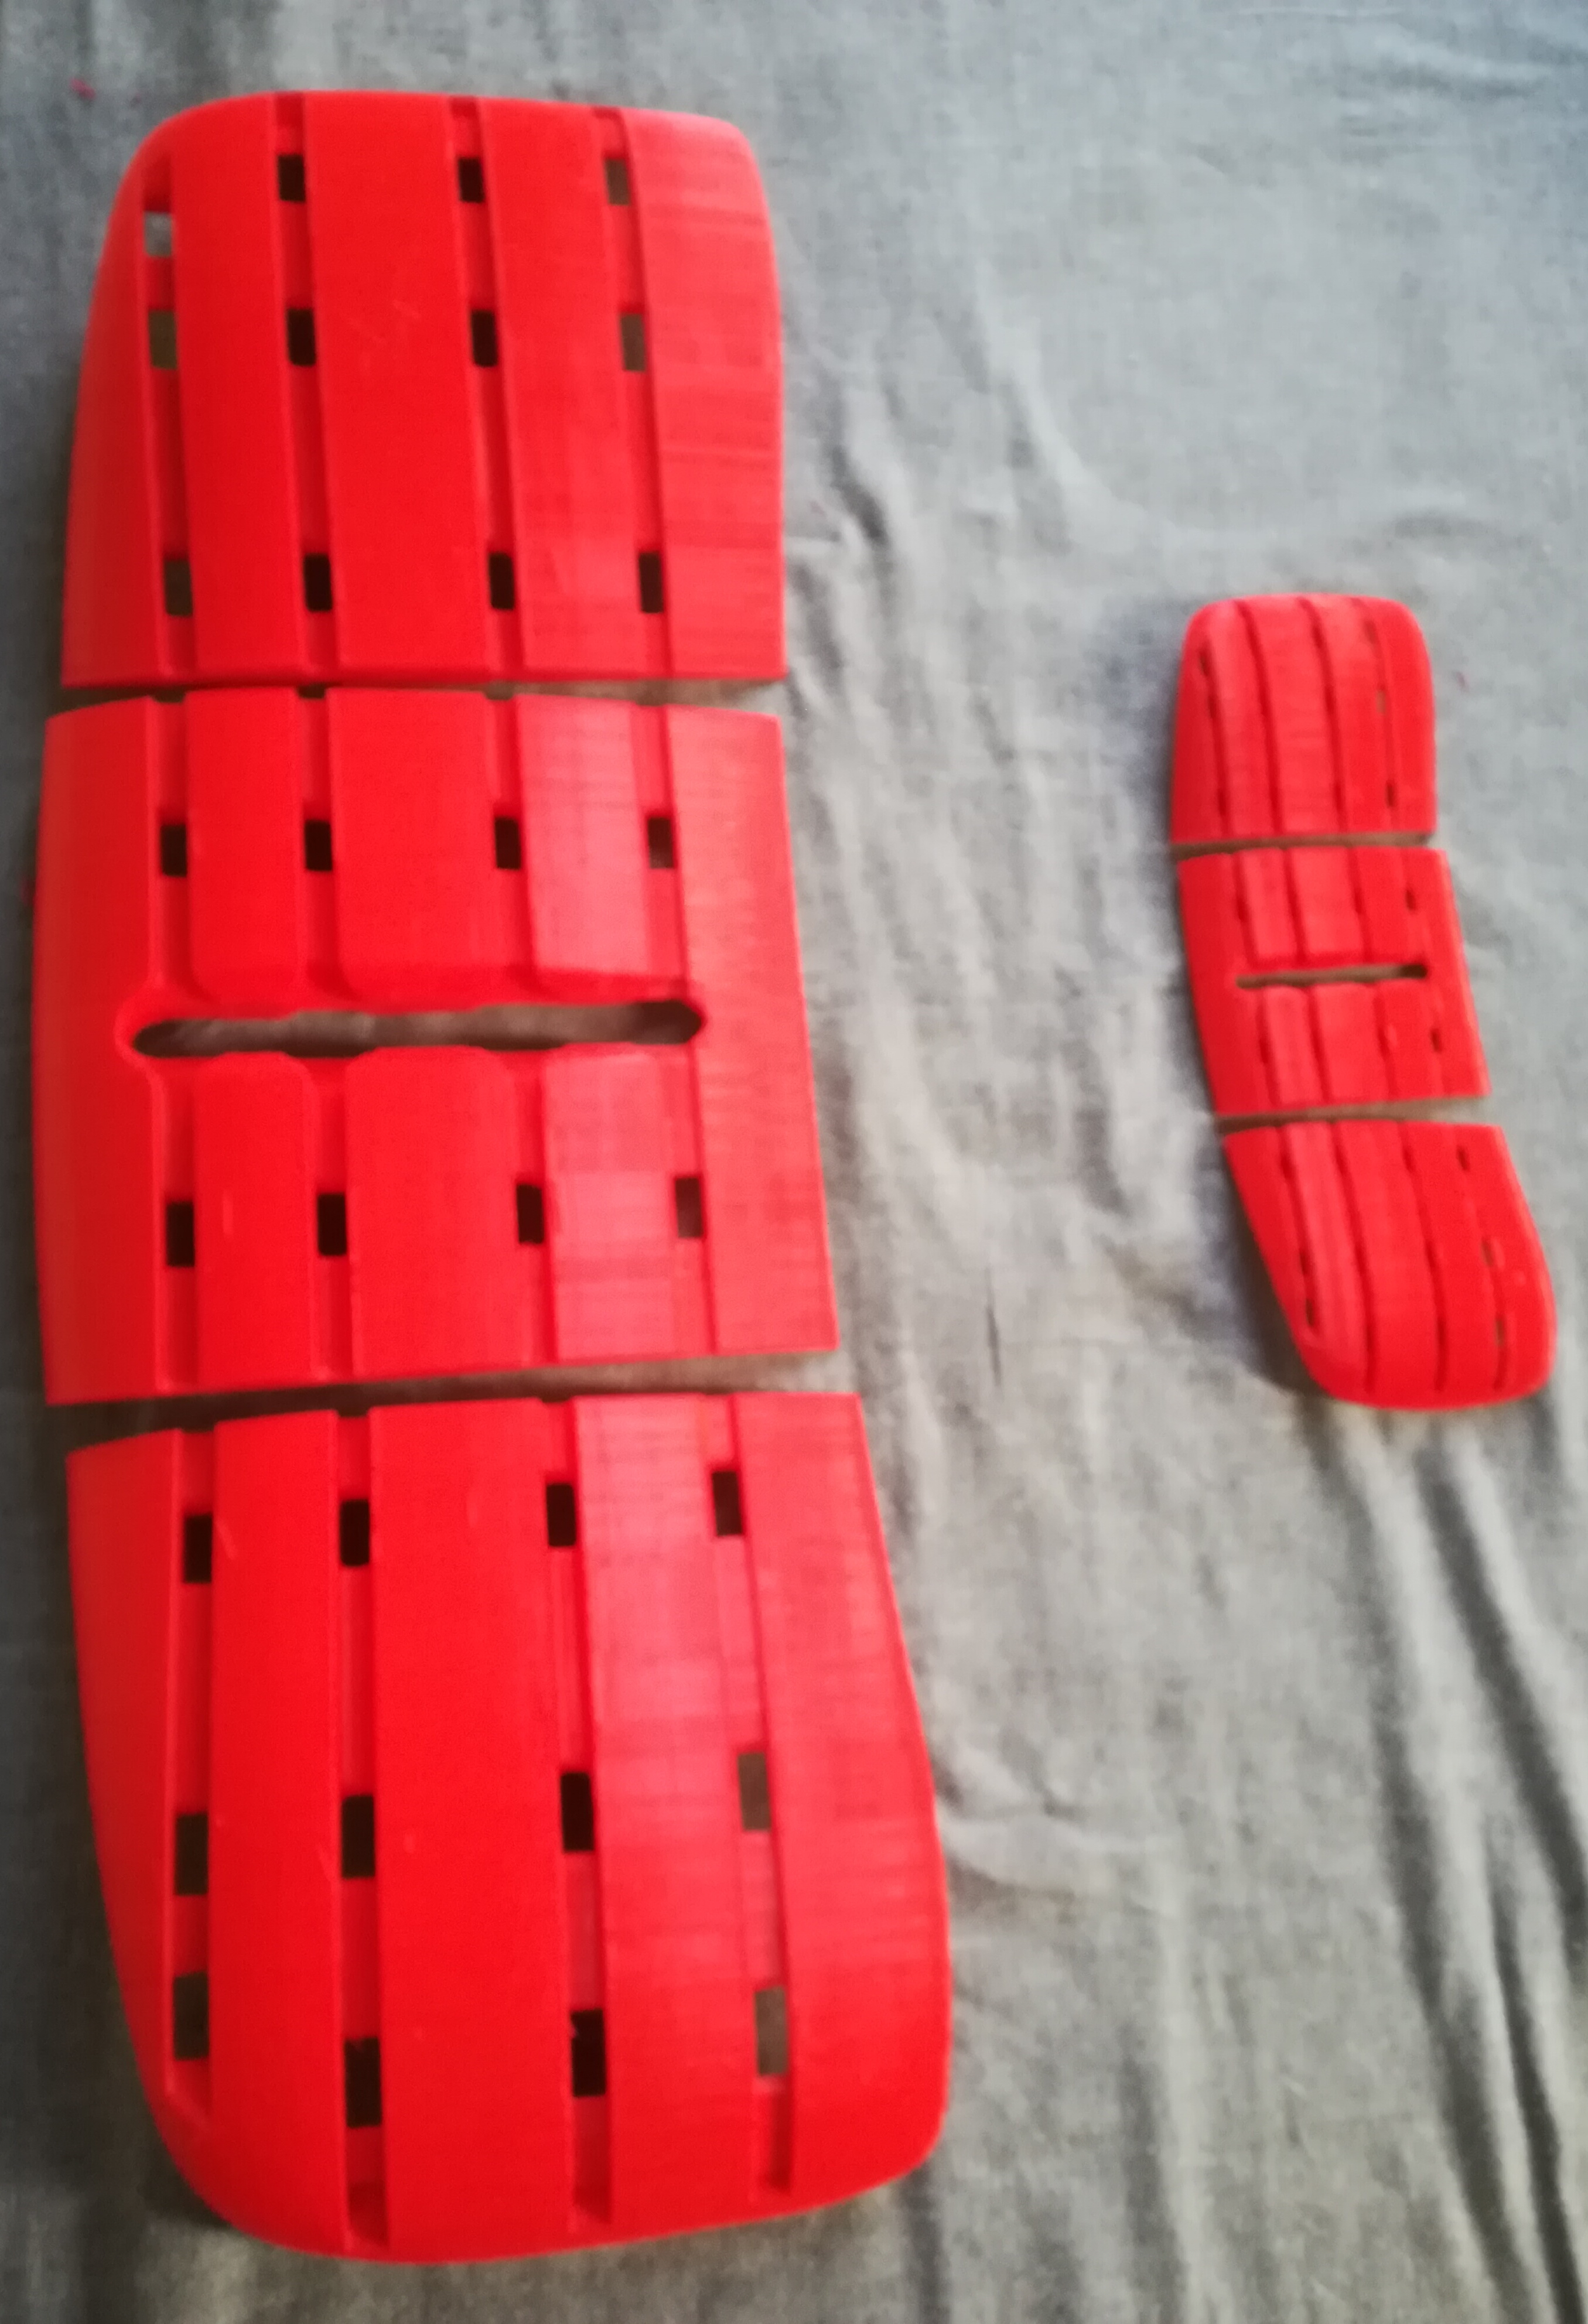
it did it in 5 parts… and then welded them with acetone…
if you print in only 2 part, as it’s quite think compare to the height, you might have bad printing at the top as it starts vibrating…
i did 1/2 scale test prints and the curved parts ended up pretty bad…
and also, as the middle doesn’t have much plastic linking both sides, you might not want a weld at that place… splitting it with an uneven number let you have the middle in a single piece…
exactly… i used ASA to have less wrapping issues… wasn’t perfect but nothing some acetone can’t fix… i used it today with the kite for 3 hours, hitting the ground a few time, and it’s holding strong…
Exactly like Mat said, indeed, even with supports, a minor issue with the very last centimer at the tip. but this should be OK once sanded and filled. Thx again @Mat for your work.
PS : I used PLA at 225 degrees and no wrapping, at 0.3mm so there is some good sanding to be done.
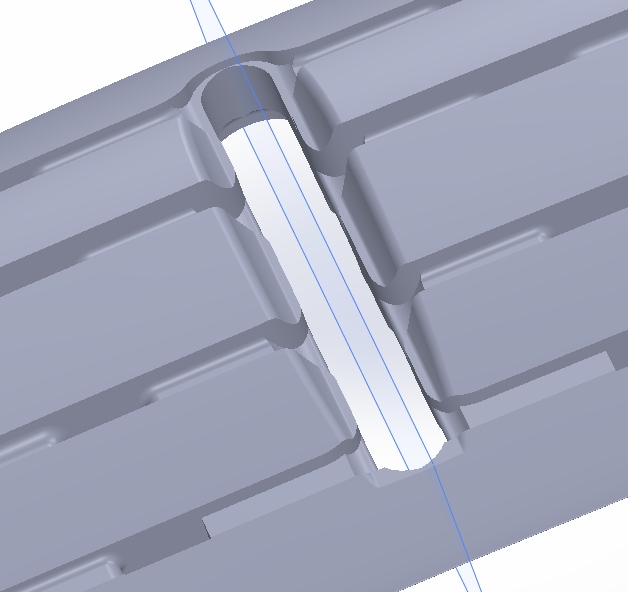
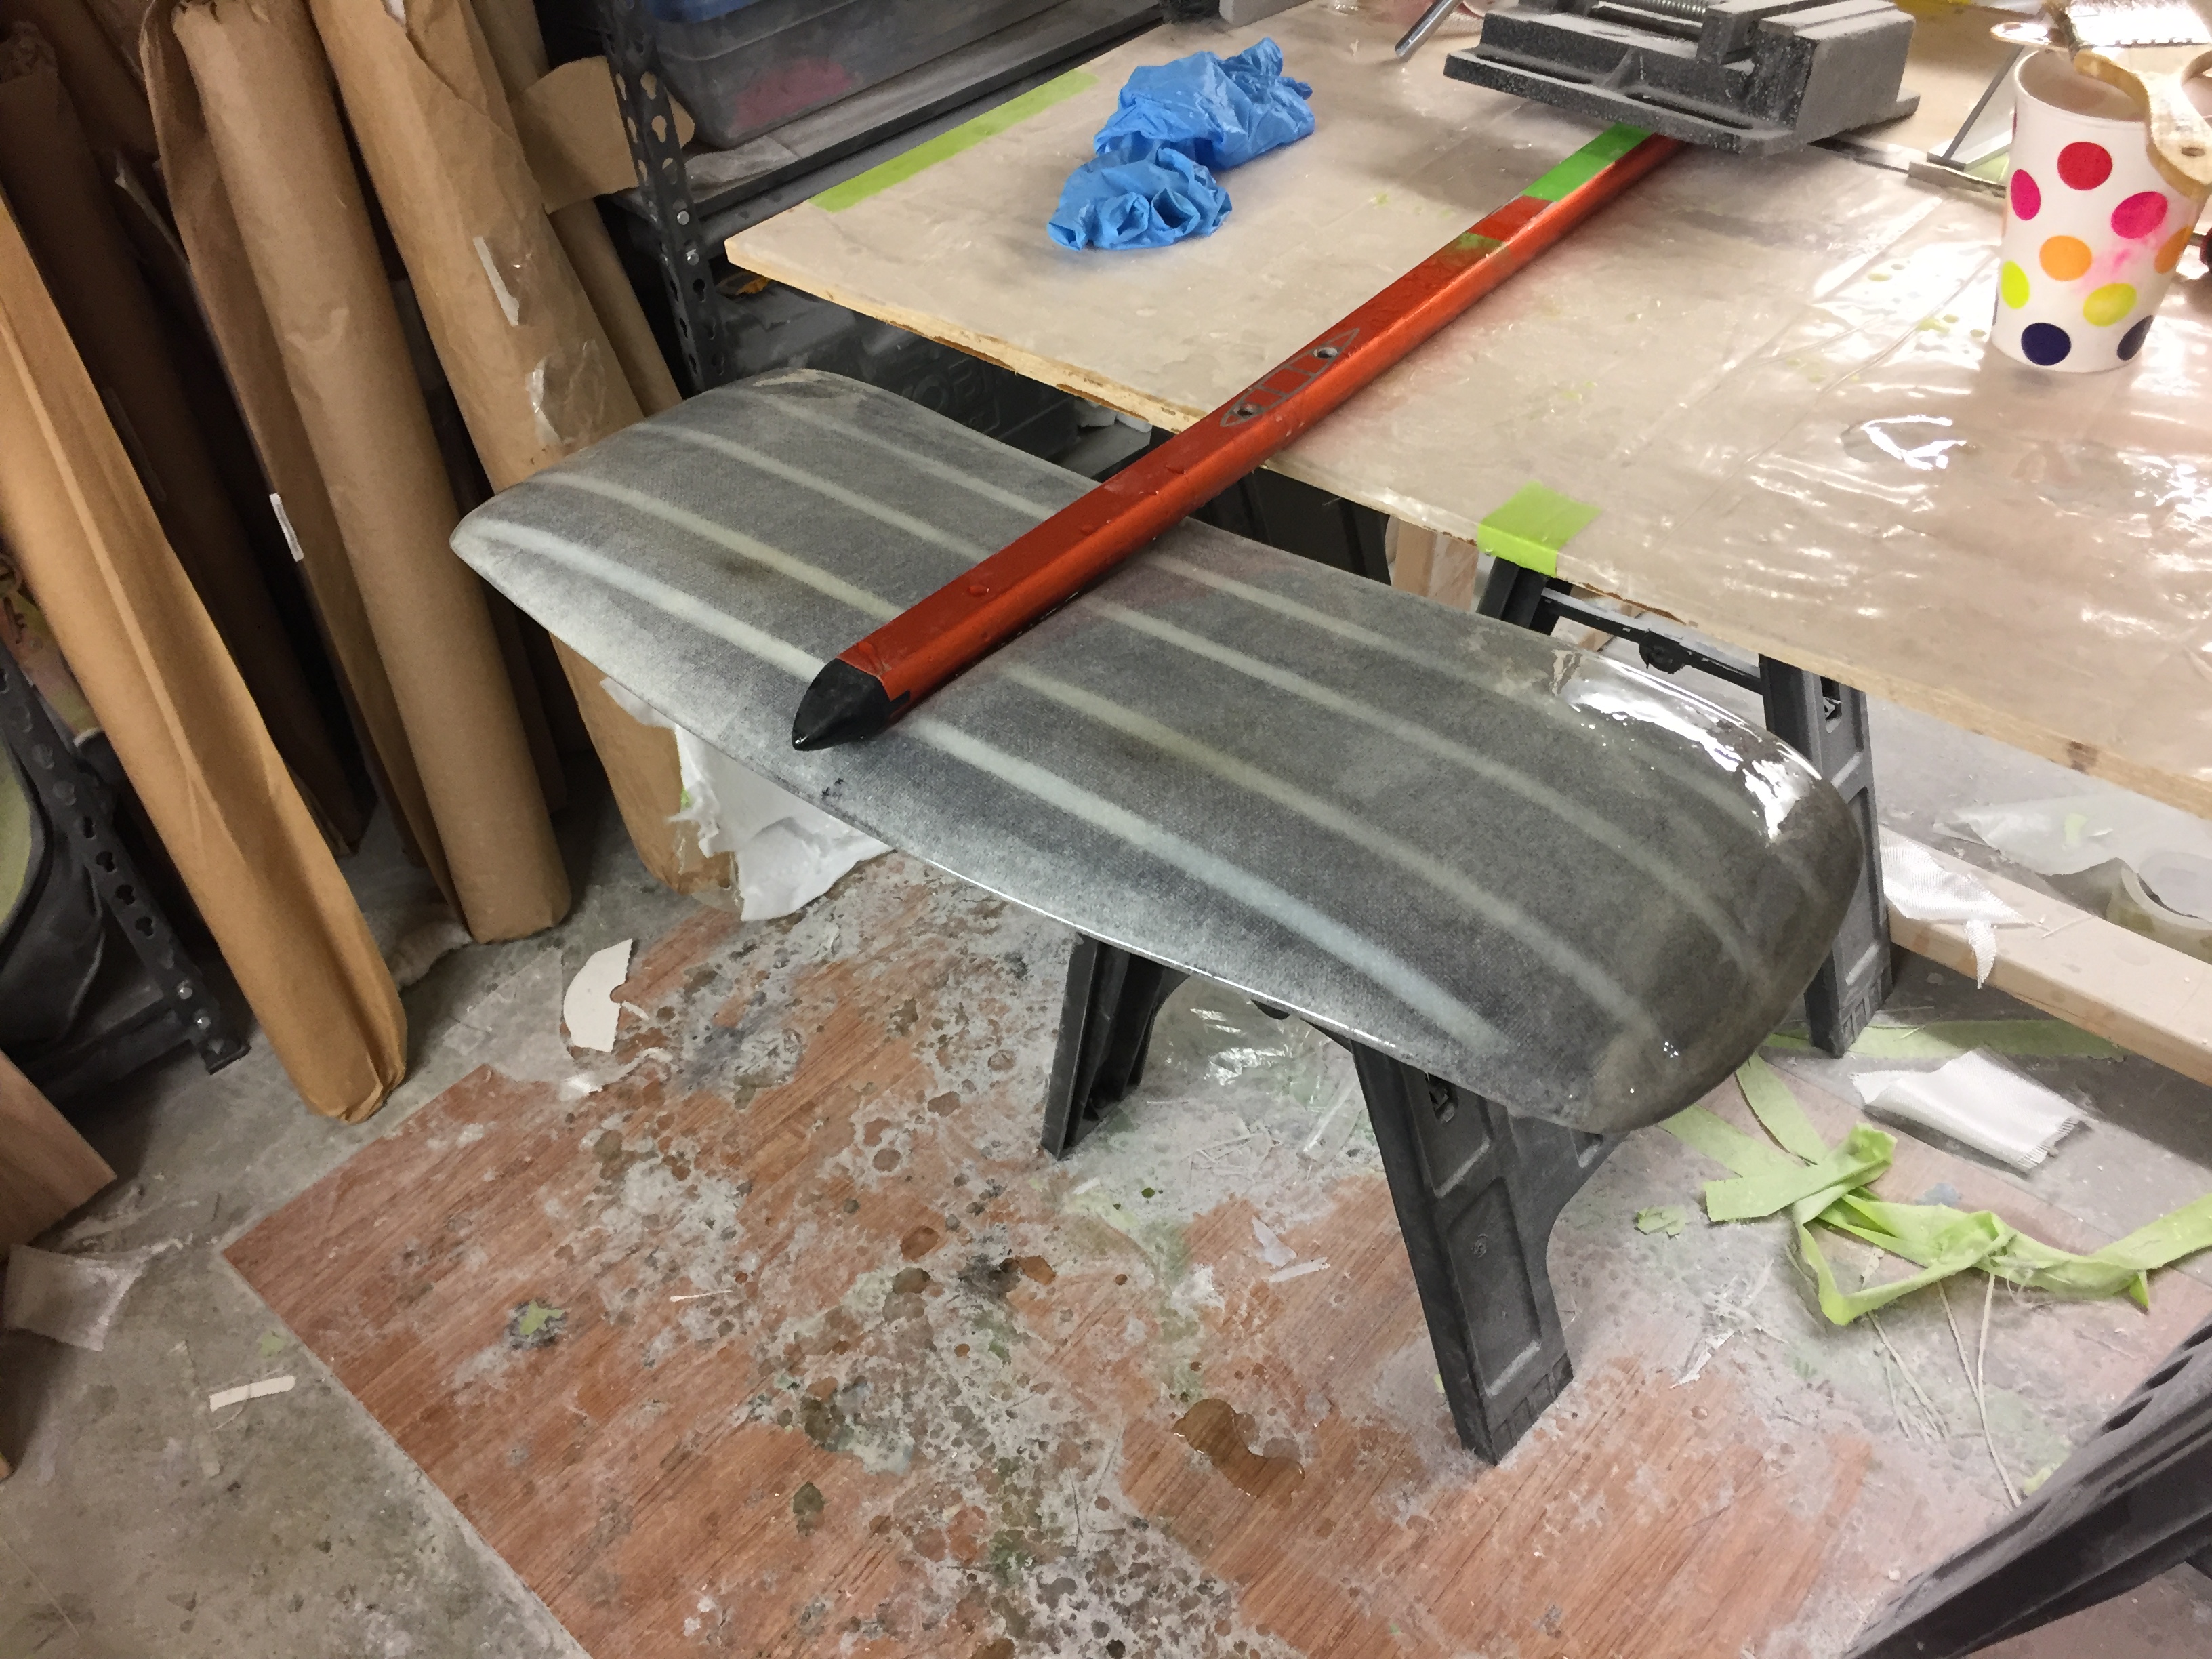
I left the big hole to get full resin where the screws clamp.
I didn’t made the holes until layup was finished.
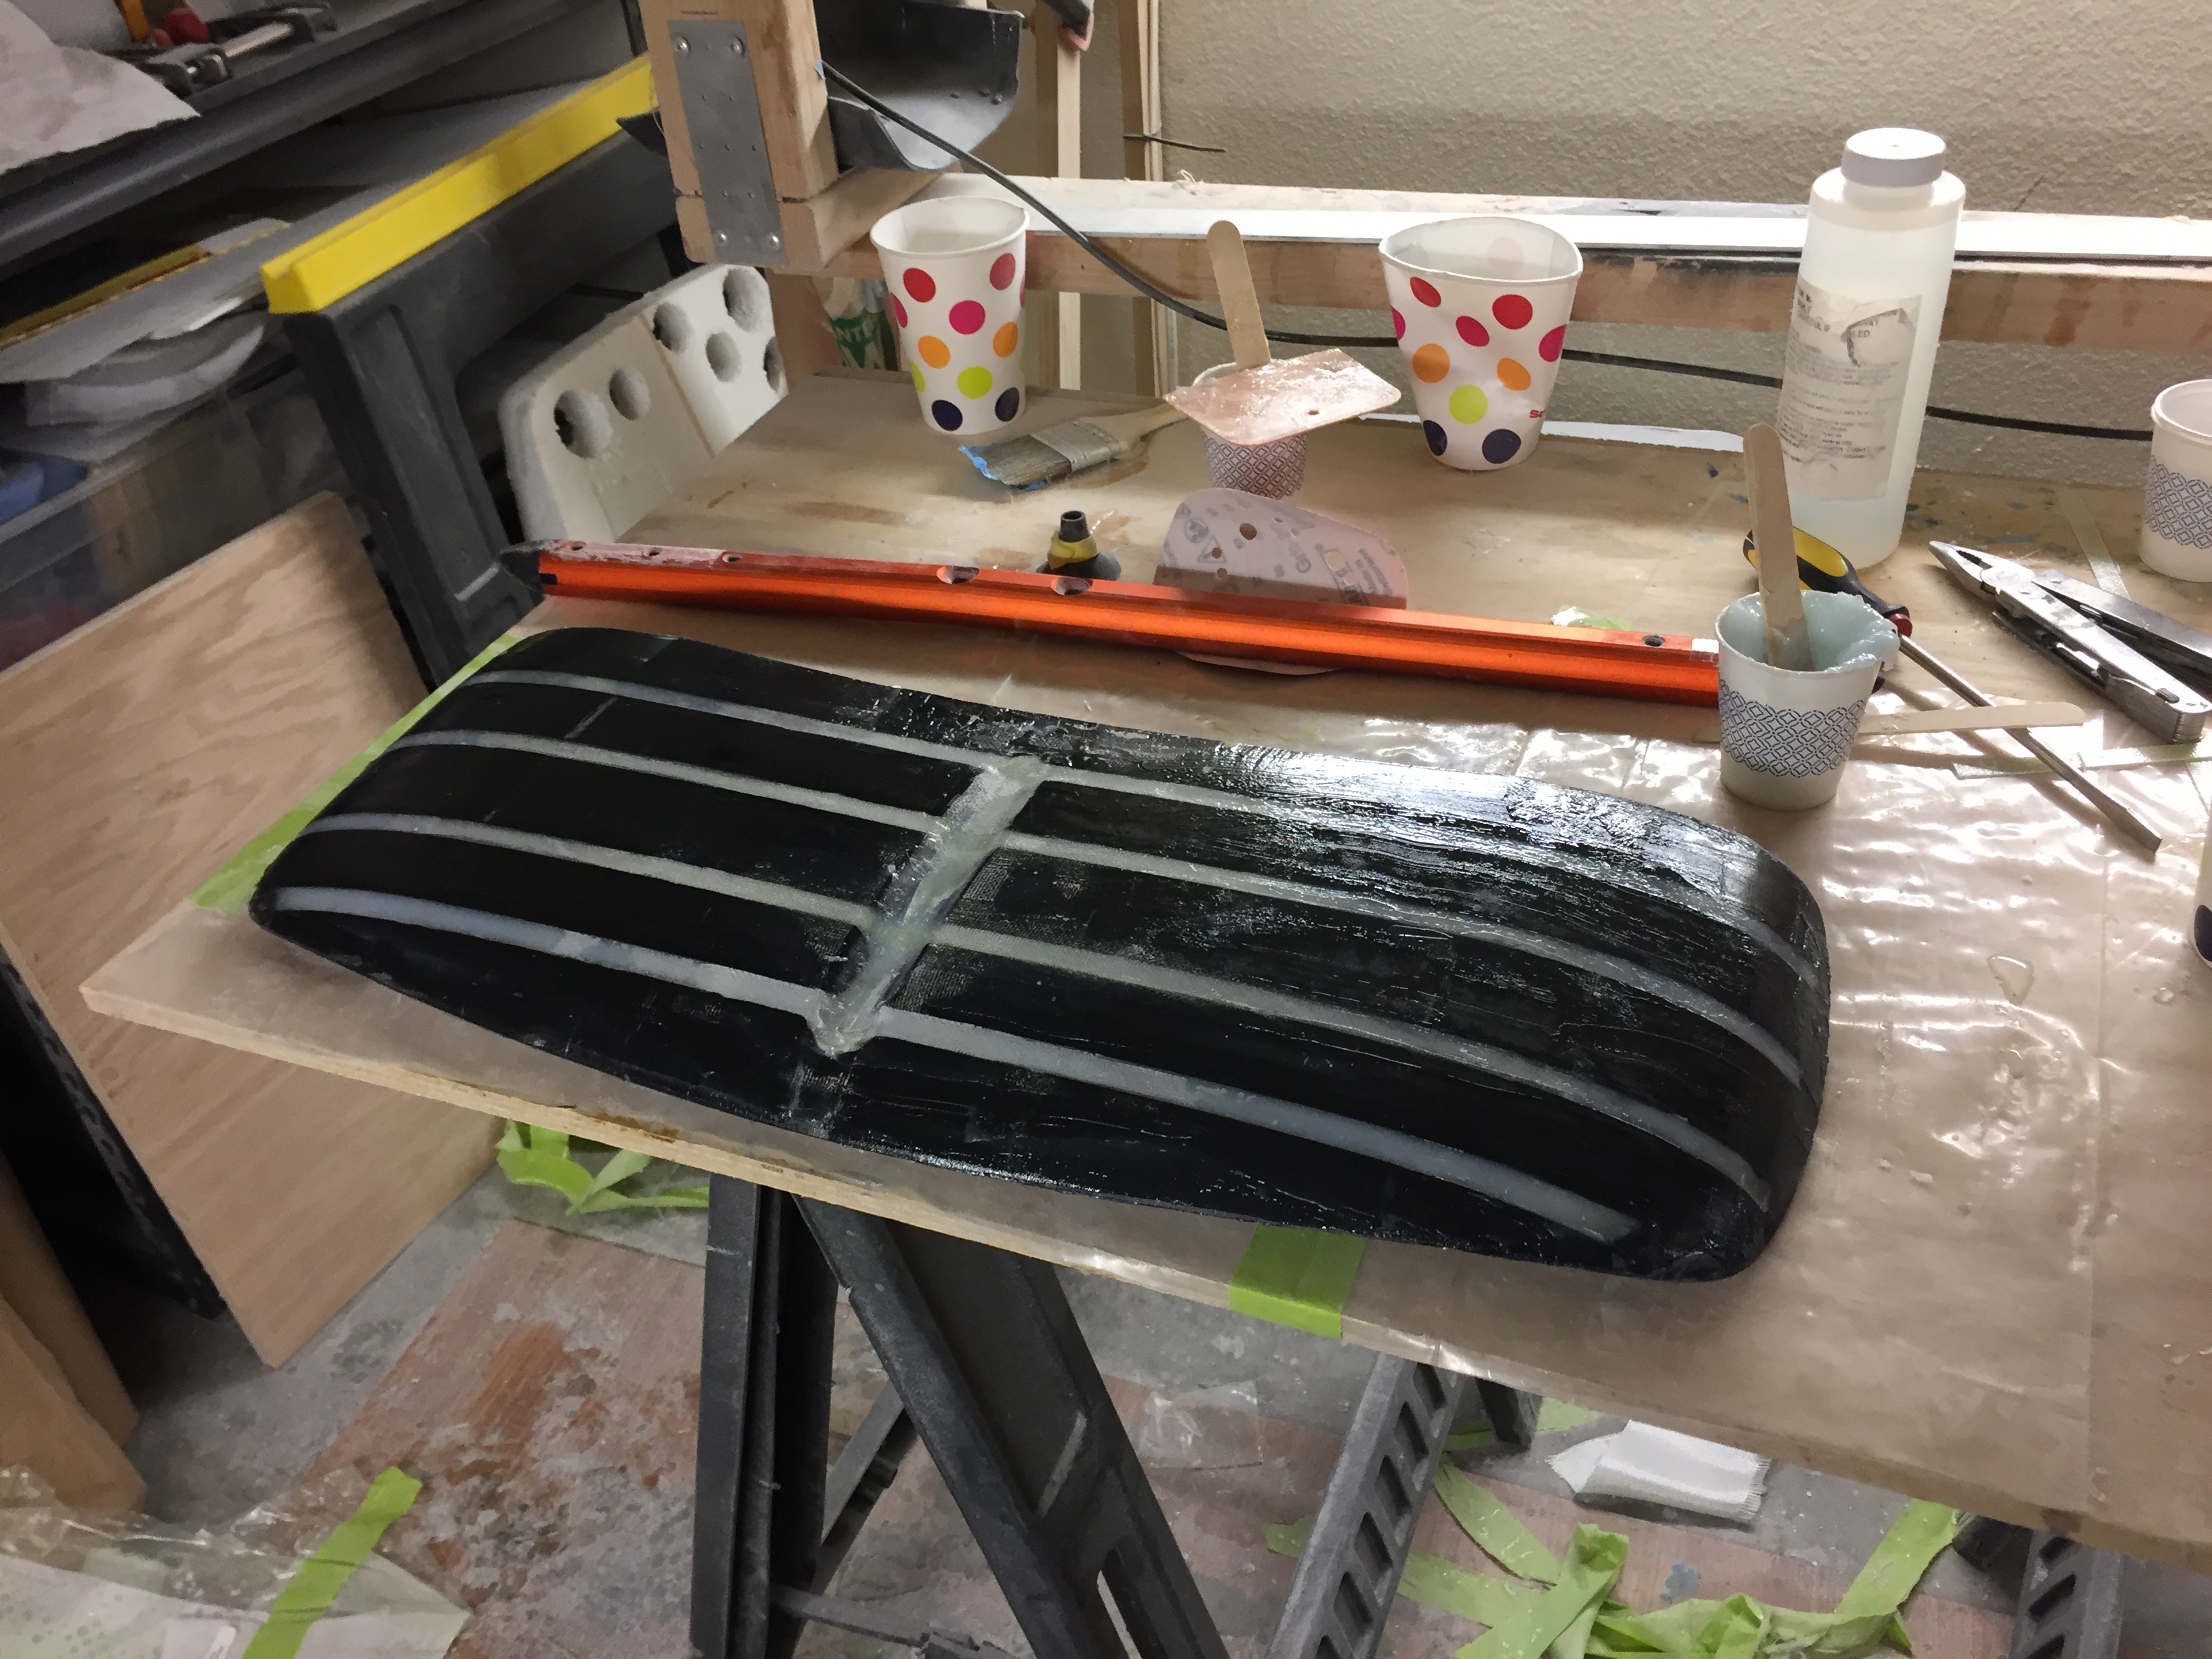
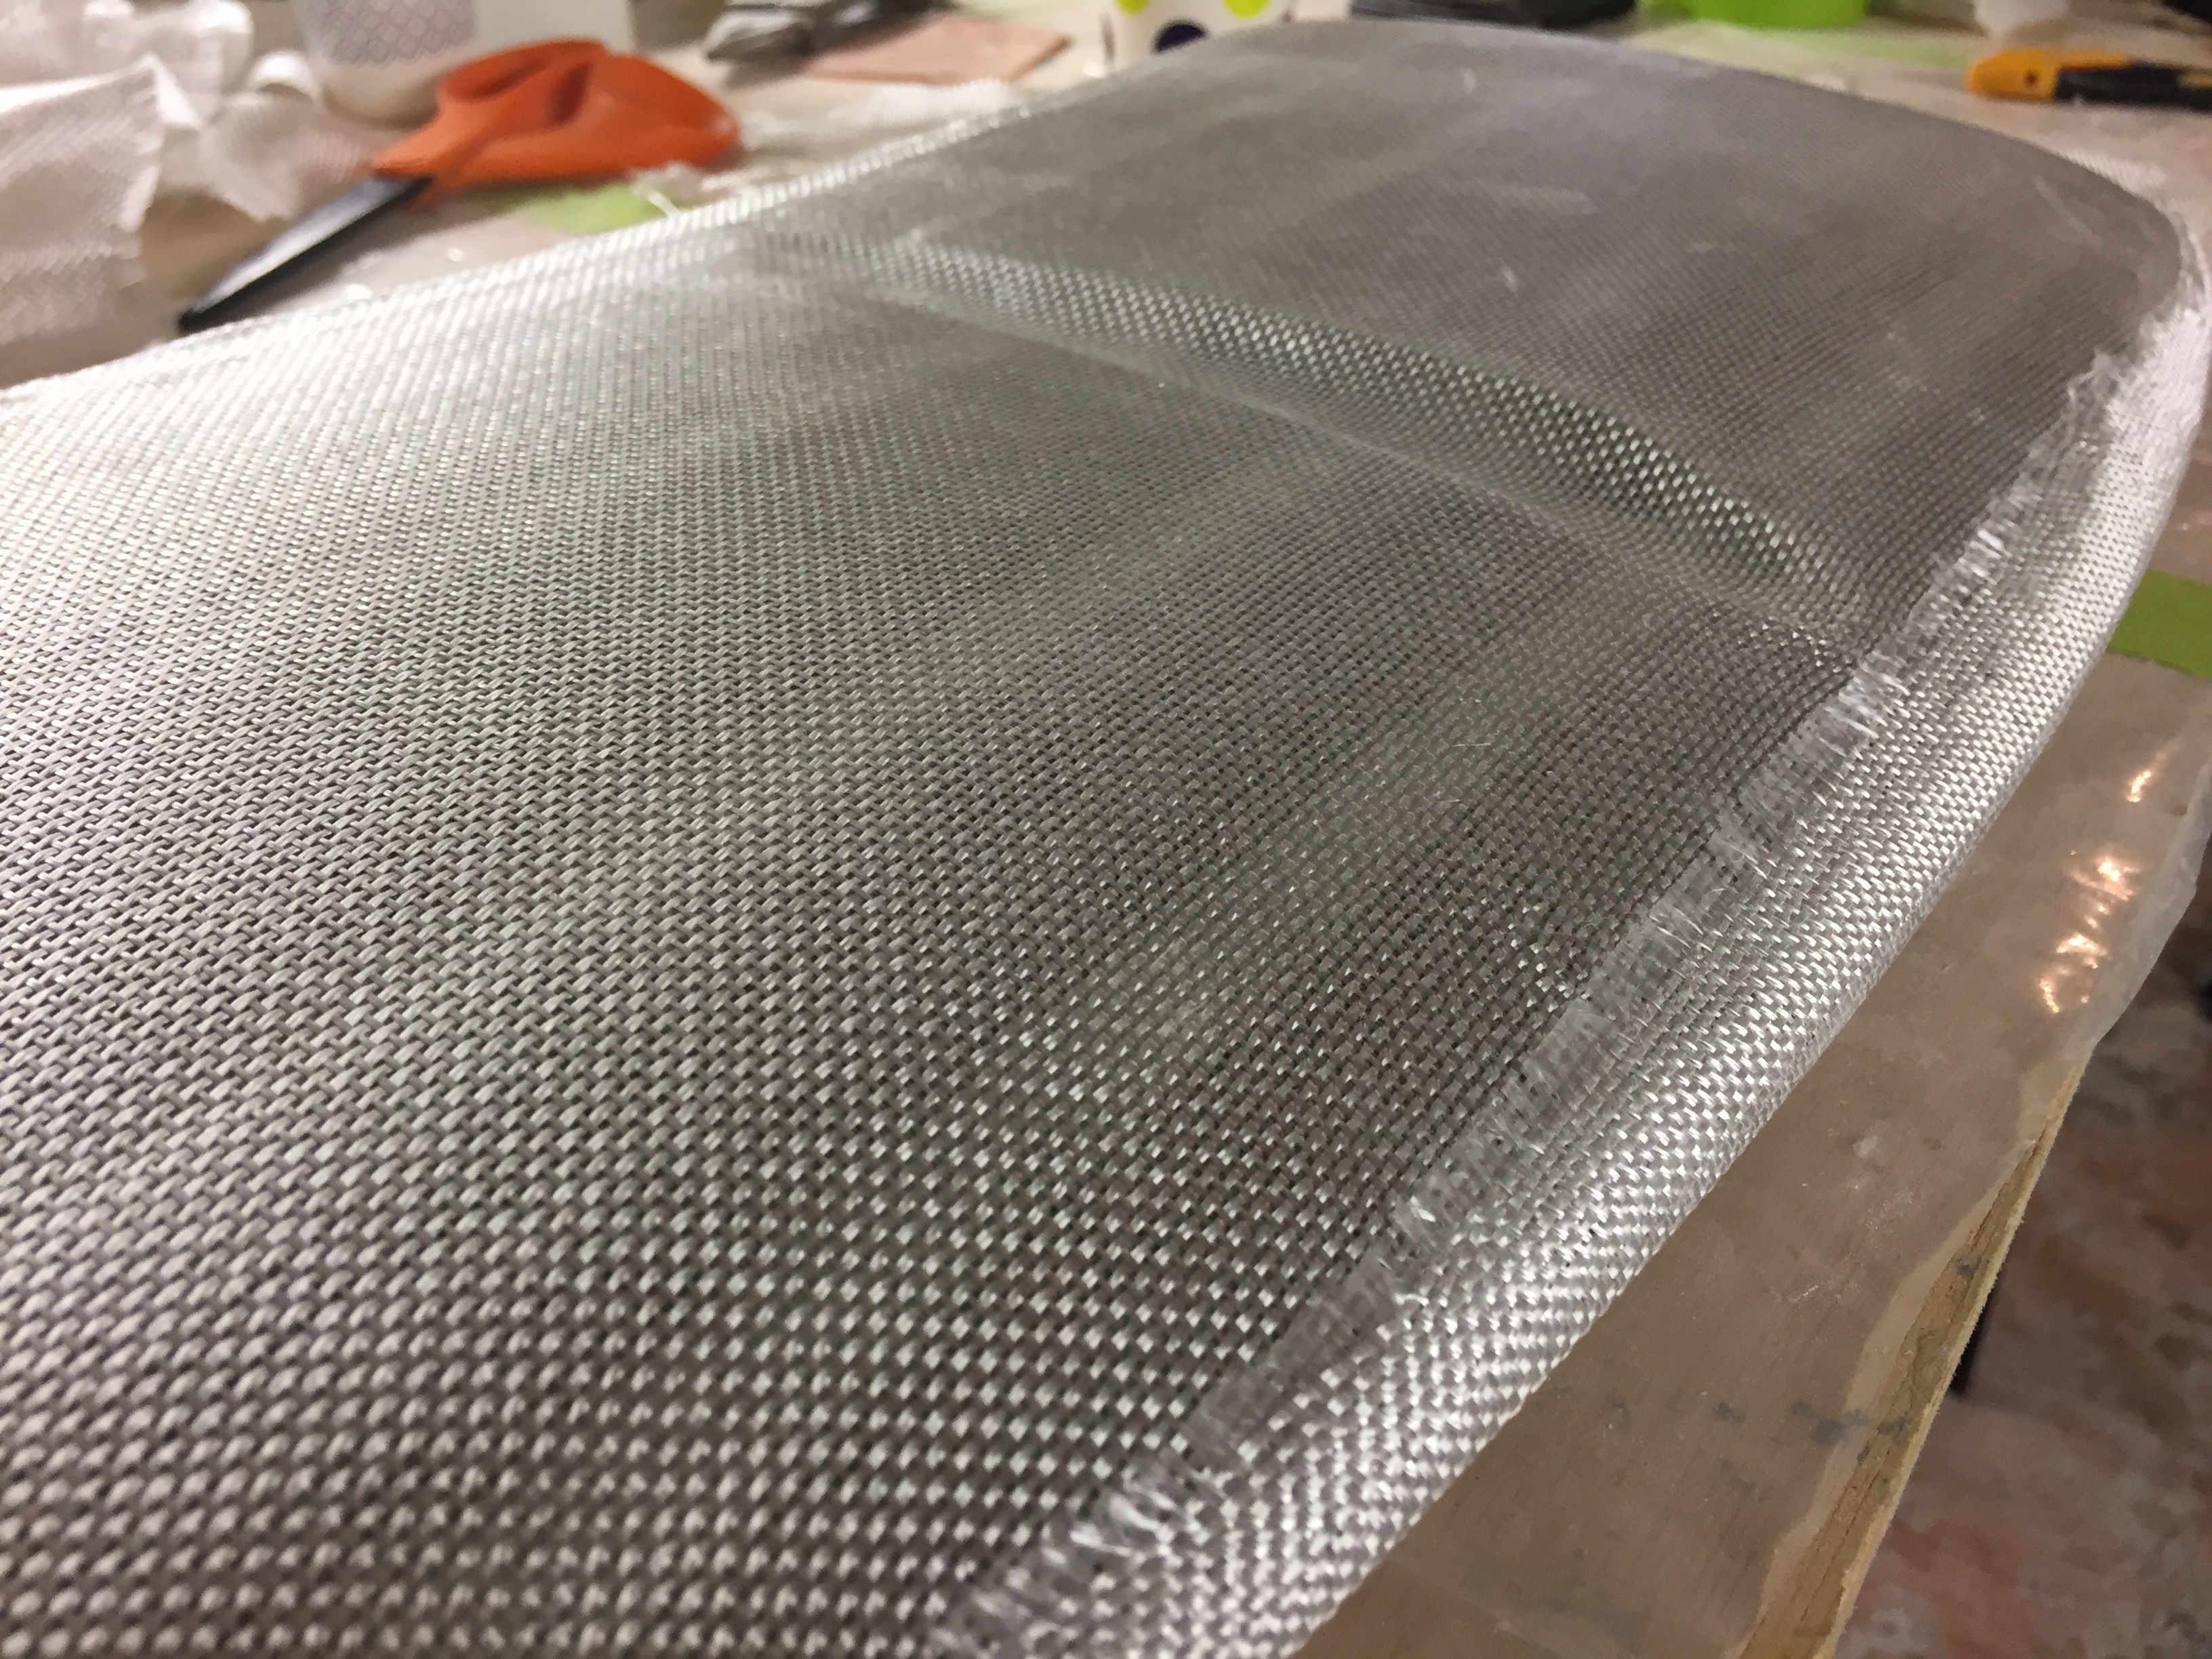
fist: i filled up everything with a mix of chopped fiber and resin.
once all the fiber was cured, i used some sandpaper around the fuselage to get the right shape. or as close as possible.
finally i got interface right by adding some thickened epoxy, and screwing the fuselage in place. Do not forget to wax the screws and fuselage
So you did not place screw inserts before filling the central space with resin, like you would do for footstraps ?
You just waited for it to dry then did 3 holes right into the resin ?
Second question : I am worrying about the epoxy not sticking to the printed PLA. Did you cover the printed plastic with a layer of epoxy, let it dry then only add a mix of chopped fiber / epoxy ? Or did you pour straight the mix of chopped fiber / epoxy ?
Somewhere I also read that adding some sawdust and some milled fiber to the mix was also a good idea but I have never done it myself.
the threads are in the fuselage, so the wing has just simple holes…
i roughened up all the surface with very coarse sandpaper… it might have helped.
when i’m using epoxy to fill big volumes, i usually add aerosil, it’s some kind of very light white powder… it avoid the resin to heat up too much. i guess sawdust will have the same effect… not sure if it makes it stronger though… it help to have the epoxy not too liquid.
Having fun with @Mat’s wing, which now prints perfectly on 0.3mm draft mode and in 3 pieces… Did a baby-wing as back-wing, at 40% of the size of the big one… Until I realised that the baby-slit is obviously too thin at 40% to welcome the 20mmx20mm fuselage… Going back to Solidworks…
For kite foil, everybody (at least on the french forum where most of the early DIY foils development happened : kitefoil.forumactif.org ) seems to agree that the back wing can have a similar profile to the front one, but mounted upside down.
For my foil, I started from a liquid force foilfish, changed the front wing, and kept the back wing.
The back wing is completely flat, with thinned edge, but i’m not sure it has specific profile.
I have built many RC gliders, and for those, then yes for sure, same profile is used. Flat are also OK, but I guess it would need more angle to be as efficient as a profiled one, meaning more drag ?
Mounted upside down… I am not sure which one is best. When you look at modern planes, now many have winglets going both up and down (called Split Scimitar winglets) …
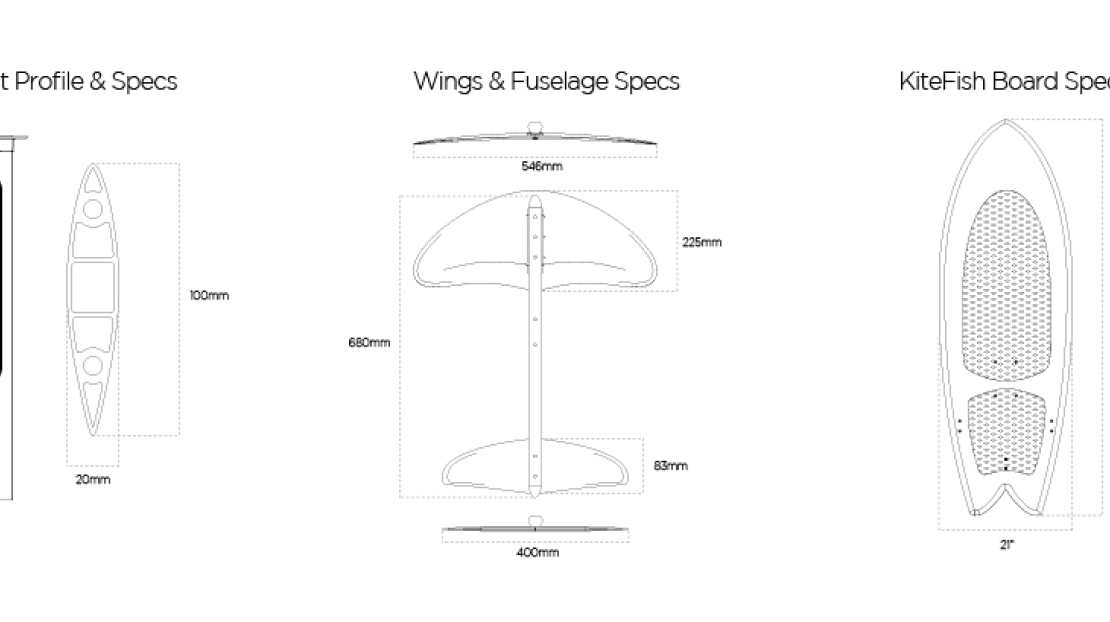
@Mat, what are roughly the dimensions of the back wing please, and how far is the front of the back-wing to the end of the front wing ? Thank you
Below is the drawing of the foil… but i changed the fuselage for the “extended aluminum” version.
i think the extended is 78cm.
Regarding the upside down, it’s not based on the direction the end of the wing are pointing toward but more based on the direction the lift is created: front wing lift up, back wing pull down.
The shape of the end of the front wing is not originally meant to reduce vortex like on planes. Instead, it’s to be able to angle the foil much more when using a kite without having the wing tip breaching the surface. Long mast as turned down tips give you the max possible angle. Board shape and width are important too.
For an E-foil, i don’t think we’ll ever angle it that much, so it might not matter.
On the wing i made, i tried to reduce vortex by making the profile more symmetrical toward the end of the wing… but i have no idea if vortex are actually an issue we need to mitigate
You guys have very interesting comments, and make me dig further into Internet reading about what I thought I understood: Thank you for that.
Then what about considering a vertical tail wing stabilizer ? Festo scientist put a vertical stabilizer on the Festo seagull and it improved dramatically. I can’t imagine a glider plane without a vertical stabilizer.
Thx Mat for the dimensions, obviously I made the back wing too small. Acccording to your dimensions, the back wing is 73% of the width of front wing, that is about 50% of the front wing area.
Liquid force releases those drawings for all their foil, and this year they have a dedicated surf-foil (made for slower speed) and 2 or 3 version of the kitefoils… comparing all the dimensions with the comments they make about each model will give you a better understanding…
@Mat thank you for sharing the wing files and mostly for DIY advices. Last night I tried to print the center piece in ABS but 18h later, the piece came out with a lot of problems, result…garbage. Probably because of the height, I am going to do it in smaller pieces to avoid that problem. @philgib, you are not allone with height problems.
By the way what was the honeycomb infill% you guys have printed?
ABS might not be the best idea… it’s a long and not very wide piece, so wrapping will be an issue.
Even with ASA (supposed to not wrap) i had some wrapping.
I printed in 5 pieces to limit the height to avoid vibration.
i’m not sure for the infill, but i think it was 35%.
When u poured epoxy and some glass with it, did u tape the bottom? I am considering few 3mm alumium bars to support and bath everything with epoxy, not sure yet how/do epoxy and aluminum react.
I had one layer of fiberglass cloth in the channel and then filled the top with epoxy mixed with chopped fiberglass and colloidial silica (it’s like a ultra thin and light powder that make the resin thicker… ). So it was not pouring down the bottom.
I don’t think aluminum will have any issue chemically with epoxy (as long as you stay away from carbon fiber), but i’m not sure about the bonding, you’ll have to roughen it up to allow the epoxy to grab onto it.
i’m not sure it will bring significant improvement though compare to just epoxy with fiber…


 You guys have very interesting comments, and make me dig further into Internet reading about what I thought I understood: Thank you for that.