This is the one I bought actually haha! It was a Miami pick up only which worked out great for me!!
Thanks!! Hopefully it can fly haha
How much do you weigh ?
Im at 170lbs! It doesnt float enough to be a sup by itself… I tried it  with some speed though, it will be fine! This board has a bit more volume than the one pacficmeister used!
Hello efoil builders, I figured now would be a good time to give an update on my build since I received most of the parts and since I started working in the board.
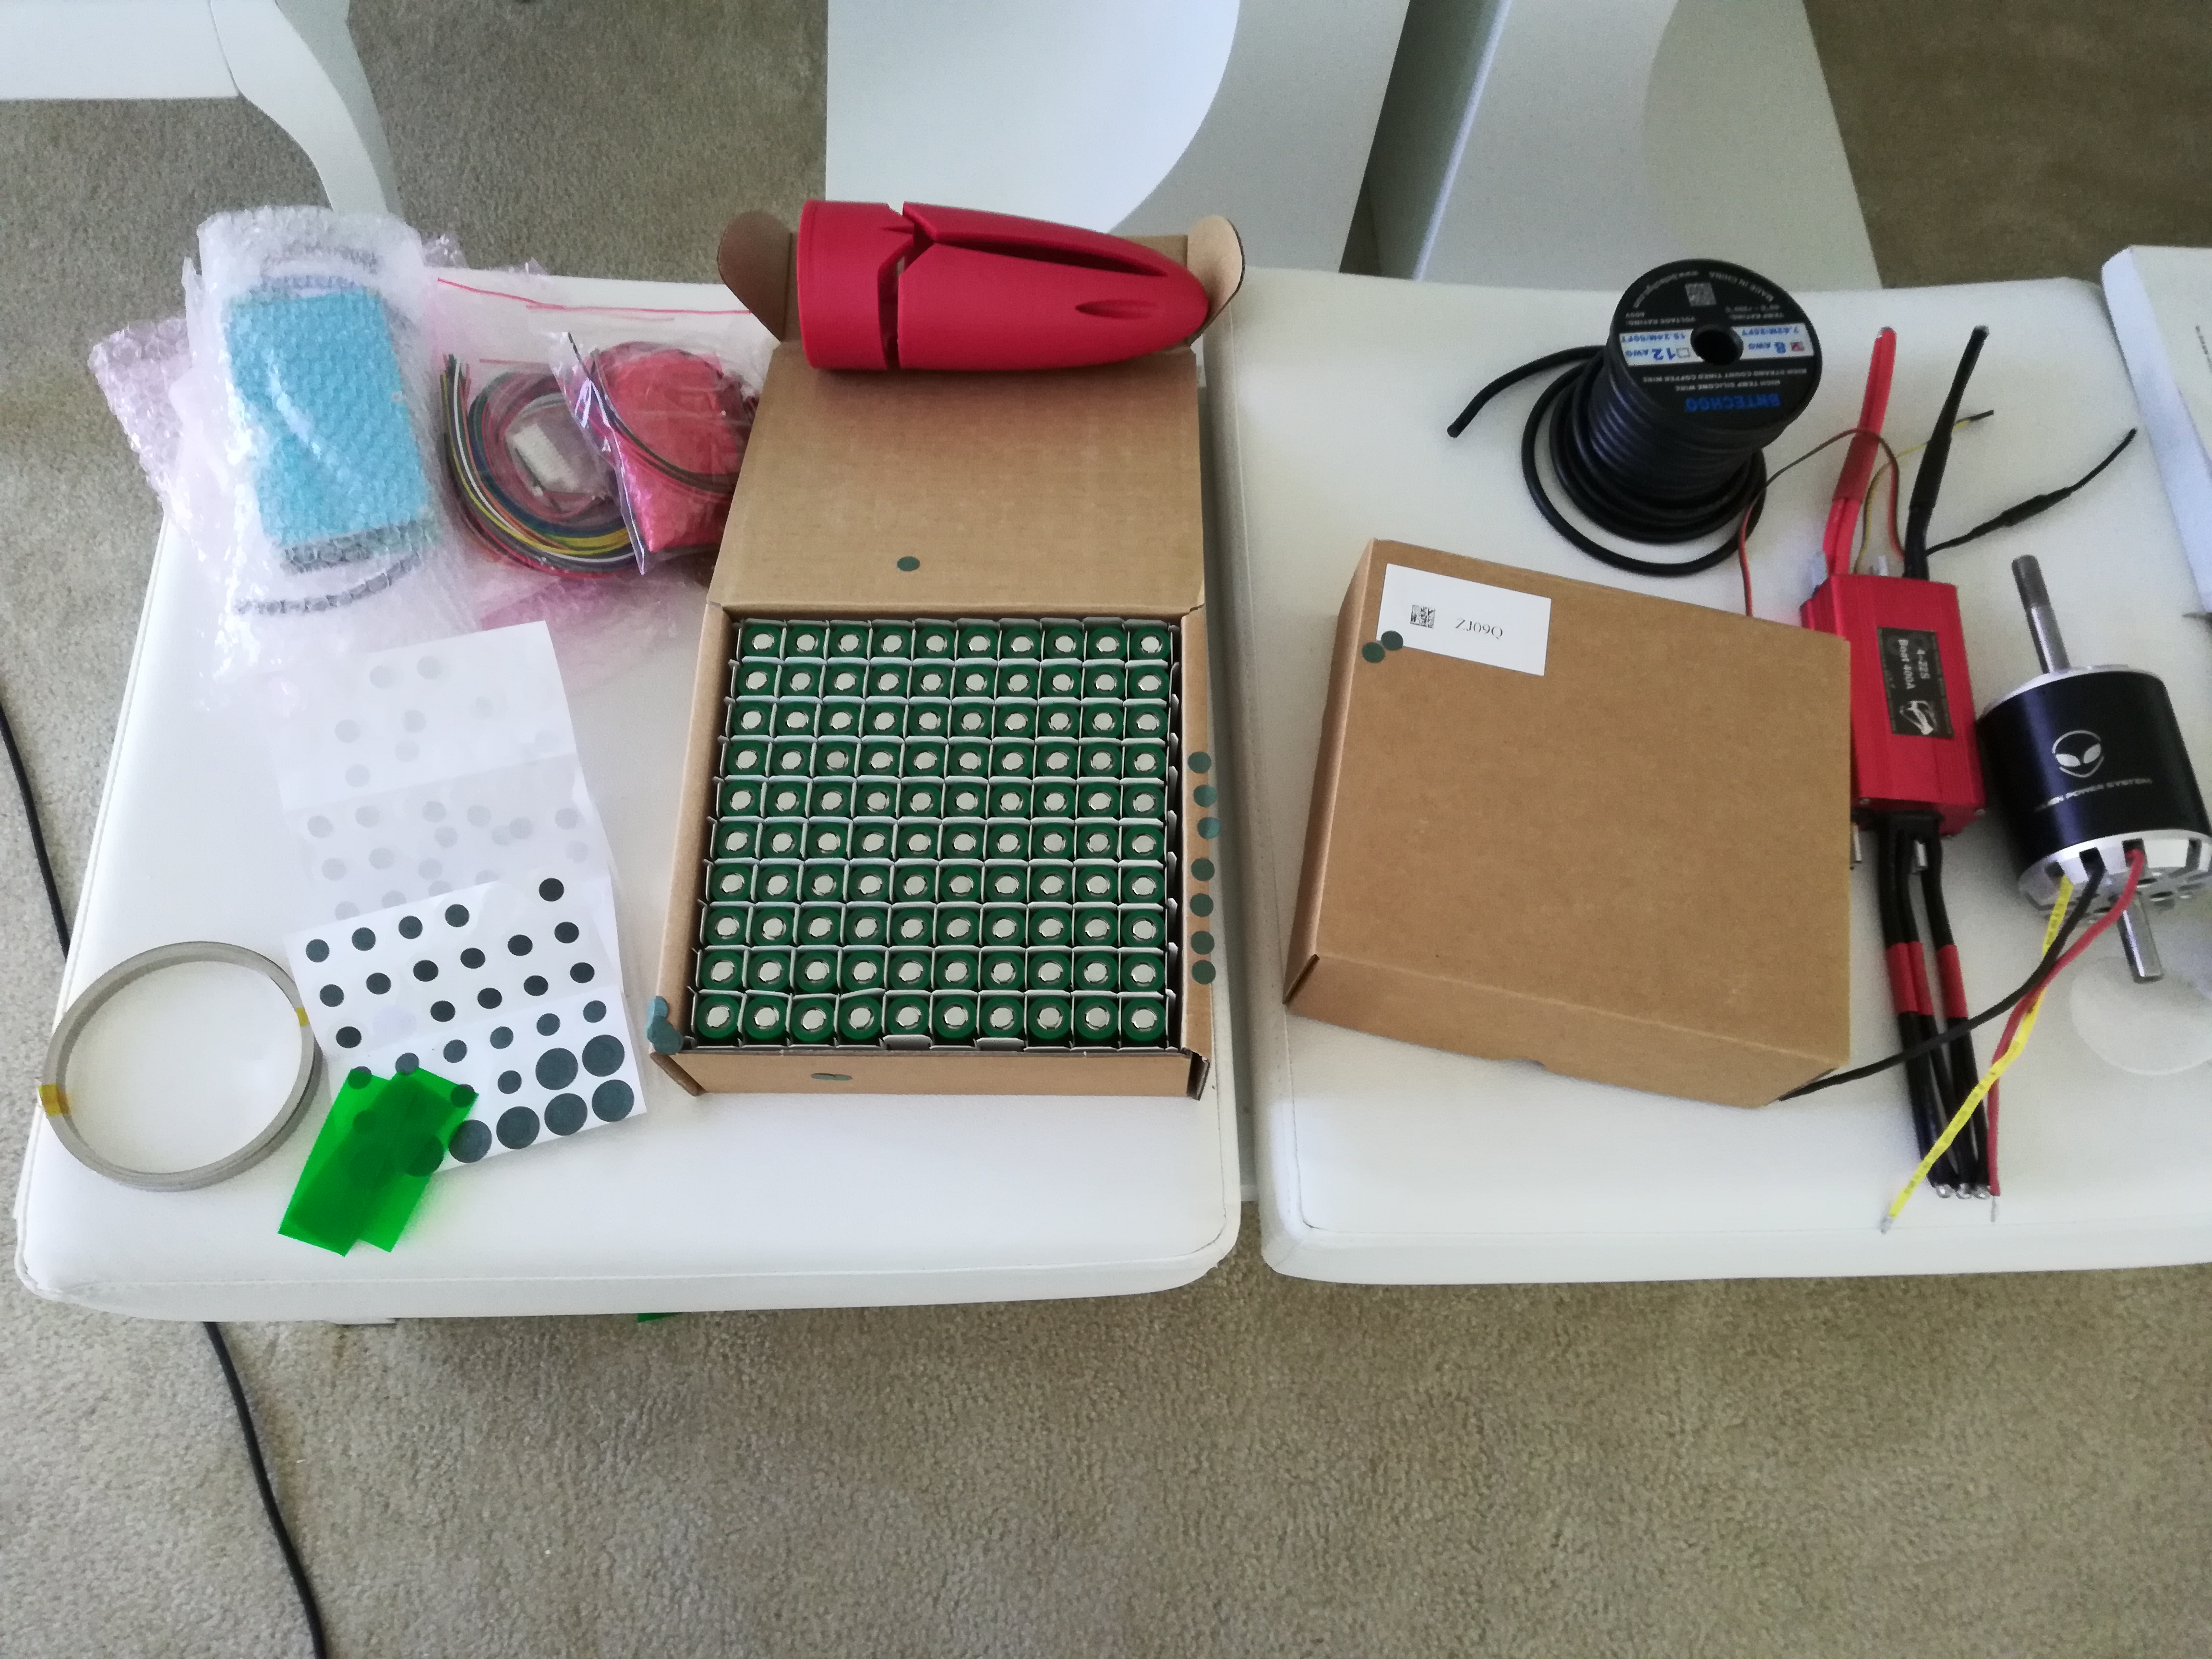
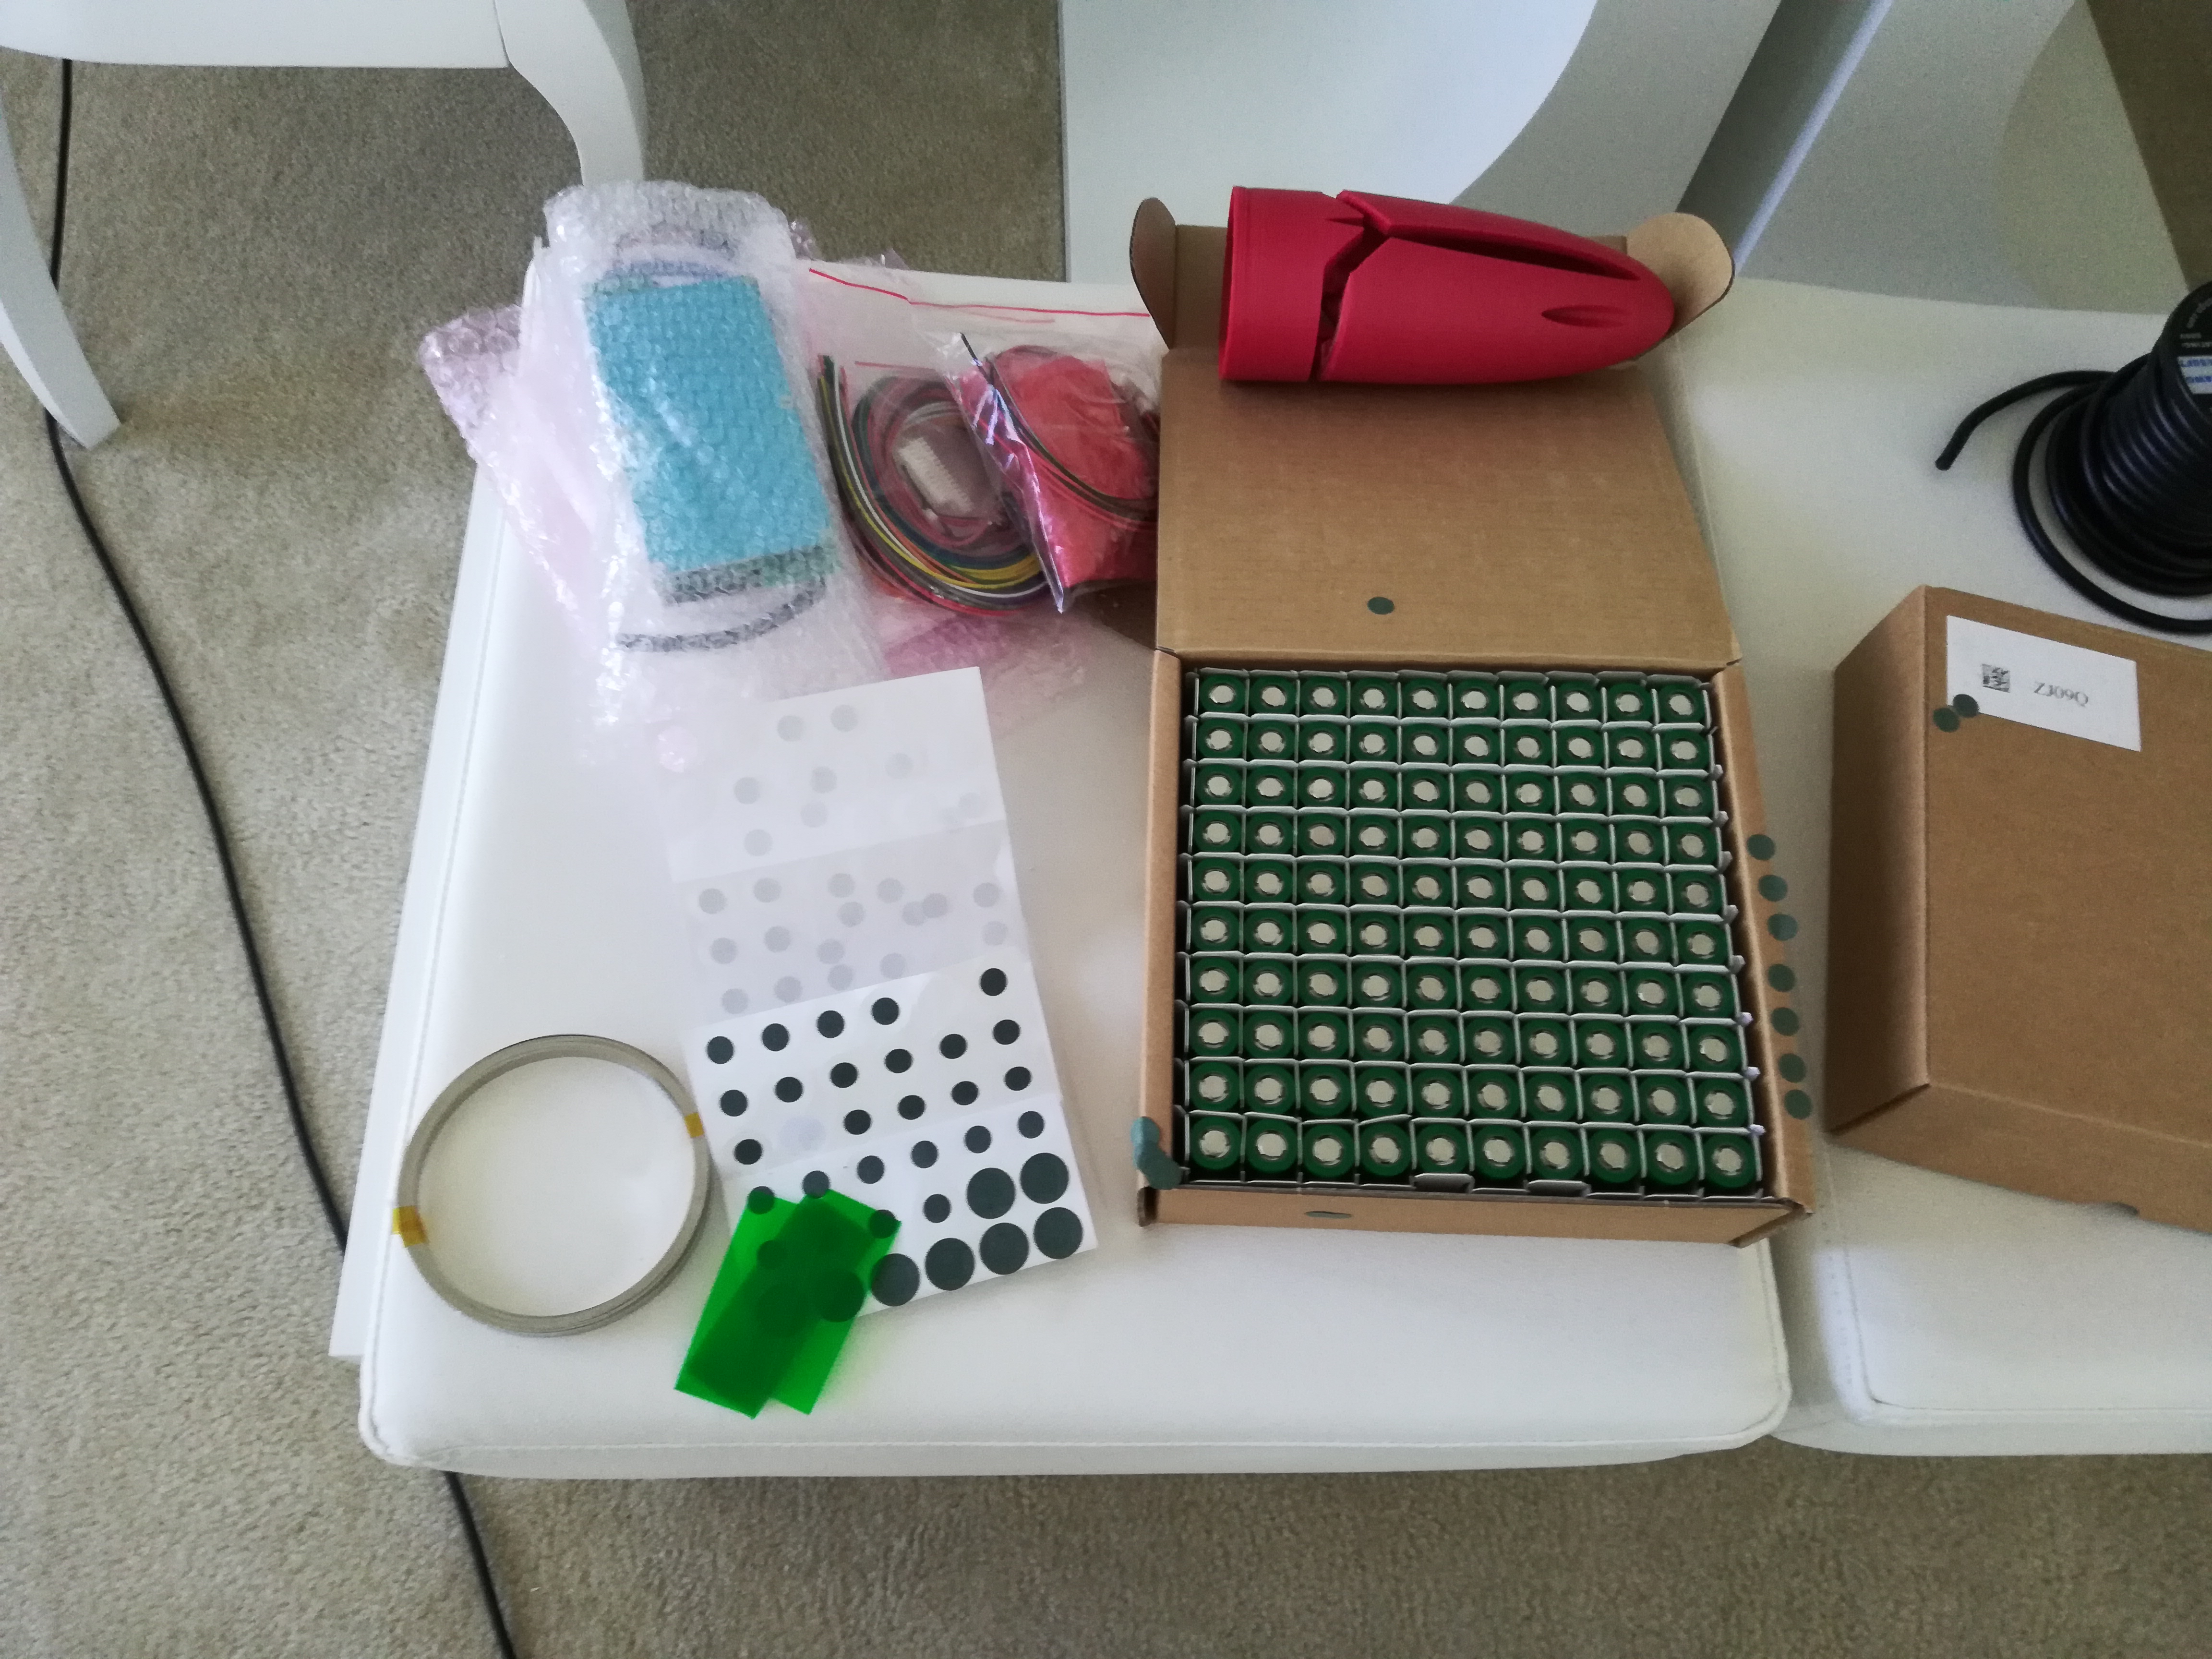
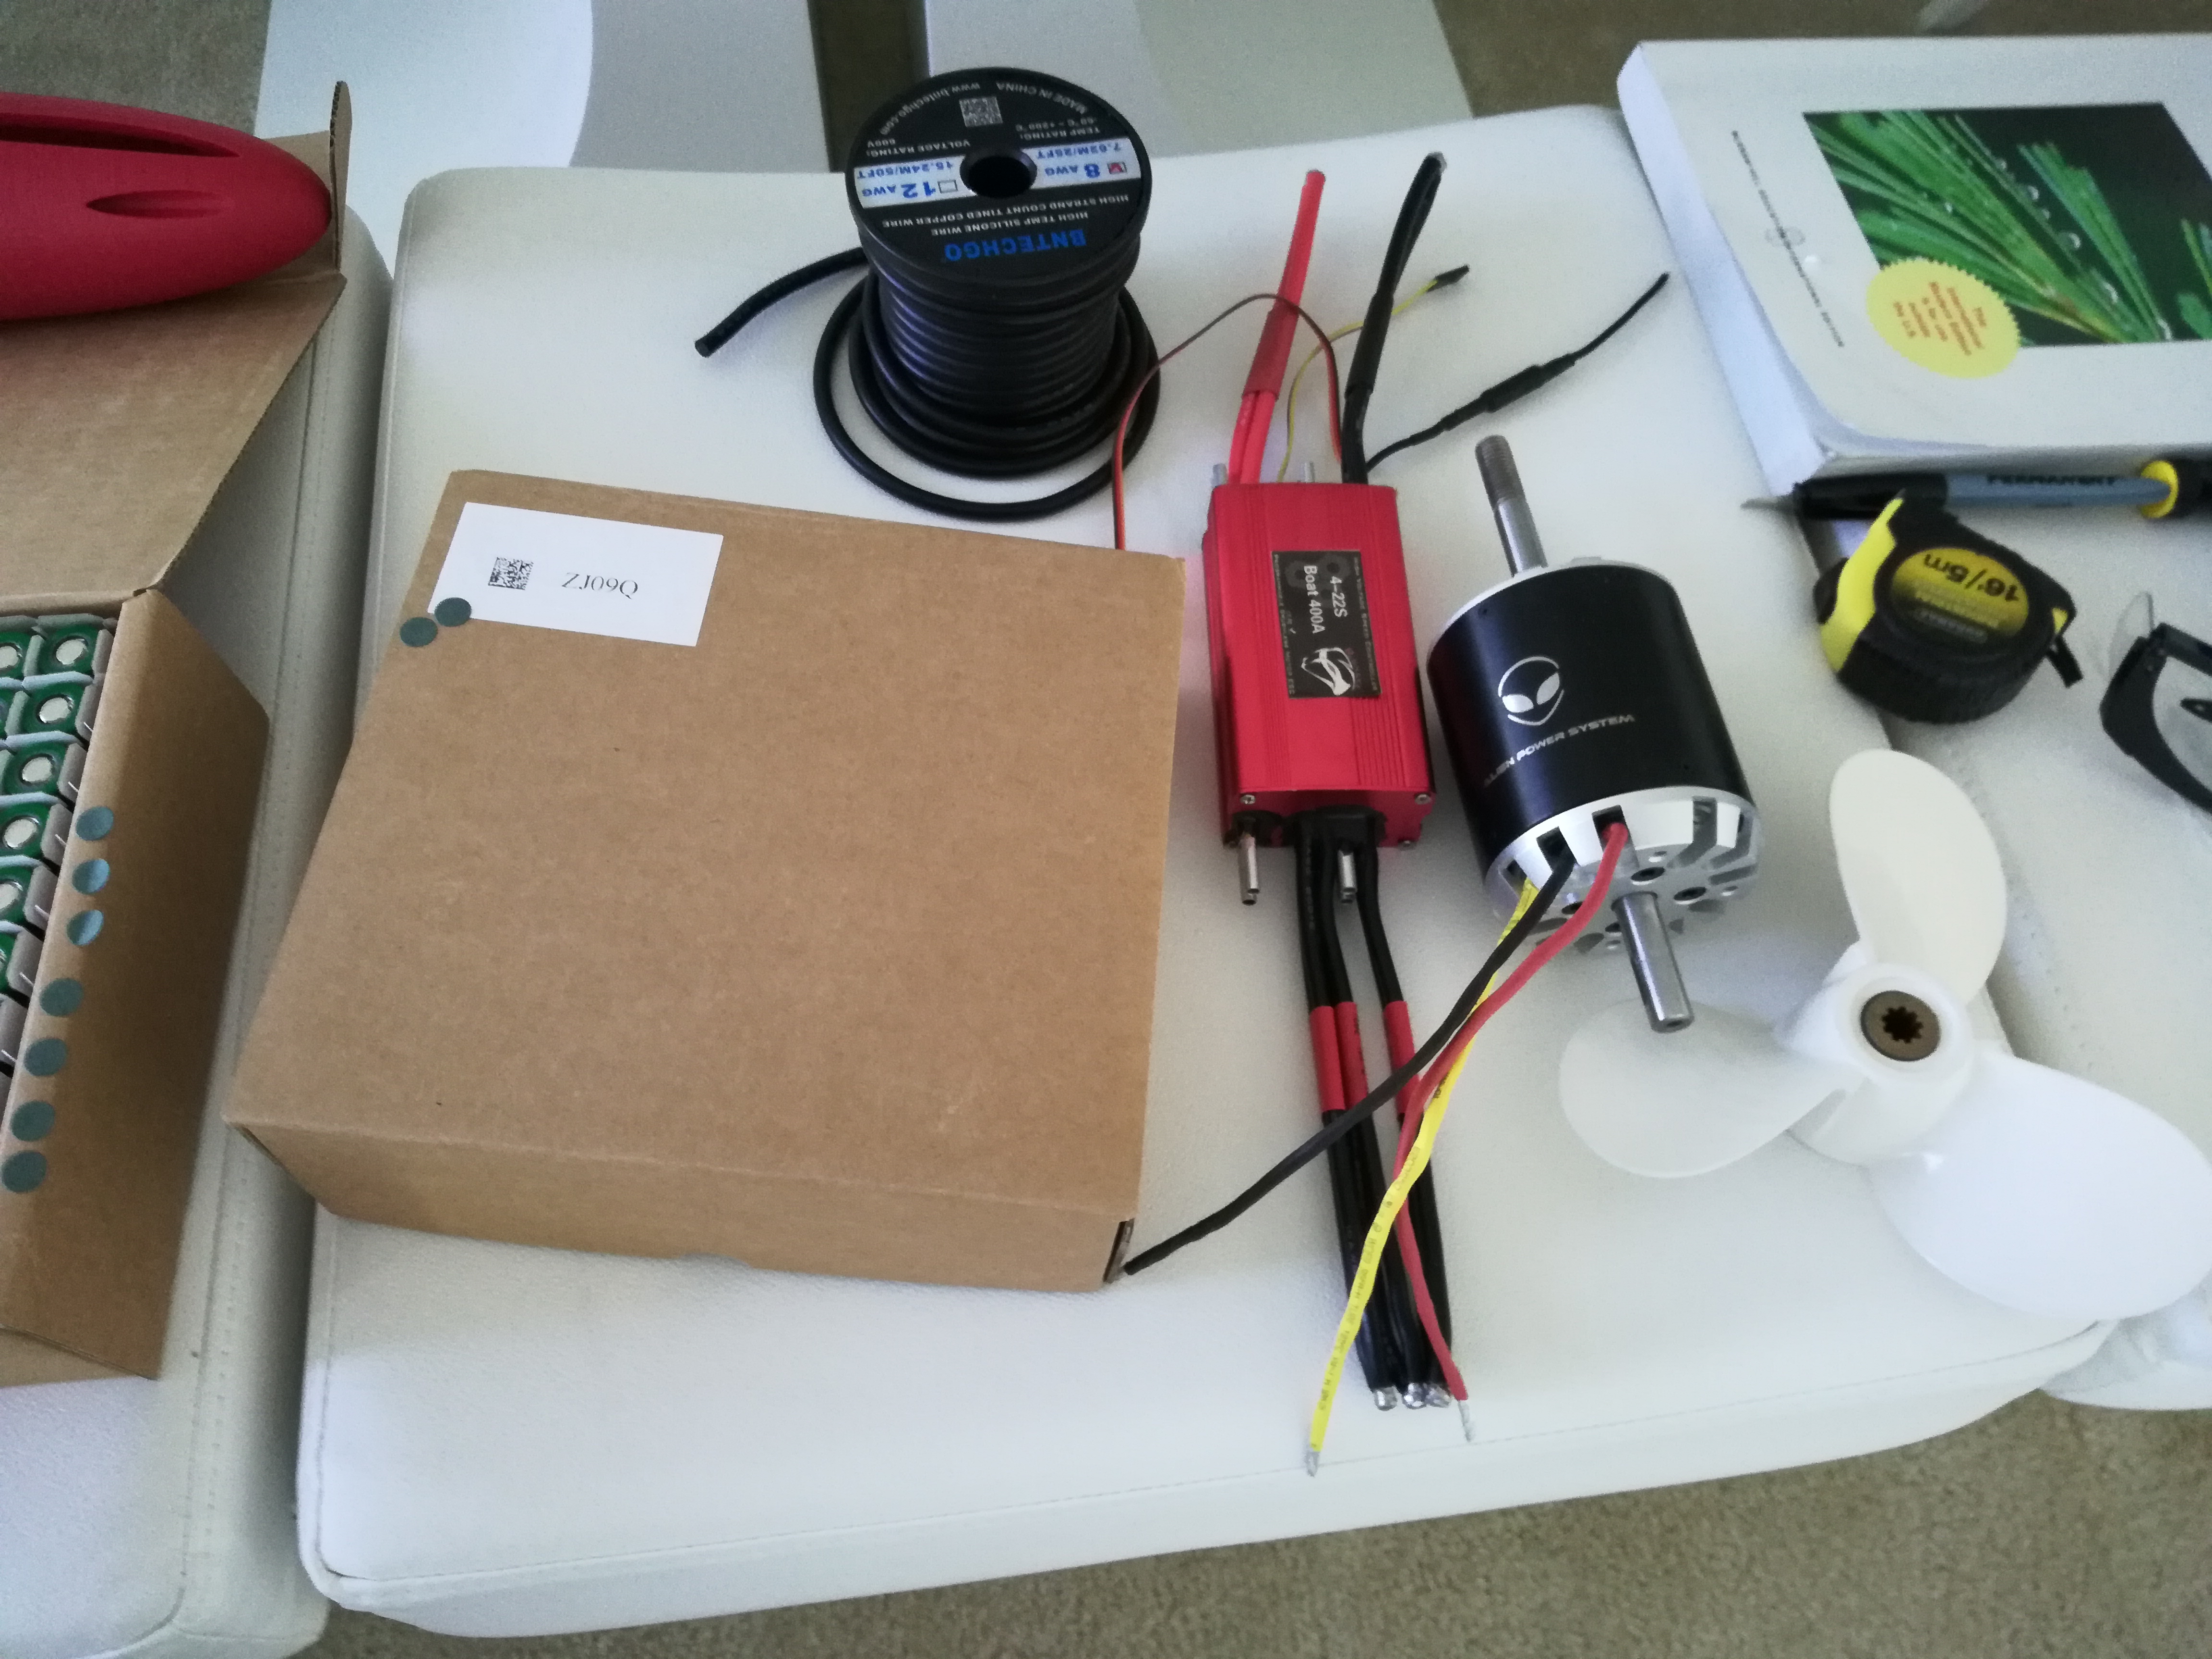
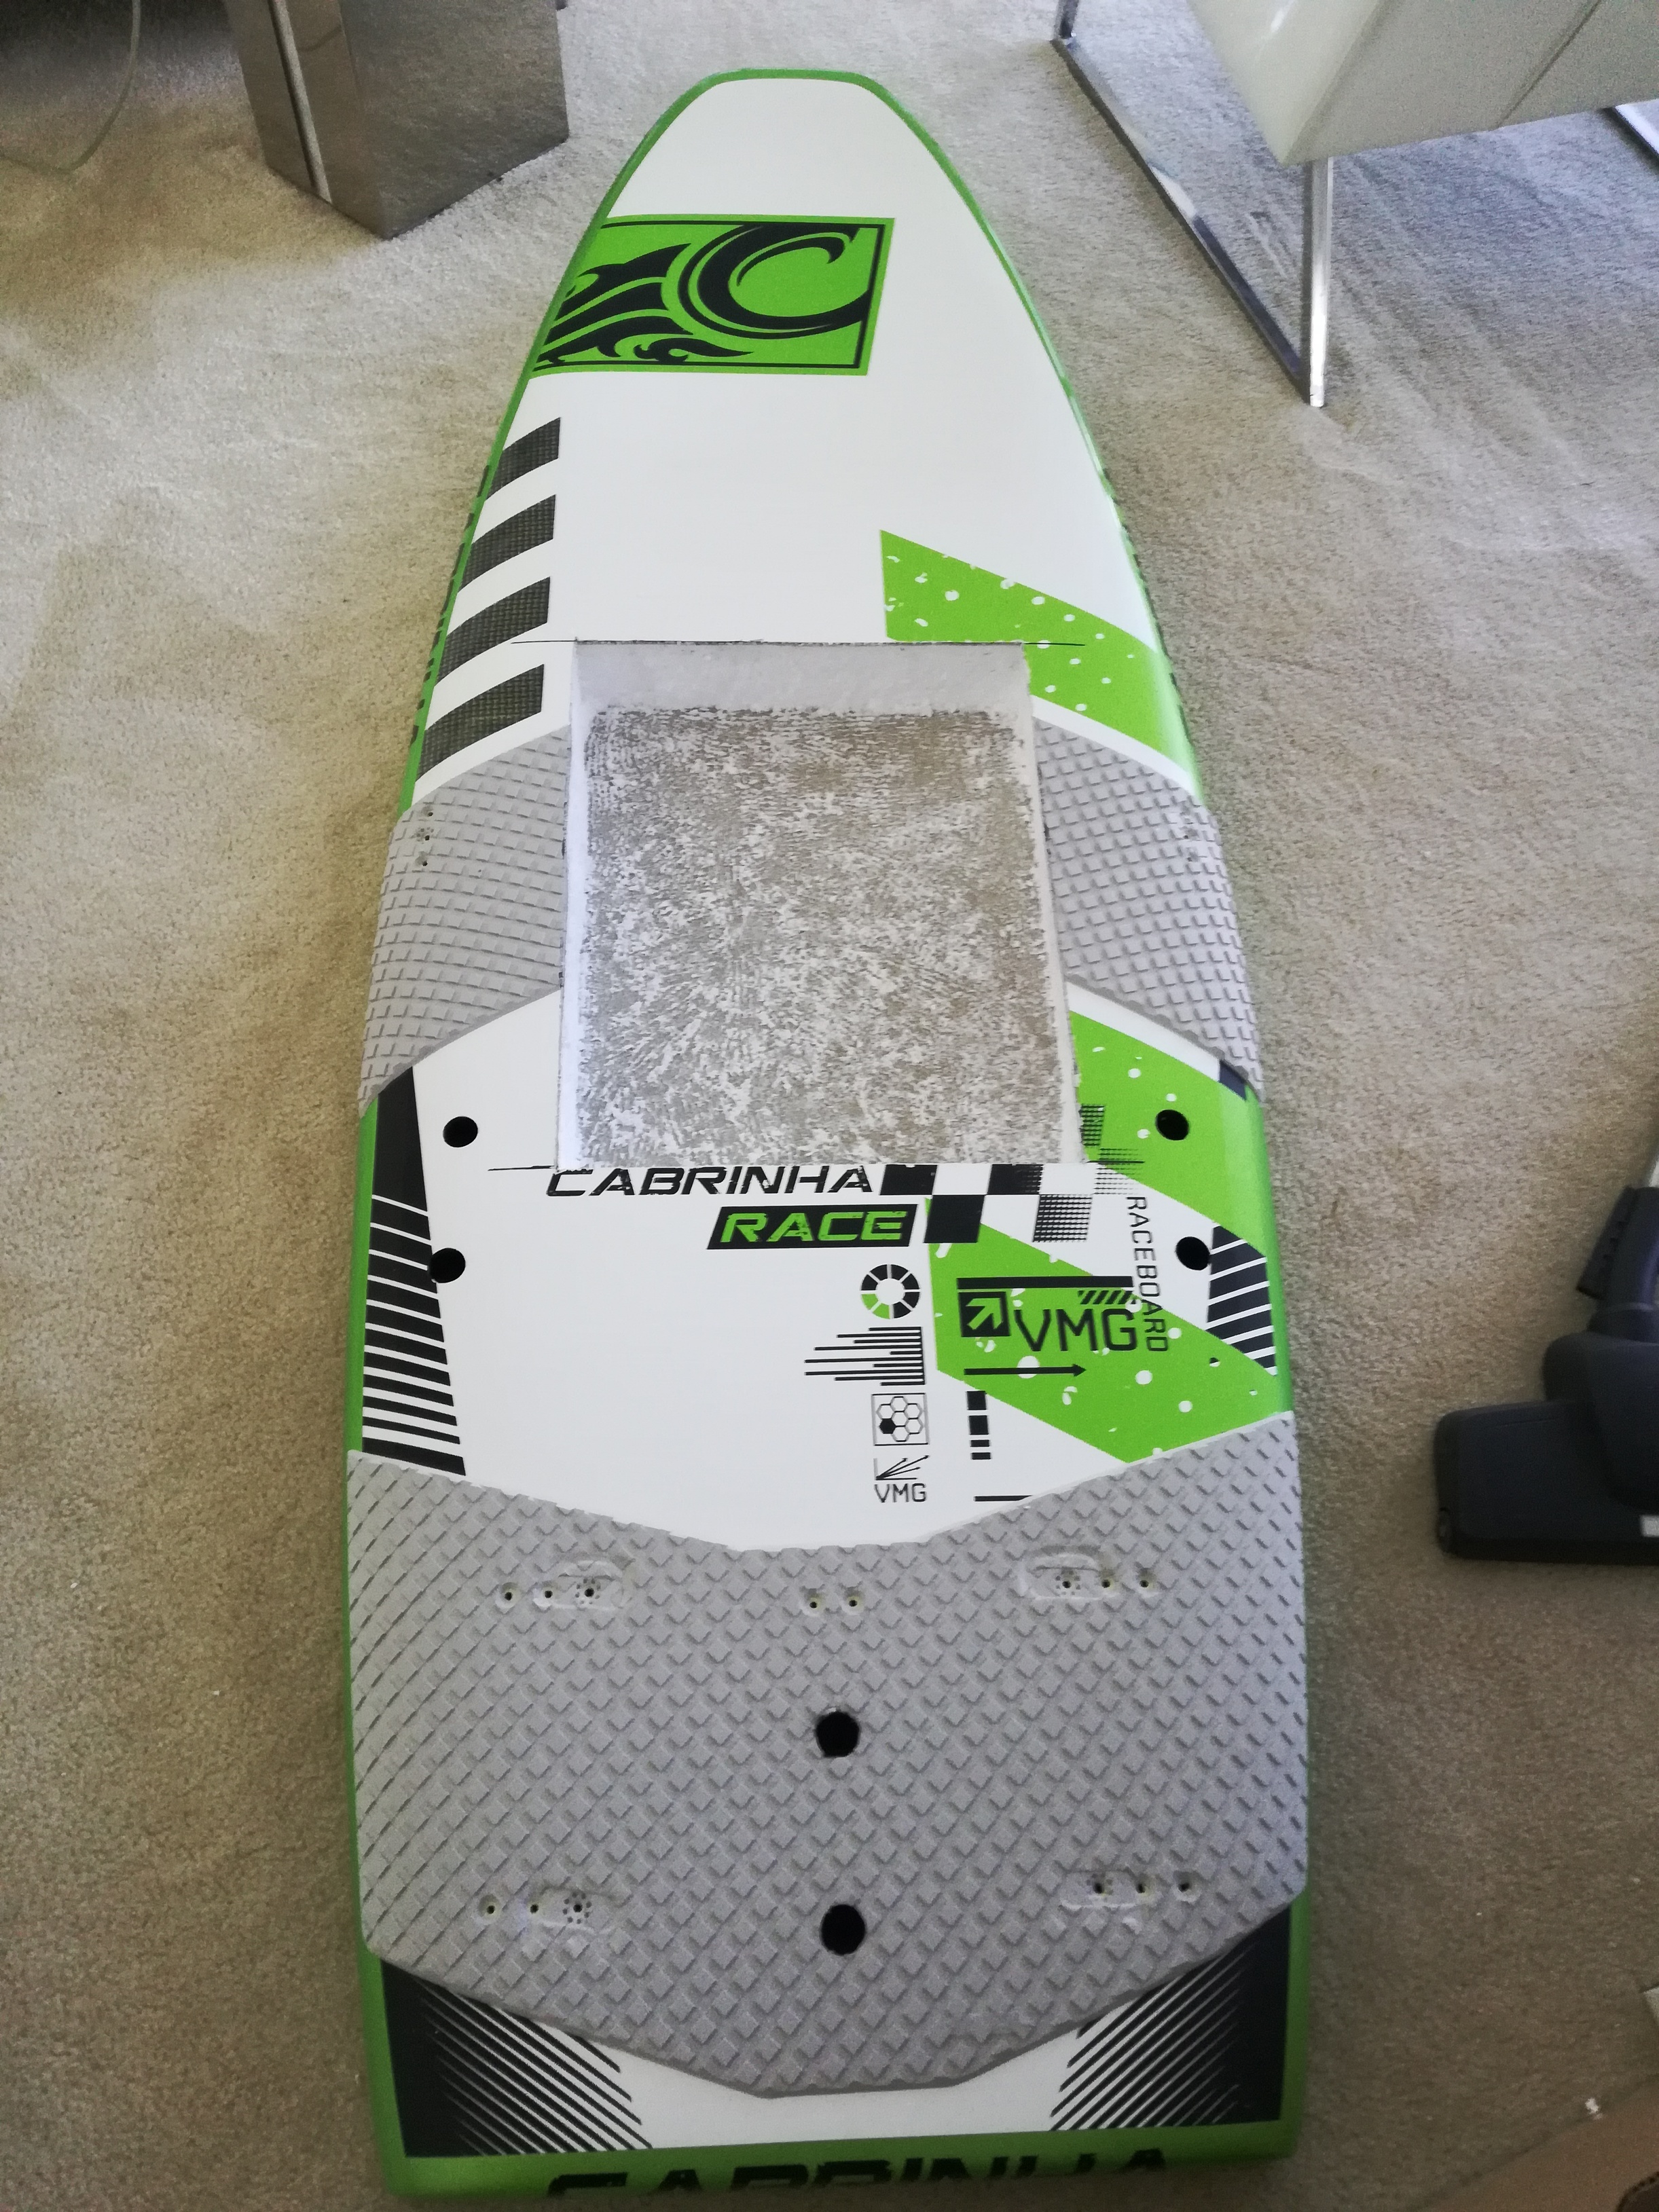

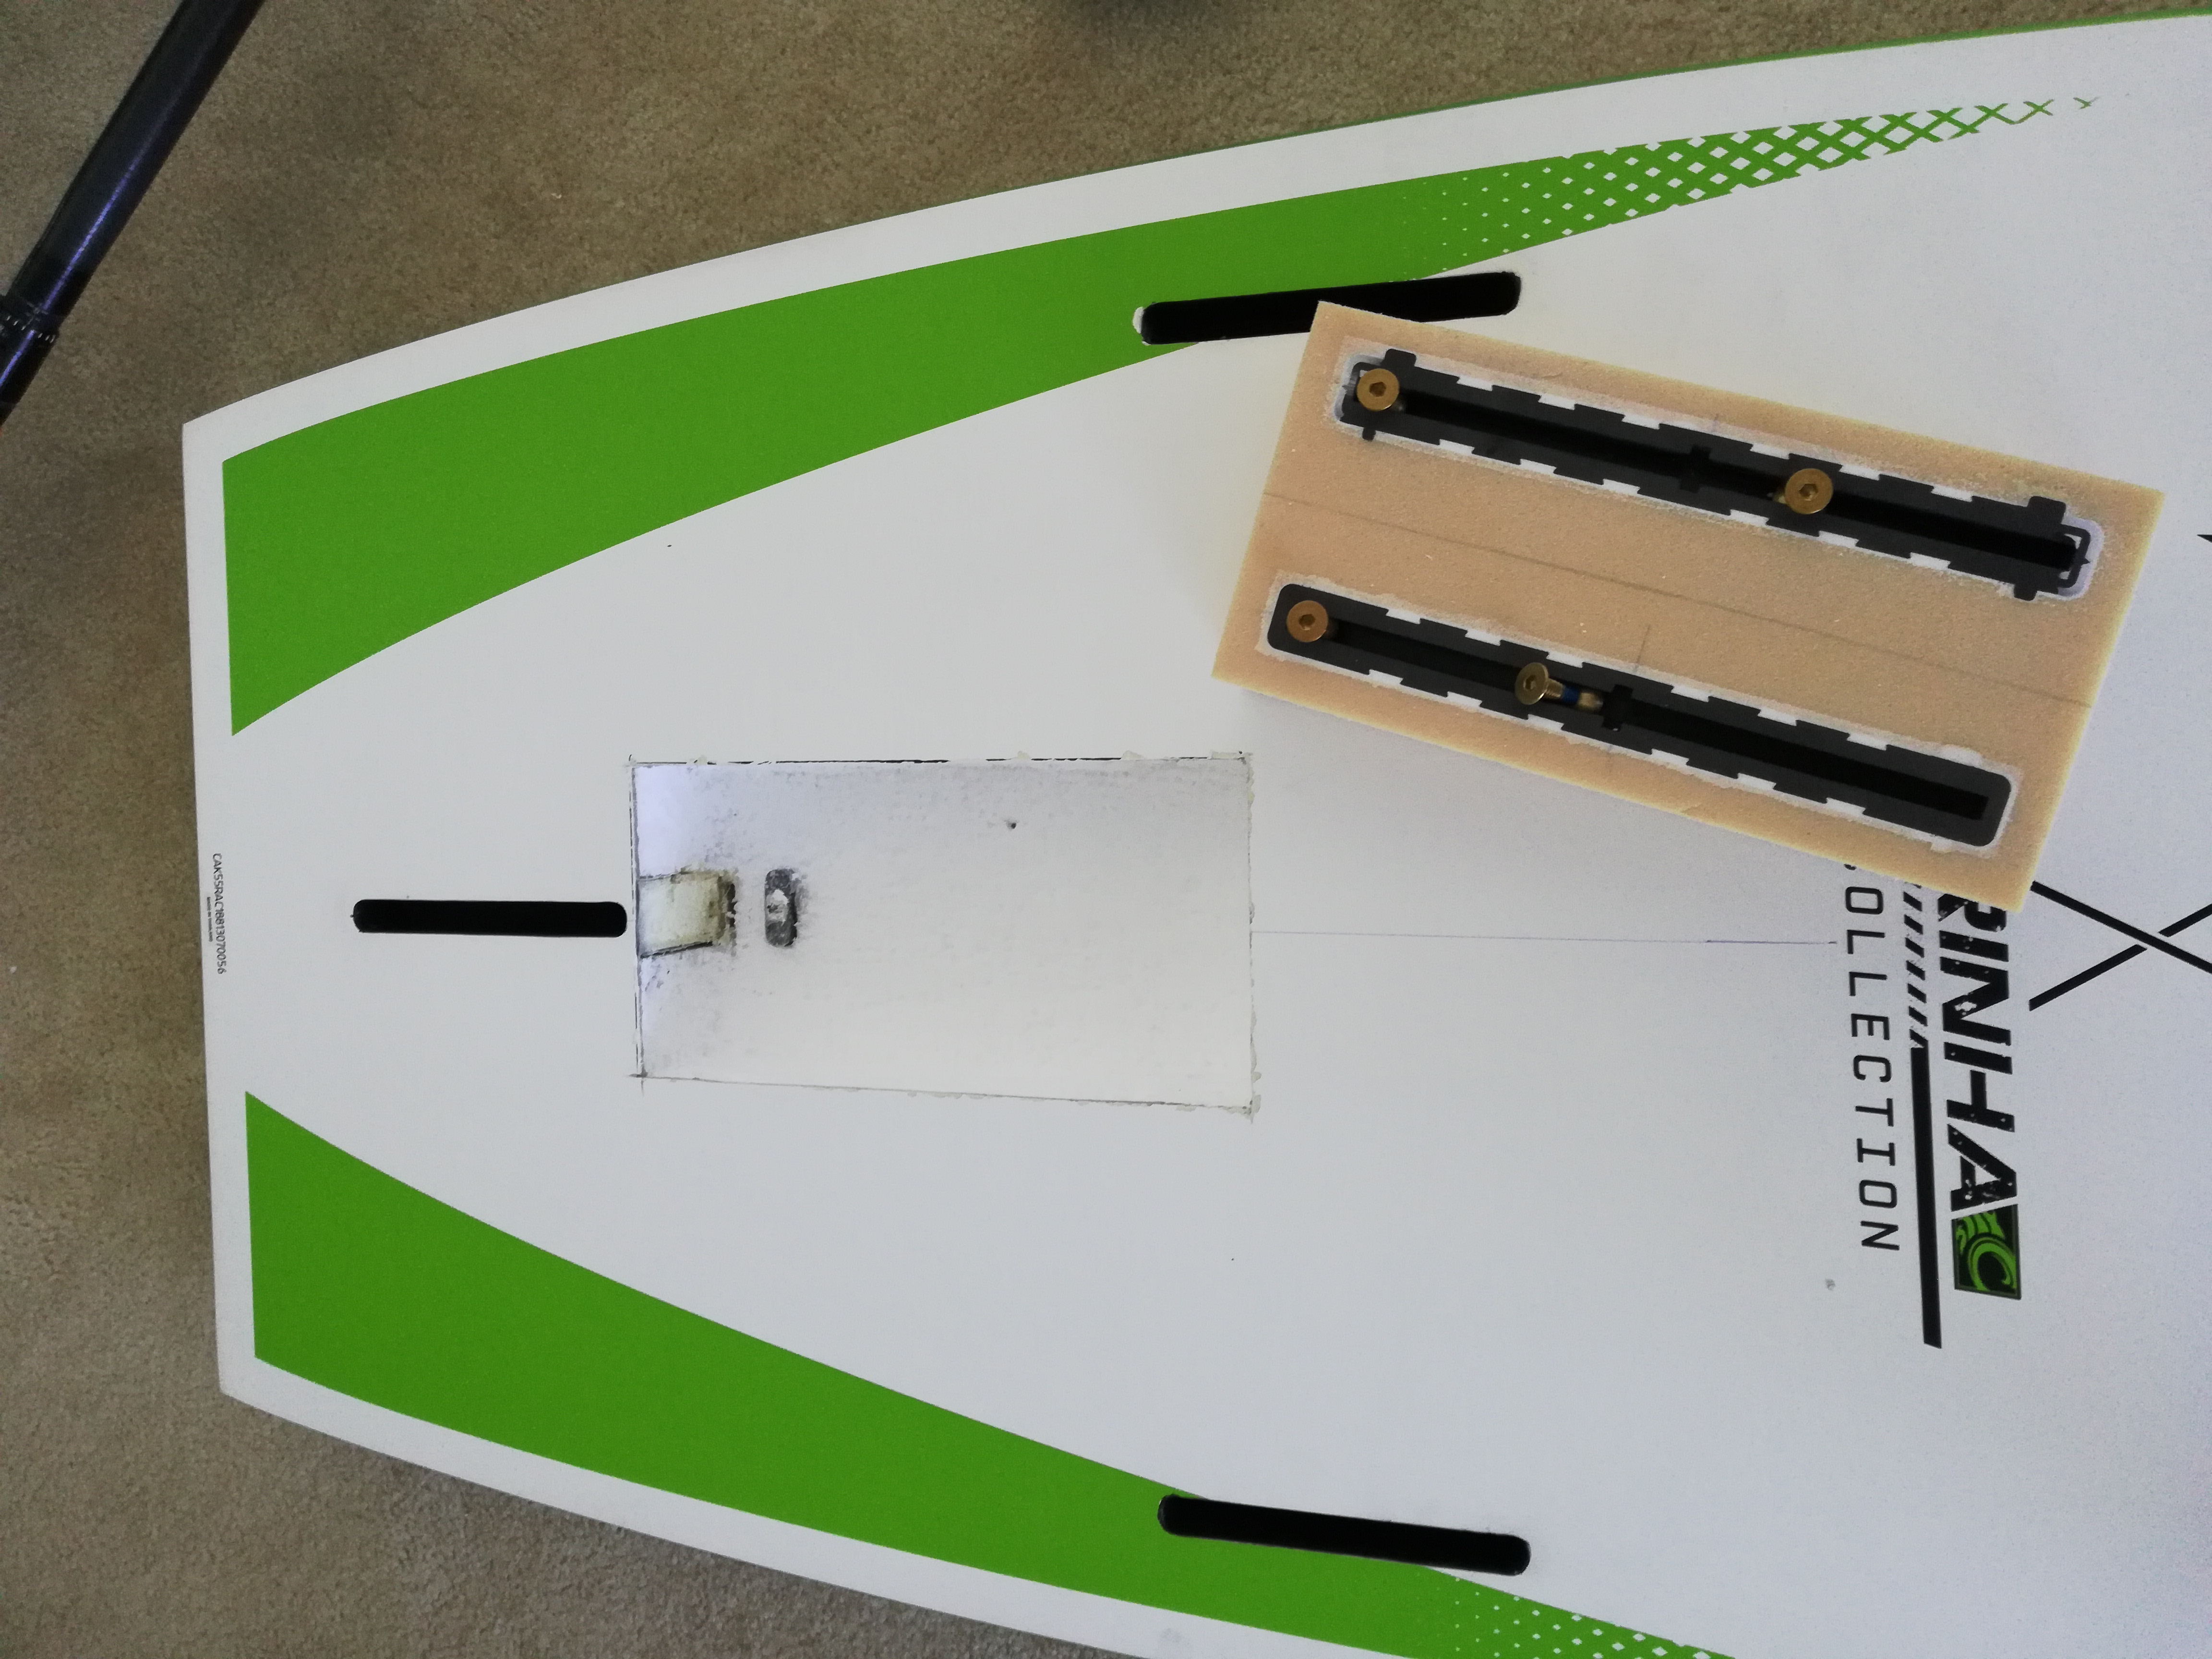
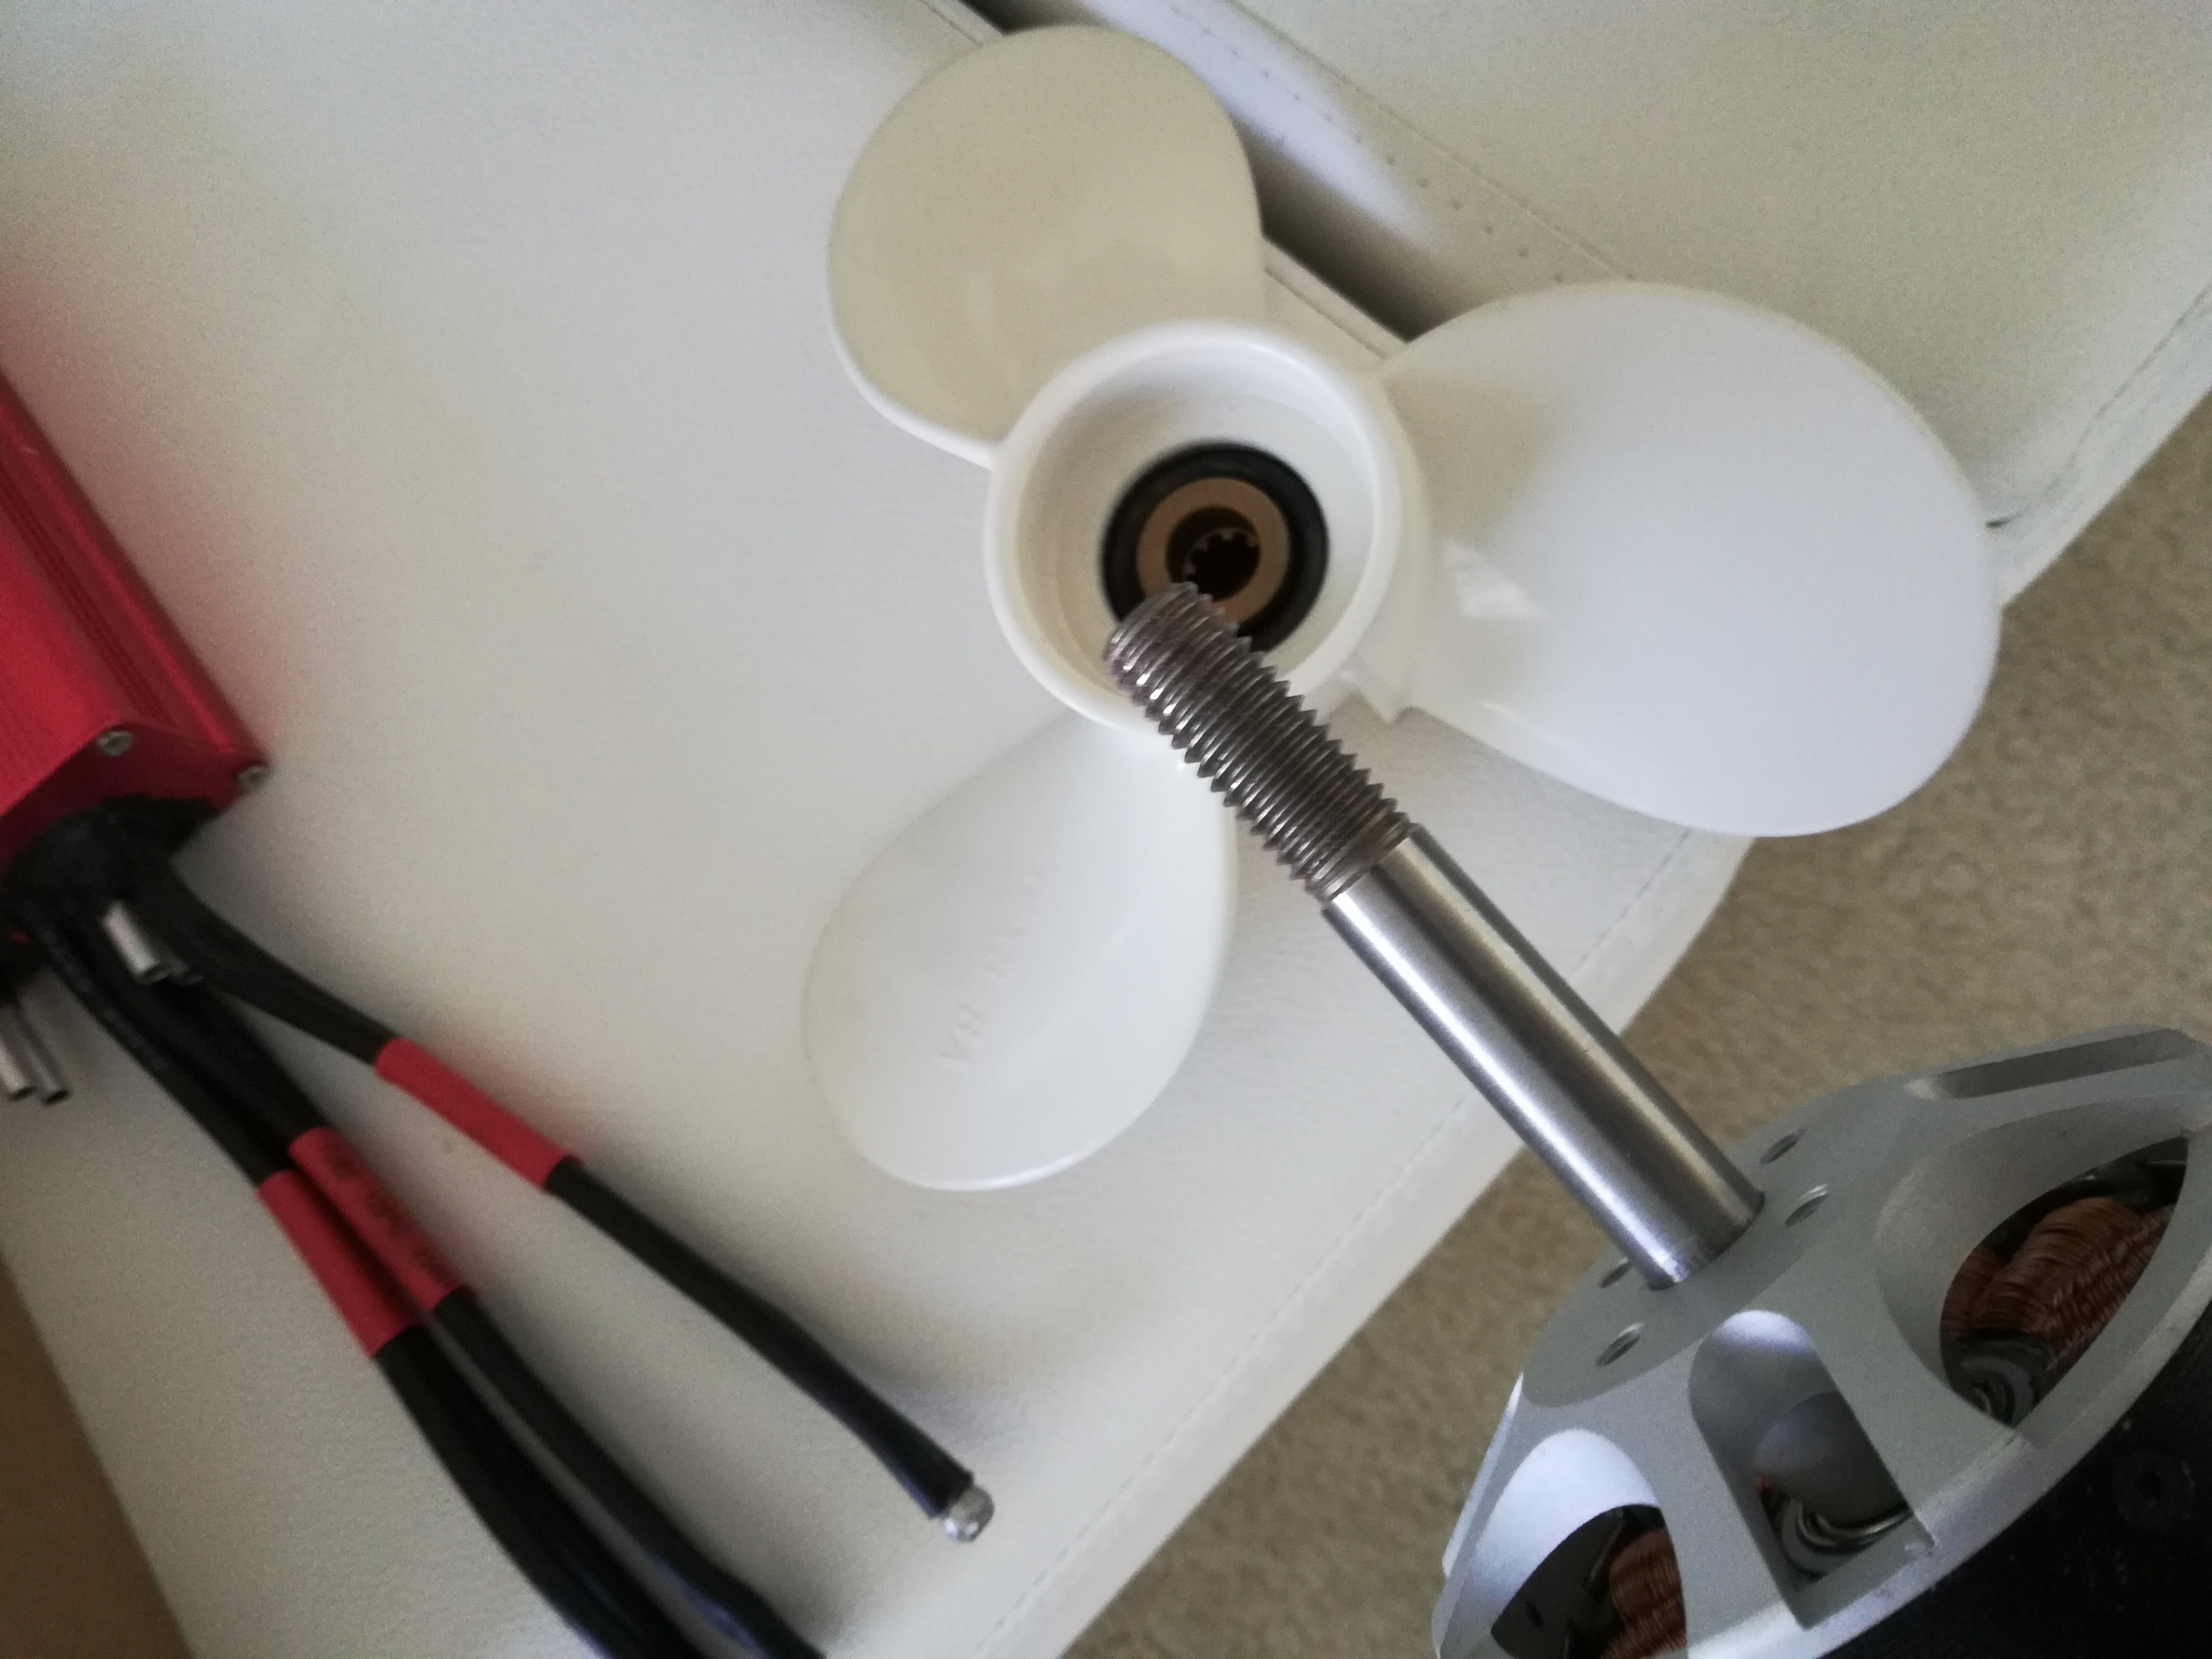
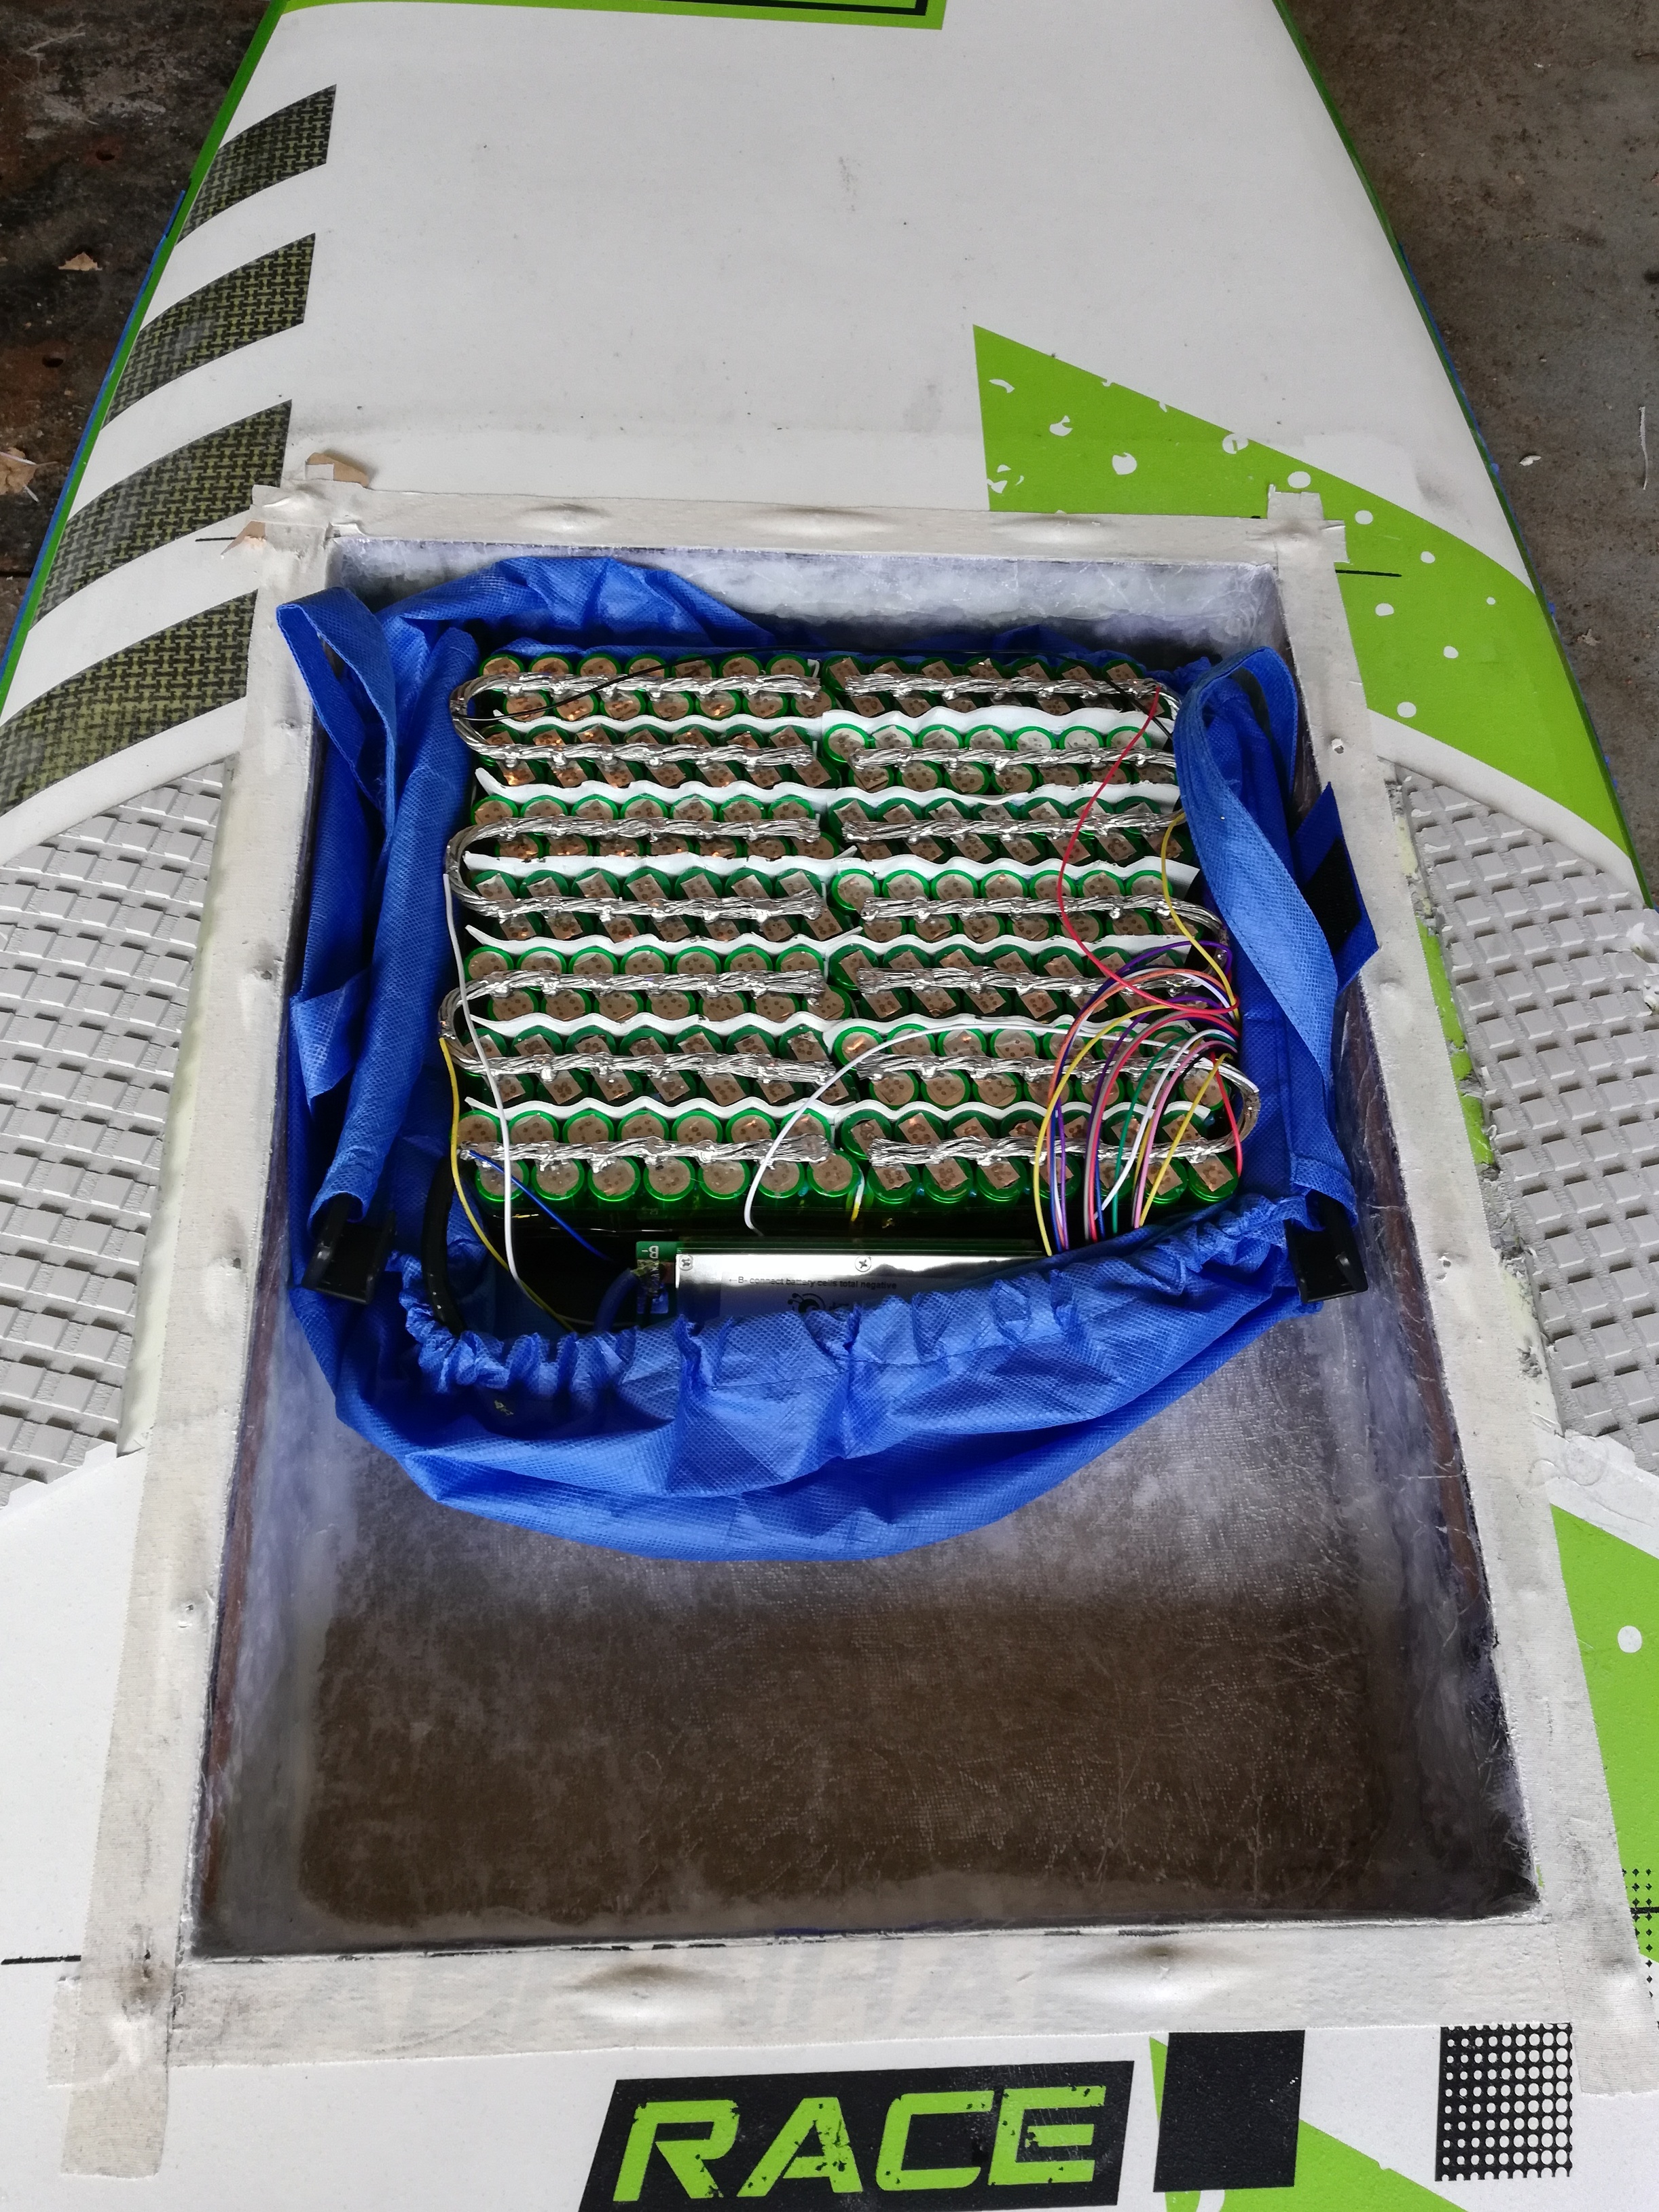
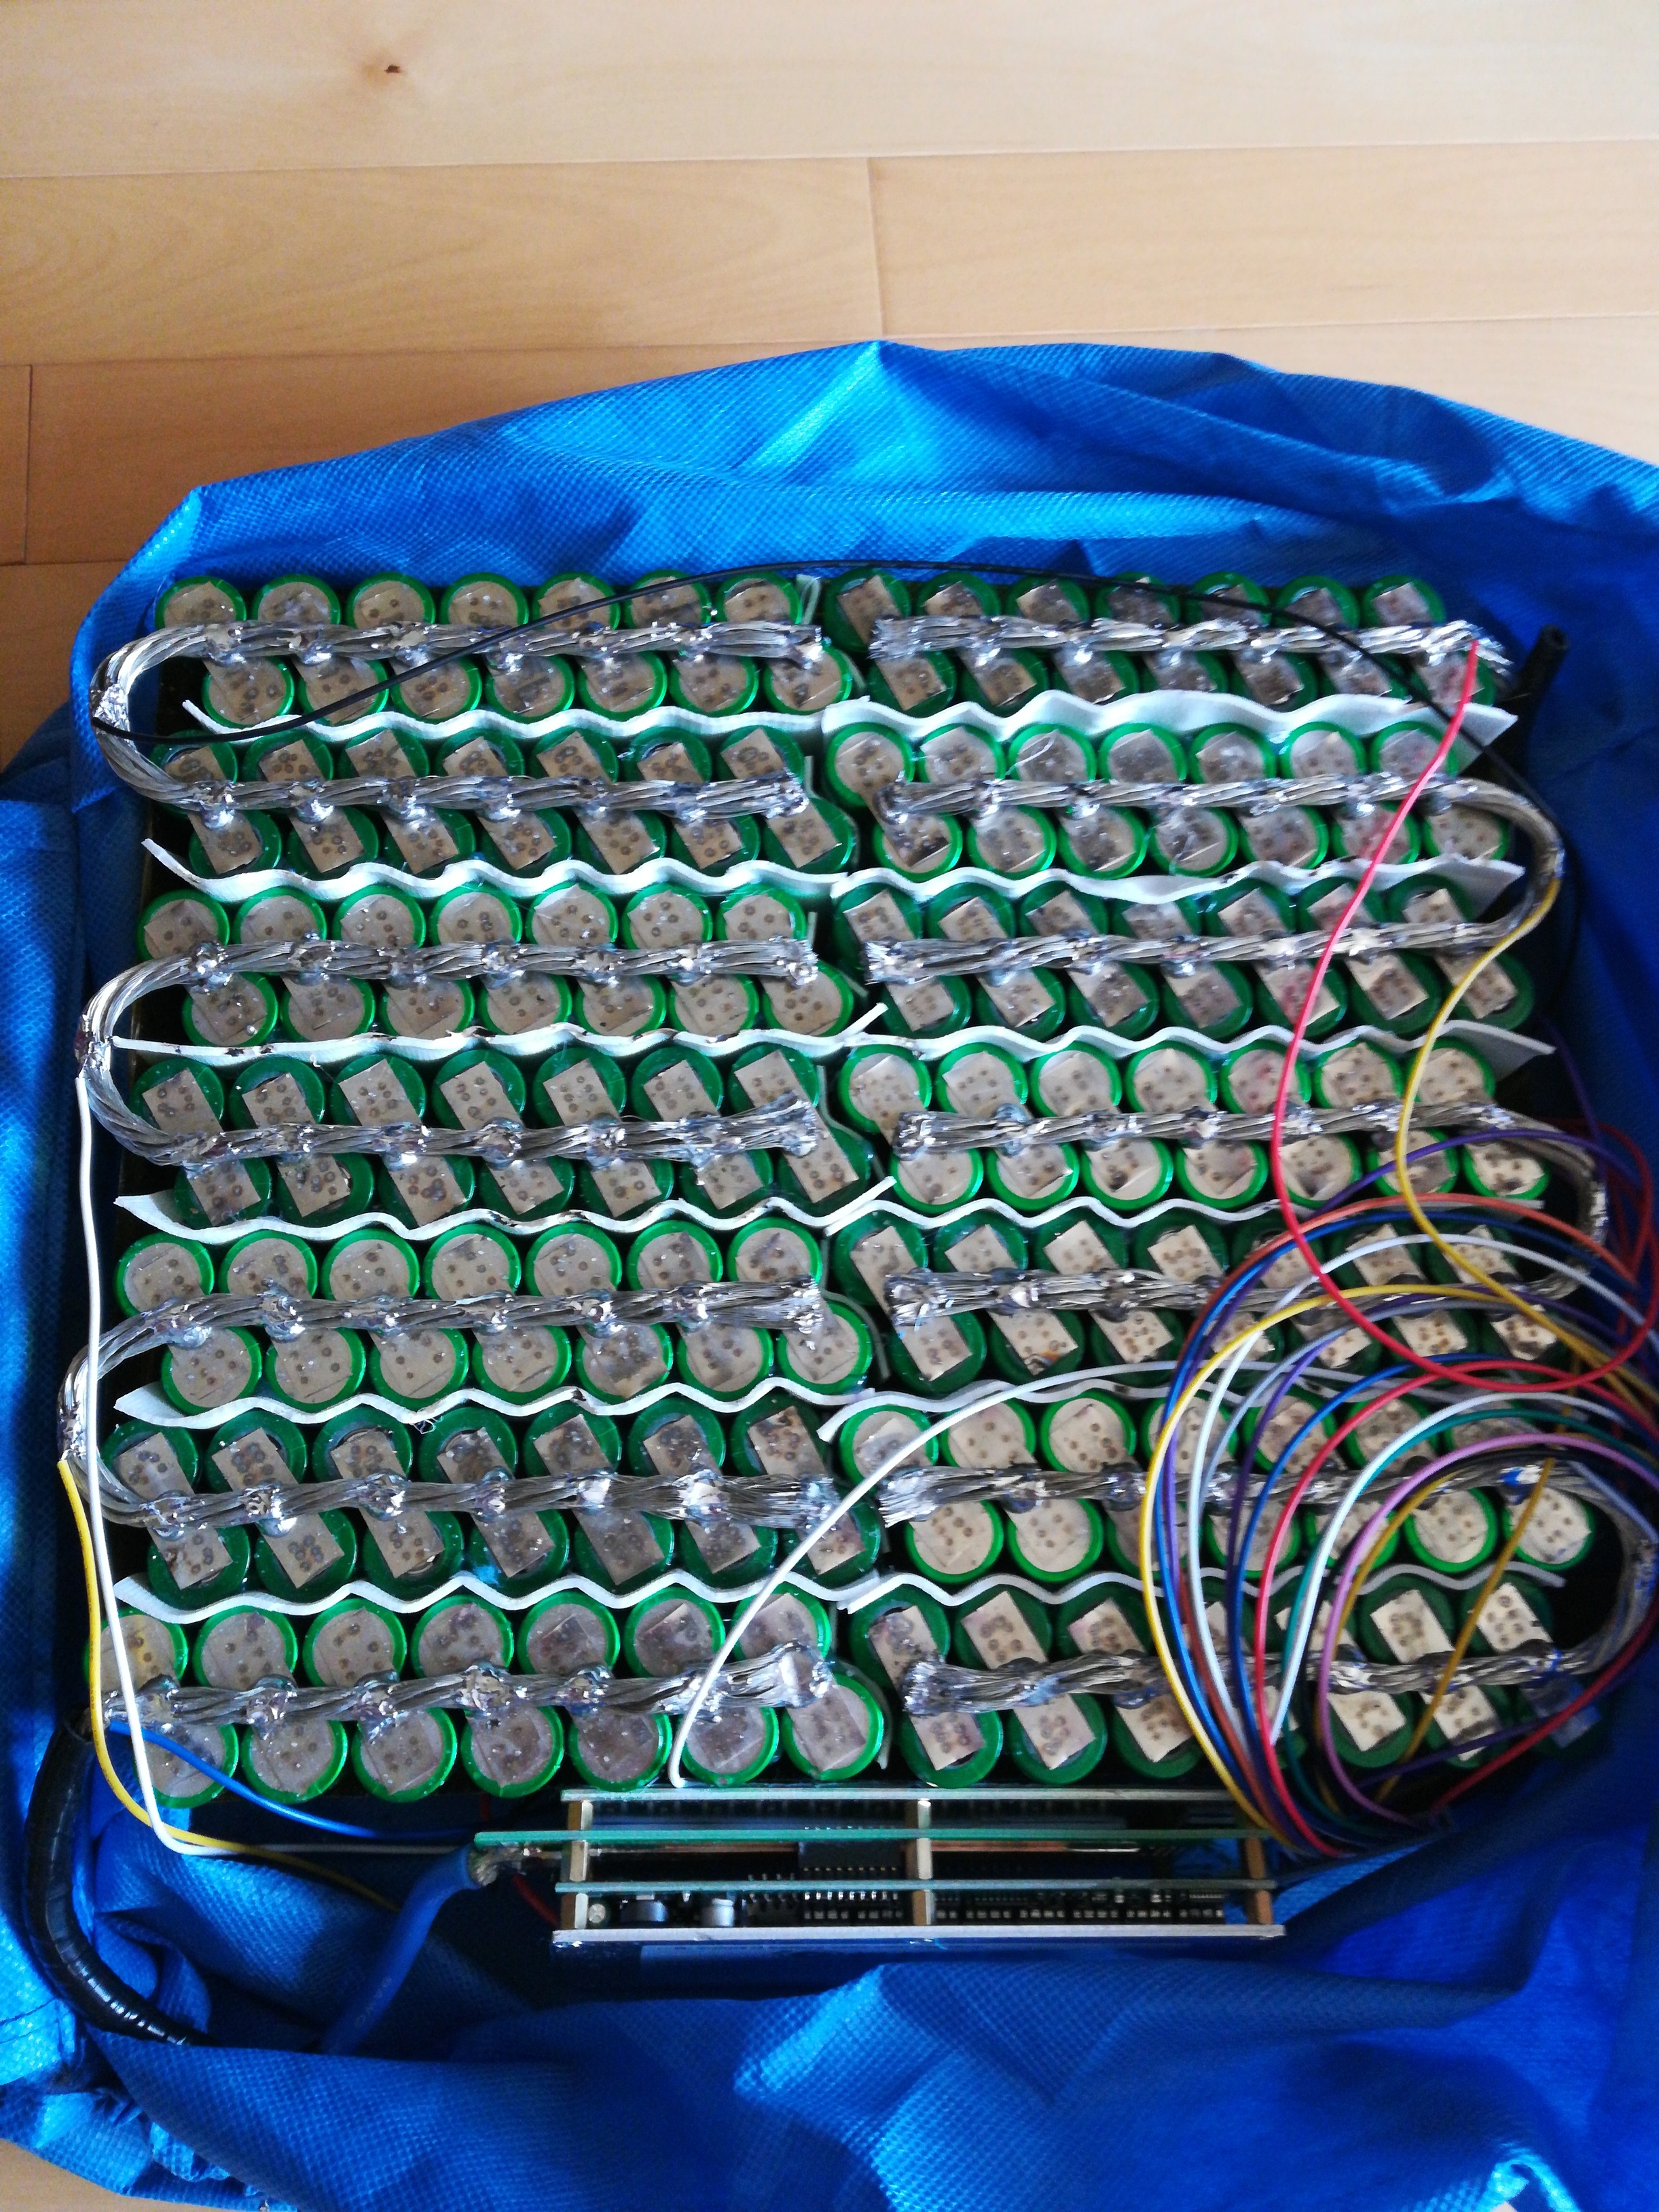
So most of my original ideas stuck around. However, as you can see from the pictures, I decided to build my own 18650 battery pack from 200 Sony VTC6 cells (3000mah). I also bought a smart BMS with a screen to monitor them. I ended up going with the APS 80100 80kv motor since I will run on 14s (14s14p battery pack). I also bought a 7.5in propeller with 8in pitch (hope it won’t be too much). As for the board, I already cut the holes for the foil box and the battery/electronics compartment. I am planning on fiberglassing those holes however I was wondering how I could push the fiberglass against all corners while curing. Could I fill up a big Ziploc bag with water and put it on the fiberglass? Will the Ziploc stick to the resin (resin research epoxy)? Lastly, my remote is still in the mail, I ordered the new waterproof model (posted on a post I made). If you have any questions or suggestions, please comment down below as I always appreciate some feedback!!
1 Like
I think the 80KV is the right choice especially with a 14S set up. I was going to ask how are you are going to mount the spline type prop on that shaft. But since your going with Matts build you will probably bolt the prop directly to the aft end of the motor. I am looking at 18650 batteries now. I also want to do a 14S x 14P set up. What Batteries did you get? Where did you get them?
I now see your using 200 Sony VTC6 cells (3000mah). Those are nice. I have been looking at those, also the Samsung 30Q 3000mah, and the LG HG2 3000mah. They are less than $590 for 200 on E-bay. I am scared that they might be fake,
I would not buy Li-Ion cells on eBay unless you like house fires.
I tried HG2 samples from 4 different ebay us sellers all were fake!!
1 Like
I support that! Do not buy on ebay!! If they are dirt cheap they are fake!! I bought mine from jehugroupbuy.com for 700$ which was a steal imo! However, they are out of stock now and the guy had problems shipping them out so I wouldn’t recommend. I also had to wrap them myself since they were an overstock from a bankrupt EV company. If I were you I would Pick any of the 3 you mentioned; whichever is the cheapest!
You can try the ziploc bag on a small sample, i would guess it won’t stick, but i had surprises with some plastic films sticking… you can always wax it to be sure.
But to reach your corners, i’m not sure water in a bag will do it… i really see 2 solutions: Vacuum ( not necessarily expensive if you build it on a salvaged fridge compressor) or you can make a negative shape out of foam, wrap it in a plastic bag and press on the fiberglass.
For the foil attachment, you already have the negative shape anyways 
1 Like
I agree with Mat on the vacuum solution - I was going to write you a novel about it but I got distracted.
The first thing I would do is put some spray foam in all inside corners, then sand until you have a nice smooth chamfer/curve. That way the fiberglass doesn’t have to make as sharp turns. If possible chamfer the corners on the outside/top as well.
I am looking at the same issue when I start cutting up my board. My plan was to put that gummy tape stuff right on the board and a large amount of plastic wrap and then vacuum it down. I’ll document my process and whether it worked or not, but it’s at least a month before I get to that.
2 Likes
@dougm … you’re exactly right about rounding the corners. An easy way to do that is to apply thicken epoxy with a “ice cream stick” … keep it perpendicular to the surfaces and you’ll get a perfectly round corners without sanding needed
one word of caution for the vacuum: you need a loooot of spare plastic to make sure it can “extend” inside the corners… i used a strechlon film with what i though was sufficient spare length, but it overstretched, breached and made a huge mess… that’s why it’s not visible in my video
2 Likes
Thanks for the suggestions!! I will probably round up the edge and use a negative to make sure the fiberglass takes the form. I’m trying to stay away from vaccuming as this will only add more steps to my build and I haven’t yet tackled the big project which is the battery pack. I read online that Ziploc would stick so I will go with that!!
I’ll definitely round up the edge a little bit to ease the process! Thanks for your input! I’m planning on inserting a wooden frame into the side of the top compartment with threaded inserts. I would then glue a rubber lining all around and screw a plexiglass panel in these threads. Do you have any other solutions/ideas on how I could make this compartment water tight?
Yea, I watched a lot of Jehu’s videos in my effort to educate myself on batteries.
1 Like
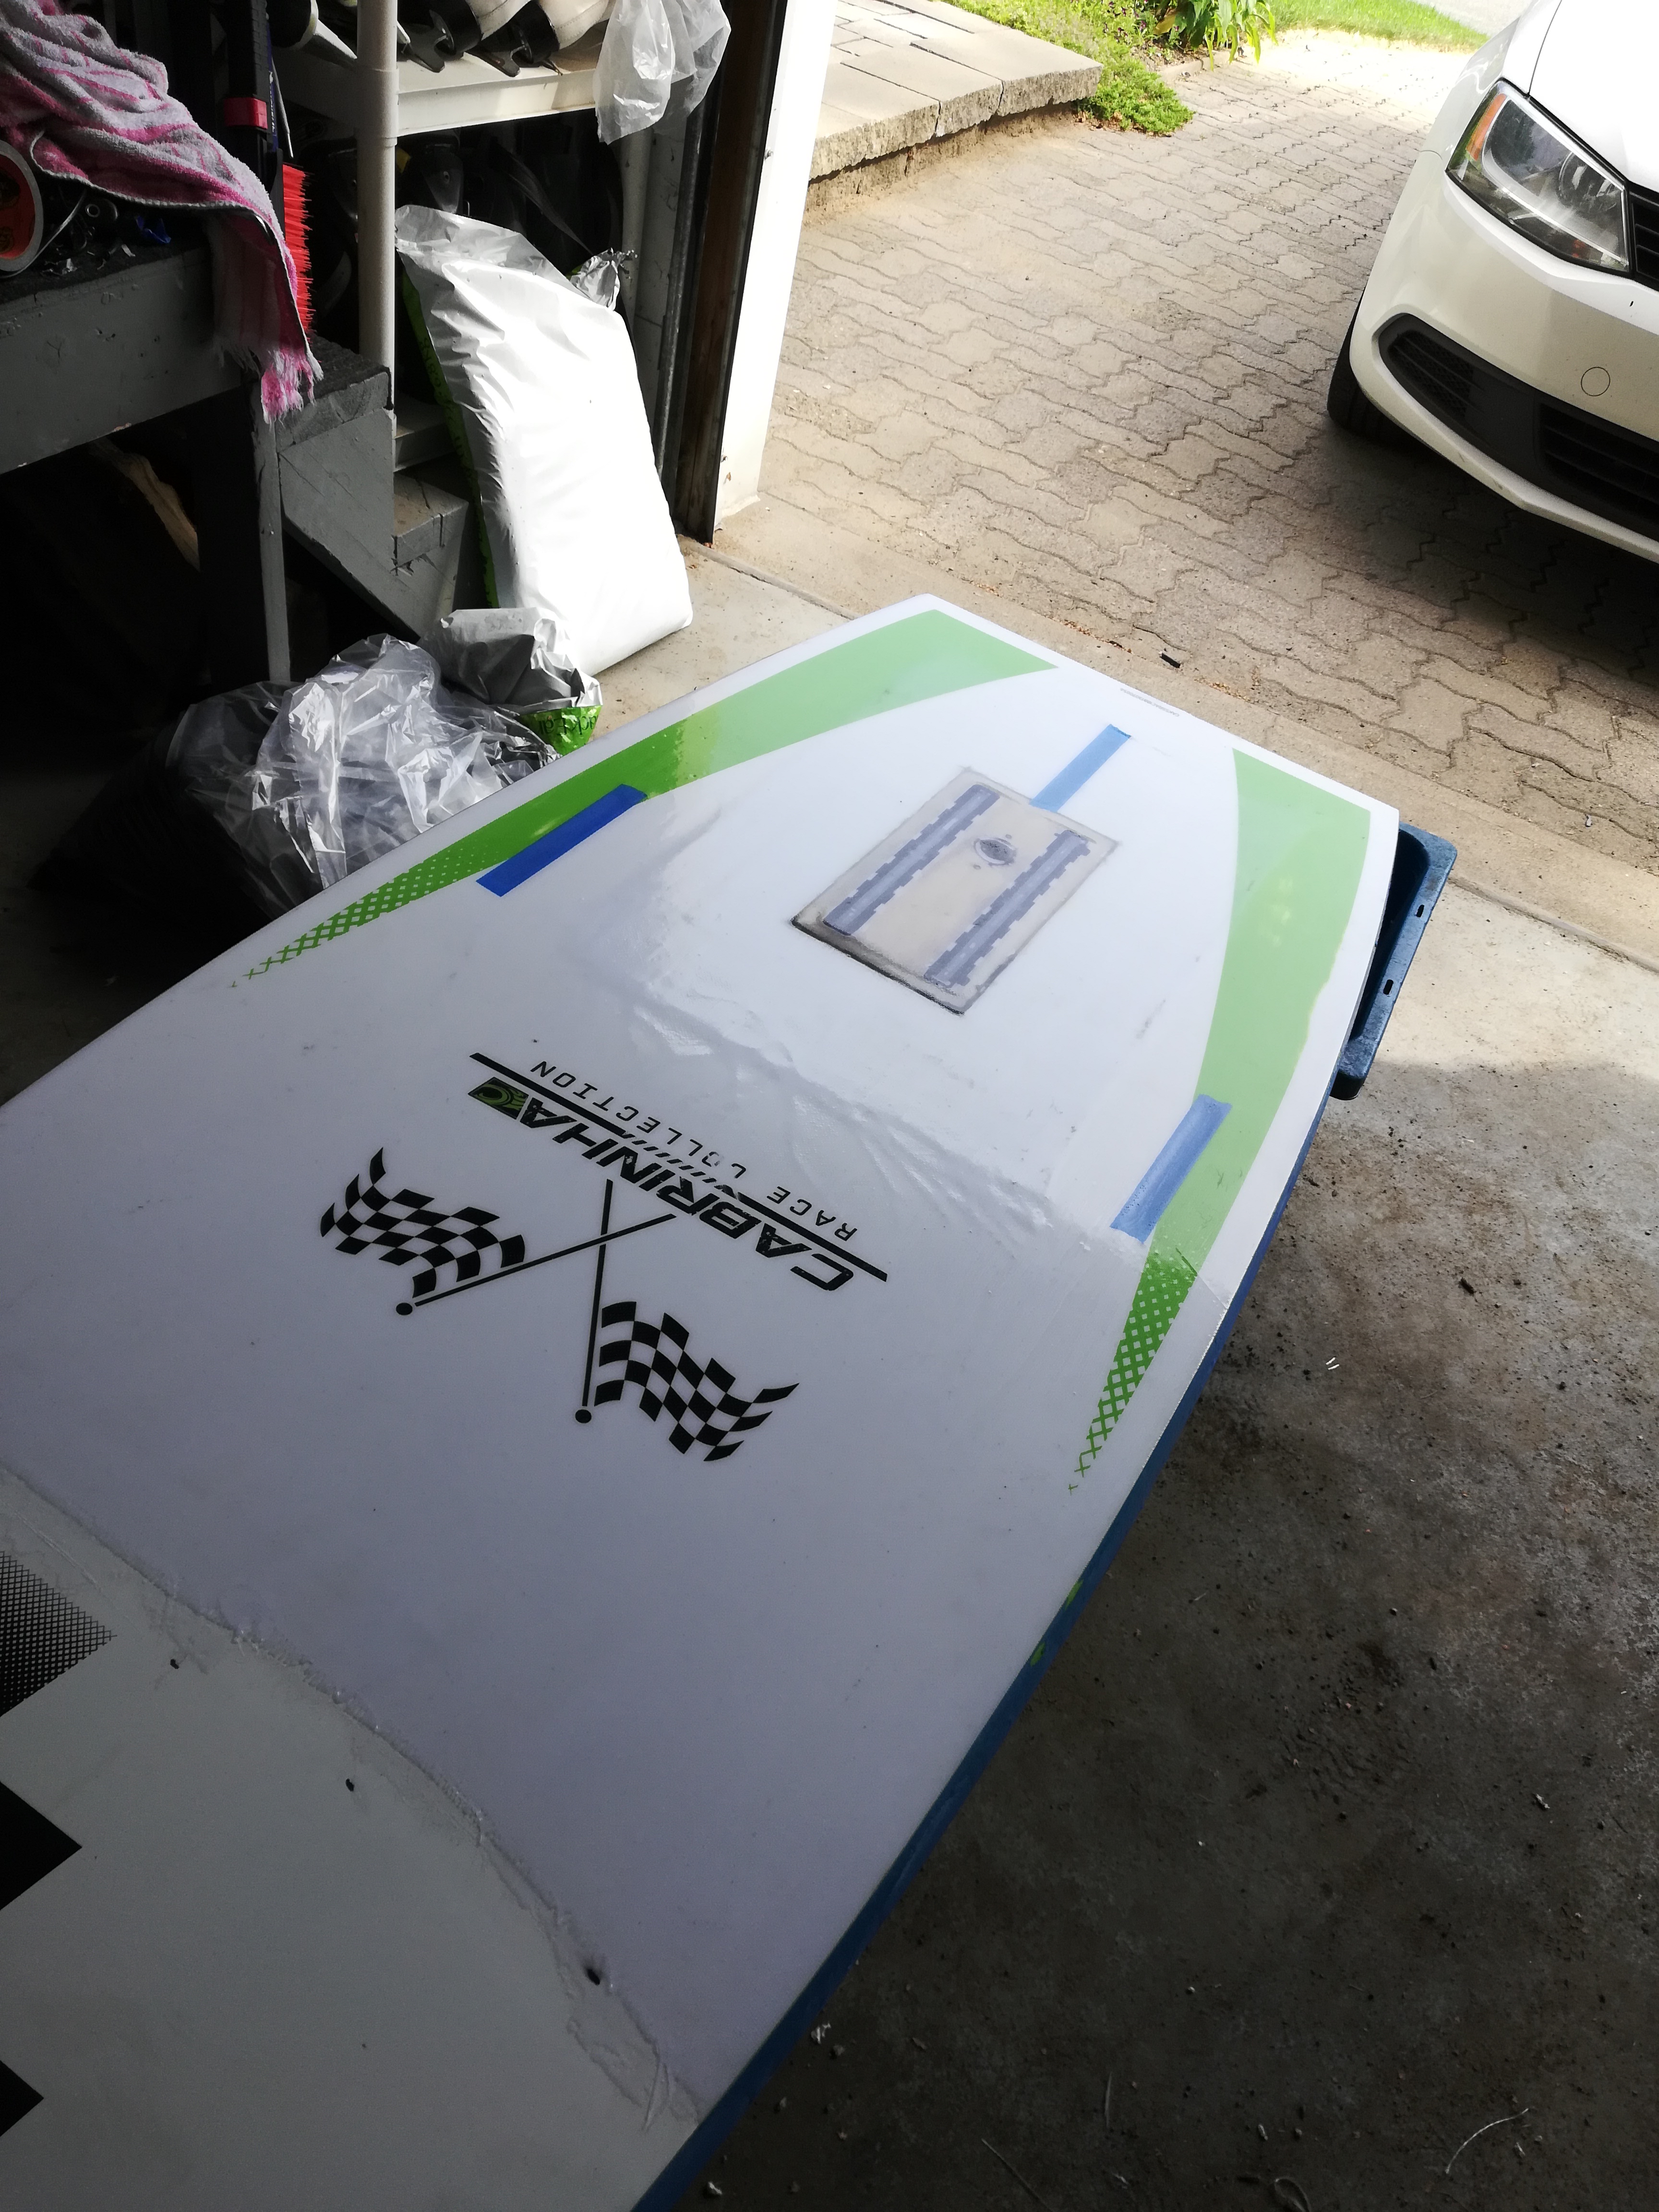
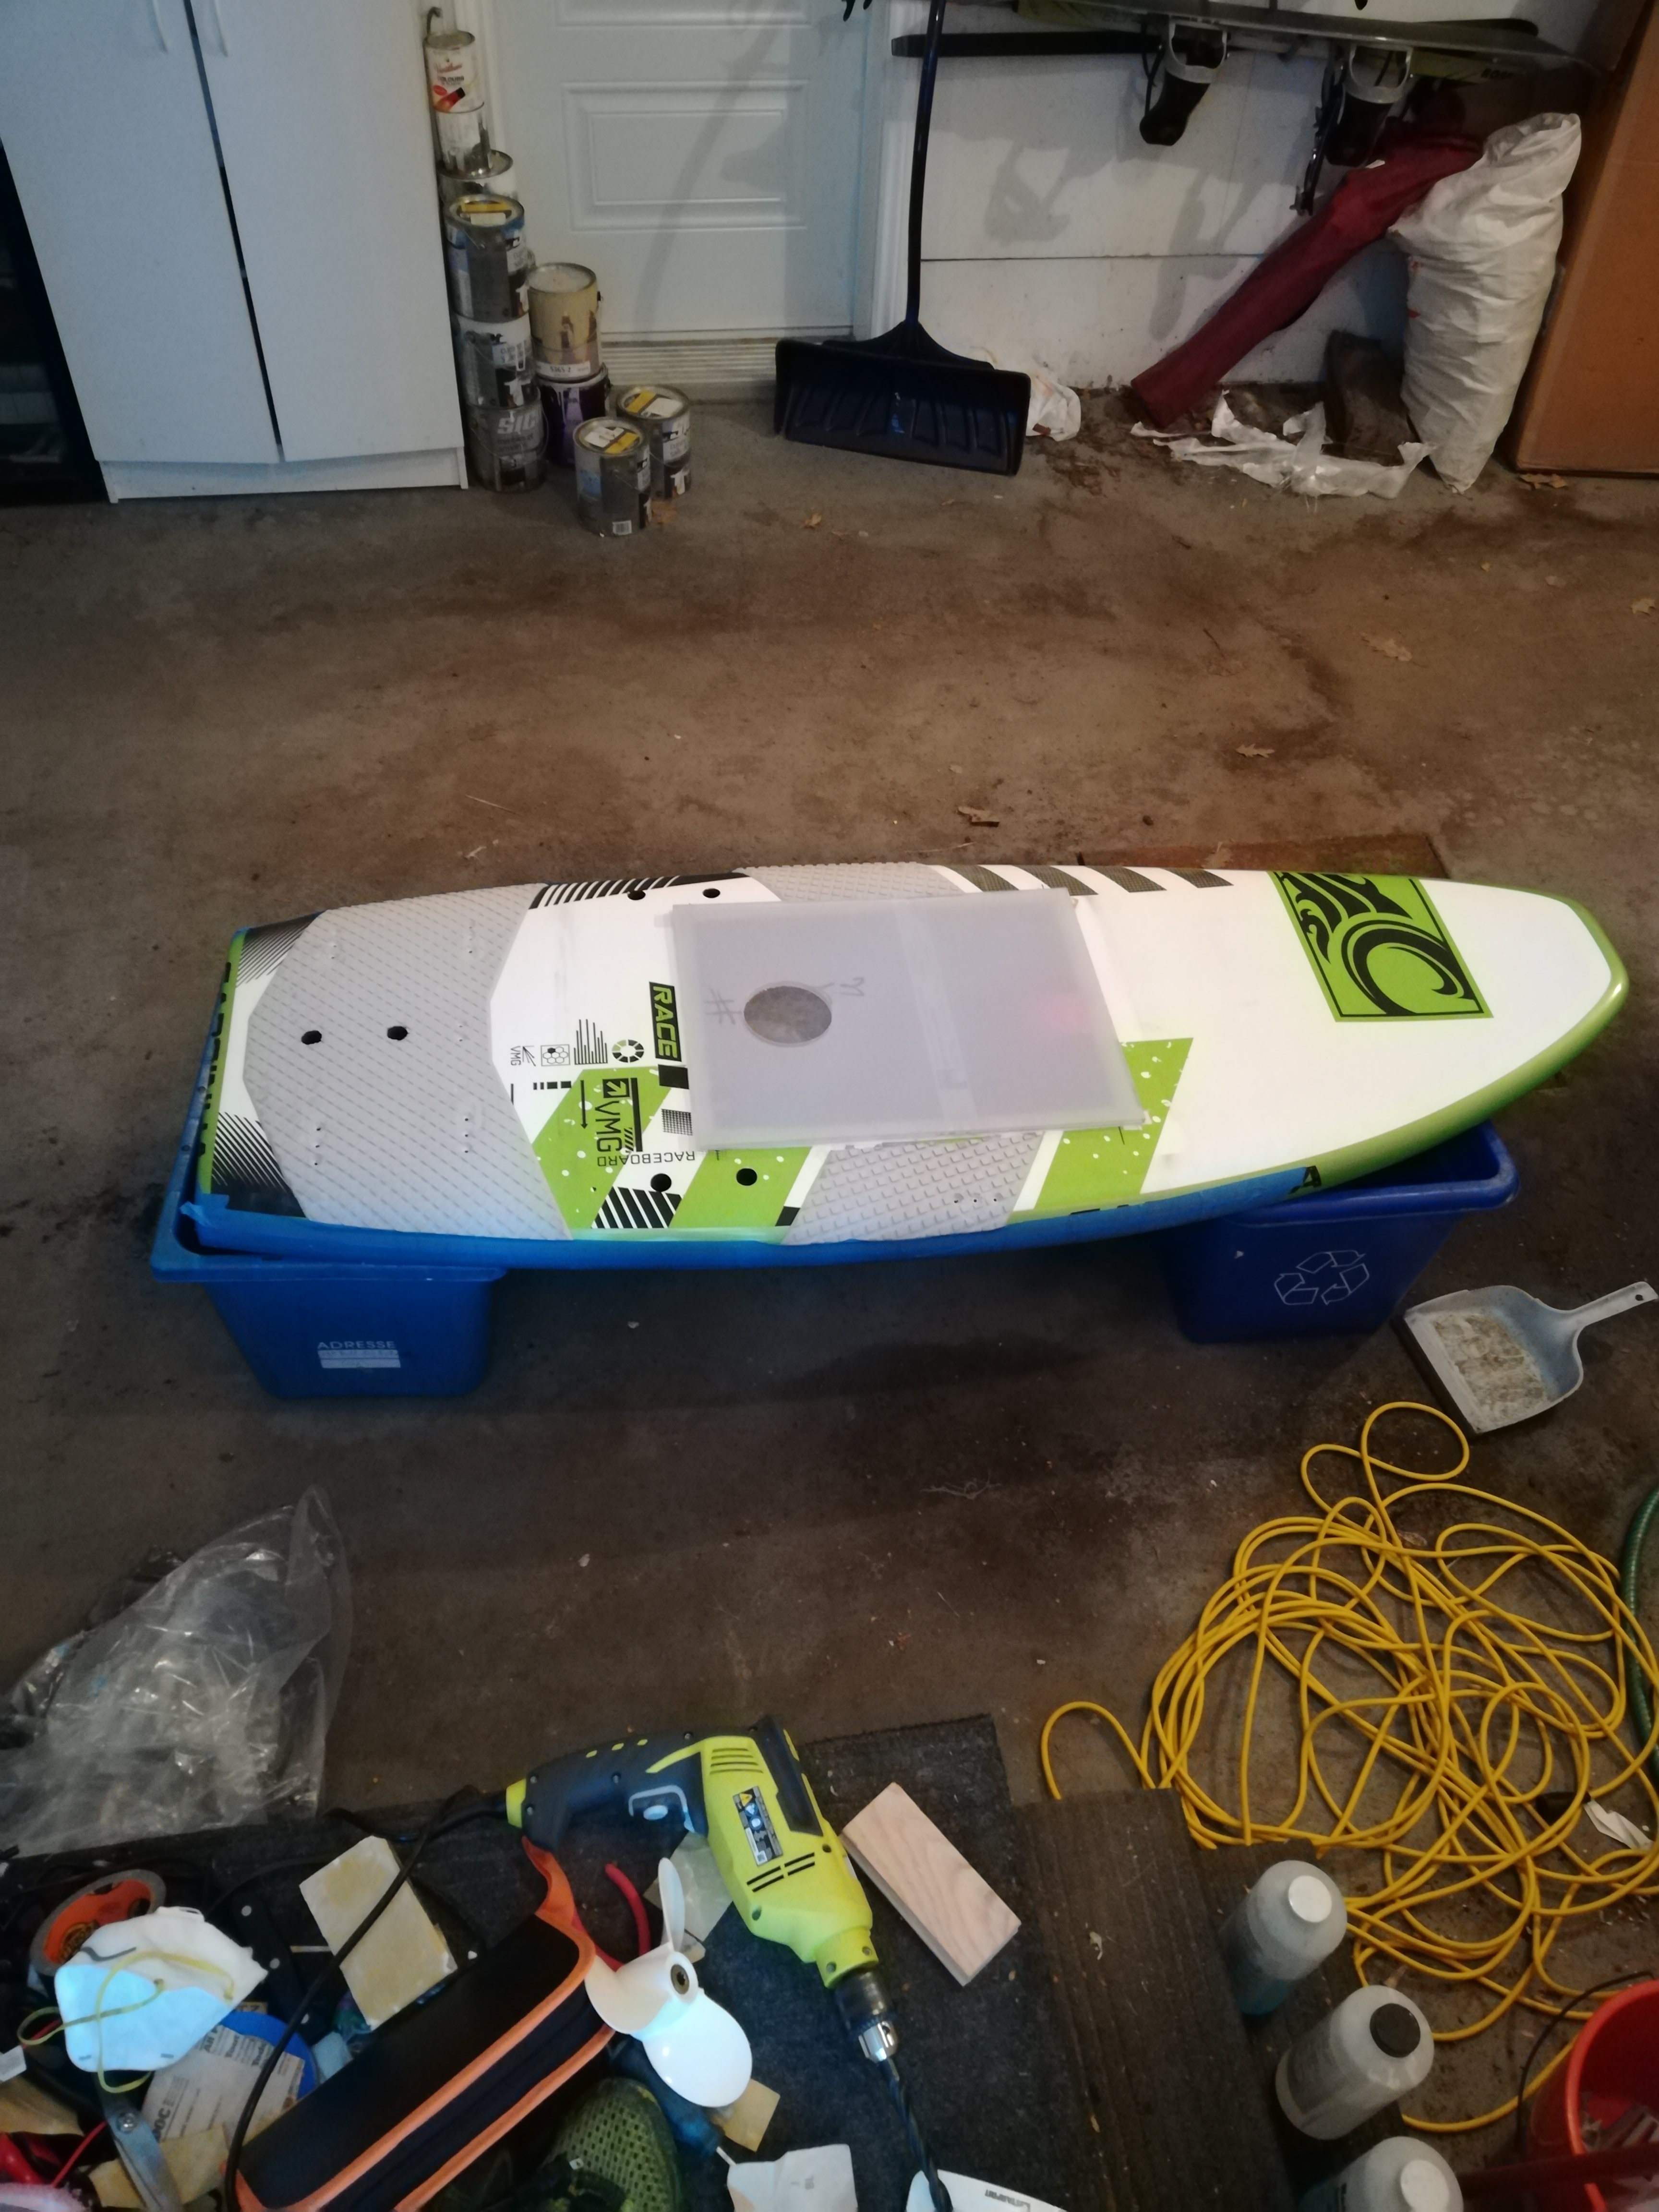
Another major update is needed at this time! I have now glassed the foil mount into the board. I have also glassed the compartment with its integrated frame which allows me to screw and unscrew the polycarbonate lid.

As for the battery pack, it is now fully assembled and almost ready to go (still have to figure out some stuff with the bms). The cells are connected in parallel using nickel strips and are connected in series using 8awg wires as bus bars. This was a lot more work than I anticipated but I’m sure it will be worth it in the end. The configuration is 14s14p of Sony VTC6 cells.
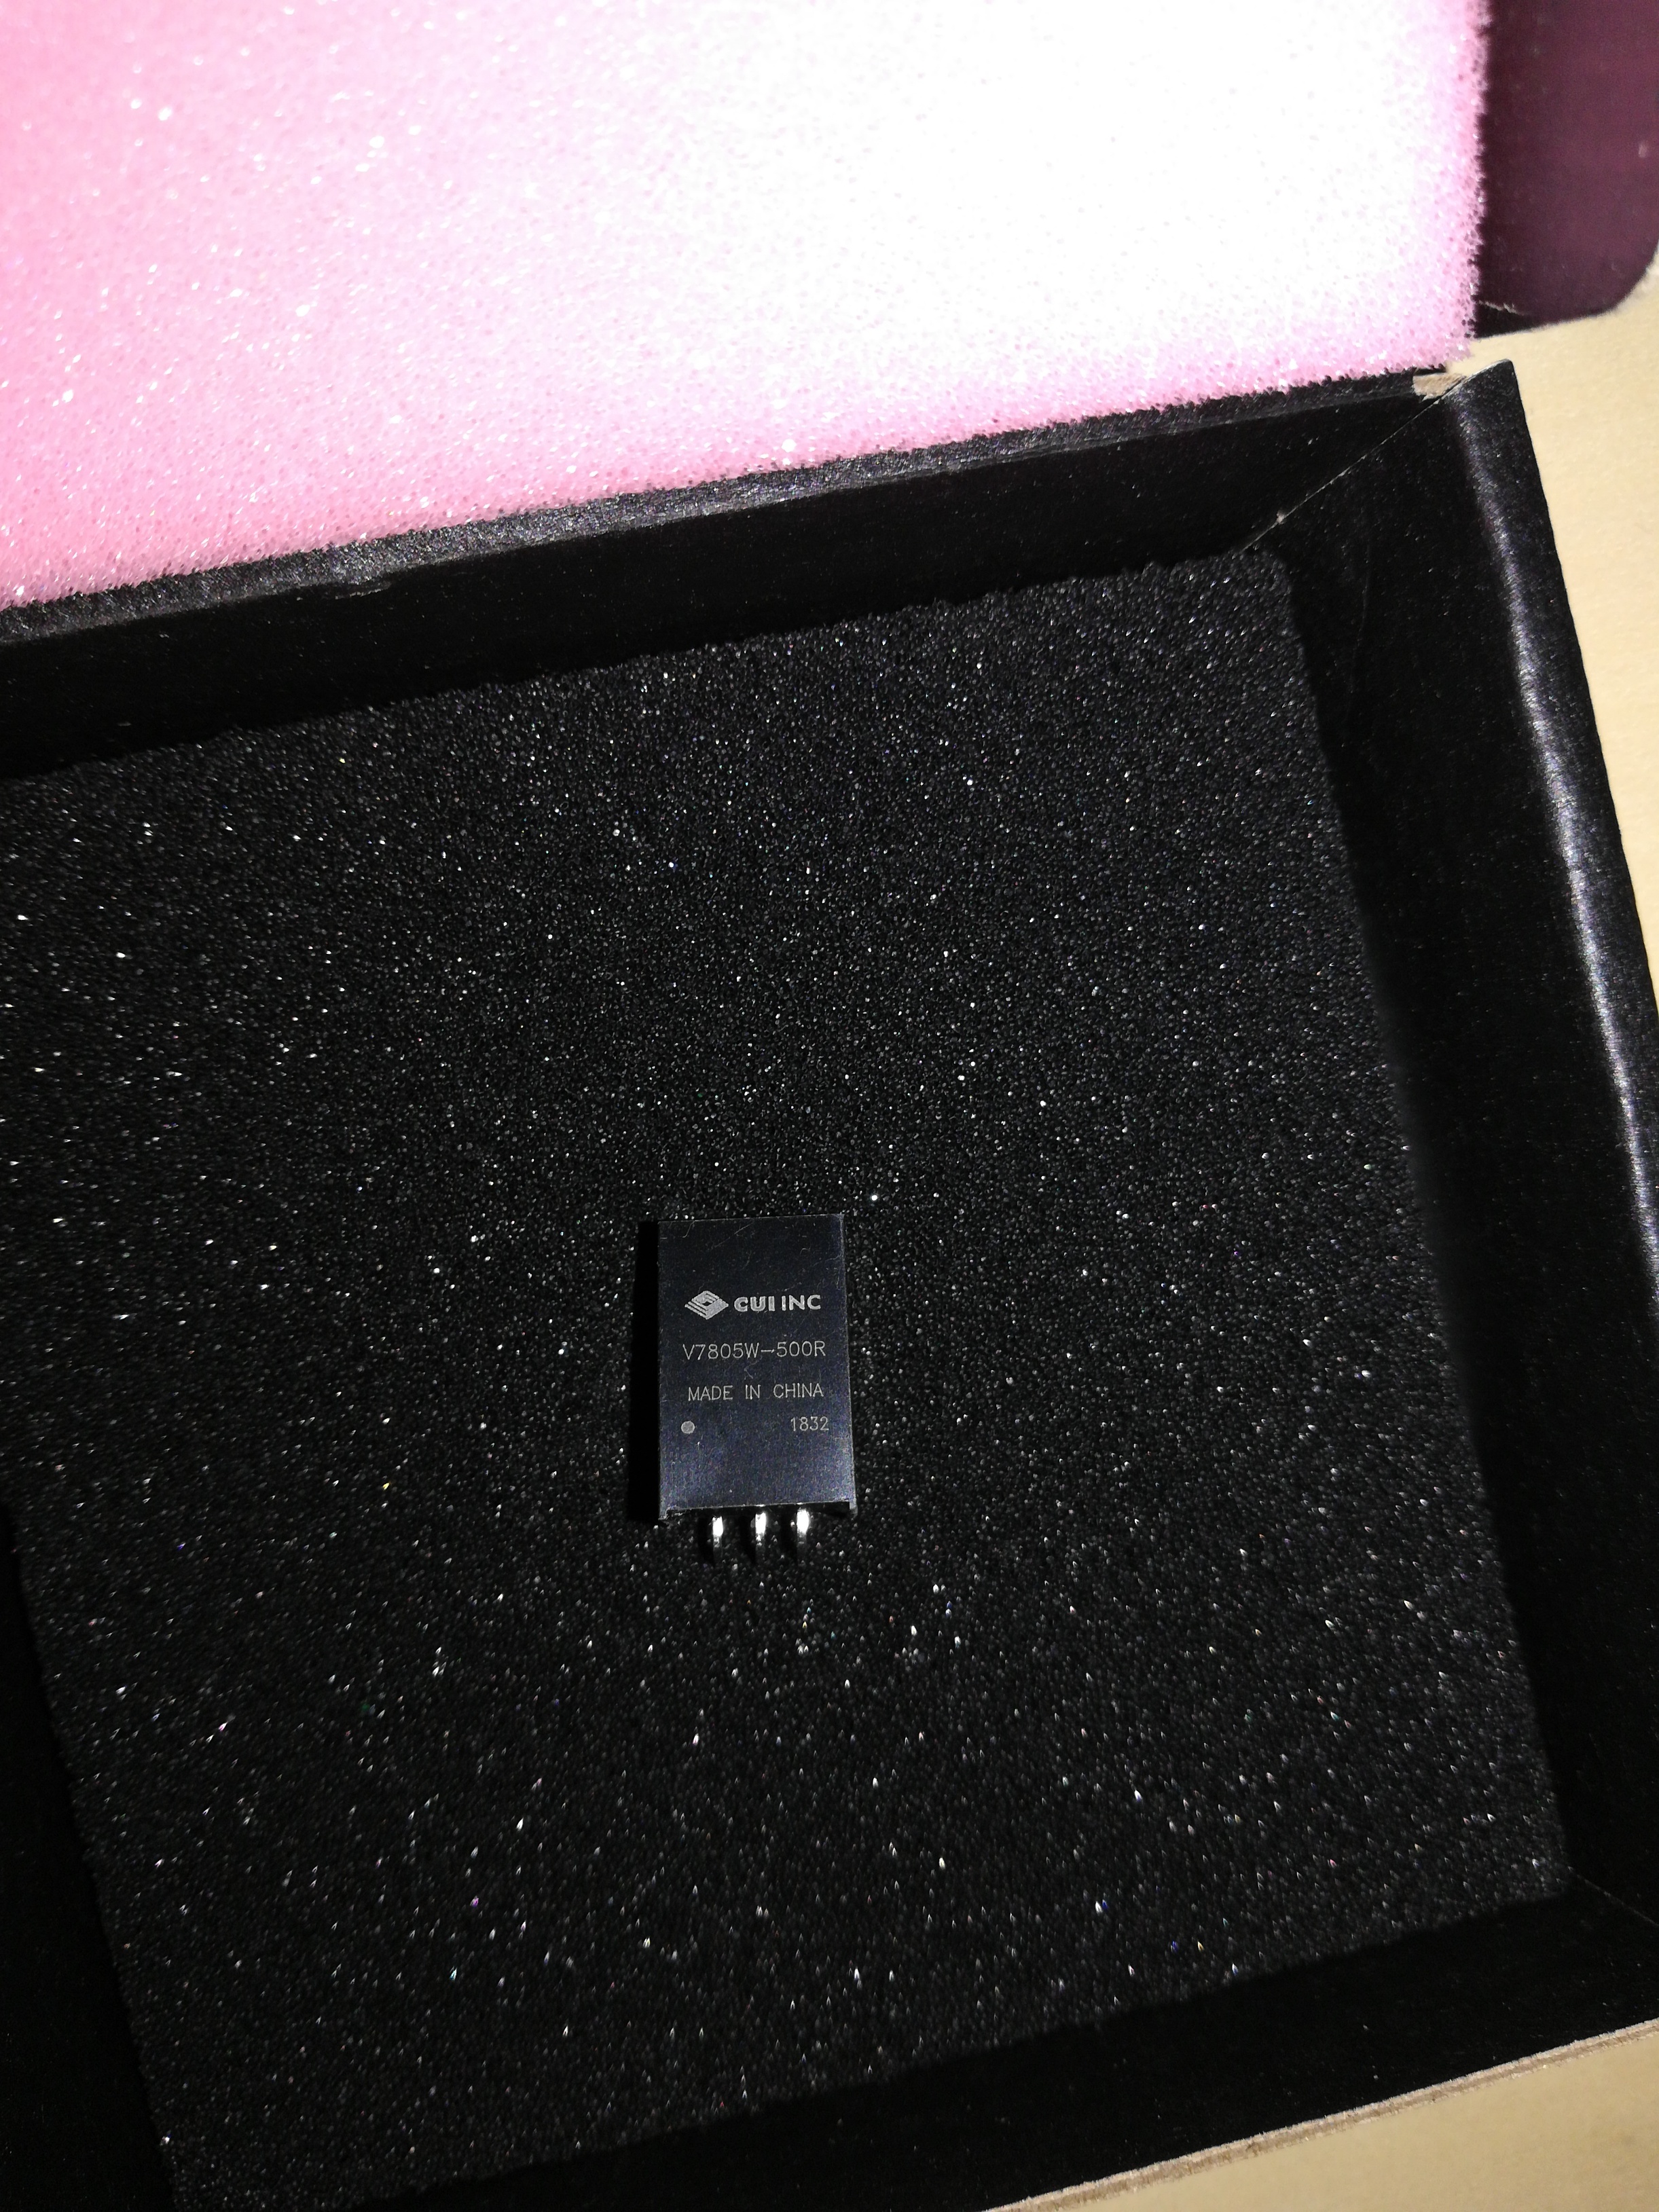
Finally, I decided to watercool the esc with a small pump that will be linked to a thermostat which will automatically start and stop it (from mat’s build @Mat). I bought step down converters that will allow to bring down my voltage to power the receiver and the pump (instead of a ubec since I’m running on 14s). However, I have no idea about how I should connect these from my battery pack to the receiver/pump. So if any of you know a little bit about these tiny things, please let me know.
Feel free to ask questions or give suggestions!!
3 Likes
Following for ideas.seems a lot of good ideas
It’s time for another update!! After testing the board for waterproofness, it was finally time to test it out on the water. I’m happy to say it was a partial success lol. I broke the water pump and the remote surrendered but I’m guessing that’s part of the process haha. The compartment didn’t leak and I was able to ride for a total of 2- 3 minutes. The main problem was that the receiver (powered with a 5V step-down converter) and water pump (powered with a 12V step-down converter) would both shut down as I was riding the board. I had to turn the whole system off and then back on and everything would start working again. Then, I would go back in the water and get another 30sec of riding time before it would shut off again. I did a test on the dock and I could get up to approx. 70a before the receiver and the water pump would cut off. I’m assuming that the step down converters didn’t like the amount of current I was pulling. Is there any other possible explanation and how can I fix this?