# YAHEF from Norway
**URL:** https://foil.zone/t/yahef-from-norway/5682
**Category:** Builds
**Created:** [September 17, 2019, 1:20pm UTC](https://foil.zone/t/yahef-from-norway/5682 "2019-09-17T13:20:40Z")
**Posts on this page:** 20
**Page:** 1
### Author:  [@YAHEF](https://foil.zone/u/YAHEF)
#### Post date: [September 17, 2019, 1:20pm UTC](https://foil.zone/t/yahef-from-norway/5682/1 "2019-09-17T13:20:40Z")
Hello fellow e-foil builders. A new build from Norway.
A few years back, I started to build YAHS (Yet Another Homemade Segway). Unfortunately, that project was not very well documented. Couldn’t find an common place like this to share and get ideas, but here are a few videos of that.
[YAHS Alpha](https://www.youtube.com/watch?v=nXzpmFrUOcw), [YAHS Beta](https://www.youtube.com/watch?v=yiXy43Up40Q), [YAHS V1.0](https://www.youtube.com/watch?v=PwID8jIGUyI)
Last year I saw a clip on YouTube of an electric hydrofoil and fell in love, so the dream of YAHEF (Yet Another Homemade Electric Foil) was born. Early this year I invested in a few basic things, like a 3D-printer and started to play with Fusion 360. During the year, more and more parts has been collected and now, I’m ready to start building and aiming to have my maiden voyage in April, May next year.
**Drive Train**
TP4070 motor, Reisenauer Chief 5:1 gearbox.
Filpsky FS65161
I will go for the Flipsky in my first build.
**Propeller**
Tbd
**Battery**
Using my old YAHS batteries for testing. Buying new ones later on.
**Board**
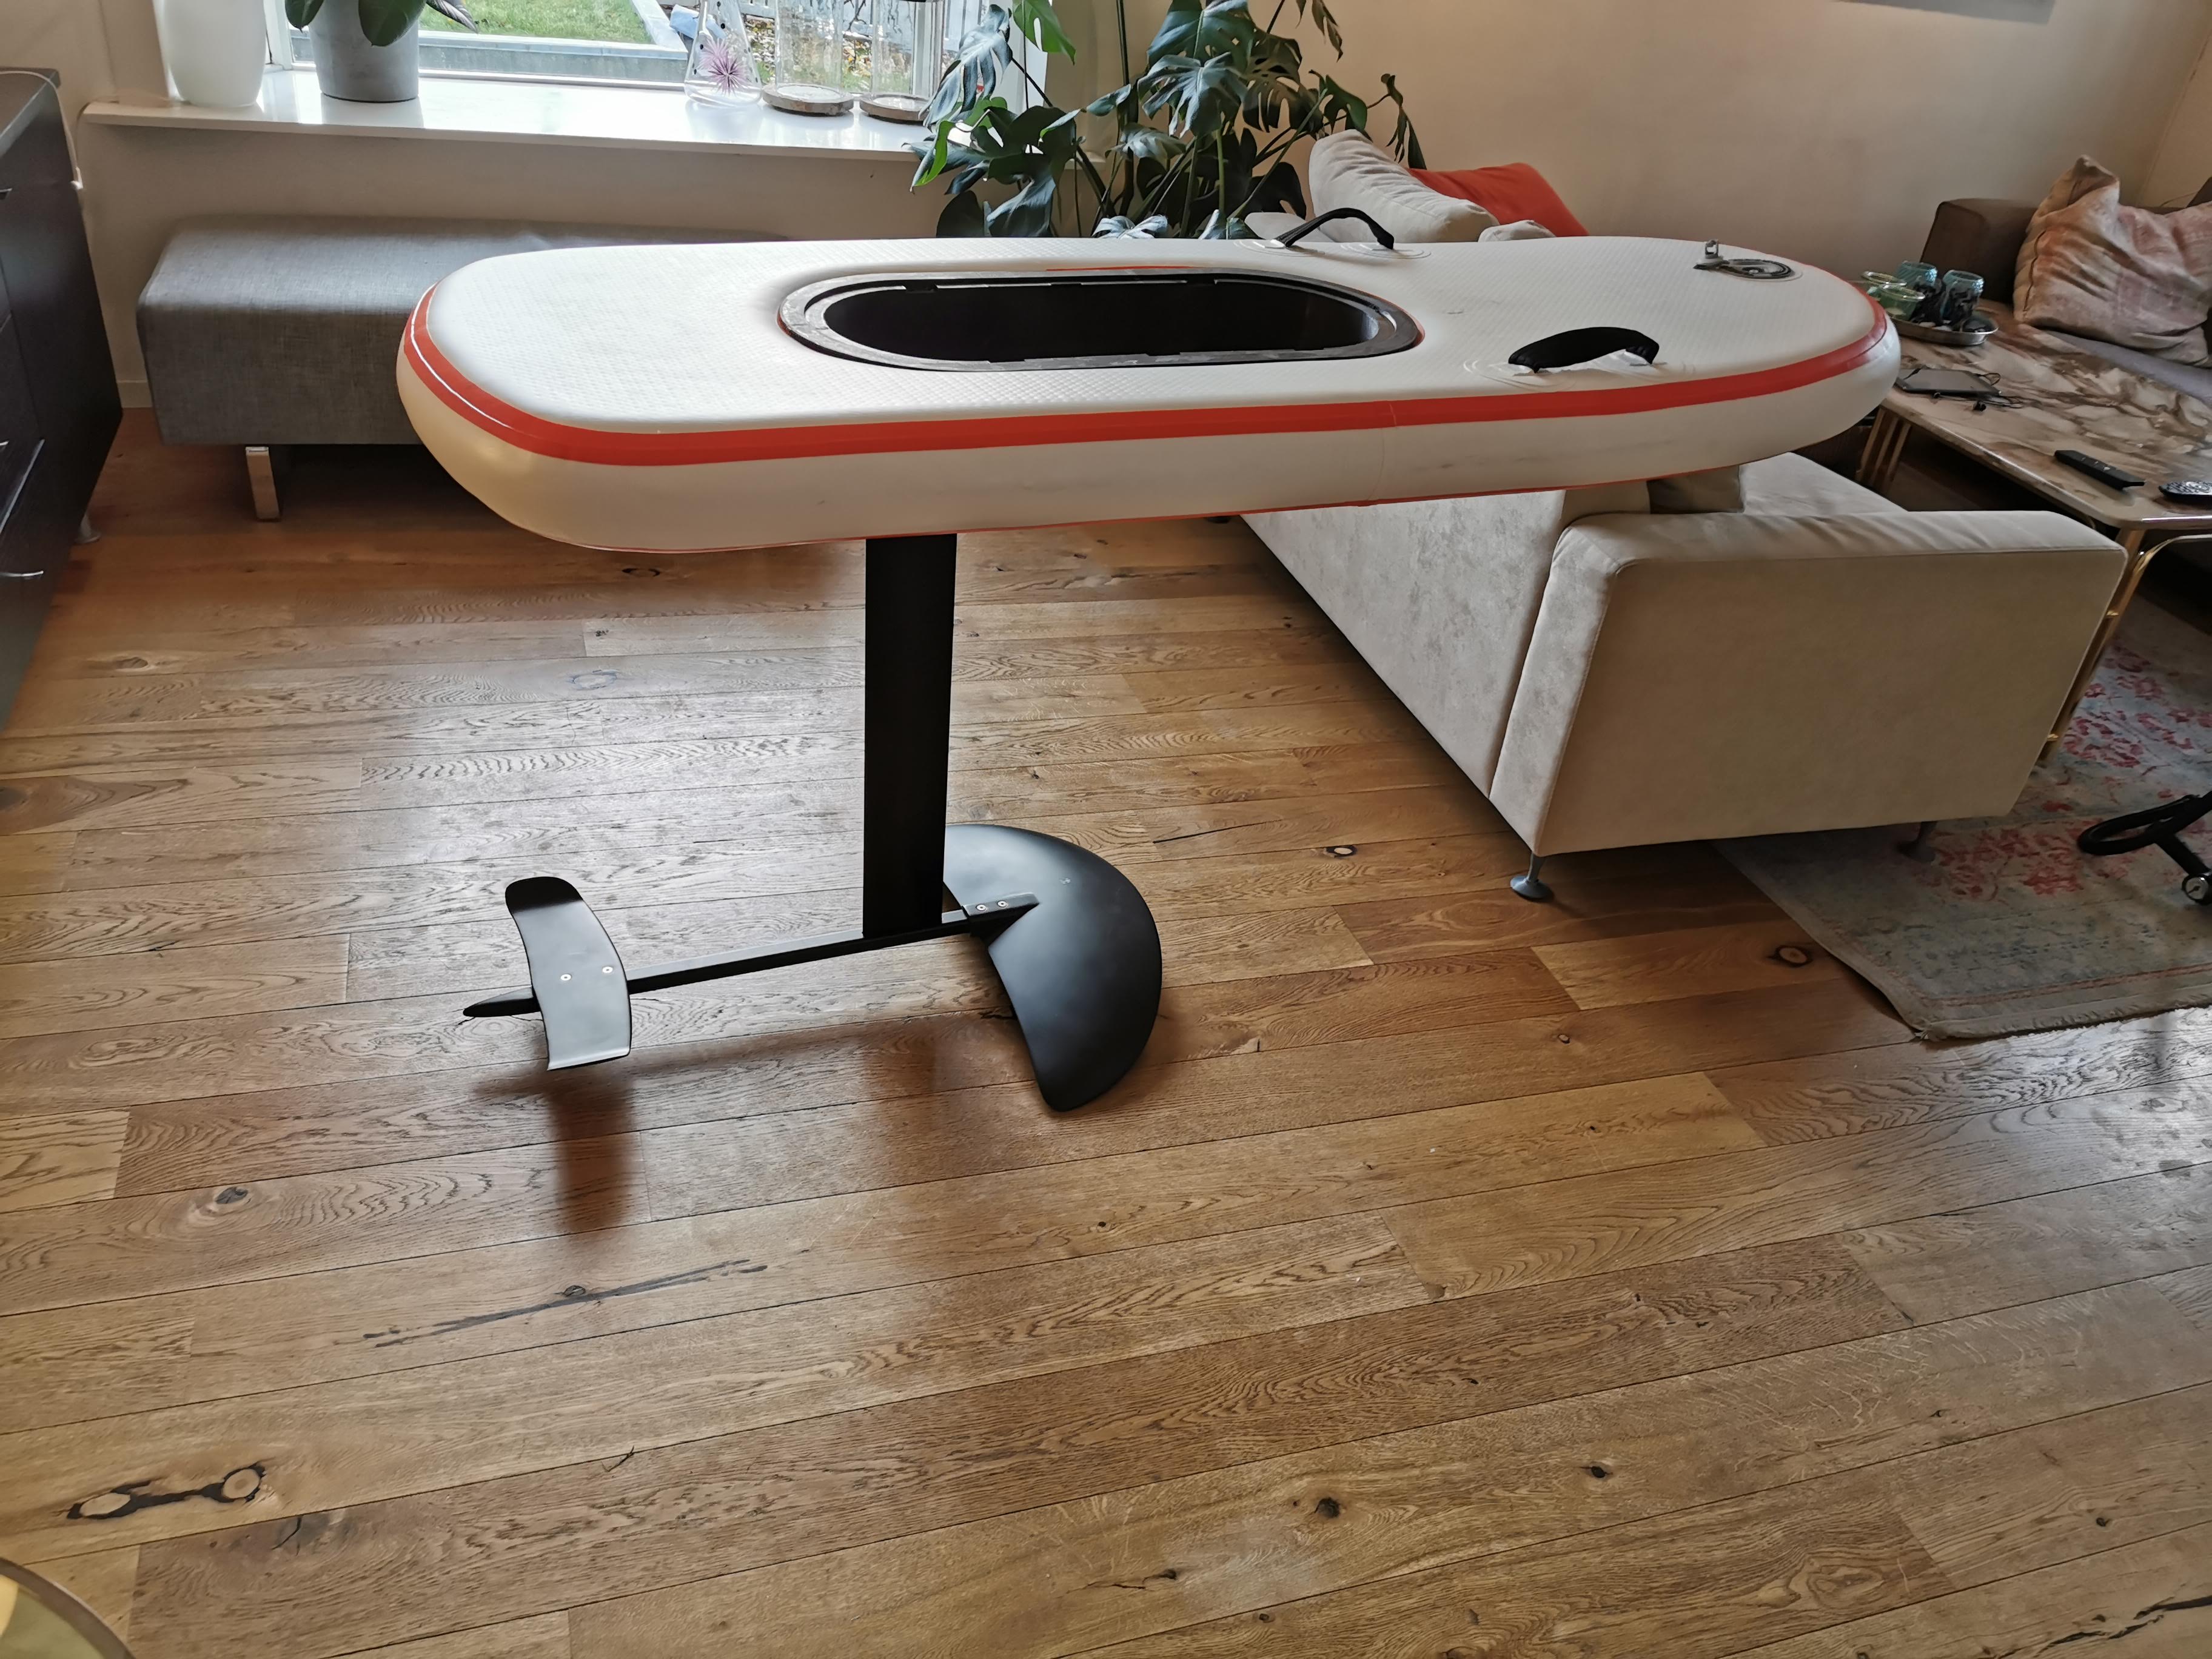
Chinese inflatable [aliexpress.com](https://www.aliexpress.com/item/33008415864.html). The only one they had was a sample, 180 x 72cm with 71x30cm hole. Ideally a smaller one is prefered but this one will at least get me started.
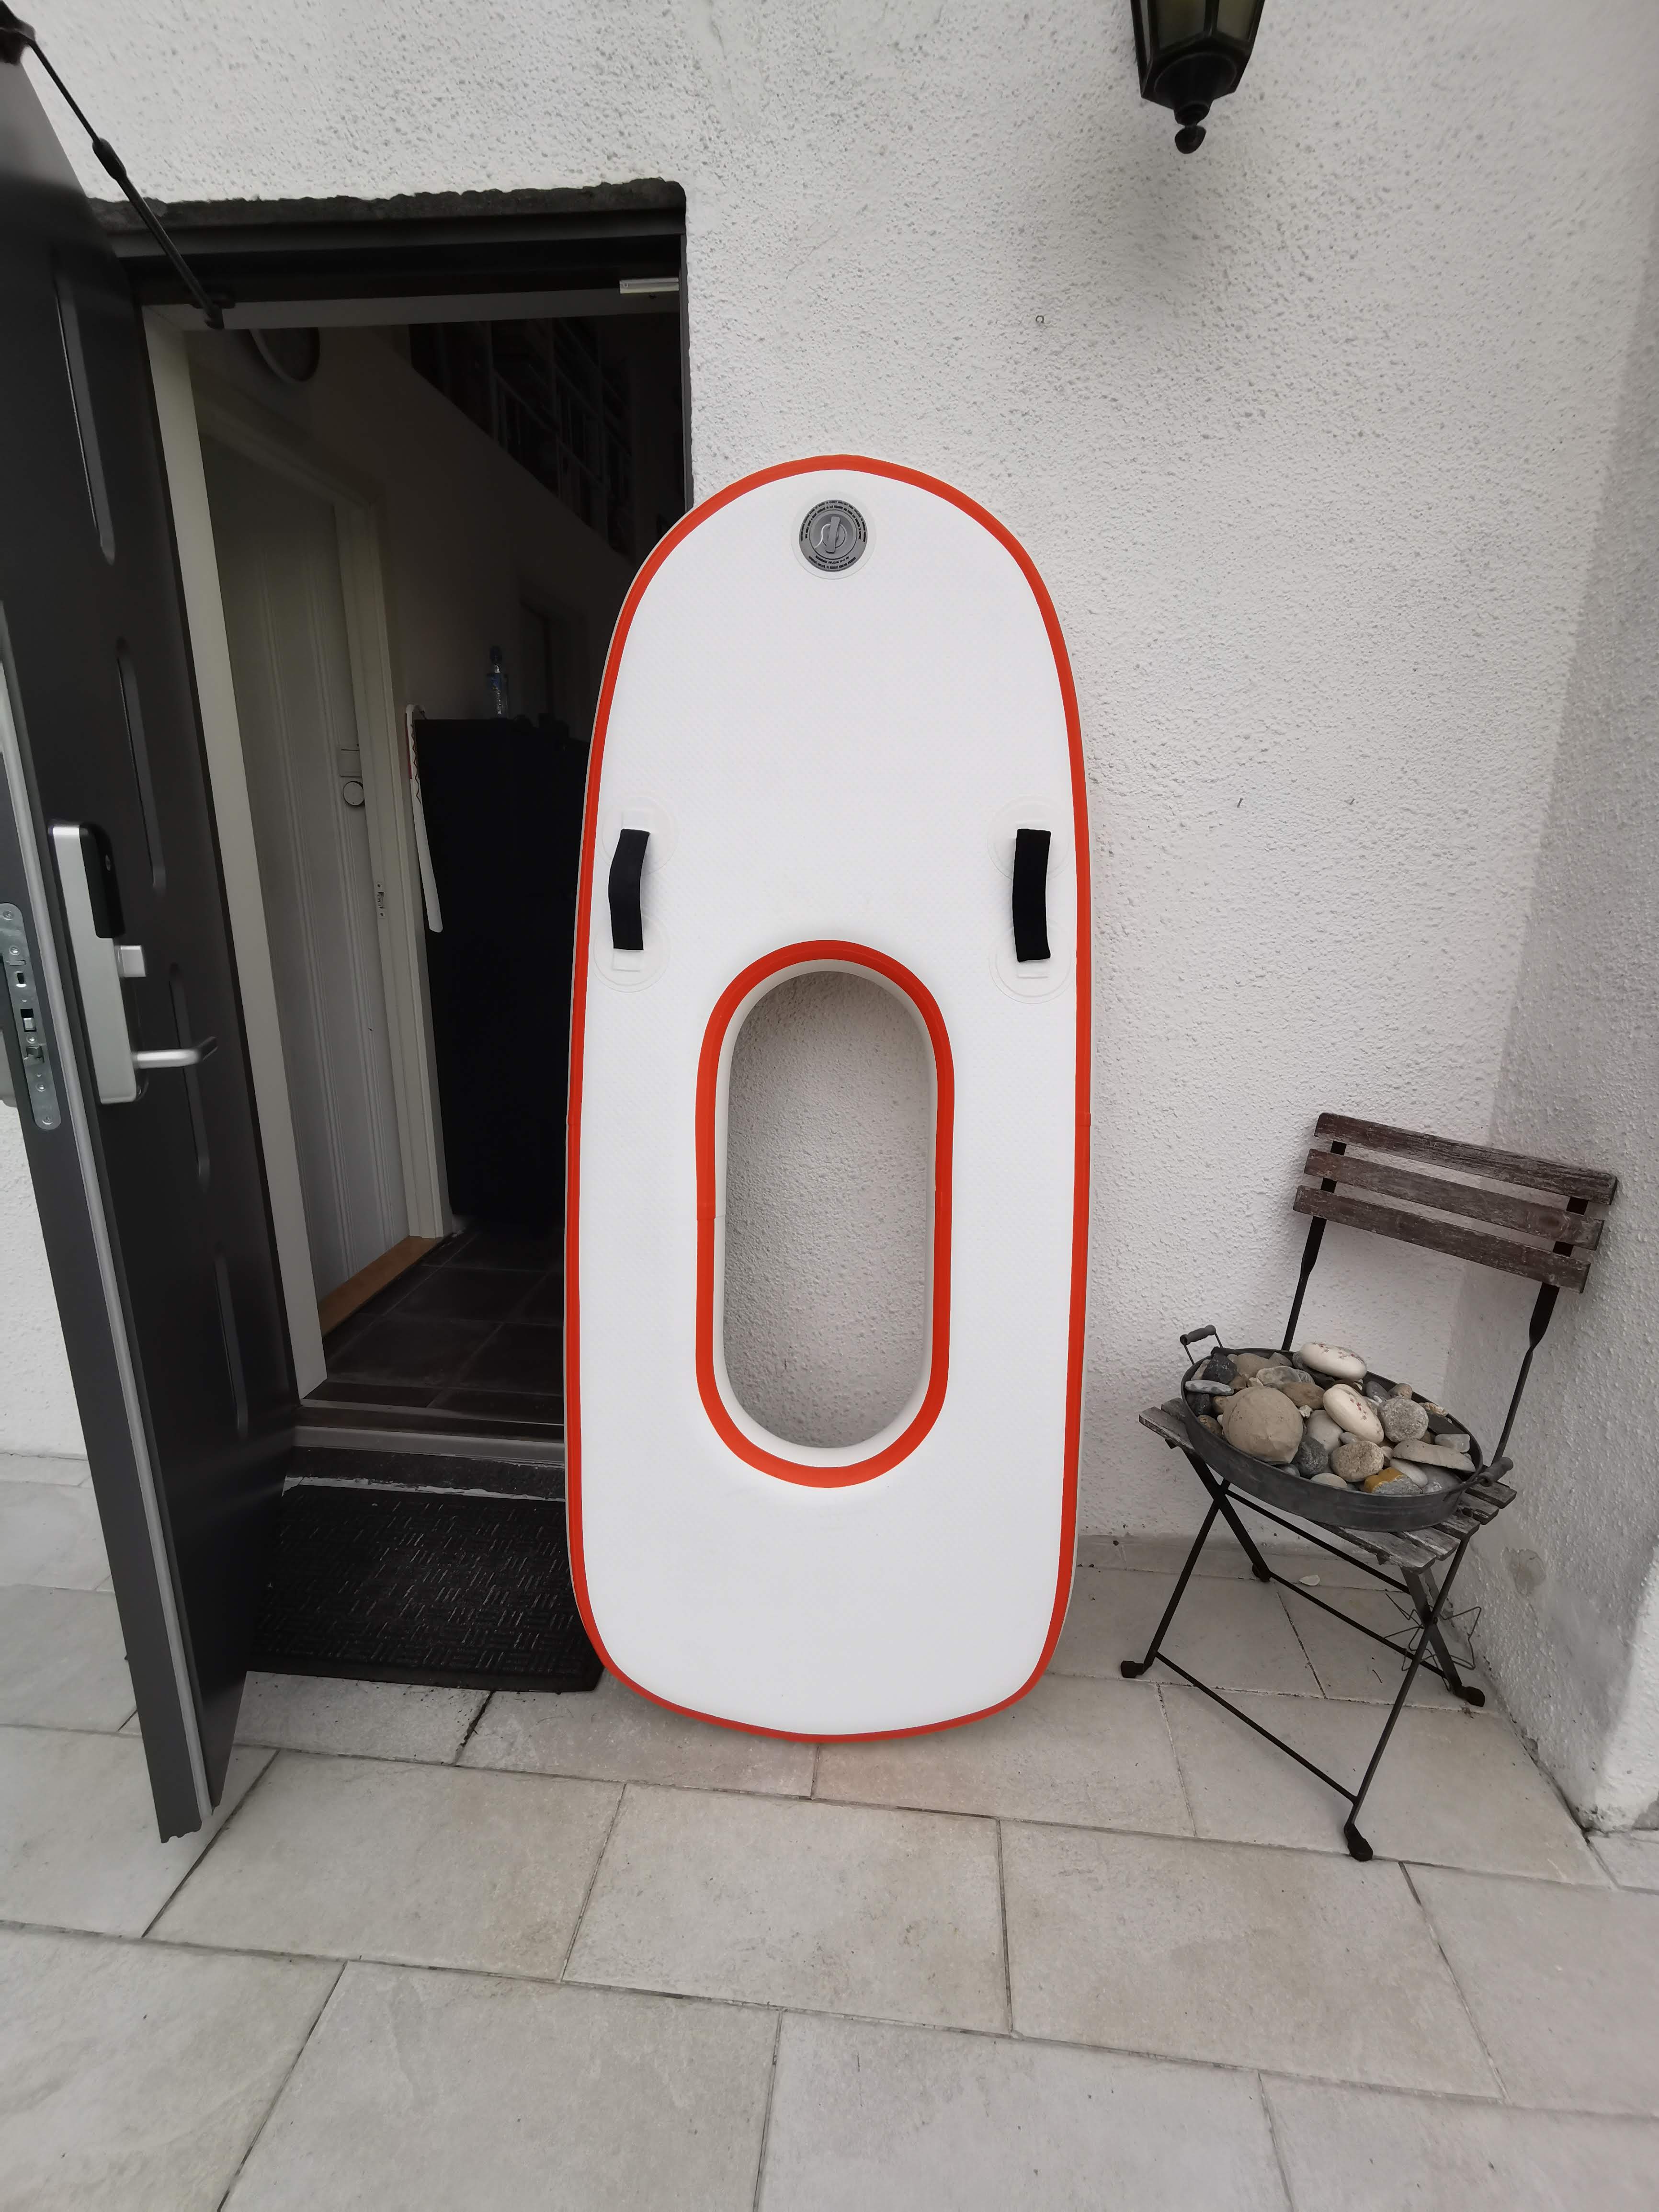
**Board Box**
Well, haven’t seen any stock box. DIY is the way to go.
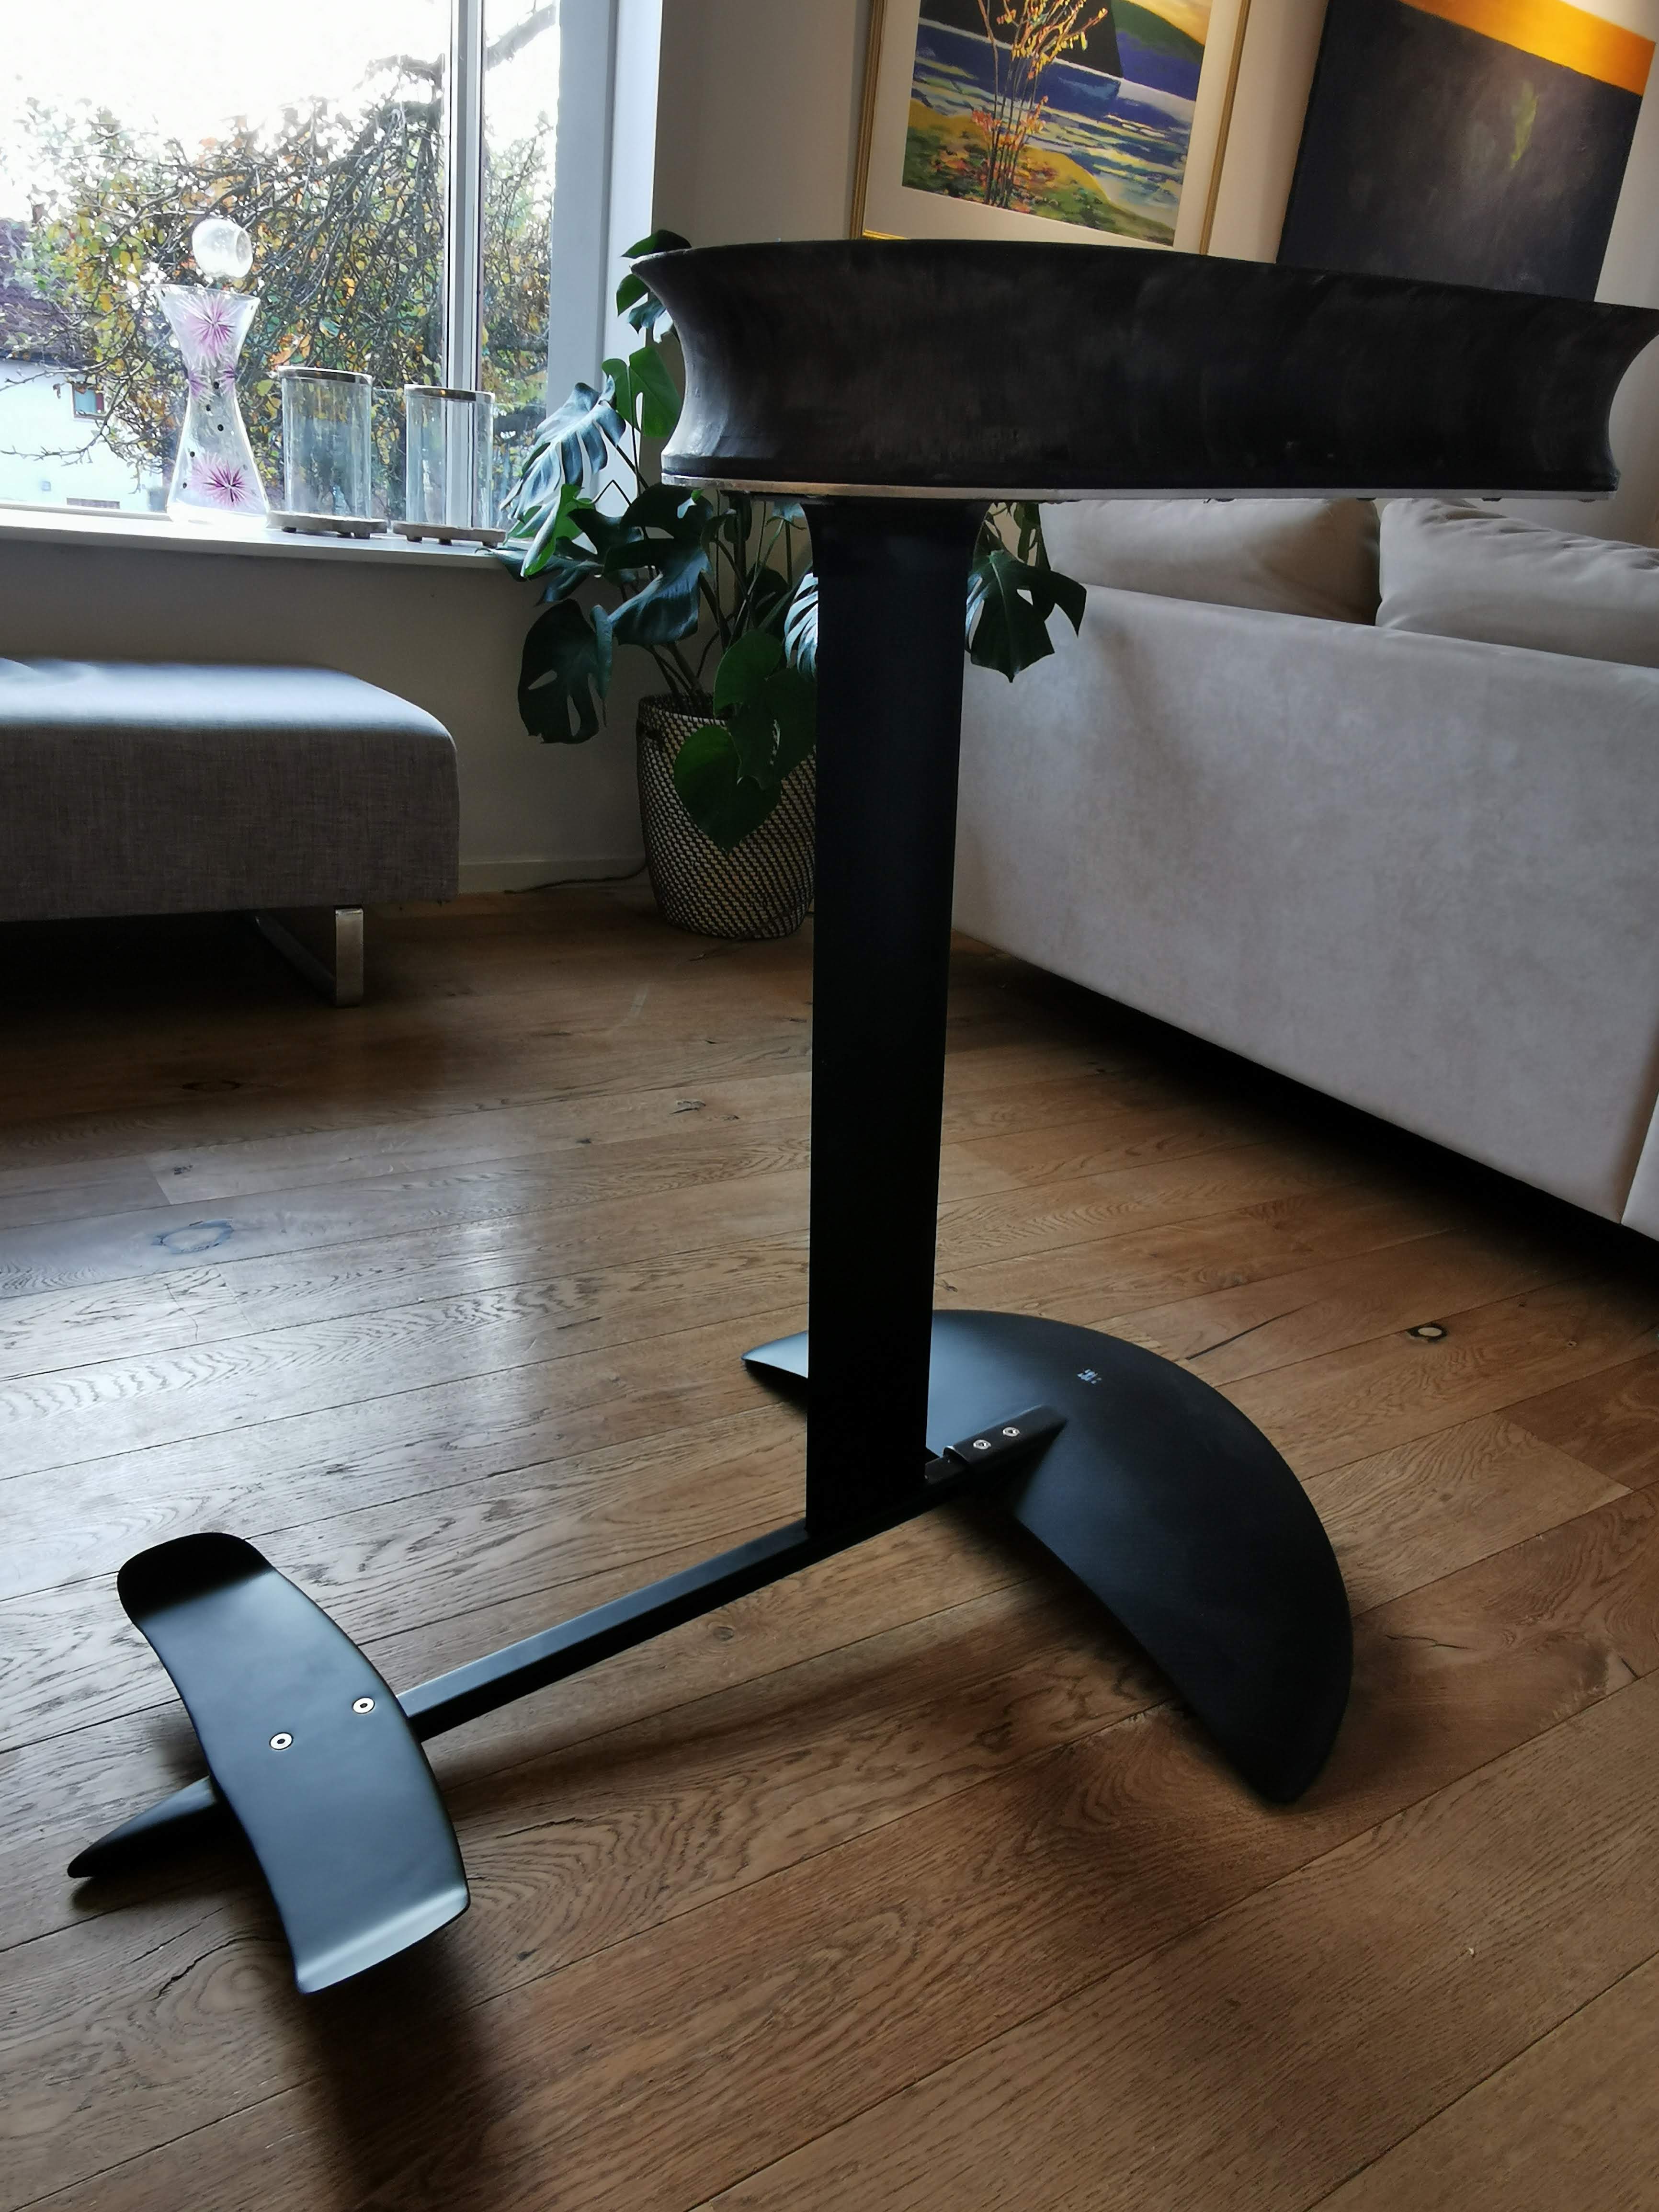
**Foil and mast**
Chinese JNJ on AliExpress. [aliexpress.com](https://www.aliexpress.com/item/32857409005.html?spm=a2g0o.productlist.0.0.3db875e389fVcJ&algo_pvid=de799e54-b9c7-4f89-bb6c-98c064129f1d&algo_expid=de799e54-b9c7-4f89-bb6c-98c064129f1d-0&btsid=da3fba89-3d5f-4f59-ab98-61718b07dec3&ws_ab_test=searchweb0_0,searchweb201602_7,searchweb201603_53)
**Board Electronics**
Flipsky VESC 200A 60V watercooled
Teensy 3.5
GPS
Bluetooth master
MPU 9050 gyro/accelerometer
Water pump
Water pump motor controller
Flow meter
Various Dallas temperature sensors
Reed switch
150A Automatic Fuse
200A Solid State Relay
60V - 12V 15A step down for air- and water pump
12V car output for inflating the board with an electric pump
**Remote Control**
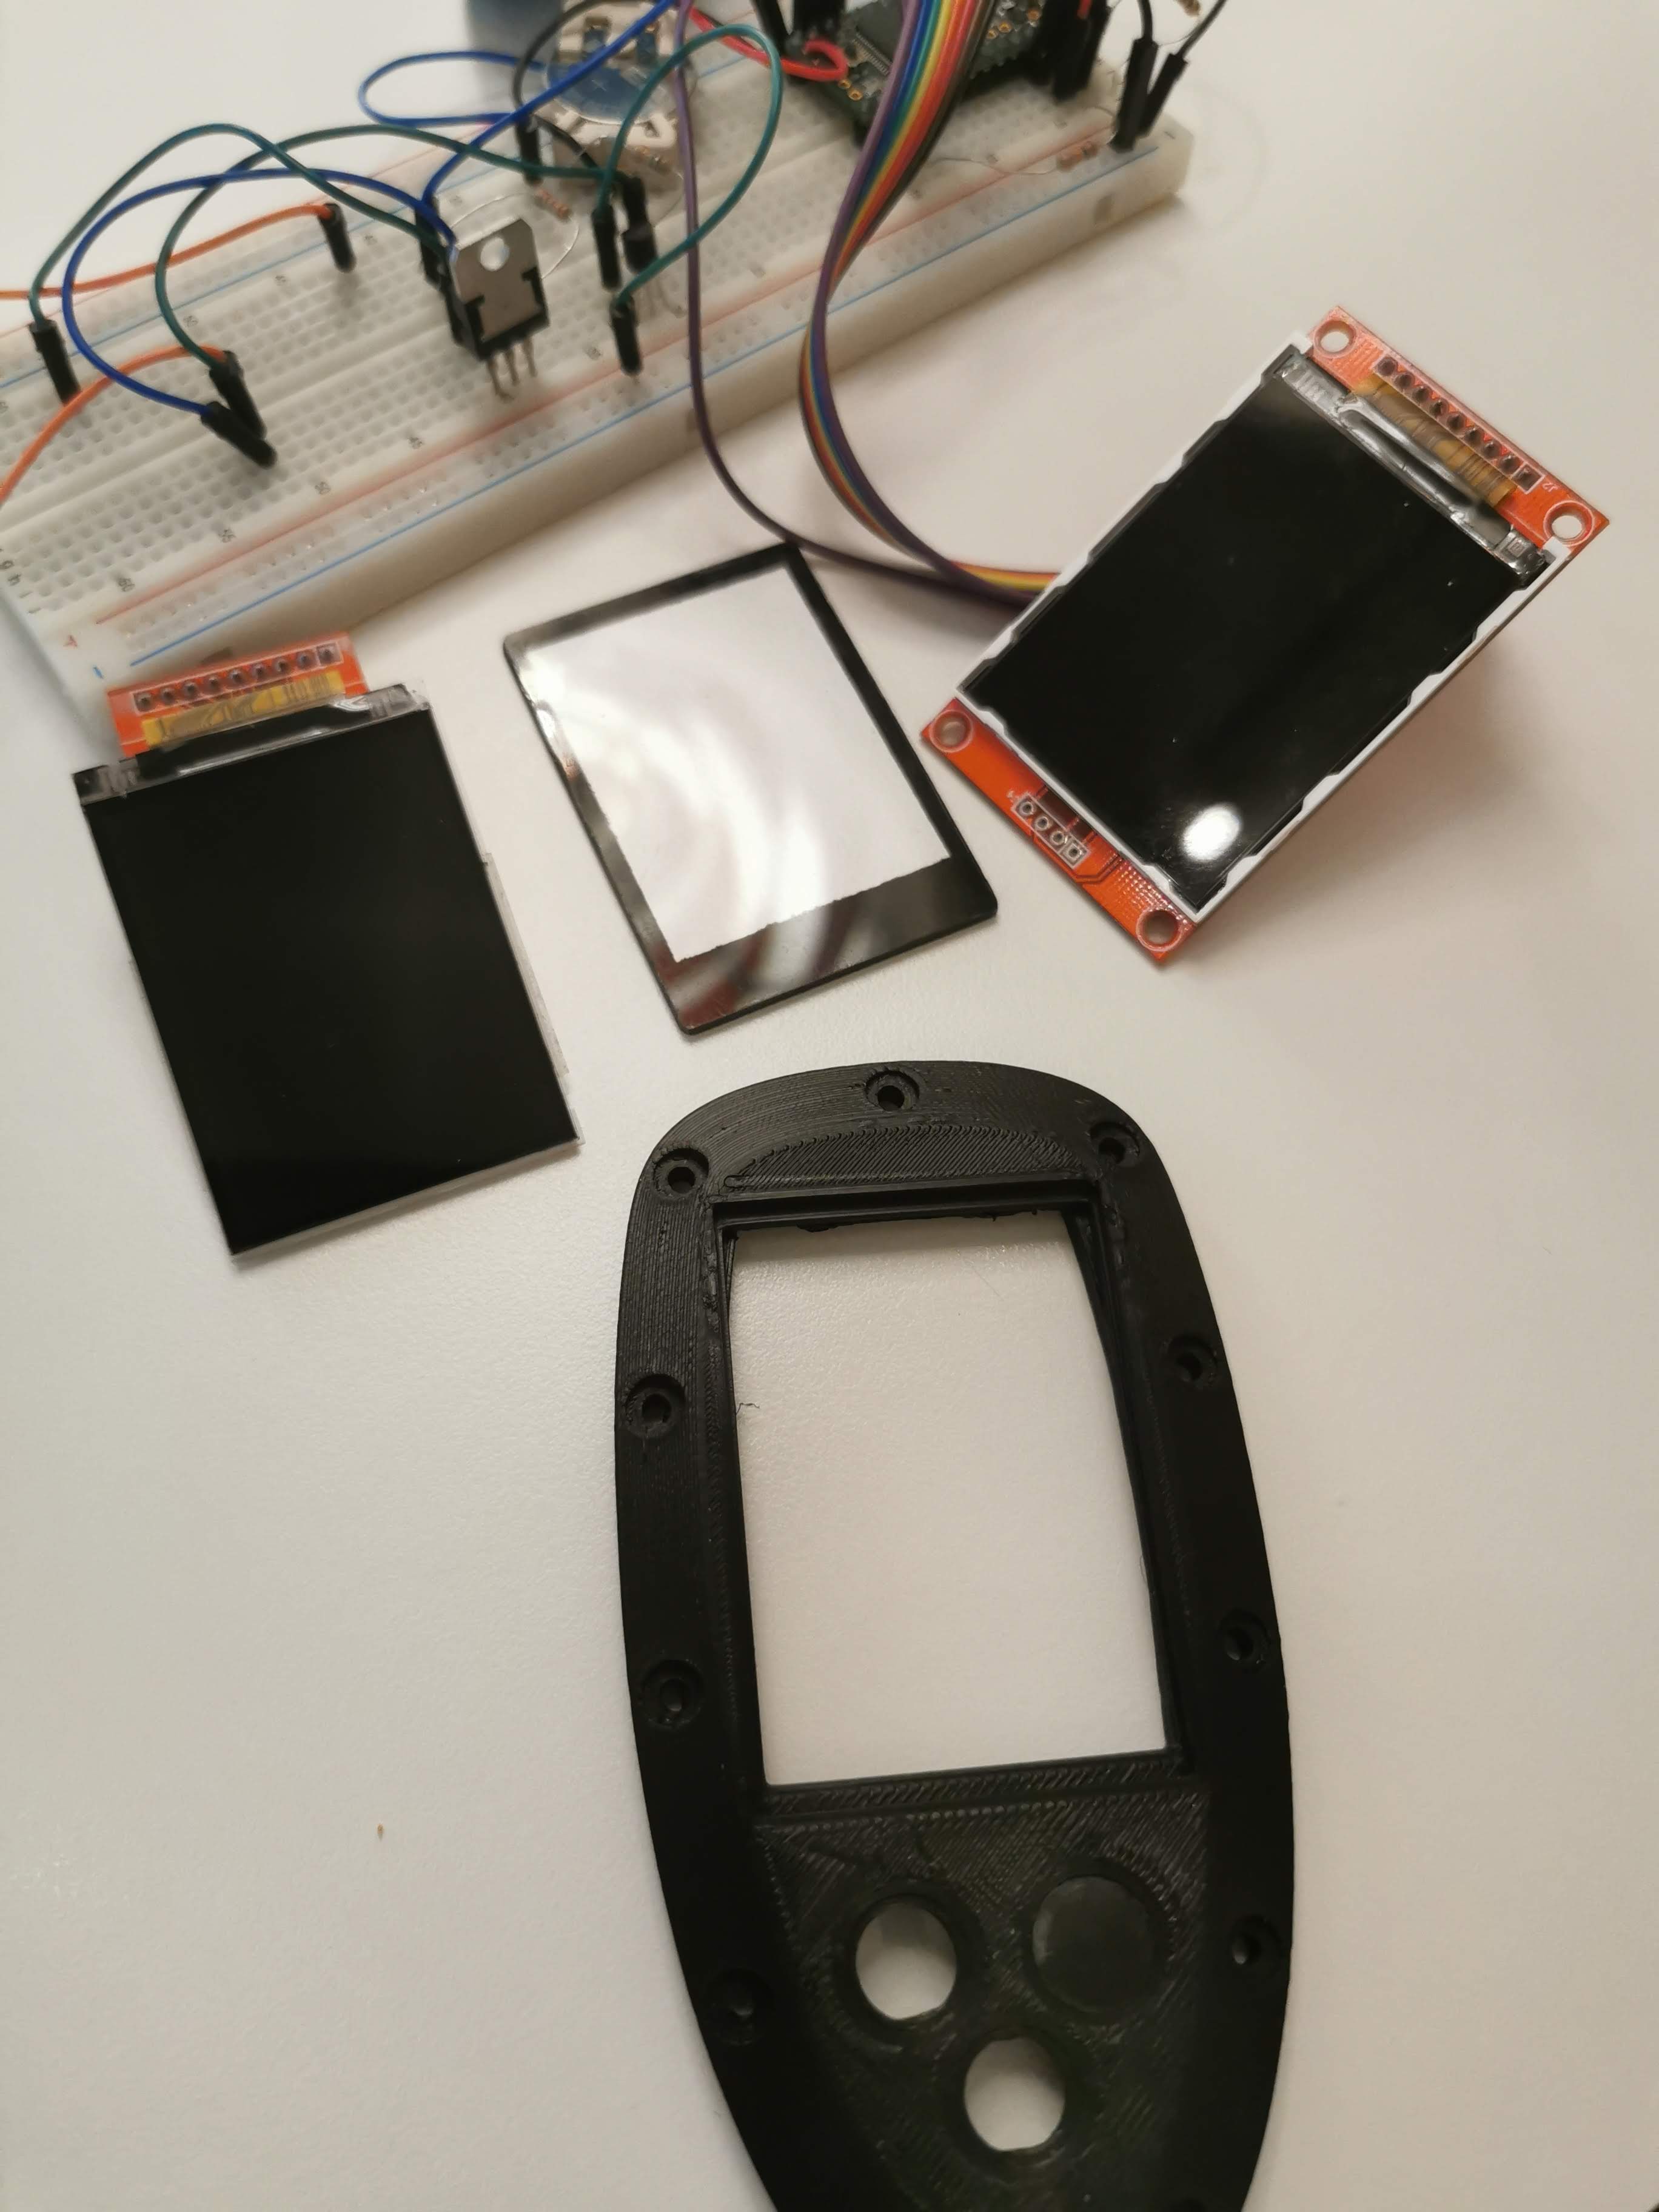
I’ve barely started with the remote control, based on @Hiorth design. The lid is changed to house a 320x240, 2.2 inch display and a navigation button. The goal is to have all telemetry, speed, heading, distance, remaining distance, various alarms, temperature on different parts and so on, available on the display in real time. More info will come.
Main electronic parts:
Teensy 3.2 maybe 4.0
Flip Flop latch switch
320x240, 2.2 inch display
Navigation switch (tbd, eather stock or DIY)
Bluetooth slave
MPU 9050 gyro/accelerometer
Buzzer
Vibration motor
Hall Effect sensor
Reed Switch
Wireless charging.
---
### Author:  [@YAHEF](https://foil.zone/u/YAHEF)
#### Post date: [September 17, 2019, 1:27pm UTC](https://foil.zone/t/yahef-from-norway/5682/2 "2019-09-17T13:27:06Z")
**Mast Clamp**
It was a bit tricky to get the mast hole right but in the end, here is what I did.
First, the profile of the mast is needed. The best way I think is to scan the mast with a light source above i order to get a clear contrast between the mast and the background. If you skip the light source, the background becomes black and it’s hard to see the profile.
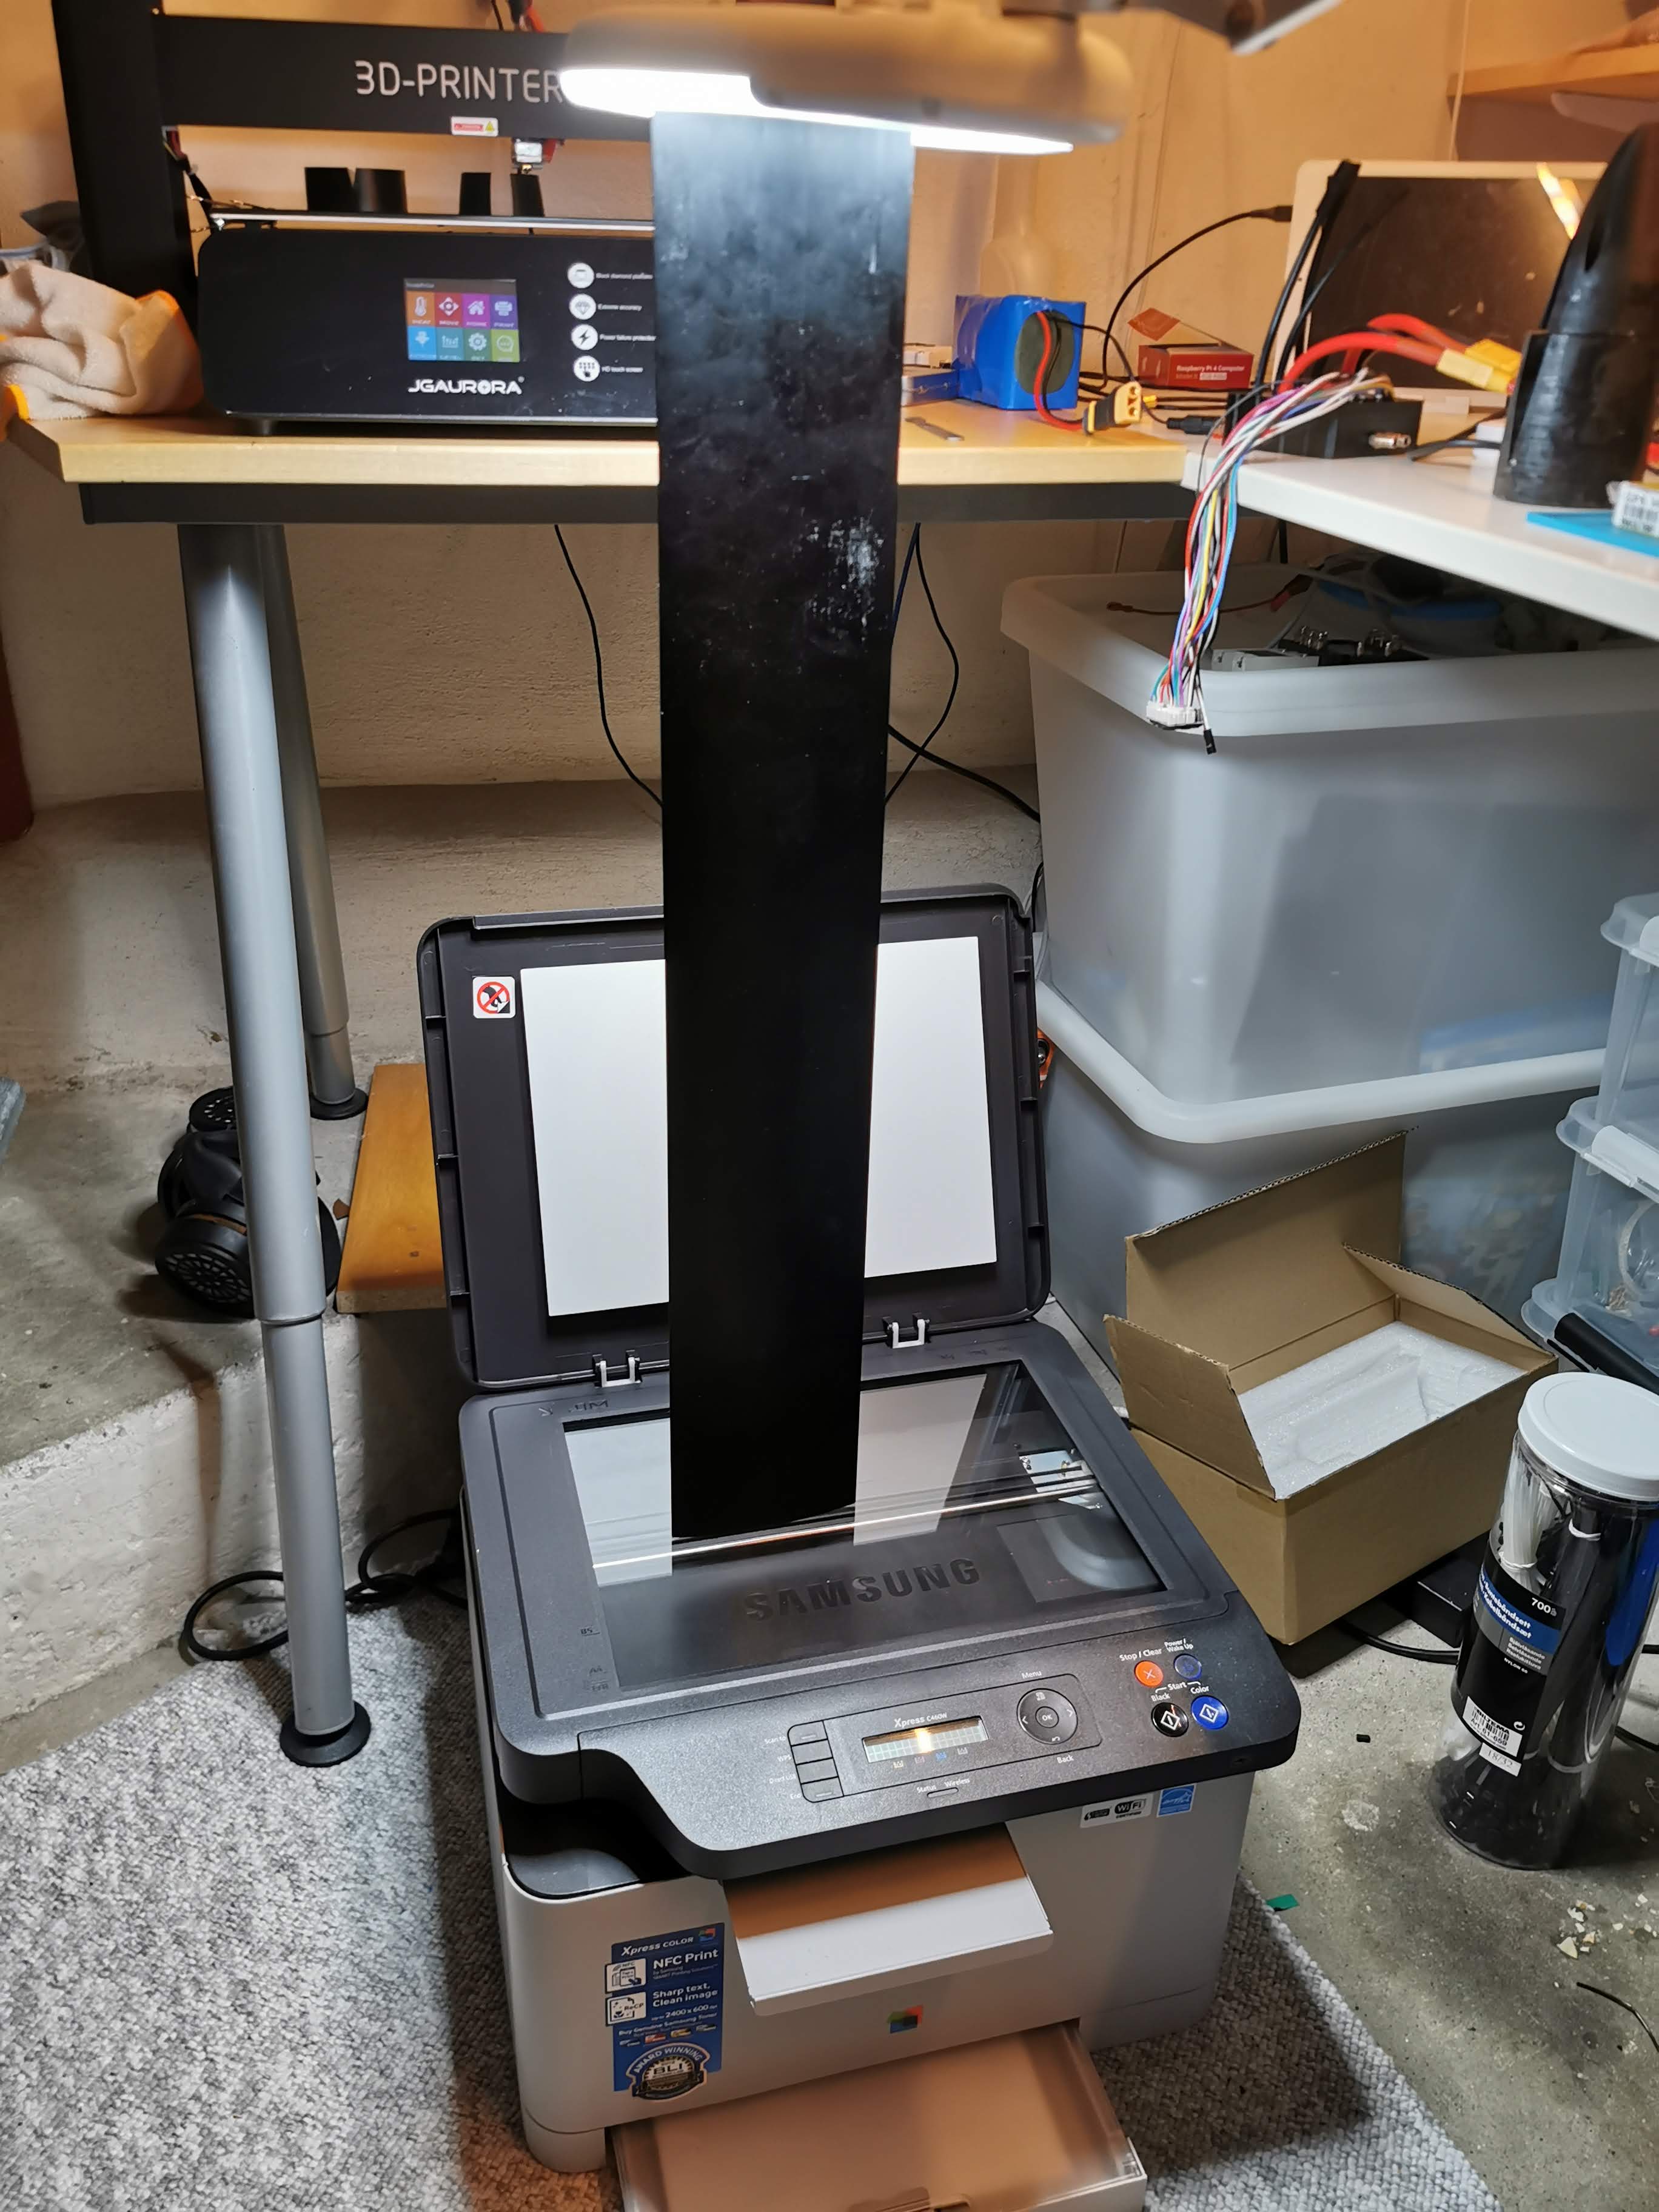
I started out with taking a picture of the mast but I had problems getting the right profile due to perspective, camera angles or whatever. In the end, scanning worked perfect for me.
Next up is to get the profile into Fusion 360, creating a copy of the mast and cut the mast profile in the mast clamp. @pacificmeister has an excellent video of how to do this. [https://youtu.be/HqTkrsiZBsw](https://youtu.be/HqTkrsiZBsw)
This became an iterative process to make a perfect fit due to inaccuracy when copying the mast profile to a sketch, scanning vs image or printer calibration and so on. Instead of using the actual mast clamp I created a 30 x 130mm cylinder. That saved me a lot of time and filament.
Now I had the perfect profile, so on to the actual mast clamp. First I needed to create the elliptical body of the clamp. I found a tool for Fusion 360 on the web. A guy named Dave explains how to use it here [https://www.davesrocketshop.com/?p=265](https://www.davesrocketshop.com/?p=265) (sometimes a login popup appears, just press cancel and you are good to go). Mine is an elliptical cone 65.5 x 155mm.
Once the clamp is done, it’s just to make the cut for the mast as described above by pacificmeister, cut for the mounting holes, cut the body in half at the thickest part of the mast, make space for wires inside the body and then voila.
> **[Fusion](https://myhub.autodesk360.com/ue2db12c7/g/shares/SH919a0QTf3c32634dcf4755736a65eb1f9a)**
>
> Share 2D and 3D design files and project files with anyone.
https://myhub.autodesk360.com/ue2db12c7/shares/public/SH919a0QTf3c32634dcf4755736a65eb1f9a?mode=embed
I don’t have much experience in 3D printing but I guess the weakest spots in a 3D printed part are between the layers (please correct me if I’m wrong). At least, the small number of tests I did, showed me that when a part snaps, it snaps almost clean of at one layer. In my design, the weakest spot would probably be where the mounting screws in the front part sits, and that got me thinking. What if I print the mast clamp as hollow as possible and then pour polyester resin inside?
Since I’m at the start of my build and winter is soon coming to Norway, I haven’t been able to test this in the water, but I have banged it with a hammer, jumped on it. The mast clamp is rock solid!
Has anyone else tried this technique? I’m so convinced of the strength that I have started to design a fuselage with a little twist but more on that in a later post.
Anyway, I exported the mast clamp as a solid body and had Cura doing the job of making it hollow with these settings.
Quality:
Layer Height: 0.2mm
Shell:
Wall Thickness: 1.2mm
Bottom Thickness: 0mm
Bottom Layers: 0
Infill:
Infil Density: 7%
Infill Pattern: Line
Infill Layer Thickness: 0.4mm
This is (almost) how the print result looks like. These are with 15% infill but that was to much (forgot to take a picture with 7% infill). The polyester resin had problem float between the infill lines so I decreased the infill to 7% and the resin floats prefect all the way down to the bottom. One tip is to fill them with water first to get an idea of how much polyester resin is needed and you can also detect leaks.
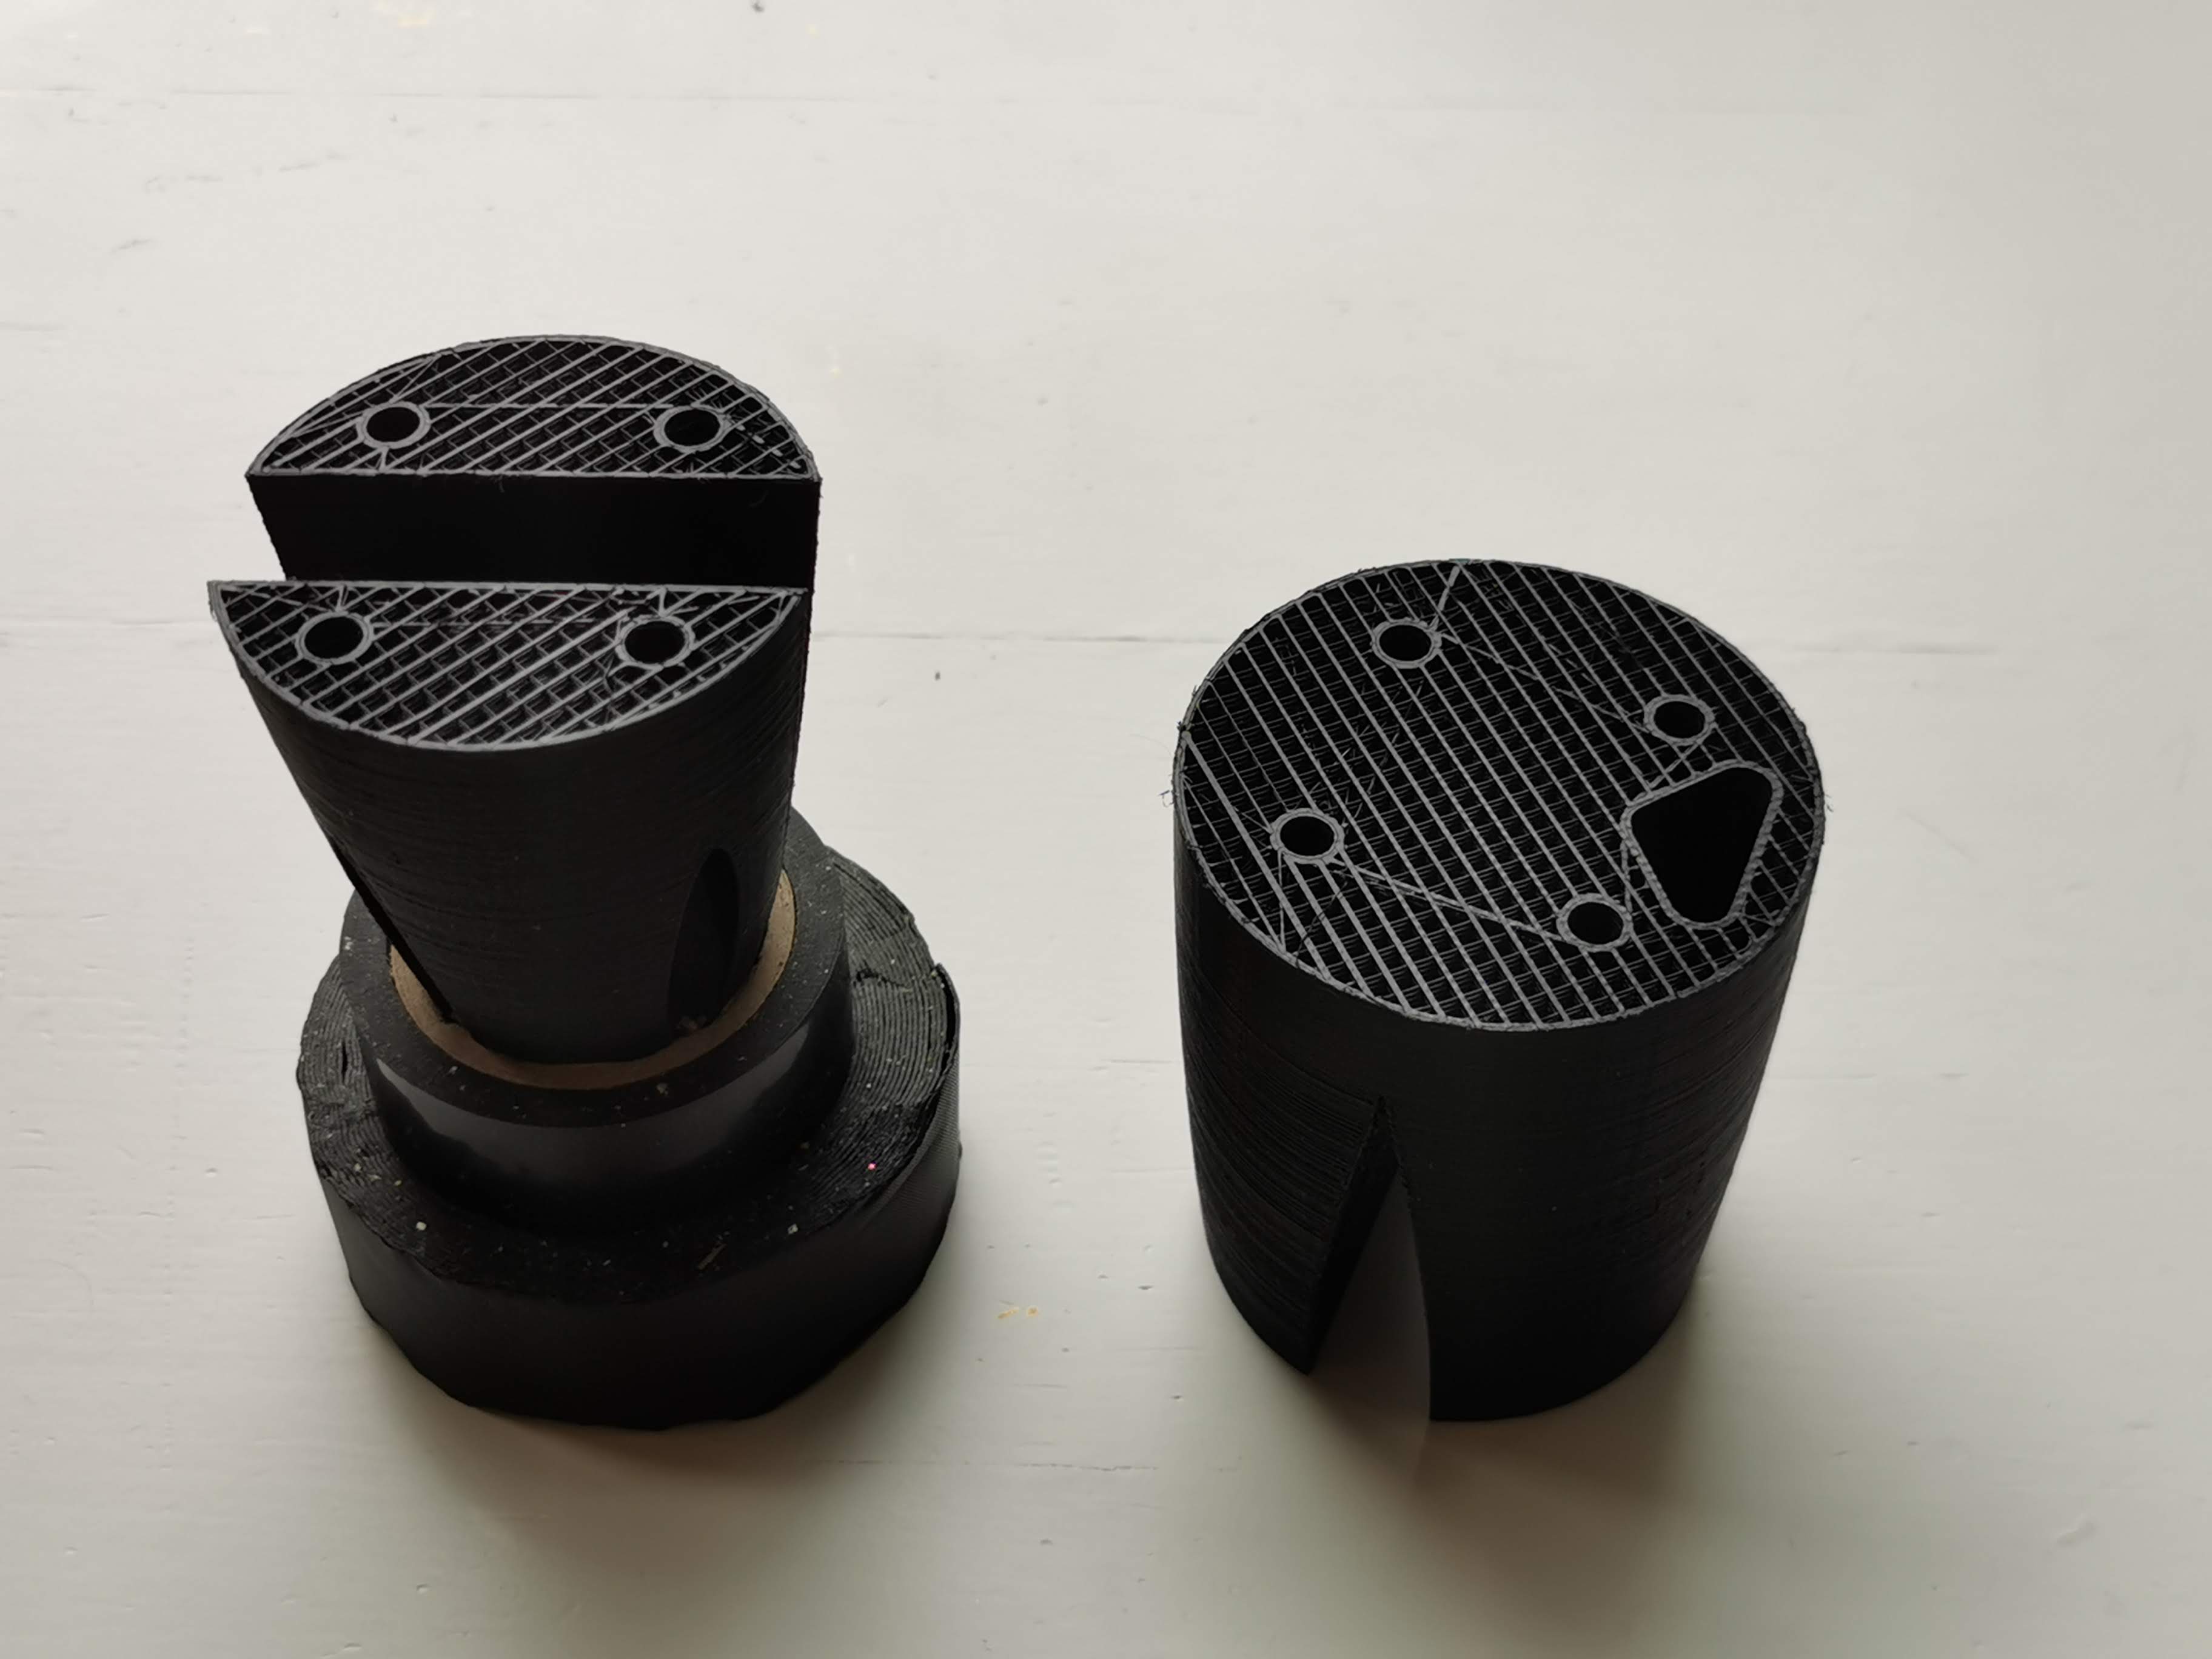
It’s a good idea to mask the outlines and the holes. I used regular masking tape and some straws. Then it’s just to start pouring polyester resin into the parts.
Another thing I discovered is, when the polyester resin starts to cure and getting warm, the clamp gets a bit soft, mount the clamp to the mast and fasten it with tape or something and there will be an even better fit.
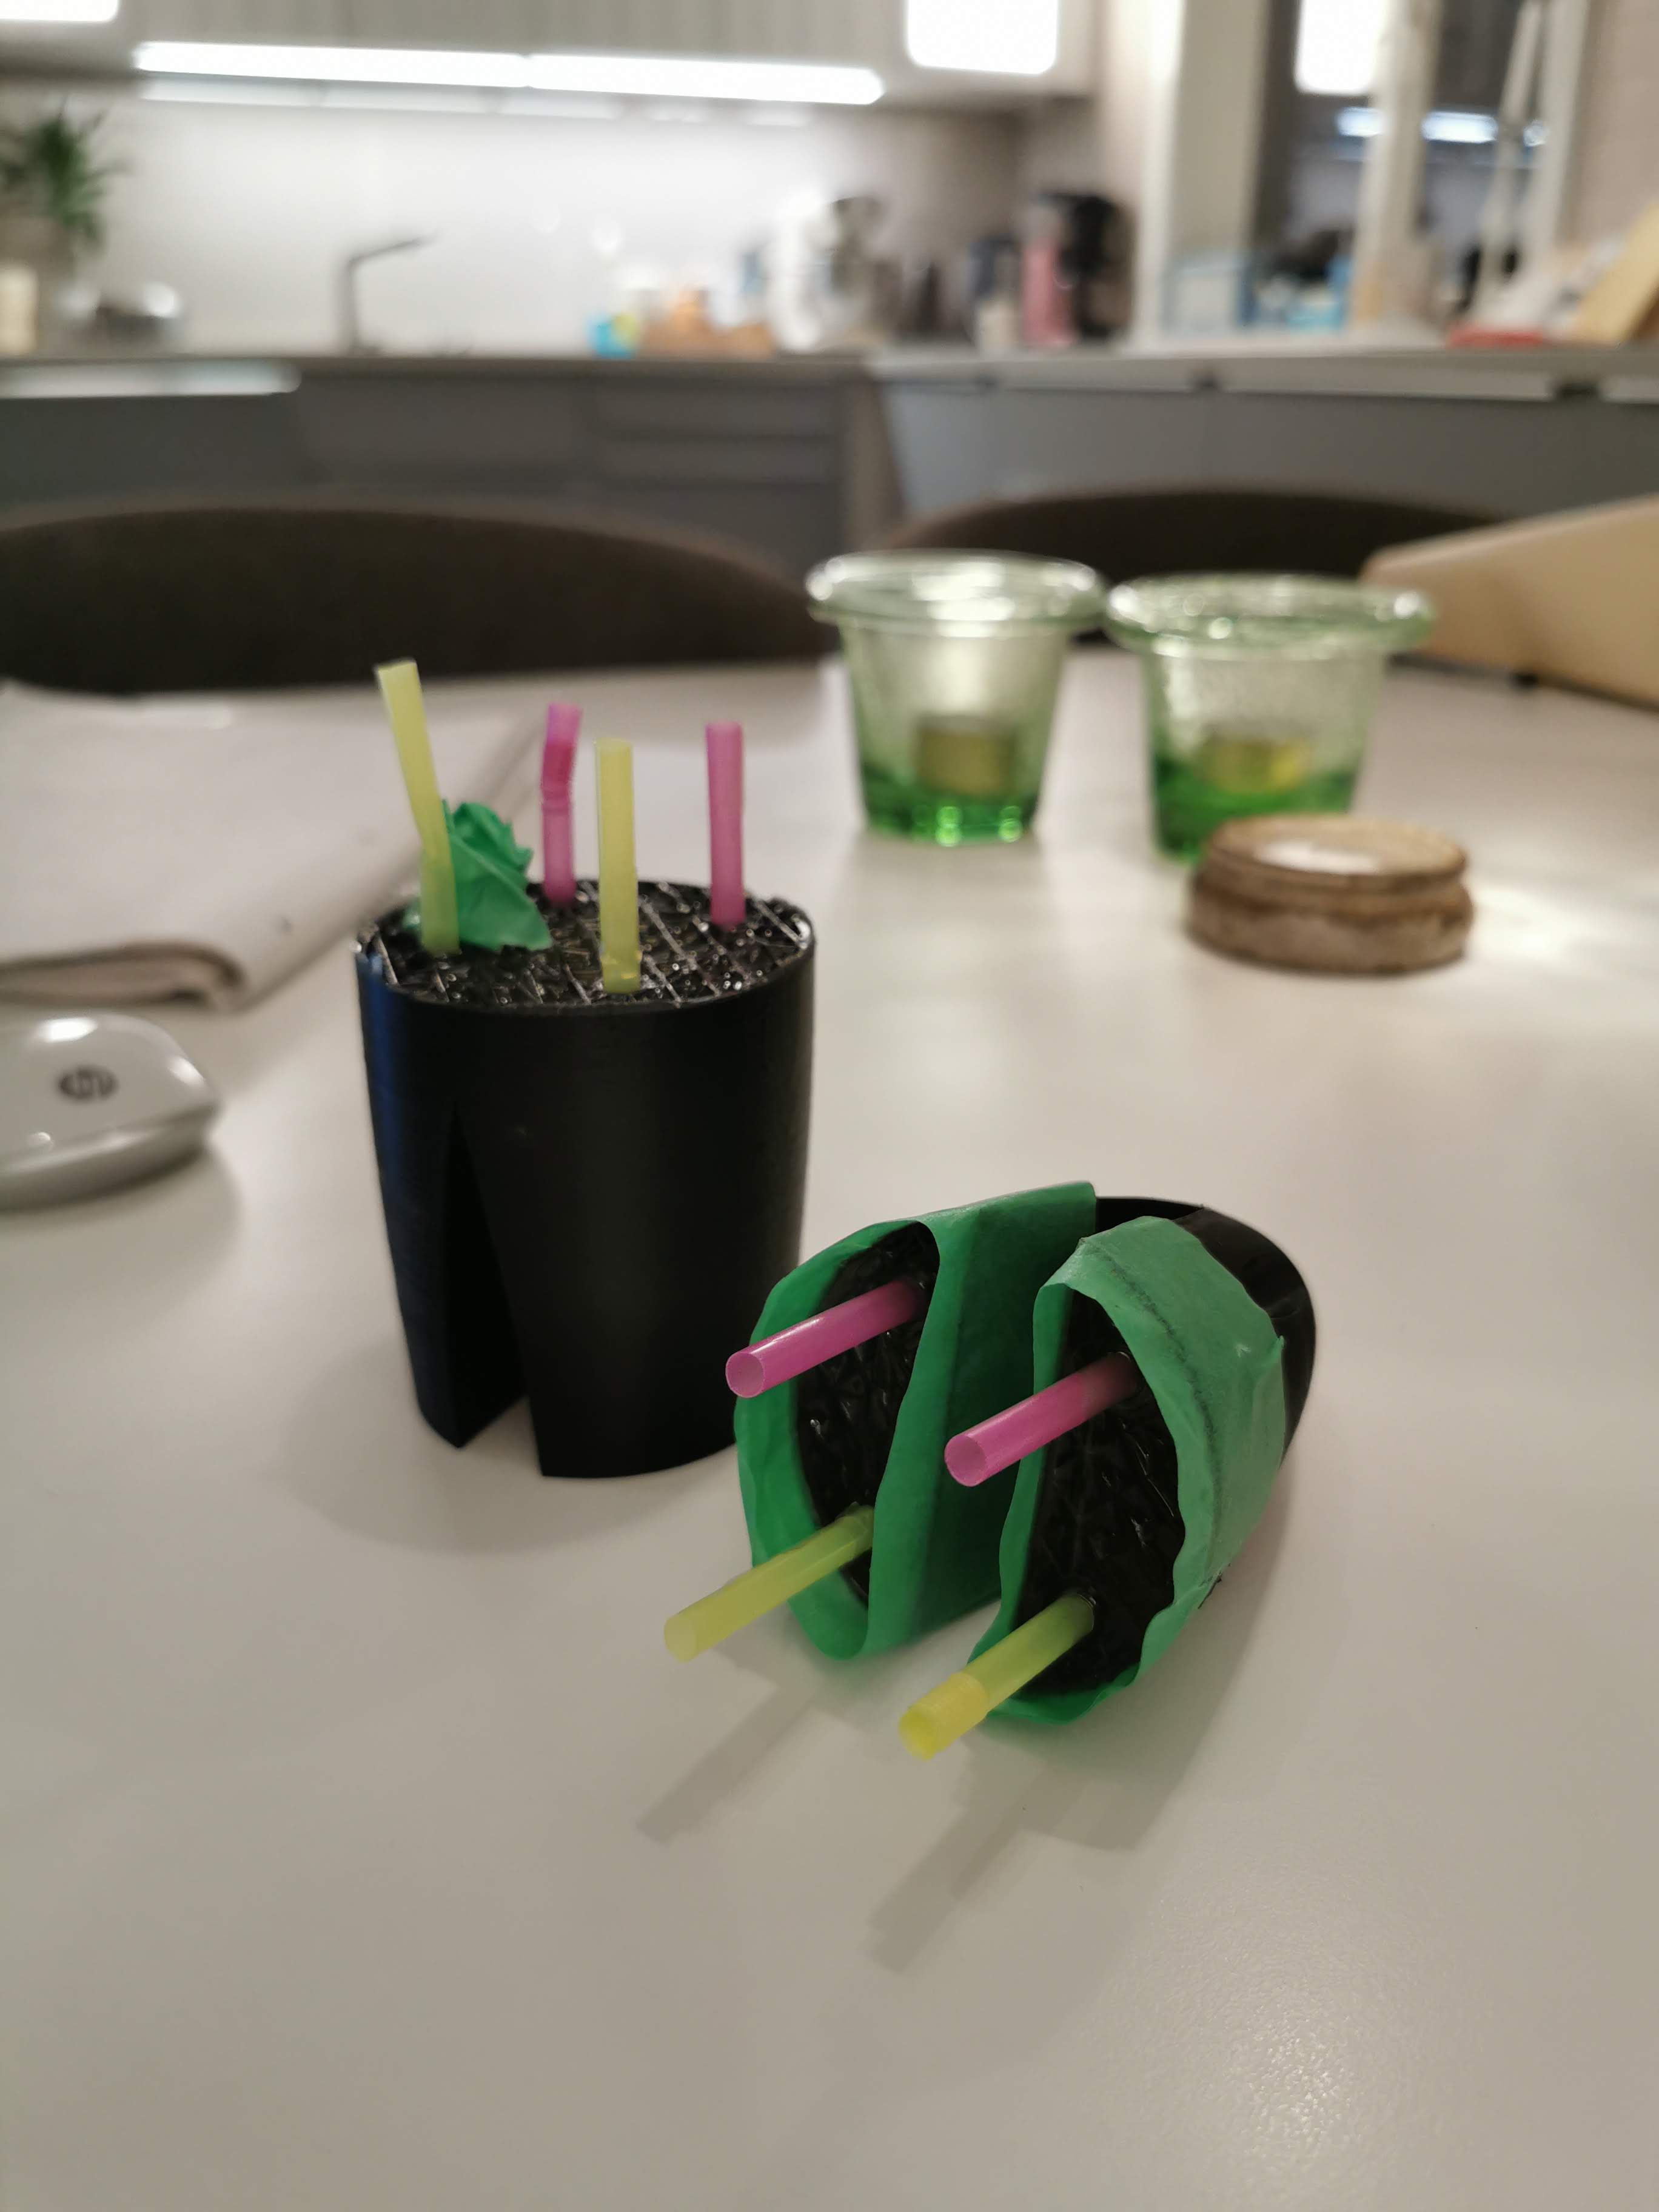
With a bit of sanding and perhaps some epoxy filler in the openings where the polyester resin went in, I have a perfect fit, rock solid mast clamp (I hope). Still waiting for my long stainless screws so a rapid action clamp has to be a stand in, just to show the result.
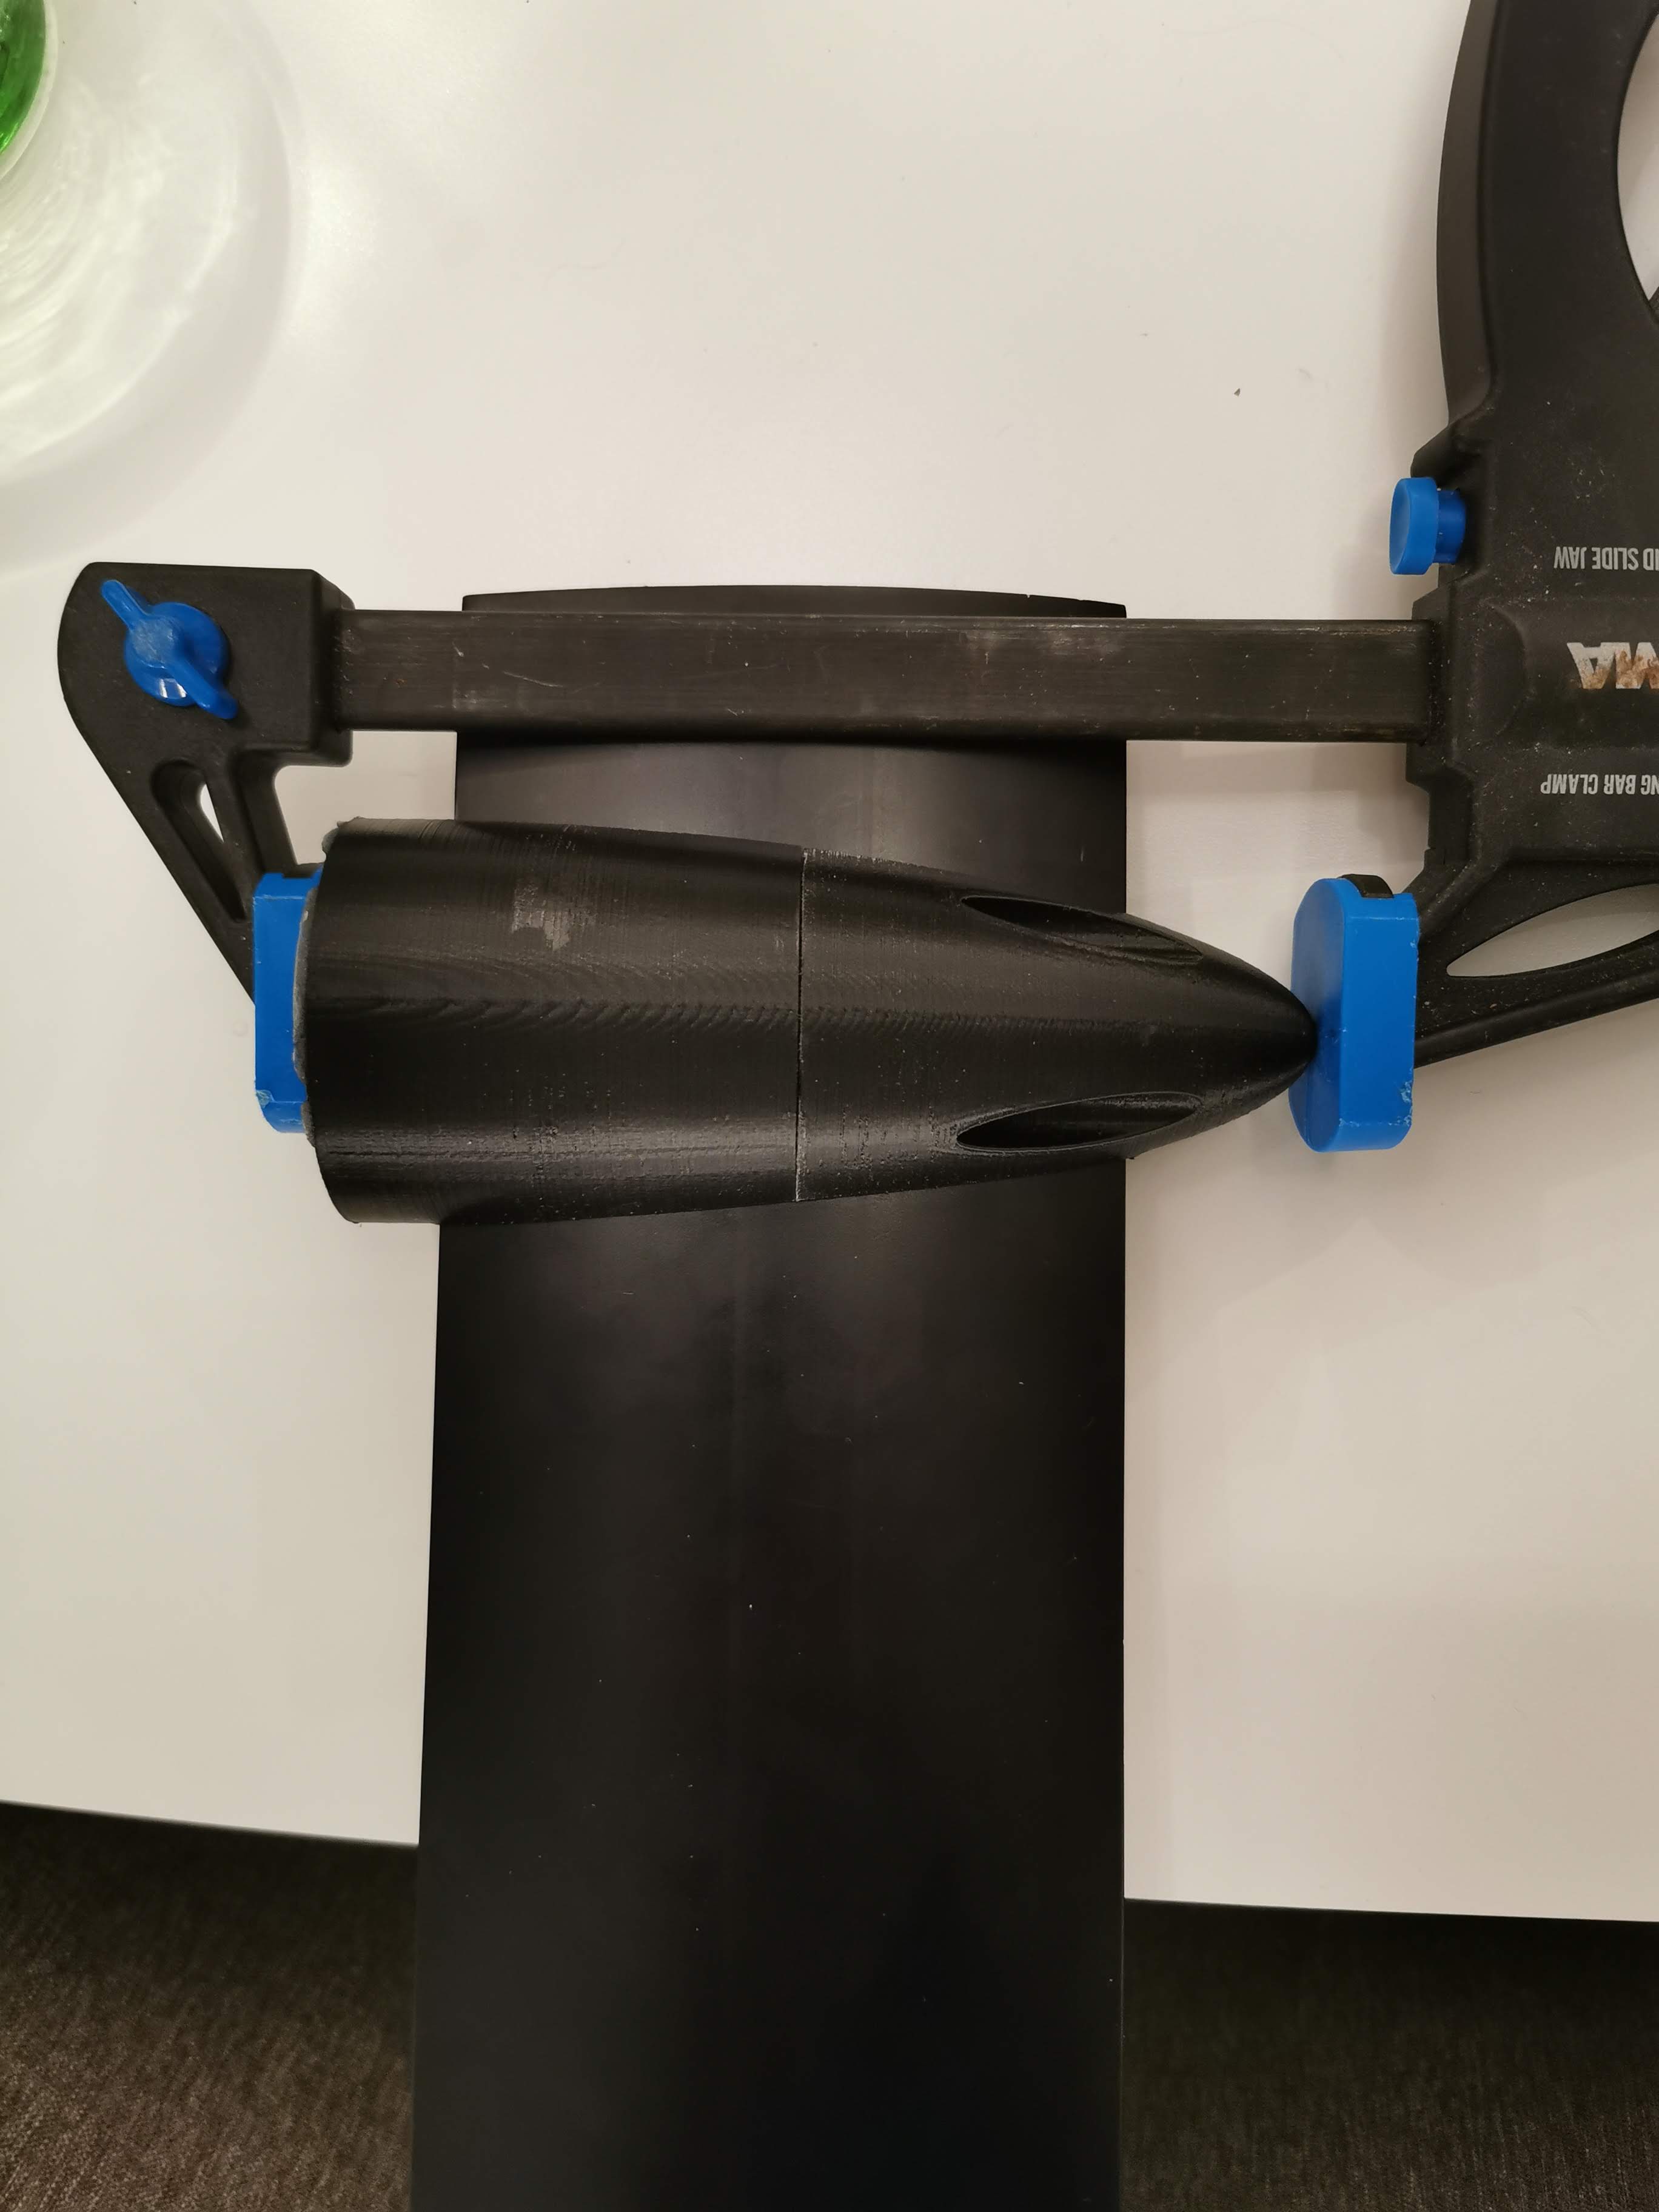
A few more things has to be tried out. I will spray some silicon on the mast, sand the surface on the clamp that goes against the mast and put a good layer of polyester resin on it and tighten everything together in order get an even more tight fit. The silicone spray will make sure that the clamp doesn’t get stuck to the mast.
Also a hole in the front clamp is needed for the cooling water.
Hope you find this useful and I’m looking forward to read your comments.
Next up is to drill the holes in the mast and plate box
Until then
---
### Author:  [@Ackermann](https://foil.zone/u/Ackermann)
#### Post date: [September 17, 2019, 2:48pm UTC](https://foil.zone/t/yahef-from-norway/5682/3 "2019-09-17T14:48:15Z")
You sir, have my subscription 🙂
I really like the idea with low infill and epoxy. I will try this for sure. Thx for sharing.
Regards,
jan
---
### Author:  [@Jezza](https://foil.zone/u/Jezza)
#### Post date: [September 17, 2019, 4:29pm UTC](https://foil.zone/t/yahef-from-norway/5682/4 "2019-09-17T16:29:37Z")
For my older front to back clamps, I used a slightly different method with the screws. I used 4 screws to attach the rear section of the clamp to the motor, then 2 larger screws to attach the front clamp to the back clamp. I made sure that the screws overlapped each other so that if the clamp ever cracked it could still not fall off. Now I just buy mast clamps from Flying Rodeo (±£45 for injection moulded) though and then CNC adaptors to the motors. Its faster, easier and more secure.
---
### Author:  [@Ackermann](https://foil.zone/u/Ackermann)
#### Post date: [September 17, 2019, 7:20pm UTC](https://foil.zone/t/yahef-from-norway/5682/6 "2019-09-17T19:20:57Z")
He did
> **[Fusion](https://myhub.autodesk360.com/ue2db12c7/g/shares/SH919a0QTf3c32634dcf4755736a65eb1f9a)**
>
> Share 2D and 3D design files and project files with anyone.
---
### Author:  [@beonwater](https://foil.zone/u/beonwater)
#### Post date: [September 17, 2019, 8:31pm UTC](https://foil.zone/t/yahef-from-norway/5682/7 "2019-09-17T20:31:03Z")
I have not tried this with polyester but with epoxy, carbon fiber flock and micro balloons. Like you said it is rock solid. But be carefull with just PLA as it´s very hard to get it waterproof. Maybe Poly Max filament and epoxy is better. I´m using that for my mast mount and it is really stiff and not as brittle as PLA.
I have not had any problem with the heat when the epoxy cures, I´m using epoxy with long cure time.
You could also try to 3d print a mould in PLA or PVA and use epoxy glas/carbon fiber or with polyuretan (hard solid one or expanding foam when you don´t need max strength). PVA is really good when you have complex parts when it´s impossible to peel of the PLA-mould when the epoxy cured. Just put the part in warm water and let the PVA-mould disolve over the night.
For my foil wings I 3d printed a bottom and a top mould in PLA. And then vacuum molded the wings in glas fiber for the front wing and carbon for the stab.
To make the fuselage I think you would need a lot´s of directional carbon fibers as you do not want the fuselage to flex. And there is lots of stress around the mast mount in the fuselage.
---
### Author:  [@YAHEF](https://foil.zone/u/YAHEF)
#### Post date: [September 18, 2019, 8:11am UTC](https://foil.zone/t/yahef-from-norway/5682/8 "2019-09-18T08:11:42Z")
Thanx for the tip, I will definitely also try the combination of epoxy and PolyMax.
---
### Author:  [@YAHEF](https://foil.zone/u/YAHEF)
#### Post date: [October 28, 2019, 12:57pm UTC](https://foil.zone/t/yahef-from-norway/5682/9 "2019-10-28T12:57:55Z")
Time flies. More than a month since last update. This turned out to be kind of a slow build but I’m in no hurry since the winter is starting to get a grip of Oslo. No efoiling for me until spring.
First of all I’m happy to see that others found the way of creating the mast clamp useful and even developed the concept. Thank you guys for that.
The last month I’ve made some progress on the remote control. The remote will be quite similar to @samisin excellent approach, but I’ve chosen not to all the electronics into the remote, only basic things like the hall sensor, display, bluetoooth communication, IMU and CPU. GPS and SD-card will be inside the electronics box and the data communicated to the remote.
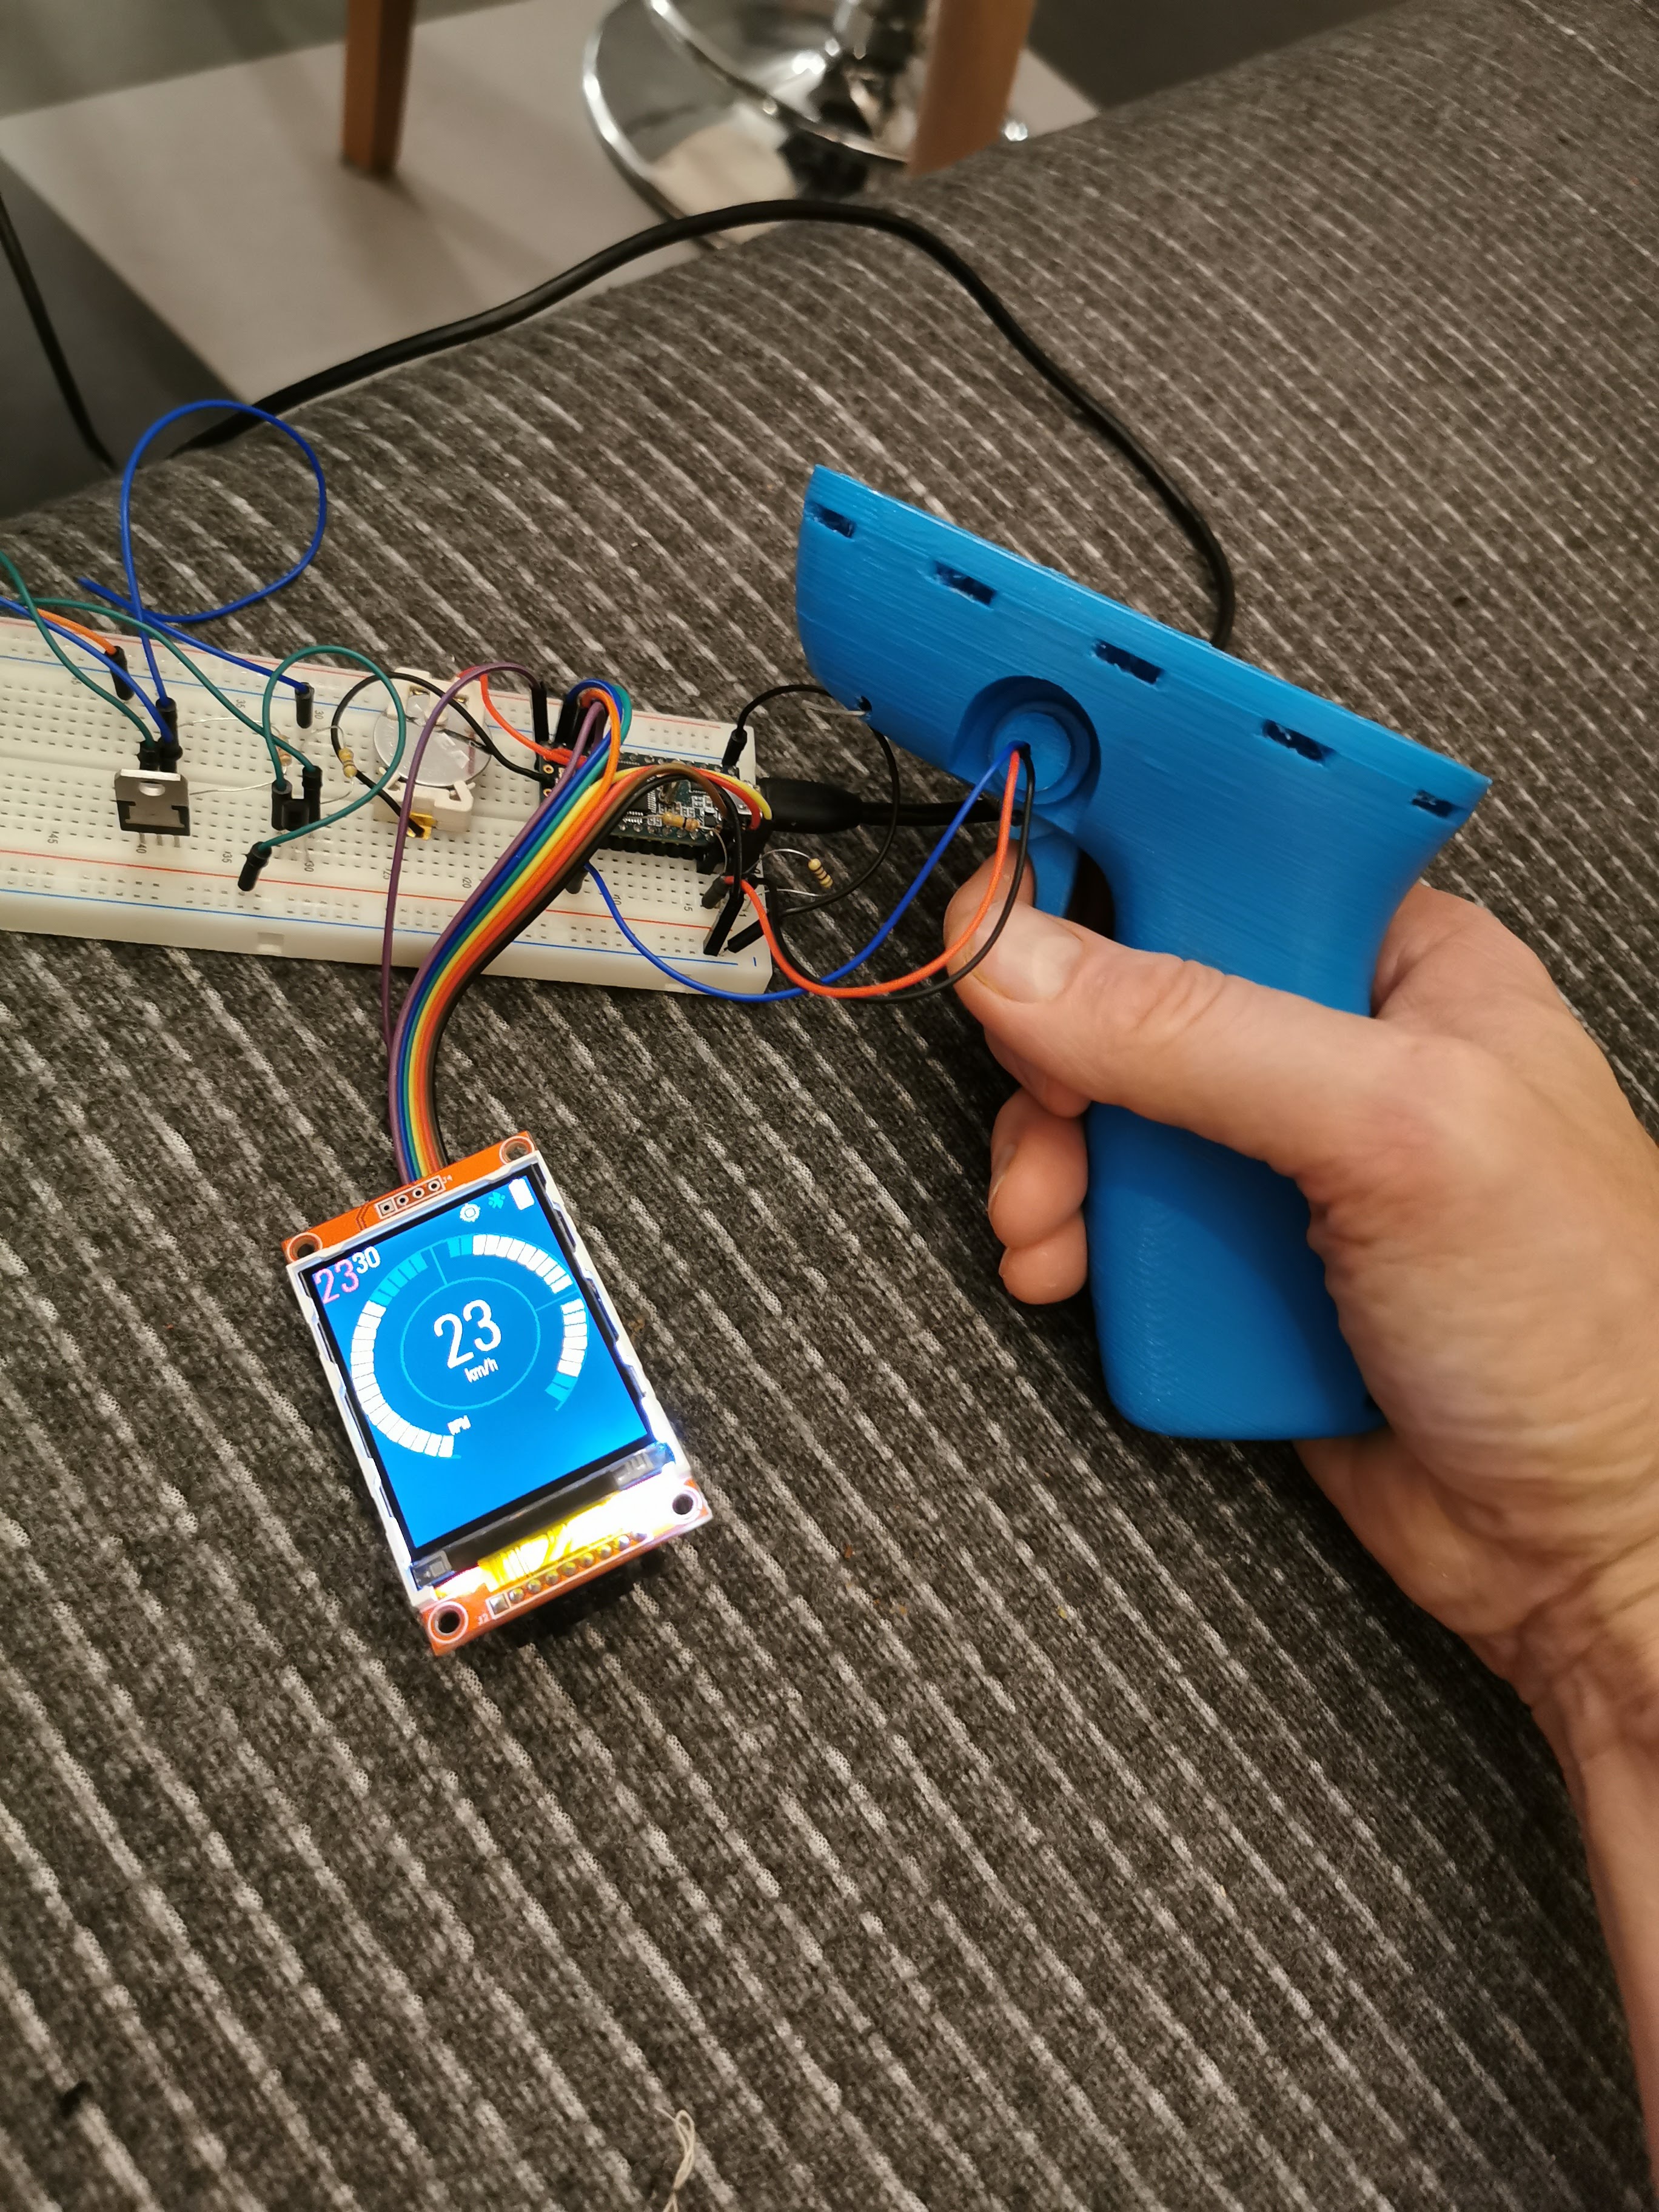
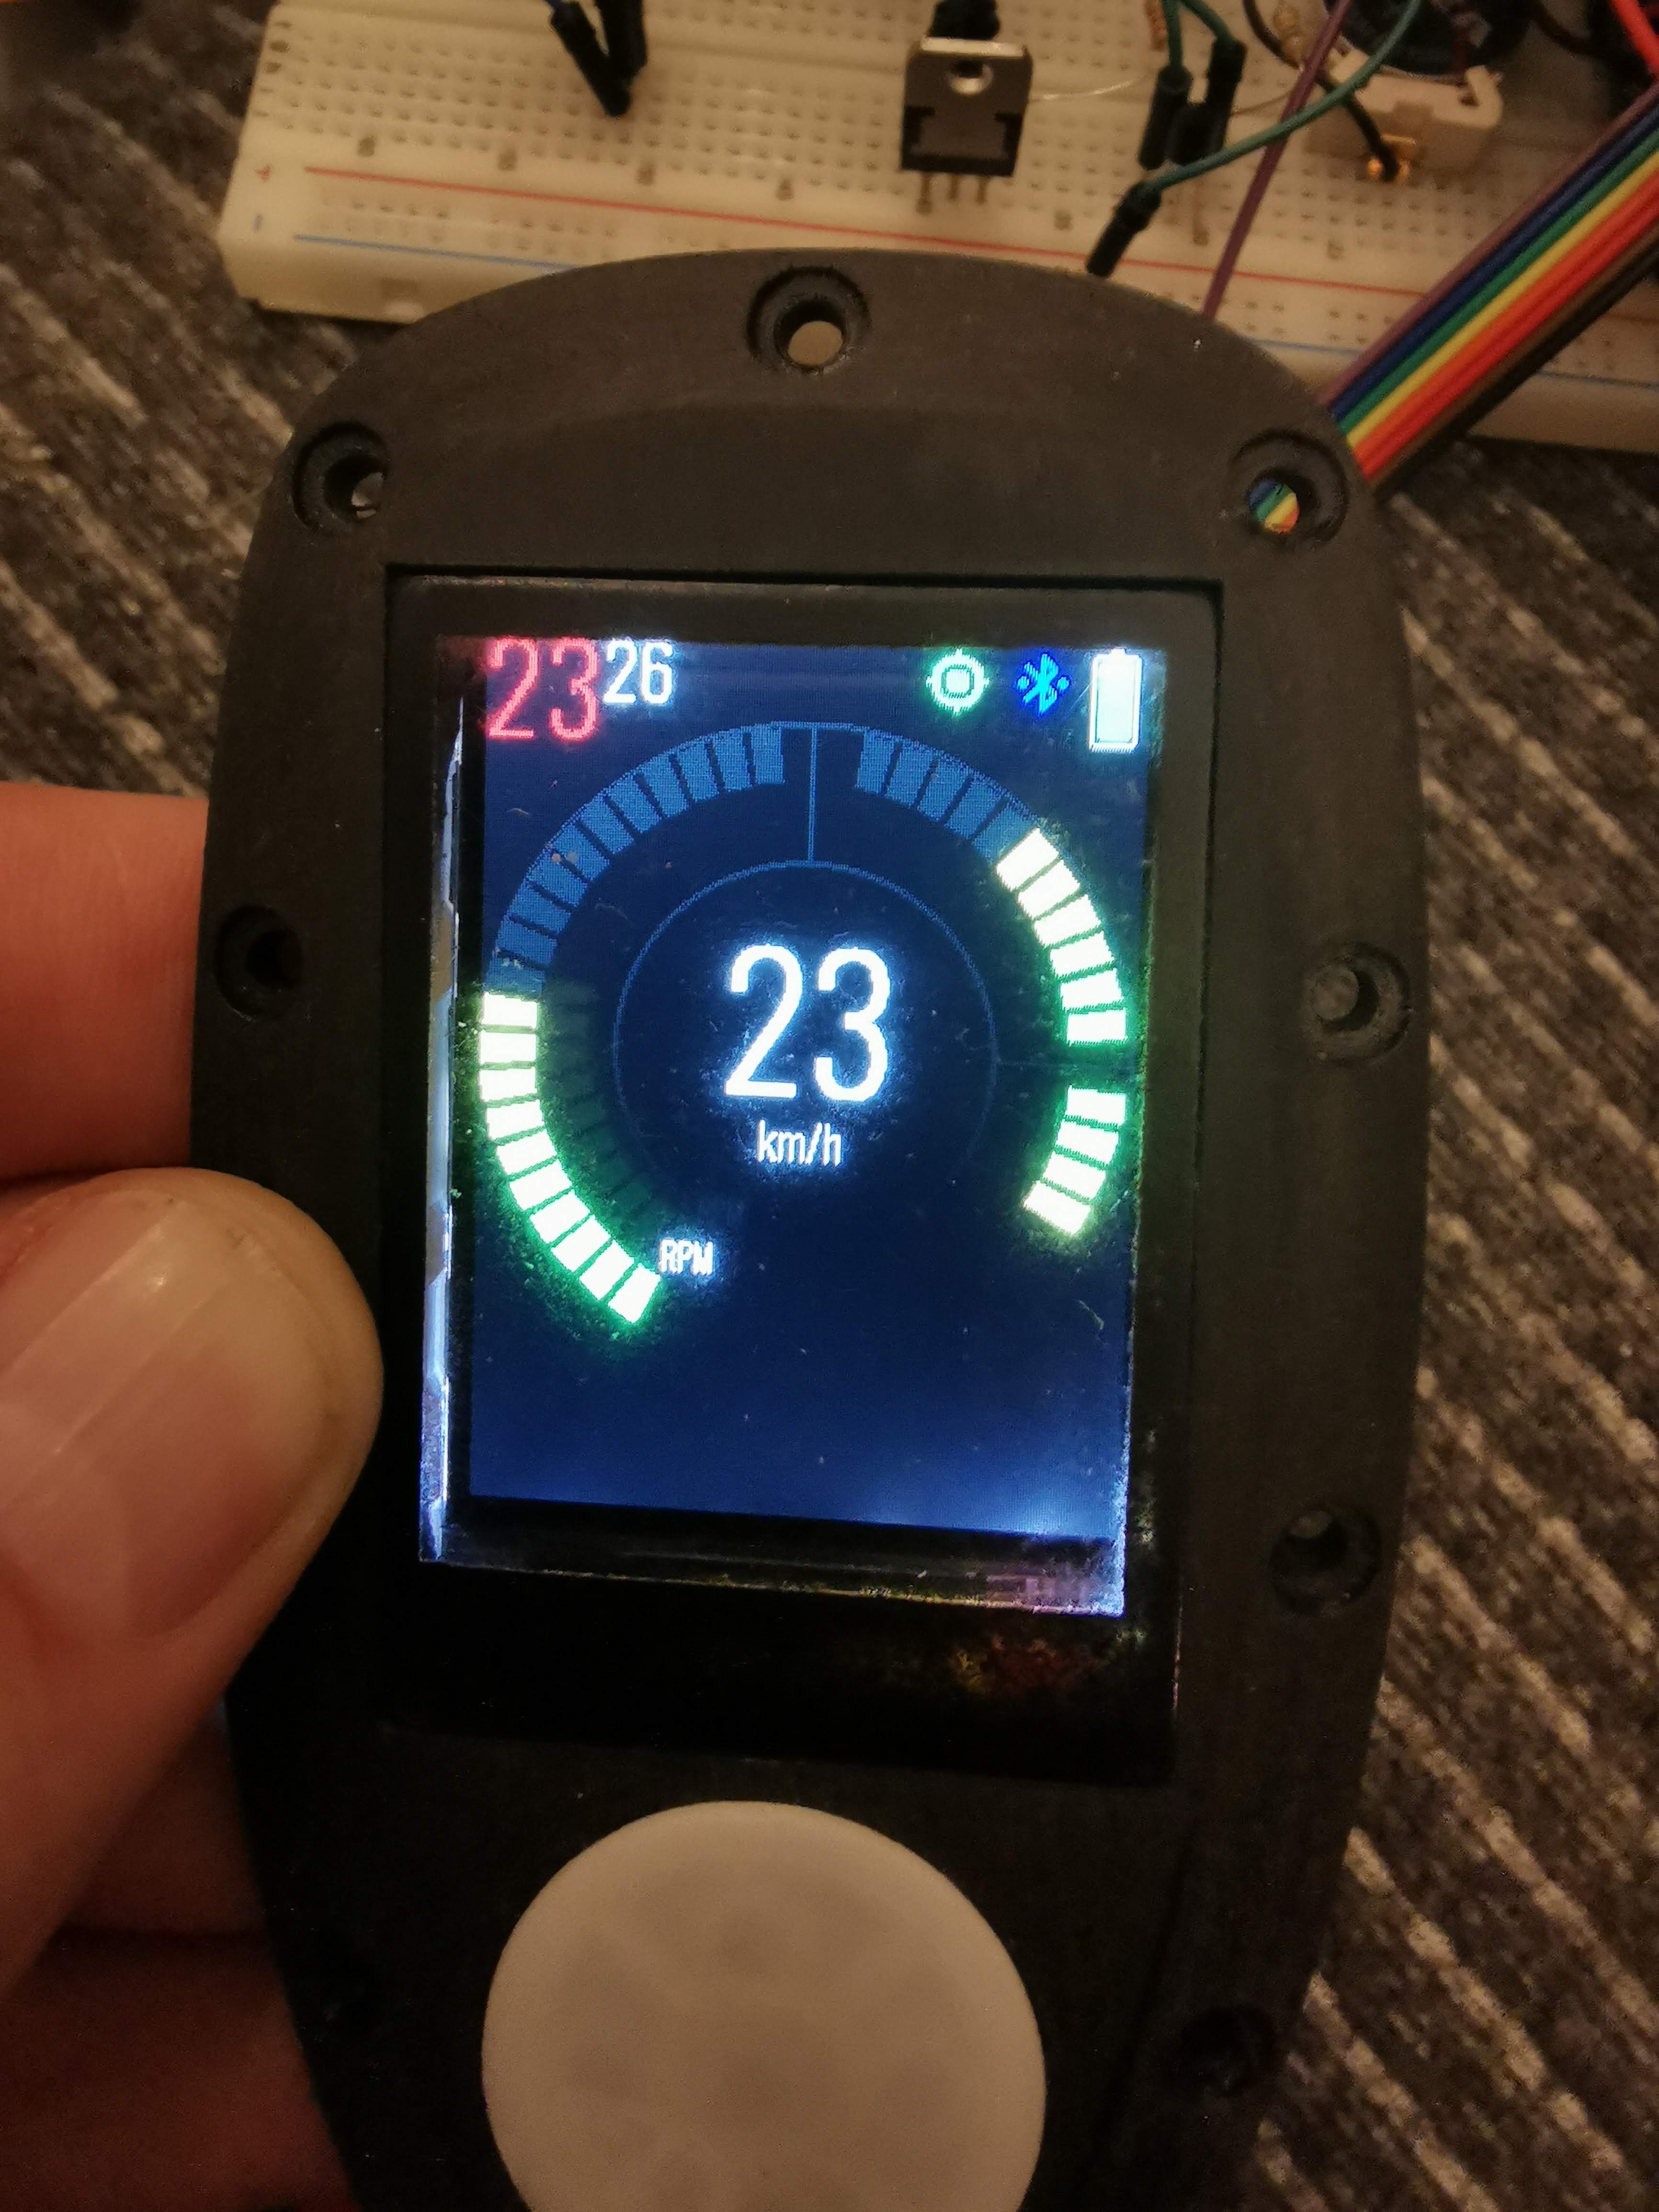
But the main thing this last month is the the frame for the box to fill the hole in the inflatable.
[https://a360.co/2q237xW](https://a360.co/2q237xW)
https://myhub.autodesk360.com/ue2db12c7/shares/public/SH919a0QTf3c32634dcfbb12edbdcf577f85?mode=embed
The frame is basically created from a profile sketch and the option Create-\>Sweep in Fusion 360, kind of the same way as the mast clamp. Also added holes for threaded inserts to fasten the aluminum bottom and some support on the top.
I have used the same concept as for the mast clamp. 3D-printed the frame in 6 parts with 5mm overlap to join the parts and with low infill. It’s a monster printout, almost 3 times 24 hours. Some extra manual work with cutting the side walls open, for the resin to float seamlessly between the printed parts, making the frame almost homogen. The parts are first glued together with Tec7 for the resin not to escape.
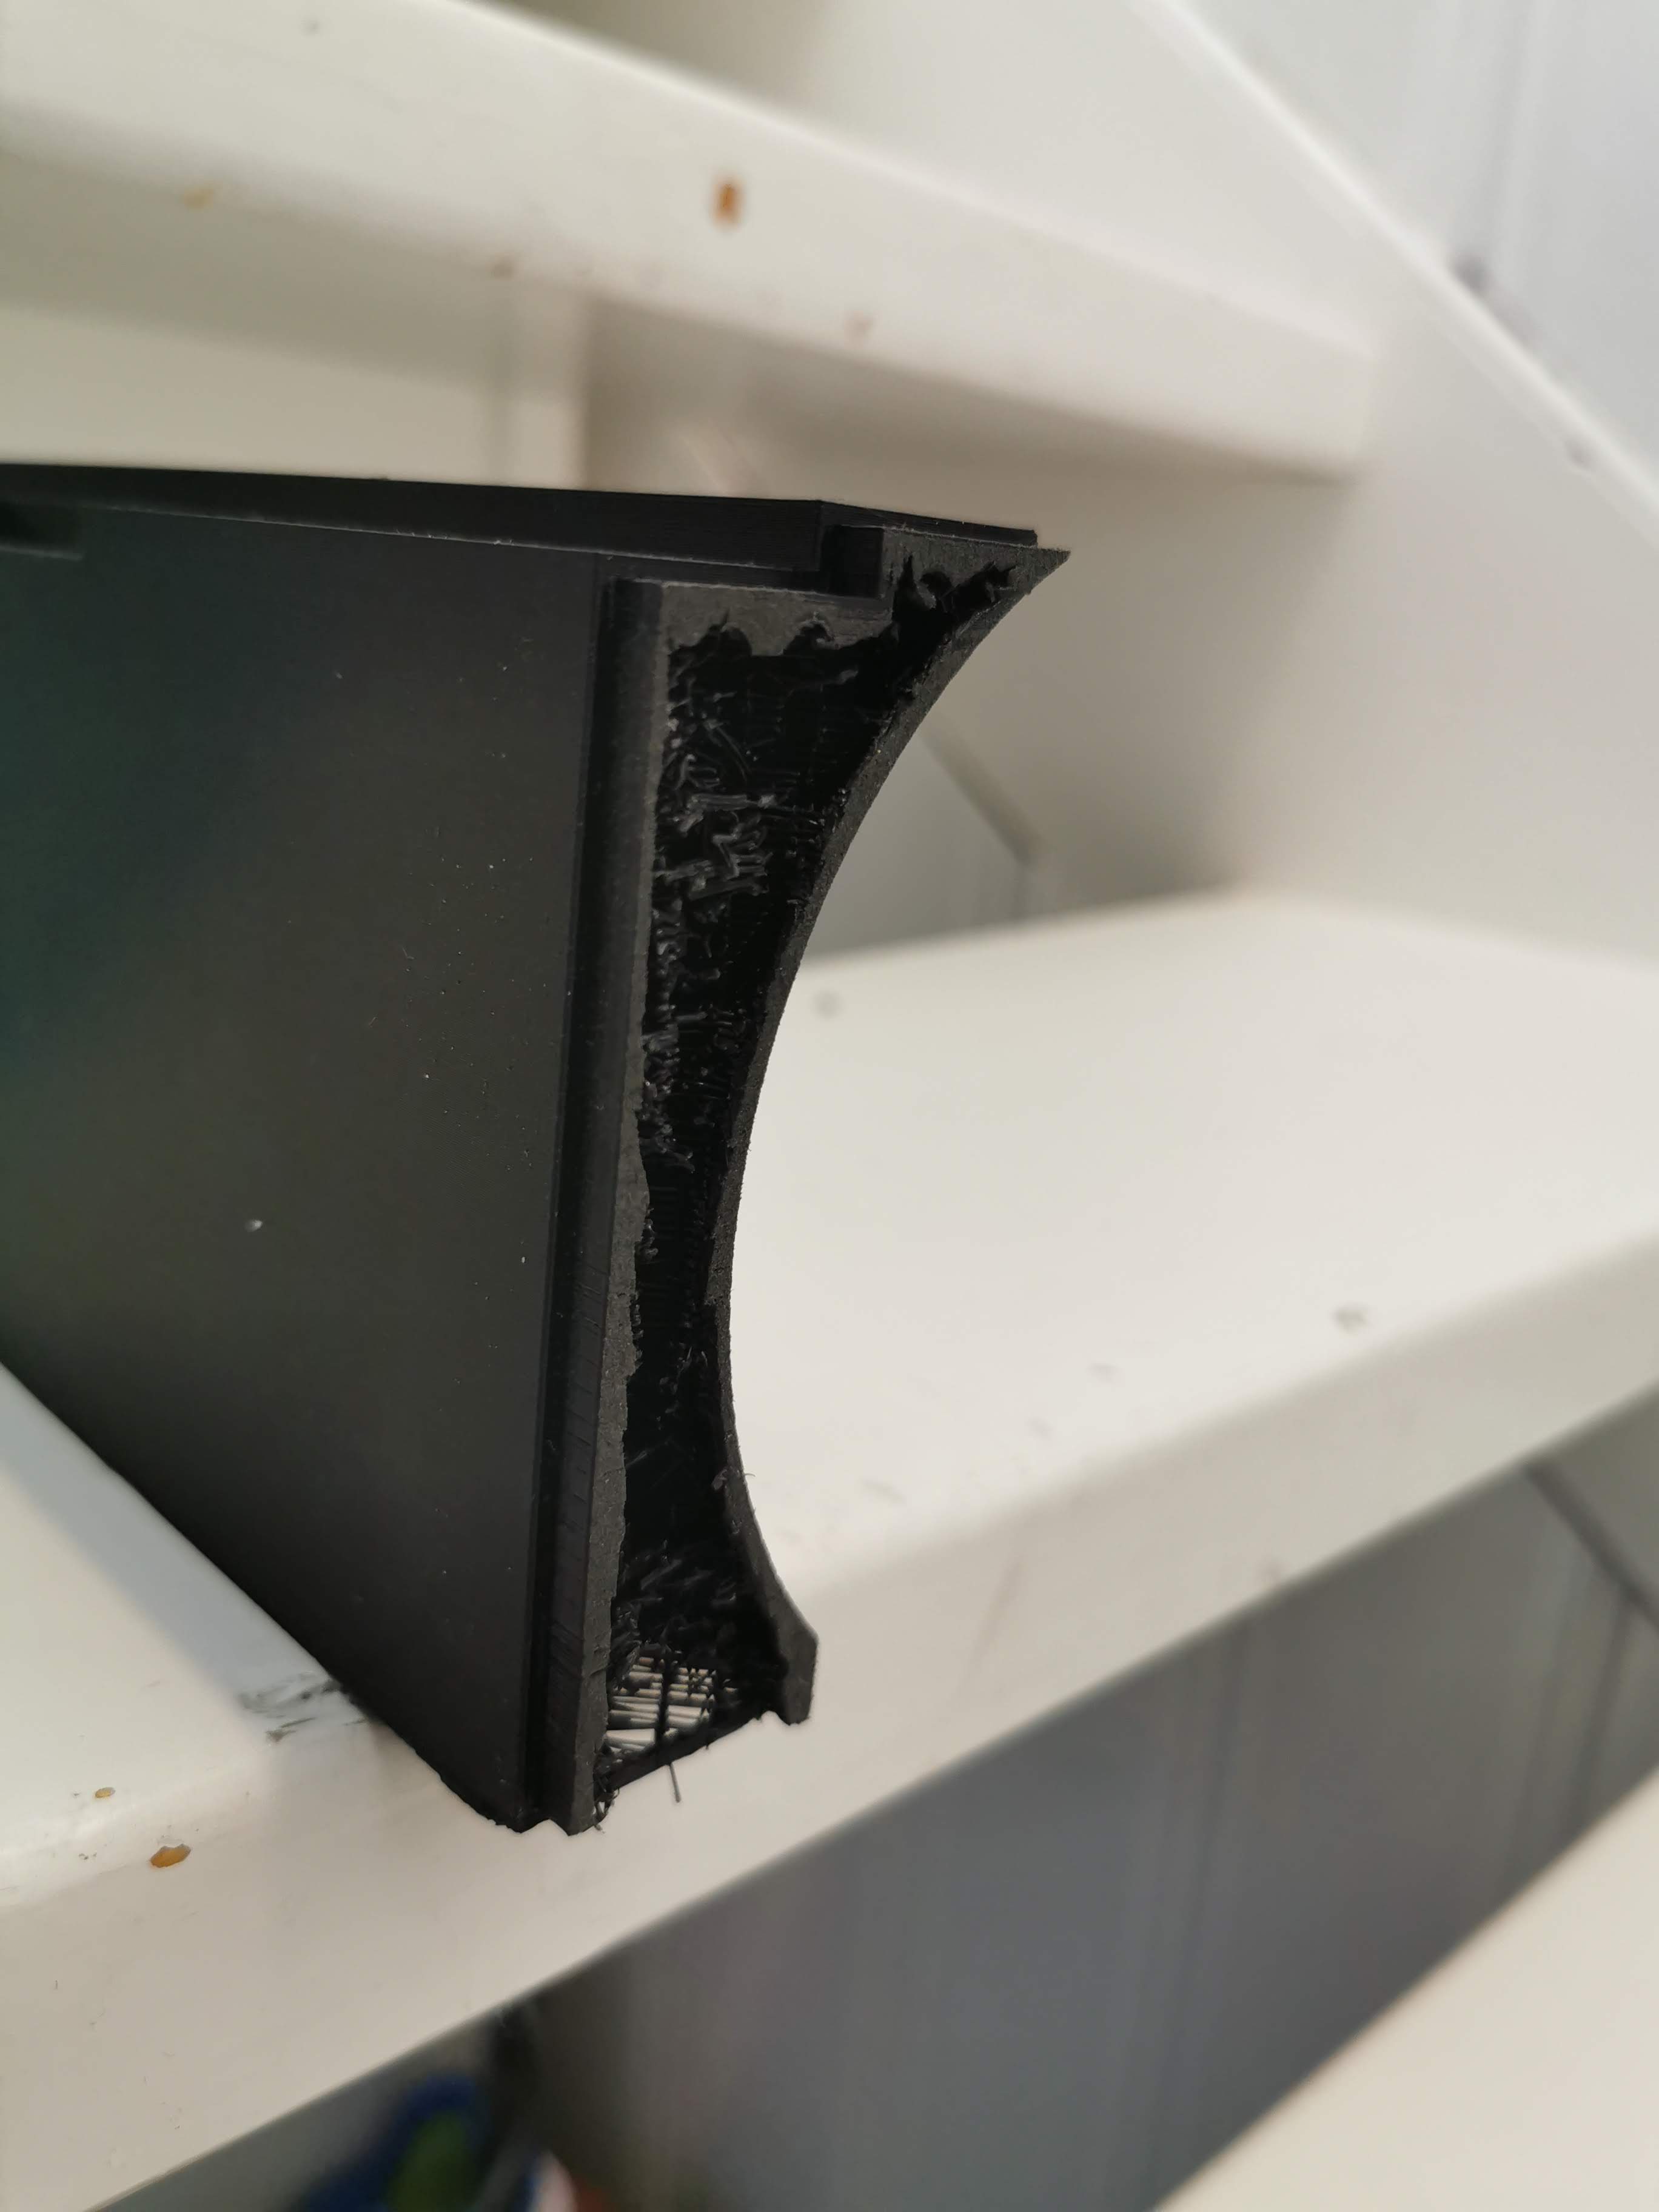
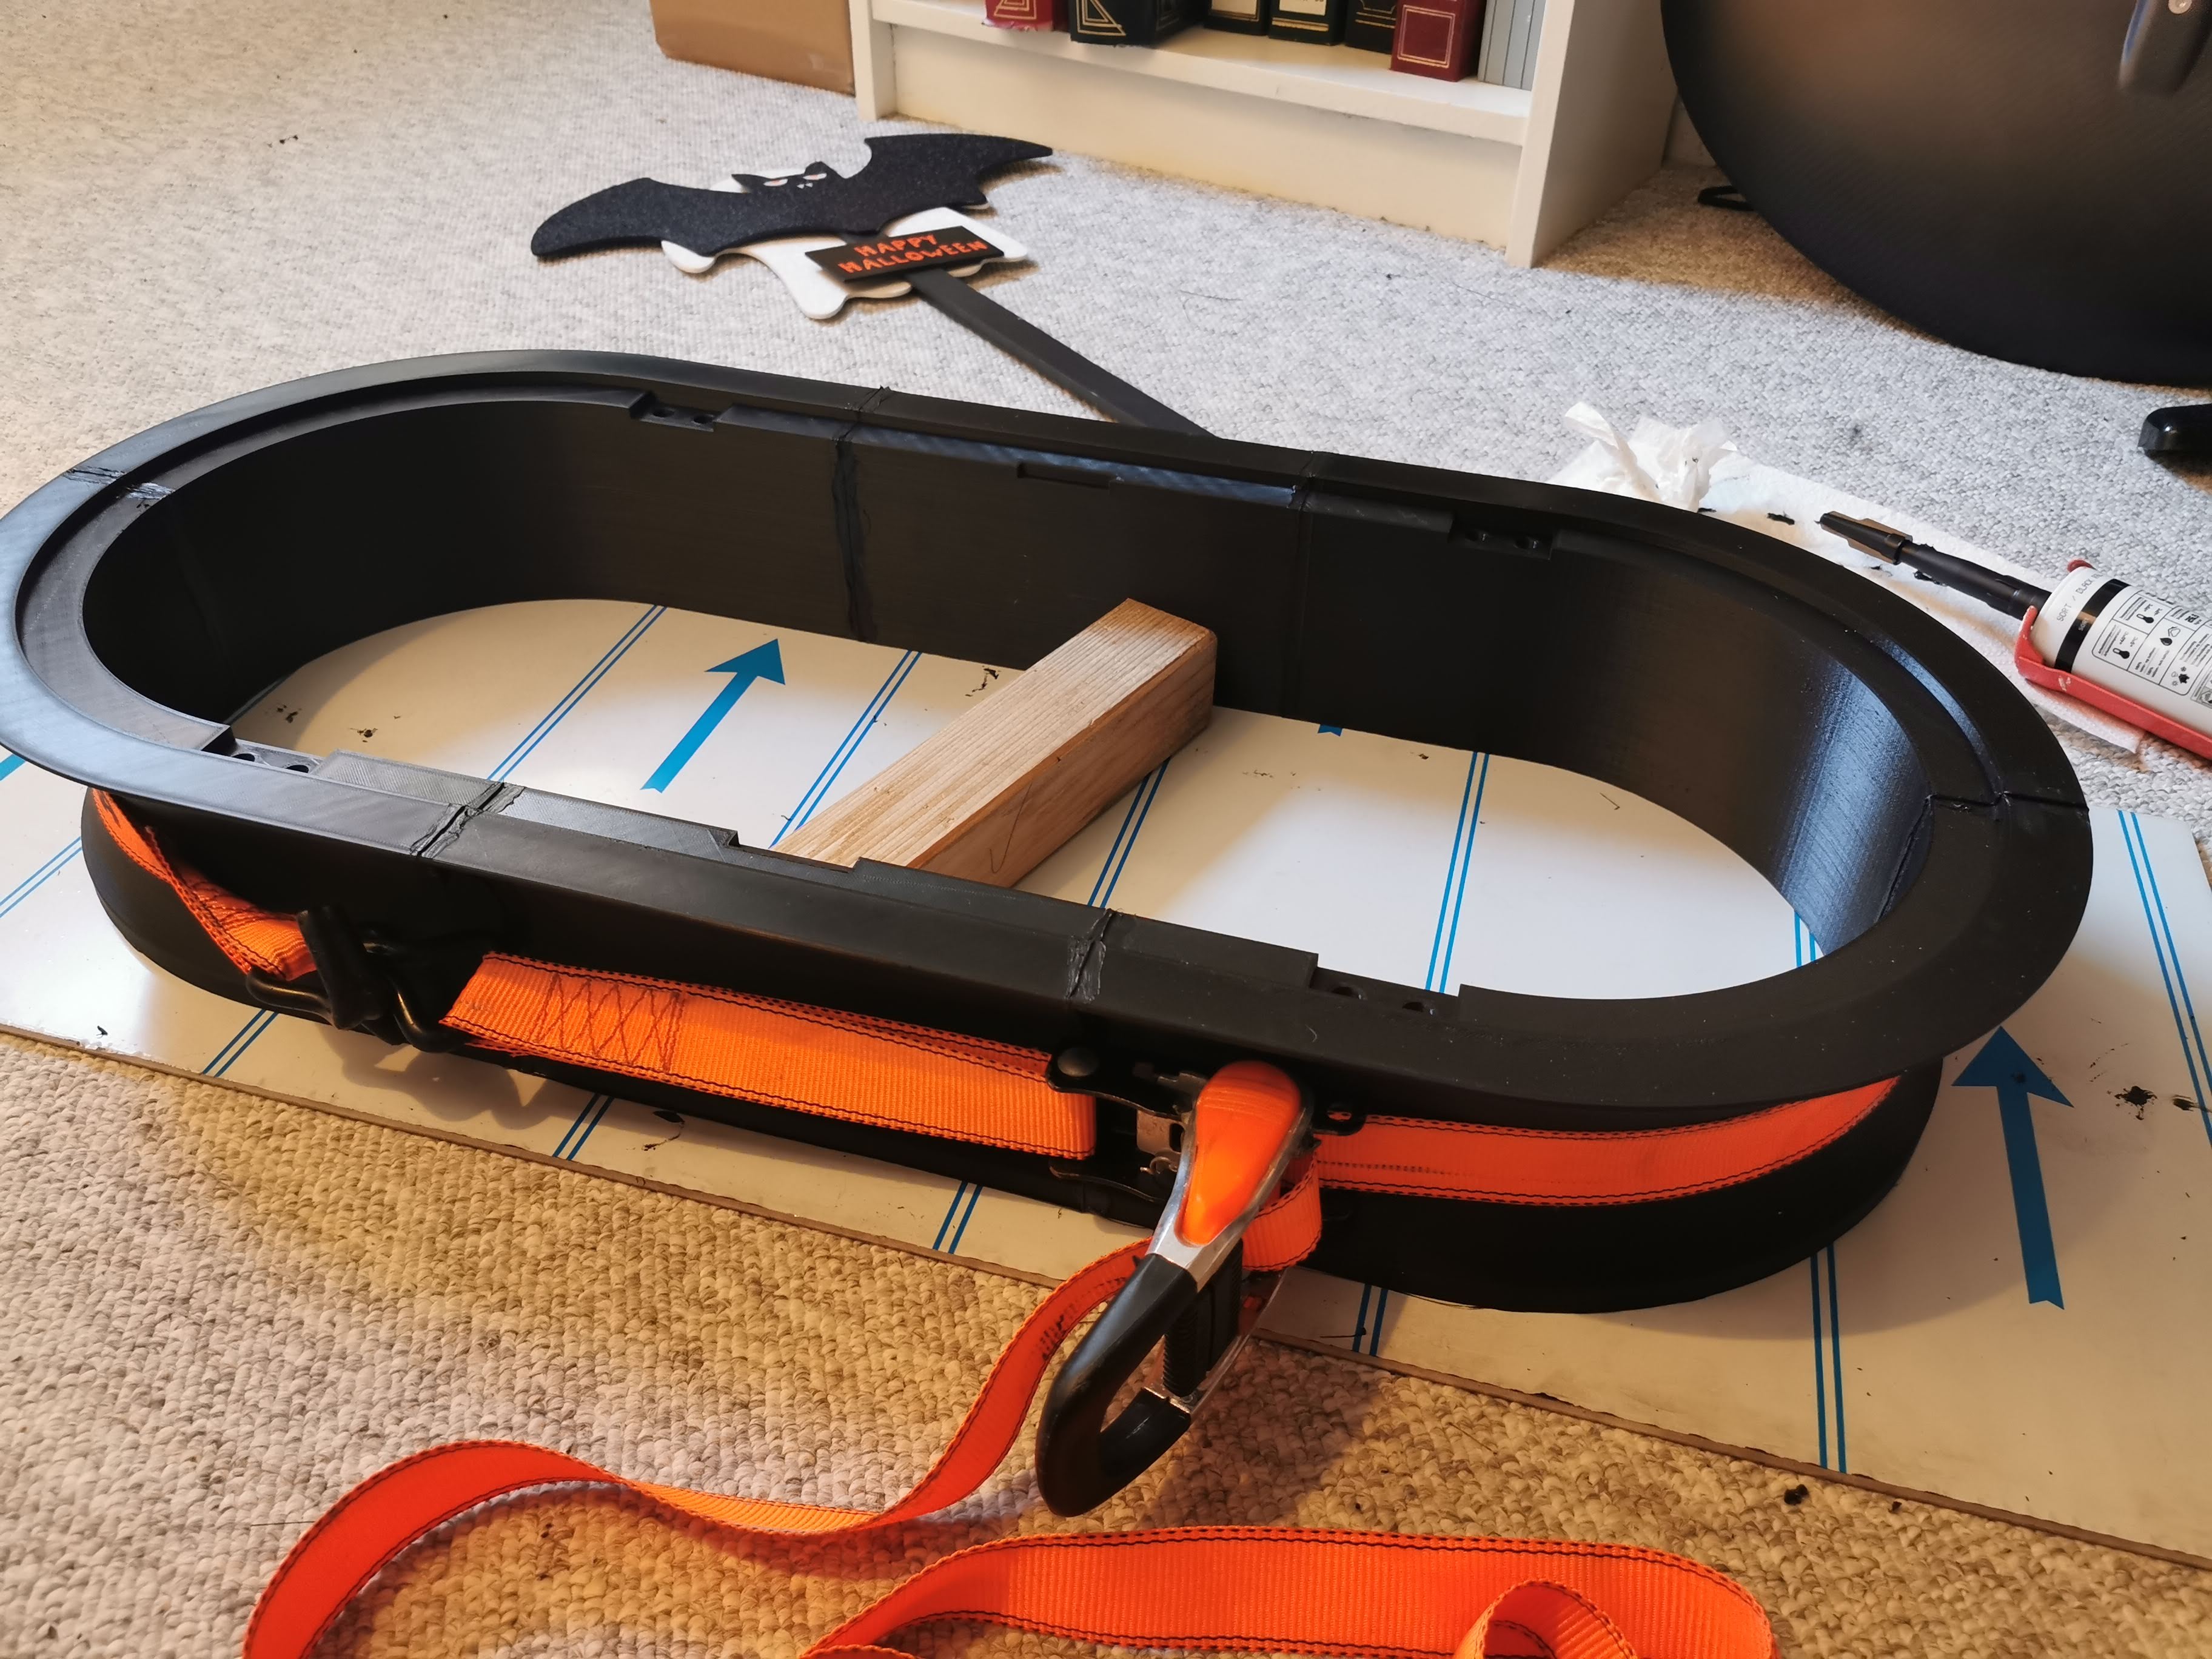
When the 5mm aluminum bottom is be screwed and glued to the frame the strength will be really solid, no need for extra reinforcement. The only drawback I can see is that the entire box with both bottom and lid will becomes quite heavy, around 6 kg. If or when I do this again, I will make the profile a bit thinner to save some weight. I believe it will be solid enough if I cut the profile with 1cm
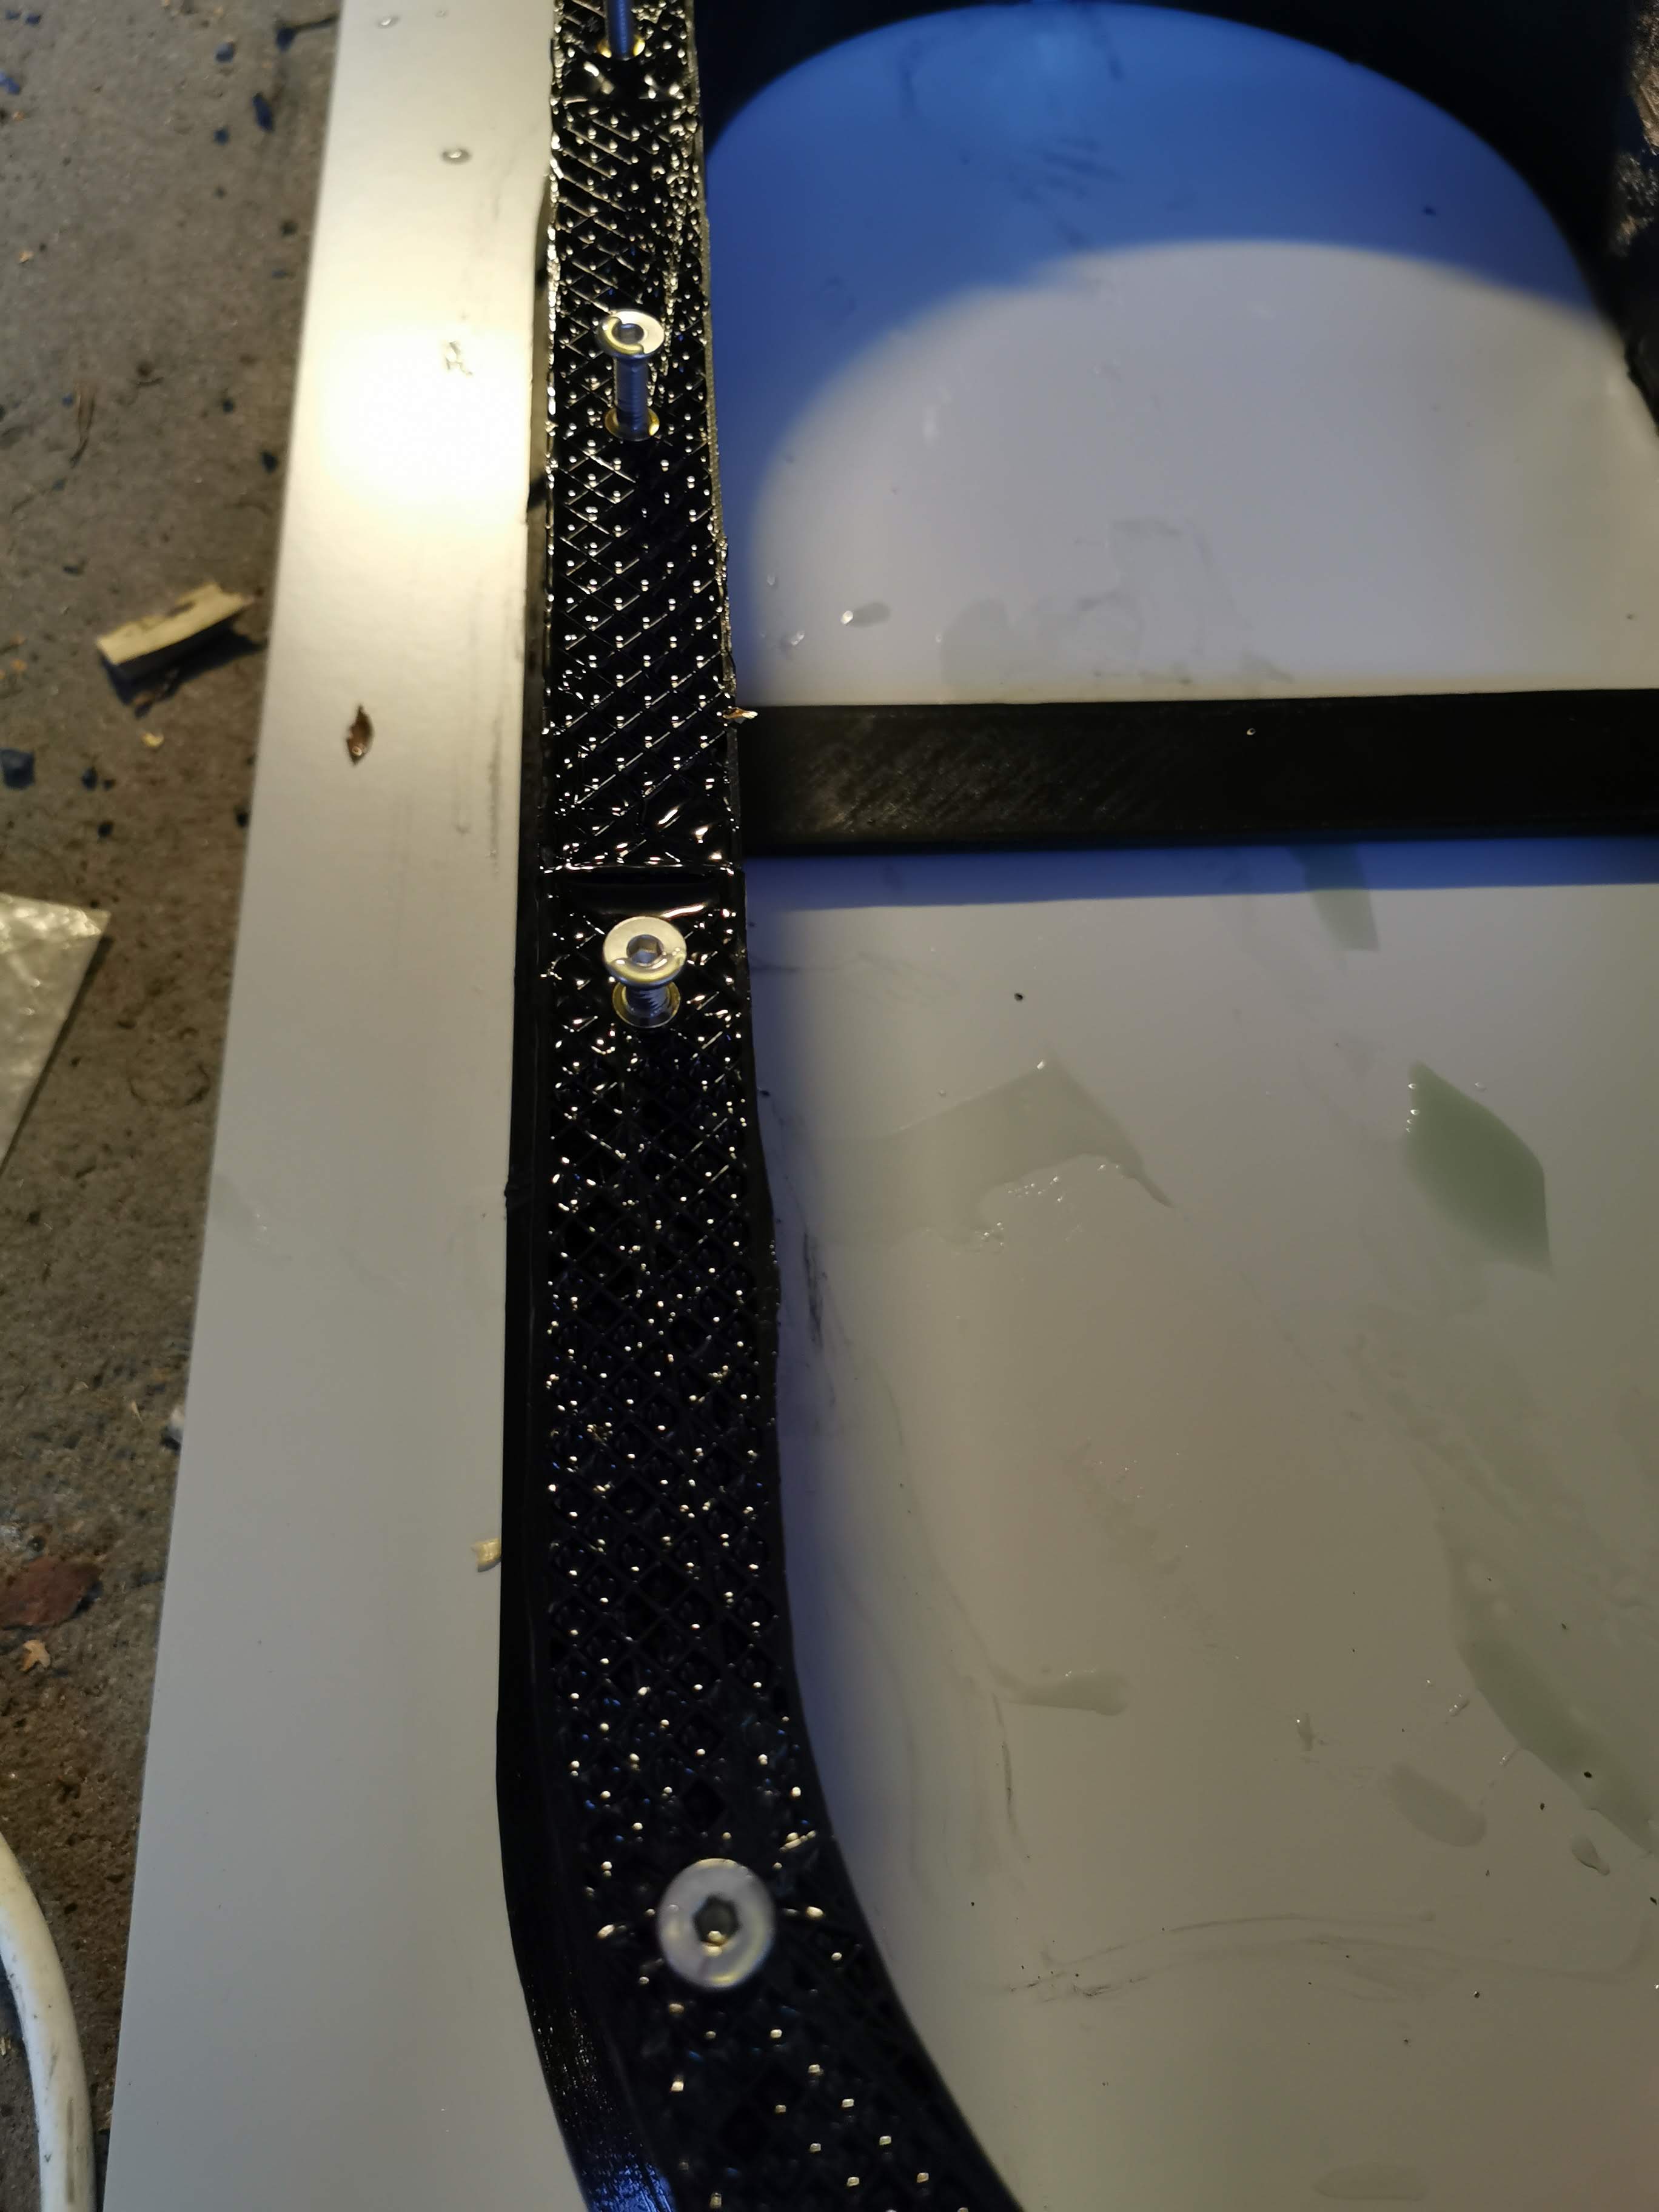
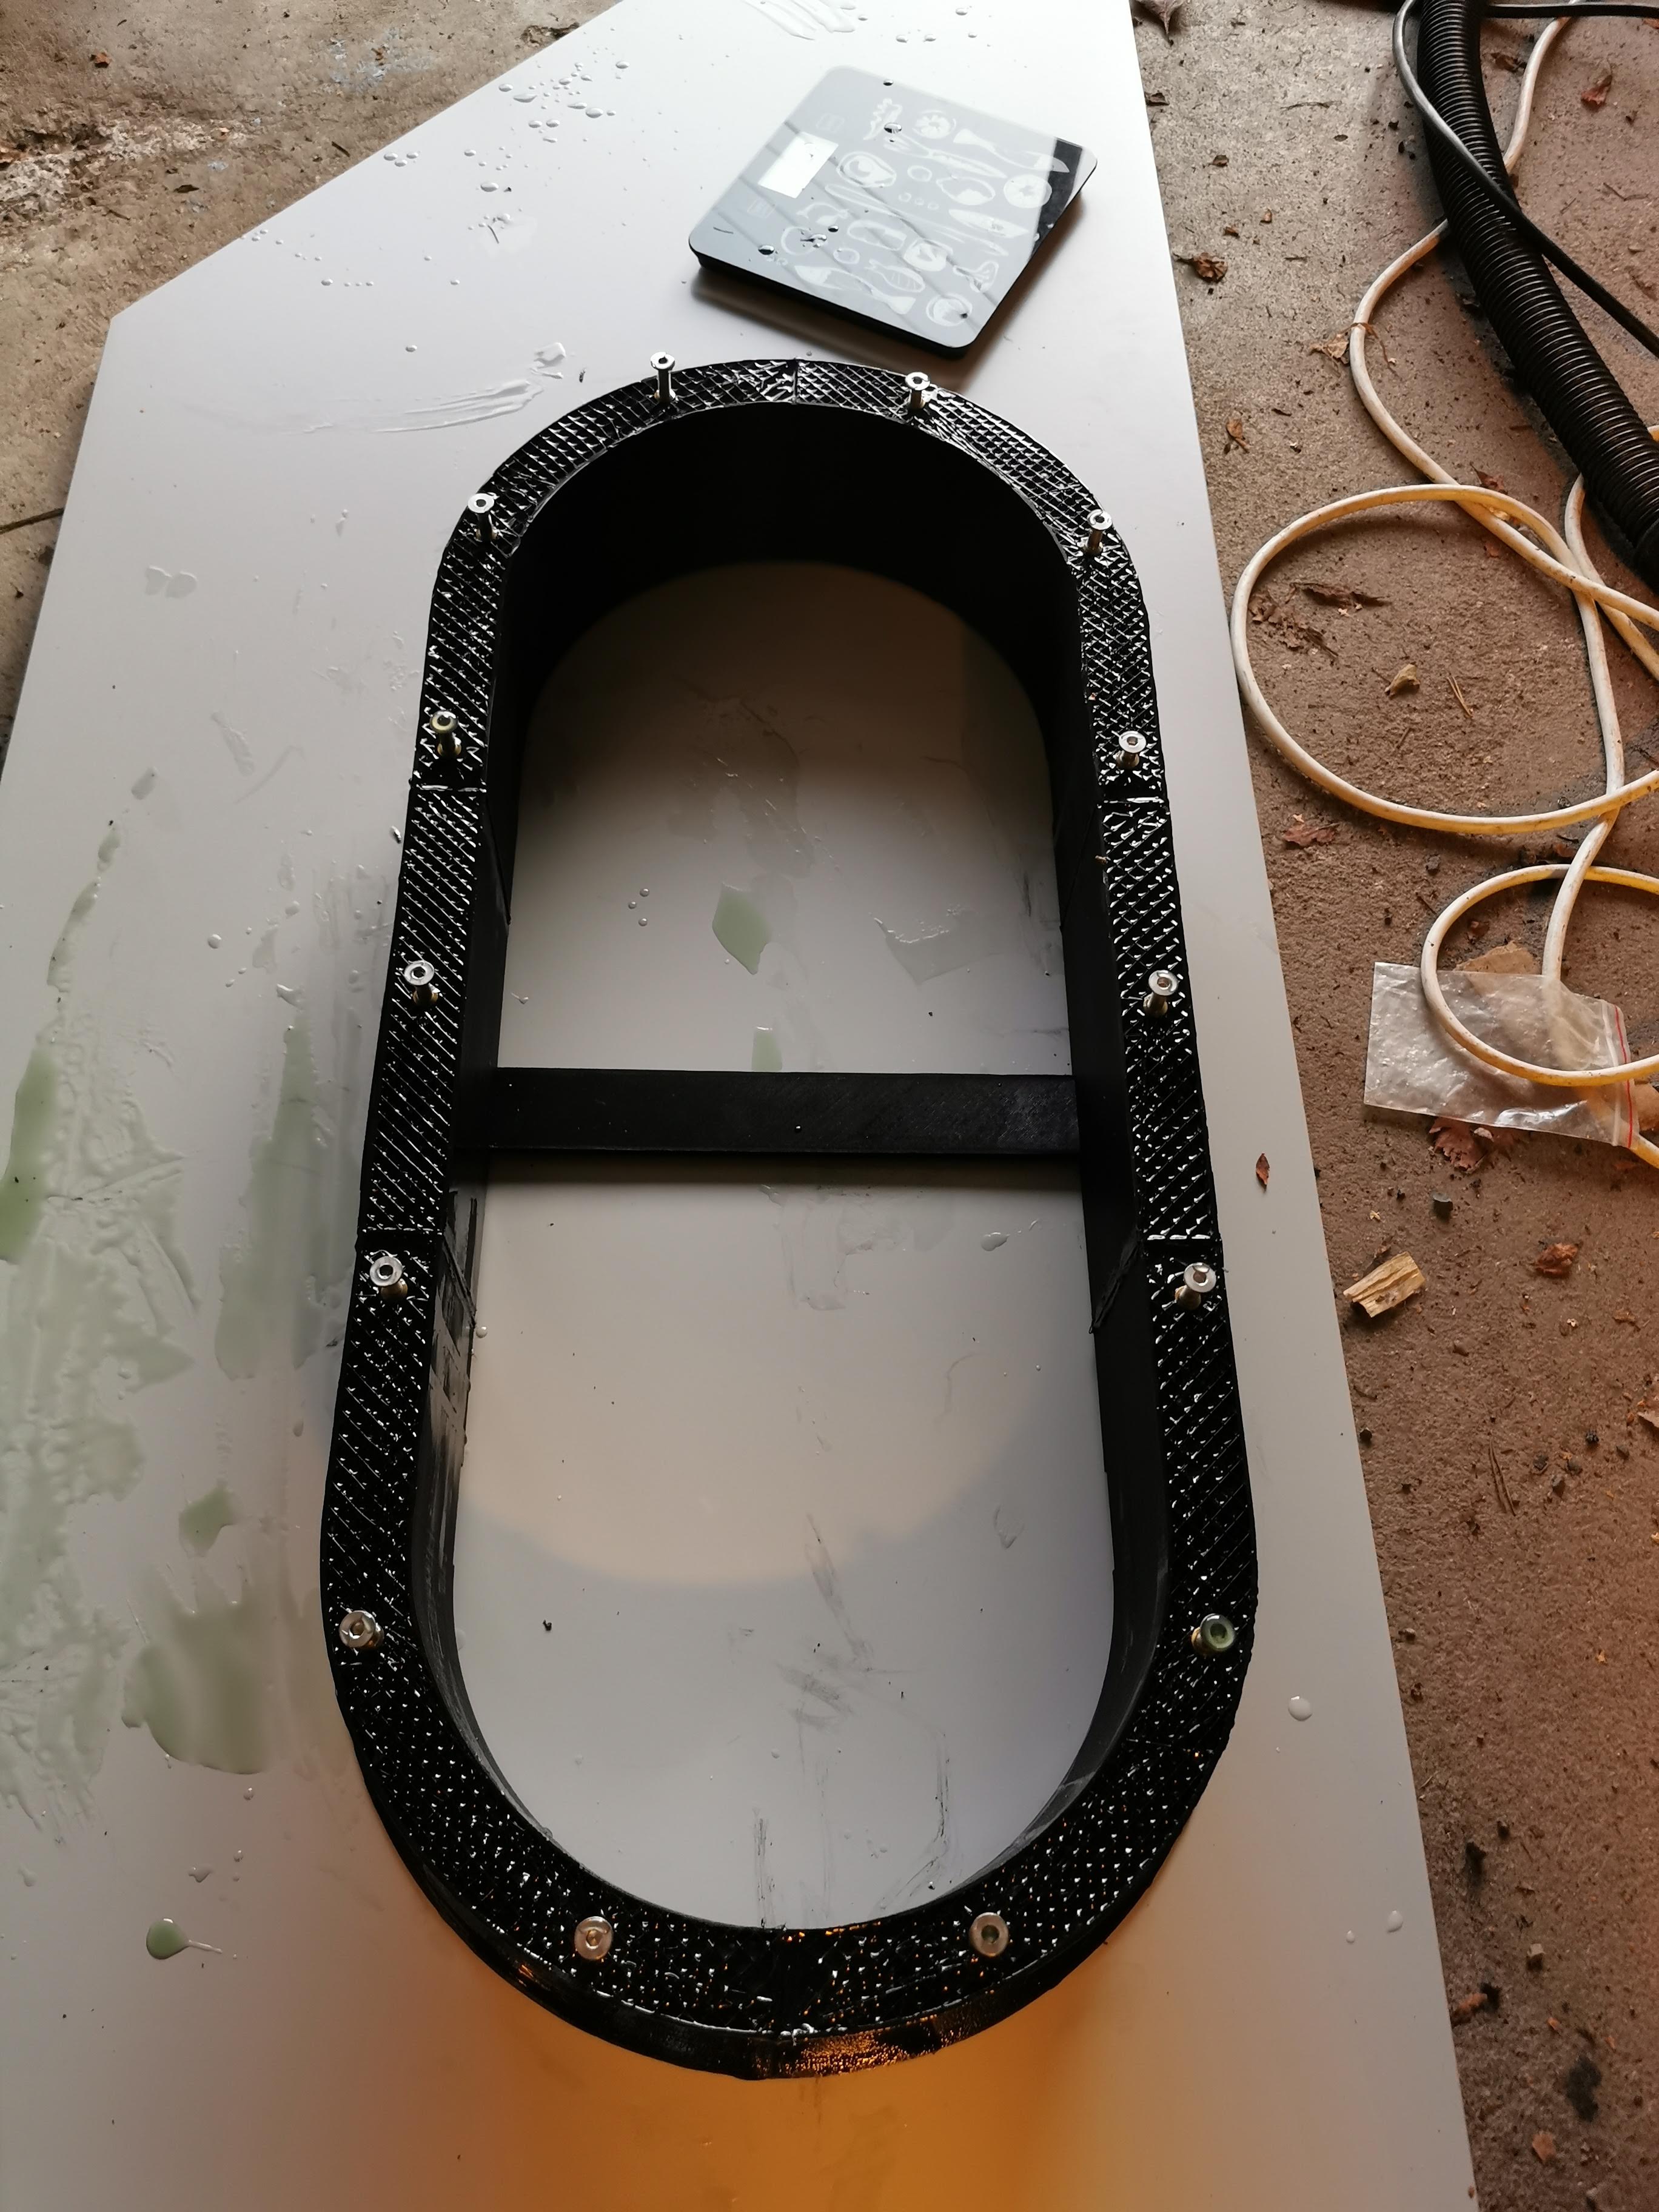
Also, the 100mm stainless screws has arrived so in the next couple of weeks I will be able mount the bottom to the frame, the motor to the mast, the mast to the box and have a testrun in the bathtub.
---
### Author:  [@samisin](https://foil.zone/u/samisin)
#### Post date: [October 28, 2019, 1:45pm UTC](https://foil.zone/t/yahef-from-norway/5682/10 "2019-10-28T13:45:22Z")
Liked the display! What is the part number for the dpsplay?
---
### Author:  [@YAHEF](https://foil.zone/u/YAHEF)
#### Post date: [October 28, 2019, 1:50pm UTC](https://foil.zone/t/yahef-from-norway/5682/11 "2019-10-28T13:50:37Z")
It’s a regular ILI9341 2.2 inch from aliexpress
Like this one
[aliexpress.com](https://www.aliexpress.com/item/32949841210.html?spm=a2g0o.productlist.0.0.57995ebaZkxKnW&algo_pvid=4e7a85c6-3a84-4492-8099-af17695edee0&algo_expid=4e7a85c6-3a84-4492-8099-af17695edee0-0&btsid=53183c32-508d-4011-8e46-b1cd4e0a5171&ws_ab_test=searchweb0_0,searchweb201602_9,searchweb201603_52)
---
### Author:  [@samisin](https://foil.zone/u/samisin)
#### Post date: [October 28, 2019, 2:06pm UTC](https://foil.zone/t/yahef-from-norway/5682/12 "2019-10-28T14:06:17Z")
Seems very bright display. I am using st7735 1.8 inch. Even 1.8 inch was challenging to fit. Good job on fitting the display there
---
### Author:  [@nice2cu](https://foil.zone/u/nice2cu)
#### Post date: [October 28, 2019, 5:09pm UTC](https://foil.zone/t/yahef-from-norway/5682/13 "2019-10-28T17:09:58Z")
It looks realy professional!!!
You filled in polyester, how and where you do it?
Why you dont print it with 0% infill?
---
### Author:  [@YAHEF](https://foil.zone/u/YAHEF)
#### Post date: [October 28, 2019, 7:06pm UTC](https://foil.zone/t/yahef-from-norway/5682/14 "2019-10-28T19:06:09Z")
The trick is to peel off the white frame around the display, leaving you with only the display itself. Then there is the acrylic glass, painted a black frame making only the pixels visible. The two parts then goes into the modifyed @Hiorth lid.
Then I have a question for you. How did you make your navigation buttons?
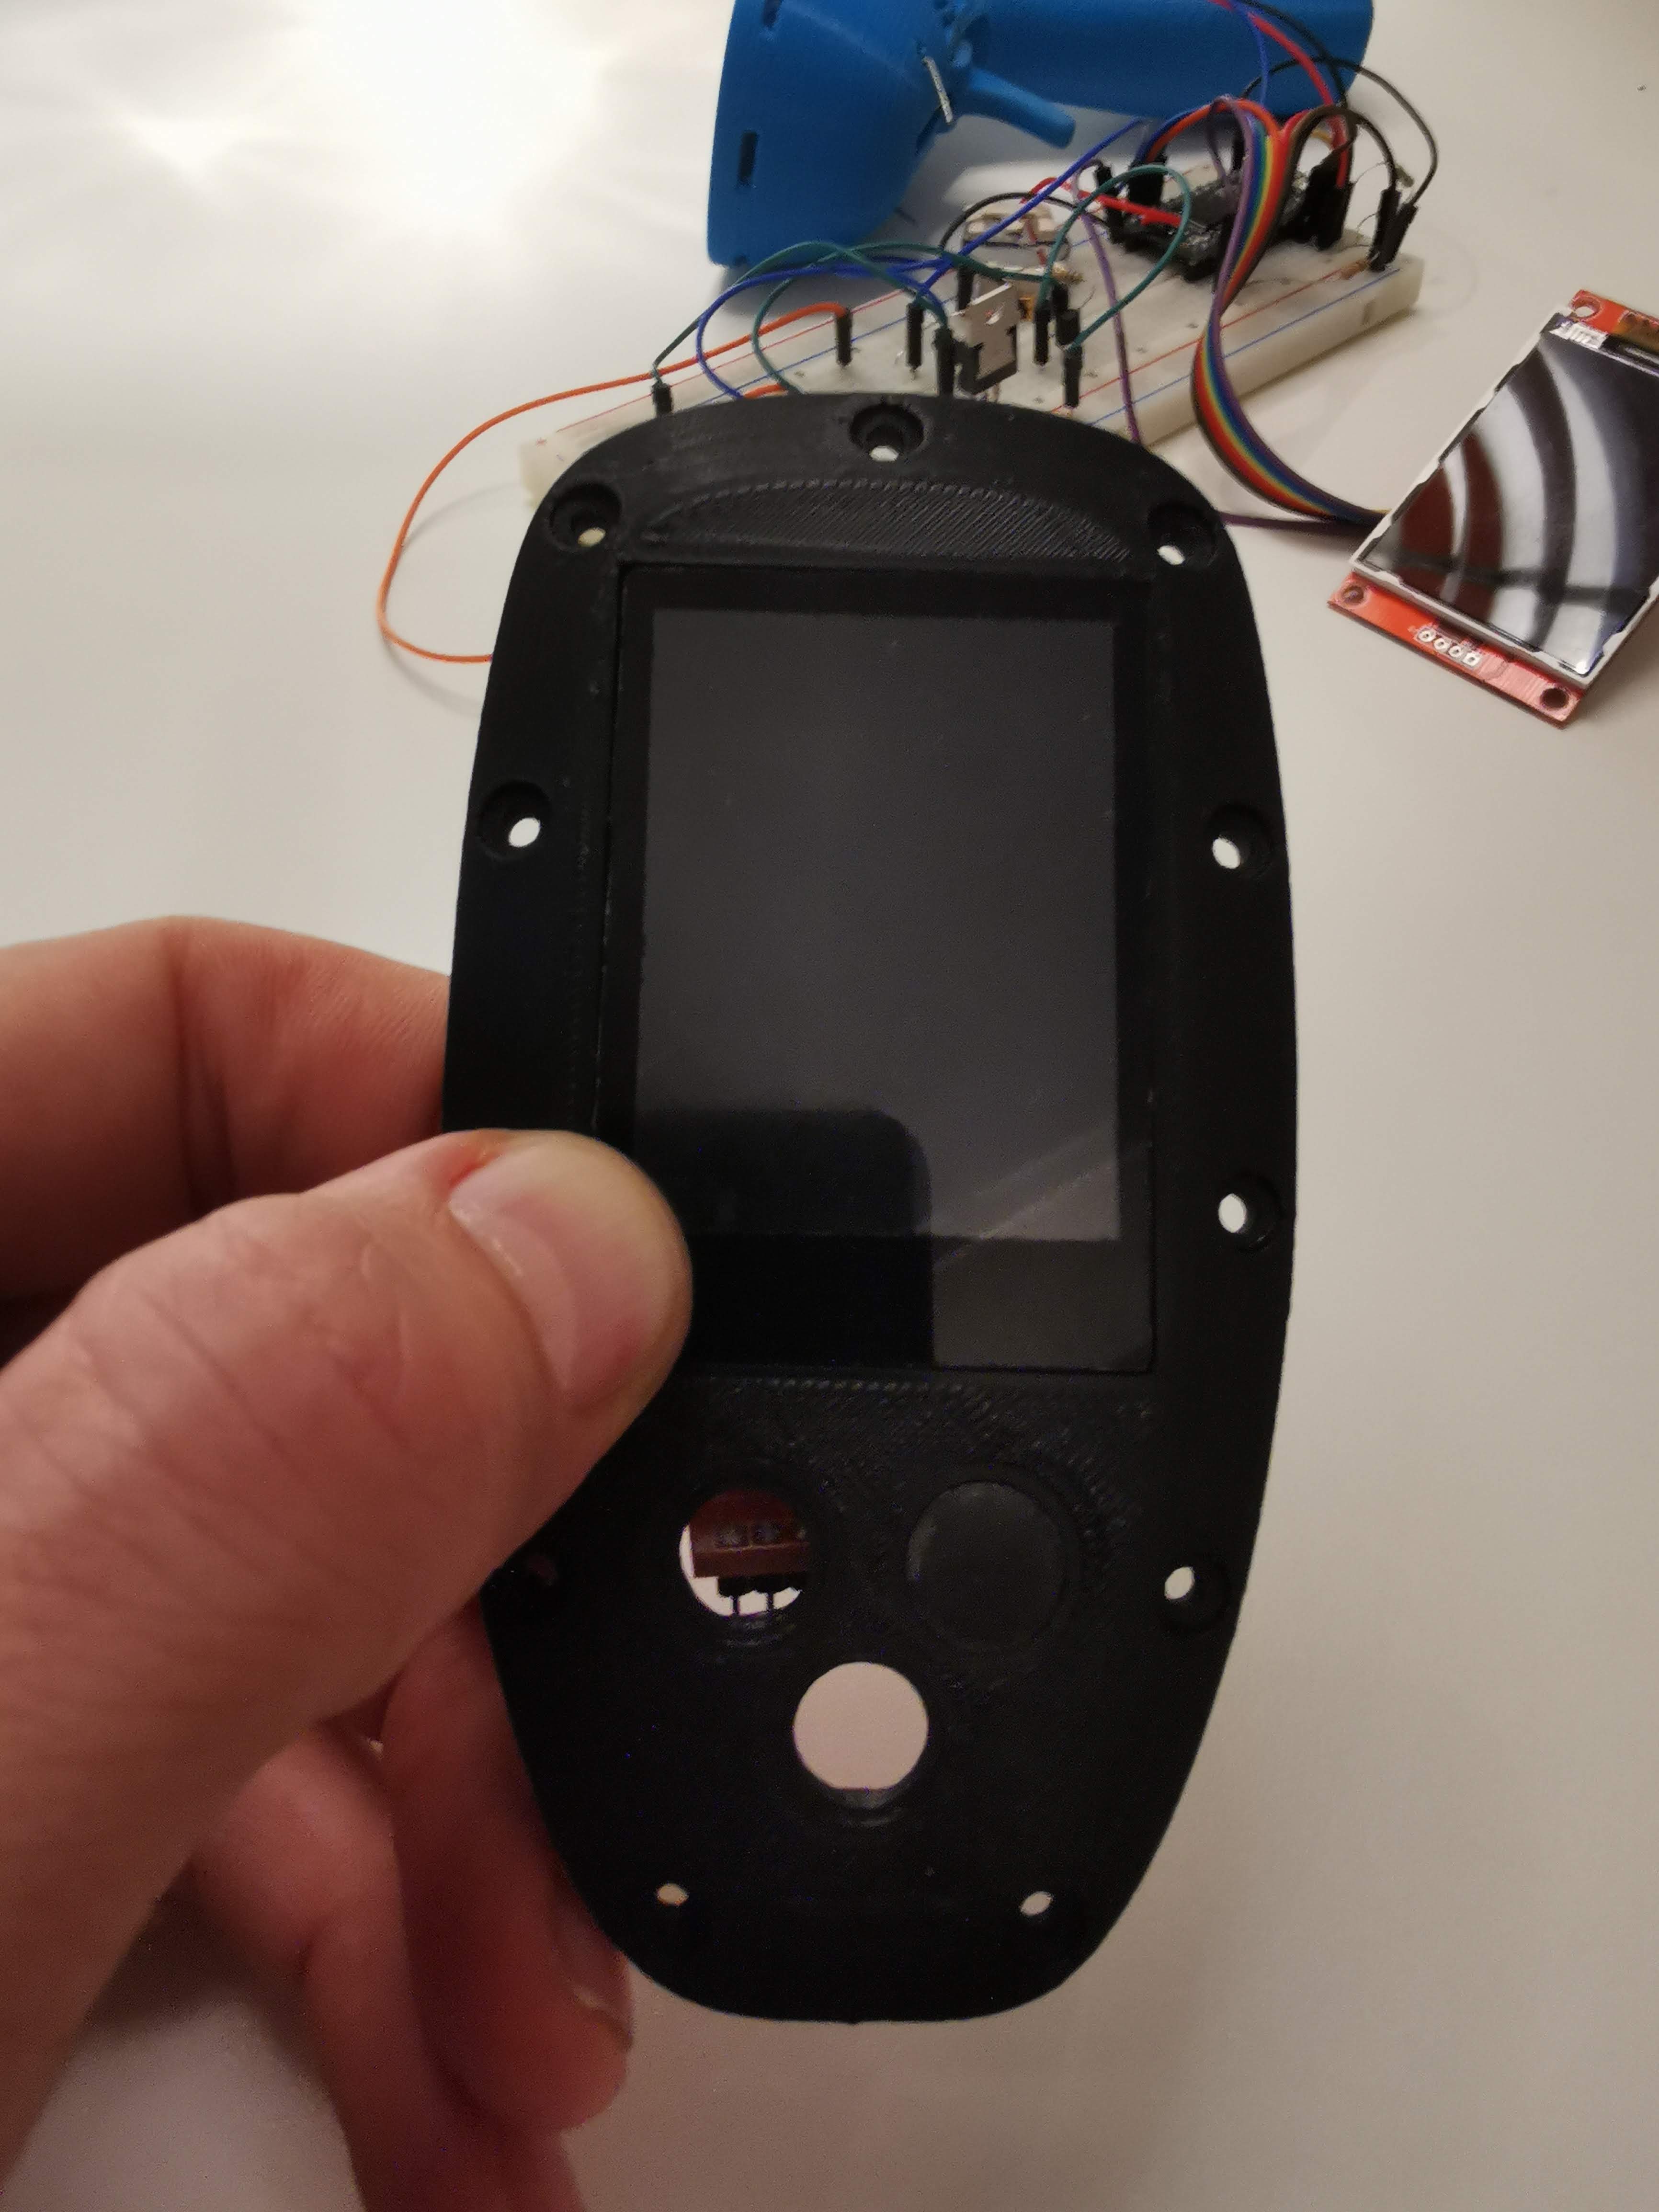
[https://a360.co/2Wl4gNd](https://a360.co/2Wl4gNd)
https://myhub.autodesk360.com/ue2db12c7/shares/public/SH919a0QTf3c32634dcfbf21c637e64607ce?mode=embed
---
### Author:  [@YAHEF](https://foil.zone/u/YAHEF)
#### Post date: [October 28, 2019, 7:14pm UTC](https://foil.zone/t/yahef-from-norway/5682/15 "2019-10-28T19:14:42Z")
Thanx Robert. Yes I filled the frame with polyester in my garage pouring it in little by little and yes, it smells like hell. Make sure to use a mask. The alternative is to use epoxy, which doesn’t smell that much but costs 3 times as much.
The parts are printed with 8% line infill
---
### Author:  [@samisin](https://foil.zone/u/samisin)
#### Post date: [October 28, 2019, 7:25pm UTC](https://foil.zone/t/yahef-from-norway/5682/16 "2019-10-28T19:25:07Z")
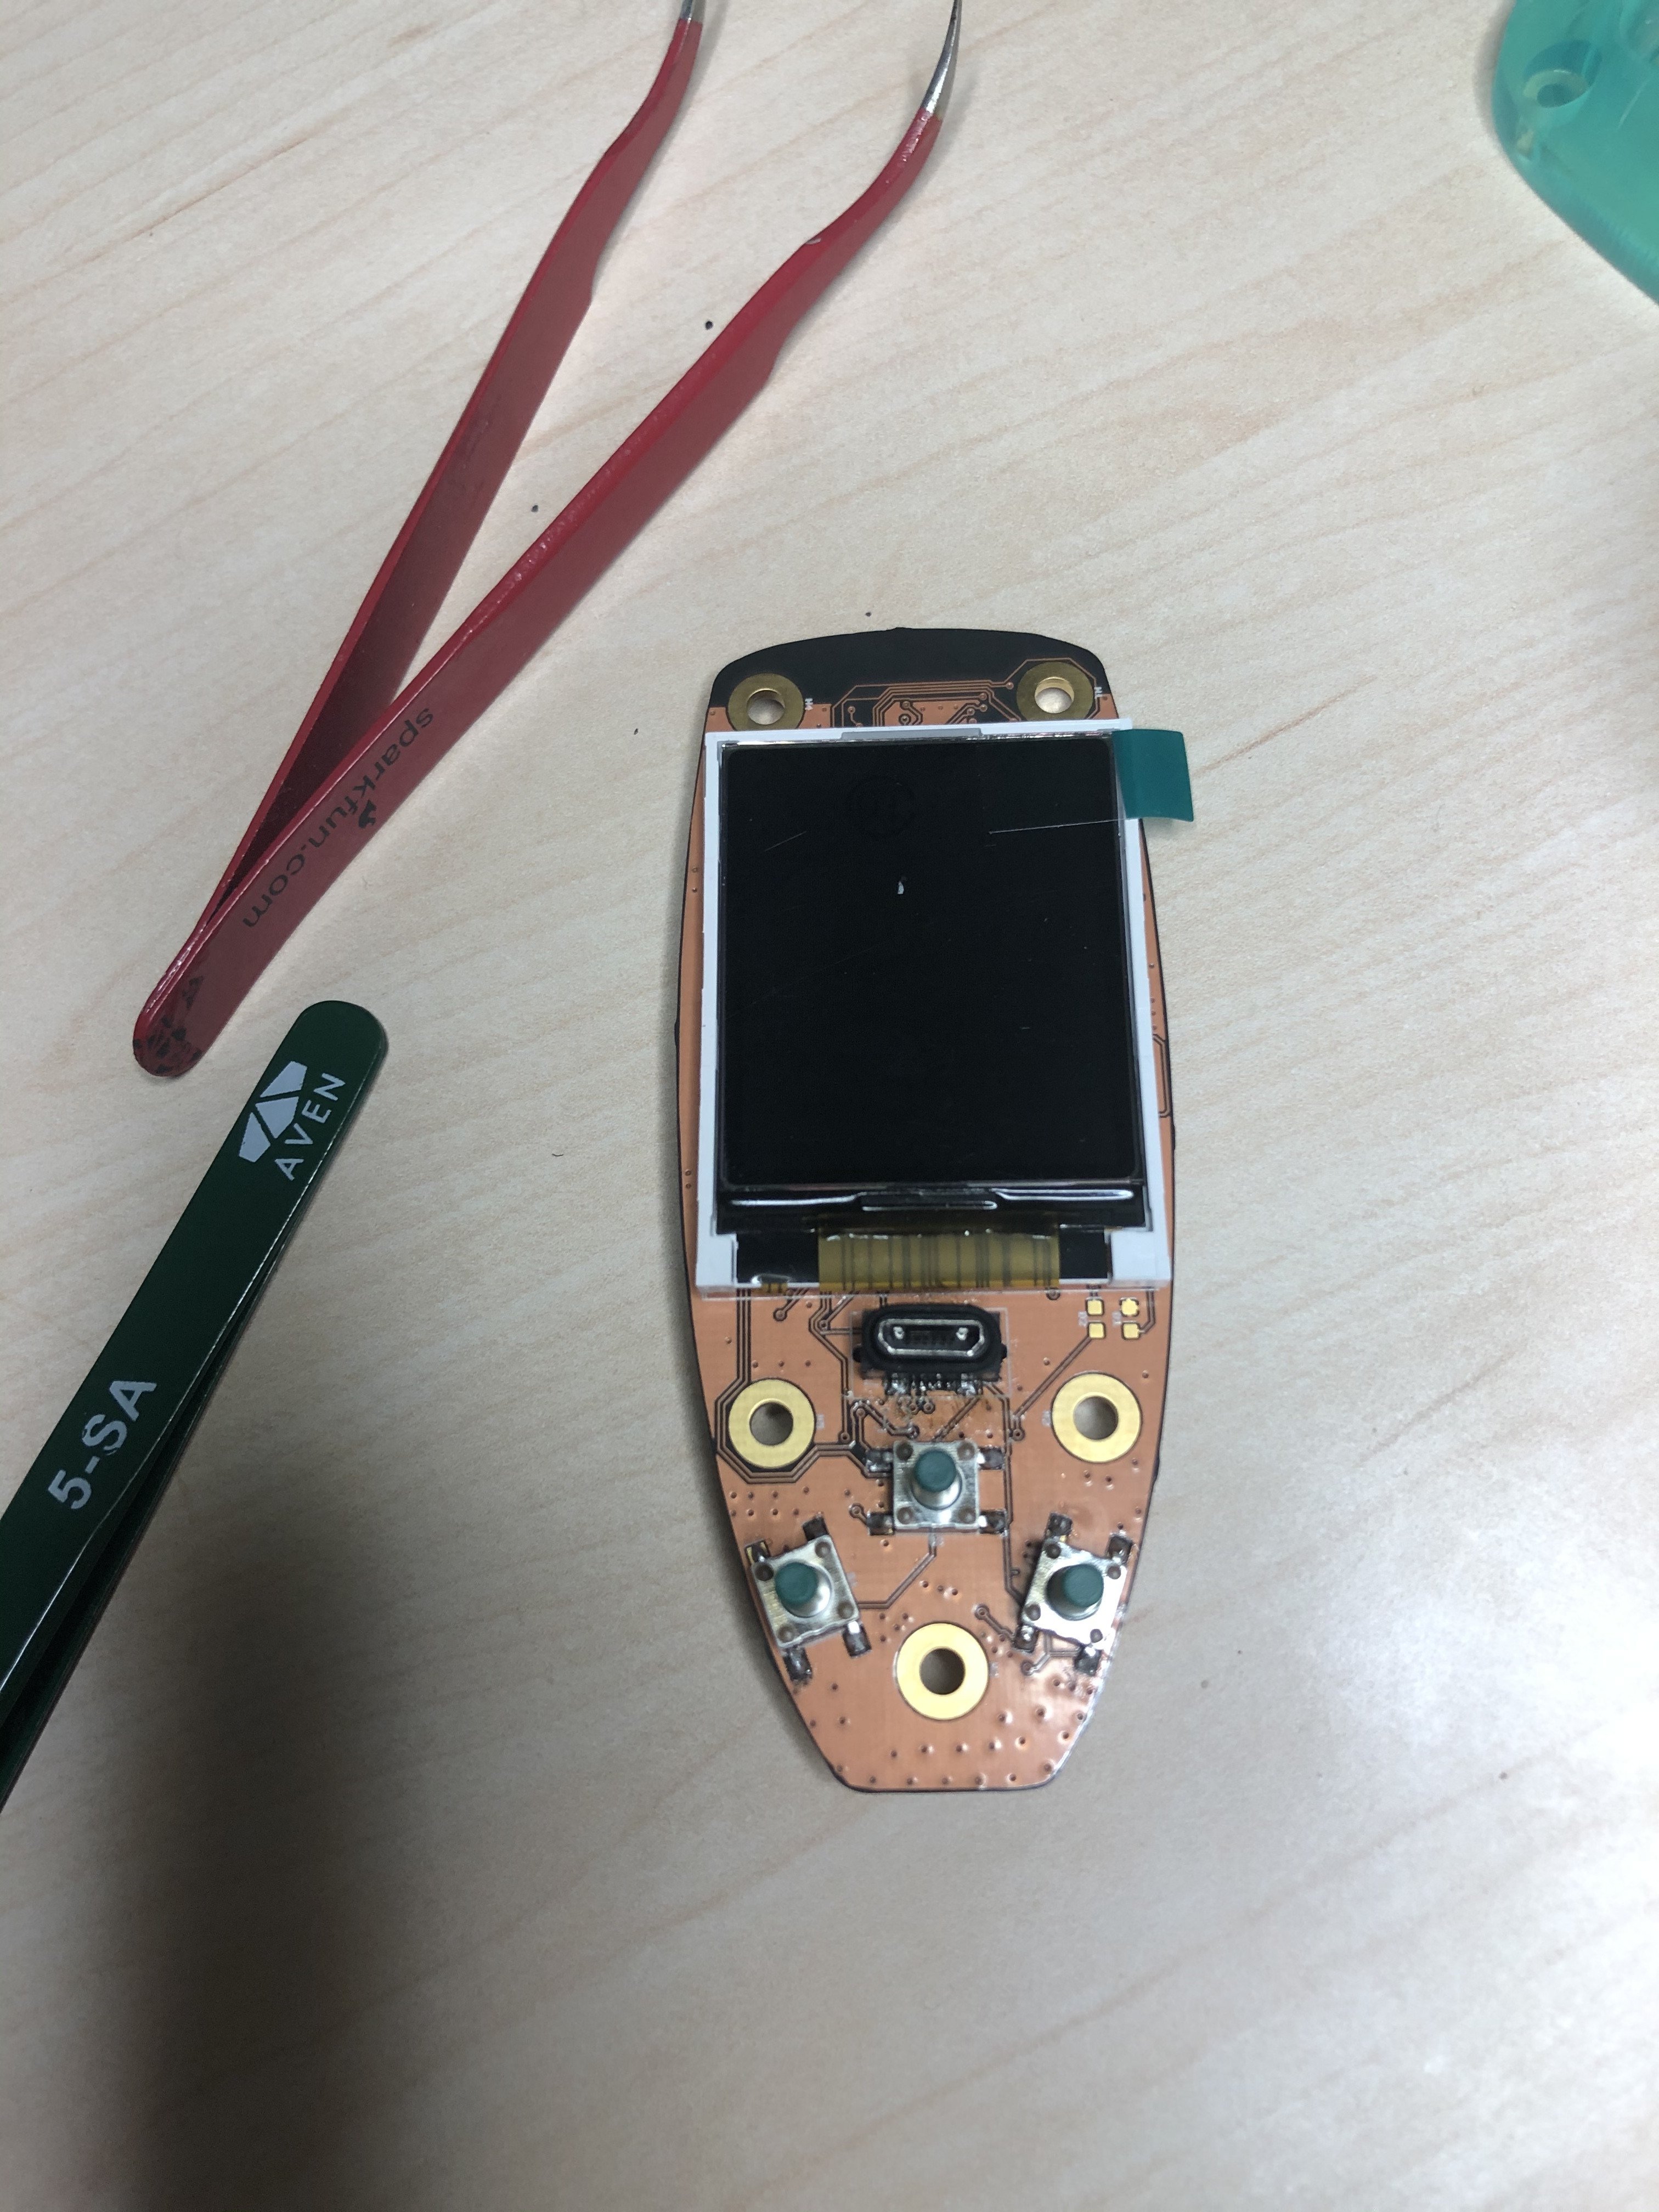 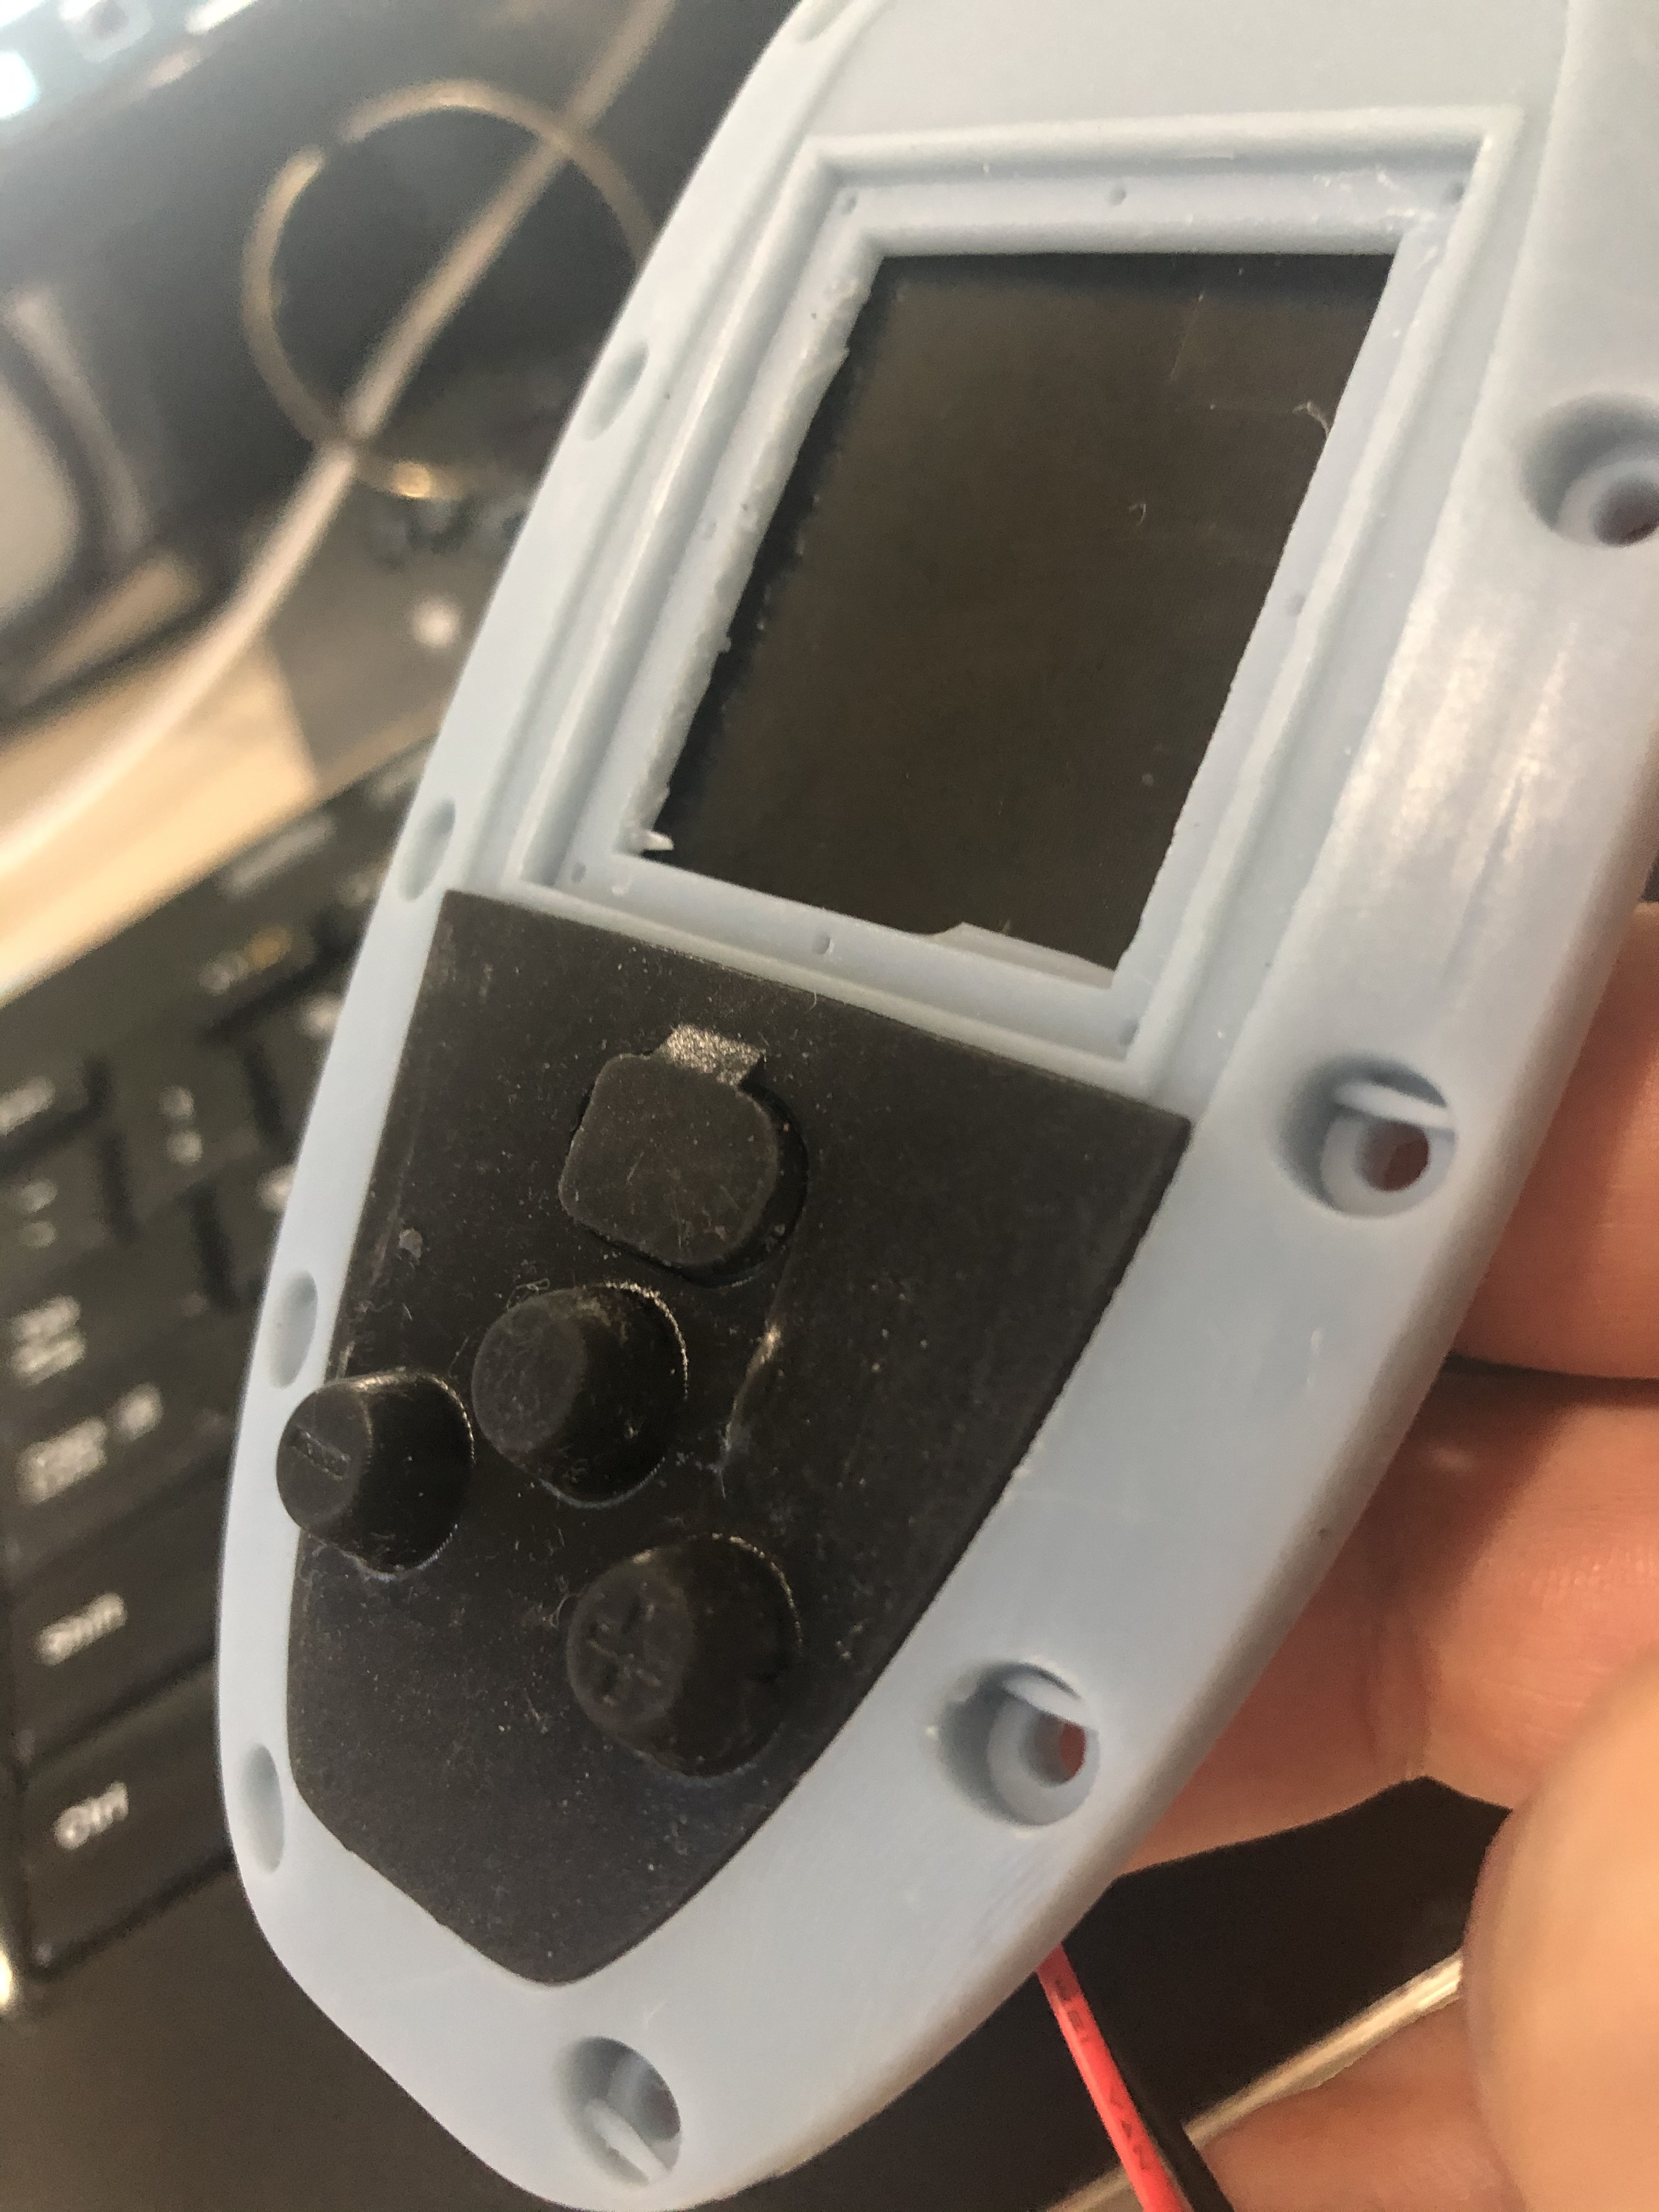 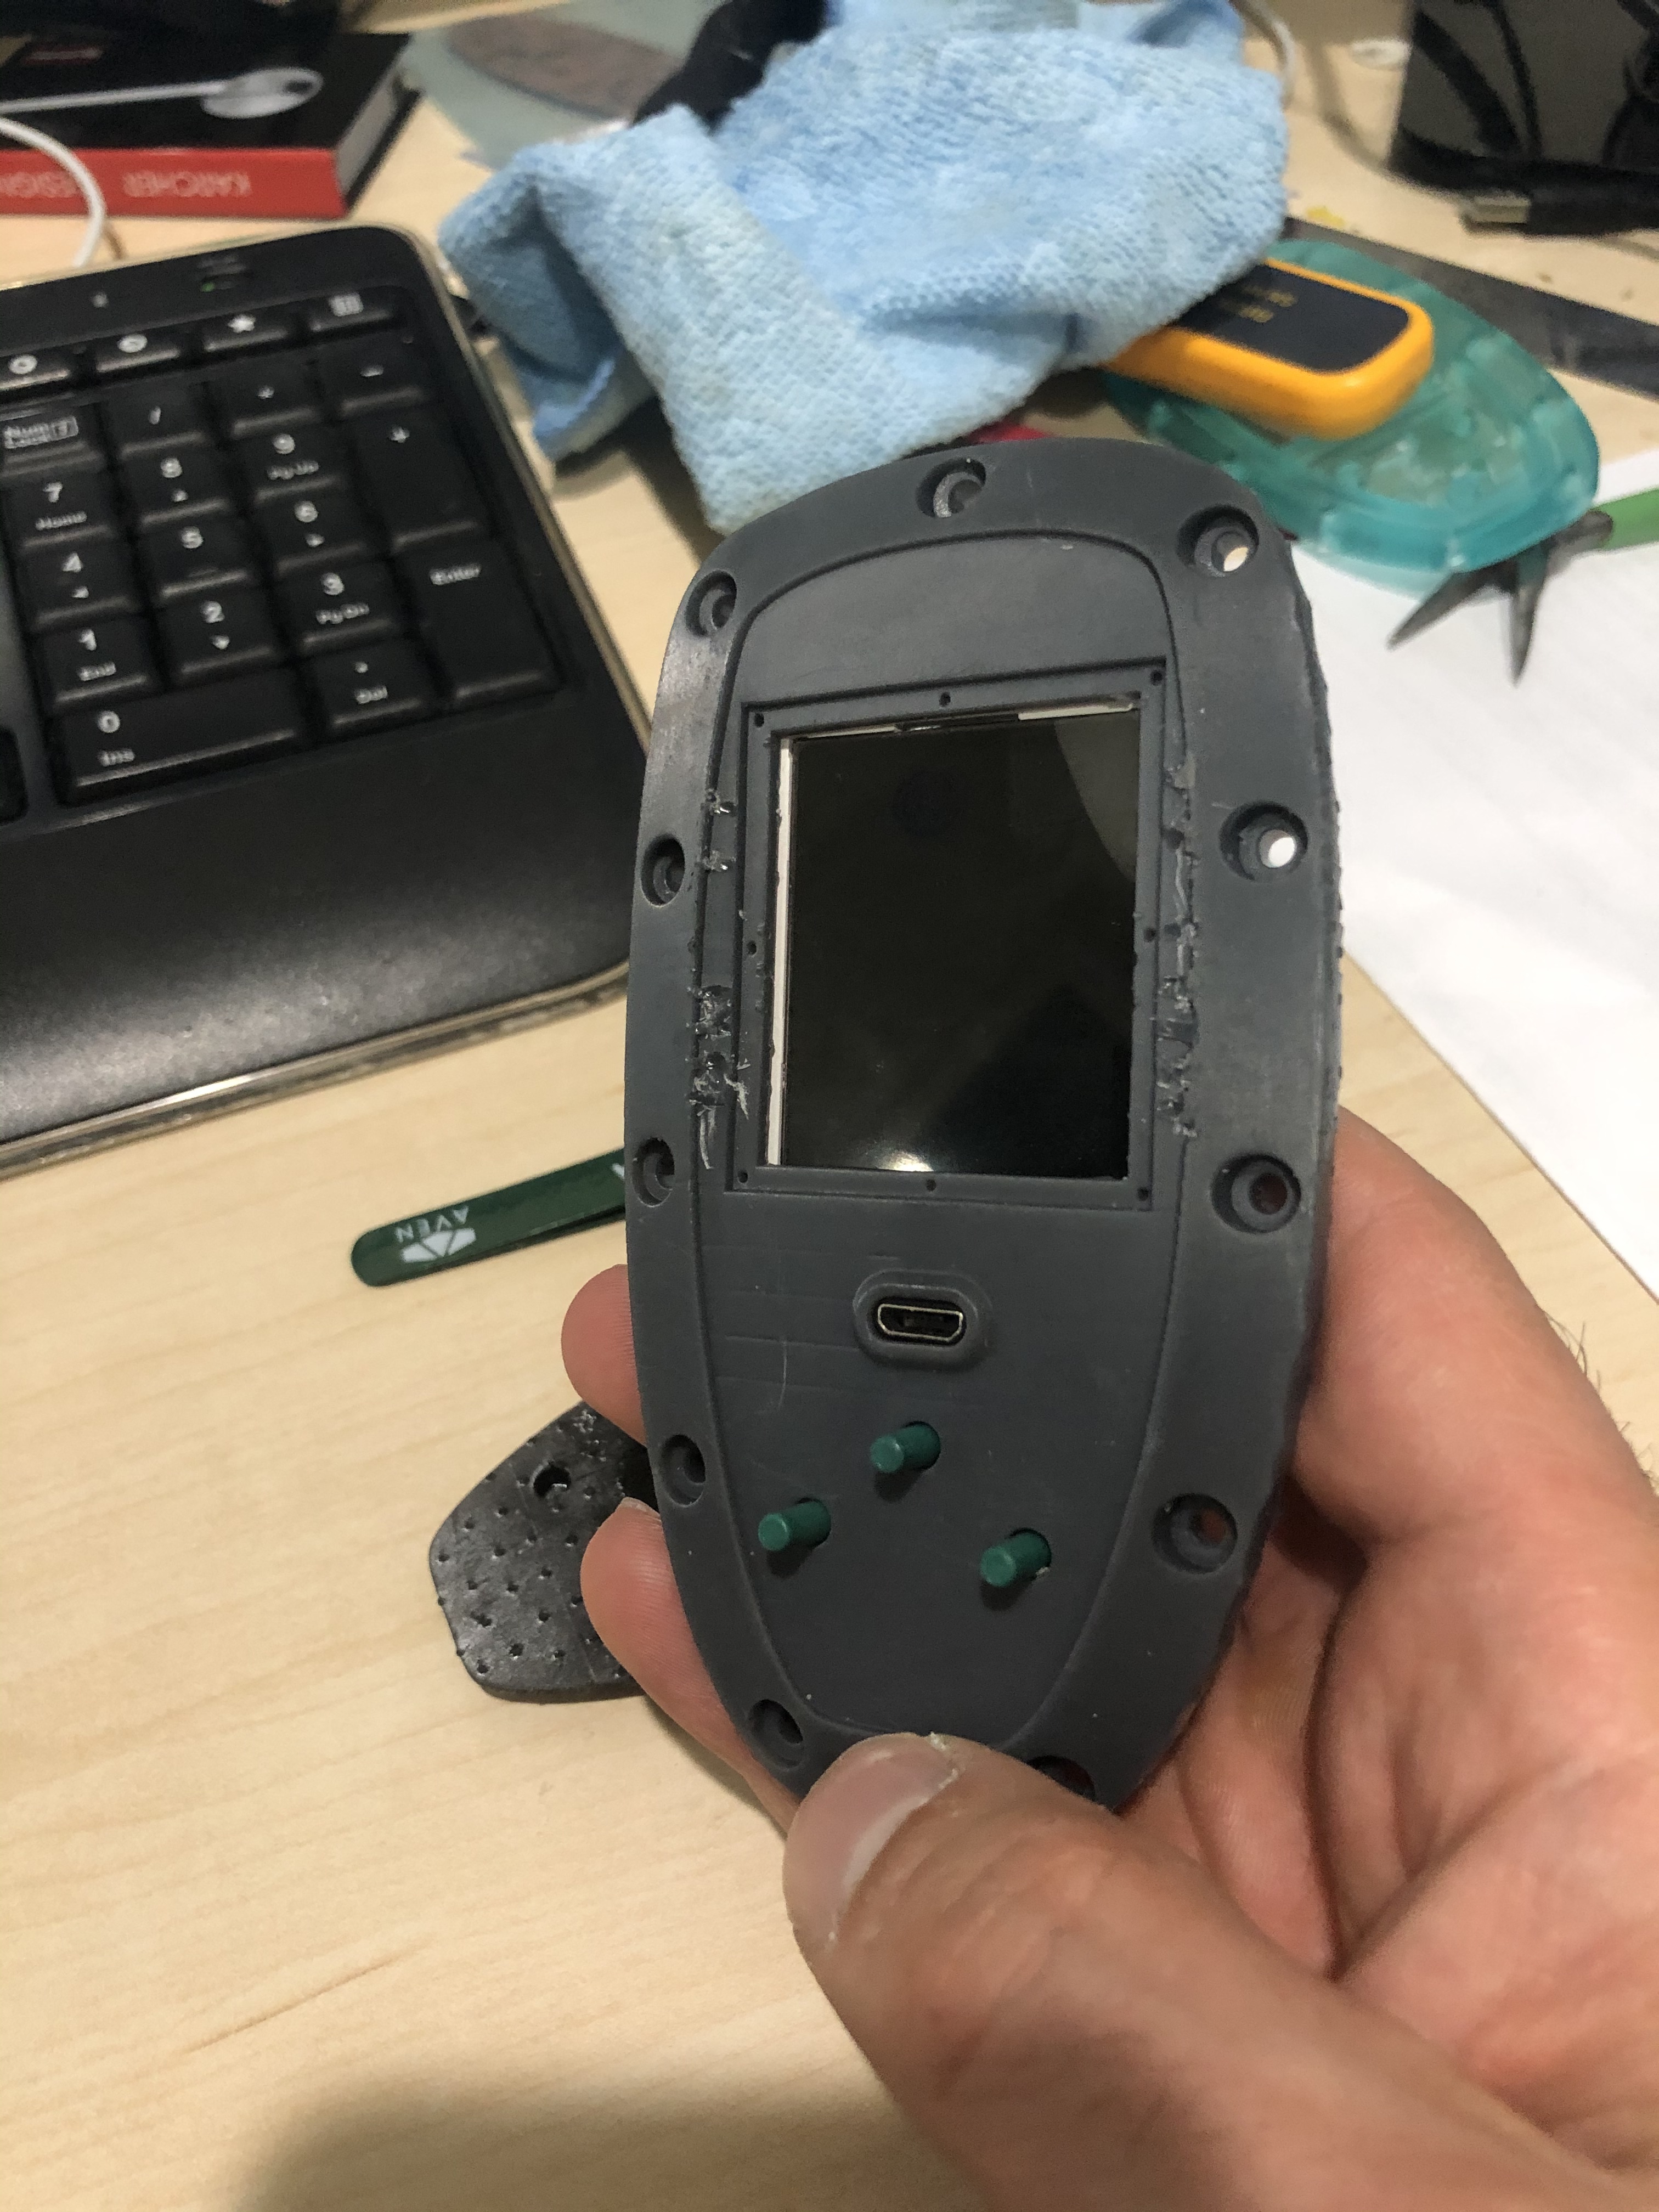
I designed a pcb that gets screwed to the lid. To waterproof it, another rubber cover sits on top
---
### Author:  [@Onhill](https://foil.zone/u/Onhill)
#### Post date: [October 28, 2019, 7:46pm UTC](https://foil.zone/t/yahef-from-norway/5682/17 "2019-10-28T19:46:15Z")
Nice work yahef i have to try it 👍
---
### Author:  [@YAHEF](https://foil.zone/u/YAHEF)
#### Post date: [November 3, 2019, 2:05pm UTC](https://foil.zone/t/yahef-from-norway/5682/18 "2019-11-03T14:05:54Z")
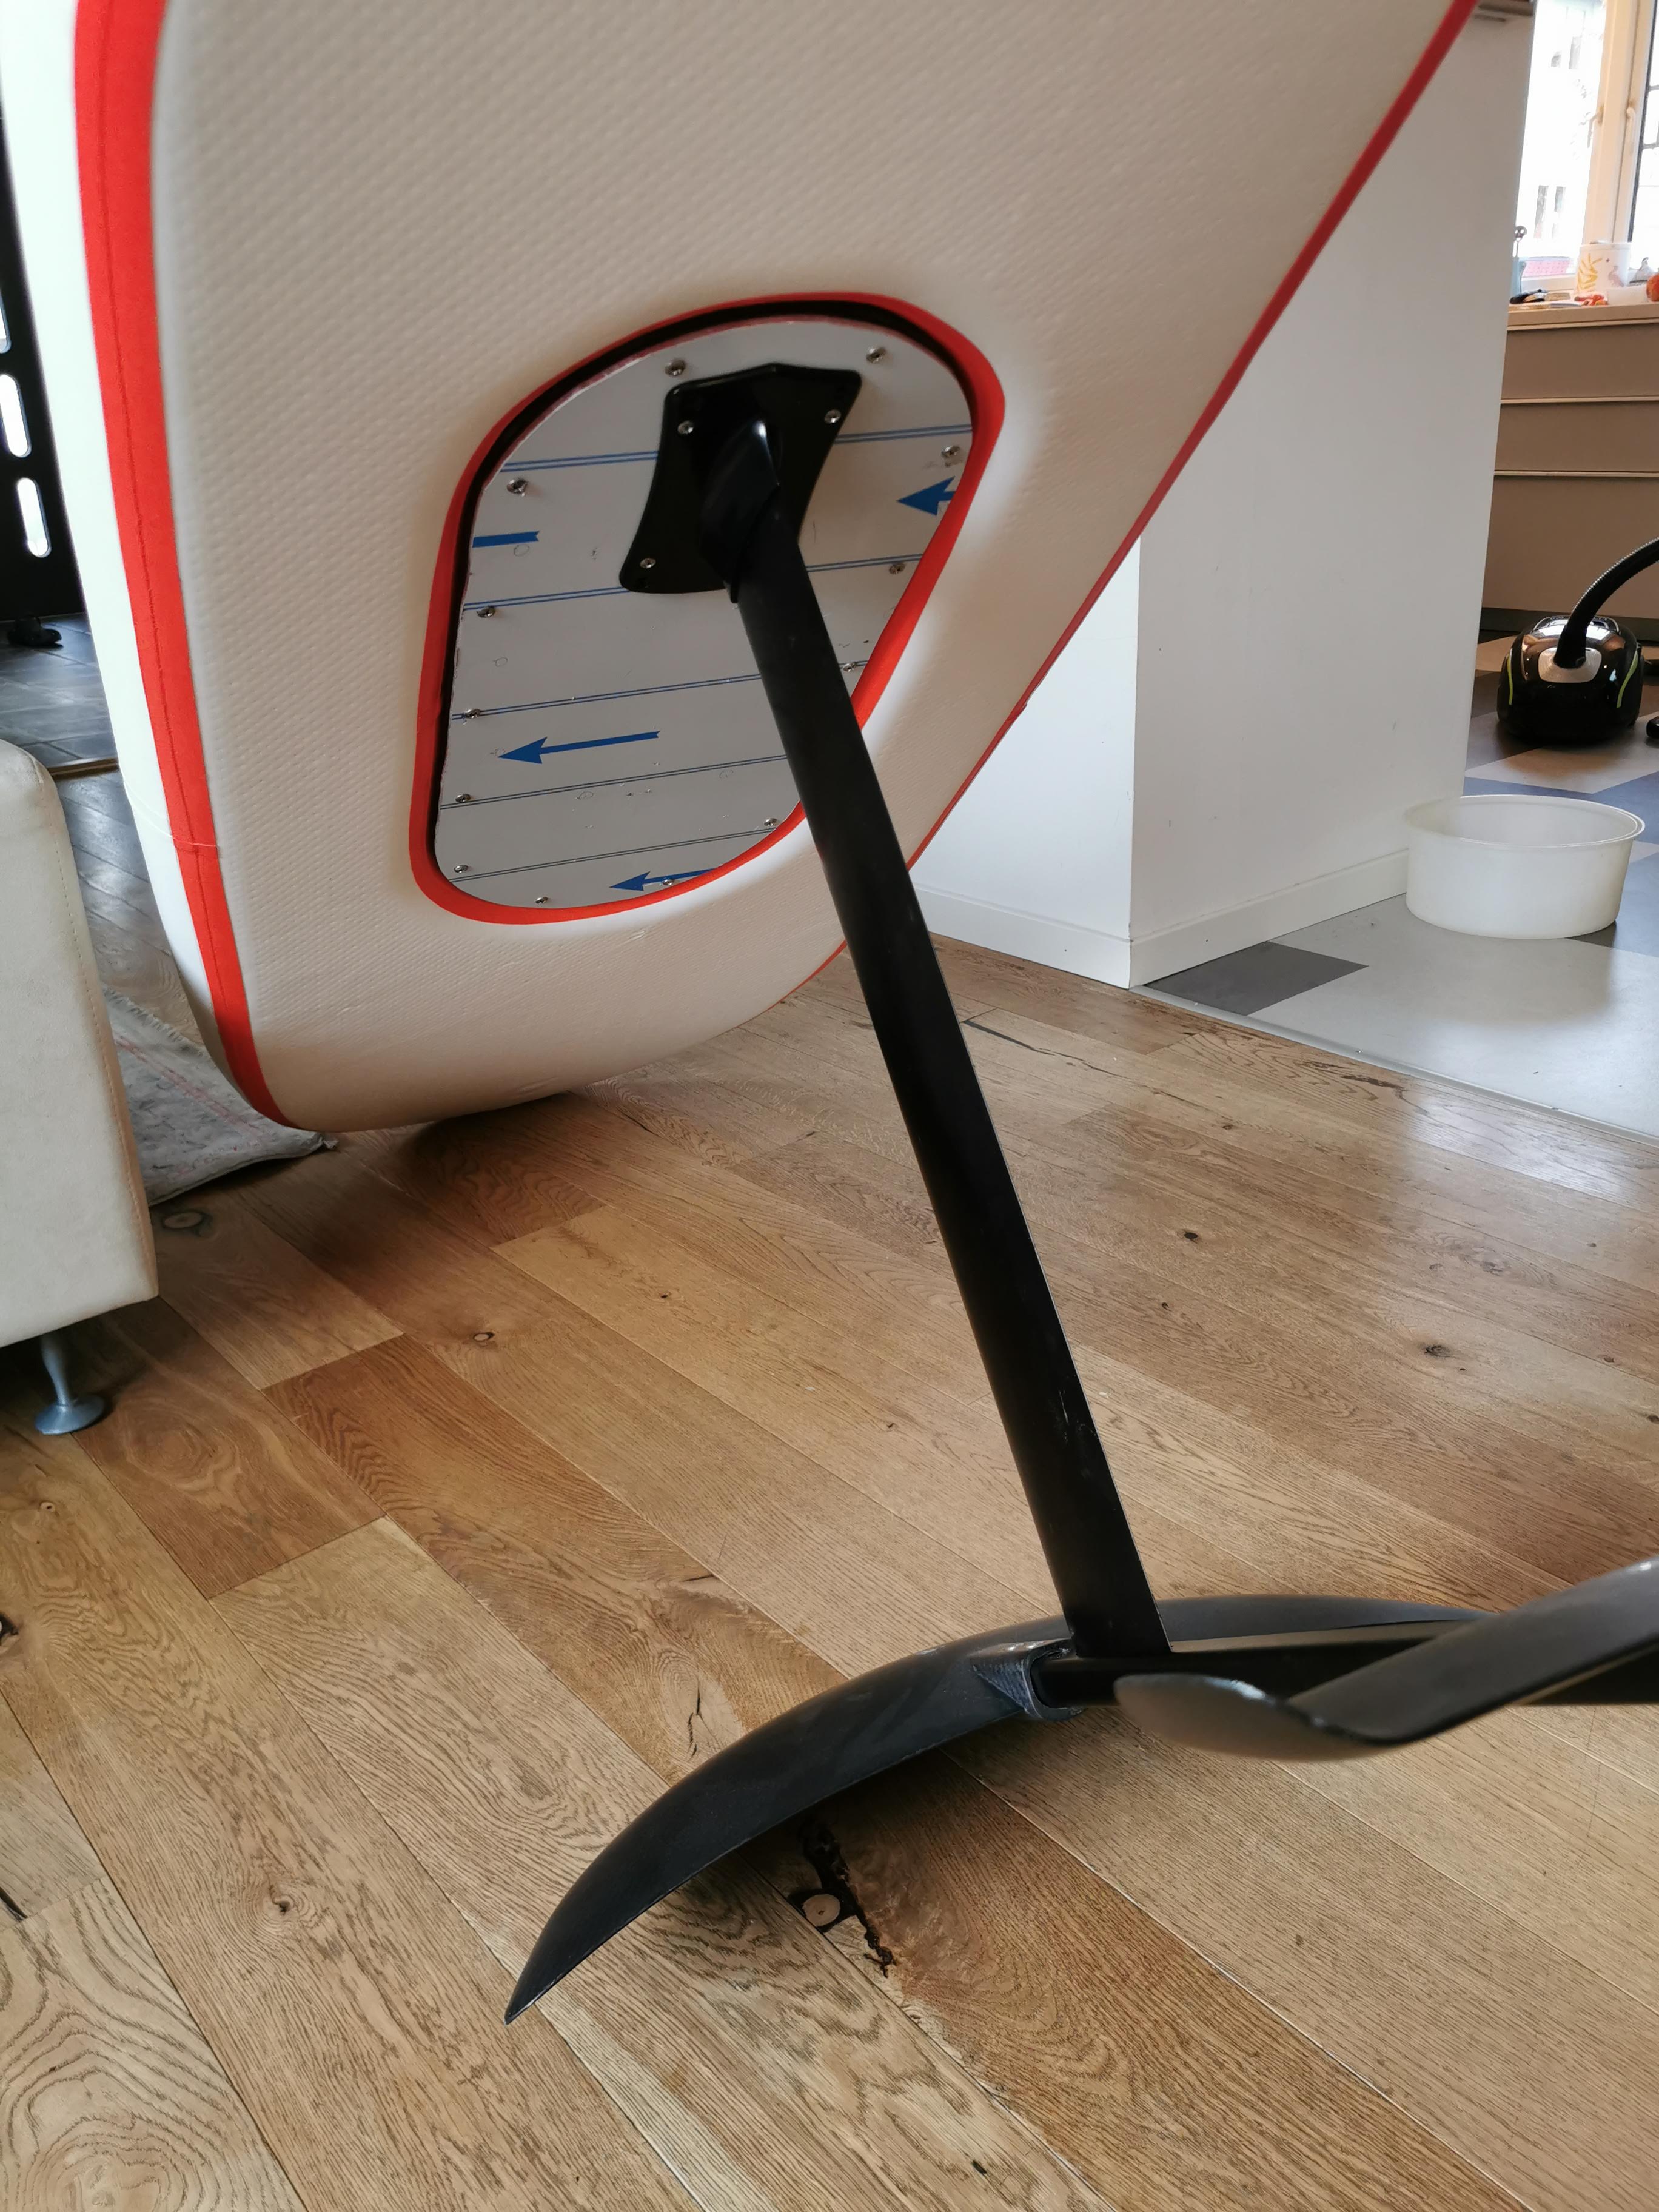
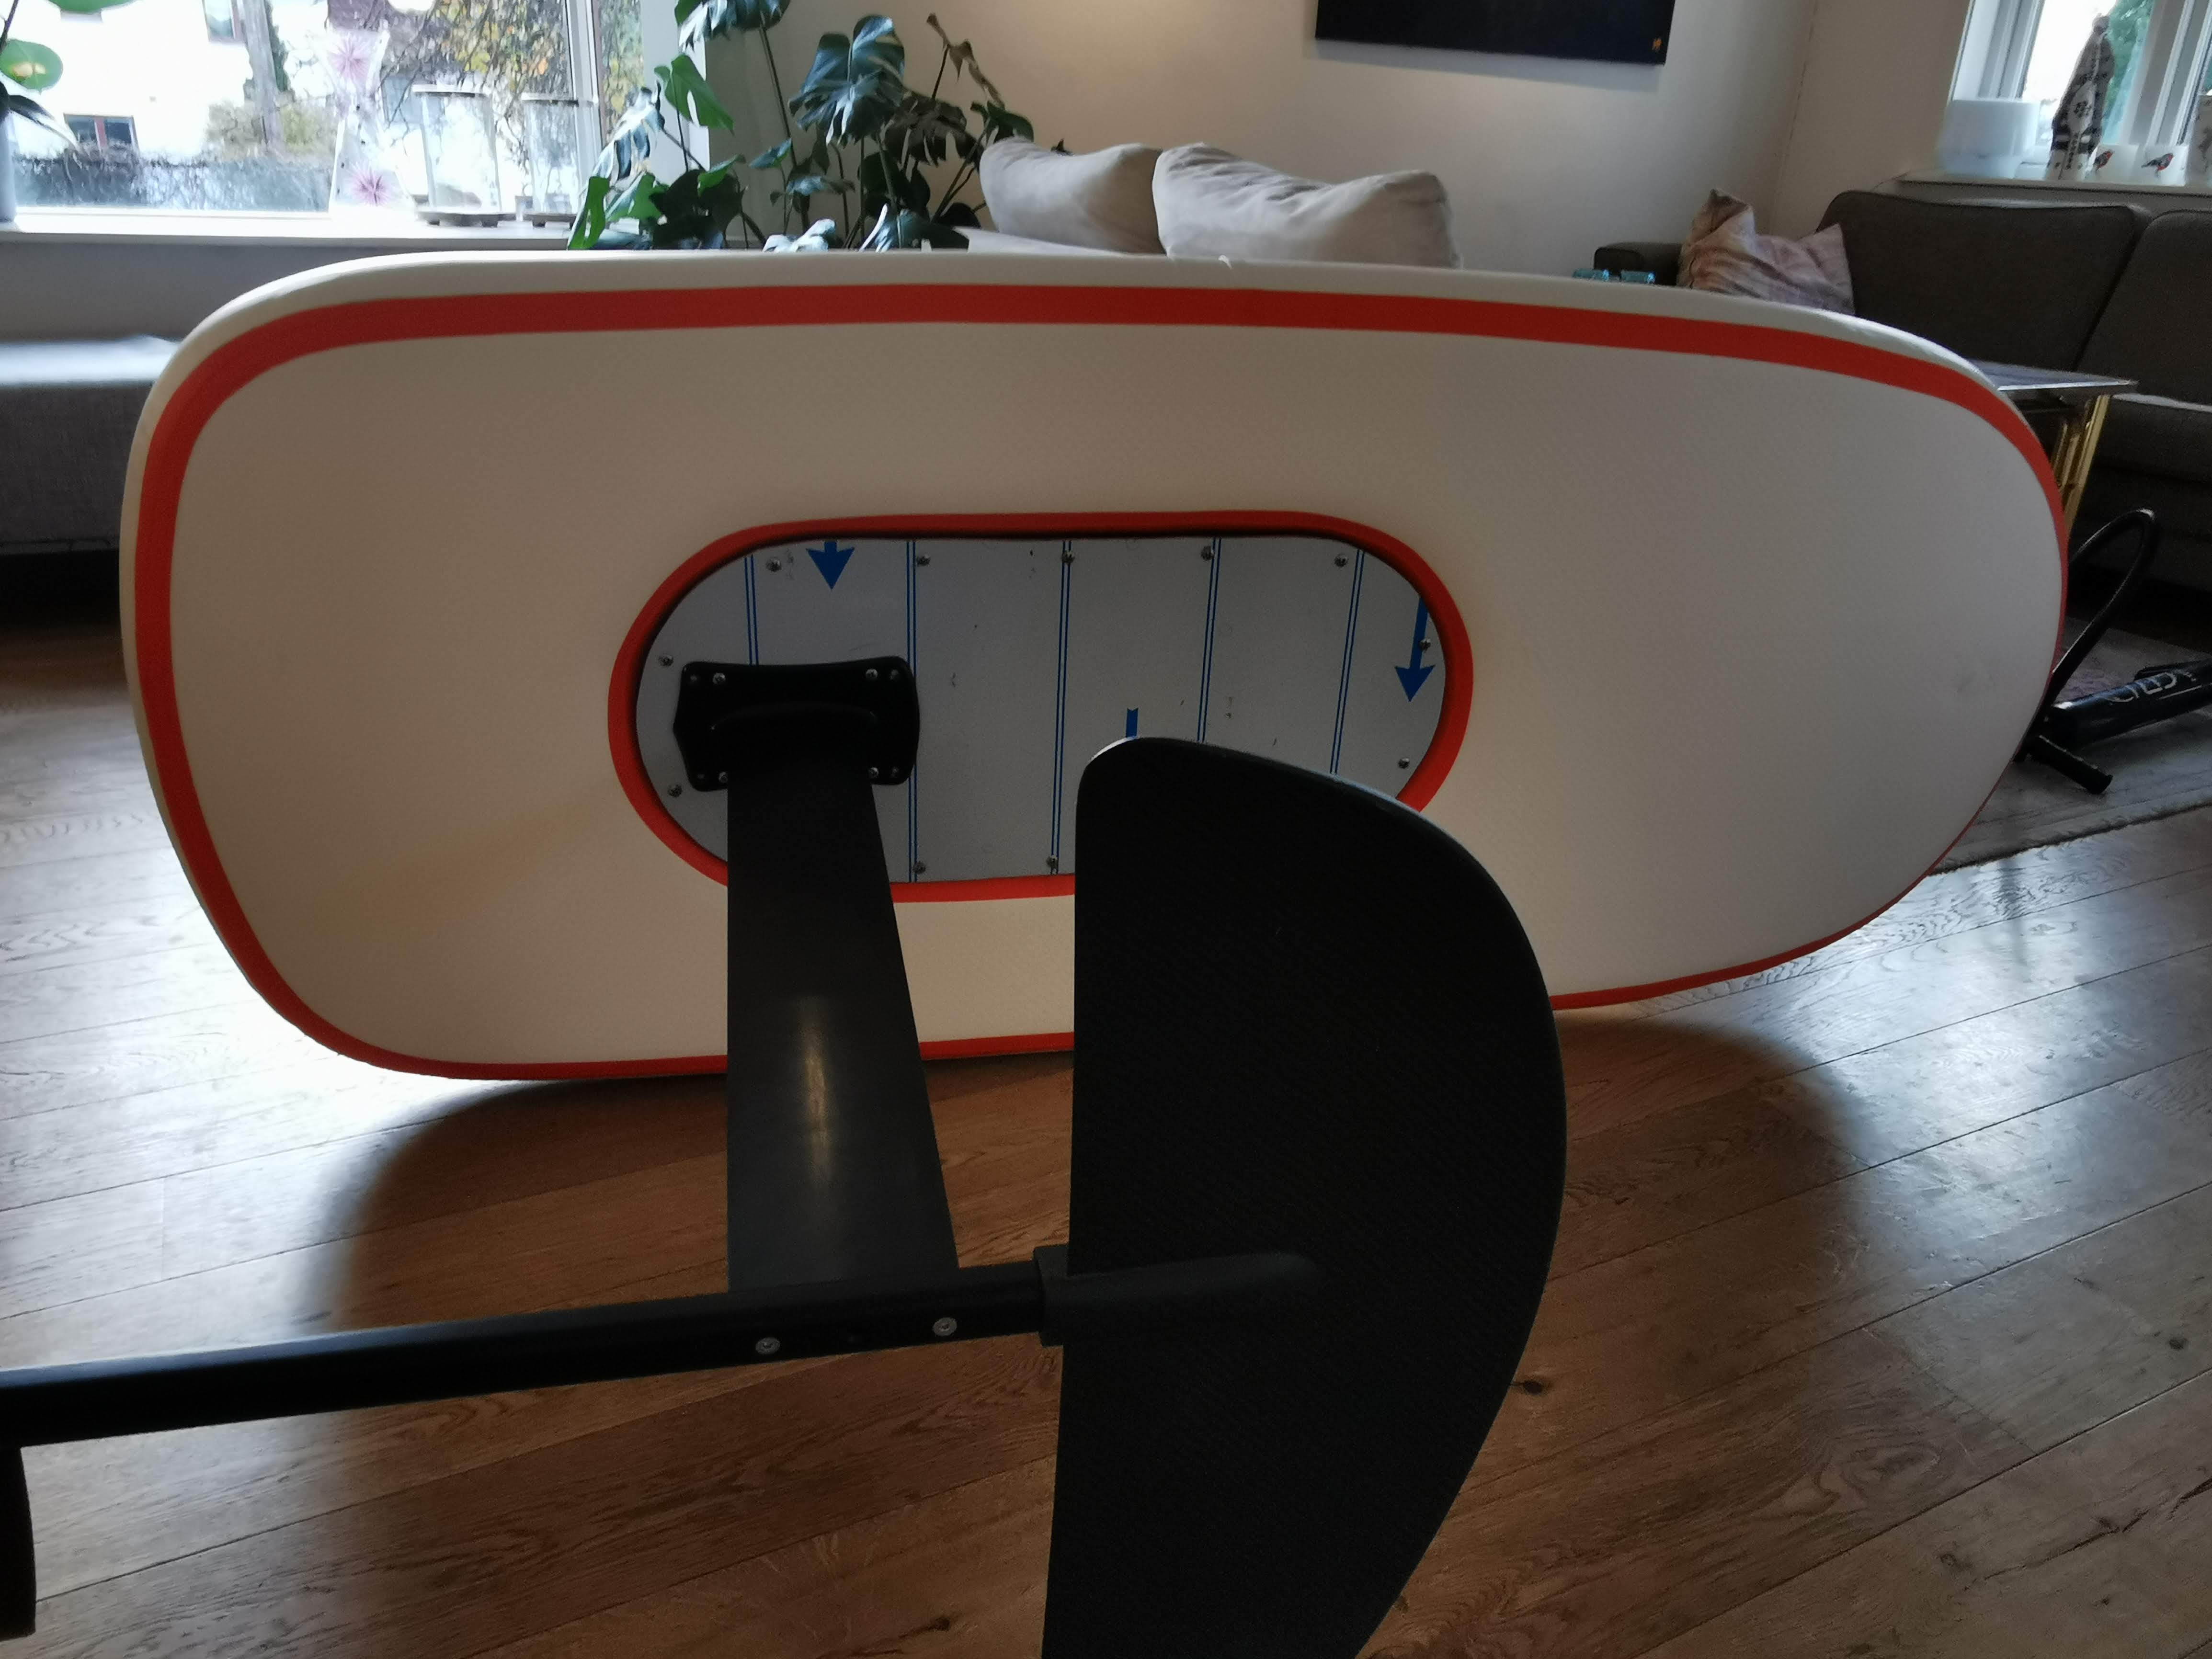
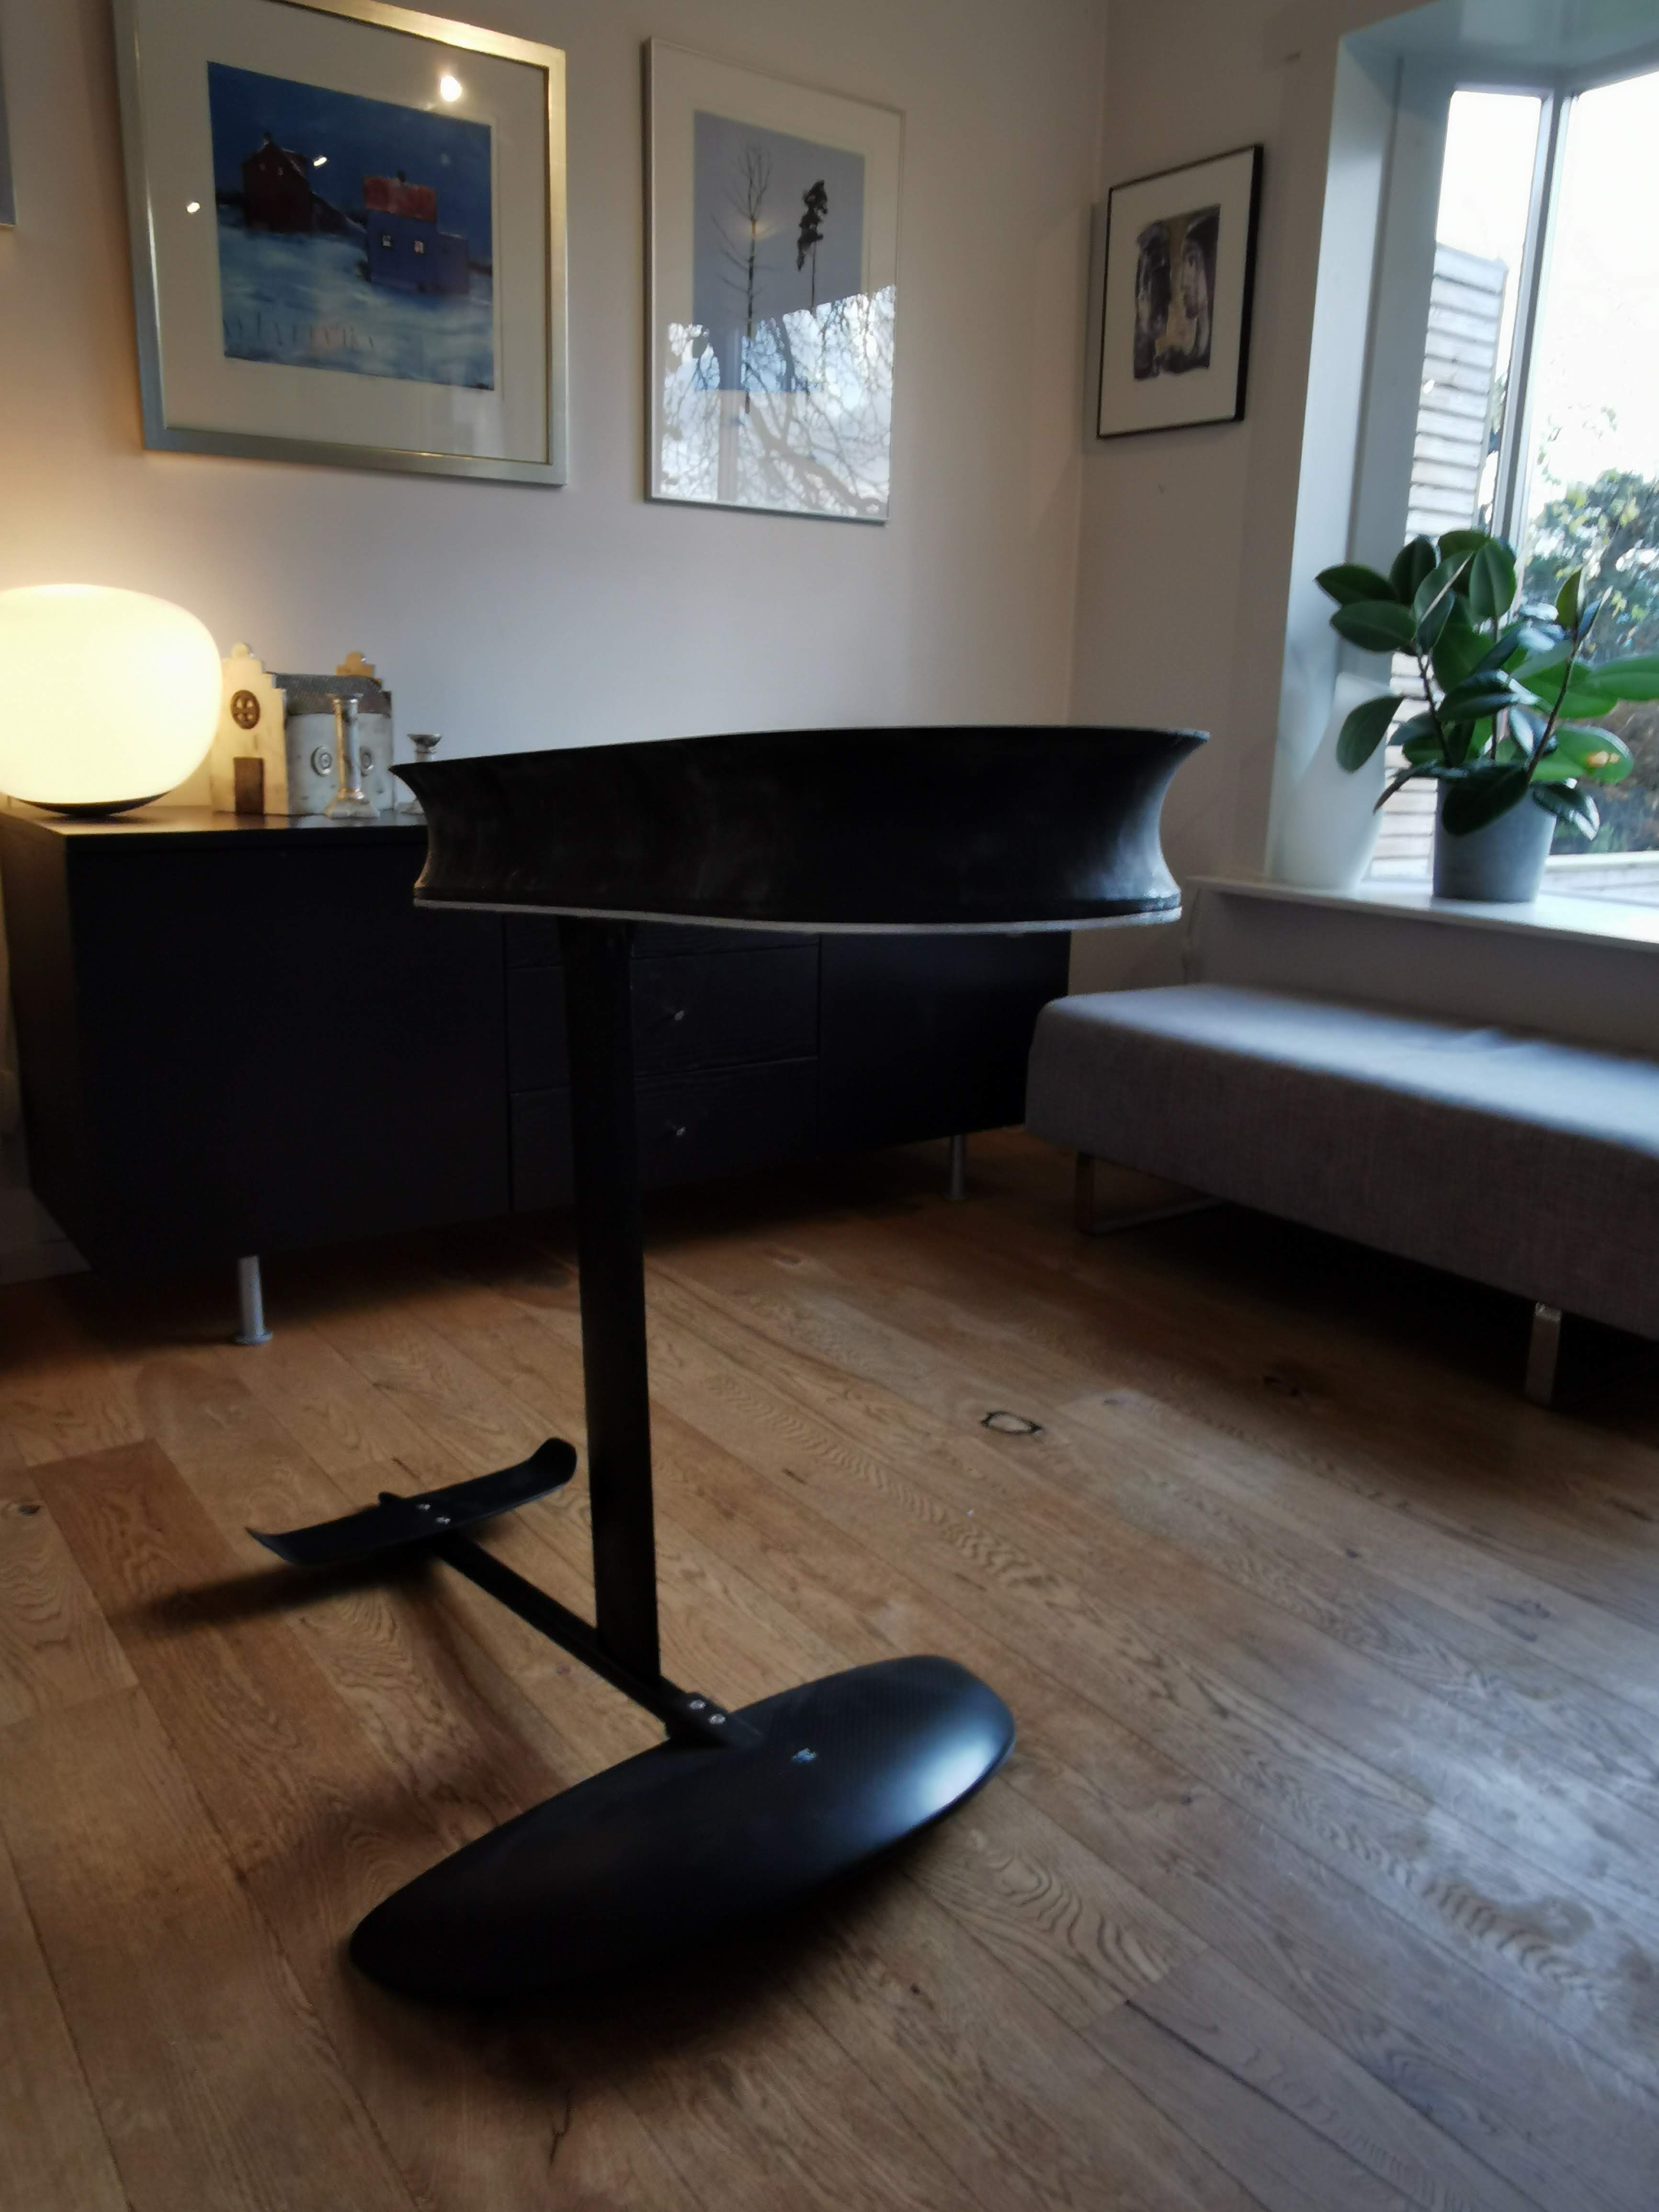
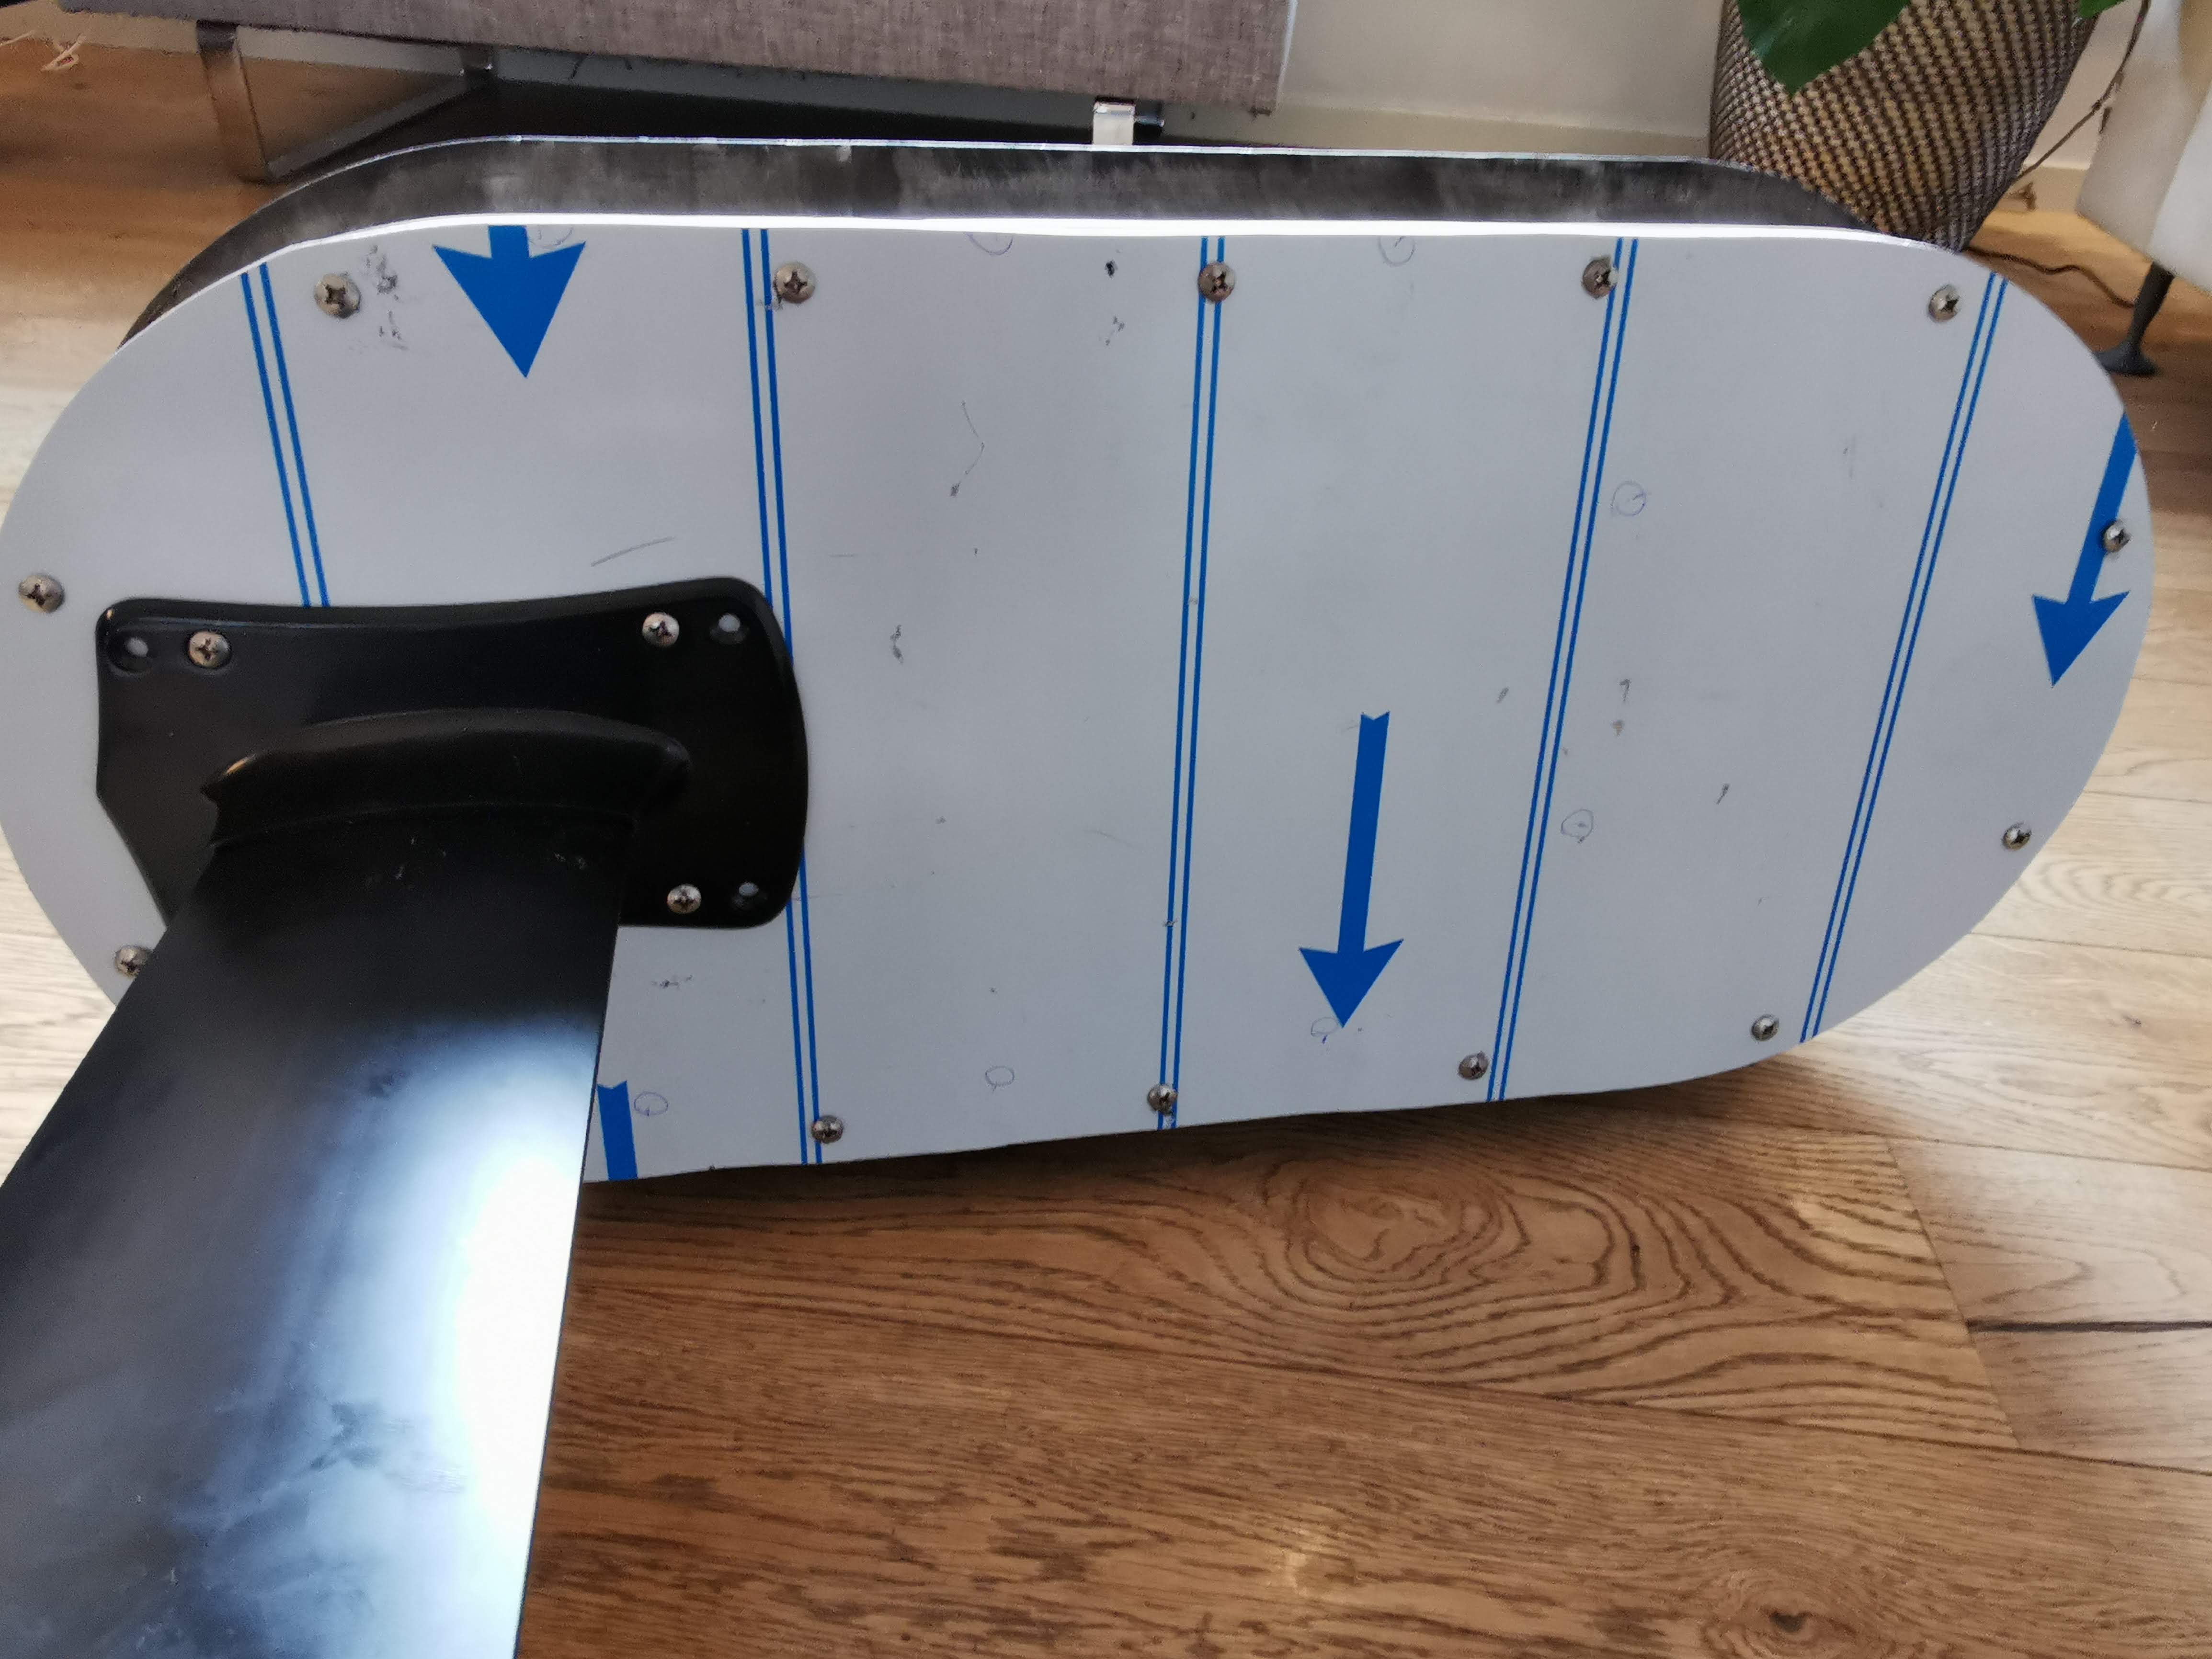
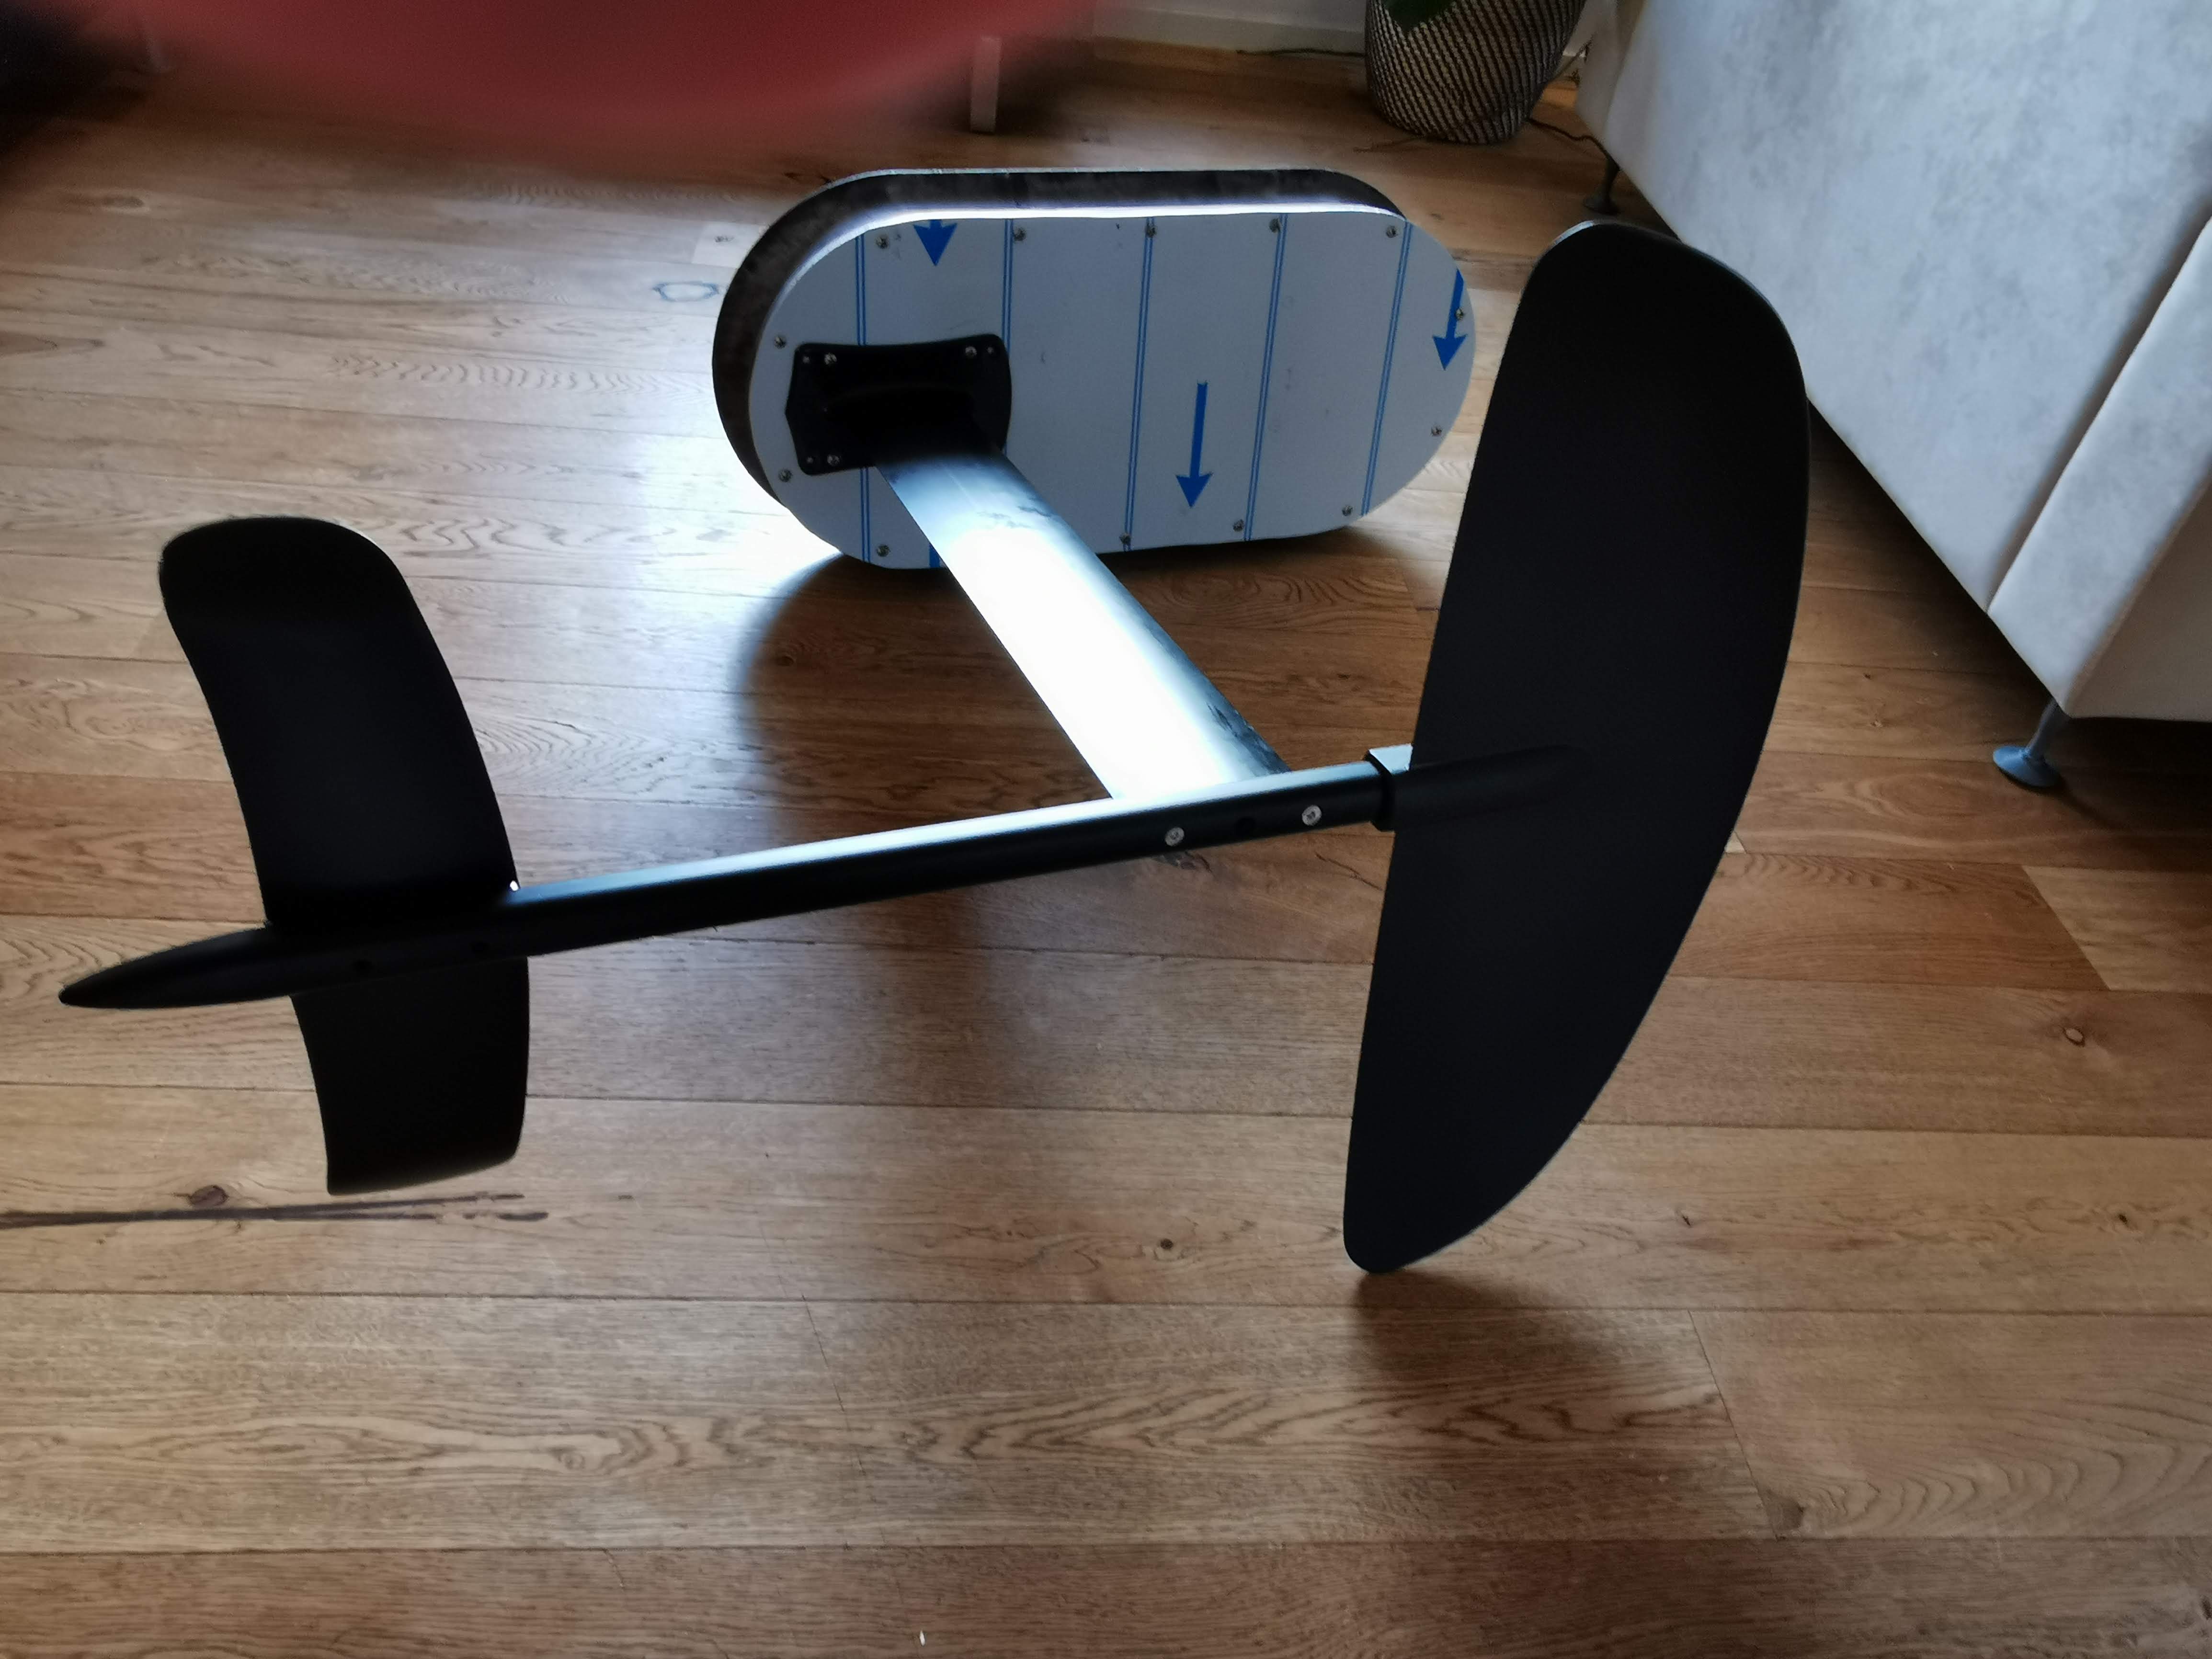
I have an inflatable hydrofoil!!! Still miss the e prefix but I’m getting there 🙂
---
### Author:  [@sat\_be](https://foil.zone/u/sat_be)
#### Post date: [November 3, 2019, 5:49pm UTC](https://foil.zone/t/yahef-from-norway/5682/19 "2019-11-03T17:49:27Z")
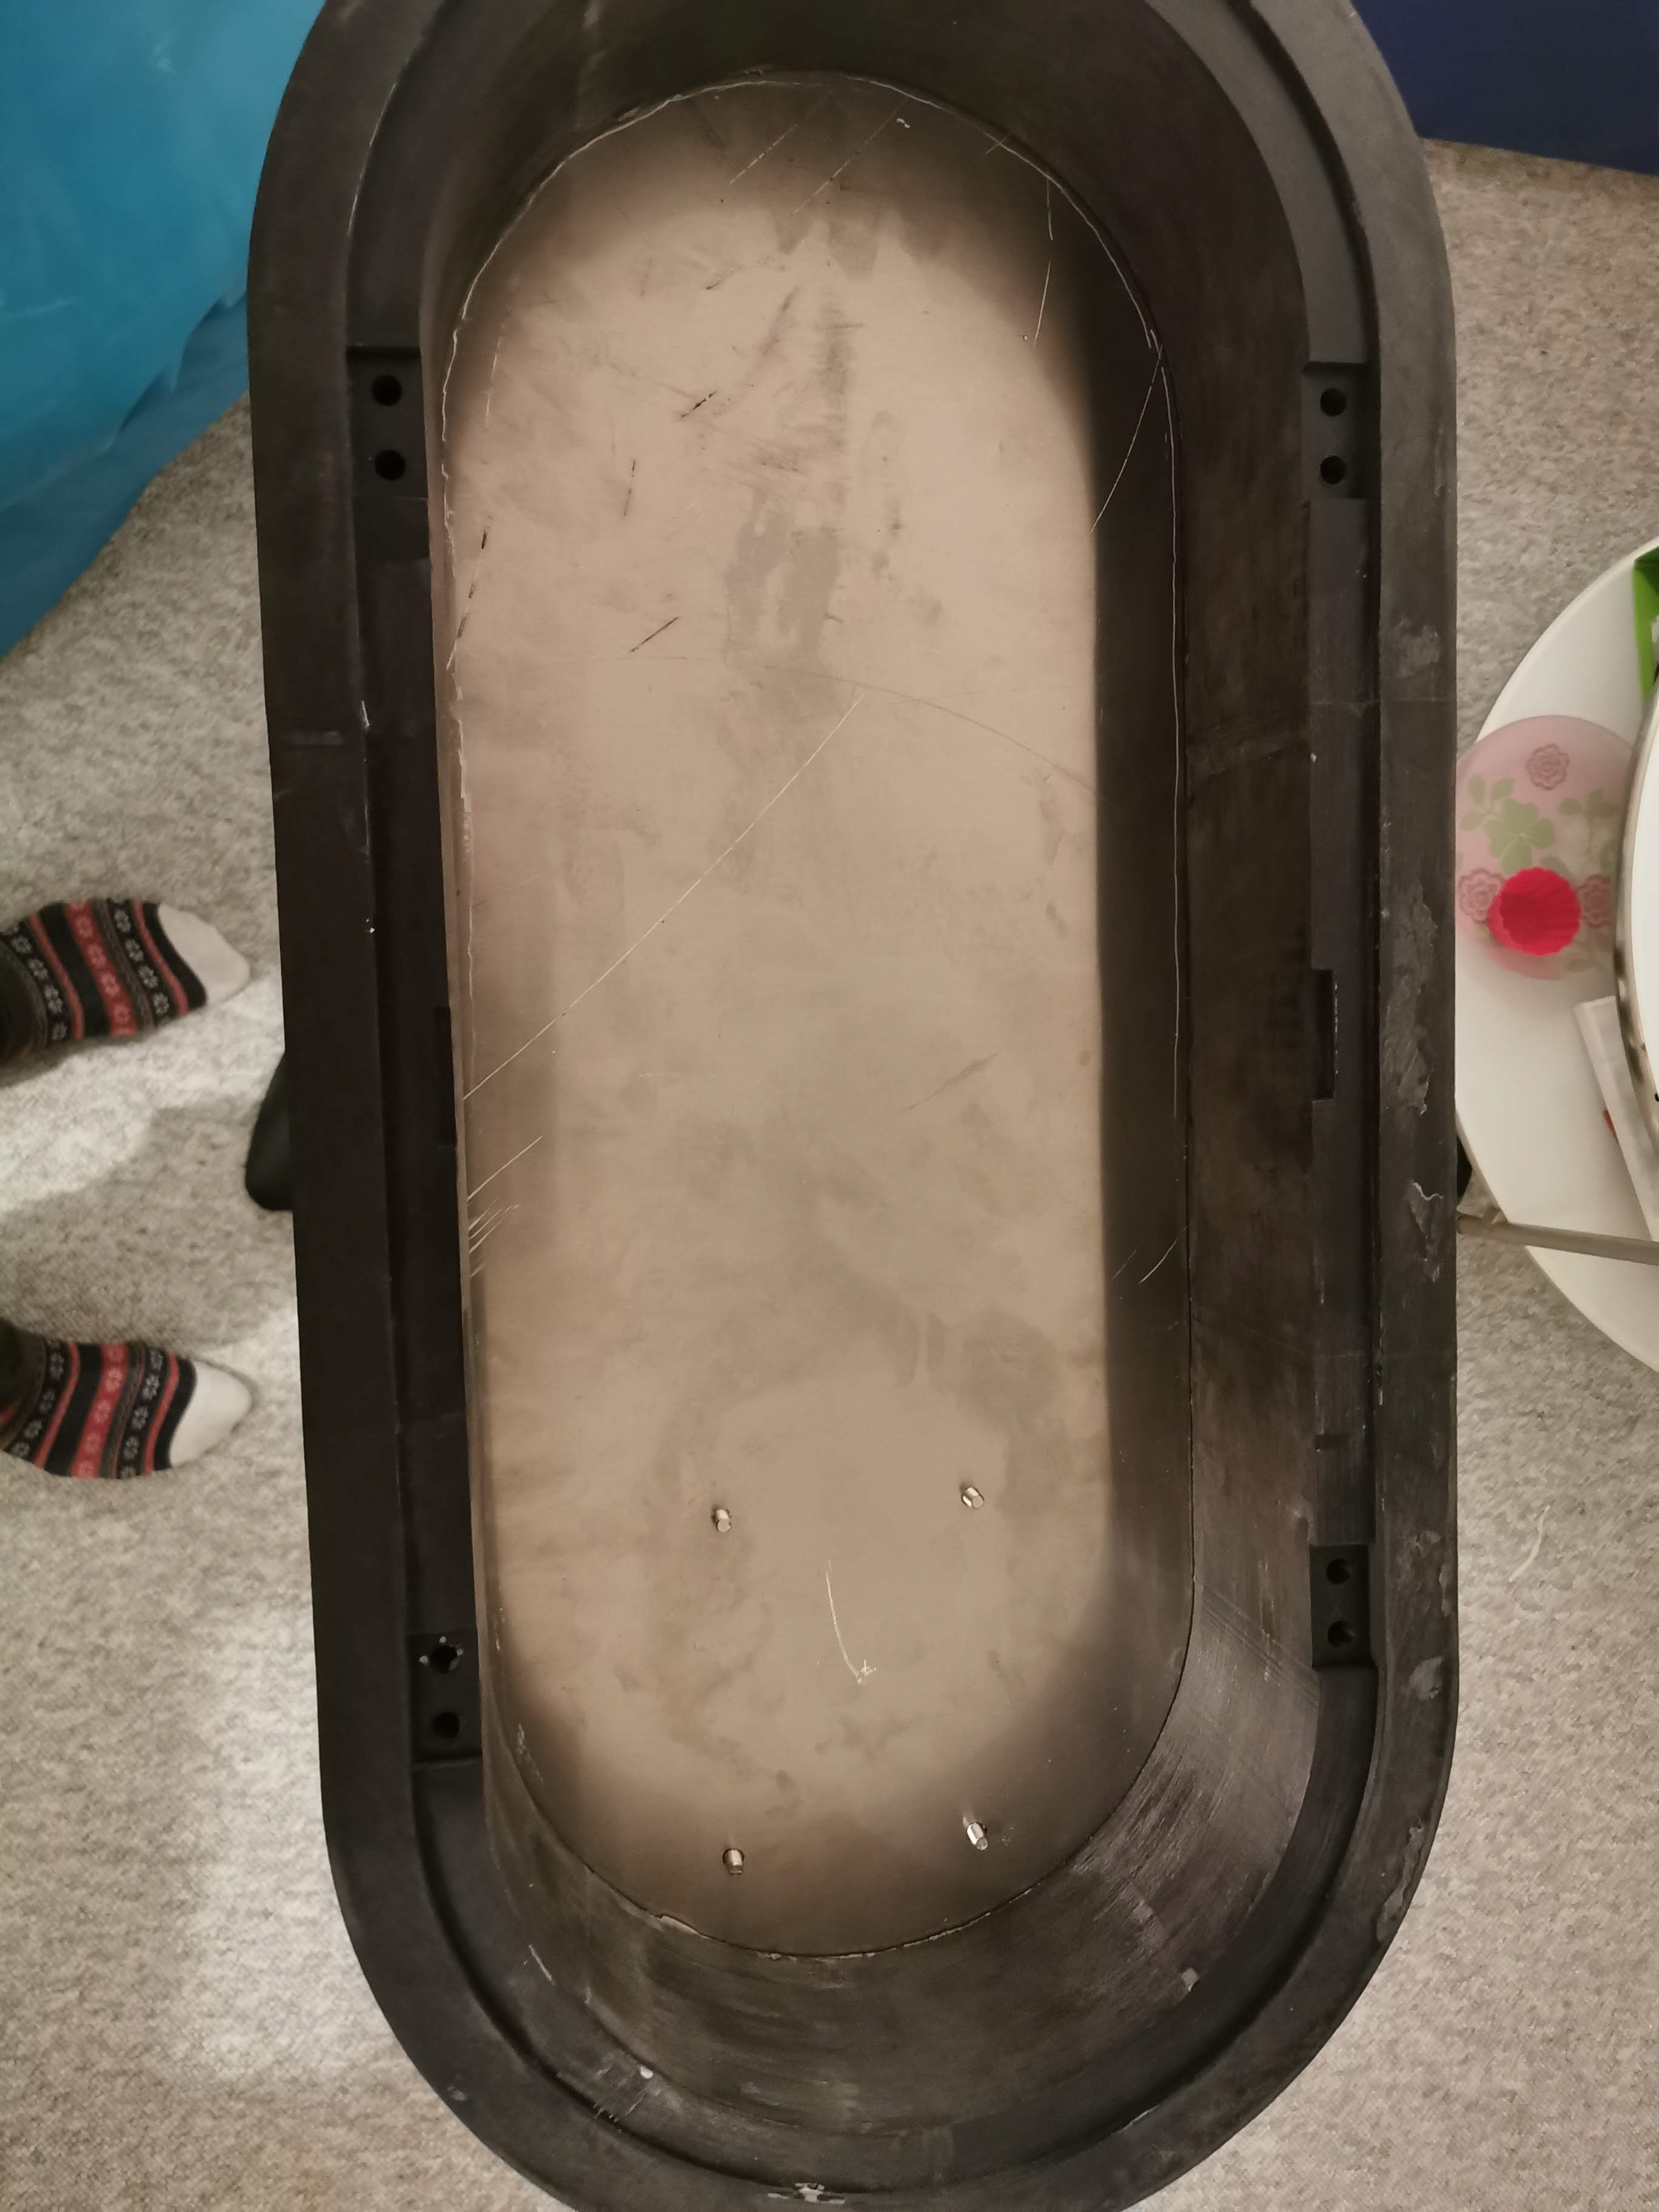
What is the thickness of the aluminum bottom plate? I’m on the same route and planned to use 4mm. How do you fix and seal the mast to the box? Picture from the inside would be interresting.
---
### Author:  [@YAHEF](https://foil.zone/u/YAHEF)
#### Post date: [November 3, 2019, 10:41pm UTC](https://foil.zone/t/yahef-from-norway/5682/20 "2019-11-03T22:41:34Z")
Hi Daniel. Well, it’s not very exiting inside the box just yet. It’s quite empty but the next thing will be to get the wires and the water hose inside the box. I’m not sure yet how to seal everything. I want it to be easy to take the mast on and off, so we’ll see. I will post my findings as soon as have something.
I’m using a 5mm aluminium plate but I’m sure your 4mm will be enough. I just wanted to be on the safe side.
---
### Author:  [@YAHEF](https://foil.zone/u/YAHEF)
#### Post date: [November 4, 2019, 6:18am UTC](https://foil.zone/t/yahef-from-norway/5682/21 "2019-11-04T06:18:43Z")
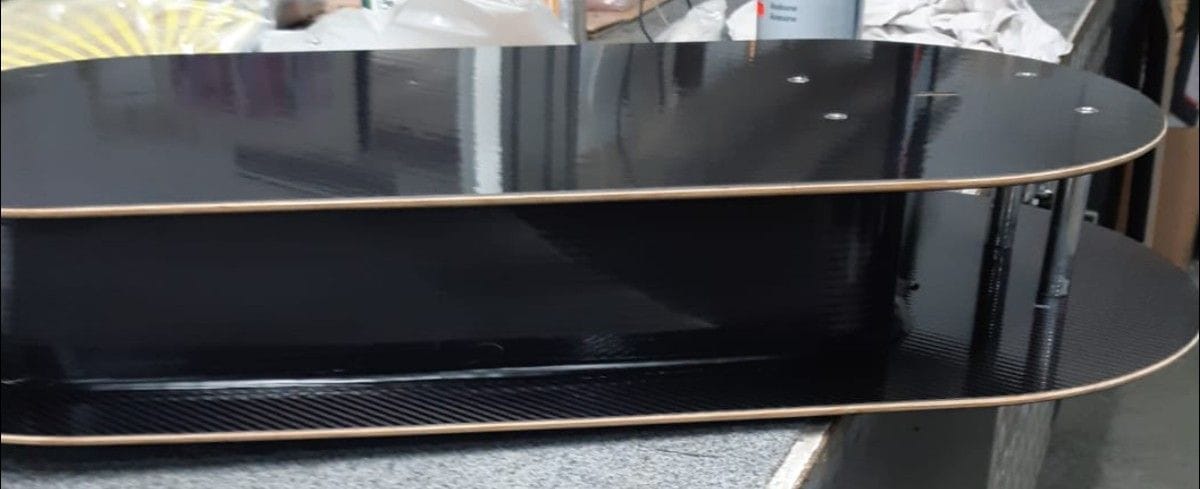
I see that [elevate.rocks](https://www.facebook.com/www.elevate.rocks/photos/rpp.120439868664115/416981999009899/?type=3&theater) takes another approach. Their box seams to only have the bottom and top plates touching the inflatable. That is definitely another way to go. Upside, less weight, easier to print. Downside smaller box, but obviously big enough.
[Next page](https://foil.zone/t/yahef-from-norway/5682.md?page=2)