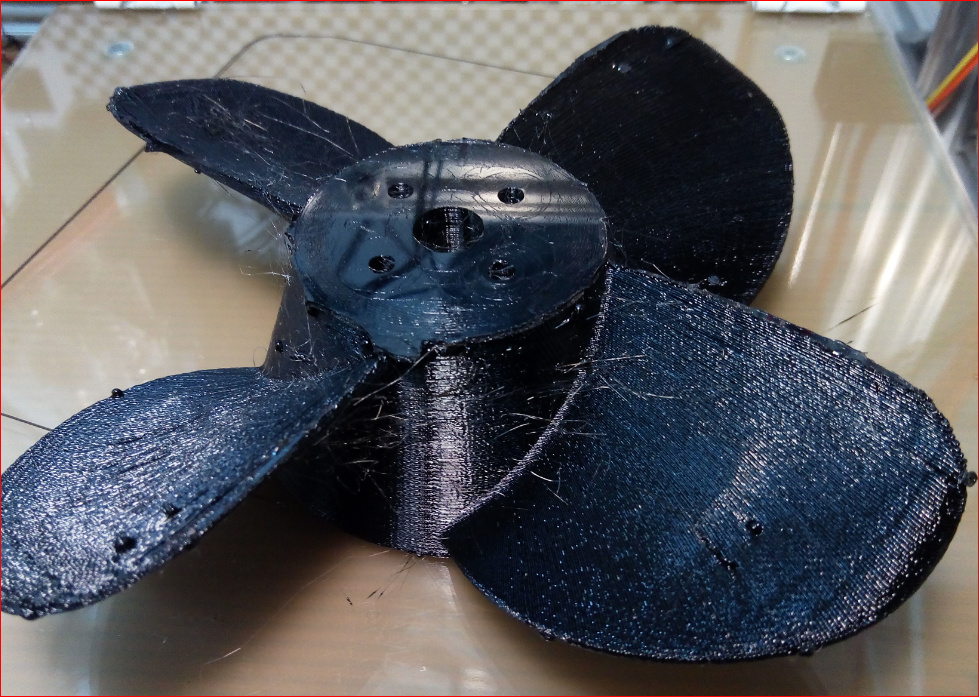
Printing good props is an art, it is rather complicated. A prop will always have large amount of overhangs, you need to deal with it, support seems to be no good idea because it disturbs the surface.
Your slicer needs to create a seam (start and end points of a loop). This introduces an imbalance, both while printing, but also for the end product. Depending on the seam position, the individual blades will receive sightly more or less material, so the blades might have different thickness, stiffness and weight.
You want a symmetrical product, so you have to take the printers symmetry lines, so in practice you cannot print a 3, 5, 6 blade prop but only 2 and 4 are possible due to symmetry of the printers movements. If your x and y axis differ in their behaviour, even a 4 blade might be hard to do, but at least you do not get an overall weight imbalance. Another asymmetry comes from the direction the printer prints. If every layer is printed in the same direction (clock wise e.g.) there might be variations from the ability to move the x-axis in the same way as y-axis. I am not aware of a slicer which lets me choose or toggle the direction.
All slicers i know so far have problems to distribute the seam. I used slic3r, prusa edition, simplify 3D and Cura and they all have no good seam control. I only found one New Feature: Seam at preferred location by dartrax · Pull Request #728 · prusa3d/PrusaSlicer · GitHub
Release Custom Seam location feature test release · dartrax/Slic3r · GitHub
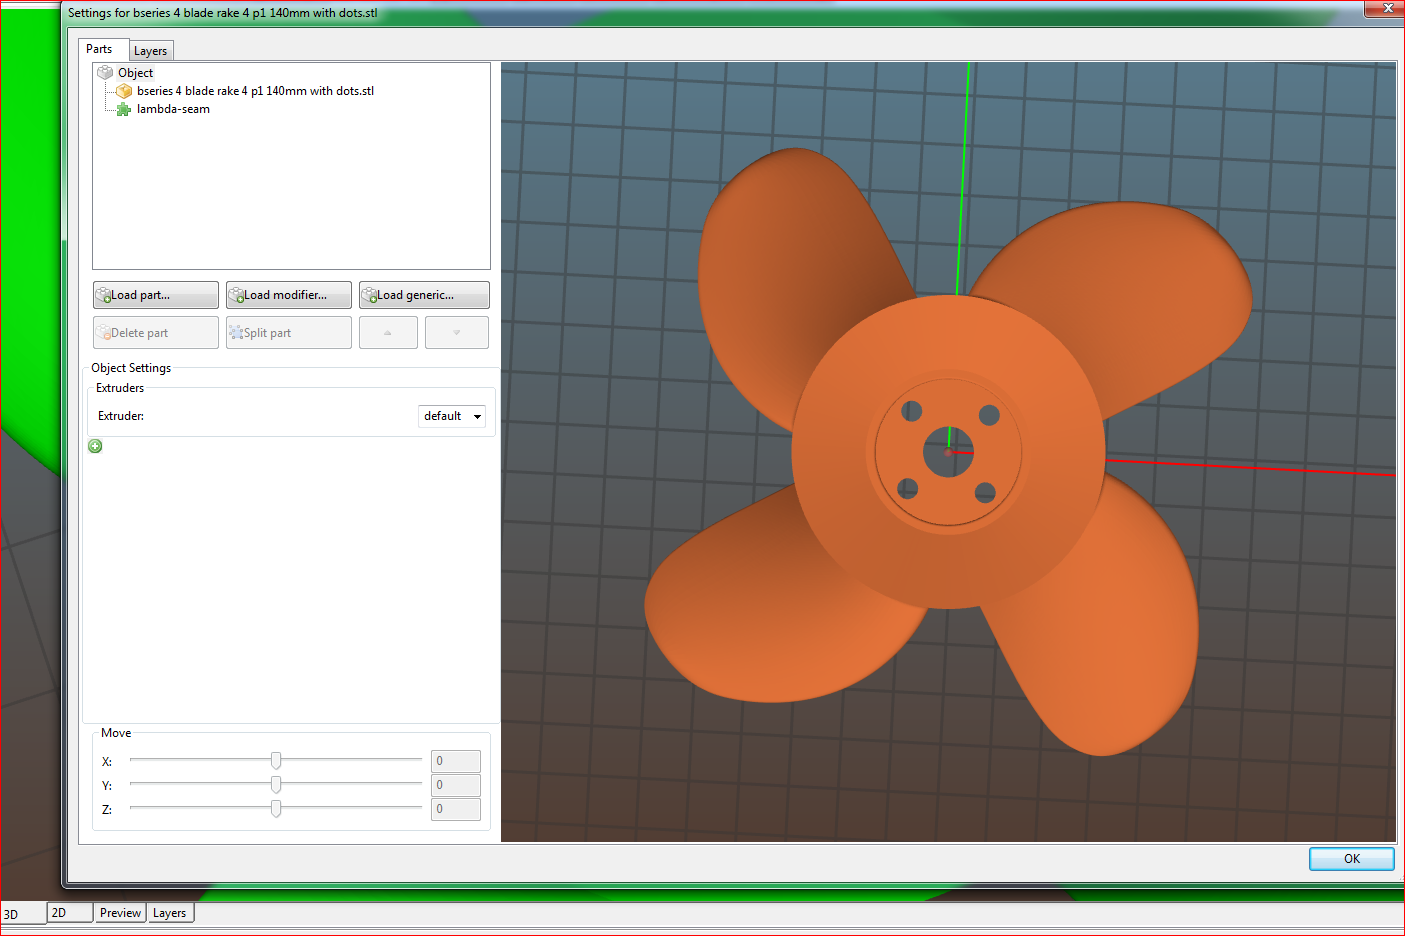
With this version there is a custom seam possible. You can place a kind of attractor for the seam position and you can define it layer wise. Very cool. You right click on the part in 3D view, choose “settings” and then “Load generic” where you can define the strength of the attractor e.g. 50 or 99.
But to get an evenly distributed seam this approach does not work - alone. And it seems not to be the most important part! It could also work without this specialized slic3r i just found out!
Now lets describe a new process to get arbitrary 4 blade props into gcode with an evenly distributed seam and theoretical absolute symmetry.
There is a rather new app from wageningen available to create their b-series called propeller family. https://www.wageningen-b-series-propeller.com/
In the first step you can create a prop with some simple parameters. If your parameters are feasable, it provides a step and a stl file for download. I do not recommend to use the stl directly, it causes problems with the slic3r, because the mesh is not so well defined. fusion 360 does it much better.
Anyhow, this is only a rough model because you cannot control the hub dimensions.
so i download the step file and analyse it in fusion, to get some important parameter, like root thickness.
In the second app on the same website you have more freedom to define the hub, root thickness and other things.Choose e.g. 140mm diameter, rake 4, pitch 1, blade number 4, for hub: upstream dia 63, downstream dia 40, length 47, blades: root 8, tip 3, thickness 0.2.
Download the step. Open in fusion. Now you can adapt the hub e.g. to adapt to a 63100 or 6384 outrunner with integrated screw holes and a center hole for the motor shaft.
This was easy, now comes the complex part.
You can manipulate the slic3r by some disturbance in the surface of the hub, introduced already in fusion.
Draw a small sphere with the diameter of your layer height in fusion360 with the center on the diameter of your hub on the bed. Make two sketches on yz and zx plane with the same content to define 4 paths on the hub. First use one path with the sphere and create 4 spheres in the distance of your layers. Make sure you compensate the angle of the hub to hit the real layer height. Now turn those spheres by 90, 180, 270 ° around z- axis.These you treat individually with a path order. Again, make sure you compensate in the distance the angle of the hub. By this you get several hundred small spheres distributed in lines on the hub. Substract them from the bseries prop.
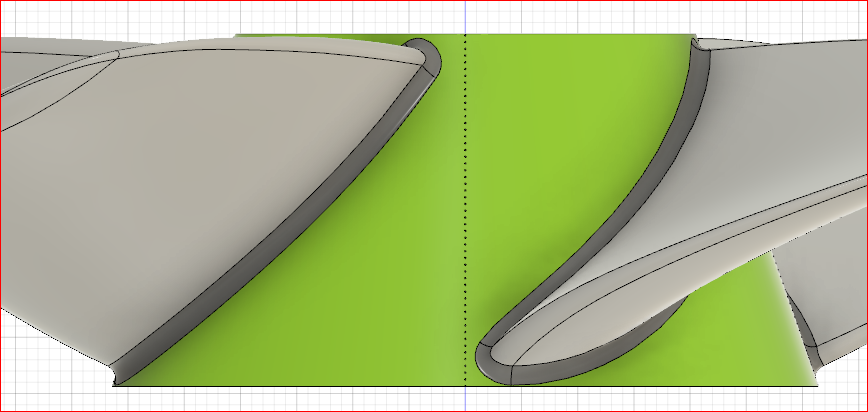
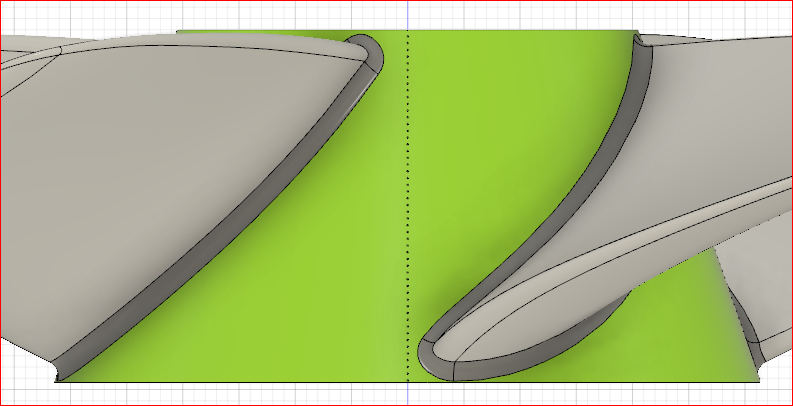
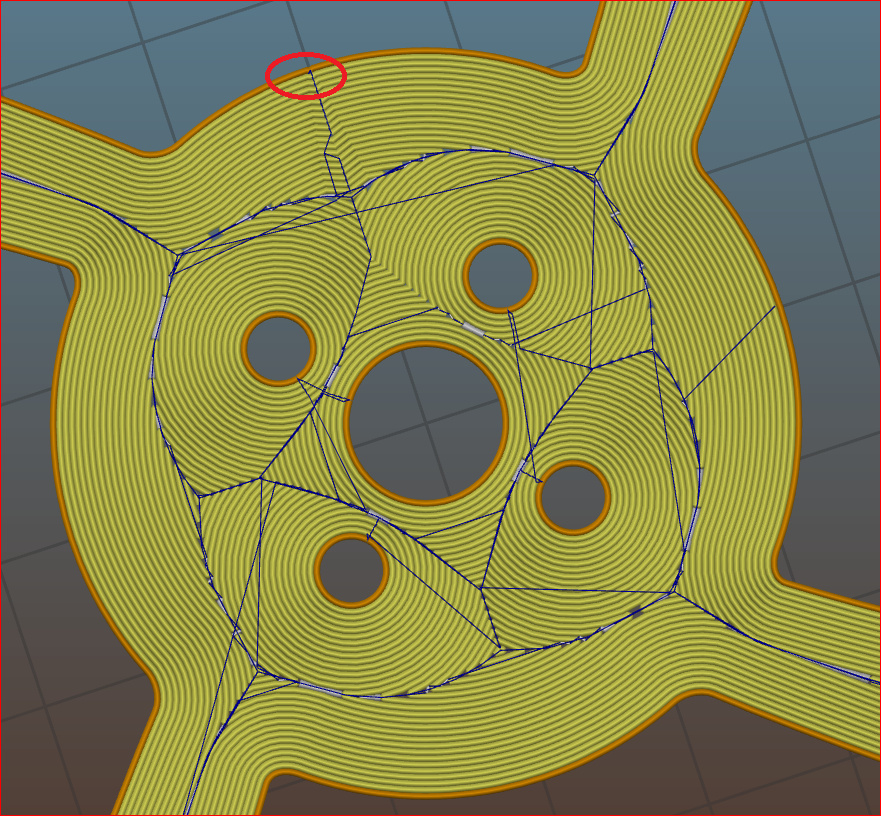
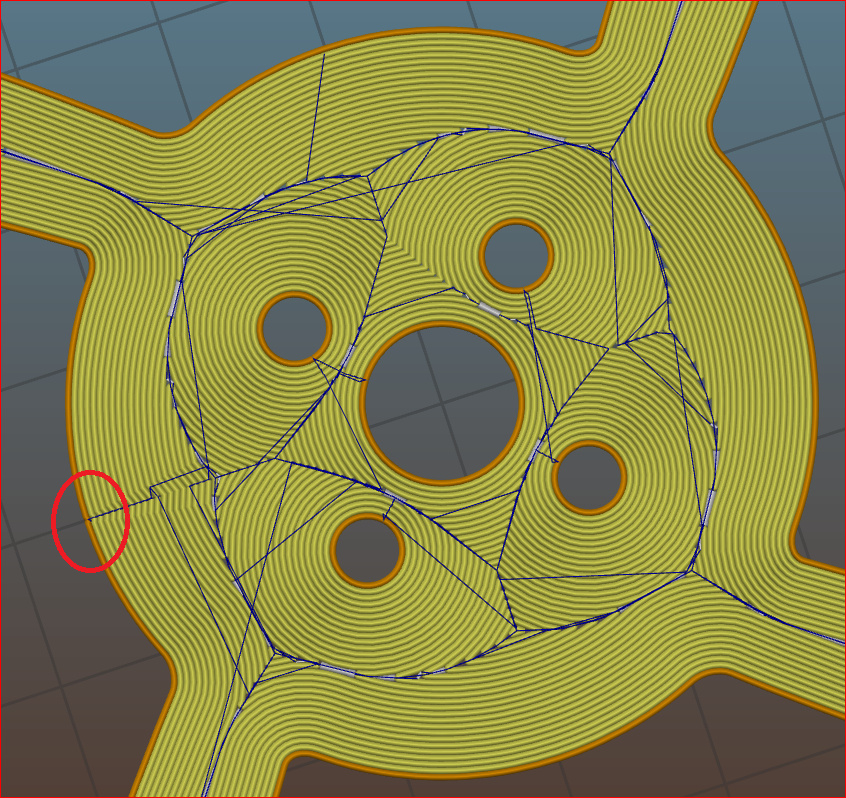
Note there is a shift on the height of these little spheres on every 90° side of the hub.
Export as stl with high resolution.
Open stl with the specialed slic3r mentioned above. Add the attractor exactly in the center. slice now.
You will get one small notch disturbance per layer, shifting by 90° on each layer.
Export gcode and you can see that the seam is shifting by 90° on each layer.
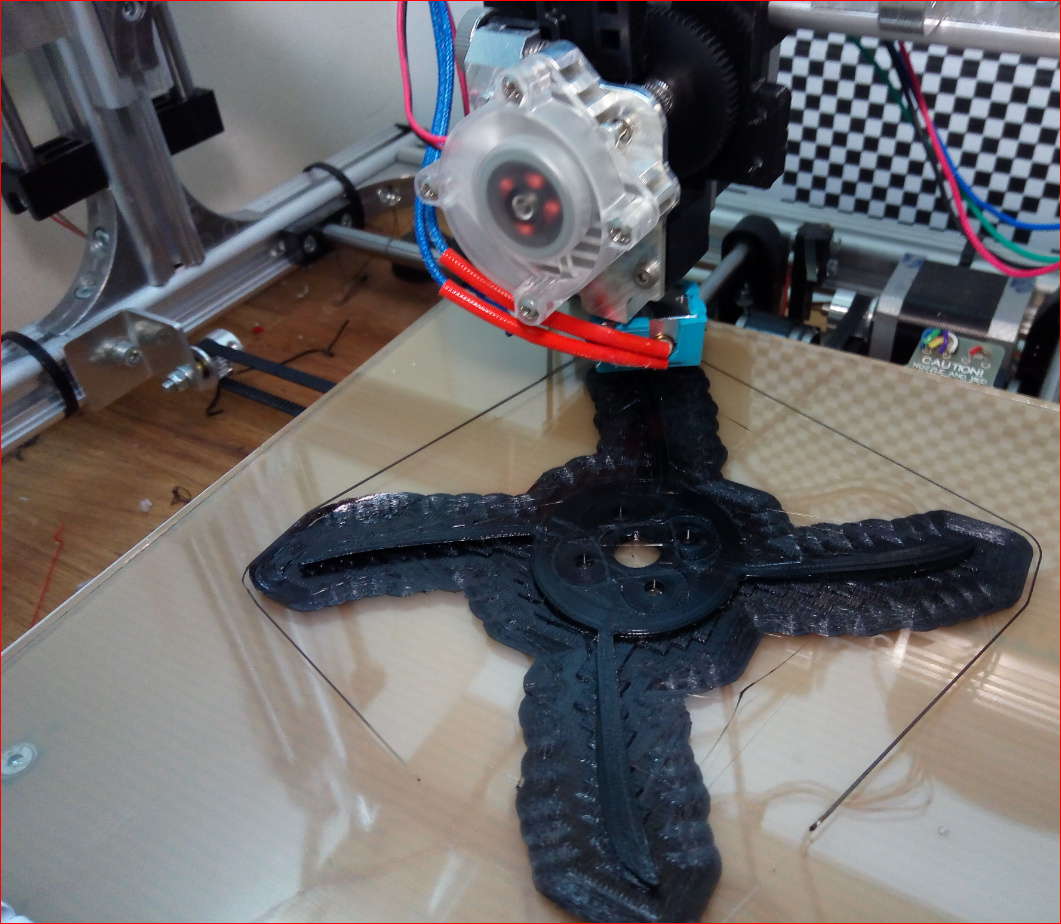
Tomorrow evening we will see the results out of the printer!
I am sure there are better processes also working in more comfortable way, please post it here!