Hey guys - which is a better 3D printer for printing props, FDM or SLA? I’m about to buy one to print my parts. And I know there’s been much discussion about materials - what’s the verdict? Does ABS work sufficiently? (not gonna use metal yet)
FDM: ABS and ASA-X are too soft without covering it with carbon. PC should work but ist hard to print. PLA+ works, I’ve seen several successful setups on the water. I’m printing in PolyMax PLA at the moment, seems to be ok but I haven’t tried it in the water. Lots of post processing sanding, 2h for a 2 Blade prop.
SLA: probably works but you need a big printer (for SLA) unless you print the blades separately. SLA Printers are also more expensive to run.
For larger parts as needed to build an efoil, FDM is probably more suitable.
Personally I print in FDM mainly in ASA, I actually put a layer of carbon on my pieces to strengthen them and for aesthetics. This is a lot of work but the result is at the top: my propeller has not yet broken nor my protection of h
How about PETG?
How do you go about covering it with Carbon?
And why do you need to sand for 2 hours ?(!)
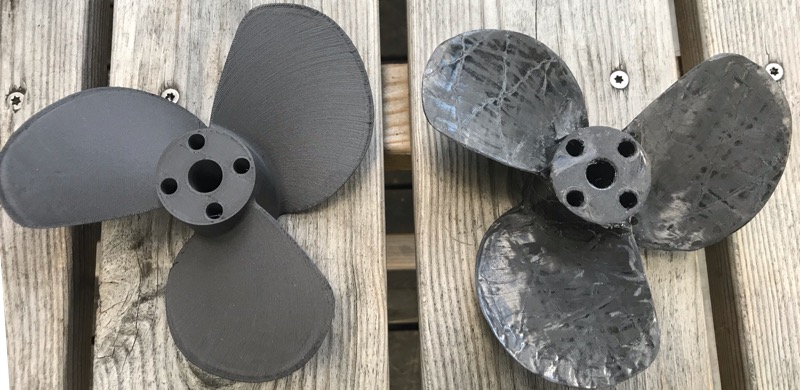
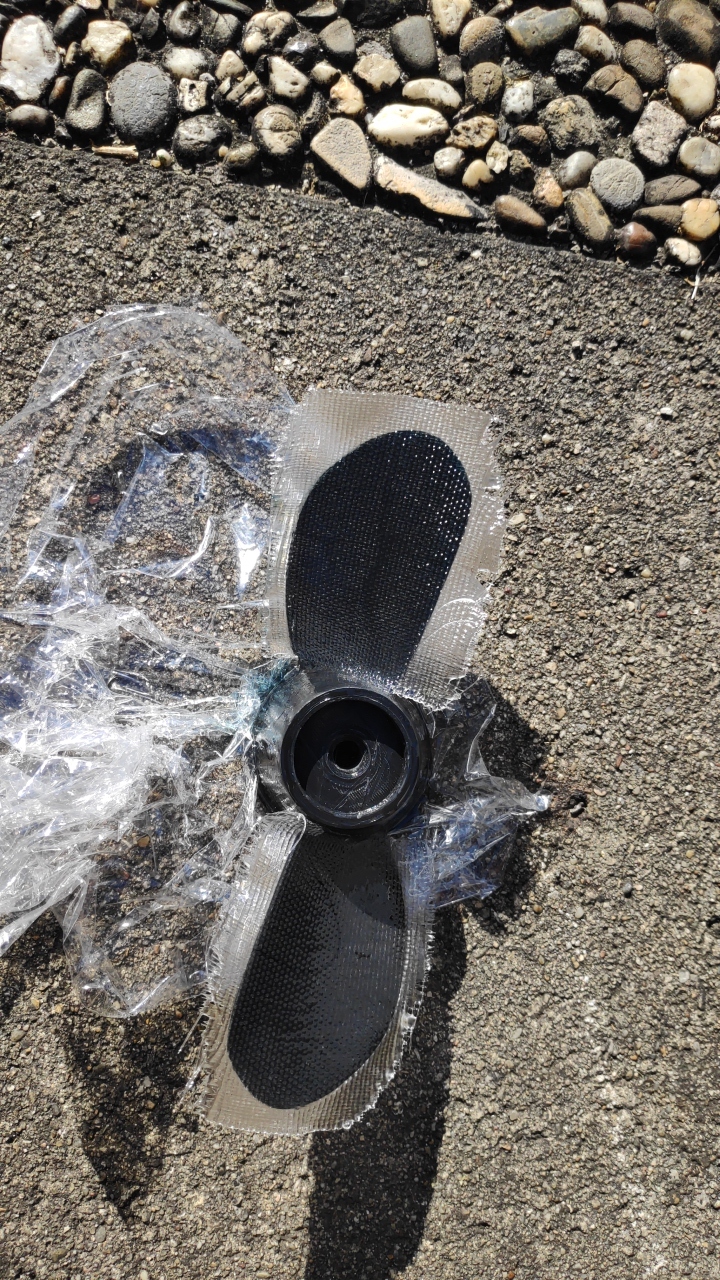
If you want an effective propeller it needs to be smooth. You start with a rough grit and go up to 400. In the end you can’t see it’s 3D printed, no visible layers. You also need to balance it.
Balance it?! oh crud  How do you ‘balance’ it? I just have the .step file
I print usually in PETG, but it’s much harder to smooth with sand paper. I would recommend pla+. Give it a little sanding and put gfk/CFK on the blades with epoxy. Then, smooth all with rough paper and start balancing. Once it’s balanced go ahead with fine sanding.
Where do you get CFK? Is that just powered carbon fiber, or a wrap or something?
Is there a link or a topic somewhere to explain the balancing process?
Thanks SO MUCH for you help by the way!
CFK/gfk is fiber, usually on a roll. Maybe not too thick one.
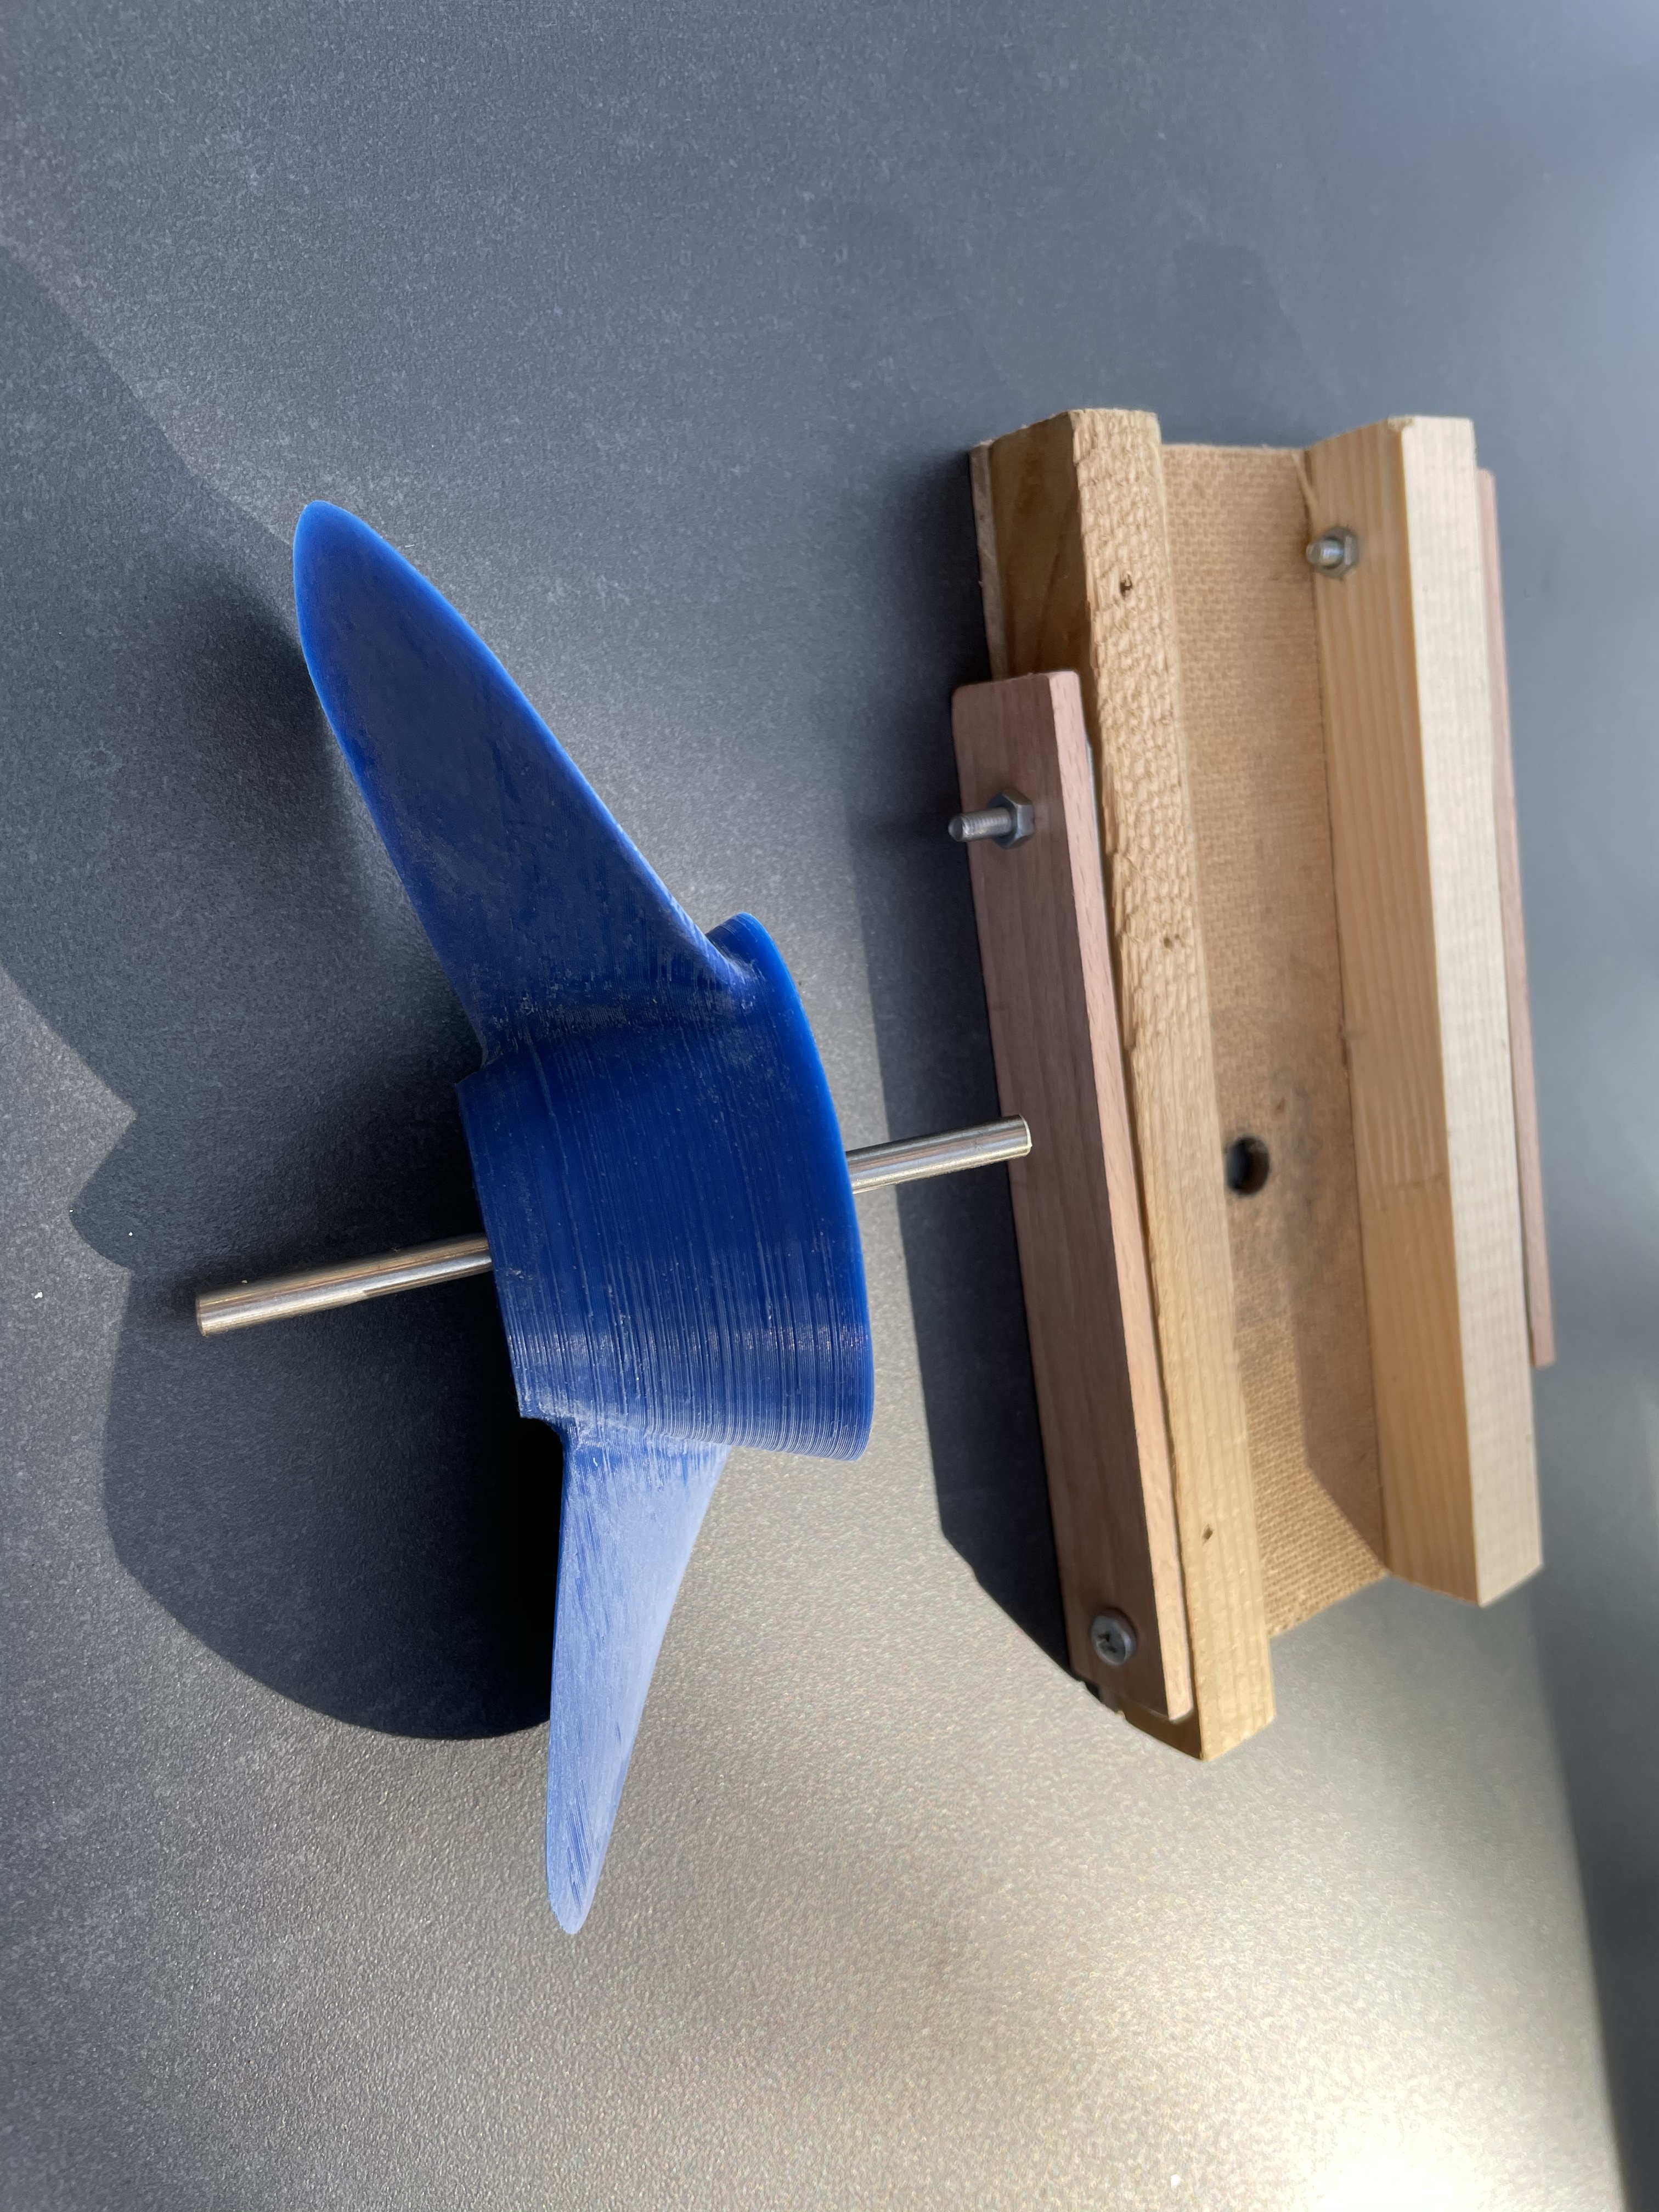
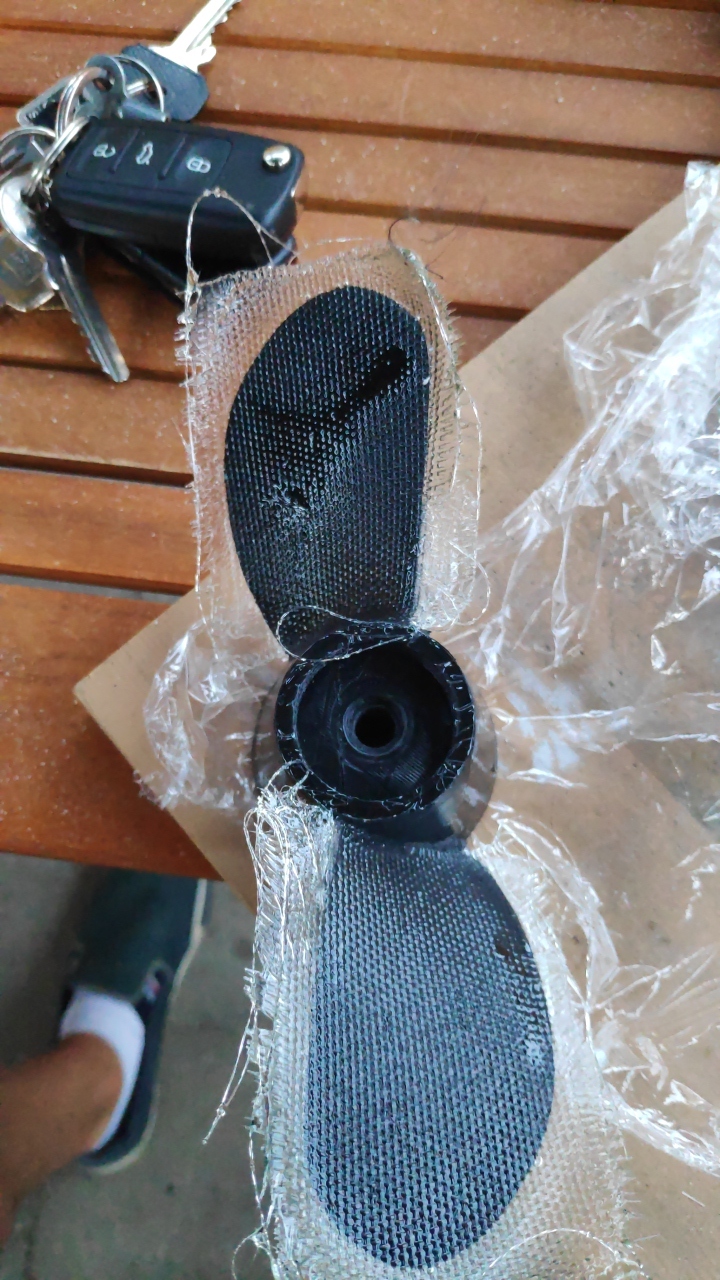
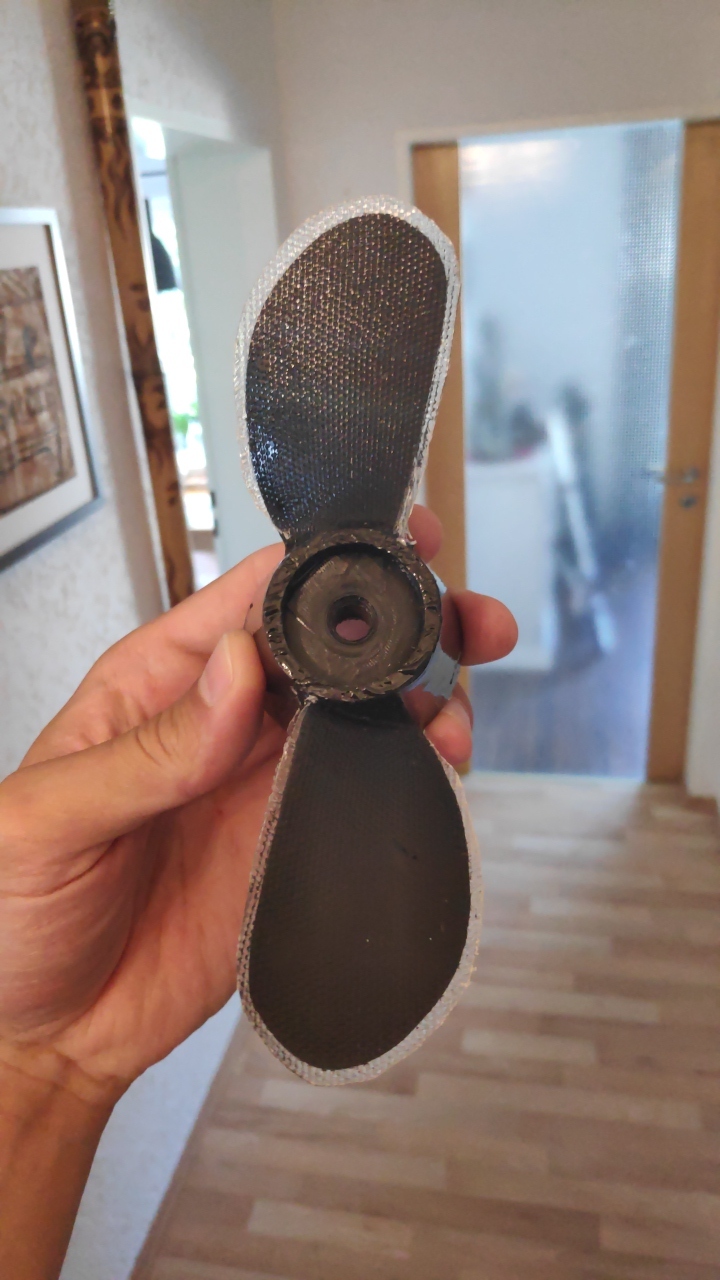
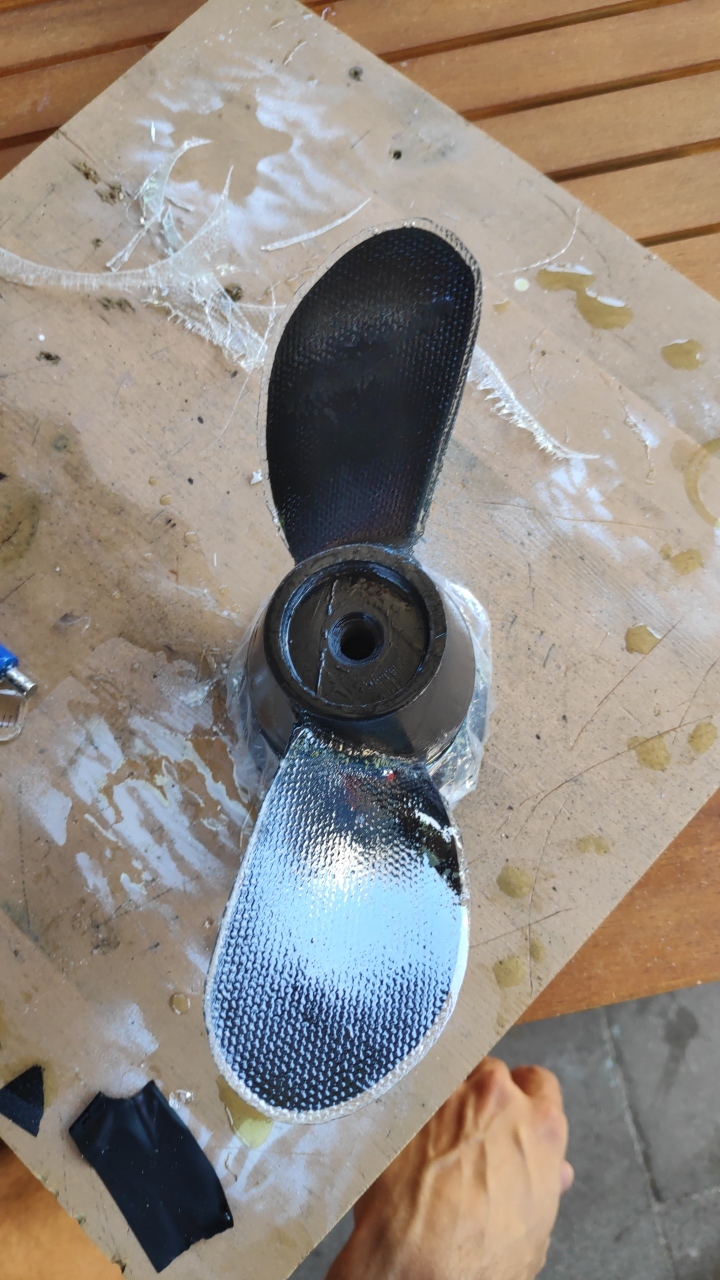
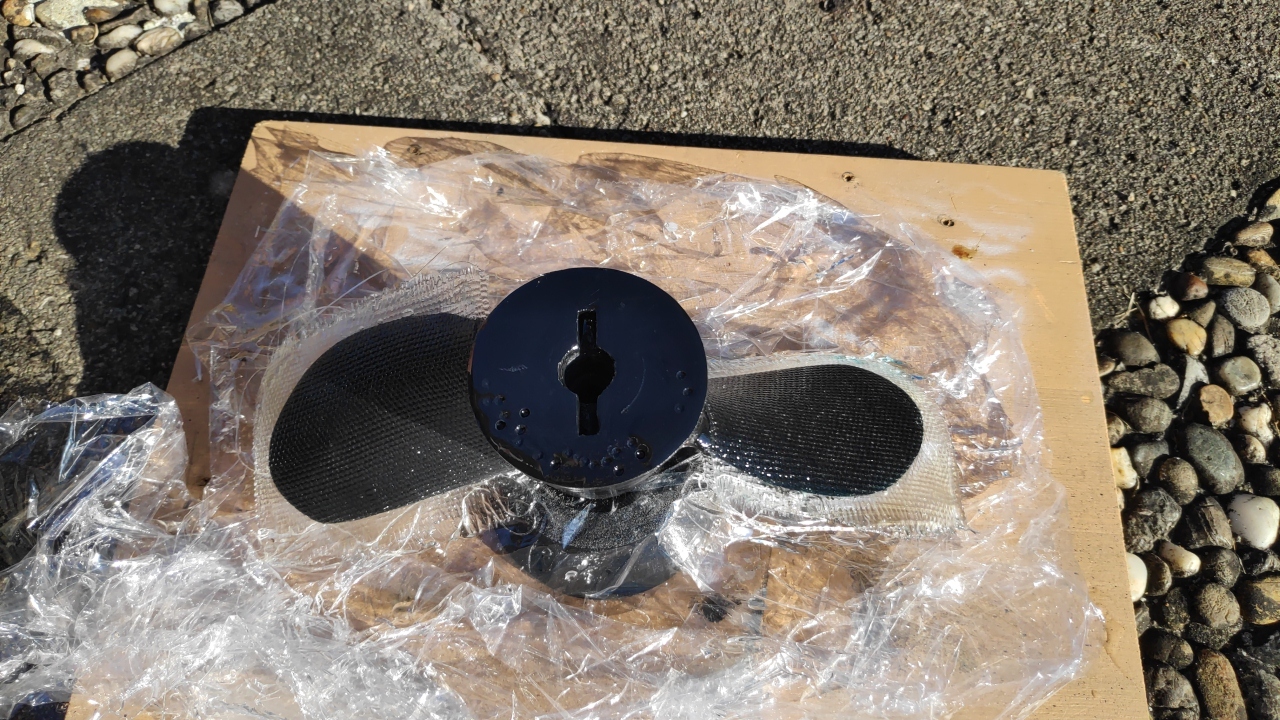
You have to cut pieces which are slightly bigger than your blades (2 pieces each wing). Now you epoxy top side pieces and blade together. Wait until the resin gets sticky, maybe like 40min (depends on your epox). Turn the prop around, mix new epox and put CFK on prop backside. Use a glove to squeeze the edge together. Finally wait and cross Fingers. After drying you can cut the edge away to around 1,5mm and start sanding. Here some pics

3 Likes
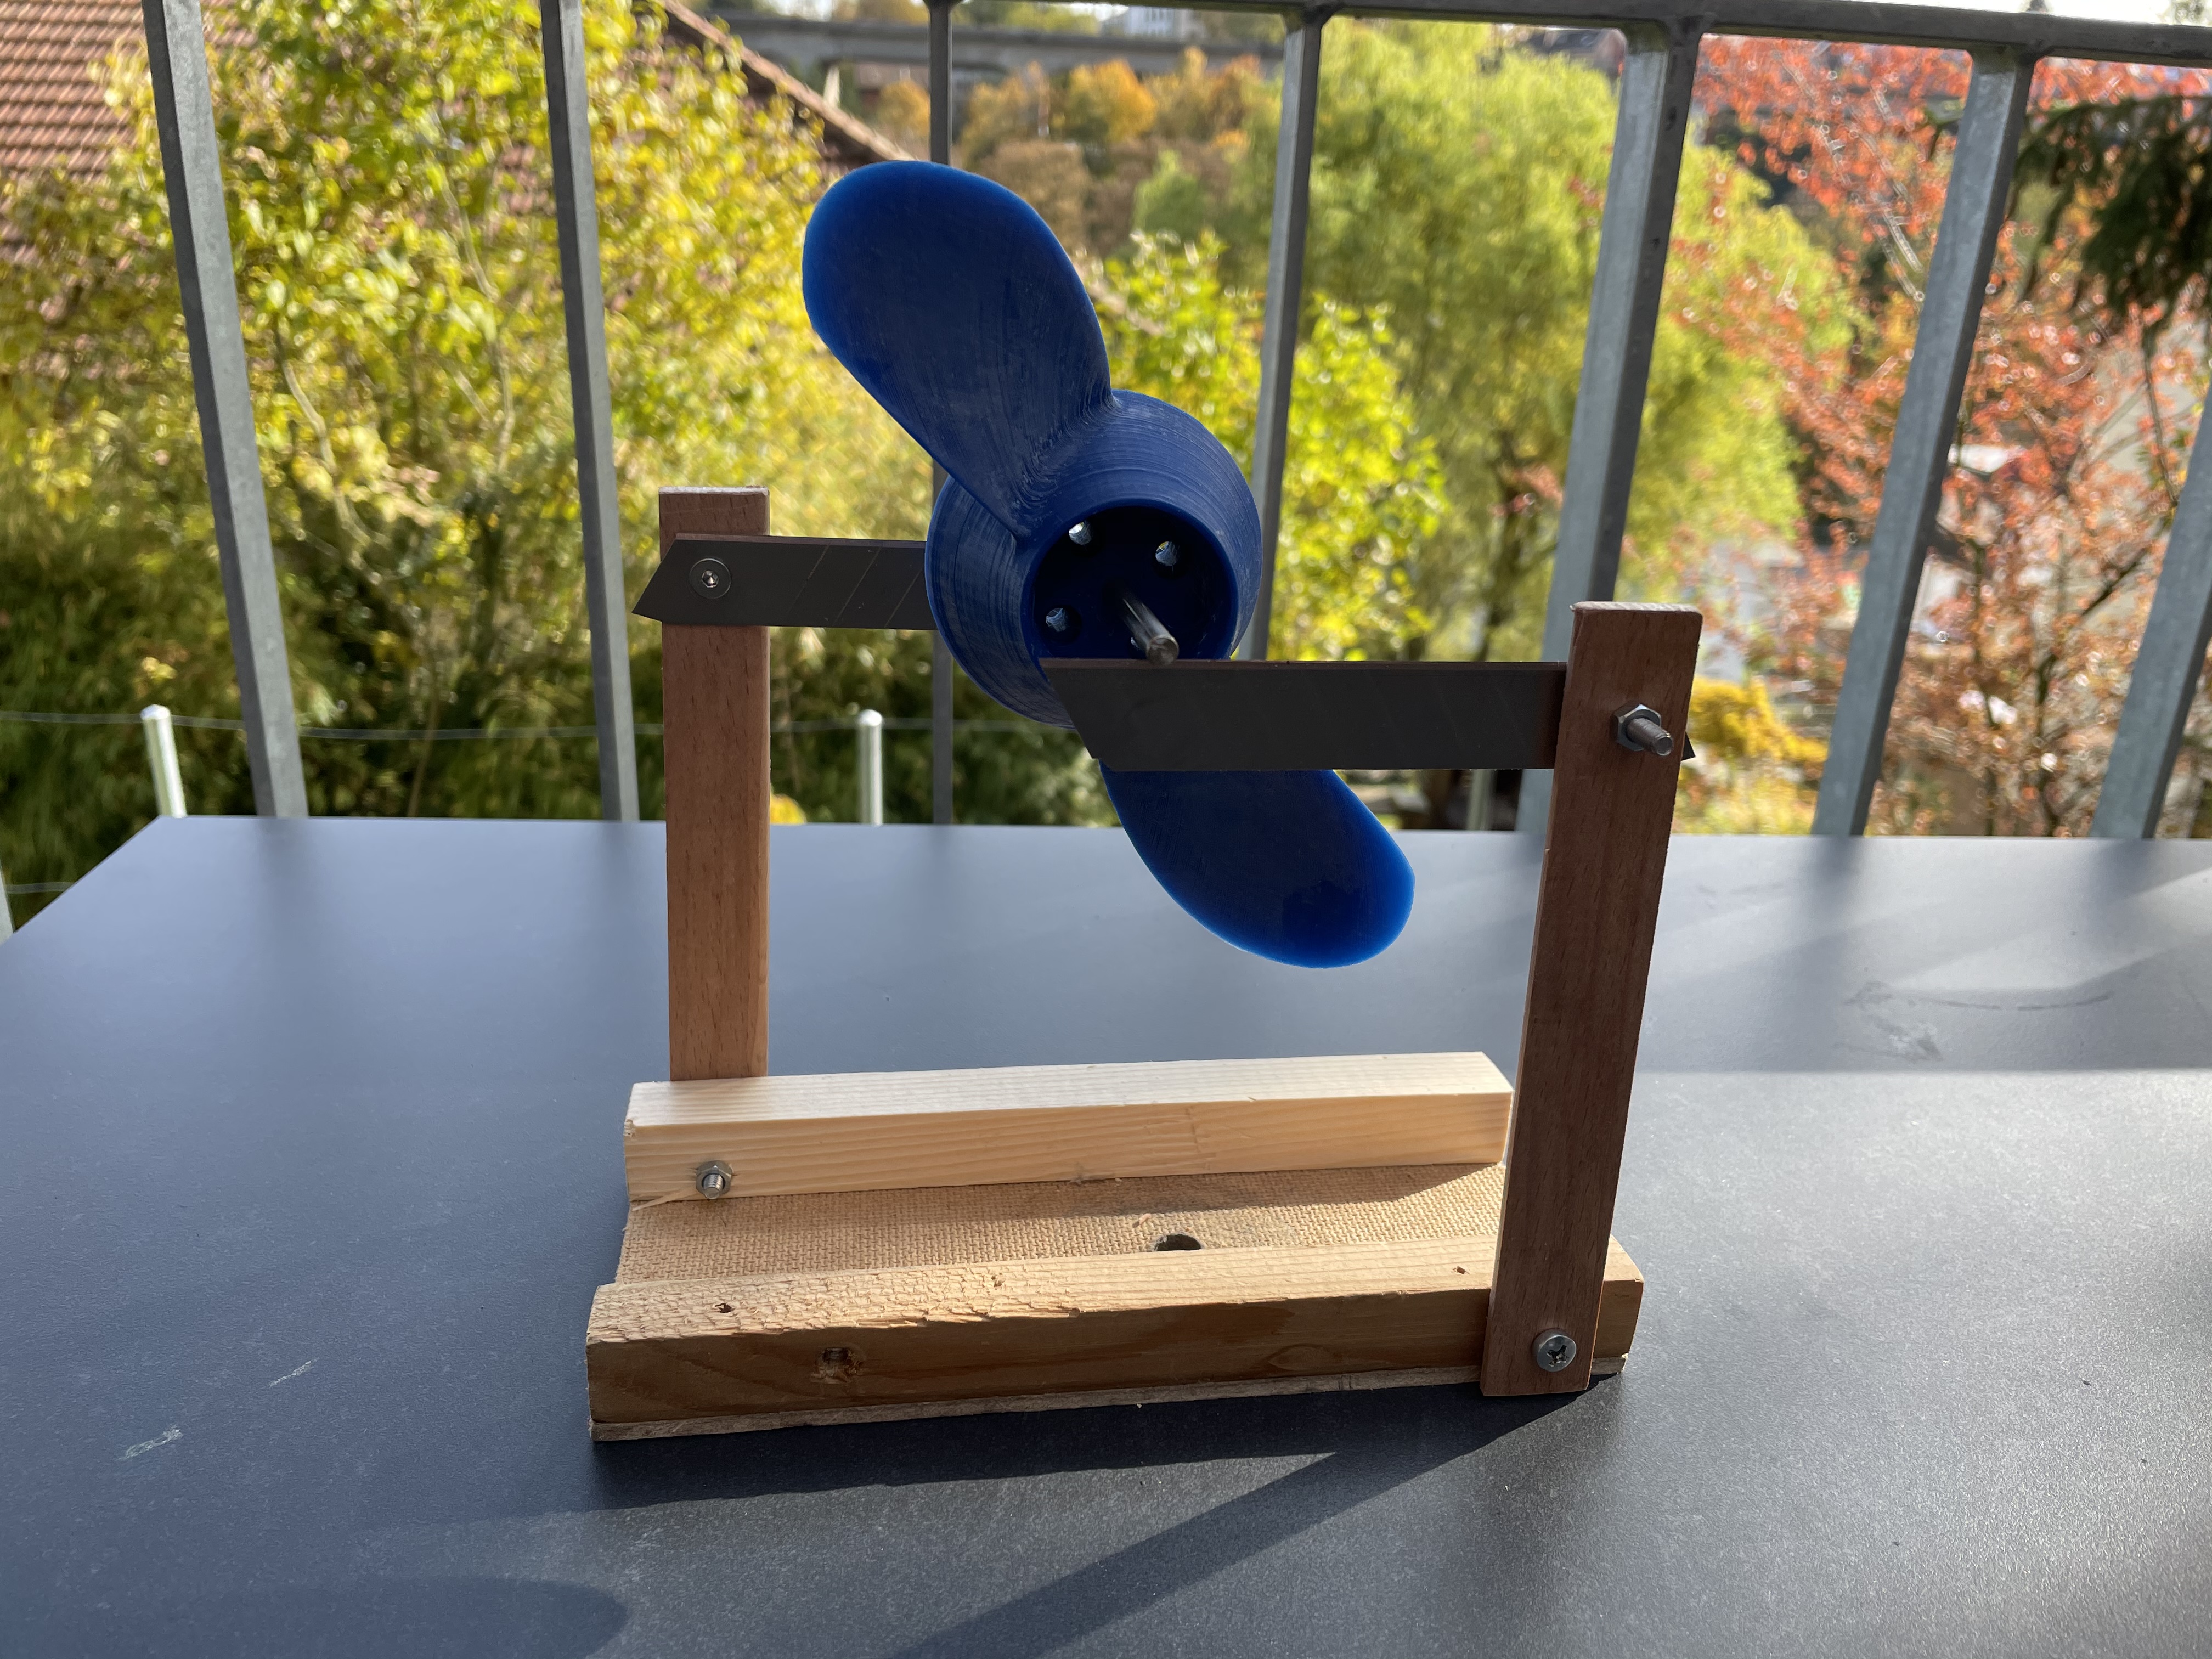
Balancing: I tried with also with a tool like from @sat_be but now I just put the prop to the motor and let it spin in air full throttle. If you touch the motor/mast you will detect vibration or not. If you have vibration take some tape and put it on one wing. If it gets worse switch the tape to the other wing. Add so much tape until the prop runs smooth. You could now weigh the amount of tape to get an idea how much epoxy to add. But it also very much depends on which position the tape was (center/outside), so the weight is just to get an idea.
4 Likes
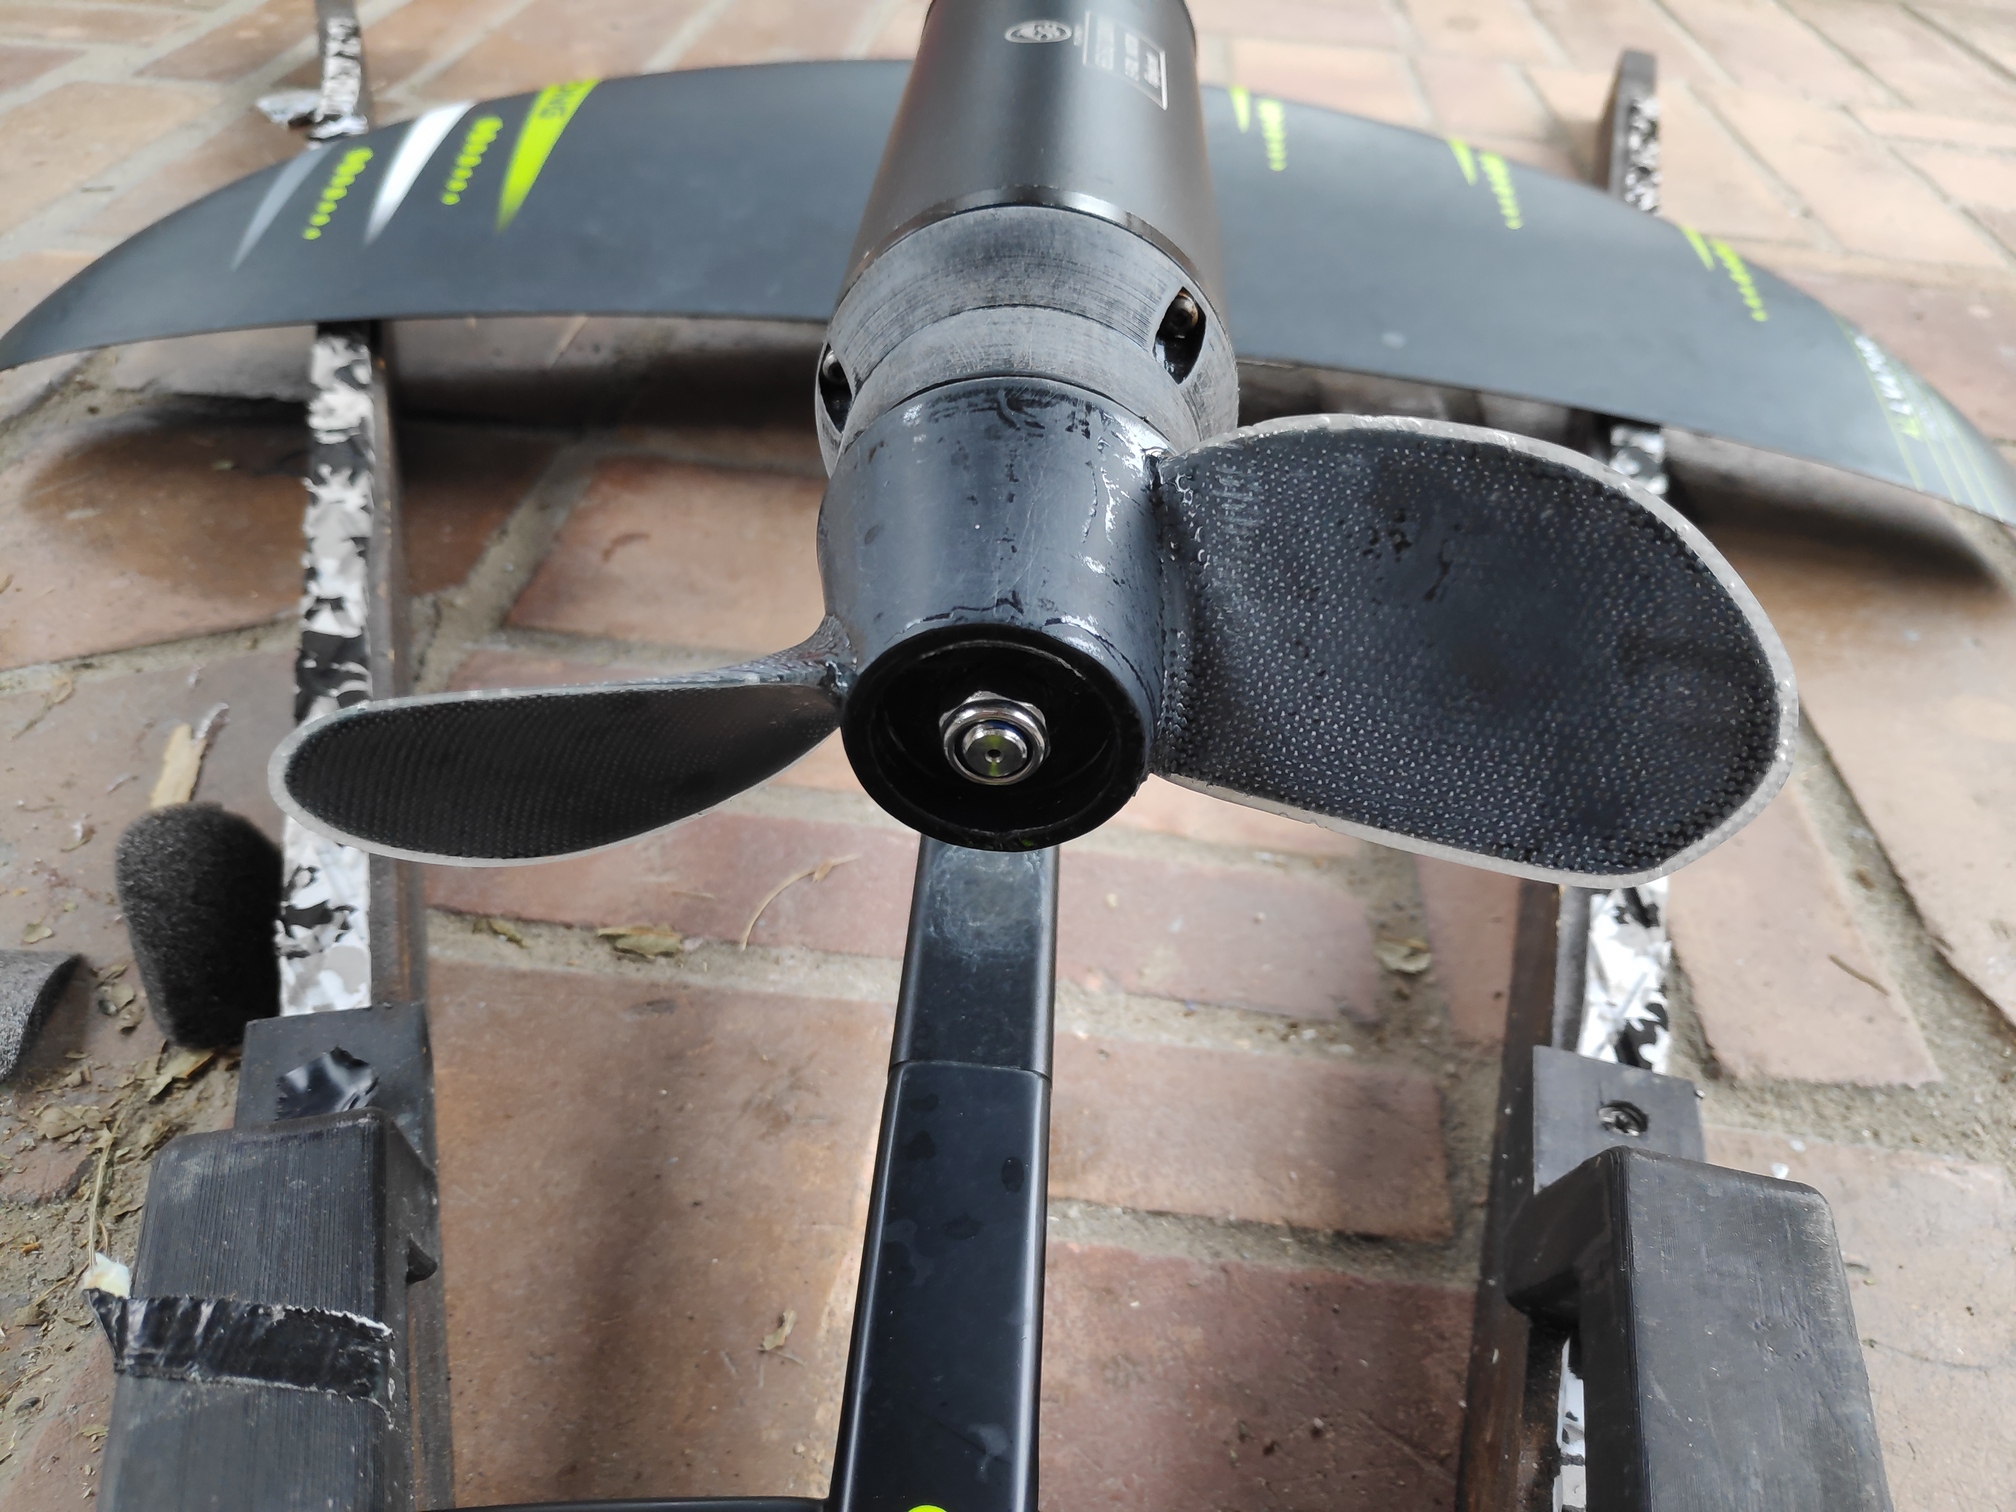
I have an SLA printer and tried a propeller on it. You need a really big printing area if you want to succeed ($$) or just split the prop blades and hub to print them. In the end, even while using toughest resin it does not compare to a good PLA prop sadly 
This was for a demo model so the blades were thin on purpose.

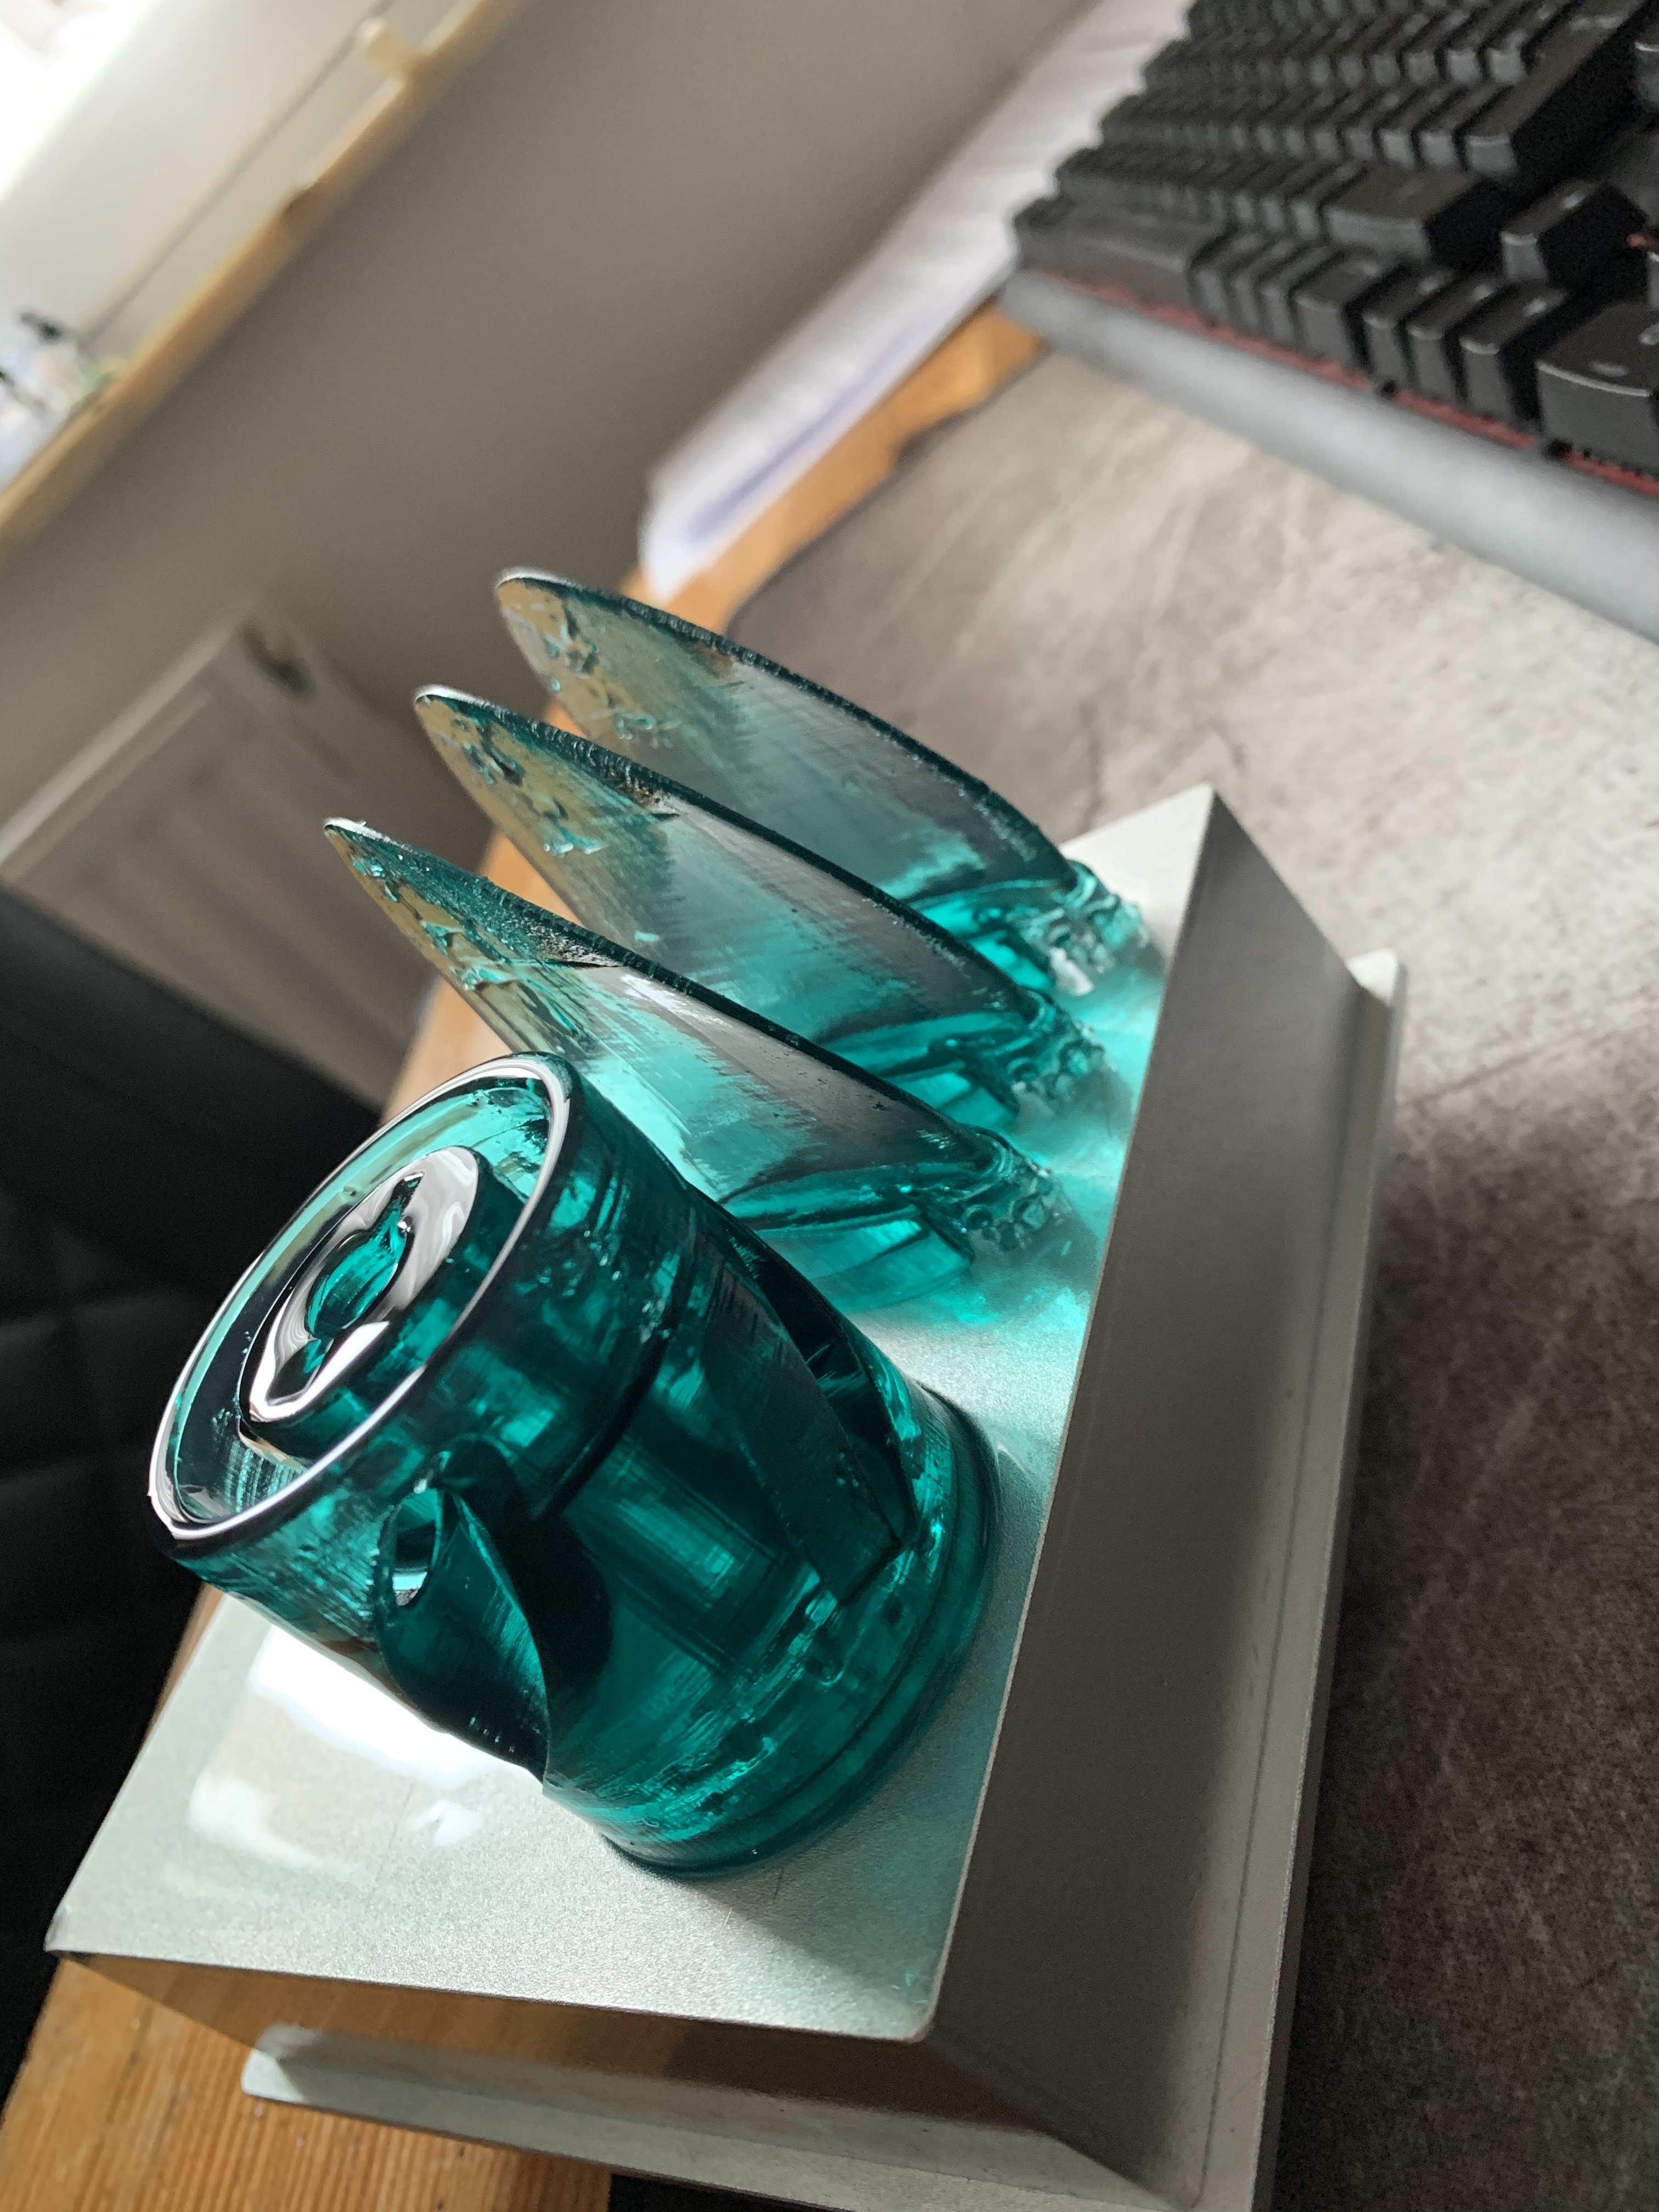
In addition you can clearly see some small bubbles on the leading edge, which is sad because after adding the pigment to the resin I vacuumed it at least 5 times for a solid 50 seconds per degas session.
4 Likes
this is priceless experience, thank you, cuz i was about to buy a SLA printer, but now will stick with FDM.
thanks guys!!! will keep you posted.
Glad I could help 
Yeah SLA printers are great for small ultra detailled parts but not for props (i can go up to 20µm on this one !).
If your main goal is for efoil, you better stick to proven FDM printer with some PLA filament or equivalent. You’ll get much better relsults after post processing. Plus, resins are sticky, you need alcohol, lots of post processing and they really stinks 

Creality Ender 3 pro would be a great choice if you want my advice.
Anycubic Photon Mono was 200$ on preorder (right now near 240$). Just wait the Black Friday and buy any SLA based on mono disaplays. It’s the best time to get on that train if you still not owner of SLA I’m waiting for BF and will bought one of them.
my experience with LCD printers was not good. Parts printed with resins degrade over time and breaks so easy no matter what resin you use. Very good to make molds. I get very good result with DFM and casting parts again with salt in oven
1 Like
Just for info
[Black Friday Sale] Photon Zero 99$. Usual price 150-170$
https://www.anycubic.com/collections/sales/products/anycubic-photon-zero
Maybe not best option due small build area and because mono printers already availale, but for 99$ it’s cheaper than any FDM printer
Price for mono printers from Anycubic and Creality not decreased on BF sales ![]()
I went with the Creality Ender 3Pro and I’m totally happy with it! Perfect for these types of parts.
1 Like
We already have a 3D printer here, but are now also looking at a Creality 3D CR-10 S5 3D printer and replace the Bowden with a Micro Swiss Direct Drive Extruder.