Awesome, thanks.
If you think of it, could you shoot a pic of the bottom side of the battery? Pretty sure I know what it looks like already, but it would be nice to see the wiring. I only see top-side pictures in the thread.
Thanks!
Awesome, thanks.
If you think of it, could you shoot a pic of the bottom side of the battery? Pretty sure I know what it looks like already, but it would be nice to see the wiring. I only see top-side pictures in the thread.
Thanks!
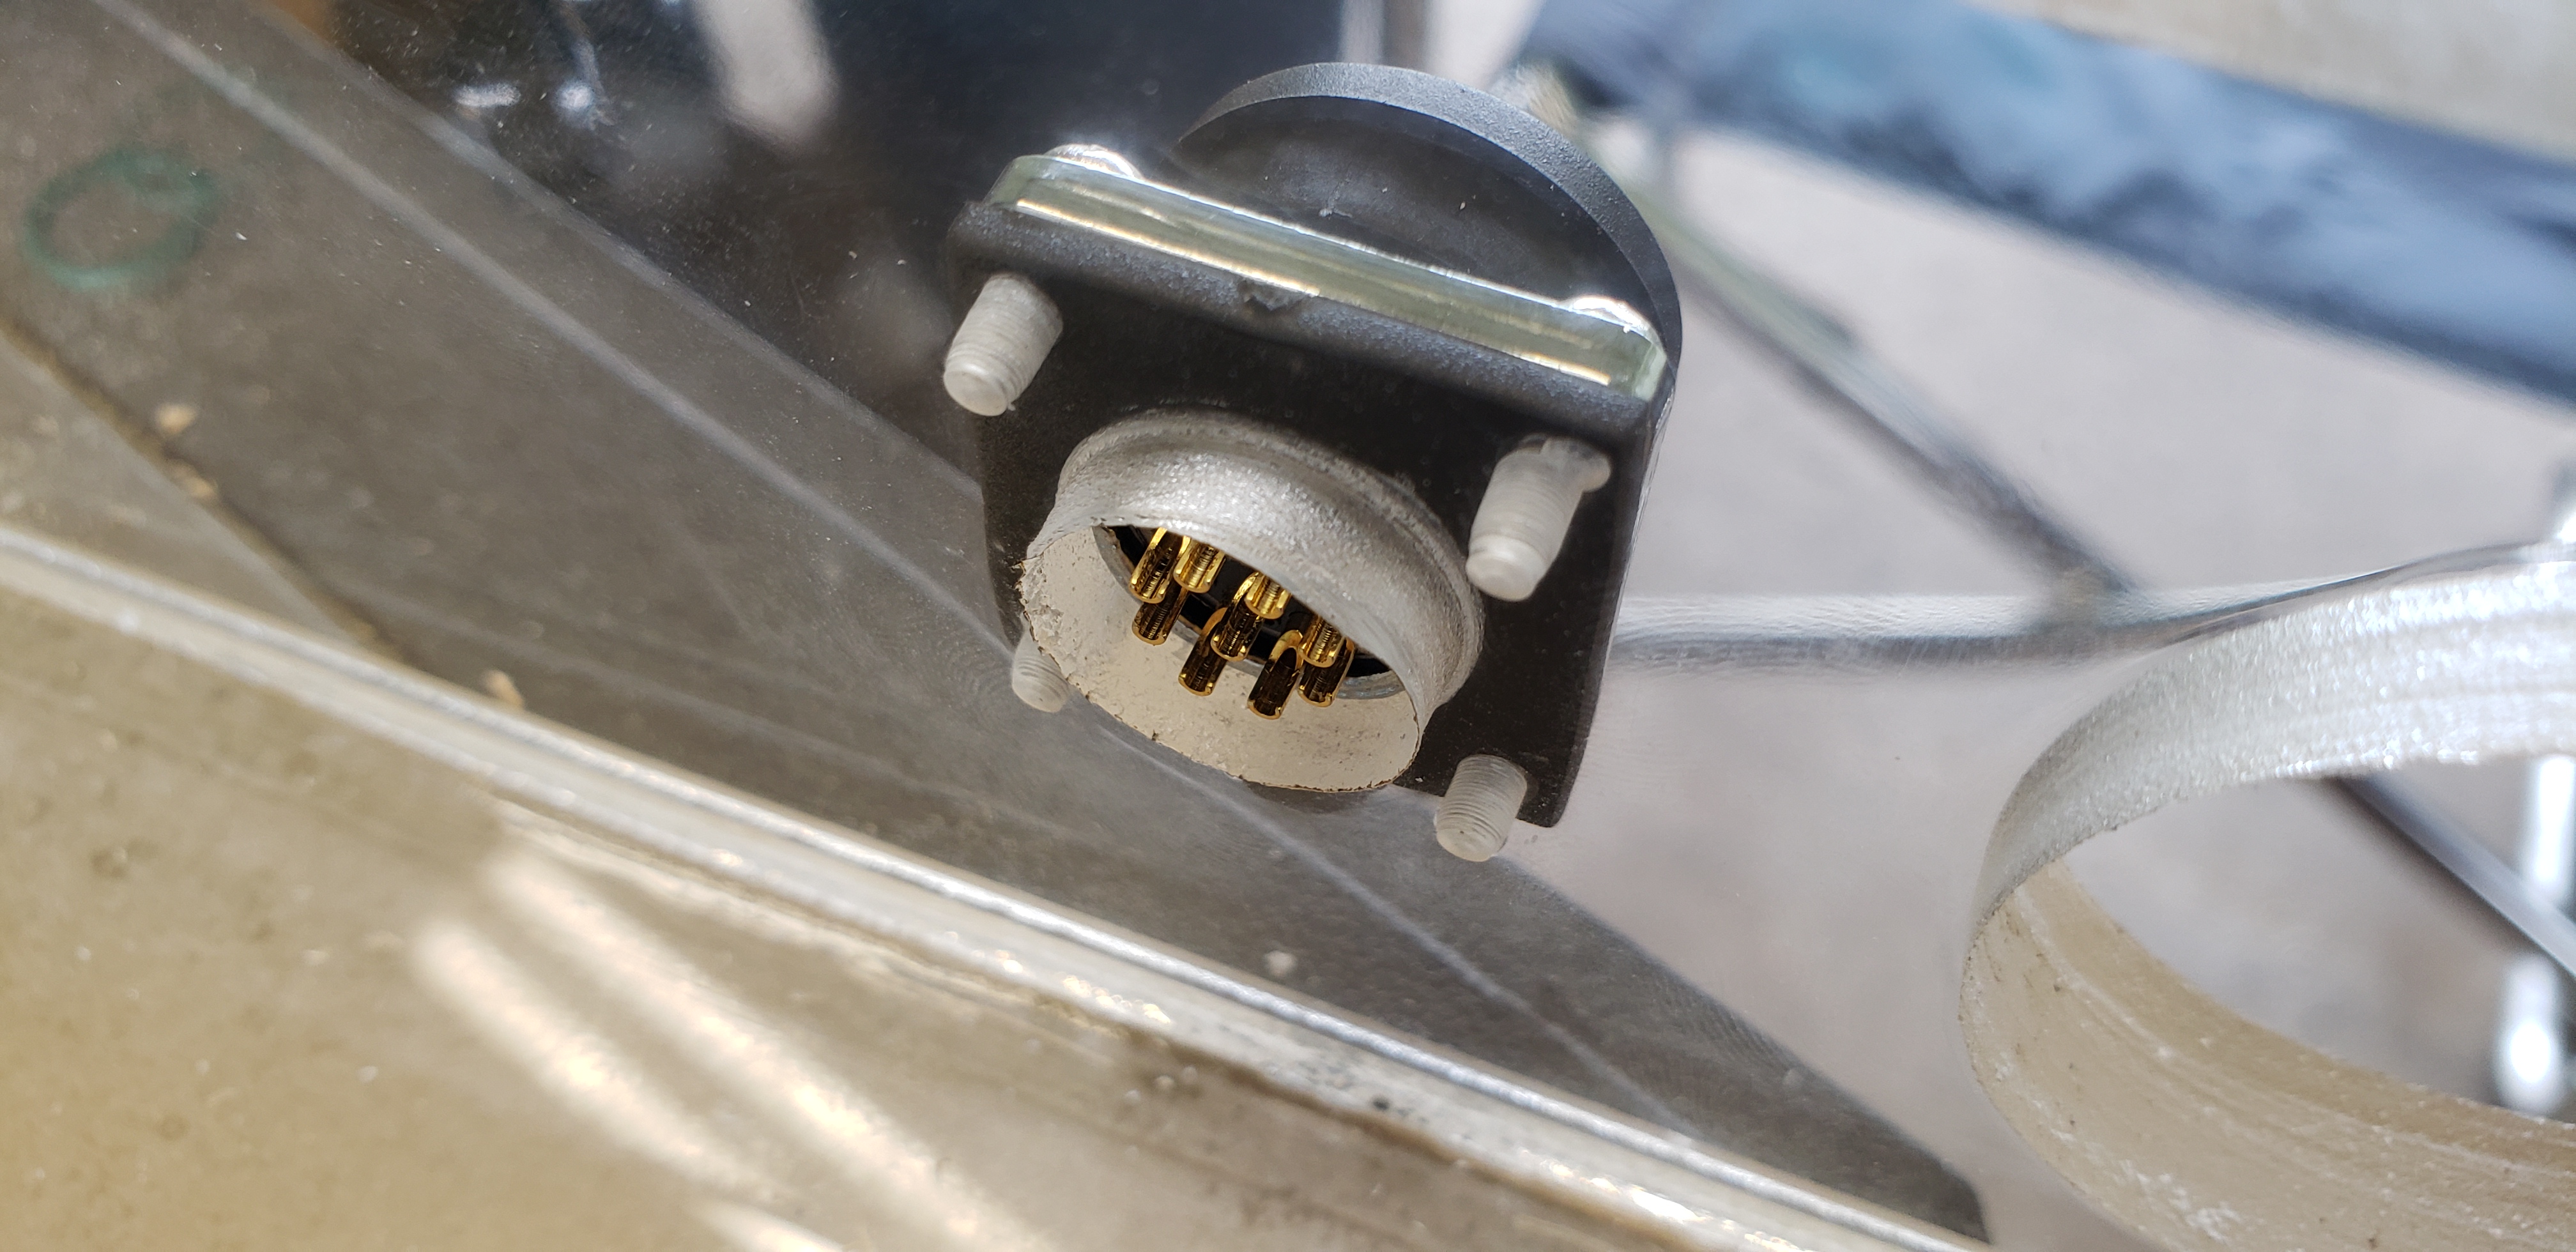
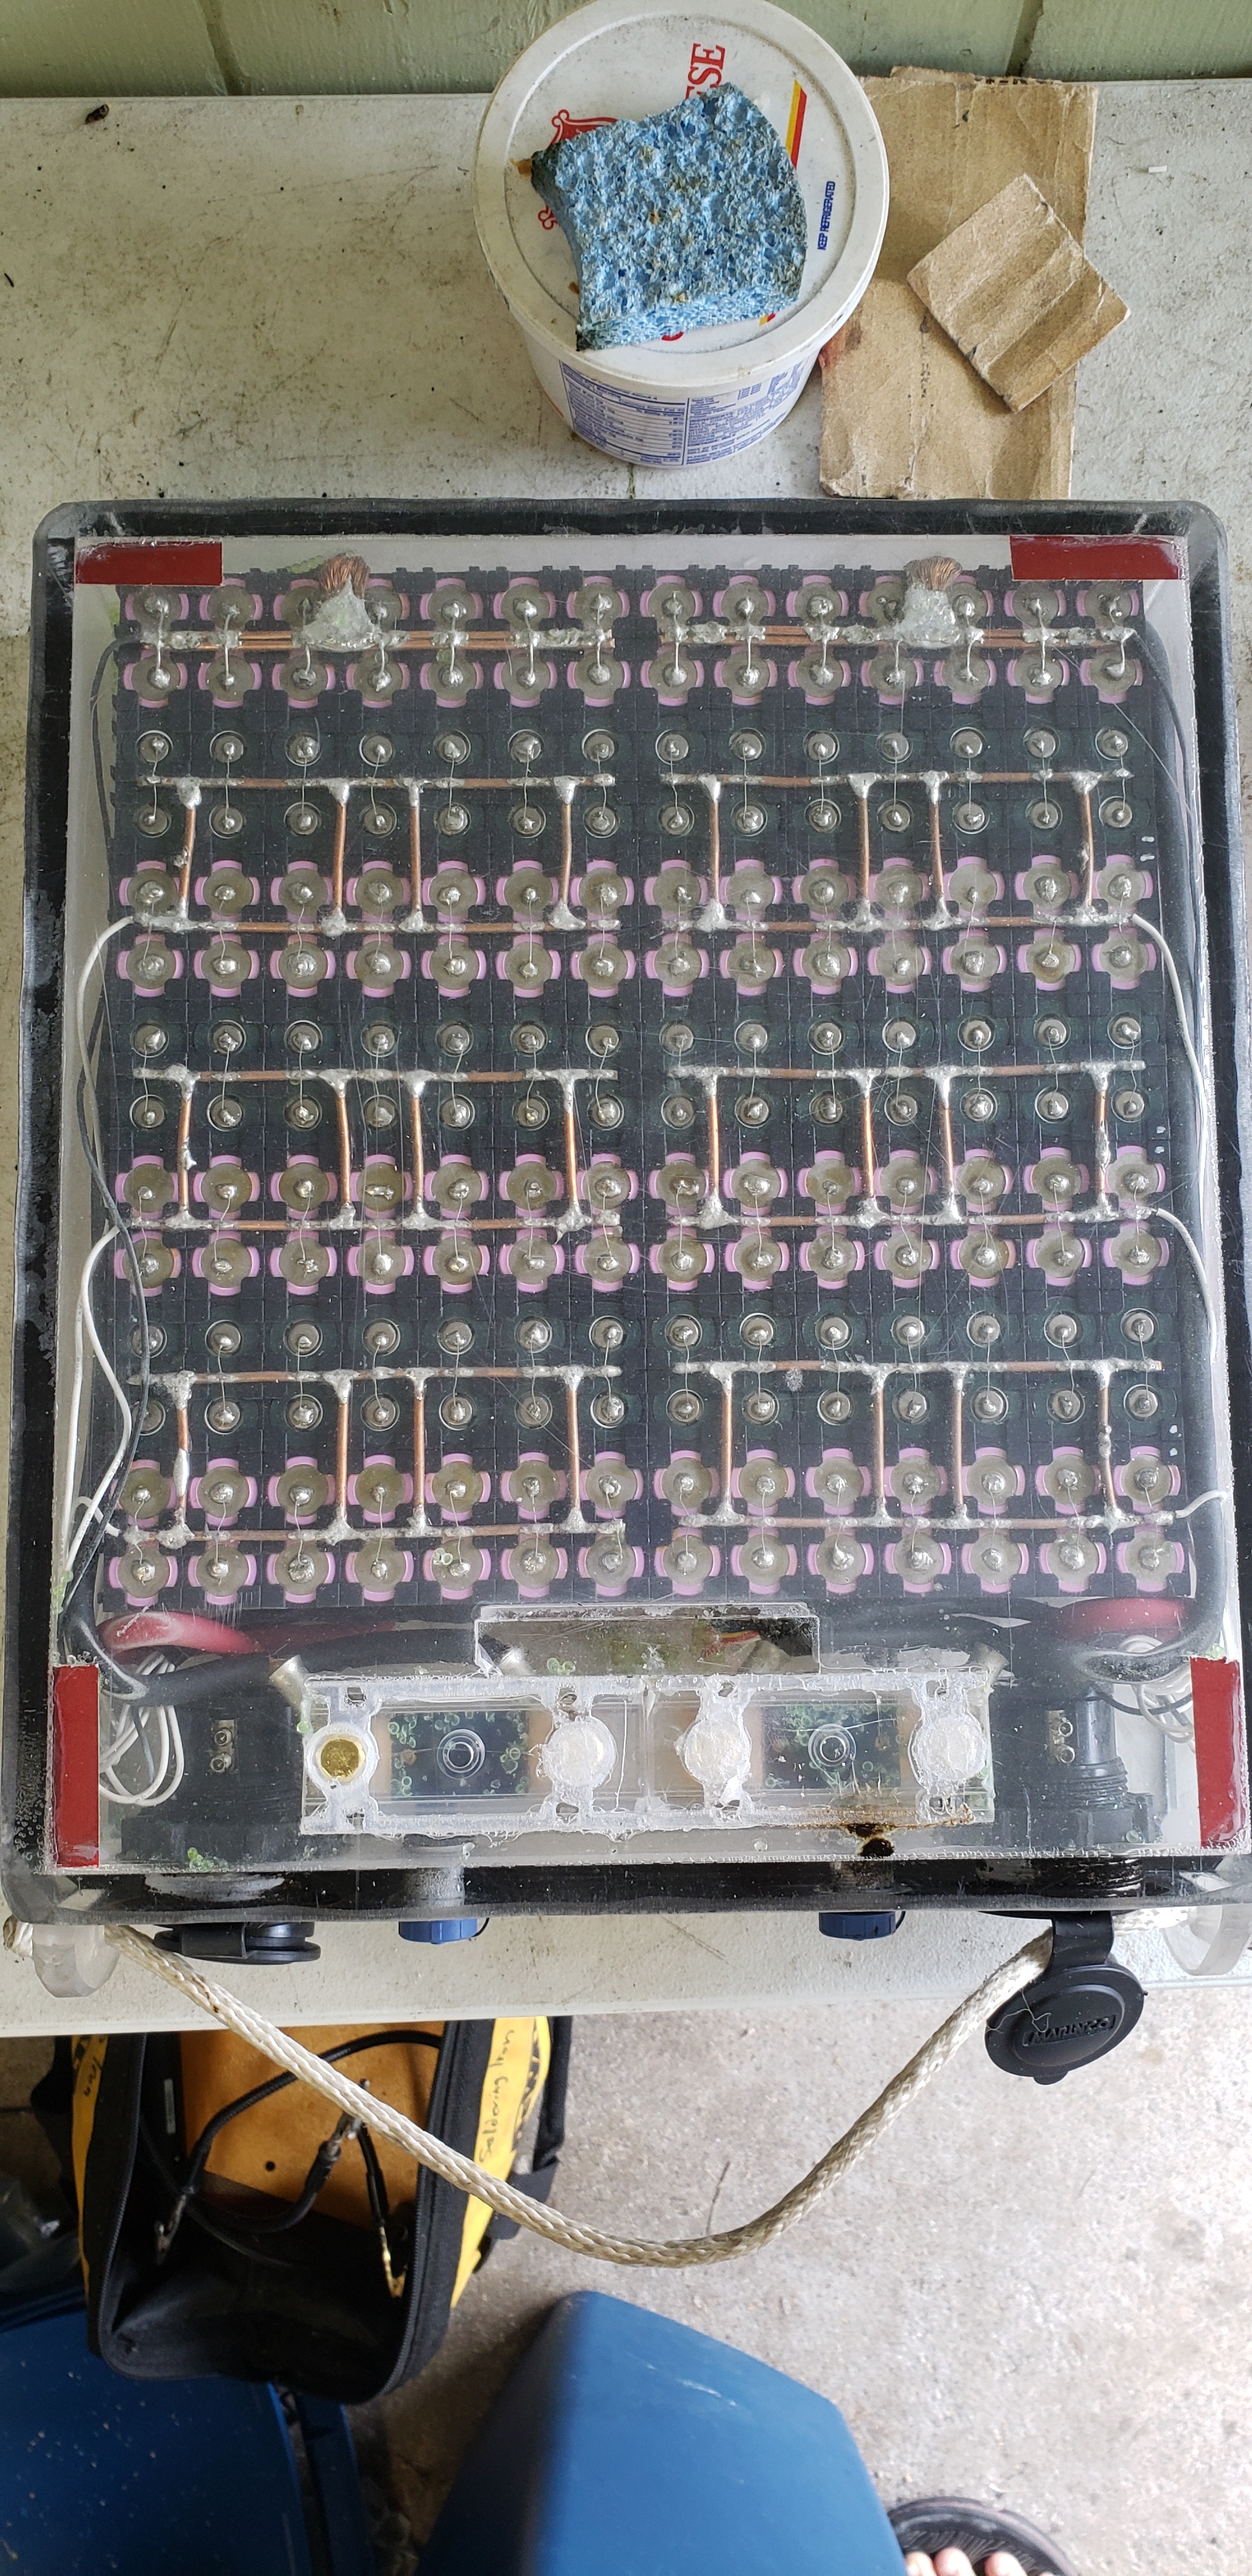
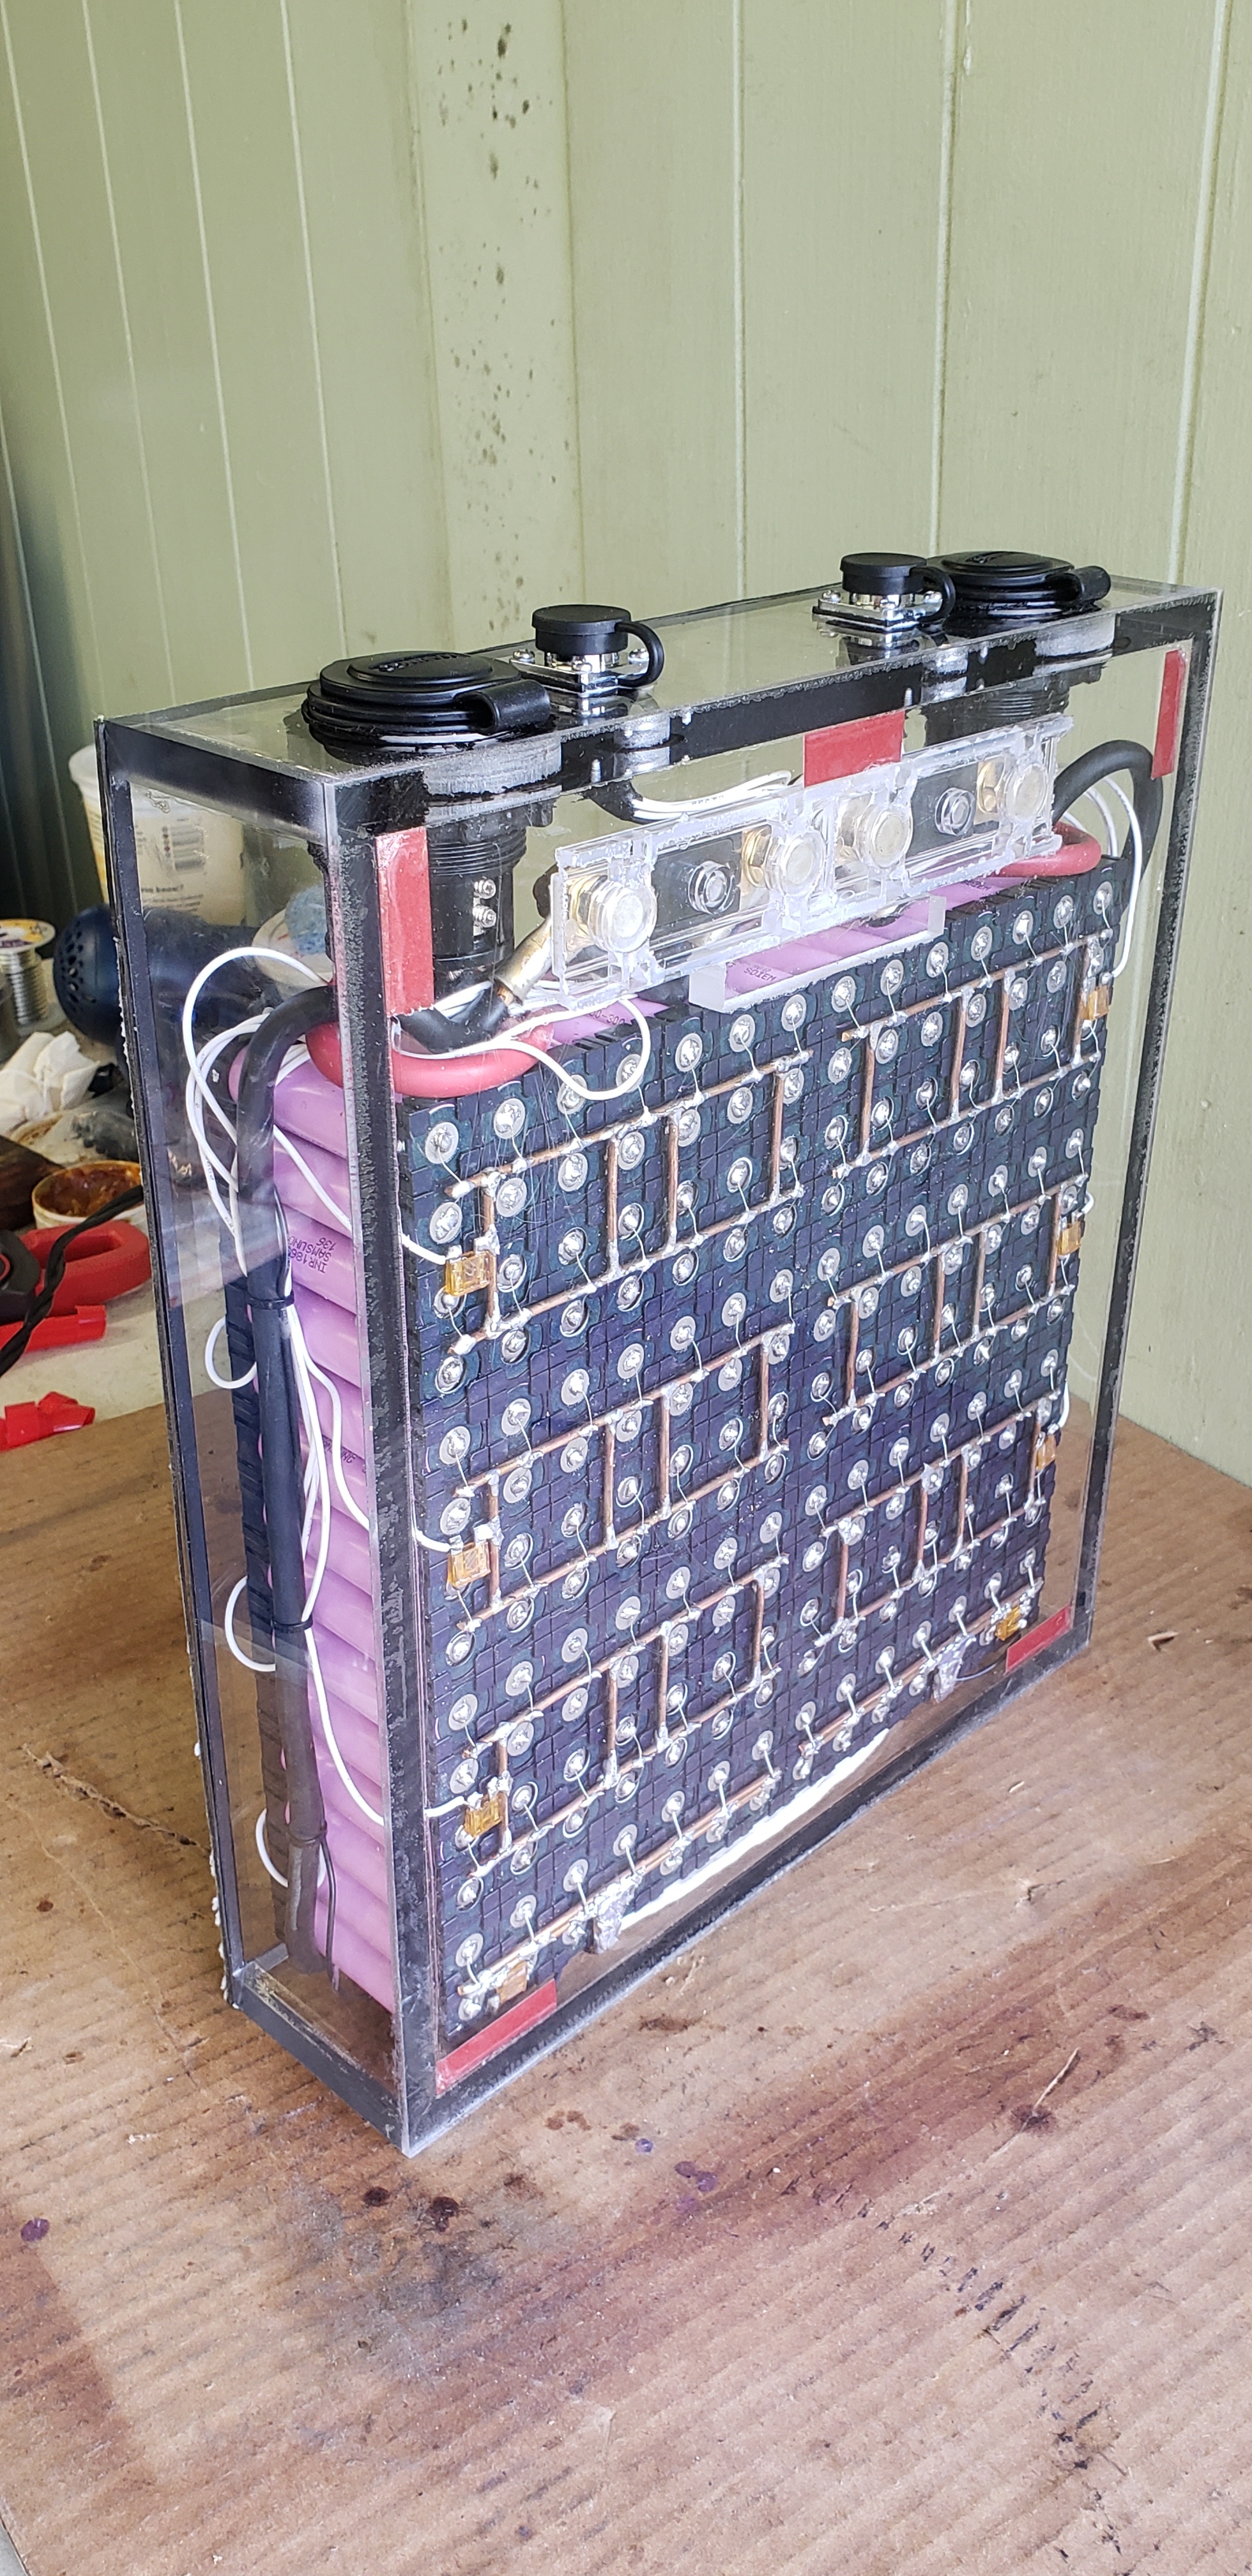
Here you go. Ignore the desiccant beads all over the place.  The bag holding them failed. Haven’t got around to opening it to clean it out.

Thanks again.
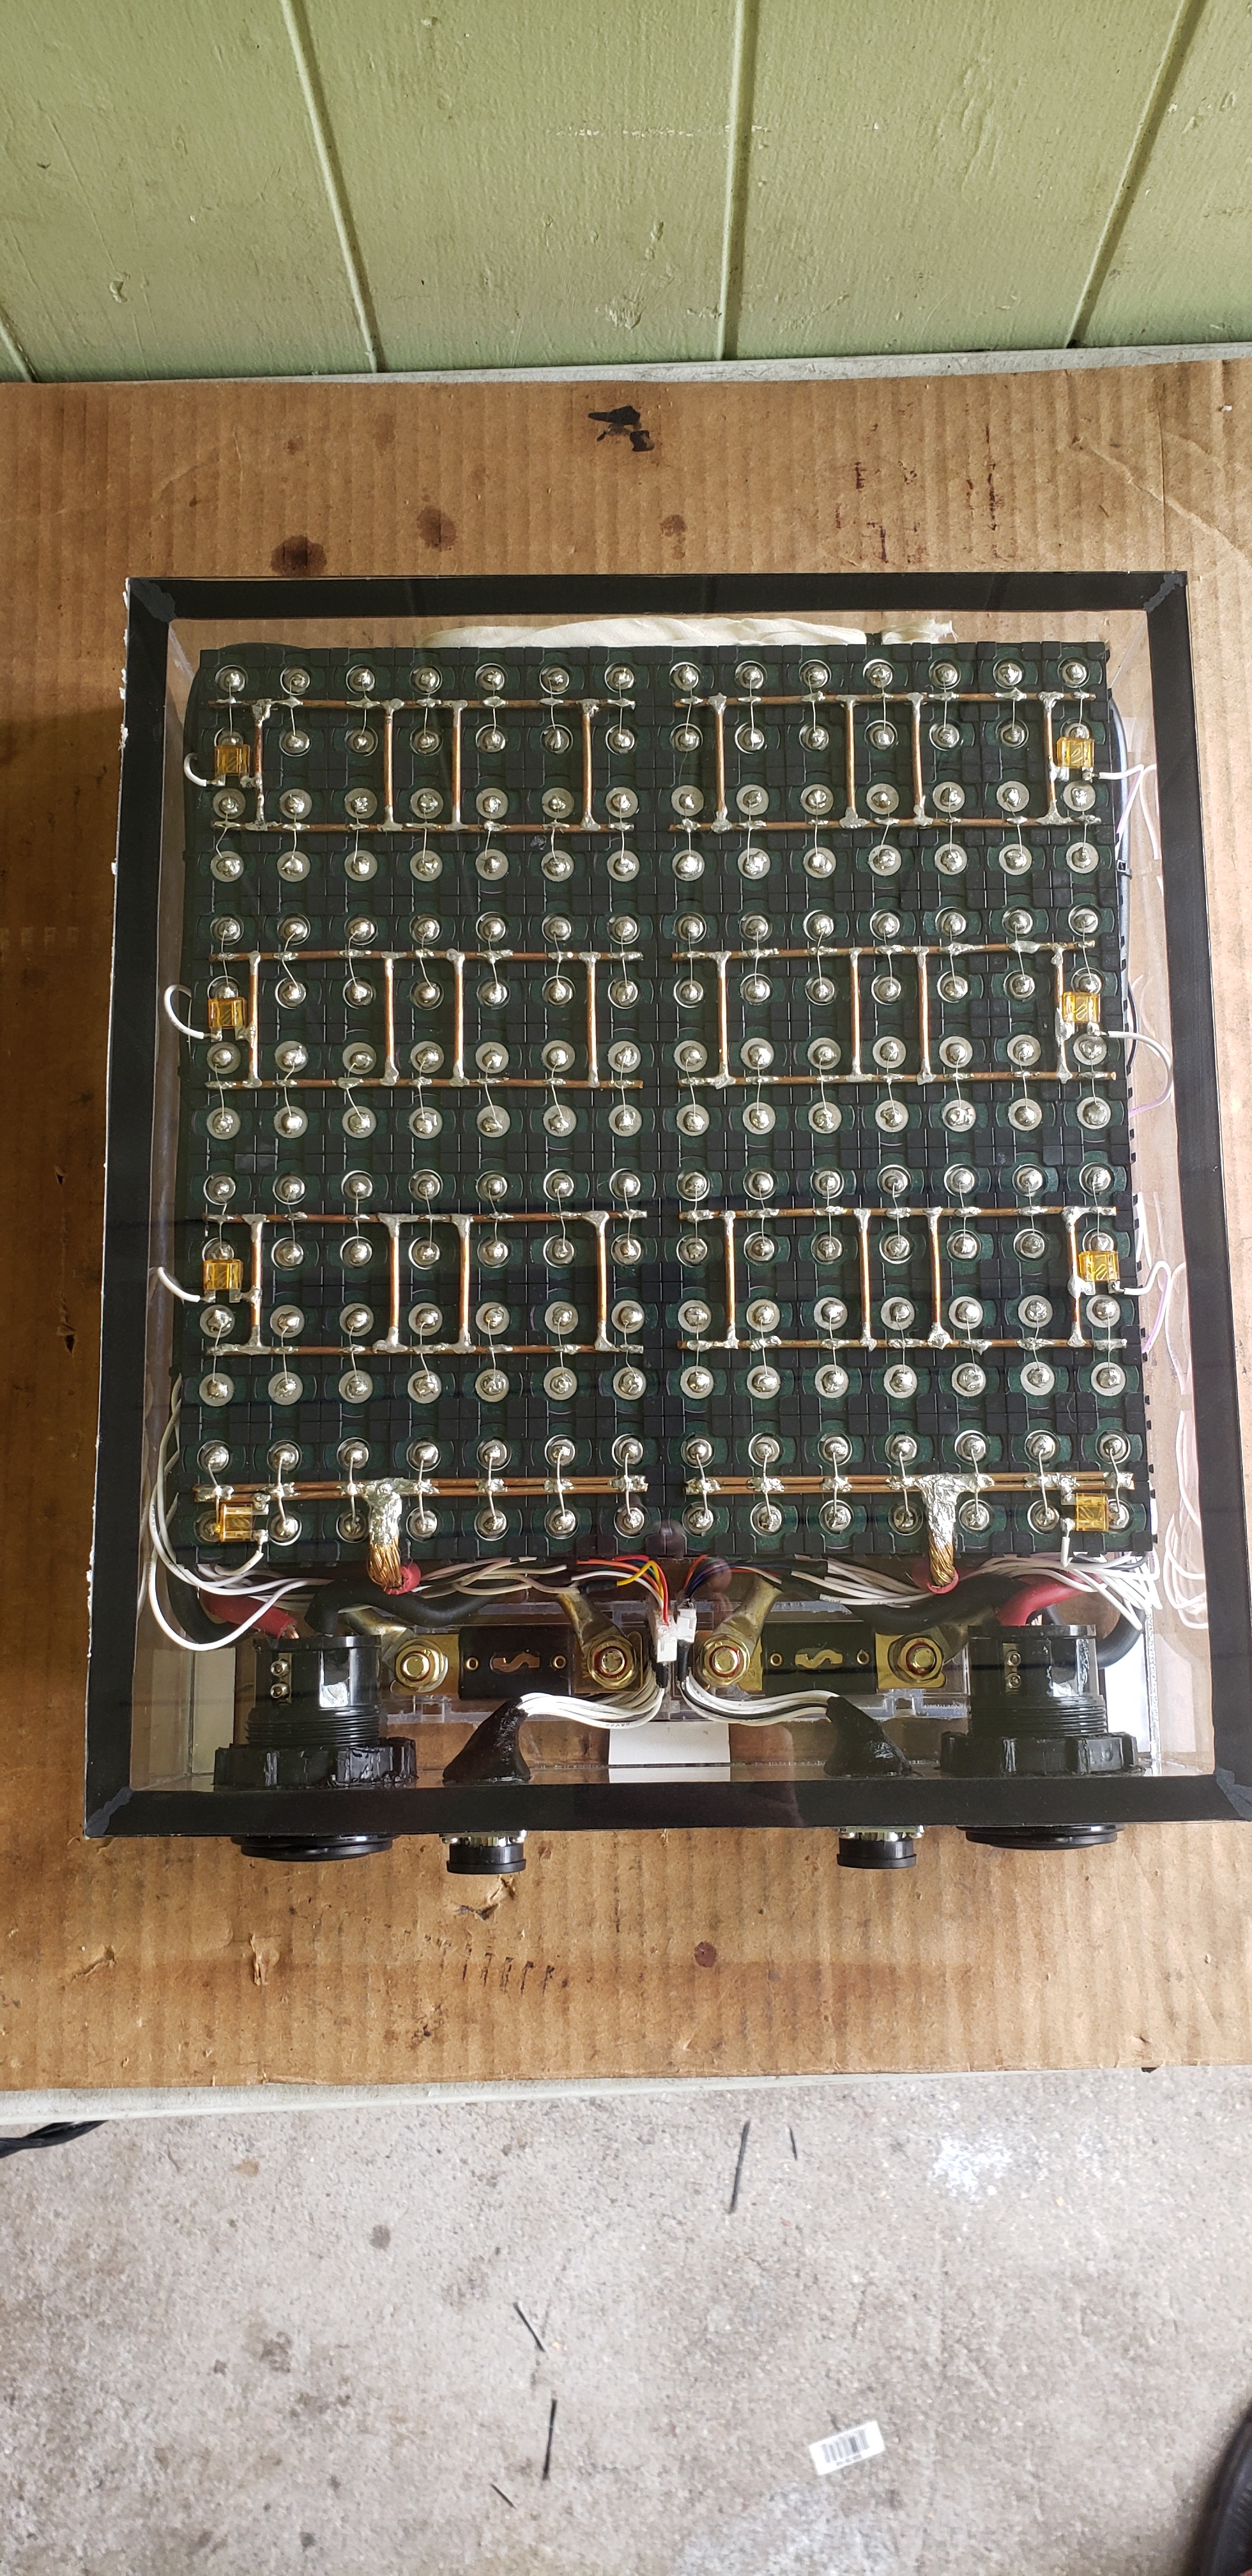
What are your thoughts on putting all of the + ends up and the - ends down, connecting the 14 cells to bus bars? Then the negative side could be spot welded (or soldered) with nickel and the positive side would have the extra protruding individual fuses. I understand why you built it the way you did and I think it’s elegant. My concern is bottom side connections. Obviously you’ve made it sturdy enough, where it is not a concern. Still it seems like continuous pounding on those copper wires could become a problem and looks hard to build.
Since I am about to make a Bunch of these, I’m thinking about how to streamline the building process. Any thoughts there would be greatly appreciated.
Hi.
I don’t spot weld. I solder everything. But, yea. There are a million ways to build a battery. This is just the system that I designed and engineered. It works for me. Yes, it is very time consuming. It probably takes me about 36 hours to build this battery from scratch. Including the waterproof case, plugs, and everything.
Post a build of how you end up building your battery. It will be much appreciated by this efoiling community!
Hi guys.
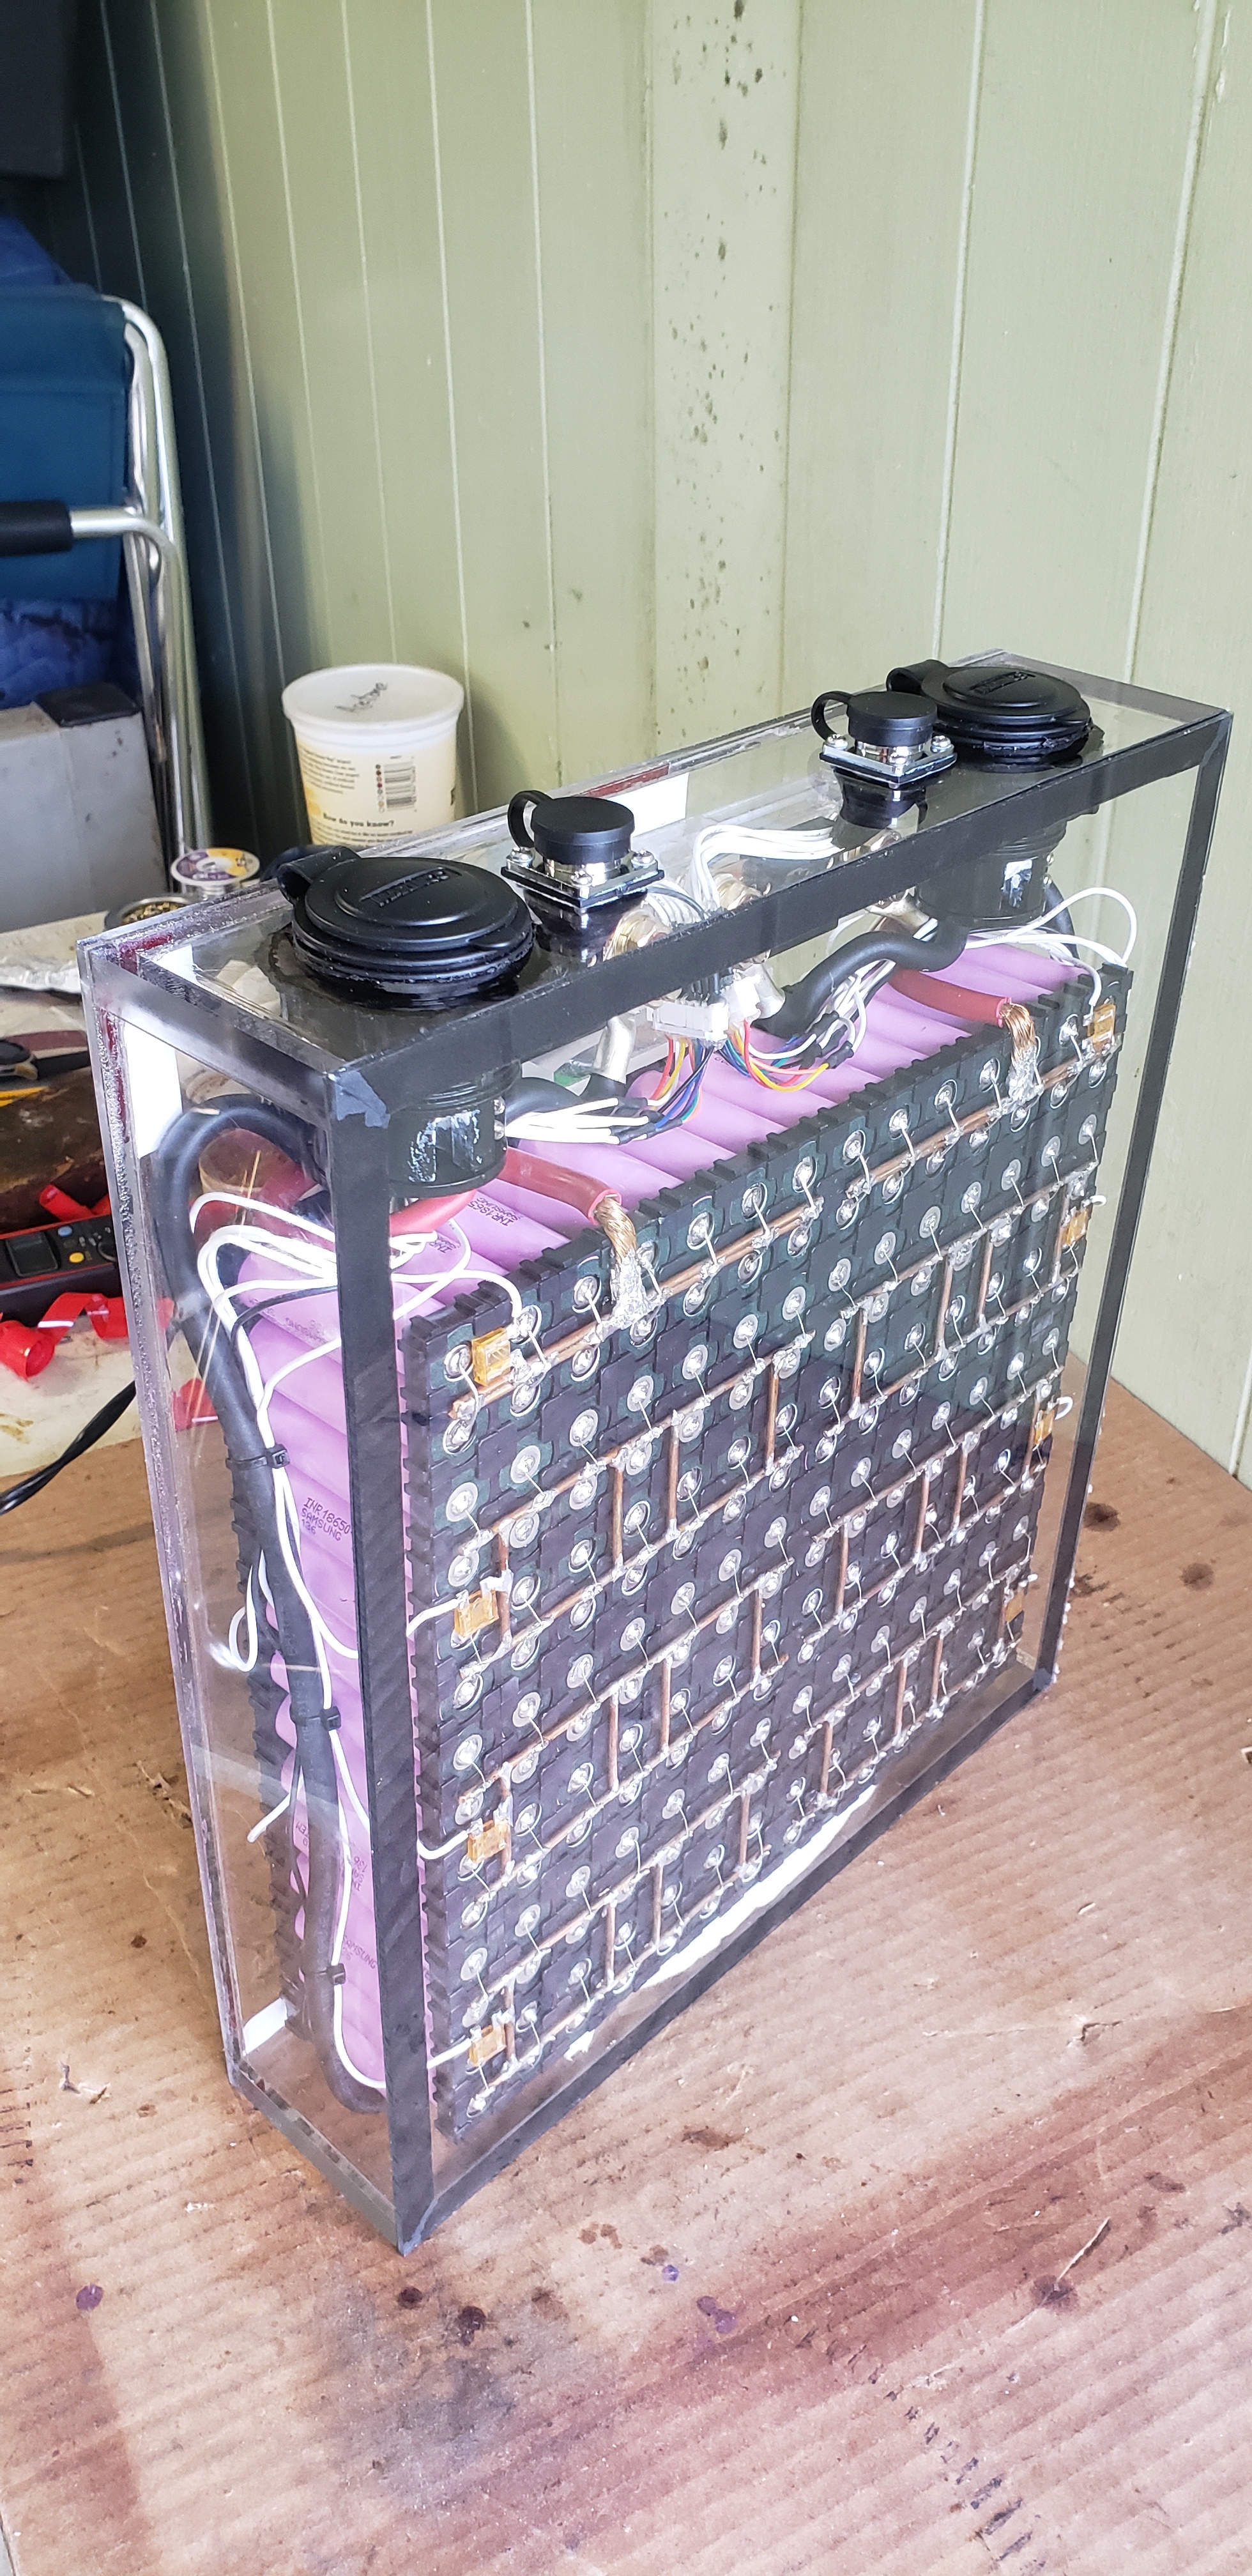
I just completed my second battery build. I just need to round the corners and add the handle.
This is a really good setup if anyone wants to build their battery and waterproof case from scratch.
I’m putting together a parts list and adding up the price and hours. I plan to post these details later.
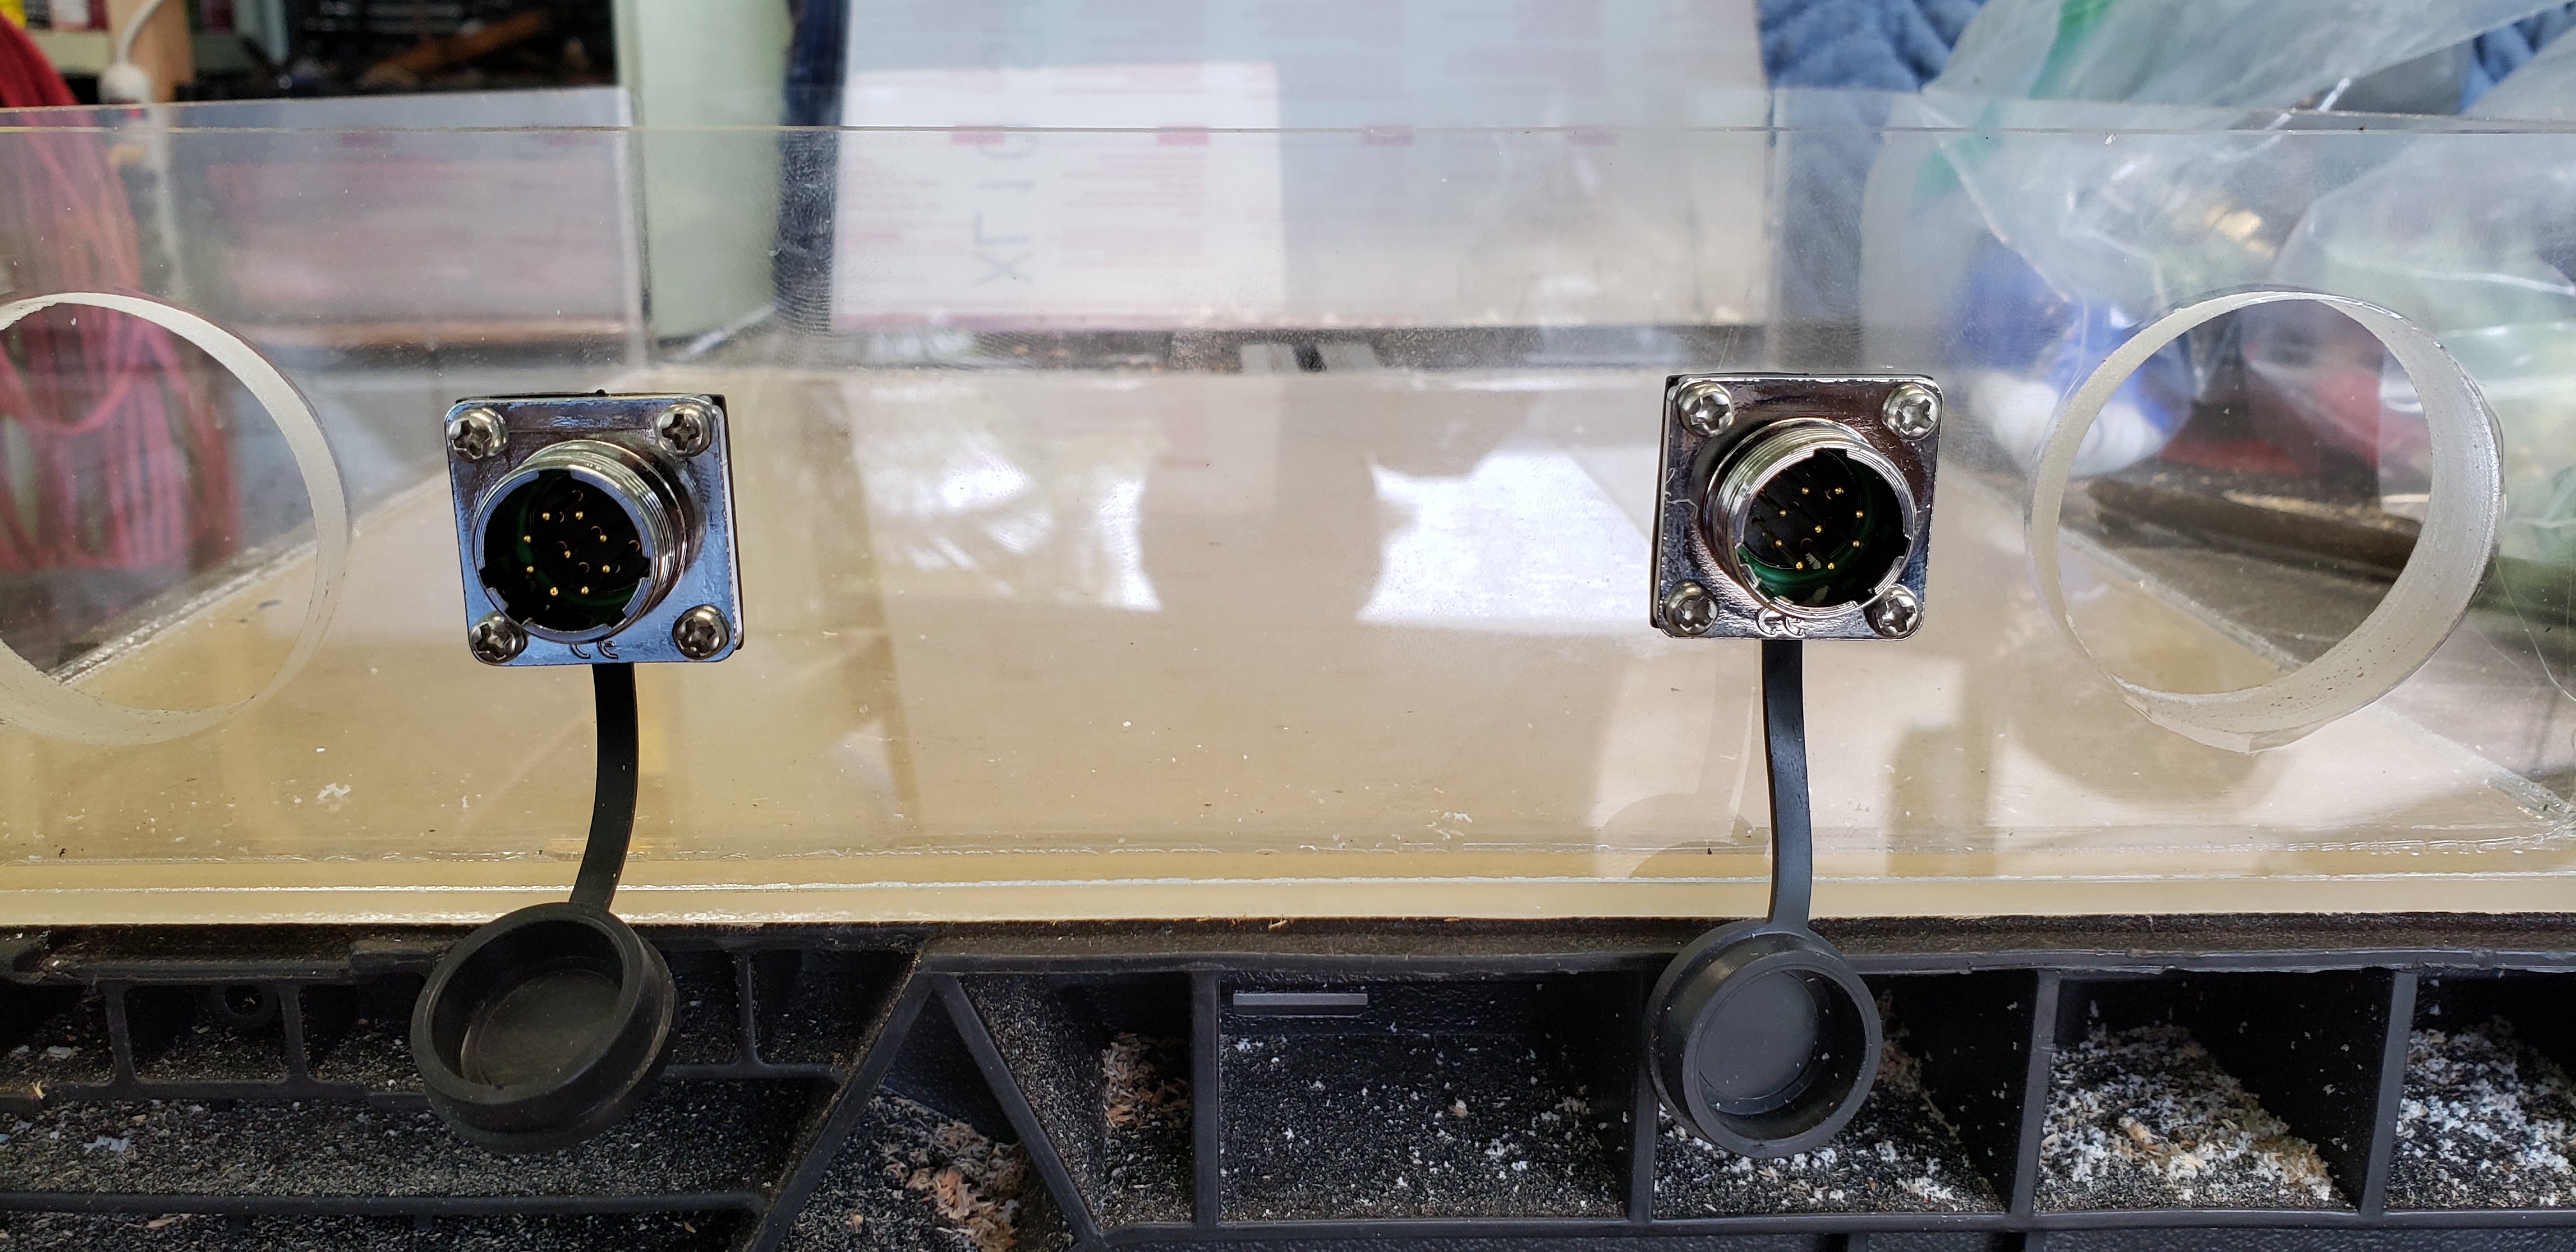
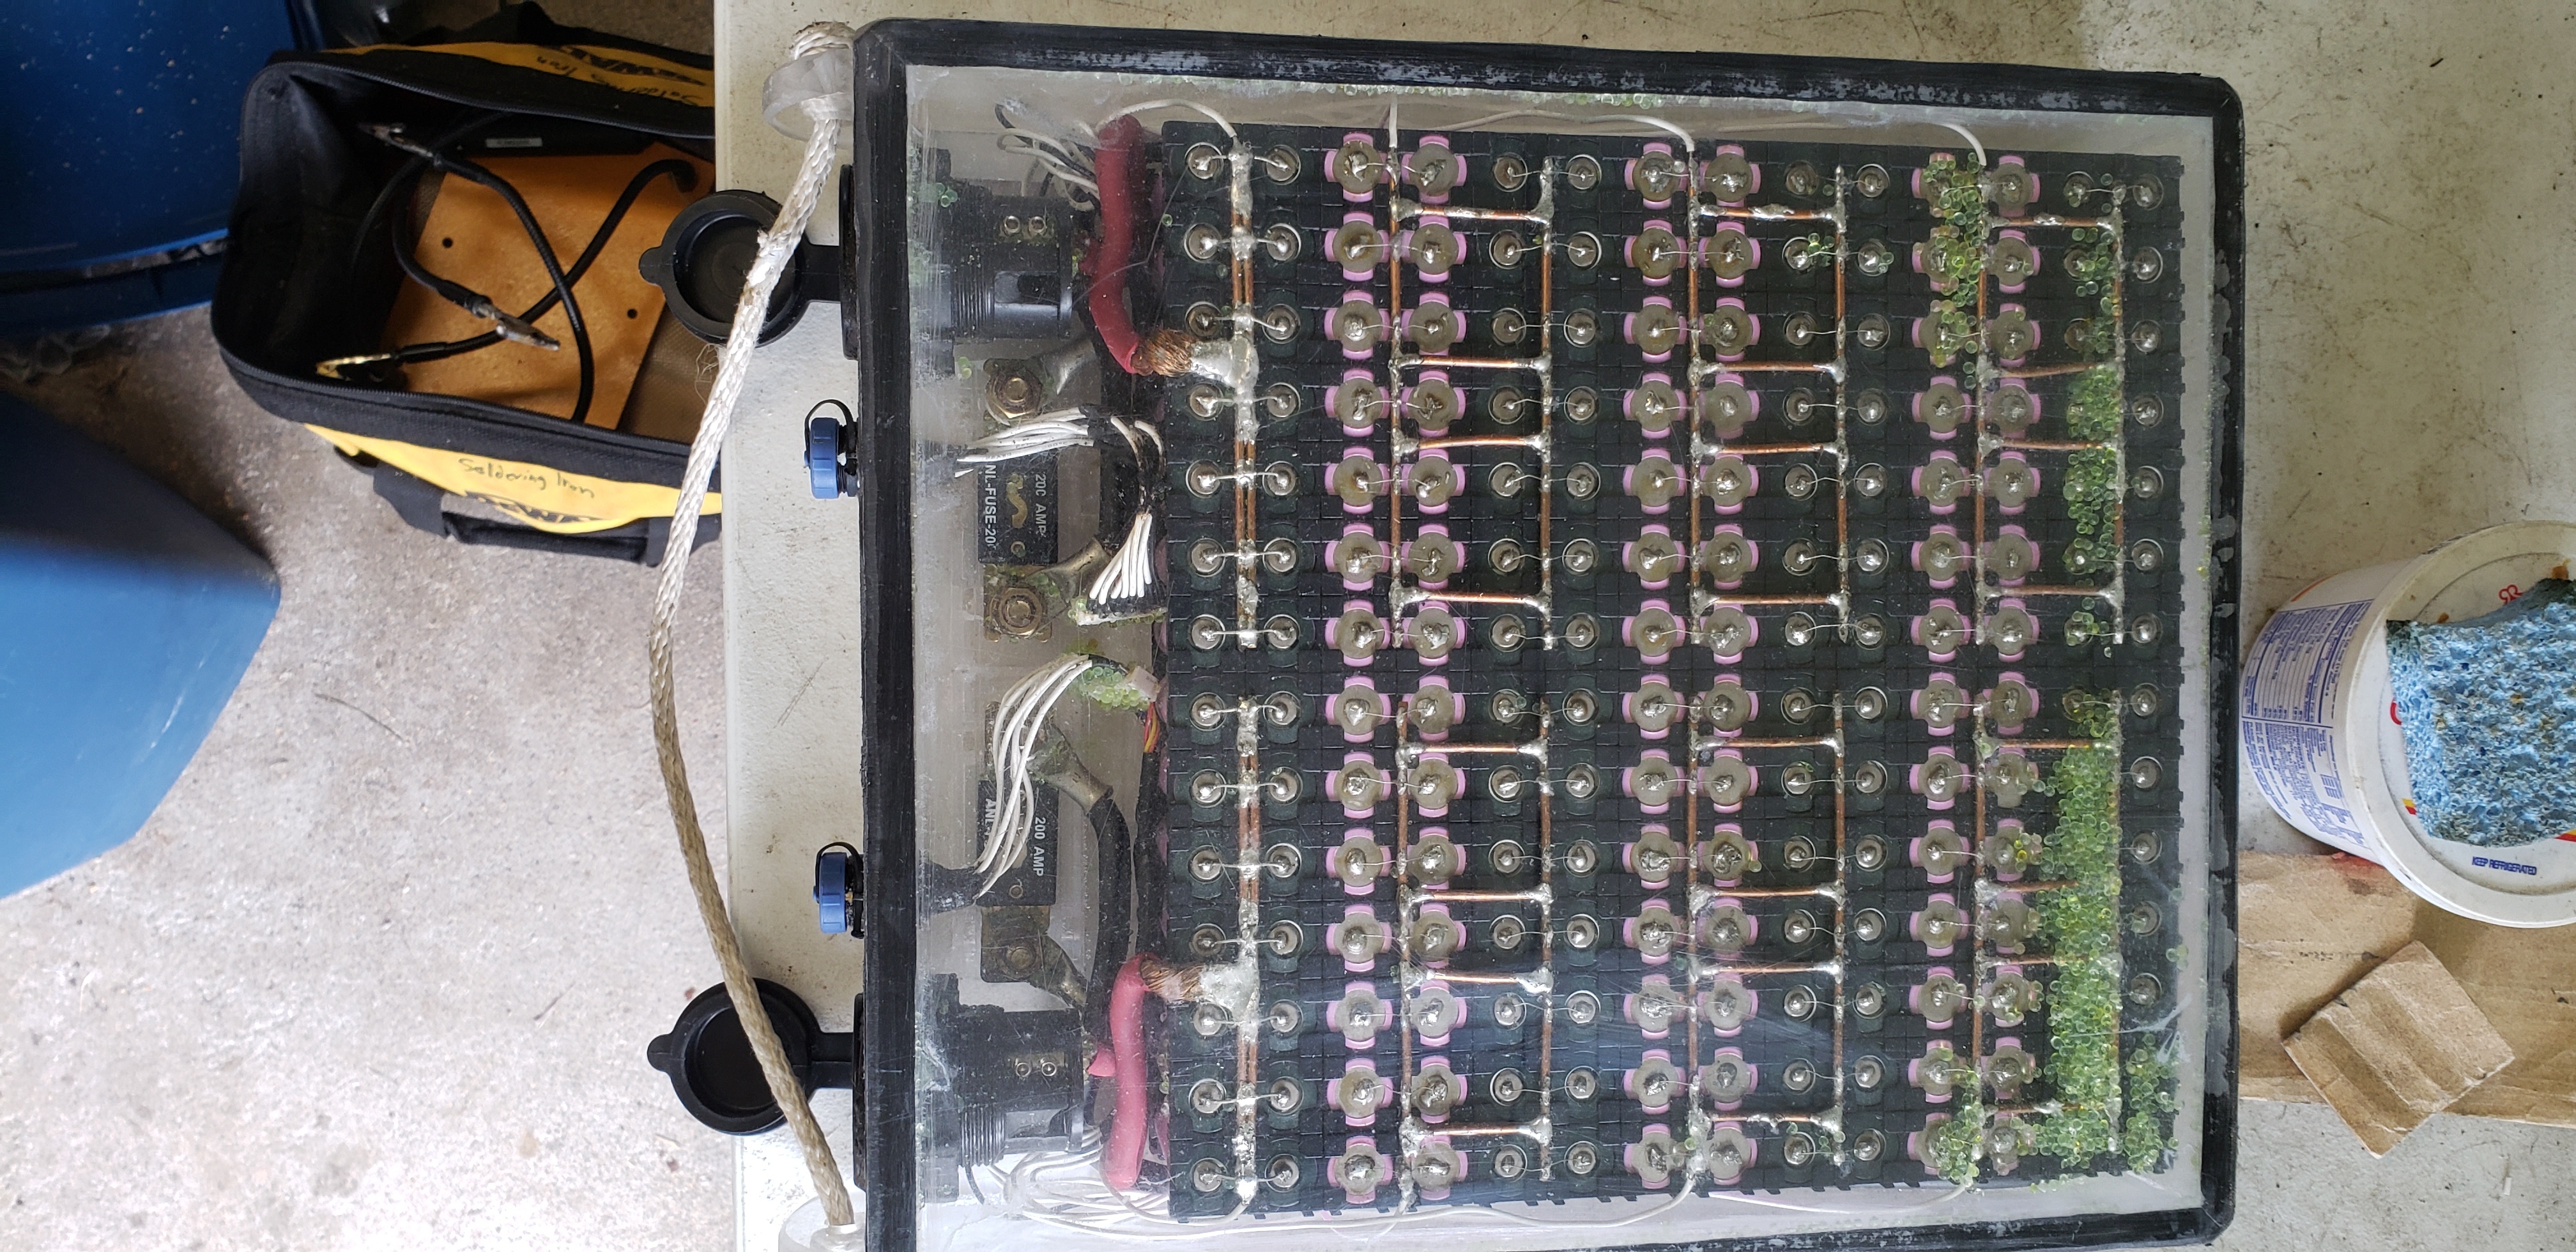
The see through case is really nice for inspection. The tape in the corners that is red on the bottom and white on the top is water detection tape. The top turns red and stays red if it detects moisture. The bag in the back is desiccant beads.
I’m gonna order more cells here soon to build a 3rd battery.
Nice and with mini fuse 
Nice build, looks solid!
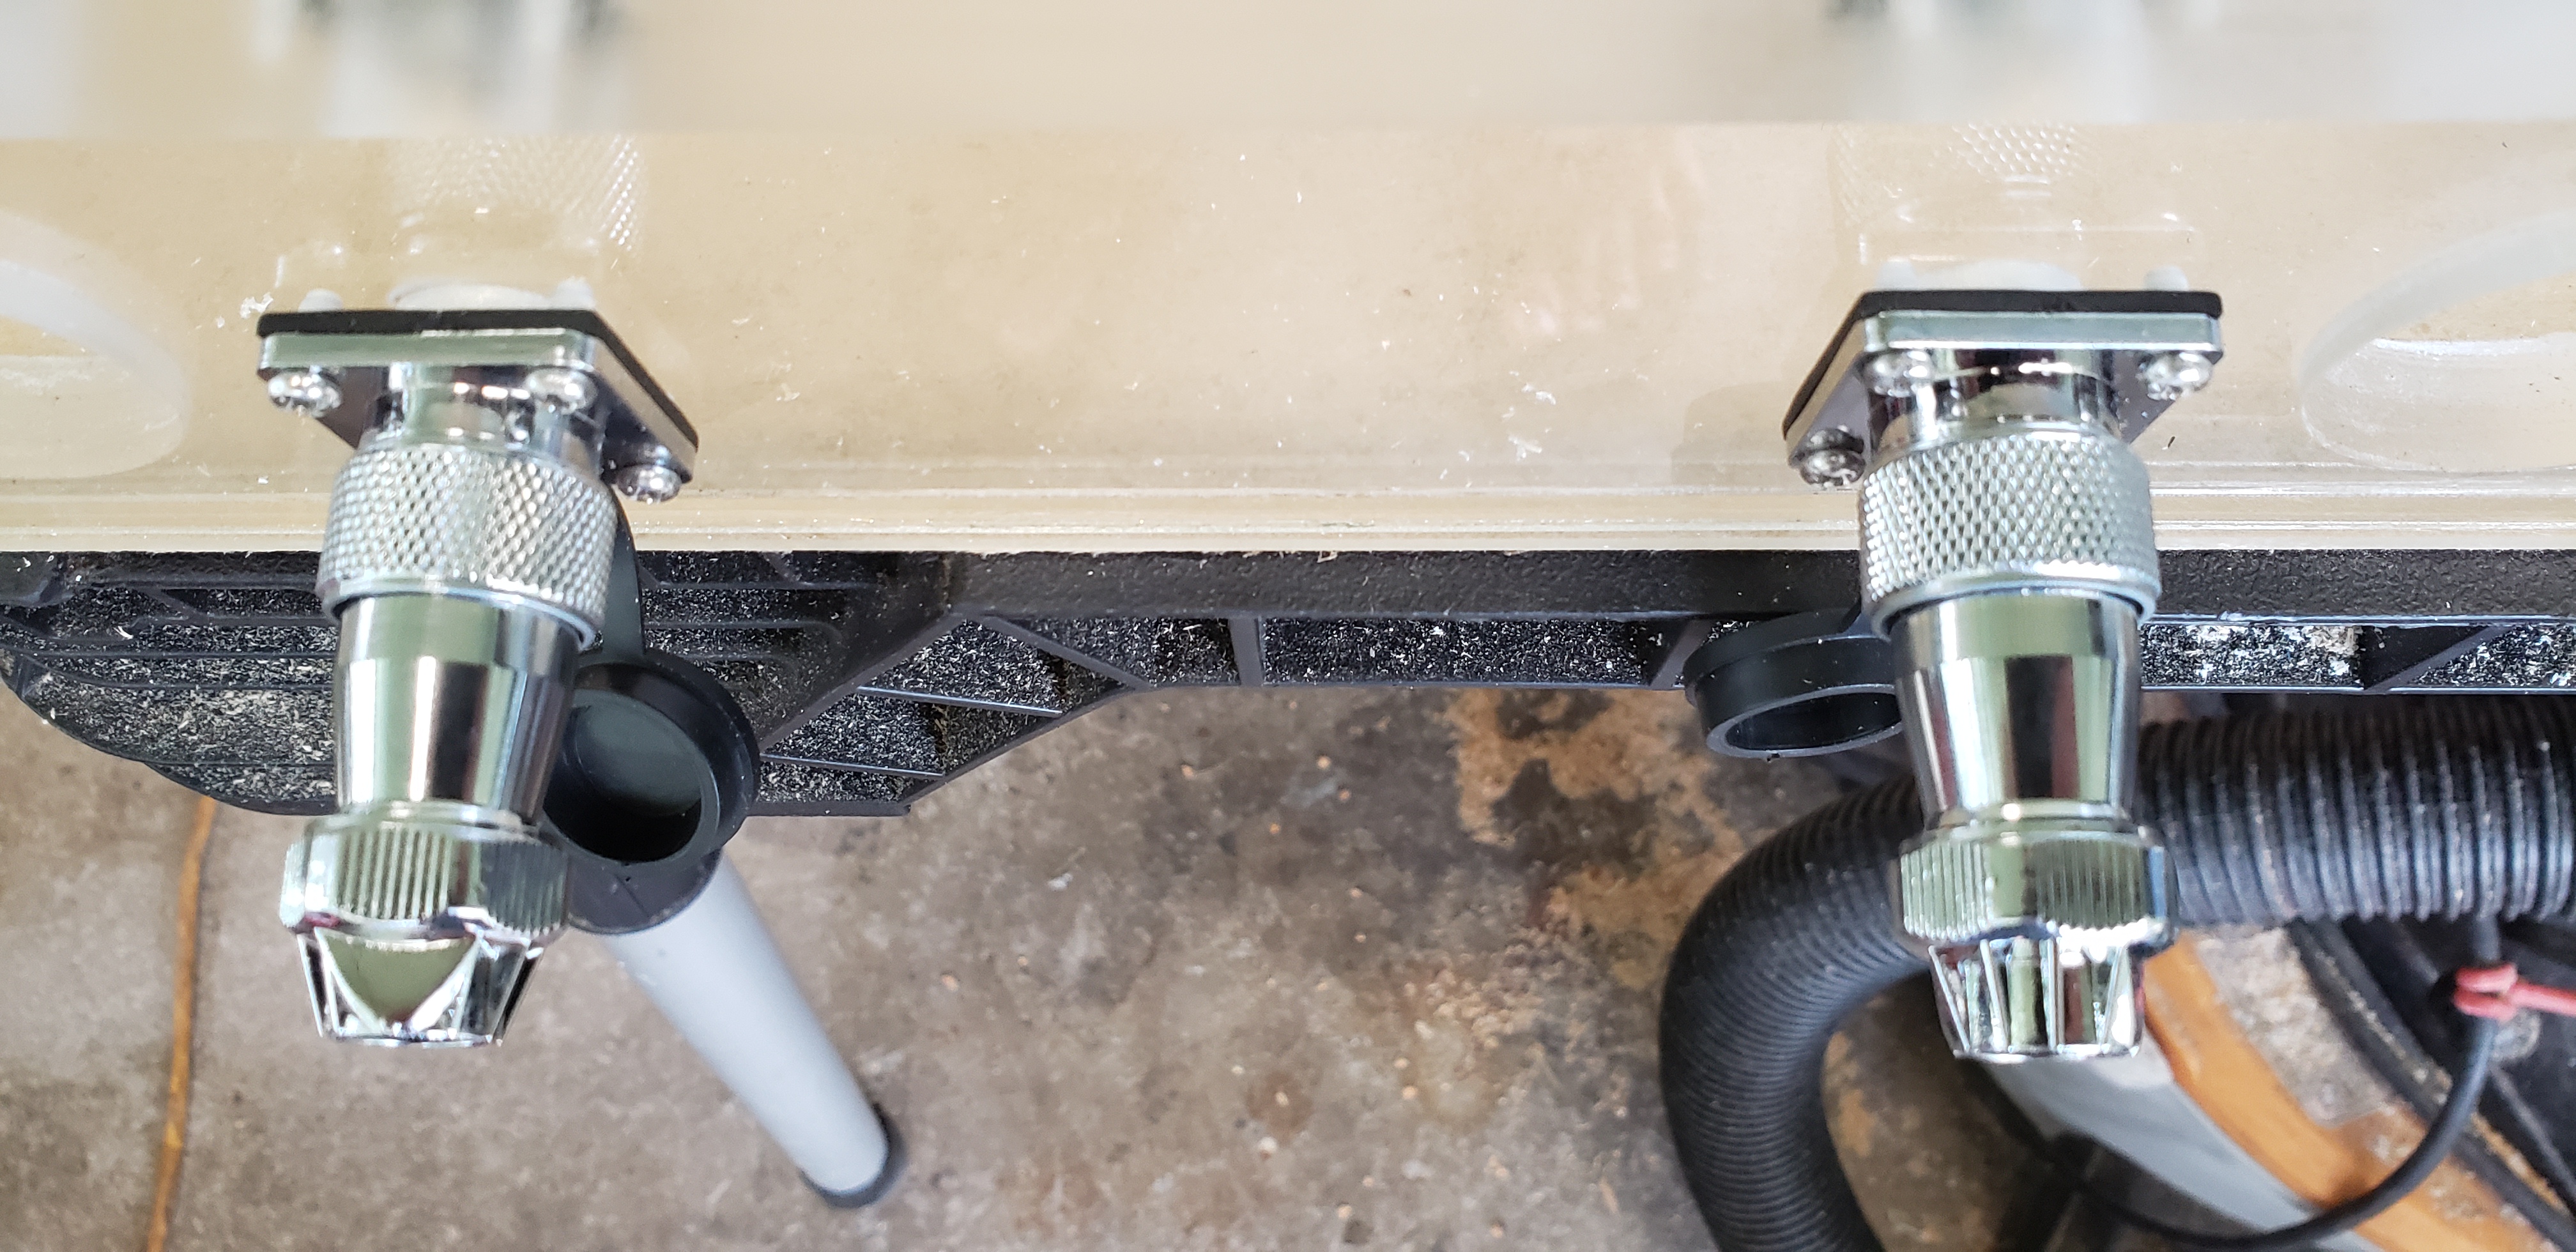
Noticed that you have different connectors for the bms leads. Was the short you had on the other pack the primary reason?
Hi.
The short circuit was caused by corrosion in the plug. The solder connections are so close together that if they aren’t sealed very very well the corrosion will grow across the contacts and cause a short. This is what happened.
The system I use now: After soldering I coat with conformal coating. After dry I do a second coating then before dry I apply heat shrink tubing to each contact. Then I fill the plug with silicone grease making sure no air remains inside.
I had the plastic plugs glued into the acrylic. I am experimenting with metal plugs that have screw fastening. I will let you guys know how I like these plugs after some use and time in the salt water.
Nice work, what’s the final weight of your battery ?
I posted the weight before, but don’t remember. I’ll weigh it and get back to you. It should be about the same weight as lifts battery. 14s14p.
I looked back in the tread and previously posted that the acrylic case weighed 8lbs by its self. Which put the total battery weight over 20lbs / 10kg.
However that case had 1/4" top and bottom. Now I use 1/8" top and bottom. So, it’s lighter. I will weigh it and get back to you.
@Flightjunkie Cant find in this thread if you glued the box together, of if you only used the 3M tape?
If glued. How are you planning to open the “lid” if maintenance is needed?
Any info appreciated.
Sides and bottom are glued. We used 3m vhb double side tape to attach the top/lid. It’s fairly easy to remove the lid with a razor and rubber wheel to remove residue. We have opened our battery boxes numerous times now.
Hi.
Yes. Like Sean said.
Google how to make a fish tank out of Acrylic. The glue is a very thin liquid that creates a chemical bond where the two parts become as strong as one.
The lid is held on with 3M VHB double sided tape.
Thank you @Sean and @Flightjunkie.
Yes. I’ve glued stuff like this before, but it looked on the pictures that you used the 3M tape at the bottom too. My mistake I guess 
Soon there will be a clone of your pack here in the Netherlands.
I’m still not sure if this is going to be a 6S or 12S version. Going to do some tests today to decide.
Awesome. Post your build! It will be good to see!
It’s glued. Yea, looks black. The fiber optics of the plastic shows the black 3M tape from the top.
What about adding a 2nd bottom plate with some space in between the two plates and running water through it for extra cooling? Would this be a good thing?
 . Thanks for sharing it with us