This is my first post so first of all, big thanks to this awesome forum/community. I won’t be able to pull off the build without it. So I thought I’d contribute to the community by sharing my experience building the project.
I have mechanical engineering and software engineering background and I consider myself a somewhat handy person but I didn’t have any RC building or surfing/boarding experience. I used ChatGPT for high level planning since I didn’t even know where to start. I also did lots of googling and that’s when I found this forum. After reading posts for a couple of days, I got a plan for the main components:
- 6384 motor direct drive controlled by 75100 VESC and Flipsky VX3 remote
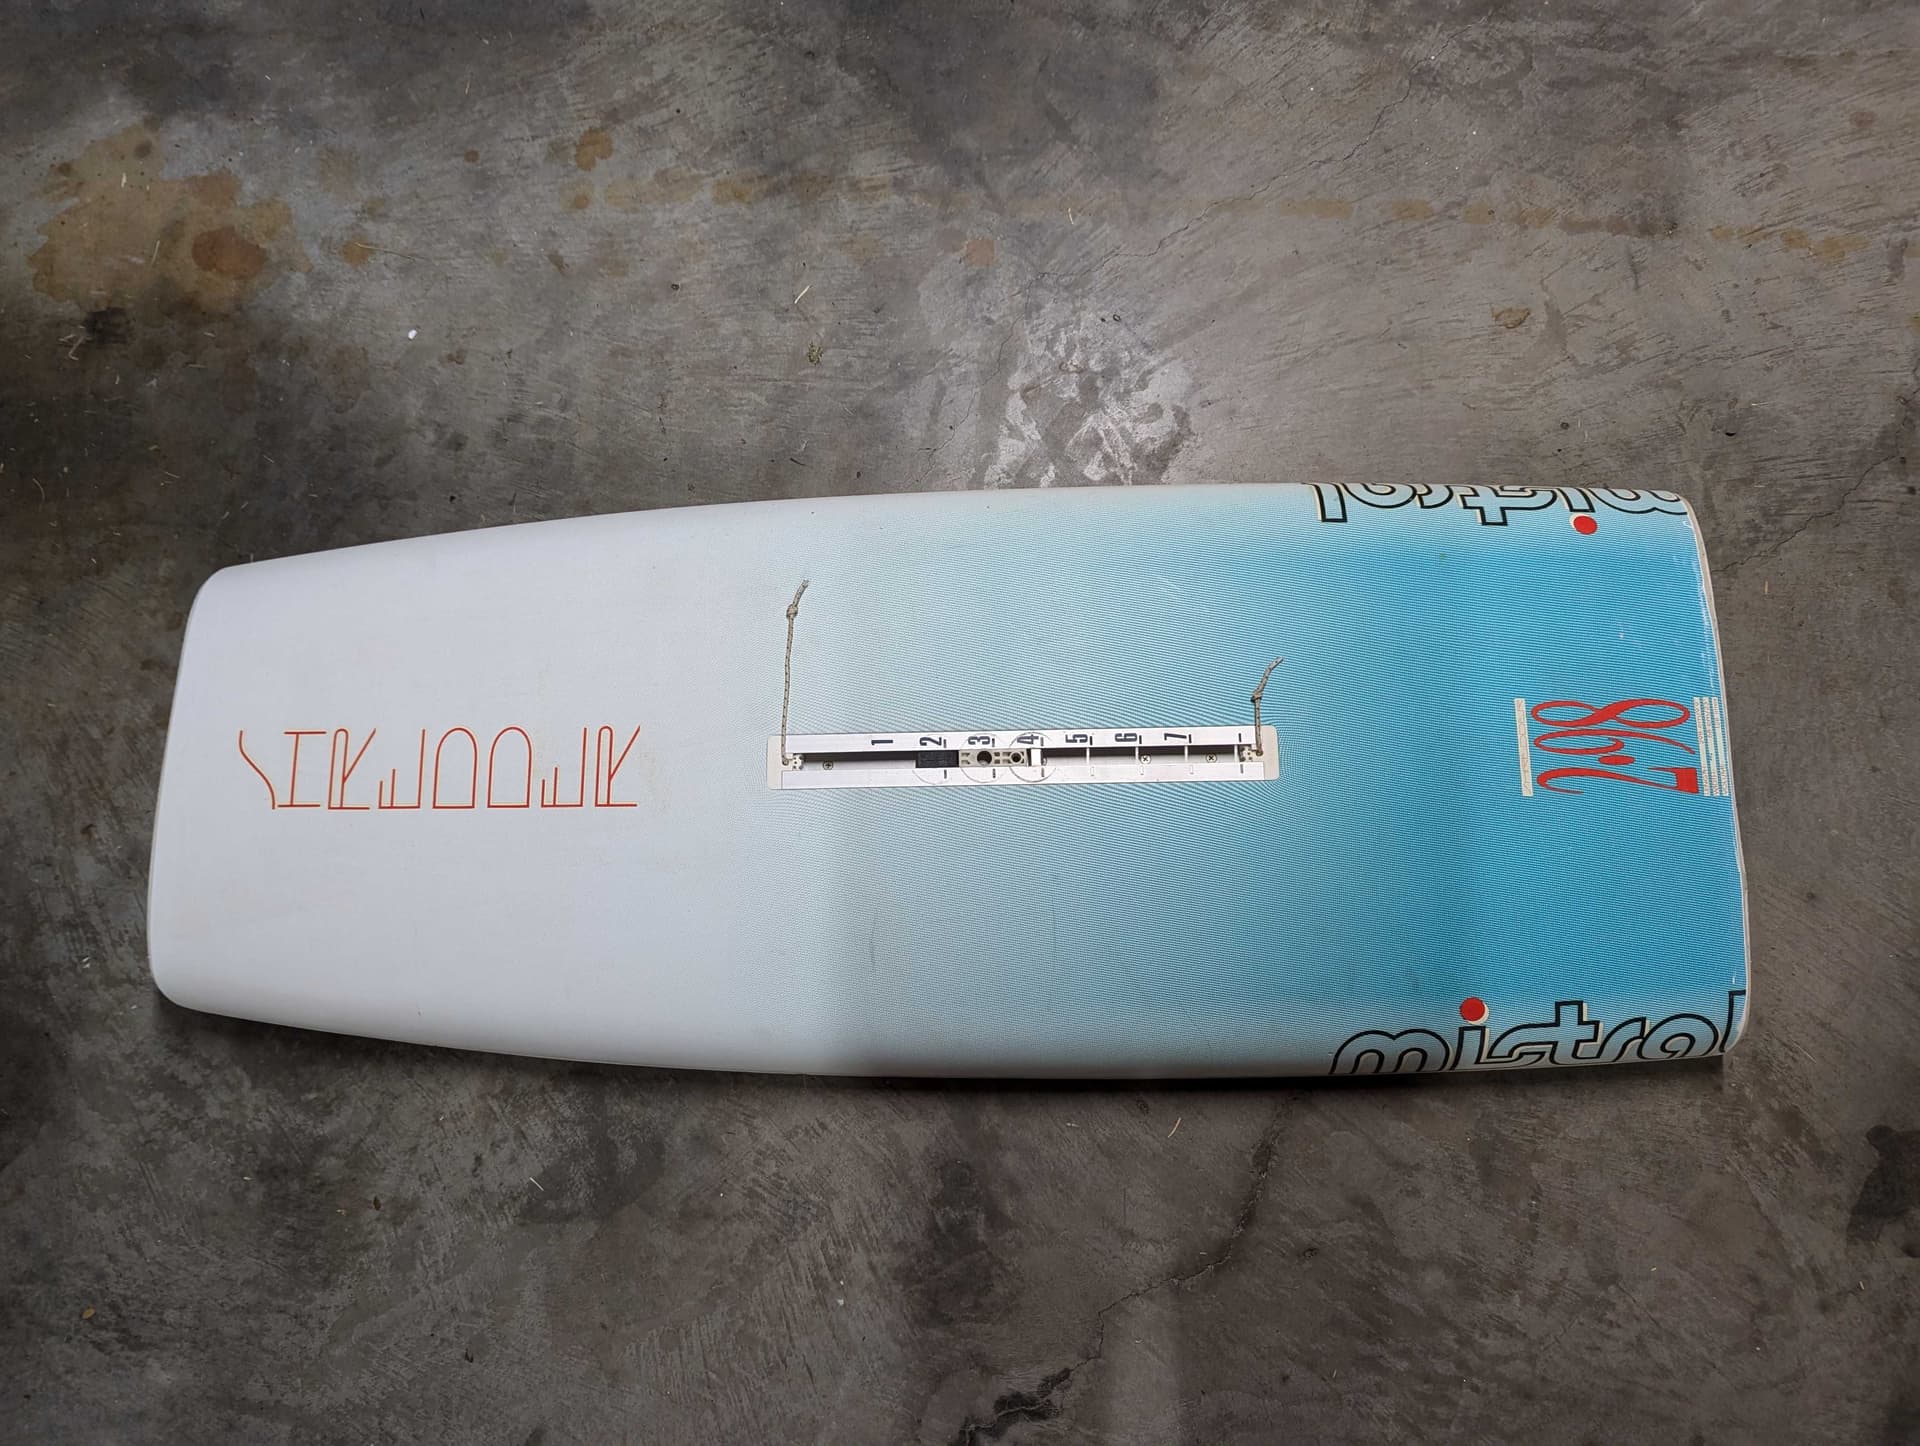
- Second-hand windsurfing board to cut off both ends
- Battery and electronics will be in a waterproof case strapped to the board (I’ve seen experienced DIYers struggling with waterproofing in-board compartment so I didn’t want to try my chance)
- Commercial hydrofoil wings (I don’t have the skill to make my own)
- 3d print the motor mount and other small parts
I decided to source all the materials/parts on Taobao (the “Amazon” in China) and ship to Australia by a shipping company. Here is the part list (price approximated in USD):
- Flipsky 6384 waterproof motor - $111
- Flipsky 75100 pro VESC - $70
- Hydrofoil wings set and mount box - $278
- 48V Li-ion battery 28.6AH (13s I guess?) - $180
- Fiberglass, epoxy, themal epoxy/paste - $28
- Water alert - $4
- Flipsky VX3 remote - $68
- Battery charger - $17
- Hall effect switch - $5
- Aluminium plate/heatsink - $5
- XT90 connectors - $8
- Bolts/nuts/inserts - $12
- Waterproof case - $12
- Waterproof cable connectors - $5
- Strap/mushroom lock tape - $6
- Cable/rubber duct - $8
- Foot strap and magnet - $6
- Shipping - $77
- Second-hand windsurfing board - $39
Total cost: $939
The parts arrived after 2 months and the build began.
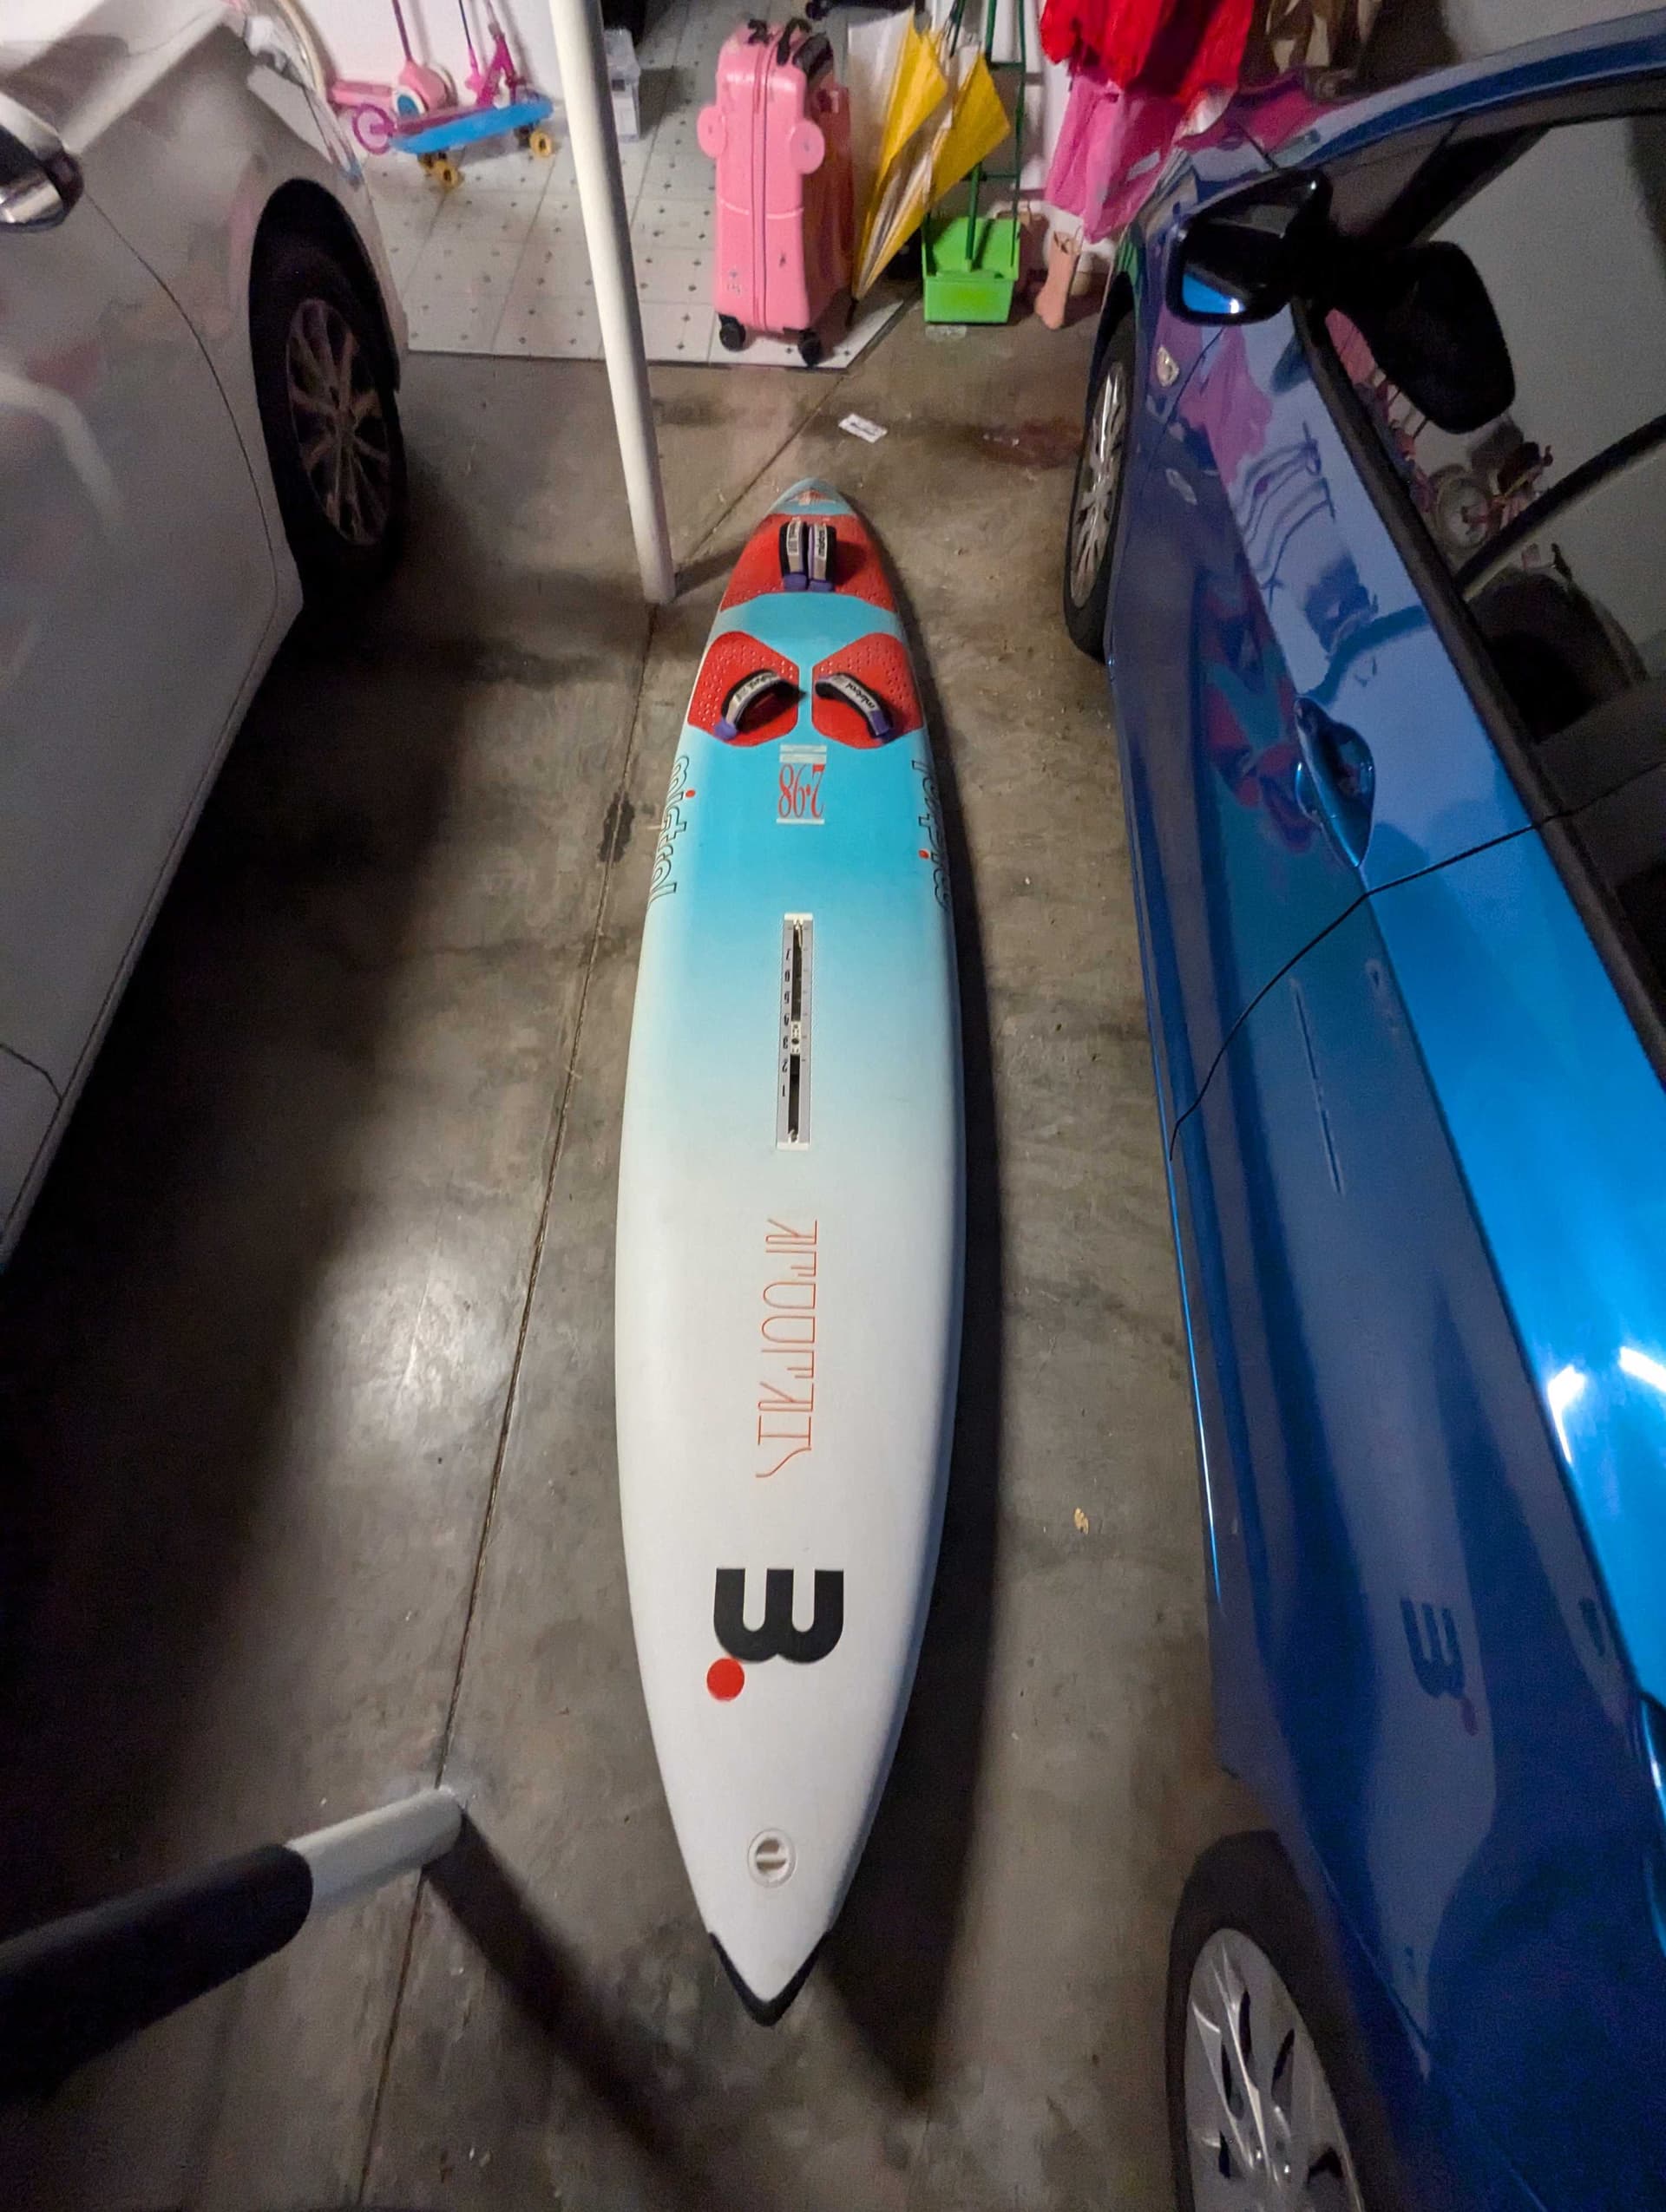
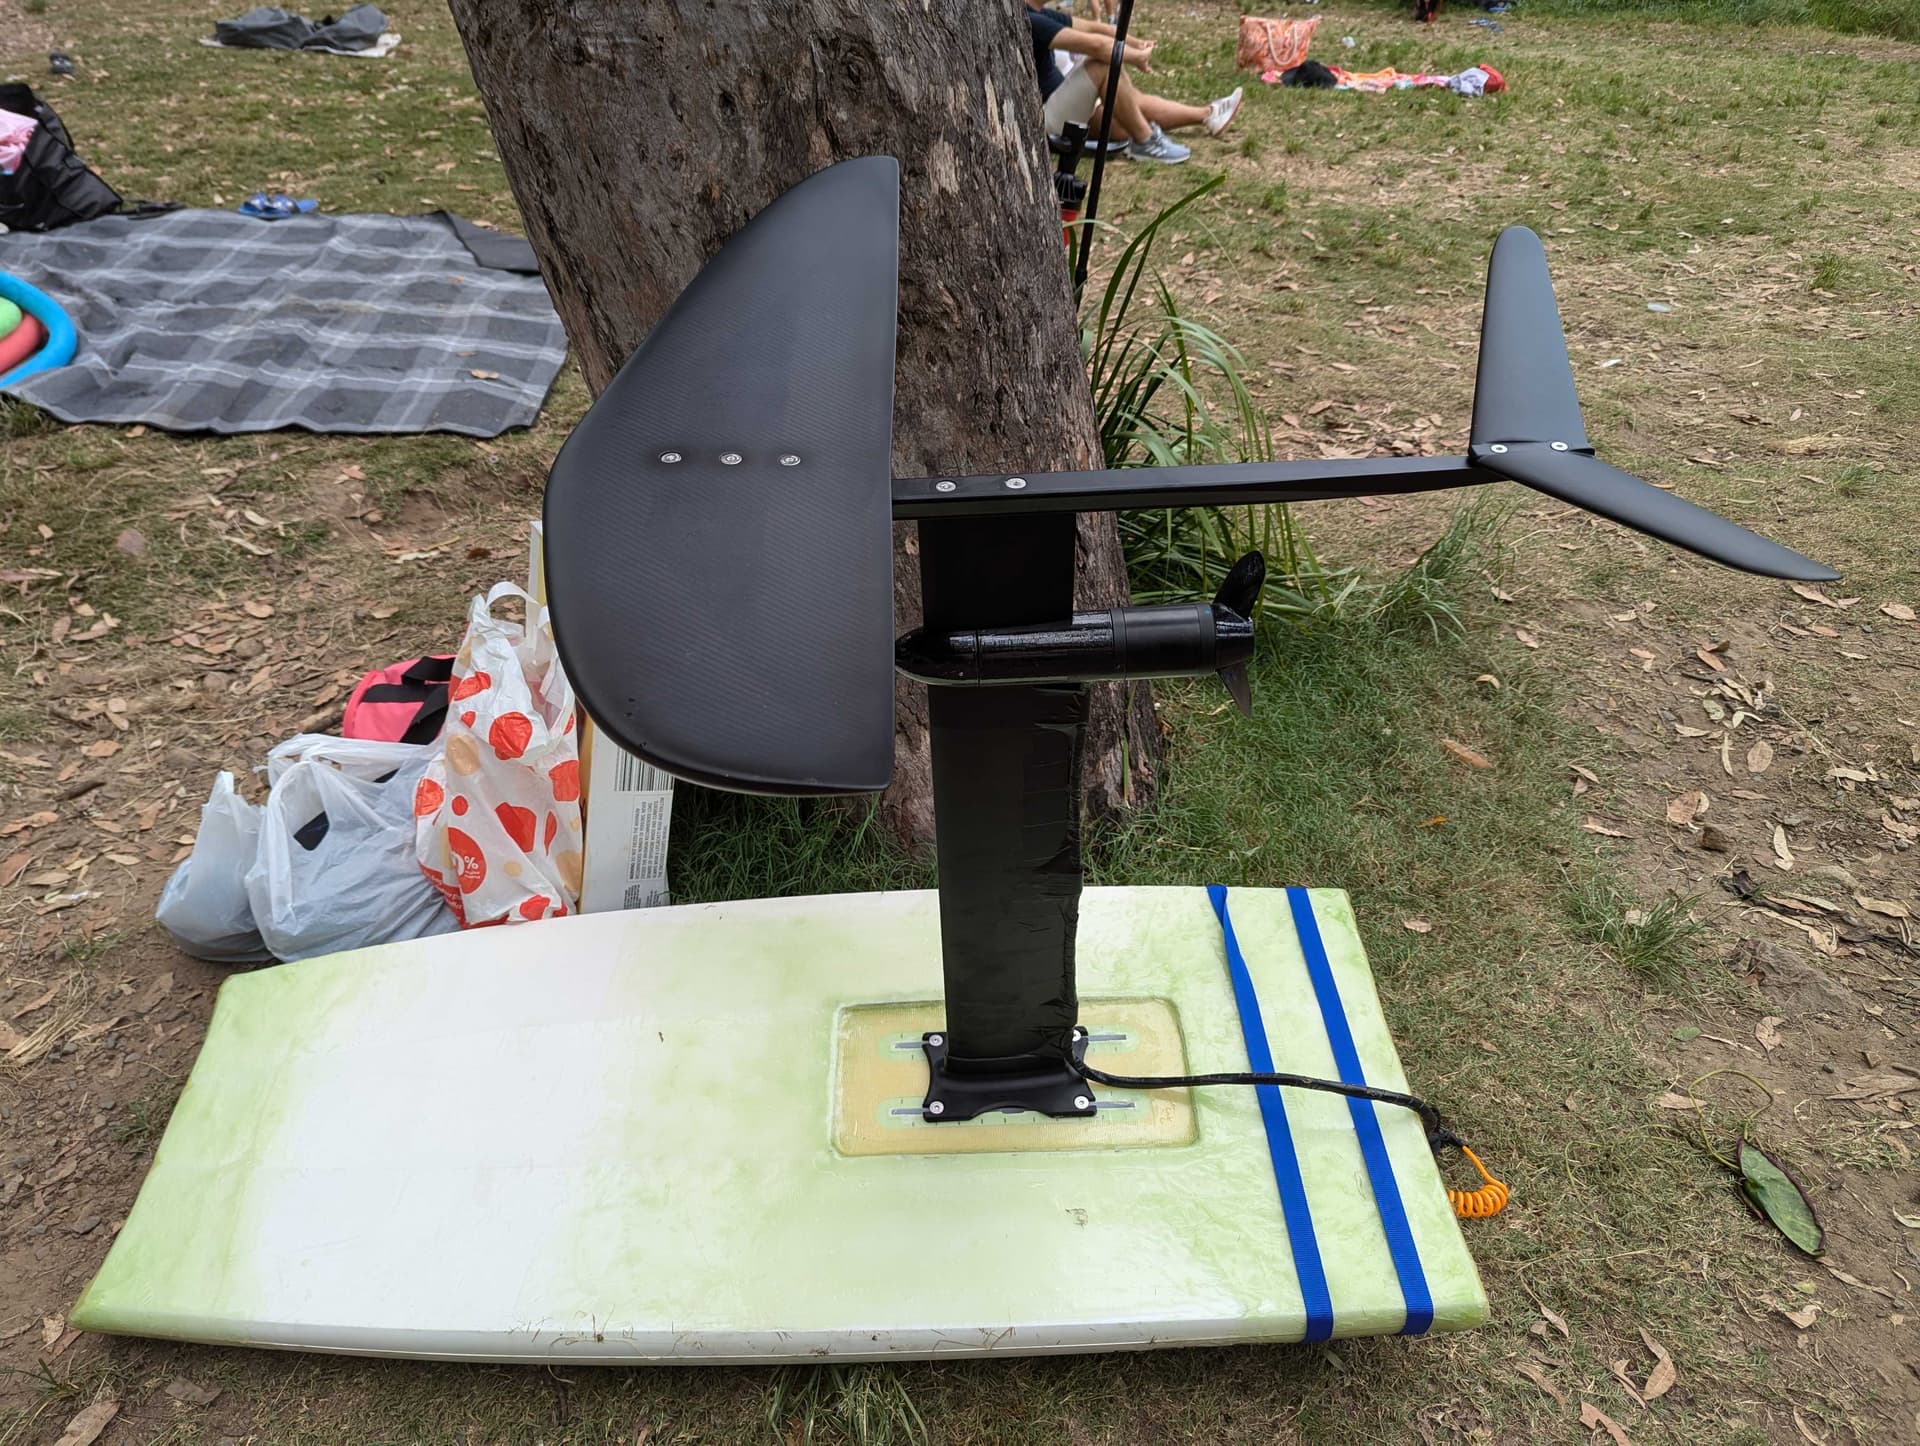
First, to cut the board and fit the foil.
This is the original board:
After cutting both ends:
Then I fiberglassed both end, cut the hole for the mast mount and fiberglass on it:

Finally, putting the foil on:

With the foil and board done, it’s time to work on the “e” part:
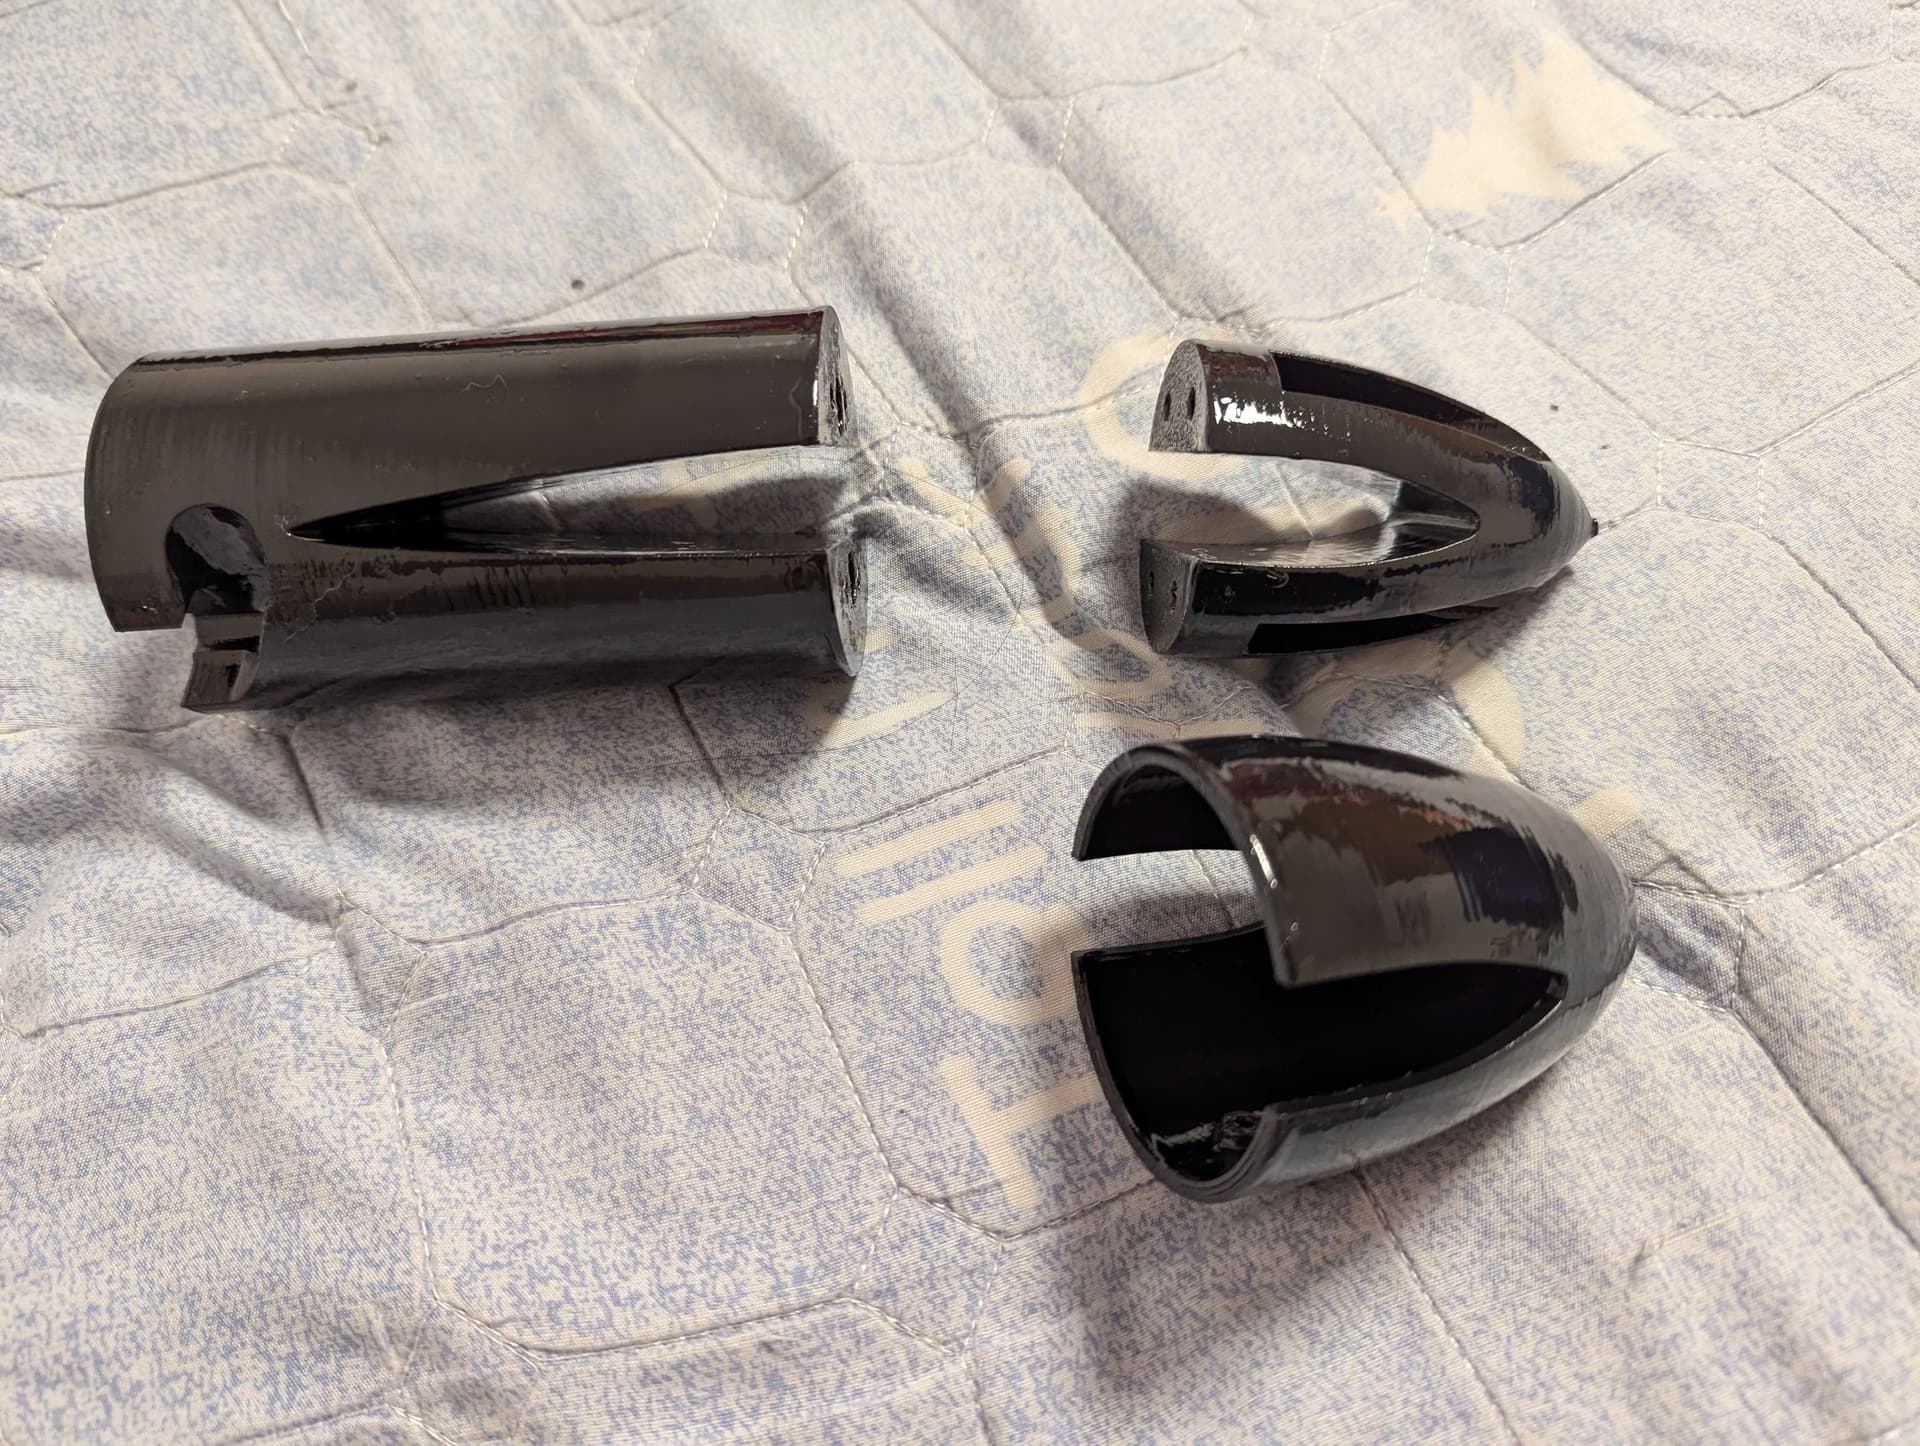
I designed and 3d printed the motor mount (after a couple of failures):
and attached the motor to the mast:
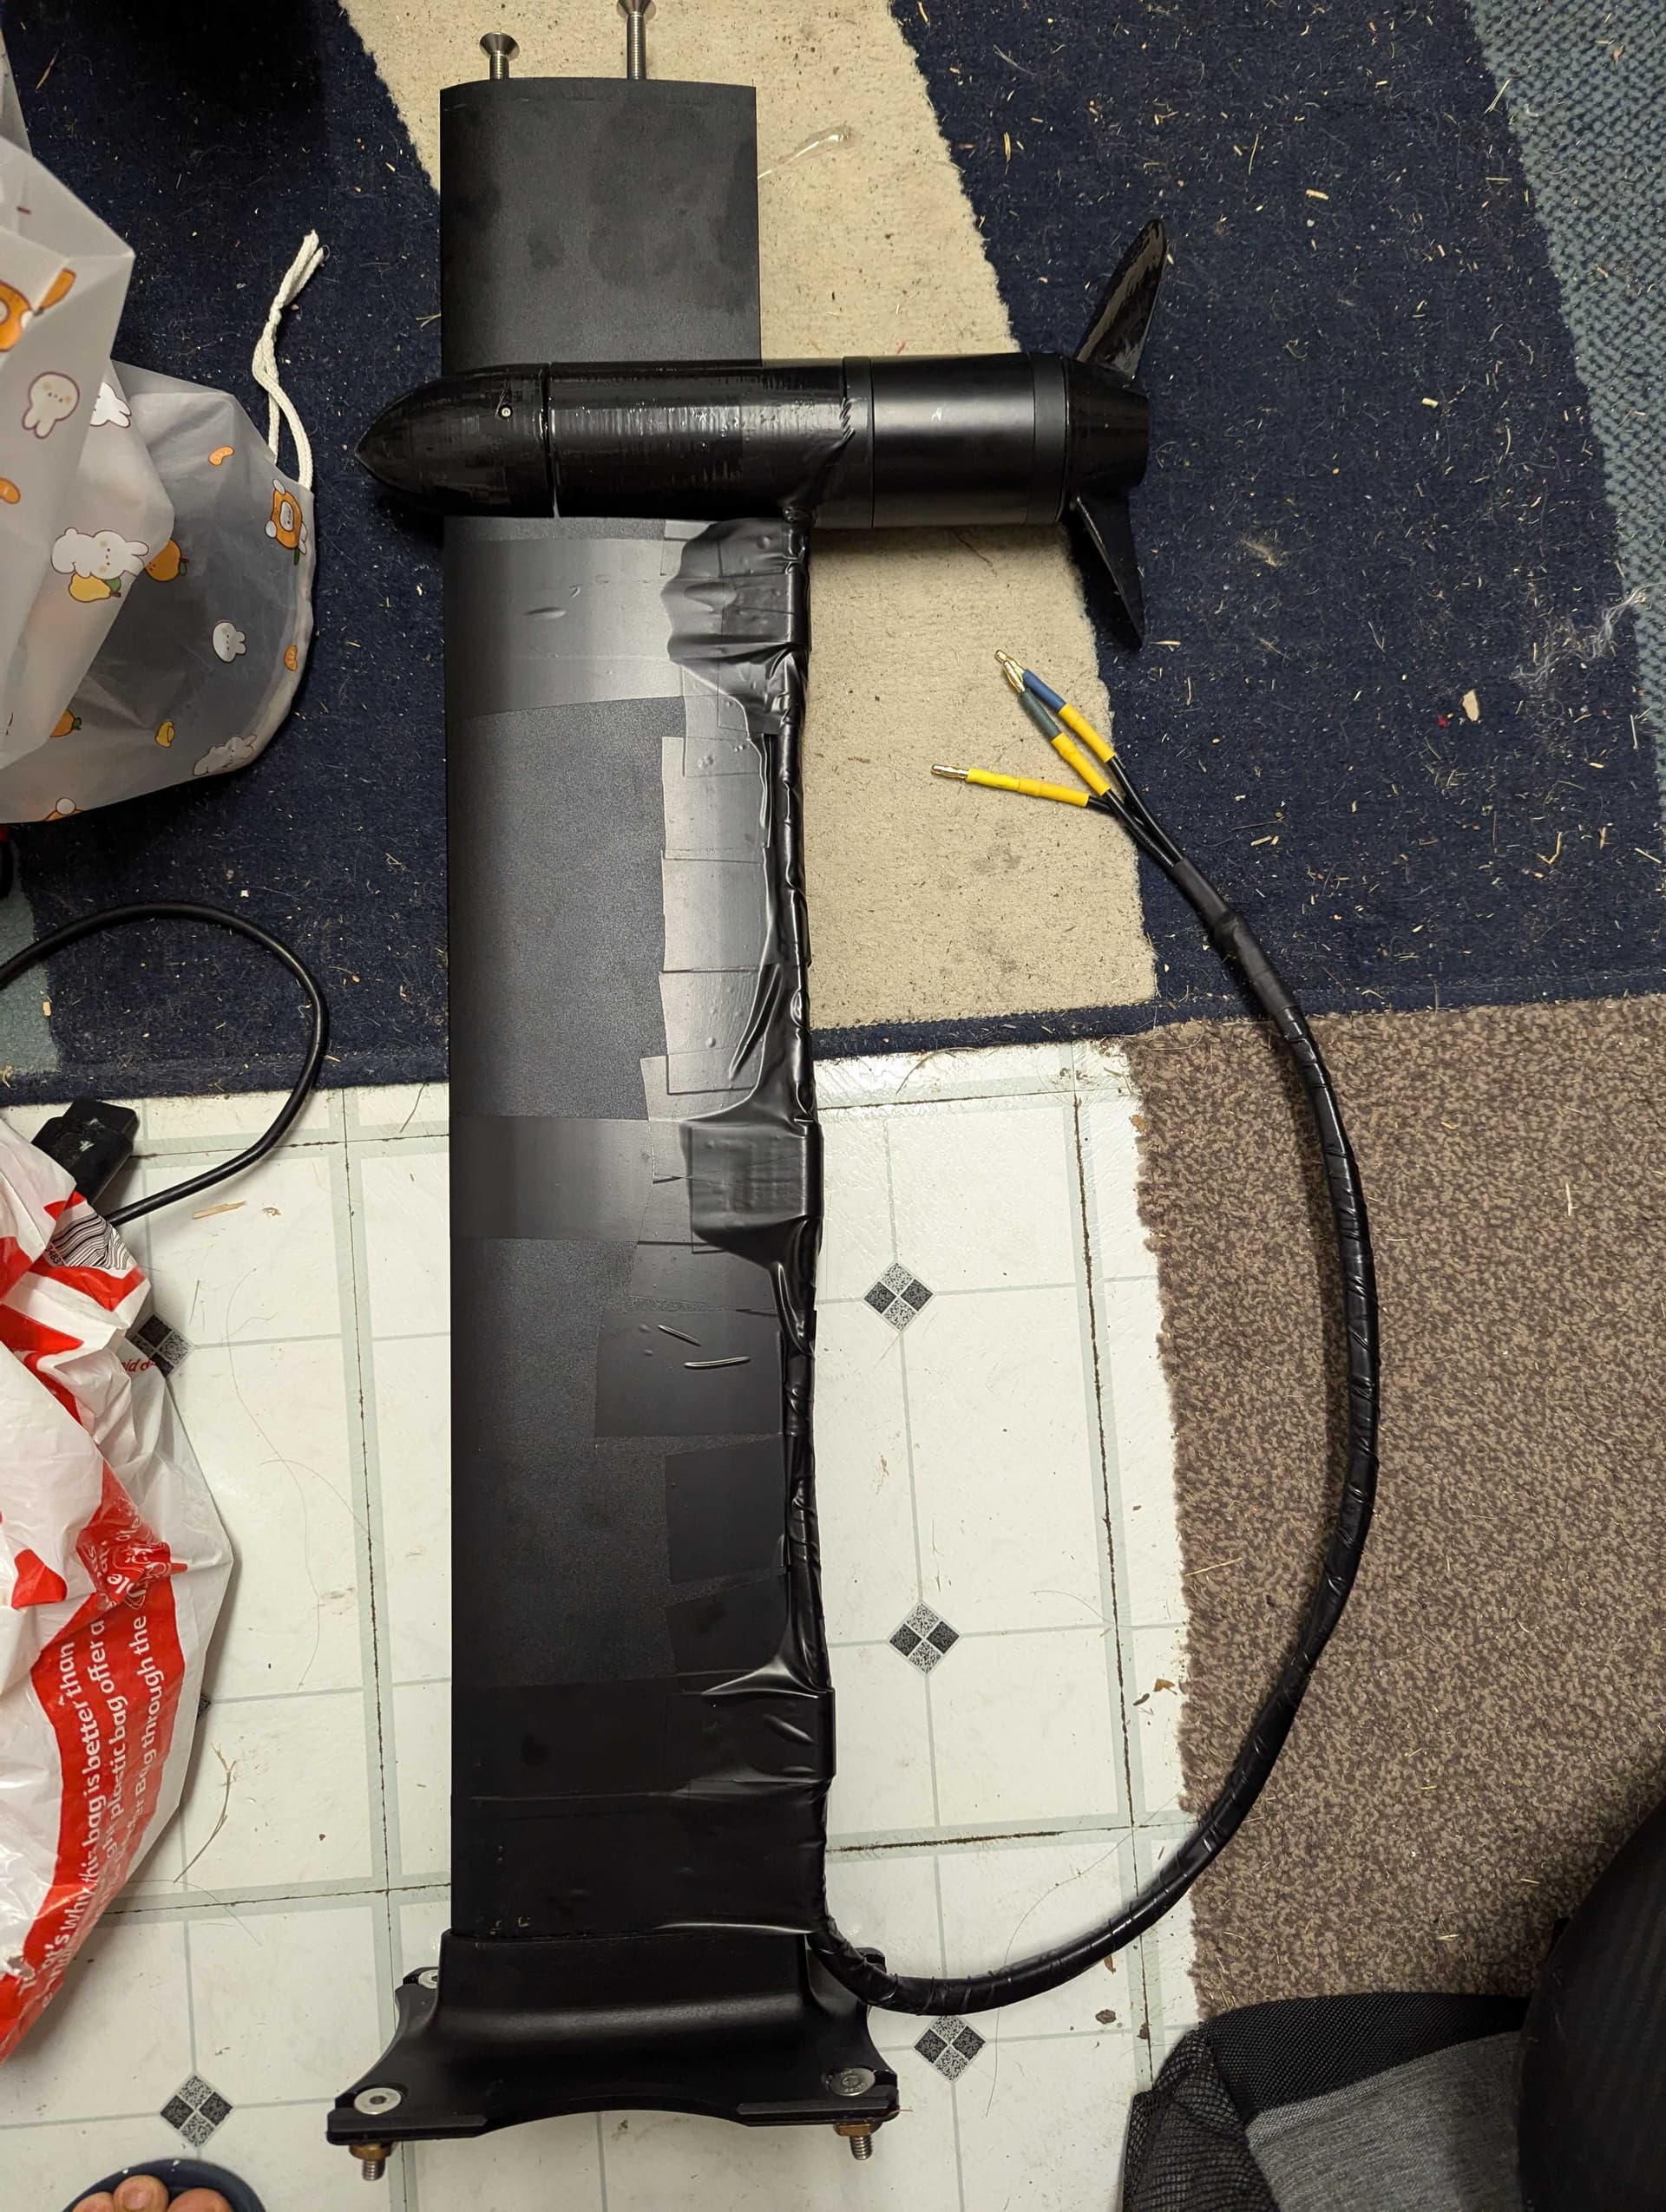
Propeller is using @V_S 's fixed 2 blade prop 3D design 156 0.39 1.09 15 4 Loch - Tinkercad
All 3d printed parts were epoxied for better strength and waterproofing (since I used plain PLA).
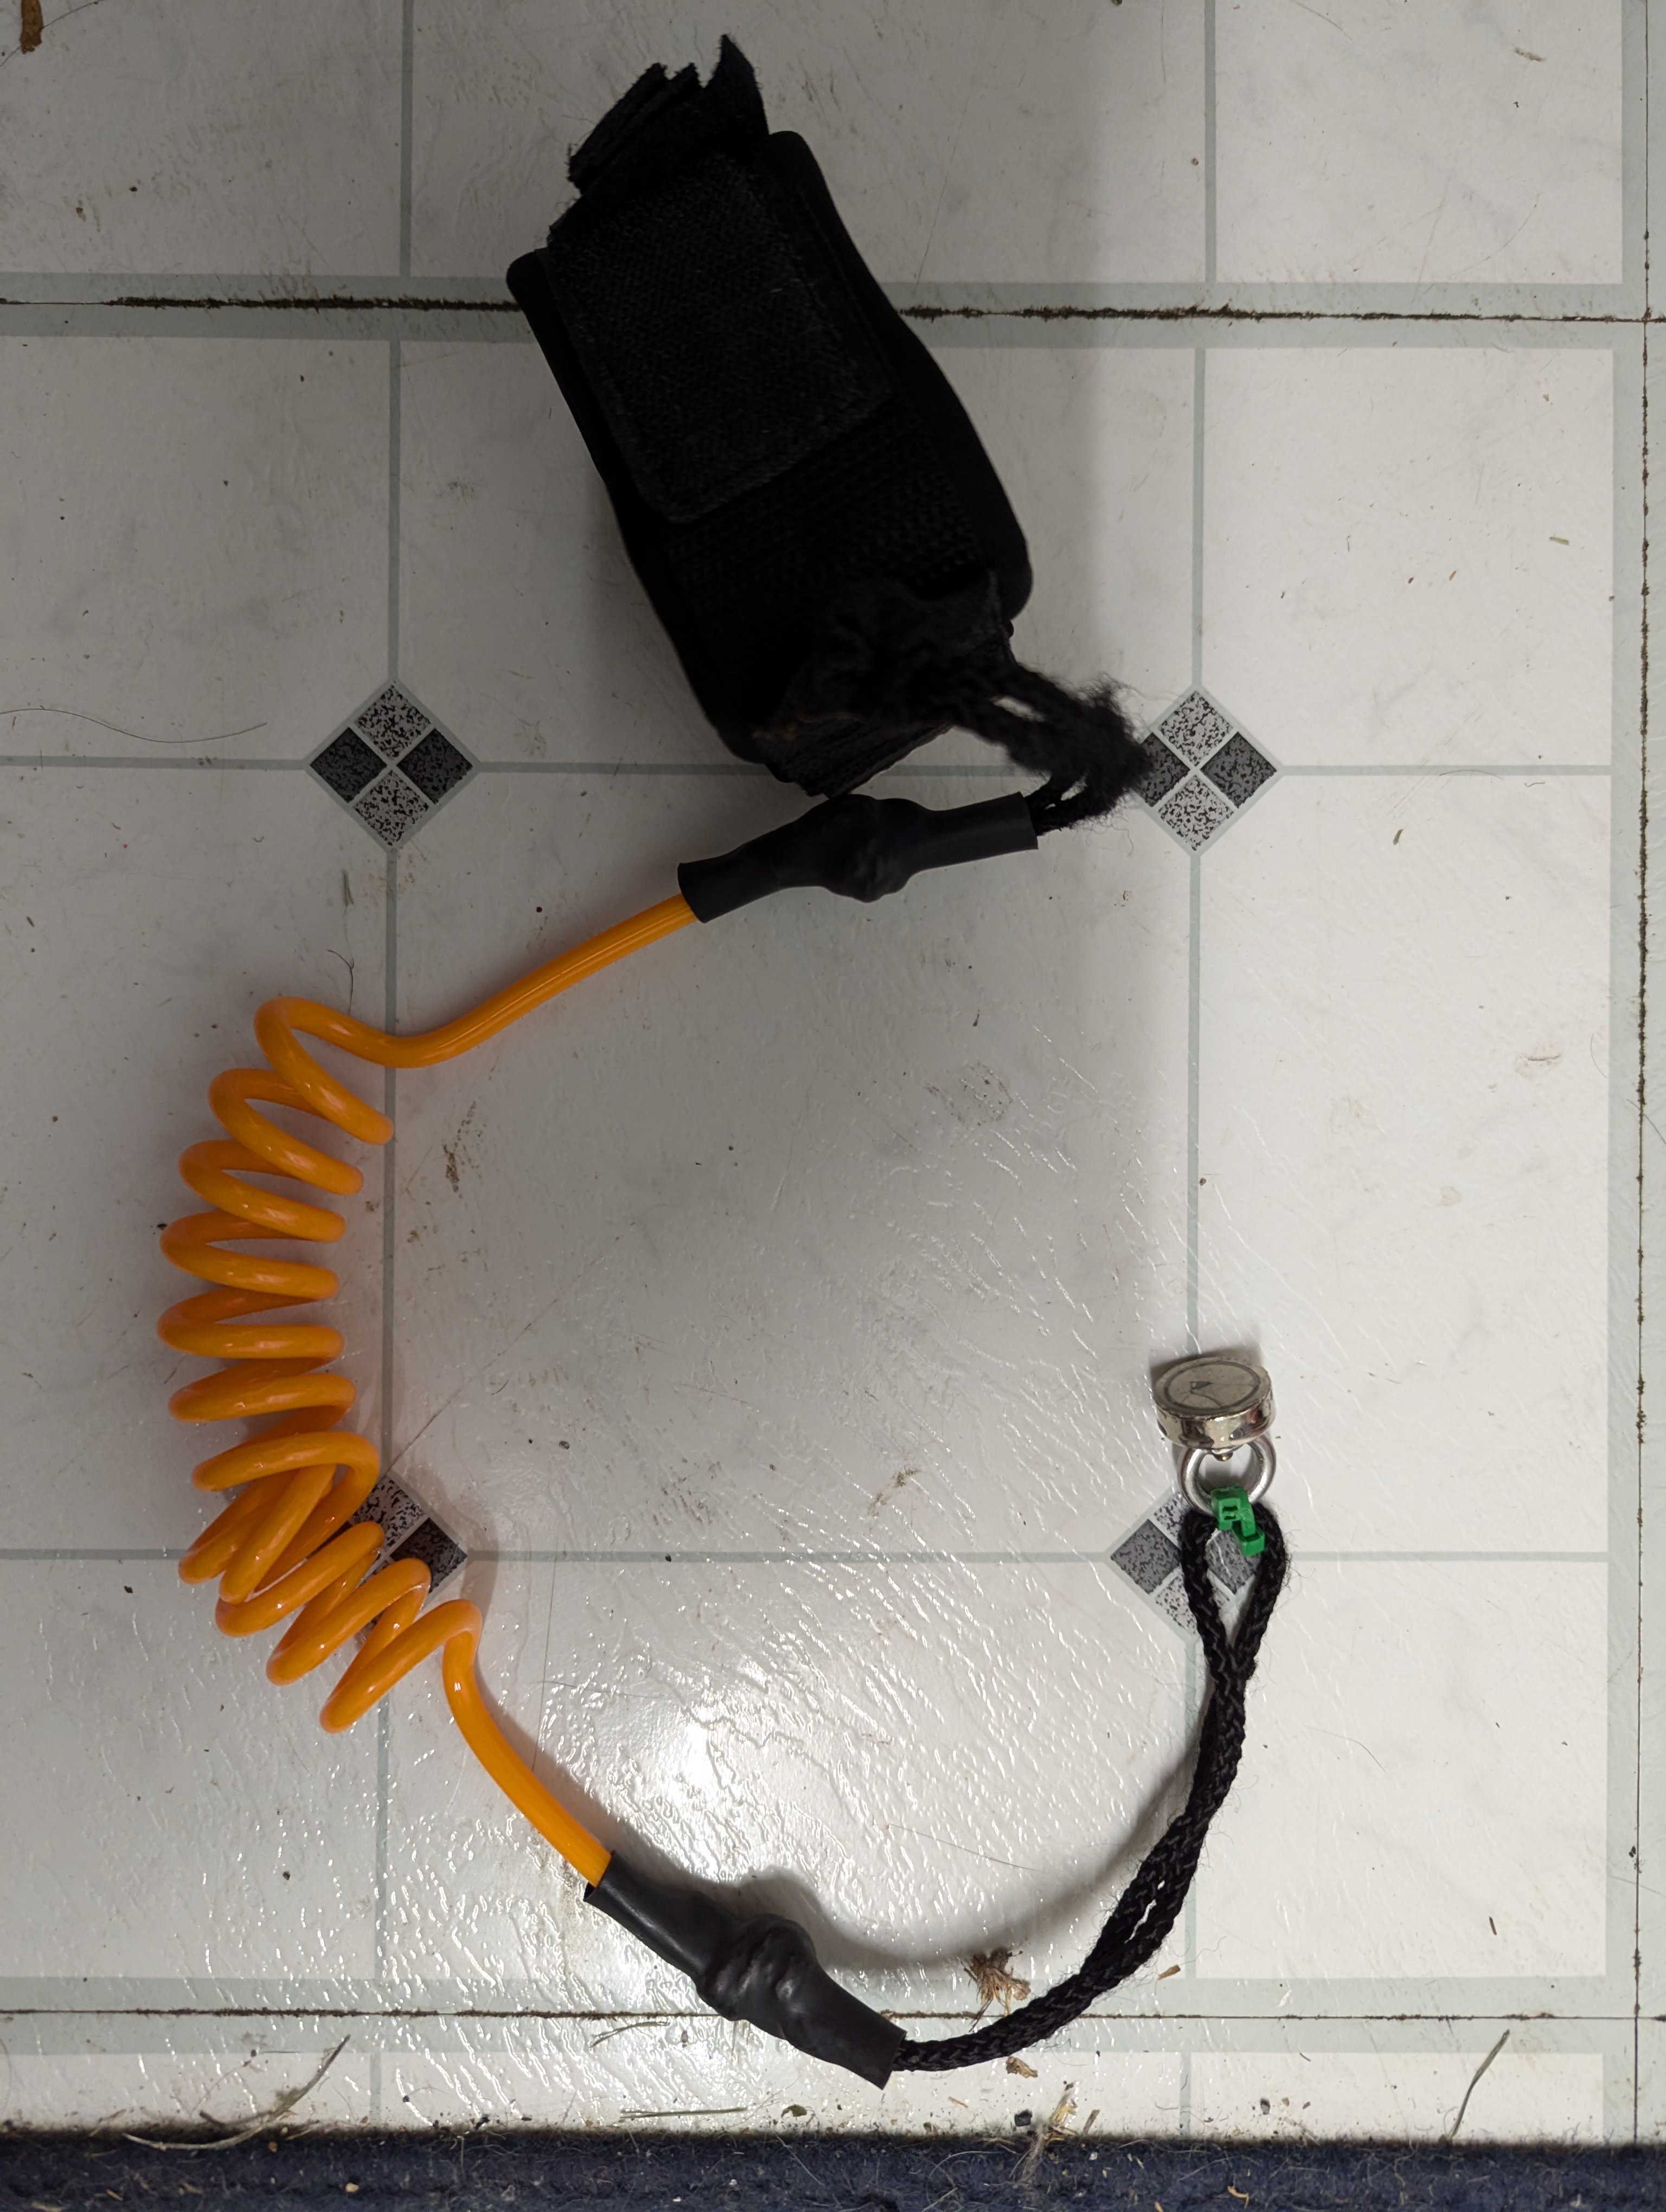
I wanted to have a kill switch that kills the motor if I fall off the board (and forget to release the trigger). Originally I thought of using a high current relay that’s controlled by a magnetic proximity switch but then I found out the new VESC firmware version supports killing the motor on ADC2 signal.This made things a lot easier. I just used a hall effect switch connected to 5V and ADC2. In operating condition, a magnet will be placed close to the hall switch (inside the case) so the switch is closed and motor can run normally. If I fall off the board, the magnet (attached to the foot strap) will be pulled away from the hall switch and 5V will be sent to ADC2 and kill the motor. I tested the setup and it worked perfectly:

(the yellow thing on the battery is the hall switch)
The foot strap with magnet:
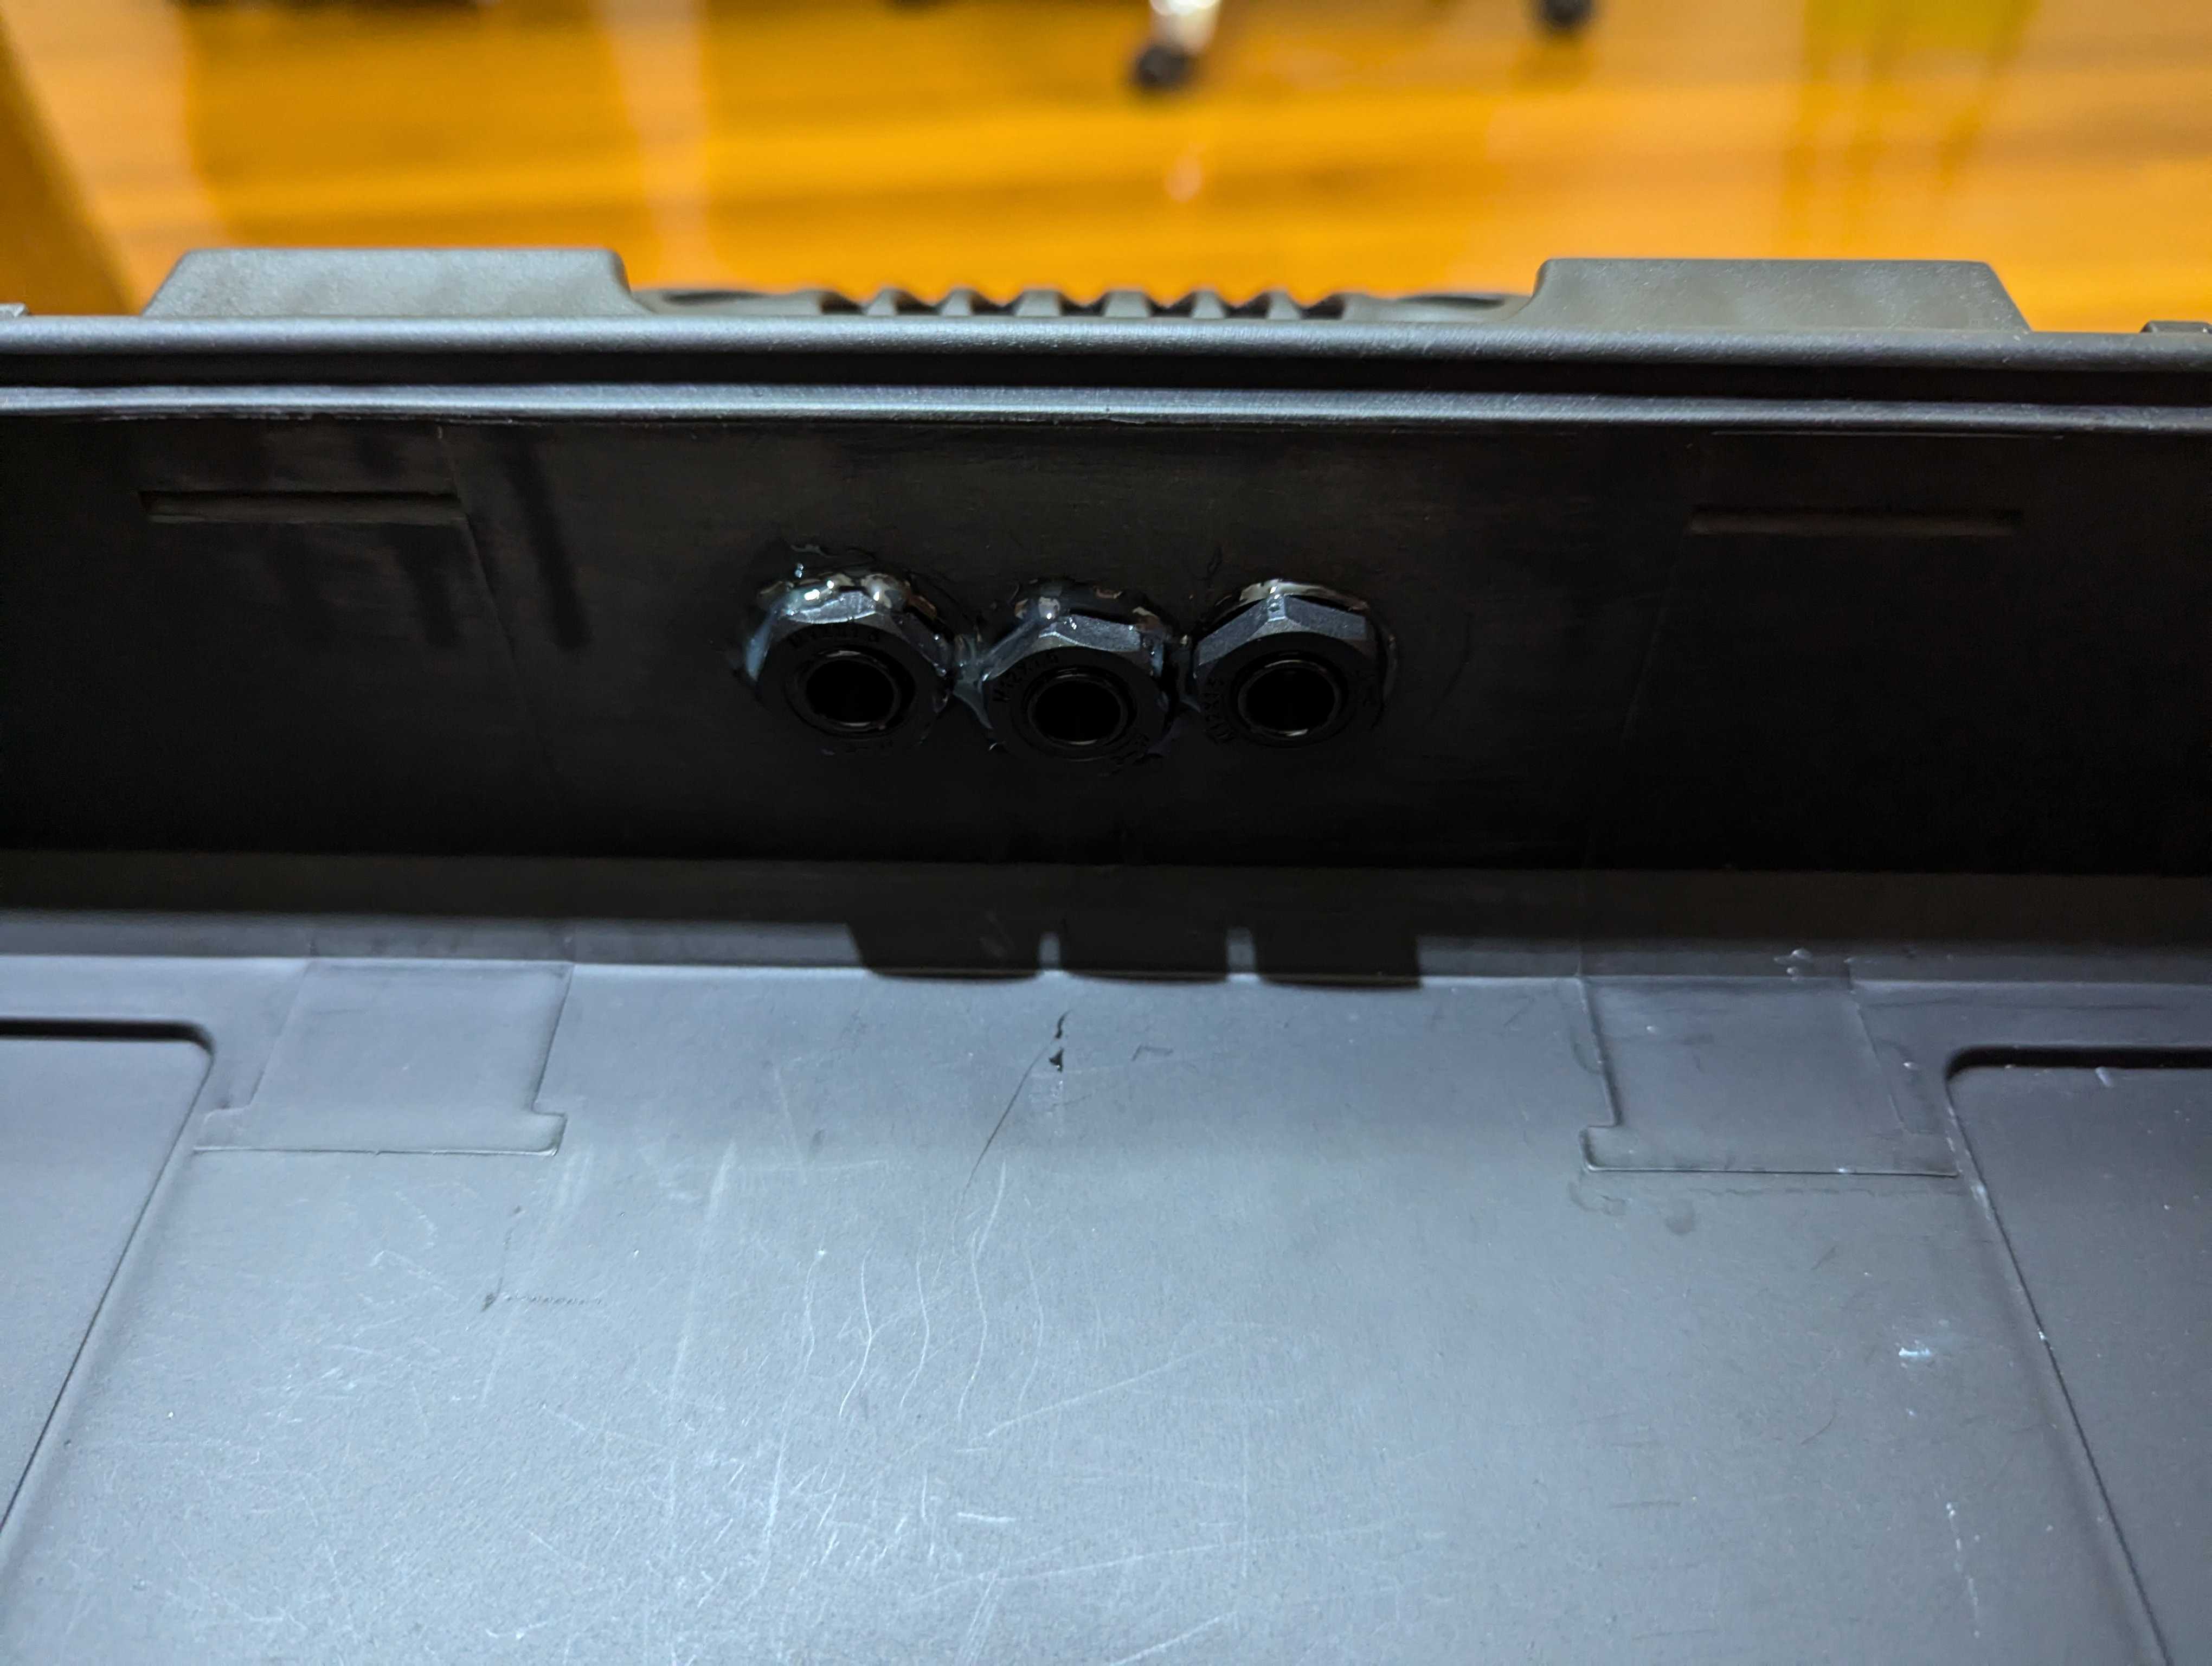
On to the waterproof case. The phase cables go into the case through 3 waterproof connectors:
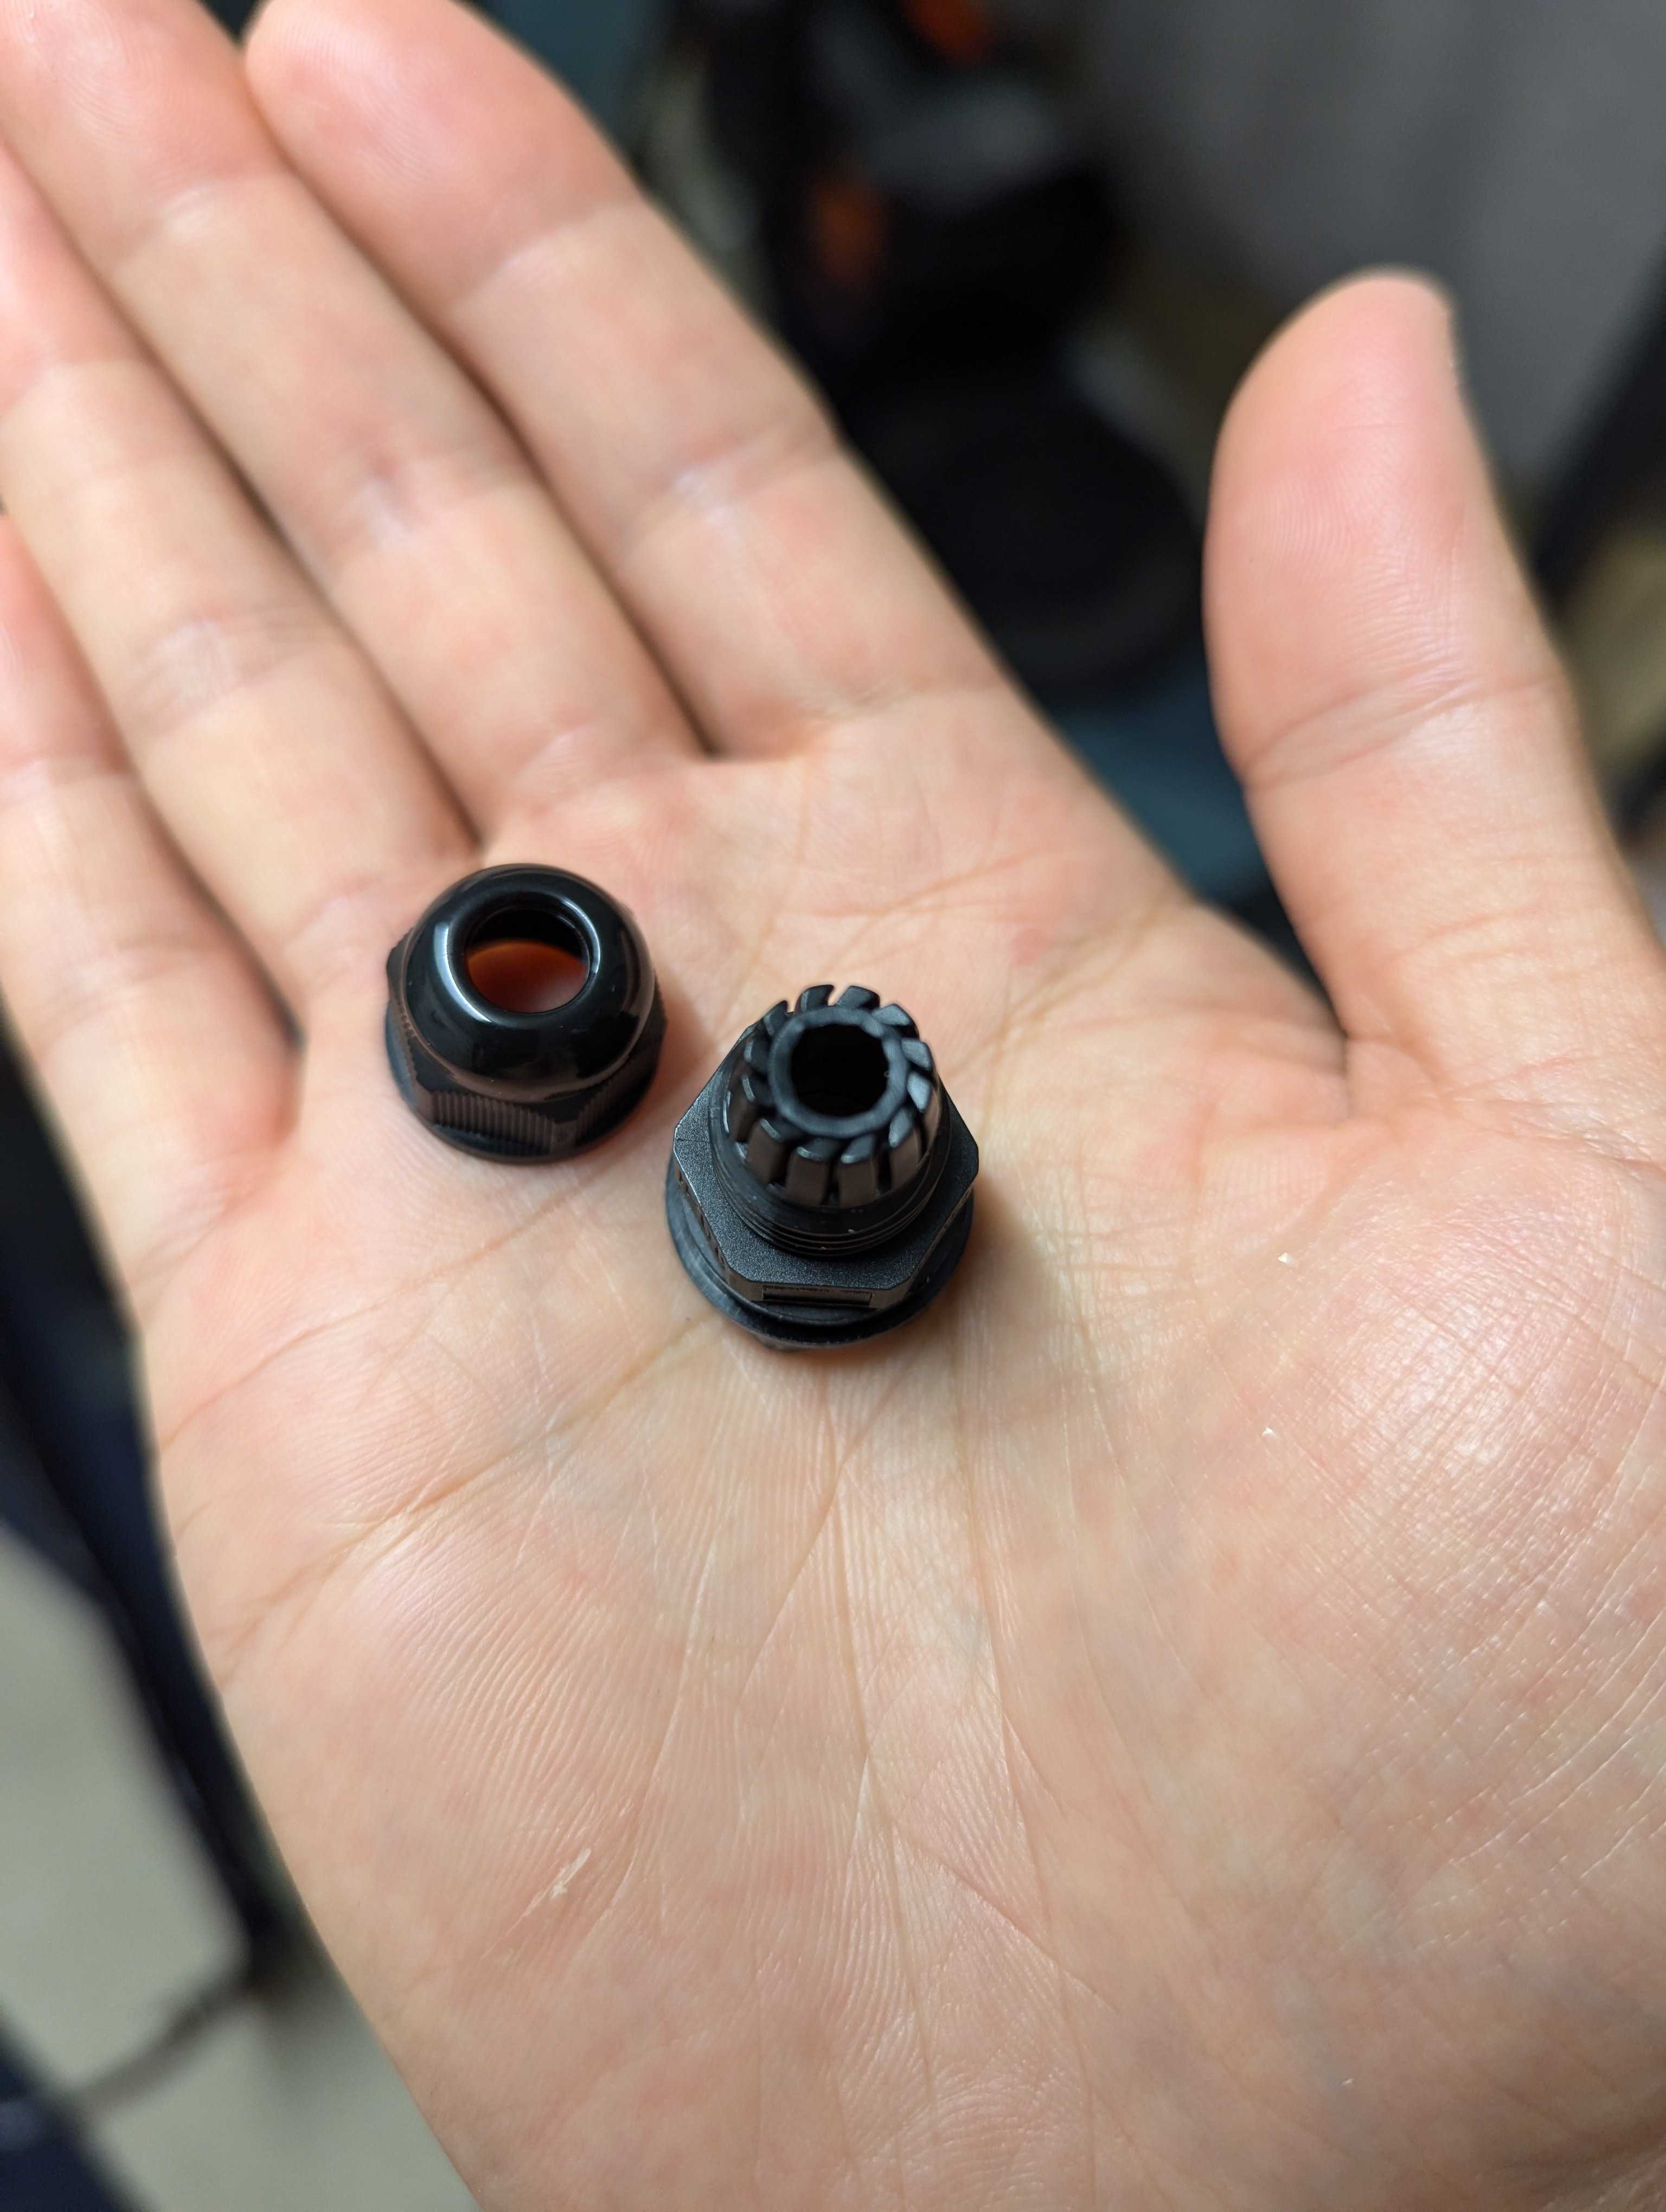
When the nut is tightened, the rubber ring in the connector will create a seal with the phase cable insulator.
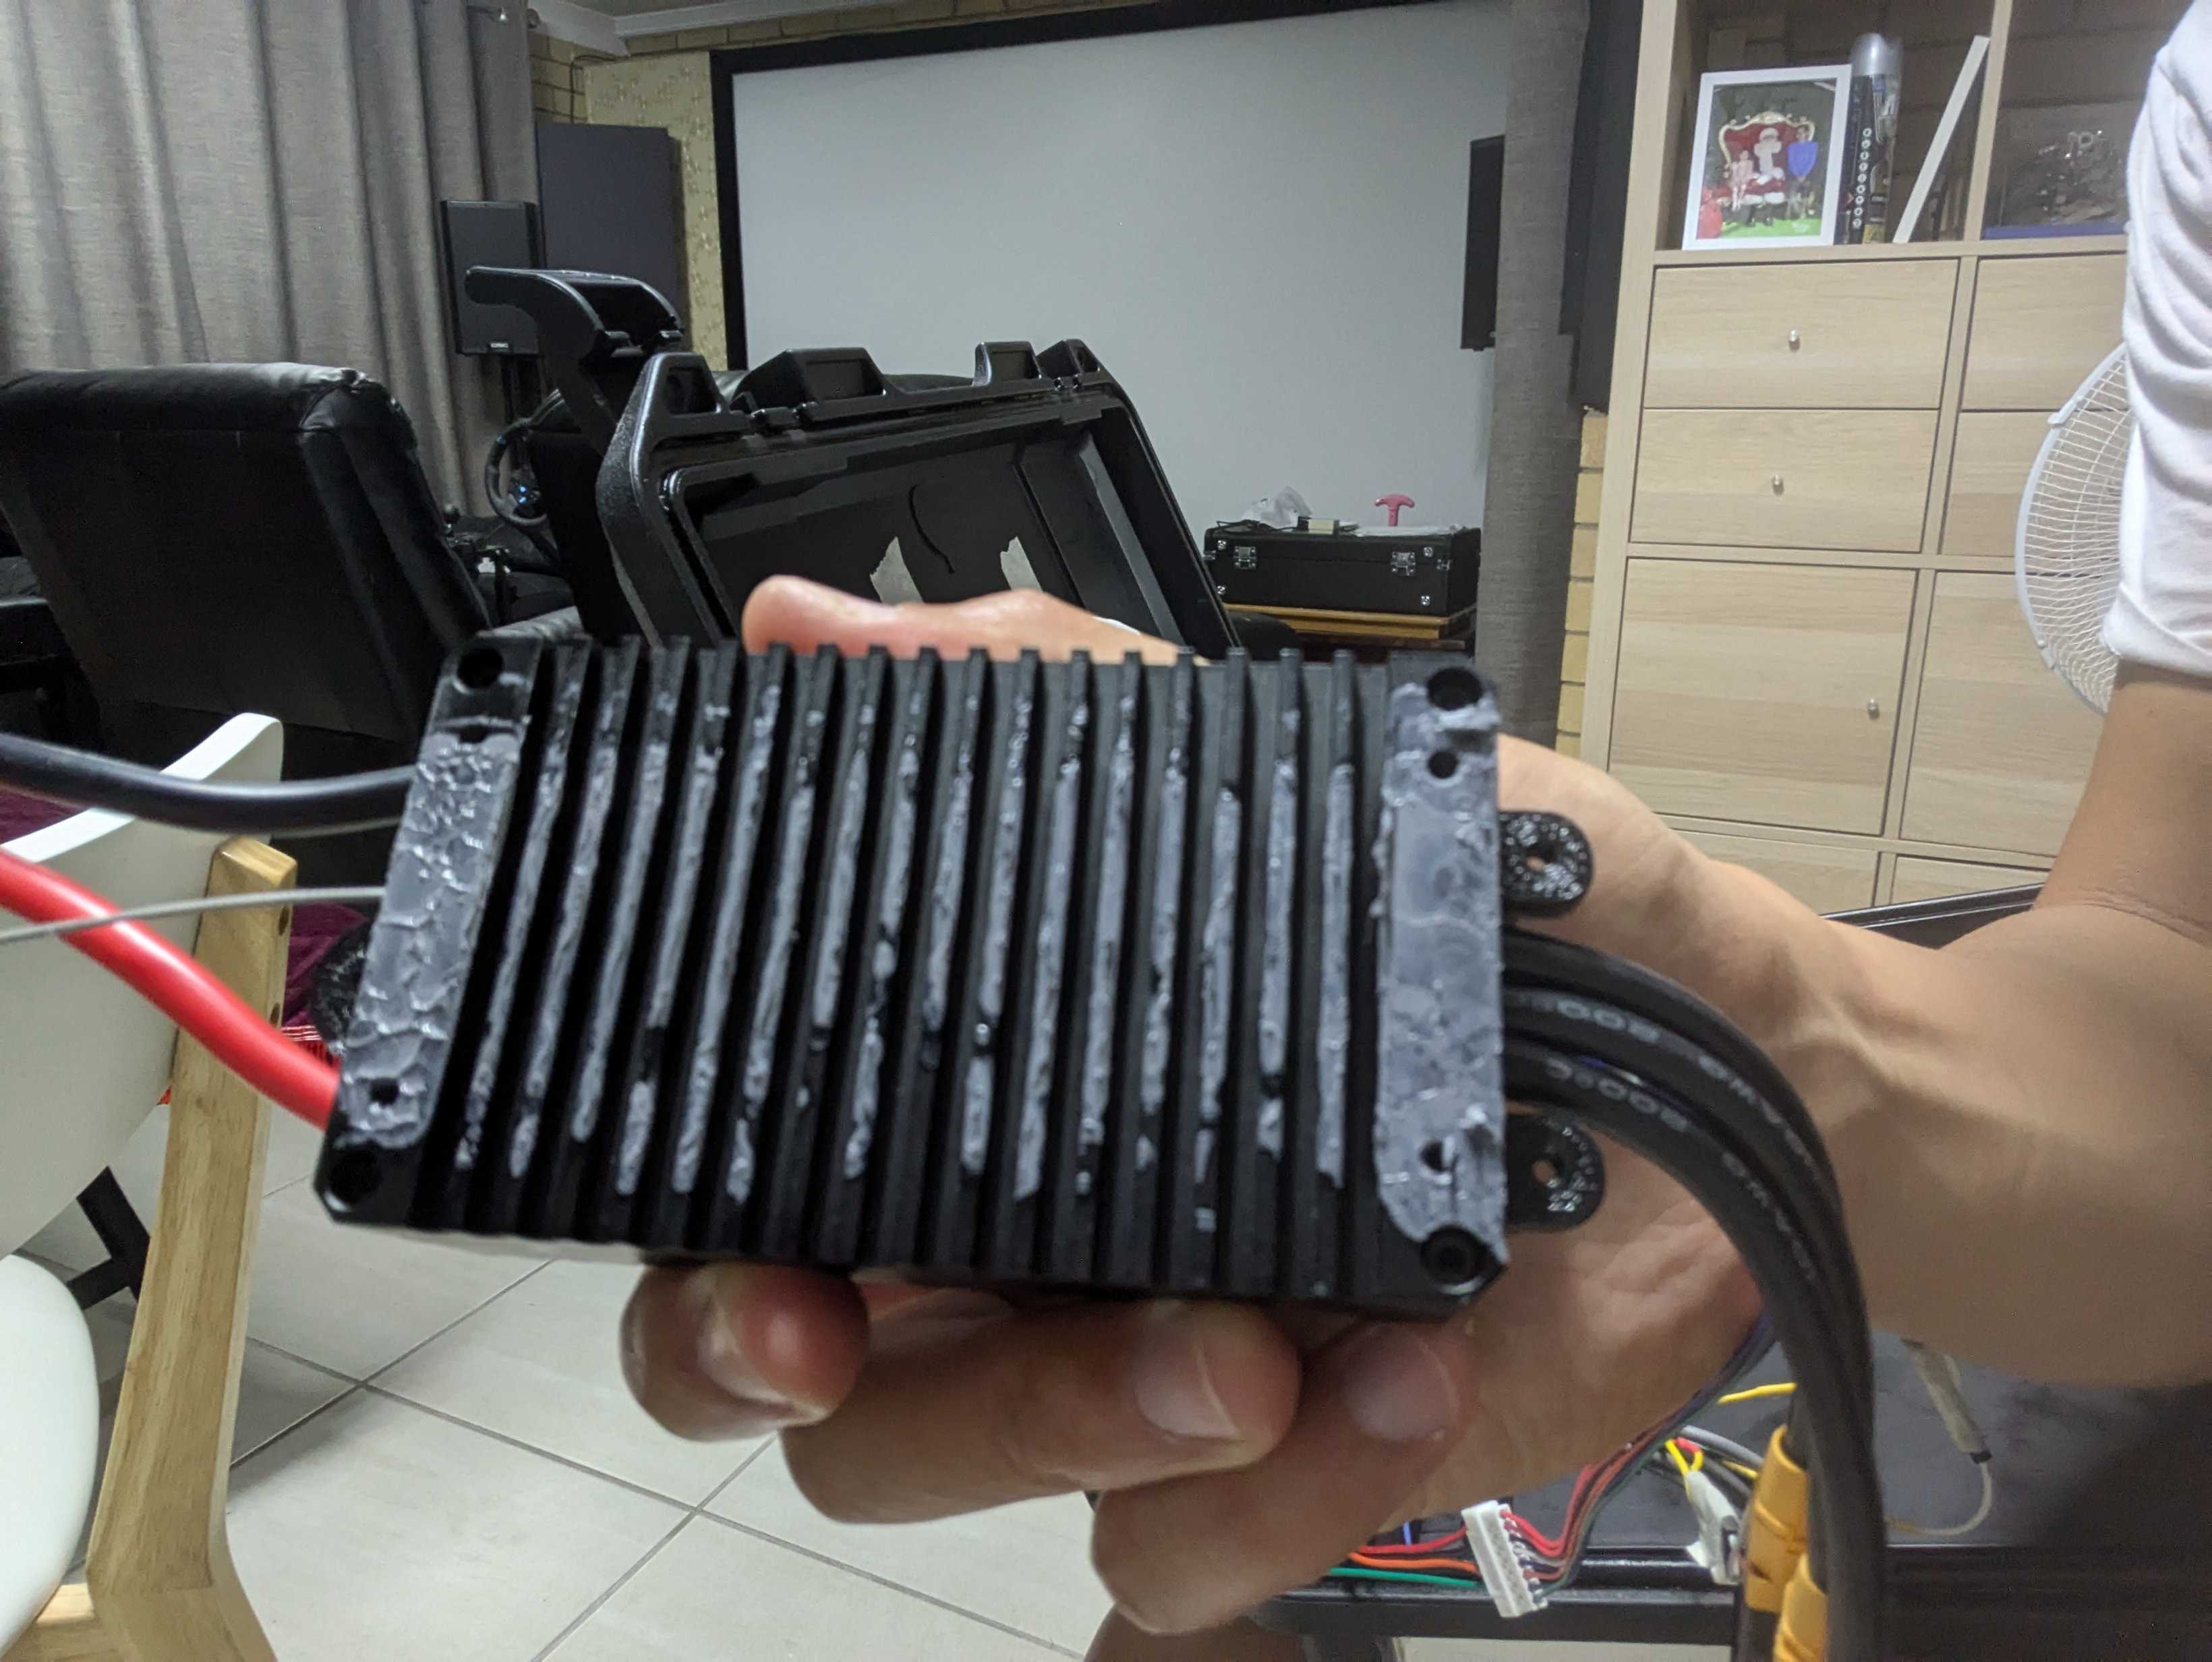
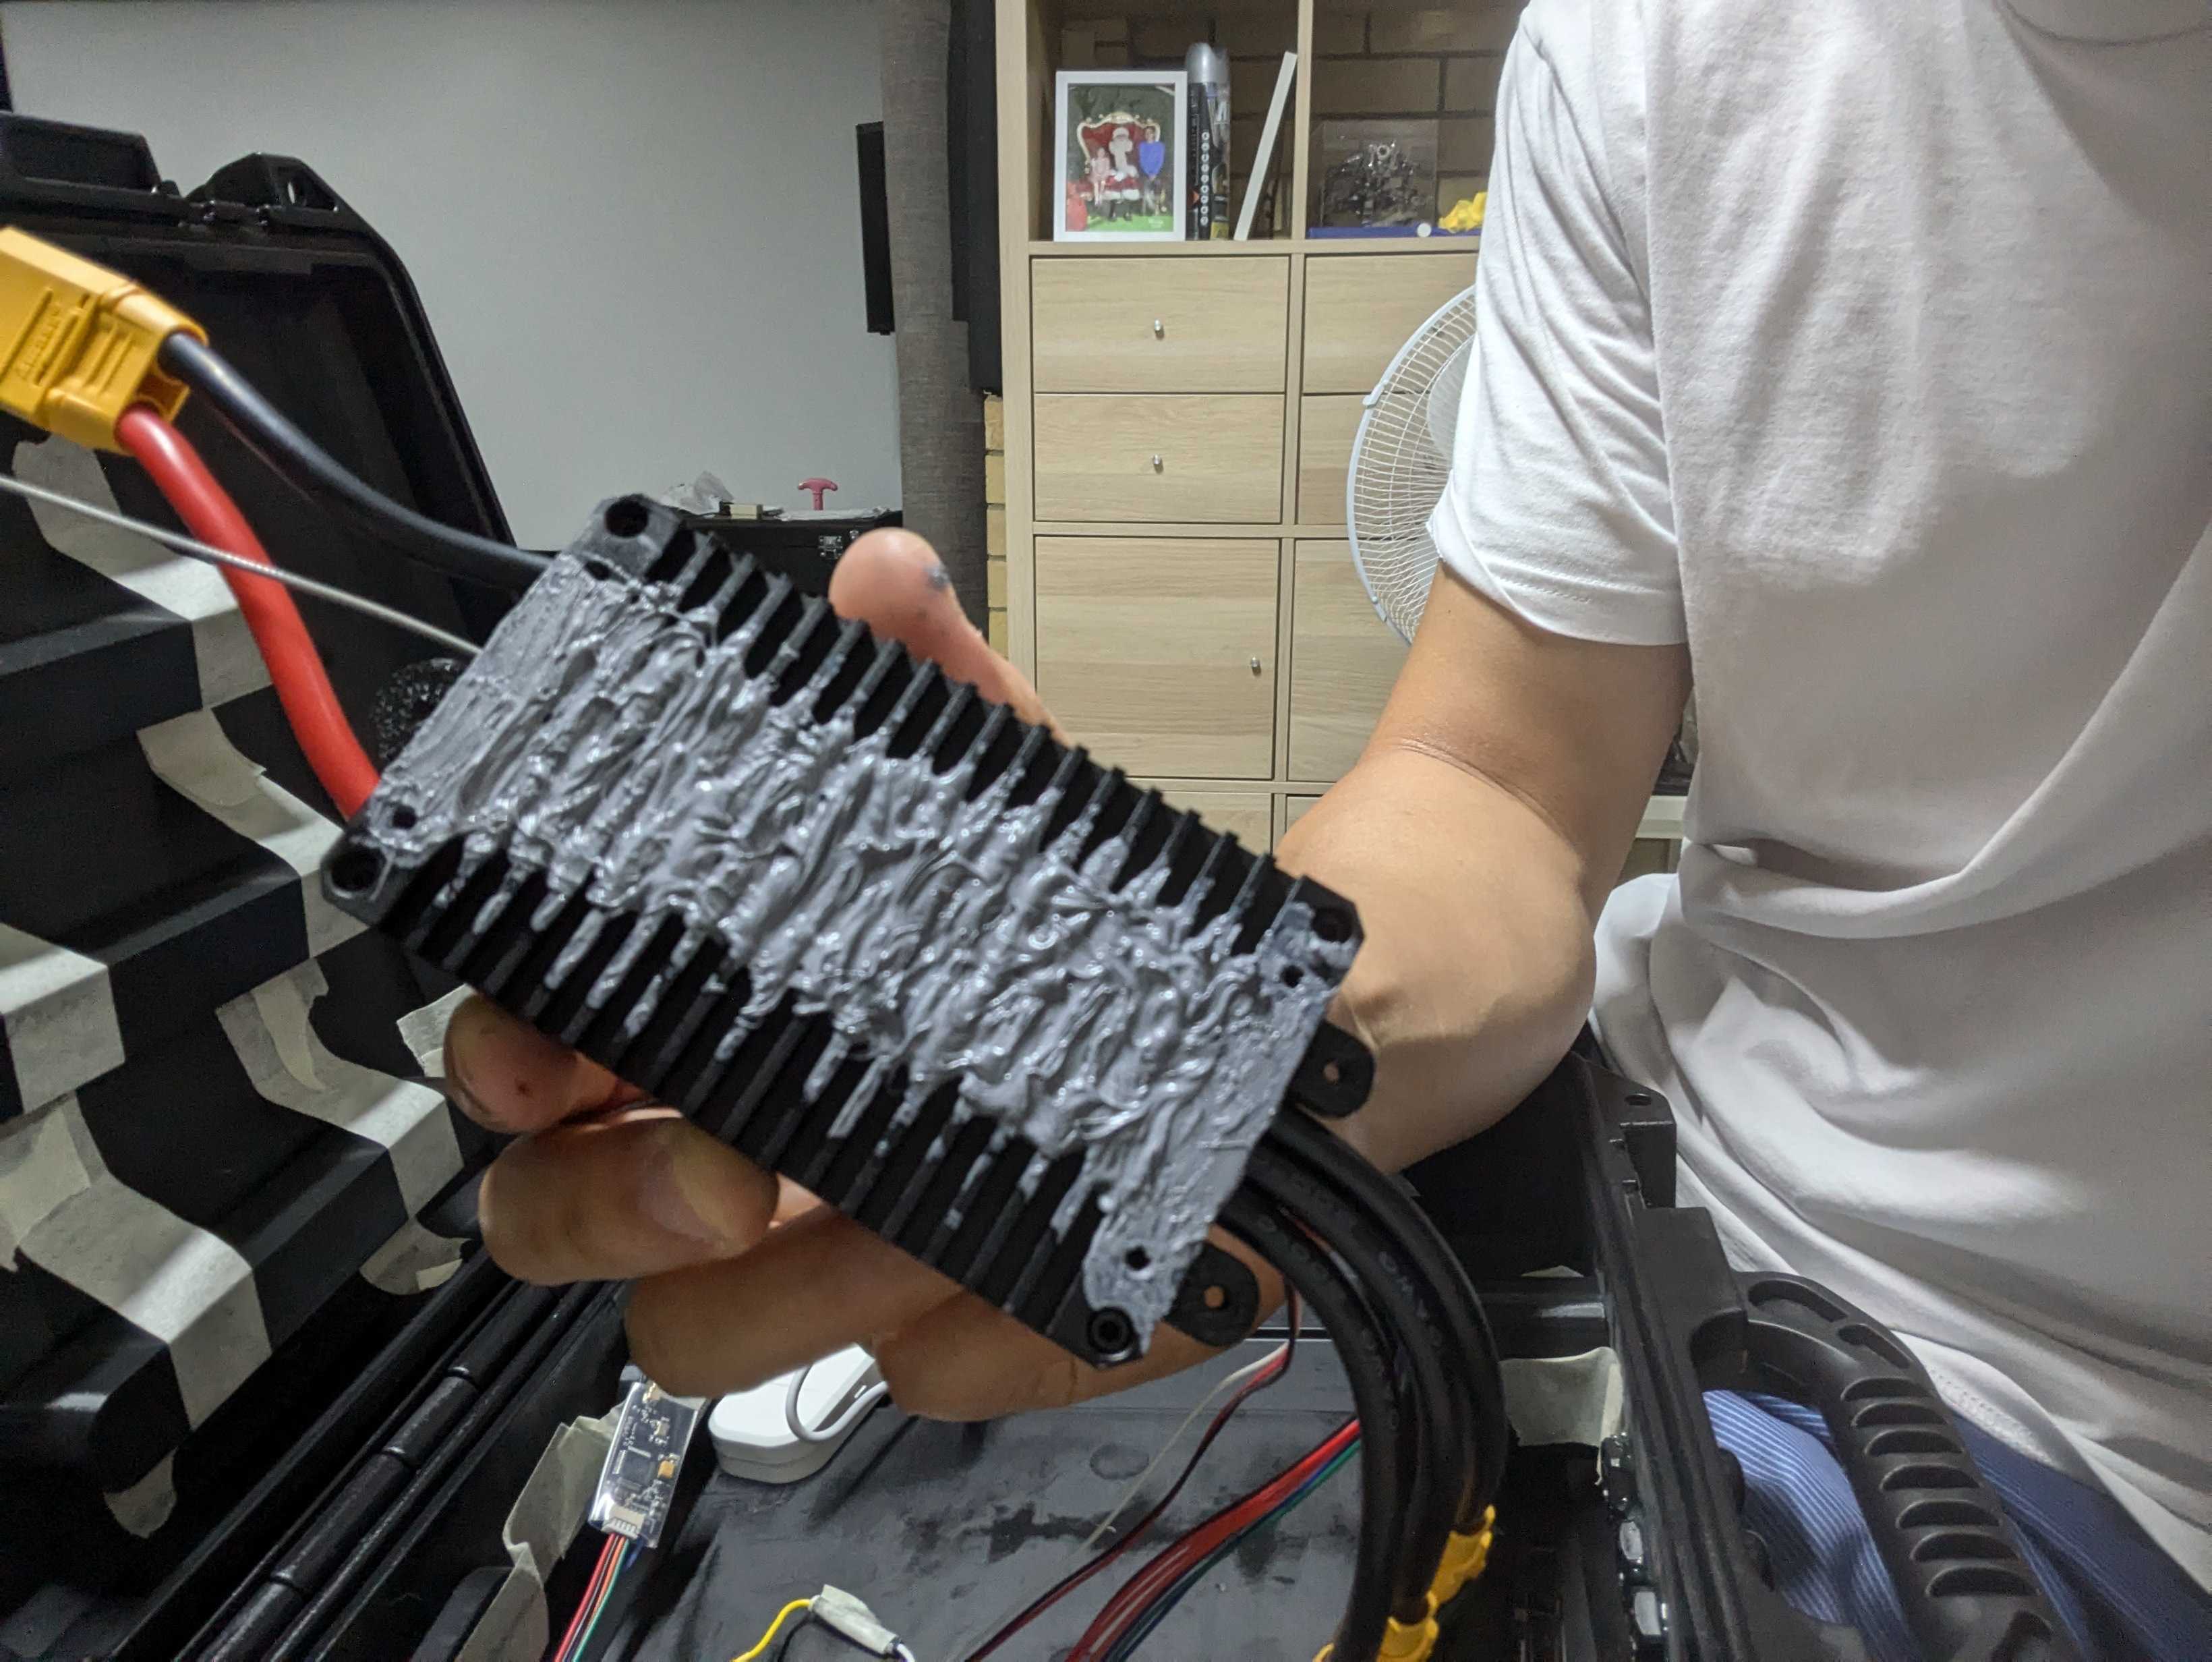
For the ESC cooling, I drilled 4 big holes on the case and epoxied an aluminium plate on the outside. To compensate the strength affected by the holes, I use themal epoxy to glue another aluminium plate on the inside that the ESC will attach to. This turned out to be unnecessary and problematic later.
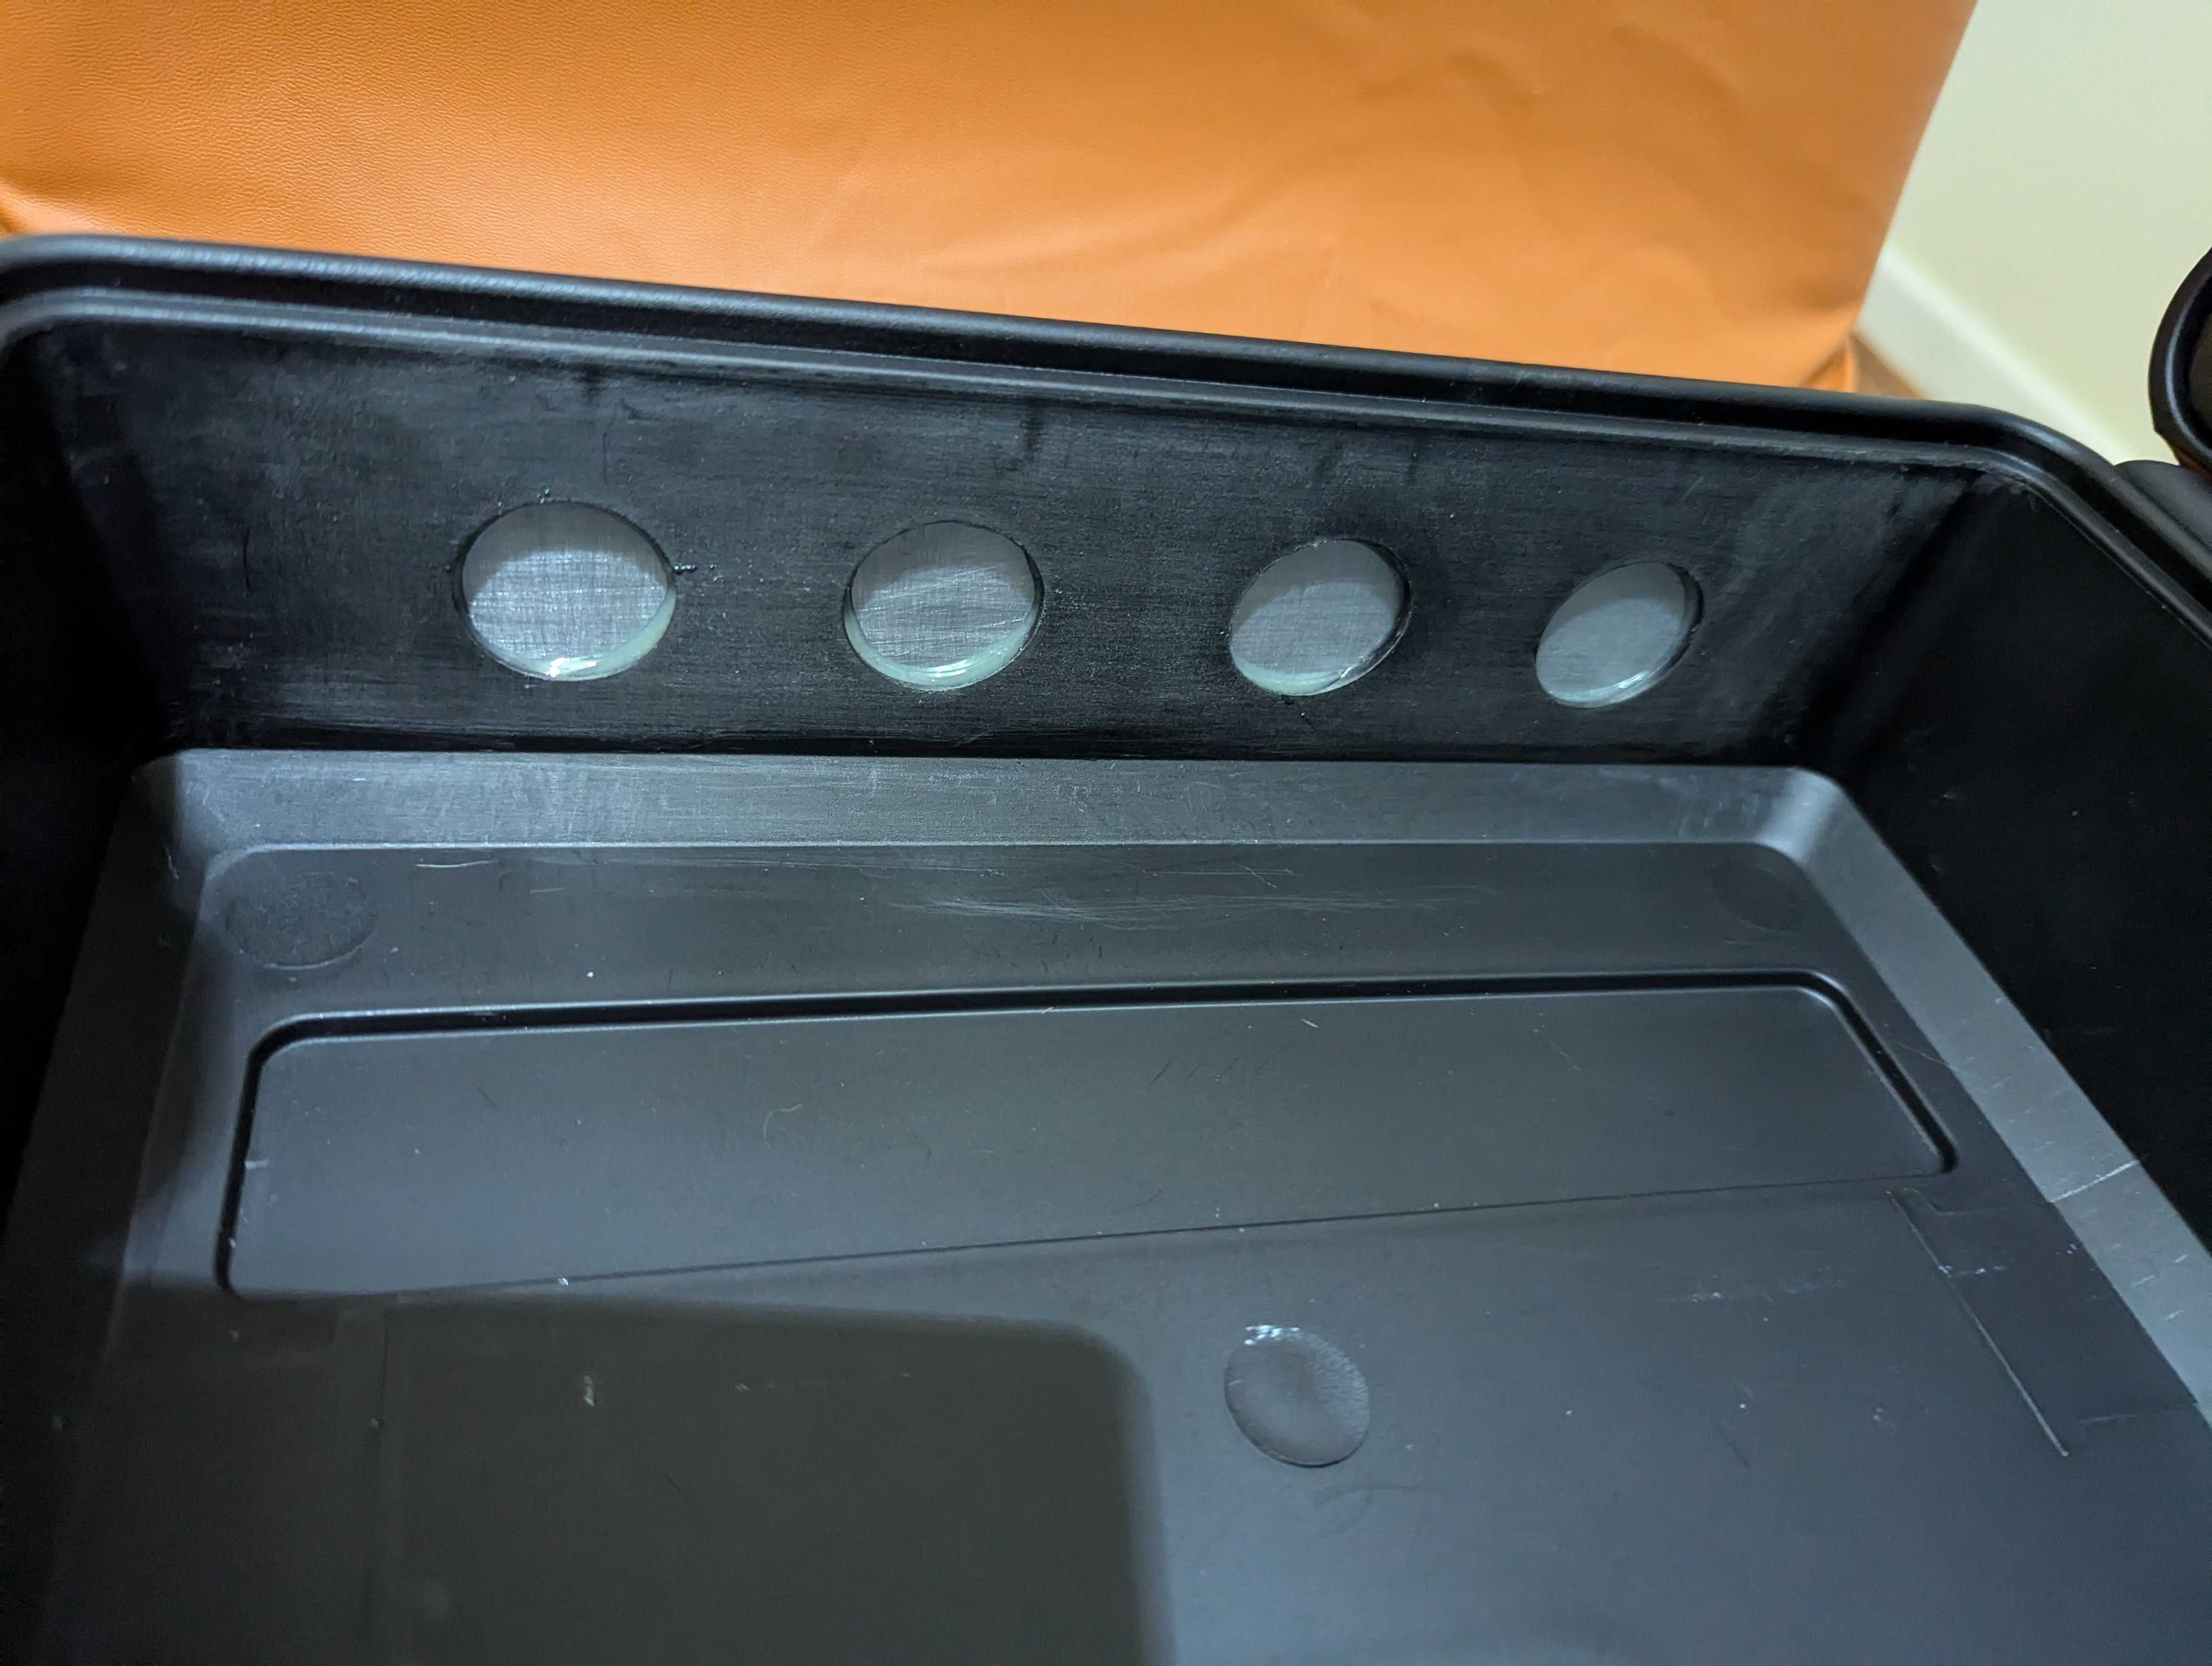
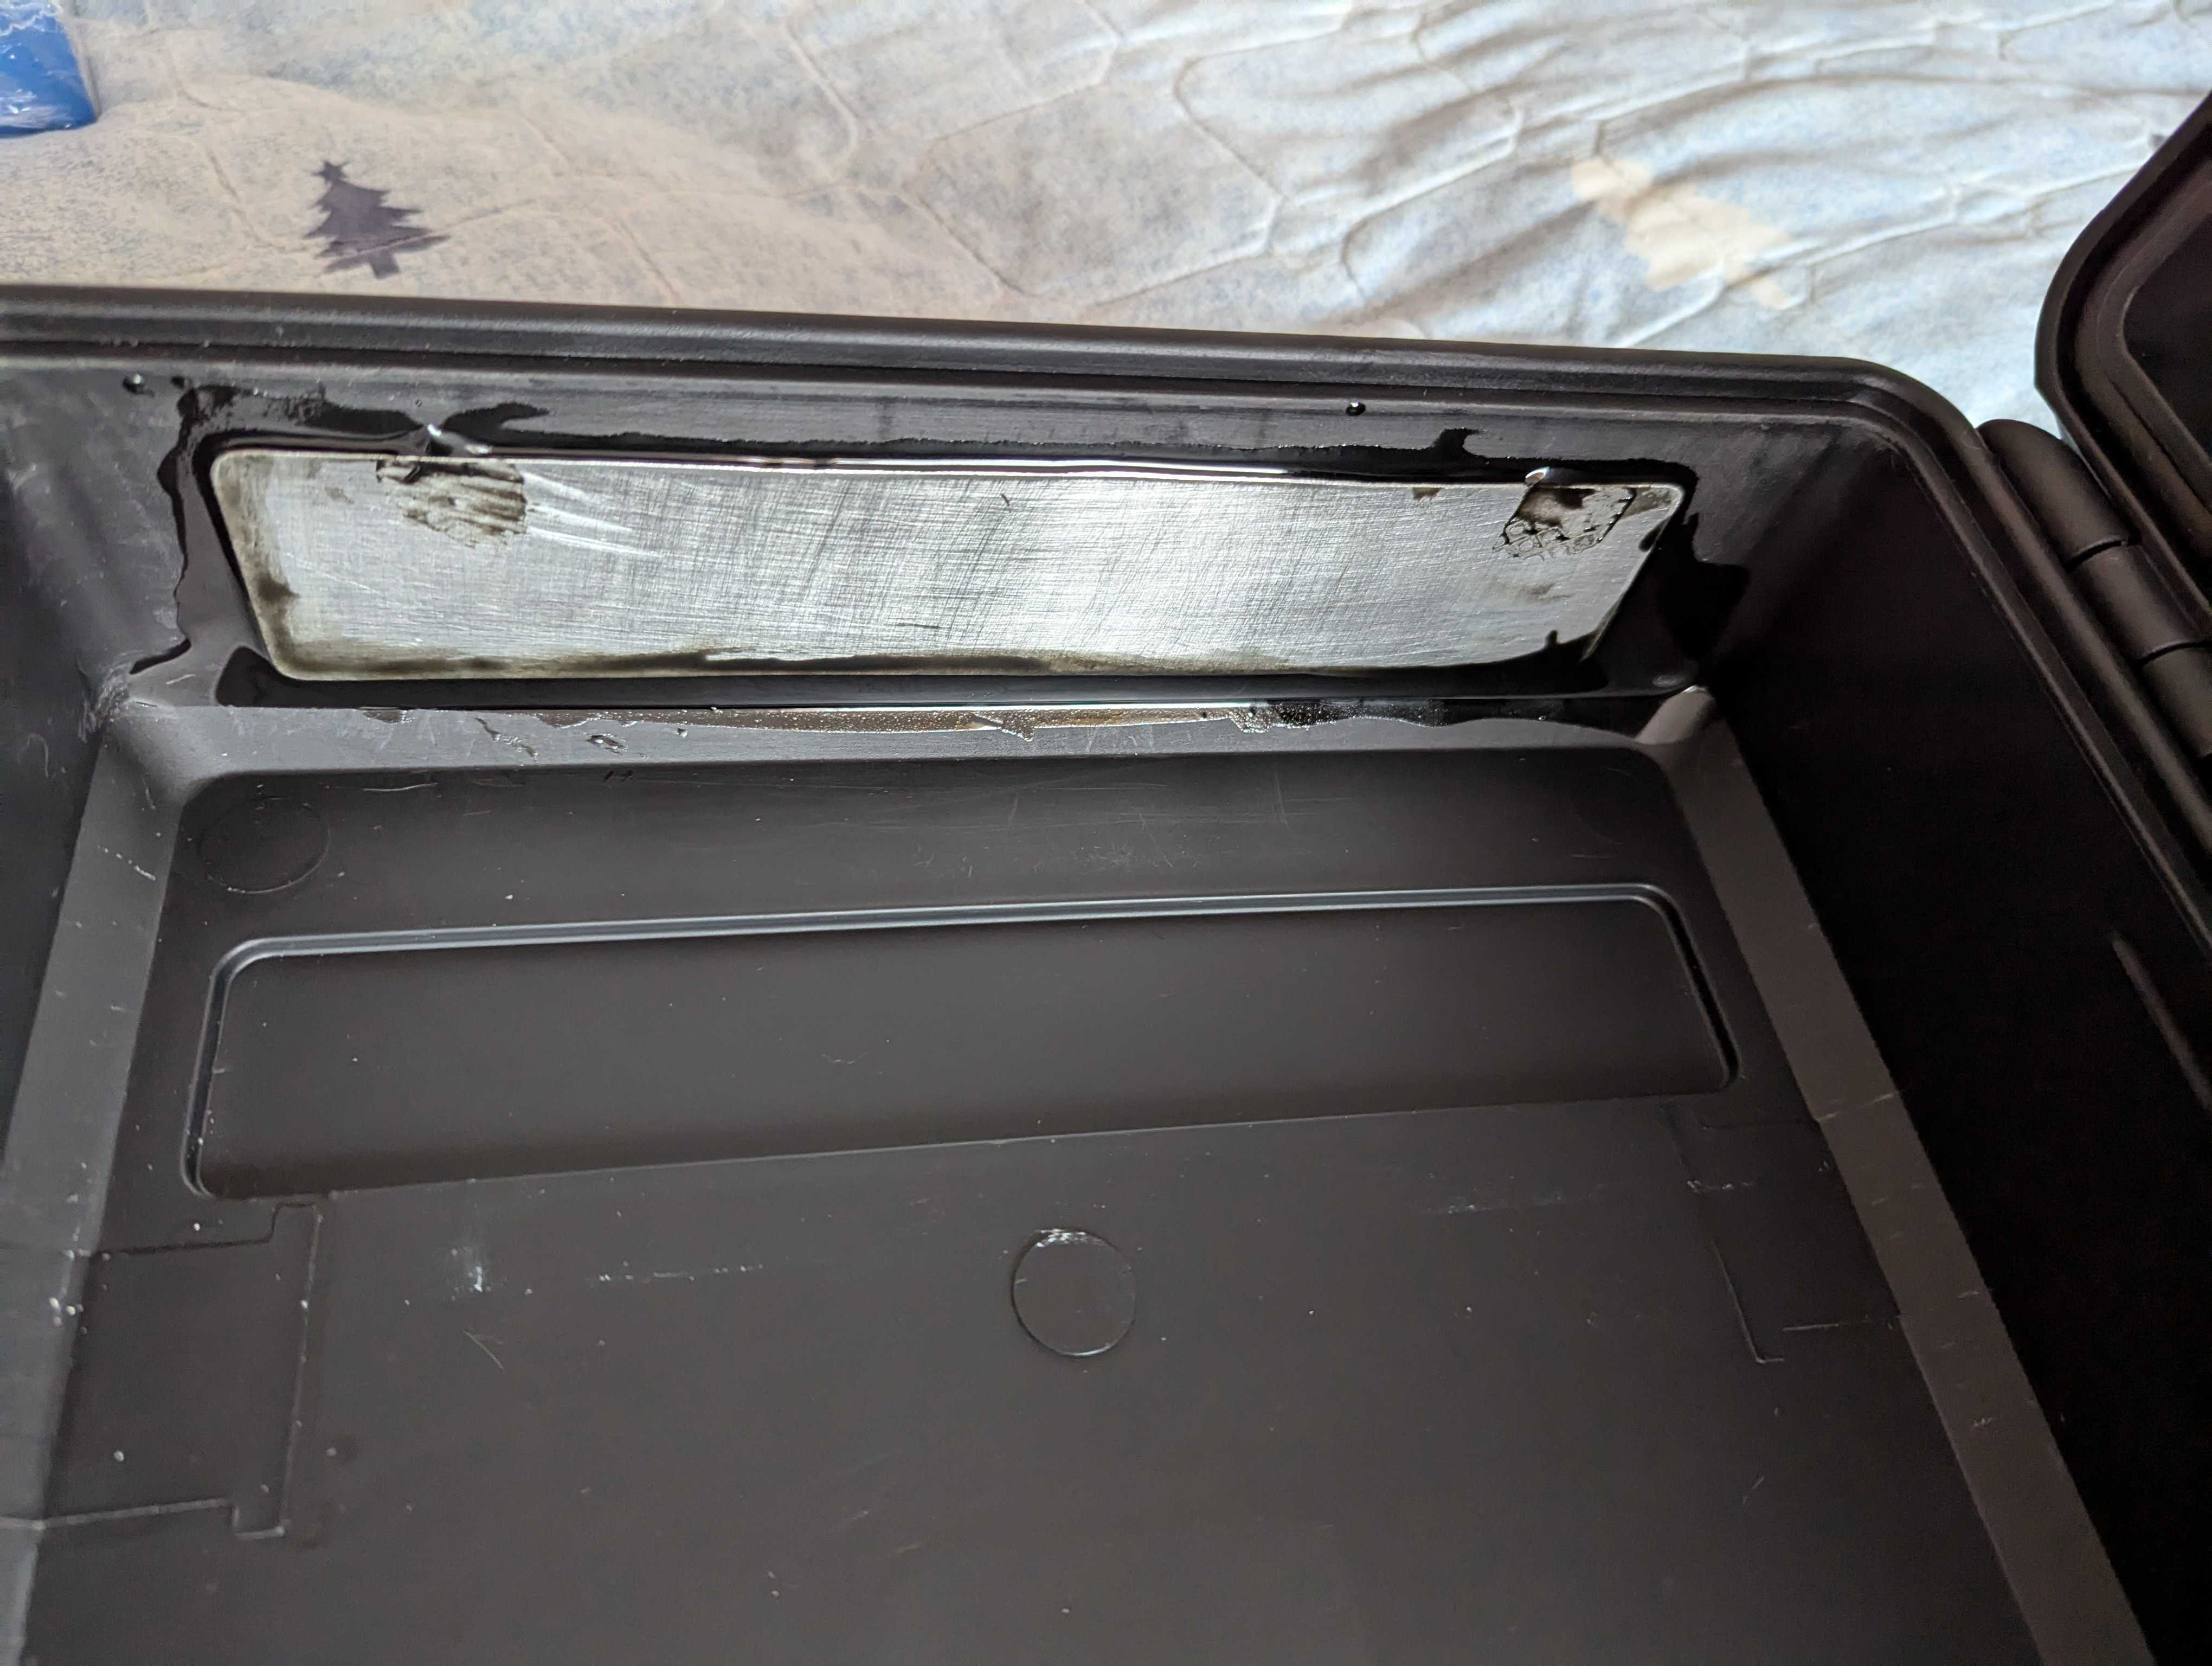
I then themal epoxied a heatsink to the aluminium plate outside:
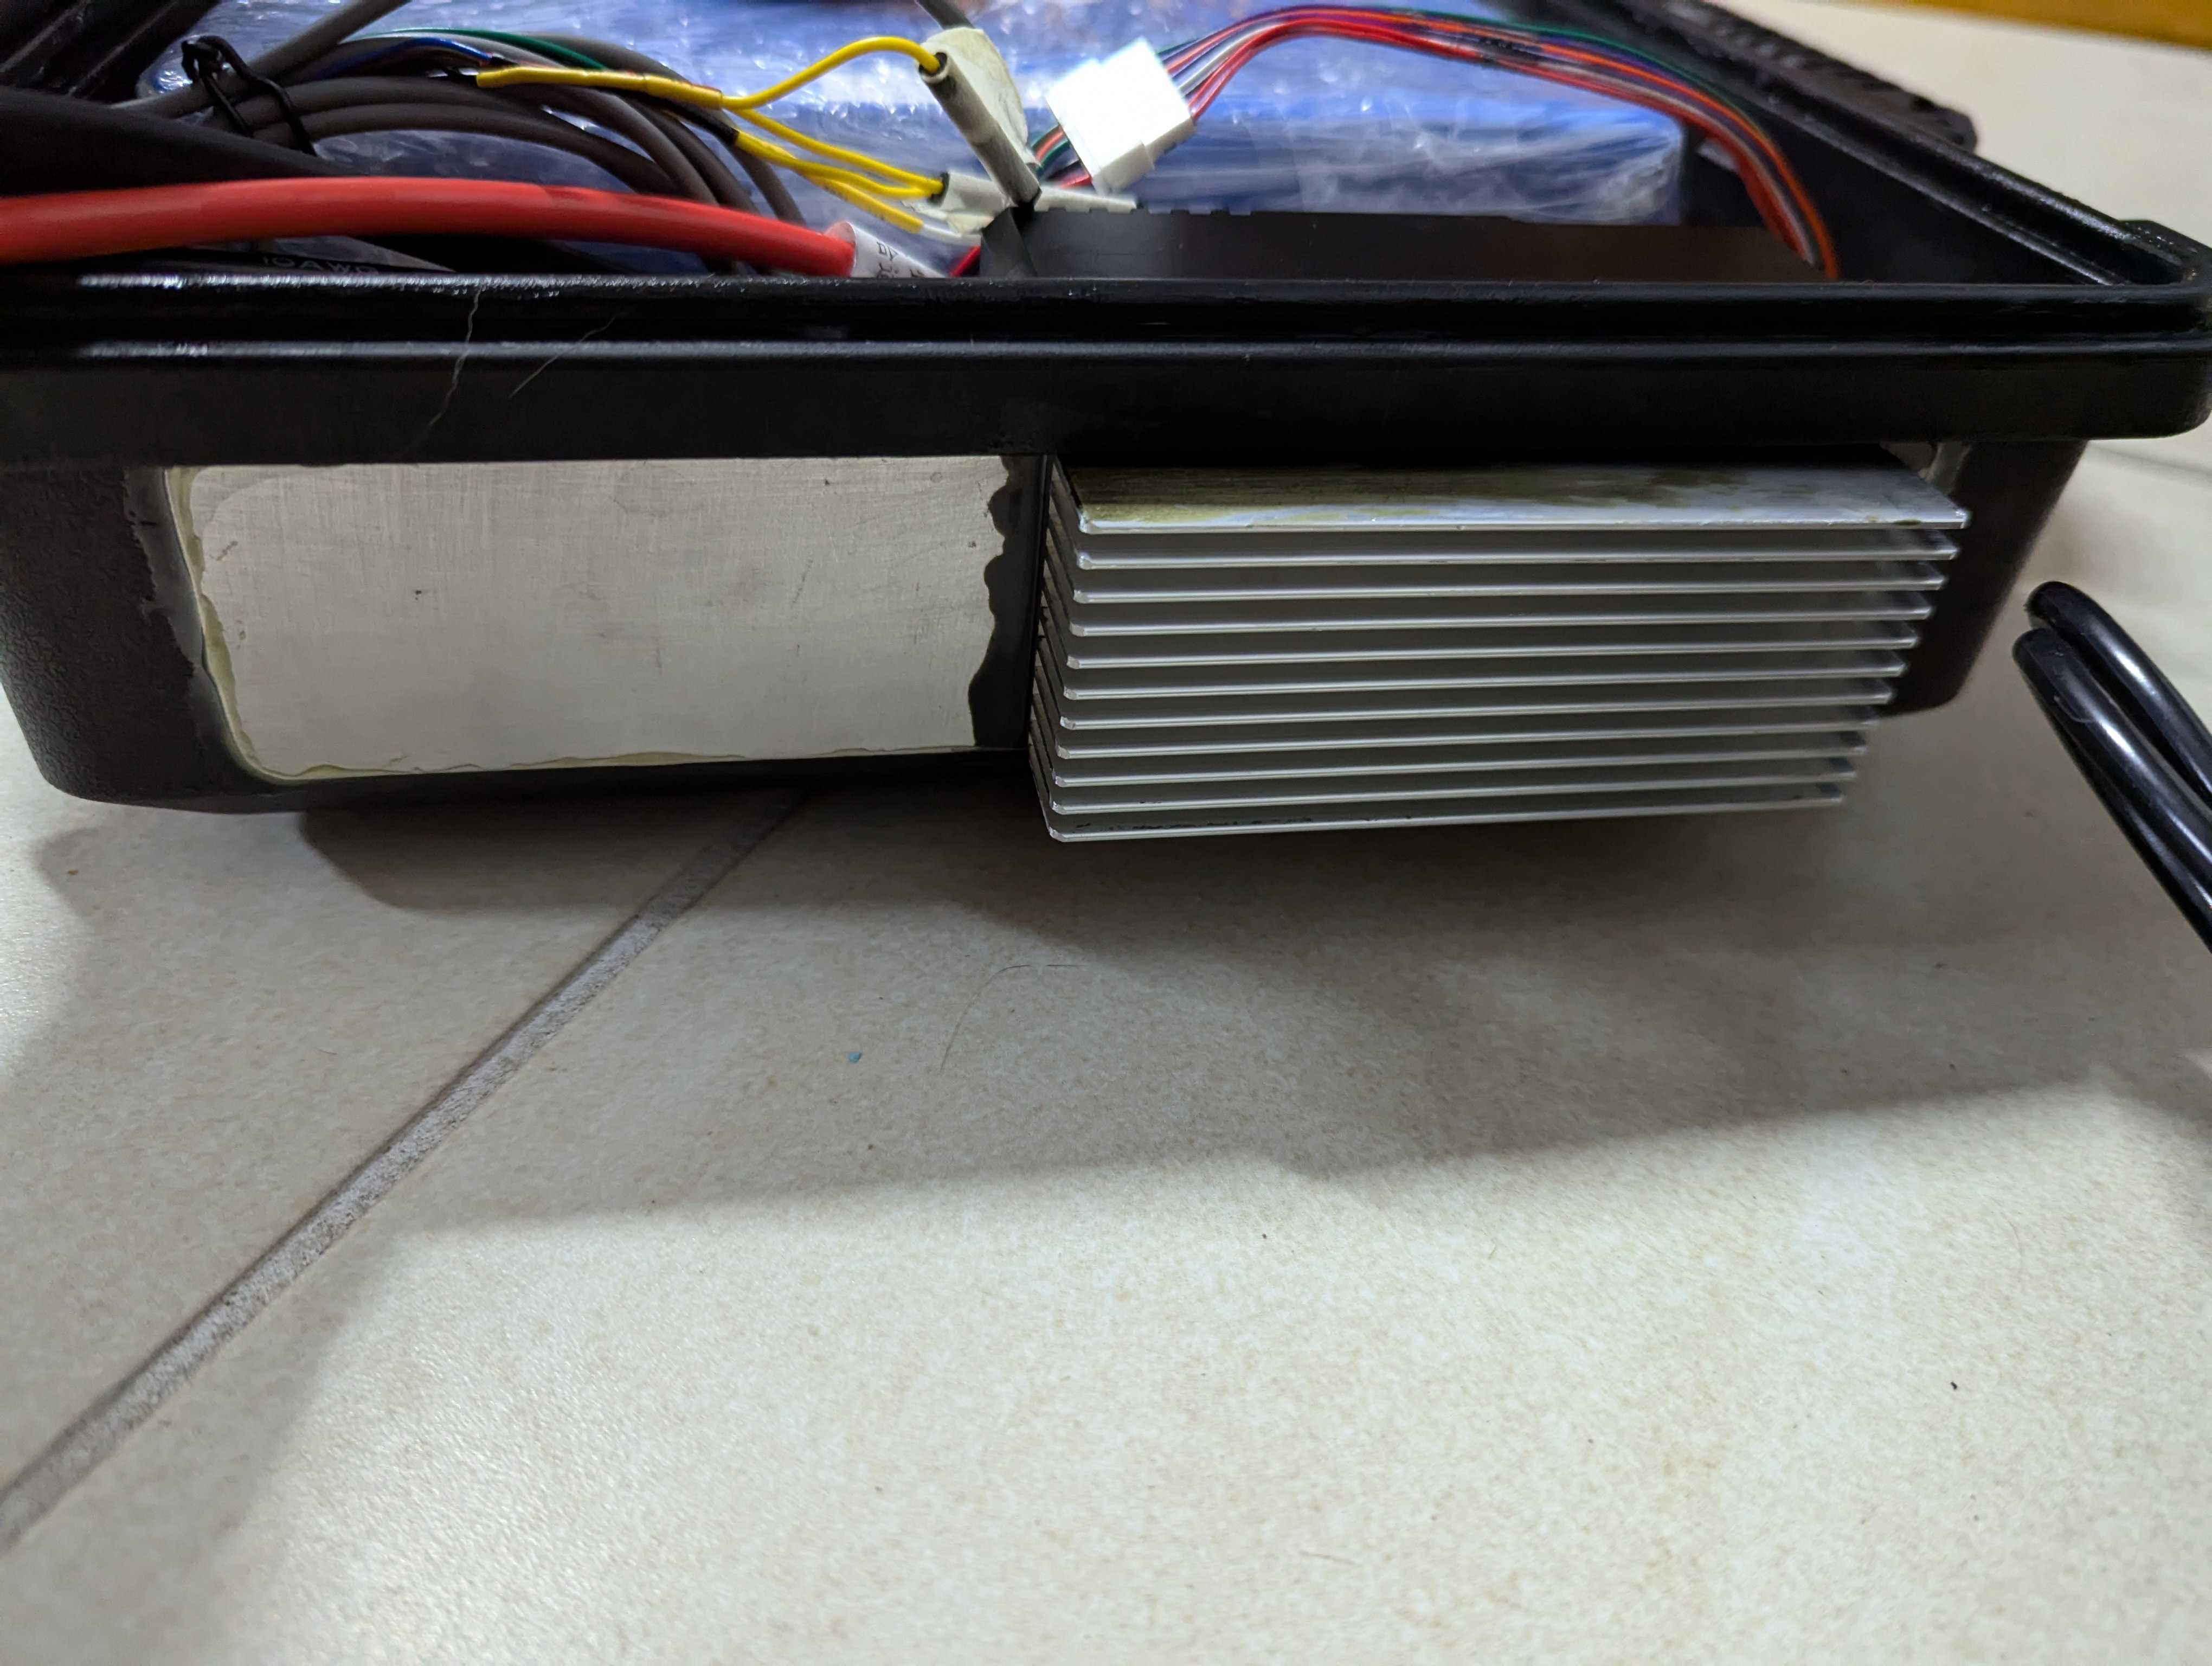
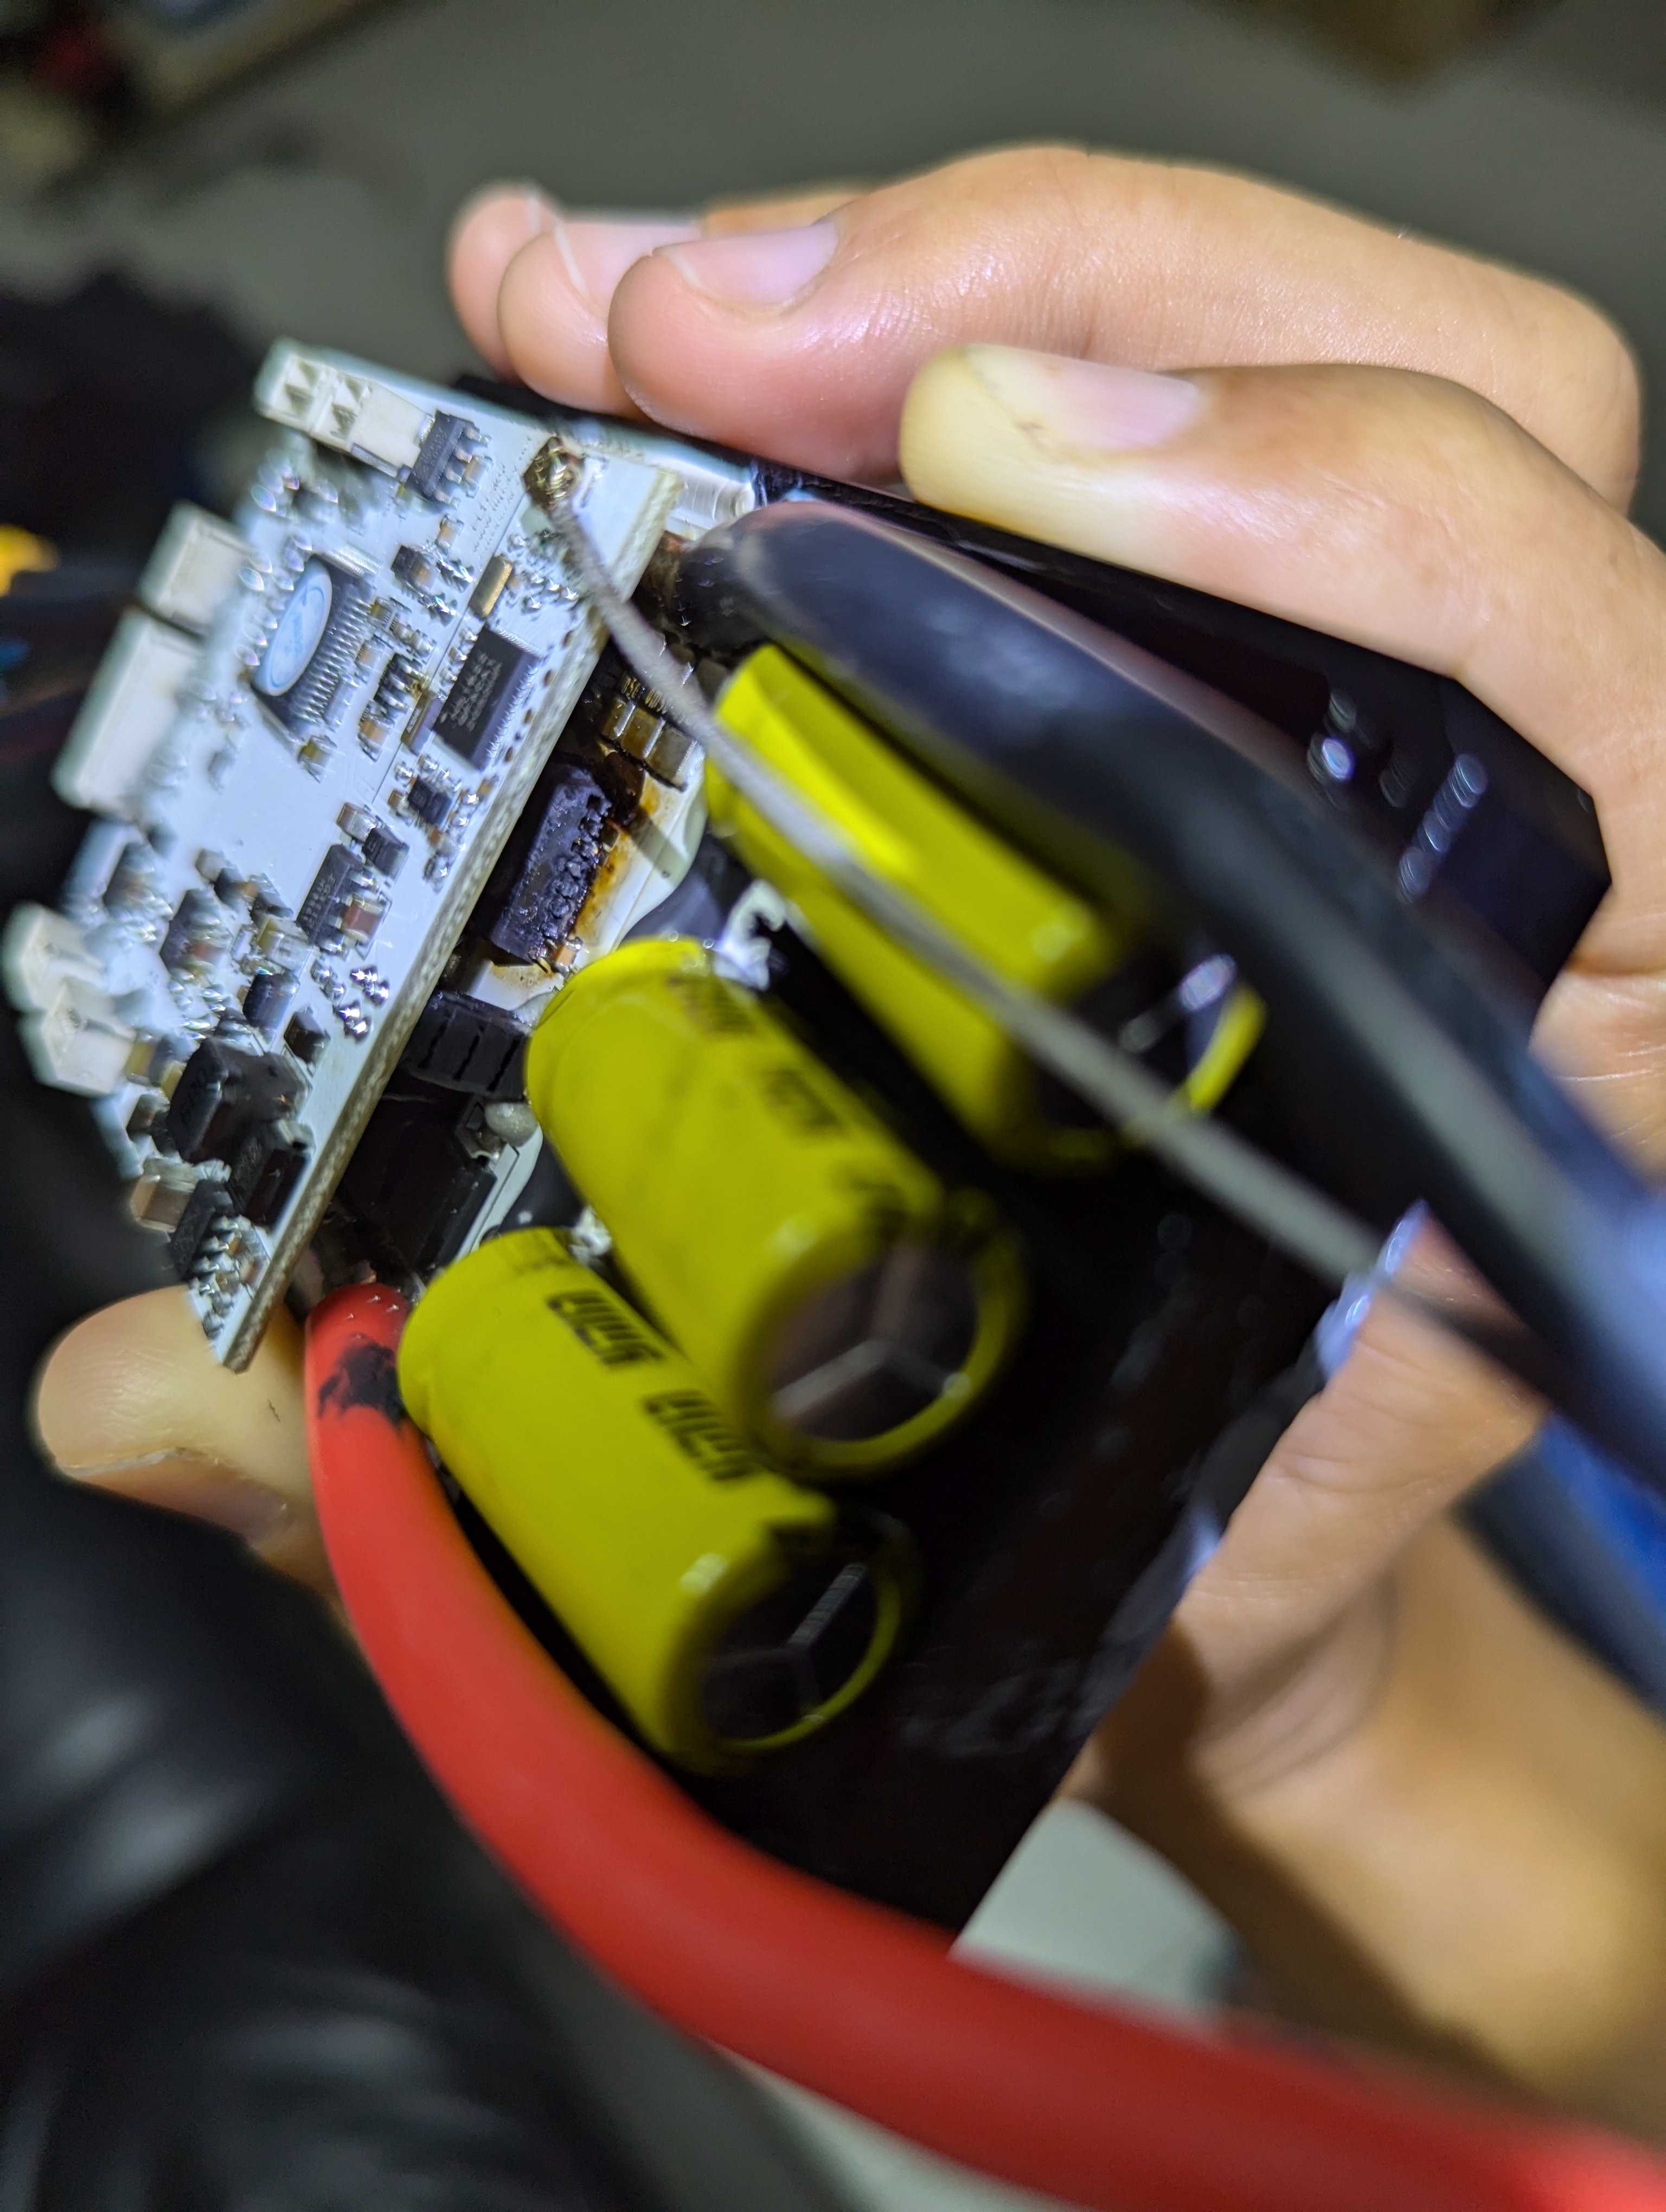
For added safety, I wrapped the battery with heat shrink bags (so minor leak won’t get into the battery). I also put a water alert in the case (the white little box on the right hand side):
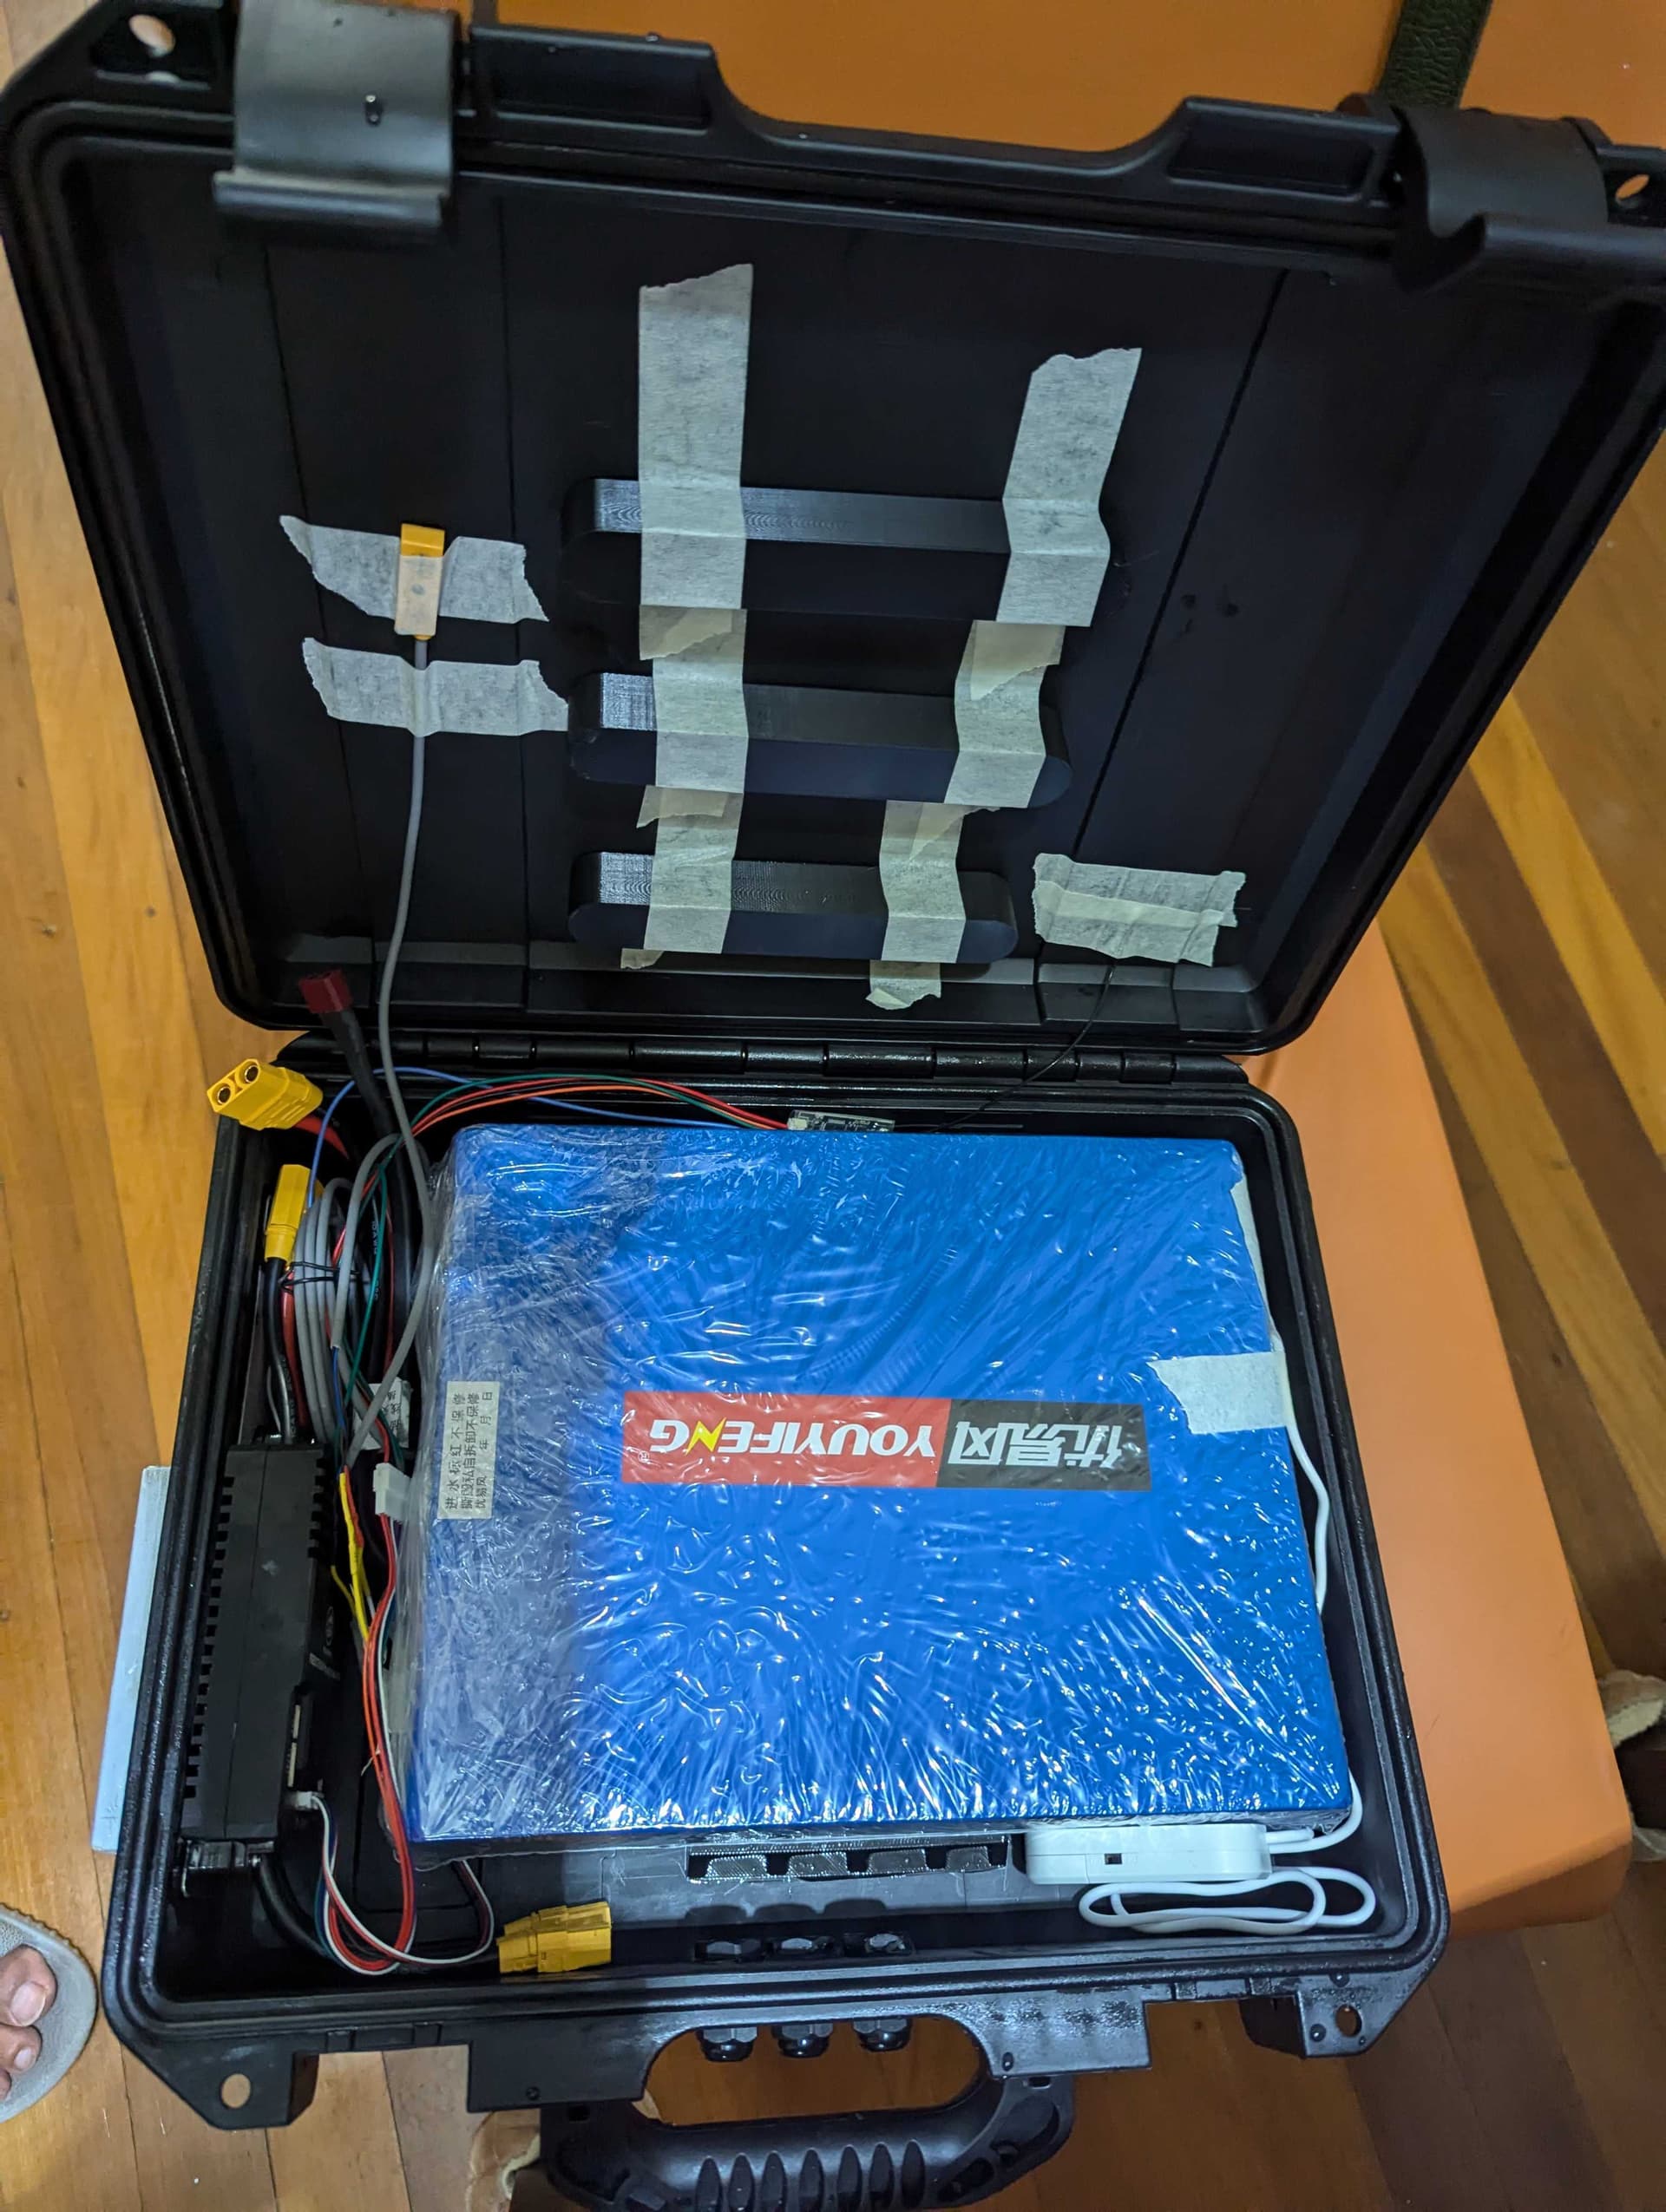
The hall switch and the remote antenna are taped (for testing) to the top along with some battery guard so it doesn’t move.
Then I did a leak test (with grease applied to the rubber seal of the case) by submerging the case for 15 mintues:
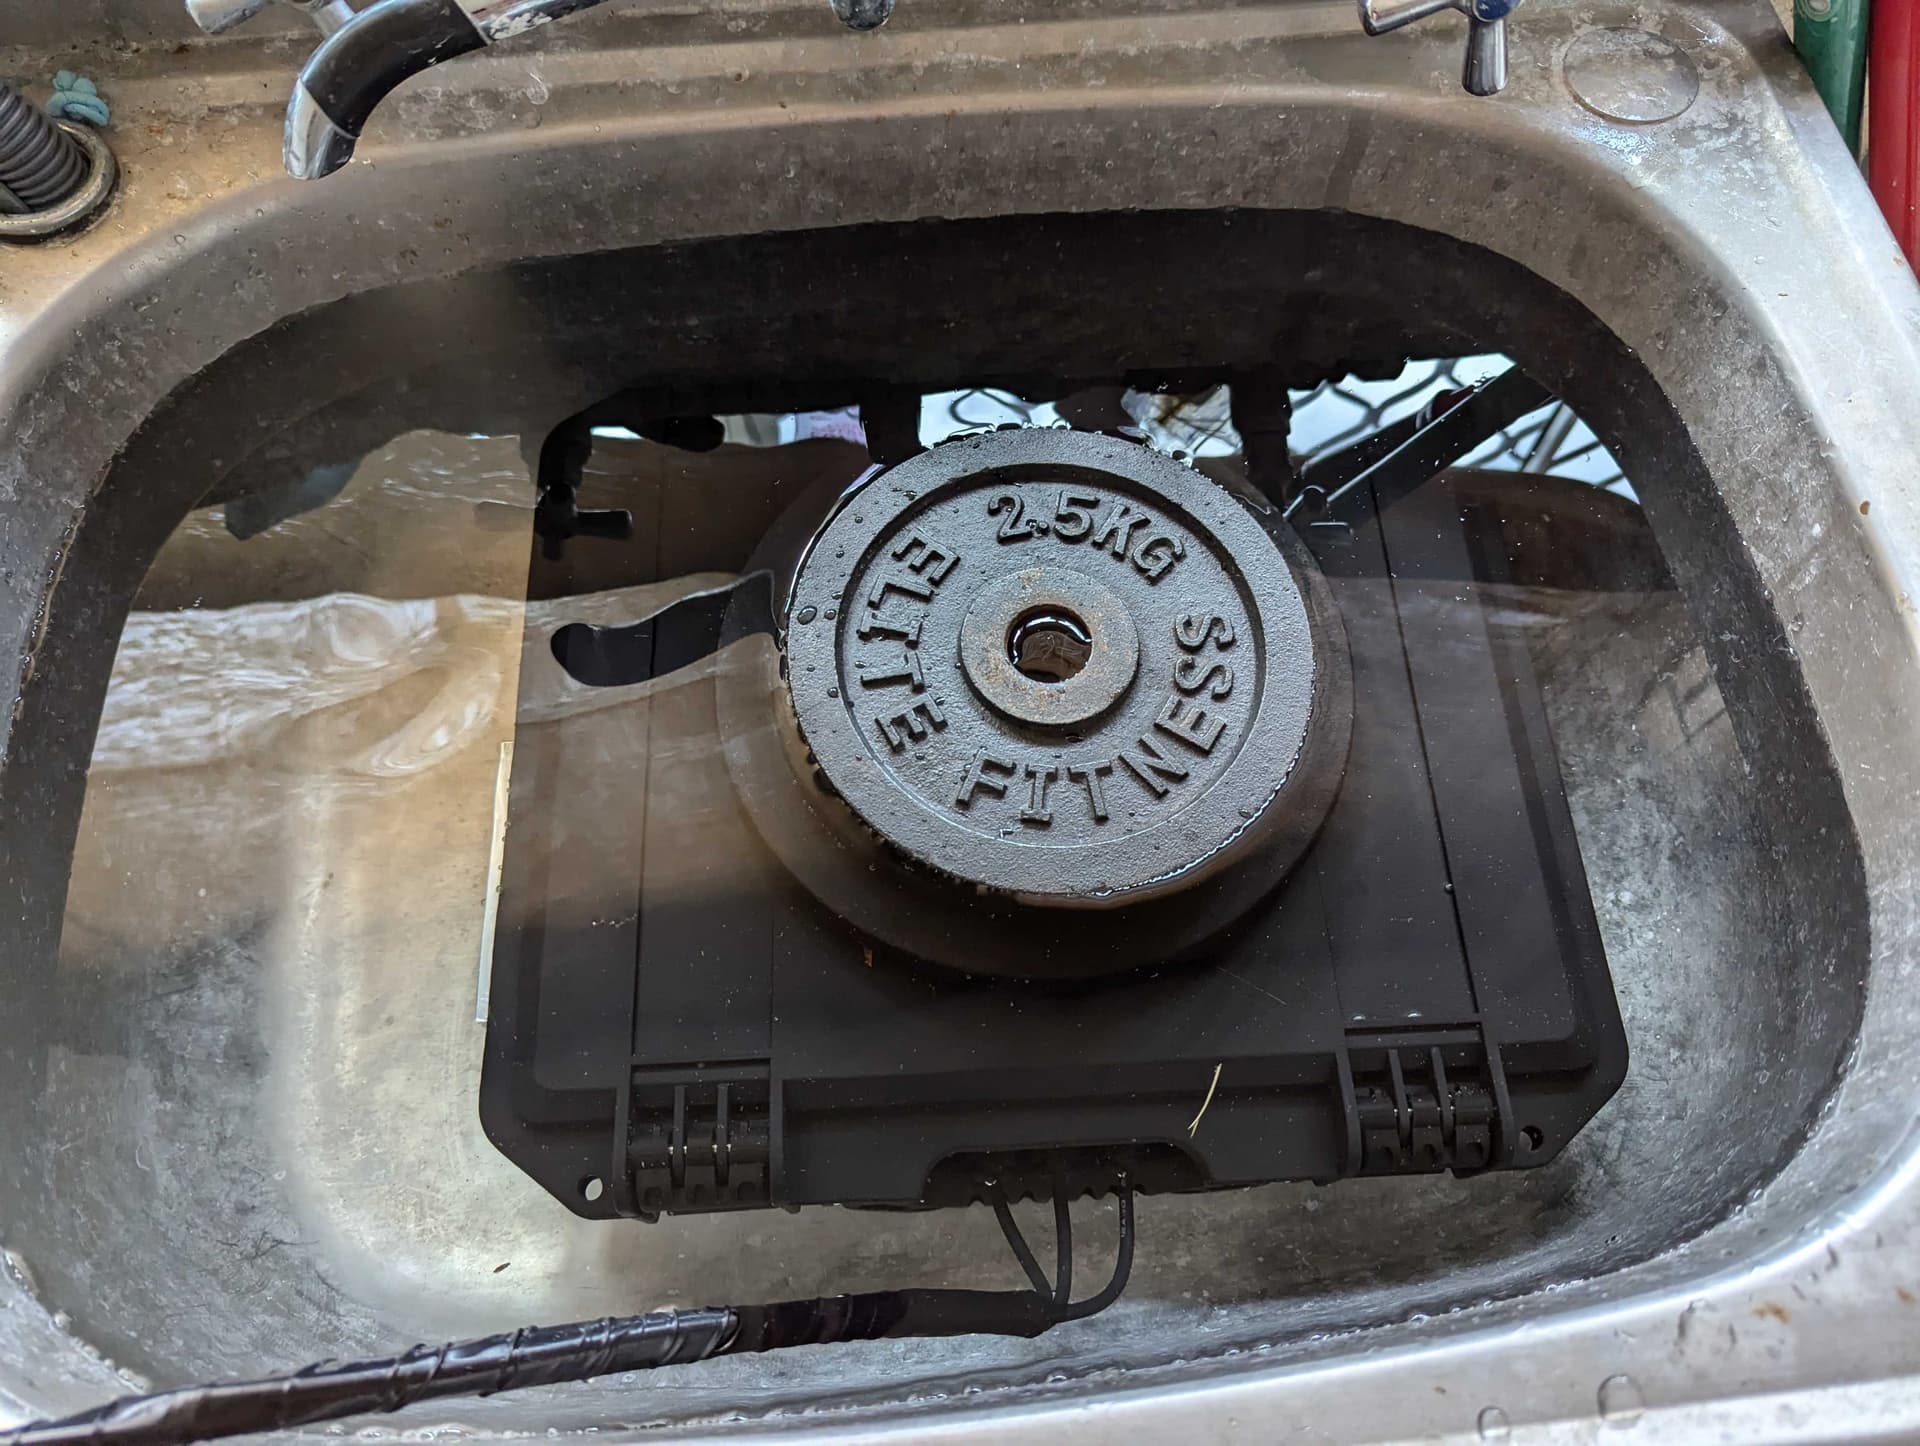
The result was good - no water got in.
The last part was to attach the case to the board. I used mushroom lock tape to prevent the case from moving and 2 straps to hold it against the board:

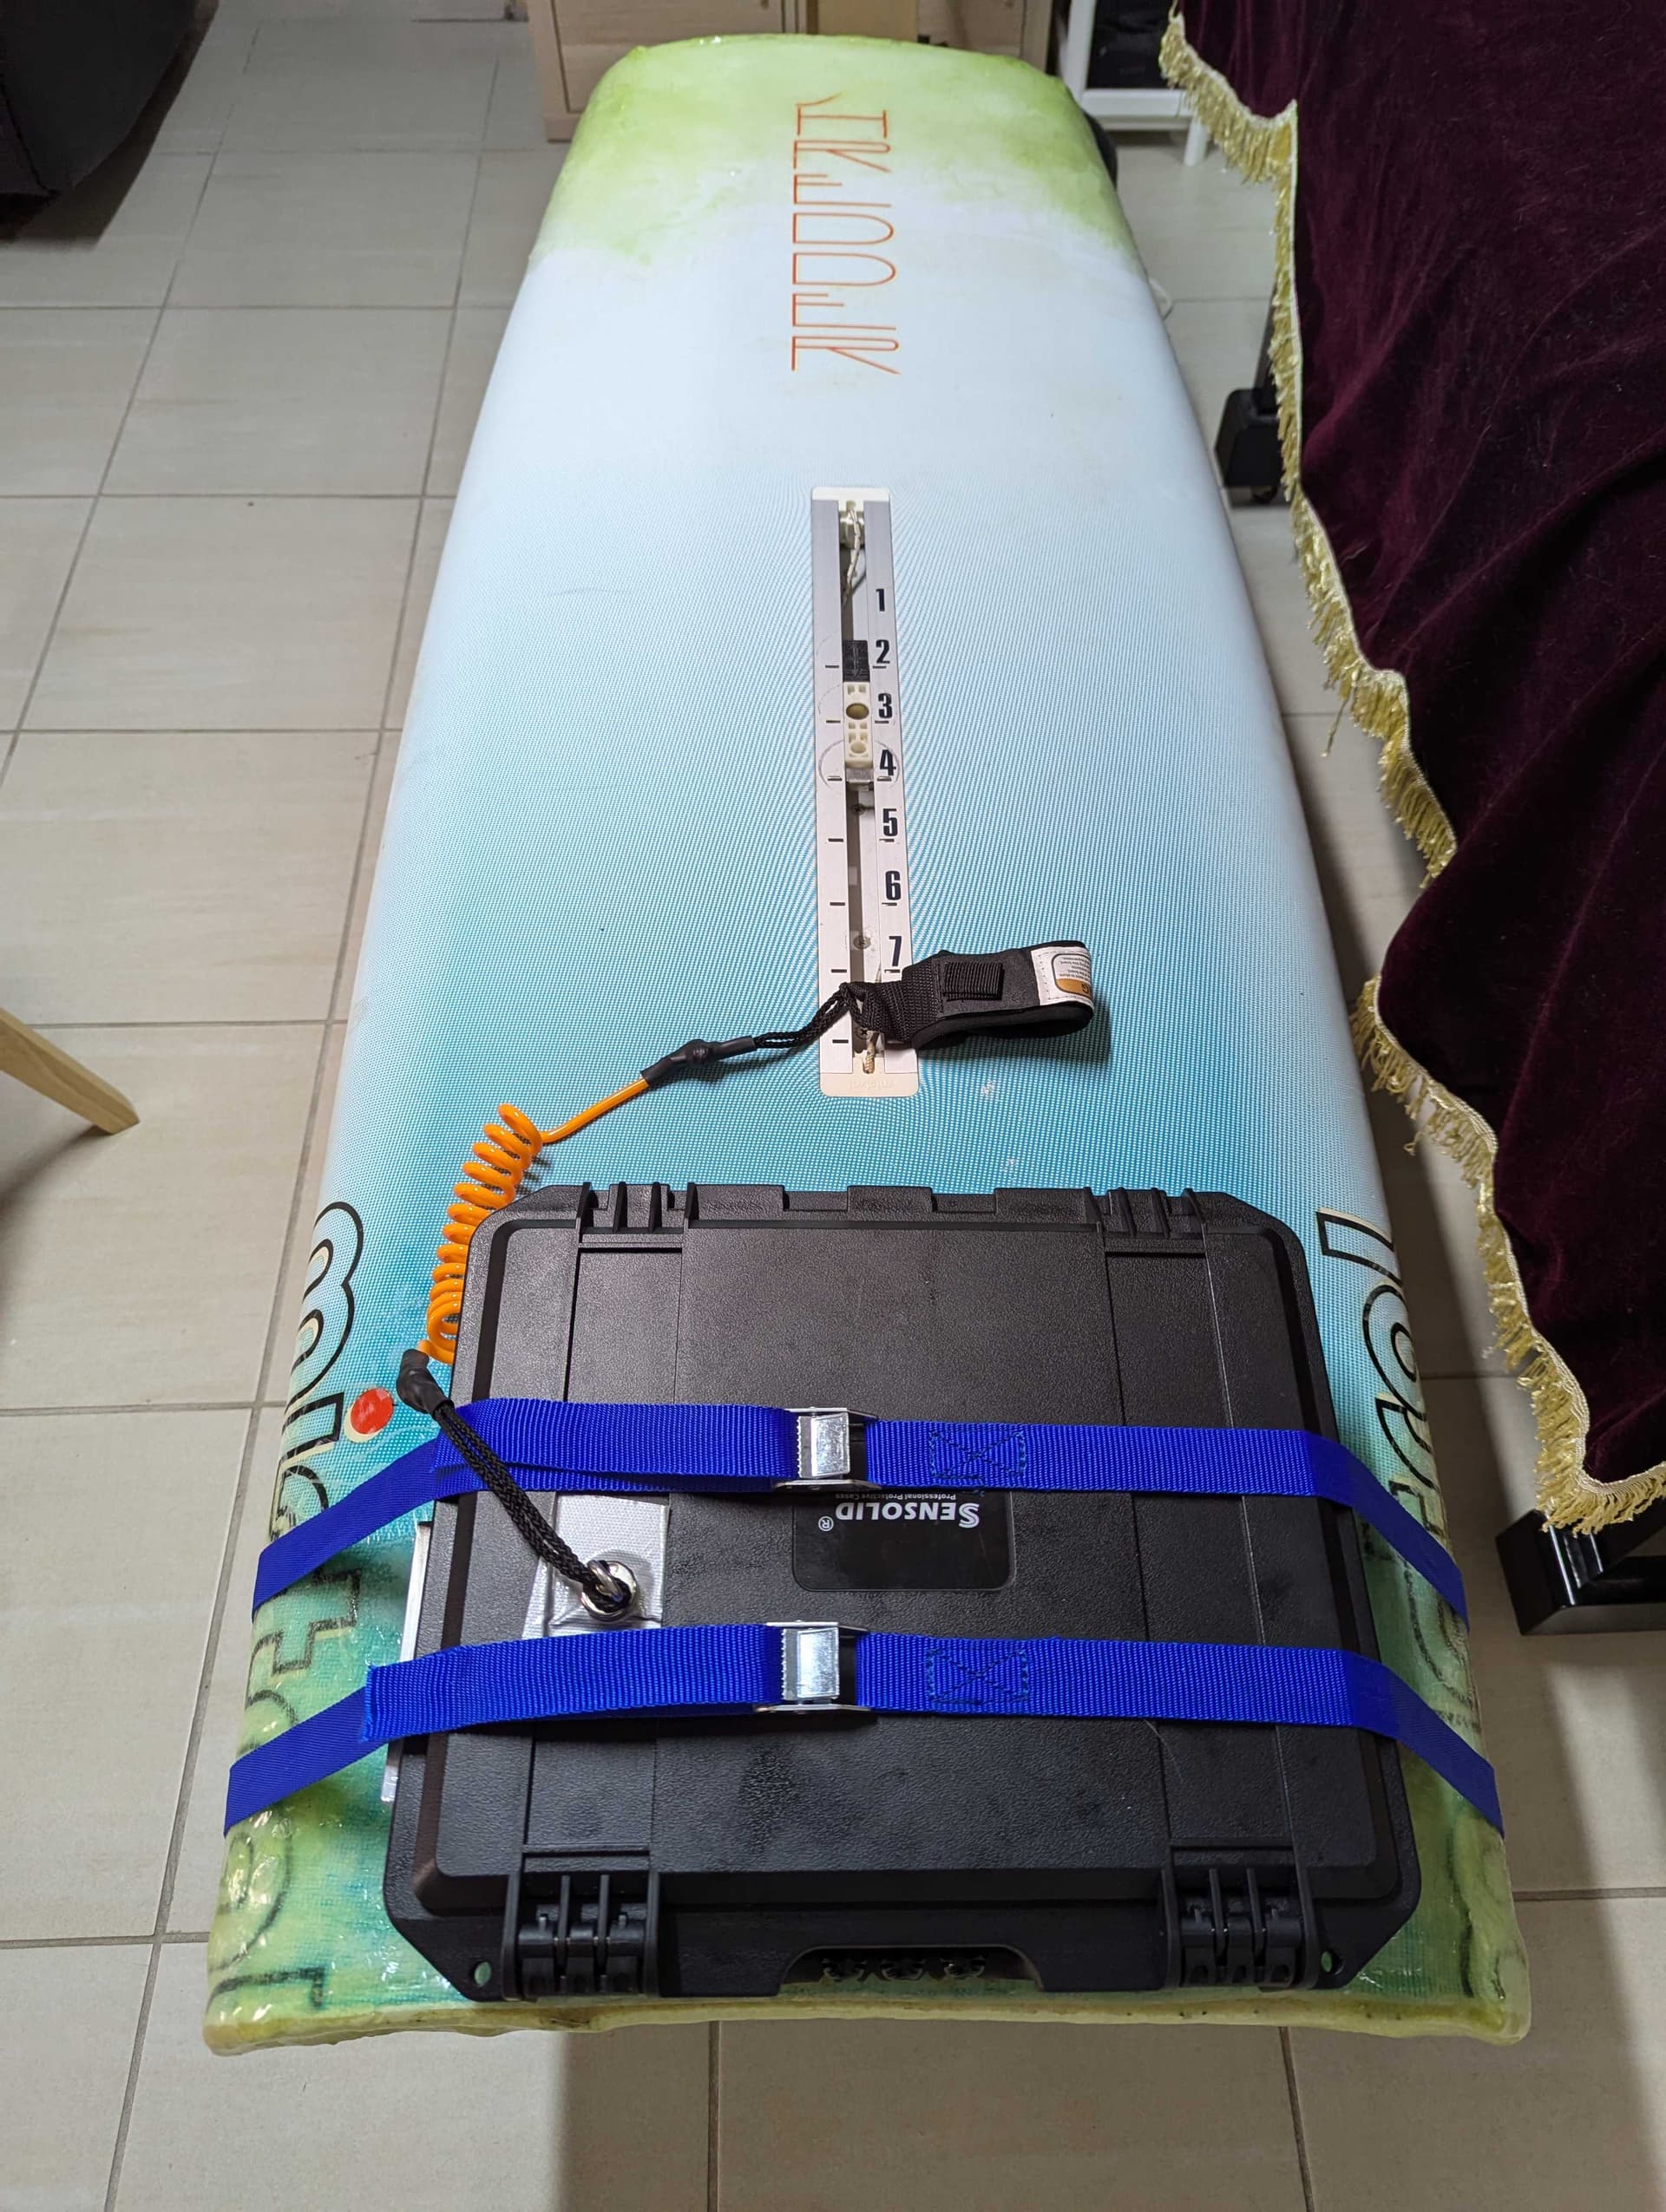
A big metal washer was taped on the case for the magnet.
Now it was finally ready for the first water test:
")