Awesome. Looking forward to hearing how it works. I have been trying the 5065 running in oil and just cant get enough power out of it. Been debating whether to make the jump to a 63mm or all the way up to an 80 (which obviously has a huge form factor). How long did it take to arrive from the time you ordered it?
right now it might be available in small numbers.
How long did it take for a custom order?
Around 6 weeks. If you want one, contact Bruno. I think a small number is available on stock. But let it test me before, so i can tell exact RPM/V.
Just tested with VESC: 95% Dutycycle at 46.3V and 32000 electrical RPM / 7=4571 RPM.
4571 RPM / (46.3V*0.95) = 104Kv in BLDC mode.
With FOC it was 29900 eRPM giving 97Kv.

I also measured the Phase resistance with multimeter and a 20A current source, 1.098V was the drop, so its 55mOhm. VESC generally shows half of the value.
I also tried to estimate the winding area of each phase by measuring wire thickness (0.35 … 0.4mm, 28 wires) and weight (0.25g/cm), each phase has around 2.8mm^2.
To make a plausibilisation, i took the old 6384S 130Kv stator and used it with the same bell and VESC and everything was the same:
37800eRPM BLDC --> 123Kv
35050eRPM FOC --> 114Kv
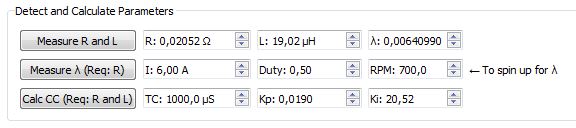
R measured manually 0.98V at 20A, 49mOhm.
No load current at full throttle was almost the same for both, 1.8A.
With these data we can make a simplified estimation of the RPM, eta and so on:
If somebody knows how to estimate better, please let me know
 .
.
3 Likes
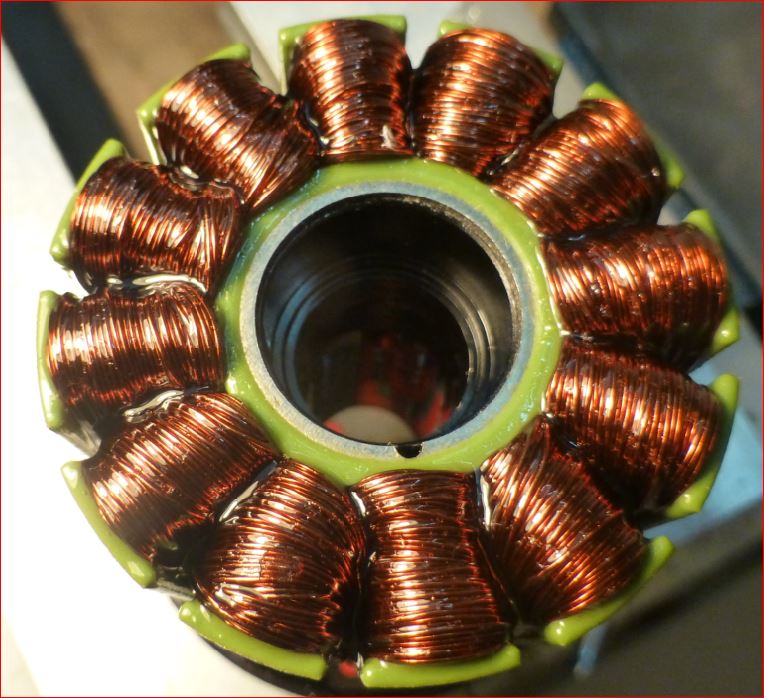
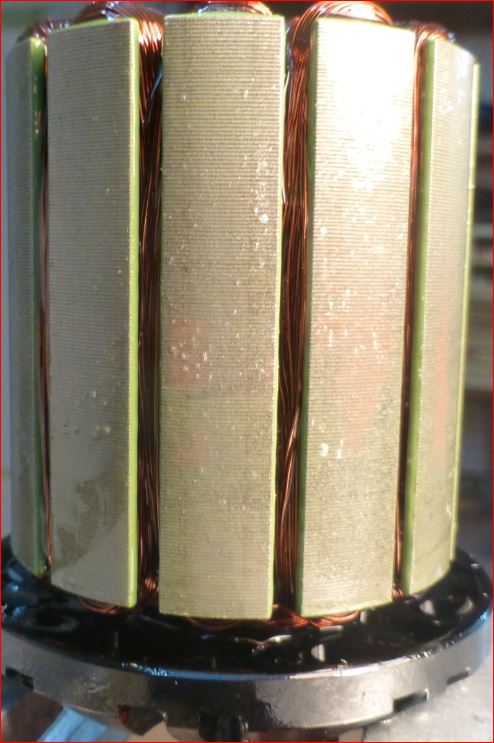
Lets start with the making of epoxied stator.
What we want: Make the stator iron and windings waterproof by filling up all cavities and wetten all surfaces with epoxy.
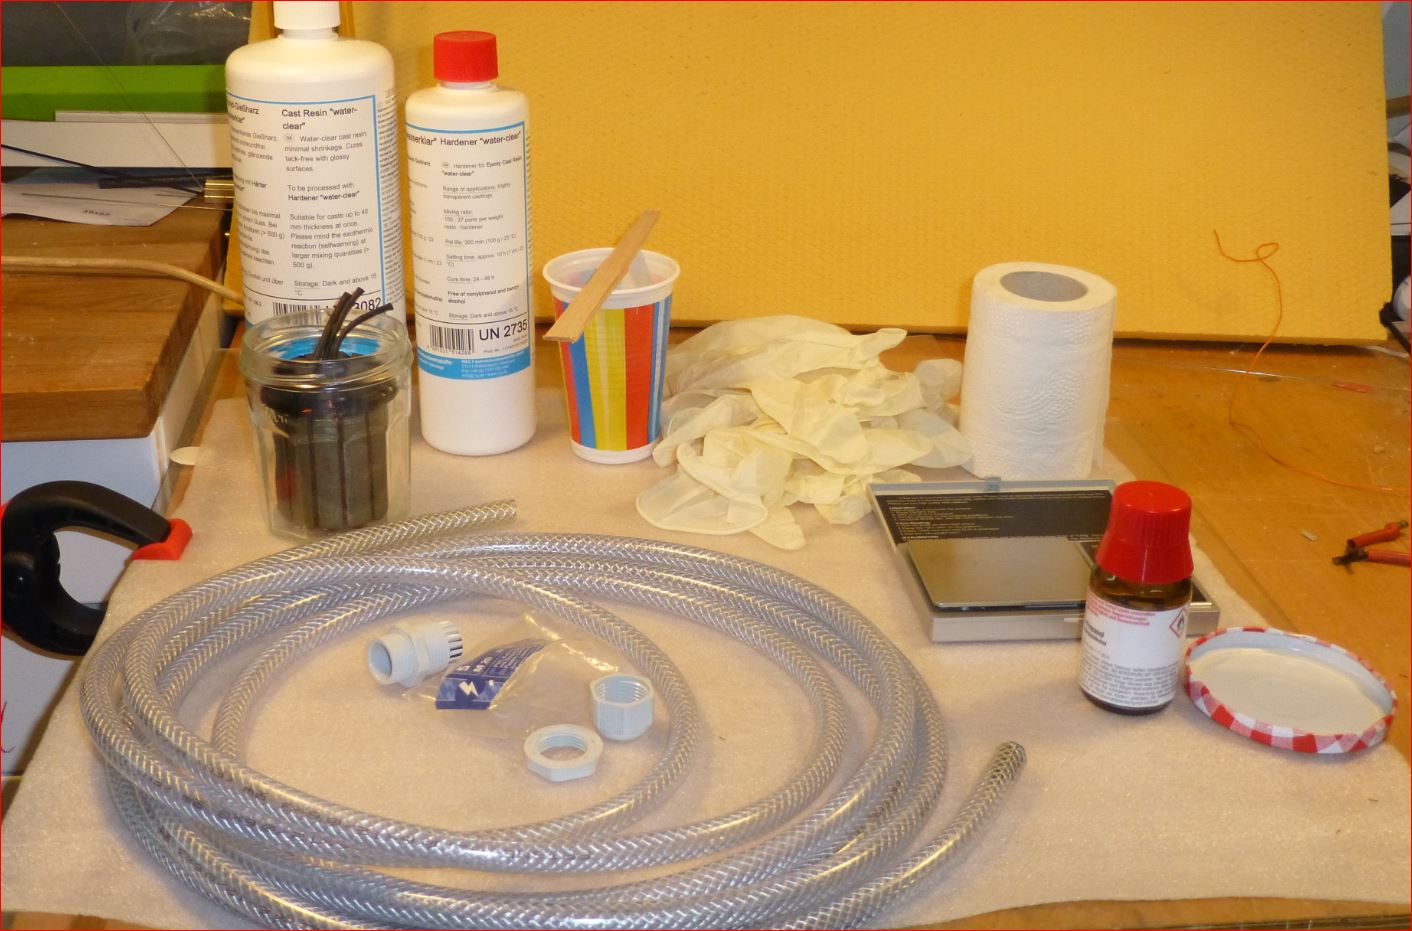
What we need:
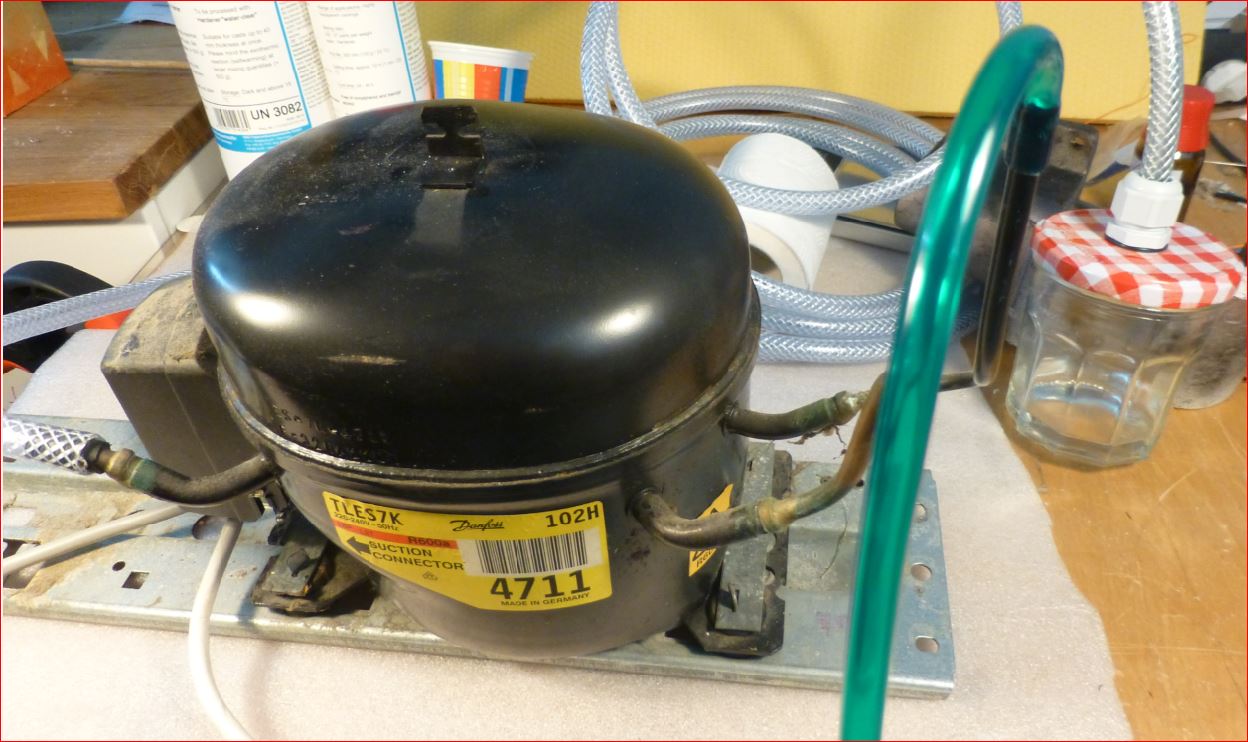
A vacuum source (see above to get some examples),
a vacuum chamber
some hose OD 12mm ID 8mm, a thighting ring with ID 17mm,
Isopropanol 99% (from pharmacy) to prepare the stator
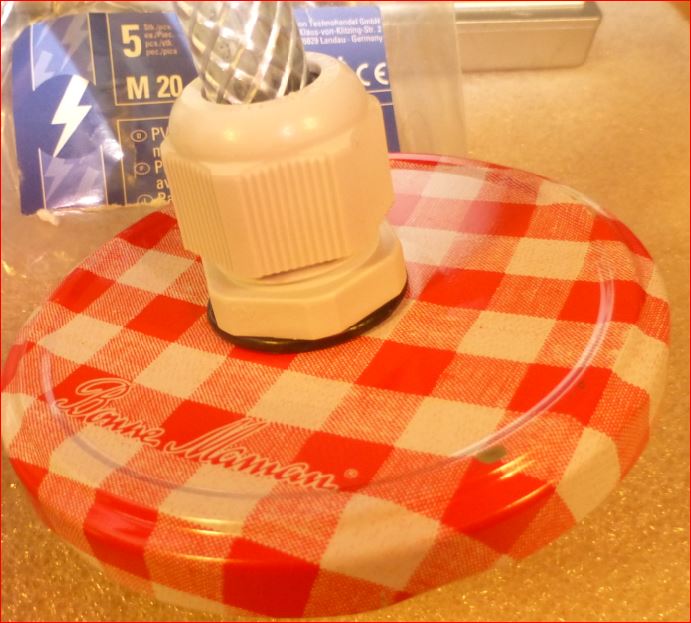
an M20 IP68 PVC cable clamp to adapt the hose to the lid
an electronic balance with accuracy better than 1g (kitchen balance might be too bad, check before use)
some gloves, stirring tool, a one way cup for mixing epoxy,
special epoxy with low viscosity and long geling time like Epoxid-Gießharz WASSERKLAR + Härter W 300 | R&G Faserverbundwerkstoffe ,
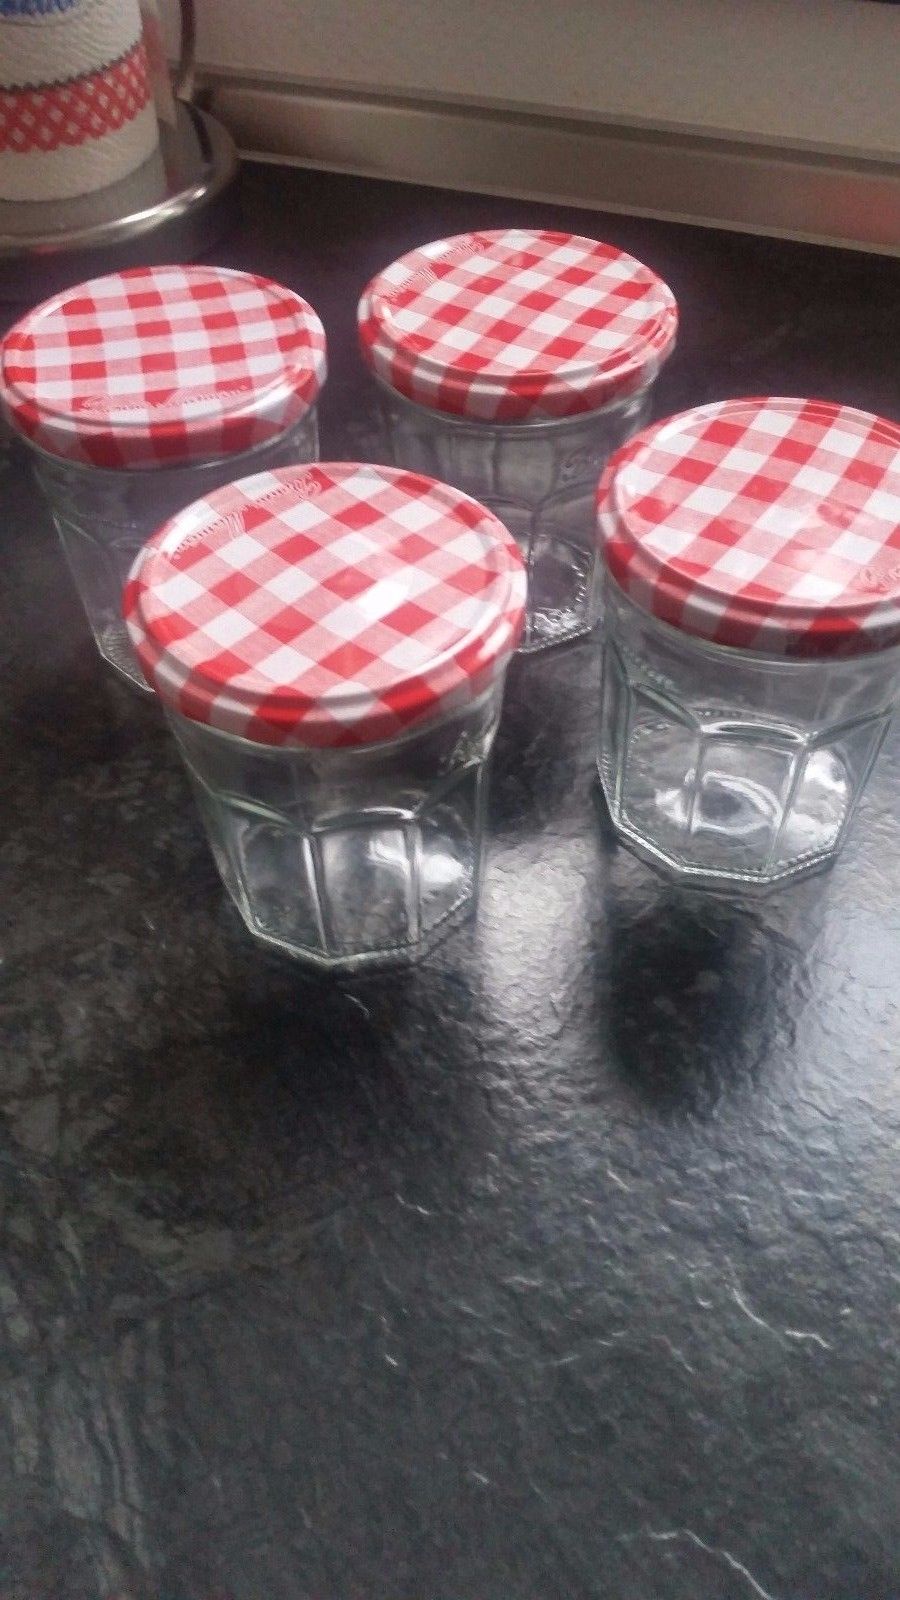
Prepare the stator with Isopropanol using the marmelade glass with the intact lid. Shake and roll it for some minutes, so all grease and oil is removed which might have been used during production.
Pour the isopropanol into an other container, maybe you can use it once more. Do this in fresh air so you dont get dizzy. Use gloves to handle the stator from now on, so the fat on your hands is not getting on the stator. Let the stator dry for half an hour in dry, warm condition. If you want to be absolutley sure there is no water left, put it in an oven at 50°C for half an hour.
Prepare the lid, drill a hole into the center.
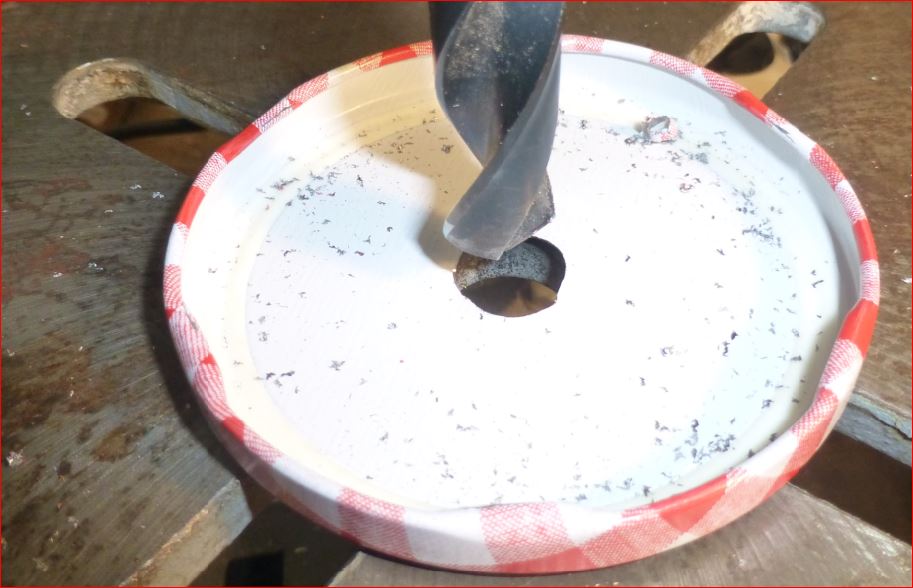
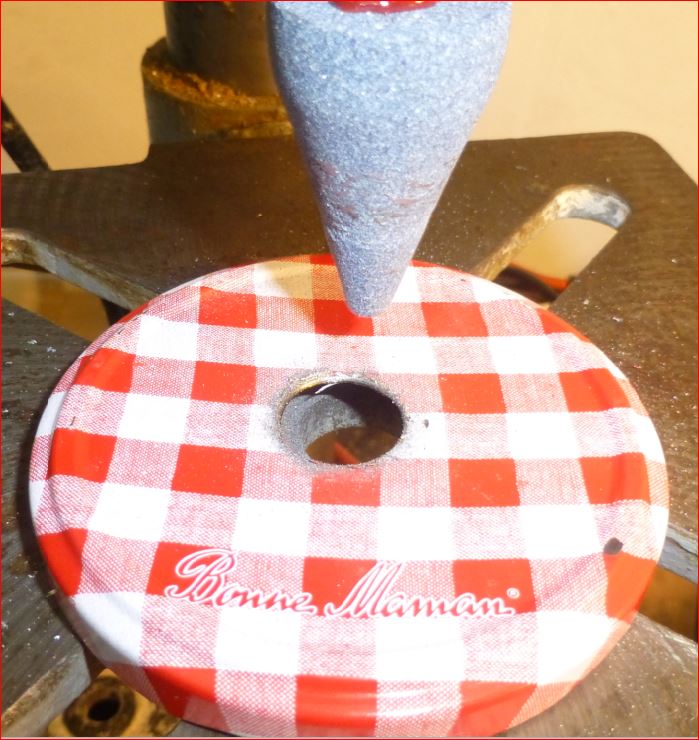
Widen the hole until it has a diameter of approx. 20mm.

Clean the lid with soap and water, let it dry. Mount the hose with the cable clamp. Use a rubber ring for thightening on the outside of the lid, ID 17mm. Do not tighten too much, otherwise the rubber ring is sqeezed out. Do not use any additional washer, this will make it untight.
Now its time to test your vacuum chamber.
You can use some warm water for testing, lets do it!
If it is boiling your vacuum is good.
Dip the cable ends into fluent wax to tighten them against epoxy.
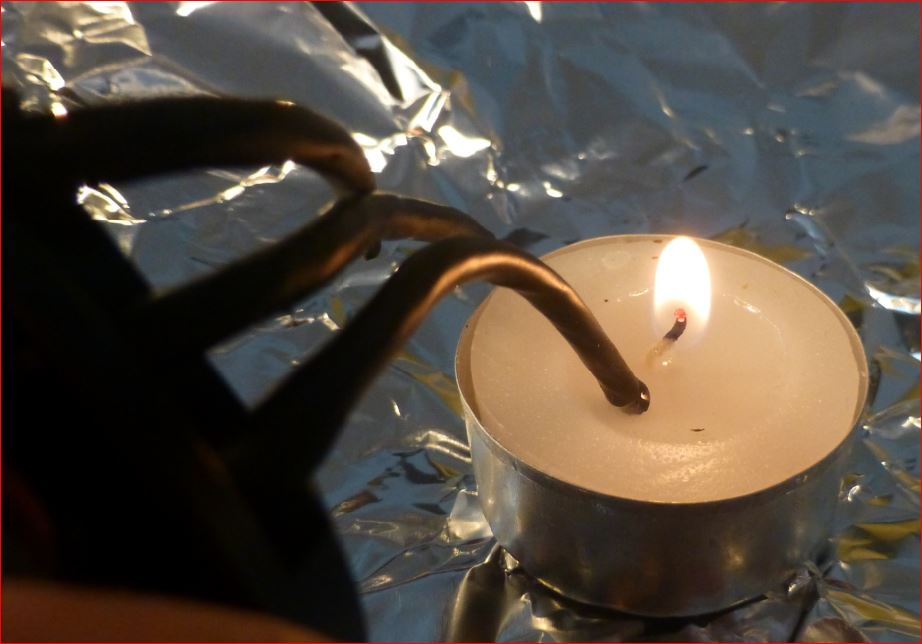
Apply heat shrink you can pull off again later if you want, i use it to prevent cables being glued together forever. Close them by using a gripper while they are hot.
Use some larger heat shrink tube to gather them together.

Wear old cloth and put gloves on, use tissue to wipe away dripping epoxy.
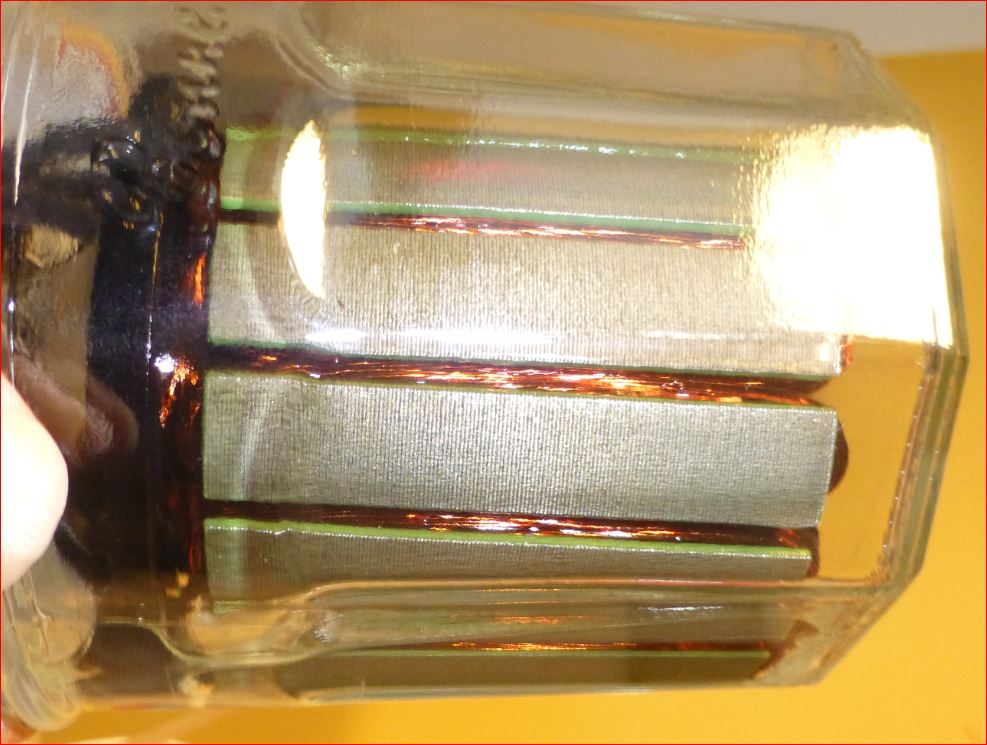
Now mix the epoxy, i needed 150g, use 170g for safety. With the superprecision balance i can only measure up to 100g, so i needed to mix twice. Use a calculator and make sure you get it right! Some balances shut off after some time, make sure you know the weight of your empty cup. 1% accuracy for the mixture is good enough, dont panic. Mix and stirr it at least two minutes. Pour the resin into your vacuum chamber where the stator is already placed. Note the time, 16:20h. From now on you have 5 hours pot time and 10 h until the geling starts. Plan for the next 10 hours.
Make sure your vacuum chamber has a good stand, put on the lid and let the hose stand vertically. Use a long hose and make it go in spirals so no epoxy can reach your fridge compressor. The epoxy will be foaming when you apply vacuum and climb up a bit into the hose. Let your fridge compressor run until you see no bubbles coming out of the stator any more, which is normally taking 60 minutes. Wave the vacuum chamber around to let the air trapped beneath som cavities to get up and out. Now, do not switch the compressor off, it might take a long time until you can restart it because of the so called clixson, which is a device modeling the temperature of the compressor. You might use a fan to cool the compressor and the clixson. If the compressor switches off, dont panic. Cut off the power, let it cool down, normally after latest 30 minutes you can switch it on again.
Instead open the vacuum by pulling off the hose from the compressor. Let rest 15 minutes without vacuum applied, so the epoxy is sucked into cavities and can distribute.
Now apply vacuum again until no air bubbles proceed, which is normally taking less time than in the first run.
Do this over and over again until there are no air bubbles visible when applying vacuum.
Now you can decide how to proceed and plan your time. You can warm it up inside the chamber to speed up the process but be careful not to miss the best time window for taking out the stator and hang it up for dripping.
Flip it over from time to time to allow a homogenous thickness distribution of the coating.
Clean the bearing seatings with tissue from time to time. The threads are not endangered you can recut them with a tap after curing. Maybe you want to clean the leads heat shrink tube as well.
If you are satisified with the thickness use a hairdryer or an oven to warm it up to 50-80°C and speed up geling so the resin cannot run away and thin out the coating. Keep it at this temperature for the next 10h.
This was almost too late! I keep it at room temperature after it was heated in the chamber.
Your comments are welcome!
…
After 4 hours curing i pressed together all surface irregularities simply using my gloves.
17 Likes
Very nice writeup. Just a small tipp: I place Epoxy in a styrofoam box with a hot water bottle to cure it in the winter.
I should have done degassing before putting the stator into the epoxy. Instead of pouring the epoxy ungassed over the stator.
After cleaning with isopropanol i should wait much longer at elevated temperature.
Hi Powerglider!
What do you want to say with this post? Did you smoke up the motor, or does it just look shitty?
It only took much longer to vacuum it. The fridge motor was running for 5 hours and there were still coming bubbles. Also repeating several times athmospheric pressure and good vacuum did not help. Also there are some bubbles visible at some edges, nothing dramatical. I was just a little frustrated because its the 3rd motor, and the others went better.
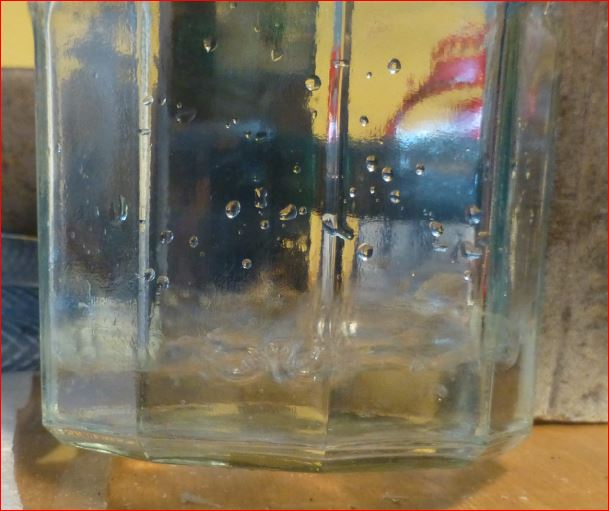
So i made the test in salty water in a stainless steel cup:
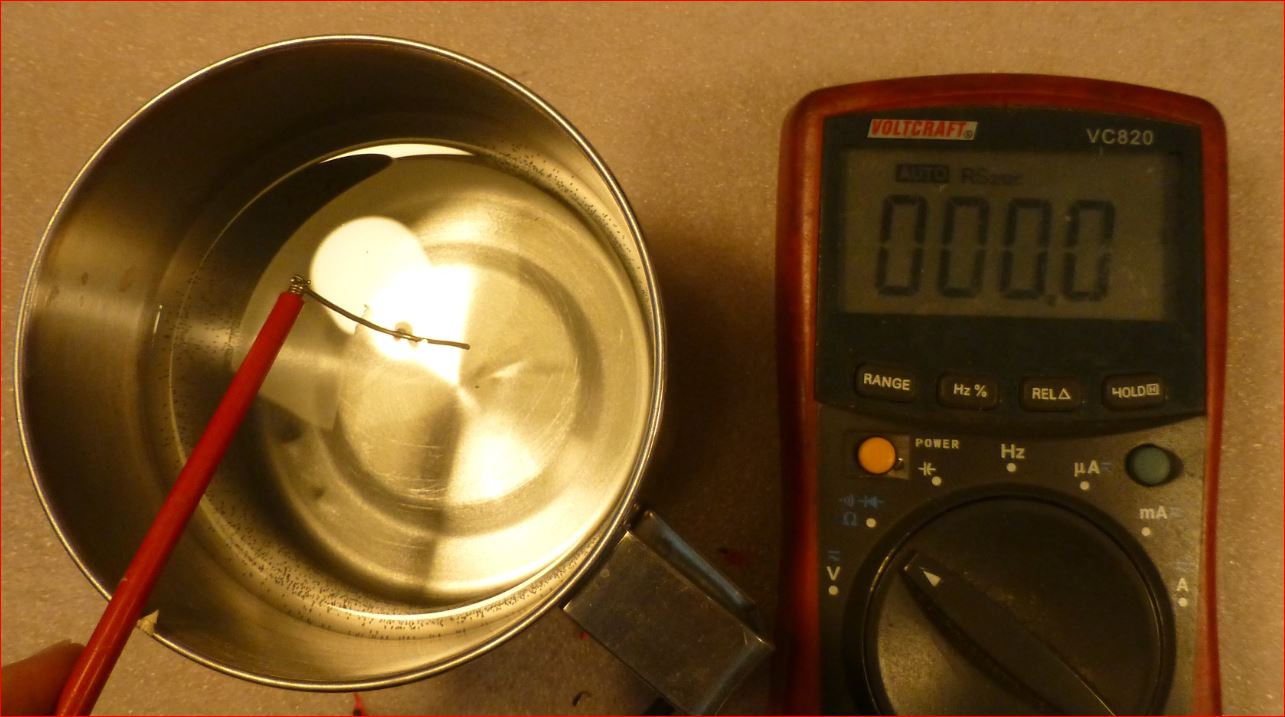
Such a little surface on one side gives you a reading of 0.0Ohm already.
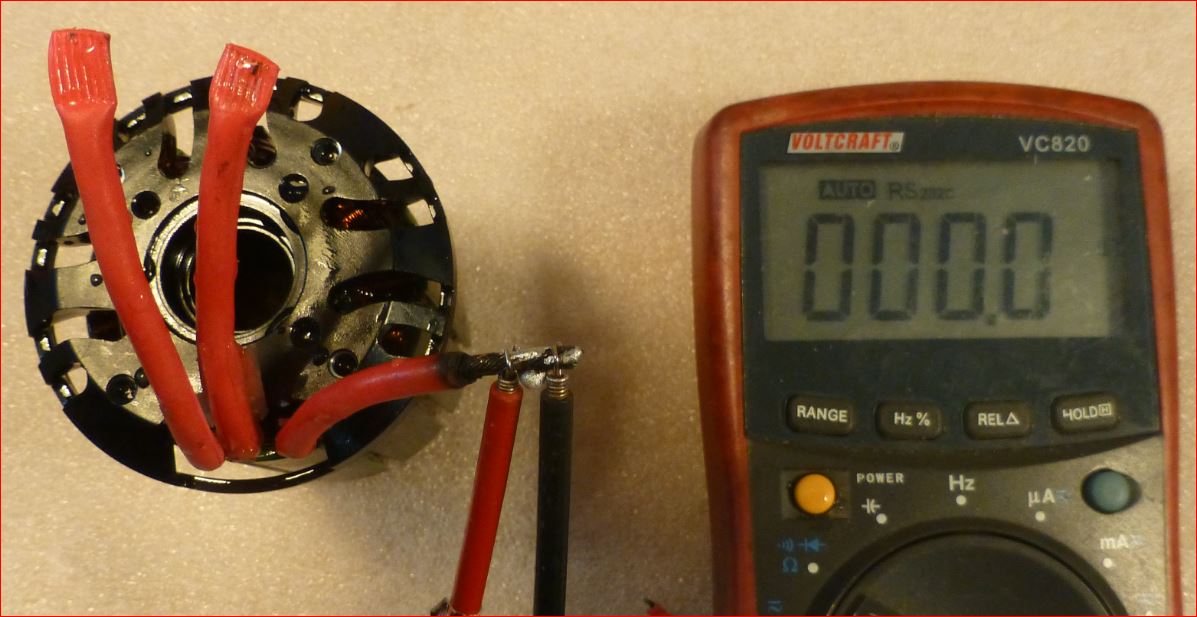
The provisoric terminal is checked to be conducting well.
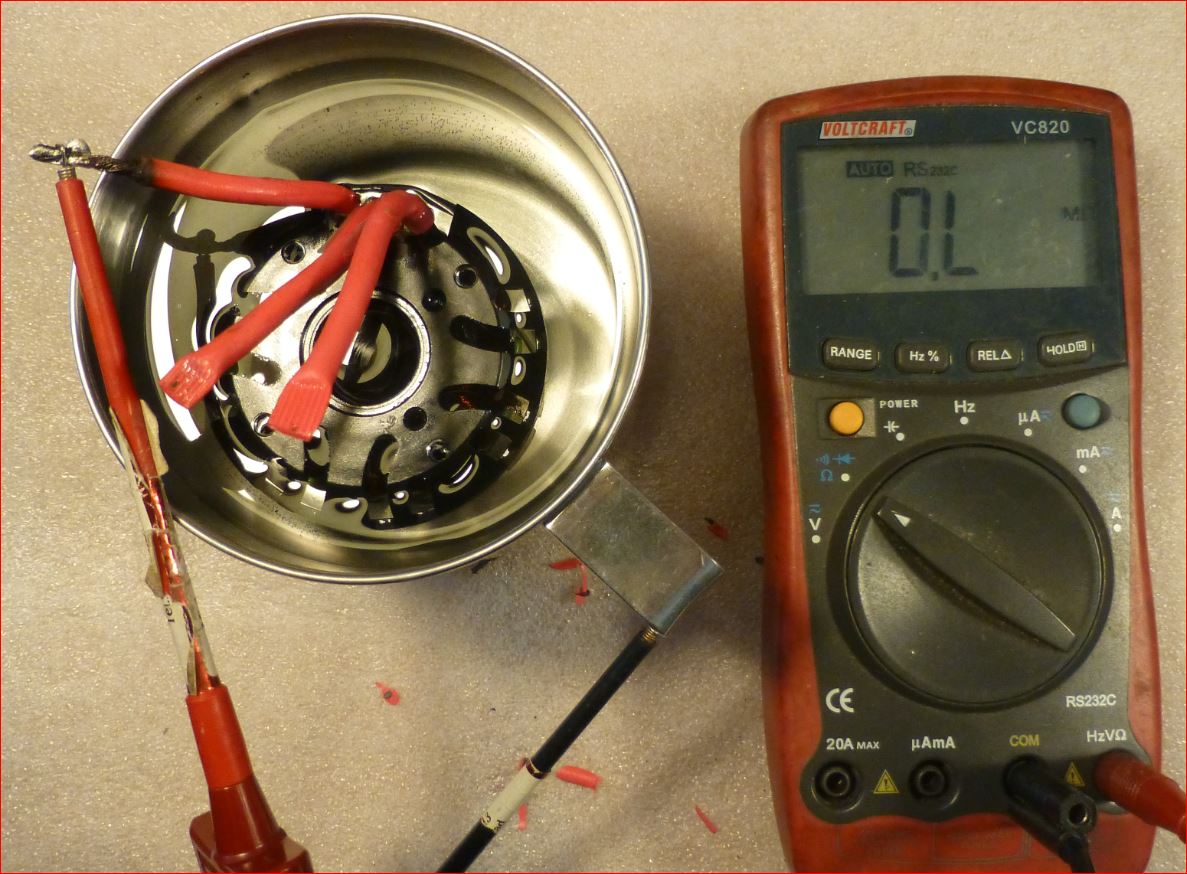
SUCCESS! Resistance of winding to ambient > 10MOhm !
6 Likes
Hi @PowerGlidern Thank you very much for such a good and informative explanation and pics. What do you think about corrosion. stator and magnets - Should they also be epoxyed?
What do you think about this material:
https://www.ebay.com/itm/MG-Chemicals-832TC-Epoxy-Black-Thermally-Conductive-Encapsulating-Potting-Com/120776114981?_trkparms=aid%3D111001%26algo%3DREC.SEED%26ao%3D1%26asc%3D20160727114228%26meid%3D1438d8bc892148fdb9ecd79929946097%26pid%3D100290%26rk%3D3%26rkt%3D4%26mehot%3Dag%26sd%3D200853086829&_trksid=p2060778.c100290.m3507
It is thermally conductive. I saw it in ROV community. Though it is expensive and the question is the difference of regular epoxy and this one is really significant.
Maybe next weekend i start the next photo story with epoxing the rotor.
I use standard epoxy with 40 minutes pot time. Thermal resistance barely plays a role for the rotor as the water is touching it from both sides and it has high velocity and it is not producing relevant heat.
Congratulation to your test results. As an idea you could, in my opinion, gain even more confidence in your setup by altering your way of mesuring isolation resistance. You could apply your operating voltage, say 50V, between your windings and the container and measure the current. This way your test voltage is closer to your usage scenario compared to the few volts of the multimeter. This might be overkill as you probably still are far below the breakdown voltage of your epoxy layer. Even more overkill, but interesting, would be an isolation tester for electritians 
By the way, how did you make your salty water? I guess just dissolve as much salt as possible. I would like to do similar tests with my Outrunner (claims to be sealed, i doubt it is sufficent), maybe even immerse it for a longer duration.
1 Like
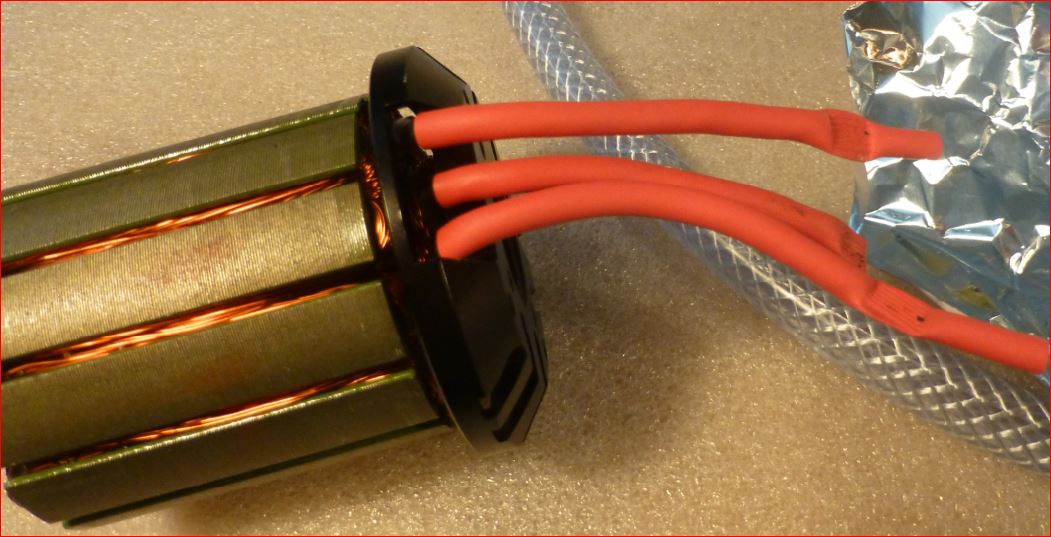
This i did with two motors, there was no effect. Next step will be to build an interface between these stubs and the ESC. In my case its usually a long way with more than 2 meters cable, 3 phases and several epoxy sealed soldered connections. Thinking about simplifications…
I use a cheap insulation tester that is normally used to test electrical motors for bad insulation.
2 Likes
Just ordered my powerglider motor. I will be testing this one with submerged dielectric oil cooling. I just finished testing the alien 5065 outrunner and maxed it out around 2000W. Hoping this 4000W motor will do the trick!
Depending on your application you should order also a stainless steel shaft 10mm, not hardened or only thin surface hardened and precise. E.g. to mount such prop is ideal:
http://www.ebay.de/itm/Aluminium-Propeller-fur-Aussenbordmotor-Bootsmotor-Ausenborder-Neu-180-mm/252493619355
You can cut it down in a lathe.
Let it run backwards and turn the tool around to reduce gear load. I had luck, a friend lent me his aluminium cutter.
I plan to cut out part of the hub and put the motors rotor end directly into it. Print out two parts to make the hydroflow continuous from turning rotor to some nose end. Include the water cooling outlets into it, so no sand can come in (if standing still).
2 Likes
Nice, love the pragmatically use of the lathe!!!
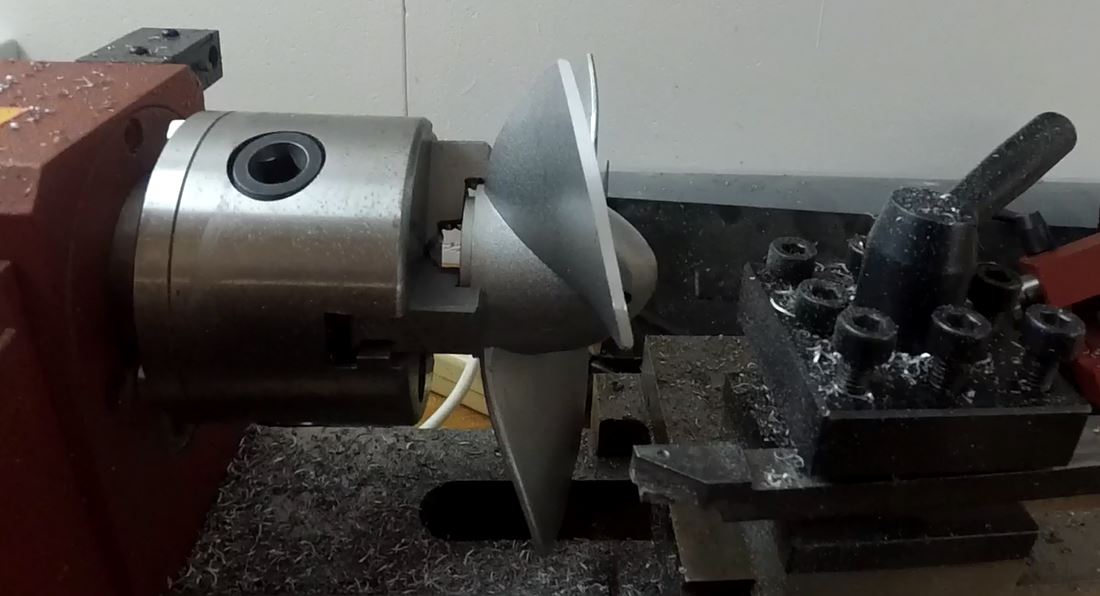
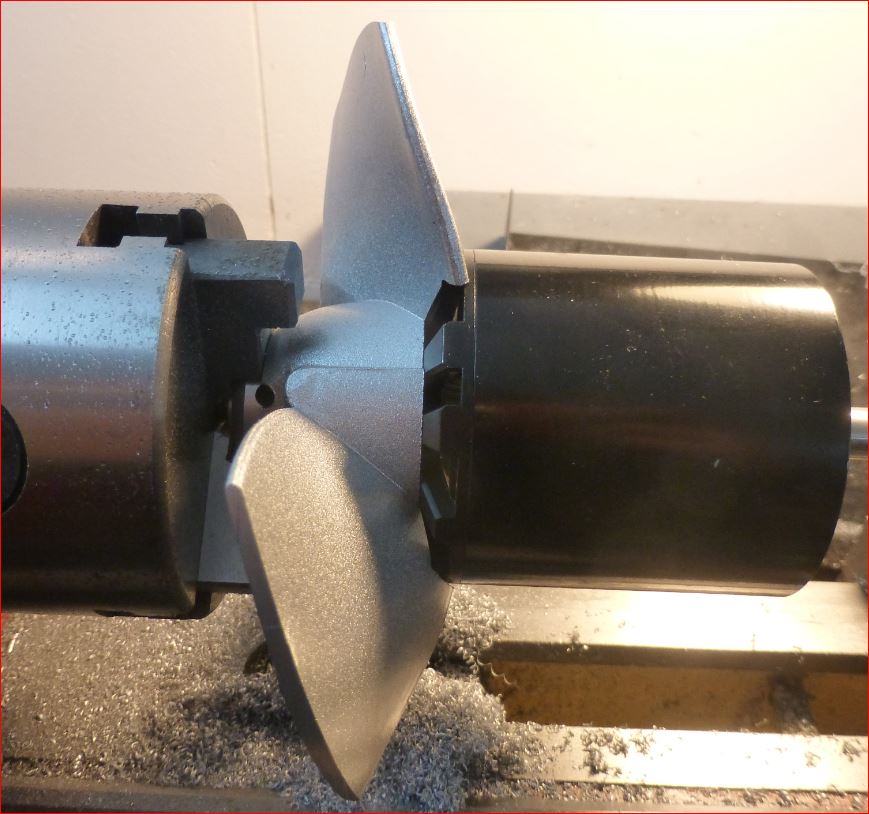
Thanks Hiorth! Here come some more pics about lathe!
To clamp the hub from other side i turned some adaptor.
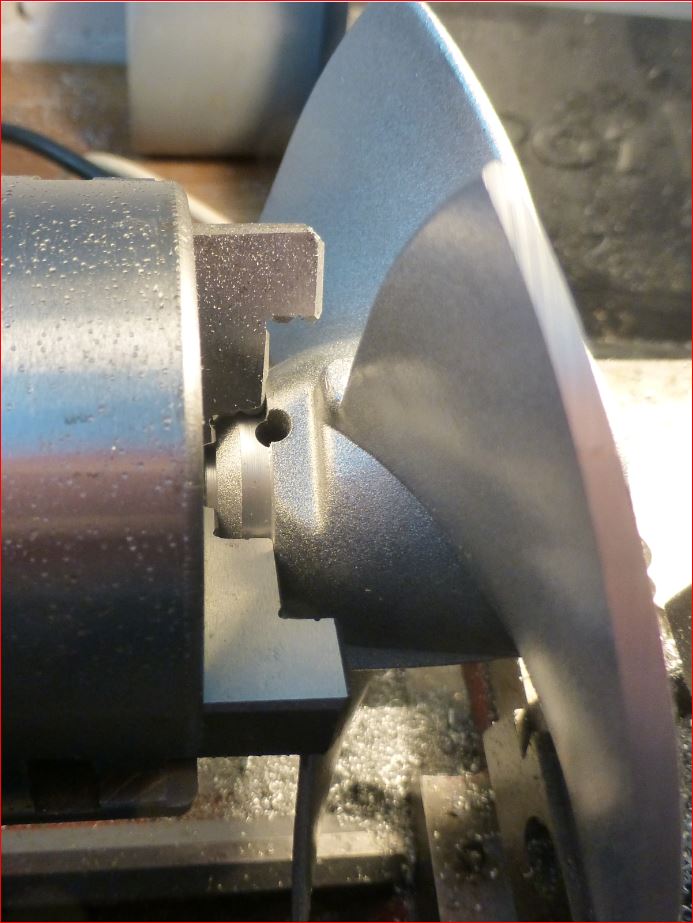
Now this prop is really short.
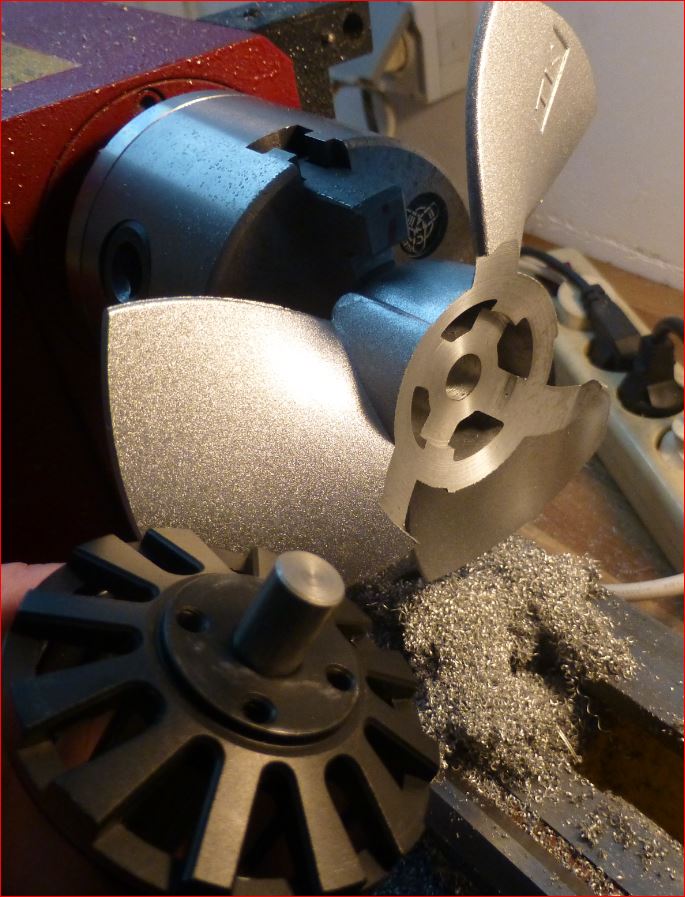
Test the rotor fitting to props hub.
I managed to make the spinner from one part 3D printed with some support.
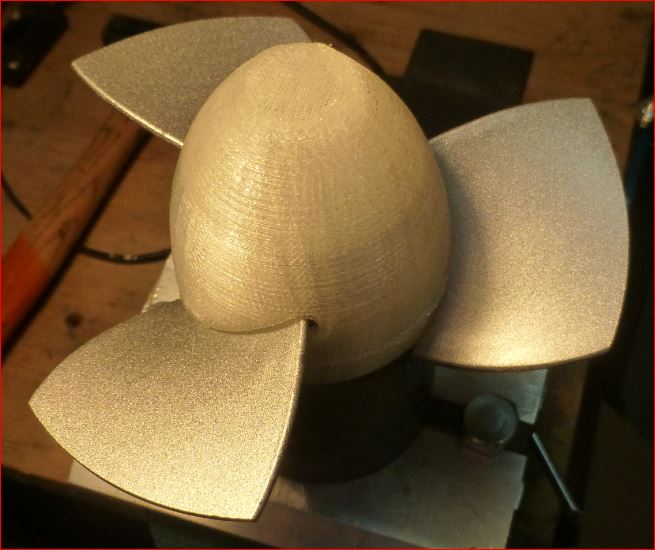
I plan to fill this with epoxy. We come back later to this.
First i have to epoxy the rotor magnets. You need to tight both ends of the rotor. For the inner part i use a rubber ring, R-32 ,ID 50, SD 3.55mm which i place inside the rotor and push it as near as possible to the rim of the rotor. Its a little big, so it sits very strong. This is the 4th rotor i am making, and they all worked perfect at that place. Use aceton or isopropanol to take away grease from the rubber.
Other end is also rather simple, i used some rings made of solder bobbins which i mount with tape to the rotors open end. This time i had no bobbin over, so i printed the part.
For this is use a ring of outer diameter 63mm, ID 53 with a kind of emergency reservoir.
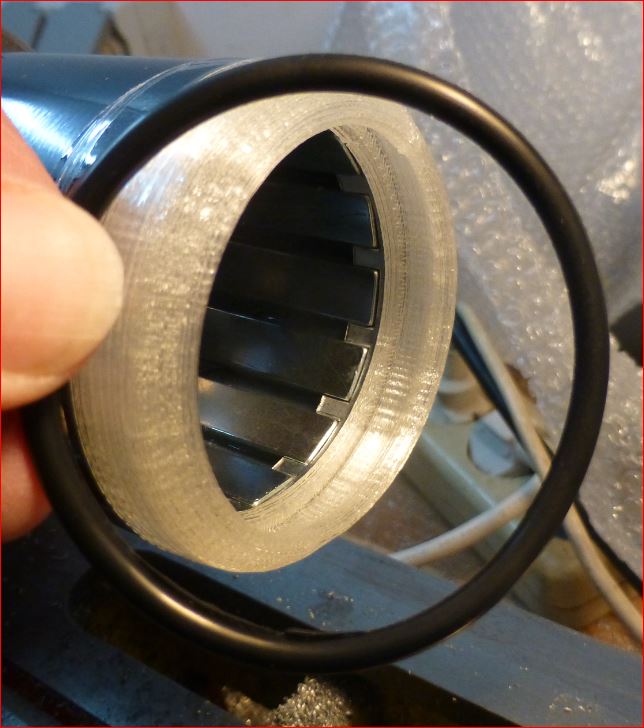
This reservoir allows you to not overfill the rotor with epoxy, if you overfill the abandon epoxy will run into the reservoir.
I used 25ml without overfilling (hope it was enough).

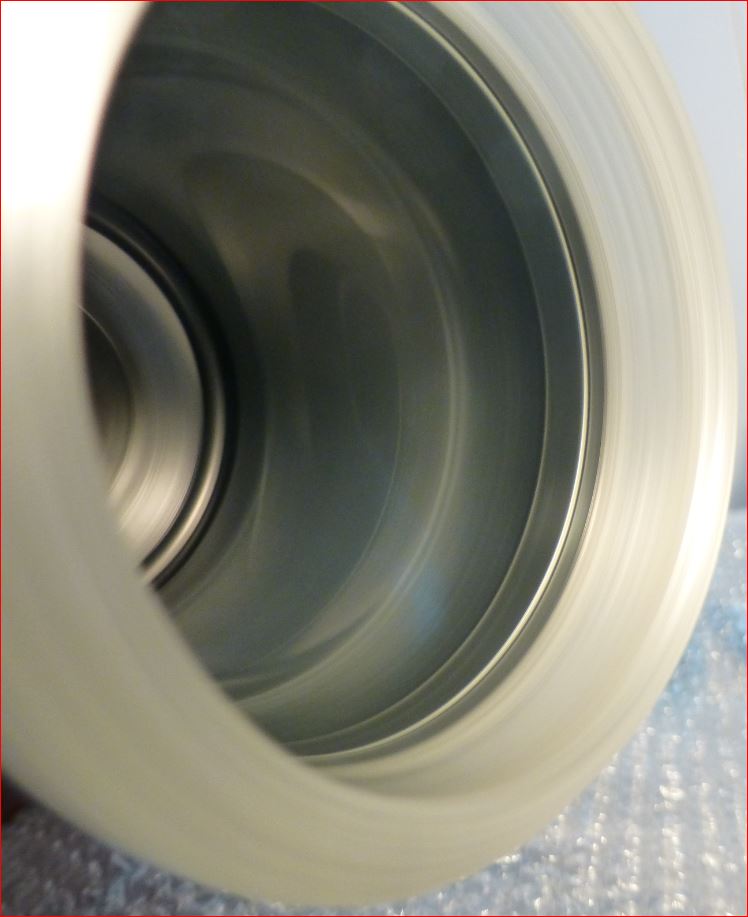
Put the tip of the syringe into the middle of the rotor and carefully dose the epoxy ml by ml while rotating at more than 1000RPM. In the end you should not see any fragmented reflexions. Never stop the rotation! If you have a power outage or stop, be very careful, make sure no epoxy dripped over the barriers and start from low RPM, otherwise the epoxy might get on you! For this reason i do not mount the axle while epoxying. If you stop, the epoxy drips on the axle and it will spray if rotated again. Avoid anything which could cause a mess.
I use 40minute pot time epoxy.
I let it run at 1250RPM two hours. When it starts to gel i reduce to 300RPM or so and let it run for several hours. If you want to speed up by warming, you have to be very very careful. The tape which tightens and holds the ring is temperature sensible and can get loose if heated by e.g. hair dryer. The epoxy will be sprayed over you and everything around giving everything a new finish. If this ever happens to you, dont panic. Let the epoxy drips where they are, do not try to get it out of your hair or cloth, you will only worsen things. Let it just where it is until its almost hardened. Than brush it away. So i will not warm it any more, but just wait and listen to the howling lathe.
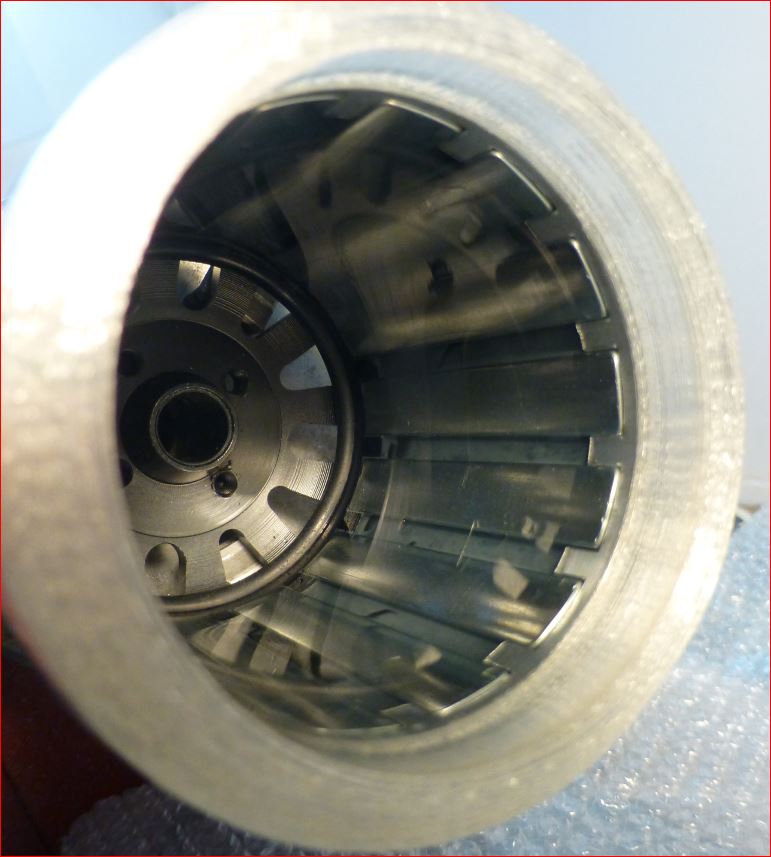
i am happy!
6 Likes
Great tutorial! @PowerGlider, why do you use so long time curing epoxy and not 5-20min one? (Suppose to shorted the overall time of the motor epoxying)