I wanted something with some power. Something capable of at least 10A. I run two 6s ~24Ah batteries in series so a dual-channel setup that lets me charge/ balance both batteries at once was a must. I also wanted something fairly affordable as high power chargers and power supplies can get pretty pricey. I also am too impatient to wait for stuff from China so if I could find everything off of amazon then BONUS!
Here is what I came up with:
All in it cost me about $170 to build.
Super easy to assemble and build.
-Everything can be had thru Amazon Prime.
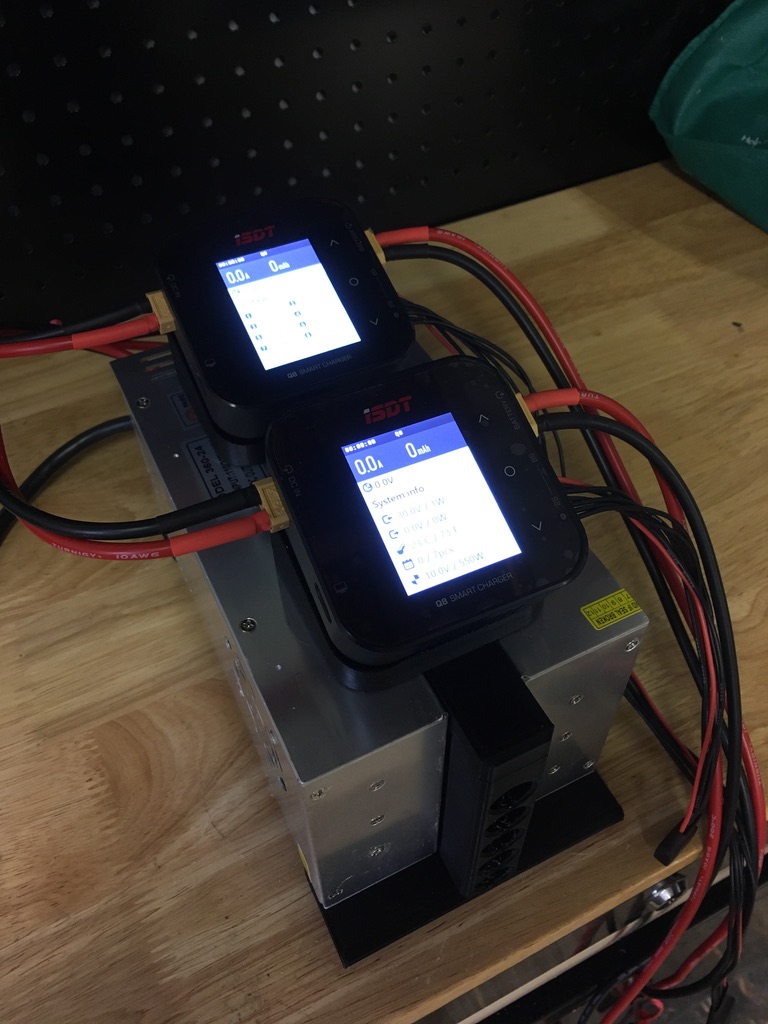
Capable of charging at 15A continuous PER battery, 30A total (chargers capable of 20A each but might toast these power supplies). It RIPS (to me at least)
Can handle up to 8S (watch your currents and stay within power supply rating).
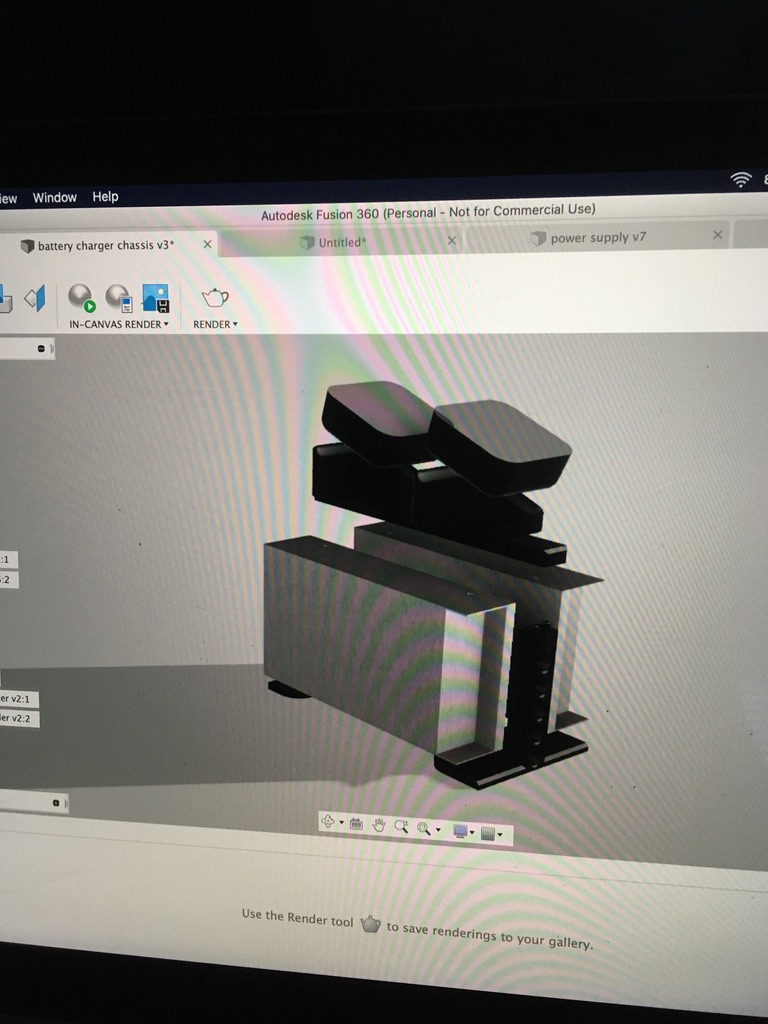
a 3d printed chassis to hold everything and designed to allow for proper airflow to all four fans (1/PS, 1/Charger) Fusion
a power cord (homedepot)
-DIY power and balance leads (you will need to make/buy your own since the chargers don’t come with input/output or balance leads)
Airflow thru both power supplies is drawn in from holes in center portion of the chassis. The hot air is blown out of either side. Make sure you note PS fan orientation when assembling and make sure fans are on outside. Chargers are tilted at an angle so that hot air from the one in the front doesn’t blow right into the intake of the one in the back.
8 screws hidden under the chargers and underside of base thread into the PS and sort of sandwich everything together. I used stick-on velcro to attach the chargers to the chassis.
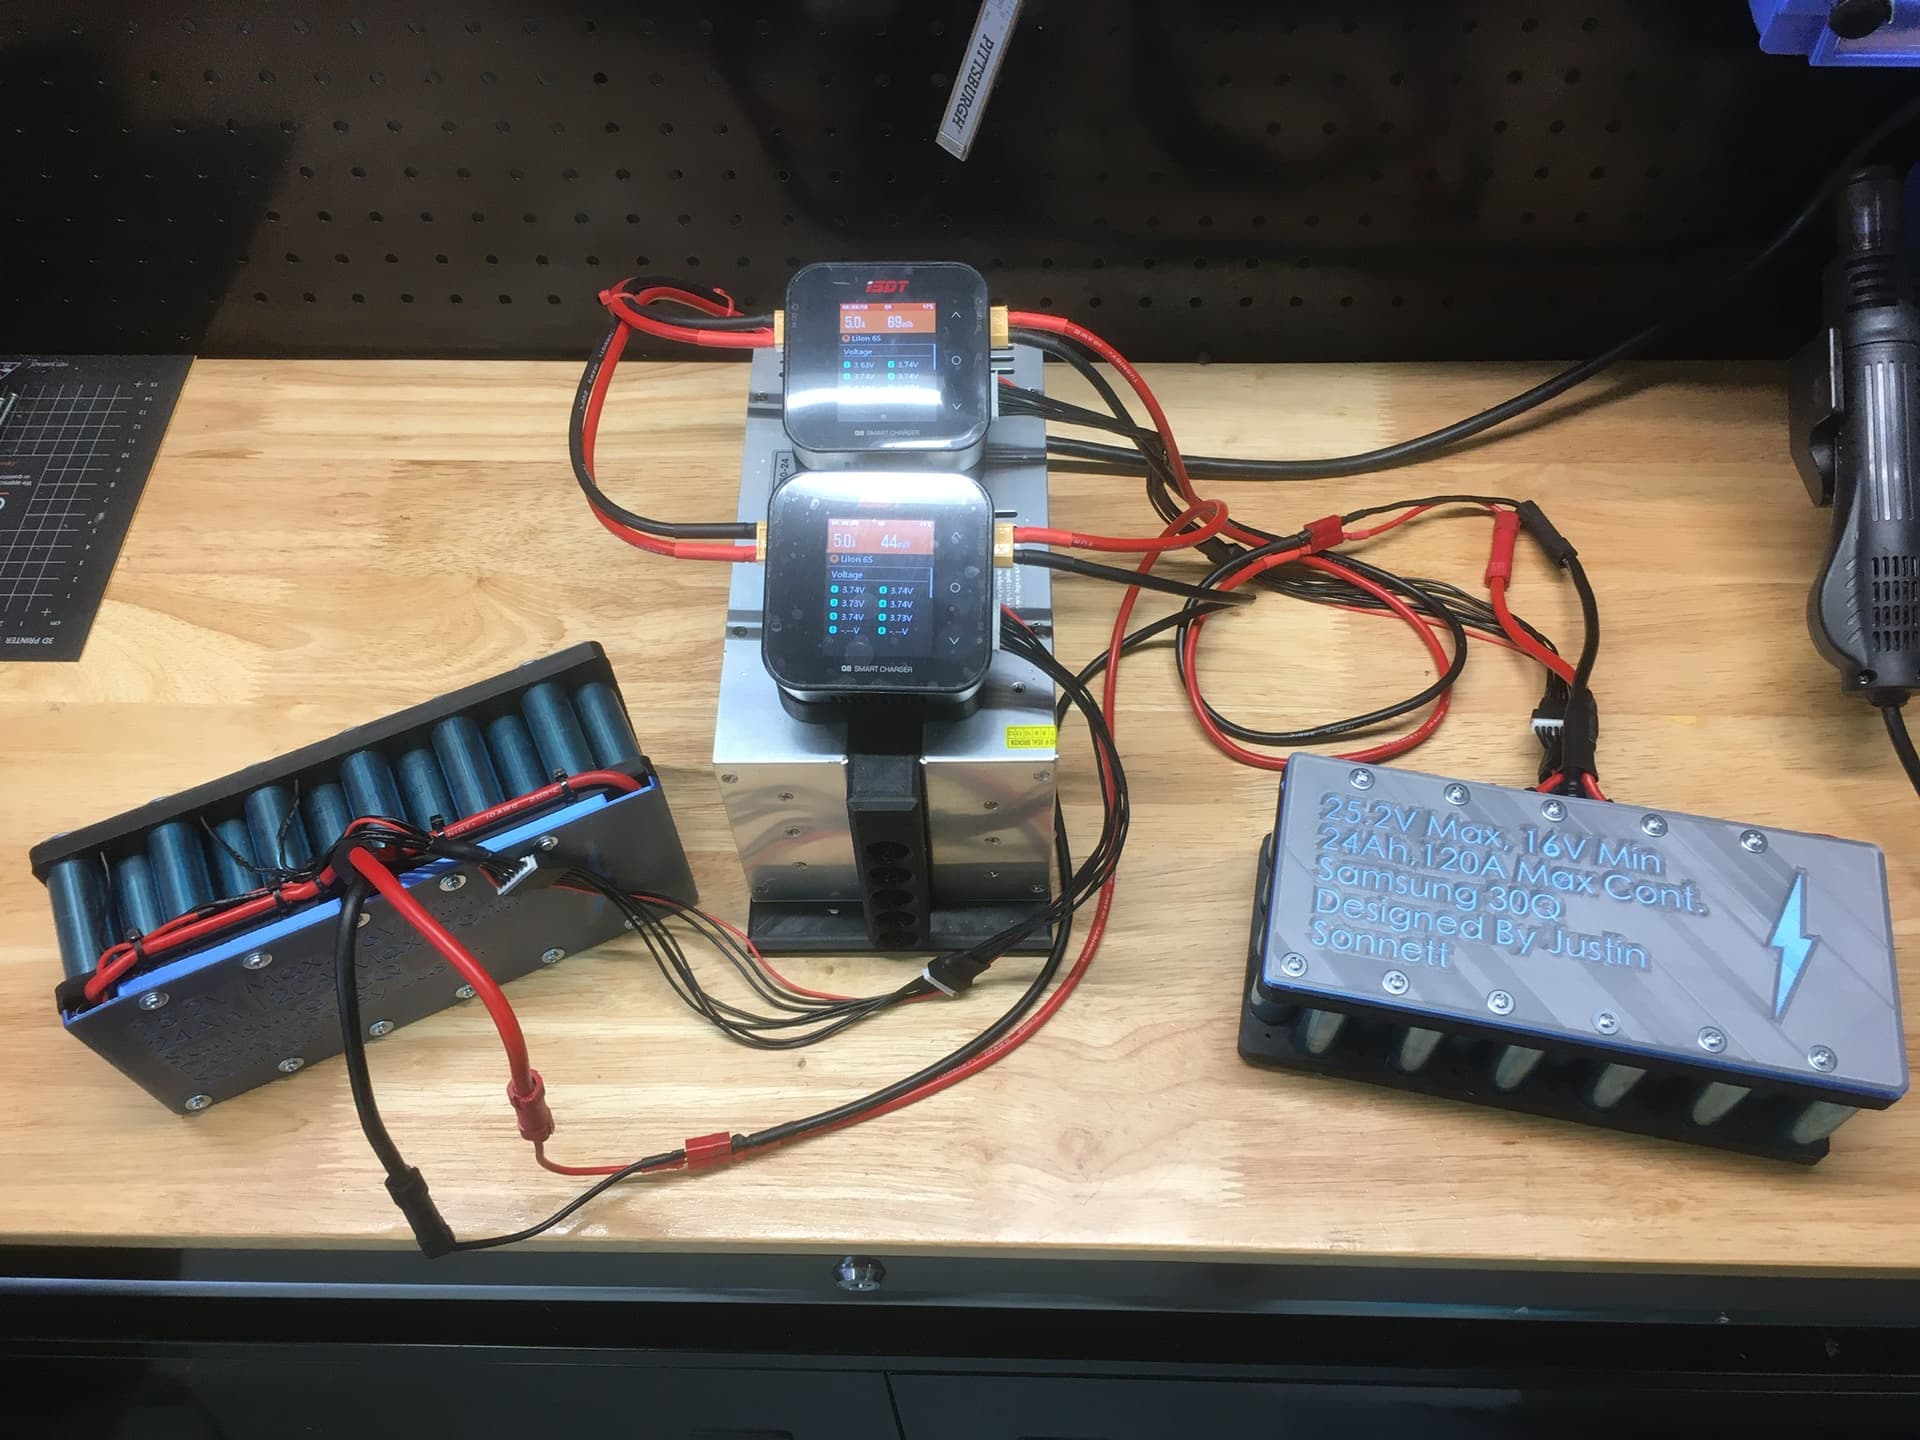
I hope some of you find this useful. Im really pleased with it so far. Its awesome to be able to casually charge 2 batteries at 10A each without even breaking a sweat while my last charger would only charge at about 3A each running wide open (and eventually burning up). I can easily get two rides in a day with this thing and can charge my 2 6s8p 30Q packs in about 3 hours at 10A but could even go up to 15 if Im in a hurry.
I have been searching around the forum gathering info before I build my electrical system and came across your post. I was thinking of doing something very similar with 2 x 6S13P batteries connected in series. I see you can actuall get an ISDT twin output charger that will simultaneously charge two batteries at the same time. This single charger would then effectively do what you’ve created.
A couple of questions for you if I may please.
You are balance charging each 6S with each charger, so I take it that you don’t have/need a BMS on each battery. Is that correct?
Do you have any photos you could share of your batteries?
Hi. That’s correct. No bms needed if running balance chargers. One less thing that could fail on the board and made it a little easier to fit everything inside the waterprooof enclosure I was working with.
Below are pics of the batteries. Thought I had some pics with the covers off to show the nickel plates and balance lead wiring but this is the best I could find.
True, i always use smart BMS nowadays, i think it’s good practice. Have had some incidents with damaged or dead batteries on BMS-less builds. User errors but as they happen they need to be countered.
yep. that looks like a good one. The Q8 chargers i used could supply 20A each but i never really ran them at more than 10A. Just make sure you power that puppy with a large enough power supply.
Hi @Jsonnett, amazing build, I’m probably going to replicate something similar and I was thinking of using 2 X HP DPS-1200FB power supply units link - would you recommend your 24V computer power supplies over these ones?
Hey @patfoil, I’m planning to use a similar approach with a server power supply and an a hobby charger. They can push a lot more power than most PC power supplies, maybe more than necessary. You may be power limited by the charger you select and then perhaps the battery pack. Also, just be aware that those server power supplies will require modification to be used like this and different power supplies require slightly different mods to get them working. I ended up just buying one that was already modified and ready to go from an ebay seller. Cost a bit more but spared me a side project had no interest in.
I built a 25V 100A power supply from two HP FB-1200 in series. They work really well for over 2 years now, I pull up to 60A (2x30) with 2 ichargerx8 in parallel. Used HP server PSU’s are good quality for a cheap price, you get them from ebay.