EFoil Build from Romania

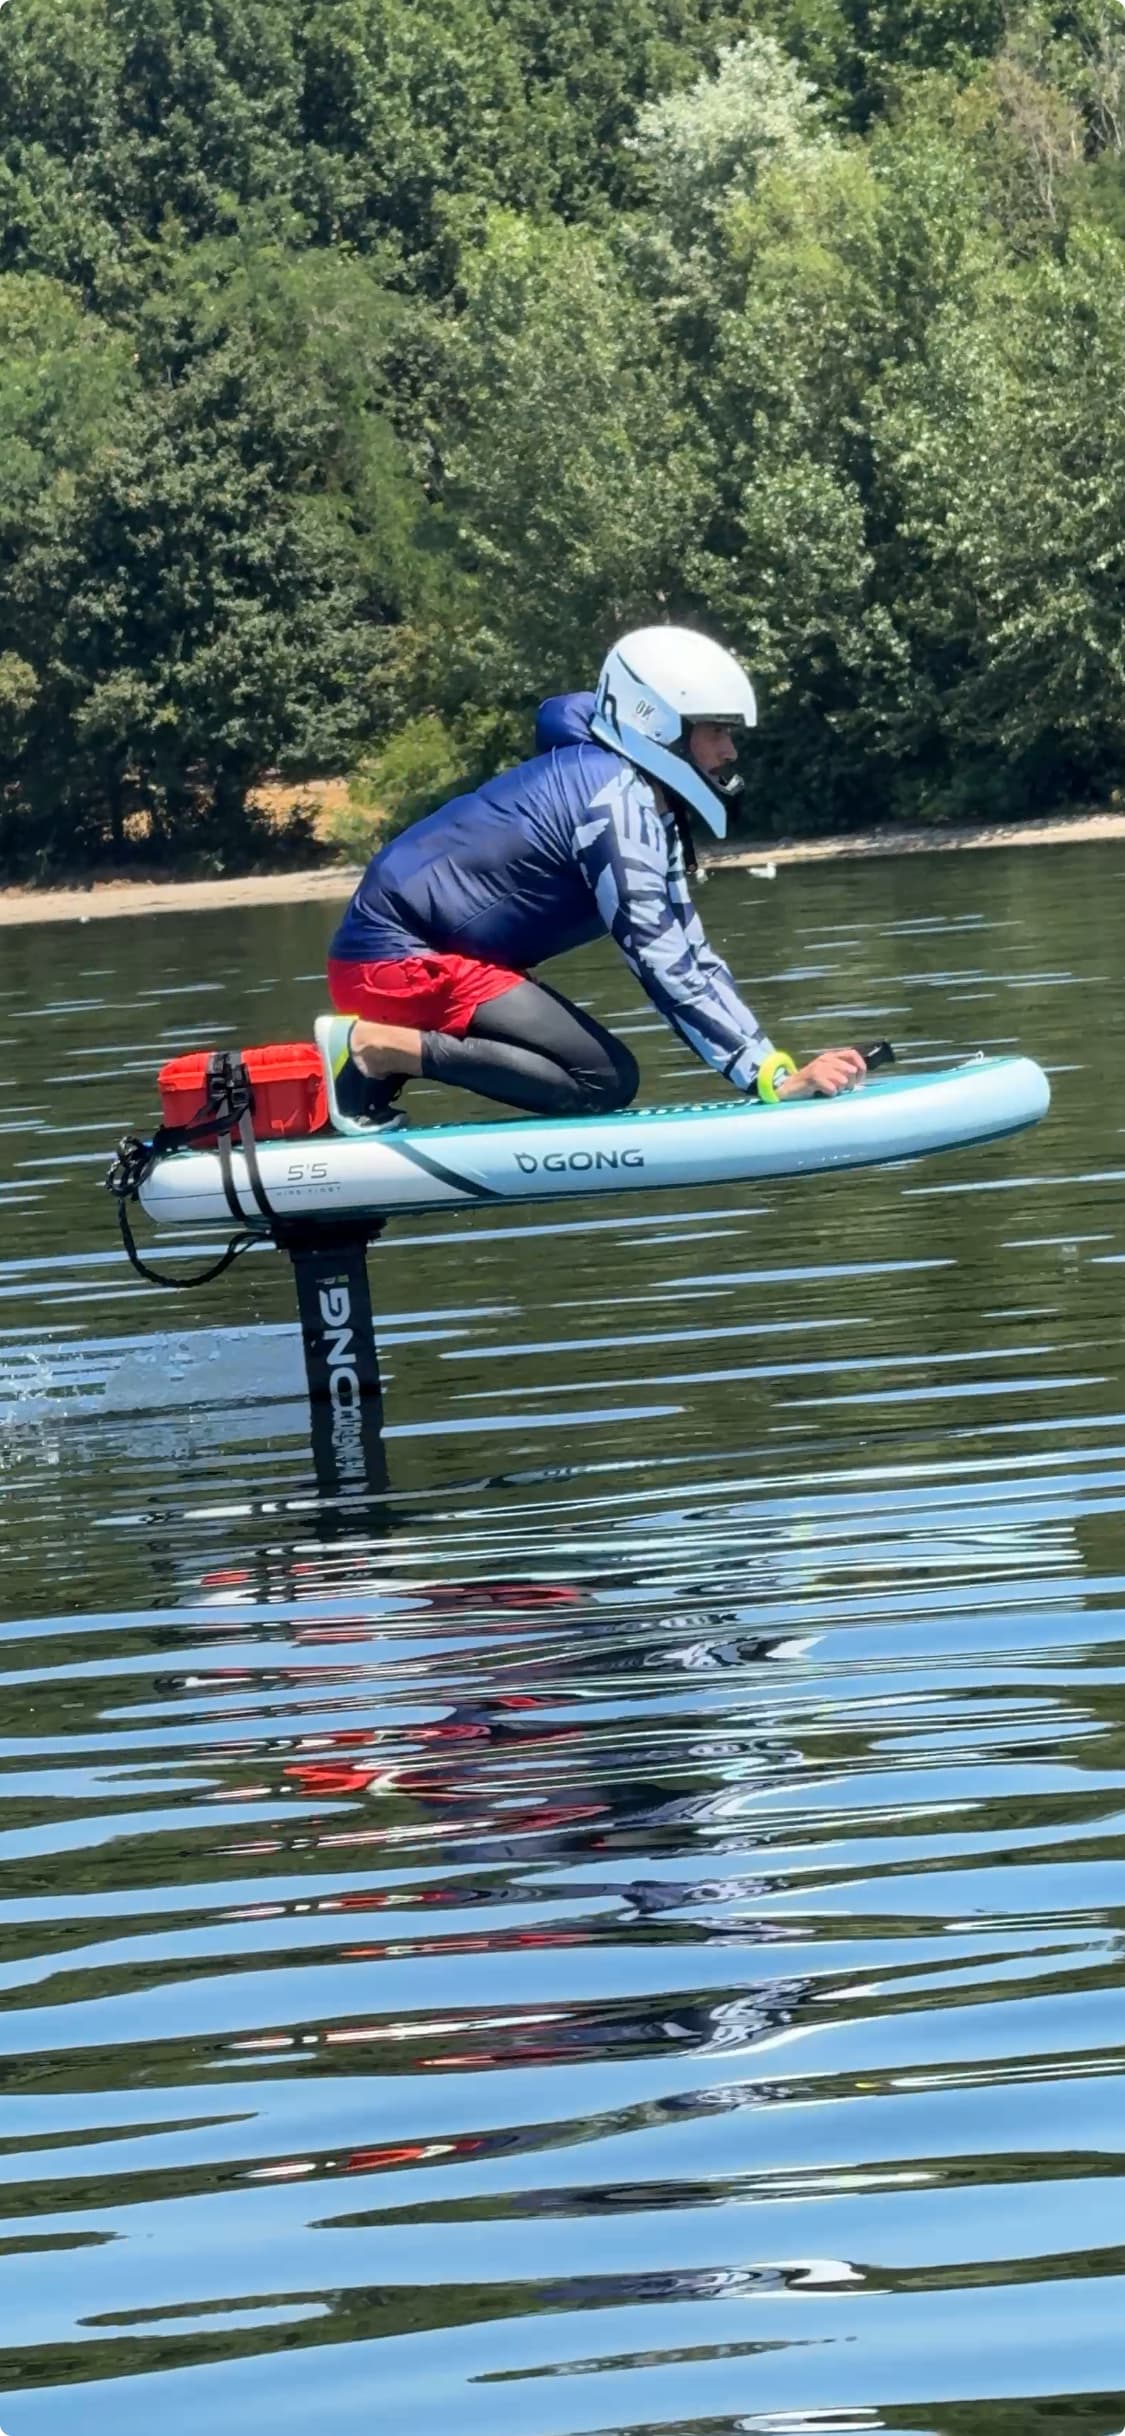
Hi everyone and greetings from Romania, I have completed my first successful flight (on my knees) and I thought it’s time to share my build. A big thanks to every one of this forum sharing their designs.

Foil: Gong V2 85cm Mast and Fuselage, Gong Curve XLT front wing, Gong Curve XL Stab

Board: Gong Hipe First 5’5

Flipsky w7 Water sport Kit:
Motor: Flipsky 65161, 12mm, round with thread, 120 KV
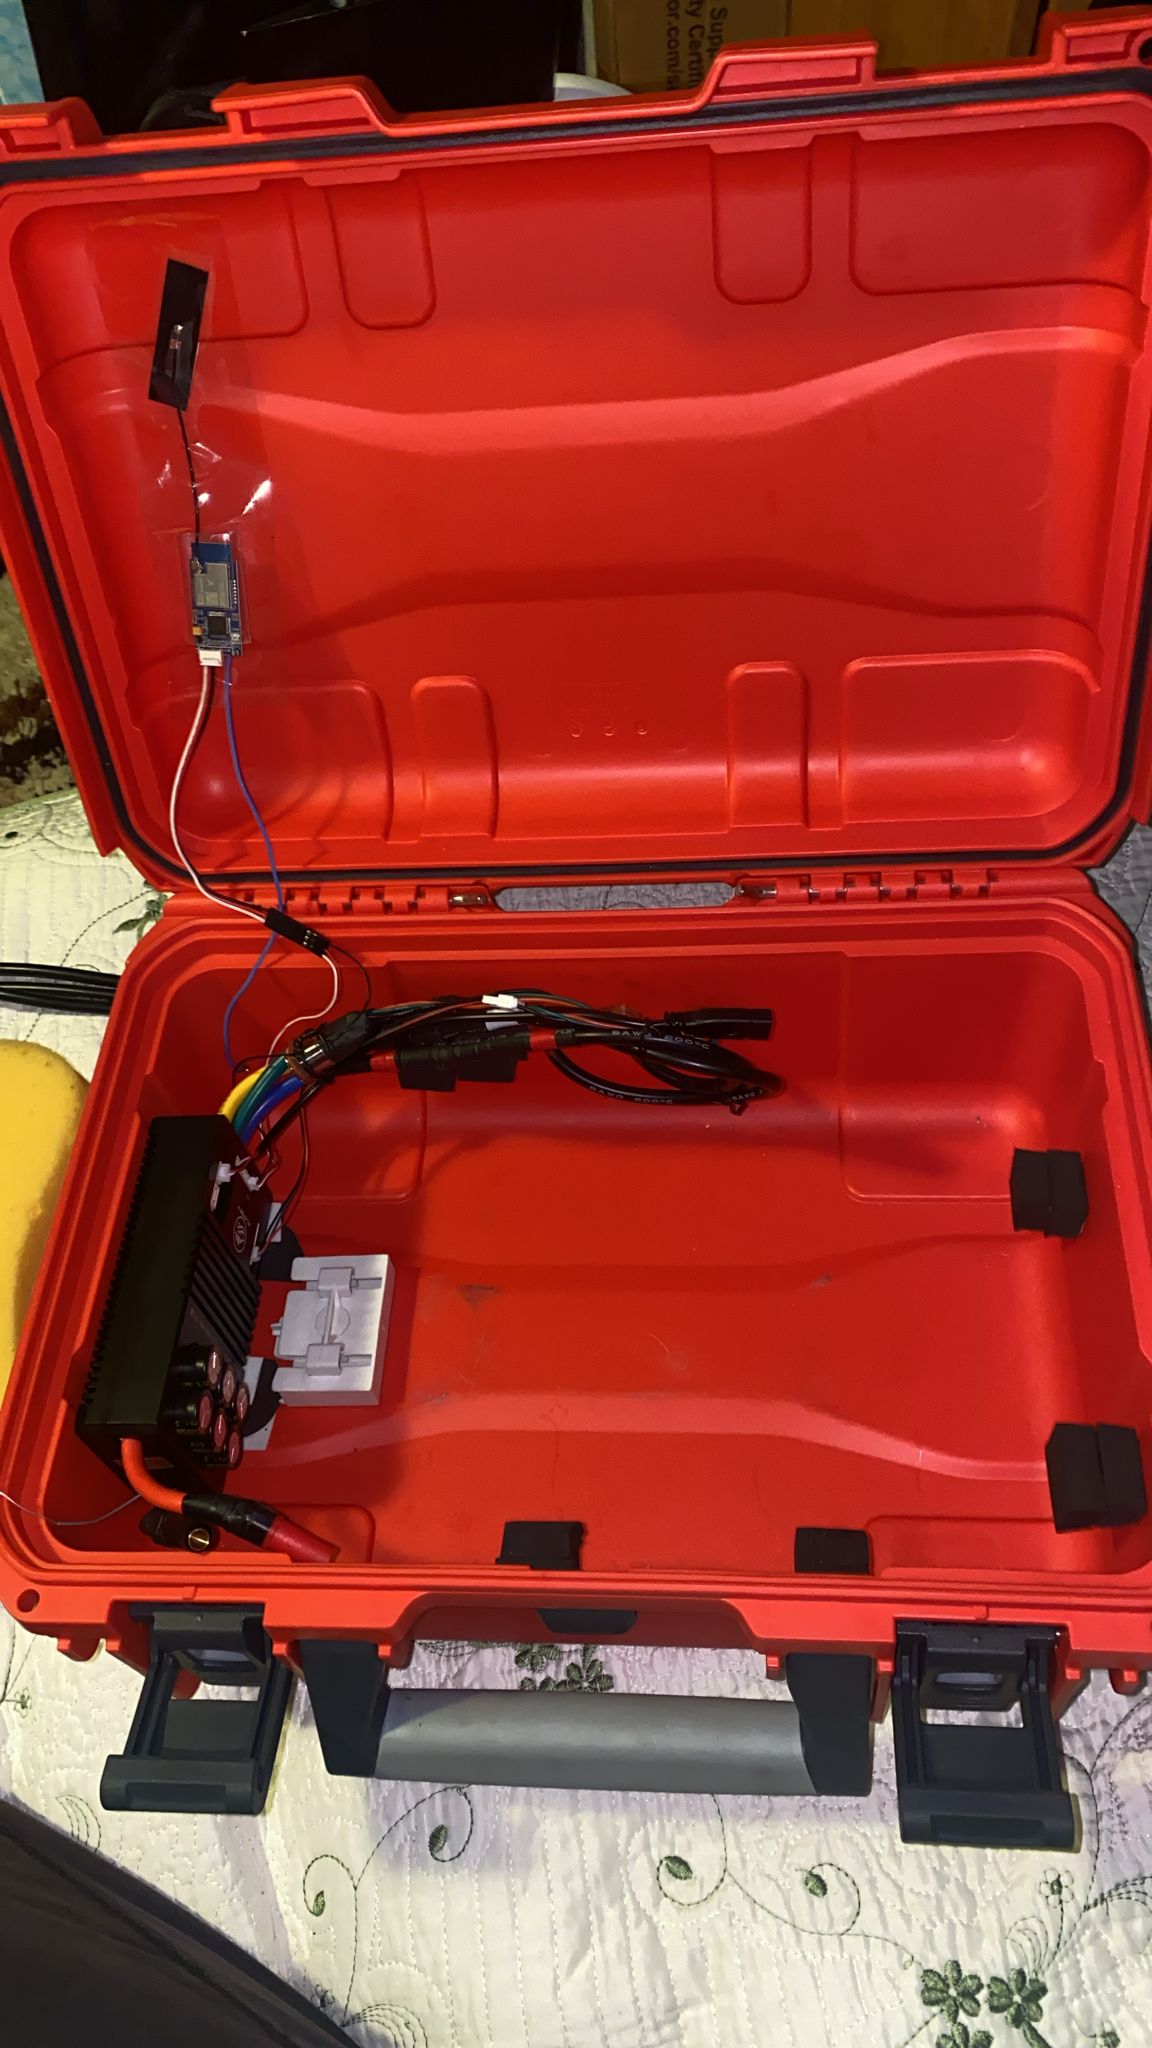
VESC: 75200 Pro V2, with Bluetooth and Power Butoon
Remote: Flipsky VX3 Pro (I messaged Flipsky and I payed 15 USD extra to upgrade from regular VX3 to Pro, at the time of the purchase it was not available in the Kit)
Flipsky Metal Propeller cut down to 140mm diameter

Waterproof box: Auer CP 4316

Battery: 2 Lime E Scooter batteries (second hand) connected in paralel + 250A BMS (JBD SP22S001 6-22S NMC). BMS is used for both charge and discharge
Charger: currently work in progress (borrowing one)

Various stainless steel nuts, bolts, washers, cable organizer and straps from Aliexpress

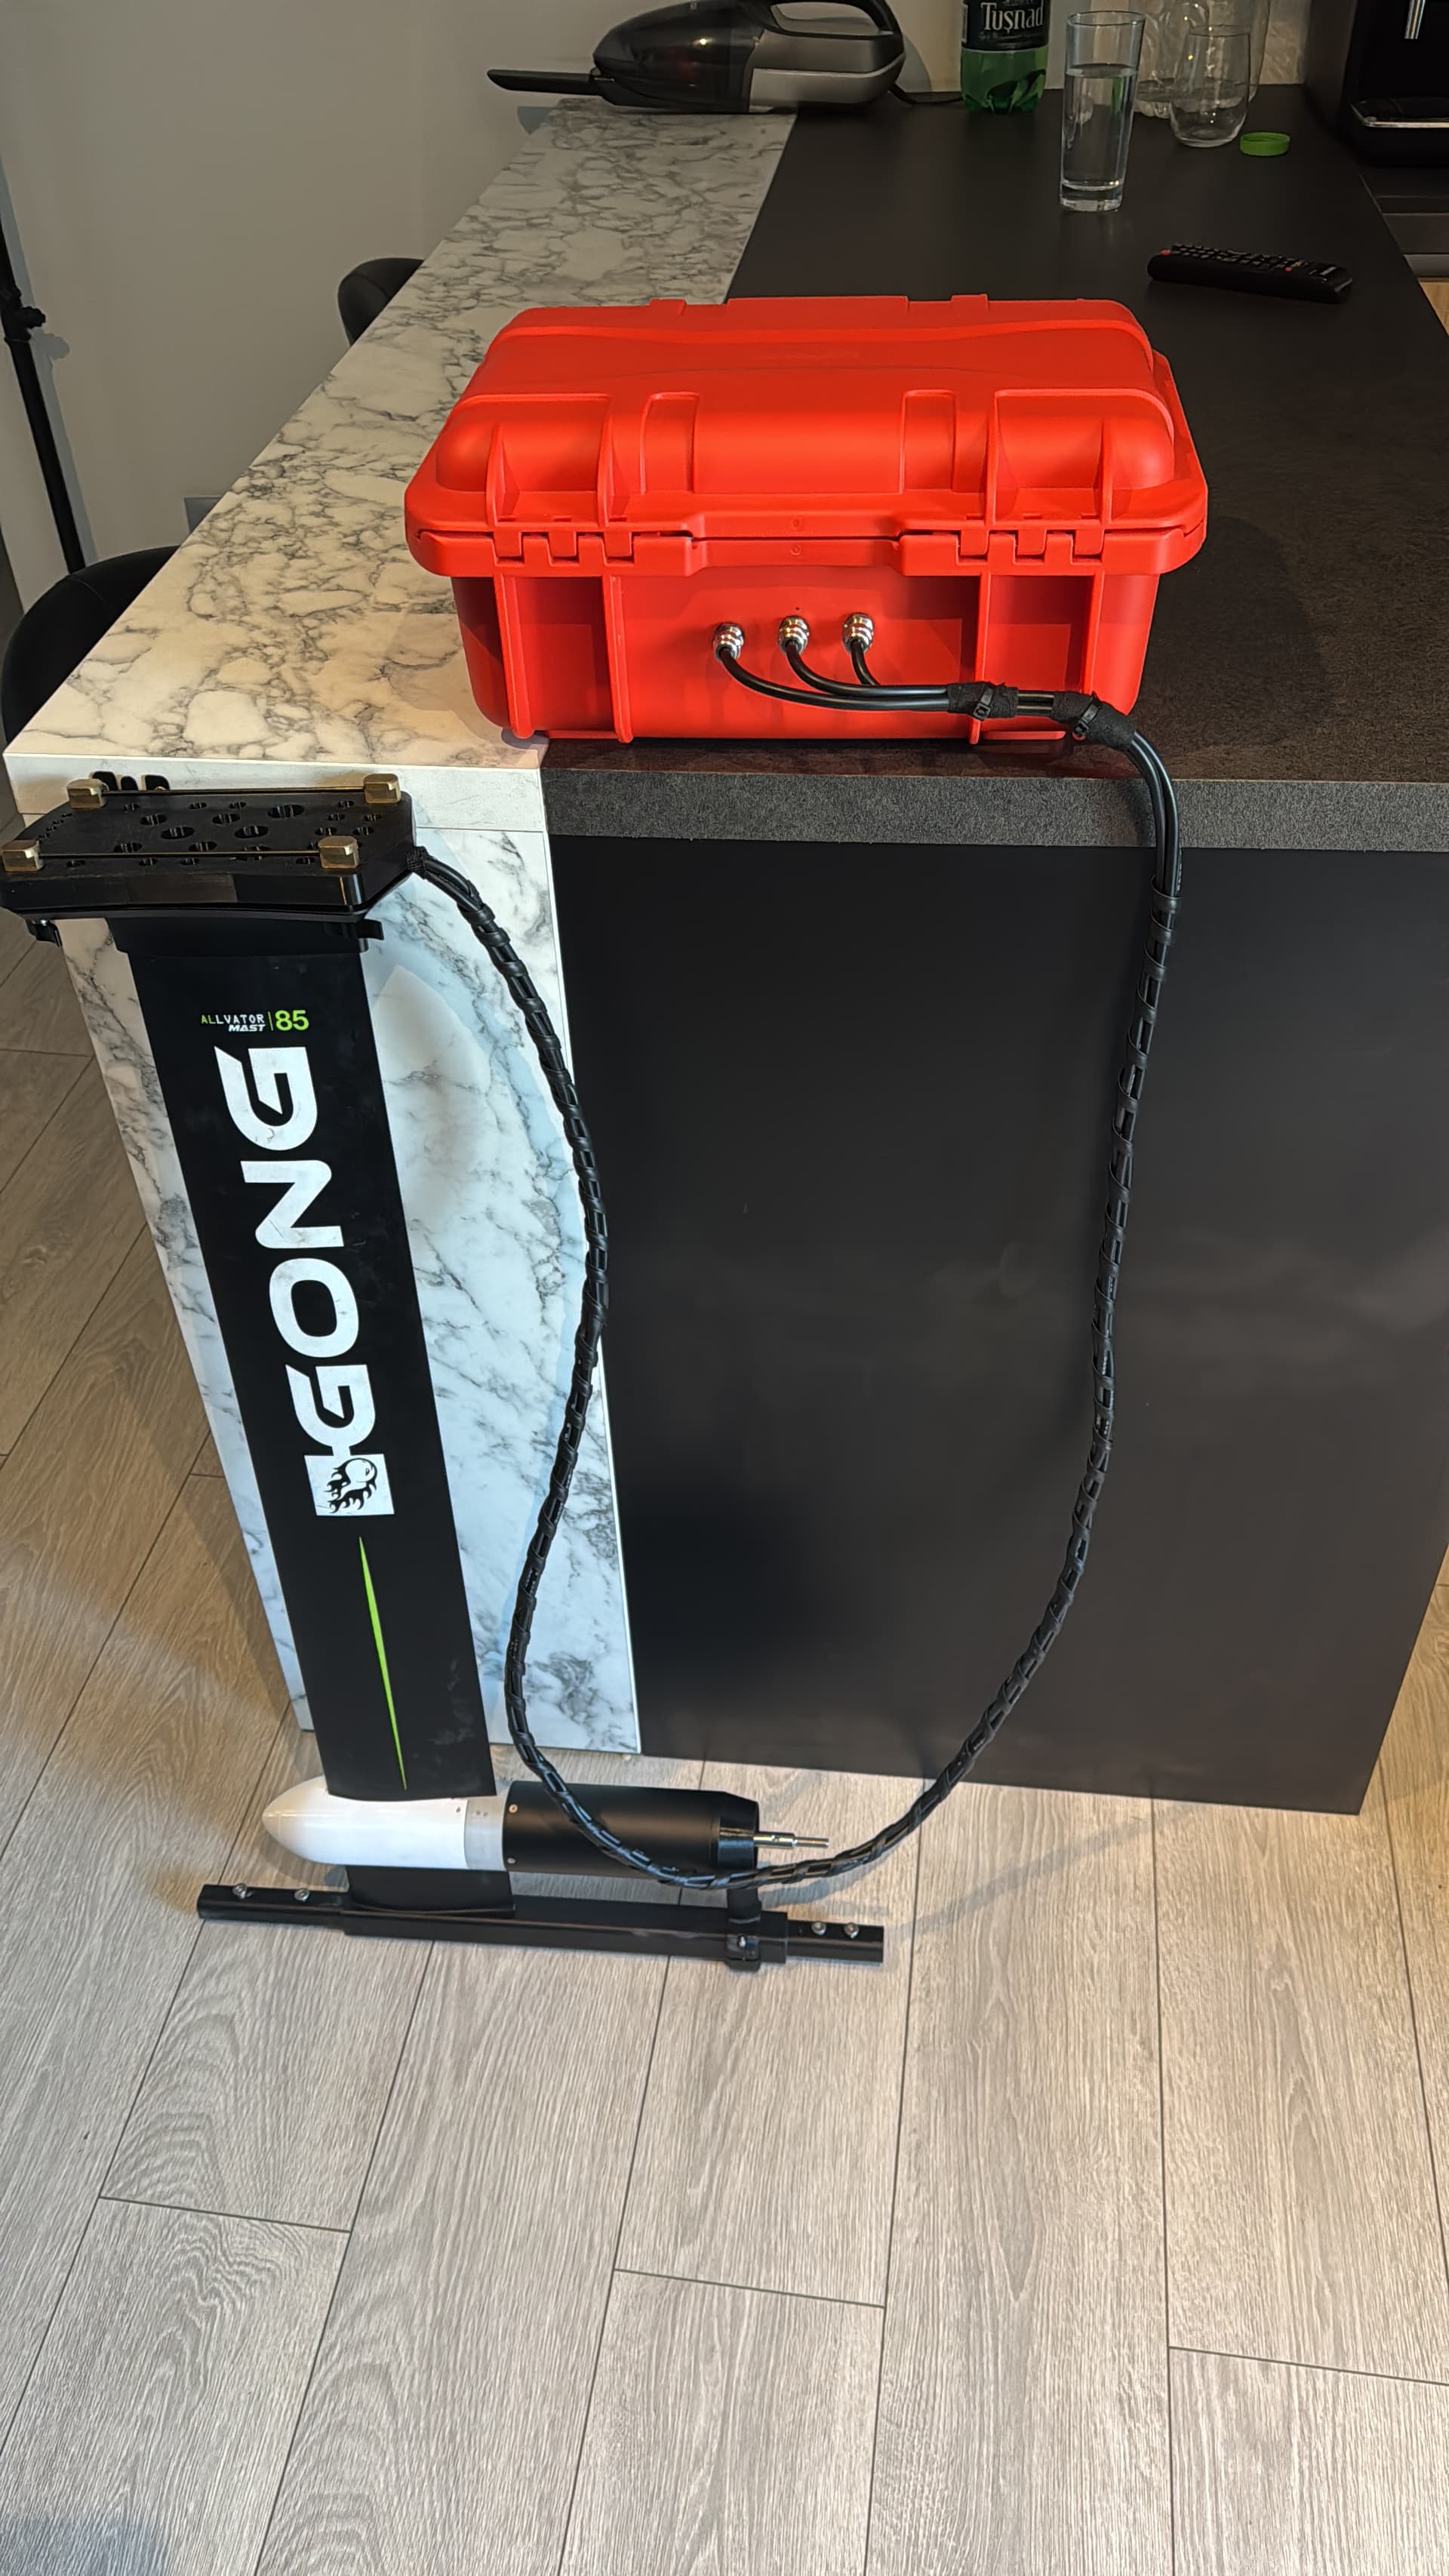
3D printed parts for motor mount, propeller protection, and top plate

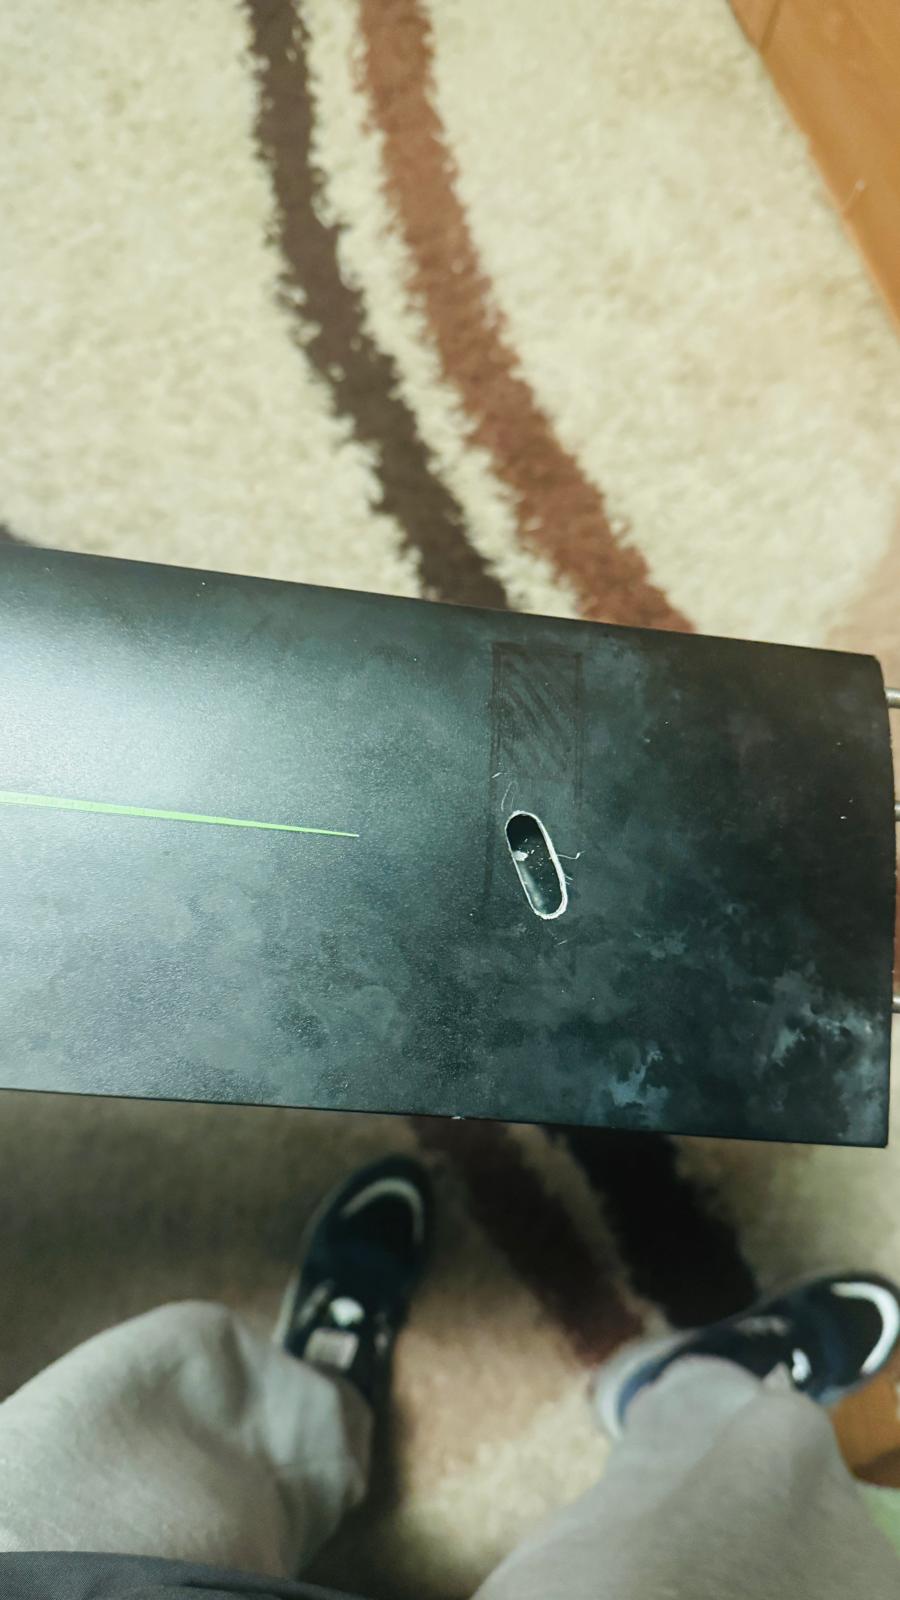
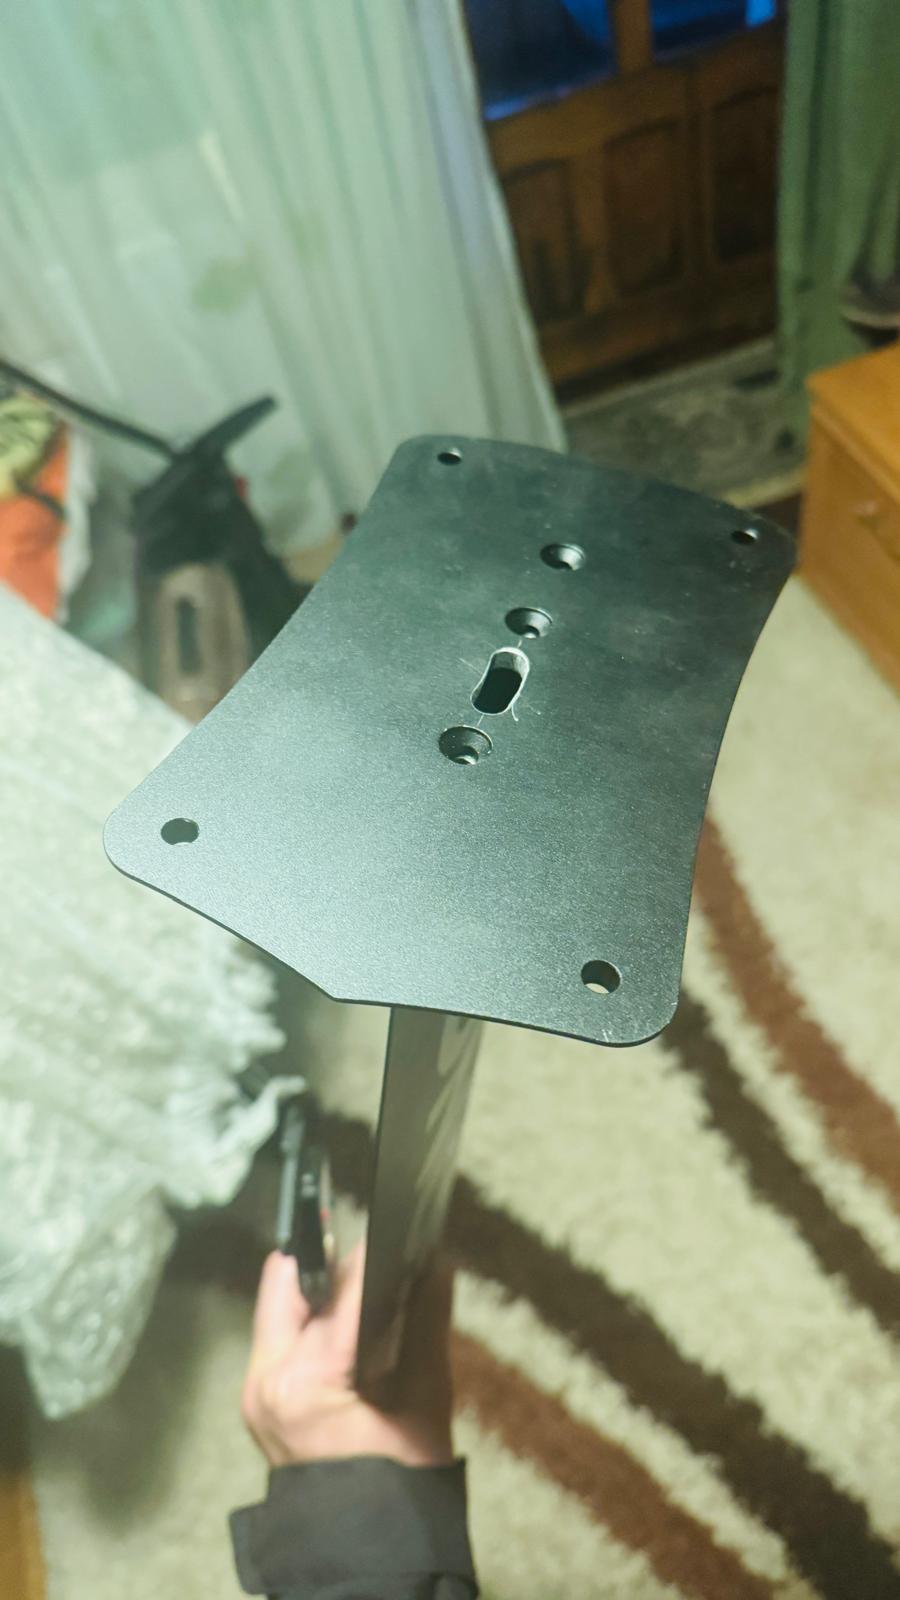
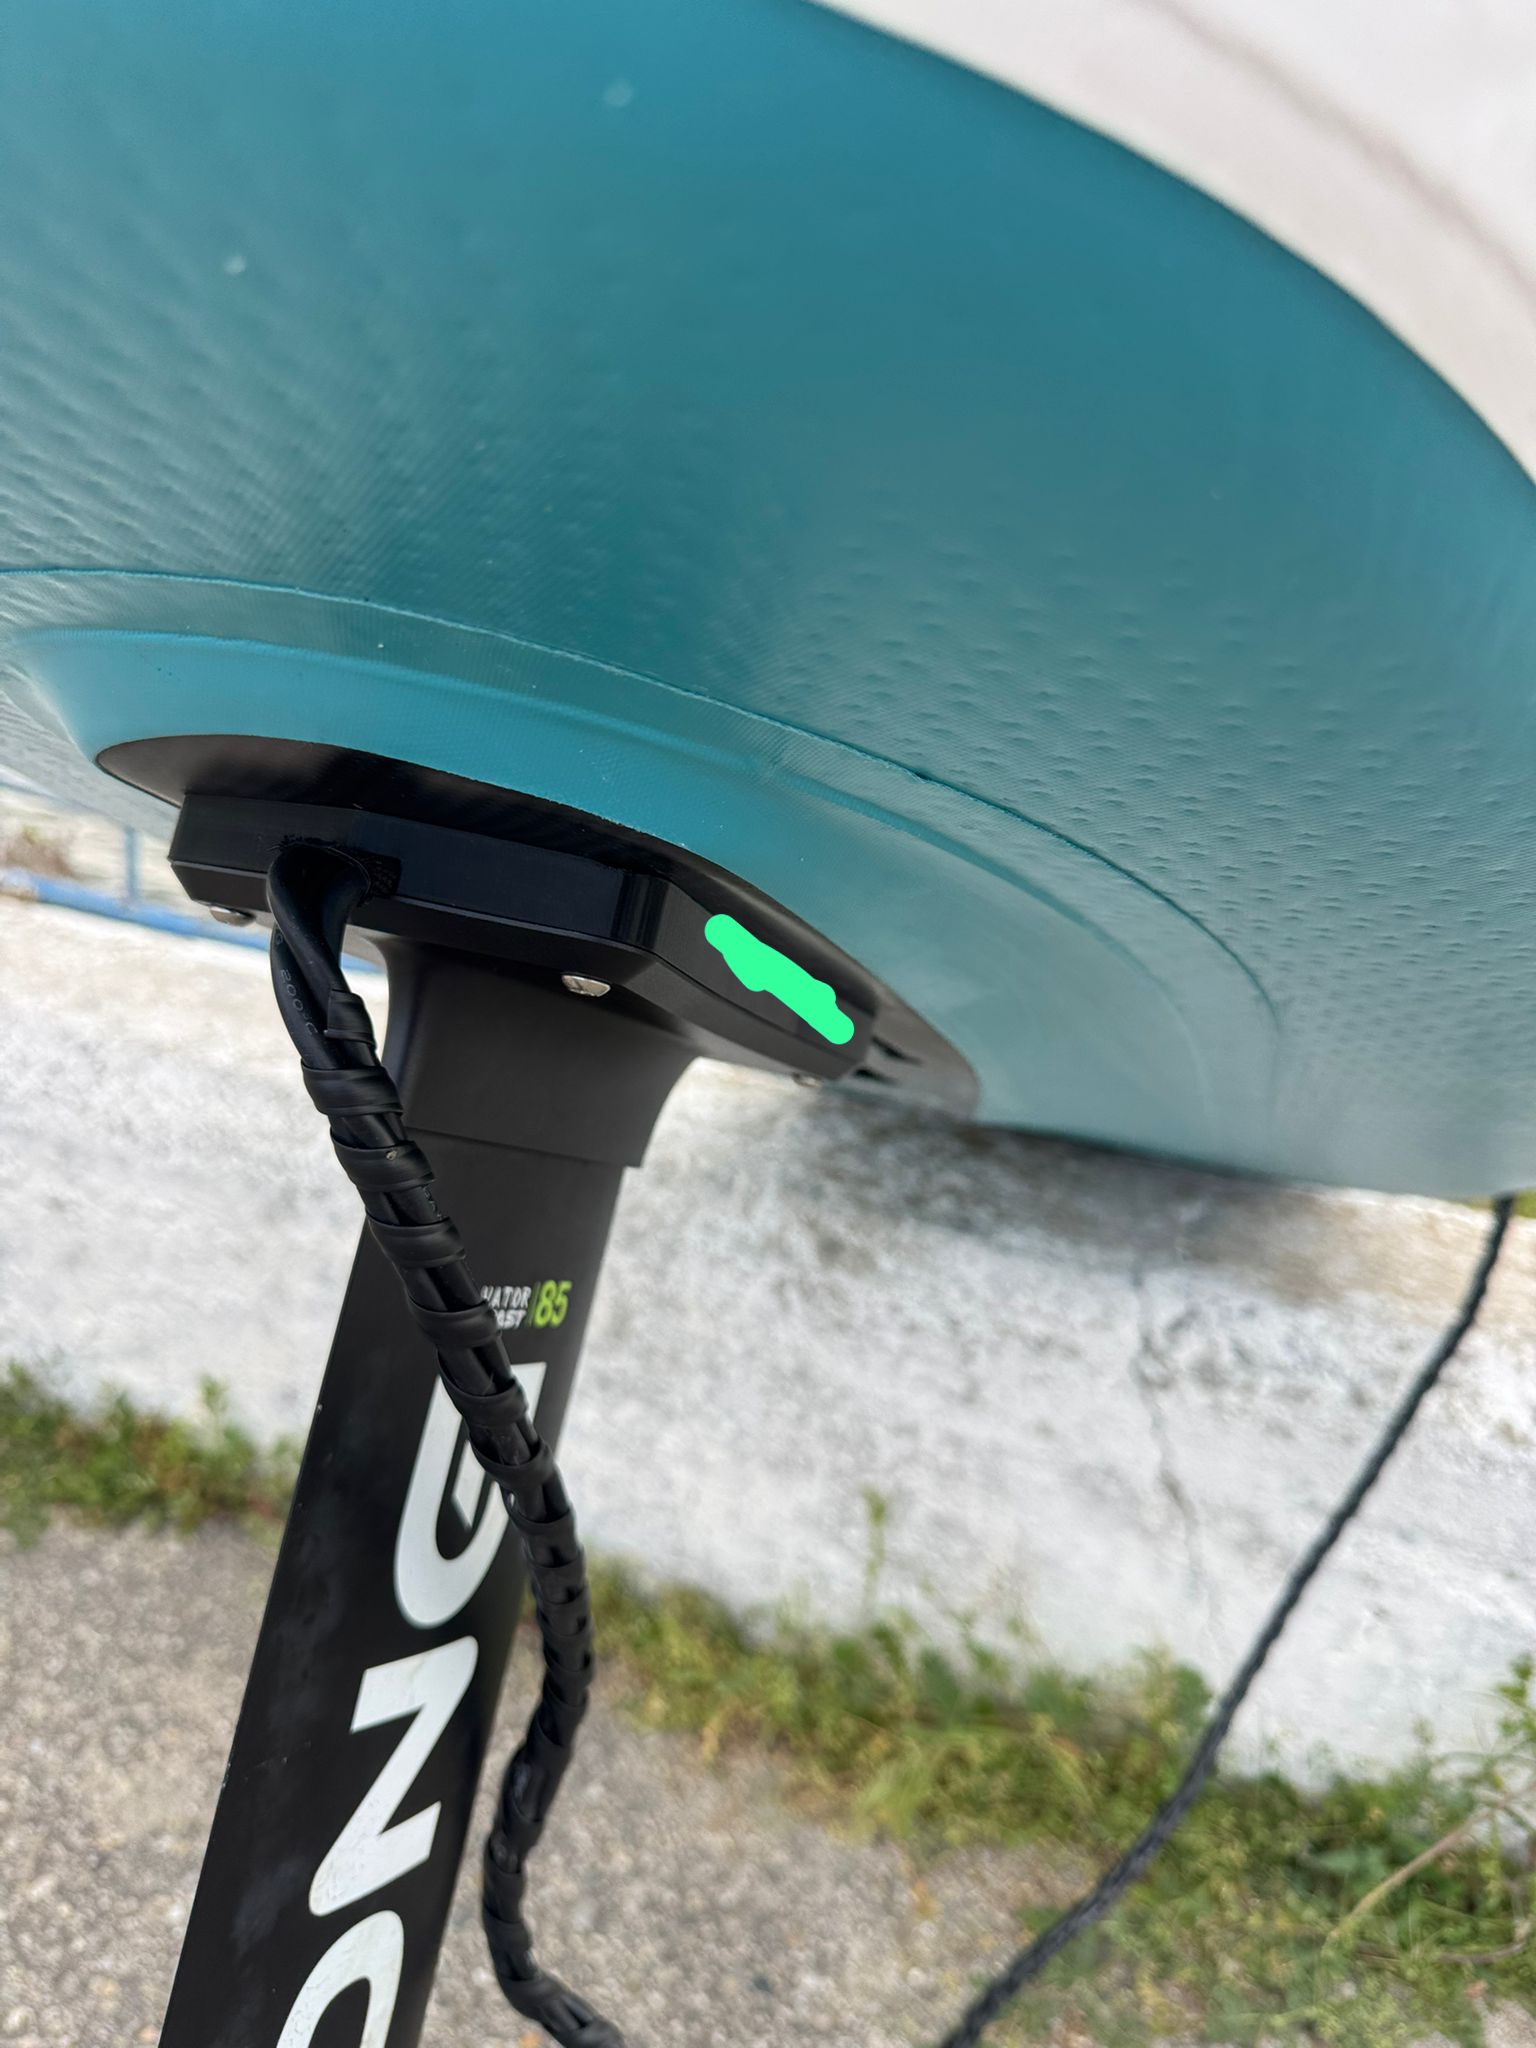
I drilled the mast and routed the wires through it, I have also drilled the top plate and I have added a 3D printed top plate extension that allows me to direct the wires to the back after they exit the top of the mast. I have also added some cable guards where the wires enter and leave the mast
Photos here:


A very important lesson I learned is that when configuring the controller you have to have it set to H (high) otherwise the motor will cut out at full throttle.
Another lesson learned the hard way is to wear a full face helmet for the first sessions

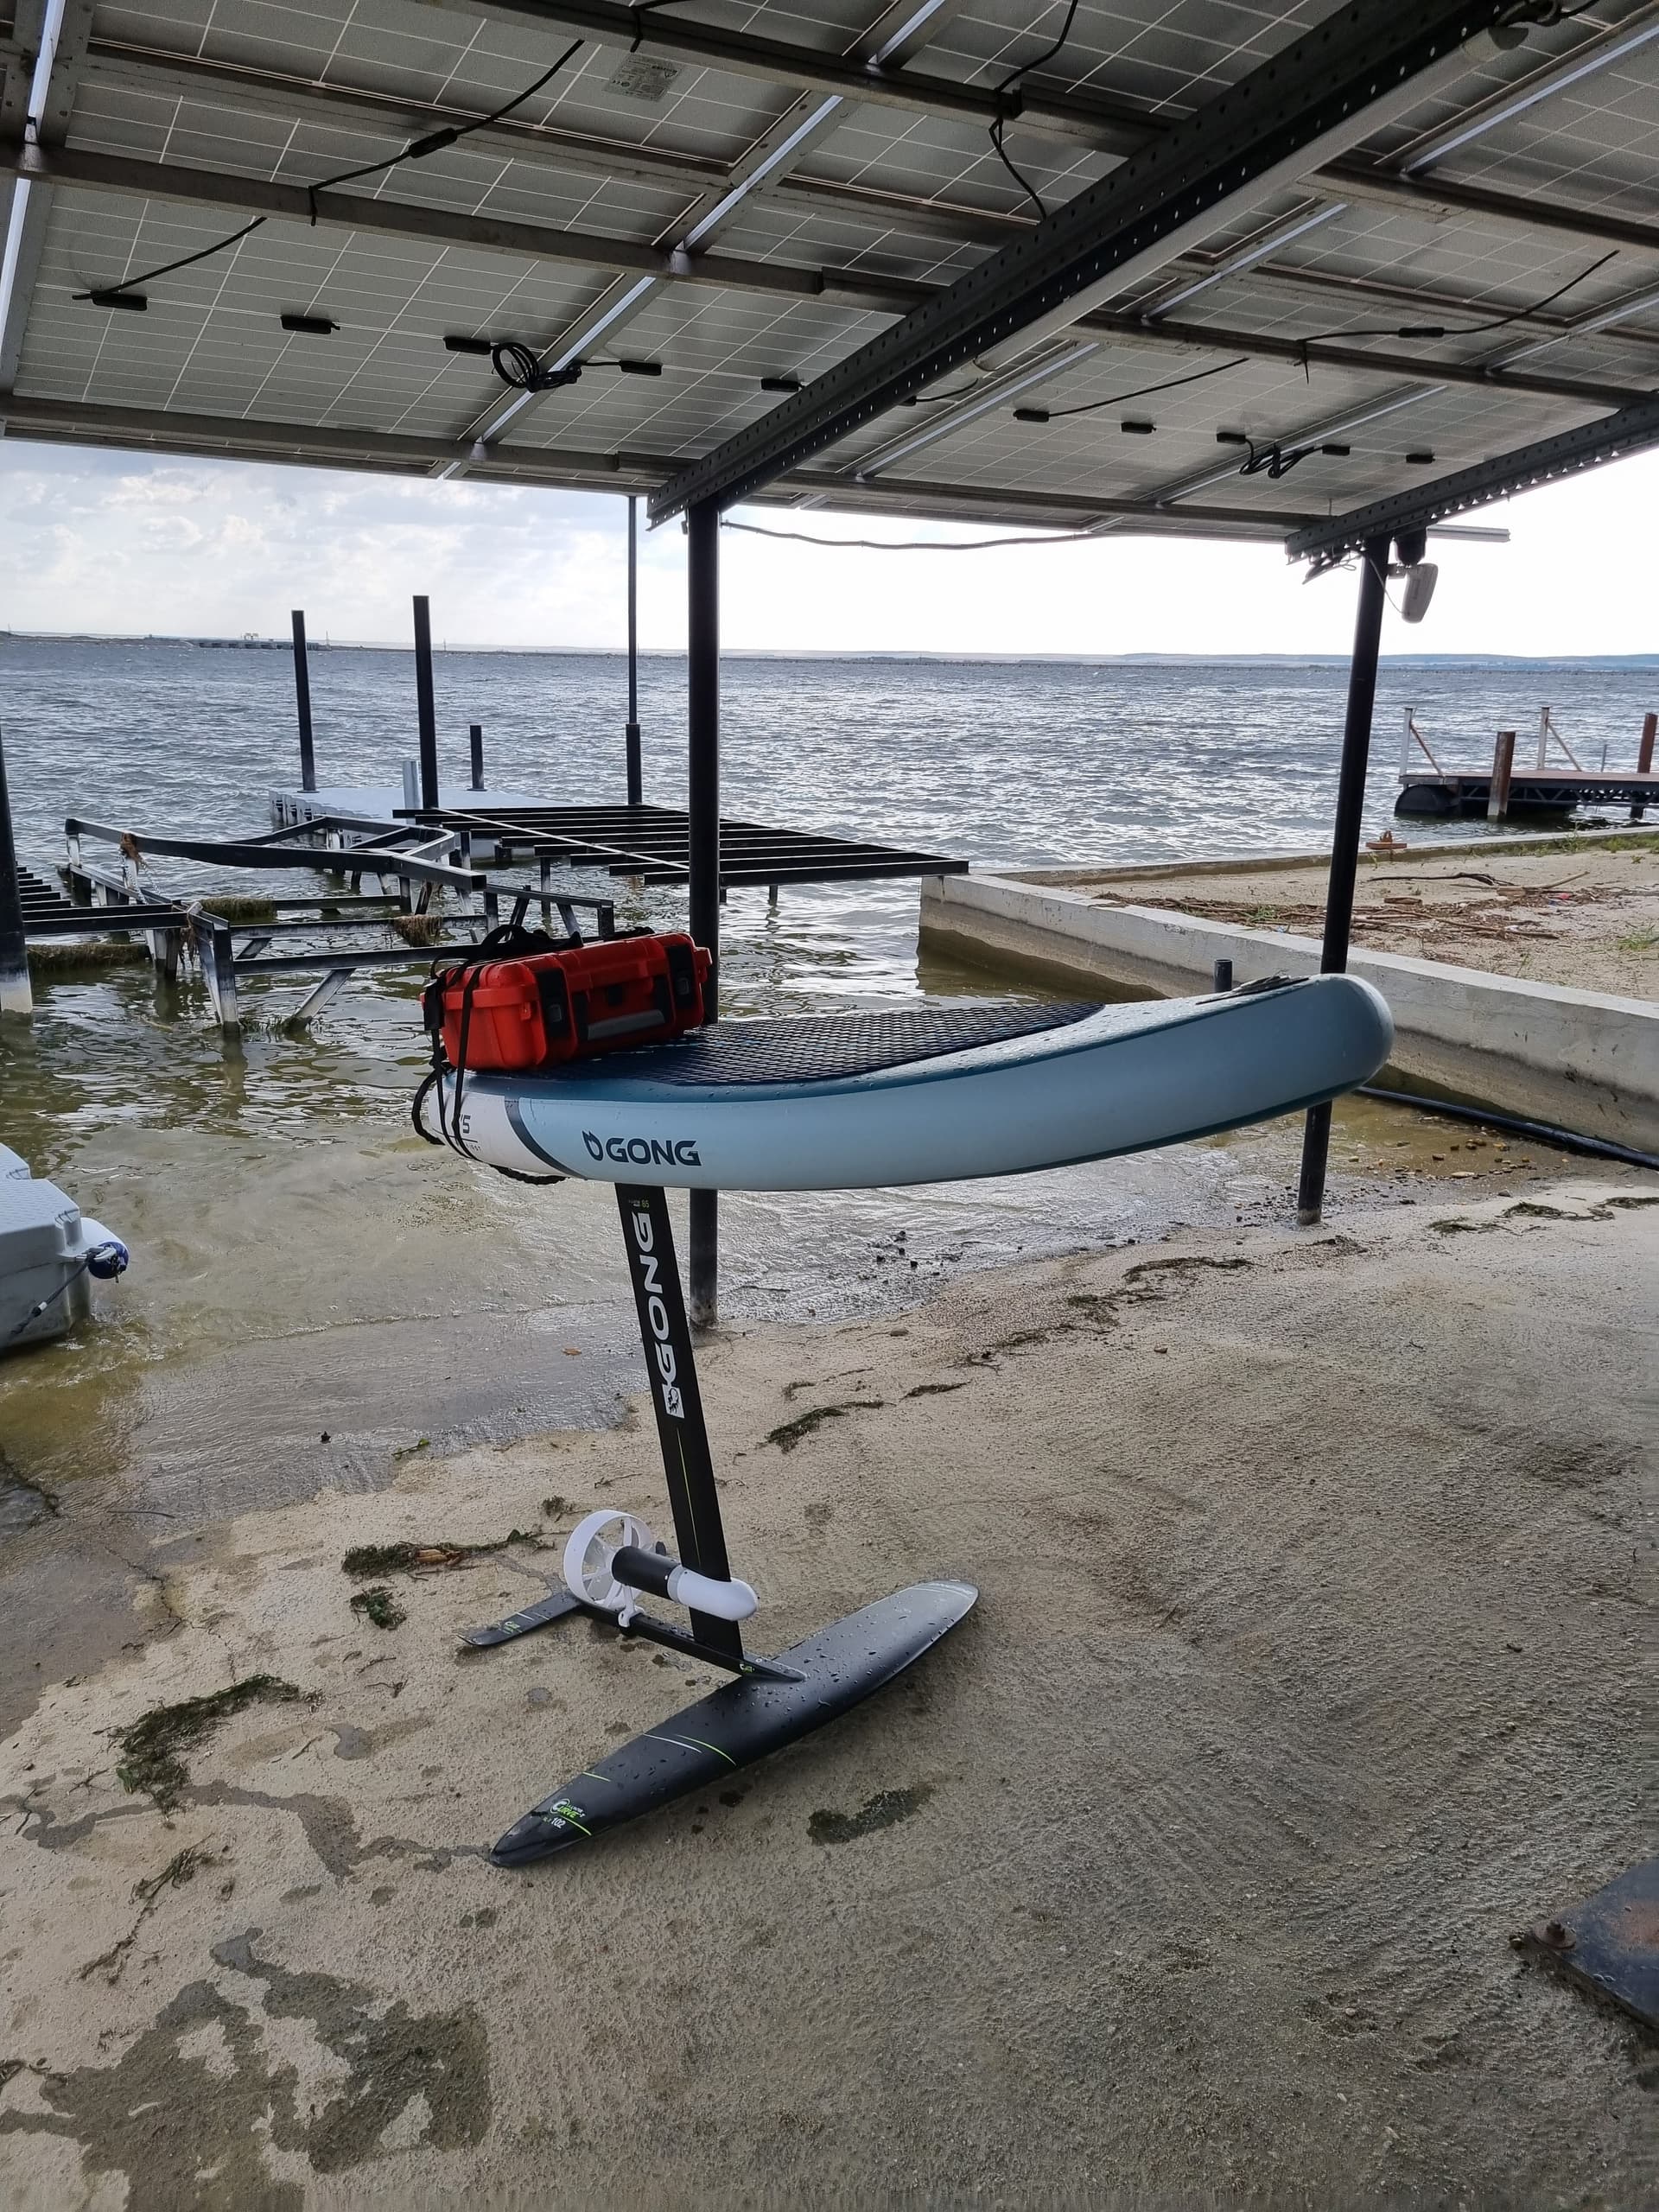
Here is the final build:


4 Likes

Cool build, well done ! :+1:t2:
Just a quick question, how did you lengthen/extend the motor cables?
My plan is to crimp, coat with silicon and then heat-shrink… but in case you’ve done otherwise I’d be interested…

I have used this crimping kit from Aliexpress and I also soldered the outside edges (to the best of my ability). After that I aded multiple heat shrinking tubes (one over the entire connection, 1 small one at each end of the first one and another large one over everything)

This type of connection failed once, it got caught in my leg and one of the connections got slightly separated which resulted in startup issue for the motor. After getting it soldered properly by someone with experience I didn’t have that issue anymore

My advice would be:

  1. use the same tube connector but cut it (lenght-wise), crimp it slightly and the use the cut in order to make soldering a lot stronger (get solder in the tube through the cut) This is what the expert did after I broke the connection
  2. Maybe try this:

I didn’t use any silicon to coat the connection, multiple heat shrinks worked for me

2 Likes

Hello “flyer” great job!

I finally finished my board last week, with an approach similar to your, big difference was the box, that the only one that I found was an electrical box, as i put my vesc inside an aluminium box waterproof, and a 14s8p battery, I need a bigger box, your is much “sexy” :rofl:

Could you post some of the interior pictures of the box to compare ?

Processing: IMG_2667.png…

I did a terrible build today and should have used these.

For the next one then, thanks for the comment.

Unfortunately I don’t have a lot of photos with the inside of the box, I will take some next weekend.
This is the only good one I found

I would strongly suggest moving the wires to the side with the handle (if possible), because right now the battery crushes the wires when I try to carry it inside the box using the handle.

The black squares are spacers for the battery and the white plastic is also spacer which stops the battery from hitting the VESC. I used double sided tape to fix the VESC to the side of the box as well as for the spacers

This is what I used to get the wires in the box and keep the water out + Gasket Sealant

Thanks for the photo, did you water cooled your vesc? I can’t see that in the photo…

I decided not to use water cooling, it seemed to me like a lot could go wrong. I have a 75200 Pro V2 VESC which is not water cooled.

I will keep an eye out for high temperatures of the VESC using the Vesc Tool app. Right now my longest continuous run was about 4 minutes and I didn’t notice any temperature increase

Yes do it, i have opted by the 75300 water cooled, that I tried not water cooled and put it inside a water cooled aluminium box attached with thermal paste.
Initially and I checked also with vesc tools and the Bluetooth module, first minutes no problem, but maybe 10 minutes or less 50/60 degrees and a few more minutes I start to feel less power, I imagine the vesc protecting himself. So even if didn’t like the ideia i water cooled it and know the temperature is 31 degrees…

Do you happen to know how many W you’re using while trying to get up and also while cruising?
Also what foil setup are you using? and what’s your weight?

I am hoping that the Gong Curve XL-T that I am using paired with my 78Kg is a relatively efficient setup. I am also thinking of purchasing the Gong Fluid XXL-T which should be even more efficient.

I need to find a way to ride with my phone on me, unlocked and screen recording the Vesc Tool app, maybe the best approach is to put it somewhere in the box. Does anyone else have other ideas?

If you use the VX3 in UART mode you can see the vesc temp displayed on the screen. You also get a live power number and you can watch it drop down once you get up on foil

The VescTools app has the ability to generate a log file on your phone so no need to screen record. Phone does need to be onboard but you don’t have to have phone unlocked.

Lots of waterproof bags for phones that work well. I put mine in the battery compartment of my Fliteboard but I have also used the bag hung over my neck and under my PFD for safety reasons but didn’t bother to try to log anything that time.

Secured in bag and inside some storage space onboard is best.

Thank you for the tips, I’ll try to log with the app first cause it seems easier and I don’t want to mess up the VX3 configuration cause I had some trouble setting it up

You dont need to mess with the vx3 setup. The watts display is a default already. Its a little hard to read while foiling depending on the lighting but I use it to compare wings and propeller performance.

Awesome! The cnc spacer between mast mount and board is interesting. Would you share your file?

Here are the 2 custom stl files that I used, one for the Flipsky propeller cut down to 140mm diameter and the top plate with cable routing inside.

Unfortunately the weather didn’t allow me to ride this weekend so I wasn’t able to log or see the watts values