I’ve decided I want to start a long term project of building an e-foil. I plan on using EPS foam and fiberglass for the board itself. Right now I’m just trying to figure out the general structure of the board and making sure it will be strong enough. I’m going to do most of the cutting of the foam with a hot wire cutter, I do have a CNC router that should be big enough to do some of the work though, like cutting out the area for the battery and electronics and whatever other smaller things I need. I also have a 3d printer that I can use for whatever it might be useful for for this build.
Does the structure I have here seem mechanically sound? I haven’t figured out how I want to seal the top off yet.
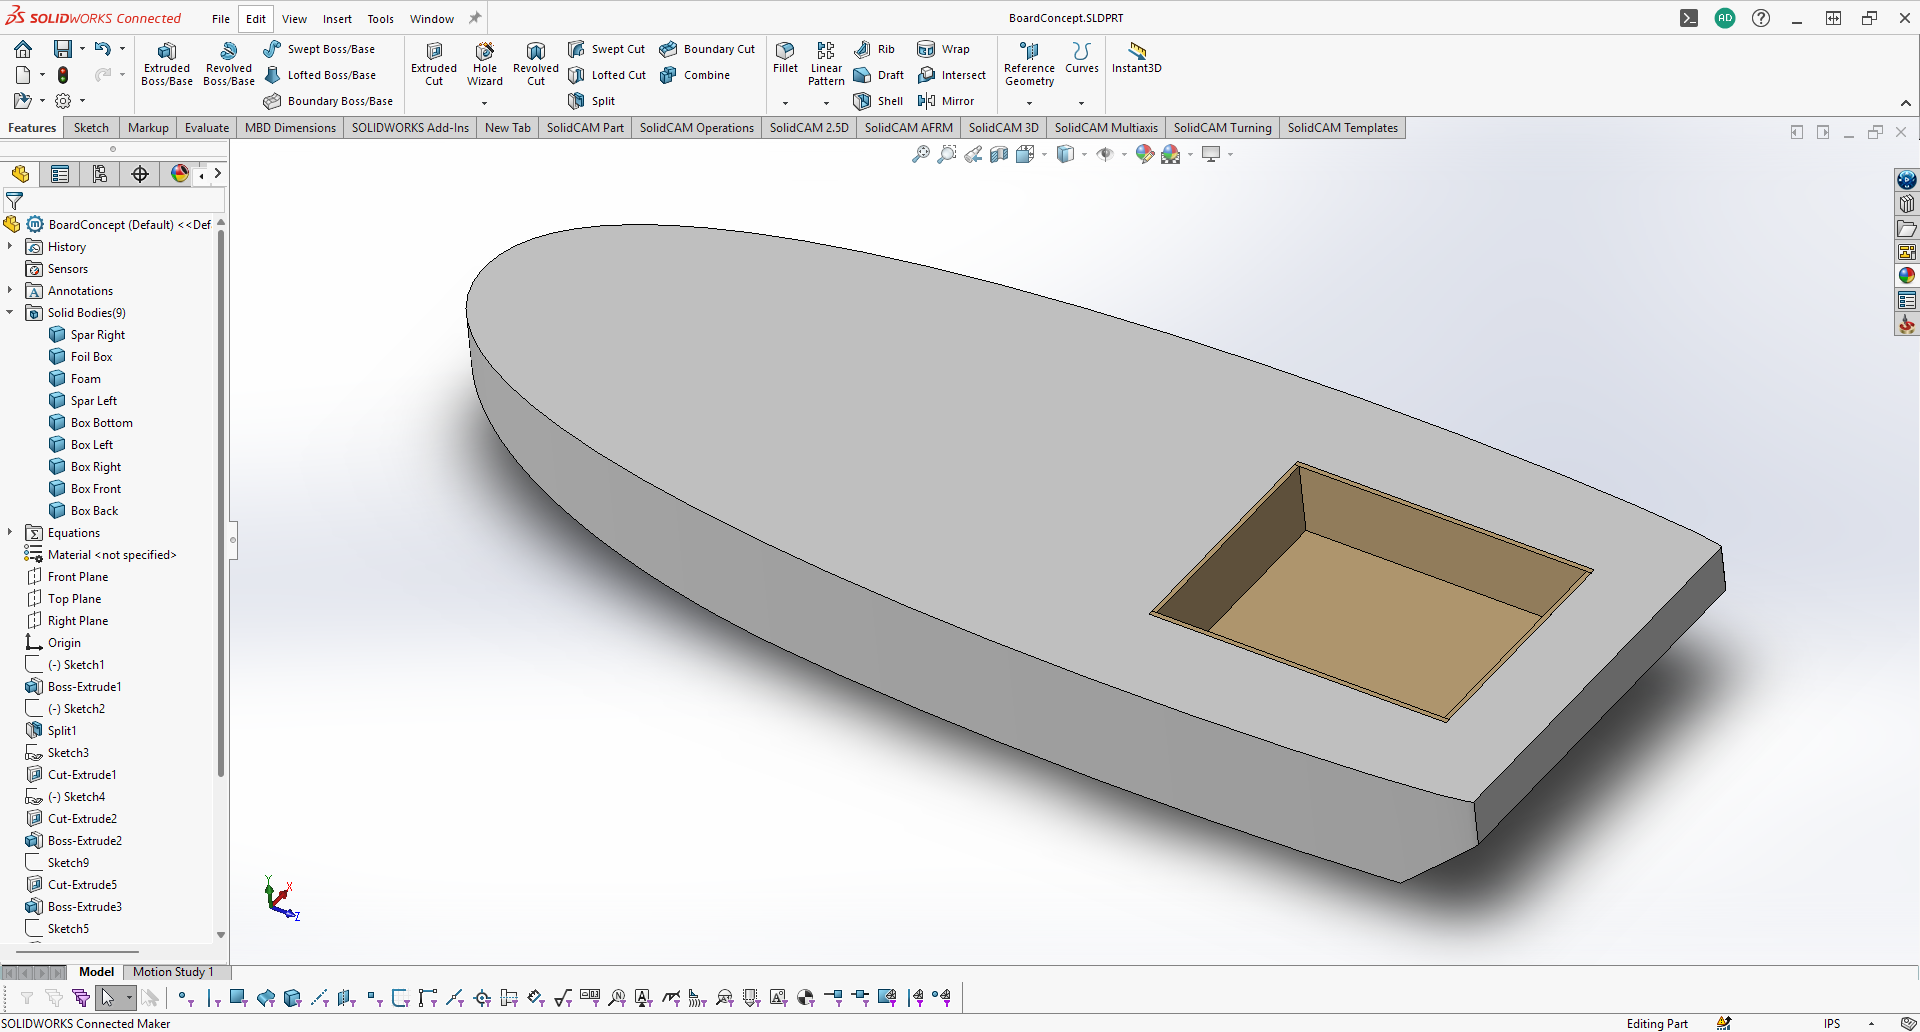
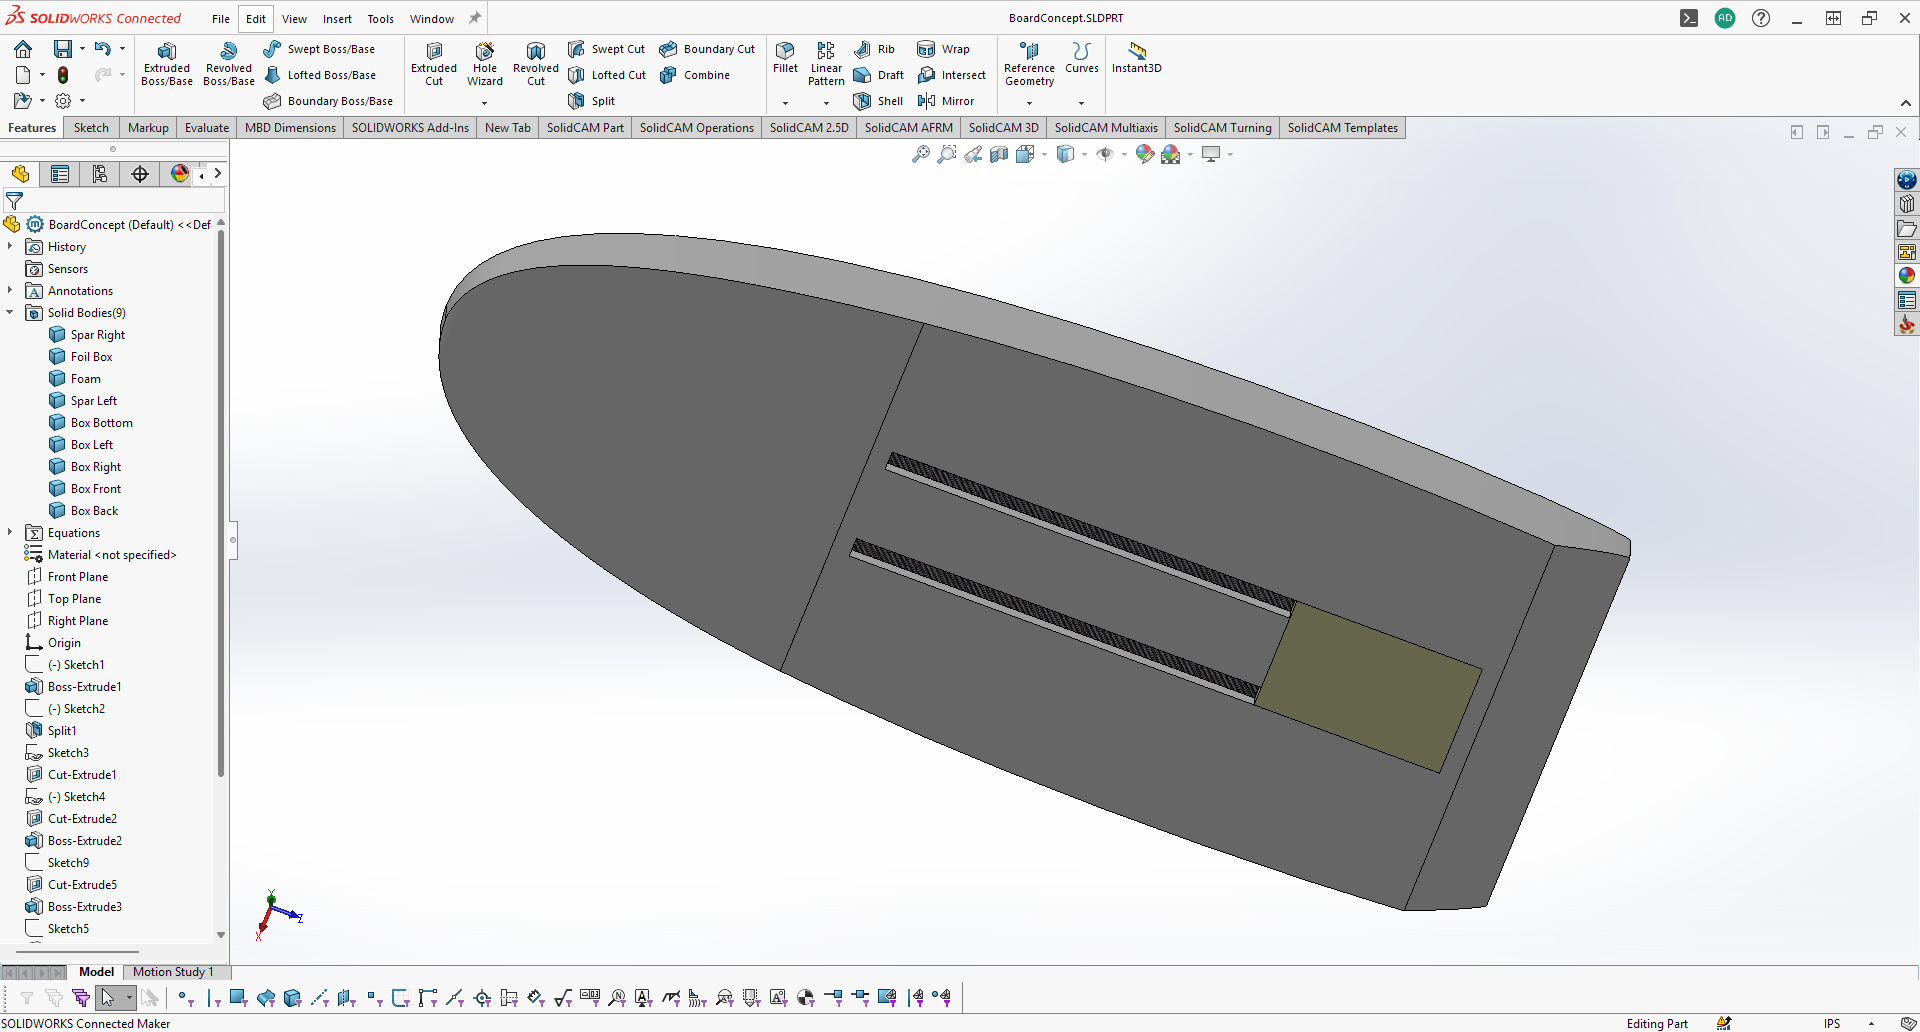
The shape is very basic because I’m purposefully modeling it to be a shape that can be easily obtained by using hot wire cuts etc. I will do some hand rounding of the sharp corners.
The board is 5ft long and 22in wide and the volume is 105L. I’m 205lb and 6’1". I’ve never done any kind of surfing or anything like this besides stand-up jet skiing, but I’m very athletic and learn fast. Is this volume too low for me to learn with, or will it just take longer? I’d rather have a board that is a bit harder to learn on and more fun to ride than one that is easy to learn with, but not very fun once I’m good at it.
Also, does anyone have any suggestions on where to order EPS foam online with reasonable prices and shipping cost? Or maybe somewhere local, I’m in southeastern MA.
hi, I have the same configuration - height and weight, I also had no flying skill. my board is currently 180 cm by 80 cm and the second one is about 165 by 75-70 cm pvc. my opinion is that for training you need a large board in order not to focus, I will also advise a third fulcrum- good luck
One other thing I’ve been thinking about is how to handle the motor wires going into the battery box and have everything be waterproof. I know that I could just run the wires through a hole and seal the hell out of everything with silicone sealant or something, but then the mast wouldn’t be removable without removing the glue.
Has anyone tried sealing shorter wires into the box that penetrate out the bottom of the board that have bullet connectors on the ends? The wires coming out of the mast could then be plugged into those to make everything removable.
I’m pretty sure that a somewhat tight fitting length of silicone tubing that is lubed up with silicone grease would be able to be slid over the connections to make them waterproof.
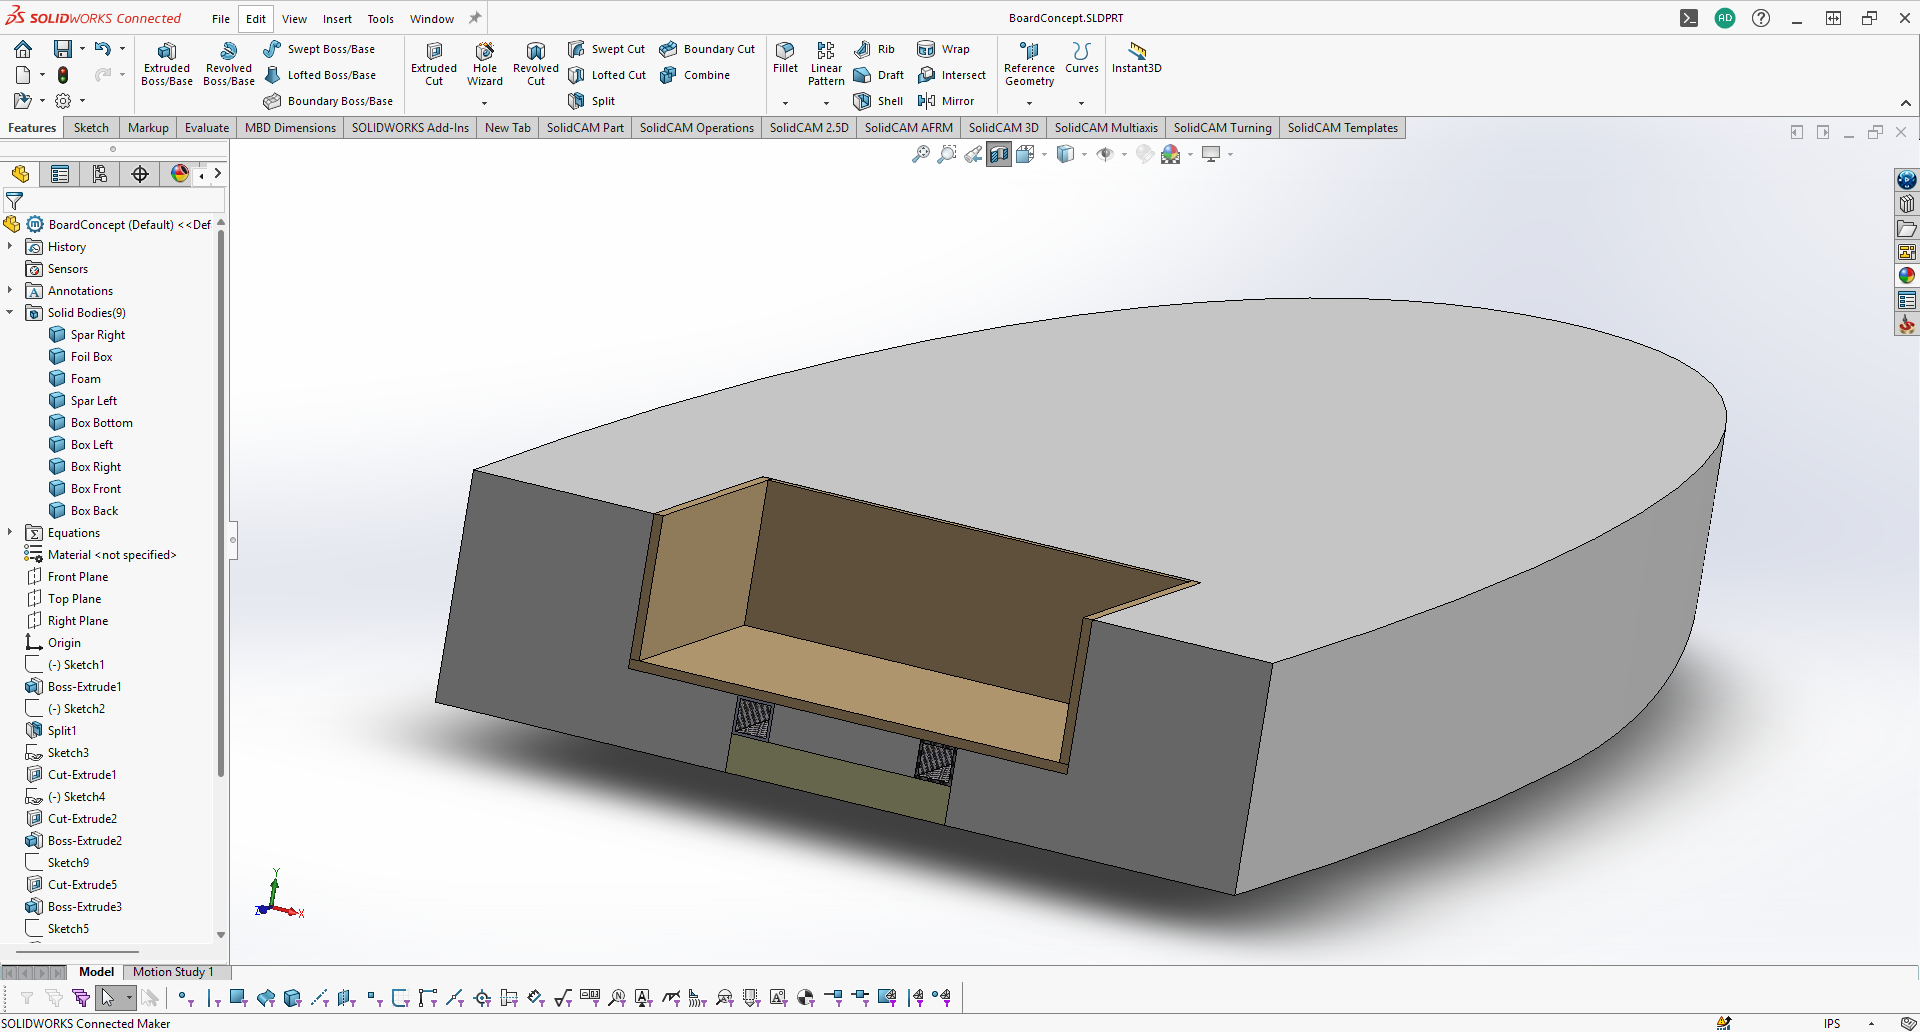
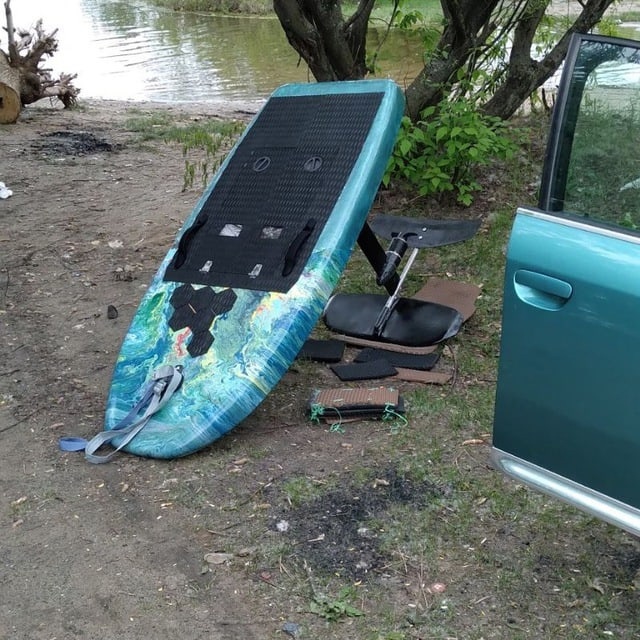
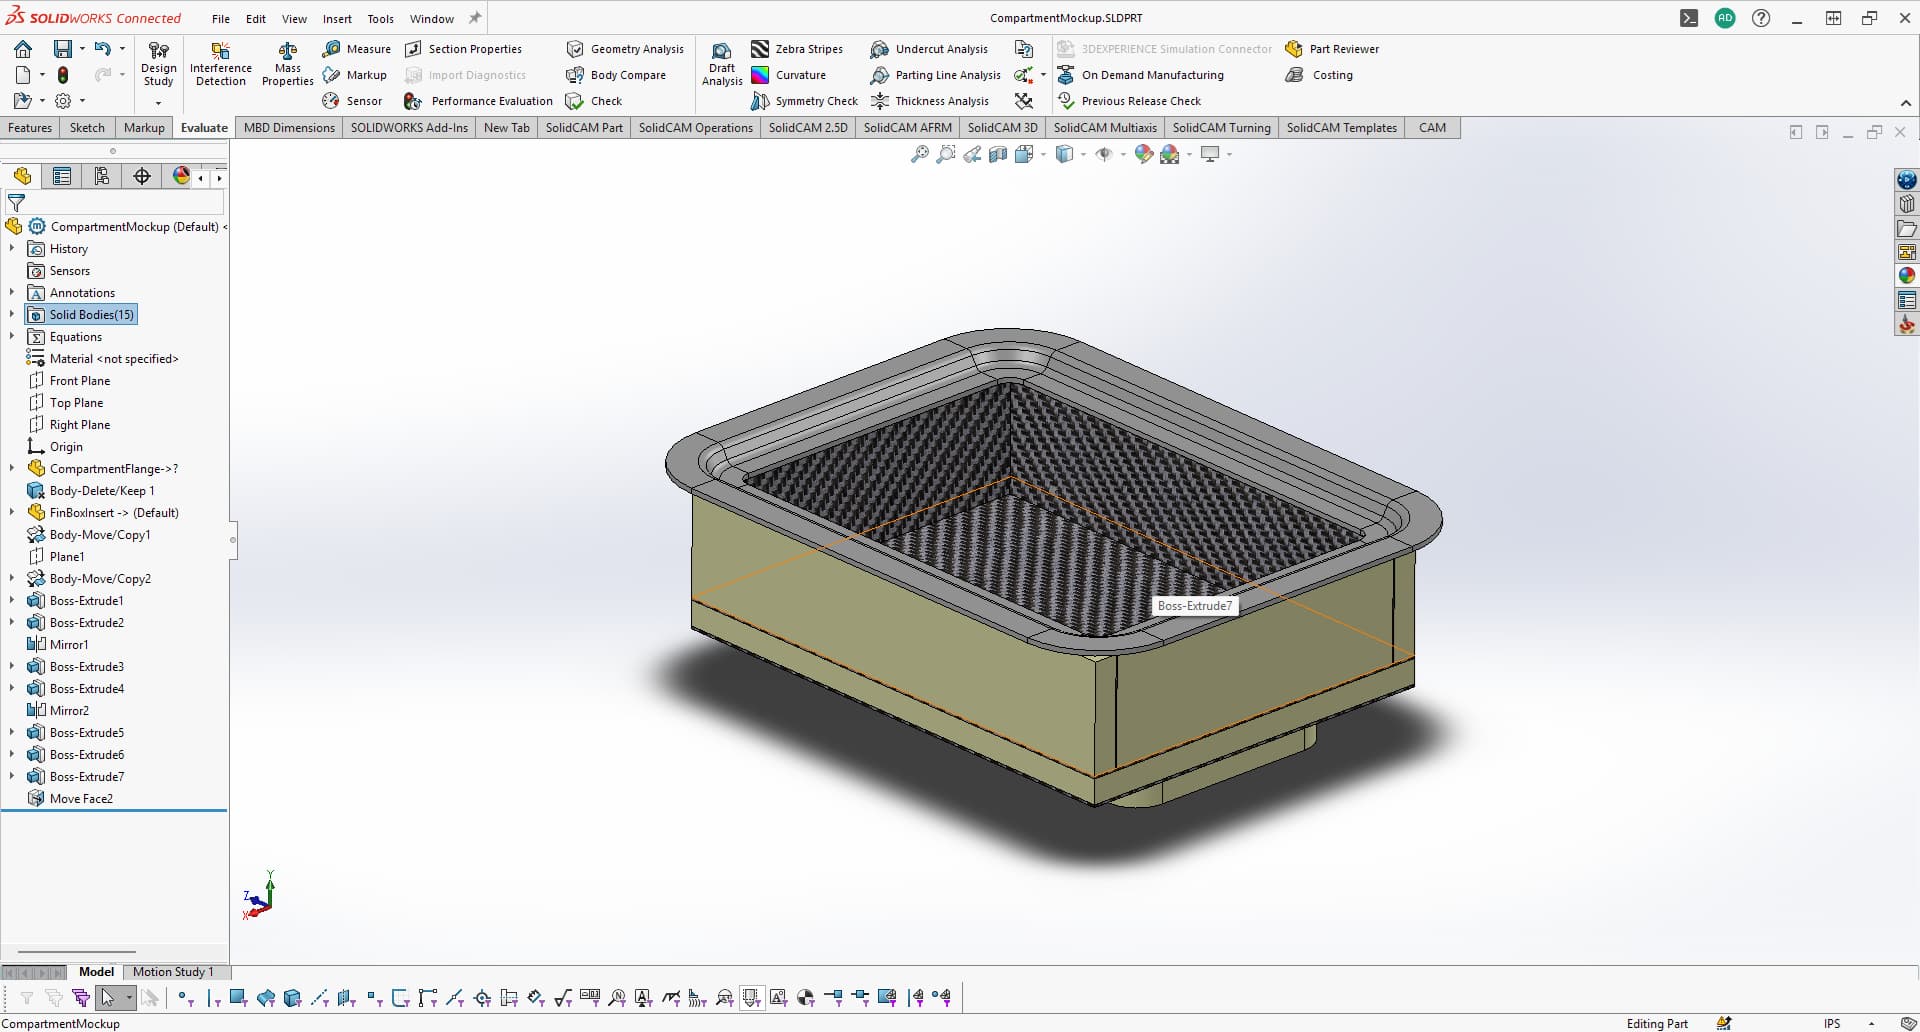
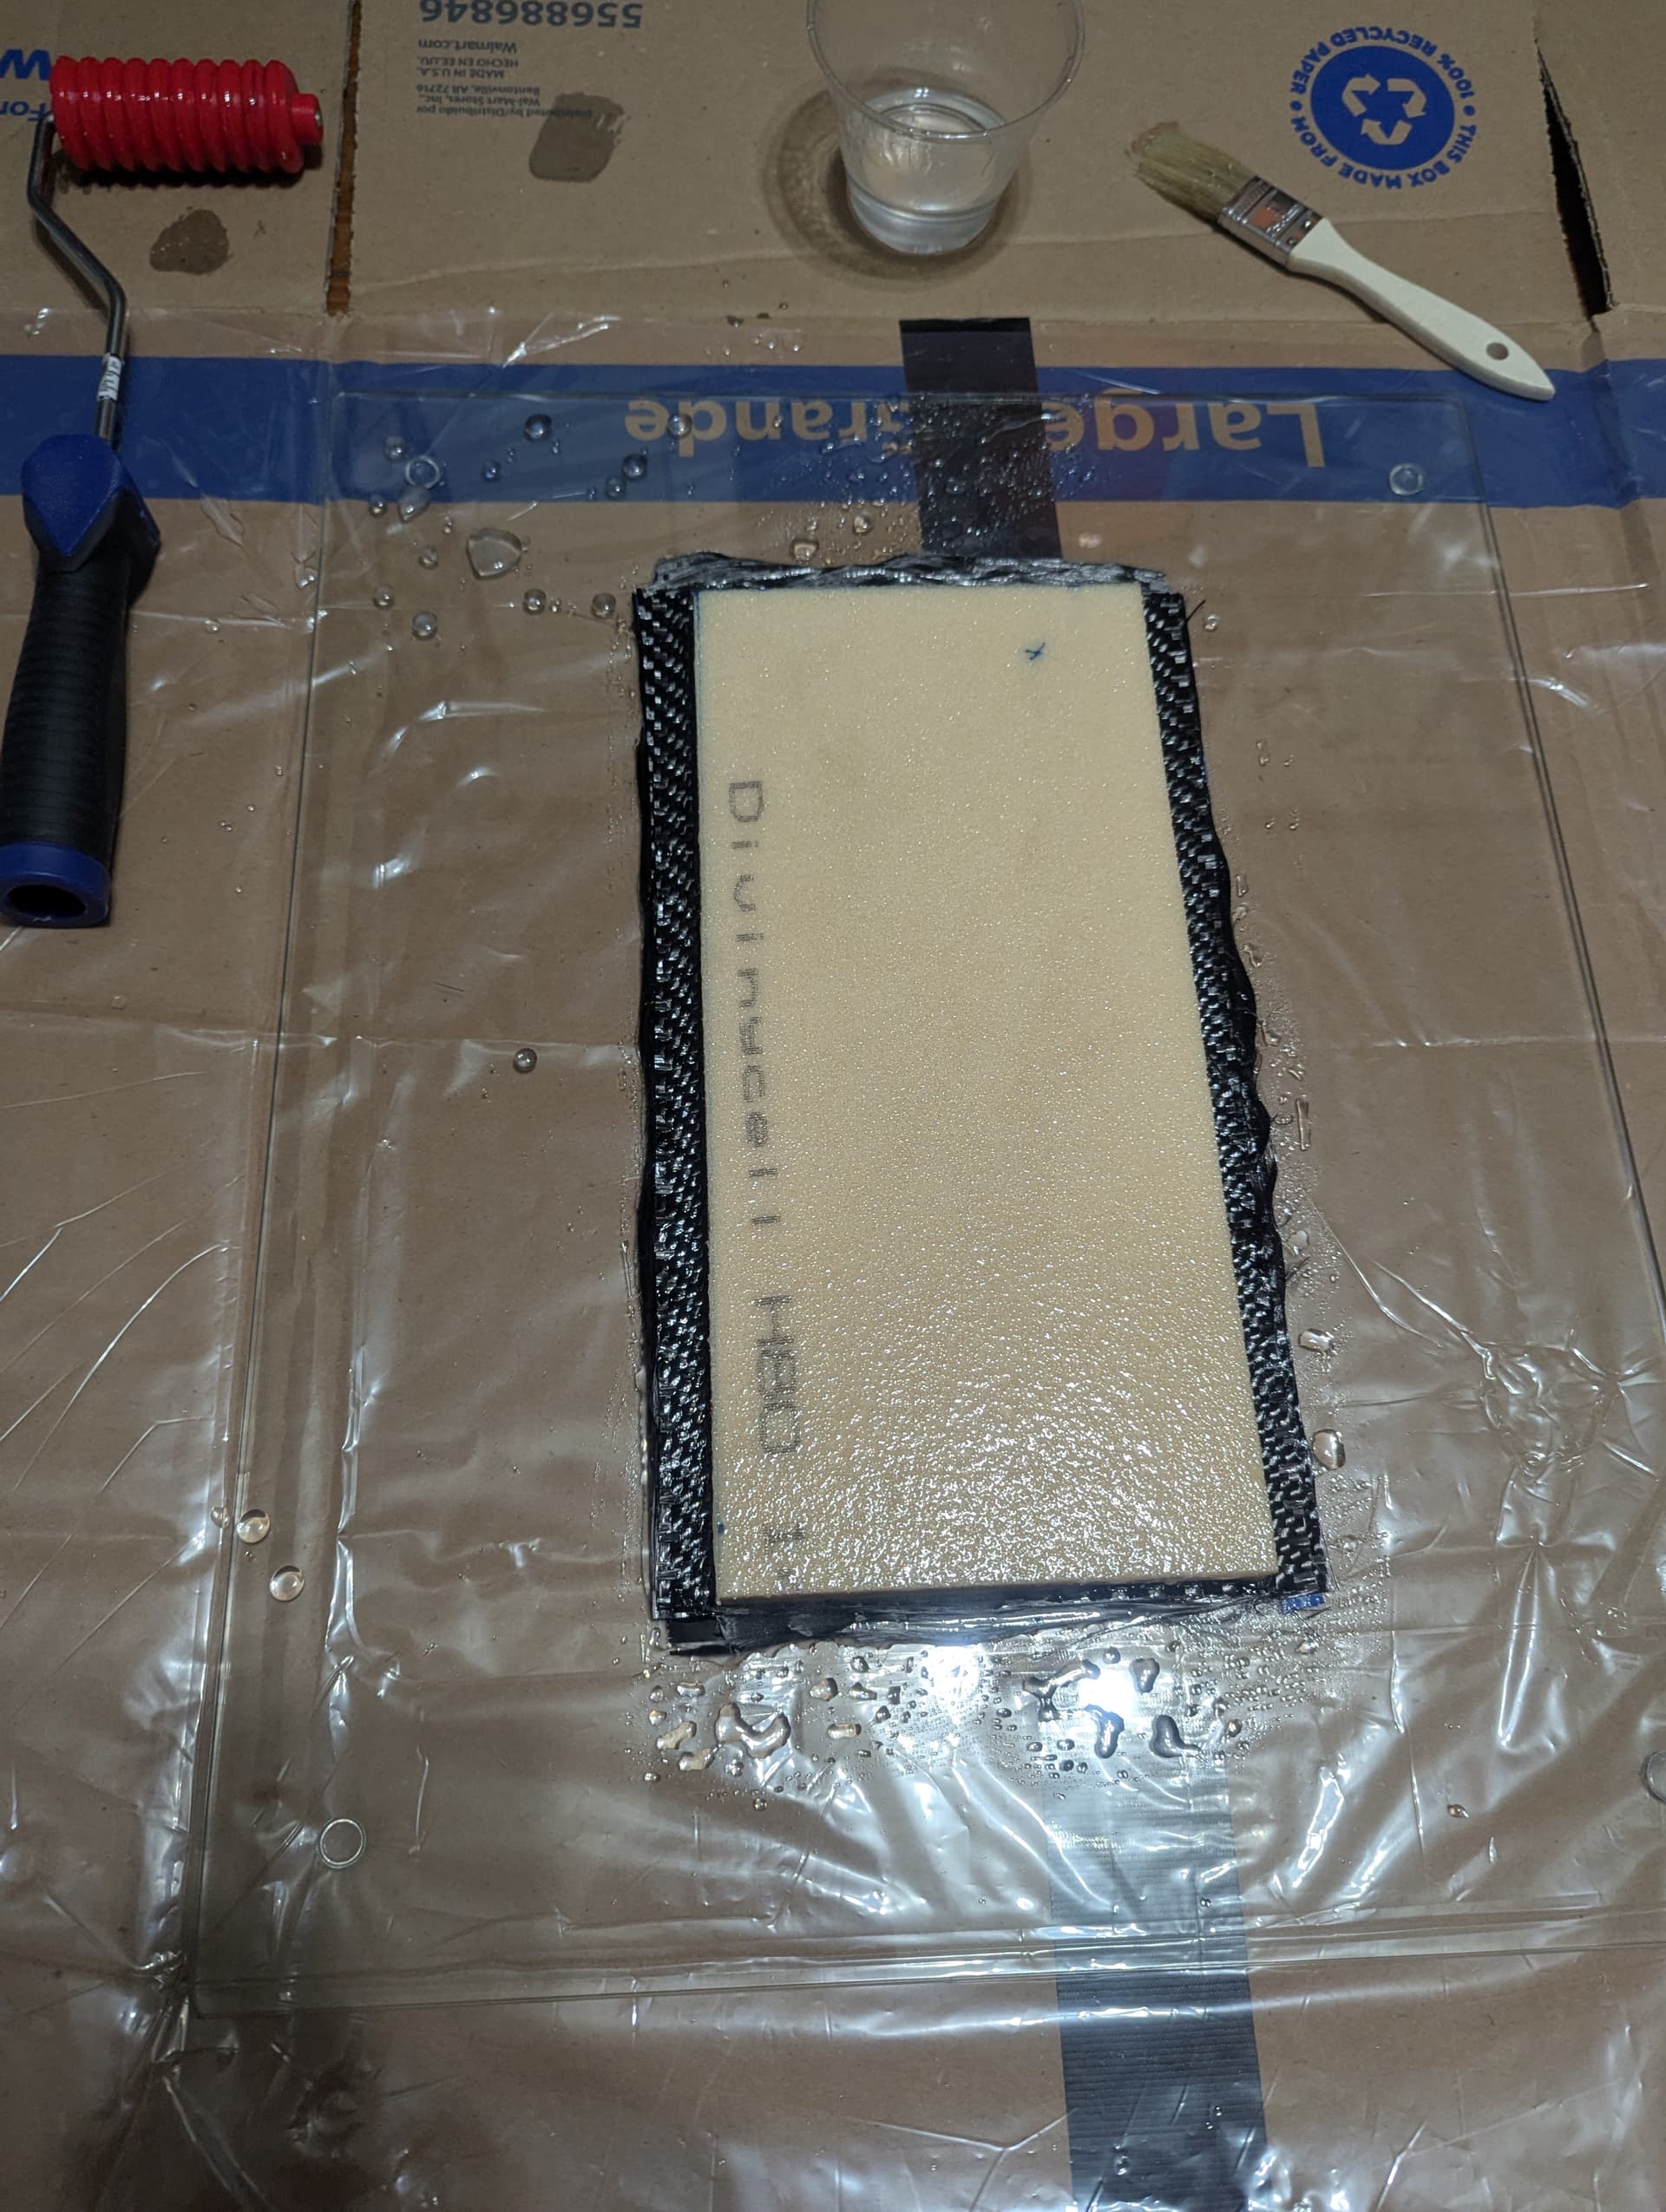
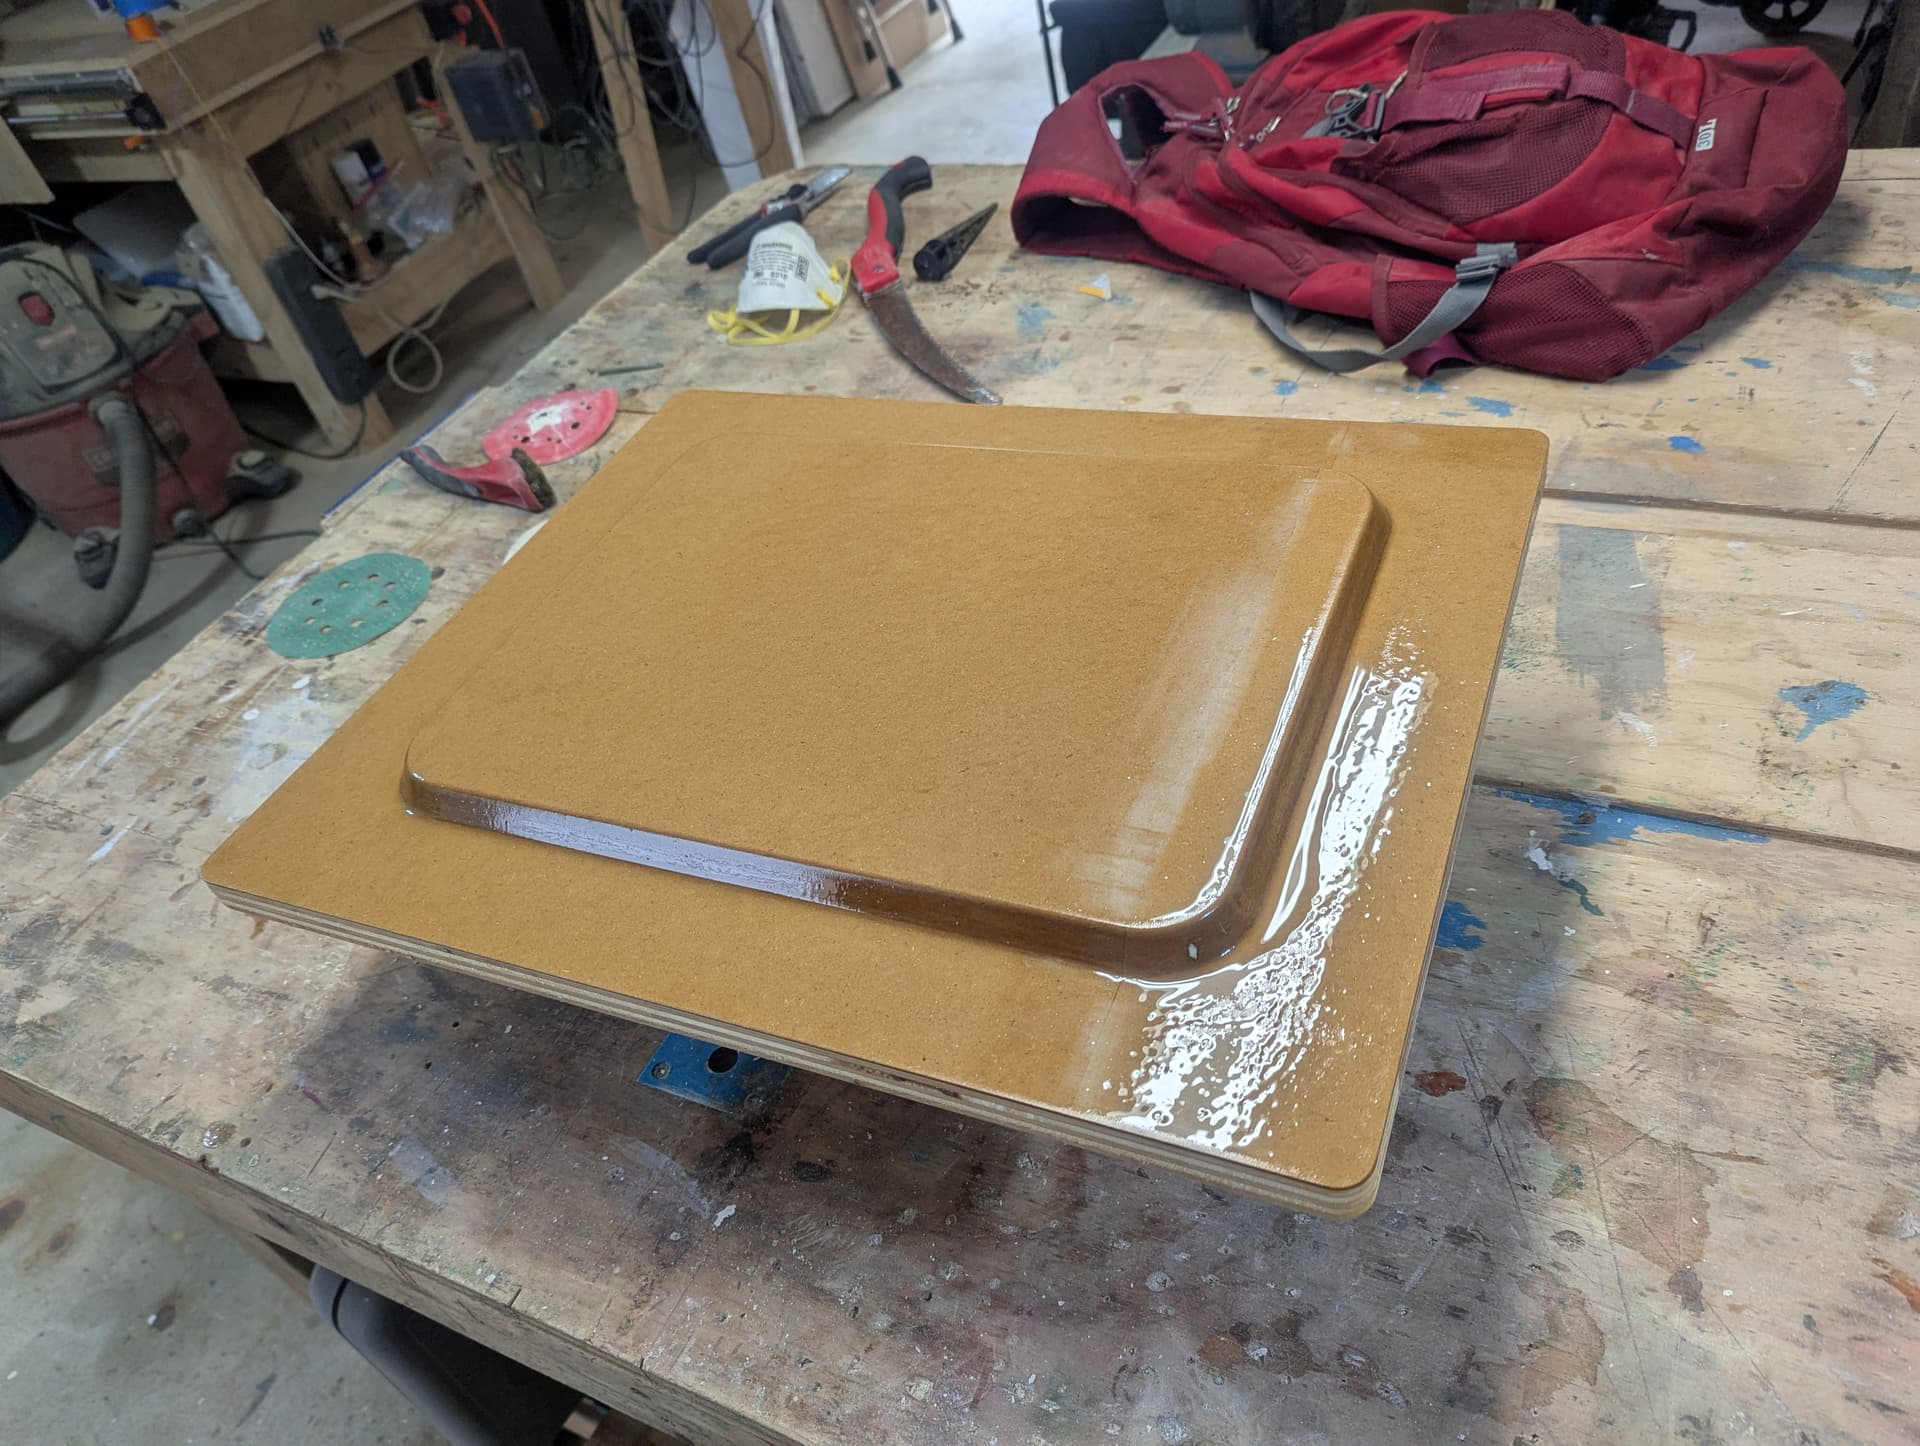
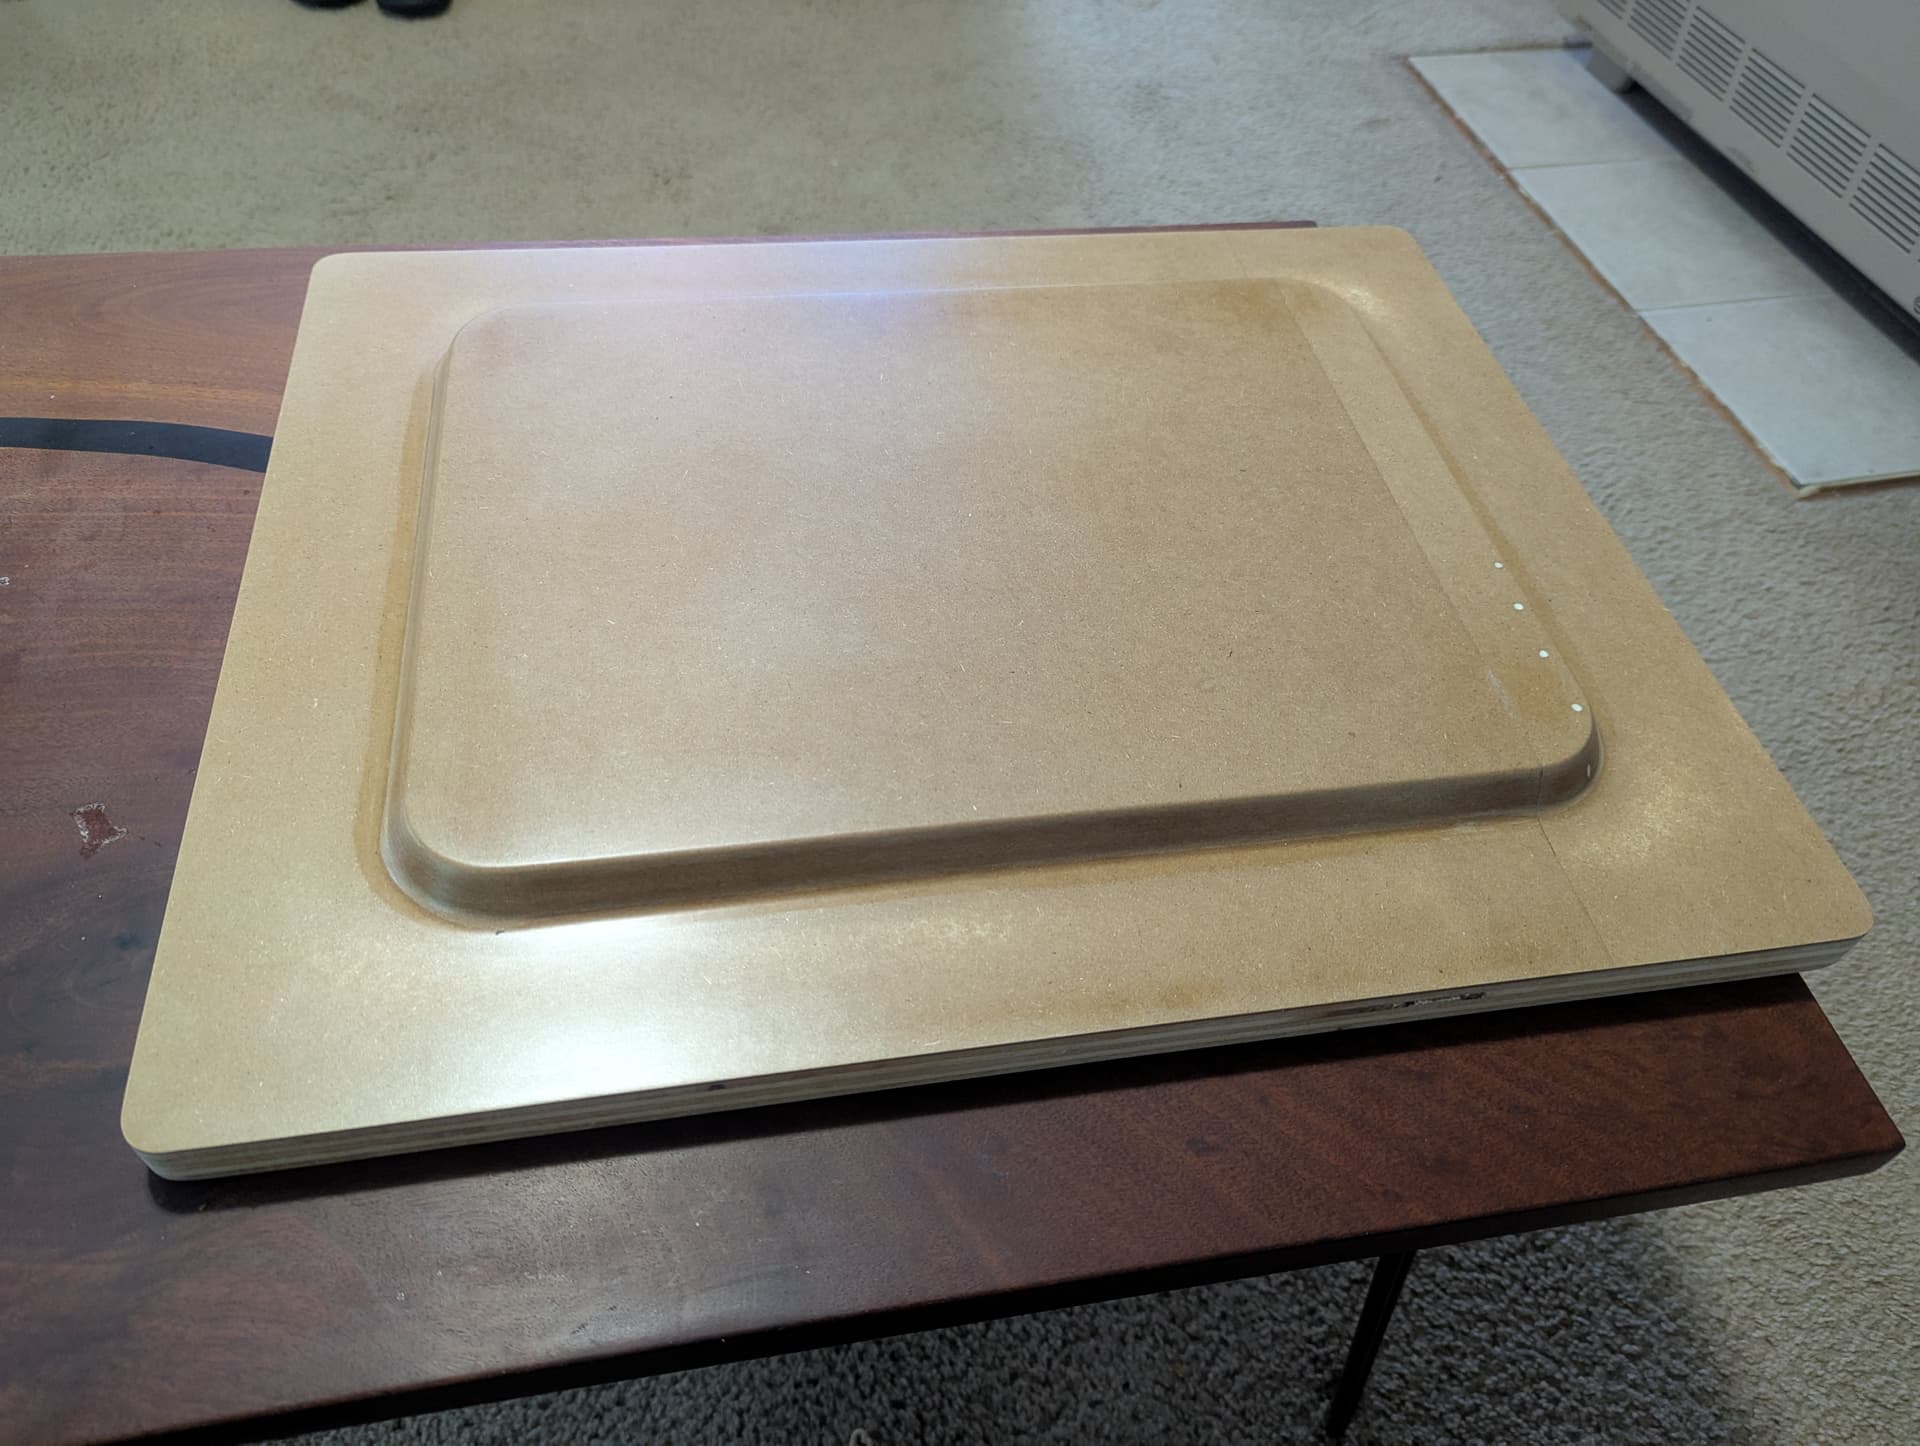
Here’s my current idea for the electronics compartment. The yellow parts are 3/4" divinycell H80. The top flange will be made of fiberglass or carbon fiber. The long flange on the top is for the board’s fiberglass to overlap and have a strong bond which will transfer the loads into the flange and into the hatch which will be bolted on top.
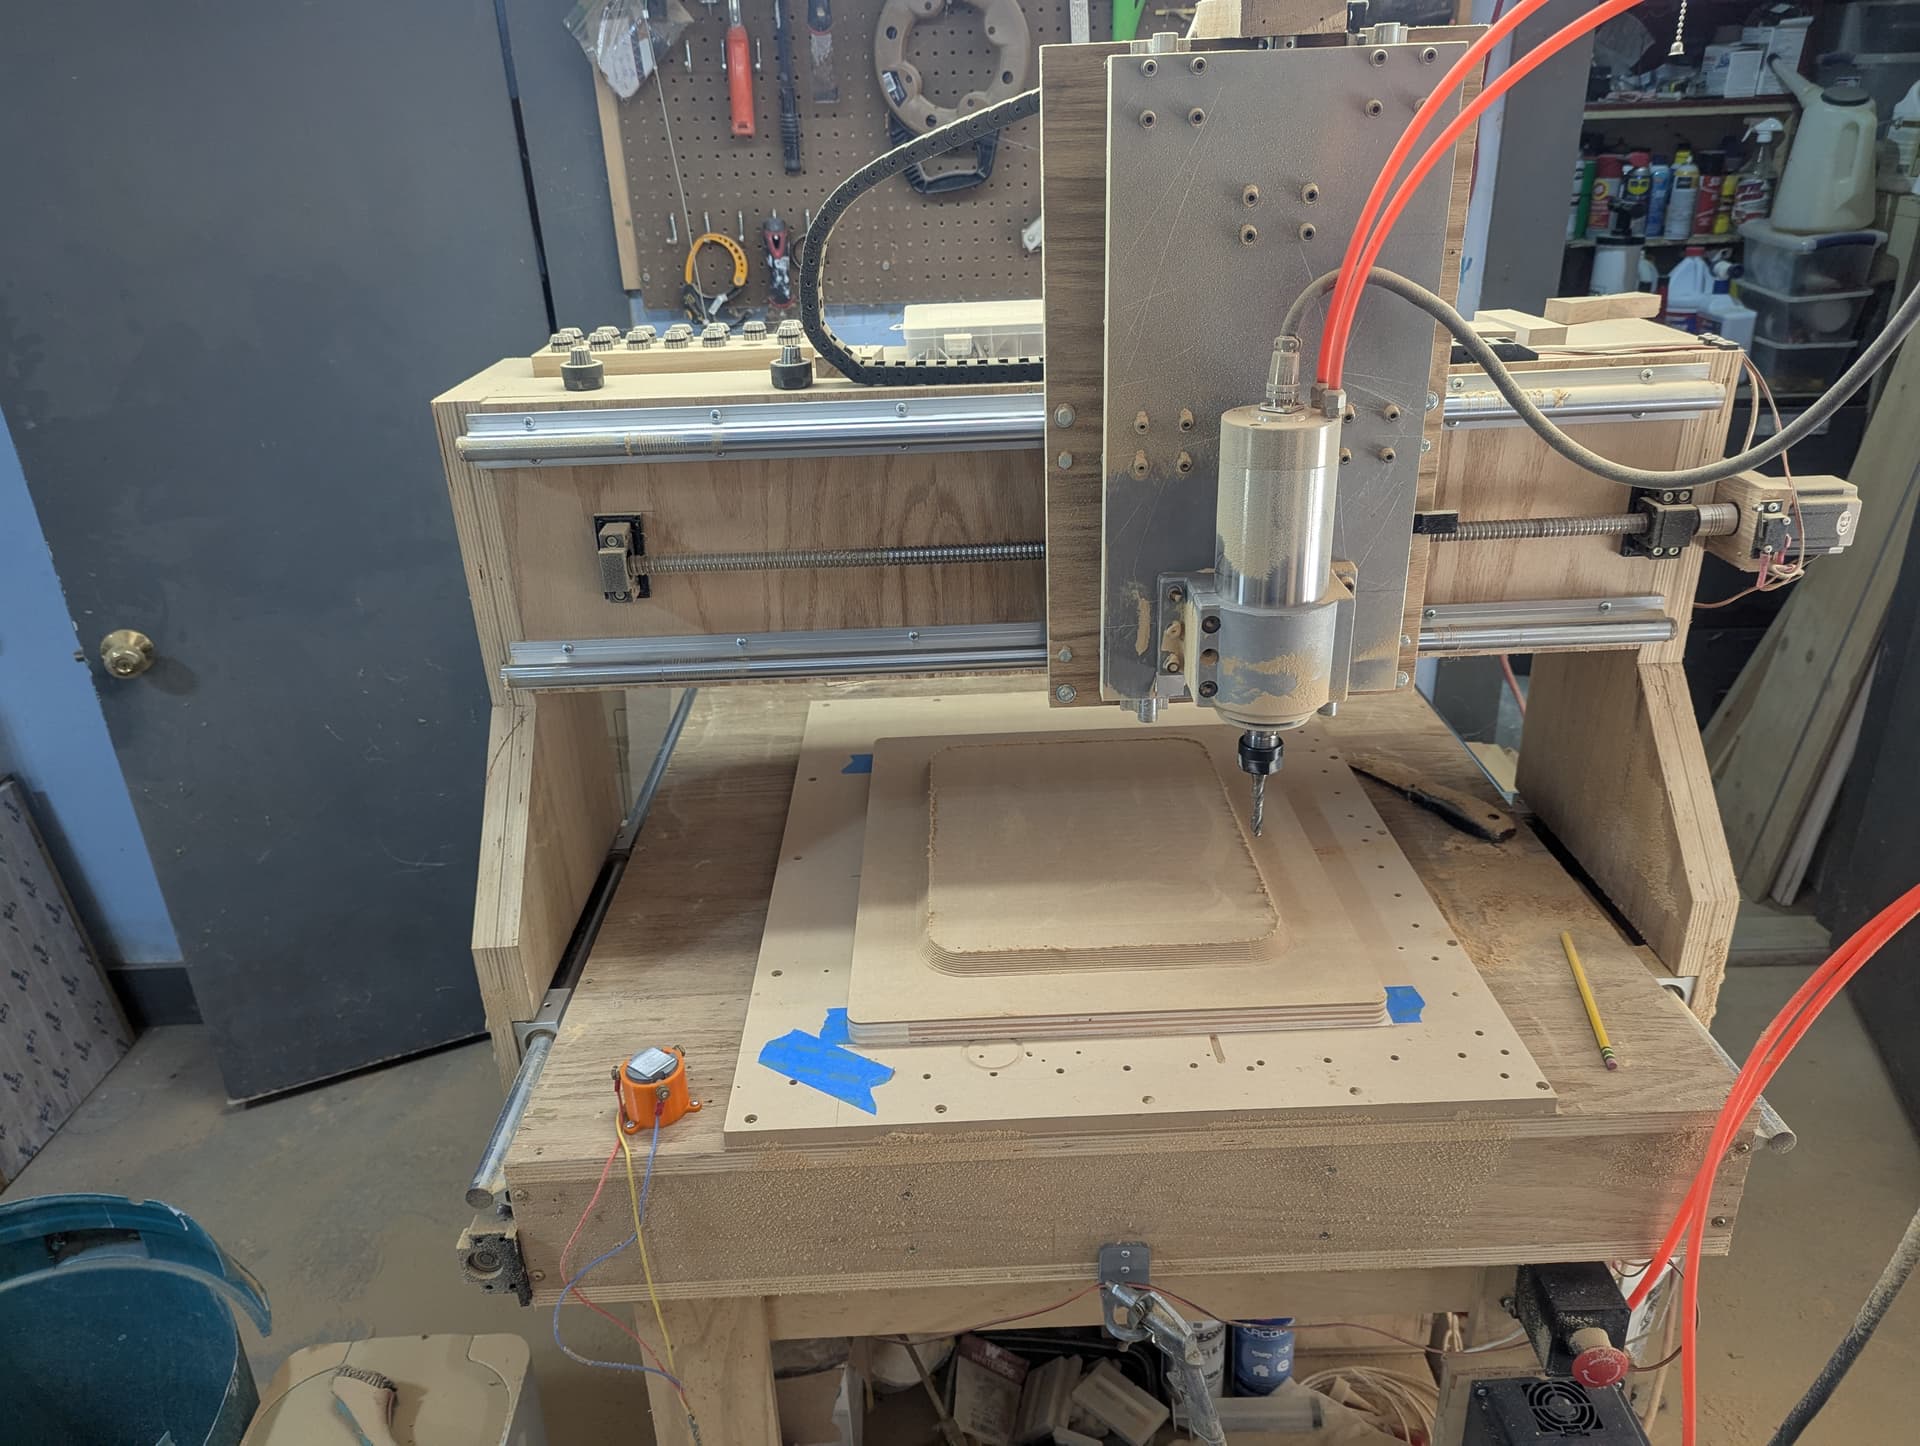
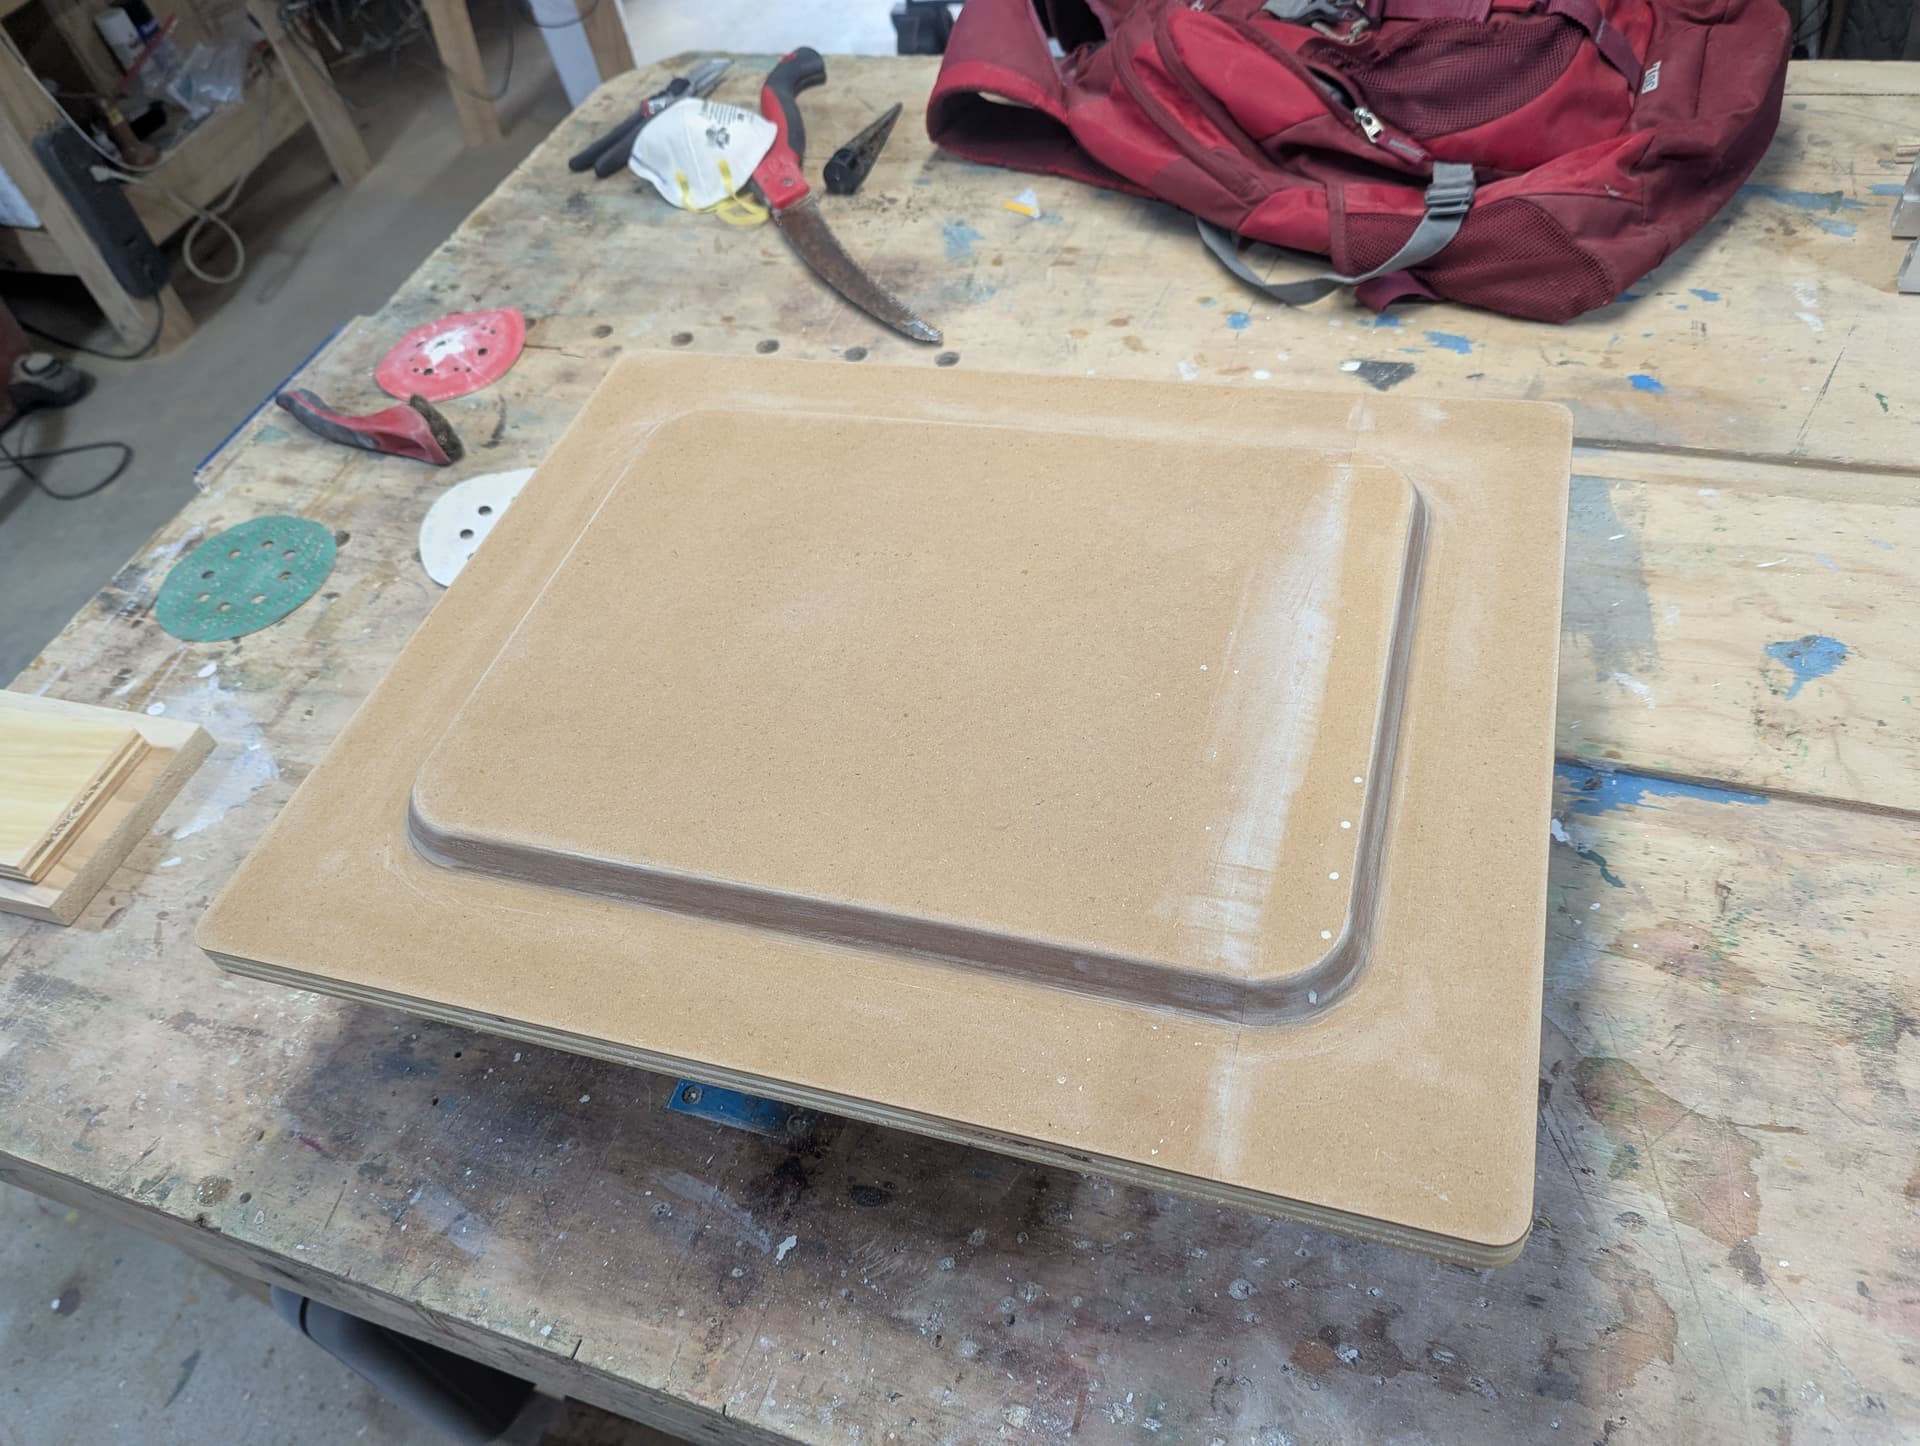
First part is done, the fin box insert. Next I’ll make the mold for the flange on top while also working out the best way to laminate divinycell with carbon fiber.
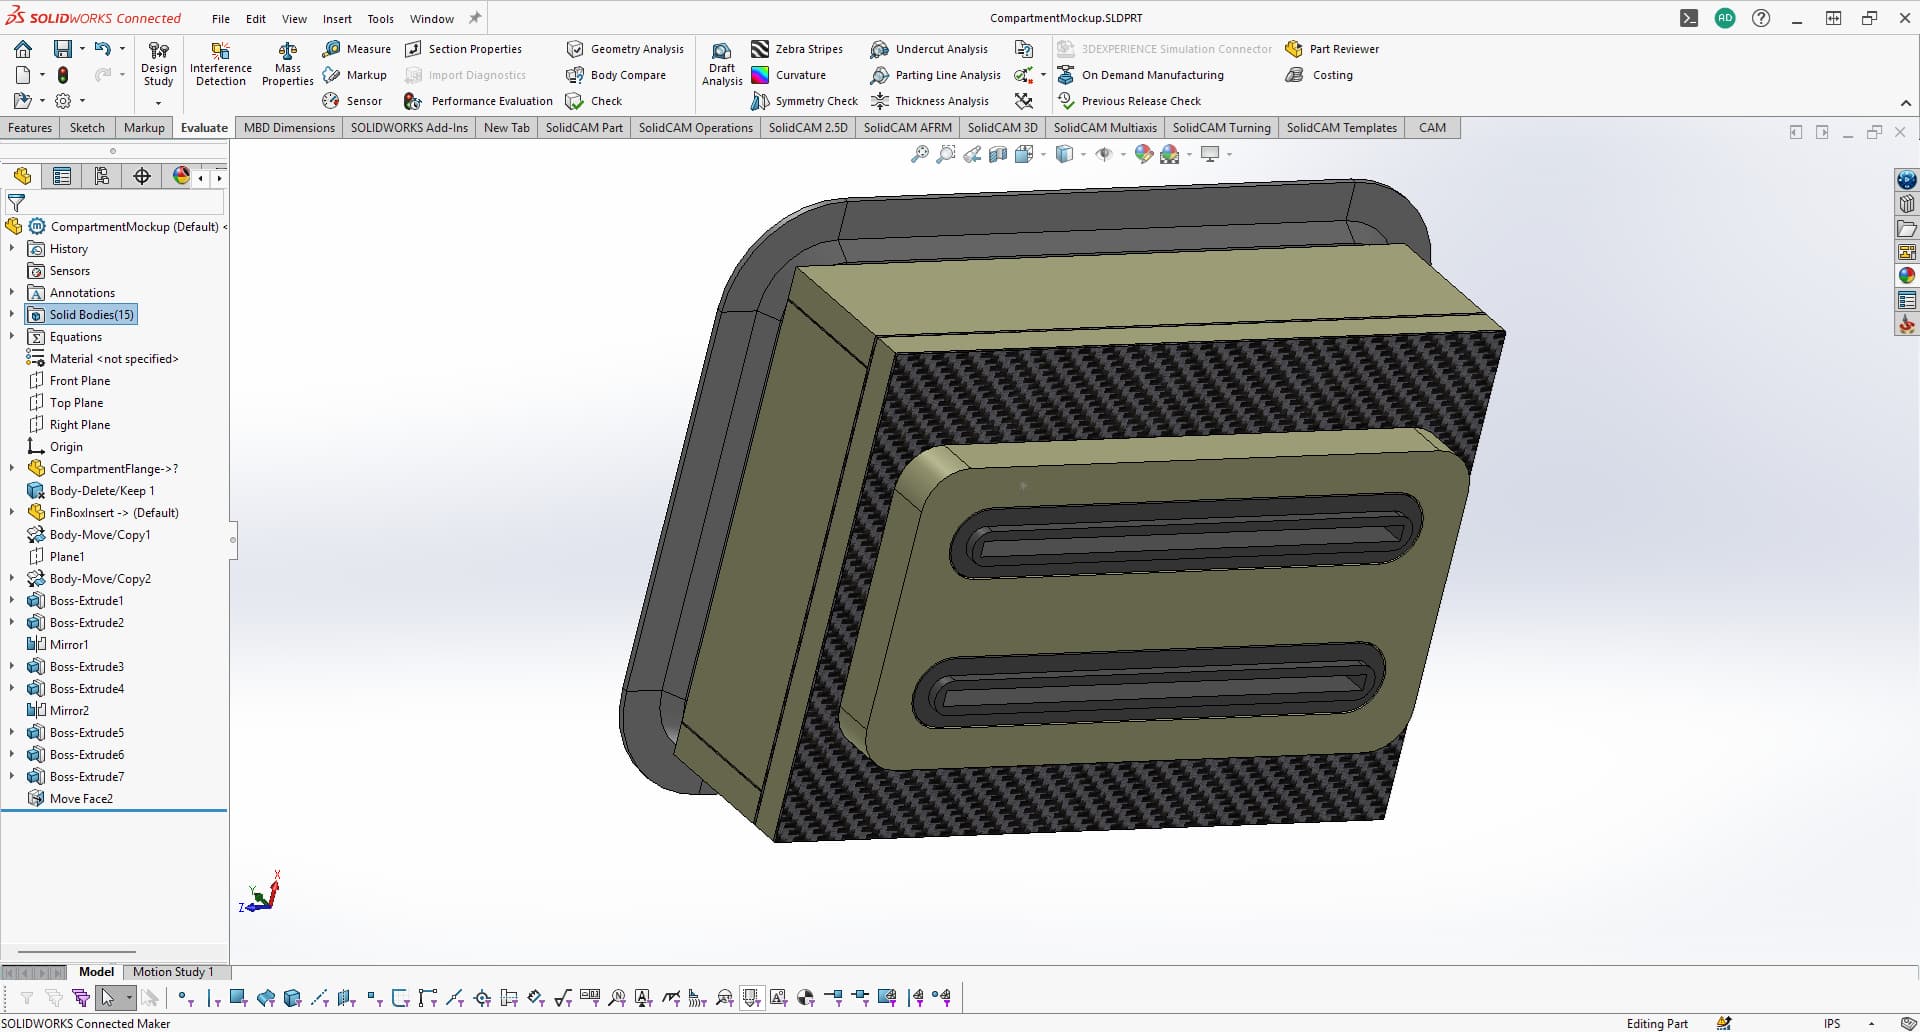
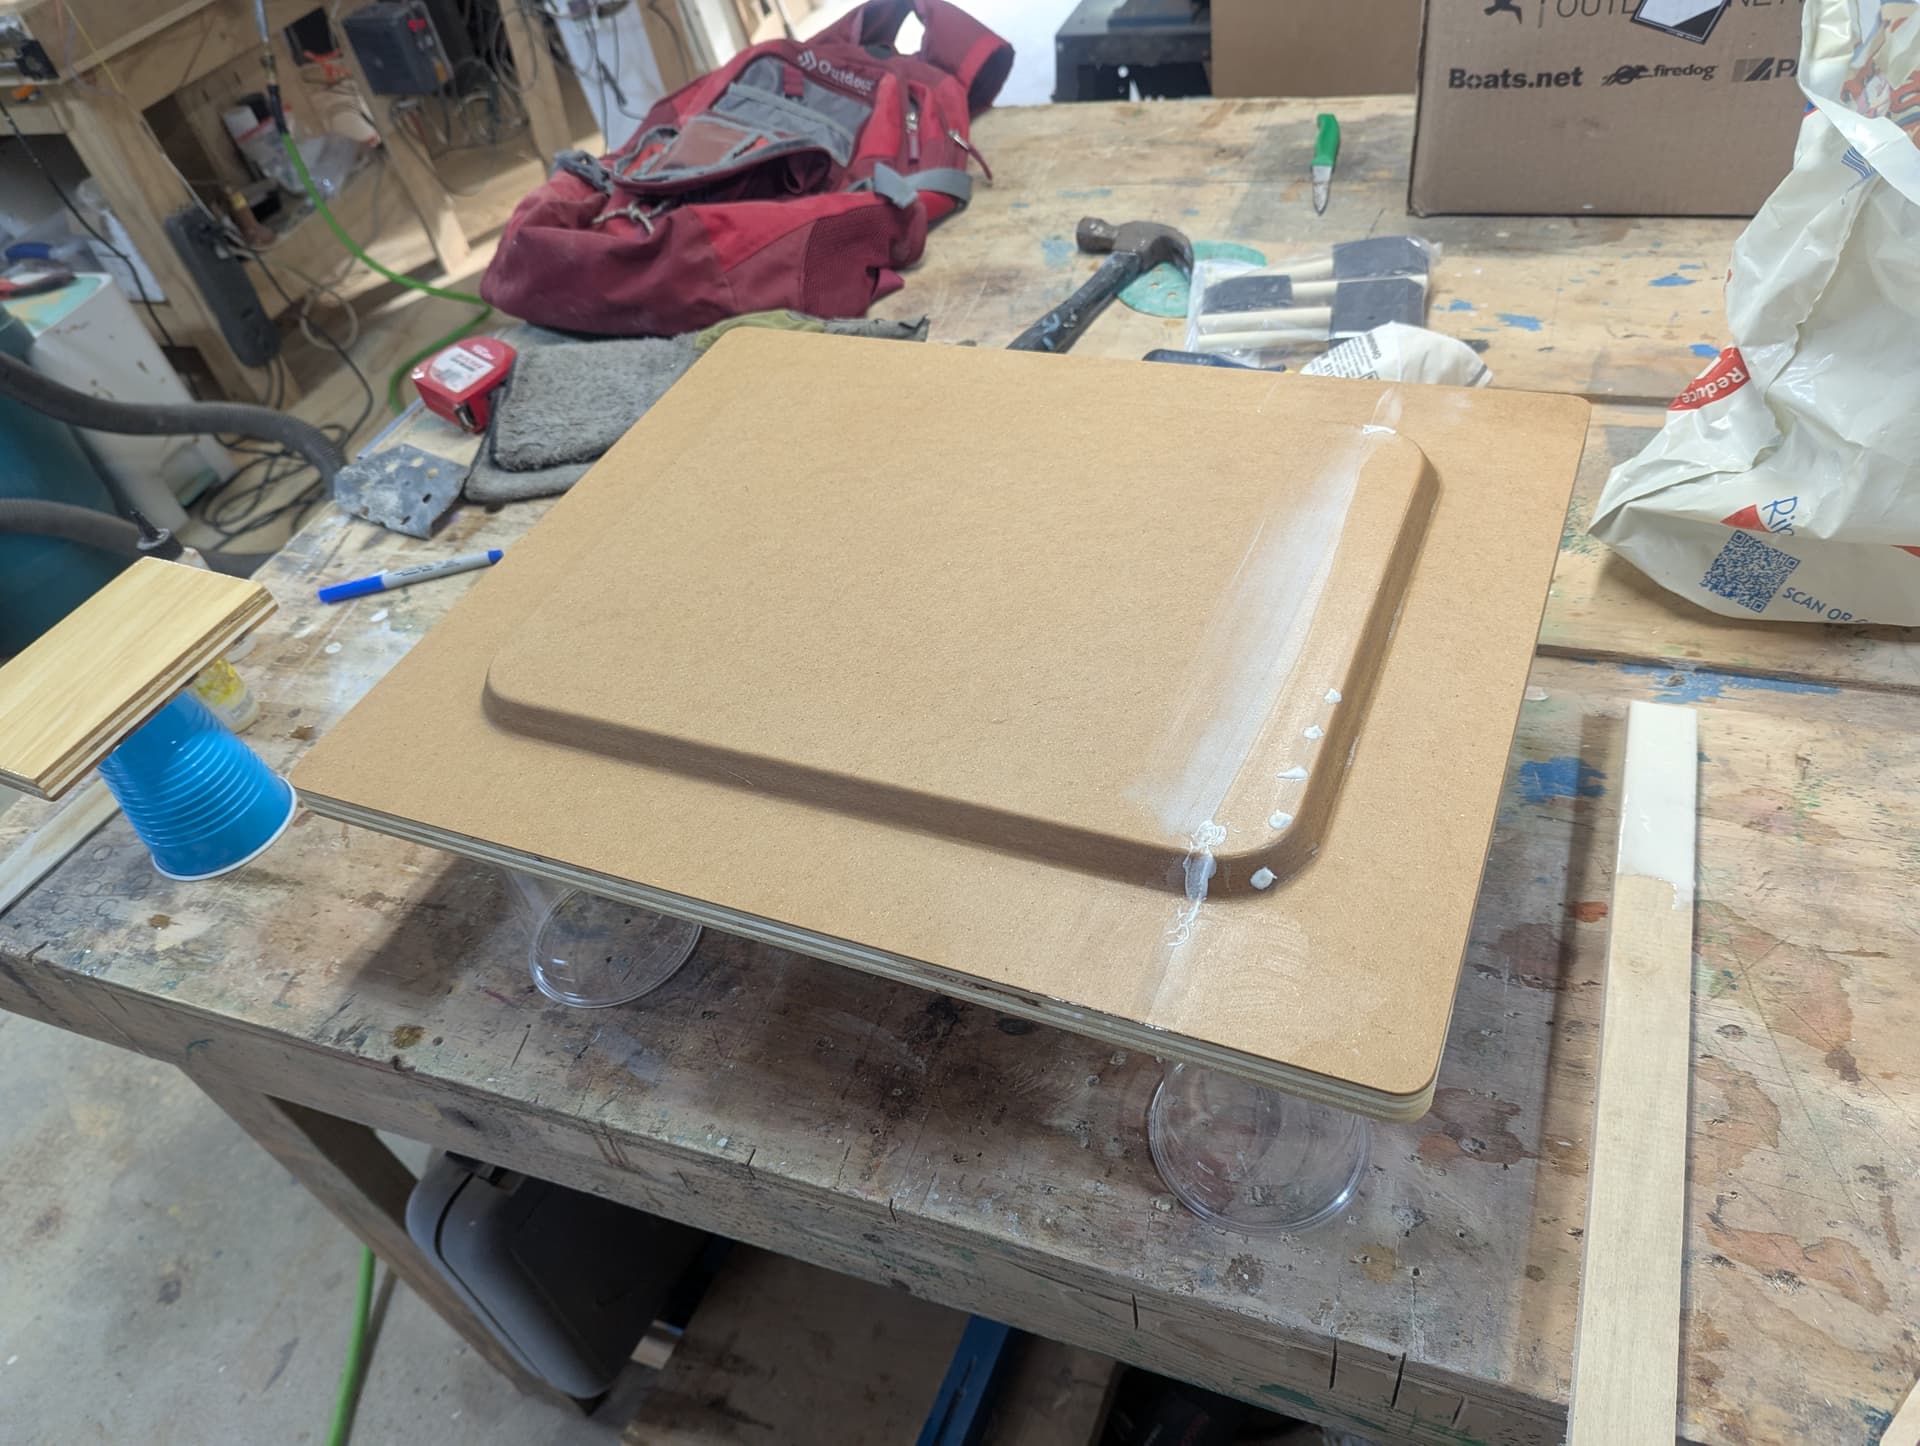
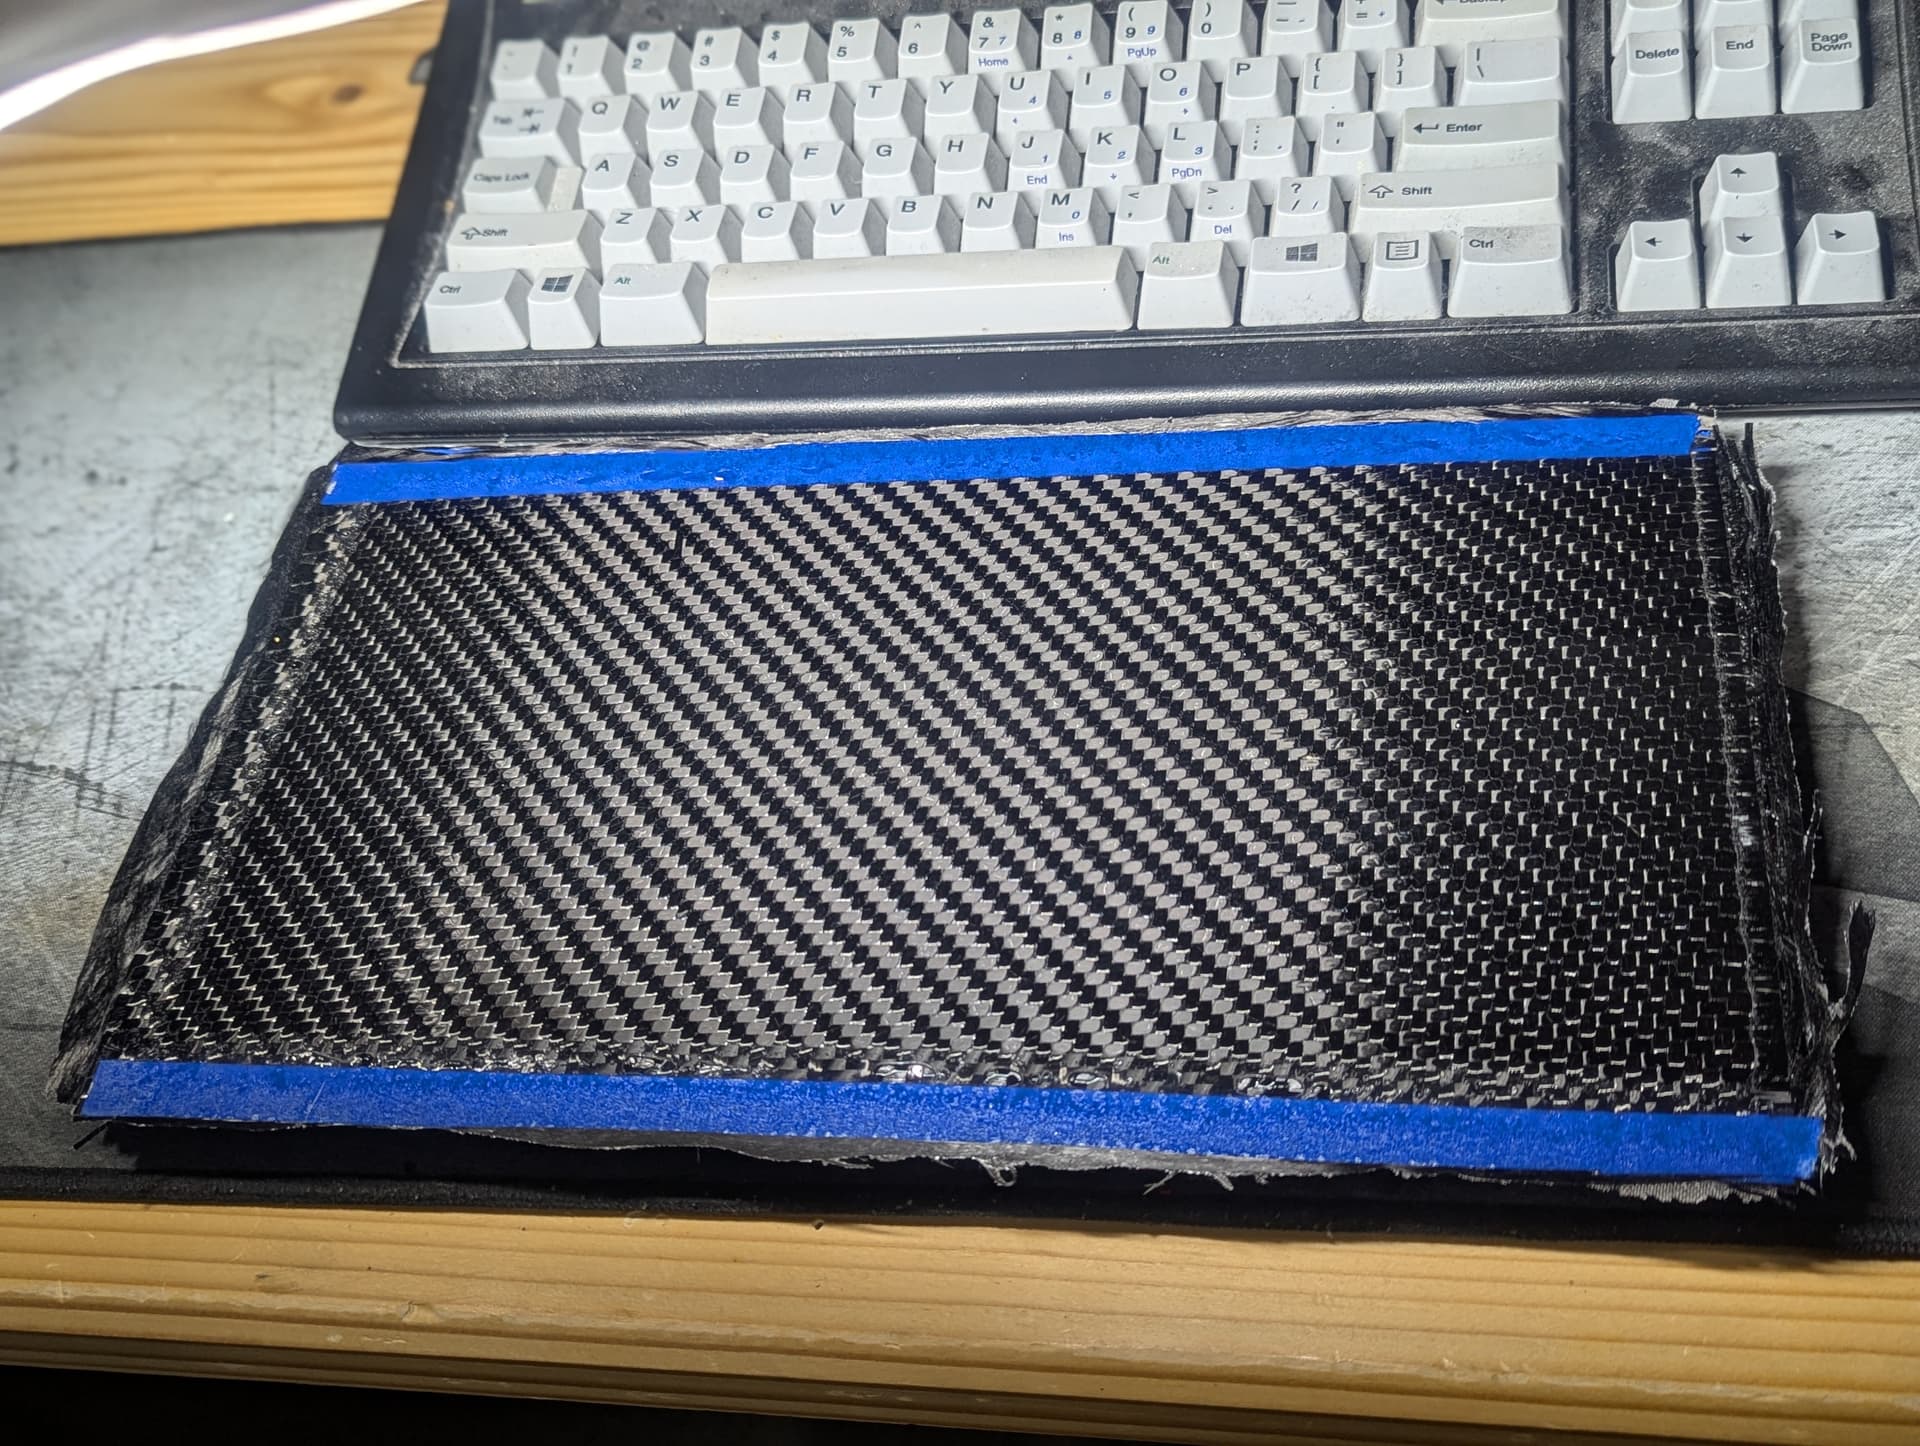
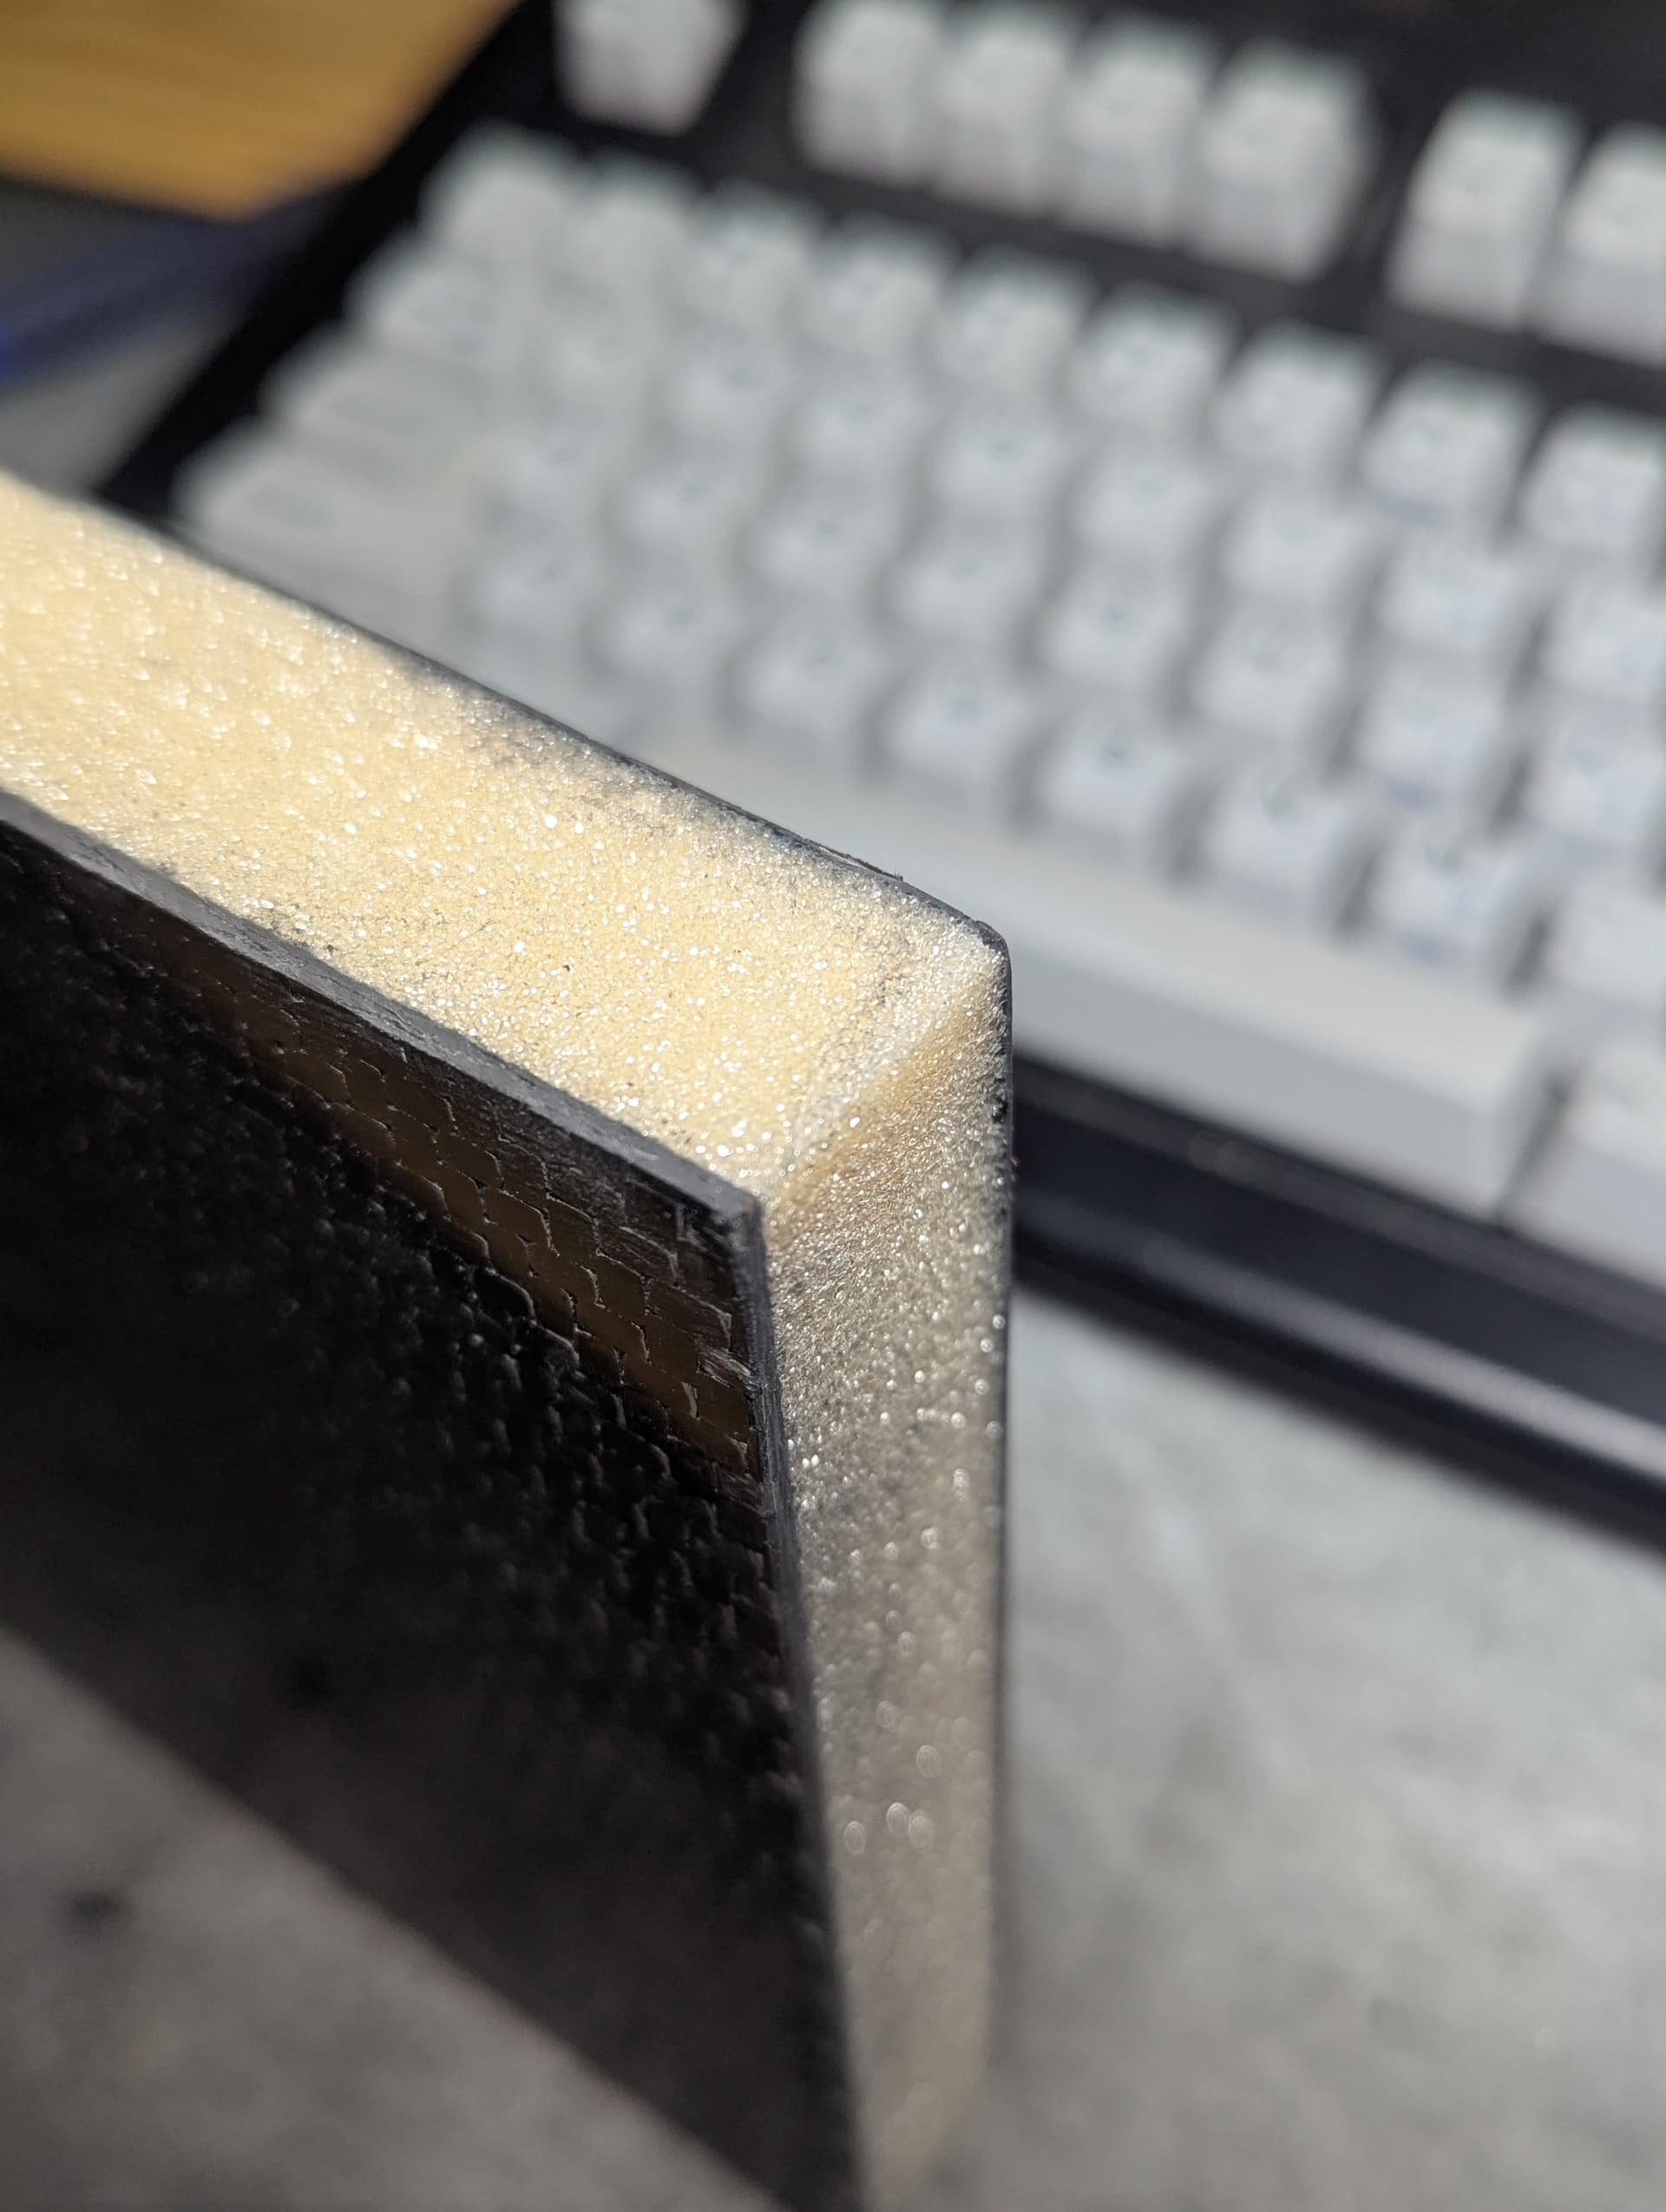
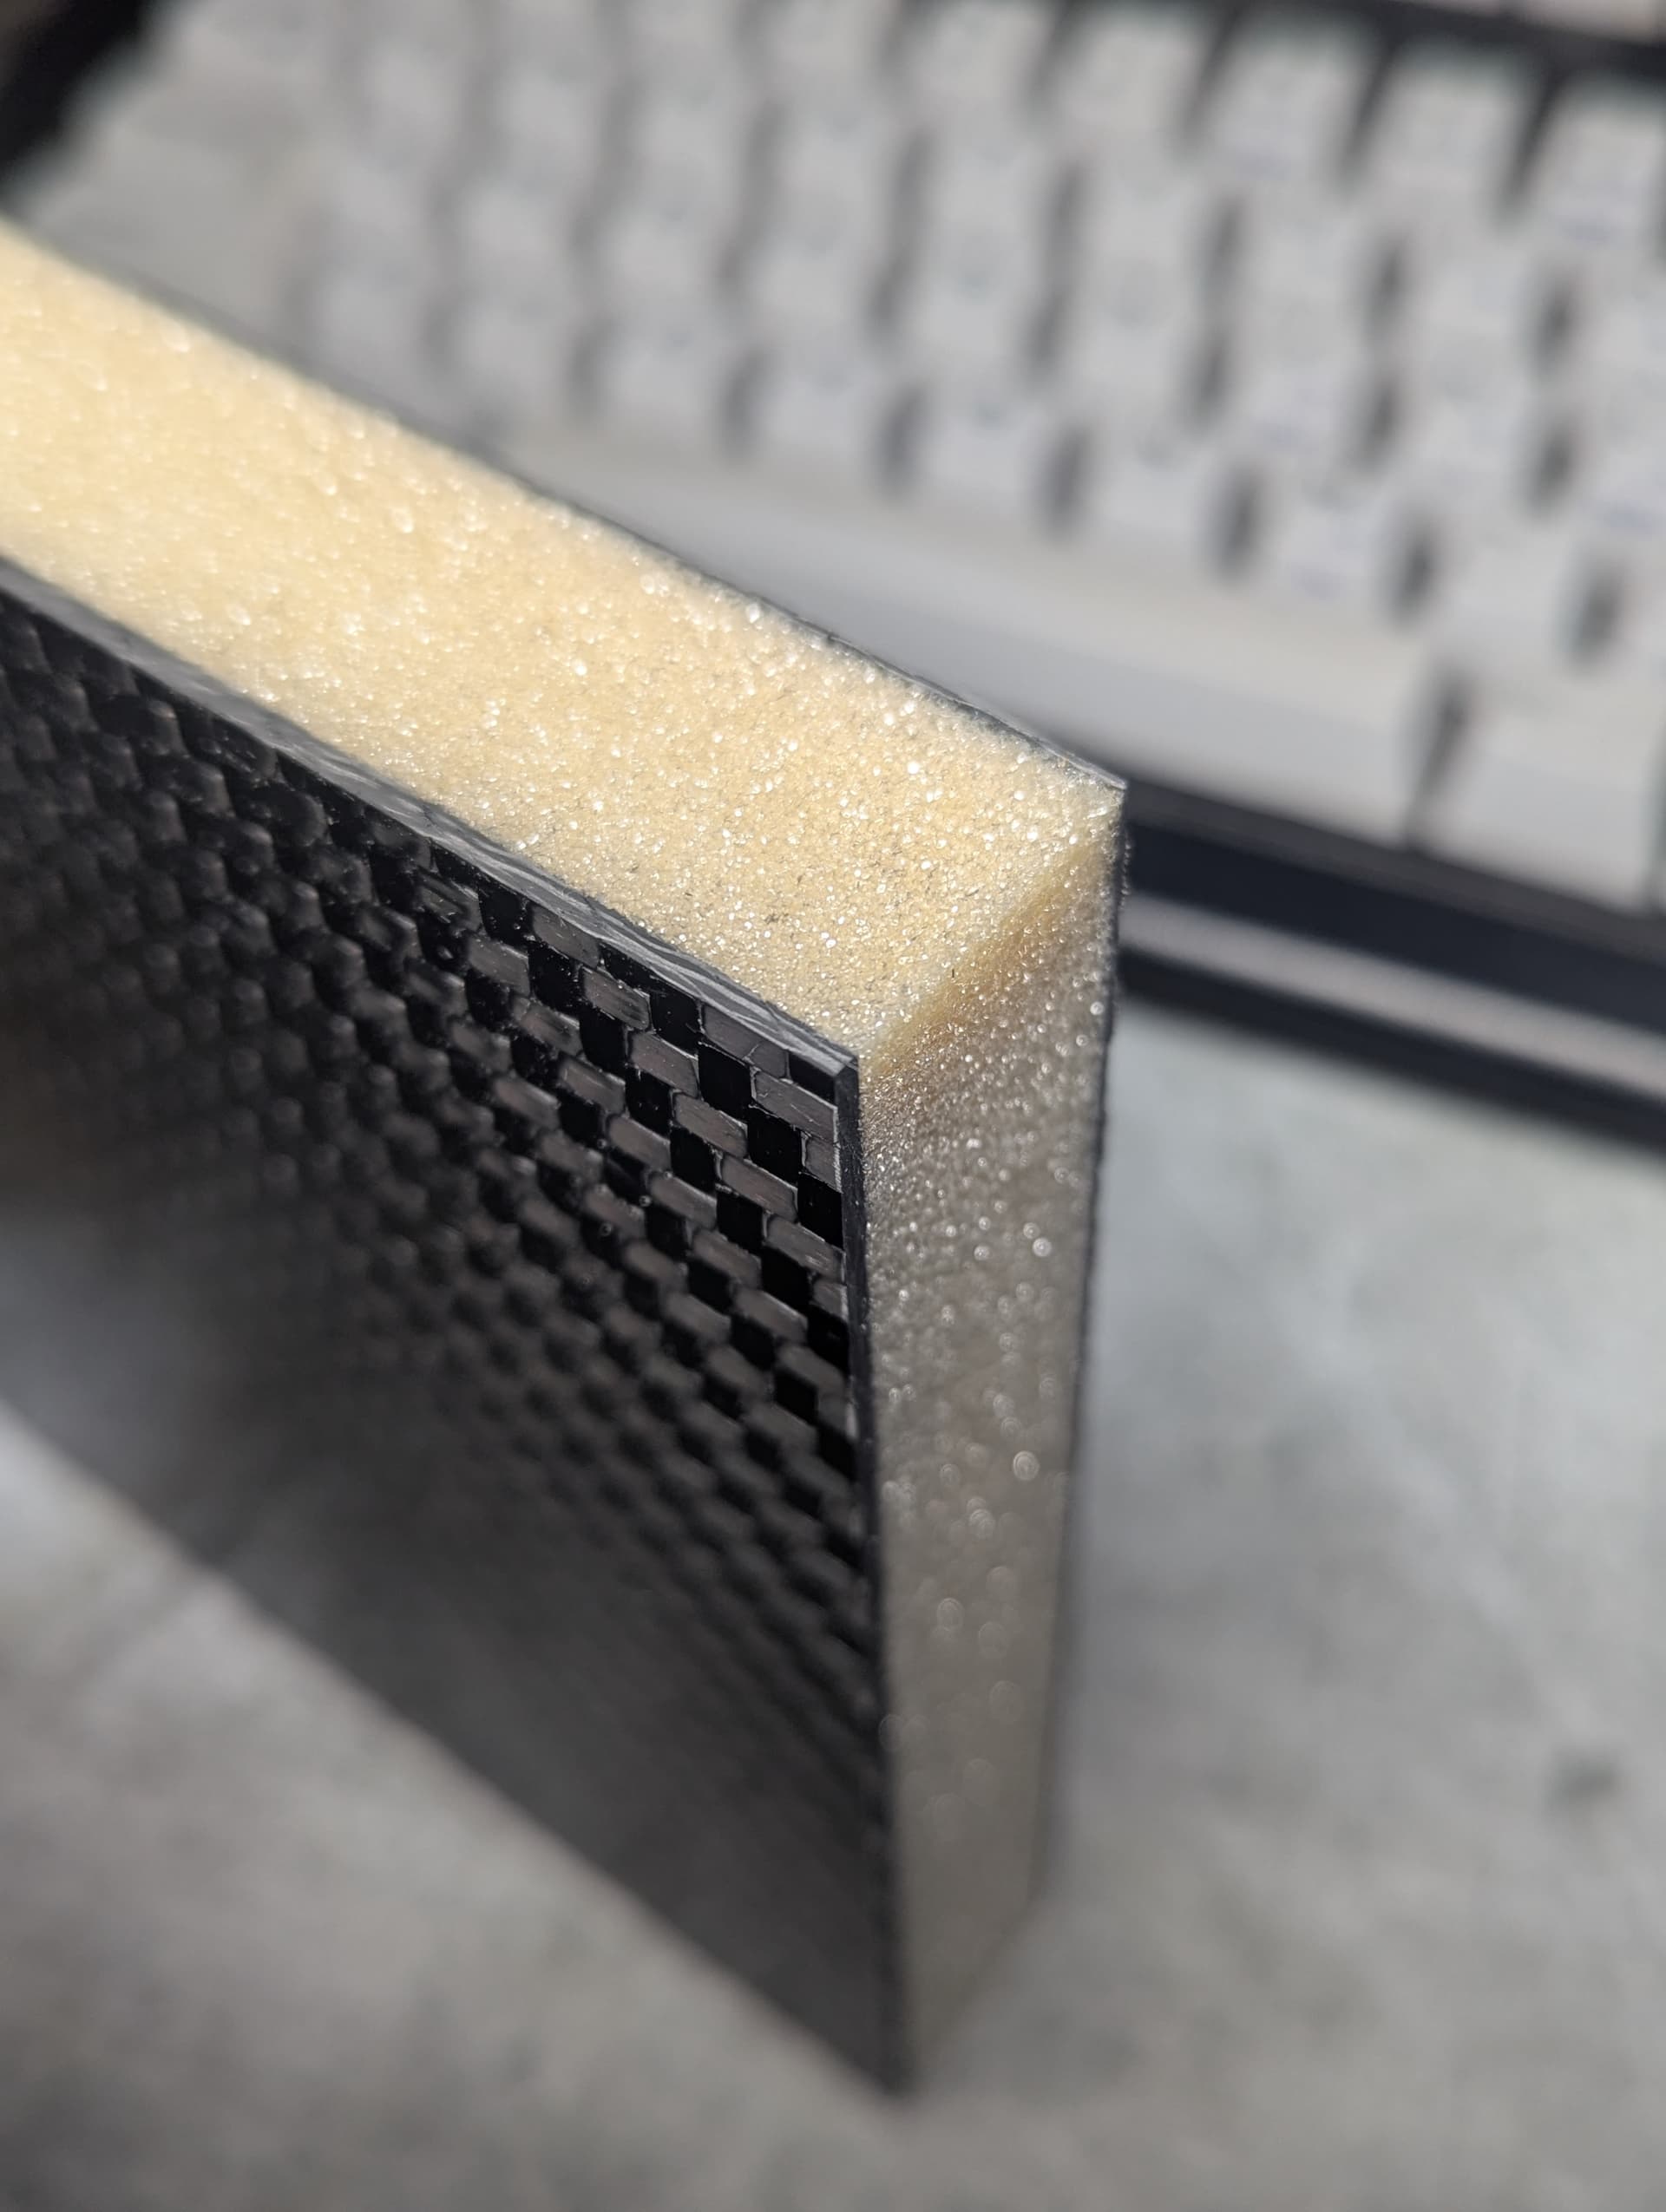
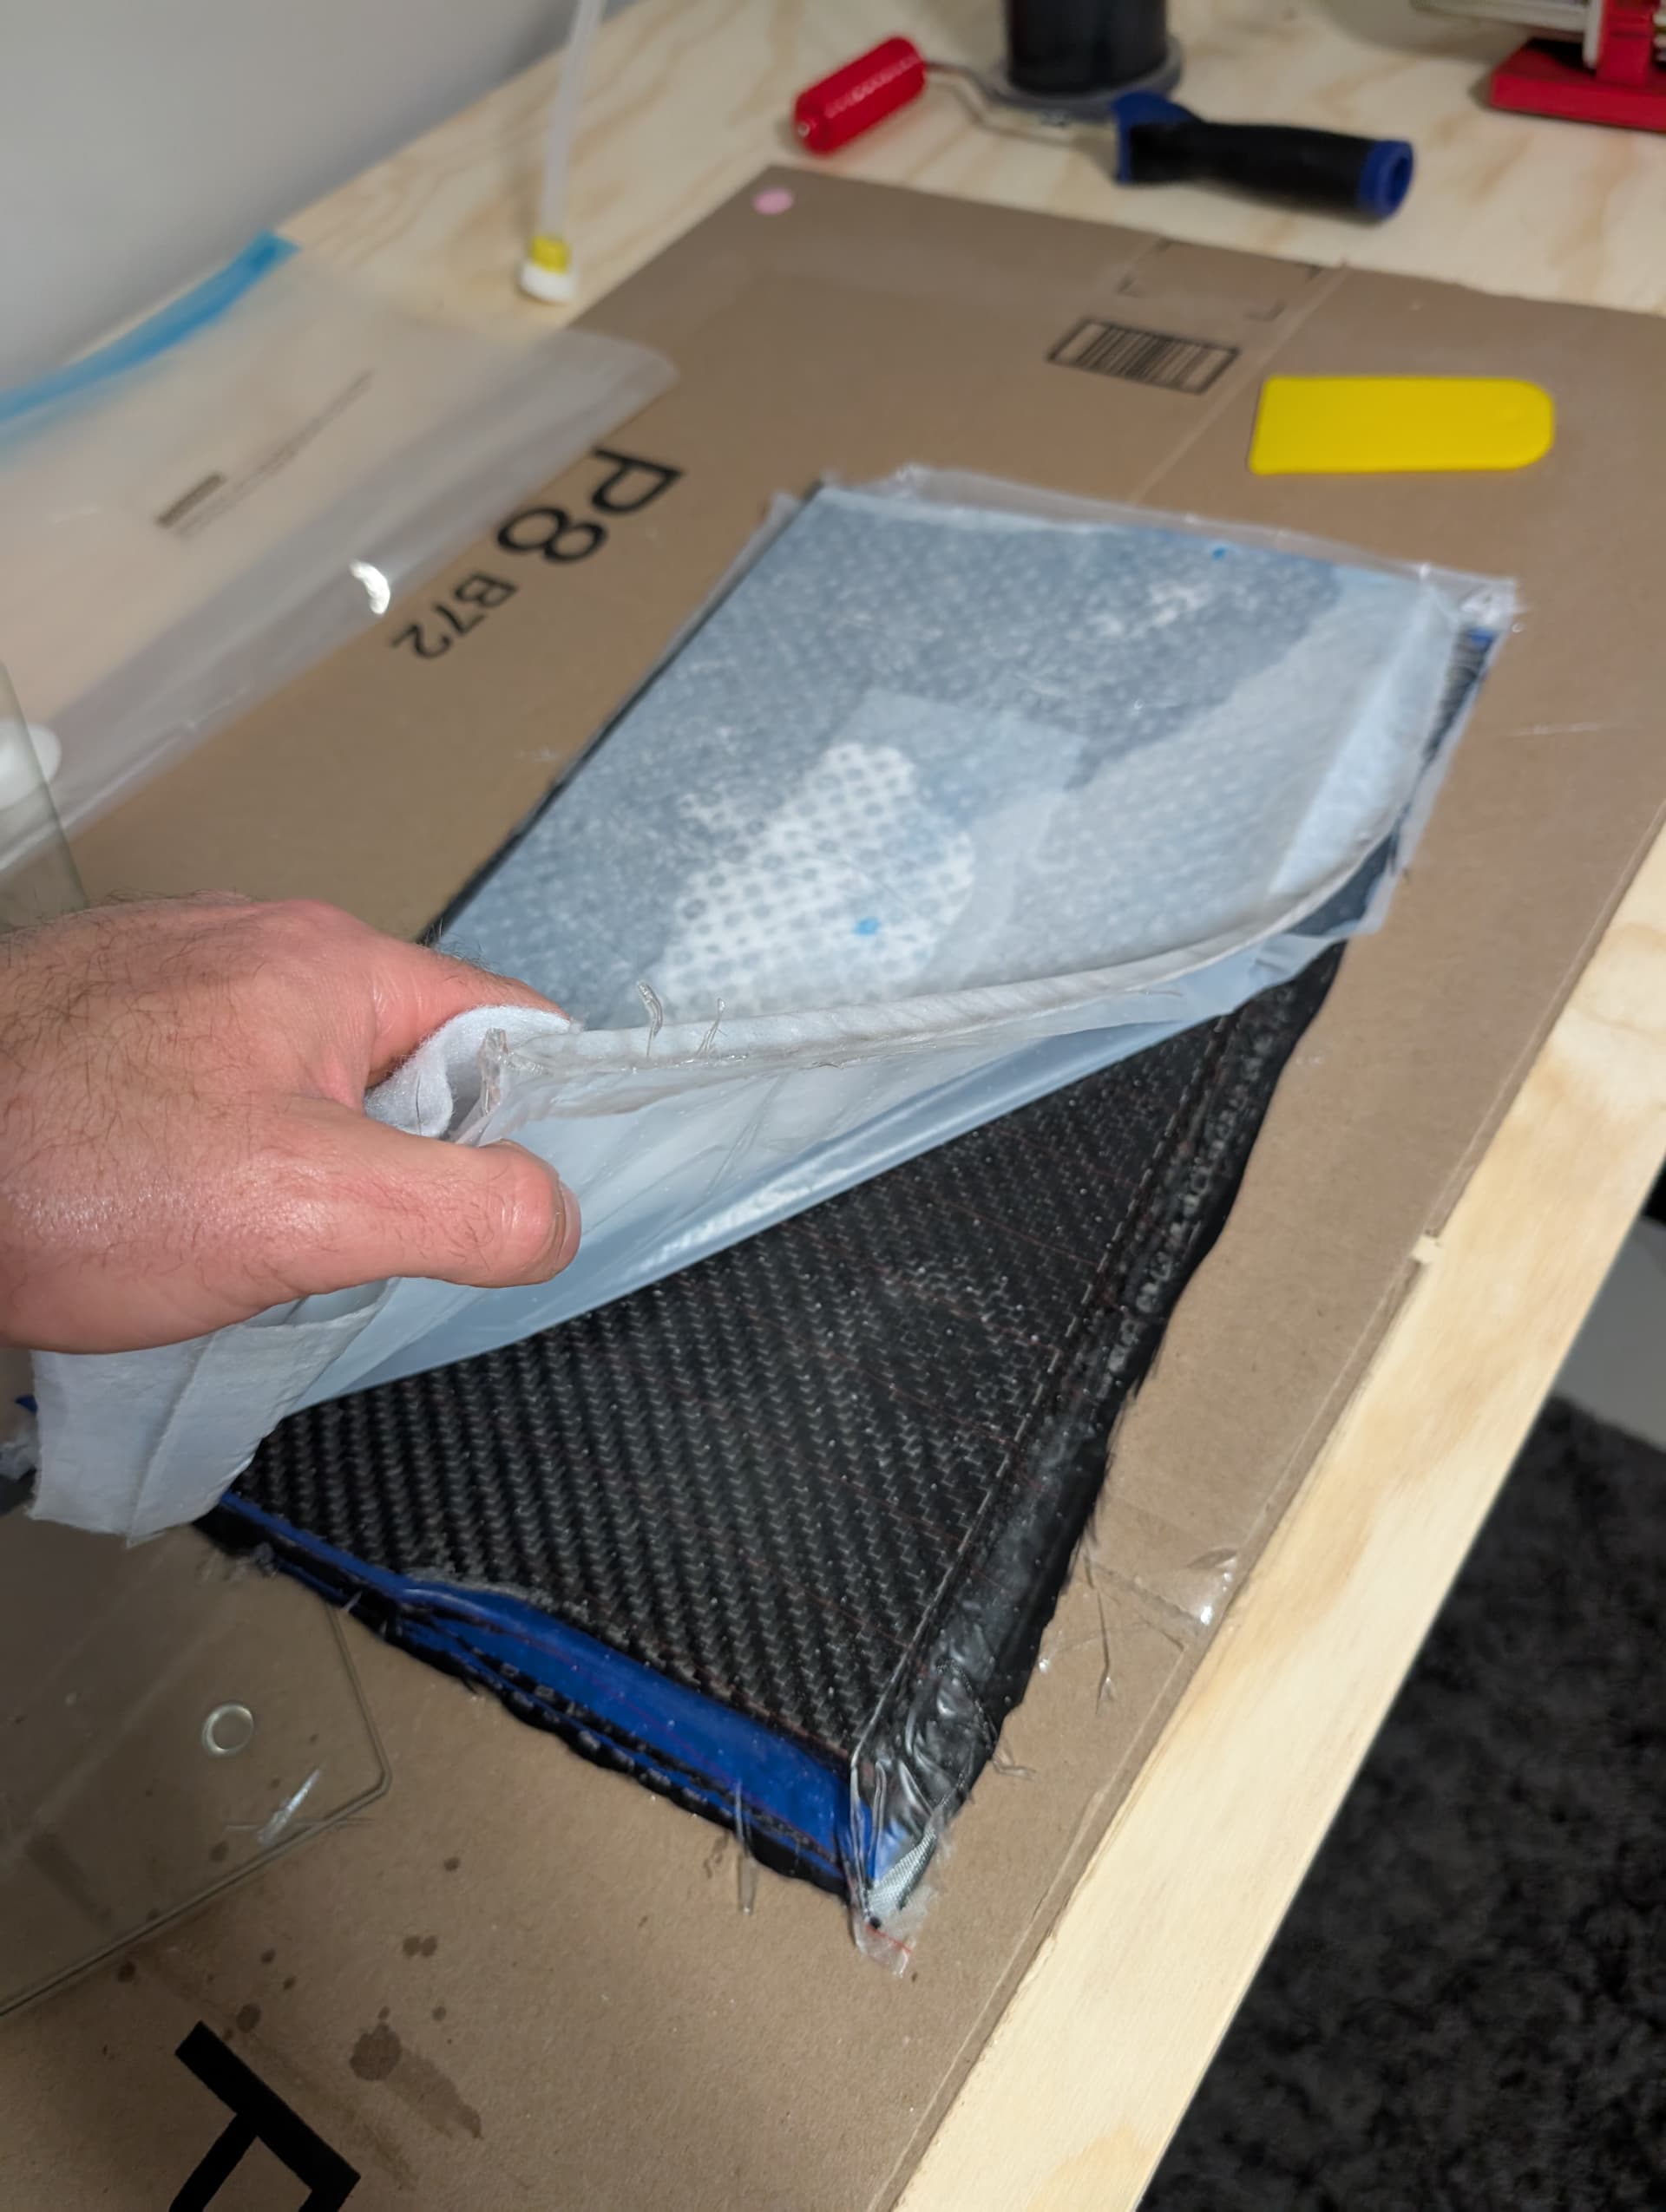
I CNCed the mold and sealed it with penetrating epoxy. I’ll probably sand and add another coat later. I also made one of the divinycell panels for the compartment. One layer of 663g/m^2 carbon on the EPS side and three layers on the side visible inside the compartment. Maybe overkill, not sure.
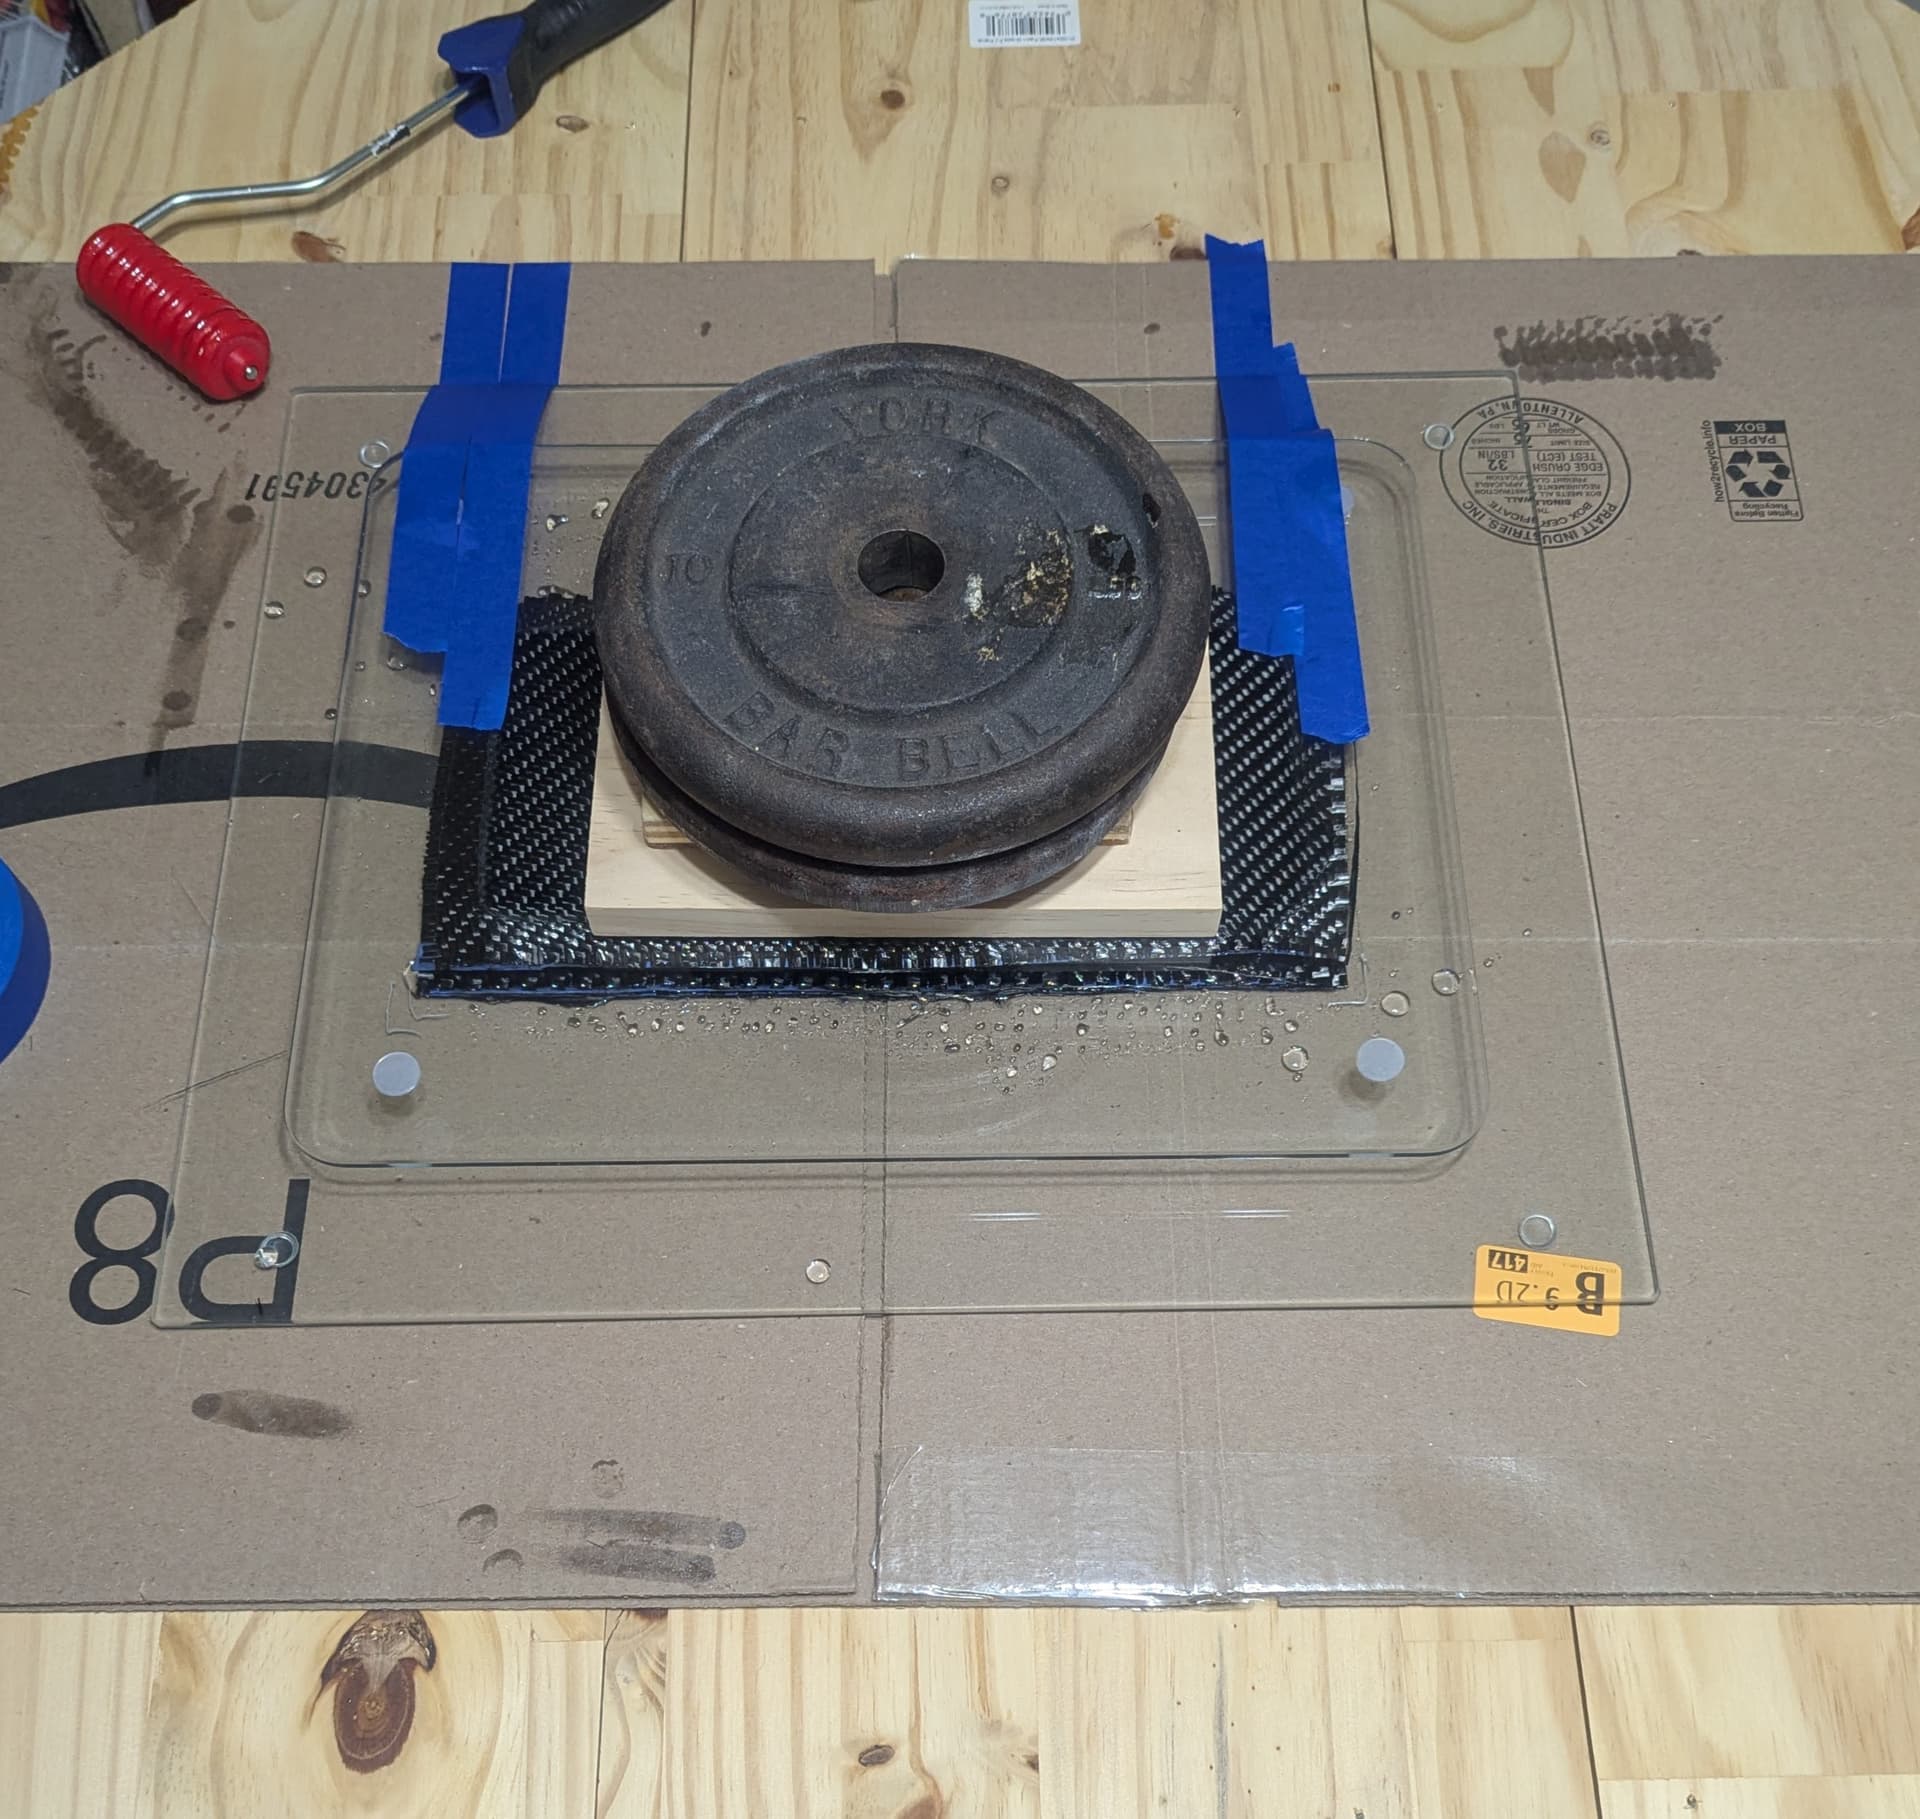
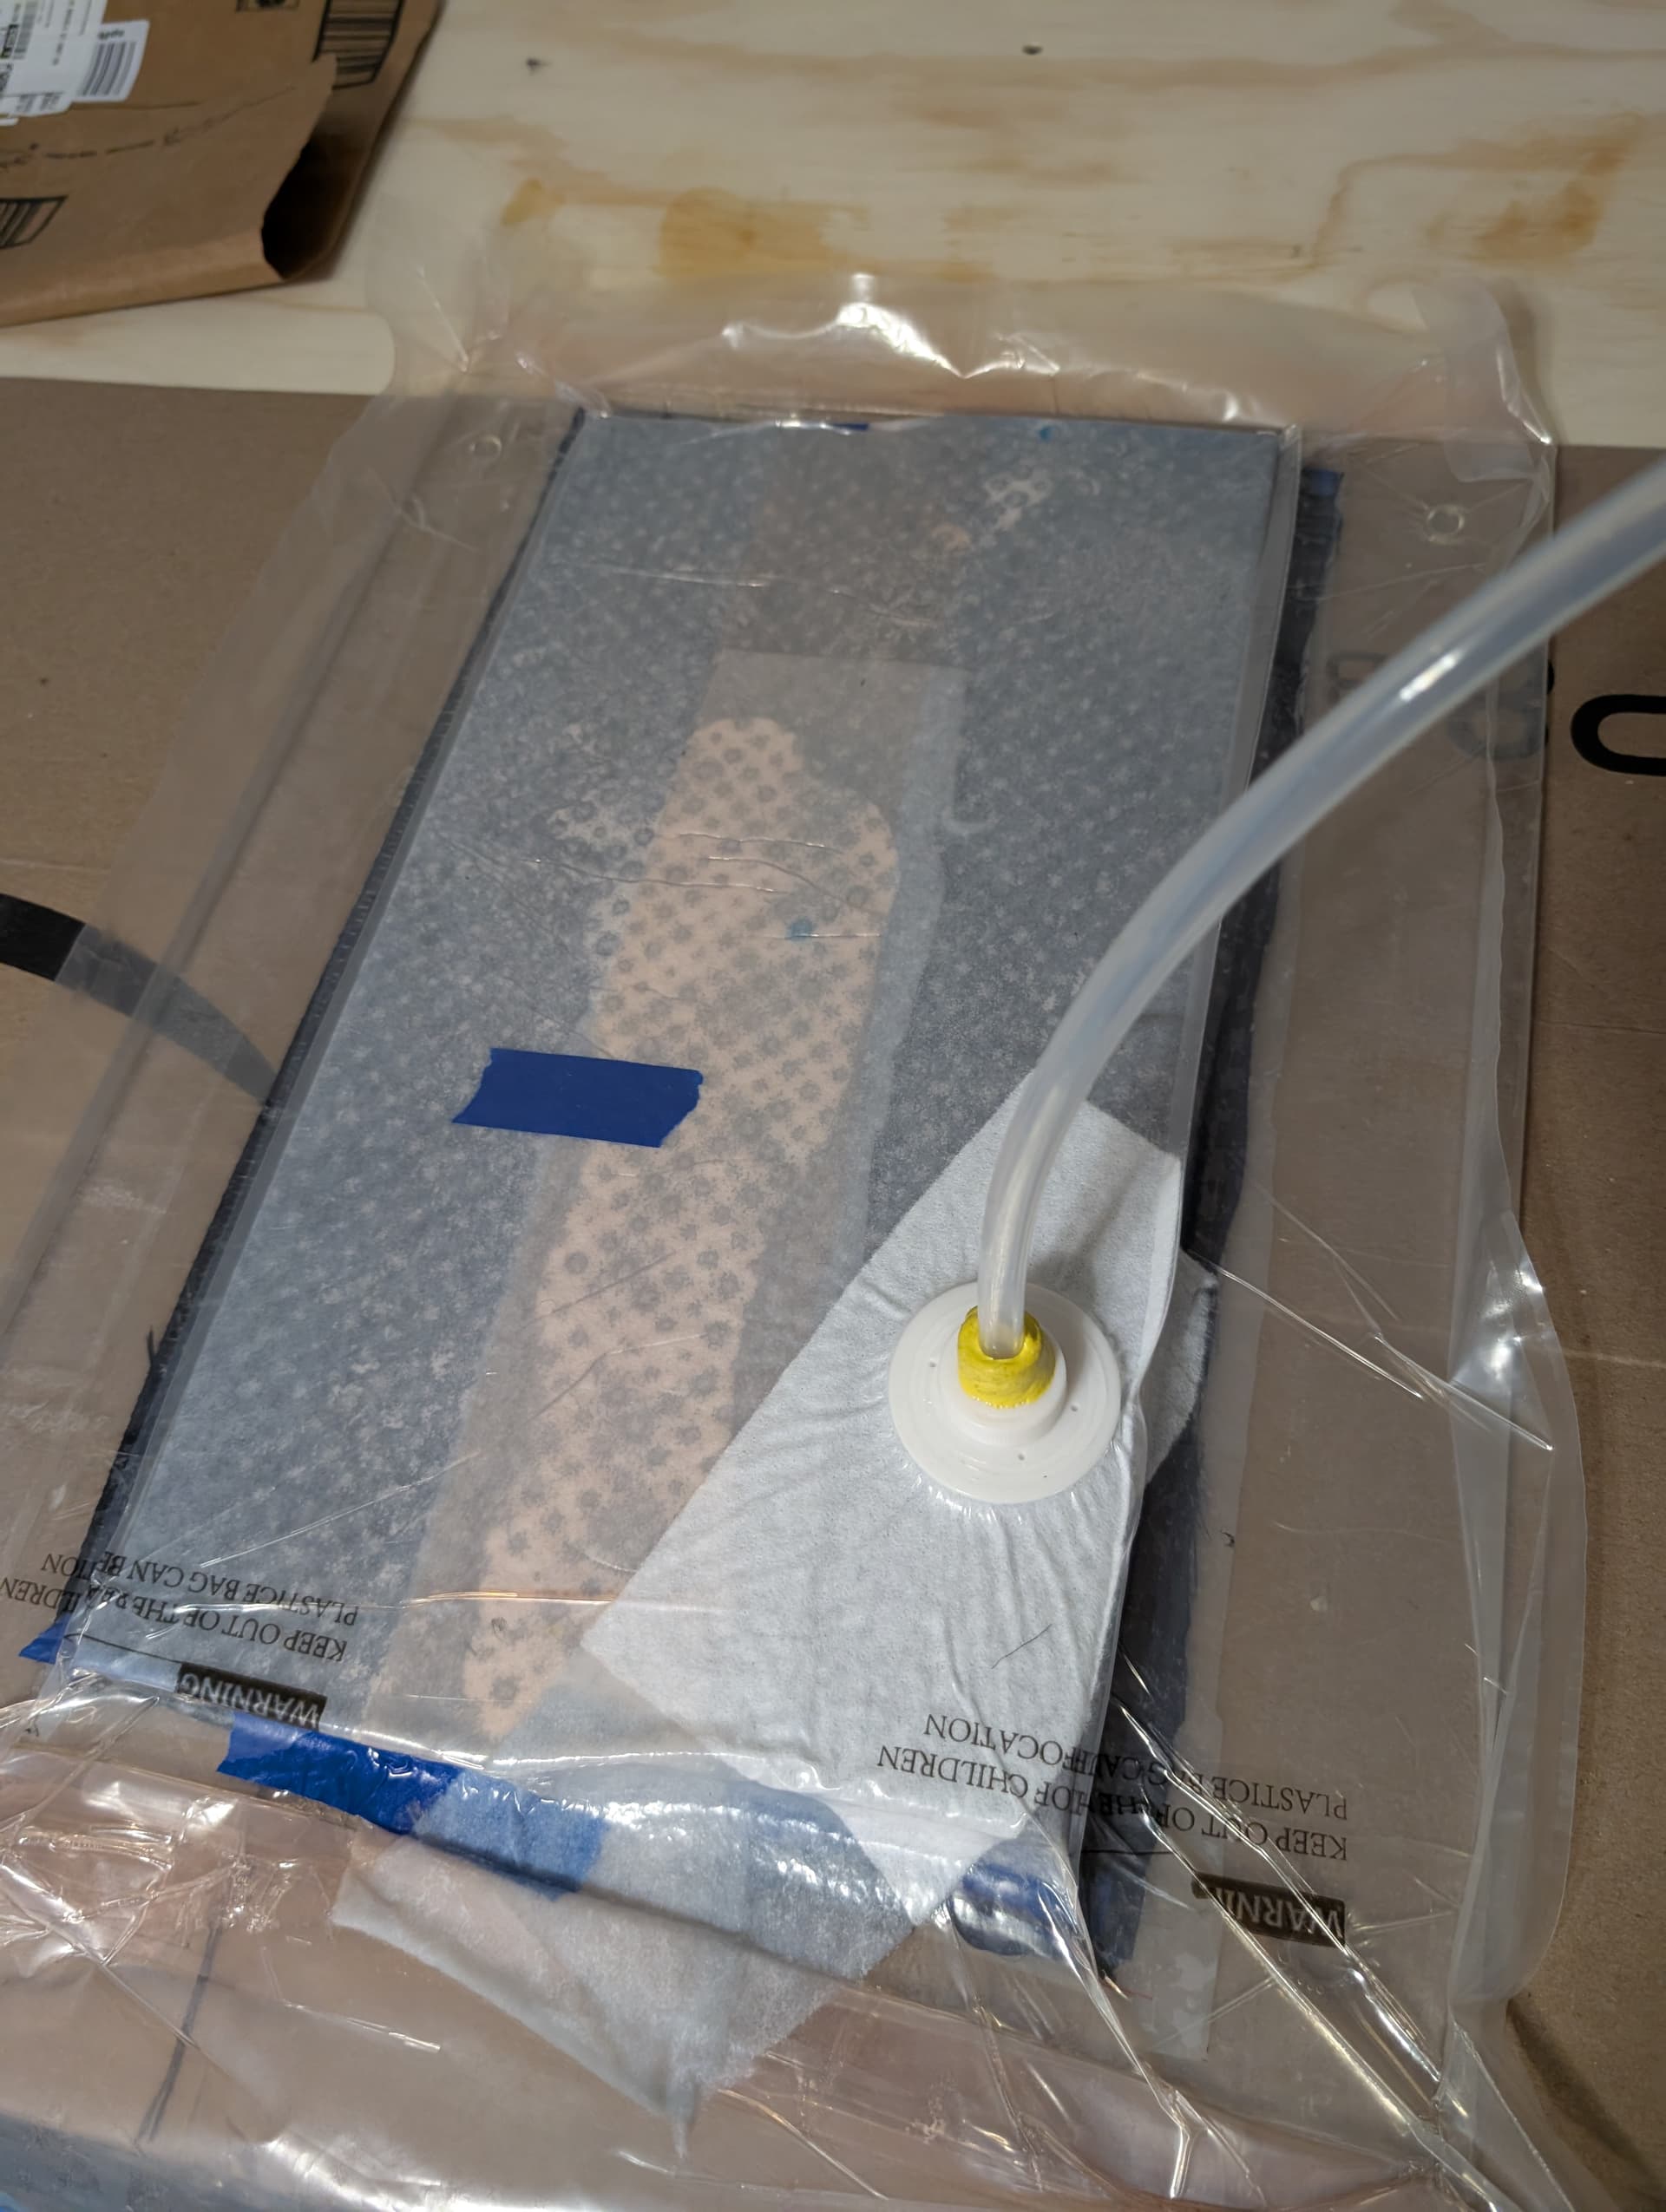
I sanded and put a second coat of epoxy on the mold yesterday and took the first panel out of the vacuum bag. It was really hard getting the peel ply off with the resin soaked breather cloth on it. I might try something different tonight and make another panel with no vacuum bag and just sandwich it between two plates of glass with a weight on top.
The mold is finished and waxed. I haven’t decided how I want to make the part though. I know I don’t want to use whole rectangles of cloth as the center will need to be cut out and wasted. I’d like to use strips that overlap in the corners. I’m still also unsure if I want to do a wet layup, or an infusion.
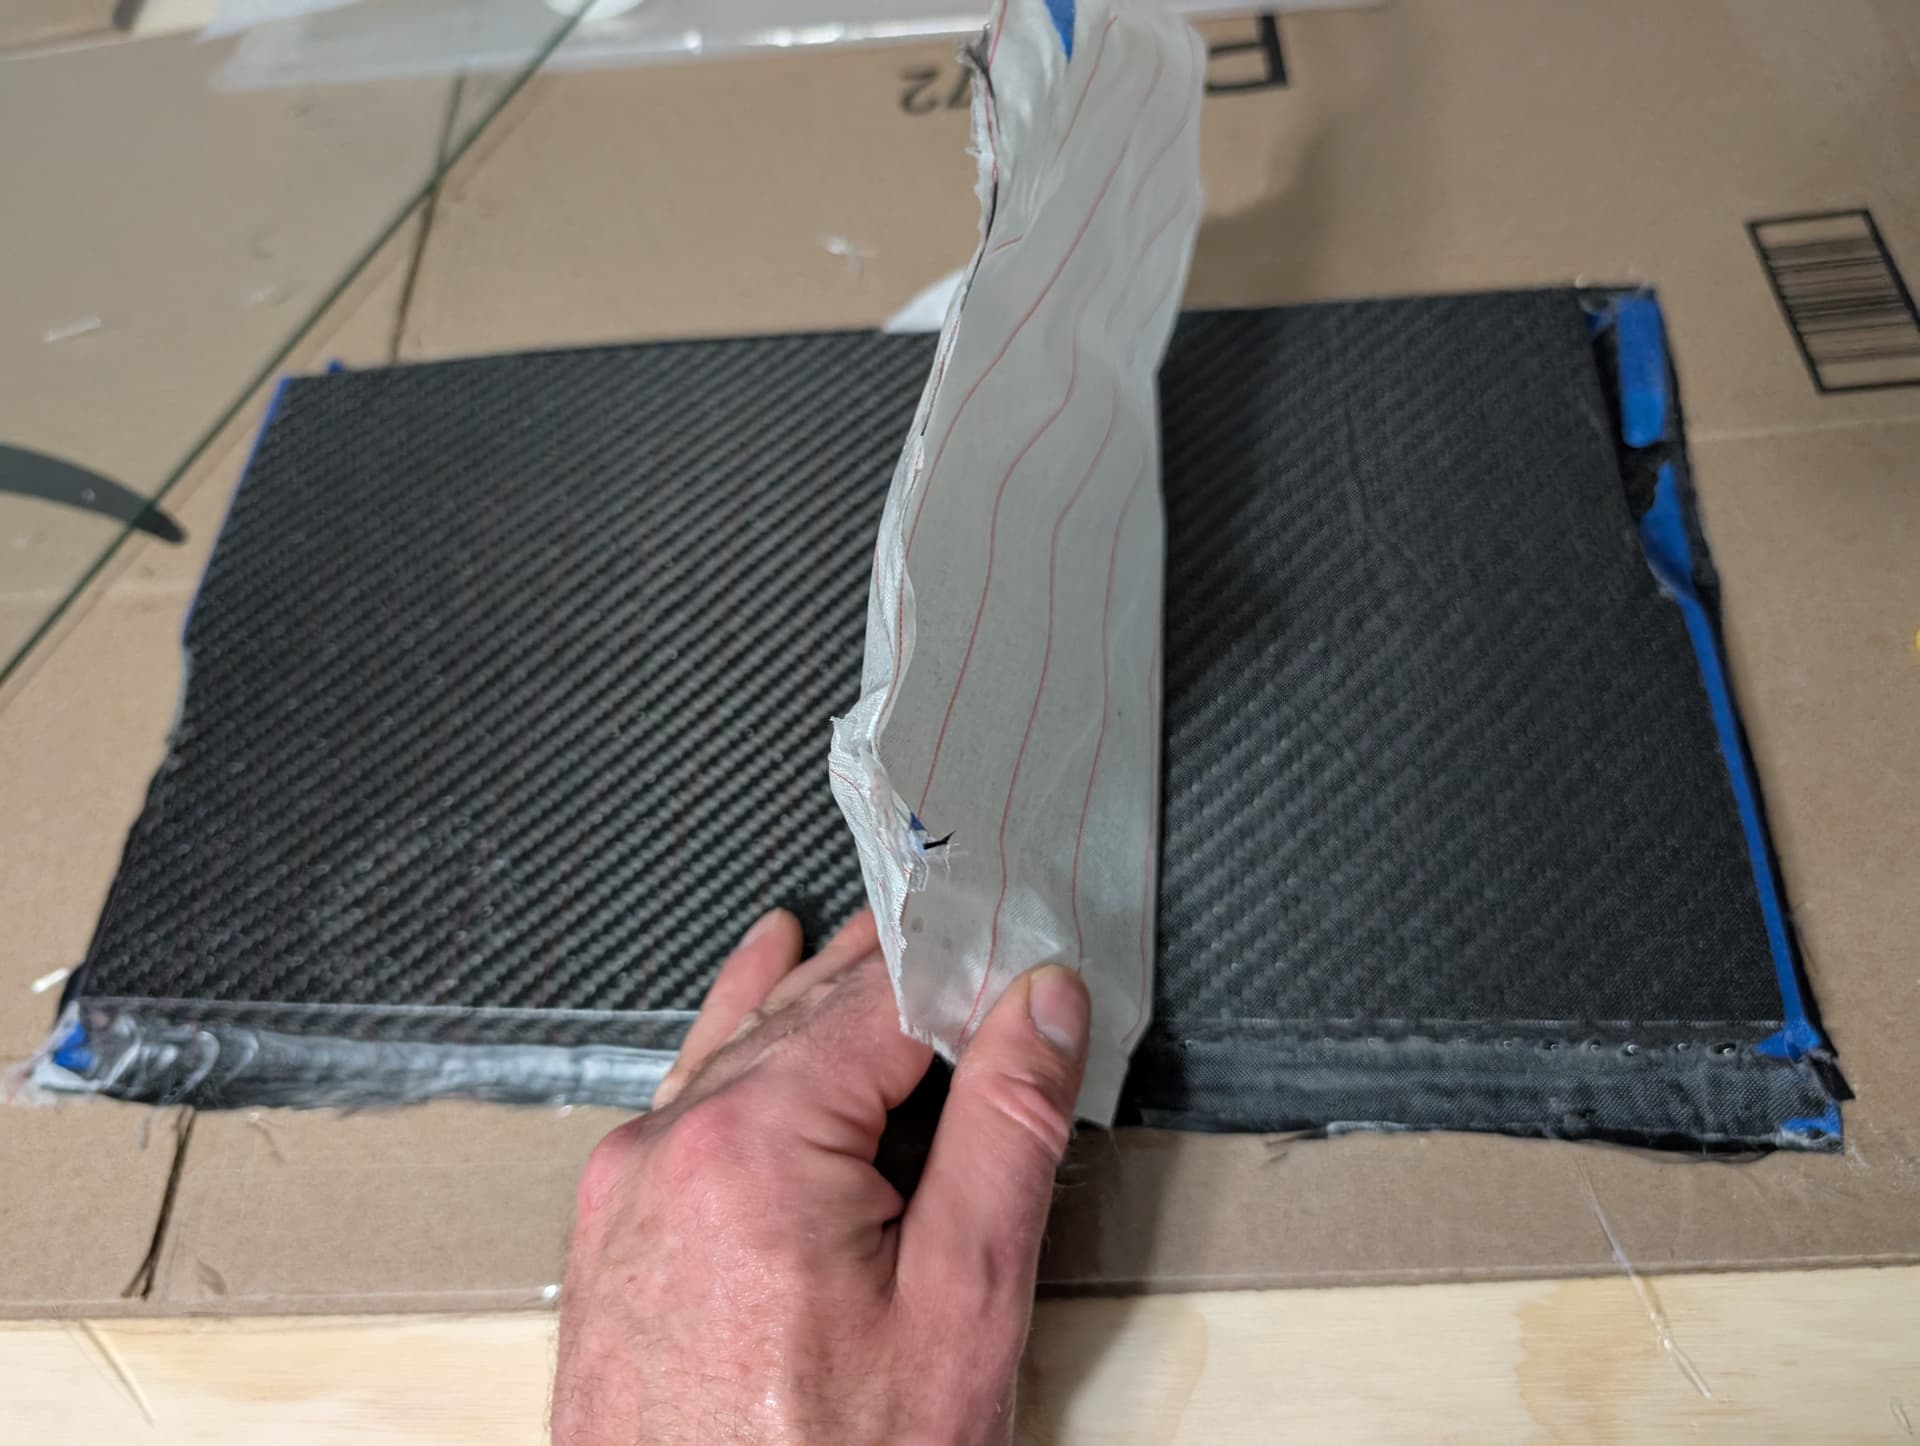
The first panel was vacuum bagged with glass on the bottom and peel ply and breather on top. Release film between the peel ply and breather would have made it easy to peel off. I have some now. The second panel was made between two glass plates with weights on top. I didn’t want to vacuum bag it because of the large overhang of unsupported glass. I was worried about it shattering. The second one came out visually better with less pinholes, but the carbon layers are noticeably thicker because less resin squeezed out than the vacuum bagged one. Both are good enough for what they’re going to be used for.
The next two I’m going to make in one bag with the perforated release film between the peel ply and breather cloth.
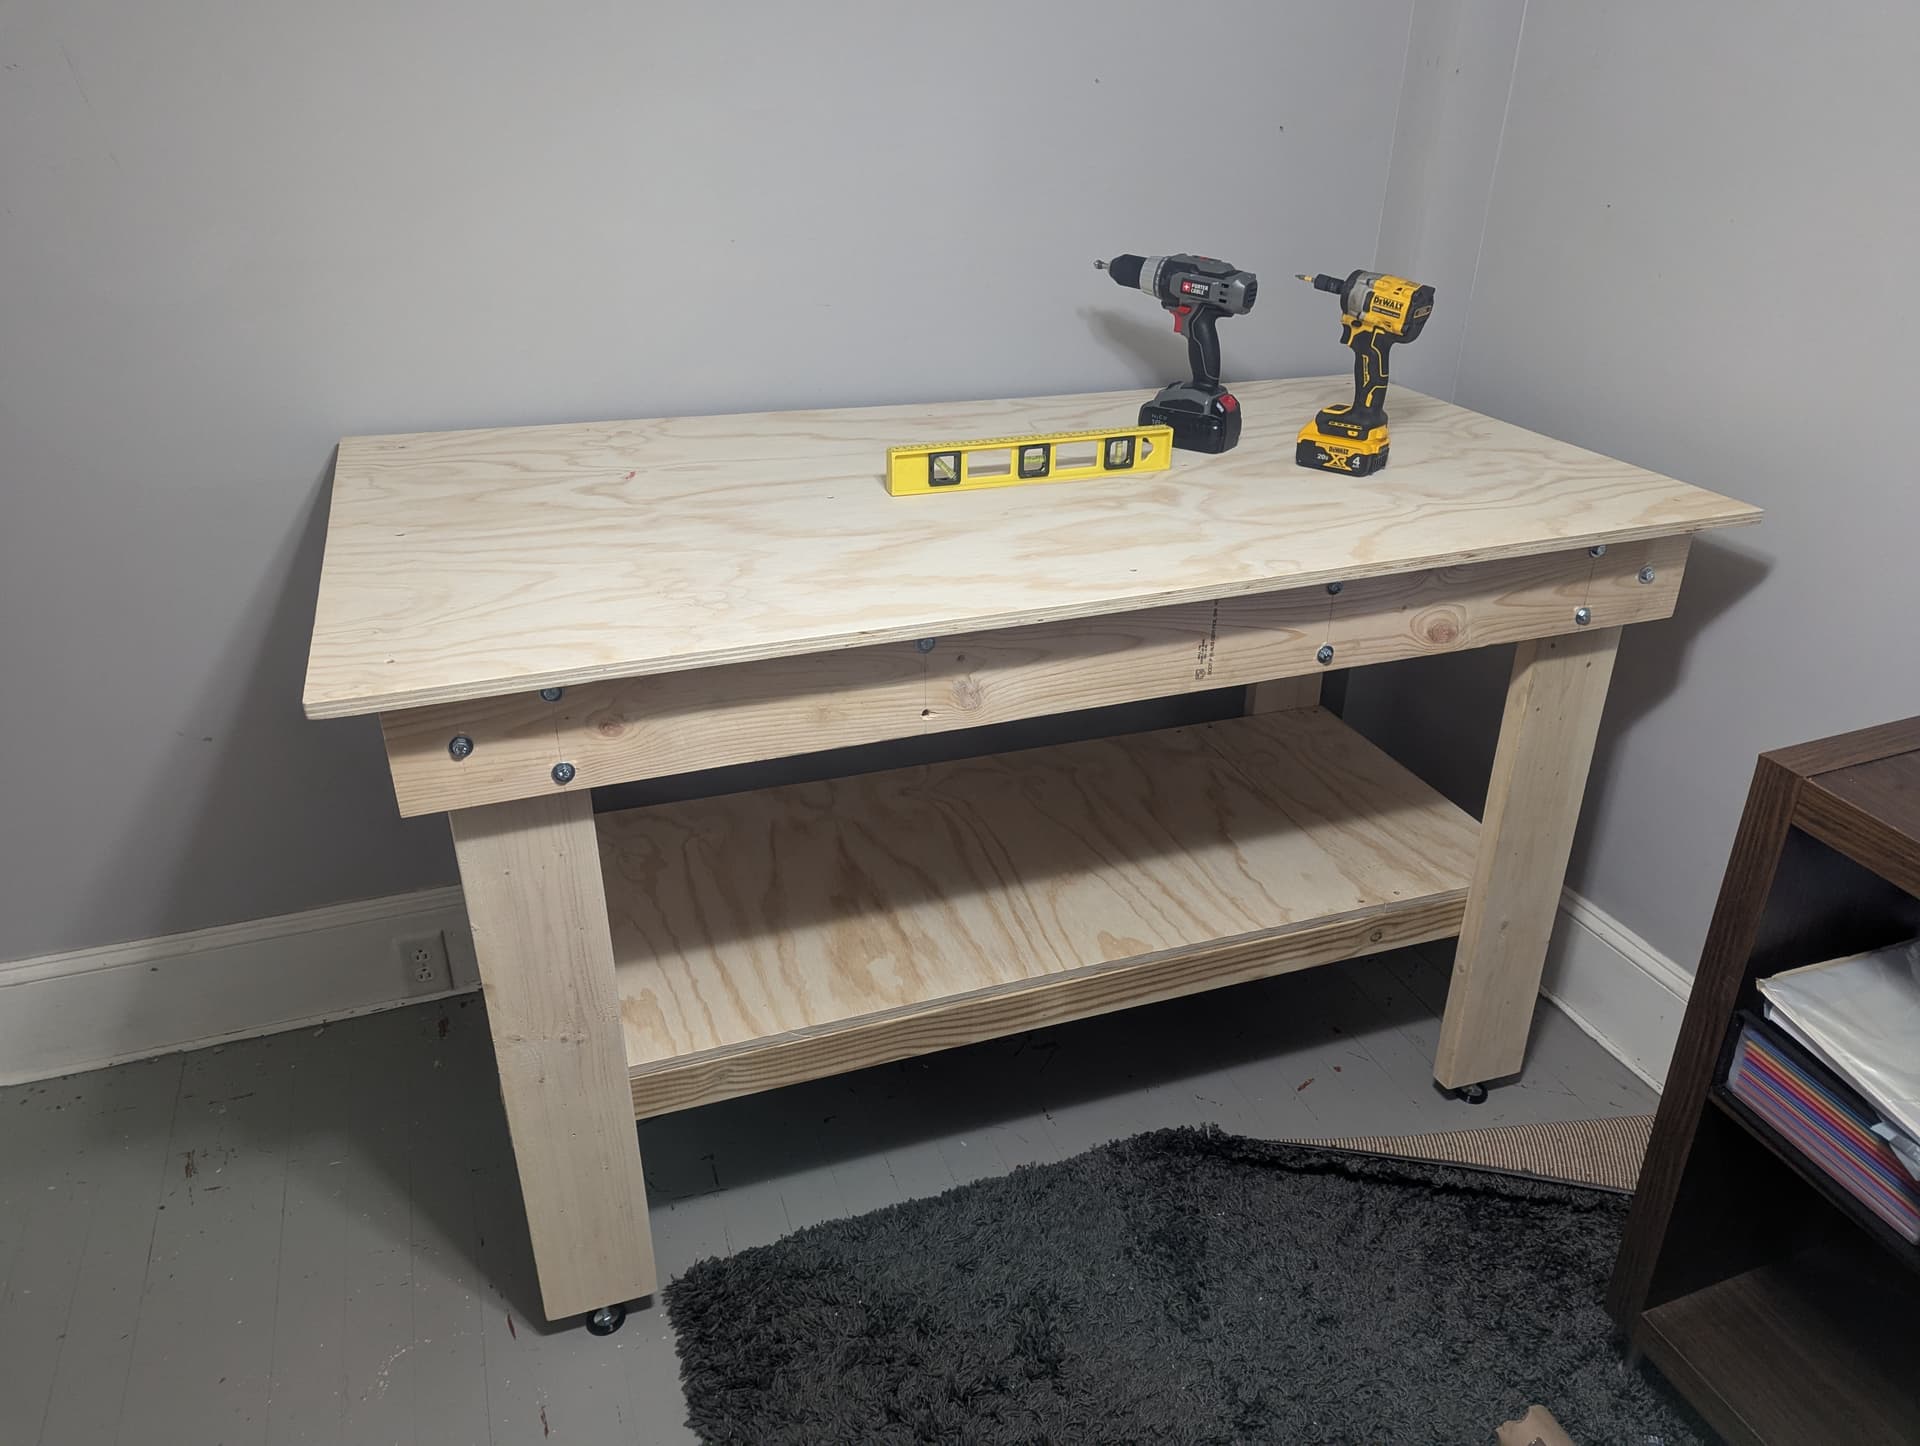
I’ve been working on a side project of a work table to do the layups on. I’ve had enough of bending over cutting the carbon on the kitchen floor. That will be done tomorrow and then I’ll either make the last two electronics compartment side walls, or use the mold to make the compartment flange.
The perforated release film between the peel ply and breather cloth made pulling this apart wayyyyyy easier. These are the two side walls of the electronics compartment.