Yes.
20charactersmore
Yes.
20charactersmore
Depends how it compares to alternatives like the Propellerking Hyperdrive in terms of performance/longevity, but maybe ballpark $70.
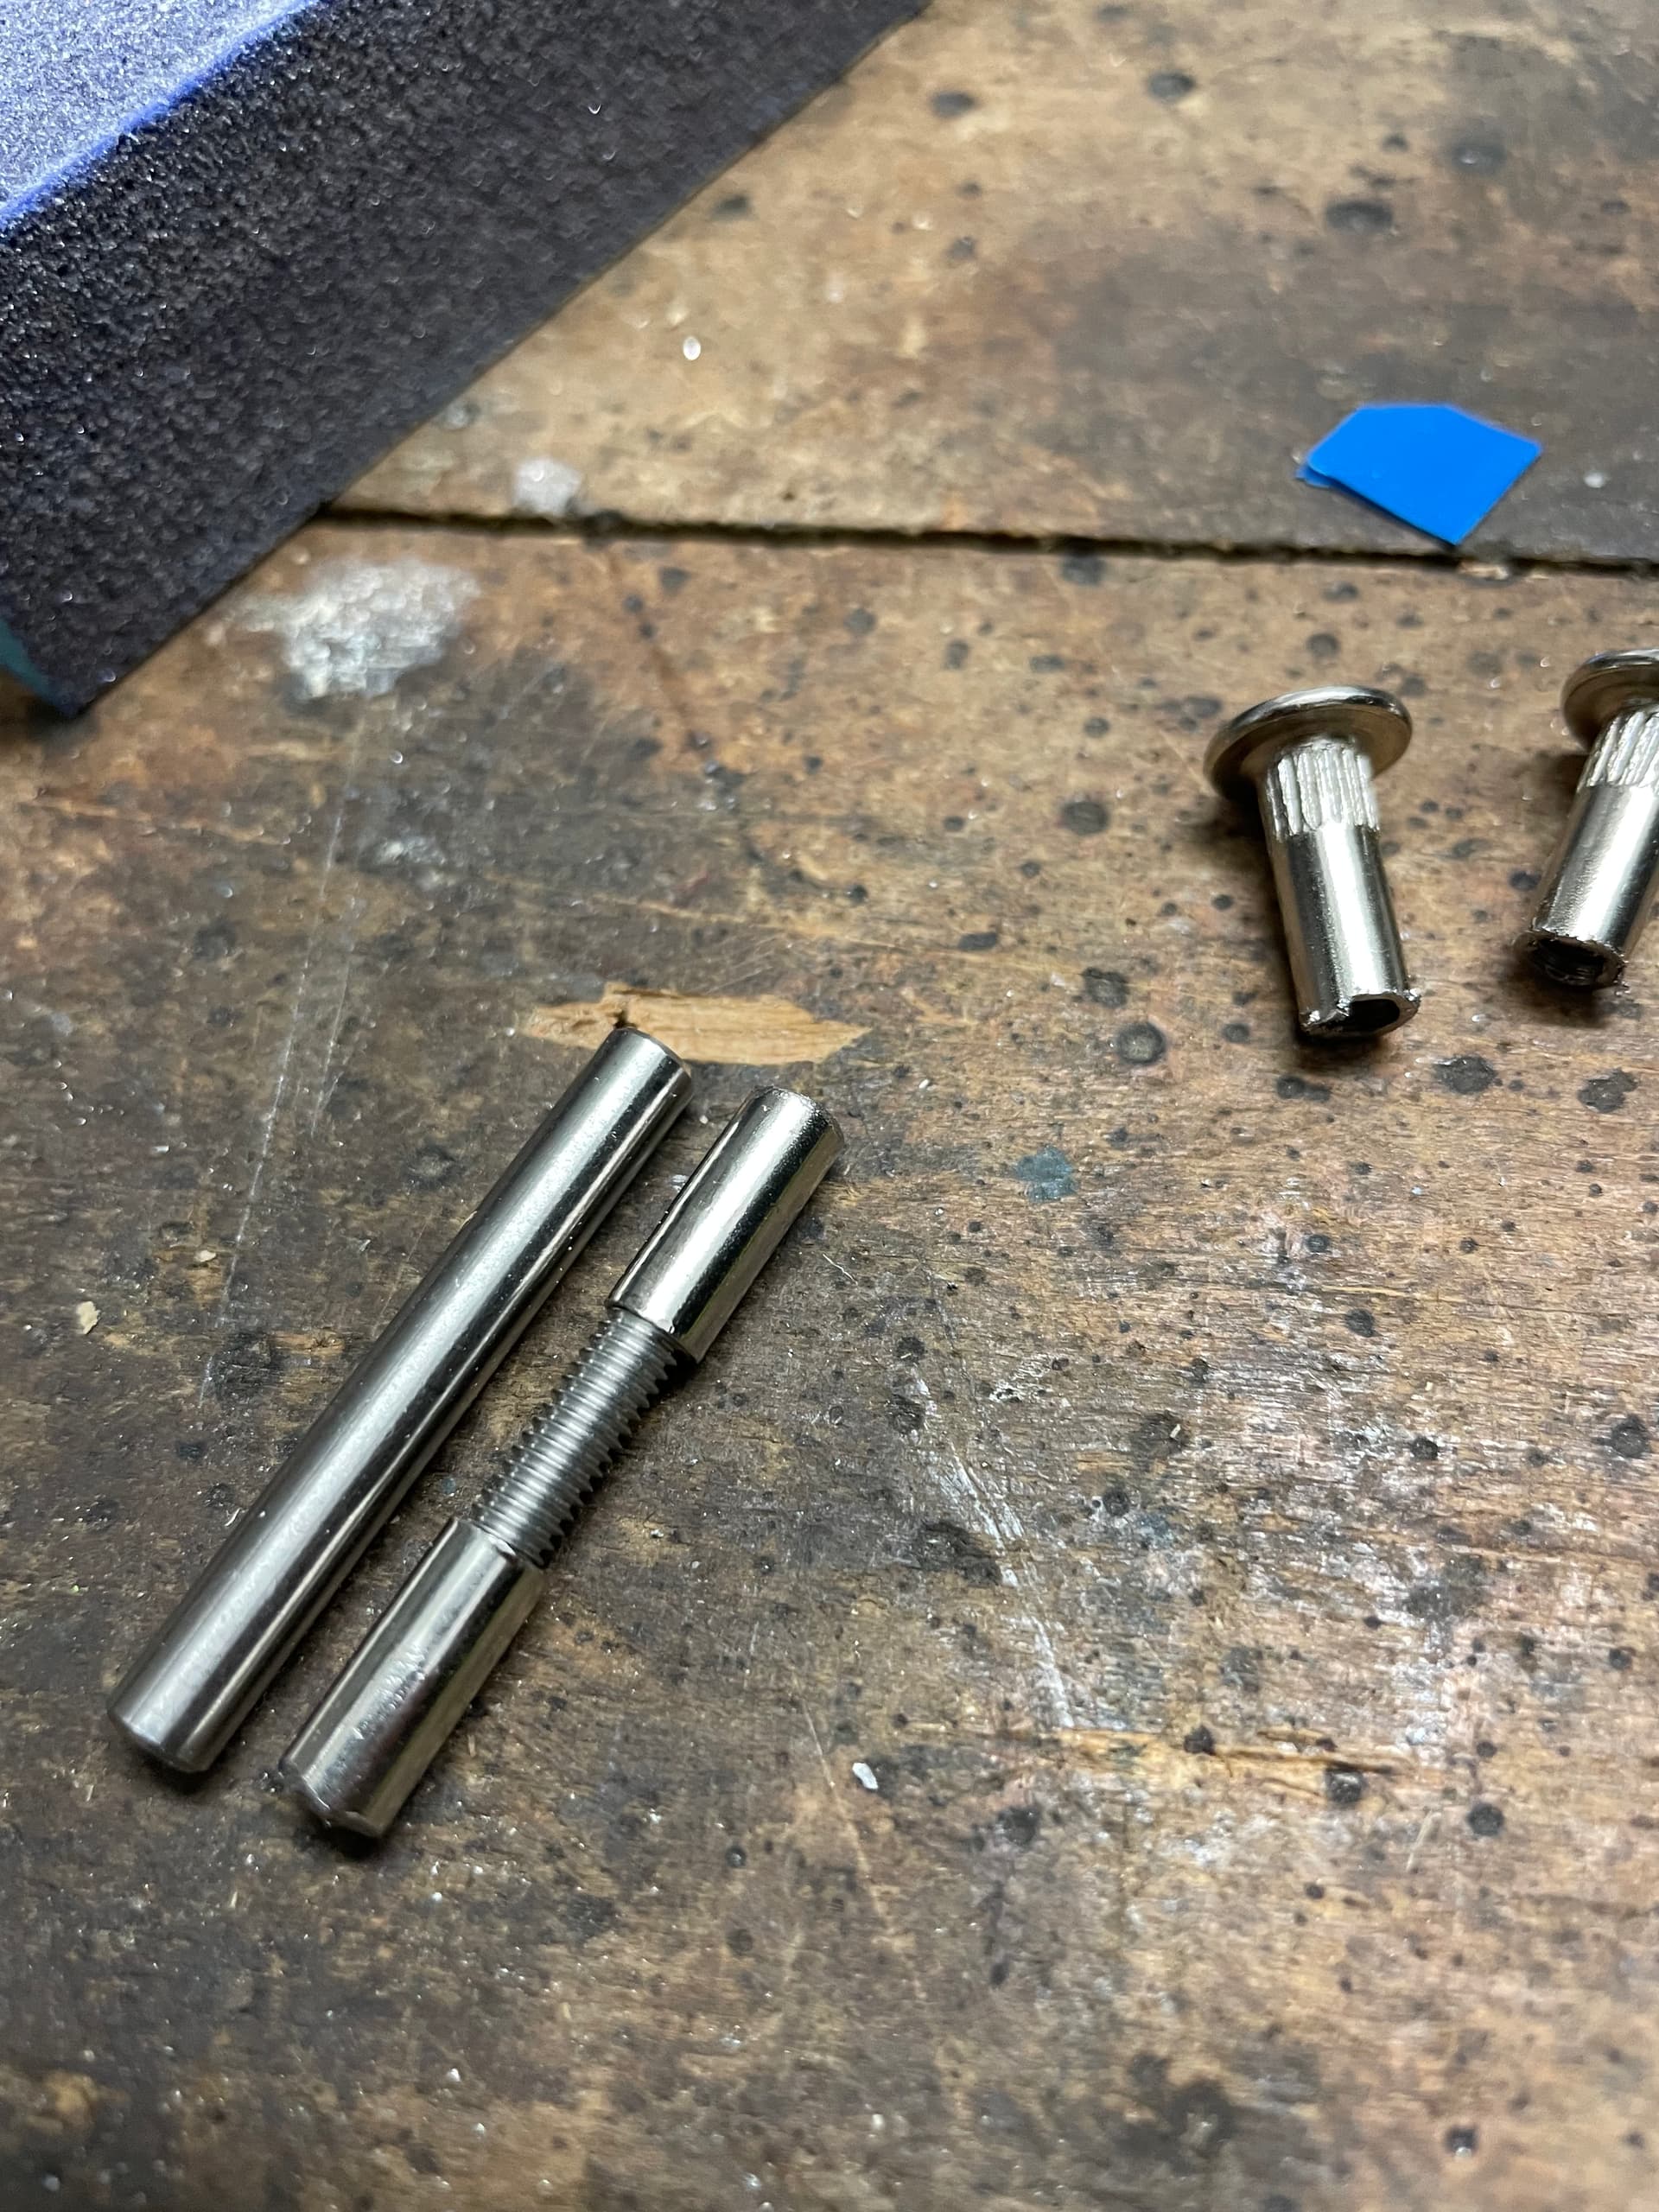
I use a 3D printed sleeve, printed the inner hole a bit smaller then drilled to 4mm
works sofar, keeping some spares in my box though
I ordered a prop today so it will be a few days before I get my hands on it. I will post some photos to confirm there hasn’t been a design change.
New prop arrived today and it measures the same as the diagram in the previous post.
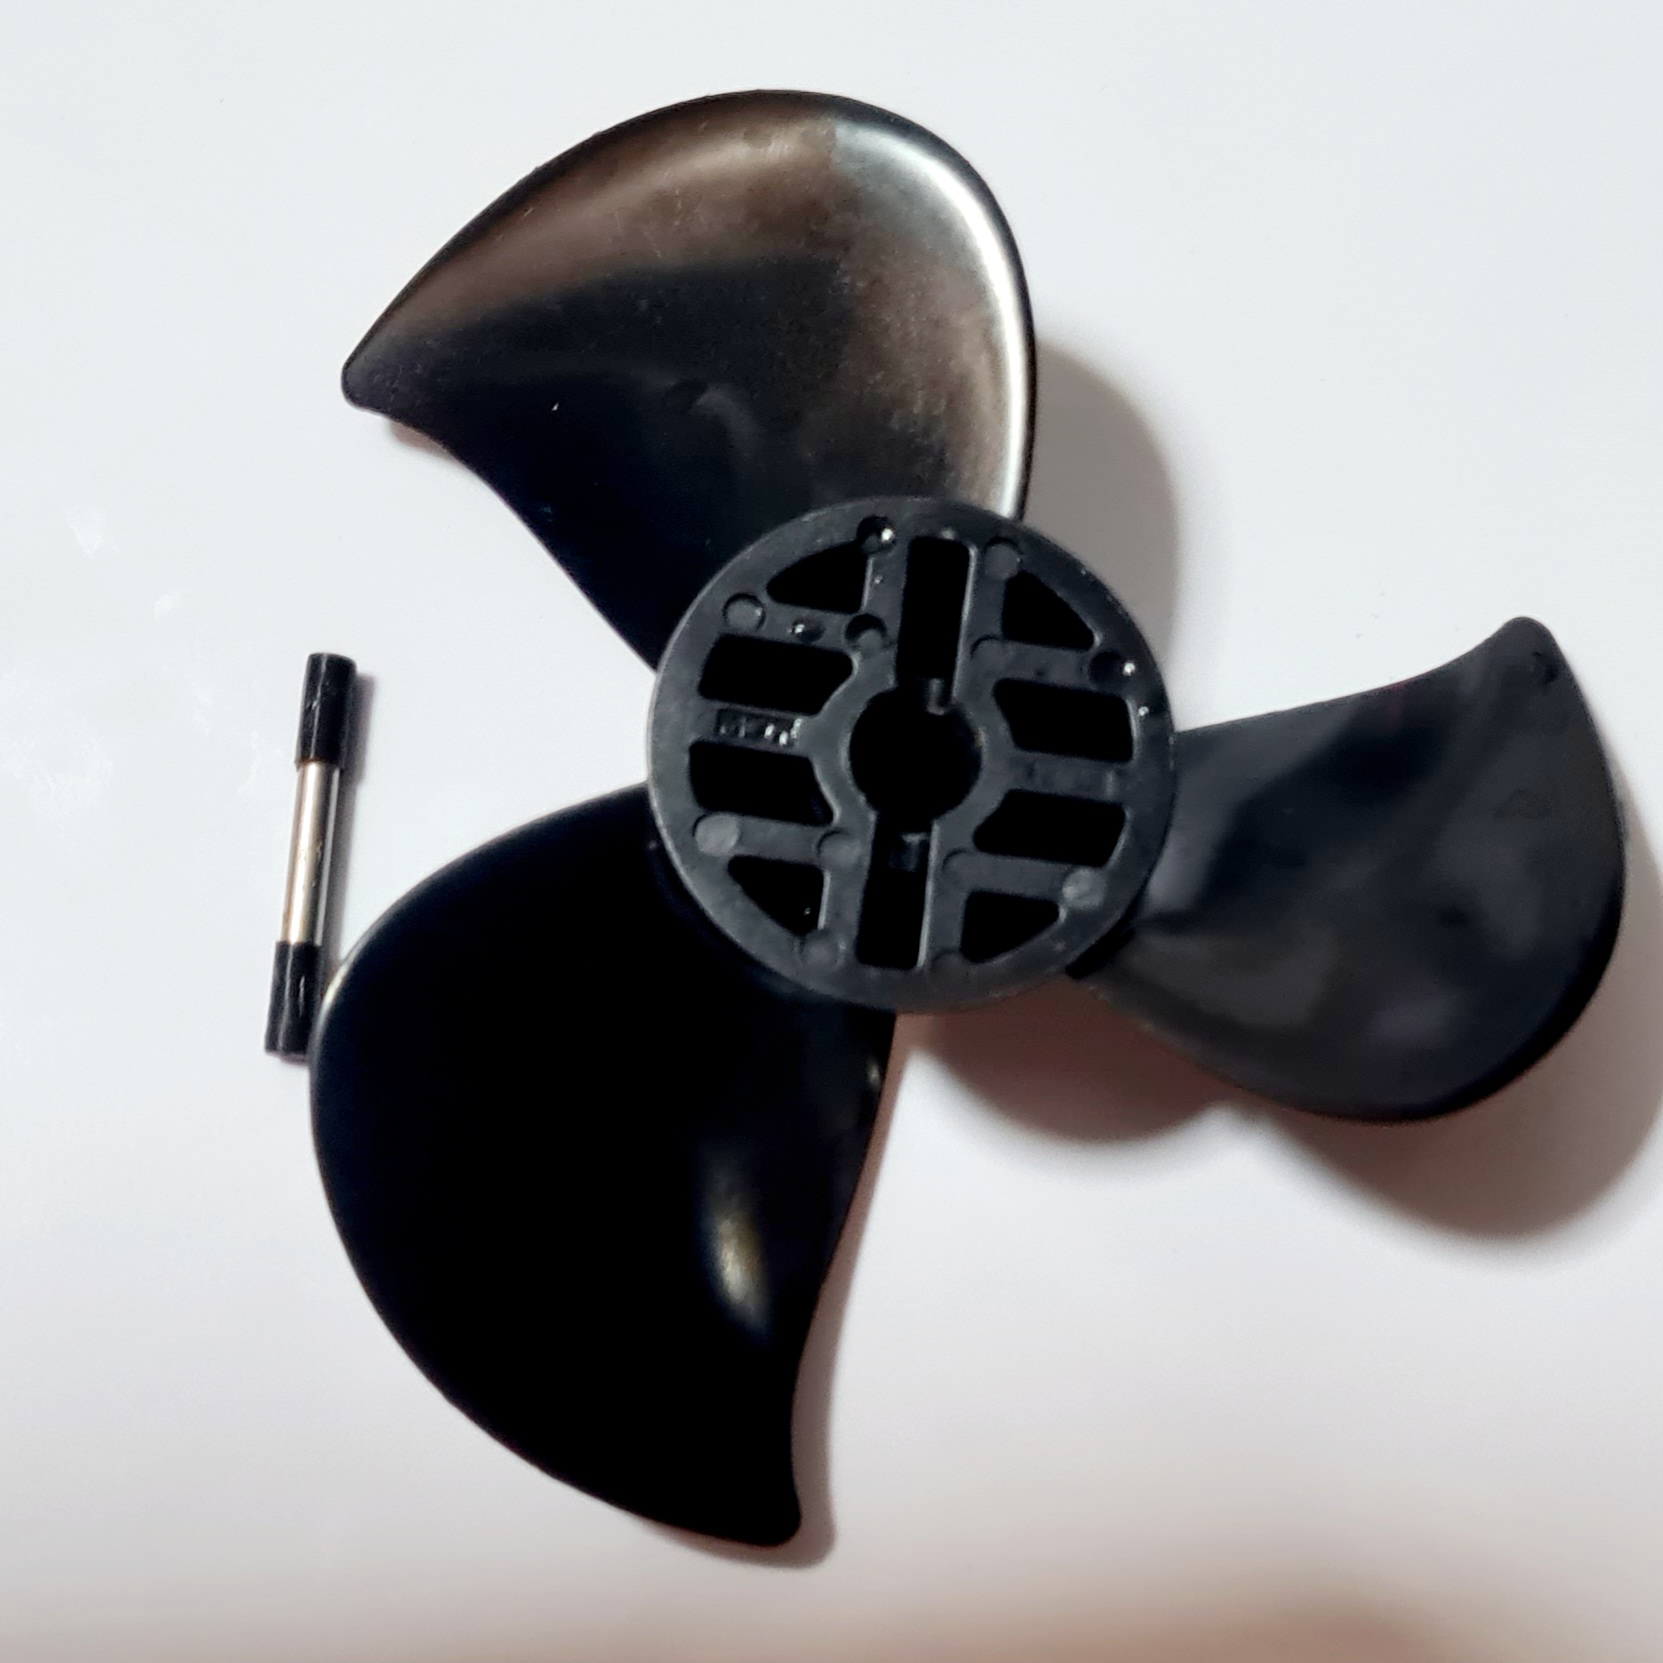
It does have “Spock ears” so nothing has changed
The Flite part number on the box reads
FLI 307-A. PROPELLER
Interesting material - I think some type of plastic or resin but when you tap on it it sounds like metal. I’m impressed by the very fine finish and complex curves in the blades and the tapered cone.
Rotation is counter-clockwise vs clockwise for my Flipsky cut down but that just a simple vesc rotation setting.
Foilguy got a fite prop for me as well. Tested this morning and it is sooo much better than the cutdown flipsky. Silent and way faster. I chickened out at 38kph. But happy foiling 25-30kph. More efficient as well. I don’t have a log yet but its very obvious how much better its is. I am running 12s with 65161 120kv.
So just to bring this to a close, I now have my new Flite prop installed and had my first session with it. I use the Flipsky VX3 remote that has three “power” settings. I use mine in M mode with a cut down Flipsky aluminum prop.
With the Flite prop I noticed that I have to use a greater amount of throttle initially to get the board moving from standstill to the point where the board starts to plane (below foiling speed). Once that happens I find a much improved range of throttle, top speed and range using the new prop. VERY happy with the change and wished I had done it sooner as it will make my learning curve shorter.
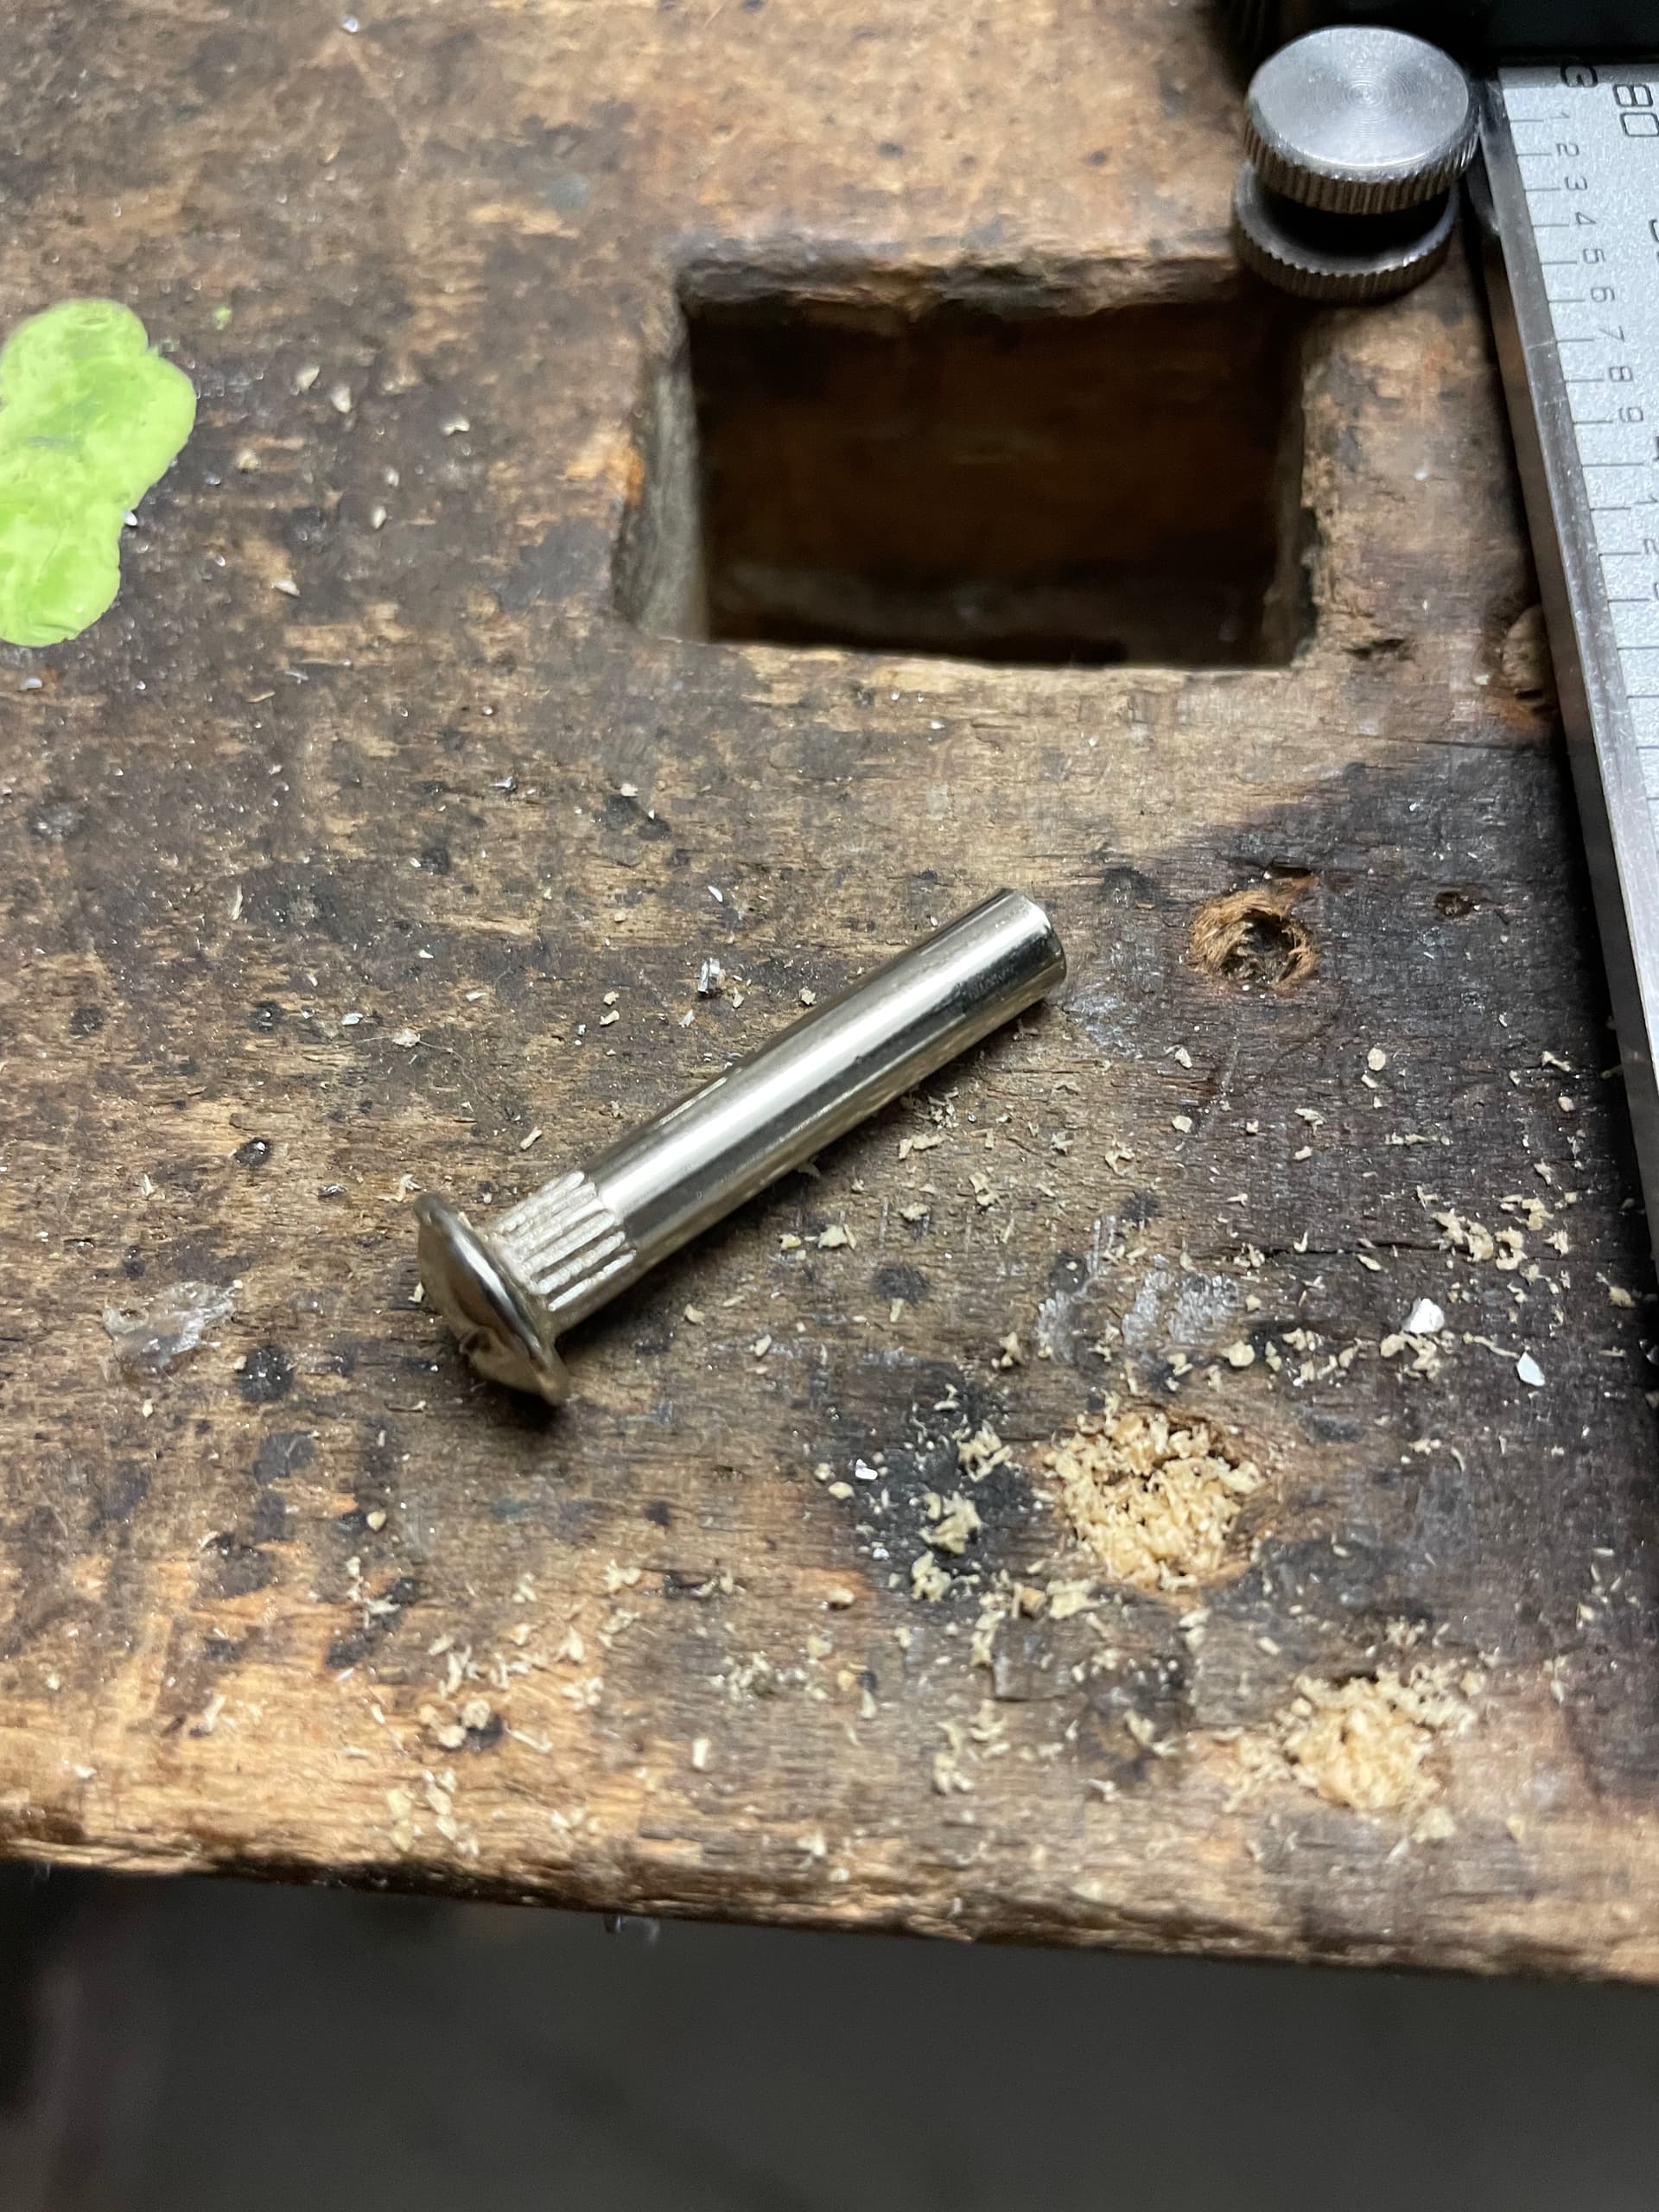
The reaming of the prop to 12mm to fit the 65161 was relatively easy. I went the full depth 20.75mm of the 10.95mm section and 1mm more as the reaming bit has a slight taper to allow you to start the process. The reaming bit does not go to its full 12mm diameter right away so bottom of the hole would be less than 12mm and I wanted to ensure the prop would seat properly on the shaft pin. The fit is very tight and I had to clean the shaft slightly as I had a little galvanic corrosion due to the aluminum prop and stainless shaft.
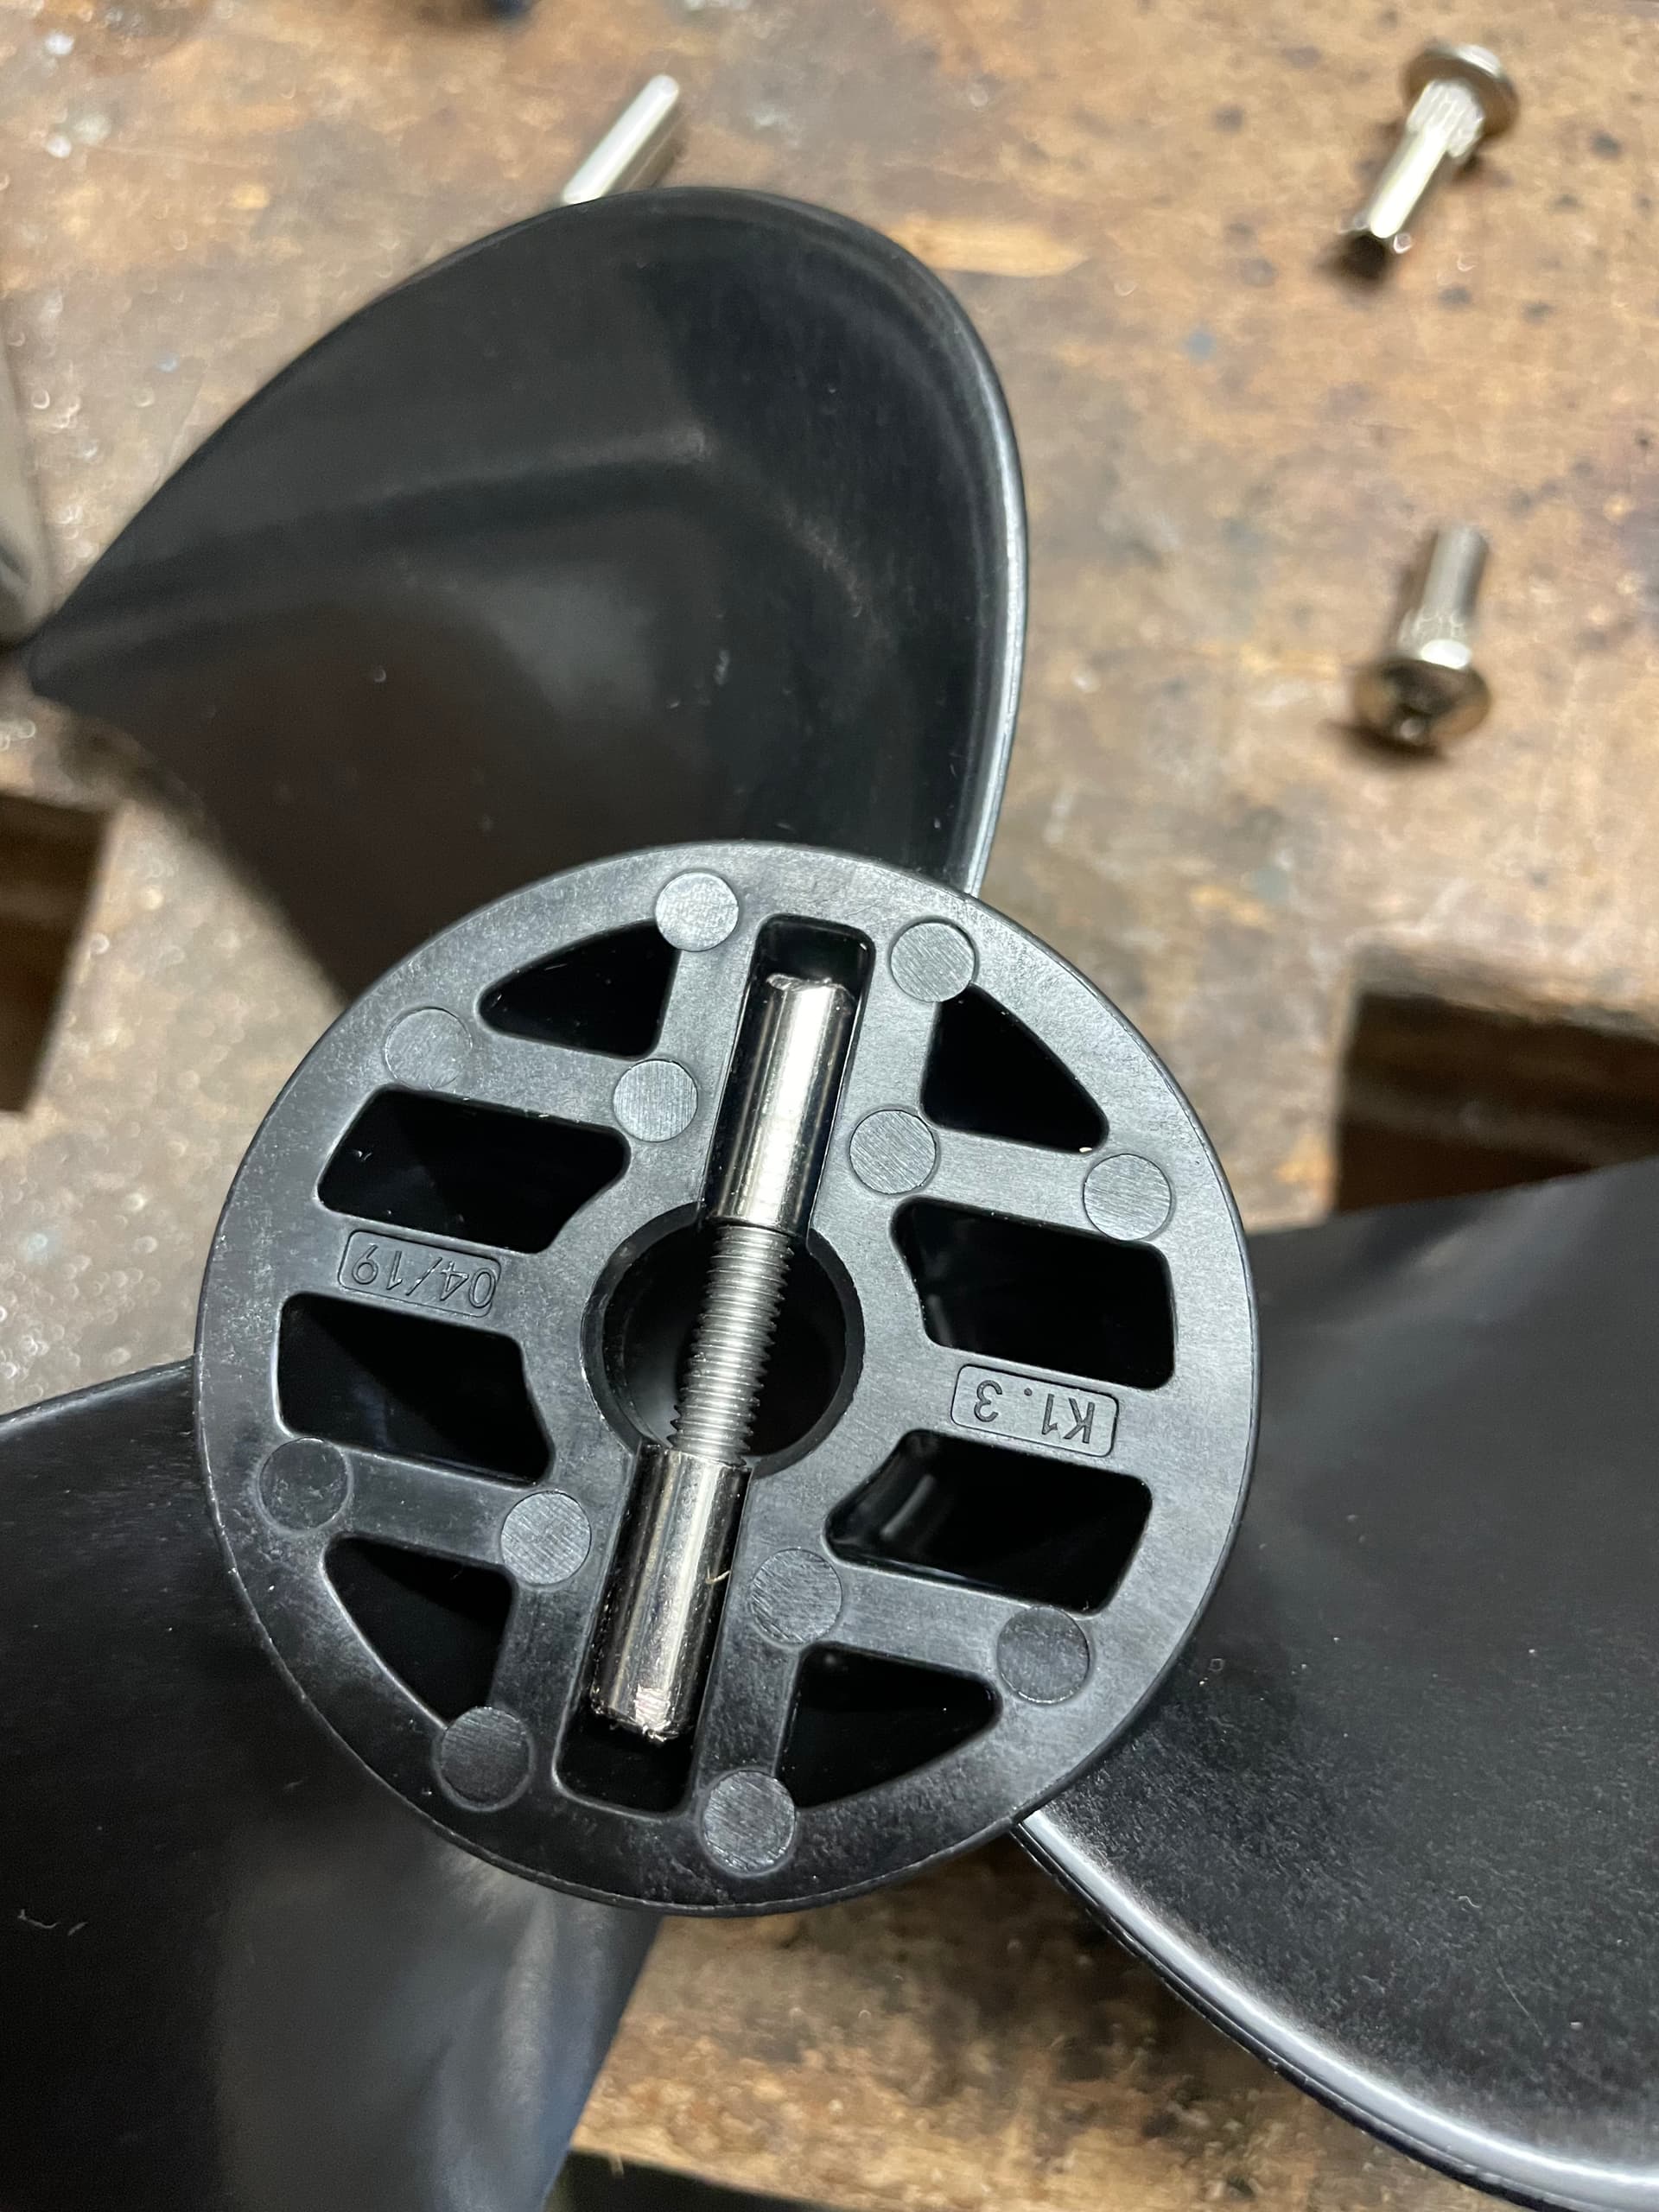
I initially tried to mount the Flite prop with the pin from the Flipsky prop but had a lot of trouble ensuring the pin was centered in the long slot of the prop. I took @aemkei77 advice and printed some sleeves and it now fits perfectly.
I love the flite prop on my 65161! Fast, quiet and efficient.
Did someone try to ream the hole with 12mm drill bit on a drill press or a reamer is the only option?
Hole might get offset or crooked on a drill press with drill, reamer is better. Only takes like 15minutes to do it👍
Did you use a few incremental sizes of reamers or go straight to 12mm? H tolerance?
As the section of the shaft pathway that requires enlarging is almost 11mm I just went directly to 12mm reamer and it worked OK for me, I also just freehsnded the reaming - no drill press 

If you have an 11mm shaft and can center it perfectly on a drill press and clamp it, then you can. If you freehand it then you may get it very wrong.
Ok, you didnt use drill press because you dont have one or it is jus better to do it freehand?
It looks like there is a workshop in the factory where I work that is equiped with very fancy drill press…
I don’t have a drill press. The prop cost was ~$40 so my thinking was if I messed it up I could buy another one for less than a drill press. It worked out for me but maybe I got lucky. If you have access to good machinery then by all means use it. I would
Yes i have machinery access, but I dont have skills. So I will also need a bit of luck 
incremental reamers, it took a set of 3 adjustable hand reamers to enlarge the hole to 12mm.
I went to my workshop to find material for the pin adapter and here is what i found:a piece of stainles steel threaded rod an two female bolts (probably leftovers from ikea cabinet)
Curious about if you have tried the prop yet and what your impressions are??
Hi foilguy. I had planed to test it today, but i found an issue with my motor holder. So I am printing new parts. I hope i will test it next week and let you know