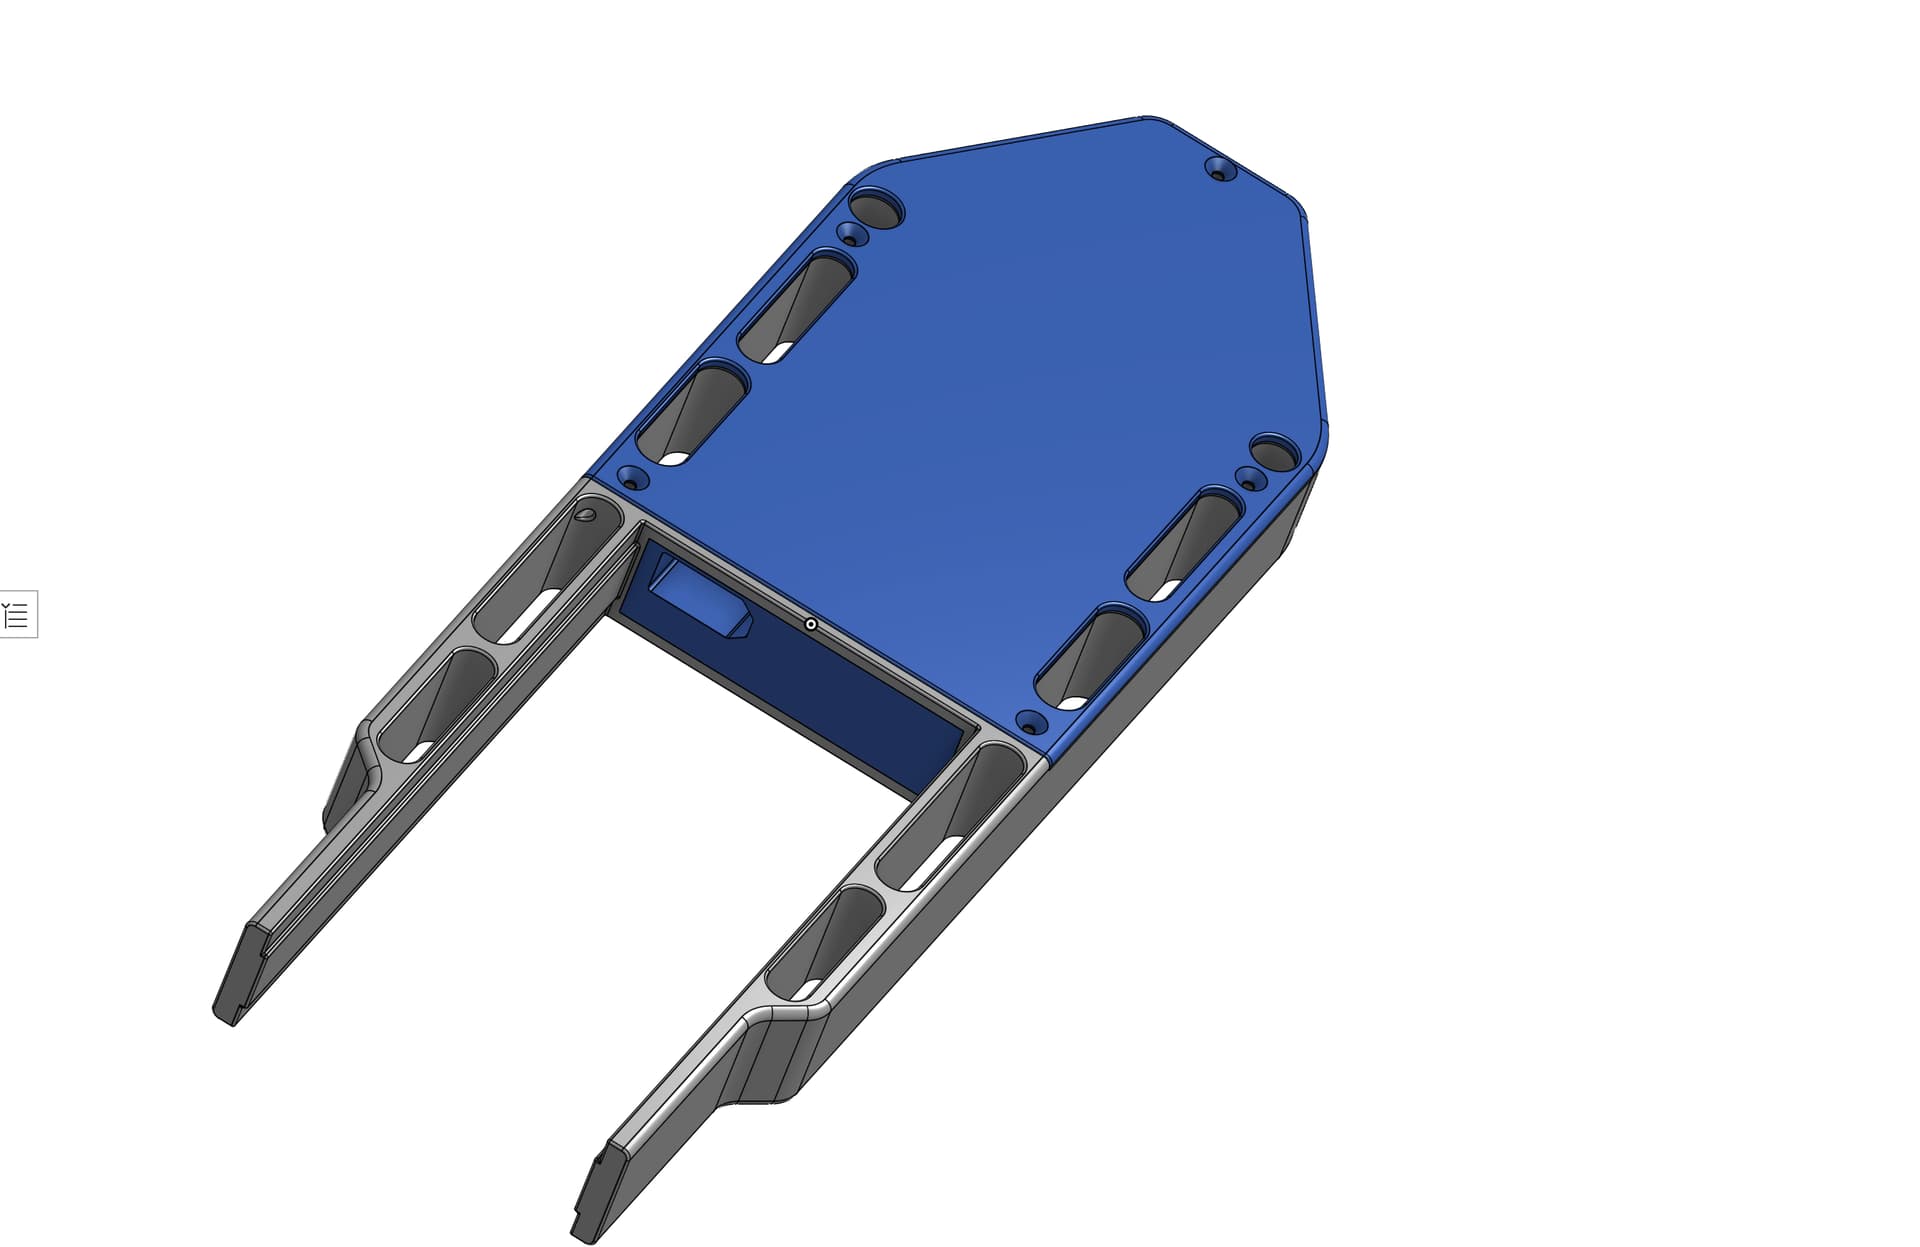
@Bzhwindtalker regarding the rib design to counteract the forces of the motor:
I would like to keep as much space as possible in the housing for future compatibility with controllers due to their different sizes.
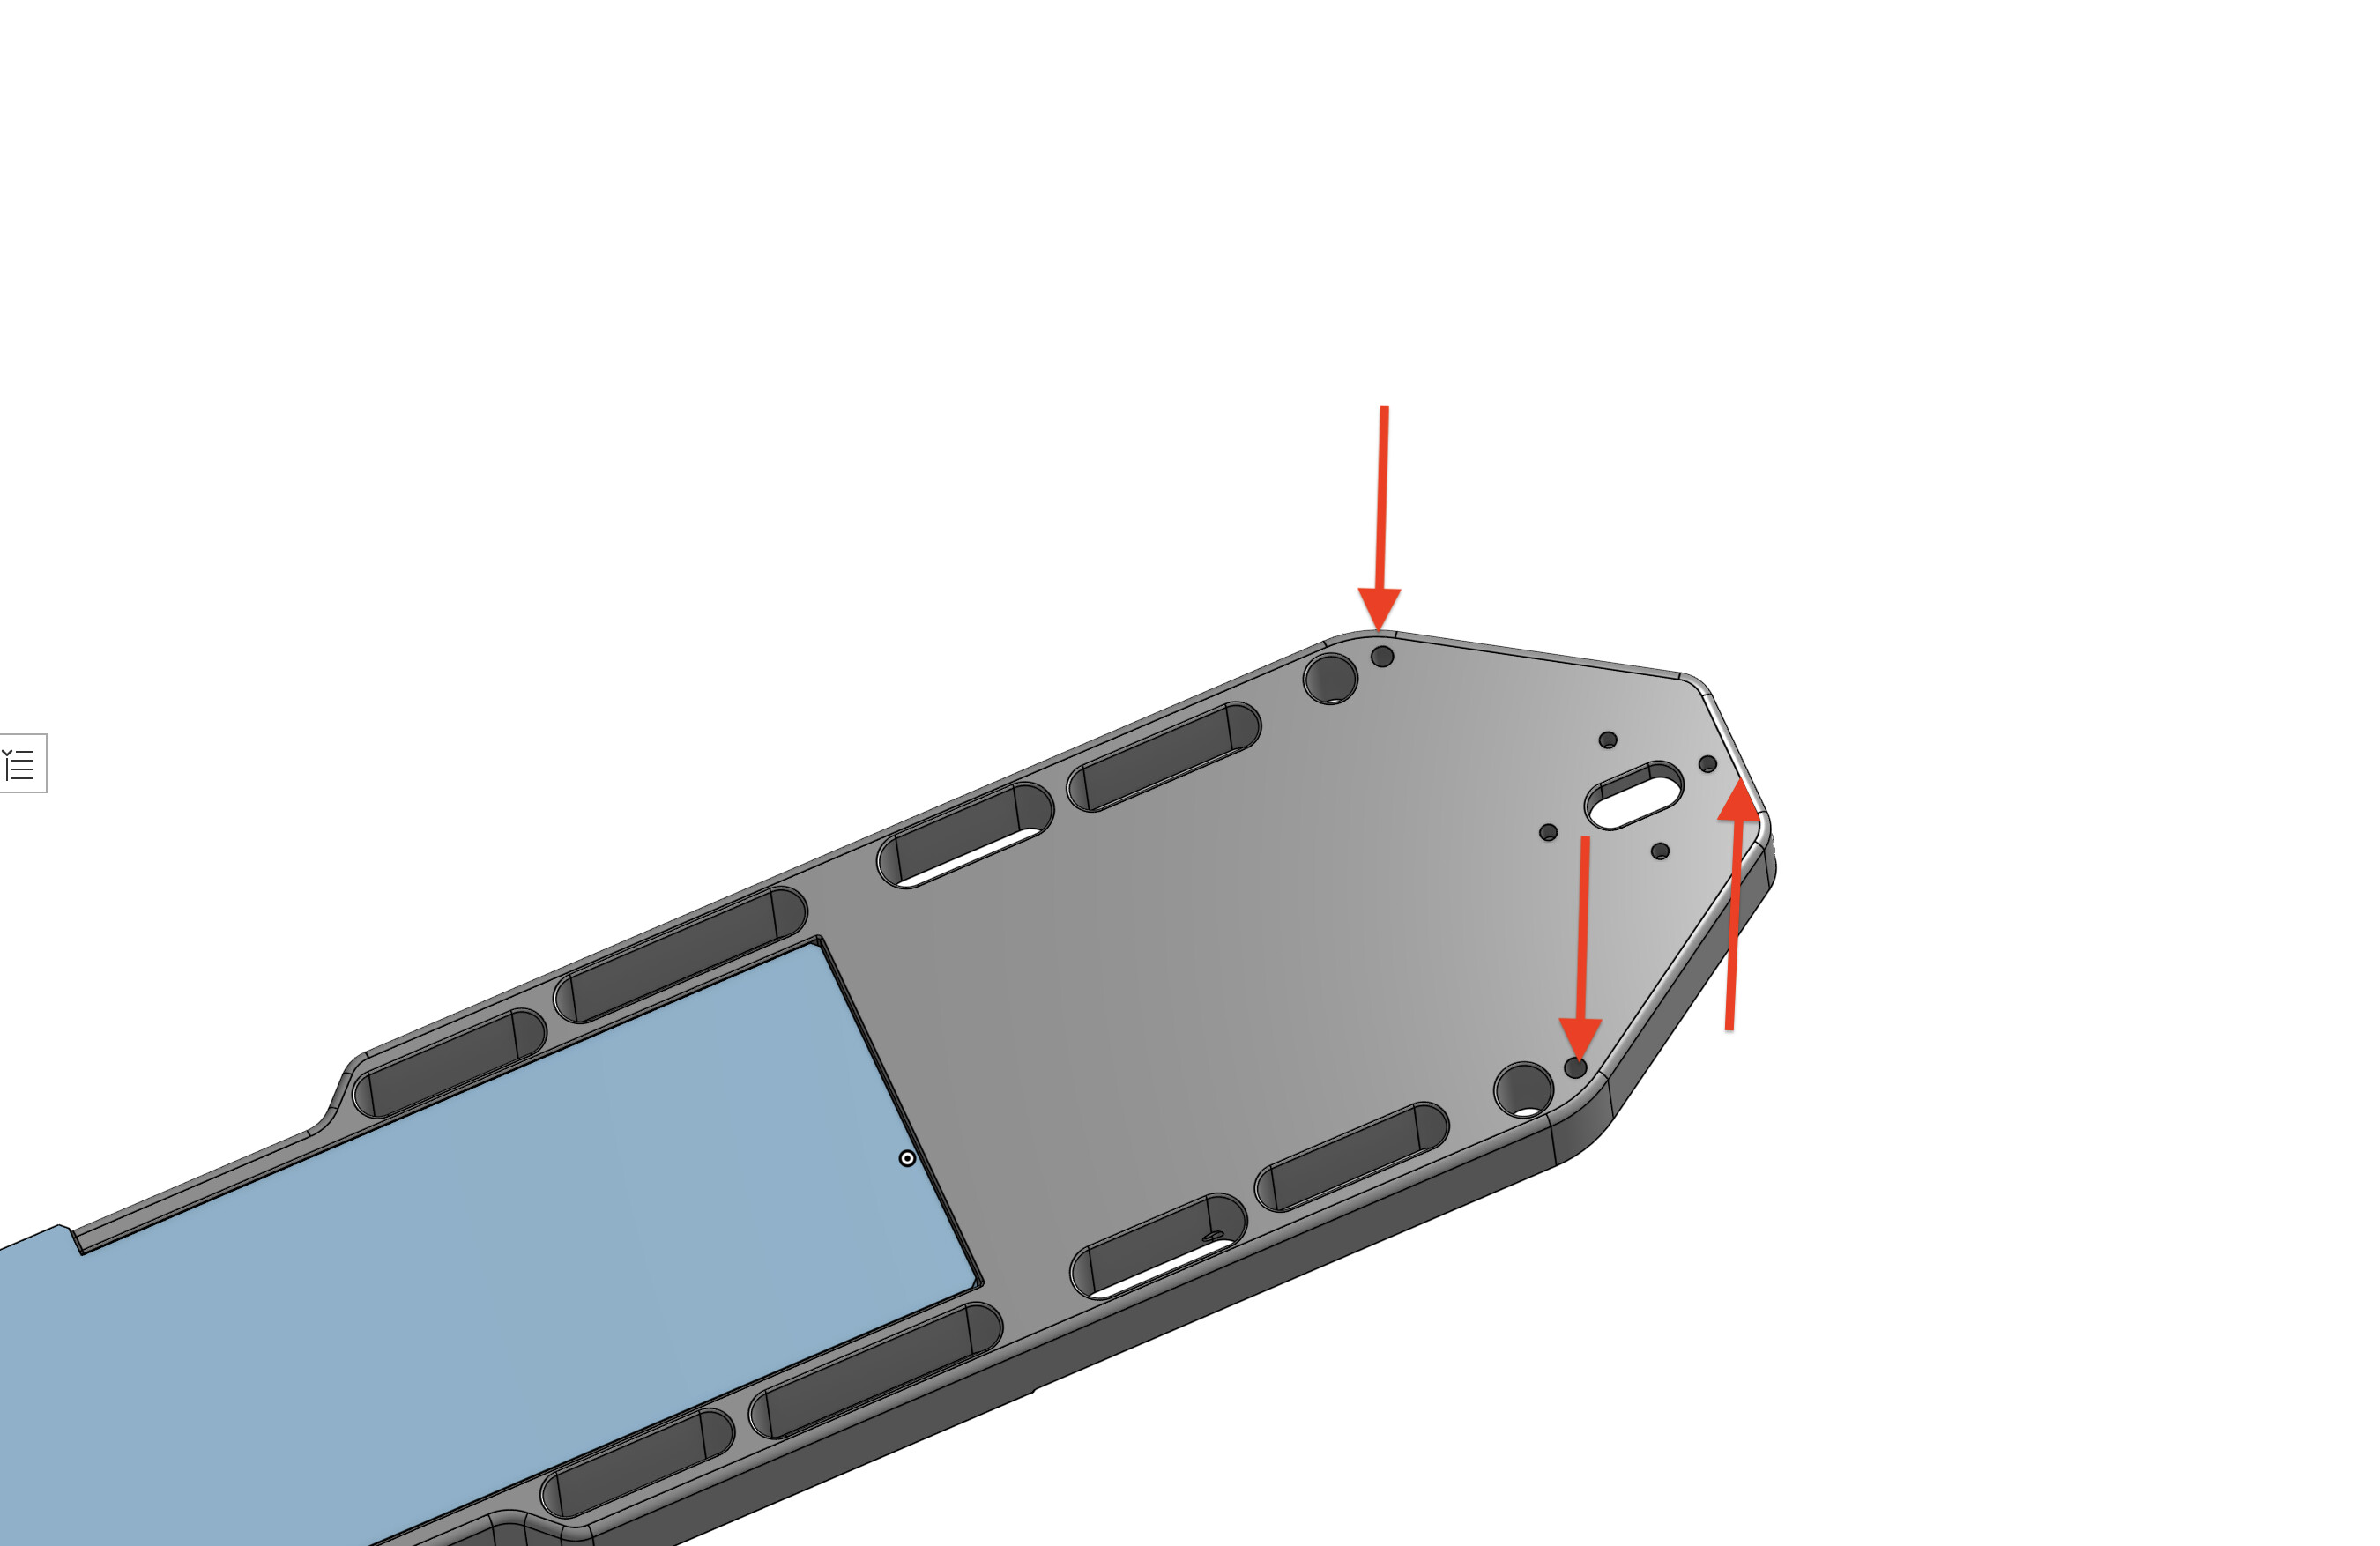
So I have moved the introduction of the leverage force to the outer side of the housing. This should make the center rib unnecessary because the force is not pushing against the area in the center anymore. I can not validate through FEM though.
To mount the motor pod a plate that mounts to the housing becomes necessary to reach the outer threads. This plate would also add stiffness and reduce tension in the housing.
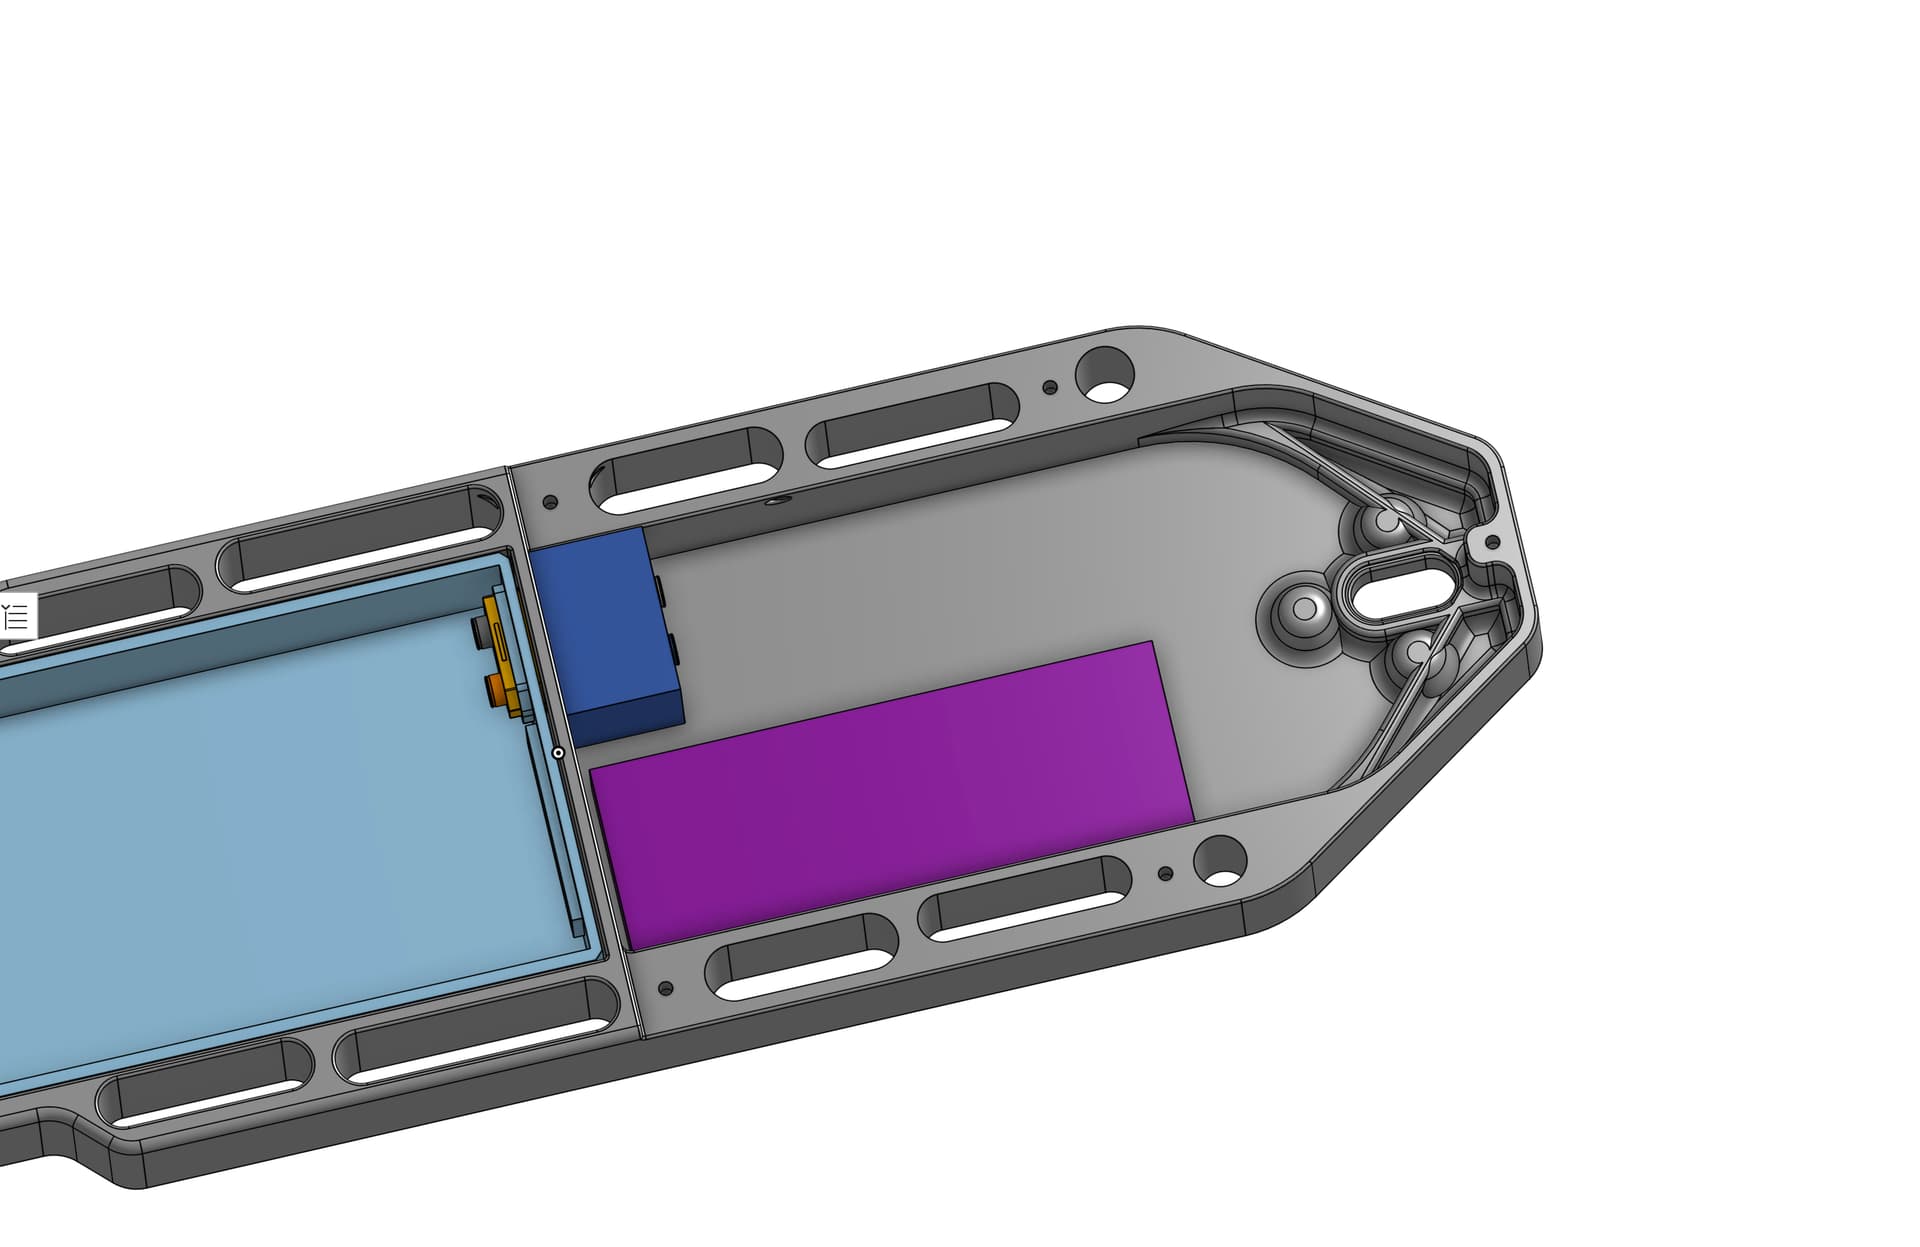
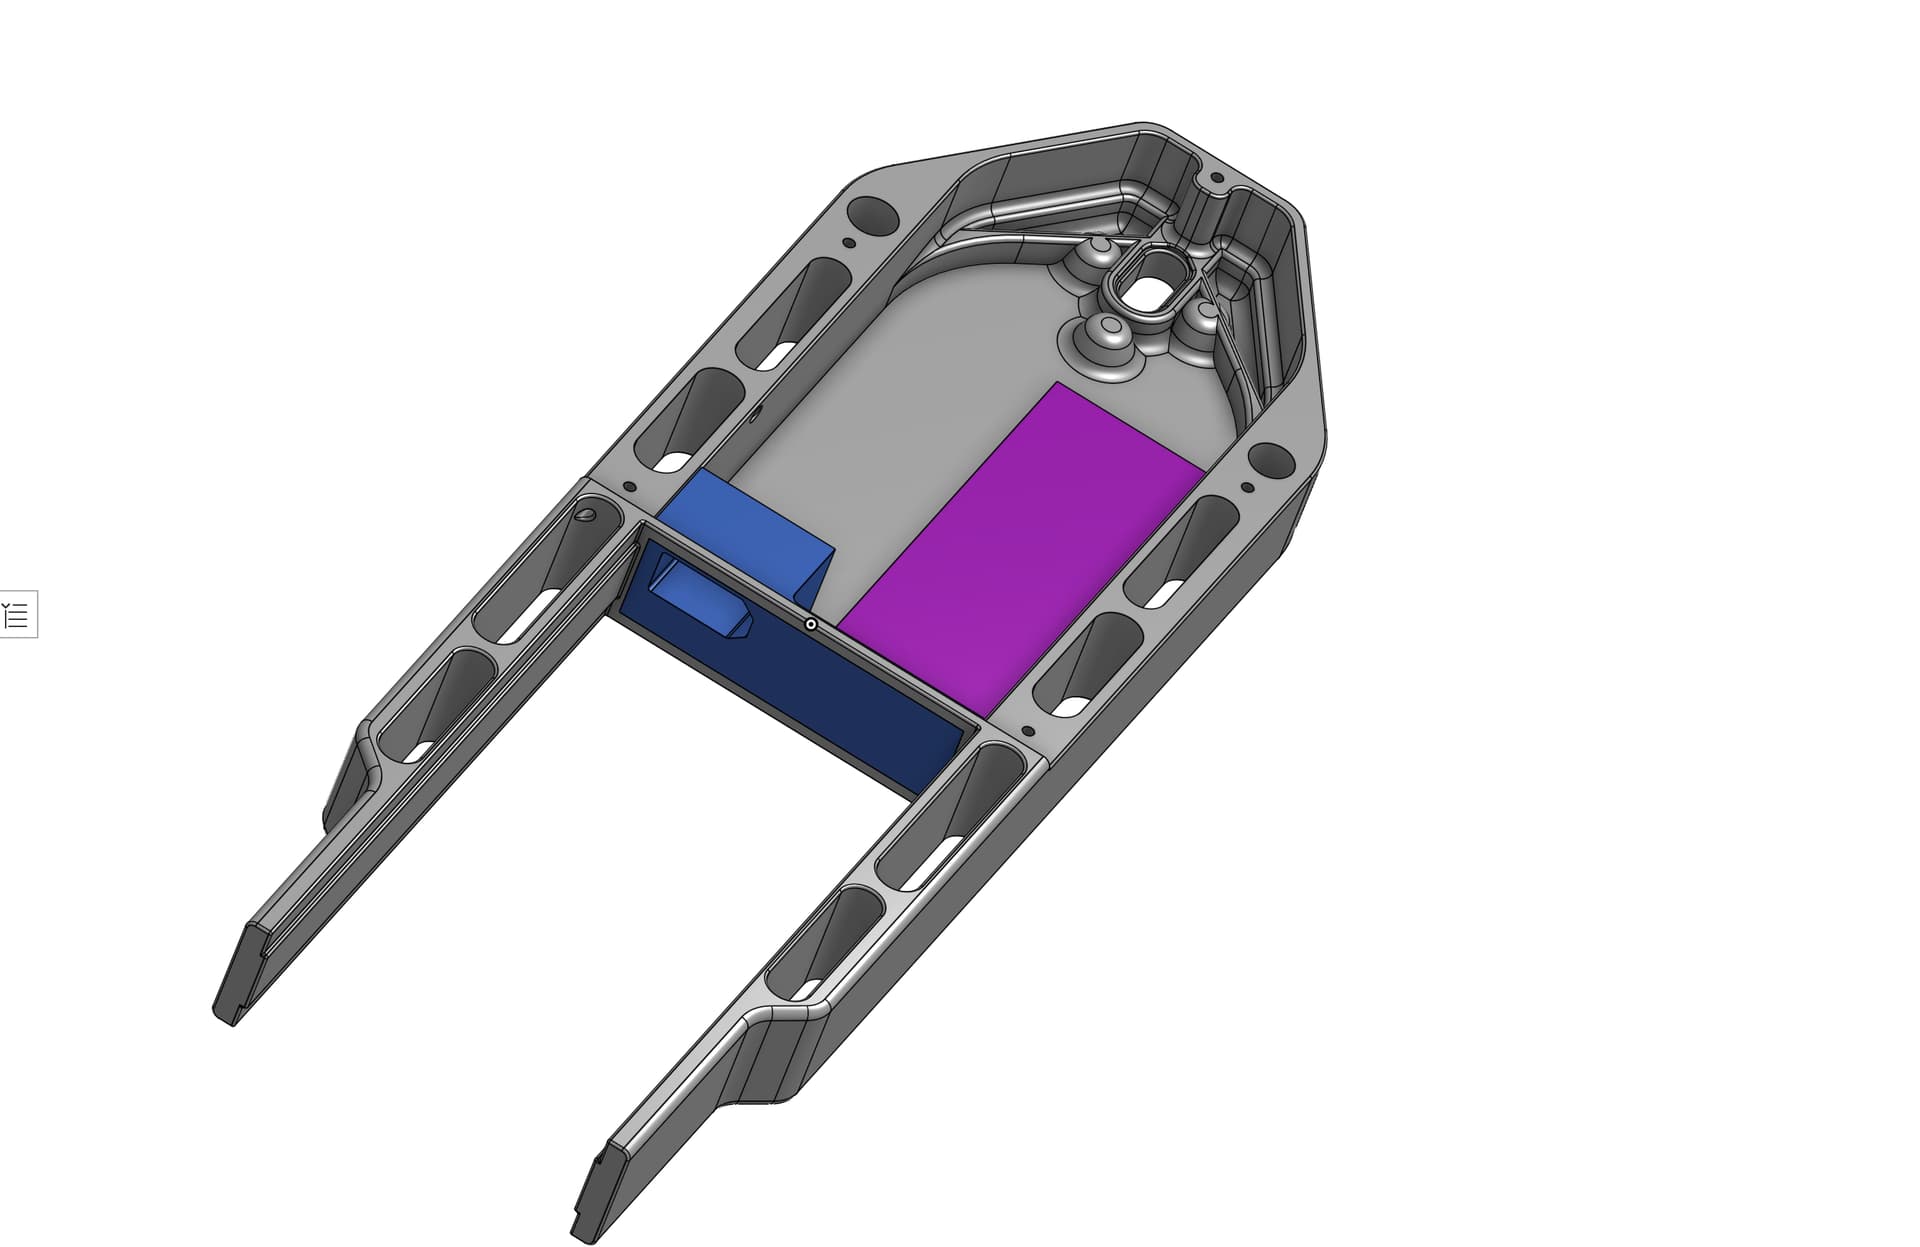
Also to be future proof for upcoming sealing and battery connection concepts I think of making that part of the housing modular. The blue part can be printed at home and glued in place:
very interested in building your design, thank you for making the project available, A couple of questions, I have a flipsky 71500 pro vesc which takes up a little more space than the hary m vesc used, do you think that would be a viable alternative with a minor redesign of the housing? I also have the maytech receiver which reads the B+ voltage, do I need the bluetooth vesc express as all the info I need is the state of charge of the pack? I also plan on reworking the mr60 output to suit a standard foildrive plug with motor mounted on the mast. and lastly I am thinking of making a 14s pack for more energy without making the unit any taller. any thoughts appreciated. Again thank you for your great work
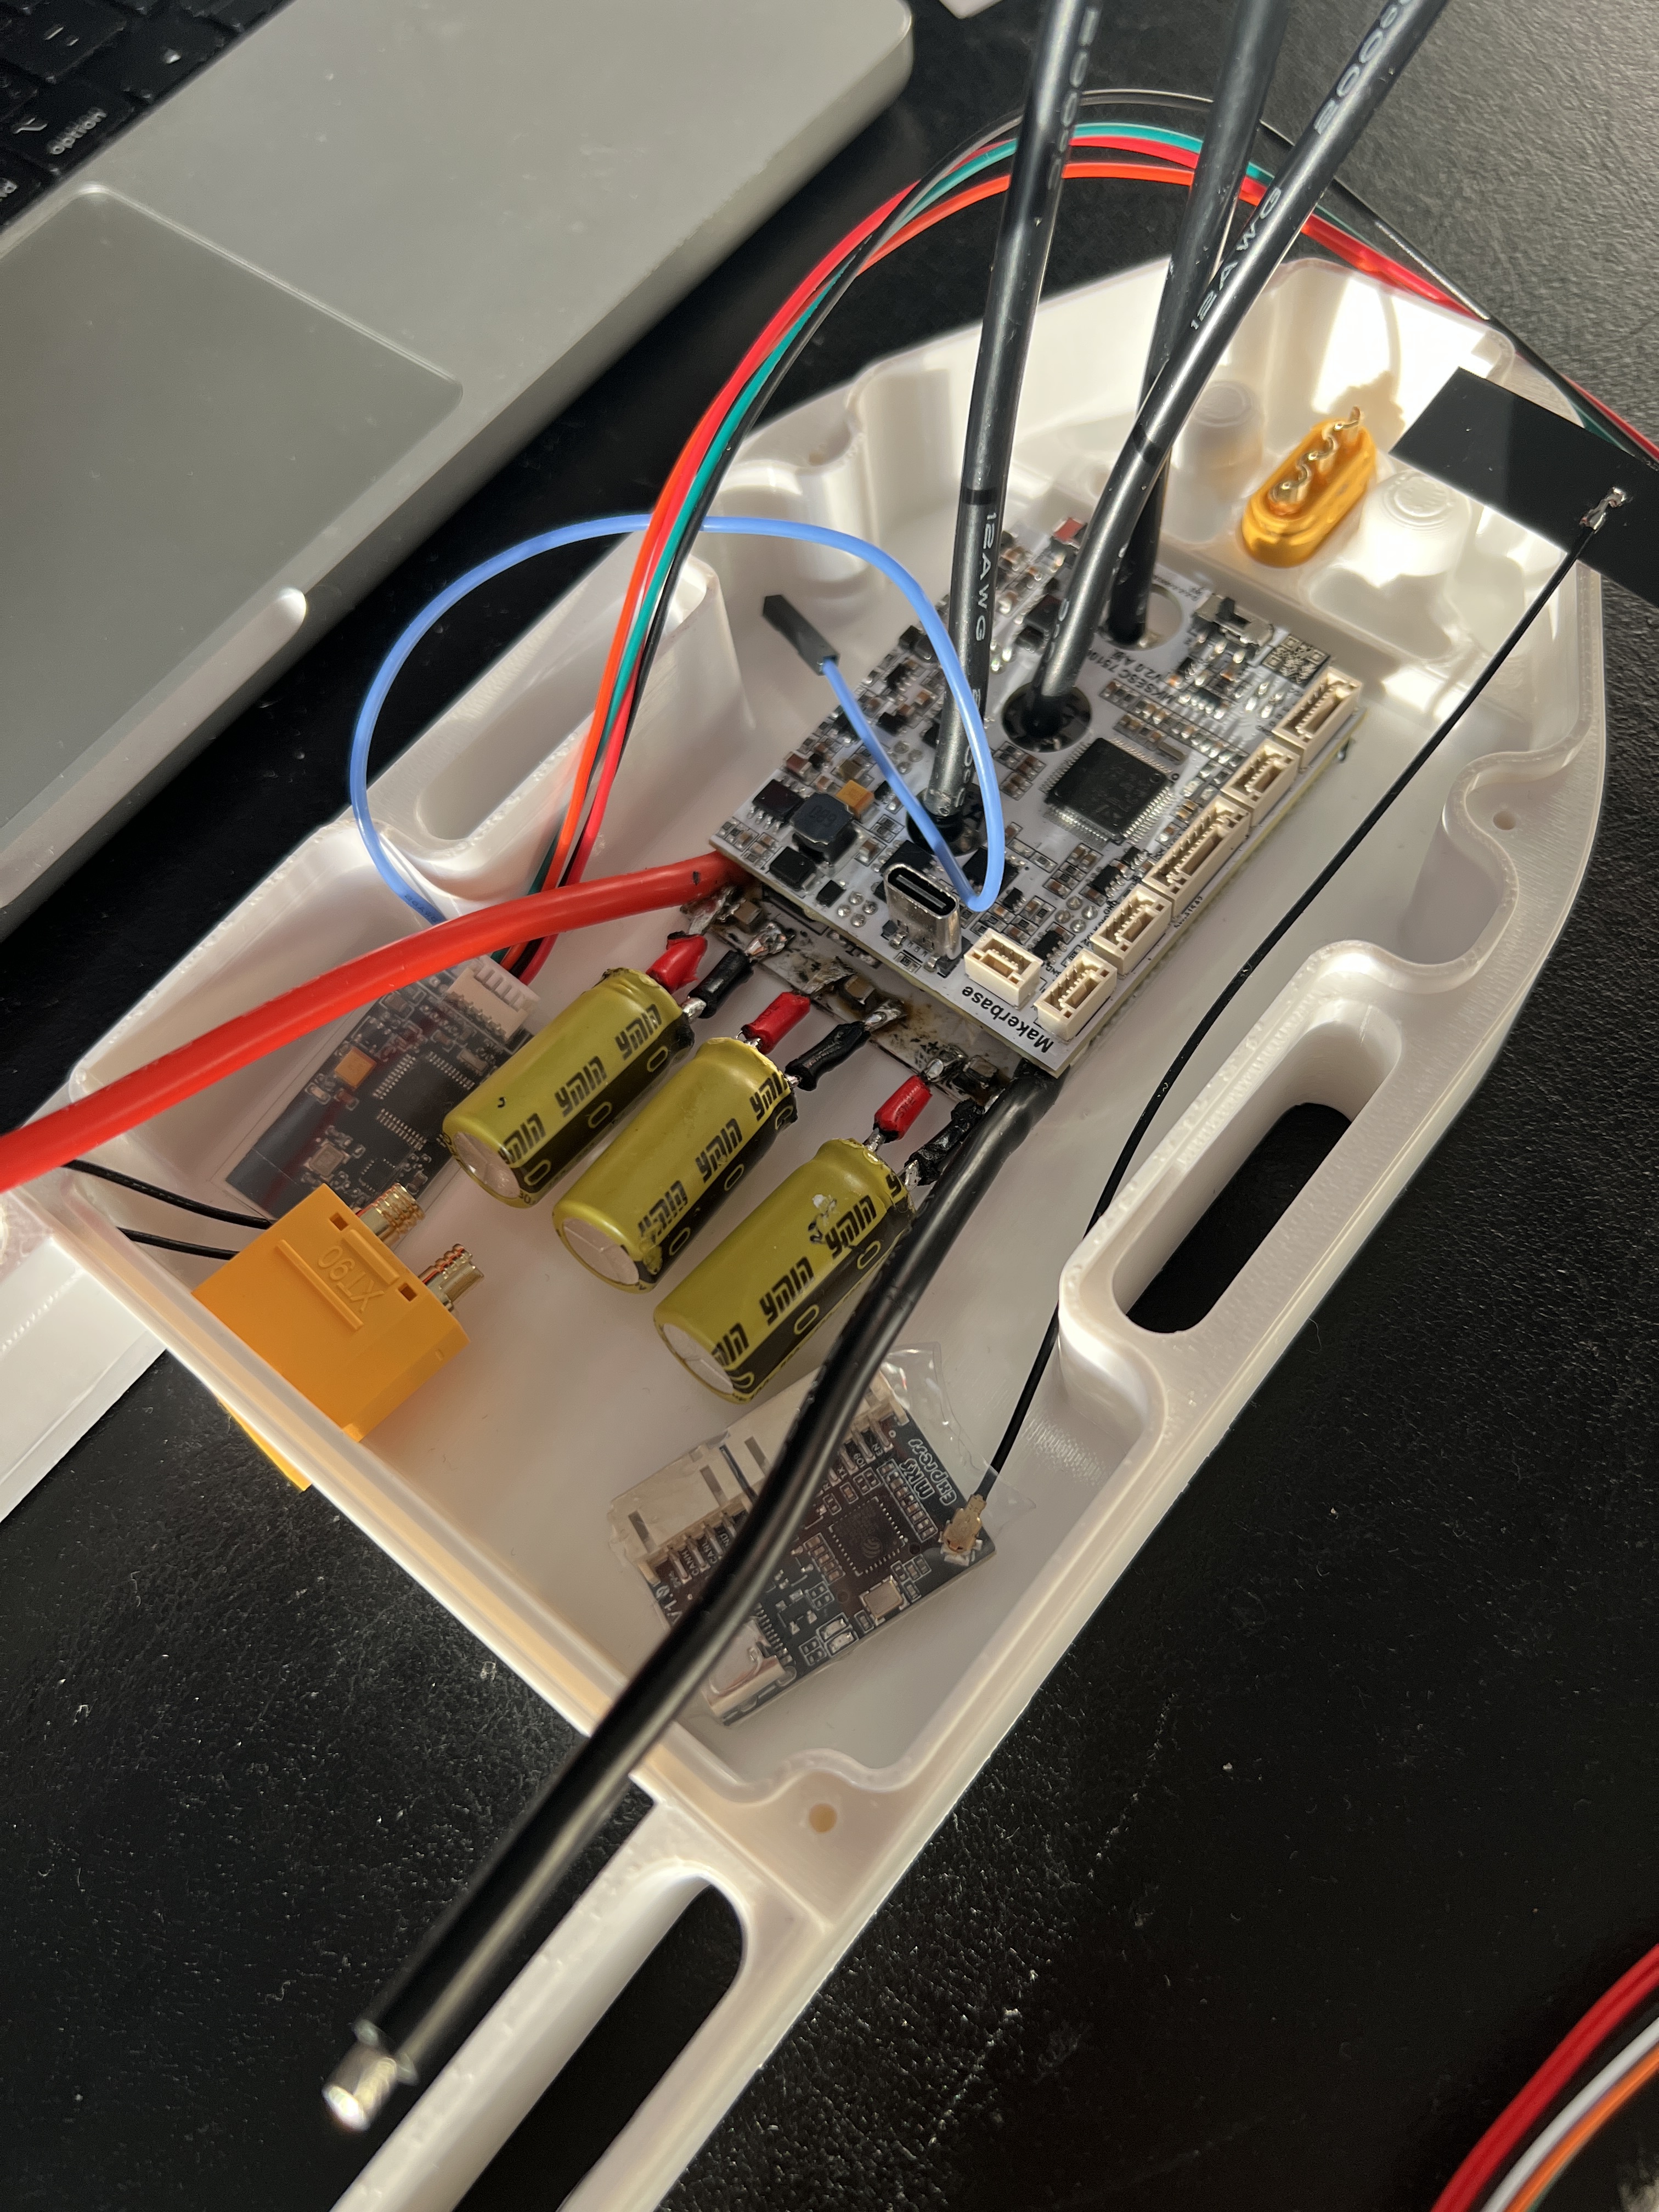
Hey, the 75100 should fit, if you remove internal rib. Vesc express is only needed if you want to change the settings without opening the gel.potting to acess usb/uart/can.
For the maytech, I suggest to wire UART then you have all info (power, current, voltage, RPM) without feeding battery voltage to the RX.
No reason 14S1P would not work. Also 12S2P has made progress but I did not build one yet
switched to uart and can now see data but I now have no response from the throttle ?? have set to current with no reverse, have searched for solutions, I am at a loss, any suggestion on where to look? thanks in advance
ok now I feel really silly I have to connect both uart AND ppm it is not a choice of one or the other, works with both connected and enabled is vesctool DUHH
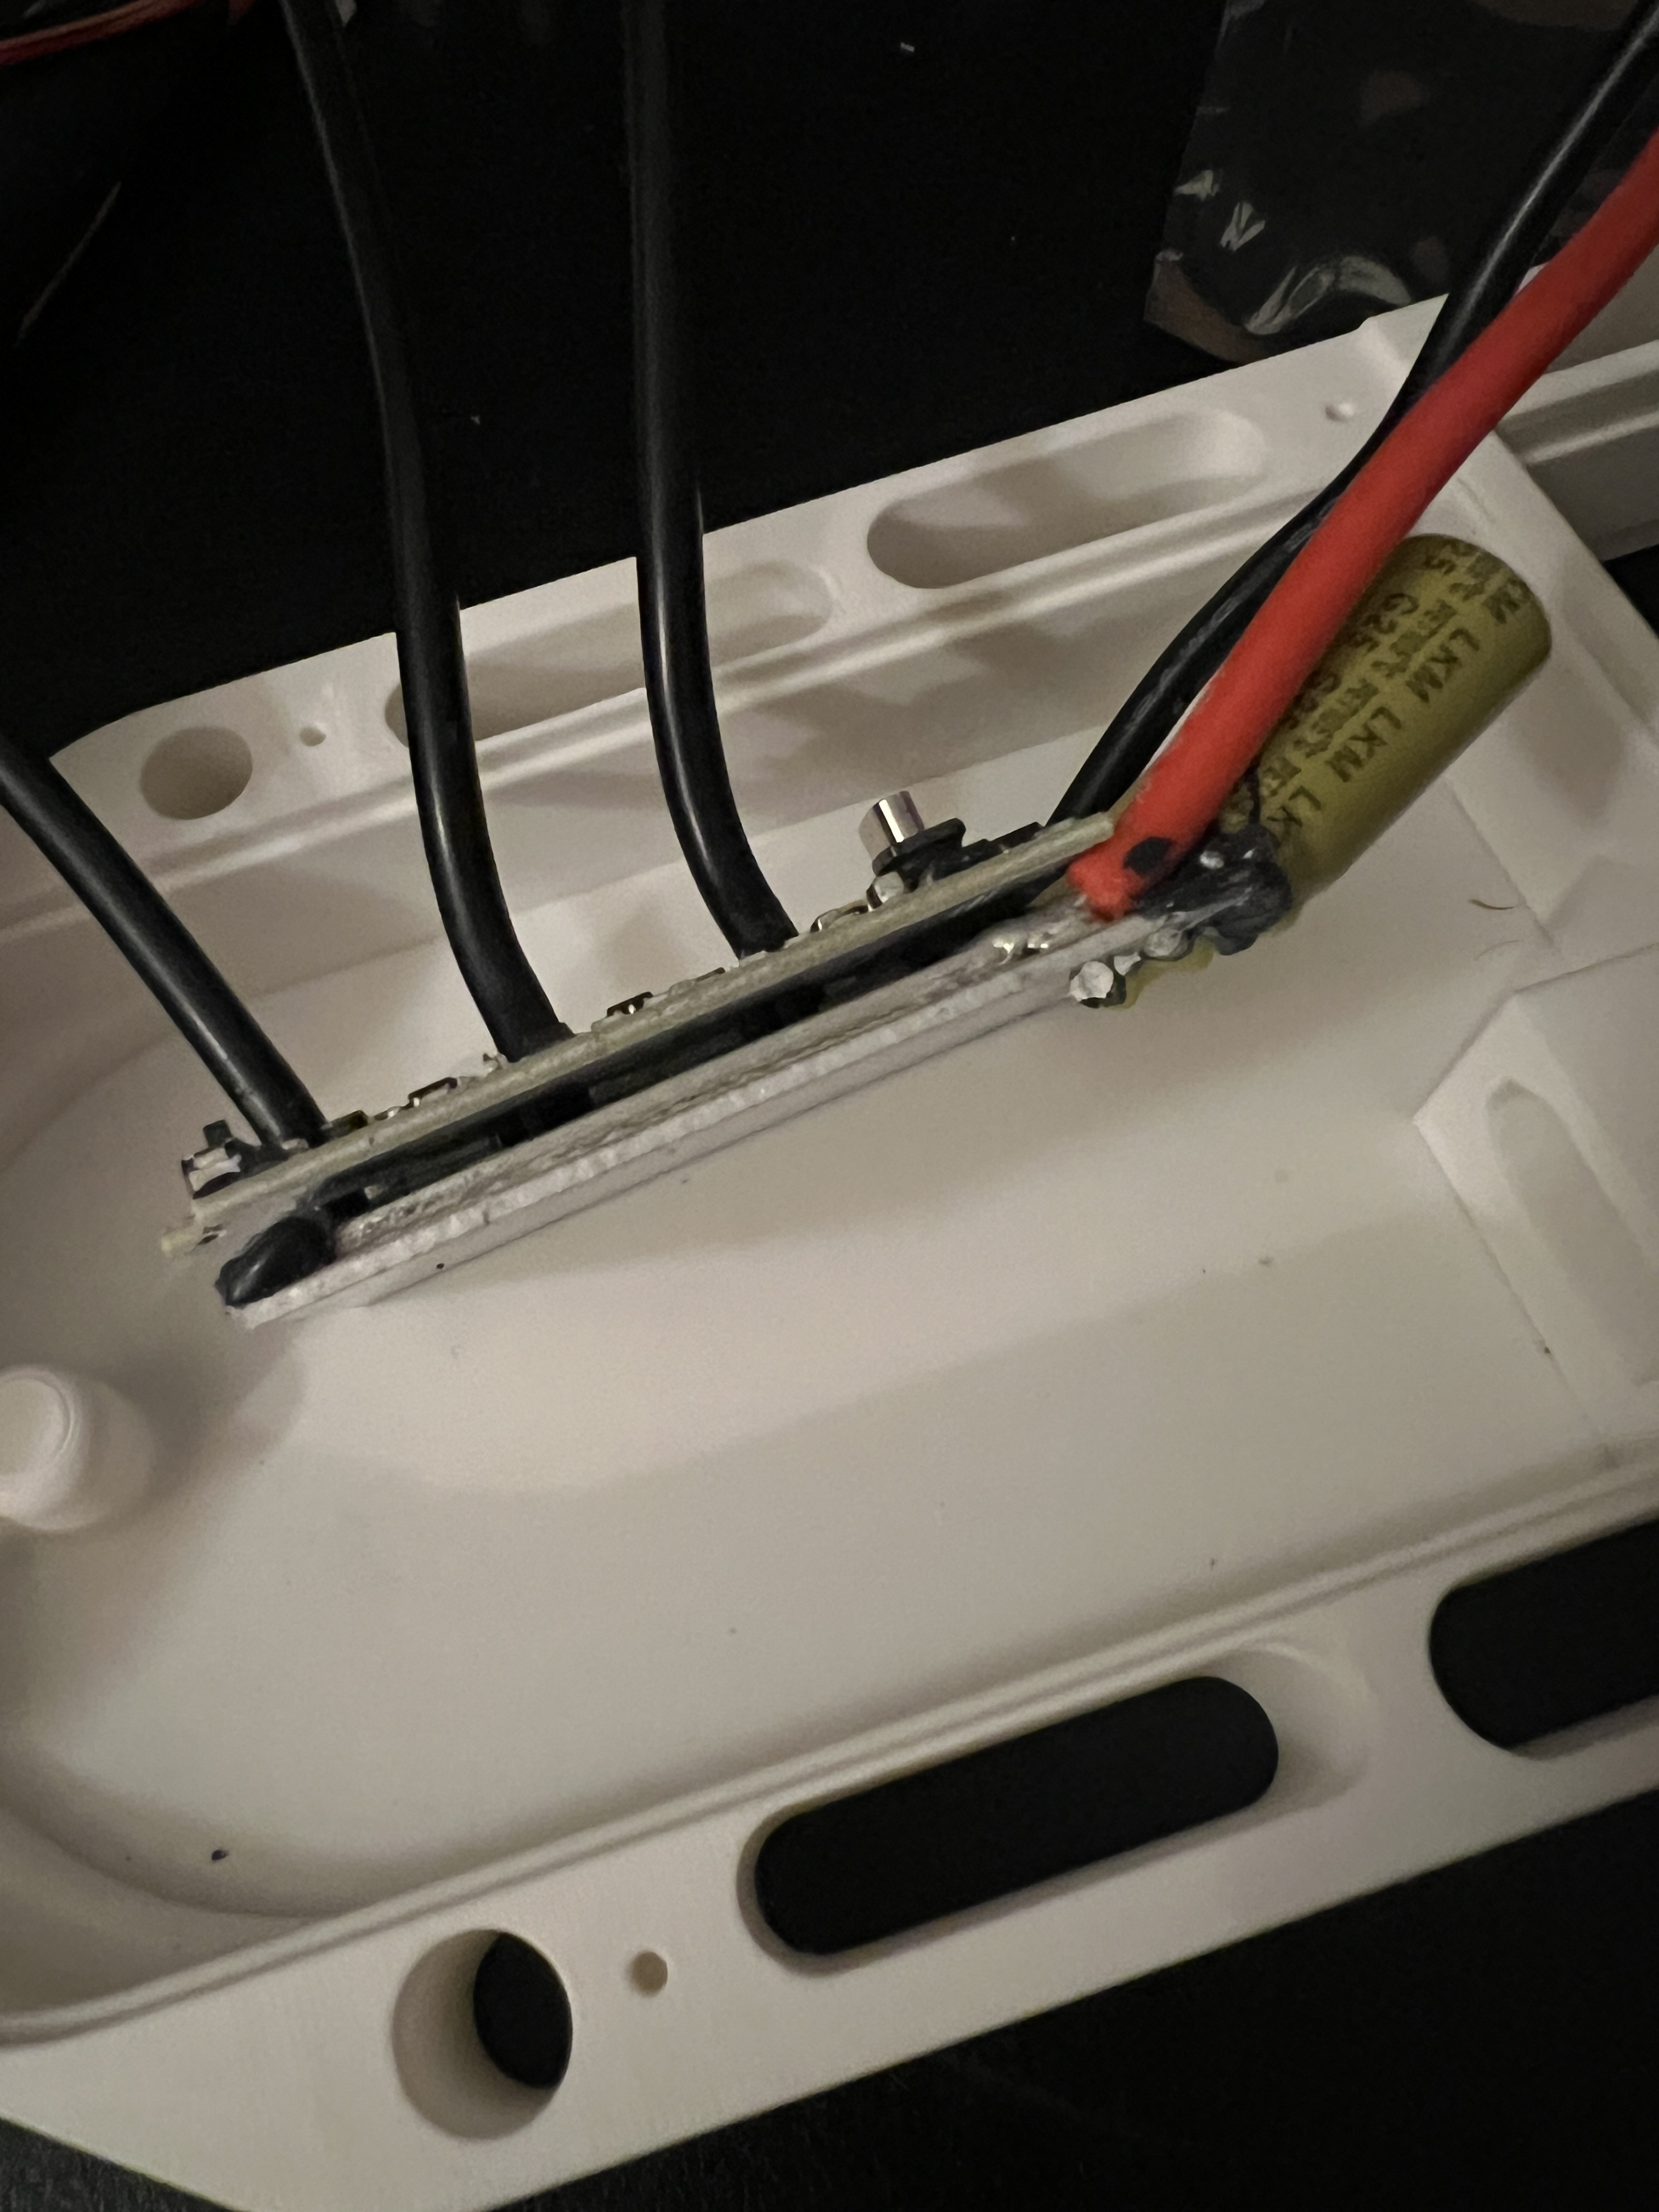
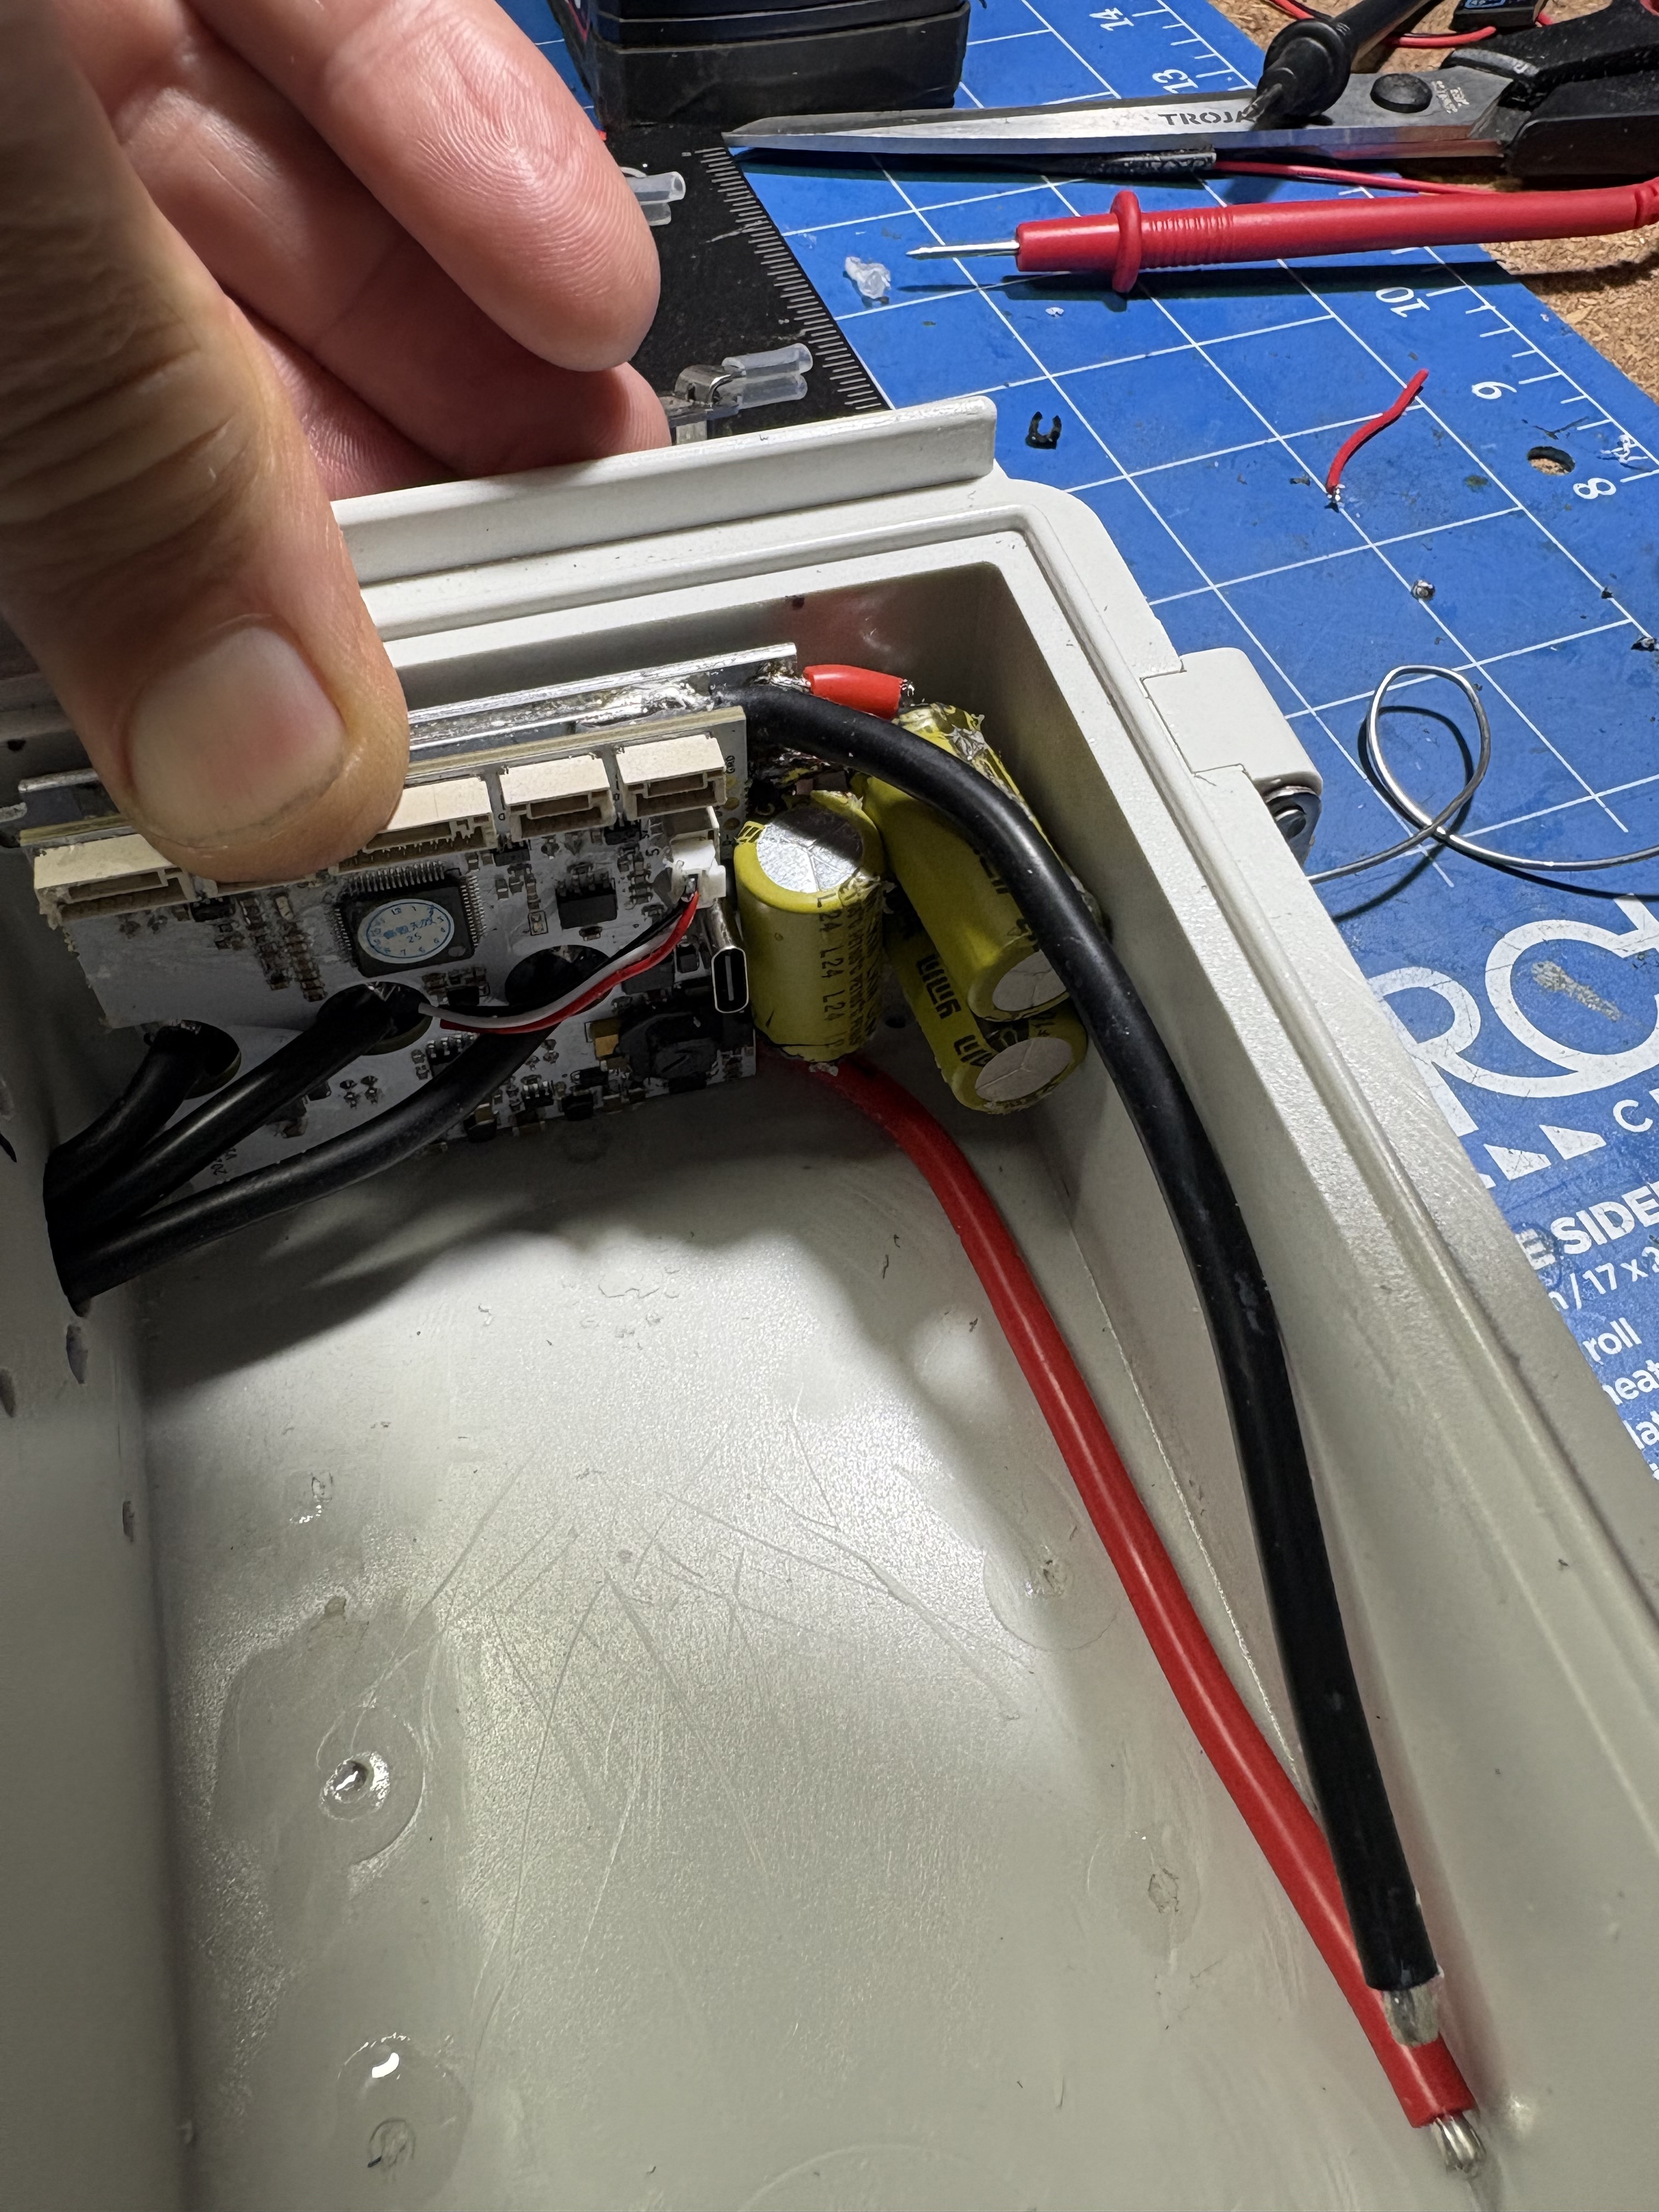
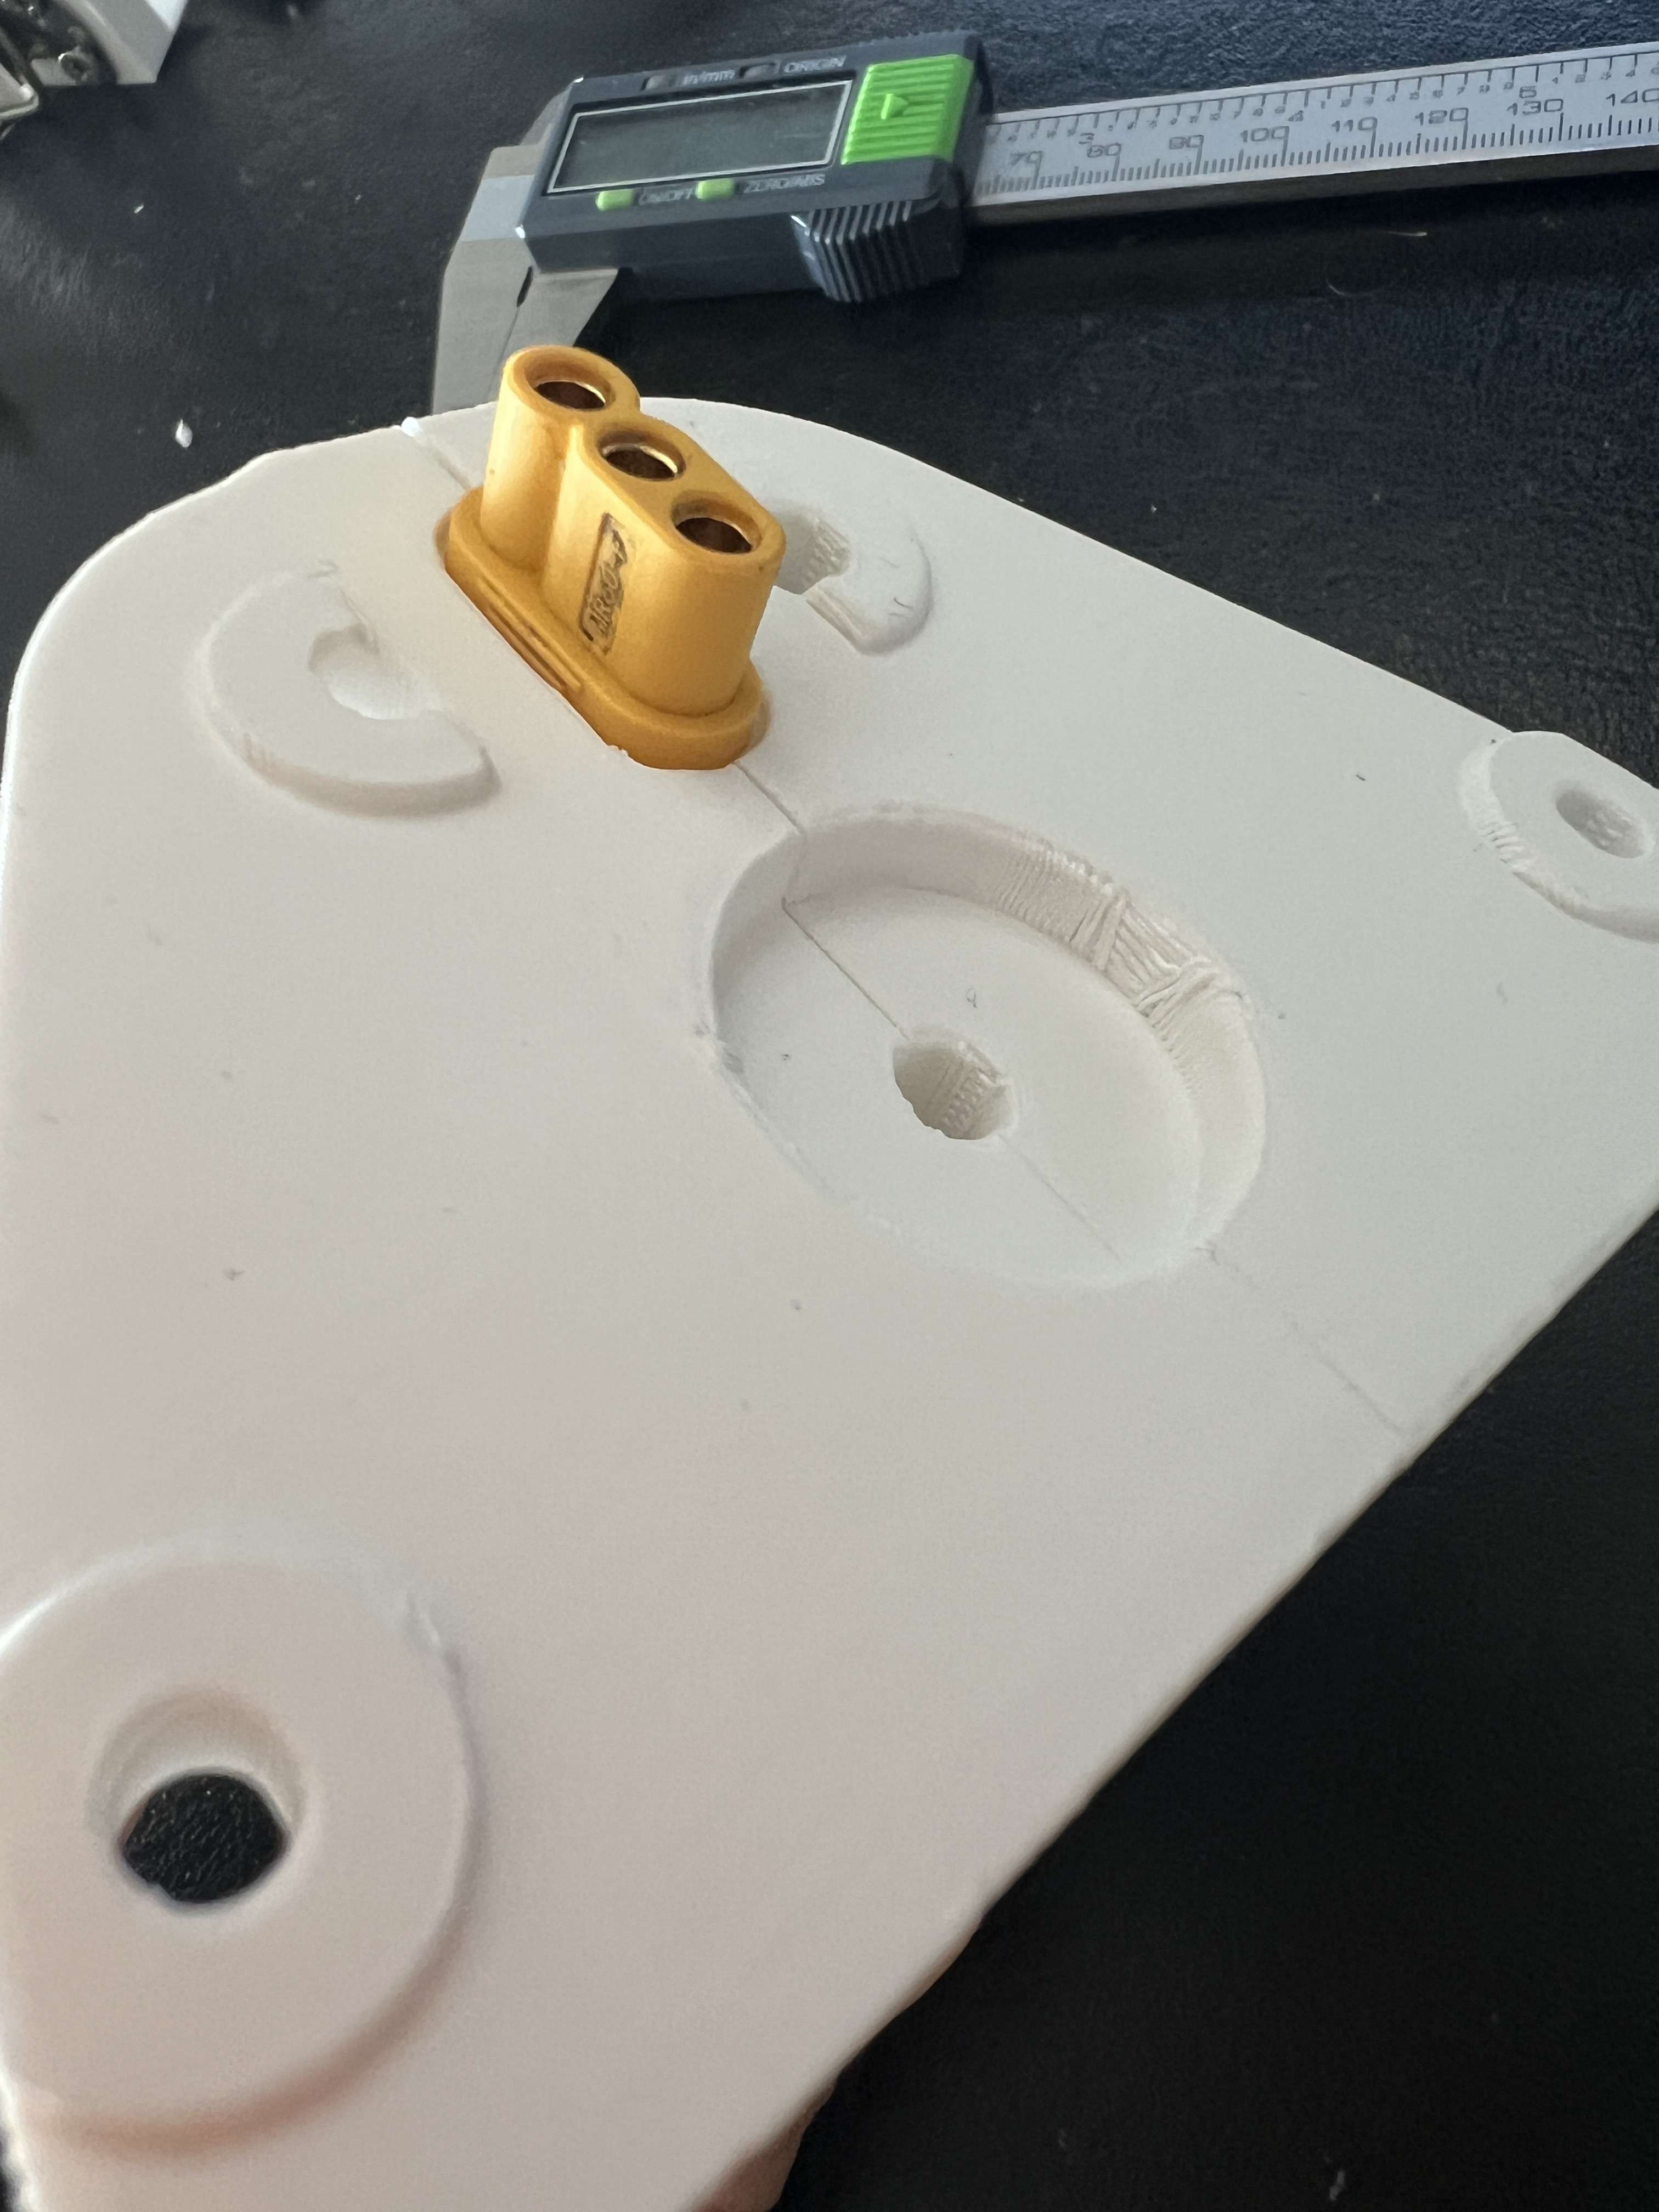
So I just received the 75100 from Makerbase and height wise it is pretty tight. I will need to elevate the controller due to the condensators sticking out at the bottom. Then the USB-C port is less than 1mm from the lid. Bending the condensators up does not help either because they are to large.
I will probably make the housing larger. But in that case I could have gone with the 84100.
Originally I planned to also use the HarryM controller and I will order it one day. But it seems like the housing height is very constraining in the selection of suitable VESC controllers. And I would like to have options in this regard.
@Bzhwindtalker how did you fit the 75100 in your test? Is probably the USB-C port of the flipsky version less high?
Edit:
Did some measurements and with elevating the controller enough to compensate for those condensators I get 21 mm with the usb port. My housing is 23 mm on the inside. The original housing is 23.5 mm. So could work with 2 mm clearance. But if you plan to use the Maytech RX as @Bzhwindtalker does you probably will not fit that one next to the 75100.
Scrape off the silicone and un solder the capacitors. Just add very small stiff wires to the board and re solder. It doesn’t take much to get it all flush.
Not a big deal, I also have some overhang on my system. I figured out it would be less frontal area with this design, even if a little less rigidity (not an issue IRL)
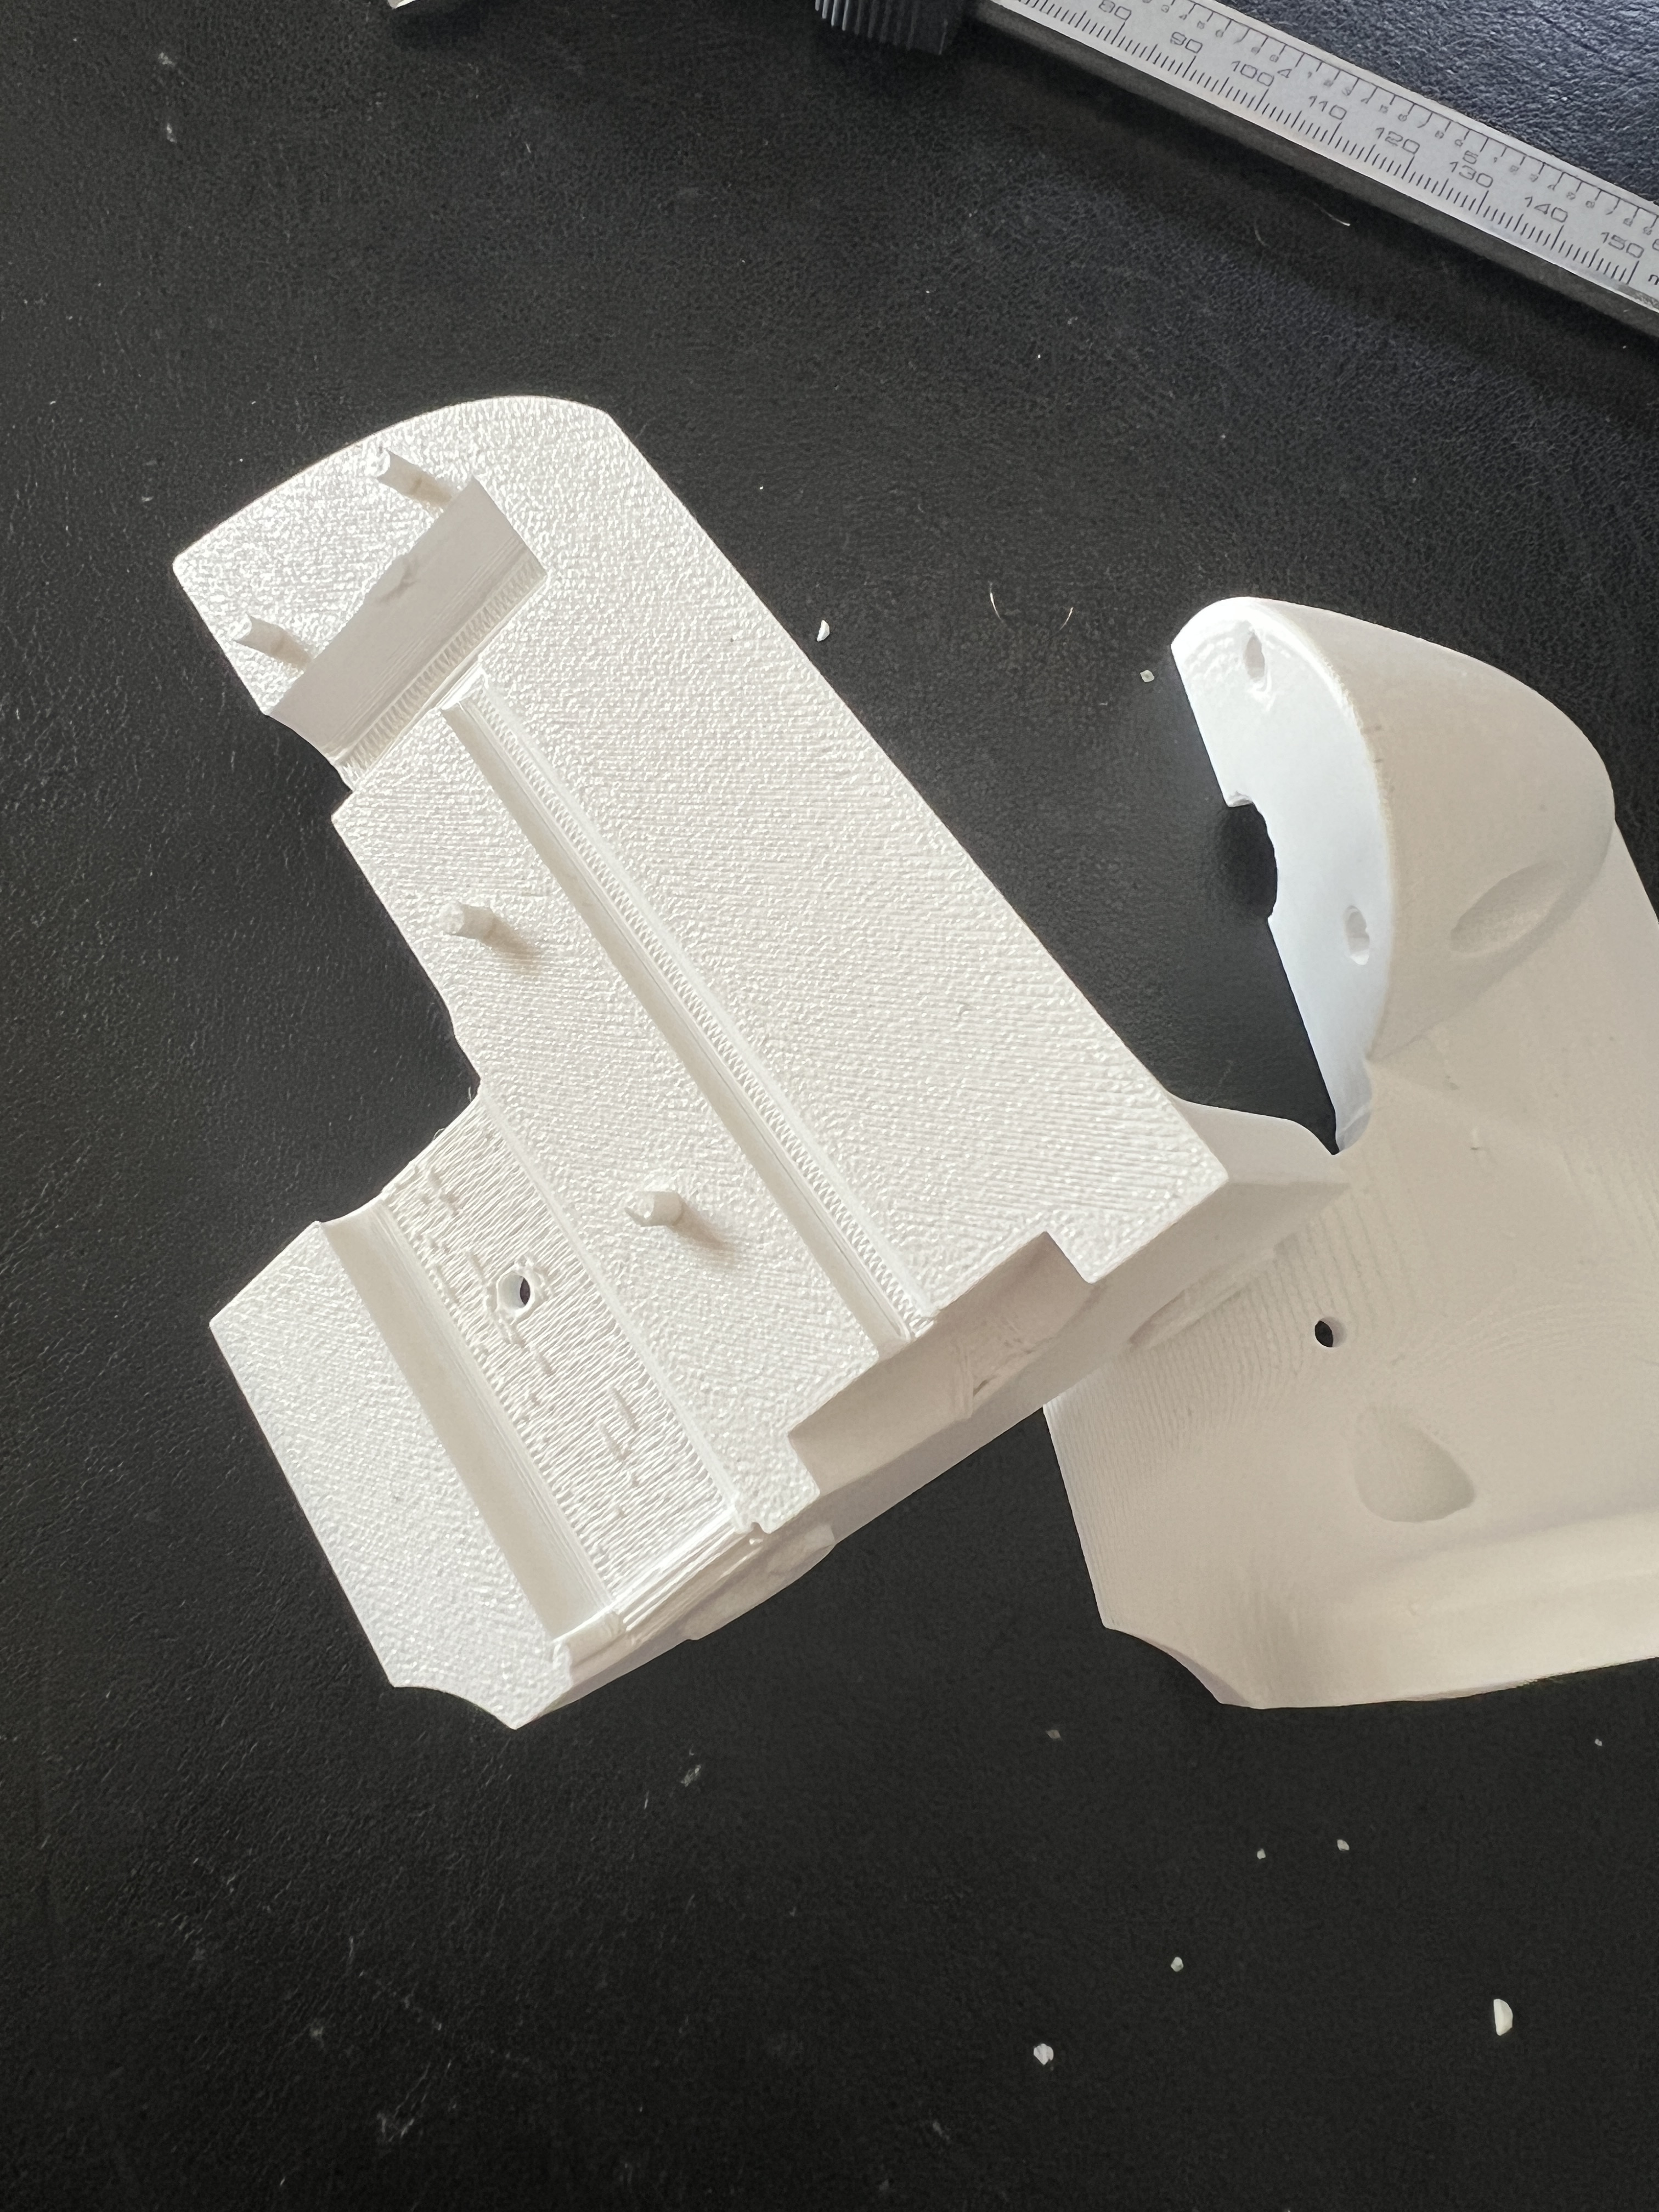
Last alignment check. I need to print it one more time due to small changes to the area with the latches. On sunday I will finally pull the trigger and order at cloudcraft.
I was able to resolder the capacitors. It was a pain in the ass. I could not melt the orgininal solder joints, even with a stronger soldering iron. So I cut the capacitors and soldered them on top of the original joints. Not sure if it should be done this way, though.
Did a very ugly job but the joints hold up and all measurements with the multimeter are fine.
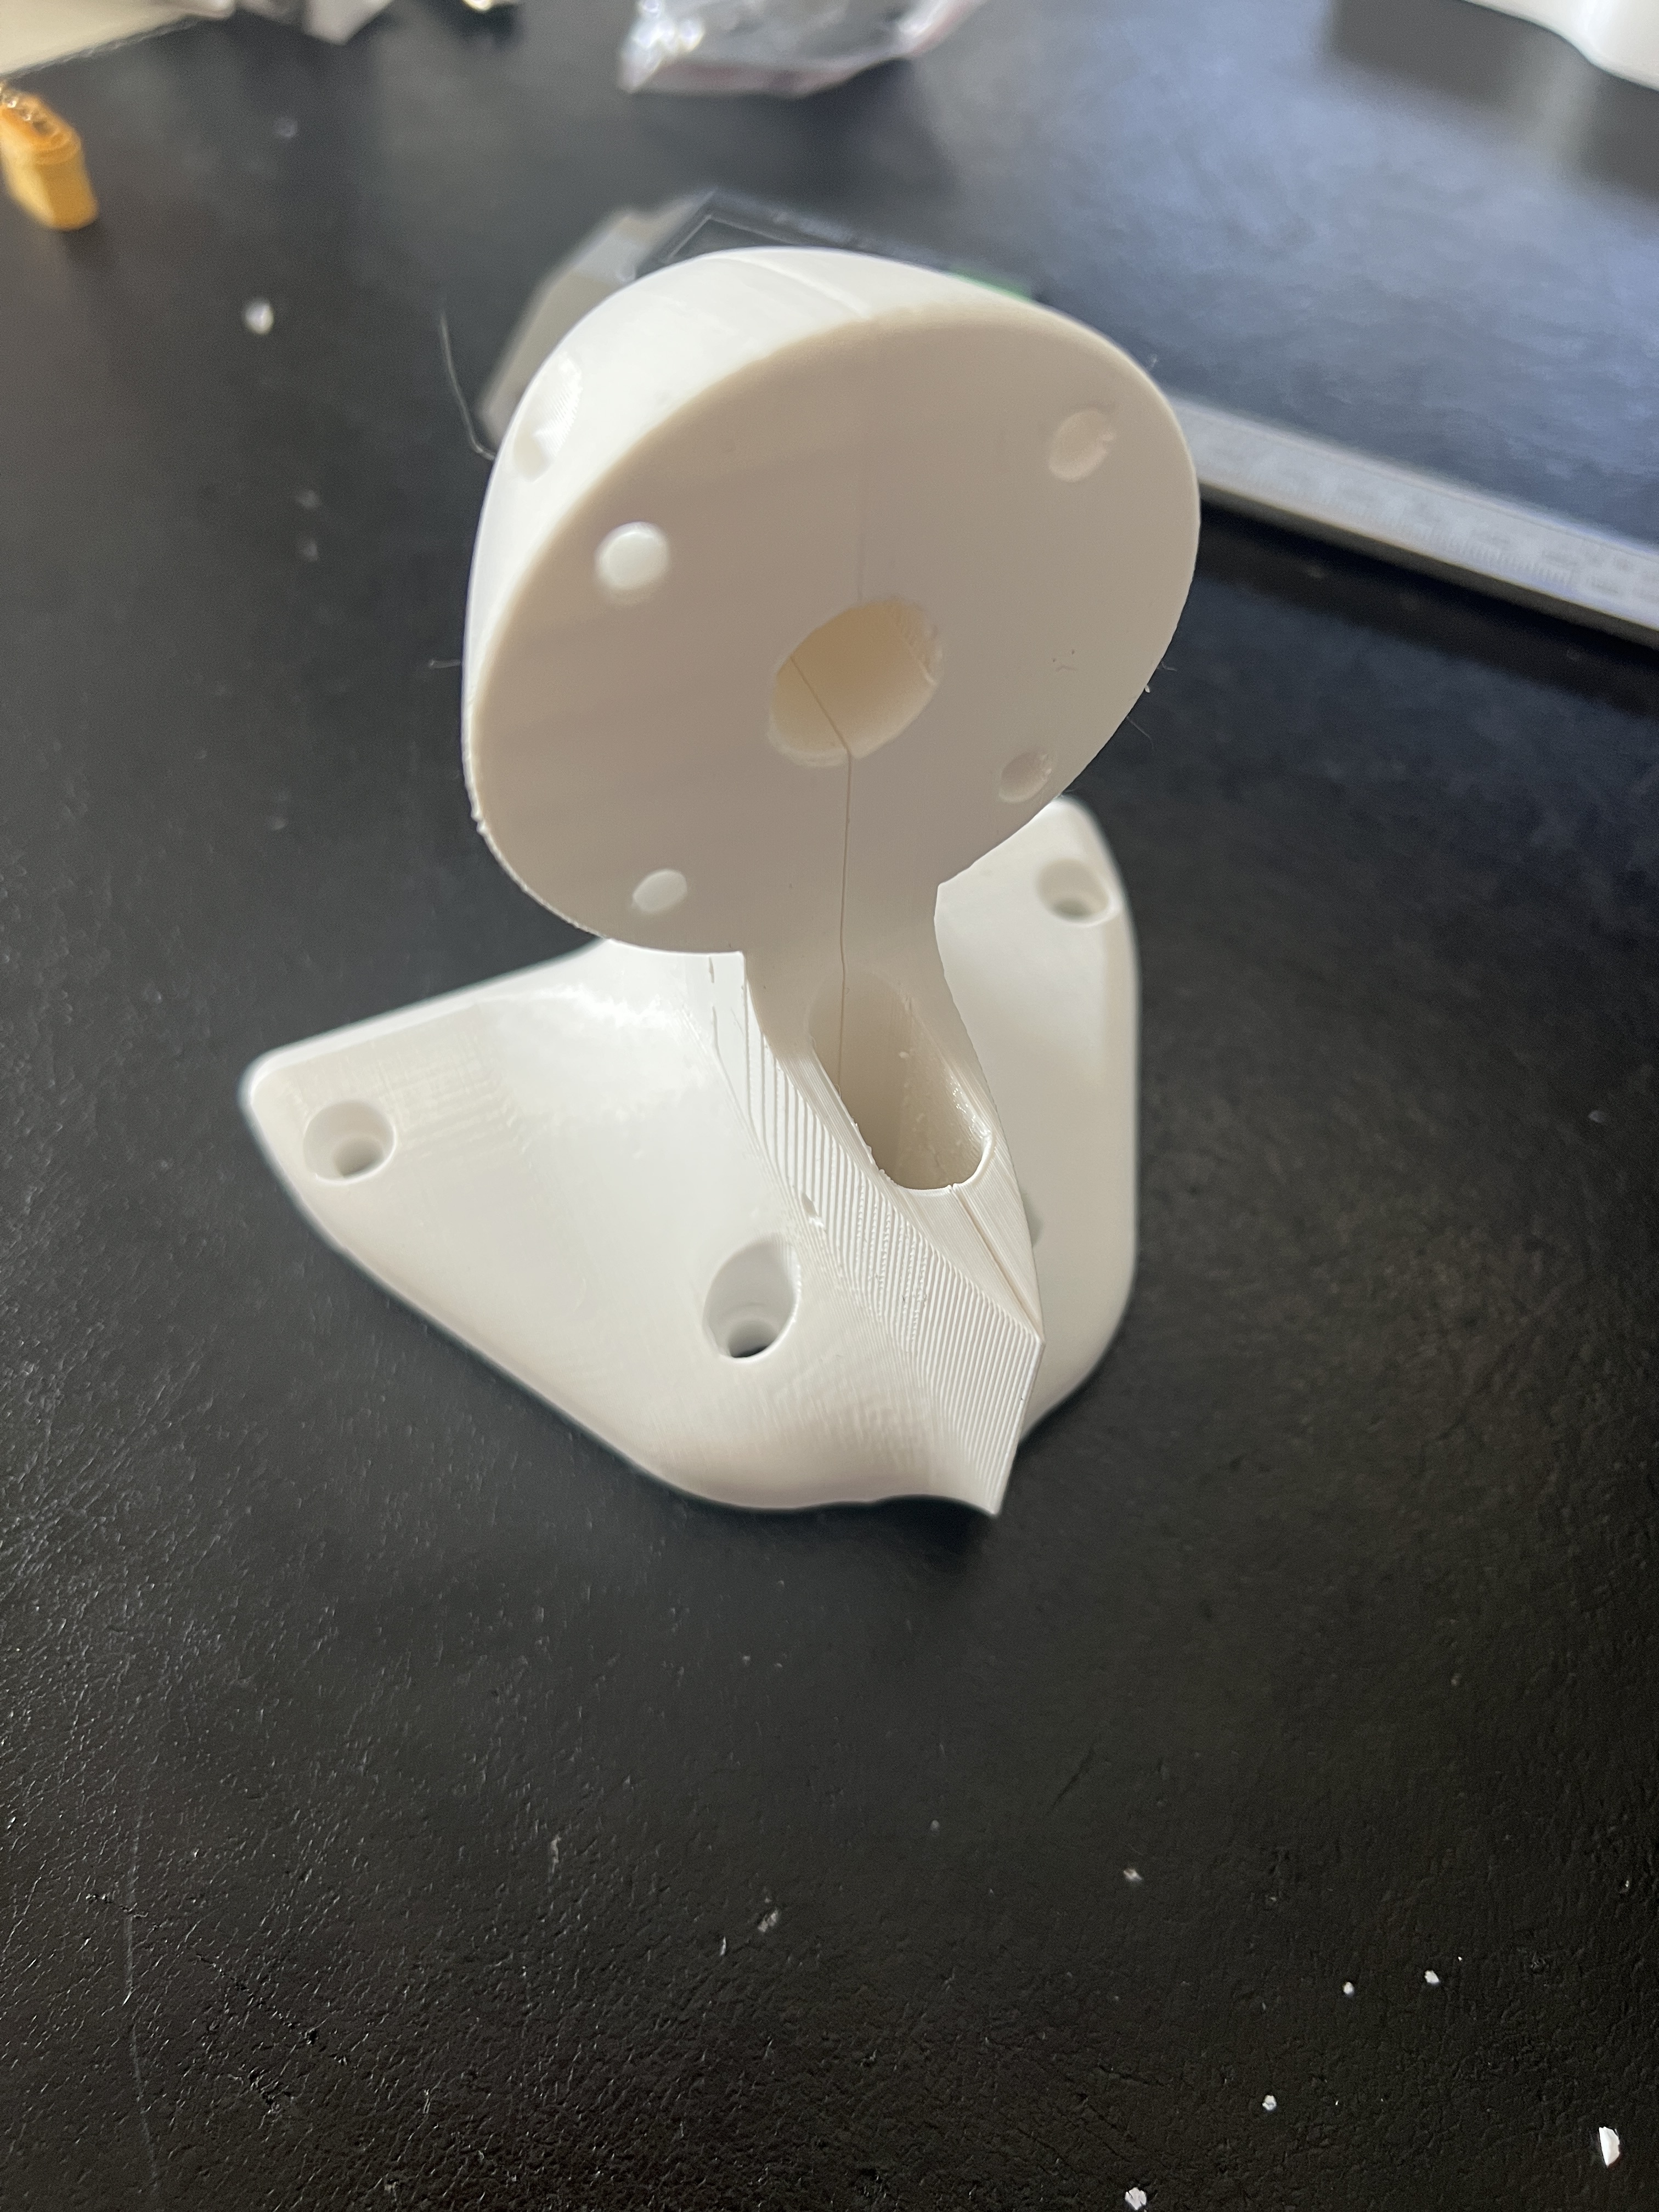
Printed the pod in two parts with layers in vertical orientation. Added holes and printed pins to align both parts.
Thought I would glue an m5 bold with a washer inside to prevent it from braking sideways. But it turned out to be bomb stiff due to the layer orientation.
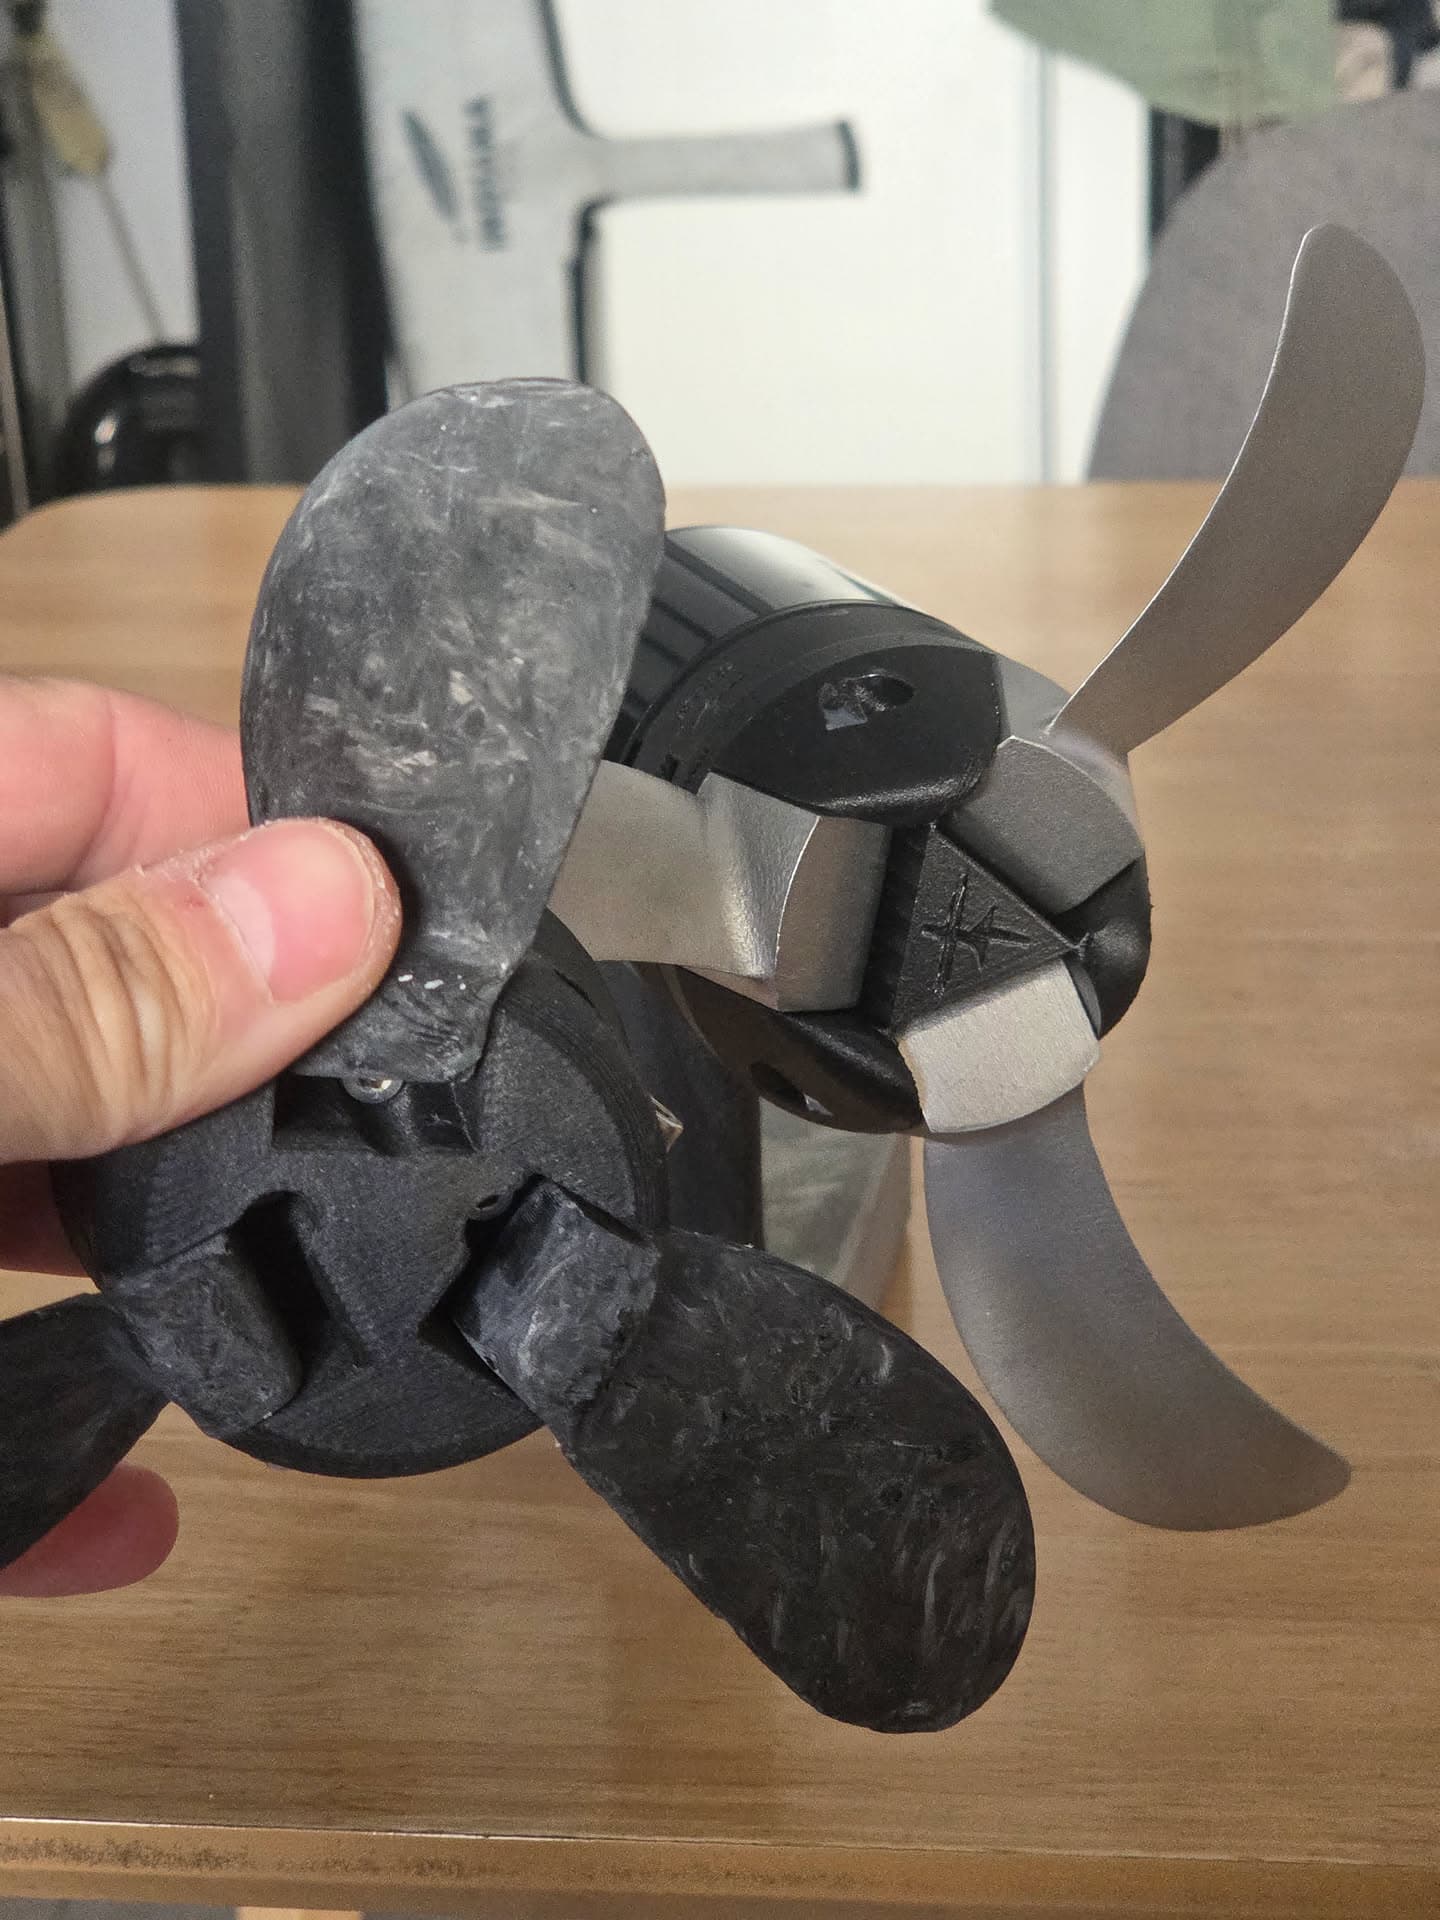
Which of those prop designs do you recommend going for? And would you share the new design also with me please?
FYI / Tipp when ordering at craftcloud:
I have saved about 50€ in shipping costs by ordering the housing and lid (both alu) from different factories vs. getting both parts from the same factory. For this you have to run the process for each part separately to add it to the basket. Otherwise you will get quotes for all parts from single factories only.