Myndset's 1st Build Log - Southern California

First - Thanks to all those that have come before and the huge amount of knowledge this community has put together to help inform builds like this. I seriously couldn’t have done this without hours and hours of reading through foilzone.

I’m about two months into my build and am finally getting around to collating all of the information, photos, and things I’ve learned along the way. There is a lot to post and add notes to so this will likely take a few days to bring up to date and get all my thoughts down.

Build Summary:

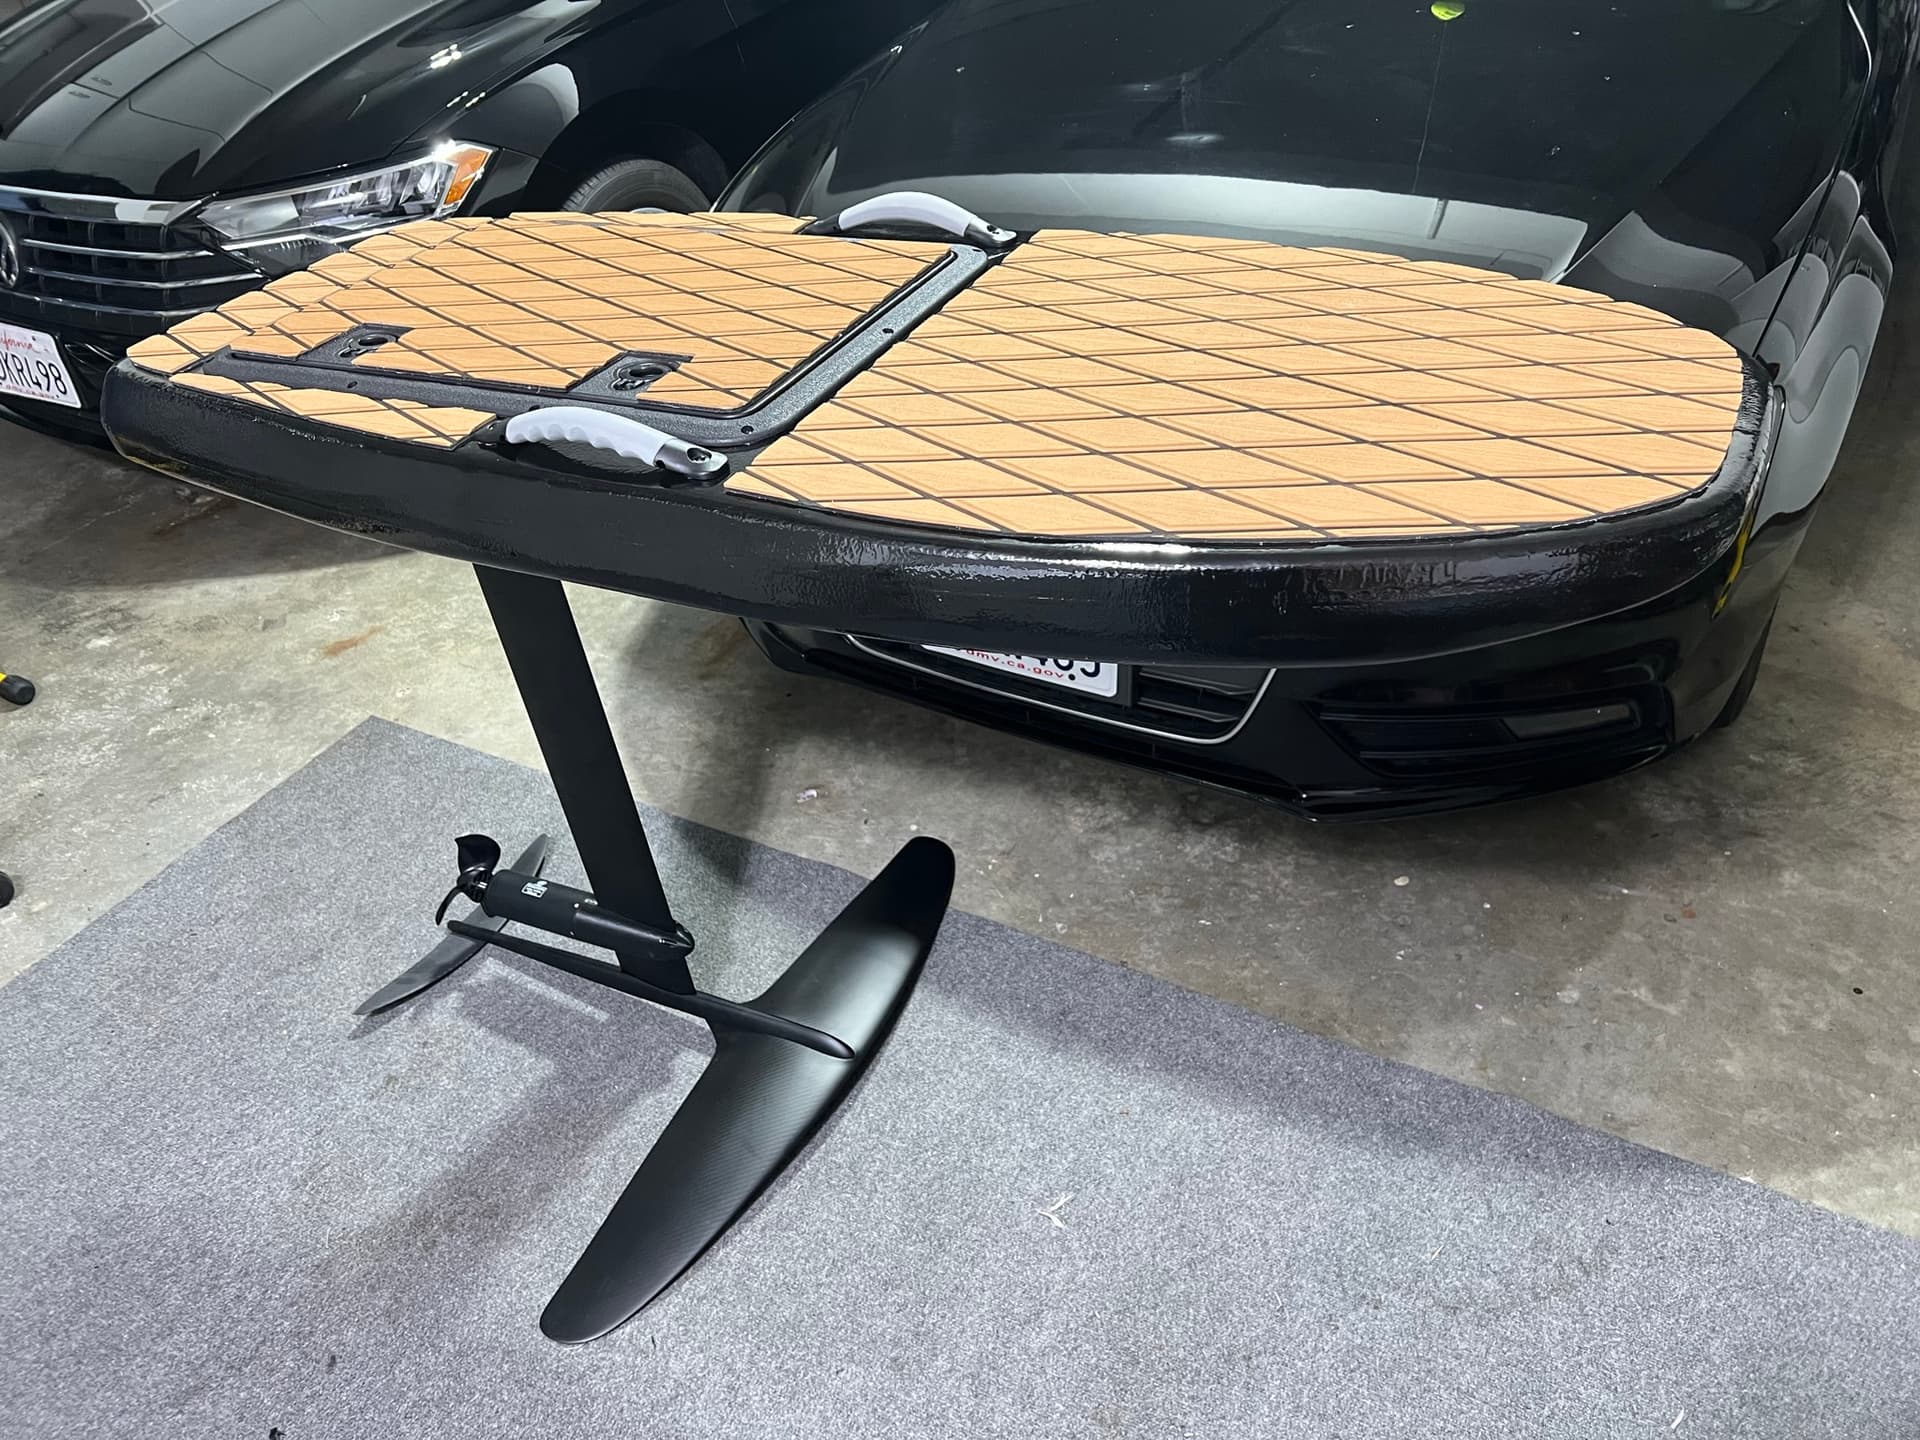
  • 4’8" x 24" x 4" Custom Fiberglass board
  • Flipsky 65161 120kv, 75200 Alu ESC, and VX3 Remote
  • 14S9P 21700 Battery: 48V, 35AH, 315 Max Amps (lol)
  • Aliexpress wing, mast and mastplate.

VESC 5.1 Config File: Placeholder to remind me to upload it
Warning use at your own risk. I had issues with VESC 5.2 firmware cutting out under high load so I went with 5.1, this file includes my parameters for 14S9P, Current / Voltage Limits, Throttle etc.

Major Build Components

1x 4x8’ 2" Formular NGX 250 XPS Board: $50

8x Yard 4oz S-2 Fiberglass Cloth: $103

1x 96oz Marine Epoxy Resin Kit: $110

1x AliExpress Mastplate, Mast and Carbon Wing: $350

126x Samsung T40v3 21700 Cells: $504 – In retrospect these cells are probably overkill

1x Daly 60A BMS: $61

1x Wate 58.8V 15A Charger: $95

1x Flipsky 75200 ESC: $205

1x Flipsky VX3 Remote:$105

1x Flite Propeller: $35

1x Flipsky 65161 120kv : $452

1x Aluminum IP68 ESC Enclosure:$25 – It took a huge amount of time to find a IP rated enclosure that perfectly fit the 75200 - Also available through Polycase as the AN-21

1x CorrosionX Dielectric Liquid: $25

1x Roll of EVA Foam: $65

1x Amass AS150U Pigtails: $22 / pair

1x IP68 Solar Panel Connectors 8awg $15

1x IP67 ABS Junction Box: $50

1x DPI Marine 16x24 Hatch: $115

Tools:

1x 12kw Spot Welder: $300

1x Rivnut Tool: $40

1x Hydraulic Crimper w/ copper sleeves for the 8awg connections: N/A Already Owned.

1x Ender 3 Pro 3d Printer: $ N/A Already Owned

1x Orbital Sander: $ N/A Already Owned

1x Drill Press: $ N/A Already Owned

Bits and Parts

1x Loctite Marine Fast Cure Adhesive $20

1x Gorilla Construction Adhesive: $10 – This was to adhere the layers of XPS. Youtube says this is the best adhesive for the job

1x 304 Stainless M8 Rivnut Set: $10 – For attaching the mastplate to the board

1x 4x35mm 304 Stainless Dowel Pins: $9 – Used to

1x Roll of 21700 .2mm 2P Nickel Strip

3x Epoxy Brushes: $5

3x Epoxy Squeegee: $5

1x Epoxy Pigment: $15

1x Pack of PG7 Glands: $10

Lots of Masking Tape

Lots of Nitrile Gloves

Total Build Cost: ~$2,787 USD
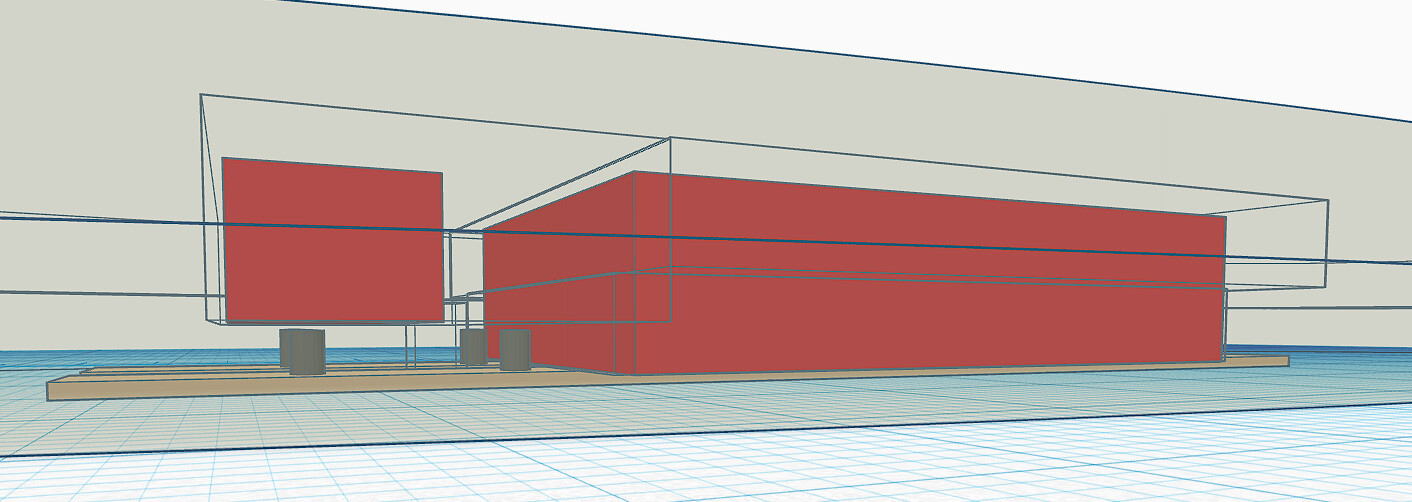
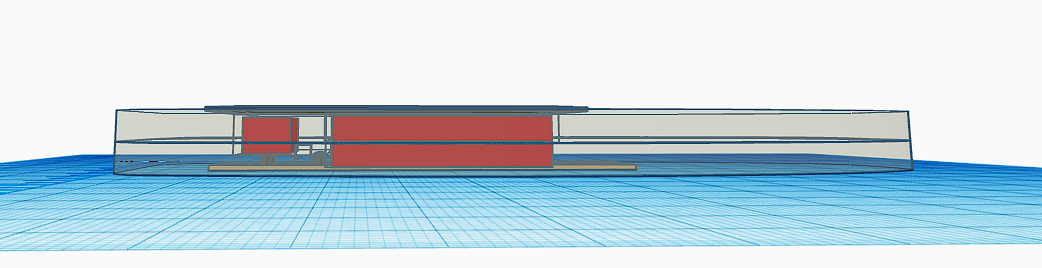
CAD Mockup

I used TinkerCAD to confirm fitment of the different components prior to starting work on the build. Everything was shown to fit but was very tight, down to only a couple of millimeters for several tolerances.

The main difference in the final design versus what is seen here is I used a single plywood reinforcing strut on the base of the board versus the two separate pieces seen here

Nose contour not included

Board Build

It all started here with a big piece of XPS insulation foam. Getting this home on top of my car proved to be quite the interesting experience. Turns out lightweight foam doesnt like to be strapped to the roof.

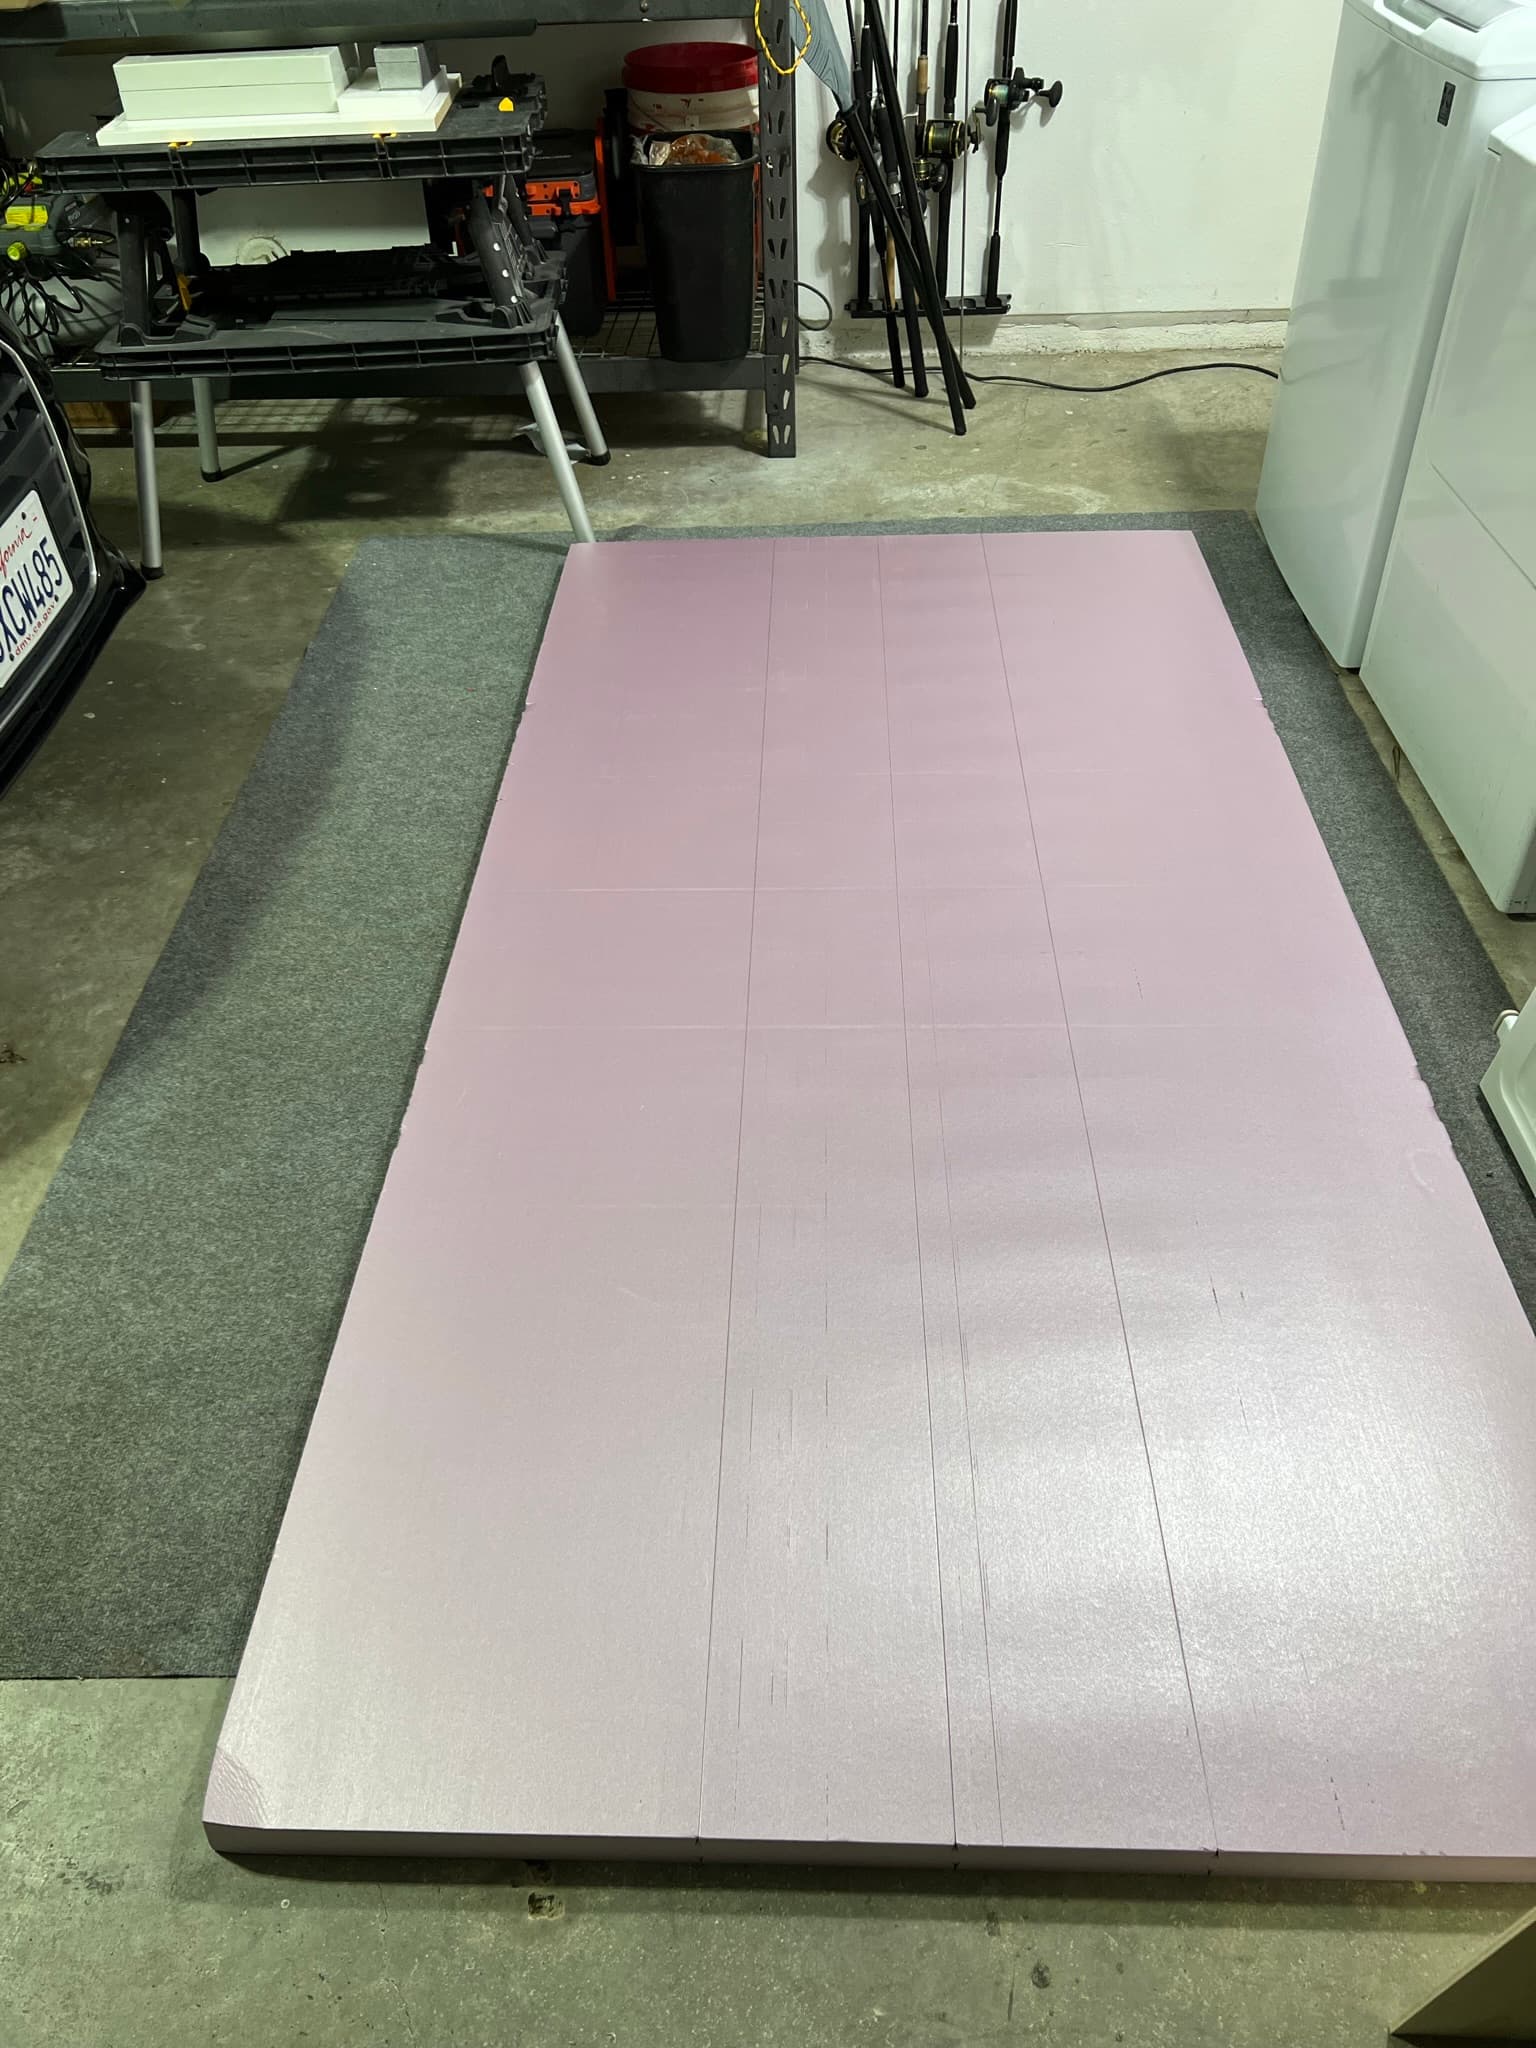
The basic idea having done quite a bit of modeling in tinkercad was to split this 4’ wide sheet into two 2’ segments, which would then be laid on top of each other to give a total depth of 4". The boards were routed separately before being glued up so I could get to the required depth.

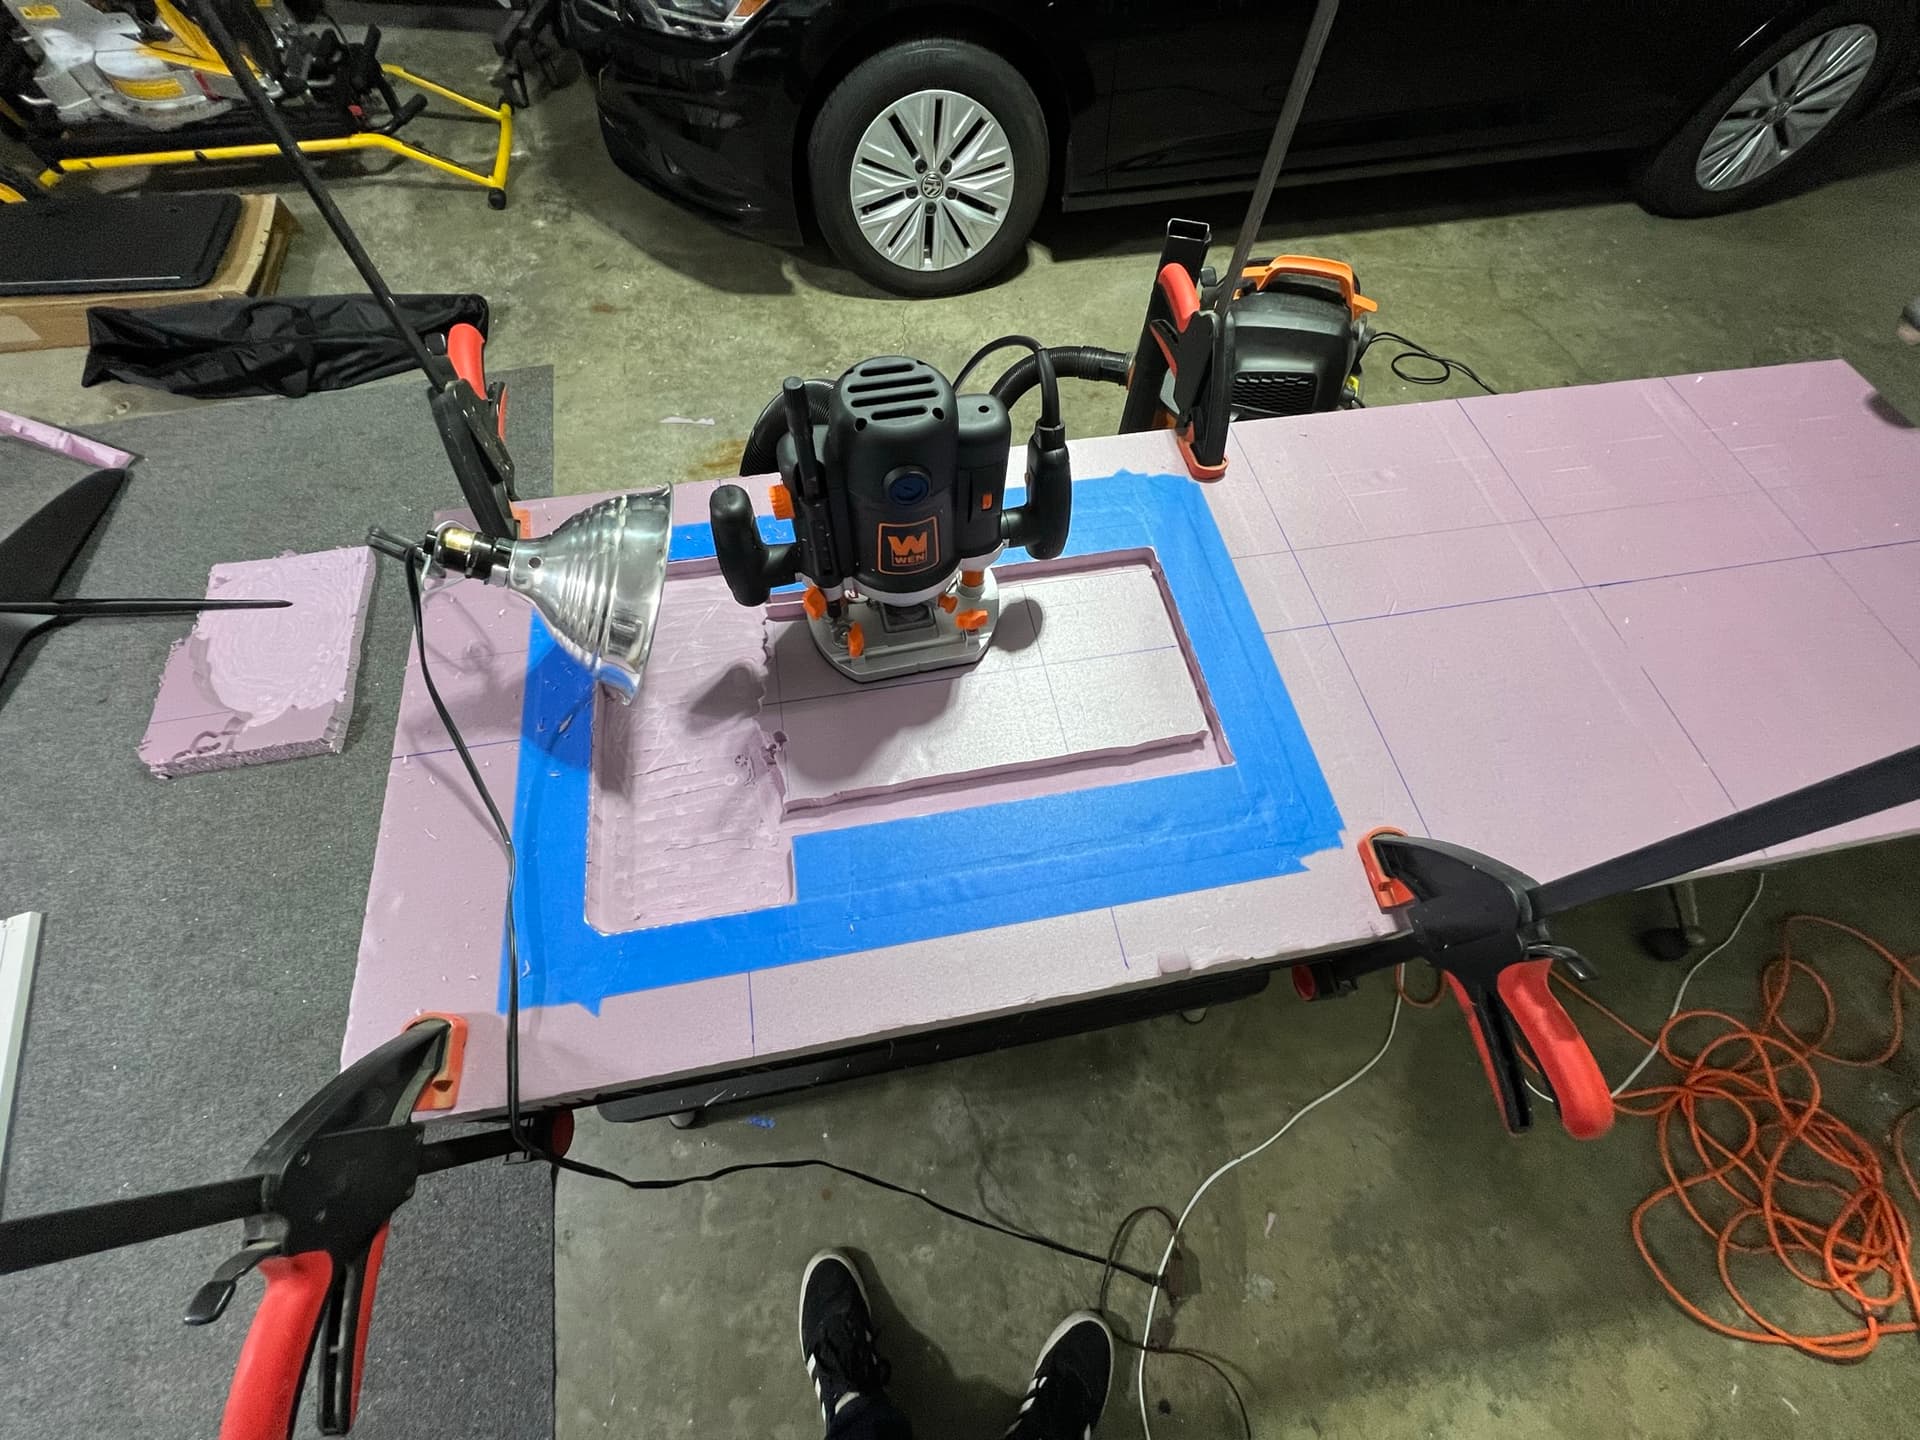
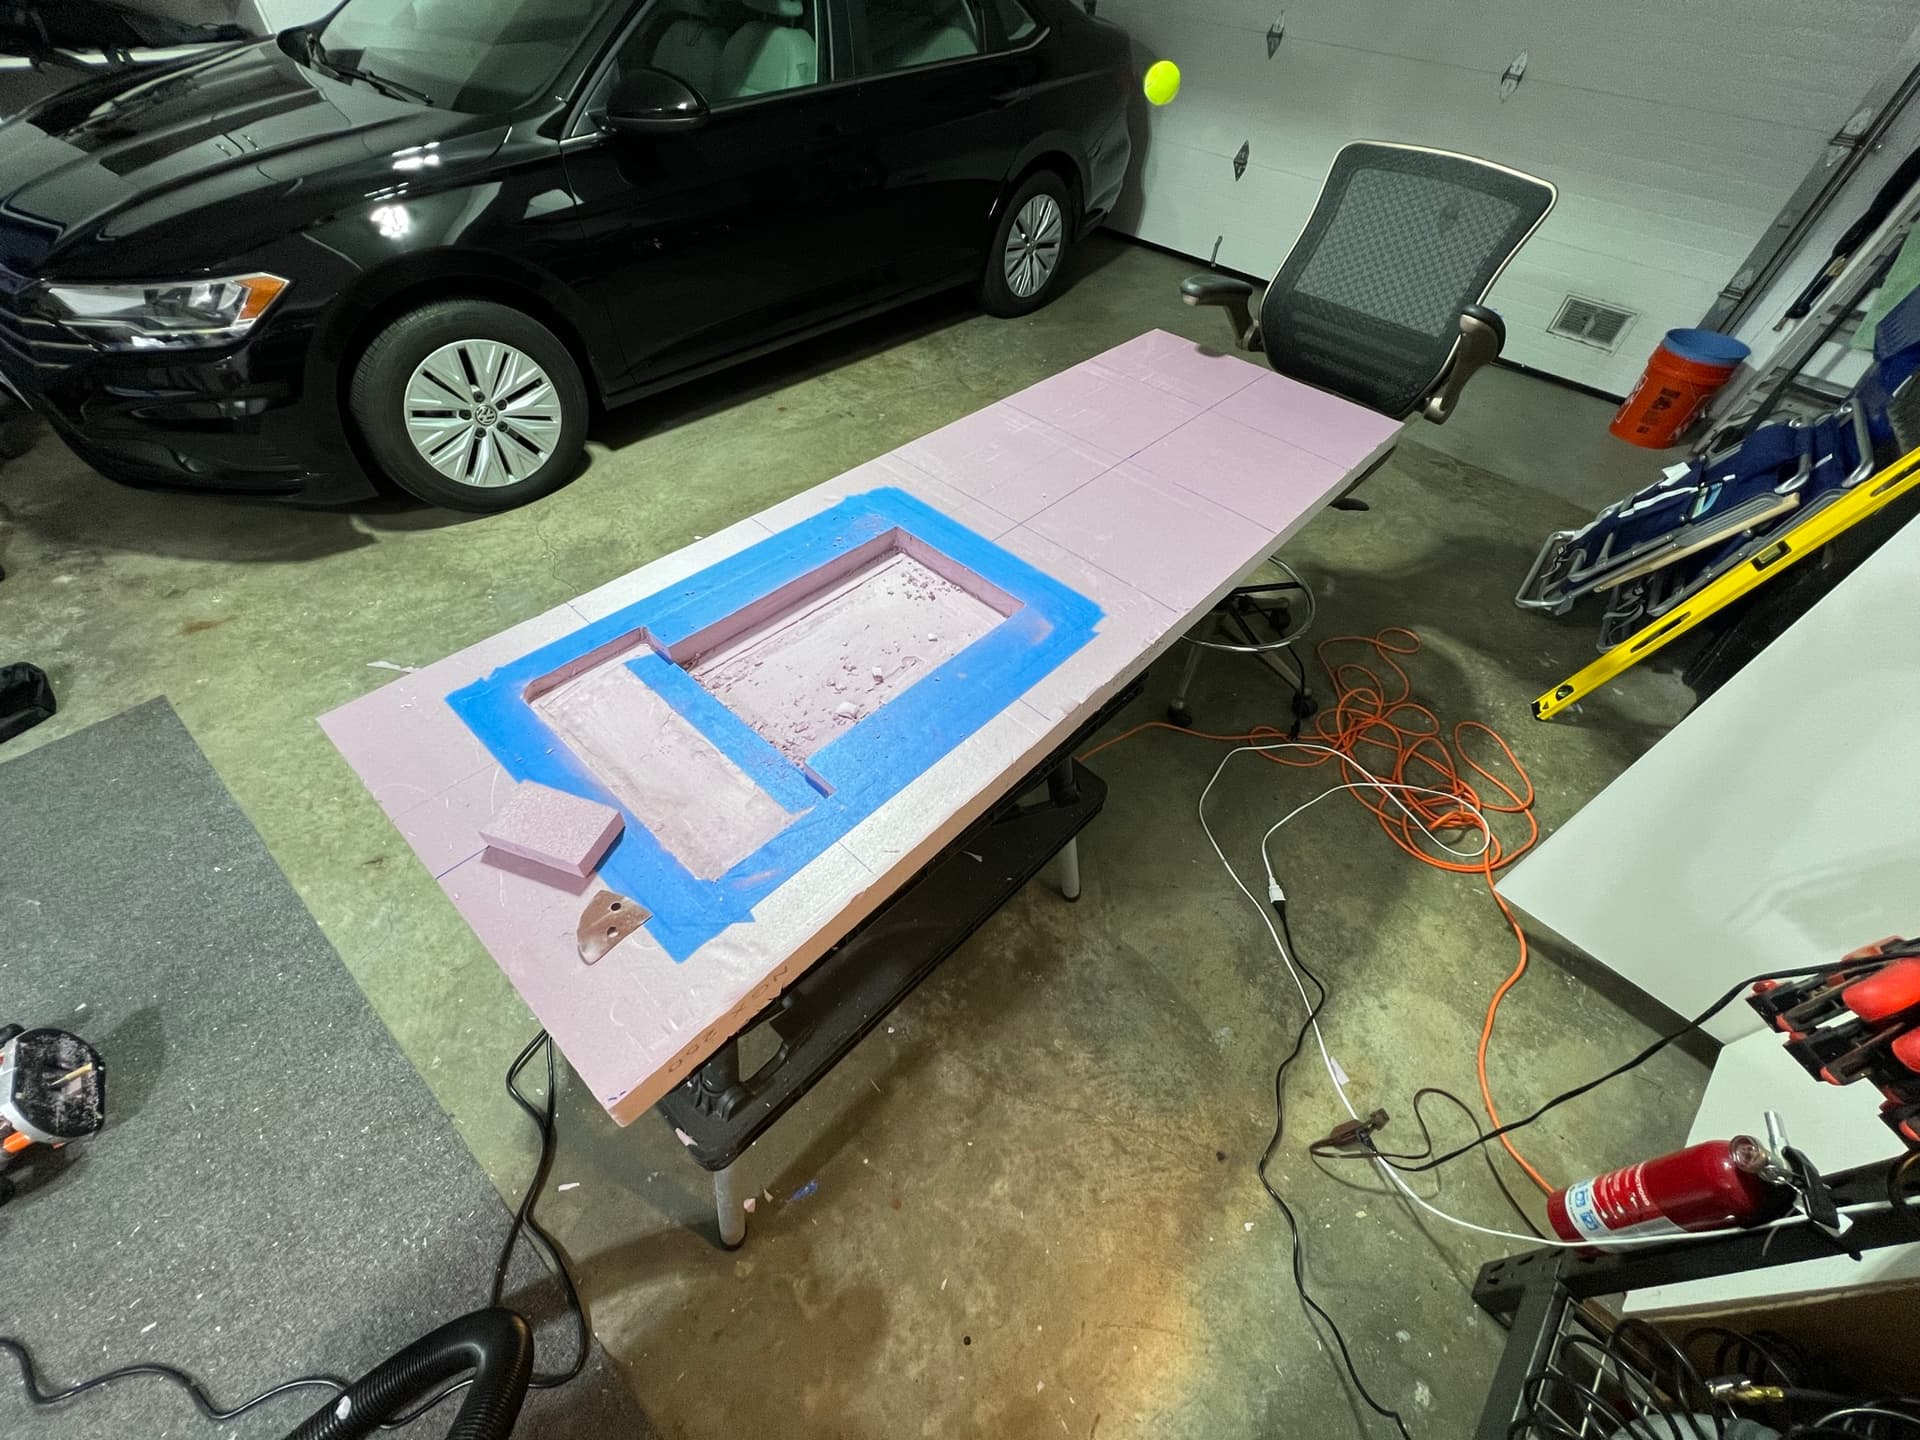
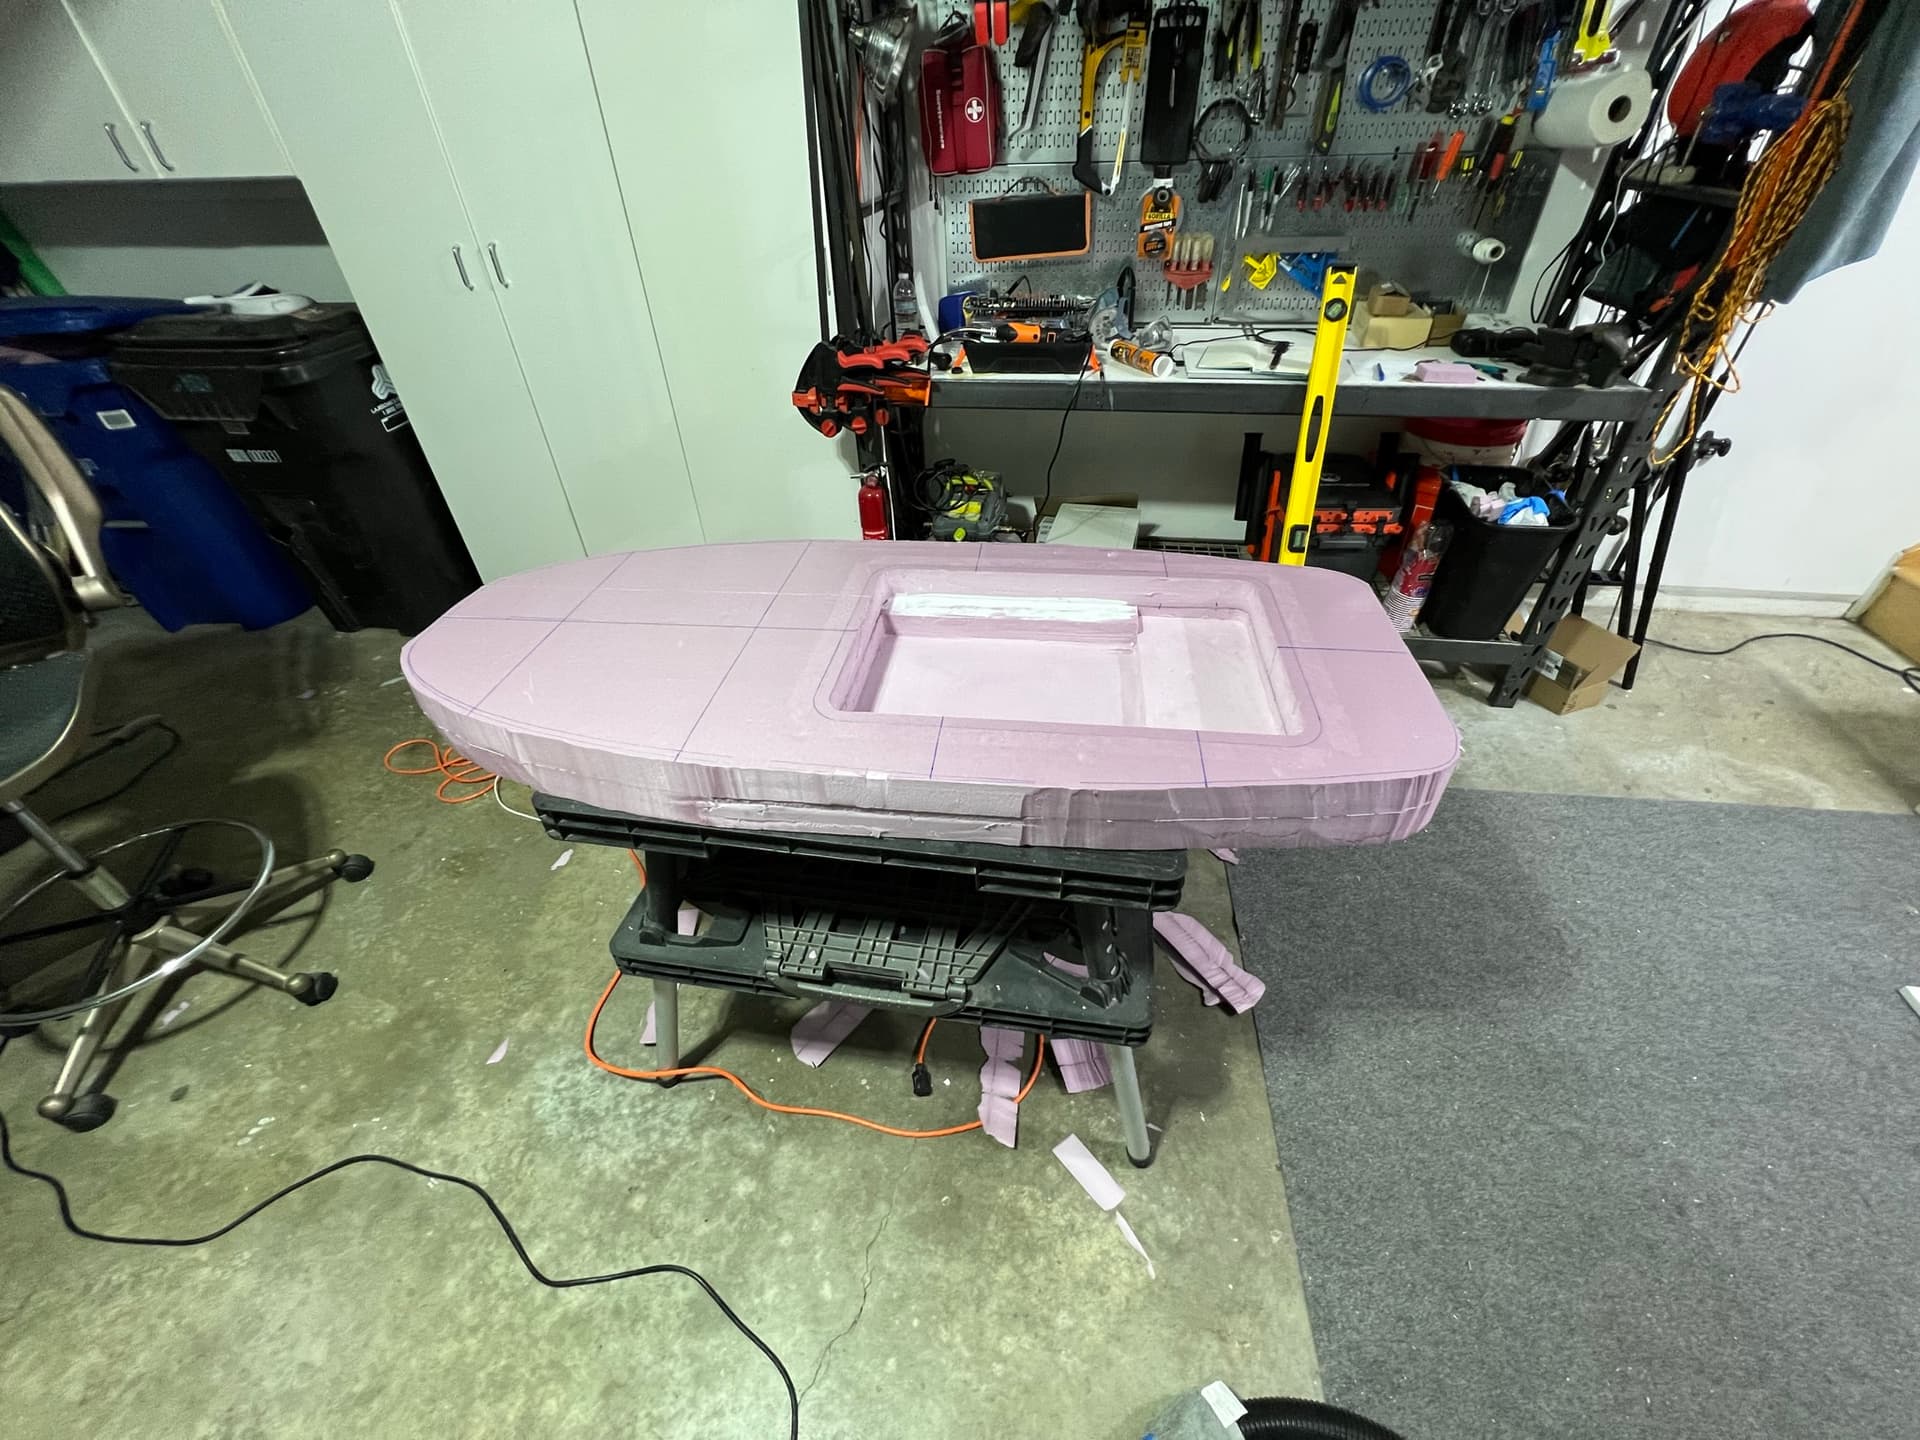
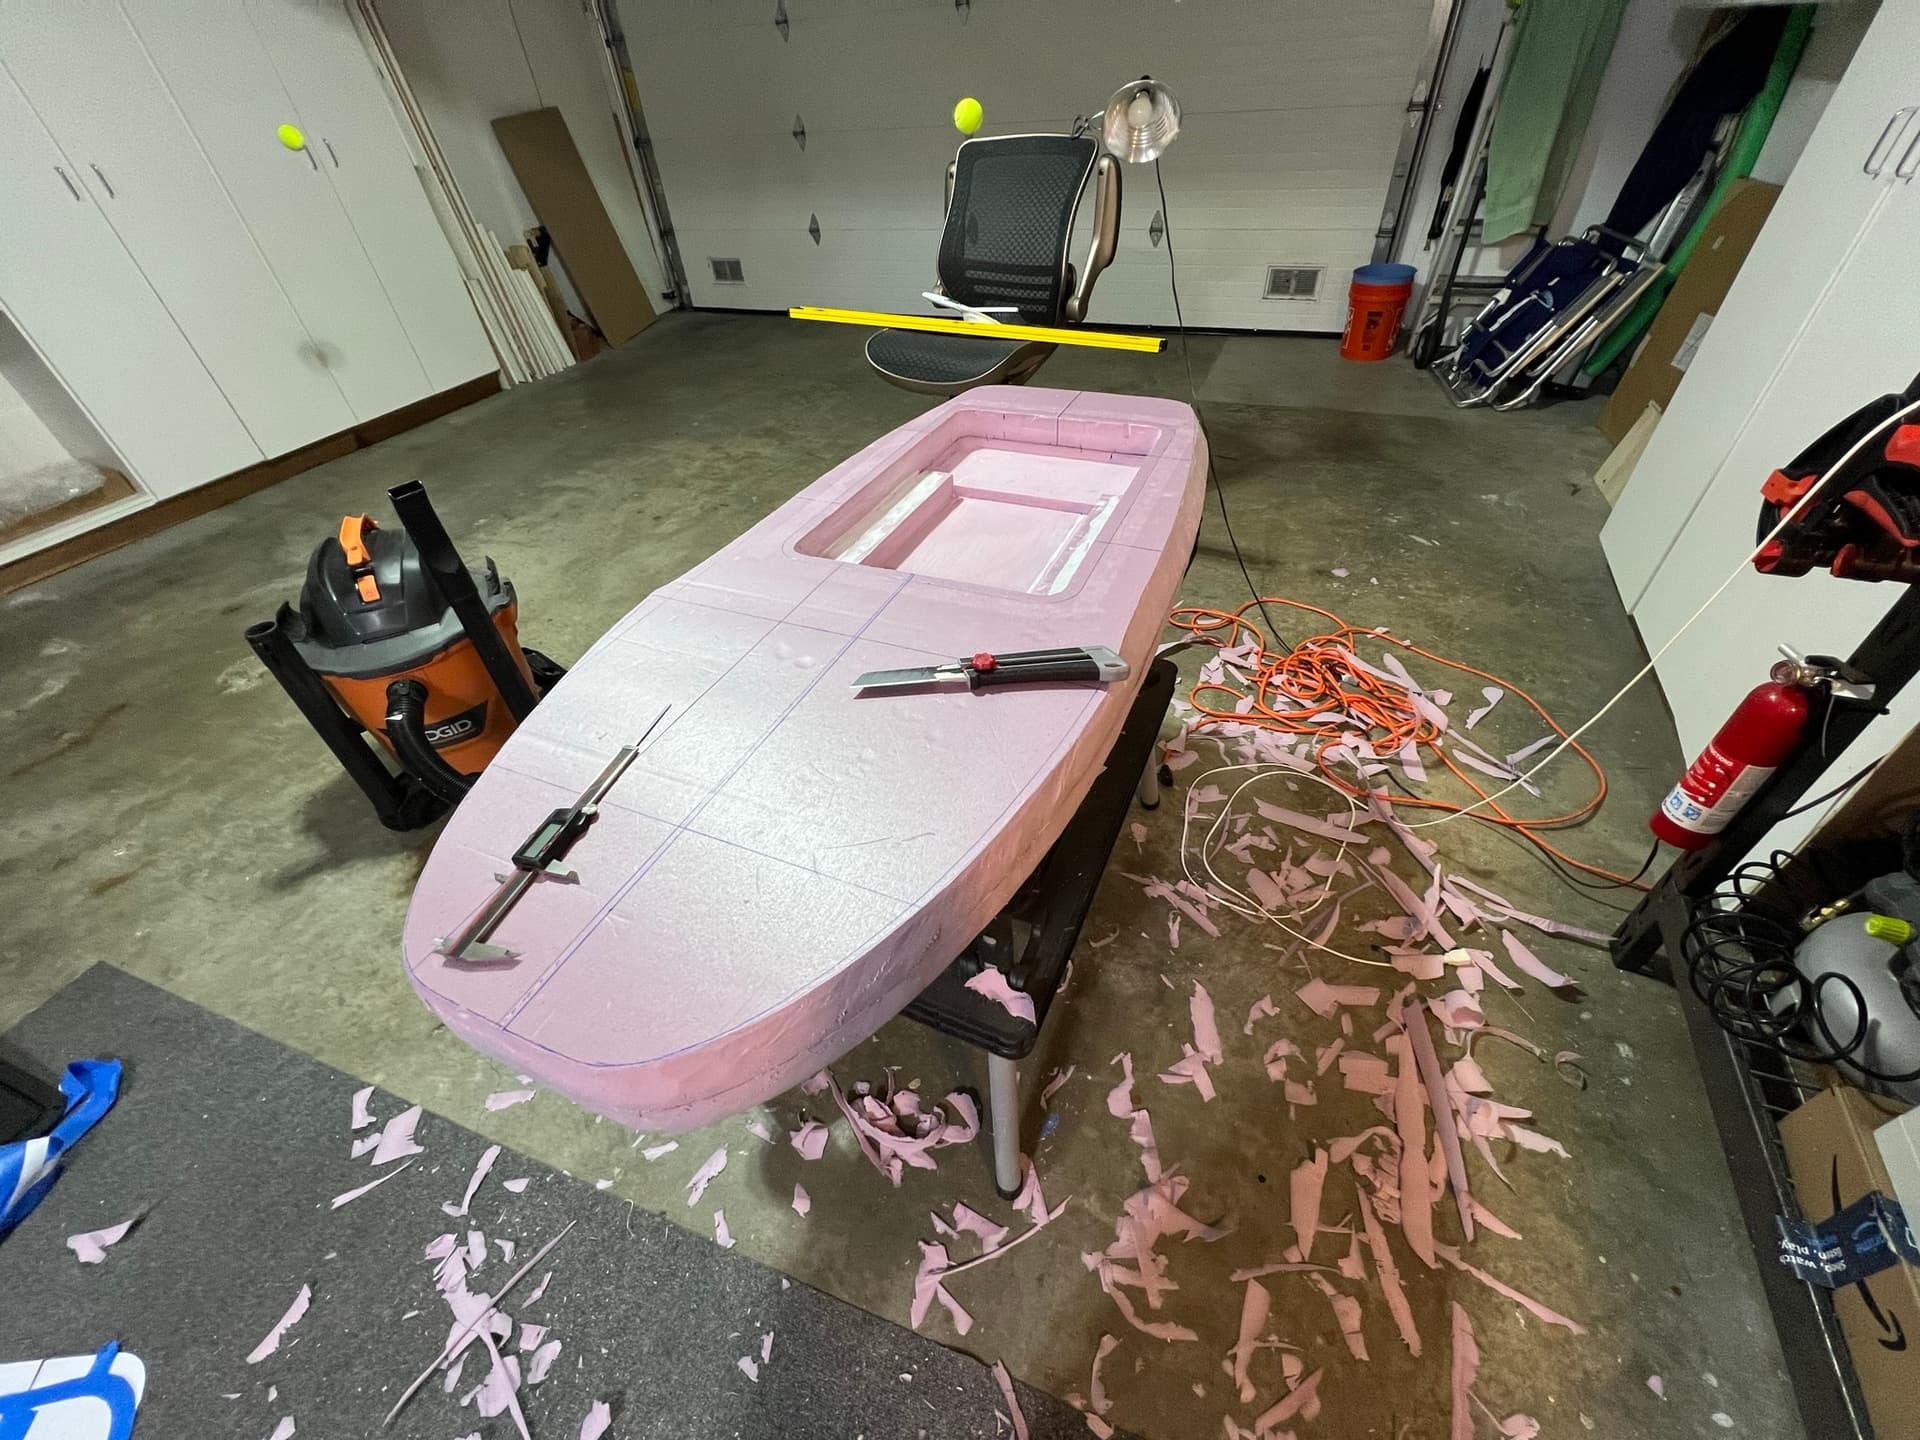
The next set of steps were to cut the profile of the board using a hot wire and start to give it some contouring. To get the basic shape I drew a a profile to scale in Illustrator and then printed it on tiled 8.5x11"s that were taped together to give me a good guide line that ultimately became the blue shape seen in the photos.

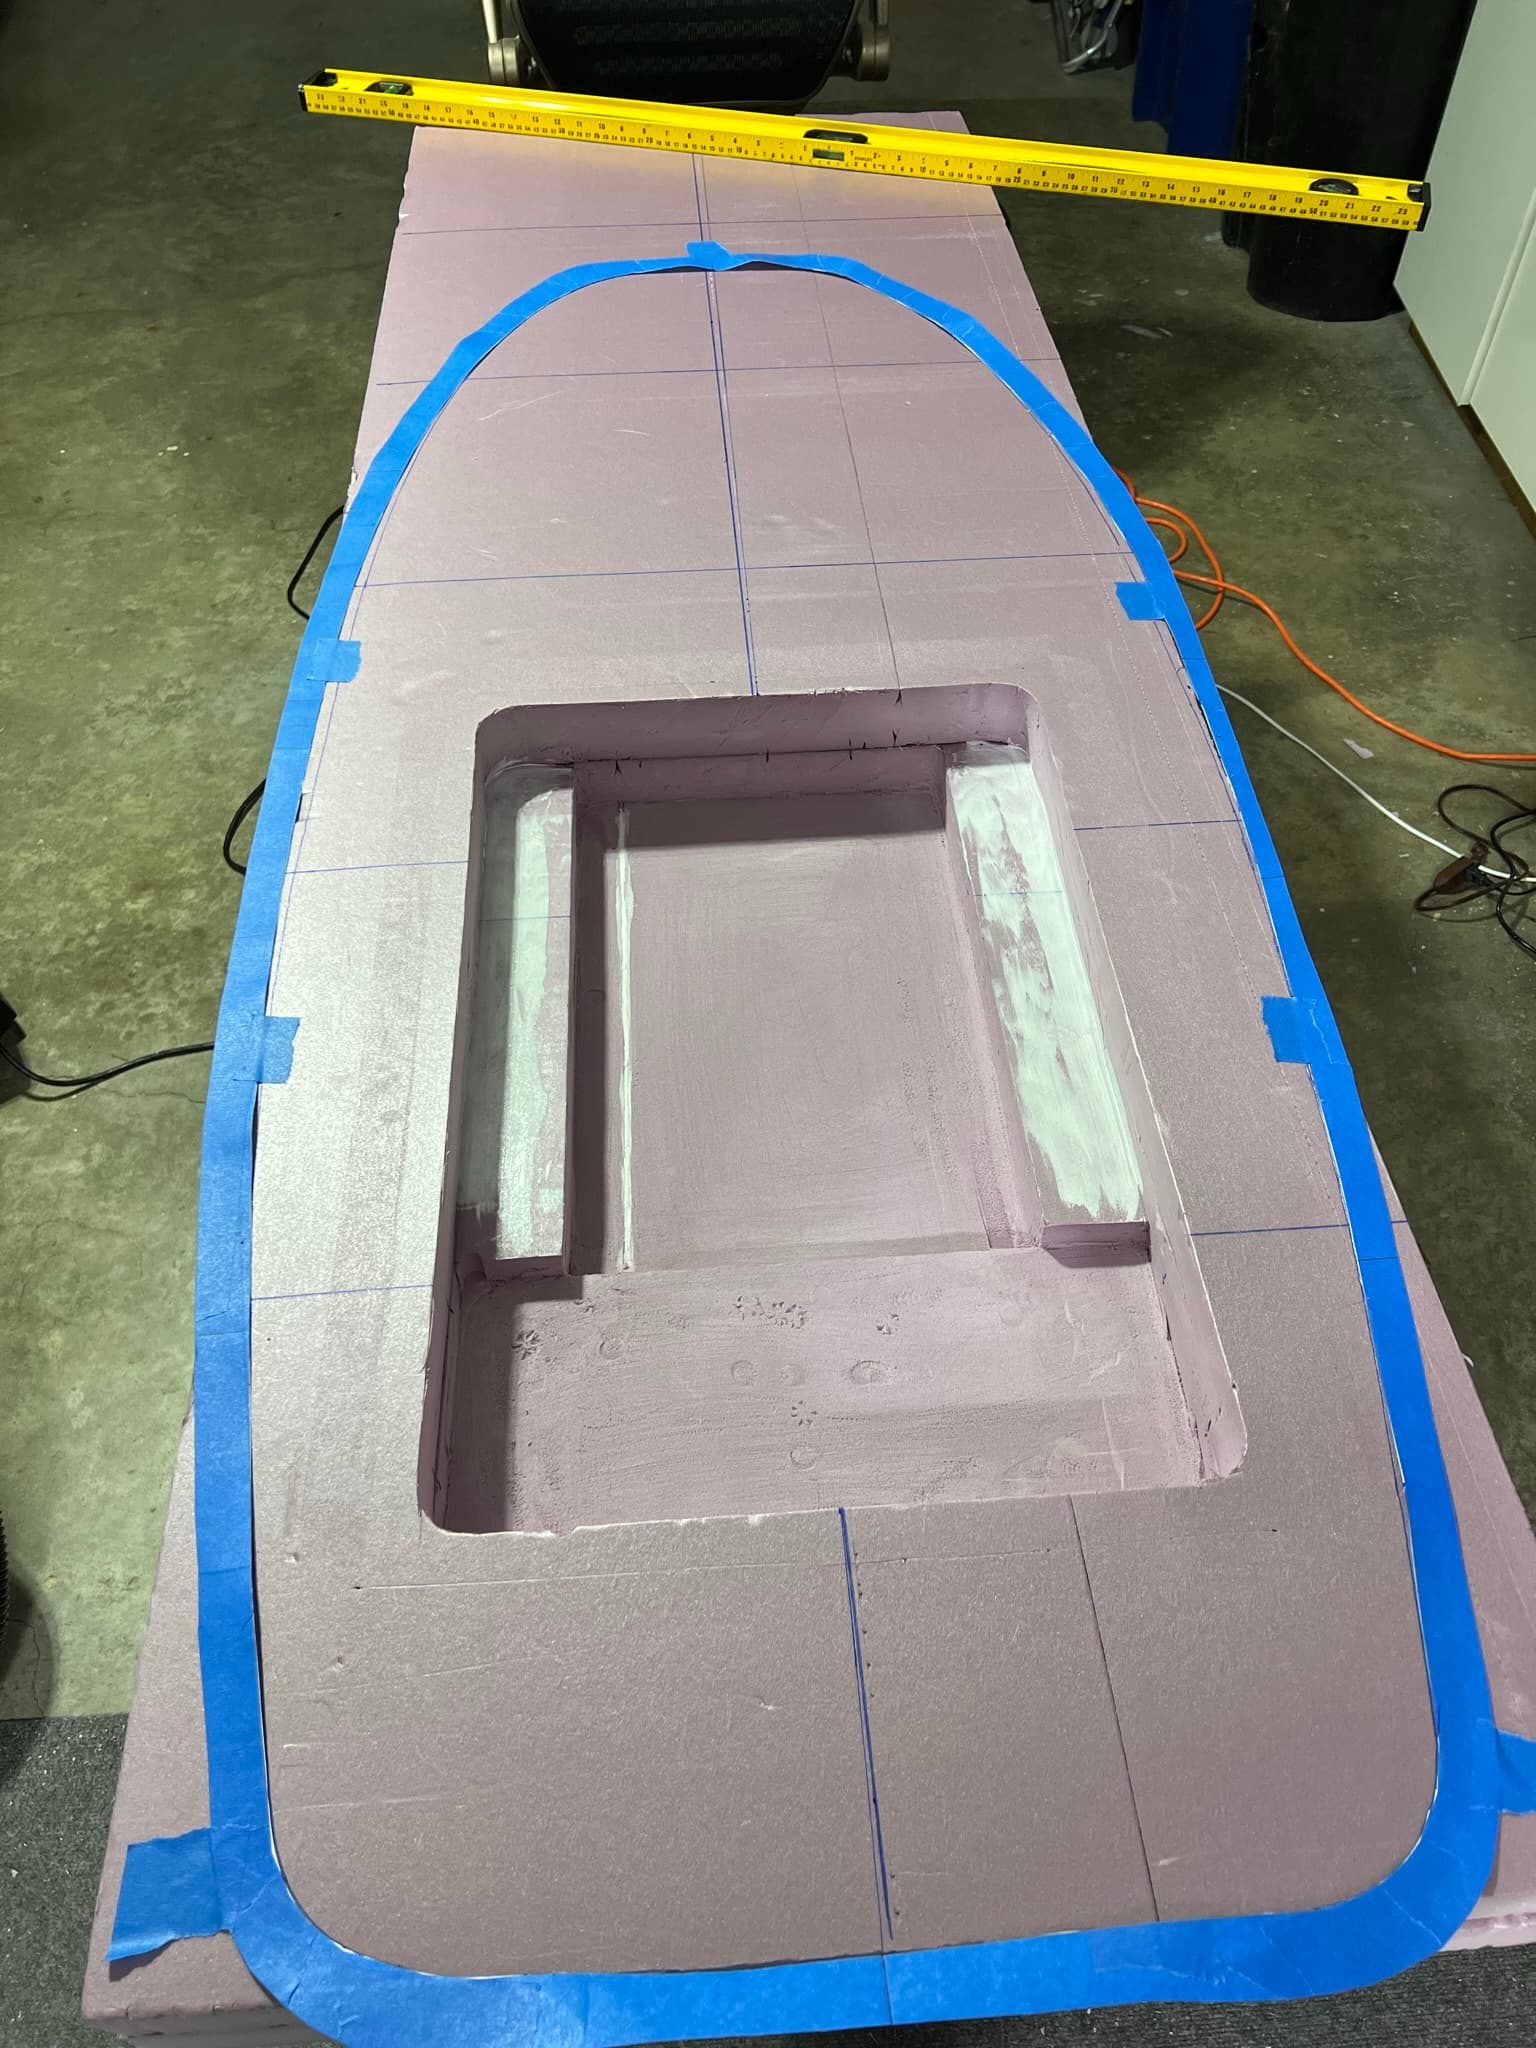
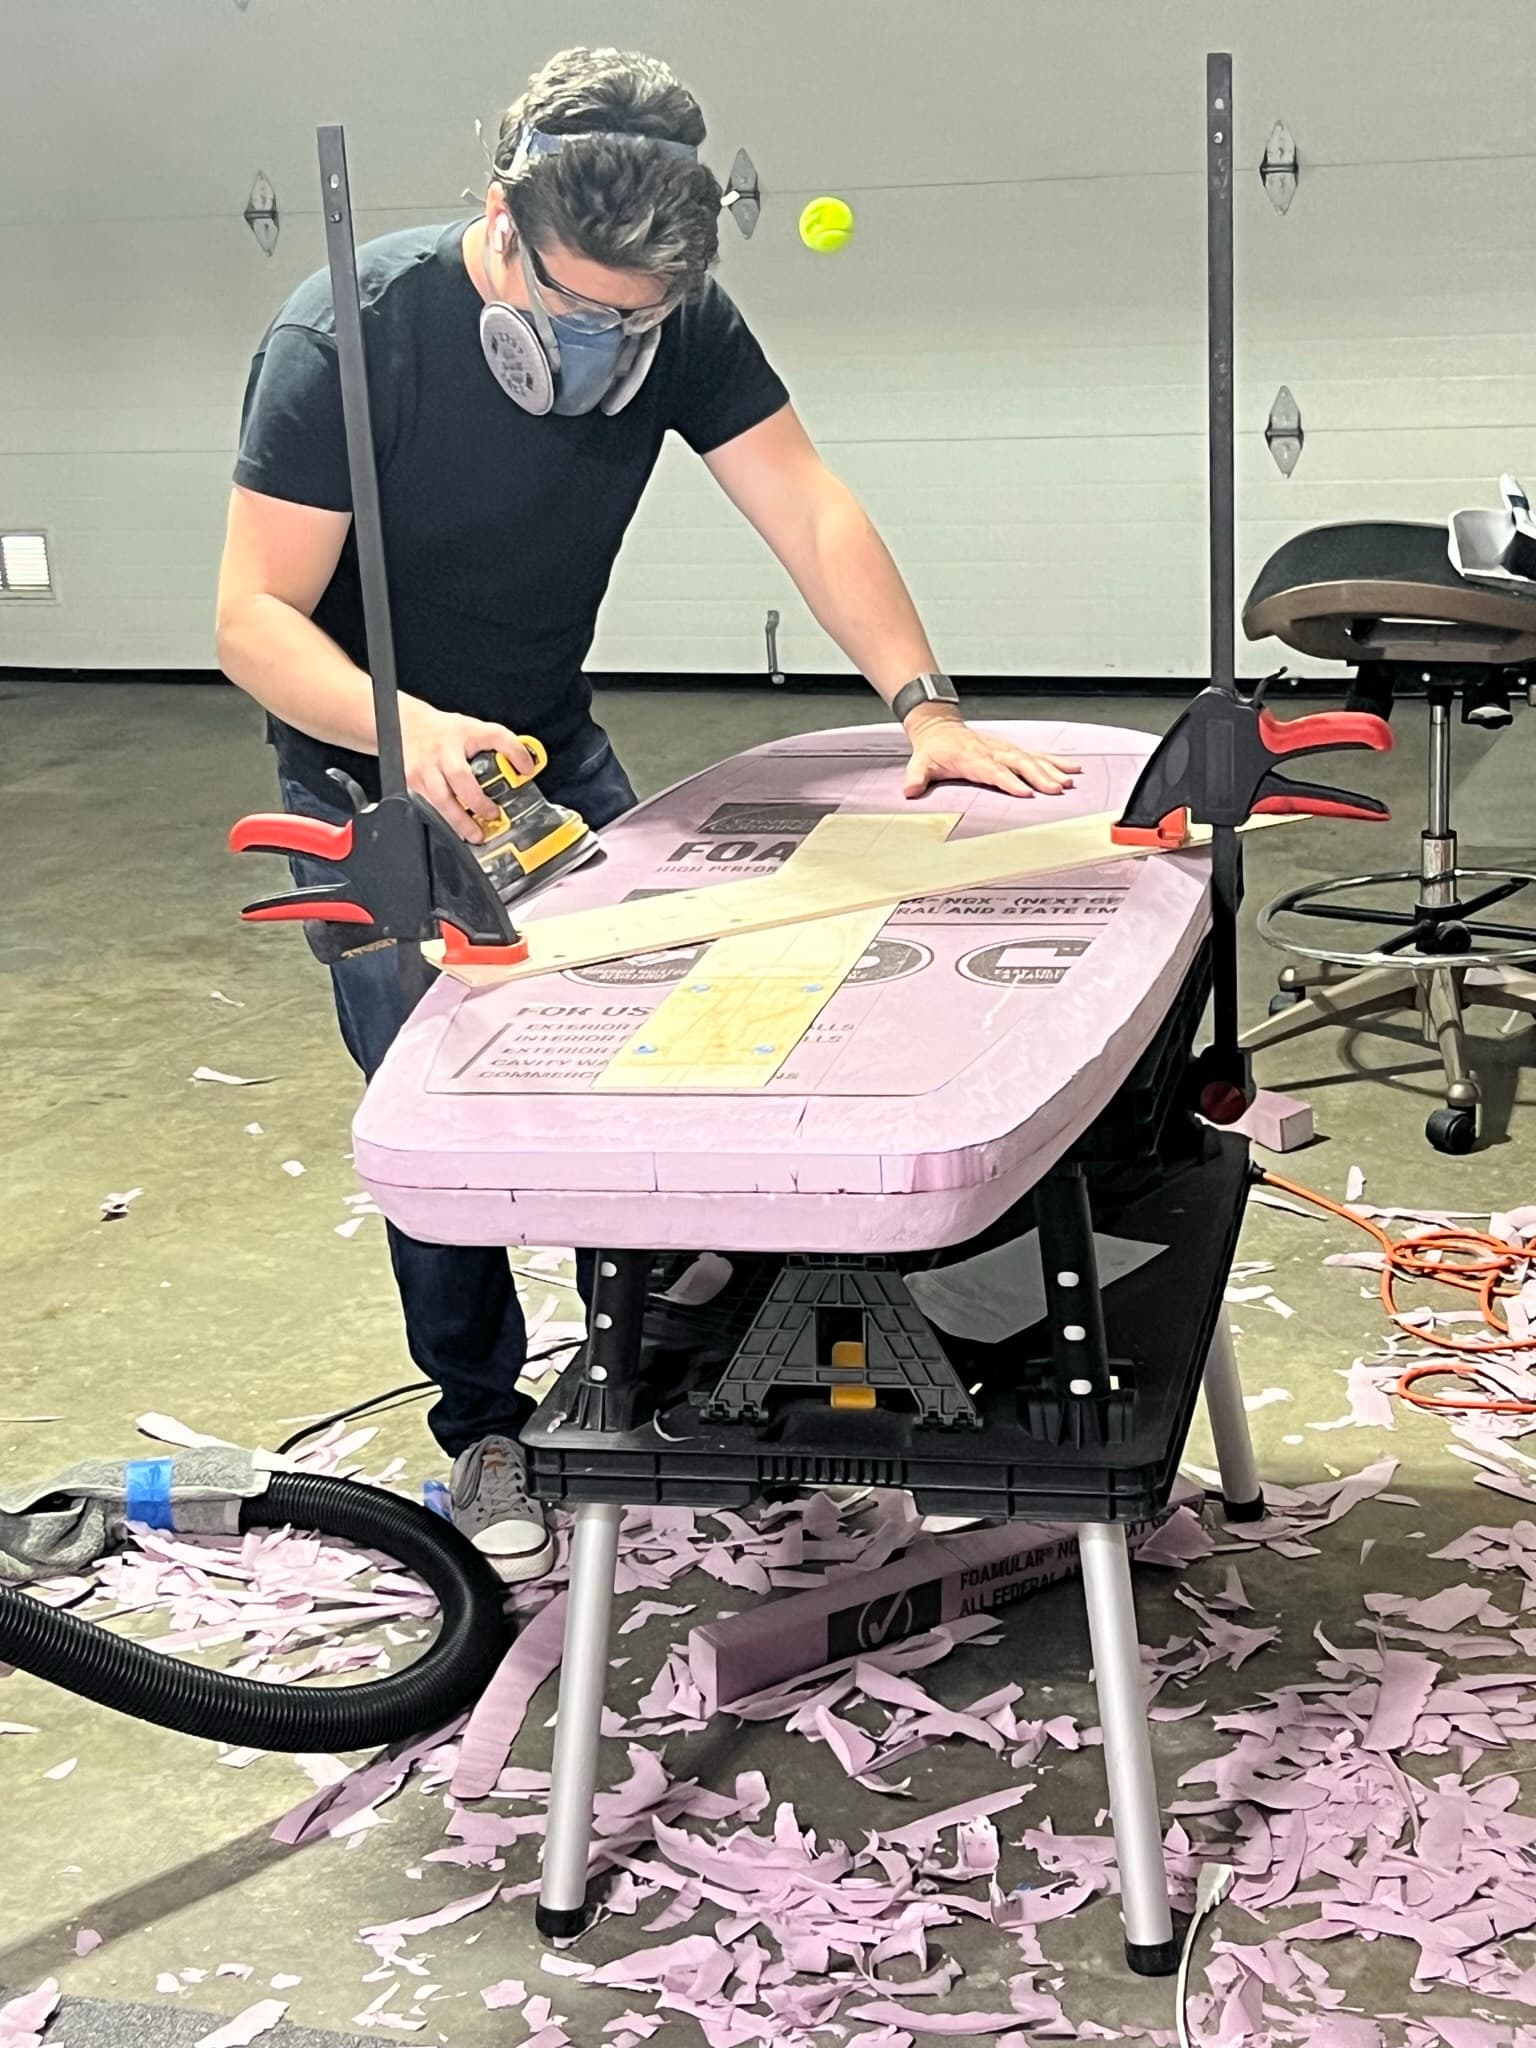
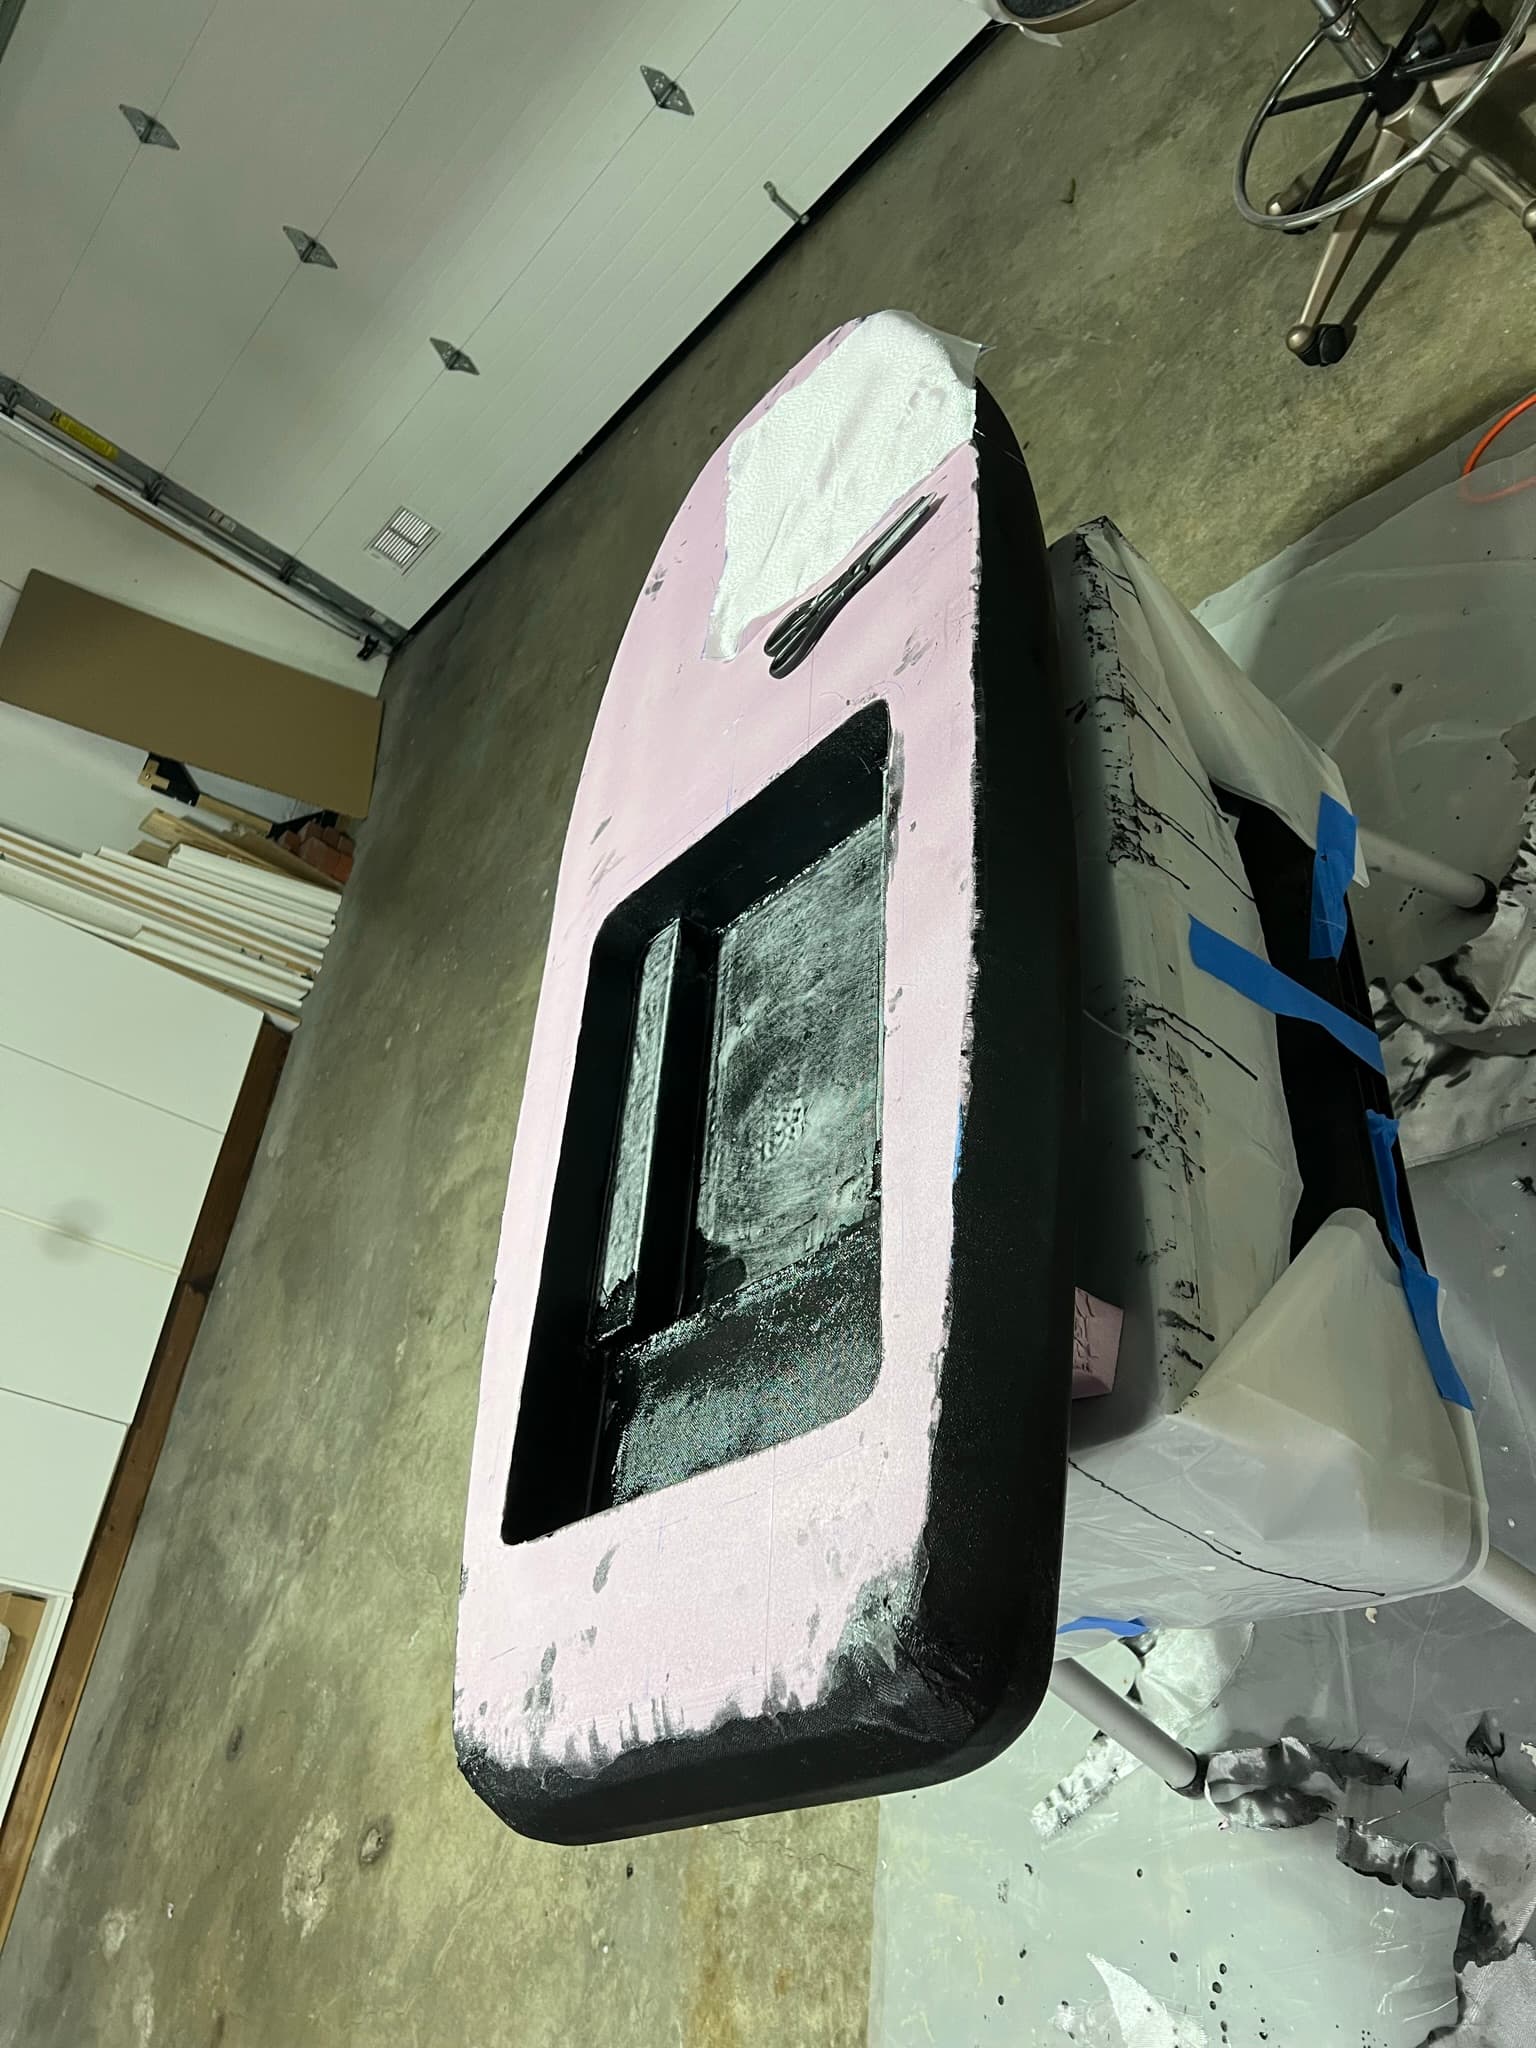
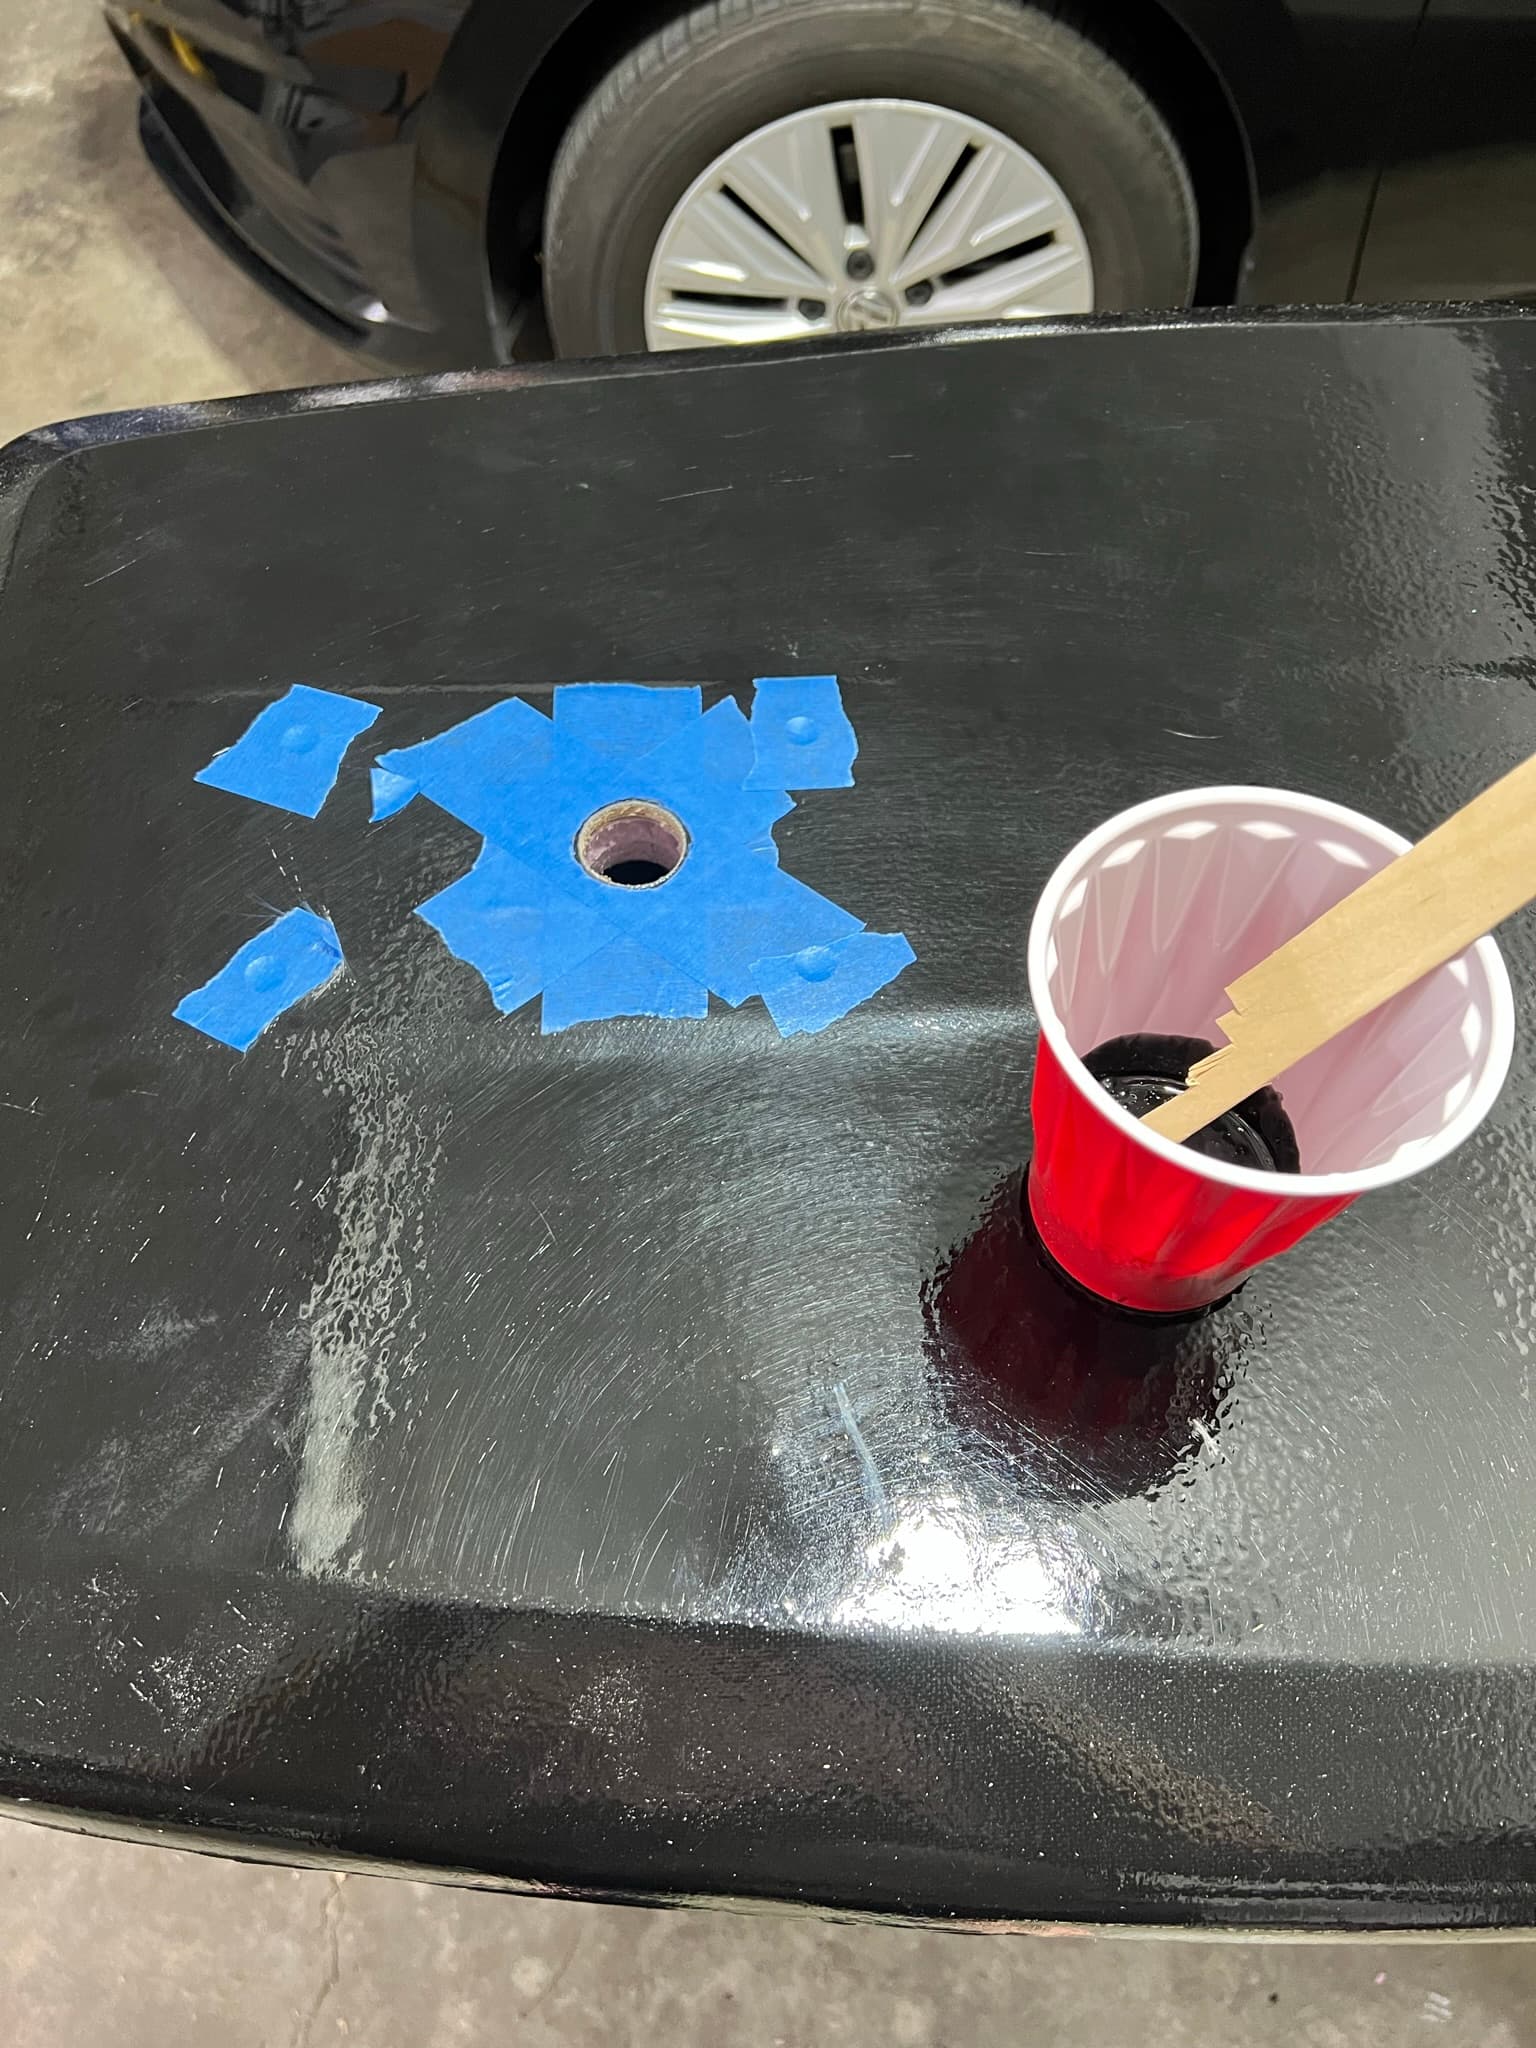
With the 3.75" of depth I needed for the battery compartment, there was only .25" of foam below where I was planning to put a 40 pound battery. Even with multiple layers of fiberglass I wasnt sure that it would hold. To reinforce this area and provide an interface for the Rivnuts I routed a shallow cavity into which a plank of 1/8" plywood would be inserted.

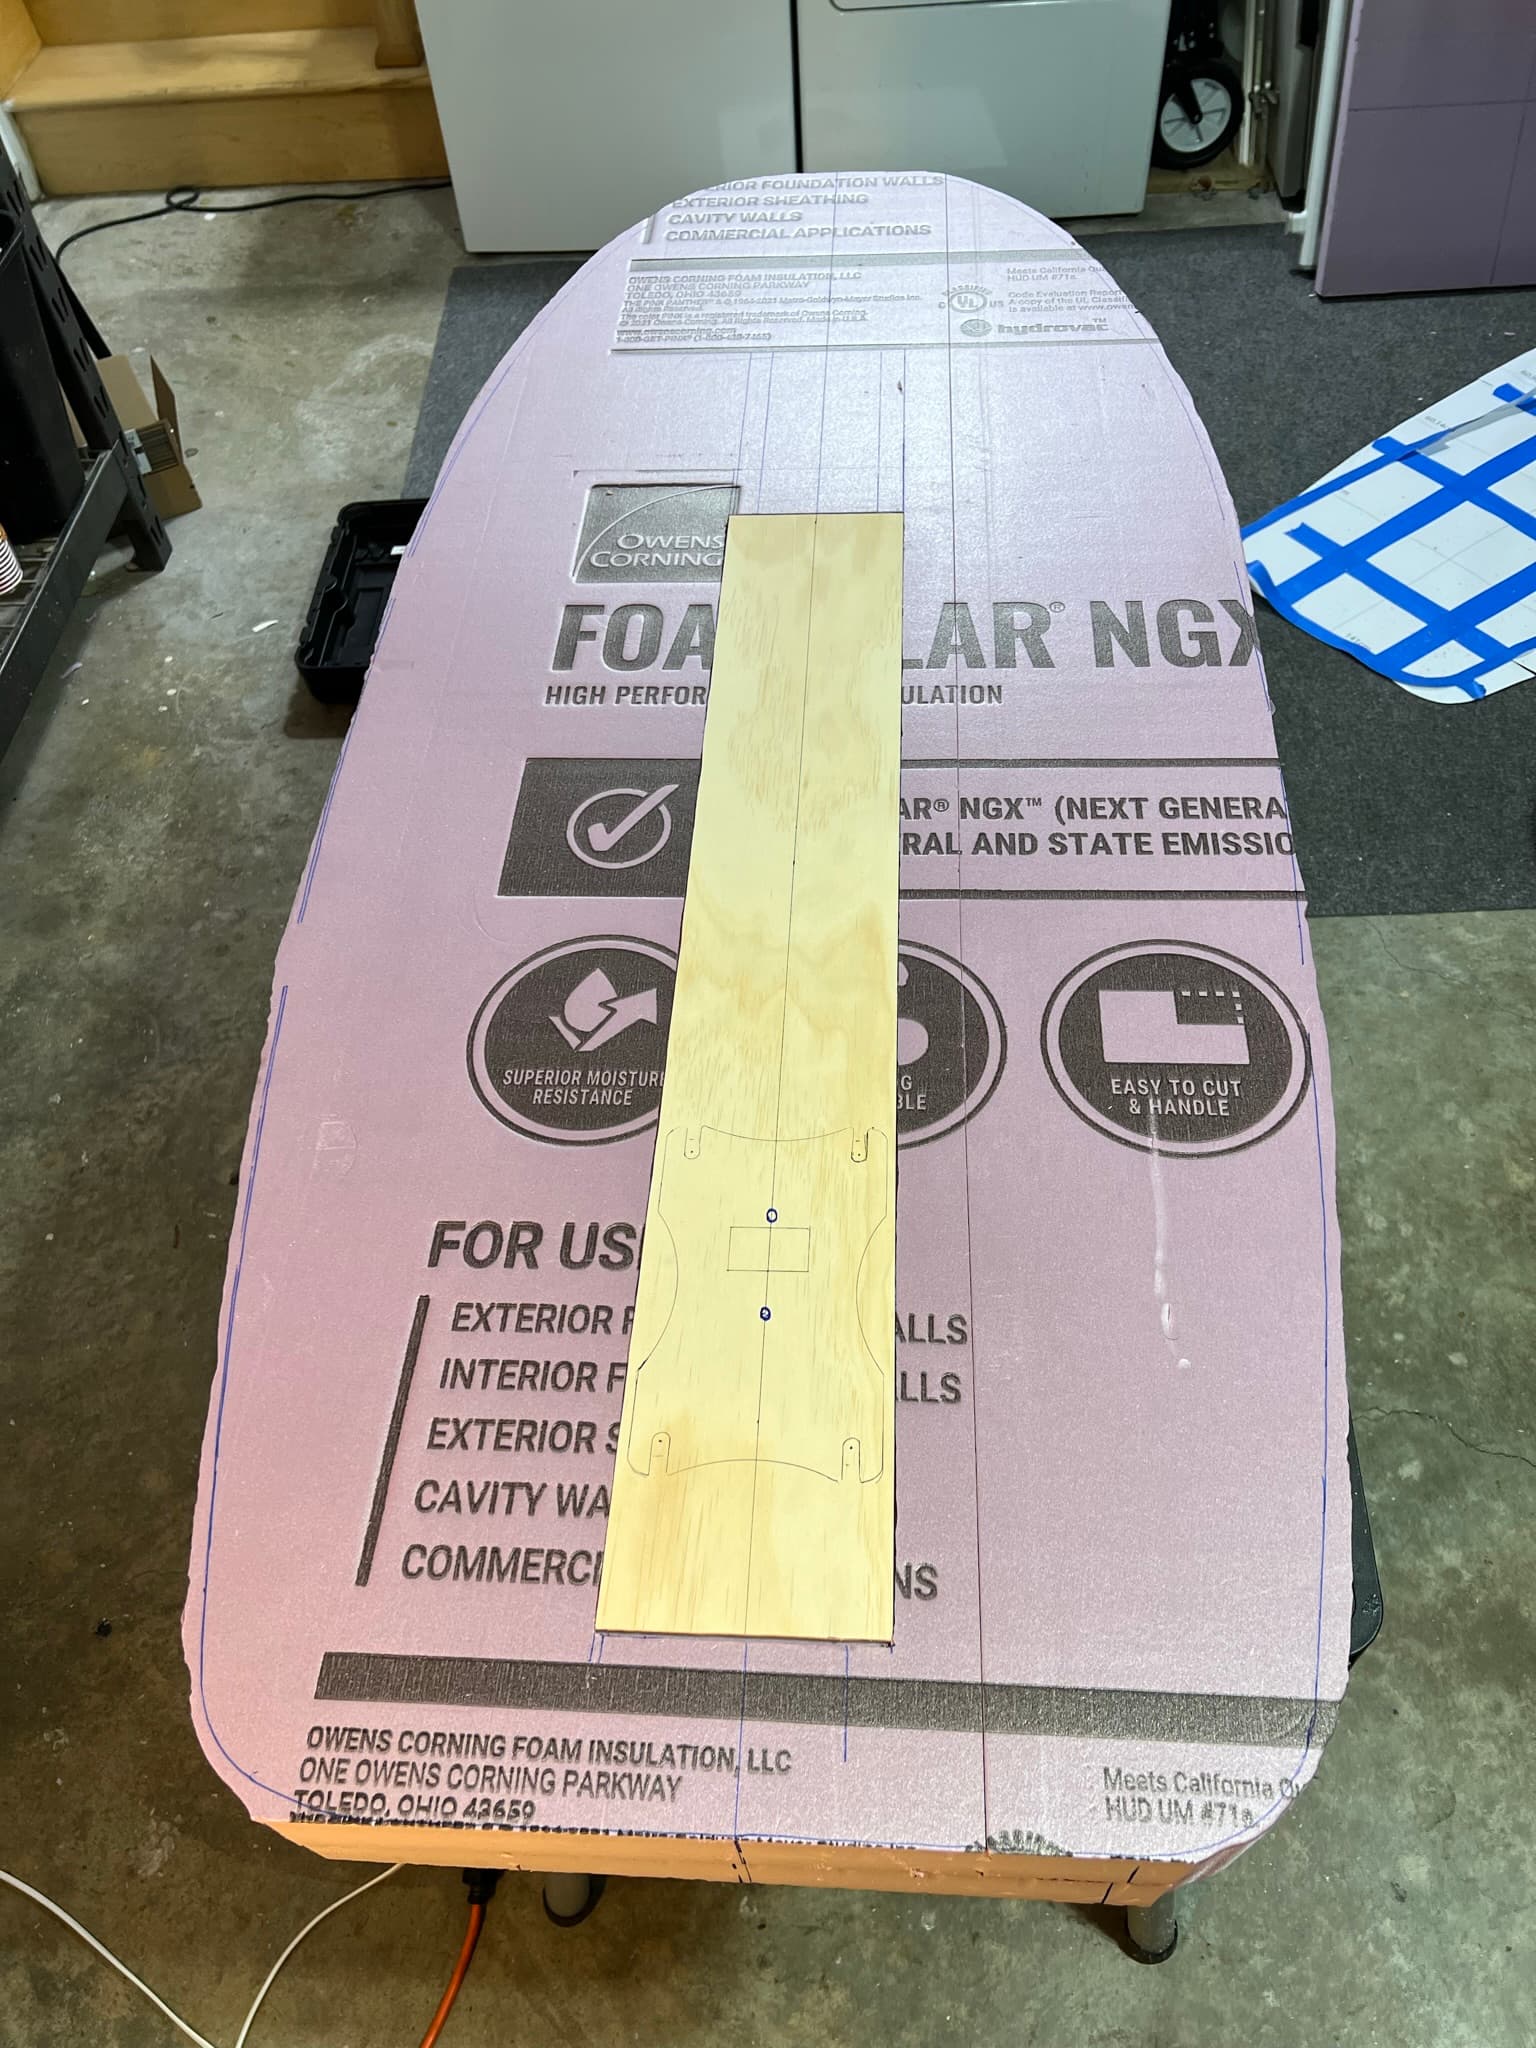
In this image you can see where the rivnuts are located under blue painters tape to keep resin from getting into the threads.

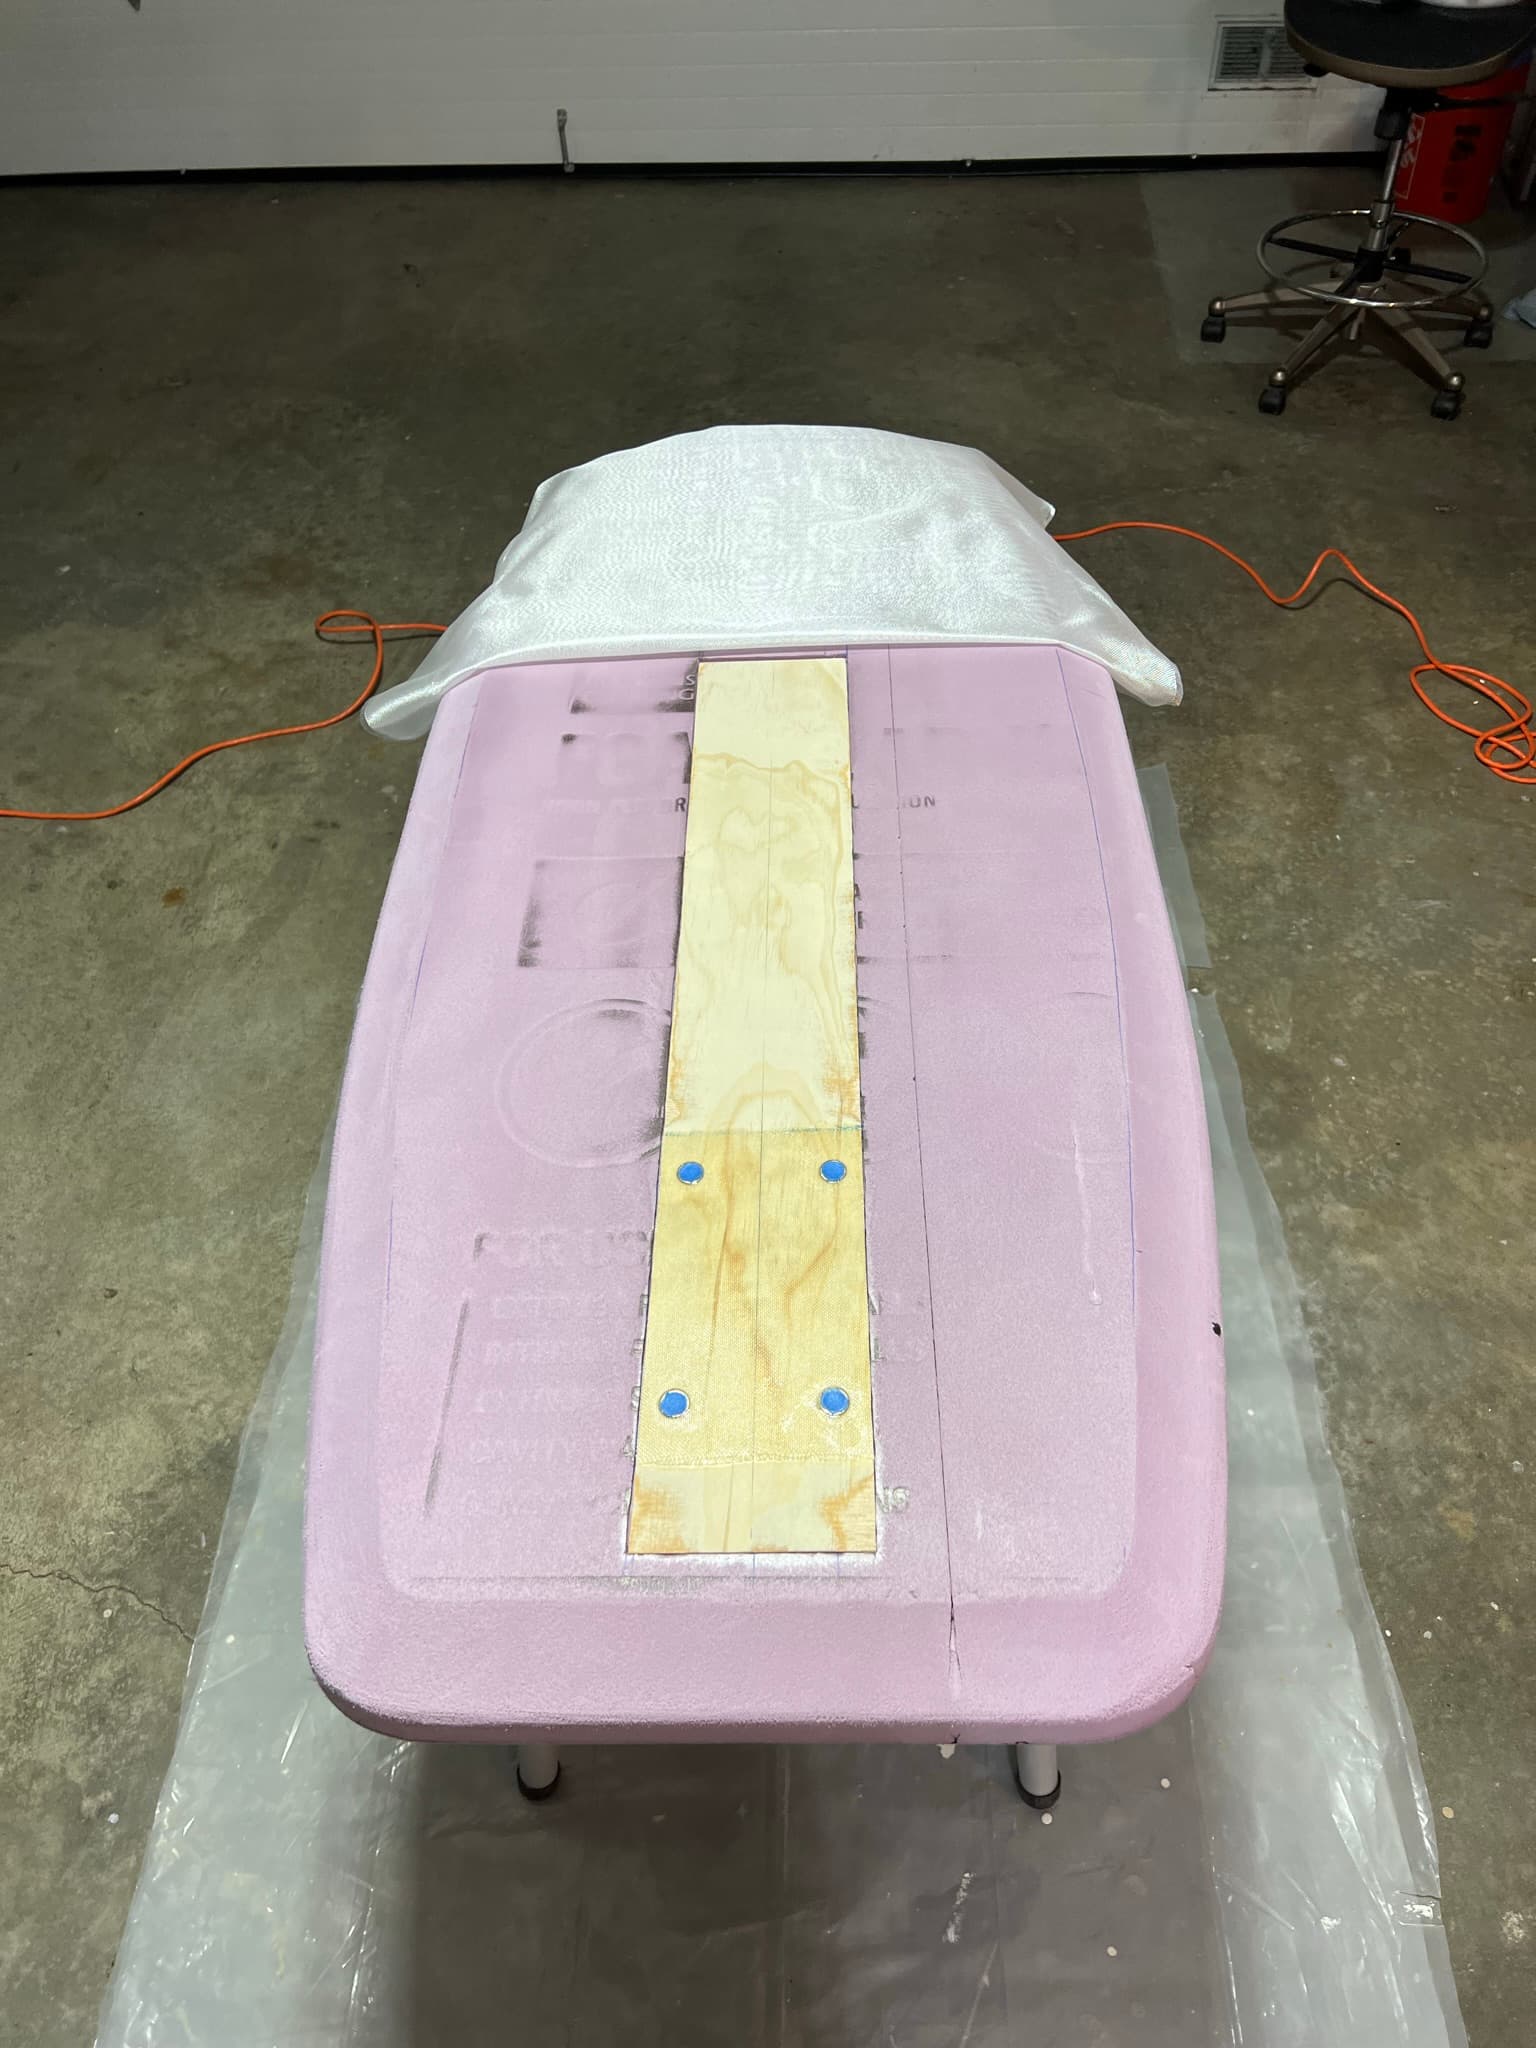
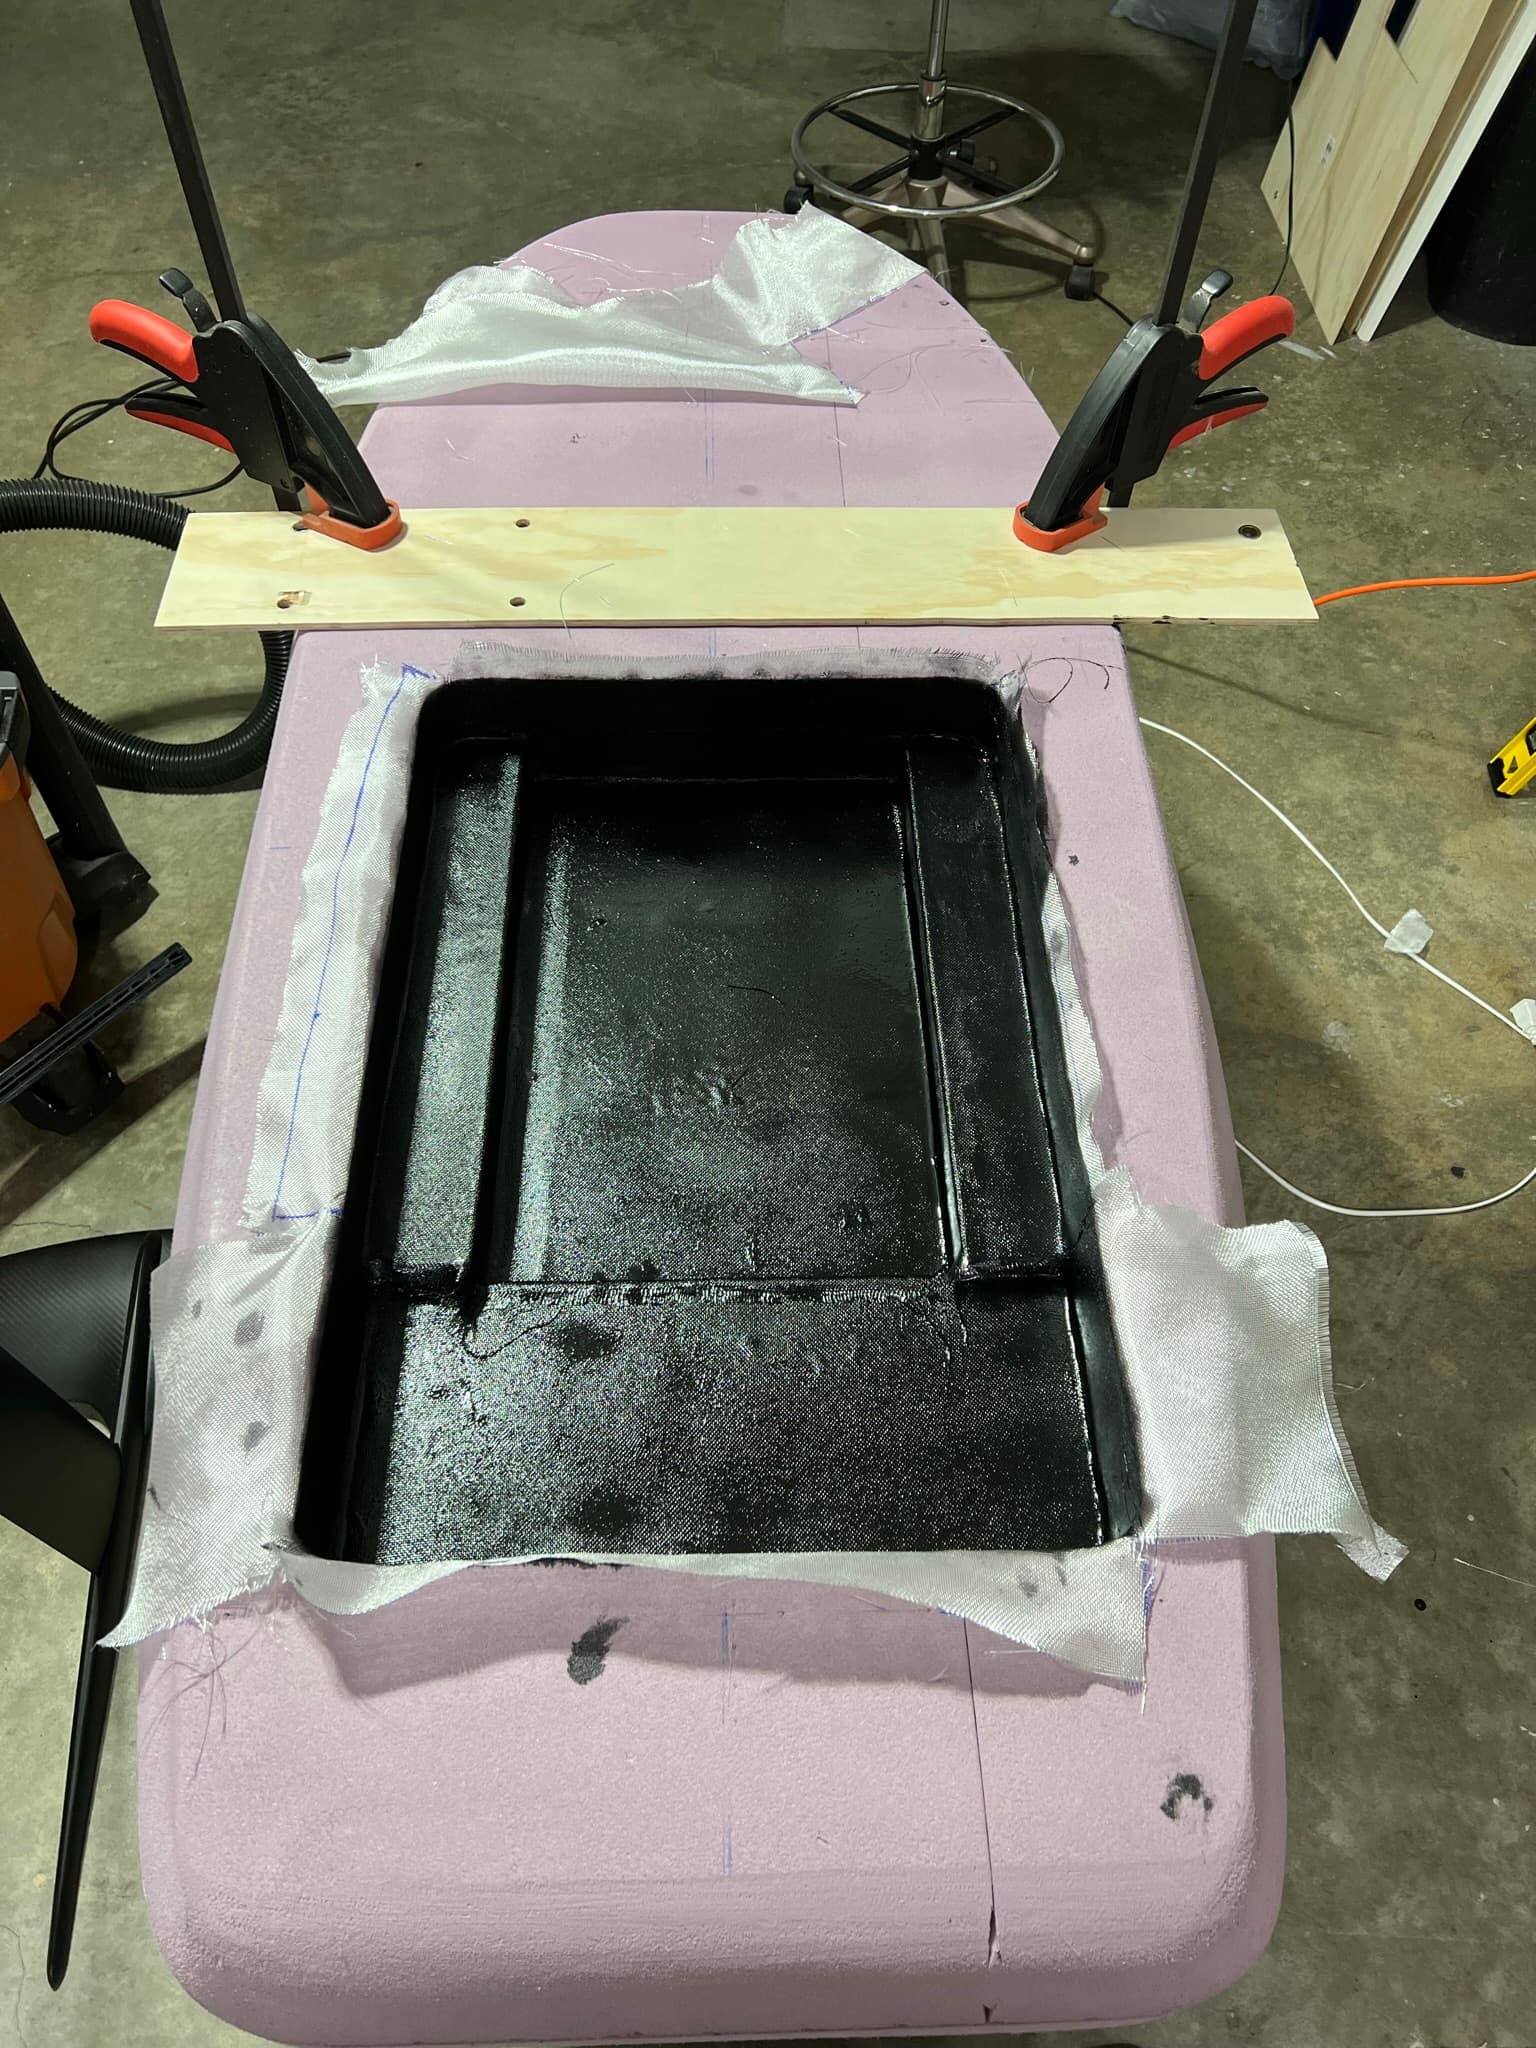
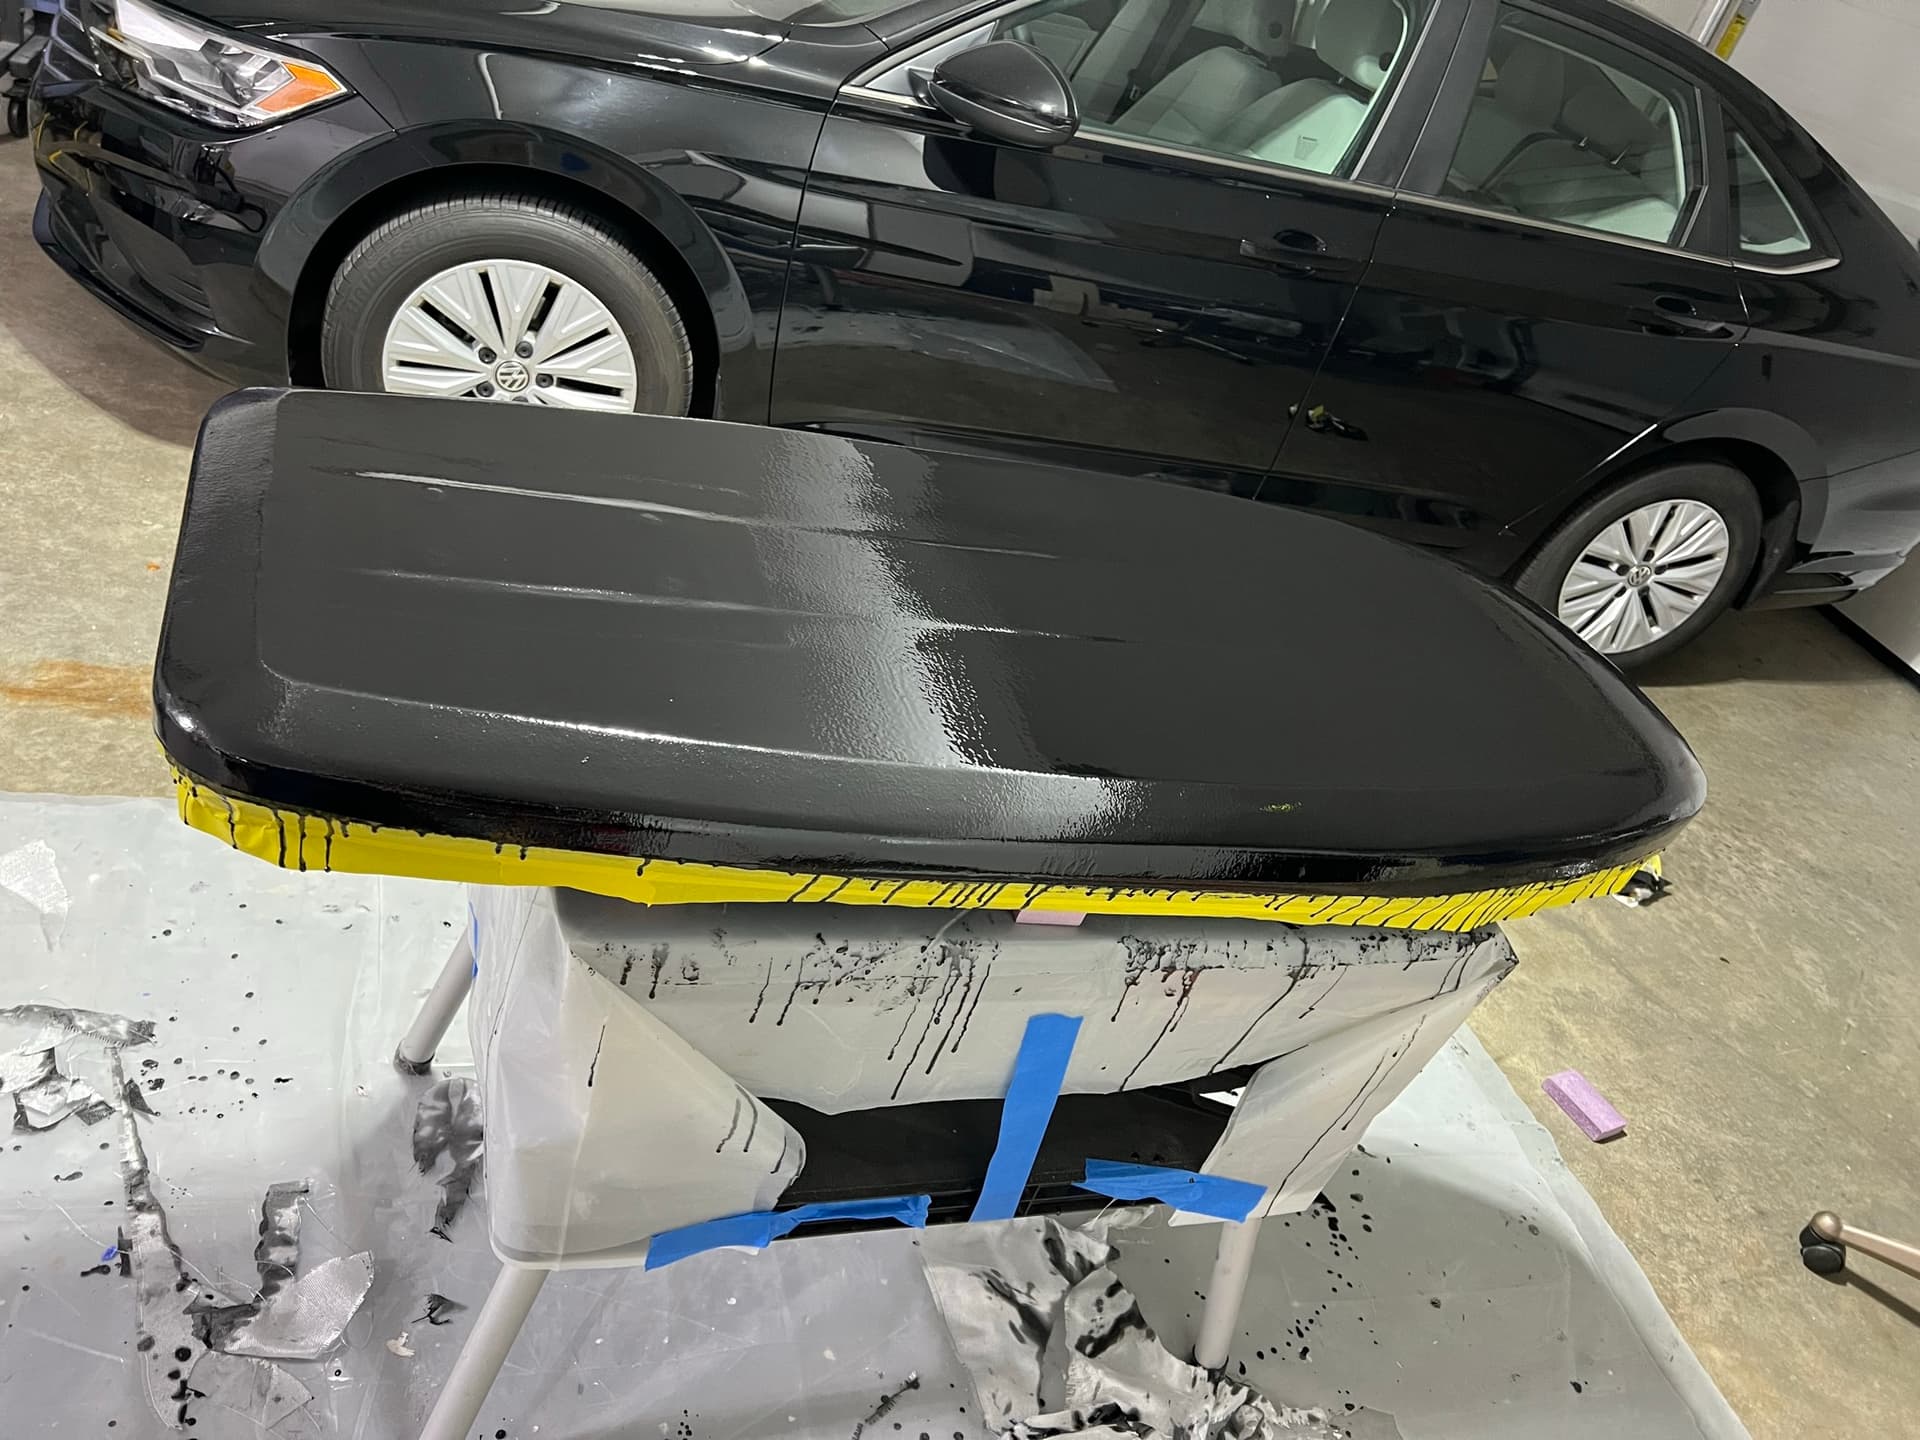
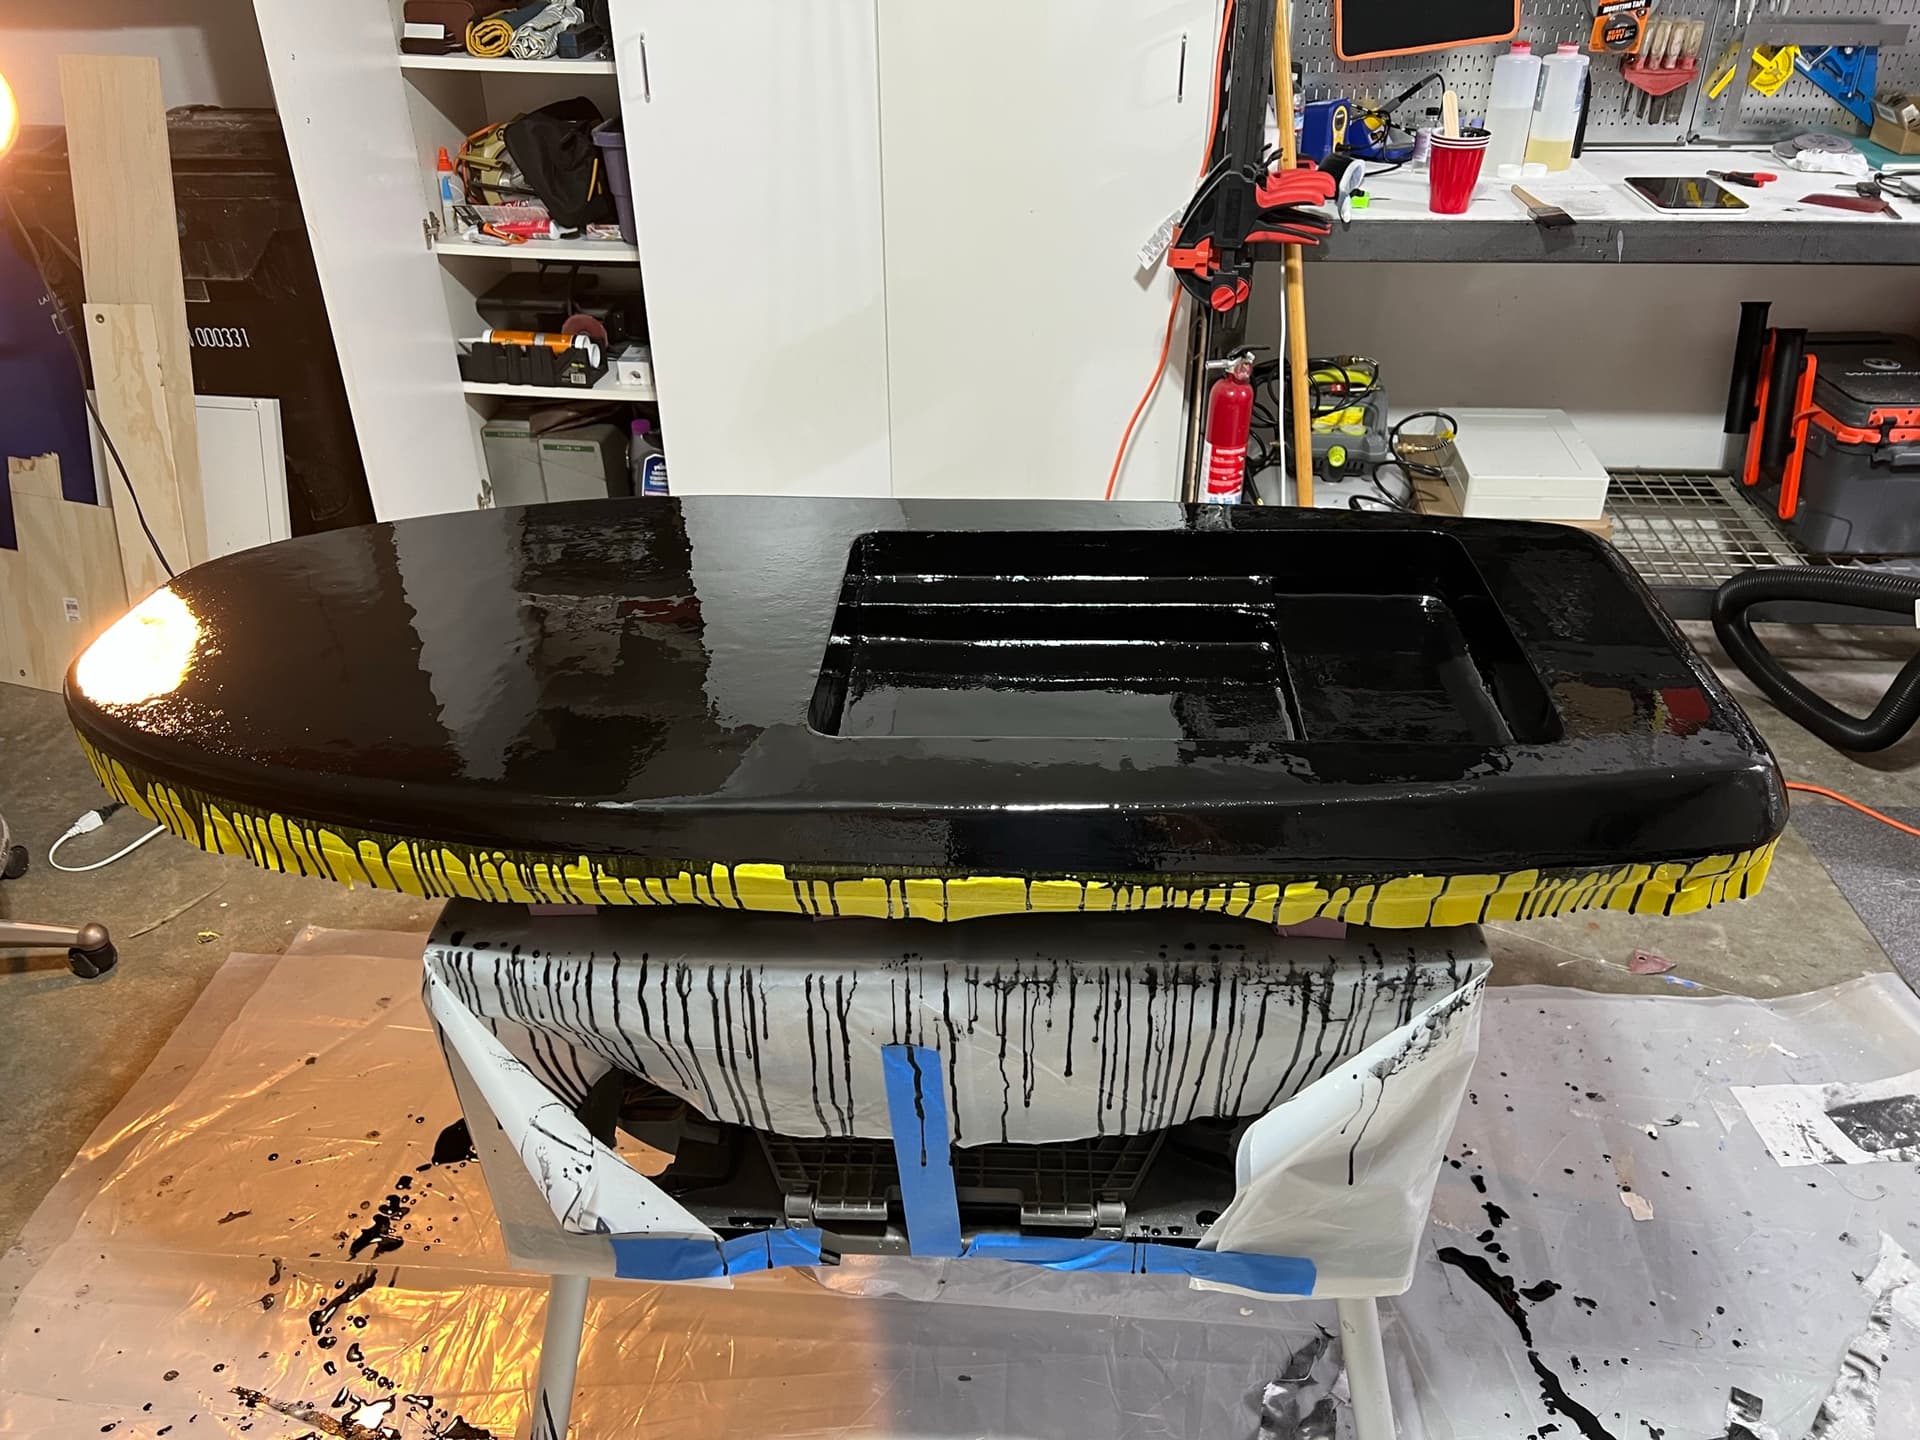
Fiber glassing. This was my first time doing this, but all things considered I think it turned out pretty well. If I had it to do again I probably would have created a mold for the cavity and over-molded the complex contours to create a drop-in shell.

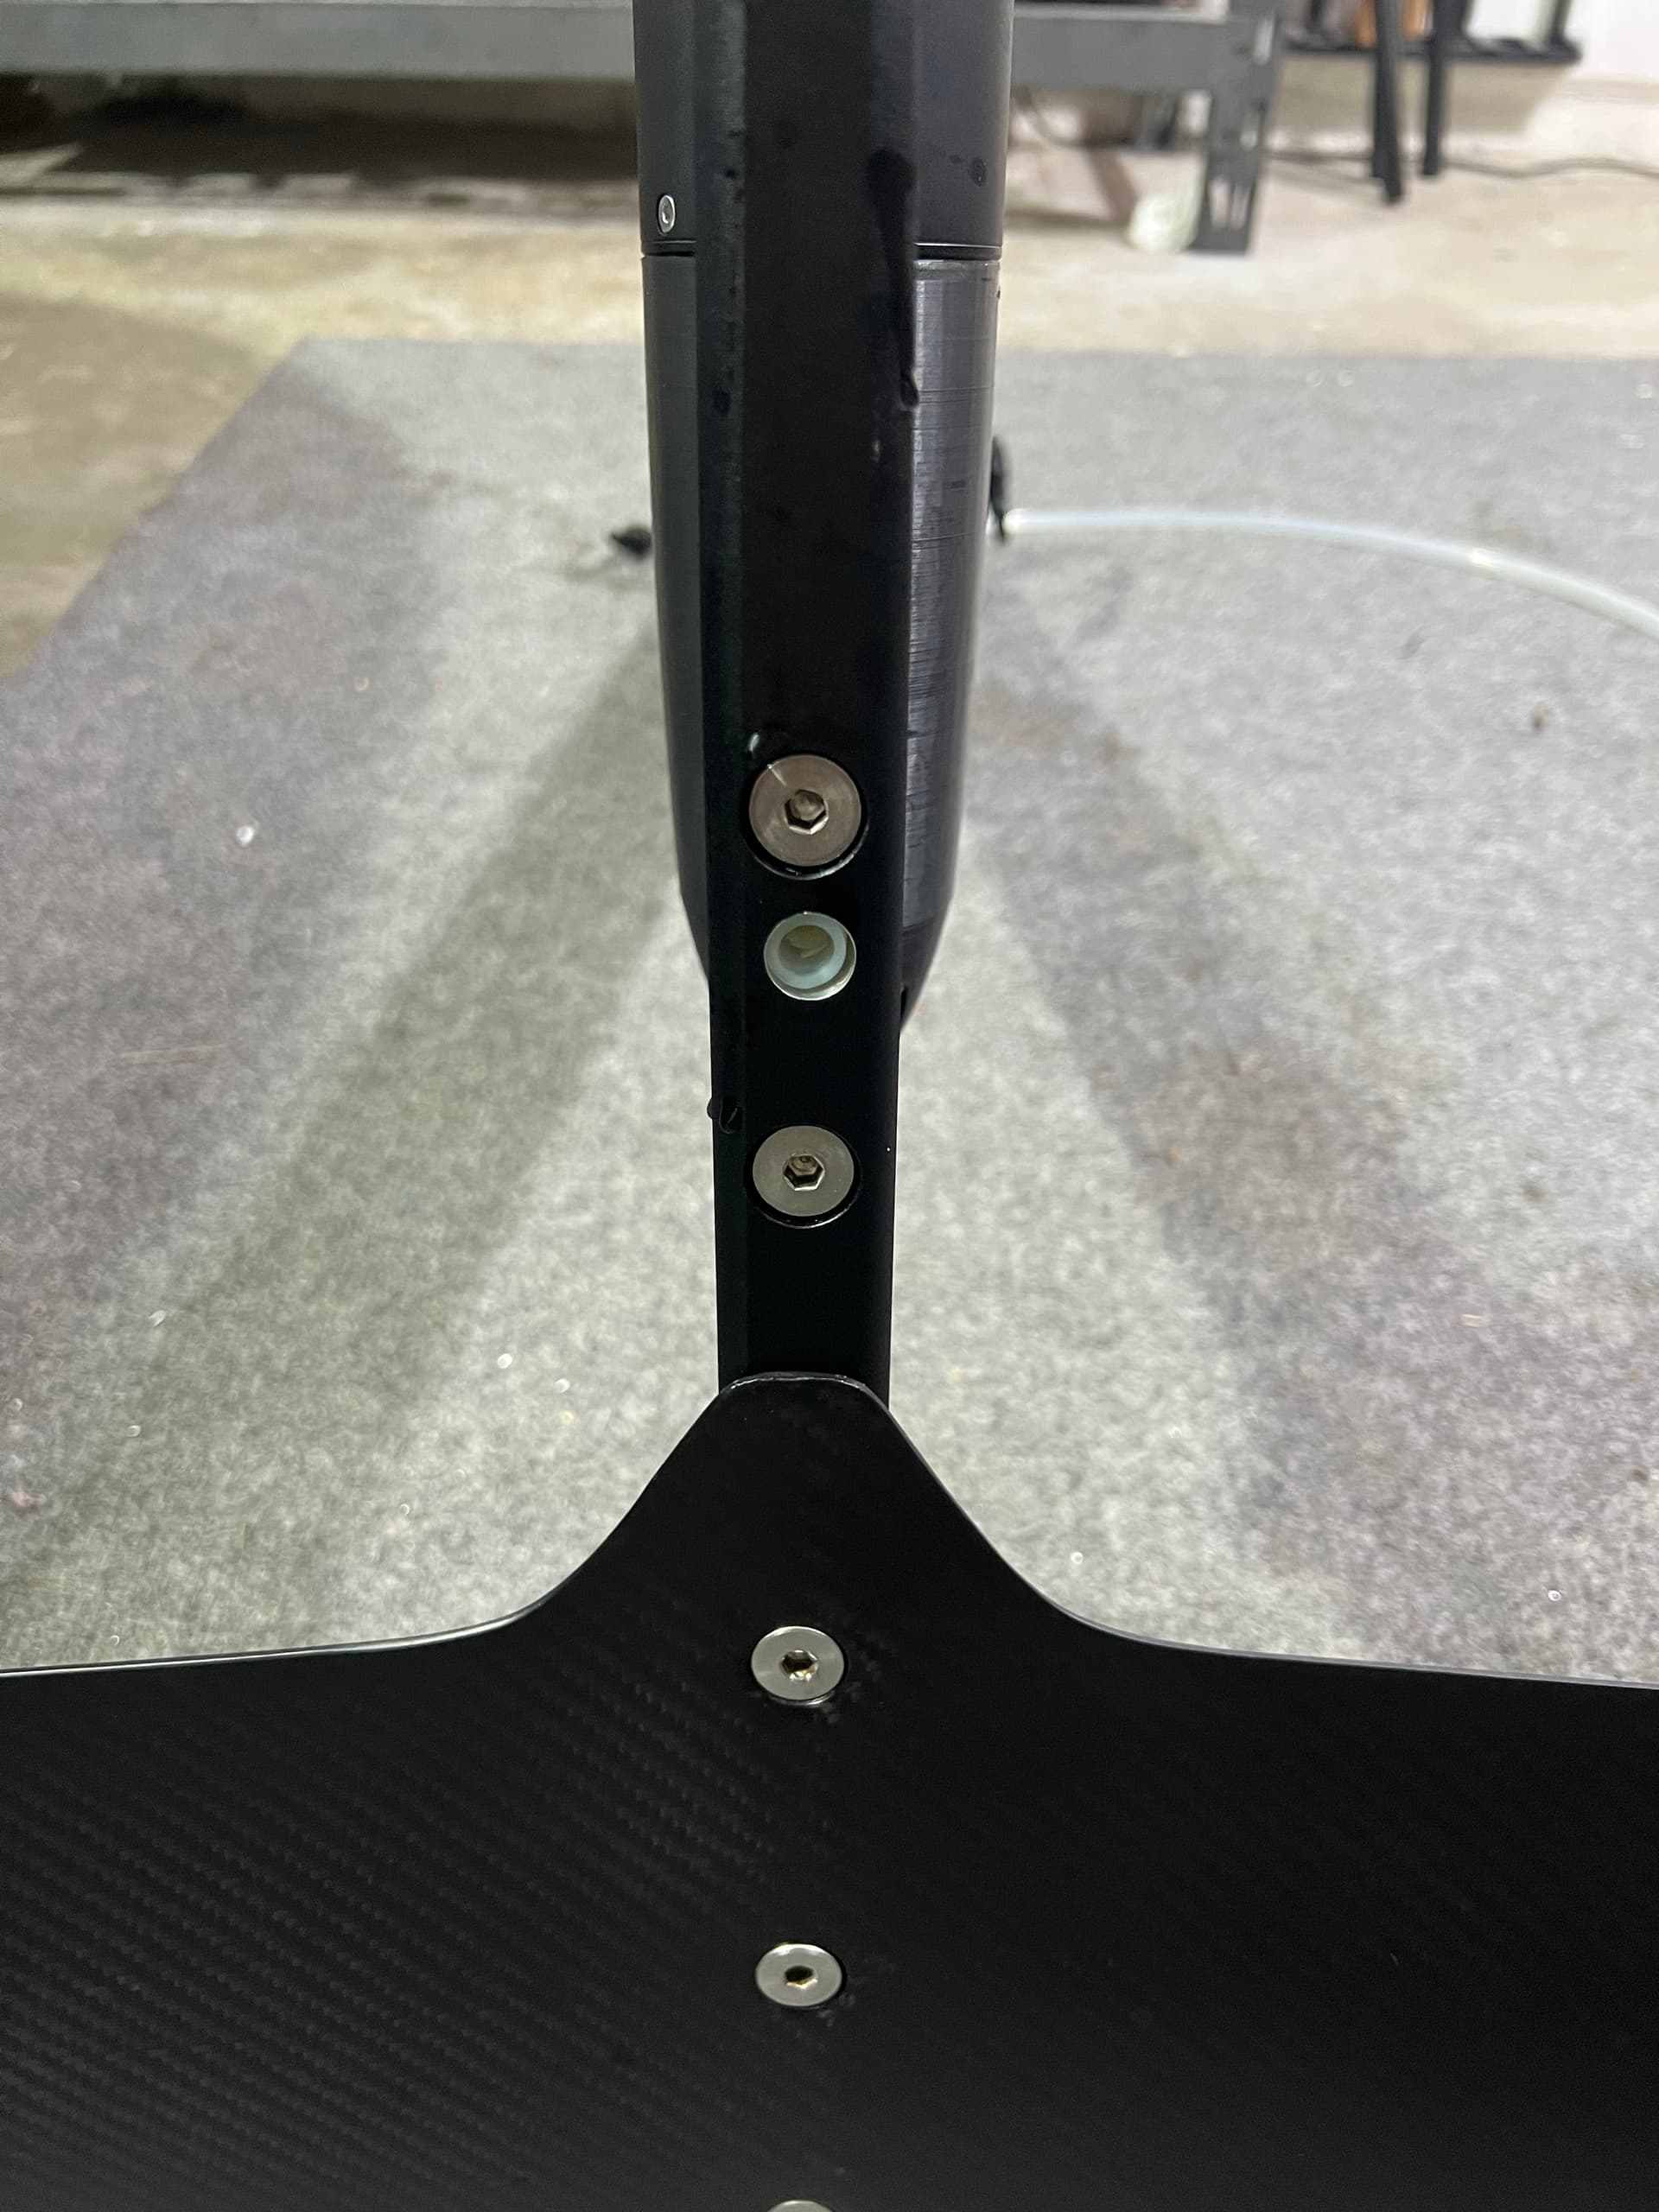
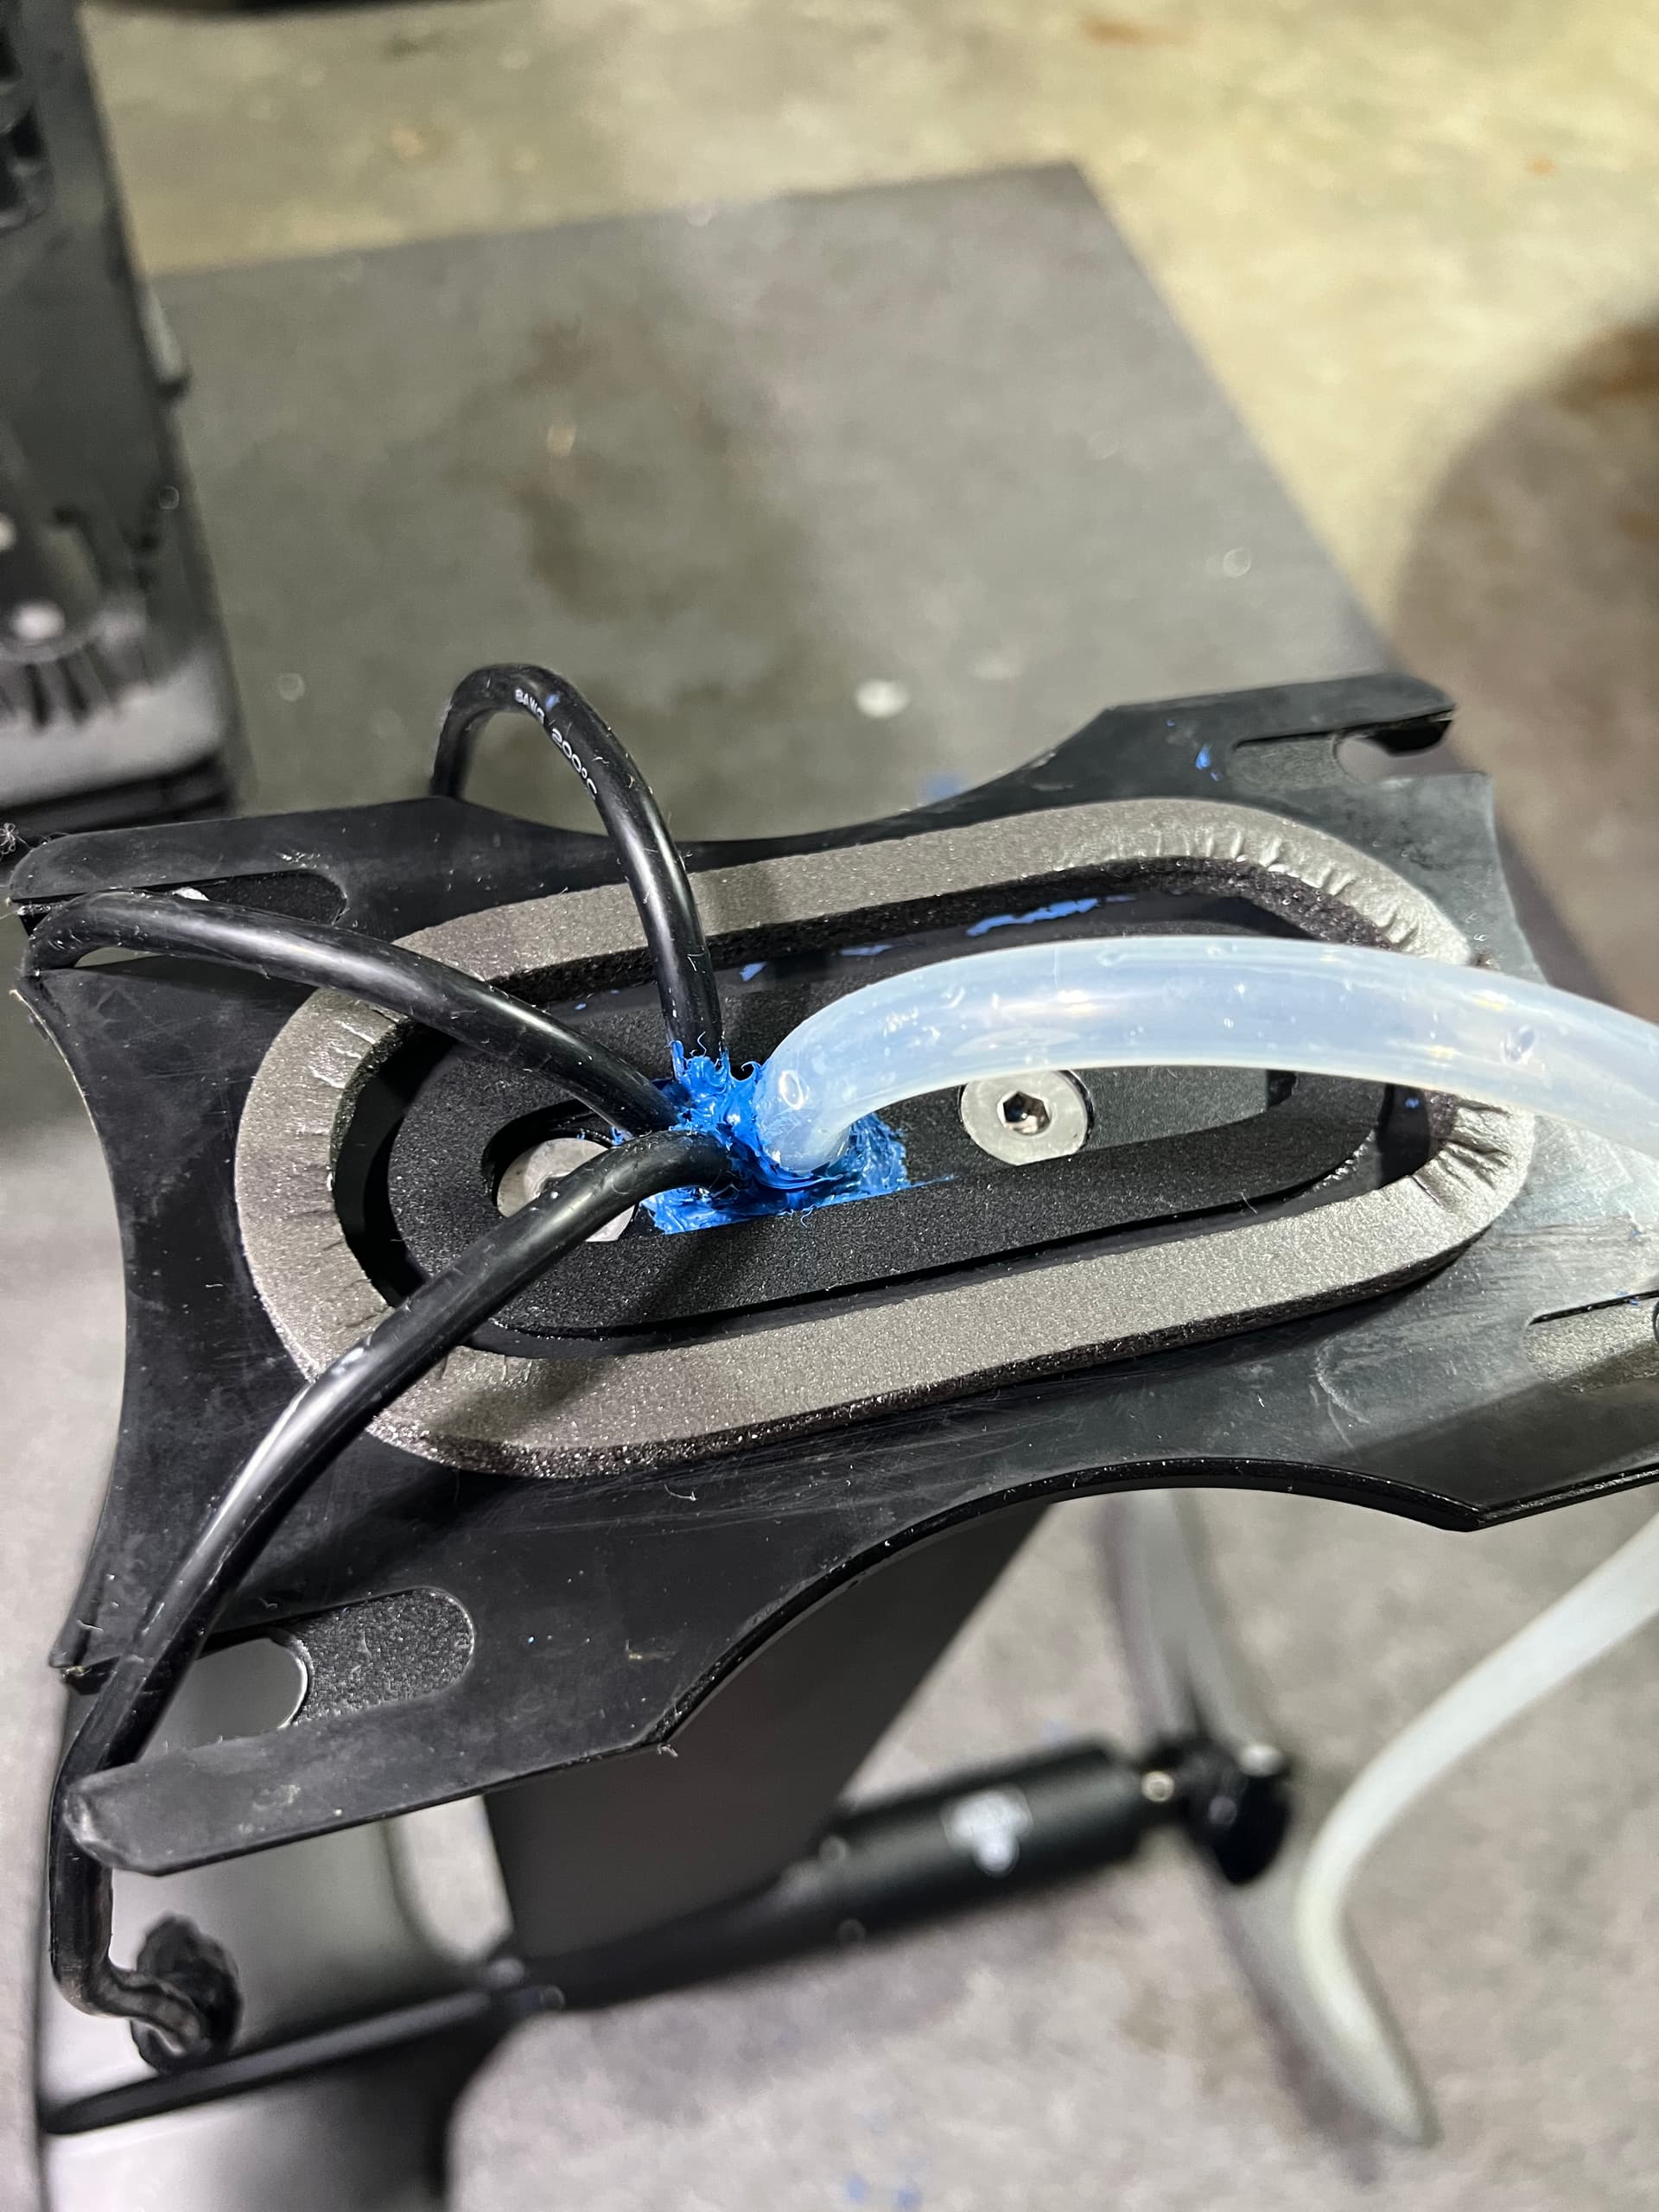
Drilling the holes for the motor wires in both the board and the mast plate. The hole through the board was fiber glassed as well.

Battery Build

Laying out the 2P connections

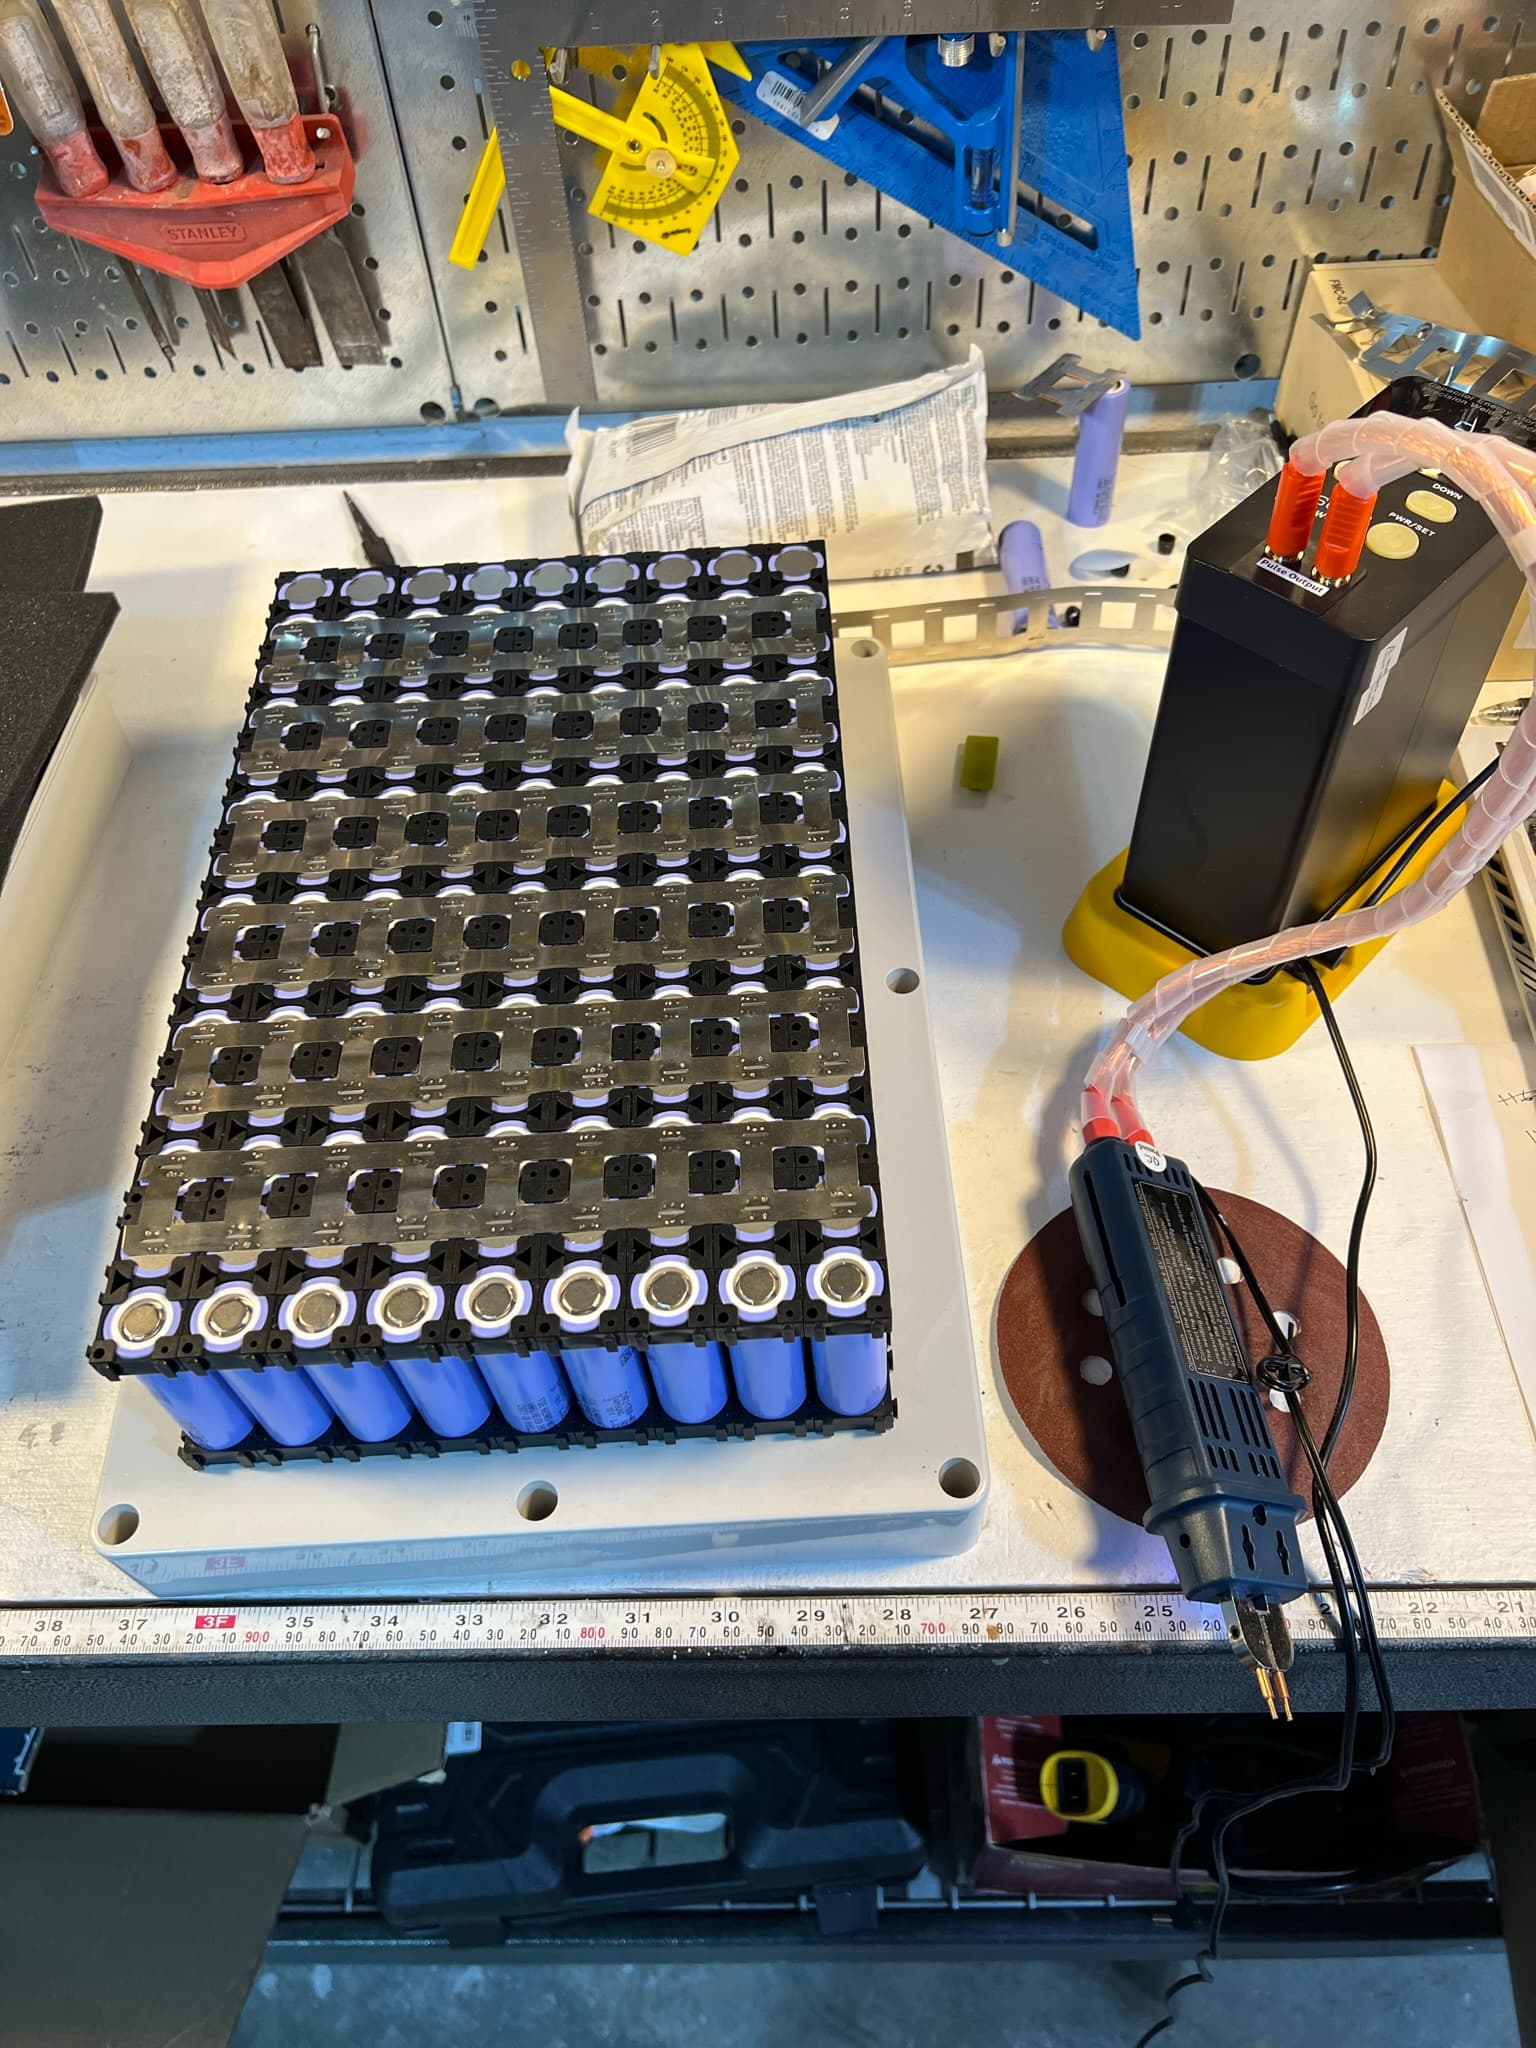
Blue tape to keep from shorting any connections while I was working.

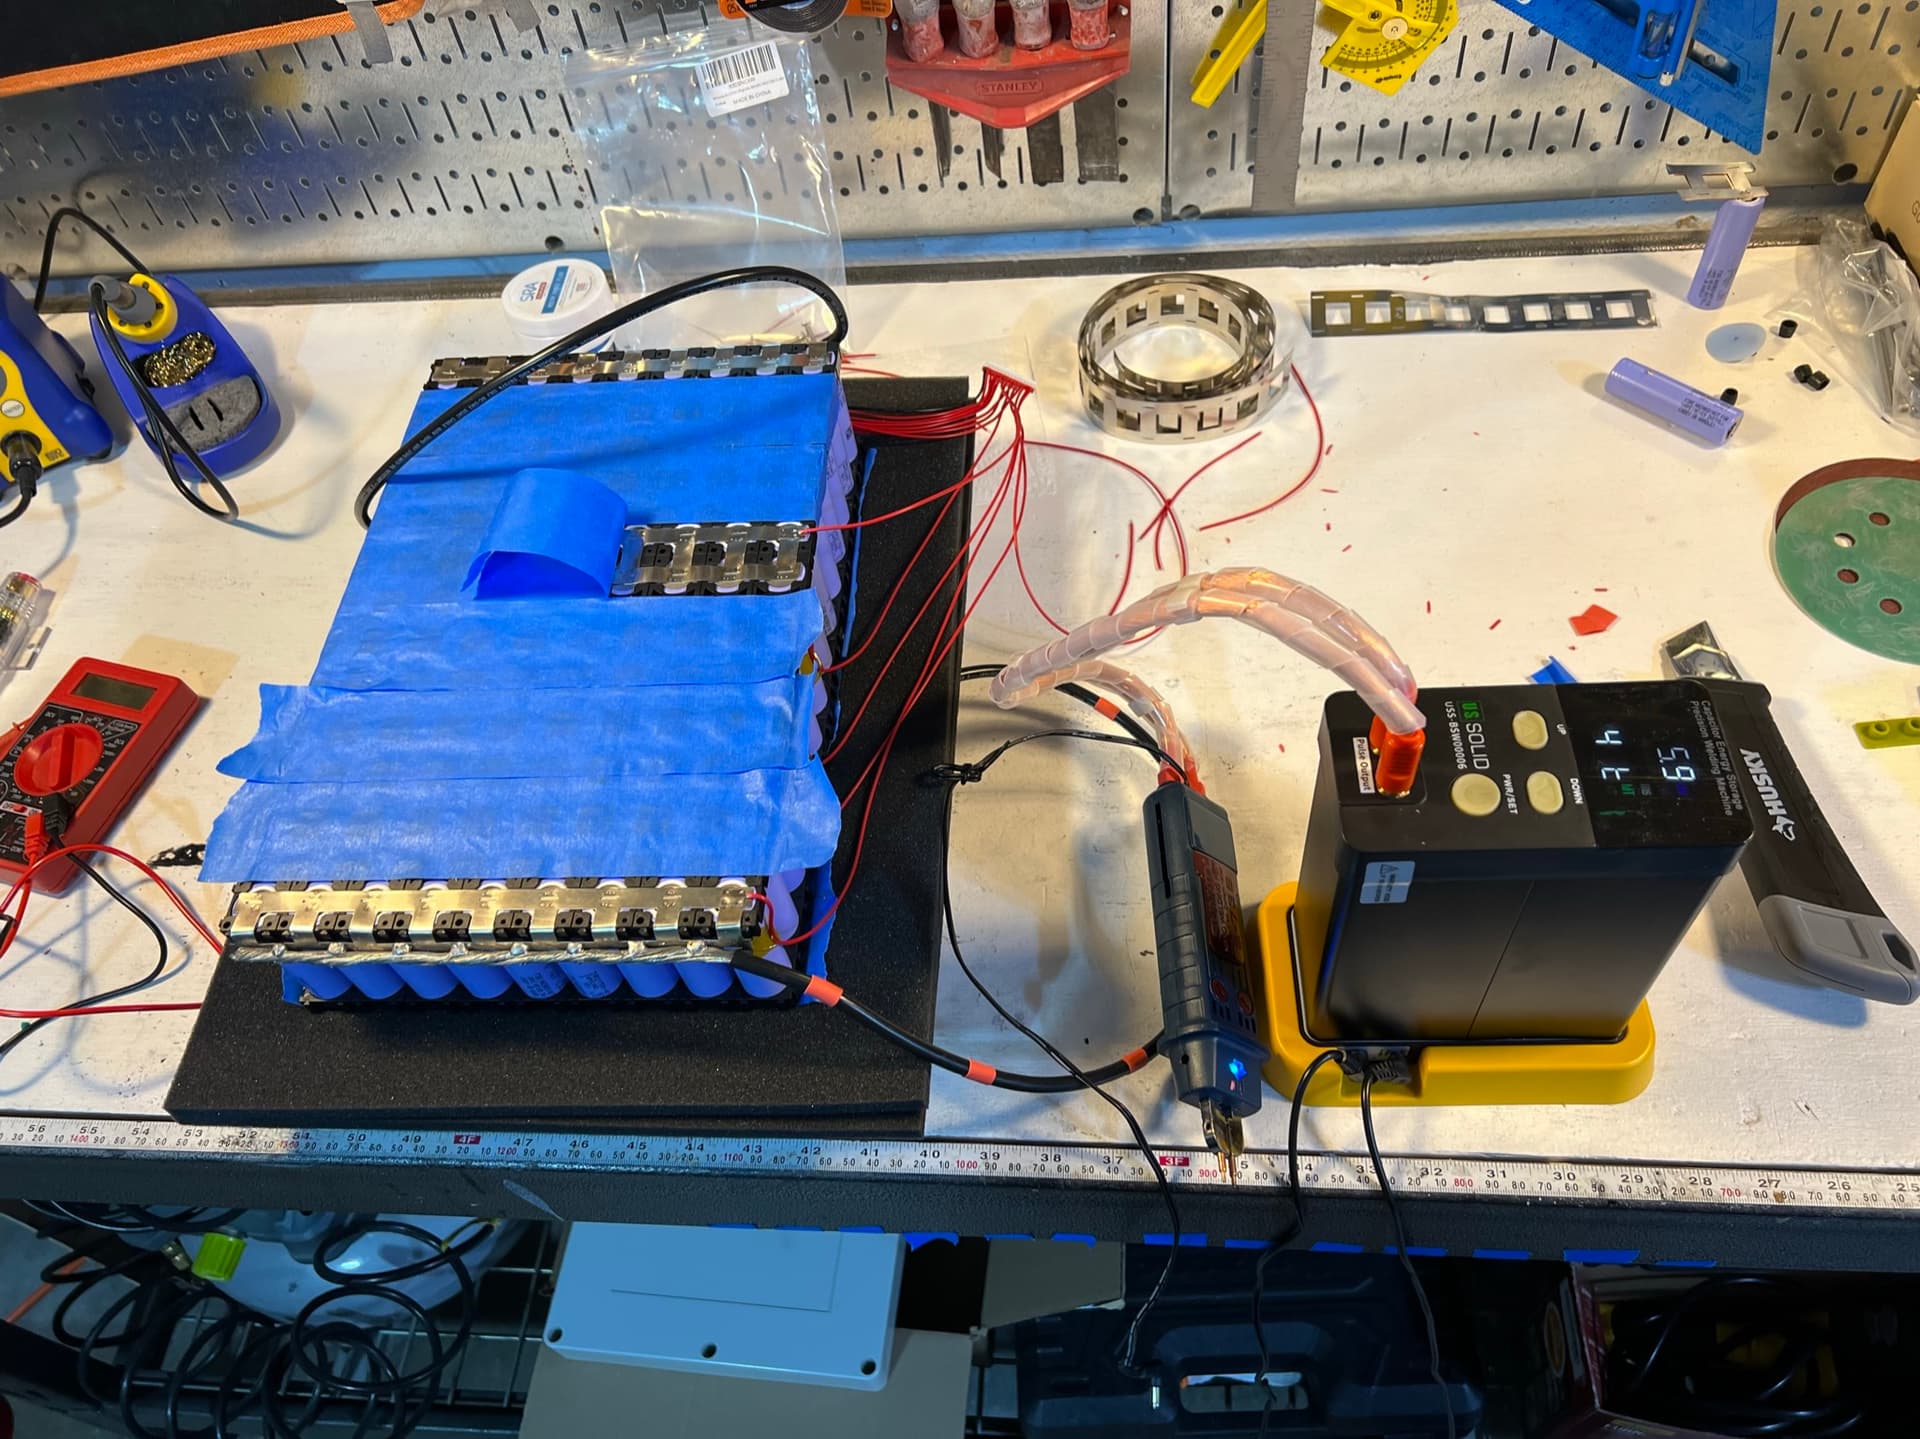
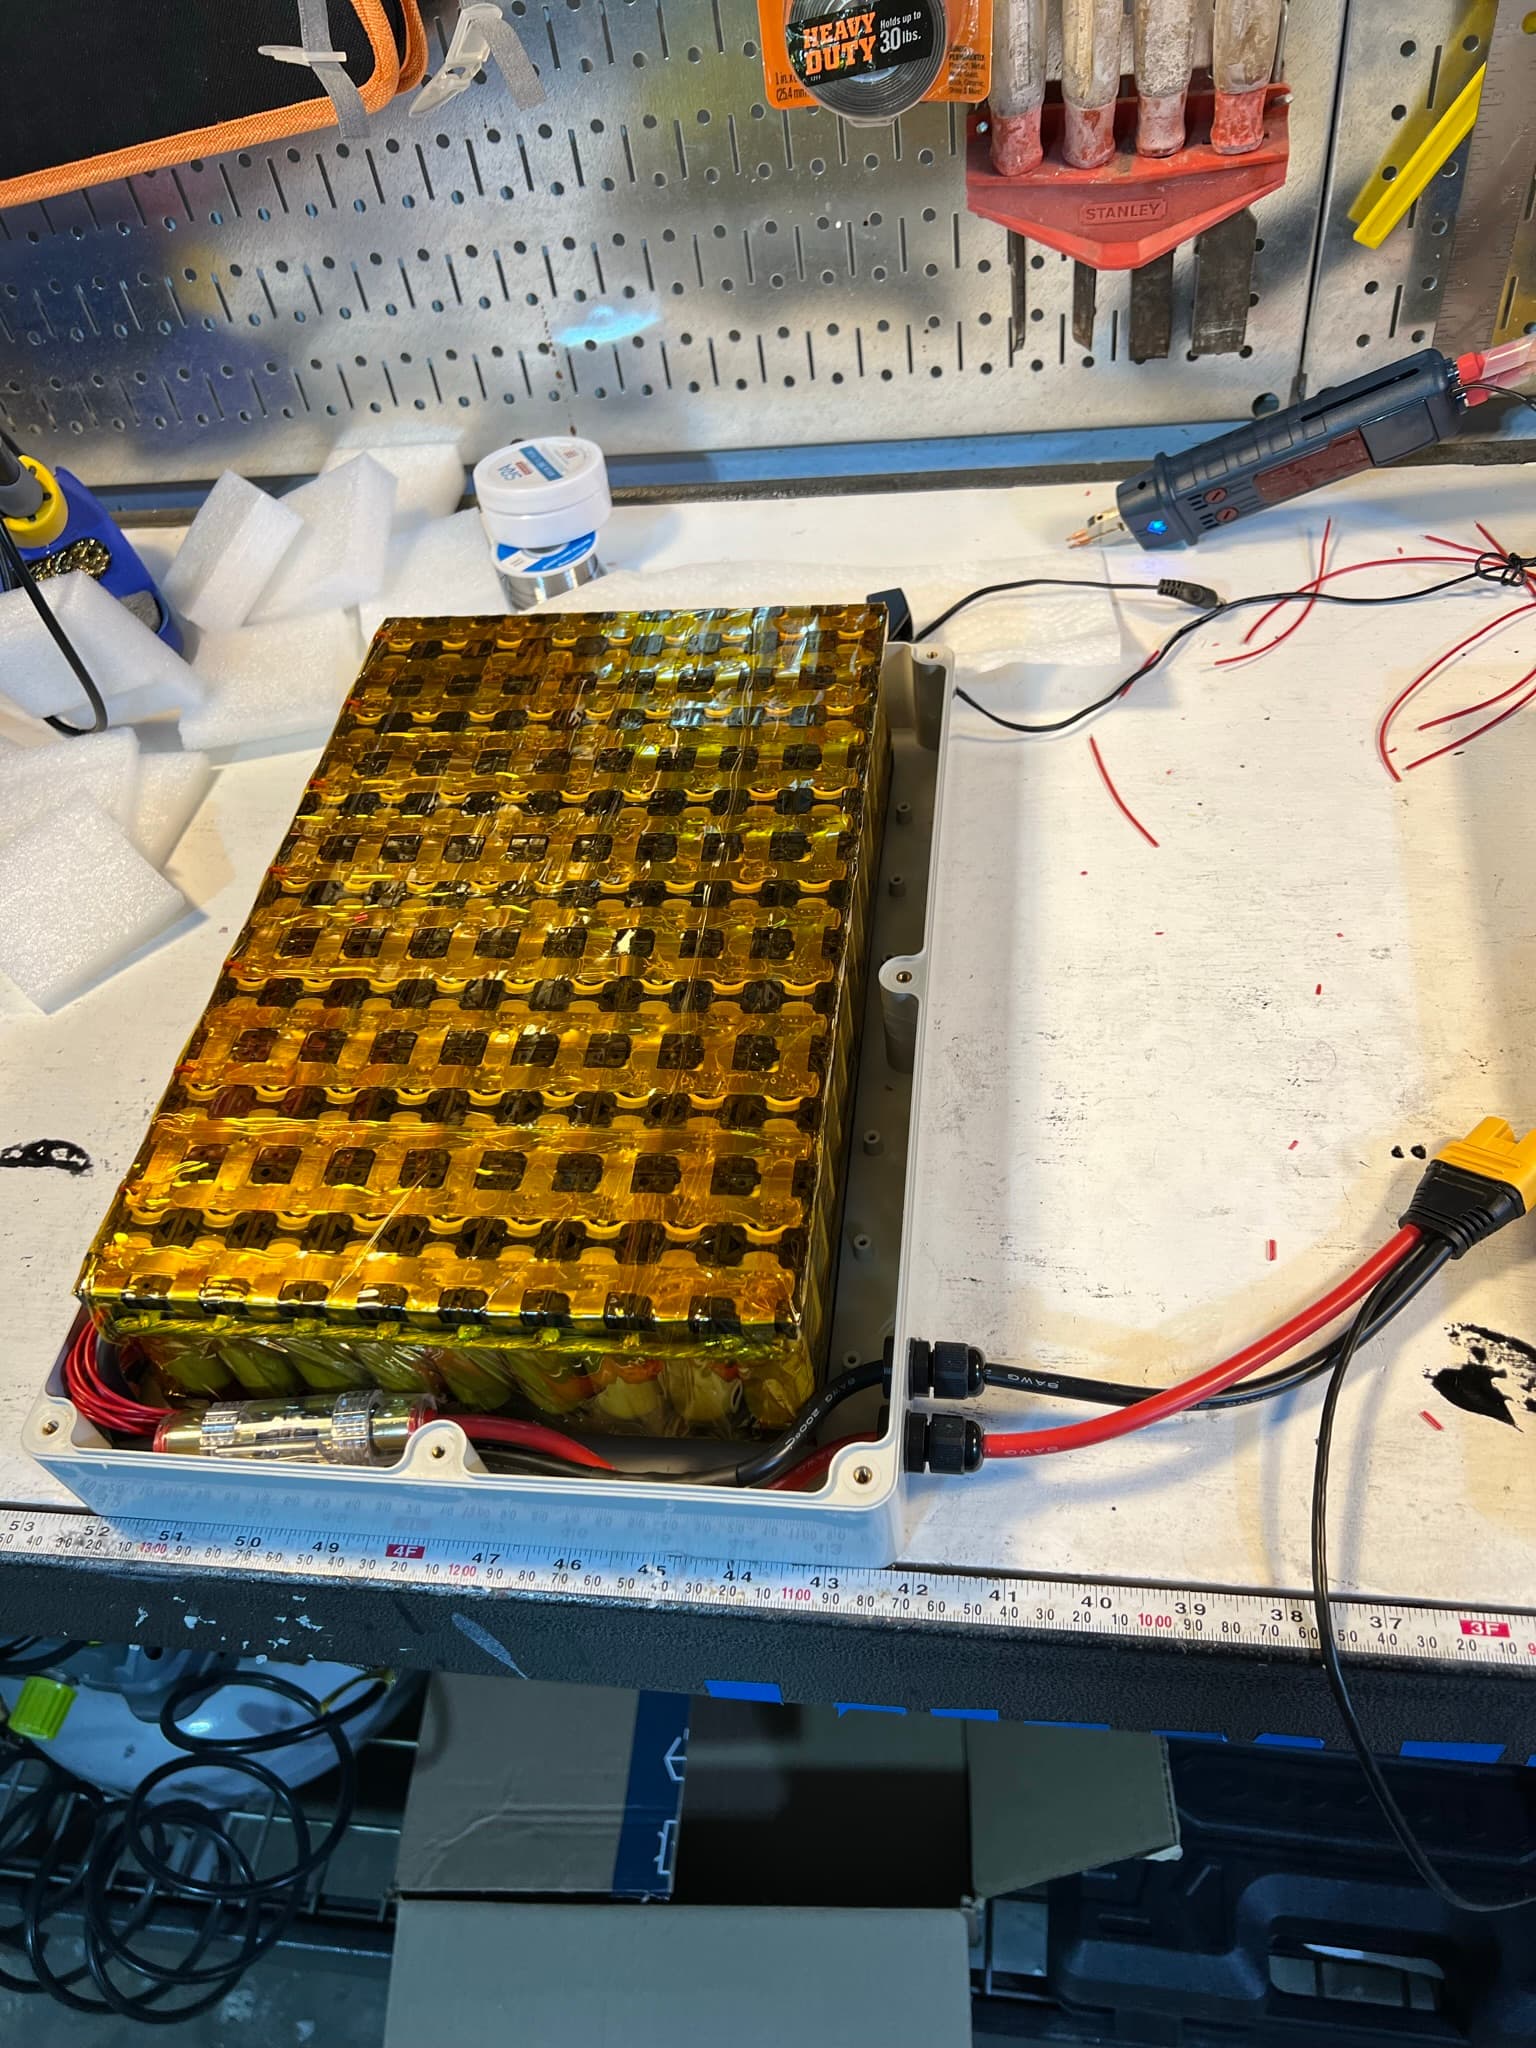
Finished welding and kapton tape applied. The collector series connections feature 8AWG cable soldered to the nickel.

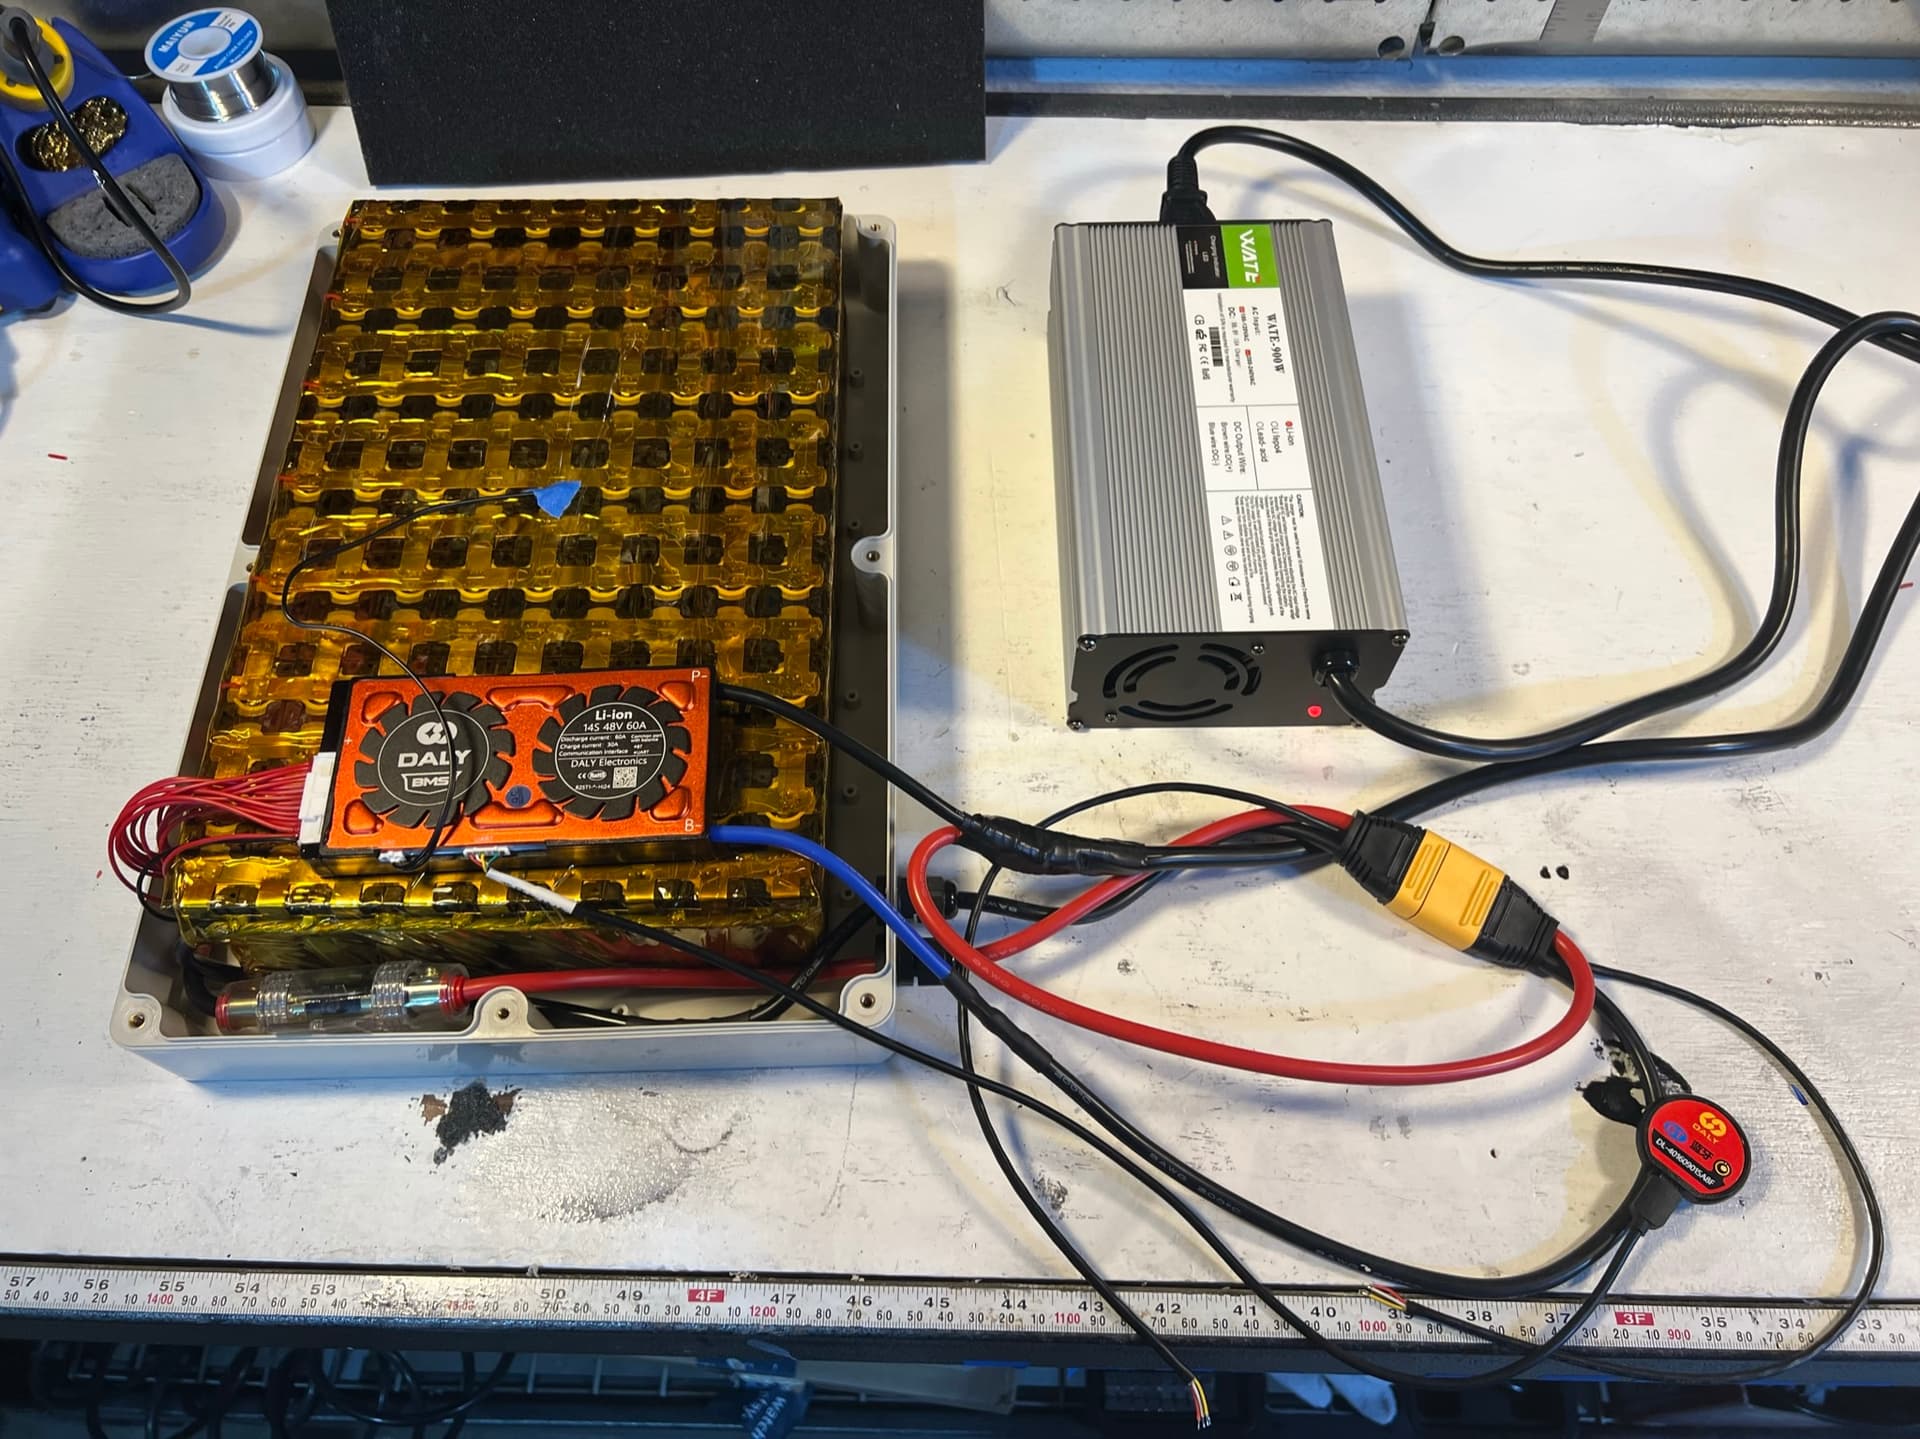
Test charging with the BMS and charger.

Misc Finishing

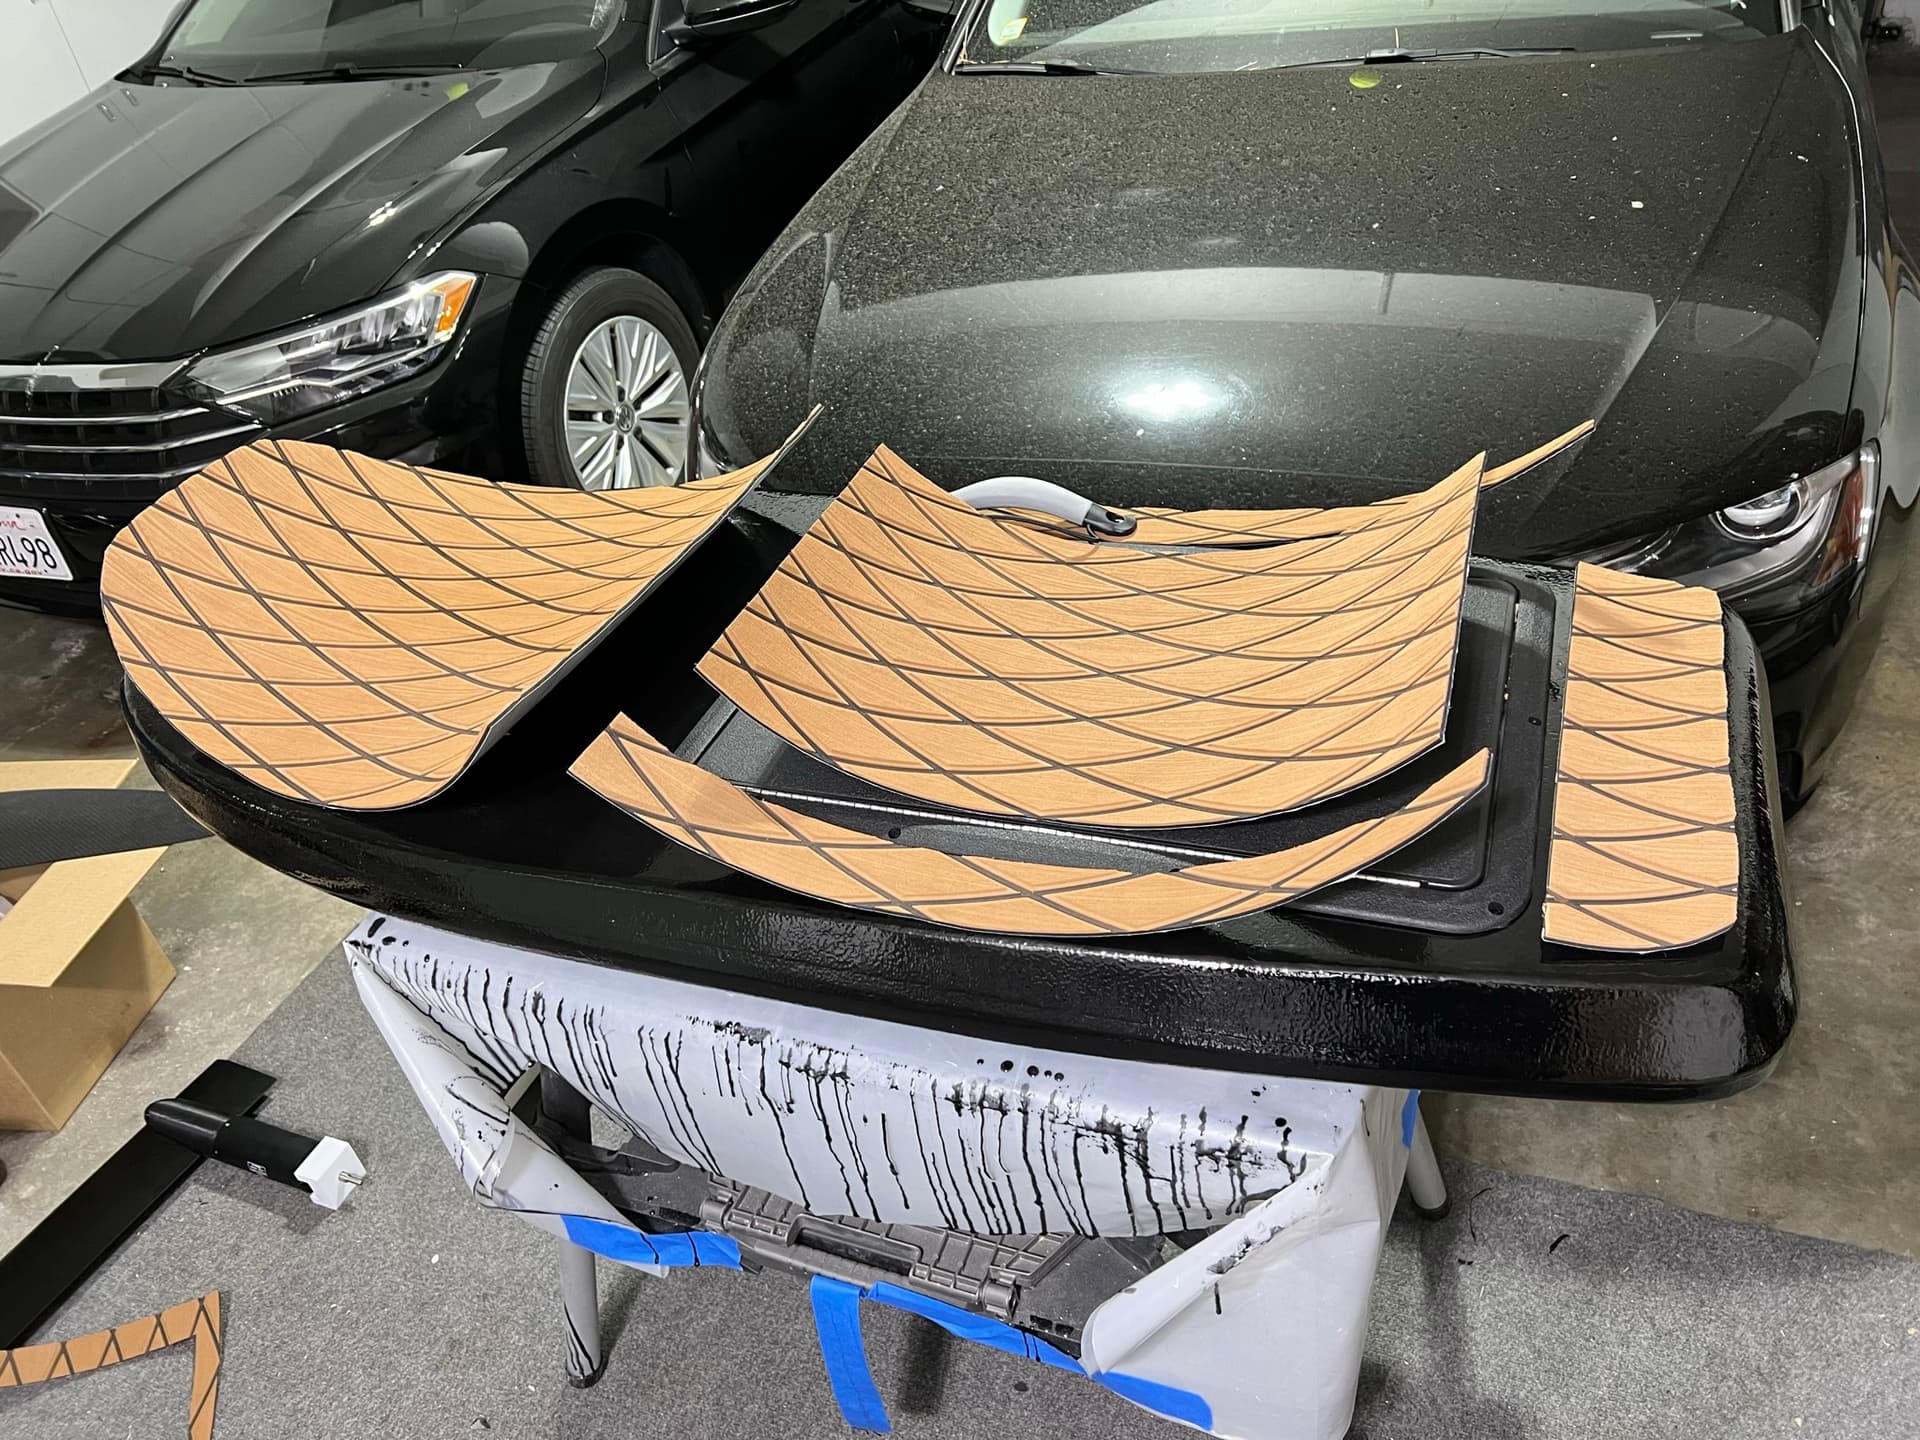
Laying out the EVA foam after cutting to shape. This came as a large roll but was fairly easy to cut using a razor

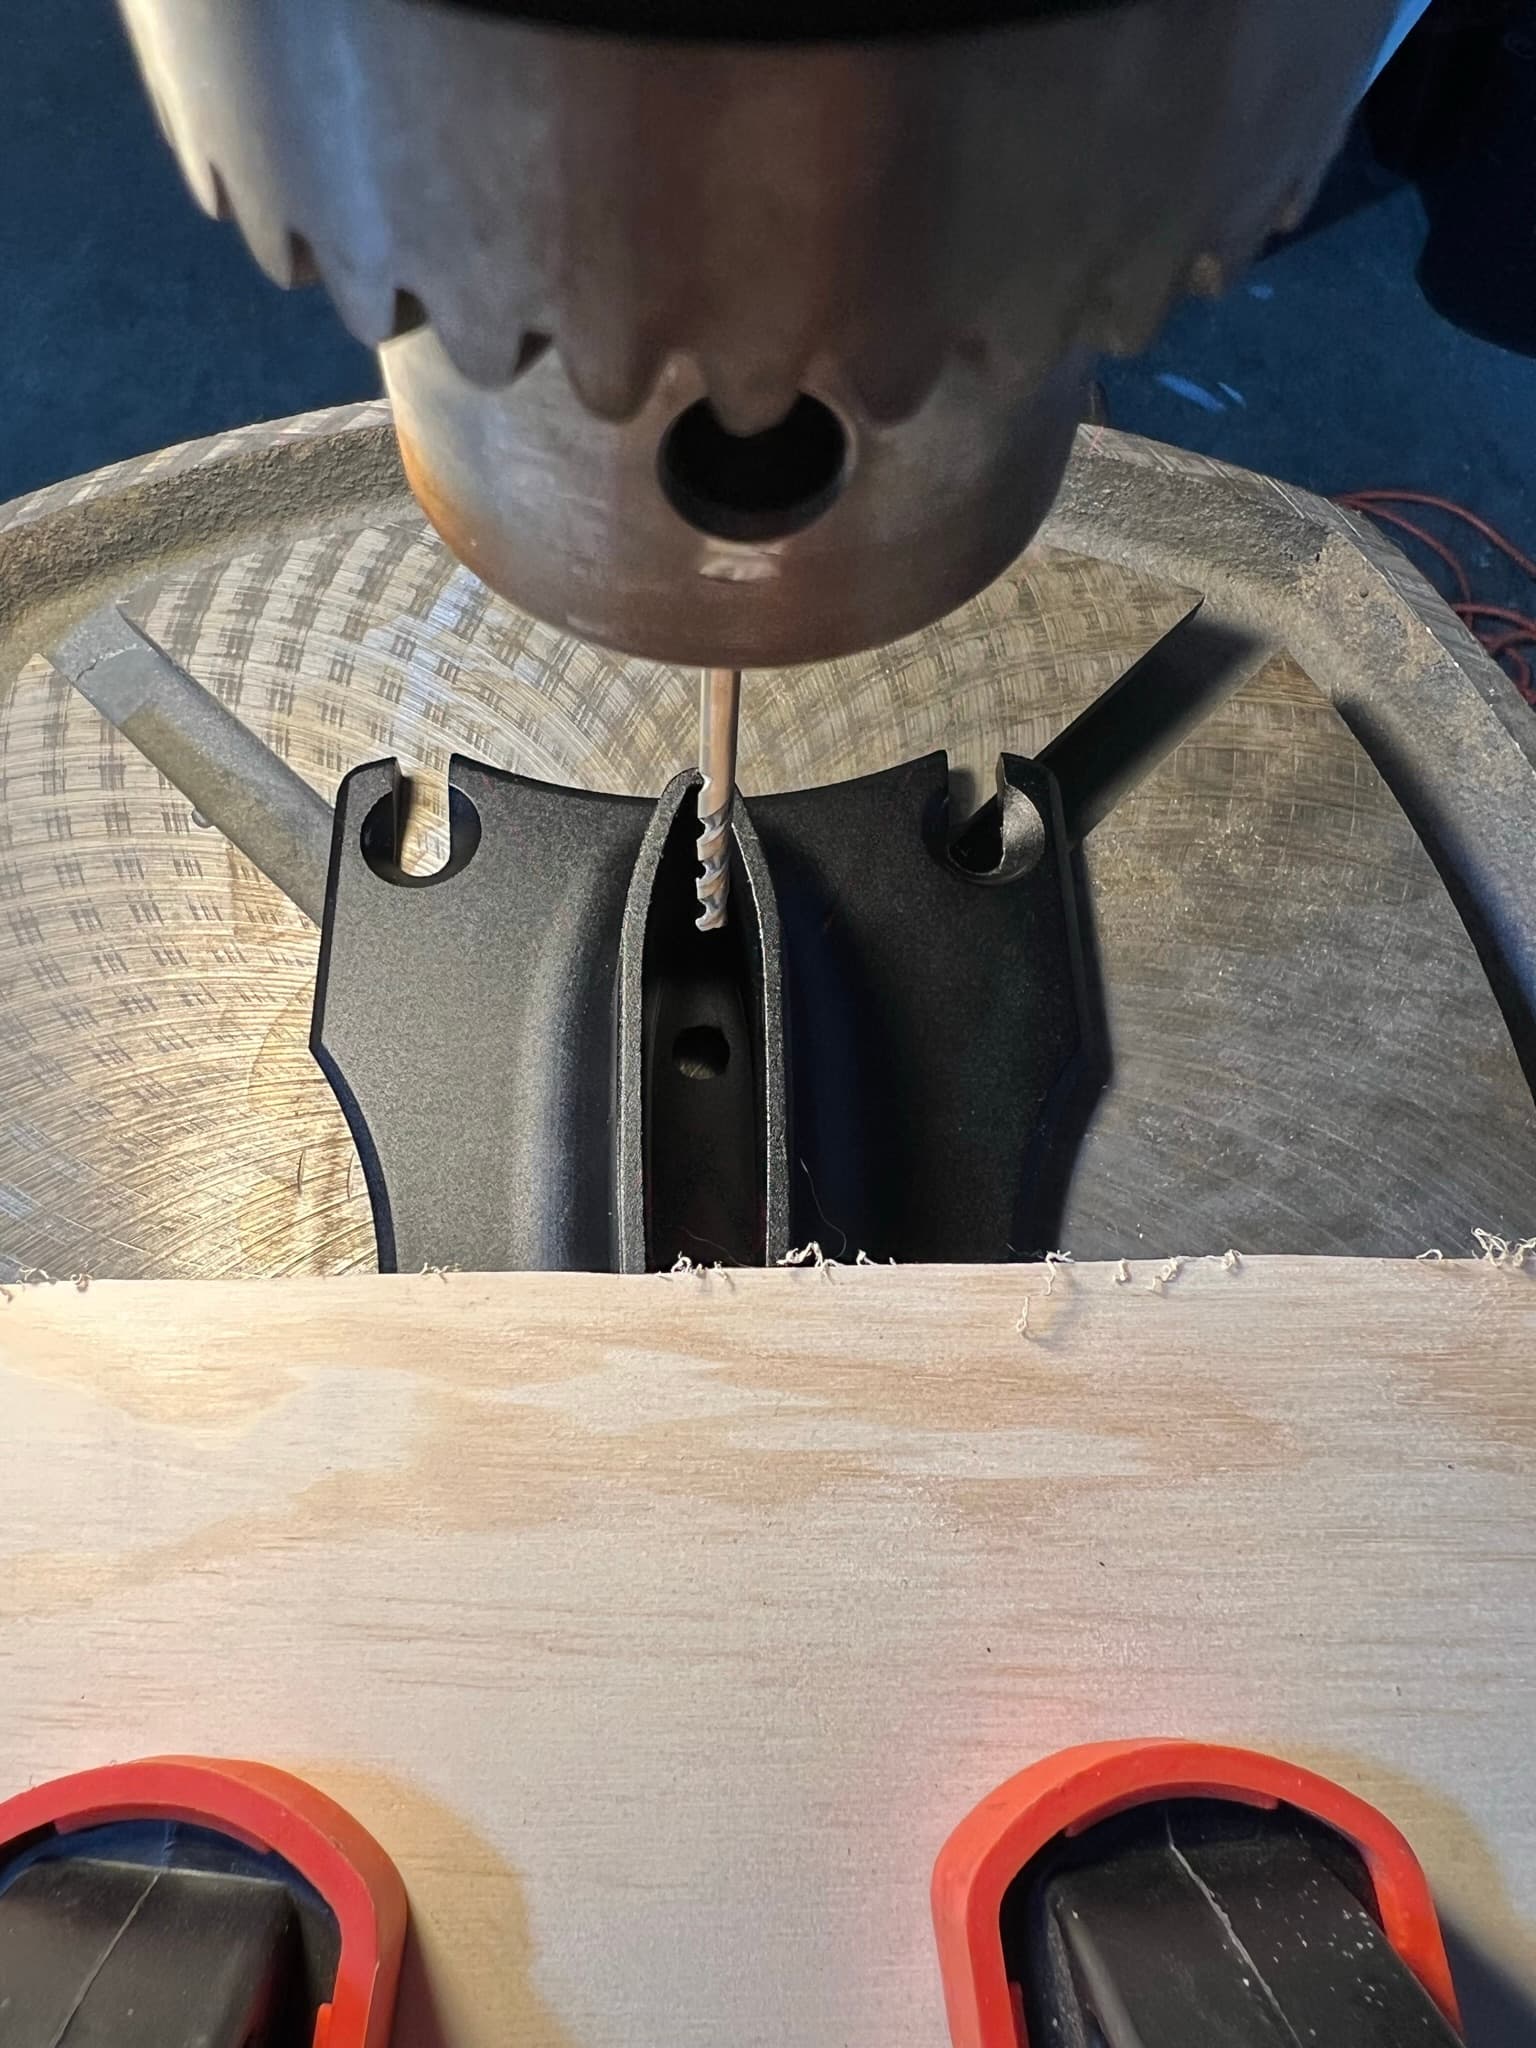
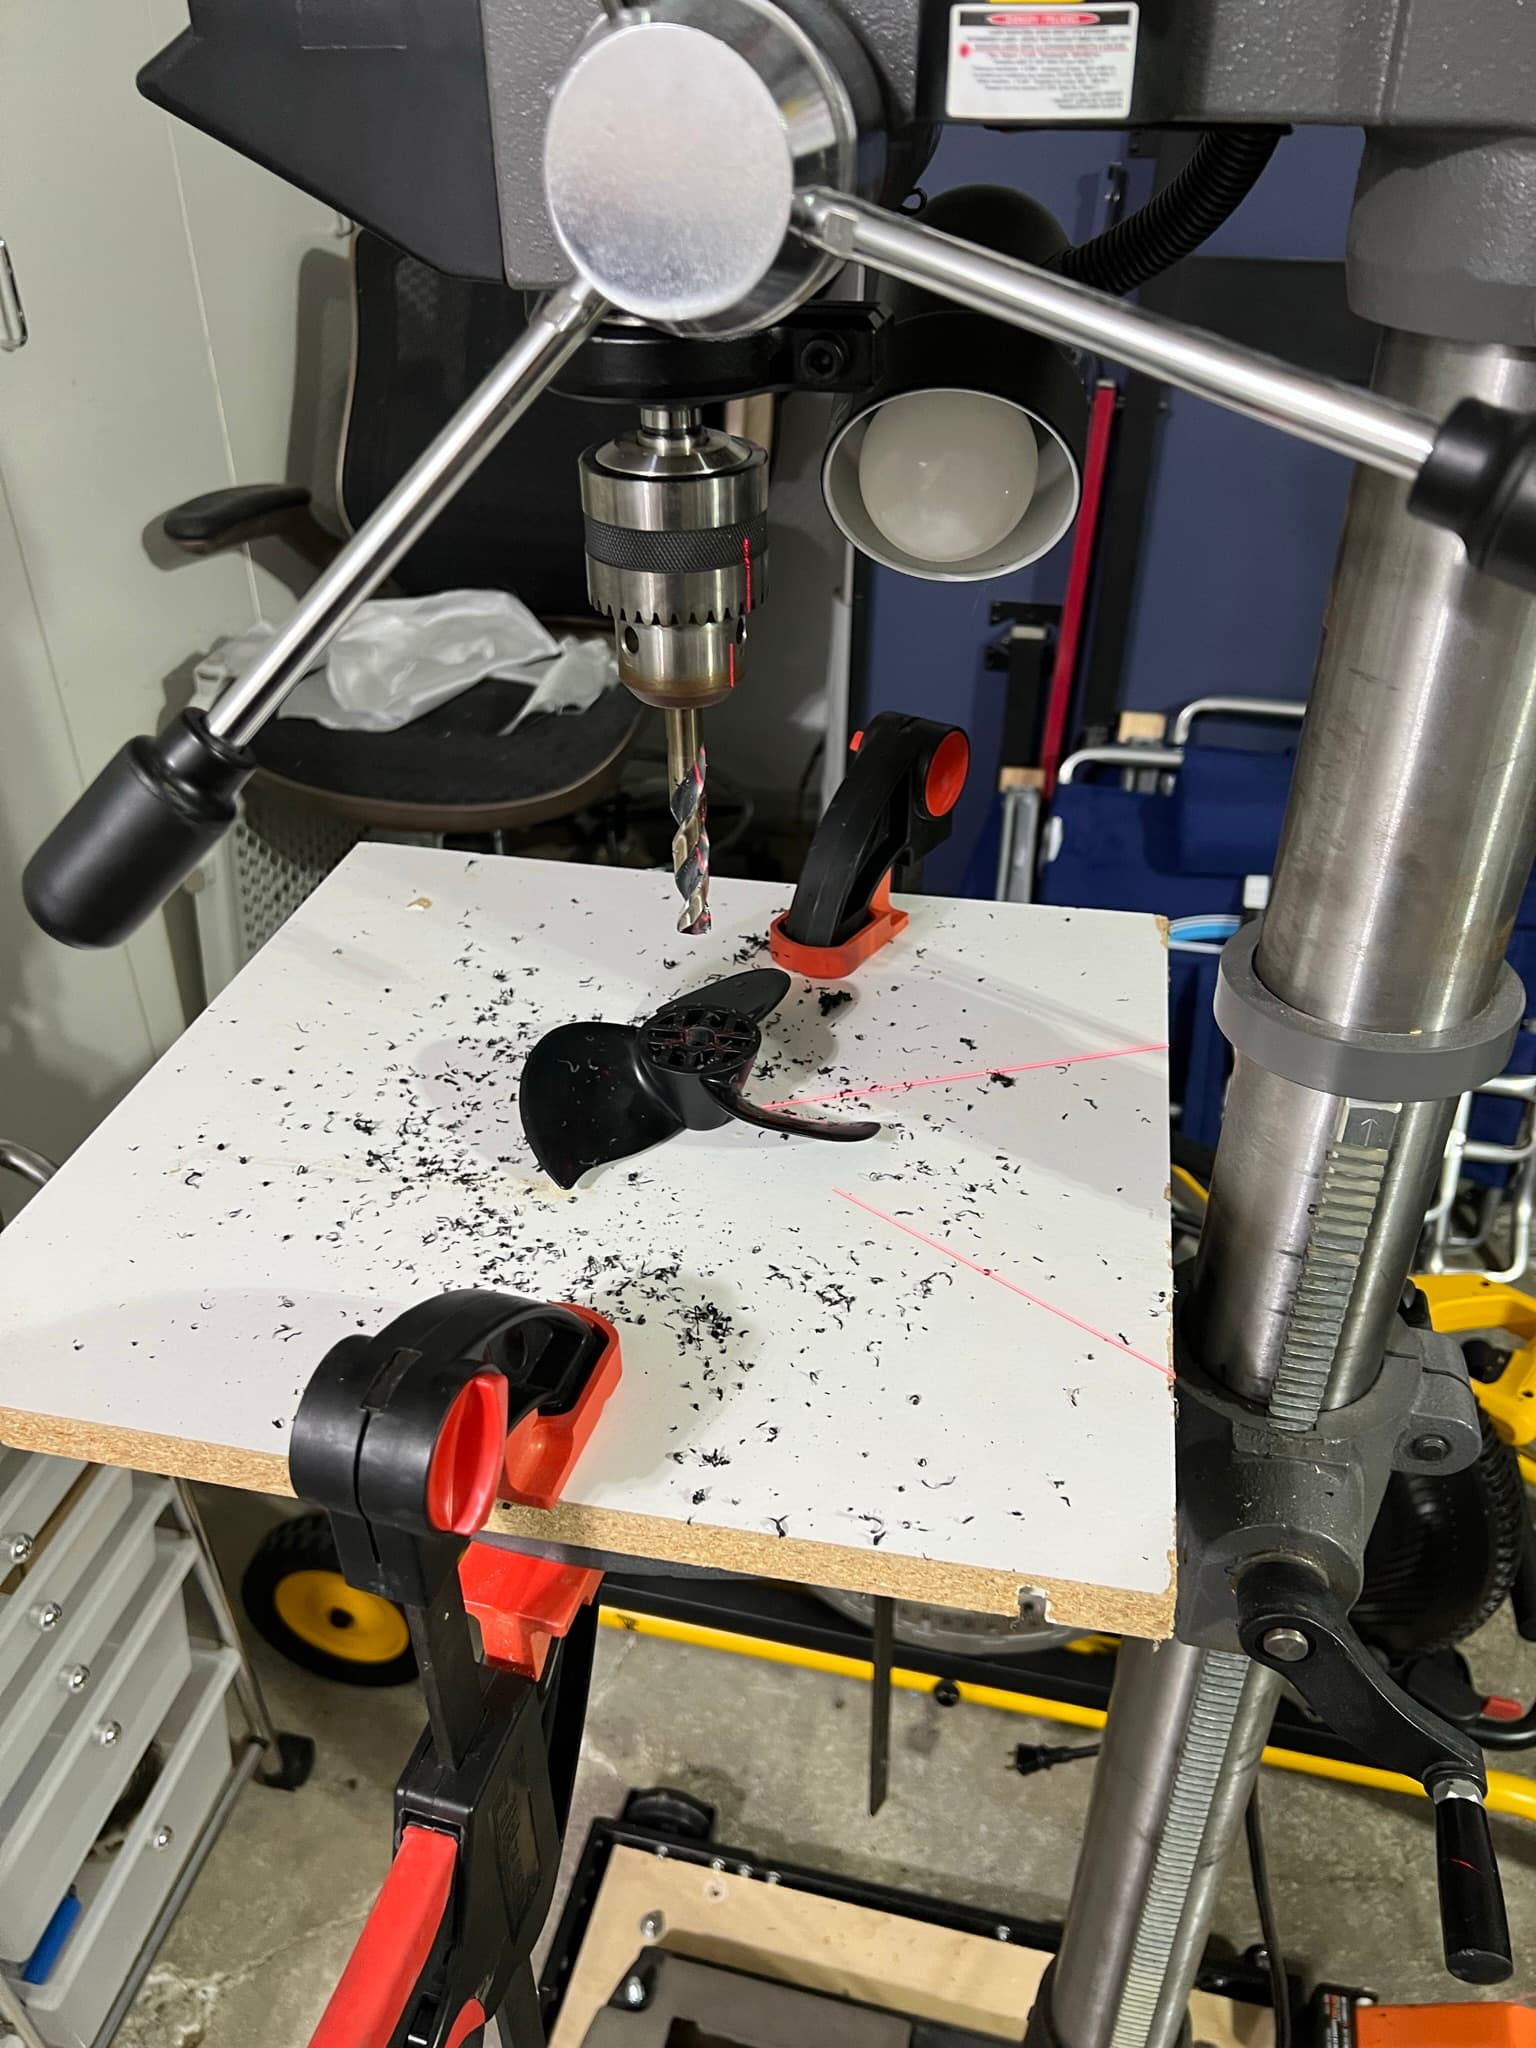
Drilling-out the Flite Prop to accommodate the 65161 shaft.

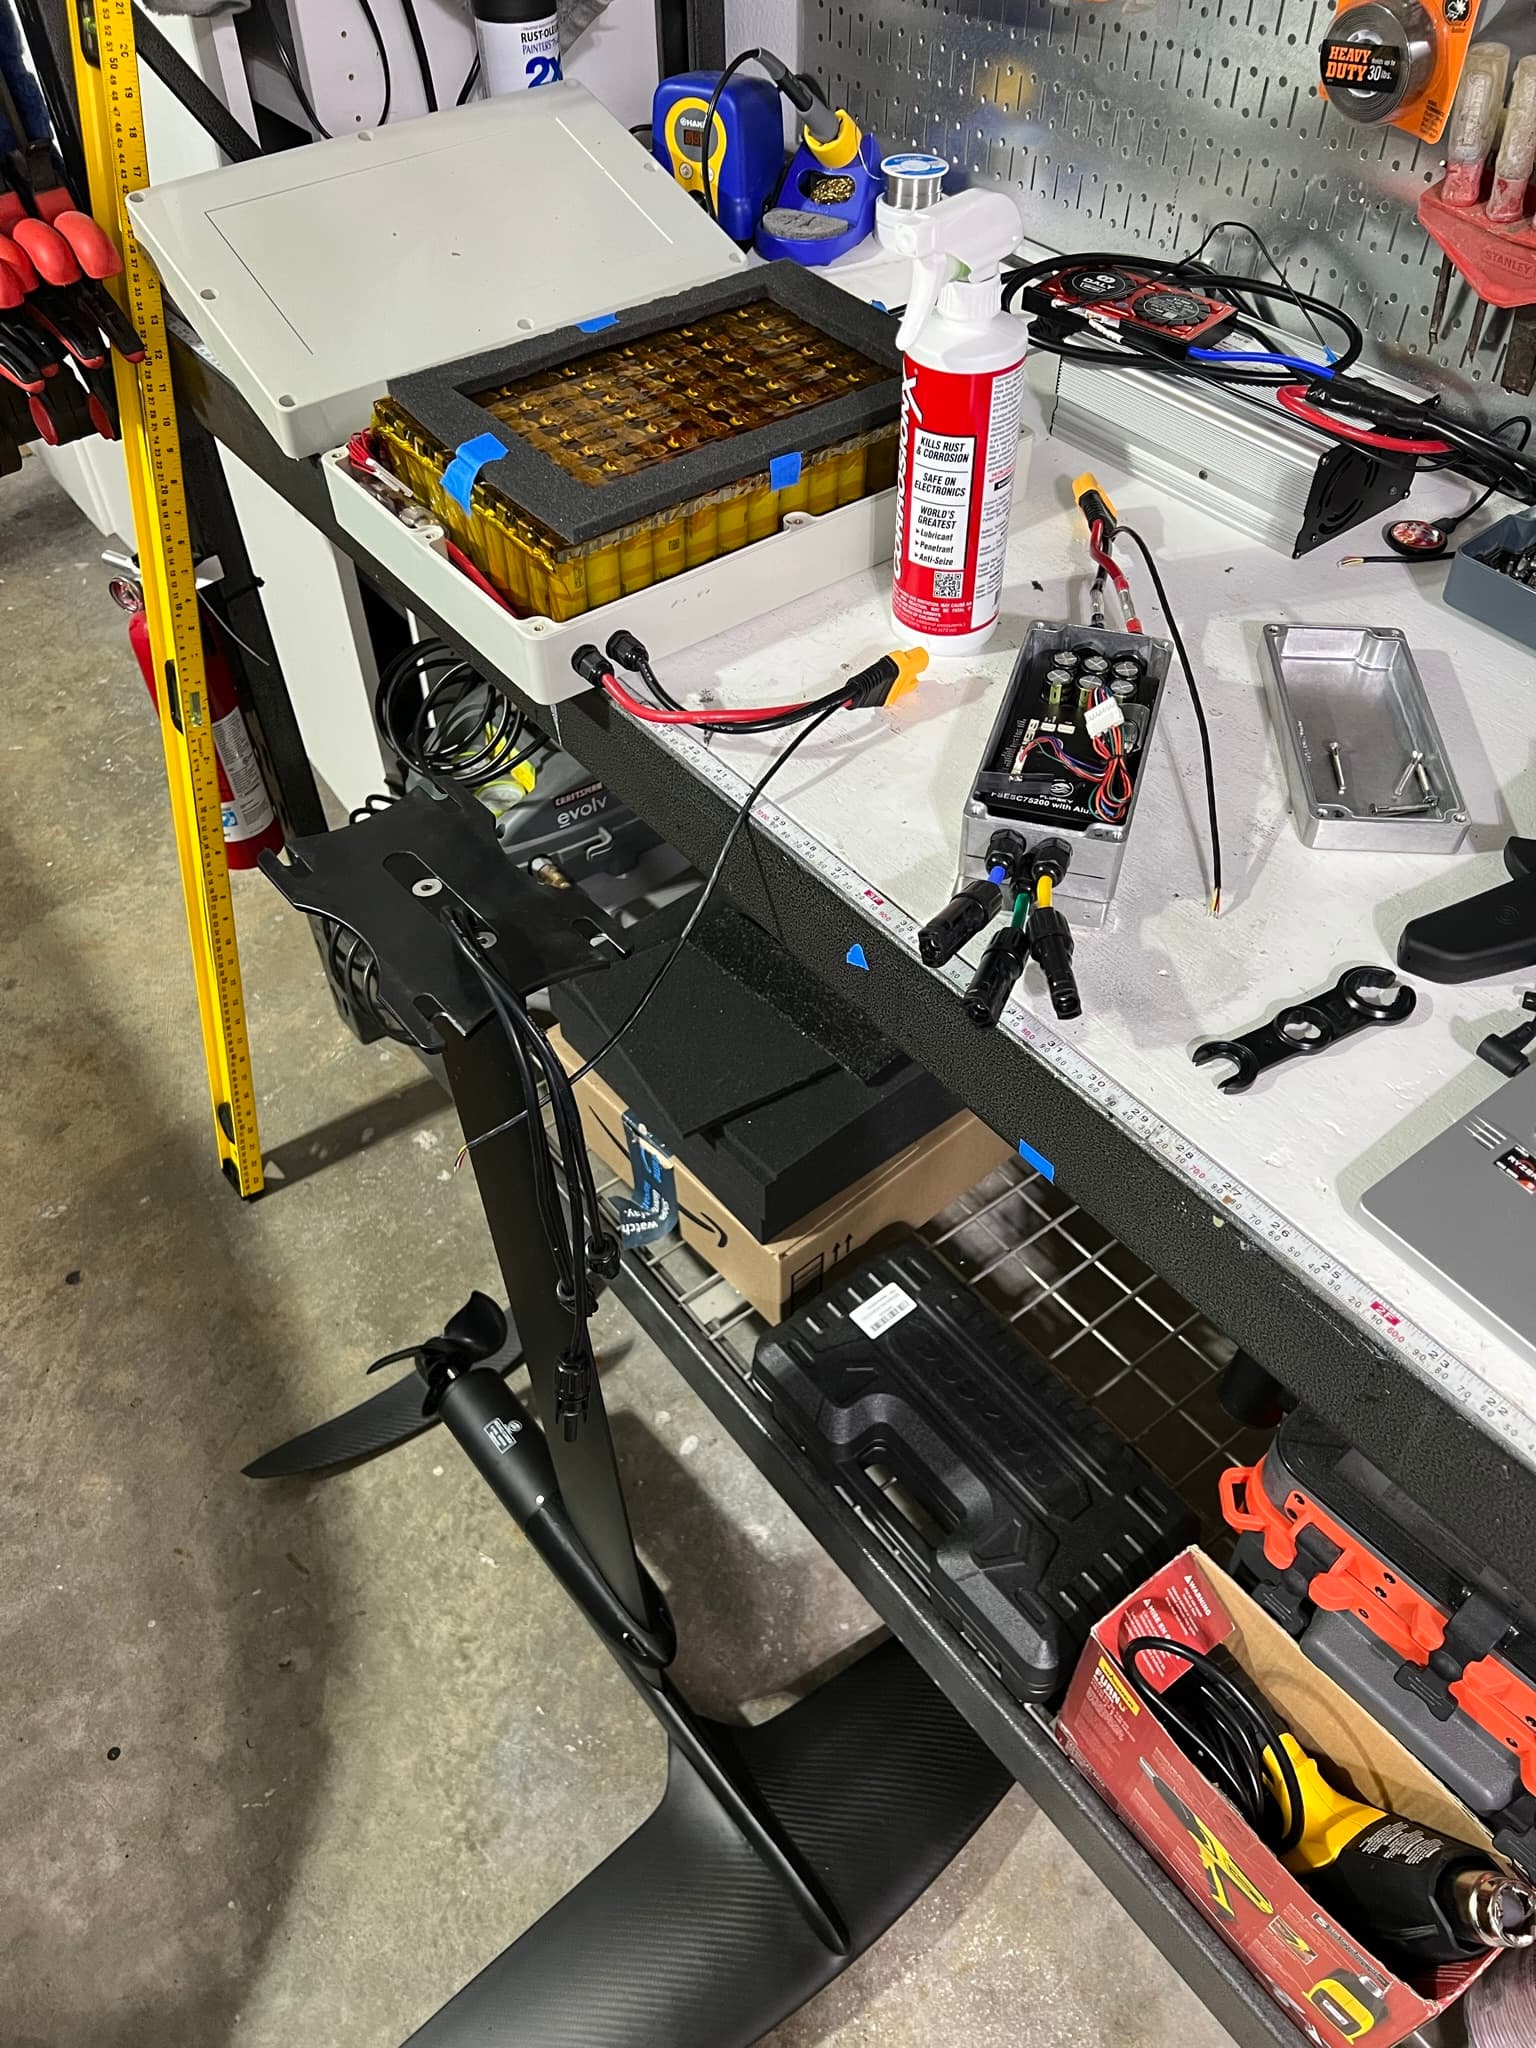
Electronics Finishing

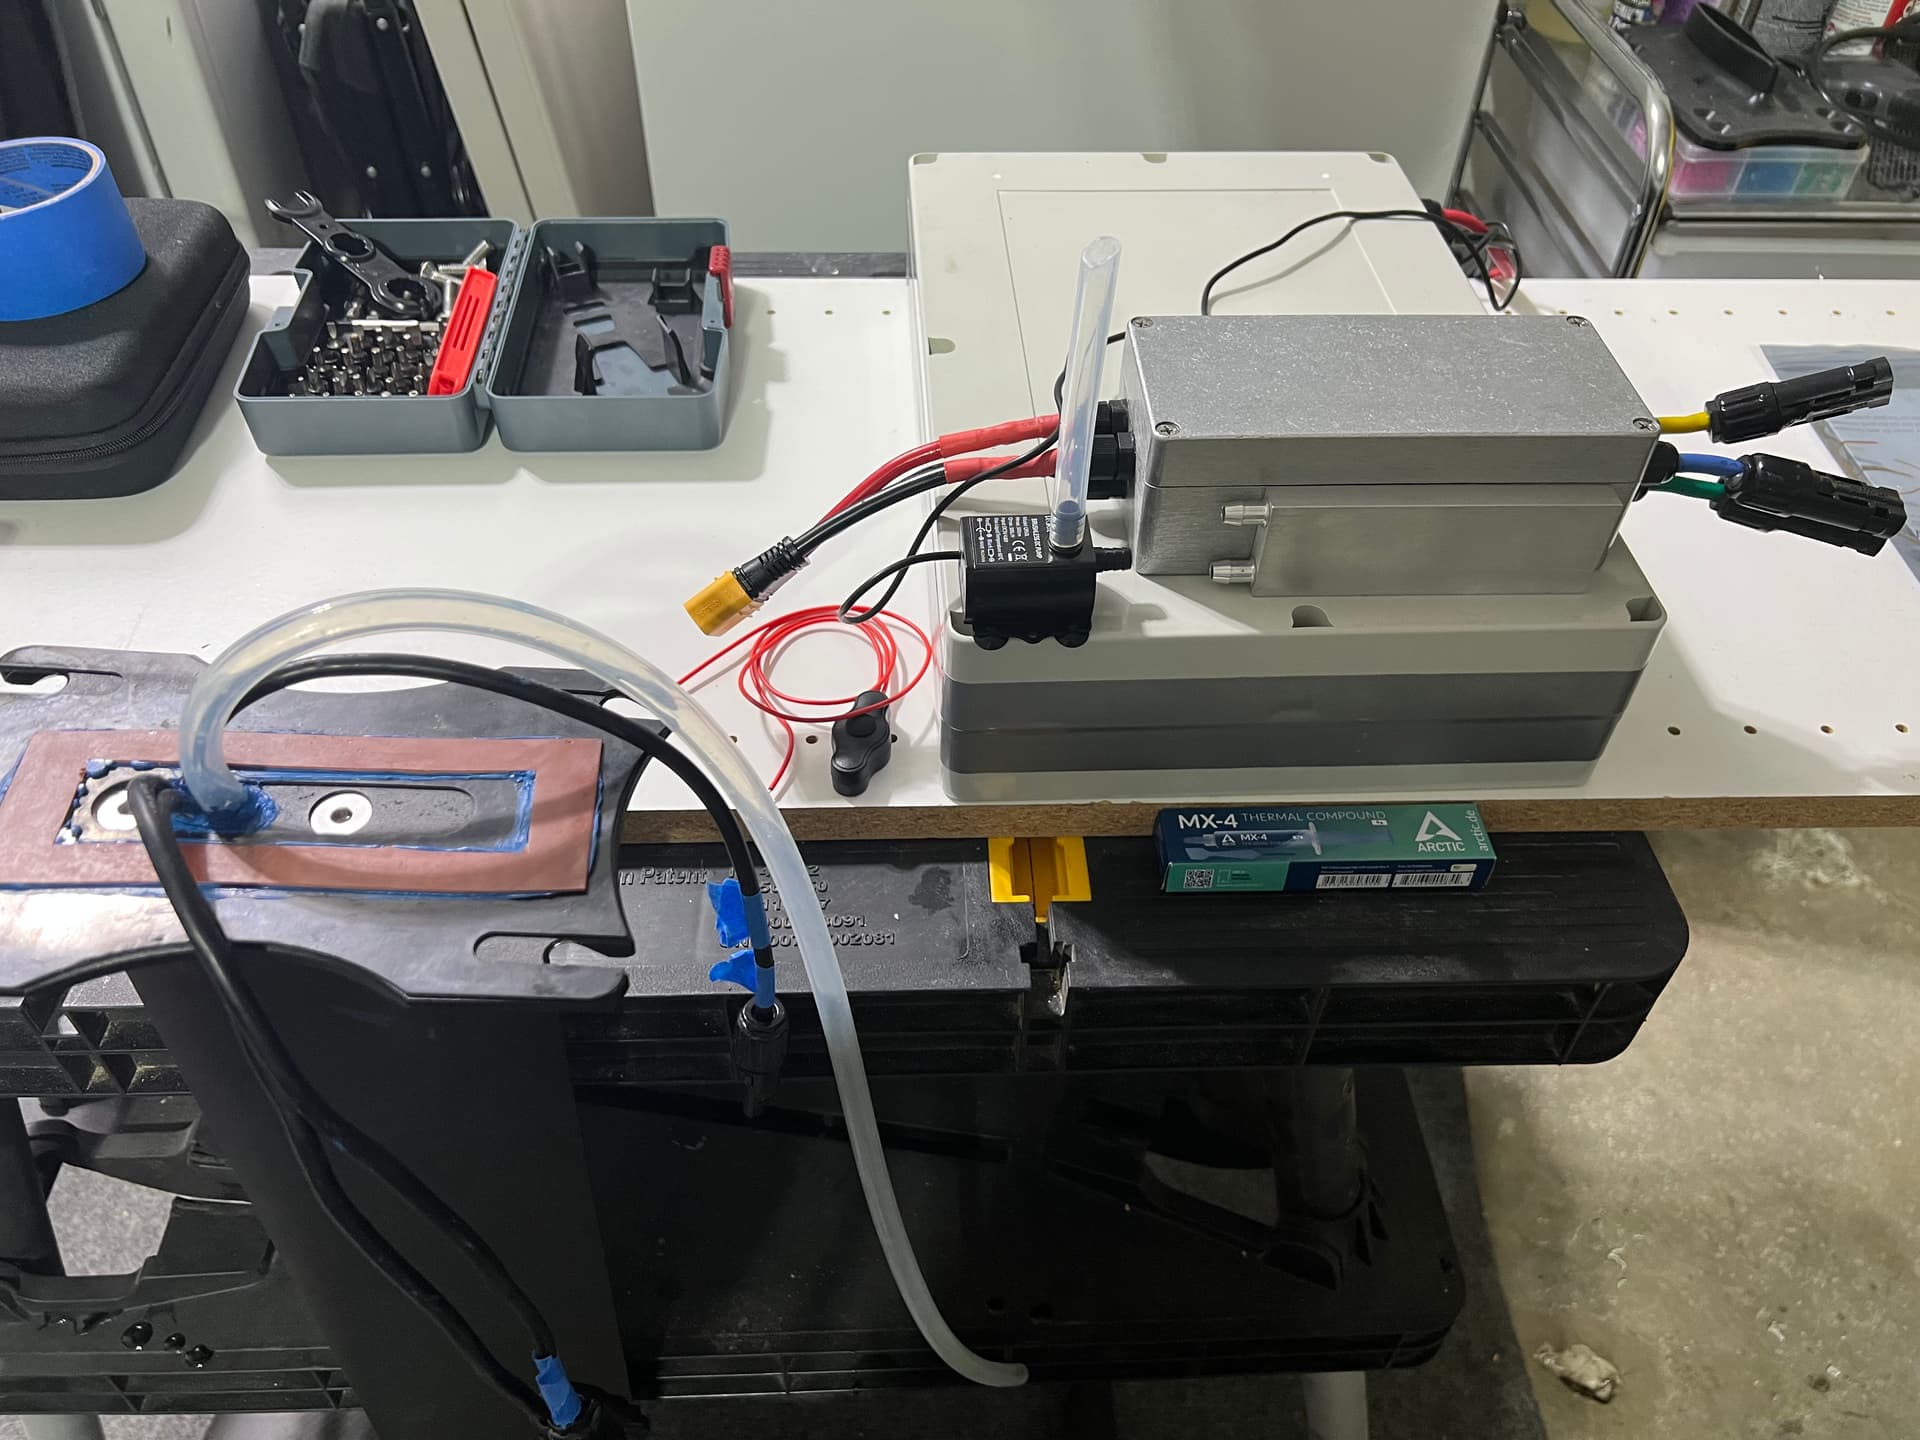
Submerging the ESC in CorrosionX. This was my second attempt at this after the first ESC enclosure leaded profusely. For the second attempt I paid much more attention to creating clean holes in the aluminum and used a bit of gasket maker on each gland to help ensure it’s completely leak free.

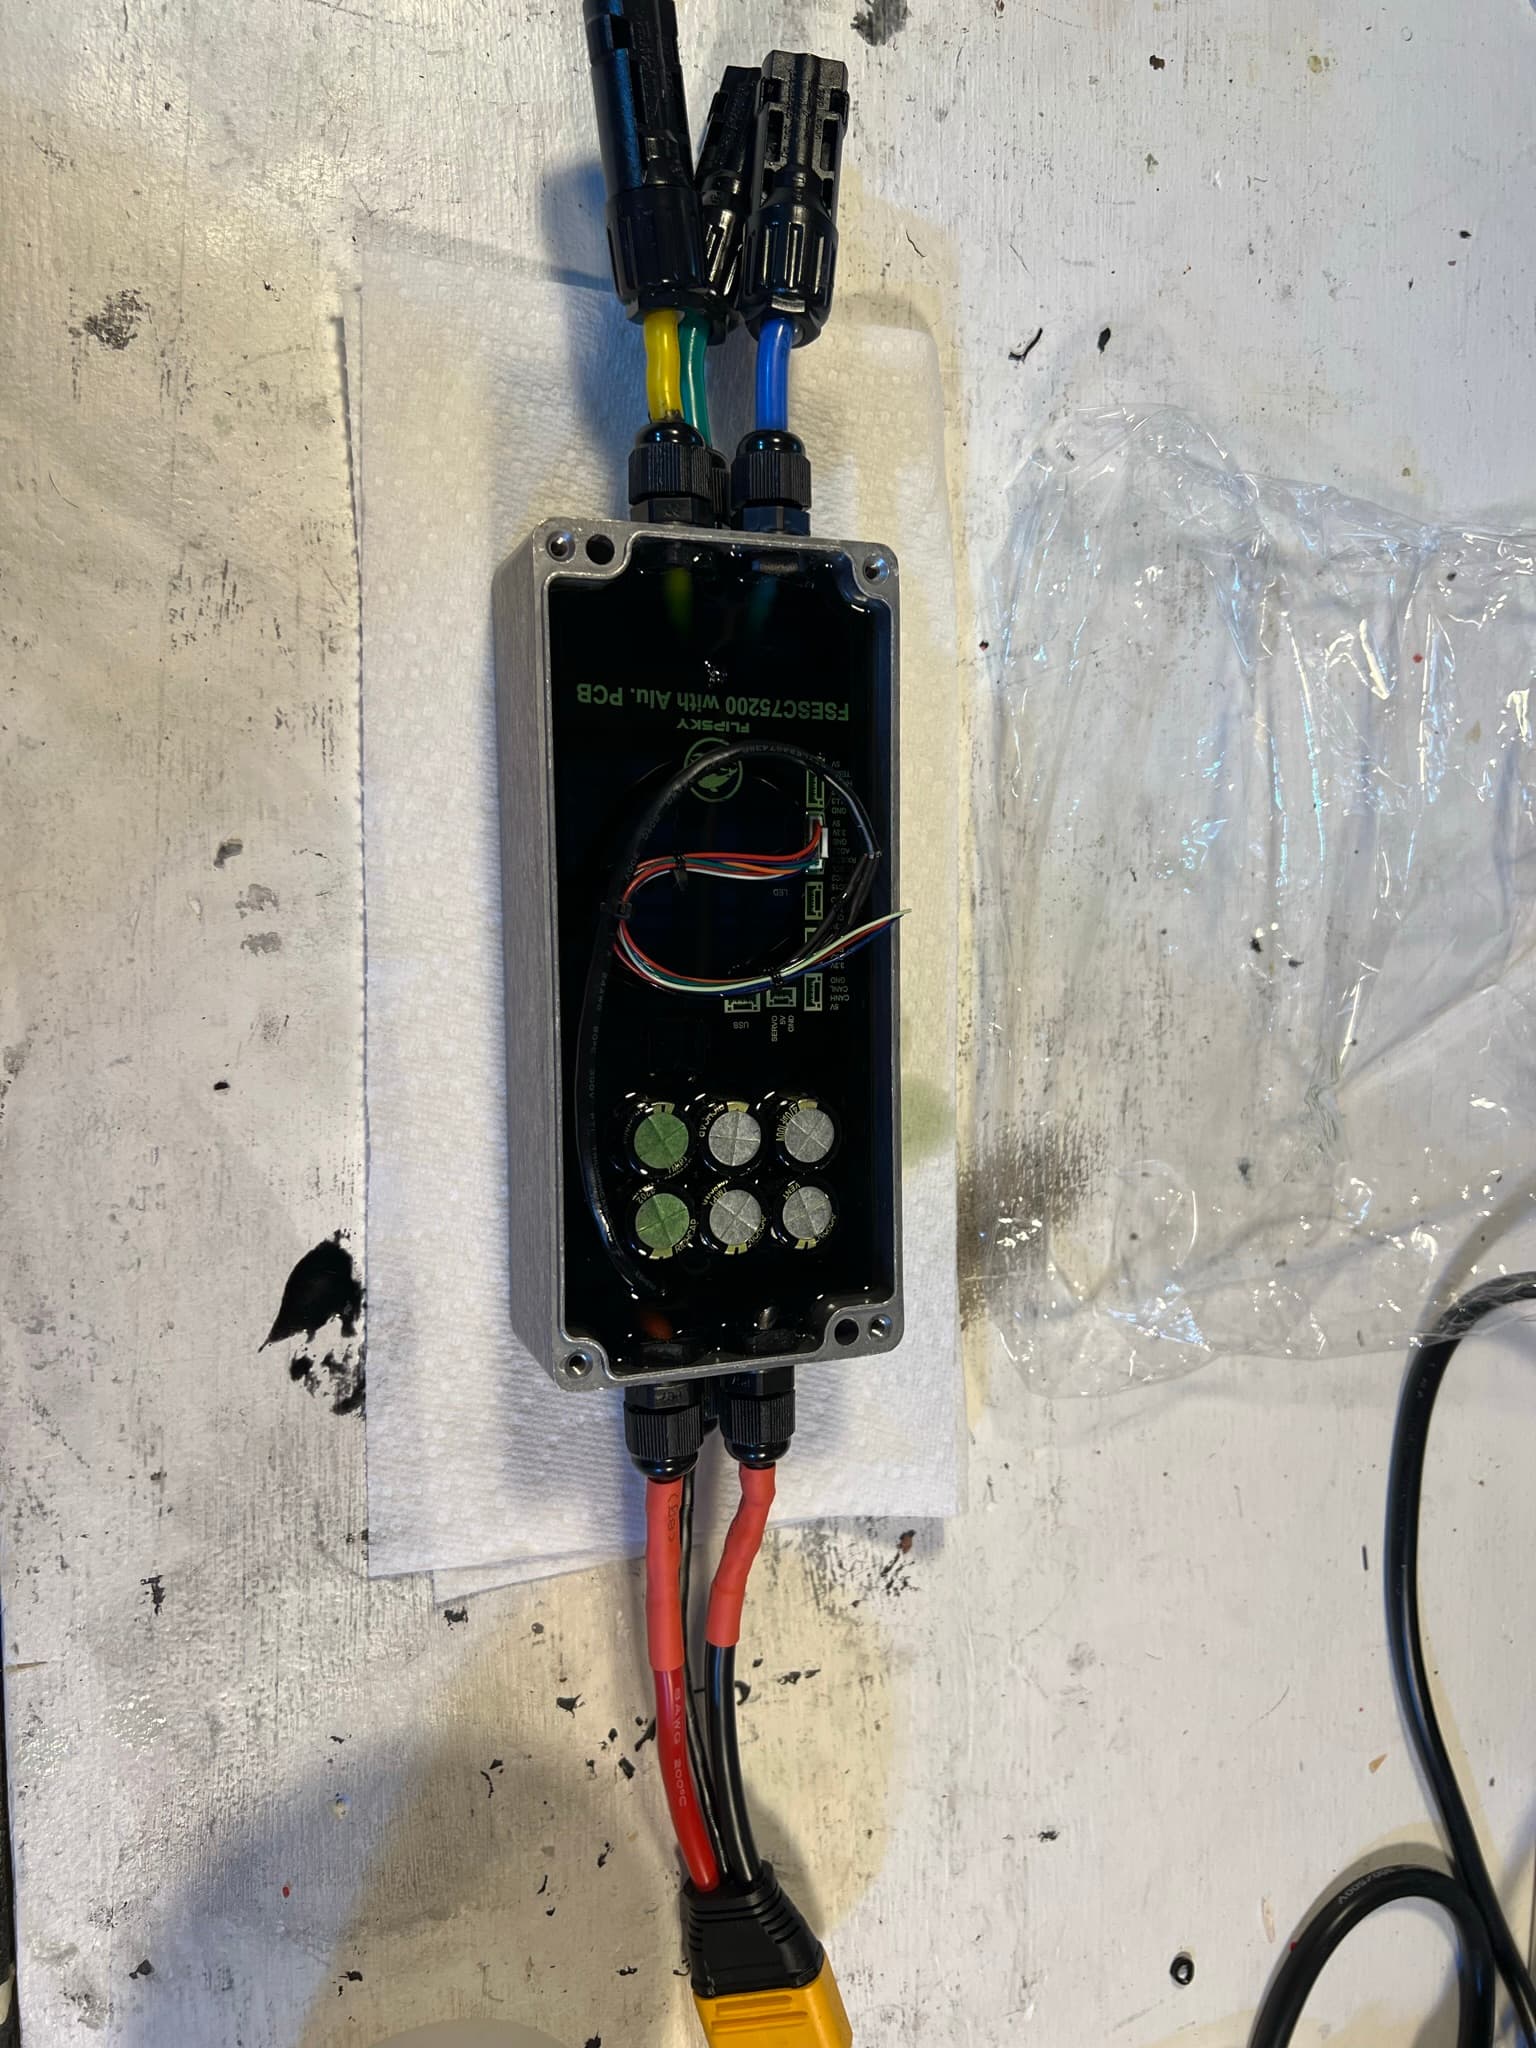
One of the huge advantages of the AS150U pigtails is they conveniently have 4 small gauge wires to also carry a data signal. This happens to be the perfect number to allow the remote antenna to be moved out of the aluminum ESC enclosure and into the ABS battery box to improve signal. You can see some of that wiring tucked in the left side of the picture below.

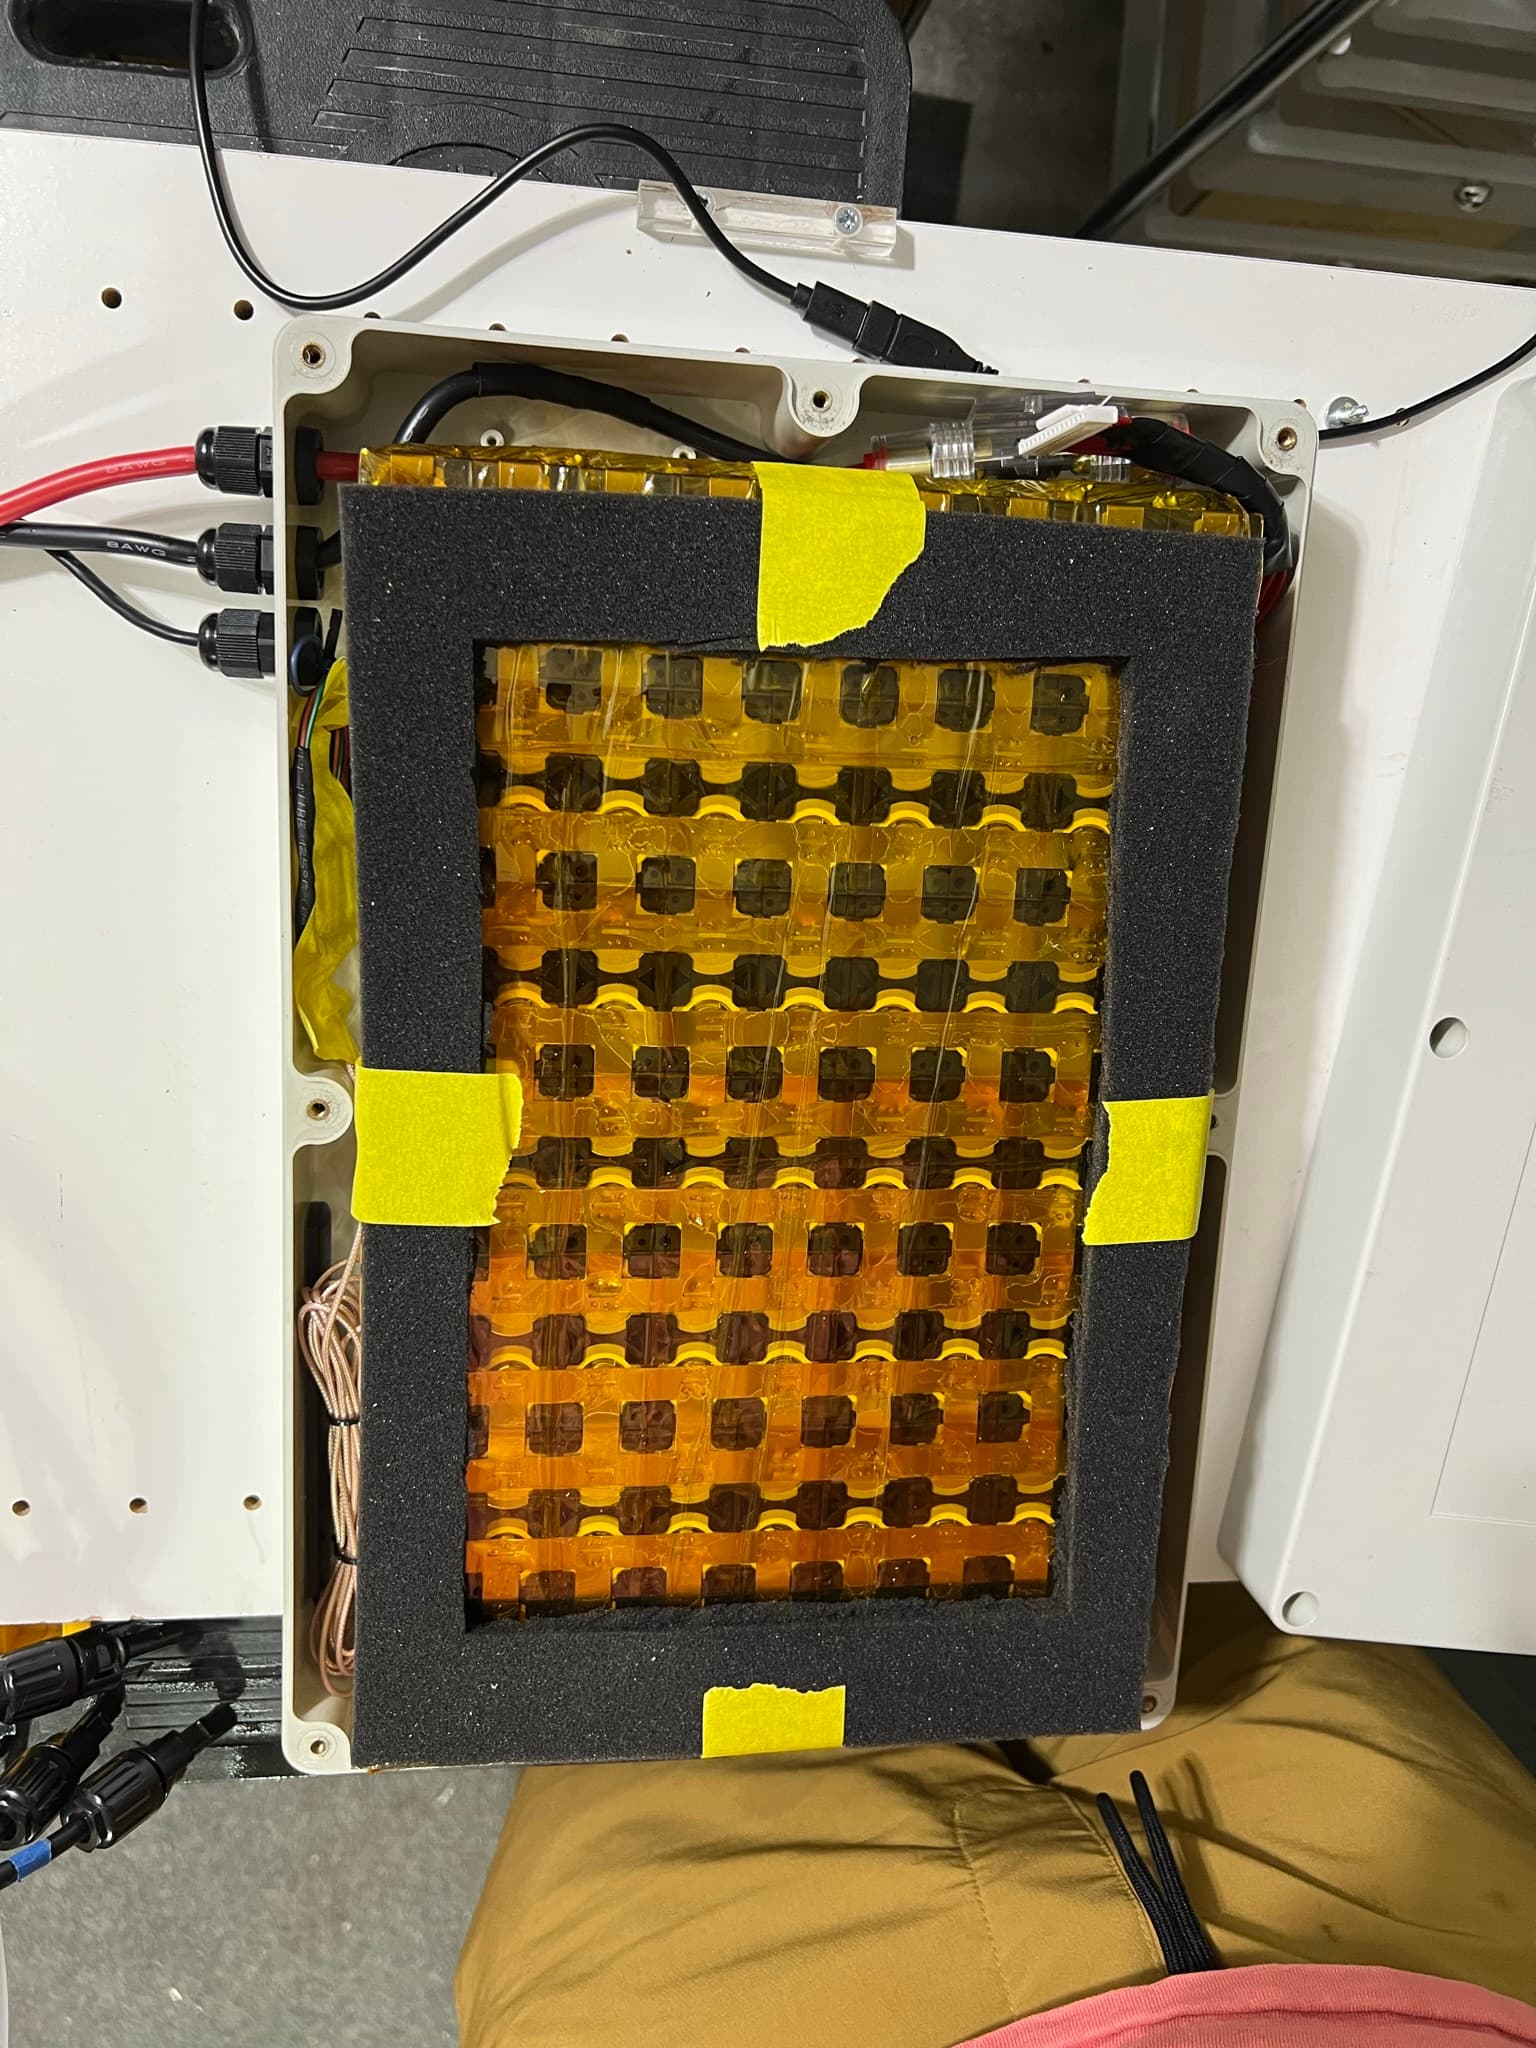
Final fit of the battery and ESC.
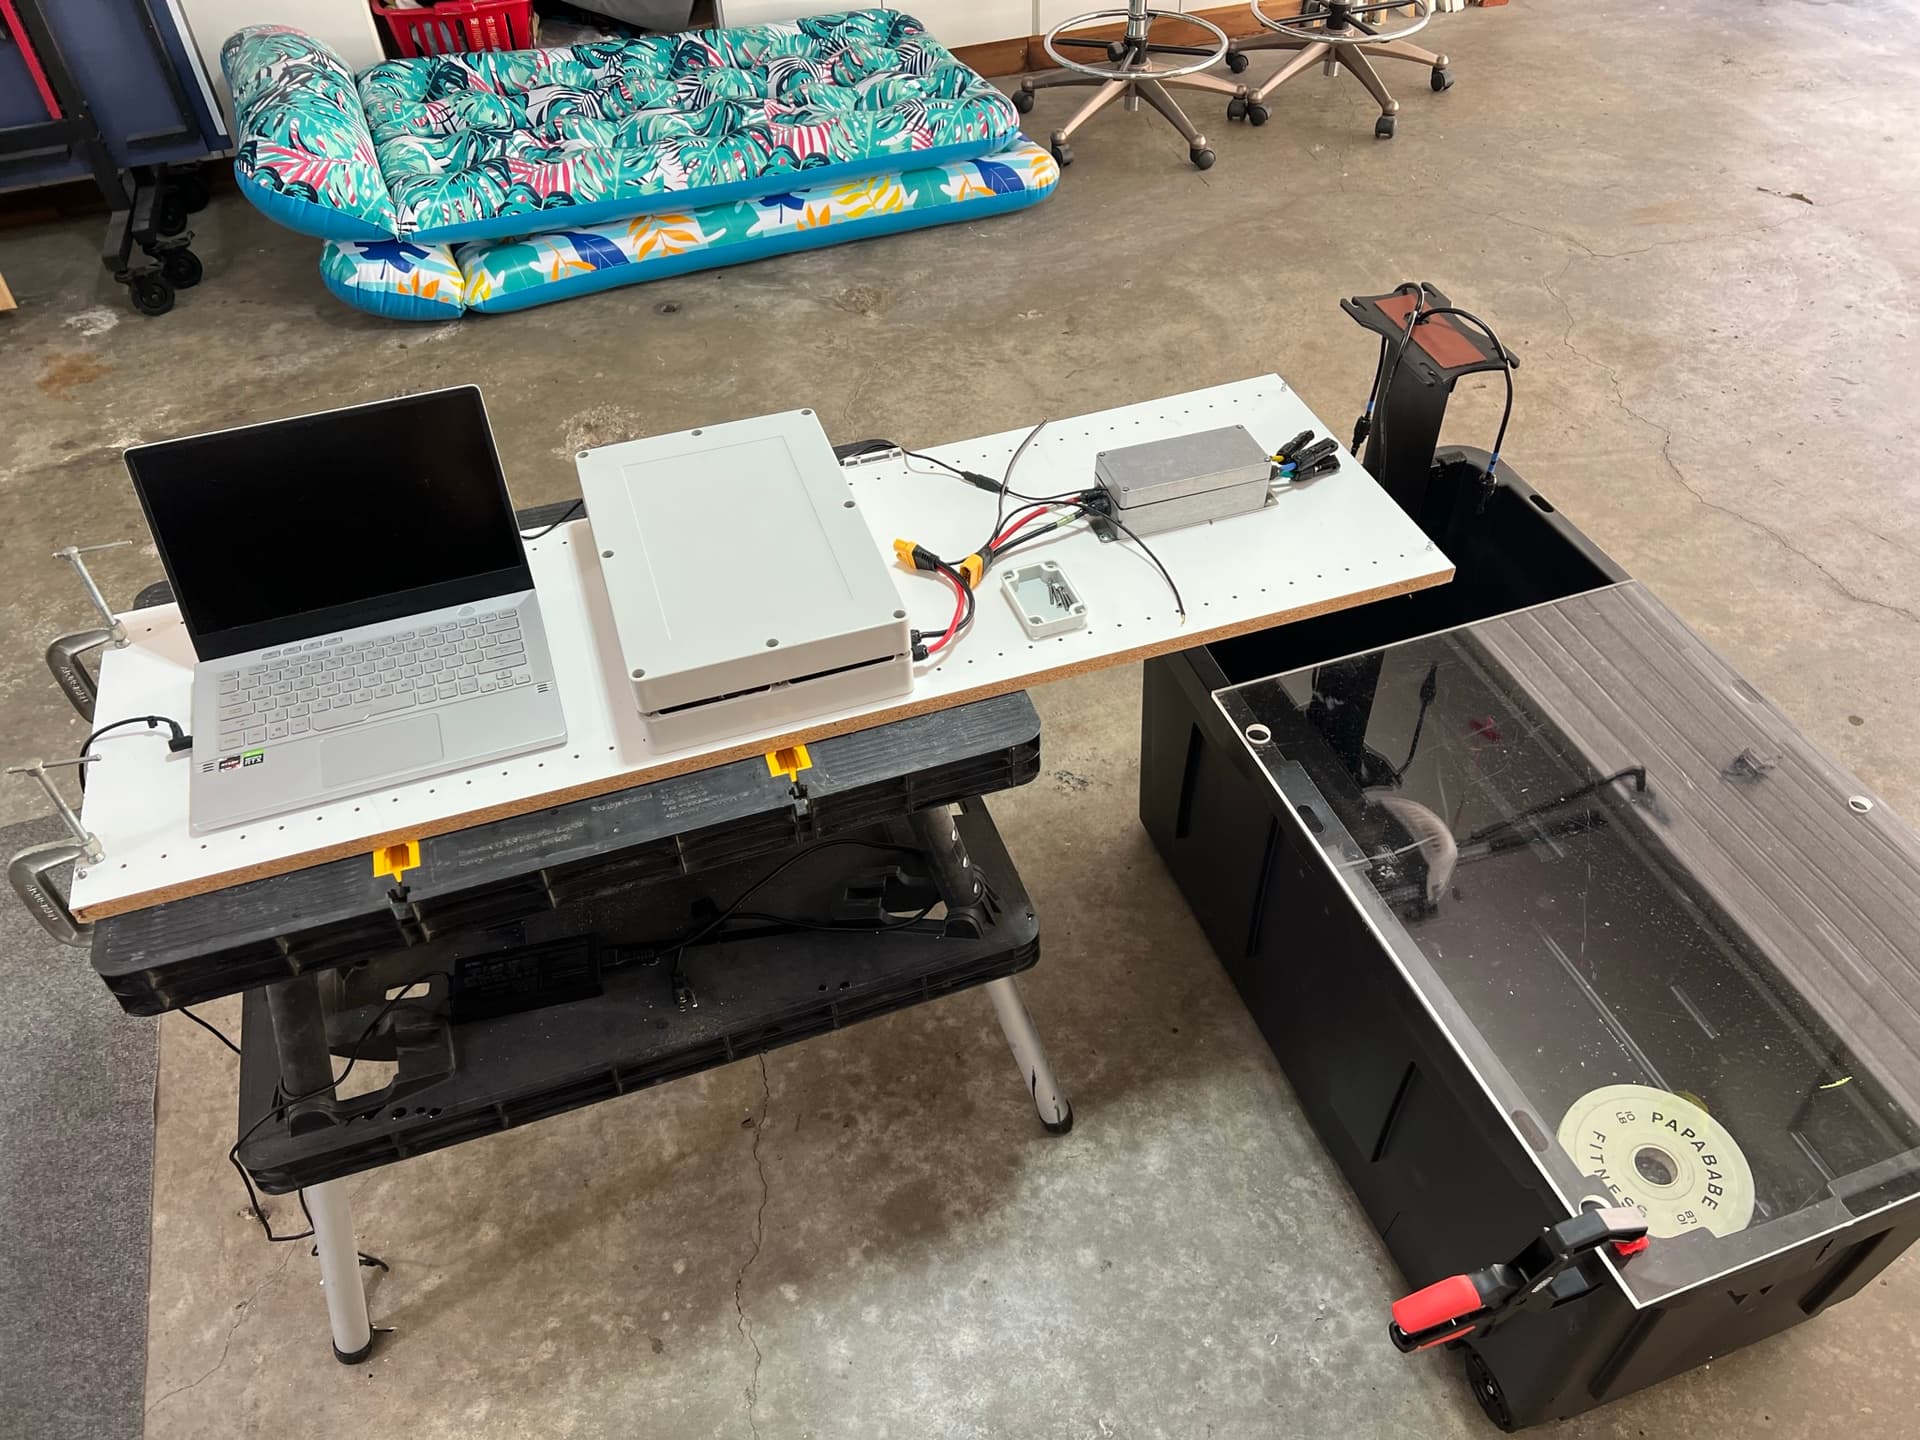
Testing

Vesc initial setup and motor calibration. Huge success, no smoke :slight_smile:

I ended up getting a 75 gallon storage container and building a mount for the mast so I could test the motor in-water without having to go to the marina. This helped me to refine my VESC settings and also evaluate ESC heat generation under load.

and finally where I was earlier today, testing in the marina. It took a while (and several faceplants into the water) to finally figure out that the VESC Absolute Maximum Current setting was causing an immediate drop in current to zero. I was hitting 90-95% max throttle and then all of sudden the motor would stop abruptly.

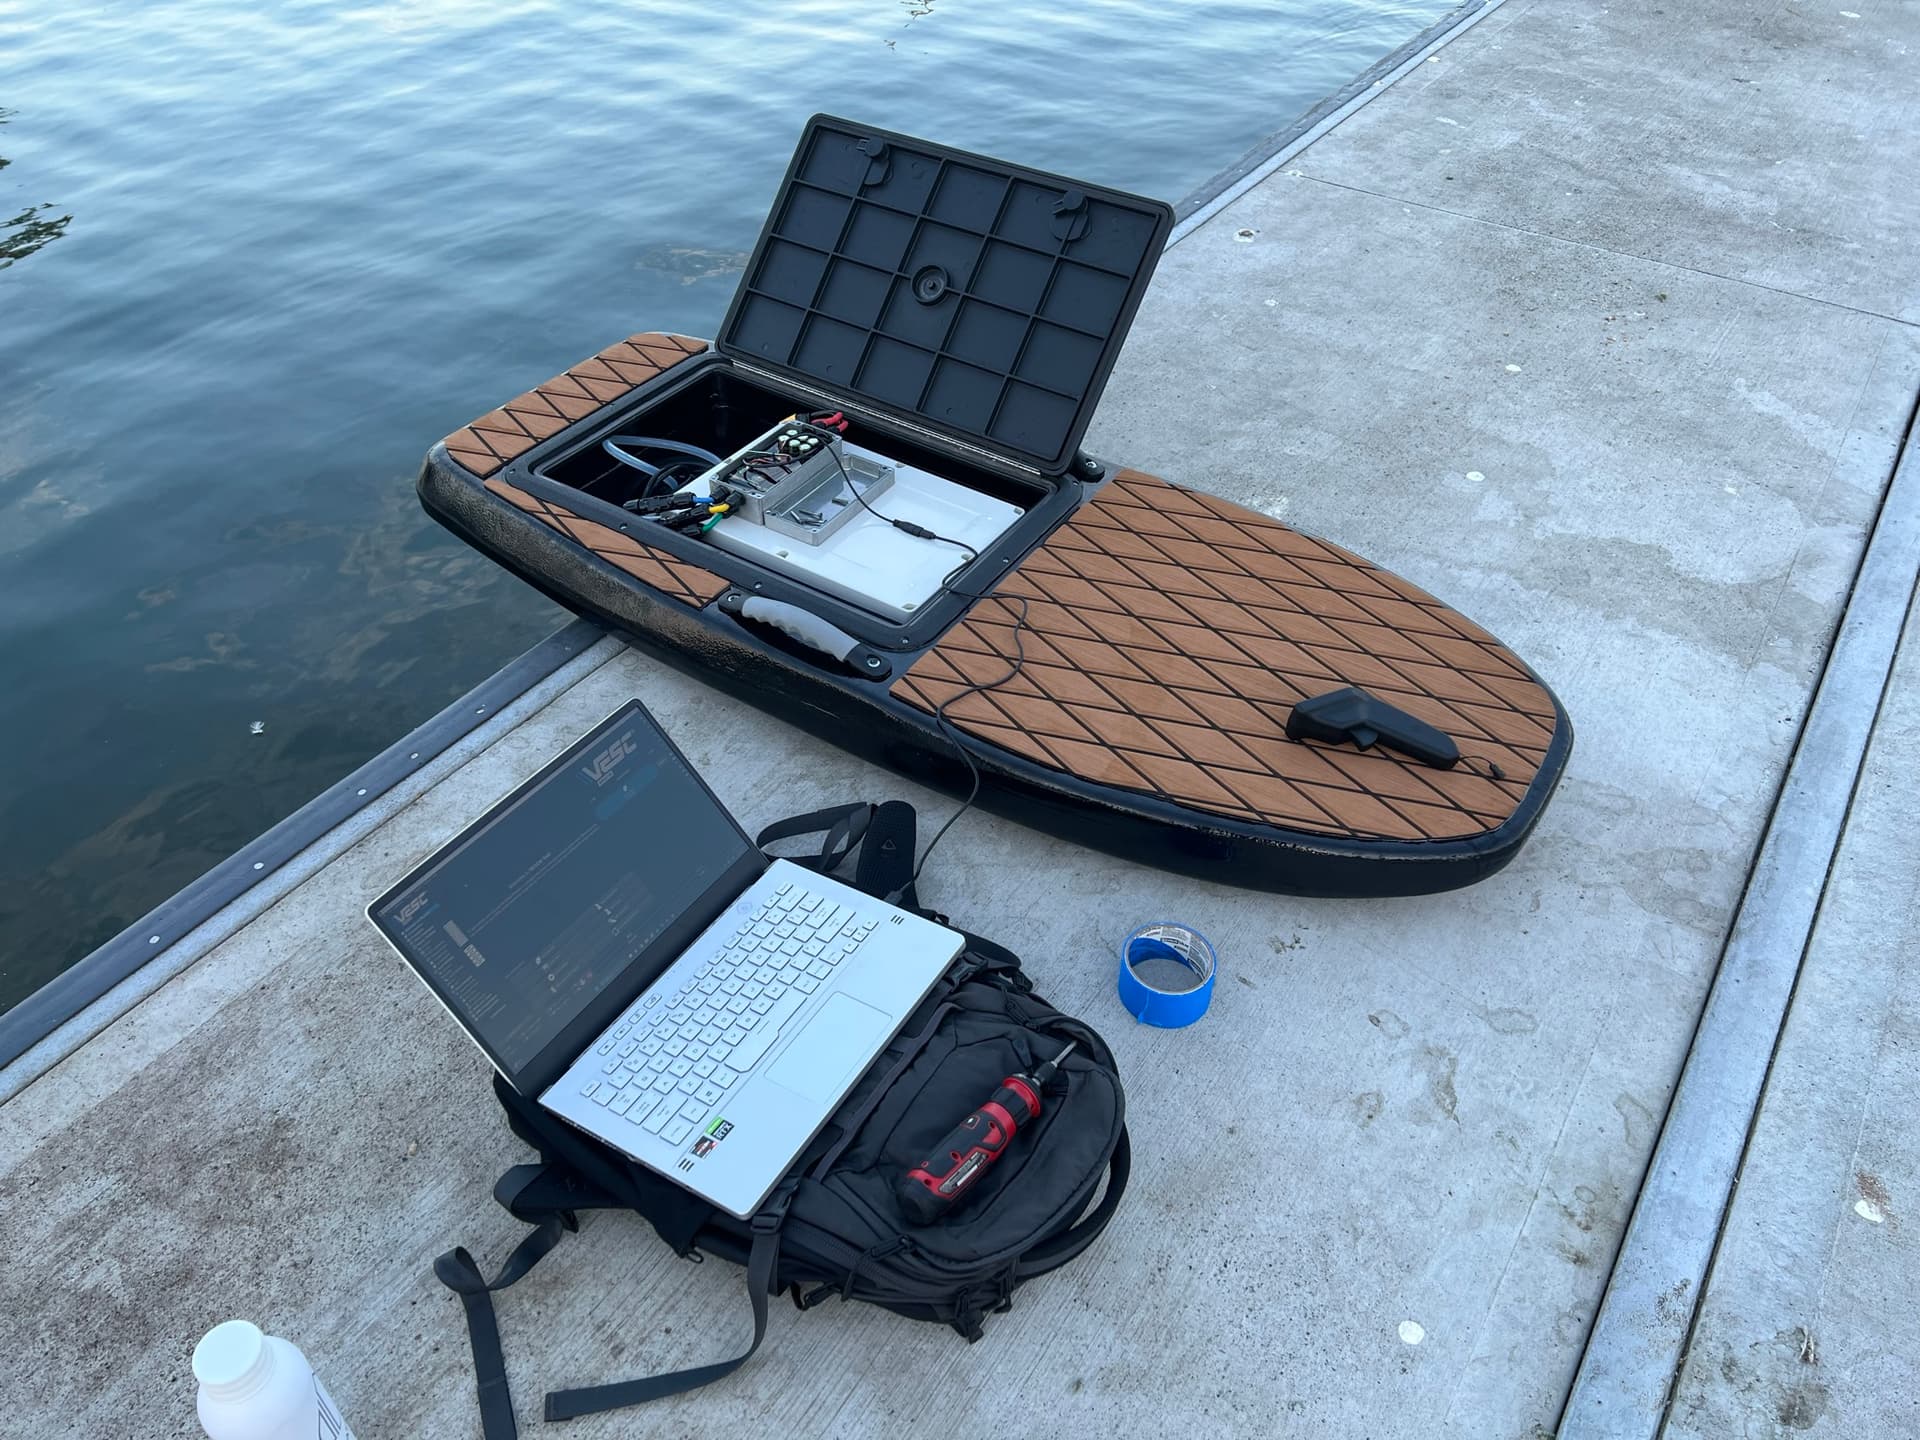
Hopefully a successful test flight coming soon!™

Thanks for stopping by.

13 Likes

Nice build - what’s the cooling plan for the 75200? You might find that it will heat soak after 10 minutes or so of riding.

You could achieve it passively, directly connected to aluminium plate or the mast plate similar to a Fliteboard, or a small water cooler on the side of the enclosure with a tube connected to the nose cone.

I’ve had good success with air cooling, but this also will heat the battery up somewhat being in the same confined space.

Nice project and very good idea !

1 Like

Welcome

Congrats - nice work

A few suggestions that might be useful.

The VX3 has three levels of throttle control. H,M and L that are independent of VESC limits.
I started learning in H and eventually switched to M and have found it much easier. Simply power on, unlock and press the function button briefly to scroll through those three choices - indicator is in upper right corner of remote screen. You have to do this on each power on.

I use a phone based version of VESC tools IOS or Android available, coupled with Flipsky Bluetooth connector on VESC with it configured in UART mode allows more info displayed on VX3 and/or the ability to log data and easily change limits at the waters edge.without your laptop risking its life :wink:

@Strongarm

Nice build - what’s the cooling plan for the 75200? You might find that it will heat soak after 10 minutes or so of riding.

I was hoping that by going with both an aluminum enclosure and submerging the ESC in CorrosionX it would help to passively dissipate heat well enough. Unfortunately I dont have enough room in the electronics compartment for the taller water cooled case option. The red box on the left is the ESC and the gray cylinders are where the Rivnuts are placed.

If that doesn’t work out, I’ve plumbed the mast with a water intake as seen below that is intended to route through a water-cooling block attached to the ESC enclosure with some thermal paste. I still need to figure out where to place the outlet if this ends up being needed.

This is probably where I diverged from common best practice the most. I had a really hard time routing the cables through the mast and getting the clamp assembly to come together. So much so, that I’m not sure I can remove the clamp without damaging the motor cables in order to run an inlet through the nose cone.

Instead, I ran a water cooling line directly down through the mast and our the bottom of the fuselage.

From here I’m thinking there are a few outcomes:

  • The inlet functions as-is and provides enough intake pressure for water to flow through the block or;
  • I need to add a small scoop to the inlet to channel water into the intake or;
  • I need to use the small 5v pump in the pic to pull water through the intake.

@SoEFoil

Nice project and very good idea !

Thanks! The other positive of these cables is that like the other XT60 and XT90 versions, they claim to be anti-spark. I’ve seen so many instances of failed flipsky anti-spark switches that this seemed like a worthwhile alternative to test.

@Foilguy

The VX3 has three levels of throttle control. H,M and L that are independent of VESC limits.

Thanks for the tip! I was scratching my head on this as I’ve seen it mentioned in other places but was only able to find the numerical throttle response 0-4 option which has more to do with throttle delay if I’m understanding it correctly.

After being thrown from the board a handful of times due to throttle sensitivity, I put in a -15% exponential throttle curve through VESC which helped some but is still not great. I’ll give your suggestion a try.

without your laptop risking its life :wink:

Bluetooth module now on order :slight_smile:

1 Like

If the rivnuts are in the way you could use countersunk bolts from inside. I put an AL plate on the inside for passive vesc cooling and also added strength in that sensitive area in front of the mast. That is a weak point for all boards. You need to prepare for when you bonk into the bottom. I hit our rock bottom hard threw me off and scratched my wings but the Al plate distributed the load without an issue.

1 Like

If memory serves you have to flip wires in the connection of the Bluetooth module. I think its in Flipsky blog - I’ll see if so can find it and post link
This is the link

Testing Update: Water Ingress Issues

I feel like I’ve finally banished all of the gremlins from the motor control system but I continue to run into issues with the battery compartment filling with water. This one has been a real head scratcher for me…

I gone back and rechecked the seals on the hatch, and am fairly confident that they are holding well, I’ve tried repeatedly submerging the board at a standstill, in some cases entirely and see no bubbles or accumulation of water. There is not obvious leak at the mast plate when sitting still in water however after a few minutes of motoring around the entire battery compartment is filled with water. I’ve also been clamping off the cooling tube and am confident that’s not the culprit either.

I’d kill for a gopro or something similar that I could put inside the compartment to see where the water is coming from… I guess the silver lining is I’ve thoroughly proven that the ESC and Battery enclosures are water tight…

My best guess at this point is that when under power that the forces acting on the mast plate joint are causing a gap to form that is not otherwise present when not moving.

I’ve added a couple of gaskets to the mast plate from both foam rubber (the larger) and neoprene (the smaller) to see if this fixes the problem… fingers crossed.

Those square hatches are hard to get waterproof, most people had troubles with them. Better build your own lid from a sandwiched cfk, much stiffer than the plastic hatch lid.

1 Like

Remove the battery and speed controller, fill cavity with water, and look for the leak. Flex the mast and see if that where the issue is.

1 Like

This sounds like a valid theory based on the non moving testing you did. Might also be hatch lid.

I would suggest you reconsider your fix. The idea is to not have any flex at the board/mastplate connection as it can cause a major failure or at the very least profoundly effect the performance of the ride. Think of standing on a tall rigid structure vs a tall wobbly one. :grinning:

Thats one thing I dont think most people post in their builds is how they seal the mast to the board. It would be easy if you never plan on removing for travel but what are most people doing to seal?

A thin silicone (or EVA) layer between mast plate and board bottom is already used by a couple of brands to preserve the board bottom and would do the waterproof barrier job nicely.

You should be able to find it cheaper than 12€usd as here with GONG

Now having done more testing, it definitely wasn’t the mast connection that’s leaking. There is a bit of flex in the bottom of the board but the mast plate is staying firmly seated to the fiberglass.

…which means it’s 100% the hatch. There must be more deformation when in motion than I am able to replicate when not in to motion. I’ve tried 5 different types of weather stripping to get it to seal and even the best result still leads to rapid water ingress.

The plan now is to remove the hatch lid and replace with something more rigid. I’m hoping I can retain the hatch frame as pulling that out will be more involved.

@sat_be I’m looking into replacing with a carbon sandwich as you suggested but finding that it’s a bit more involved than fiberglass. Can you “wet layup” a carbon fiber sandwich panel without vacuum or is the vacuum bagging method the way to go?

Any other materials worth considering for the hatch? I was looking at Polycarbonate but seem like it could be pretty heavy.

You can wet layup carbon same as glass. Making a hatch not leak seems to be difficult. Mine is small with 6 m6 to hold down,no leaks. My next build will be with hinge and latch custom built from carbon and hard foam.

Yes, you can build it without vacuum. Put a thin acrylic glass board on a stable thick wooden board. Treat it with release agent, next a layer of fiberglass, then aprox 600-800g carbon (2-n Layers), 5-8mm foam core, carbon, 1xfiberglass, acrylic board, wood, board + weight on top.
Release agent is important, otherwise the acrylic will be part of the sandwich. For easier release, cover the edges with tape expoy does not stick to.

Any details on the motor mount? Planning on using the same mast/foil setup