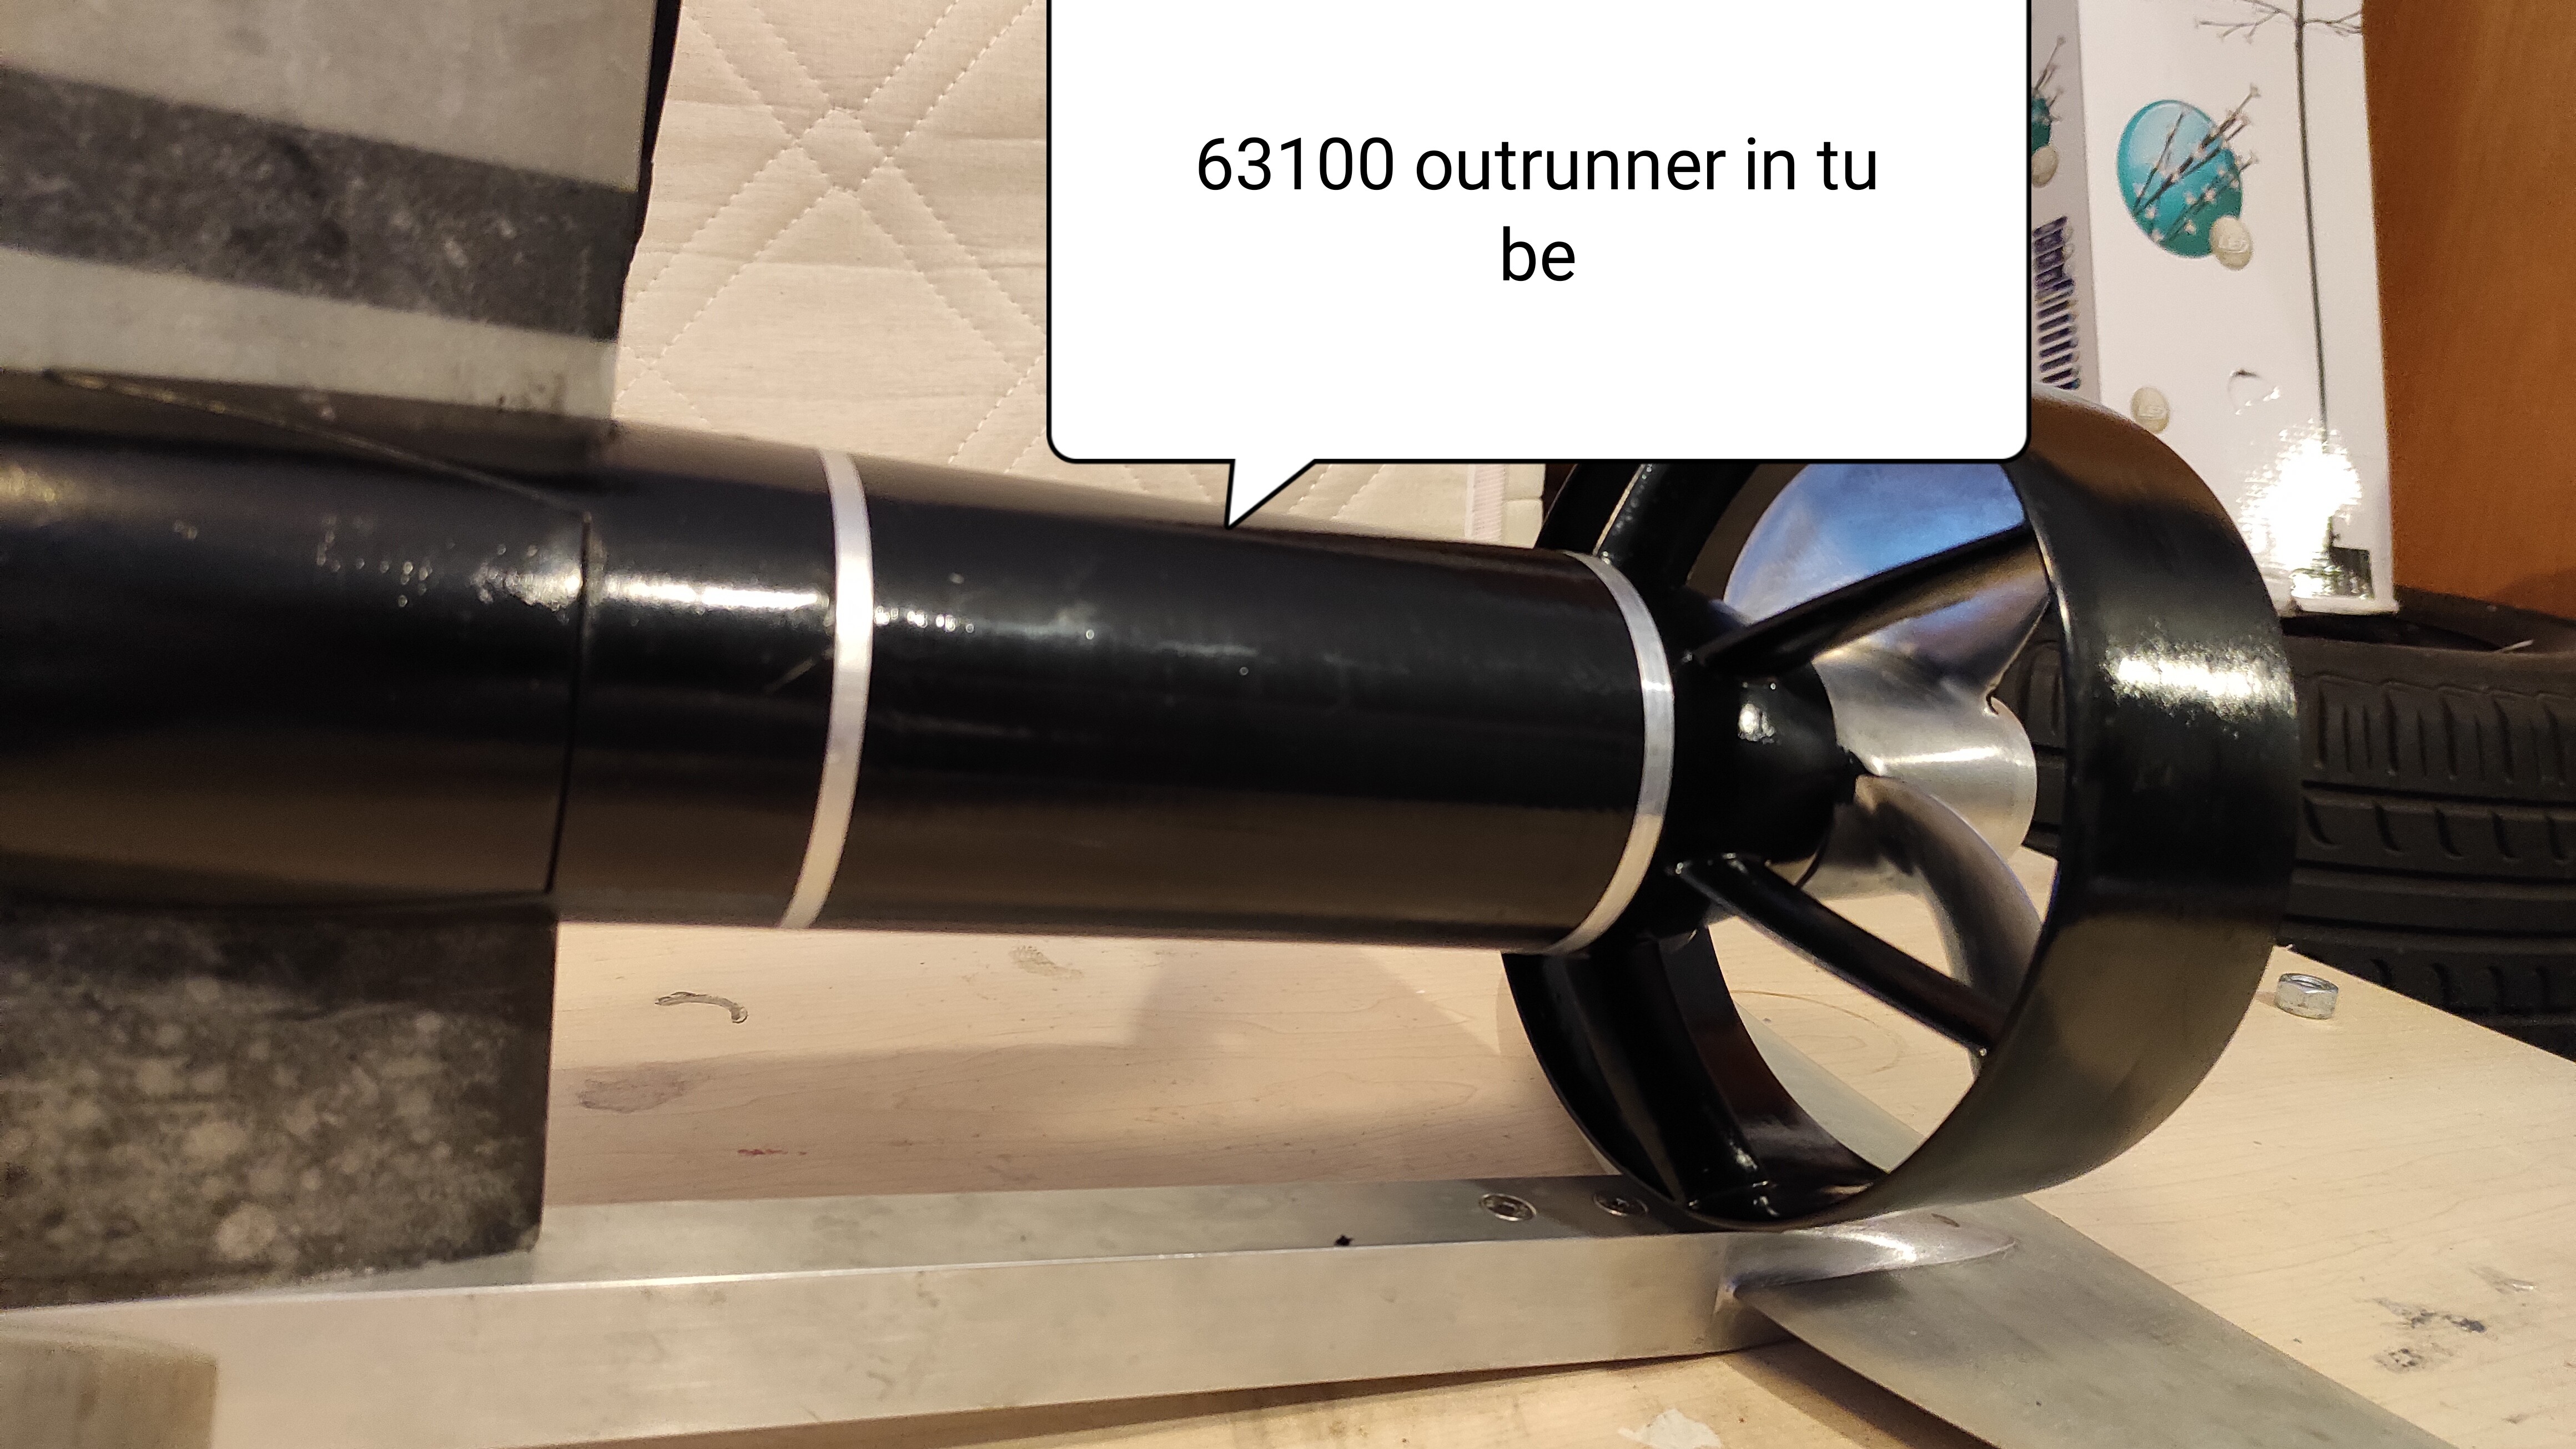
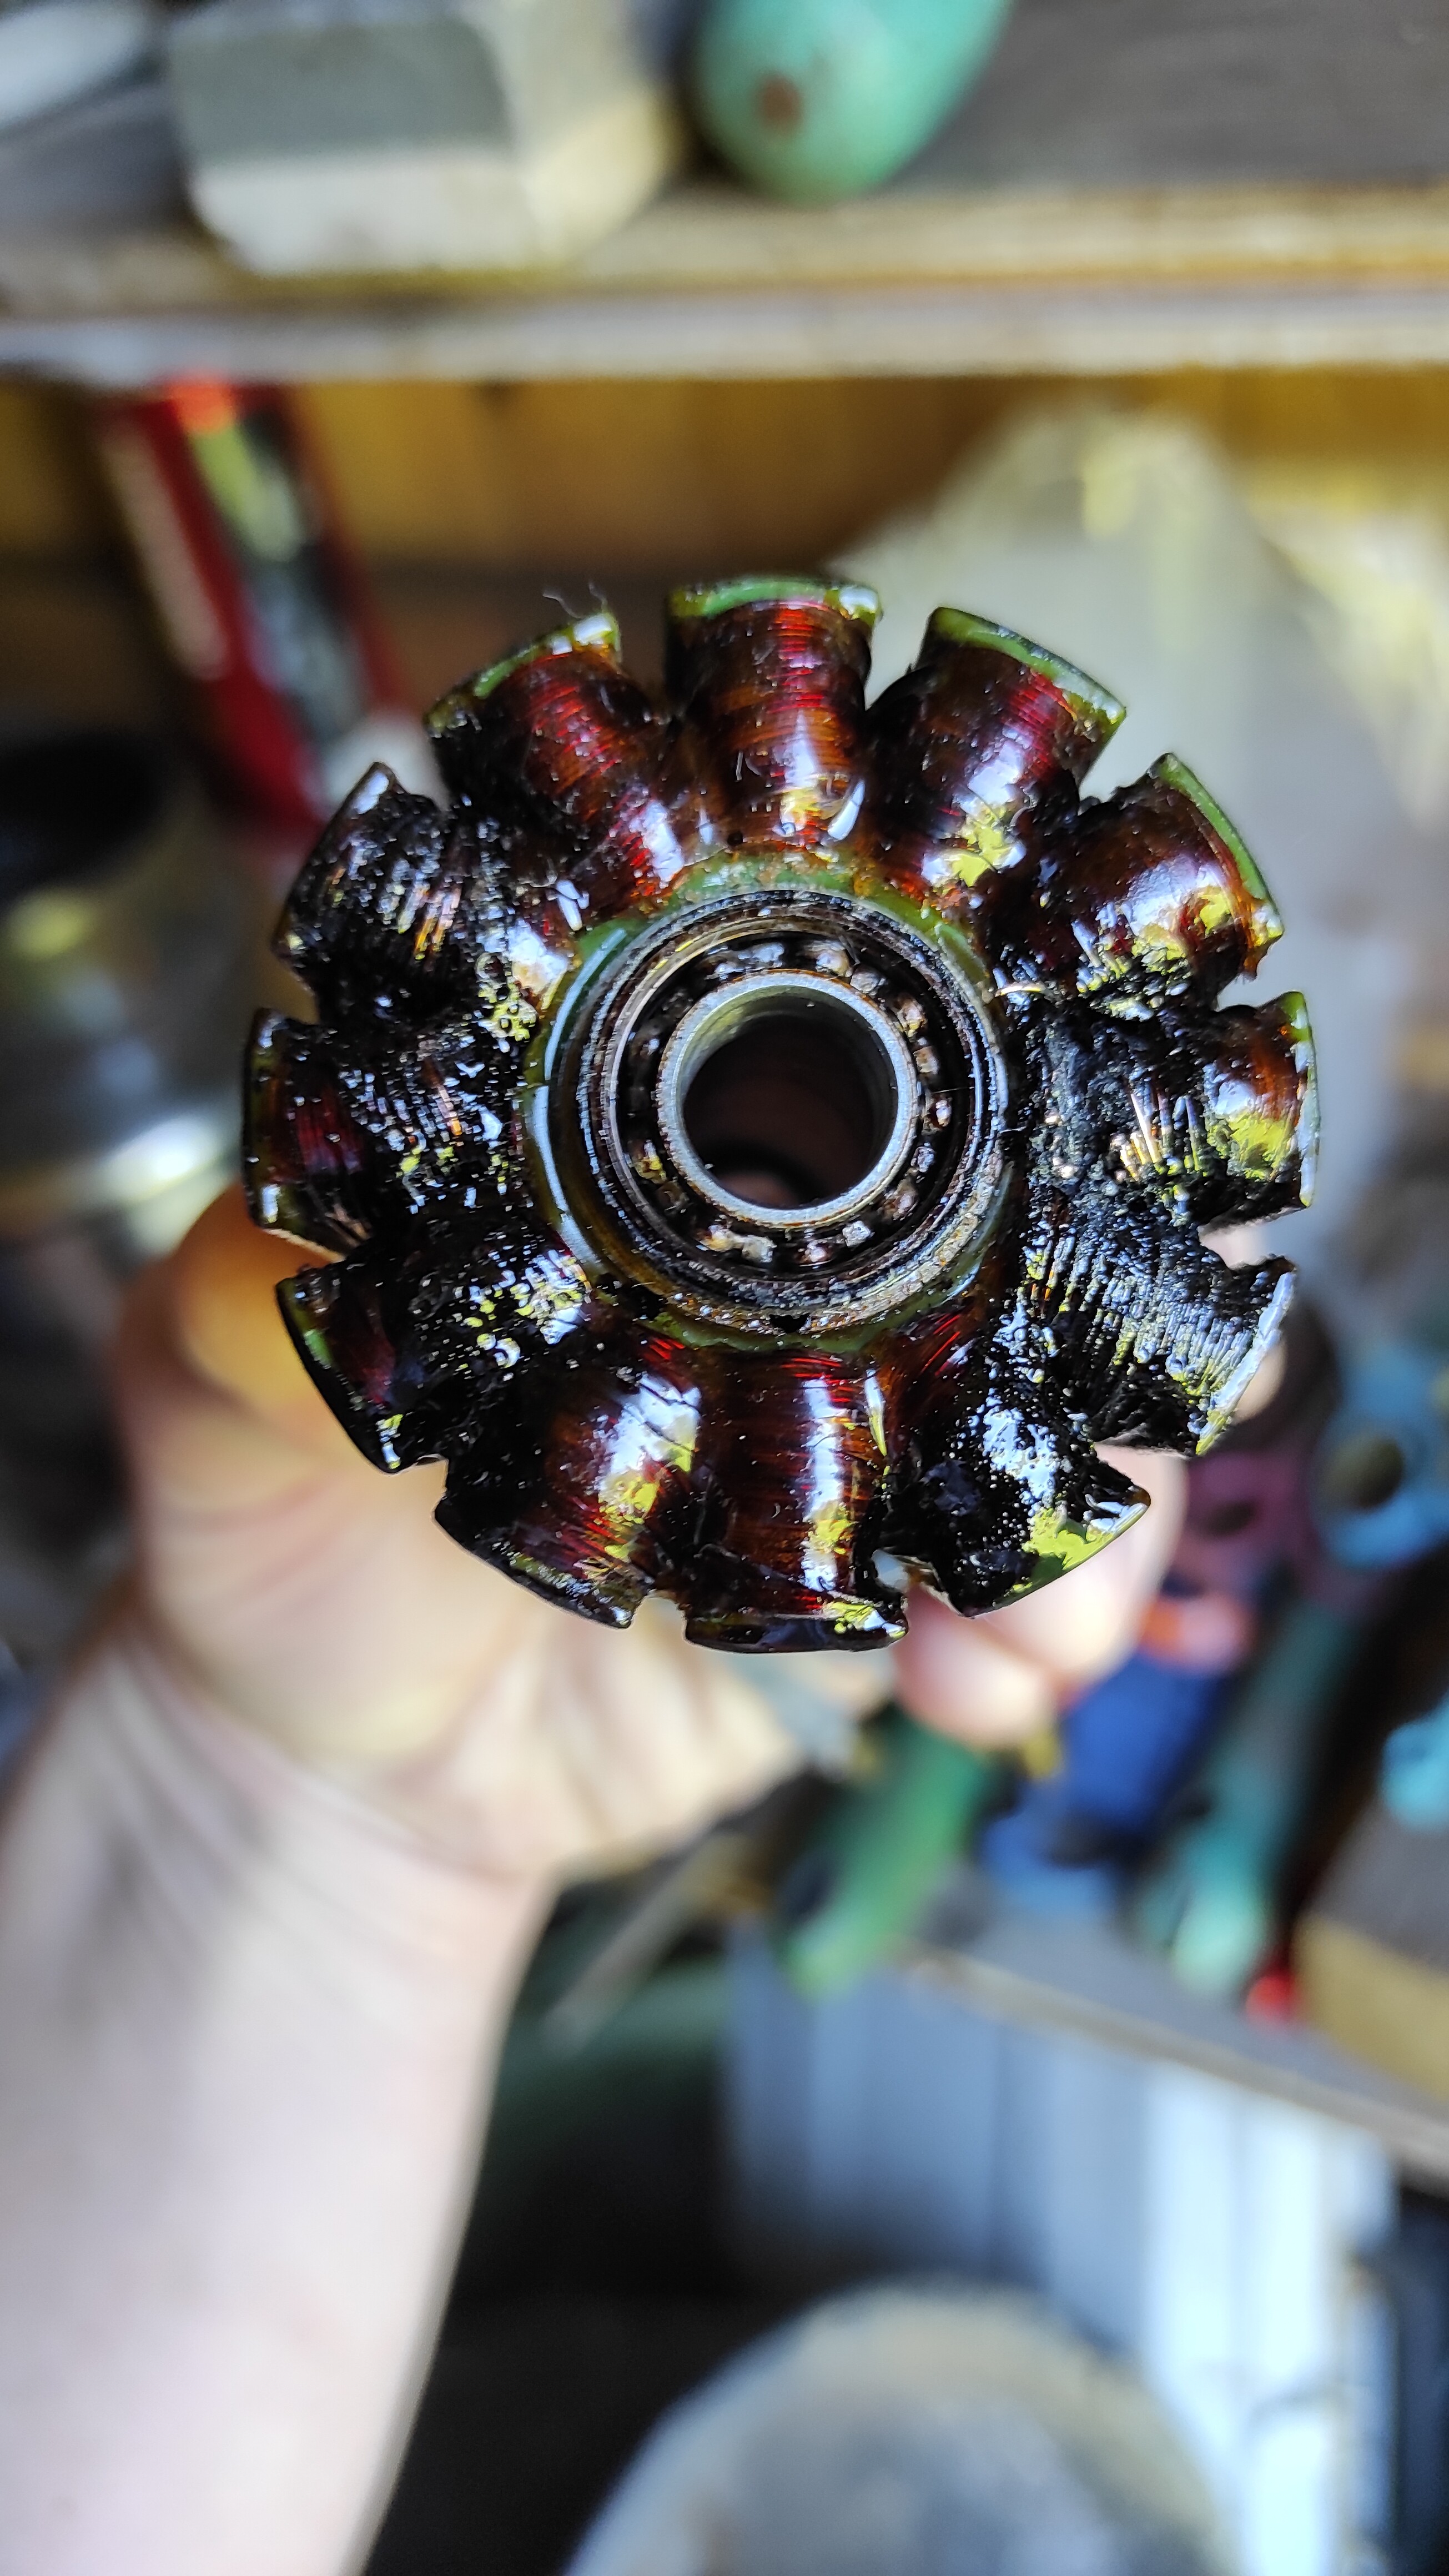
However, at the very beginning it was necessary to completely disassemble the motor, and immediately the first problem arose - it was not possible to loosen the grub screws (M4 x 10mm) in order to extend the shaft (10,00mm). I even broke a good quality Allen key on the first attempt, I was unhappy about it. I was beginning to accept that I would have to drill out the grub screws, then create a new thread for a larger screw (M5 or M6) etc etc.
After much thought, I finally decided that the glue that the bolt is glued with must be reliably loosened by the elevated temperature. After all, the heat will also expand the surrounding aluminium, which will significantly help loosen the bolt, as the thermal expansion of aluminium is about 50% greater than steel. So heating the rotor face to 70 to 80 °C should be sufficient (most plastics start to soften at this temperature), and it is very easy to cool the neodymium magnets to avoid reducing magnetisation. And this technology proved to be the right and best solution in the end, in 5 minutes the screw was loosened.
Now the technology itself:
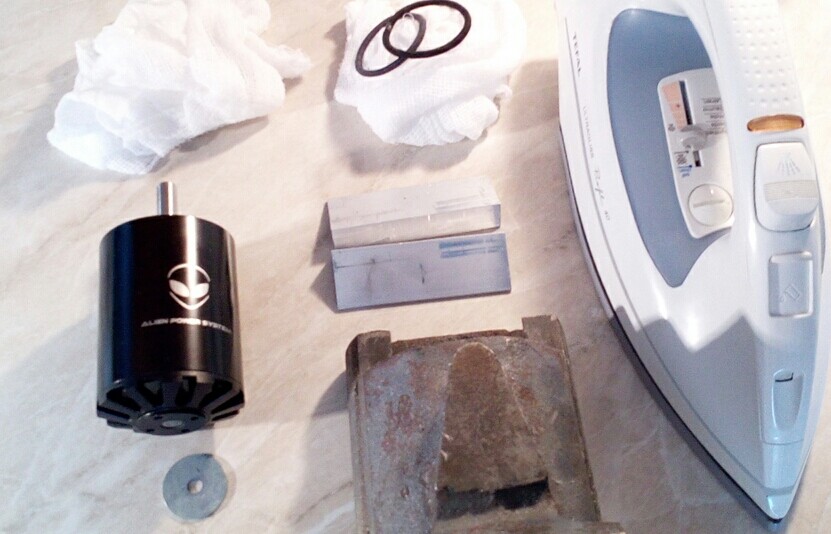
You will need to do this
cotton cloths (oalso two hair elastics used by women)
iron
a good quality workshop vice
two aluminium flanges for the vise (to prevent damage to the shaft surface)
very cold water
a very good quality Allen key (possibly with extension lever, arm, etc.)
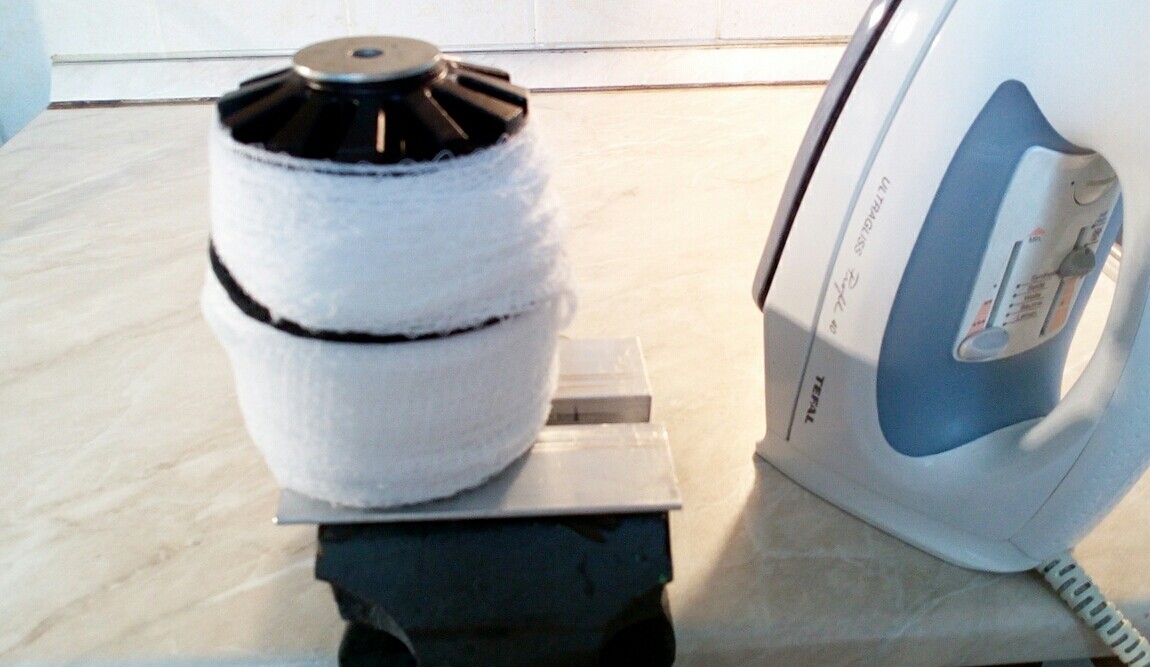
(Note: In both photos you can see a round aluminum washer, this should only be used if the rotor face is straight to the edge, like the motor face from tacktun https://foil.zone/uploads/default/optimized/3X/3/5/355dda5f5ba882eefe5e1f864aa2354218aaa95e_2_562x750.jpeg The aluminum washer thus transfers heat only at the position of the grub screws and the shaft. The aluminum washer can be replaced with a copper washer, which conducts heat better, but is more expensive or difficult to buy. …hope you understand what I mean)
You set the iron on the highest power (without water of course), after it has heated up, you carefully place it on the center of the rotor face.
Once the rotor face is heated to the desired temperature (you have to guess, you may have to find out just by wetting your finger, repeatedly) quickly remove the iron and loosen the screw with an Allen key.
This procedure (according to points 2 and 3) will probably have to be repeated several times, because the heated rotor face cools down very quickly!
A similar procedure can be followed when extending the shaft, replacing bearings, etc.
It is advisable to have a helper on hand when working. Just estimate the flange temperature with a wet finger. However, there is a risk of damaging or stripping the magnets if the temperature is exceeded. The shaft can be protected from corrosion by a thin layer of grease to prevent it from corroding (from wet canvas). Similarly, it is necessary to protect the surface of the workshop vise to prevent it from corroding (from wet canvas).
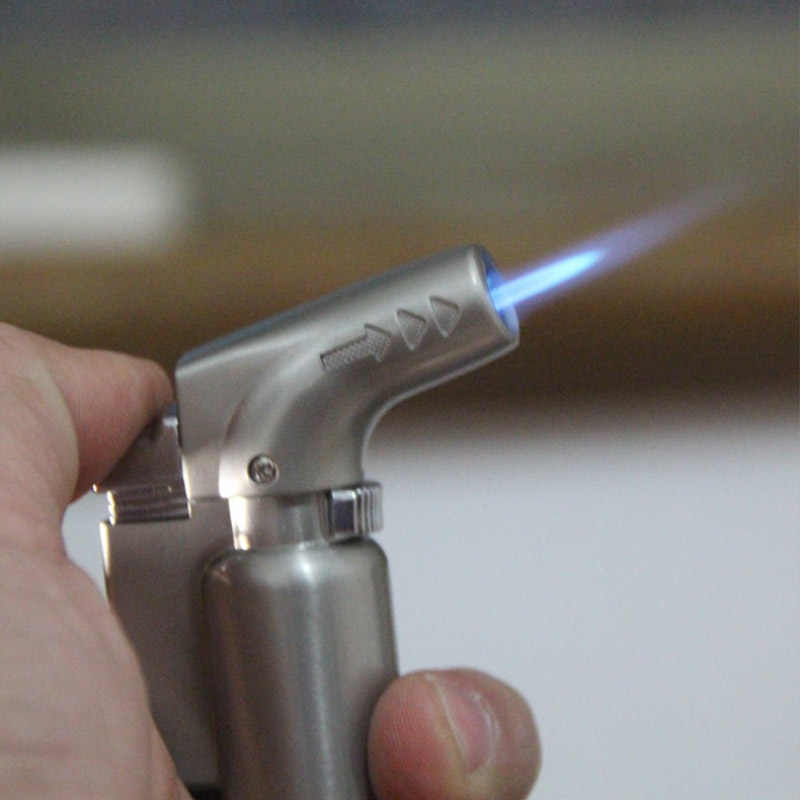
Thanks for making this post, what works best for me is to put the right hex key in the grub screw, grab my trusted pocket turbo lighter, heat the area for 10 seconds, undo the grub screw, no need to cool anything since it doesn’t even get warm.
I just used a gas burner with a small focused flame to heat up only the area directly at the screw. Works very good, could remove it without any problems
The iron heating technology is mainly intended for the variant of transforming the motor into a completely waterproof solution using a sealant (preferably epoxy). I therefore chose iron heating for the following reasons:
the fire could damage the epoxy sealant I use to seal the rotor face holes
fire could damage the quality paint that I will eventually spray all over the future waterproof motor (…I don’t know the type of paint yet, the aim is to reduce the water resistance of the rotating casing, i.e. to maximize the torque, I will measure and compare different surface variants - first without paint, then with paint, etc.)
the iron can be used at any time in the future, e.g. during maintenance (shaft replacement/shifting, bearing replacement, …)
the iron allows you to set any temperature you need using the thermostat
Yeah your iron method is quite good honestly, like you said if you your coating is heat sensitive paint then yeah, it’s probably a safer more or controlled way of doing it.
Just be careful, the parts that come in contact with the iron like shaft/bolts/screws/rotor can get extremely hot, if you drop something, don’t rush to pick it up from the floor, it happened to me once, use gloves.
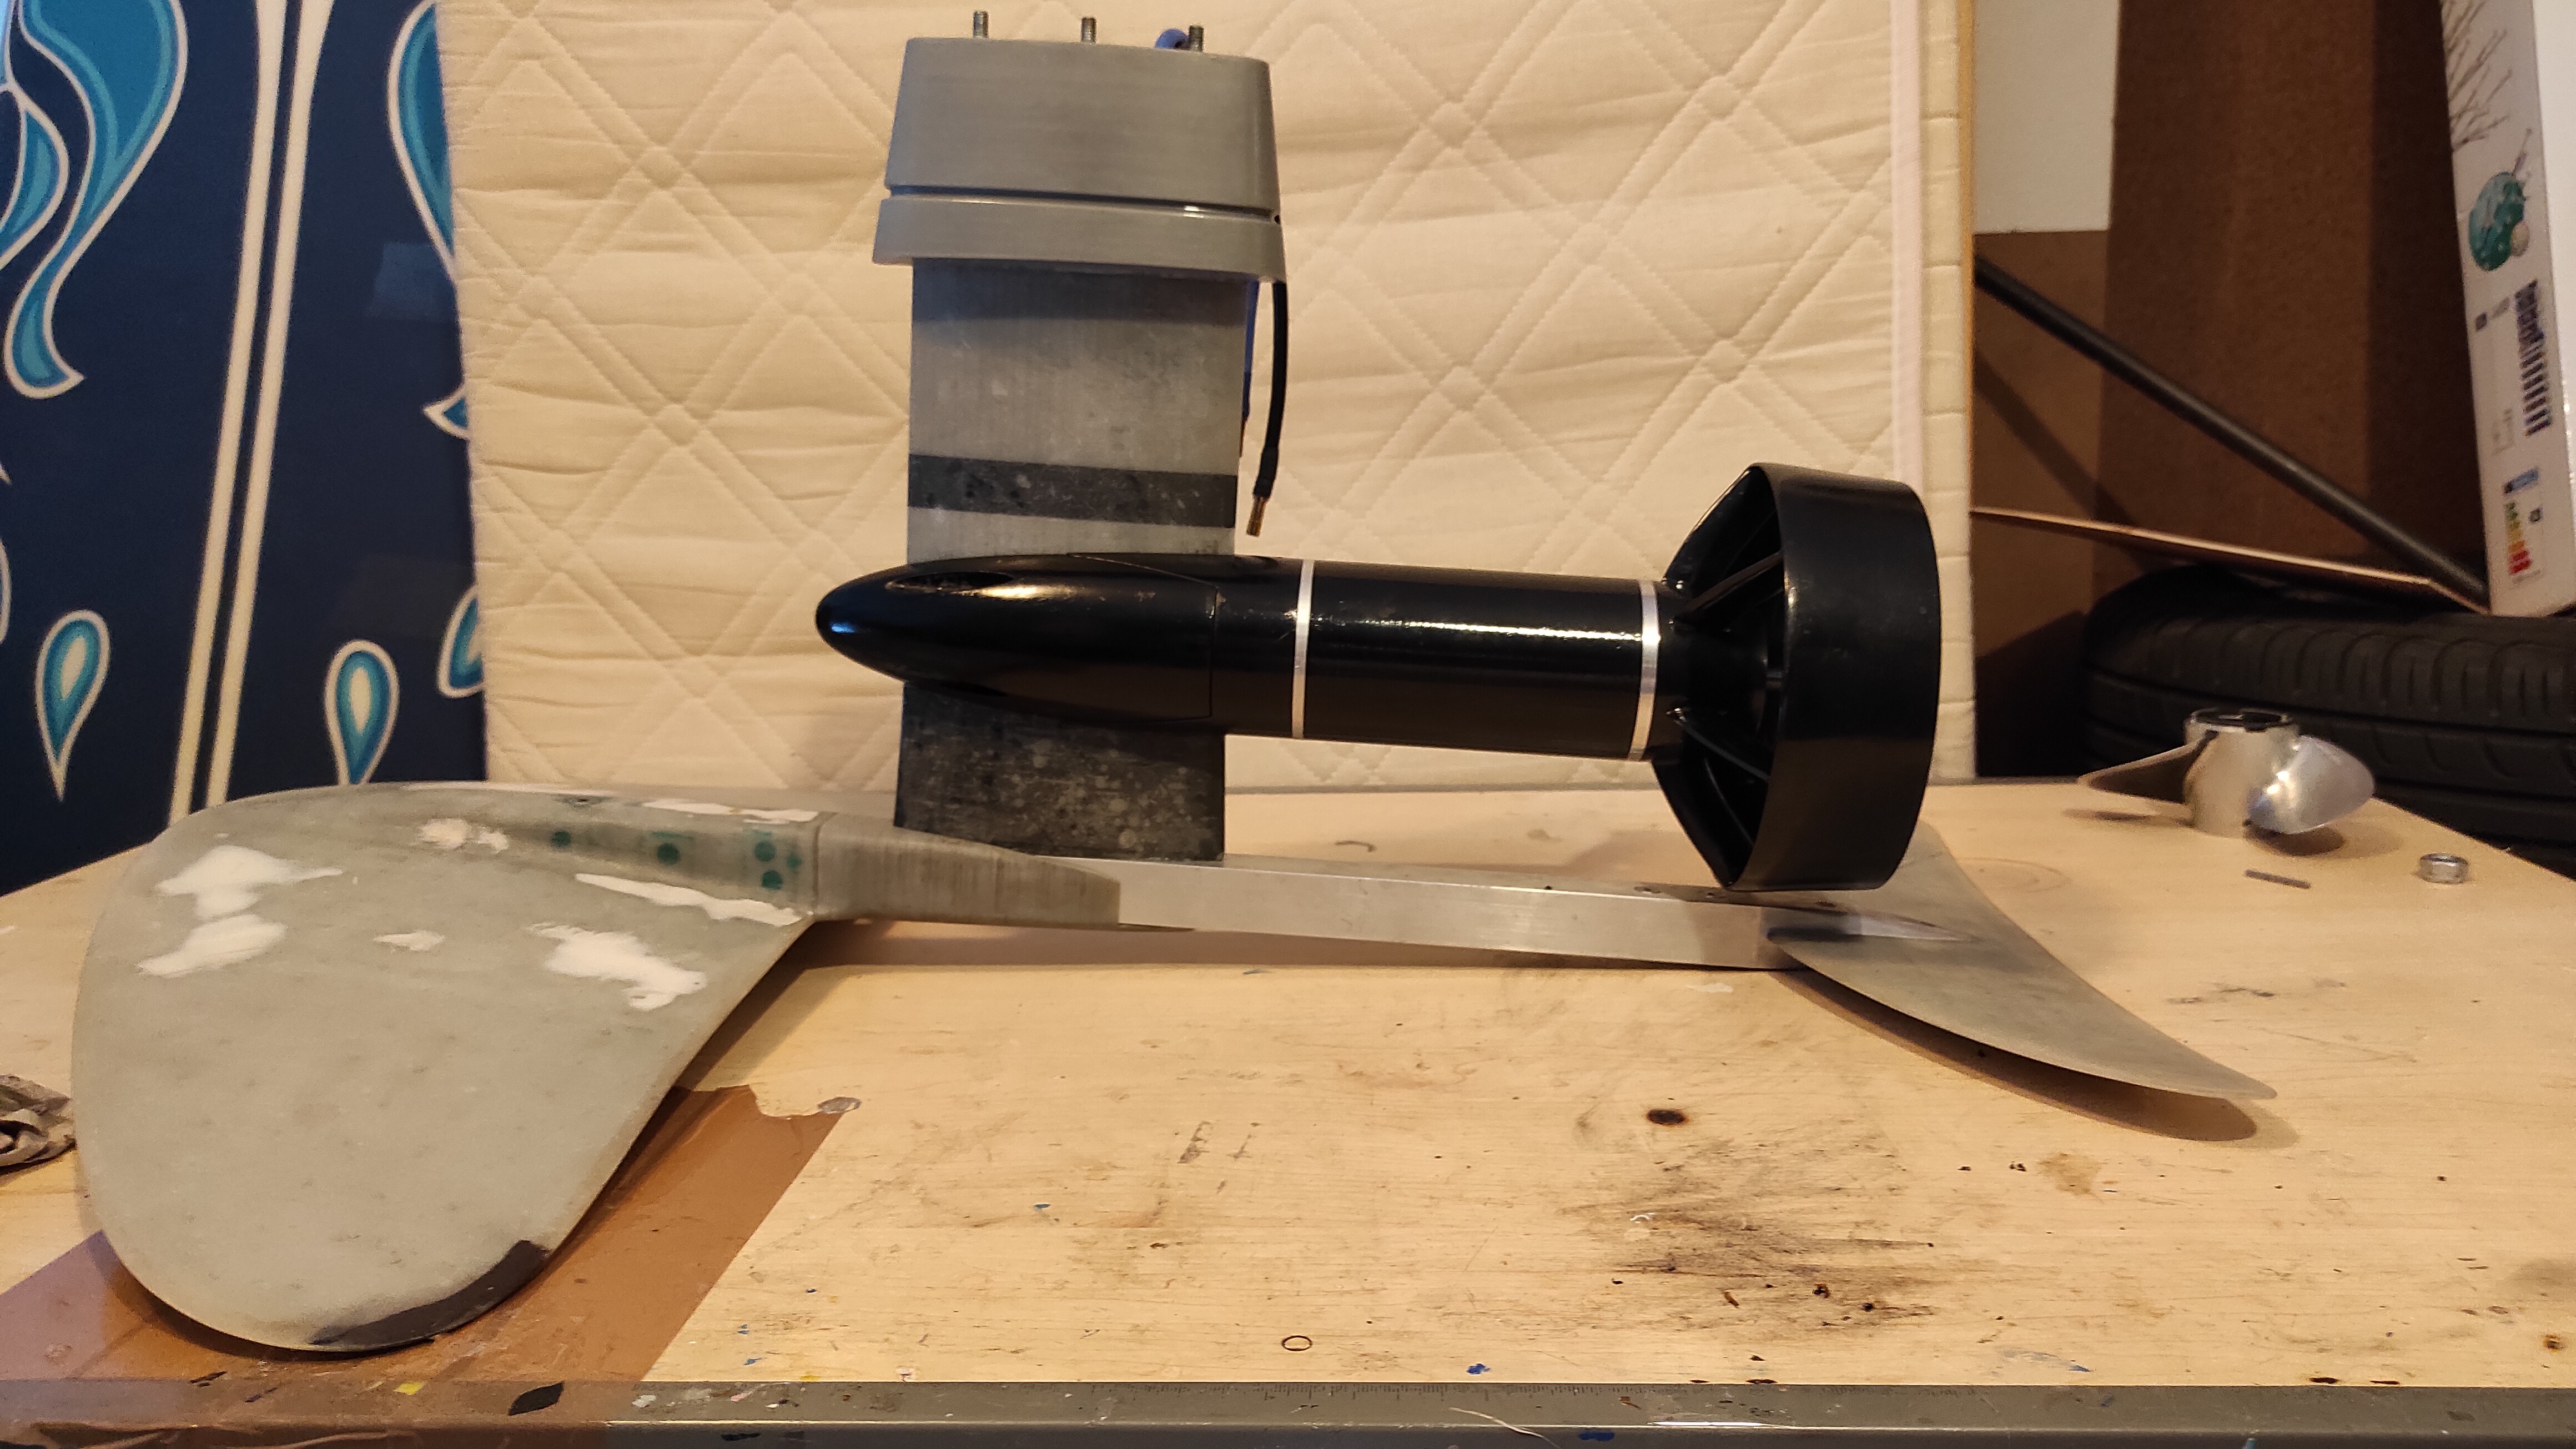
3mm tube. Epoxy No magnetic resistance. I tested the same in aluminum when idling = magnetic resistance. So yesterday I tested it in the water with an epoxy pipe. Result = engine has burned out. Shit, that’s clearly too much heat, no cooling. My conclusion. With the outrunner, the motor has to be actively coole inside, because the wire winding is inside.
I believe that cooling the stator (after transforming the motor to a completely waterproof motor …will post in a new topic soon) will help substantially with this
a certain amount of the right oil
very strong copper supply wires (not conductors)
a highly efficient propeller
Oil plays a vital role not only in lubricating the bearings, but especially in cooling the stator coils. However, the amount of oil must be minimal so as not to create rotor drag. The specific amount of oil is yet to be determined during initial testing. There may be oils that have a higher thermal conductivity, I will find that out too.
The copper supply wires (connected to the coils) run through a hollow stainless steel shaft (12 x 1 x 130 mm). The copper wires completely fill the space of this shaft. Thus, the oil draws heat away from the shaft and the shaft draws heat away from the copper wires.
The highly efficient propeller (efficiency rate) contributes substantially to the pin amps going through the motor when the e-foil starts. The higher the propeller efficiency, the lower the Amps. I have a Flite propeller set up for initial engine testing. Subsequently, however, I will have to design my own propeller to even achieve the goal of the project.
OK, was not aware that this is already so well tested. Sure, running wet is well proven method but can understand it would be appealing to have motor and bearings in an isolated environment not exposed to water and impurities. Either way we will have power loss due to viscous drag created by spinning of rotor, more from inside but some also outside, bur so far looks like the wet running is way to go.
Too bad to see, sorry. Just coat stator and bell with epoxy and run it in water, it’s not a problem, many people run it like this, change the bearings to stainless and replace them at the end of the season or when they start to sound strange (you hear it when they need to be changed).