Hand shaping is fun… but building a DIY CNC to make boards is another level of fun… and dust! V1 engineering make a nice kits to which you just have to add some wood, and stainless tubing to get yourself a cool CNC.
Designing a board in Fusion 360 is actually not bad (using the form tool), creating the G-code for the CNC is dead simple with the right post processor (see V1 site) and then just watch the magic happen…
And if you don’t pay enough attention to the parameters in the CAM part, you end up watching 5 hours of “magic” for a single face (bottom), the top only took an hour.
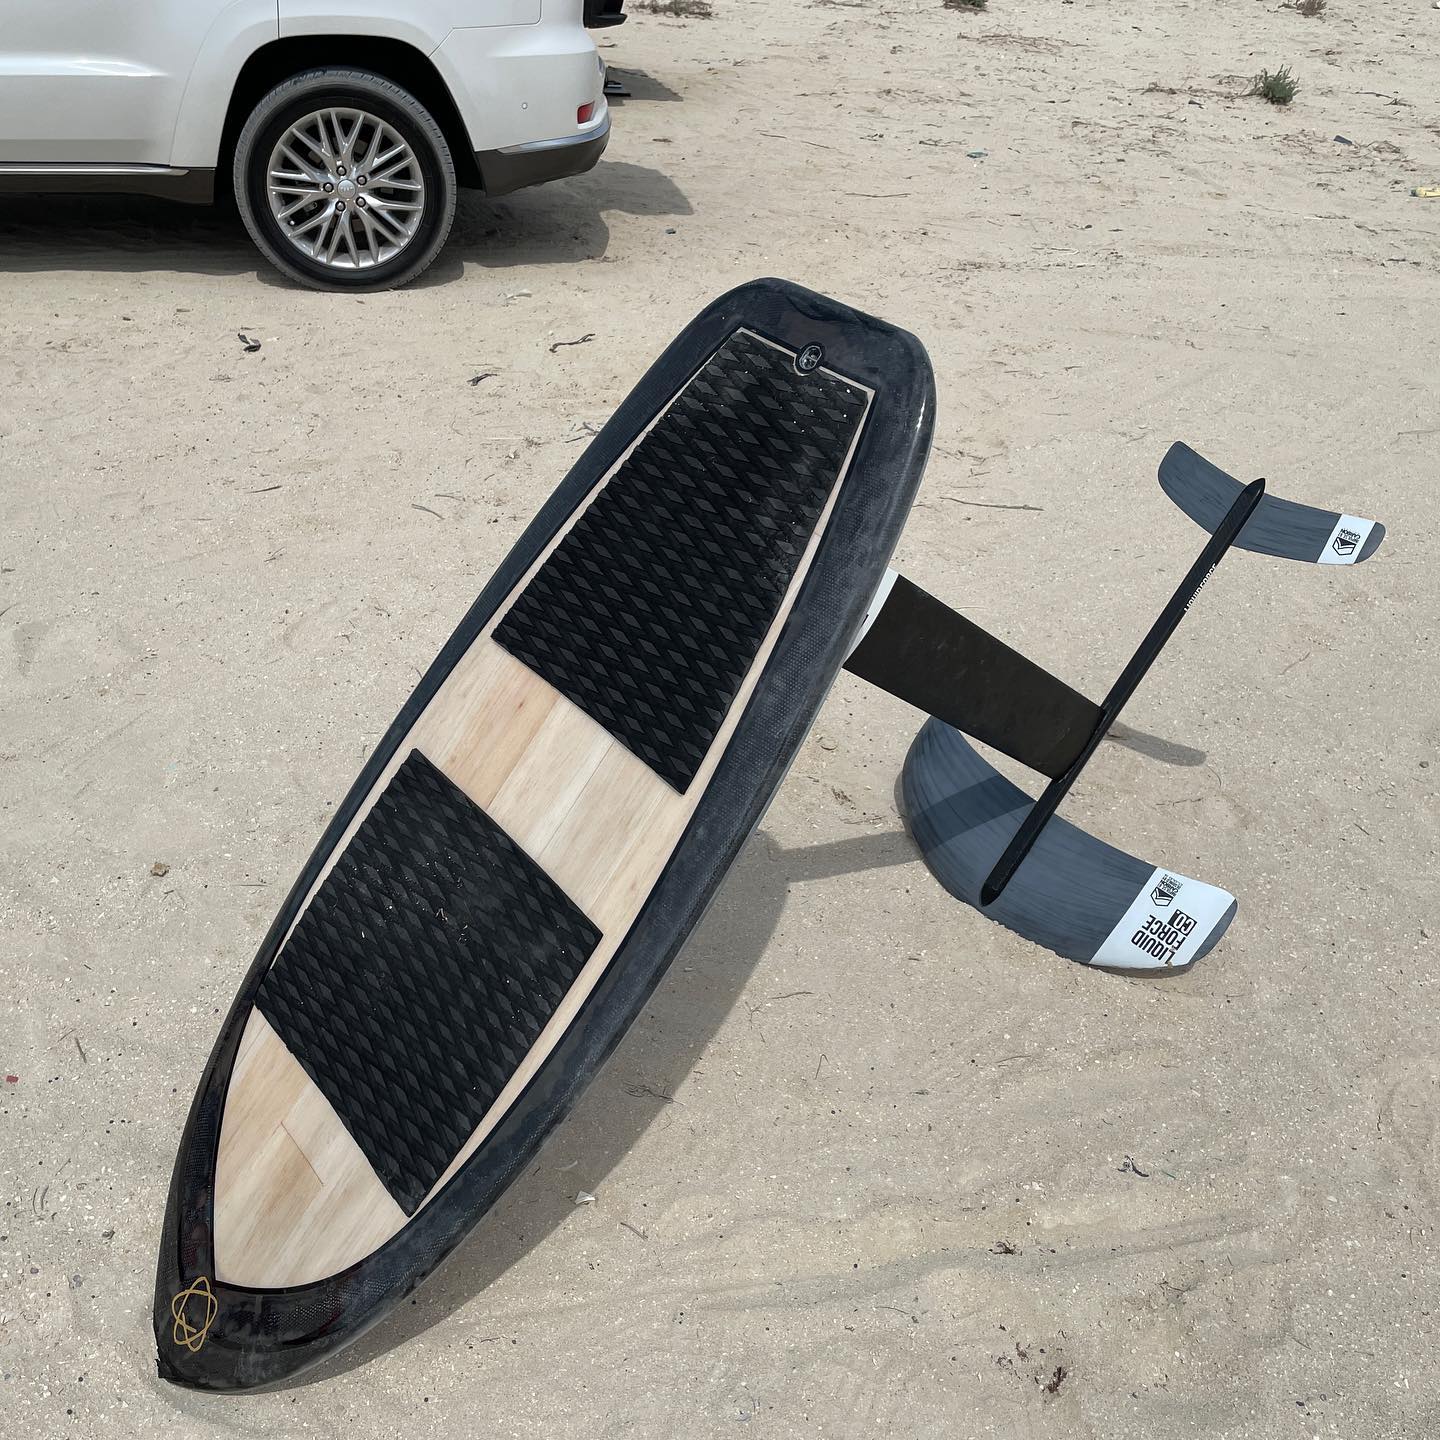
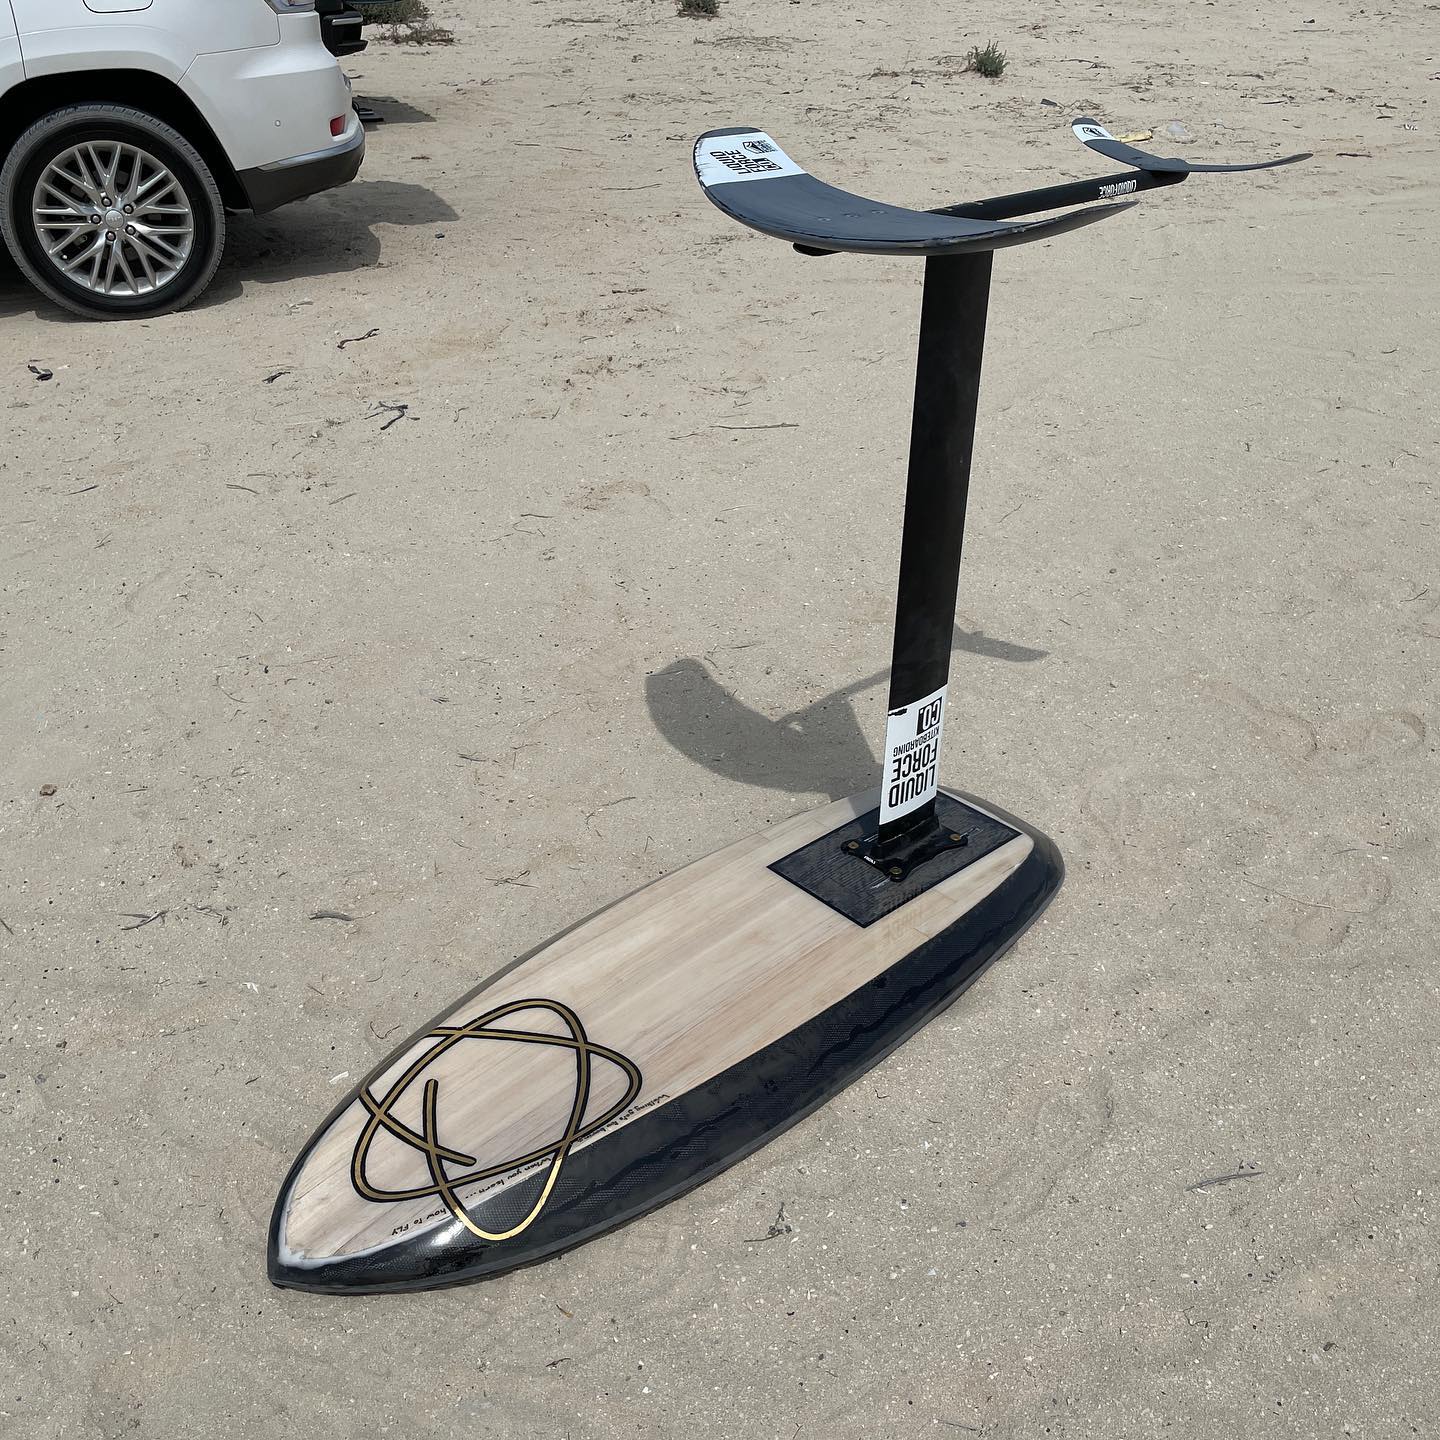
Just shaping the board wasn’t enough, so I modeled and cut the HD foam insert for the track…
Pressing GO to cut the opening on the board was a scary moment, but turned out great.
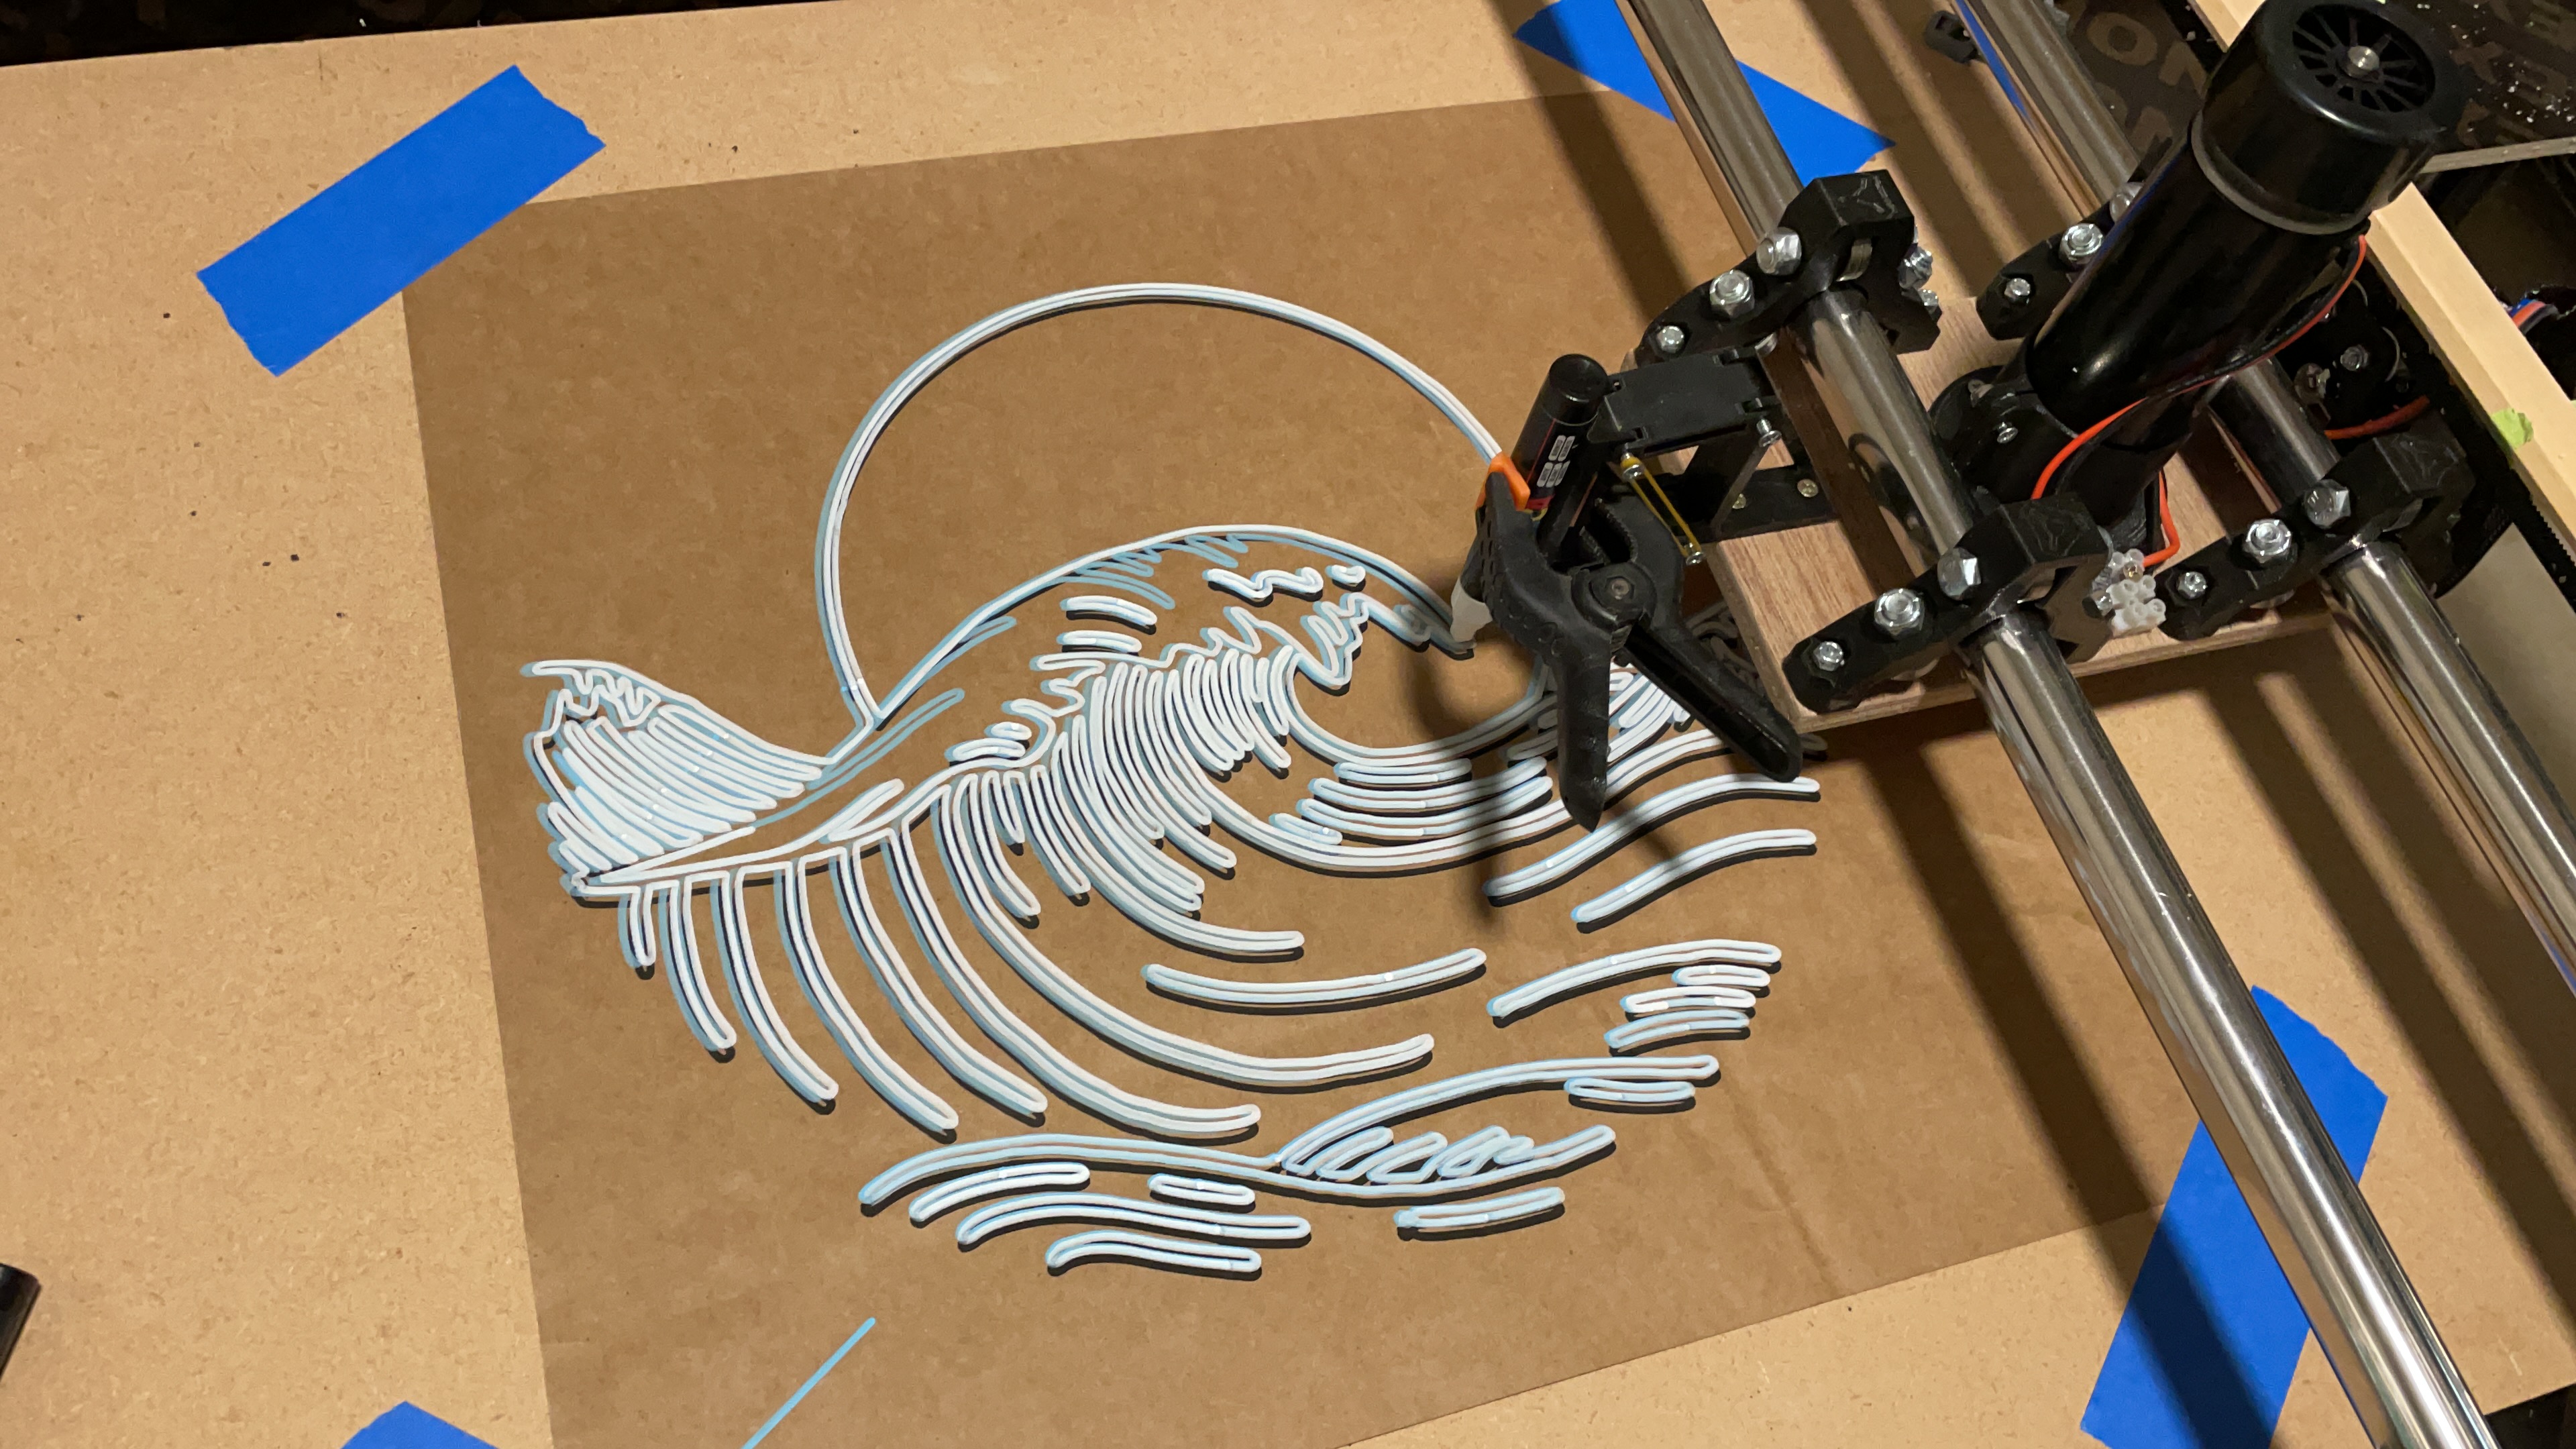
Next, glass/balsa/glass on deck and bottom and some CF on the rails… I’ll enlist the machine’s help to make the graphics on rice paper with Poscas I think… Below is one of the test drawings she did before starting to cut stuff… (yes, it’s a she!)
I didn’t really bother with feeds and speed… it’s polystyrene … so I basically maxed out the machine… cutting federate: 3000mm/min
only thing I looked at was the stepover, as the spindle picked can only handle up to 6mm, that’s the bit size I got.
at first I used the option “machine steep areas” in fusion as it adapts the stepover to avoid steps… which was a mistake as the whole board is considered “steep” due to the rails… it took 6 hrs too machine a small prone foil board"
for the next ones, I tried 5mm, but as the spindle support wasn’t rigid enough, and the bit very long, there was some bending issue that left a bit of foam between alternate path.
I think the sweet spot will be at 4mm with a very rigid mount (i.e. not plastic that deforms with the heat of the spindle…) it leaves some ridges on the blank, but a quick pass with a sanding pad and it’s clean.
Overall the main issue was to find bits long enough. I found a corn end mill with 60mm cutting surface that works great …but 60 mm is not enough to machine most board, so it’s only usable for a first pass with a max cut depth at 59mm. Second pass is done with a regular flat head upcut bit with 100mm cutting bit (meaning the max blank size it can handle is 200mm depending where the apex of the rails are)
working in 2 pass seems to be better for the machine as it vibrate like crazy when taking a full 100mm depth pass
Thank you for the detailed info on feeds and speeds,that was very useful. I can’t believe how good the blank and your final board looks. What foam did you use for blank and insert? Here in Alaska supplies are limited but I can get 1.5 and 2 pcf construction EPS. Would you recommend using 1.5 or 2 pcf EPS? I am struggling to find a good source for 6-8 pcf foam for the insert, and currently my plan is to use end grain balsa or 6 lbs urethane pour foam. Do you think this will work?
My dad and I are thinking of building a mpCNC.
Why did you go for a lowrider2 model? Is it because of space saving?
Also. Did you try CNC’ing other materials with it?
Also. What router and board (Rambo board??) are you using with your setup?
I’m not 100% sure, but I think it was around 25kg/m2 EPS so slightly less than 1.5pcf, the insert is XPS, I think around 2pcf…at nearly equal density, XPS feels much stiffer than EPS.
I used to use 1pcf as it was the only big blocks I could find before and never had any issues…so 1.5 should be plenty
For the wing board I made recently ( Where to buy foil track boxes? - #7 by Mat ) I used 2 “planks” of balsa instead of a block and it seems to work really well so far.
I did a lowrider to get the working area (1800mm x 800mm ) which is enough for most wing/foil boards … a MPCNC of that size is not recommended I think…and probably much more expensive to build.
The board/driver/screen is SKR Pro1.2, 5x 2209 drivers, TFT35 E3 V3.
the spindle is a cheap amazon one
I couldn’t really try other materials as I only did the initial tests in my apartment as was afraid of the noise for my neighbors
if you look on V1 forum, you’ll see a lot of people cut wood with lowriders.
Your boards look great!
One more question Mat,
How did you CNC the other side of the board? Did you just simply flip the foam block, and lined it up again?
Thanks!
exactly: in fusion, I set the starting point in the middle of the top edge at one end of the block for both operations, just ensure your block of foam is as square as possible and dimension matches what you enter in fusion
You just need to be very careful how you set both setups in fusion, especially how the coordinates are oriented. there are 2 way to flip a block
I’ve come to the conclusion that the simplest form of alignment is to route an index pin on either side of the long axis/stringer.
You route the holes in the outer perimeter on the topside. Then flip the board along the stringer and place 2 pins in the holes.
Just make sure your zero doesn’t change in between.
Nice foam cutter. Where did you buy that tool?
Did you leave tabs or do your parts just fall out?