The Seahorse e-foil project

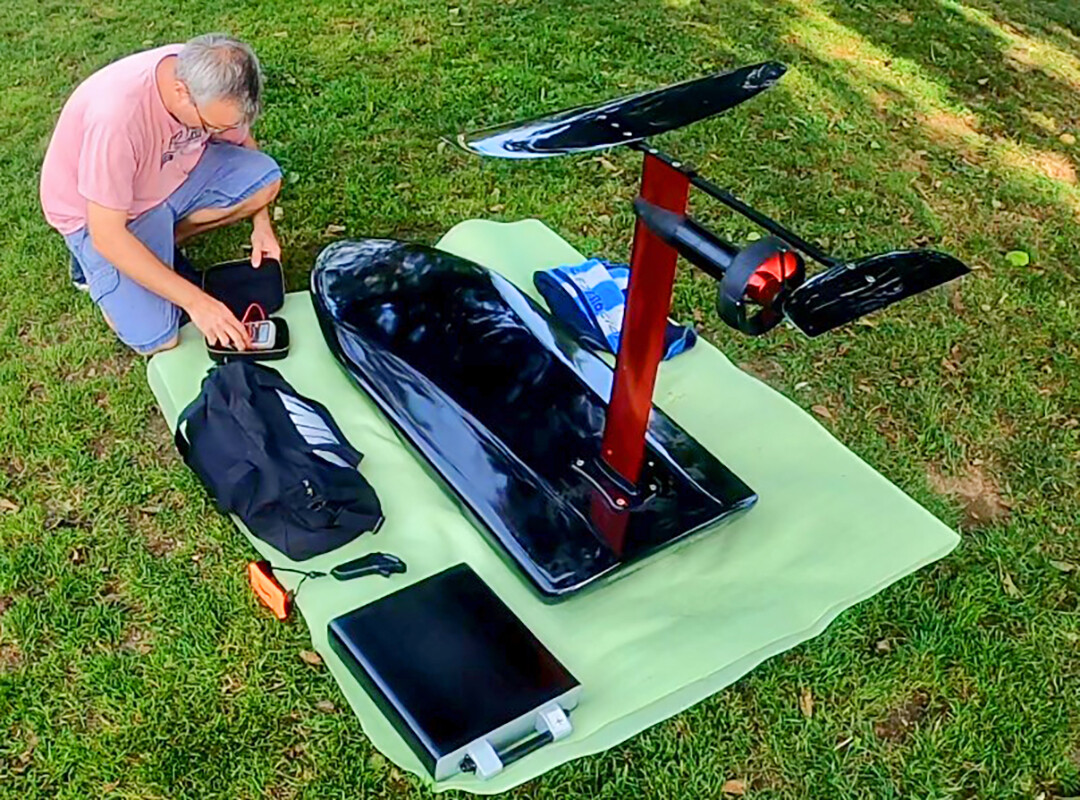
For the last two years, I was designing and making a fully carbon e-foil.
The product came out so great, I have to share it and try to make a business out of it.

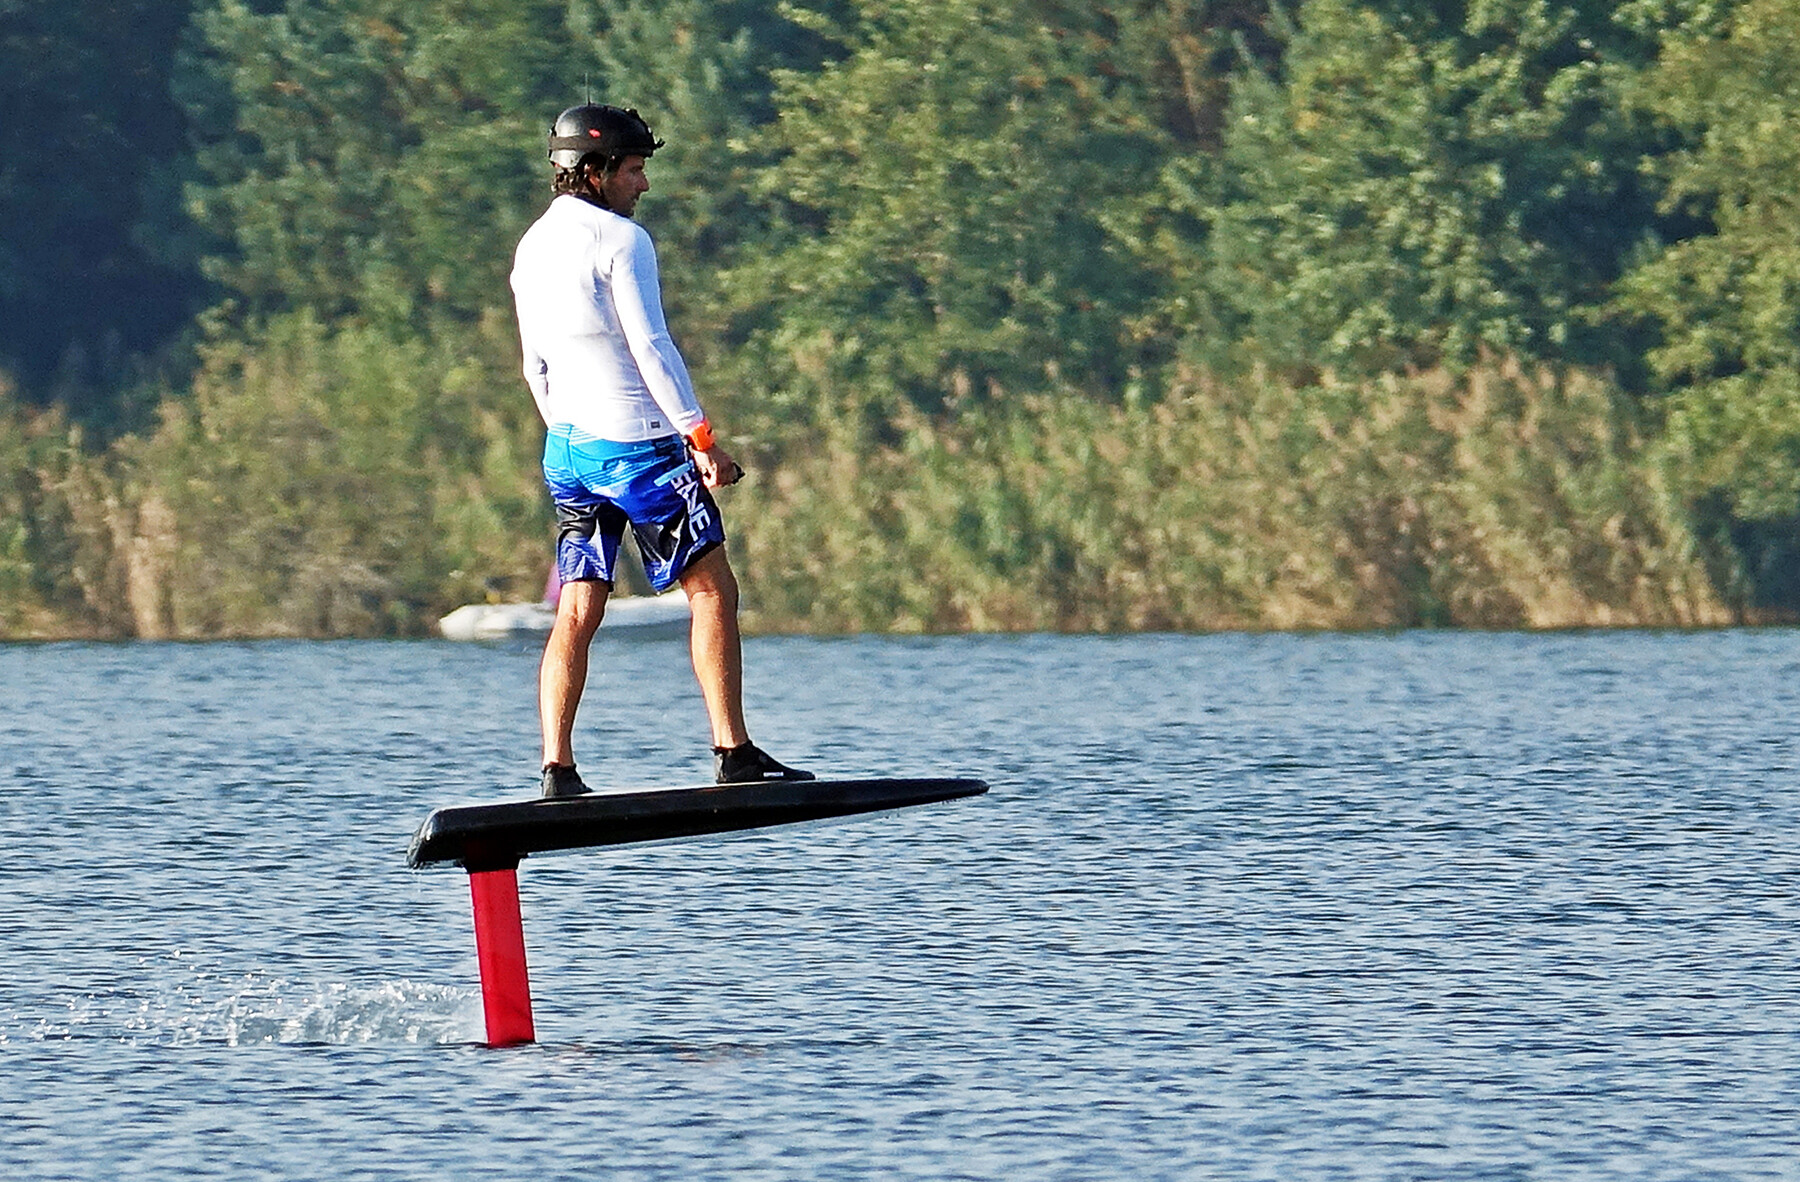
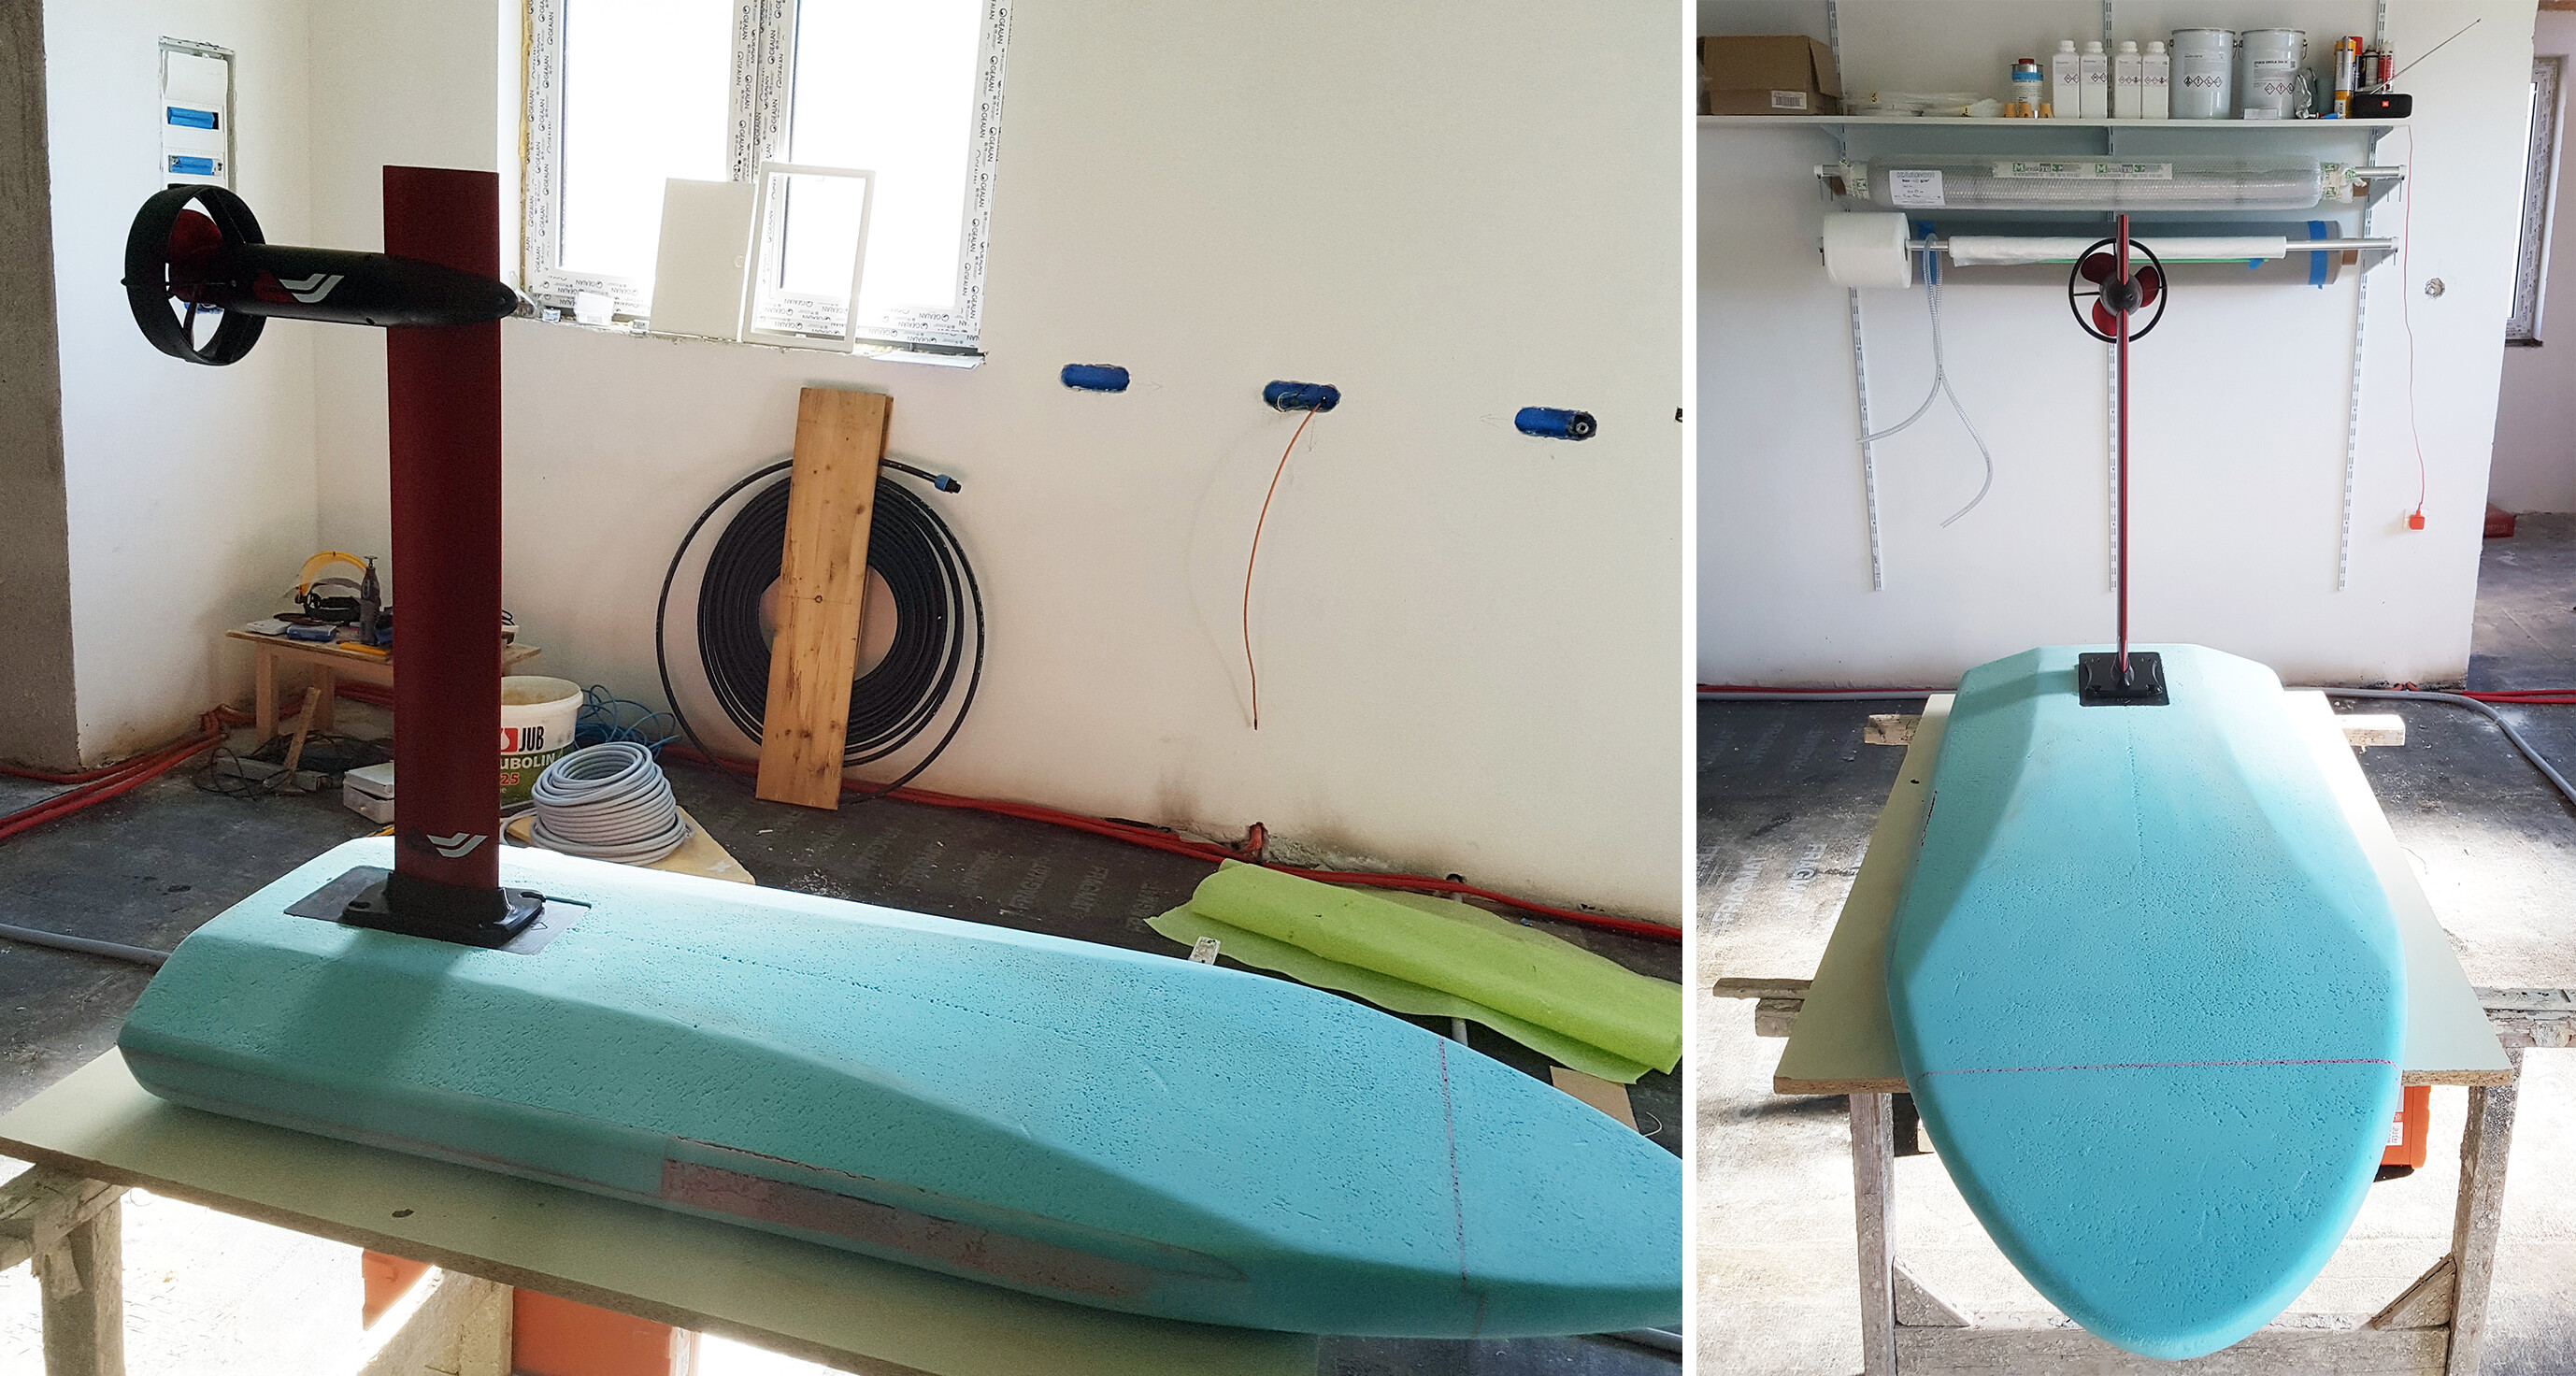
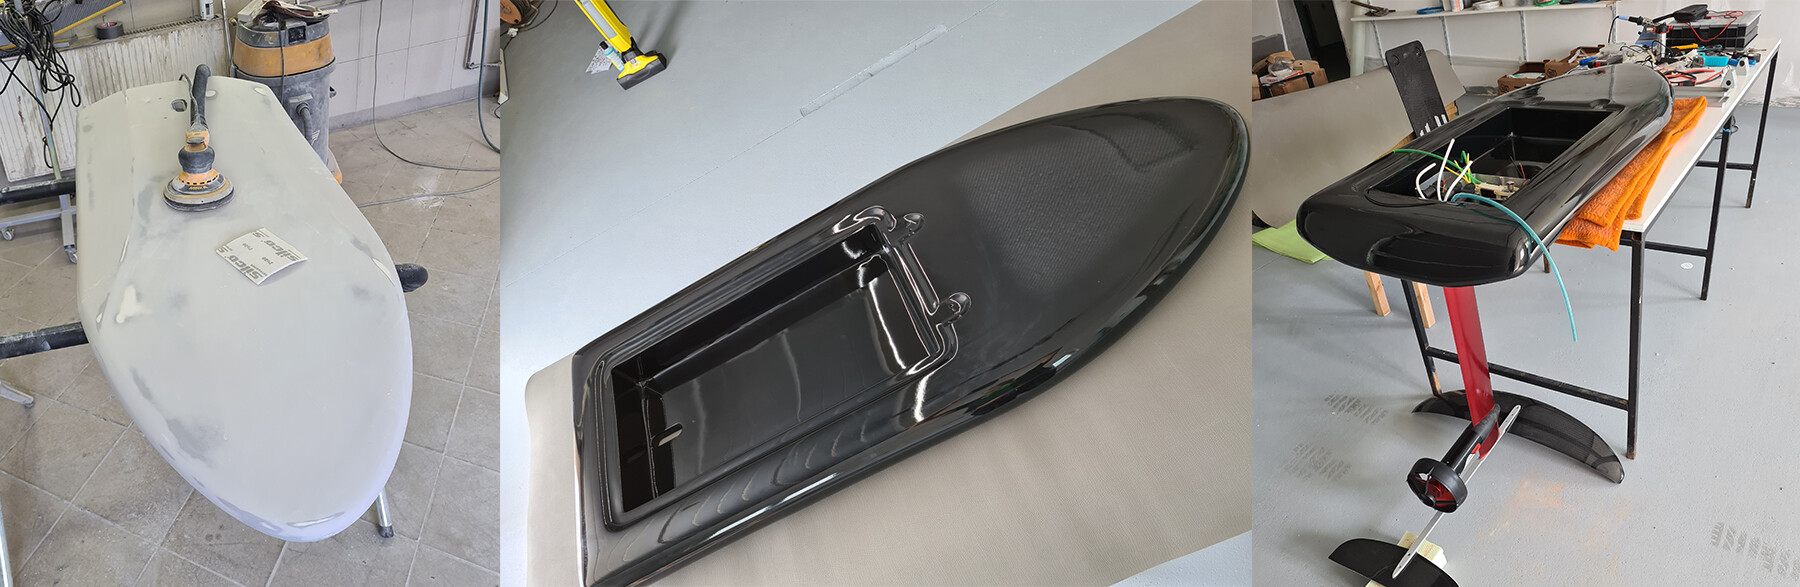
First, I have designed the e-foil. My next step was to CNC carve the polystyrene core, and then the real work began.

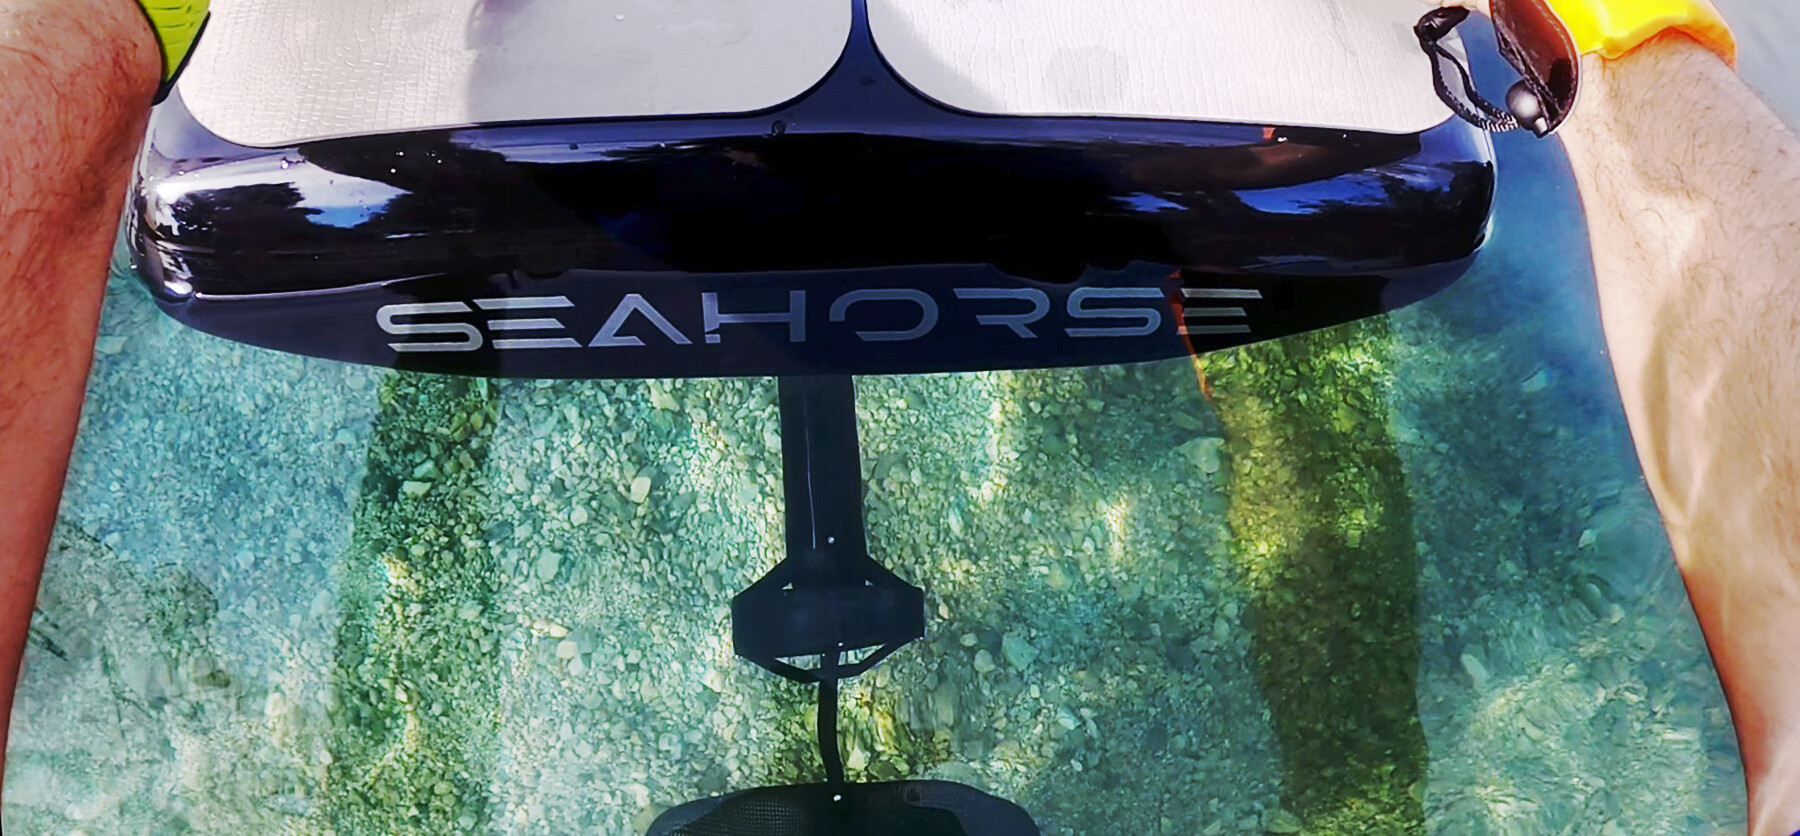
Since I was in the middle of building a house, I took a shortcut and bought the FR motor assembly from Slovenia. This is where I come from too, the land of e-foil pioneers :blush:. Flying Rodeo rules.

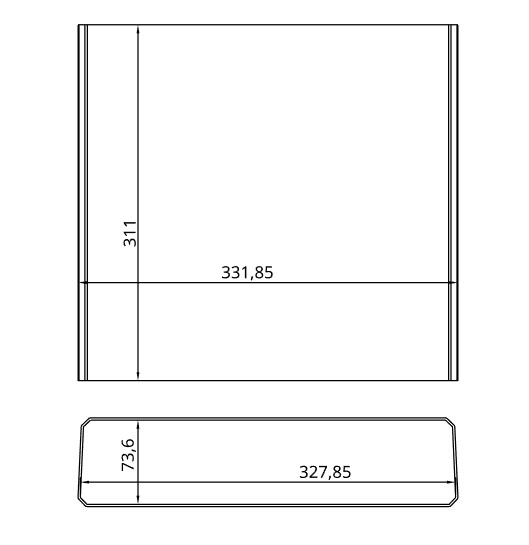
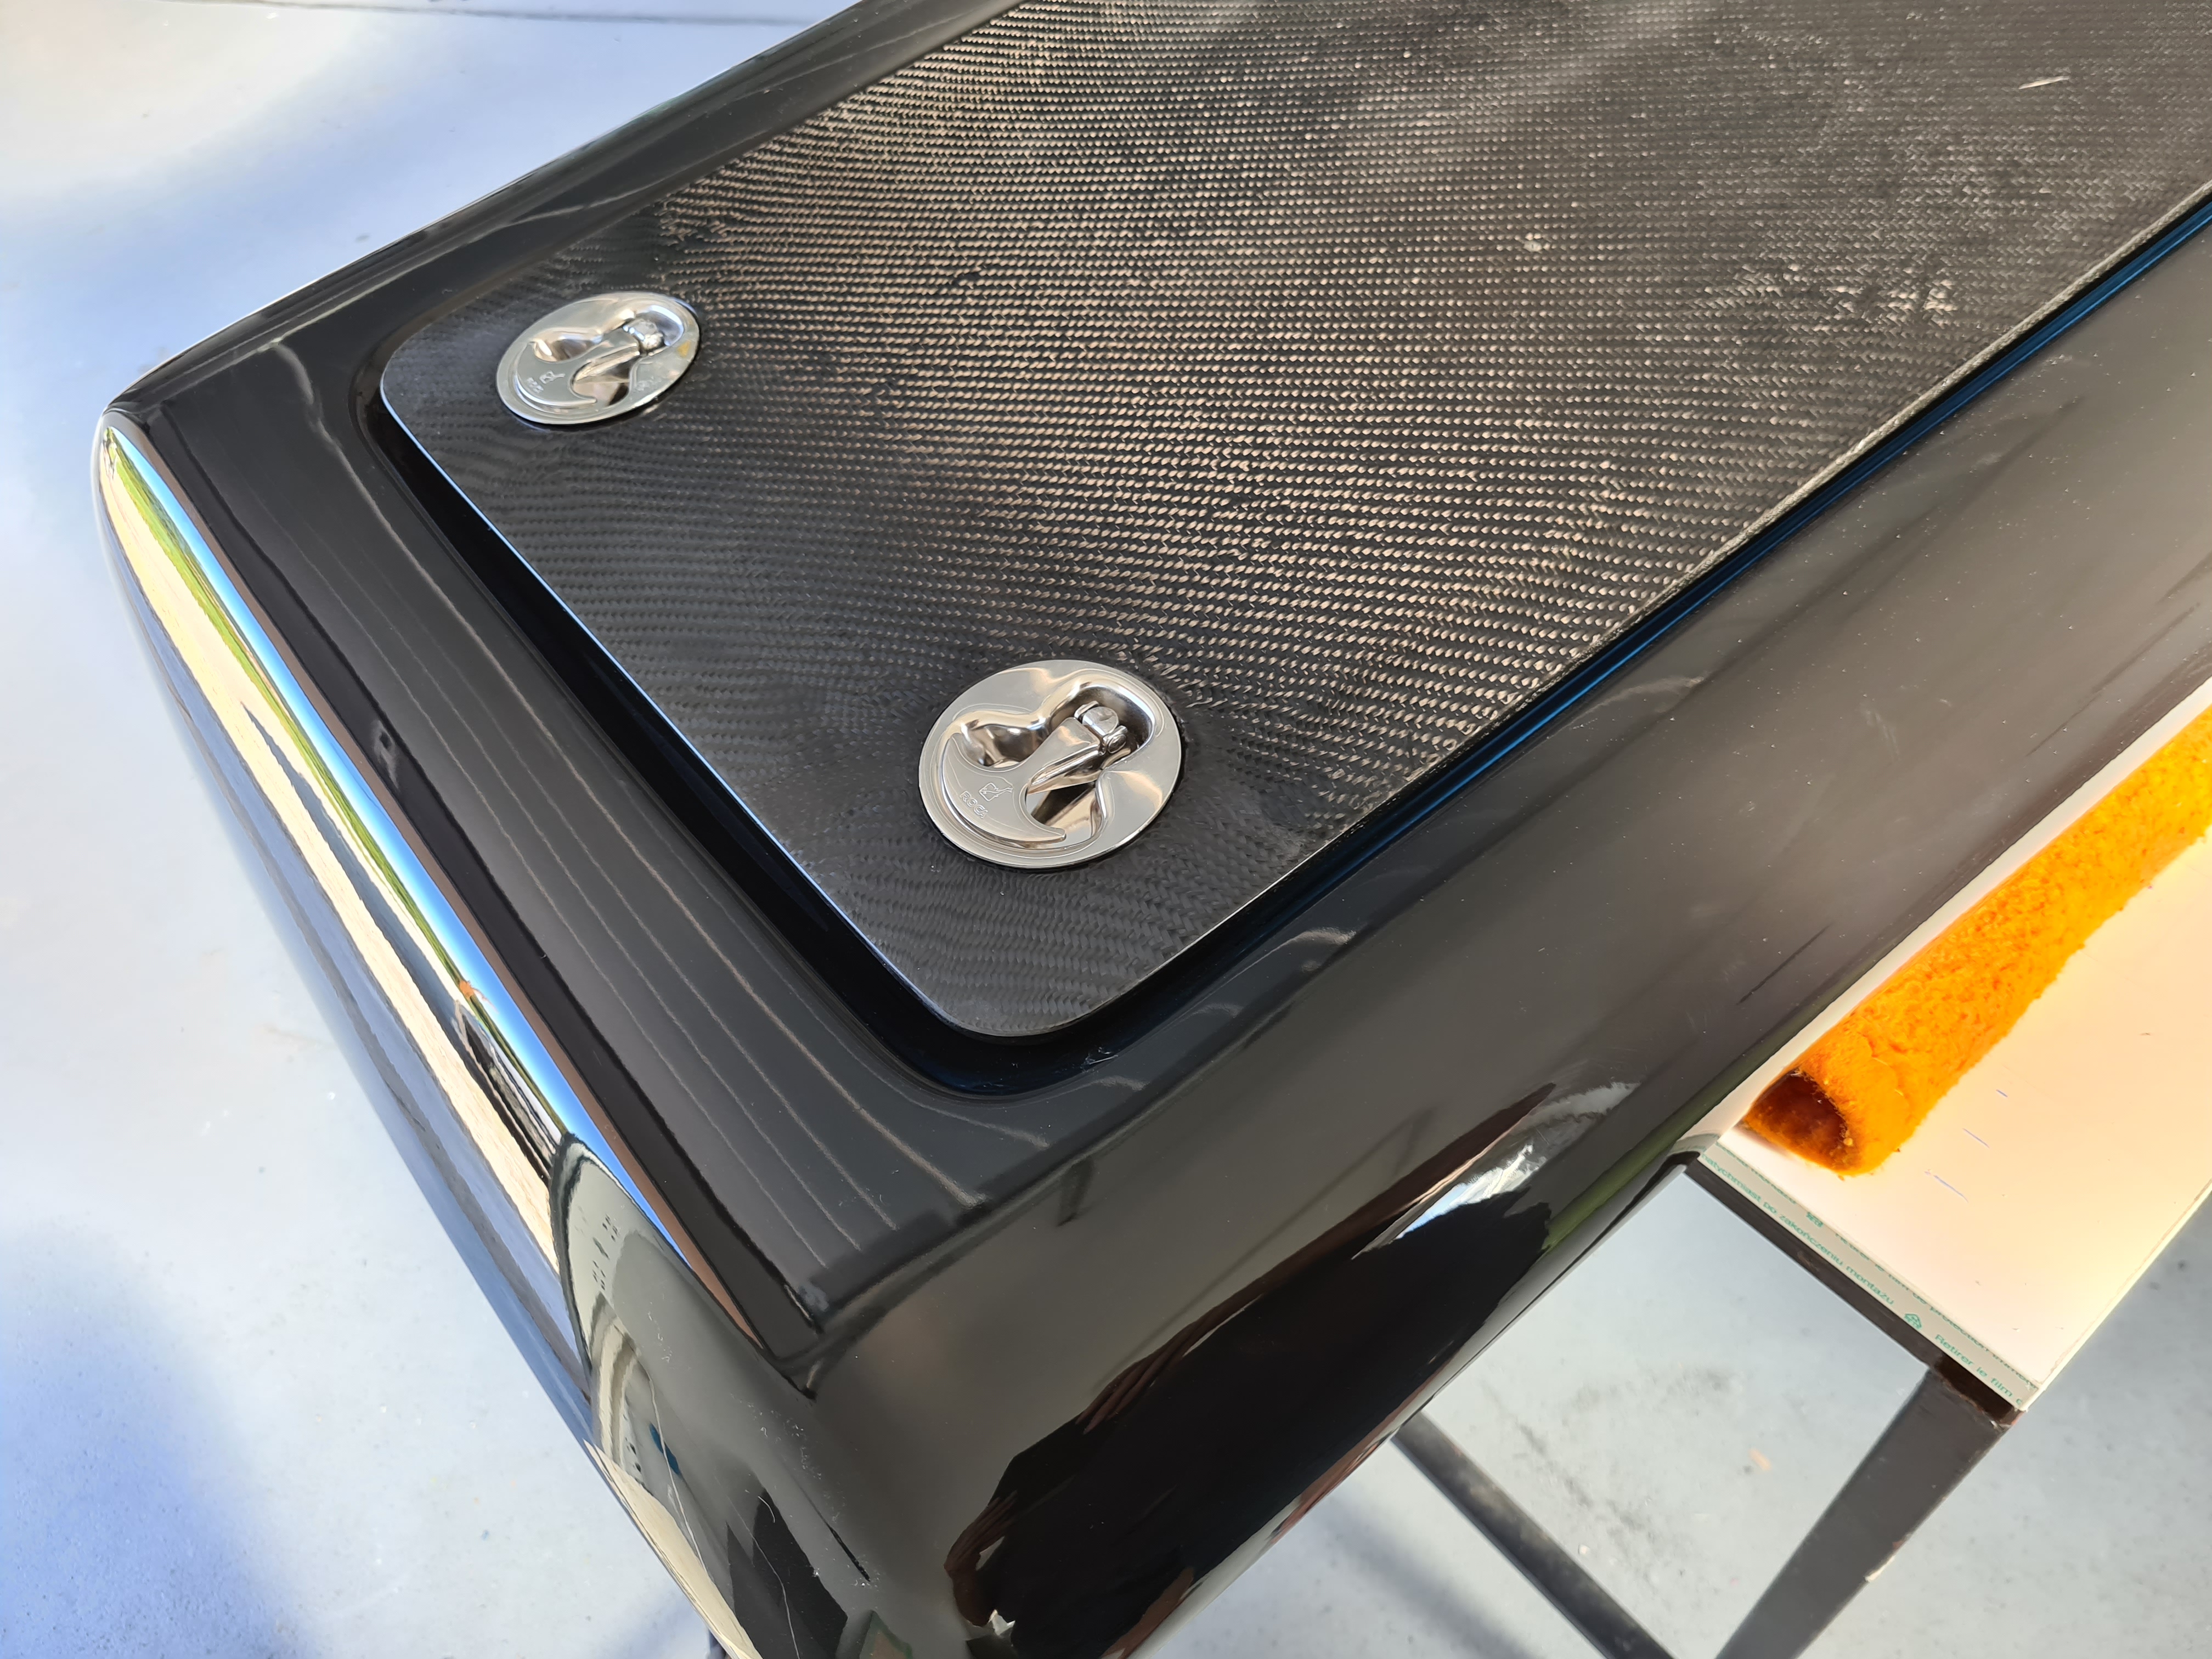
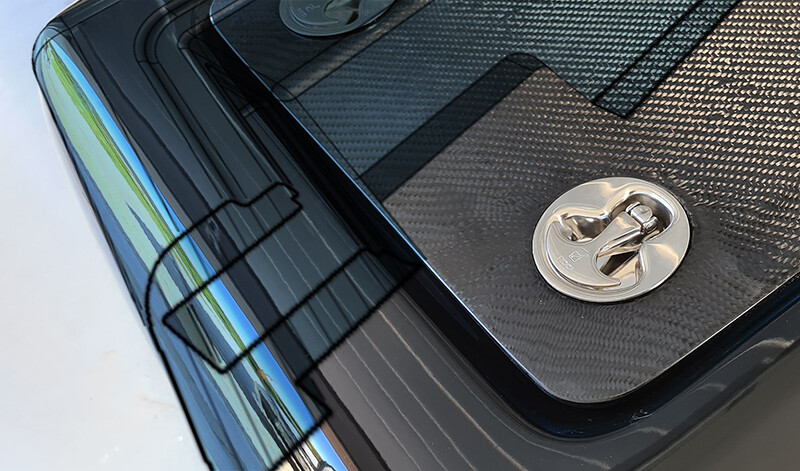
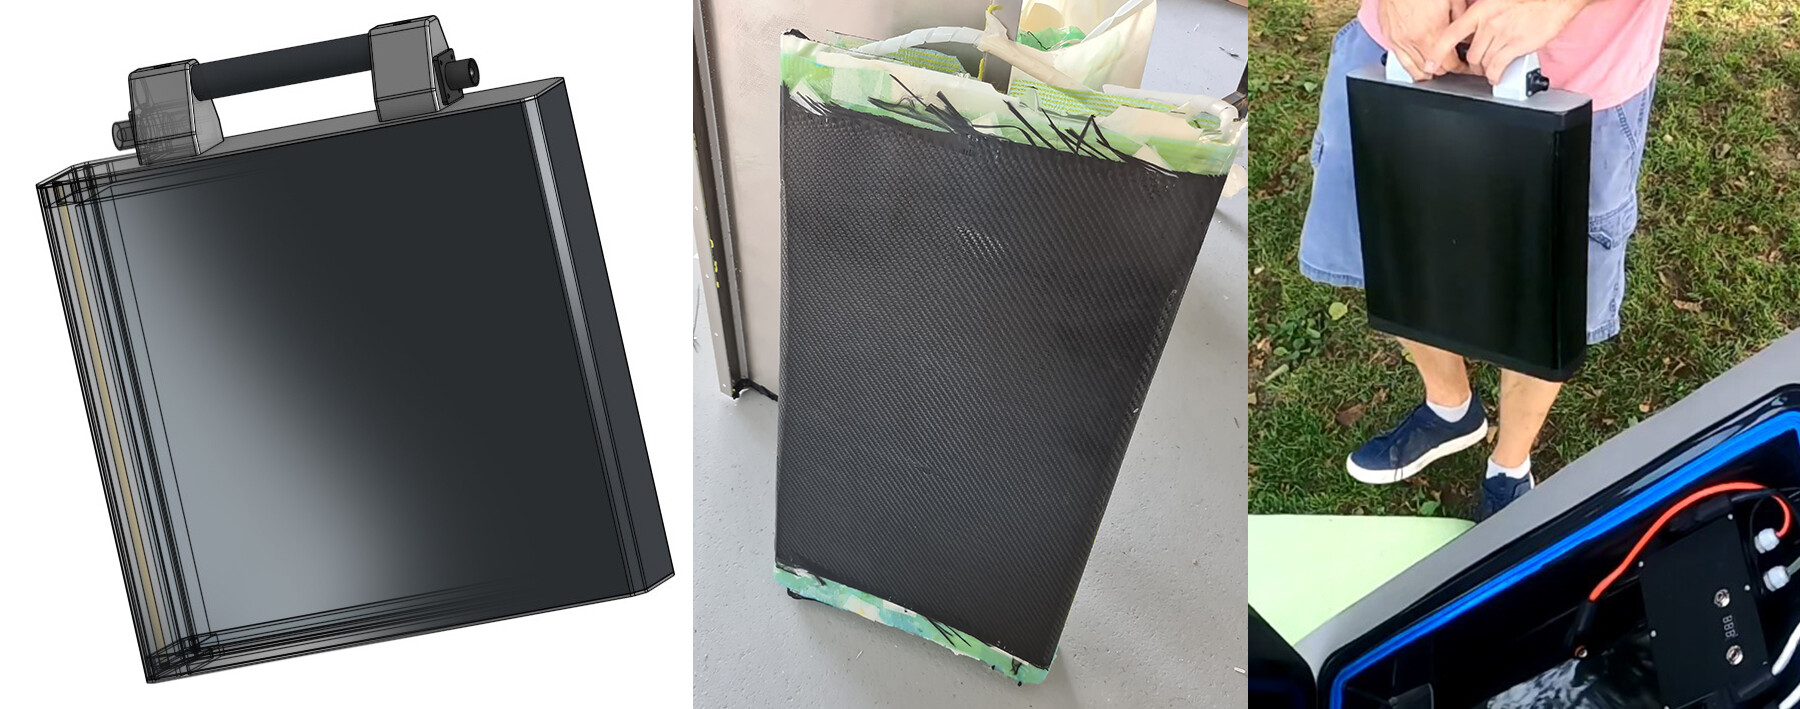
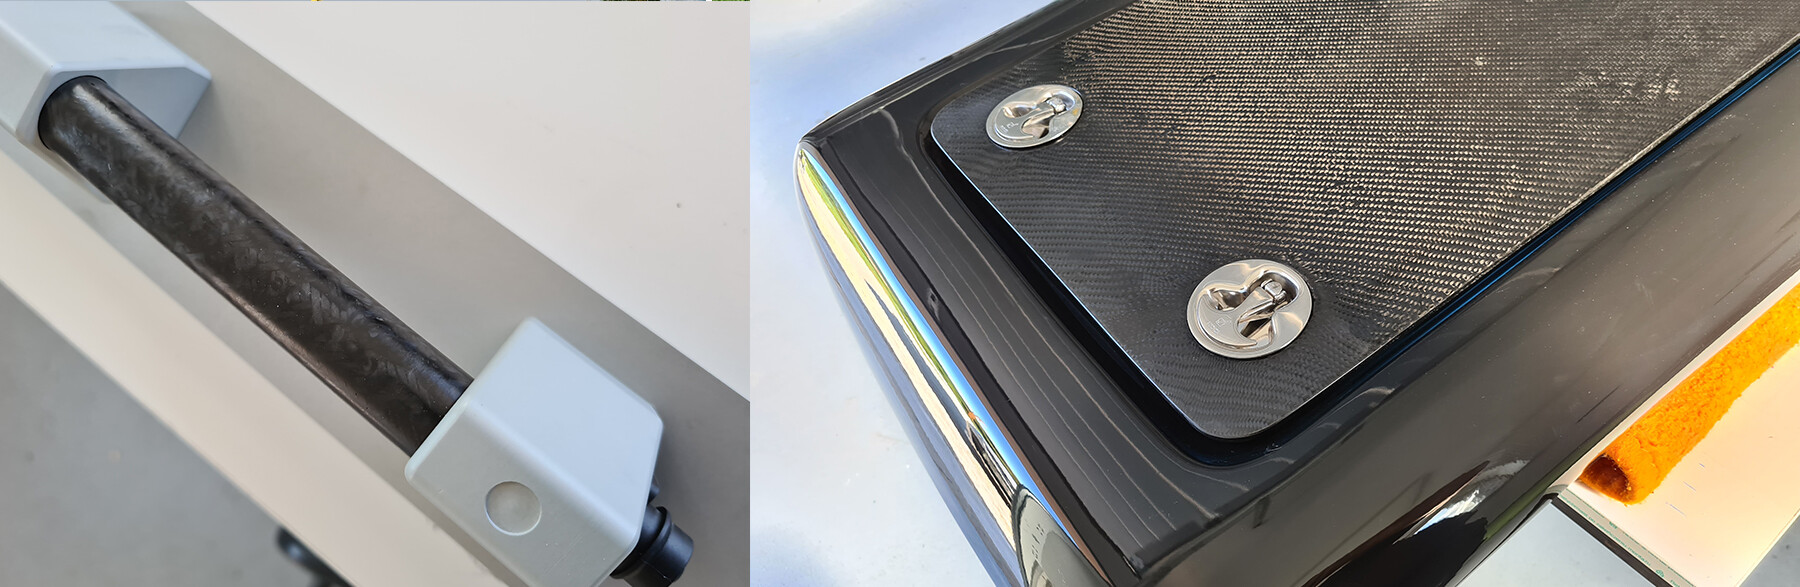
After curving the board, it was time to design the battery case. The idea behind the design was that even if I designed the case for a Li-Ion LG INR18650-HG2, 14S, 14P battery, anybody could adjust/cut the width of the carbon sleeve on his battery specification. I have also included another idea design-wise, and that is that all screws are hidden.

Disclaimer: Because of carbon being conductive, I have made the interior of the carbon sleeve of Kevlar, which is heat treated. Thus, is can bear high temperatures.

Time flies, so a year passed since I was working on other things, too, e-foil being my free time activity. I was lucky enough to meet Peter, who joined the project. Besides being an adrenaline sports junkie, he comes from financial sector and he has really good organizing skills.

After that, the project skyrocketed.

We finally had schedules, timeline and project management with regular meetings. I’m so grateful to Peter, because with his work we can achieve better and faster results.

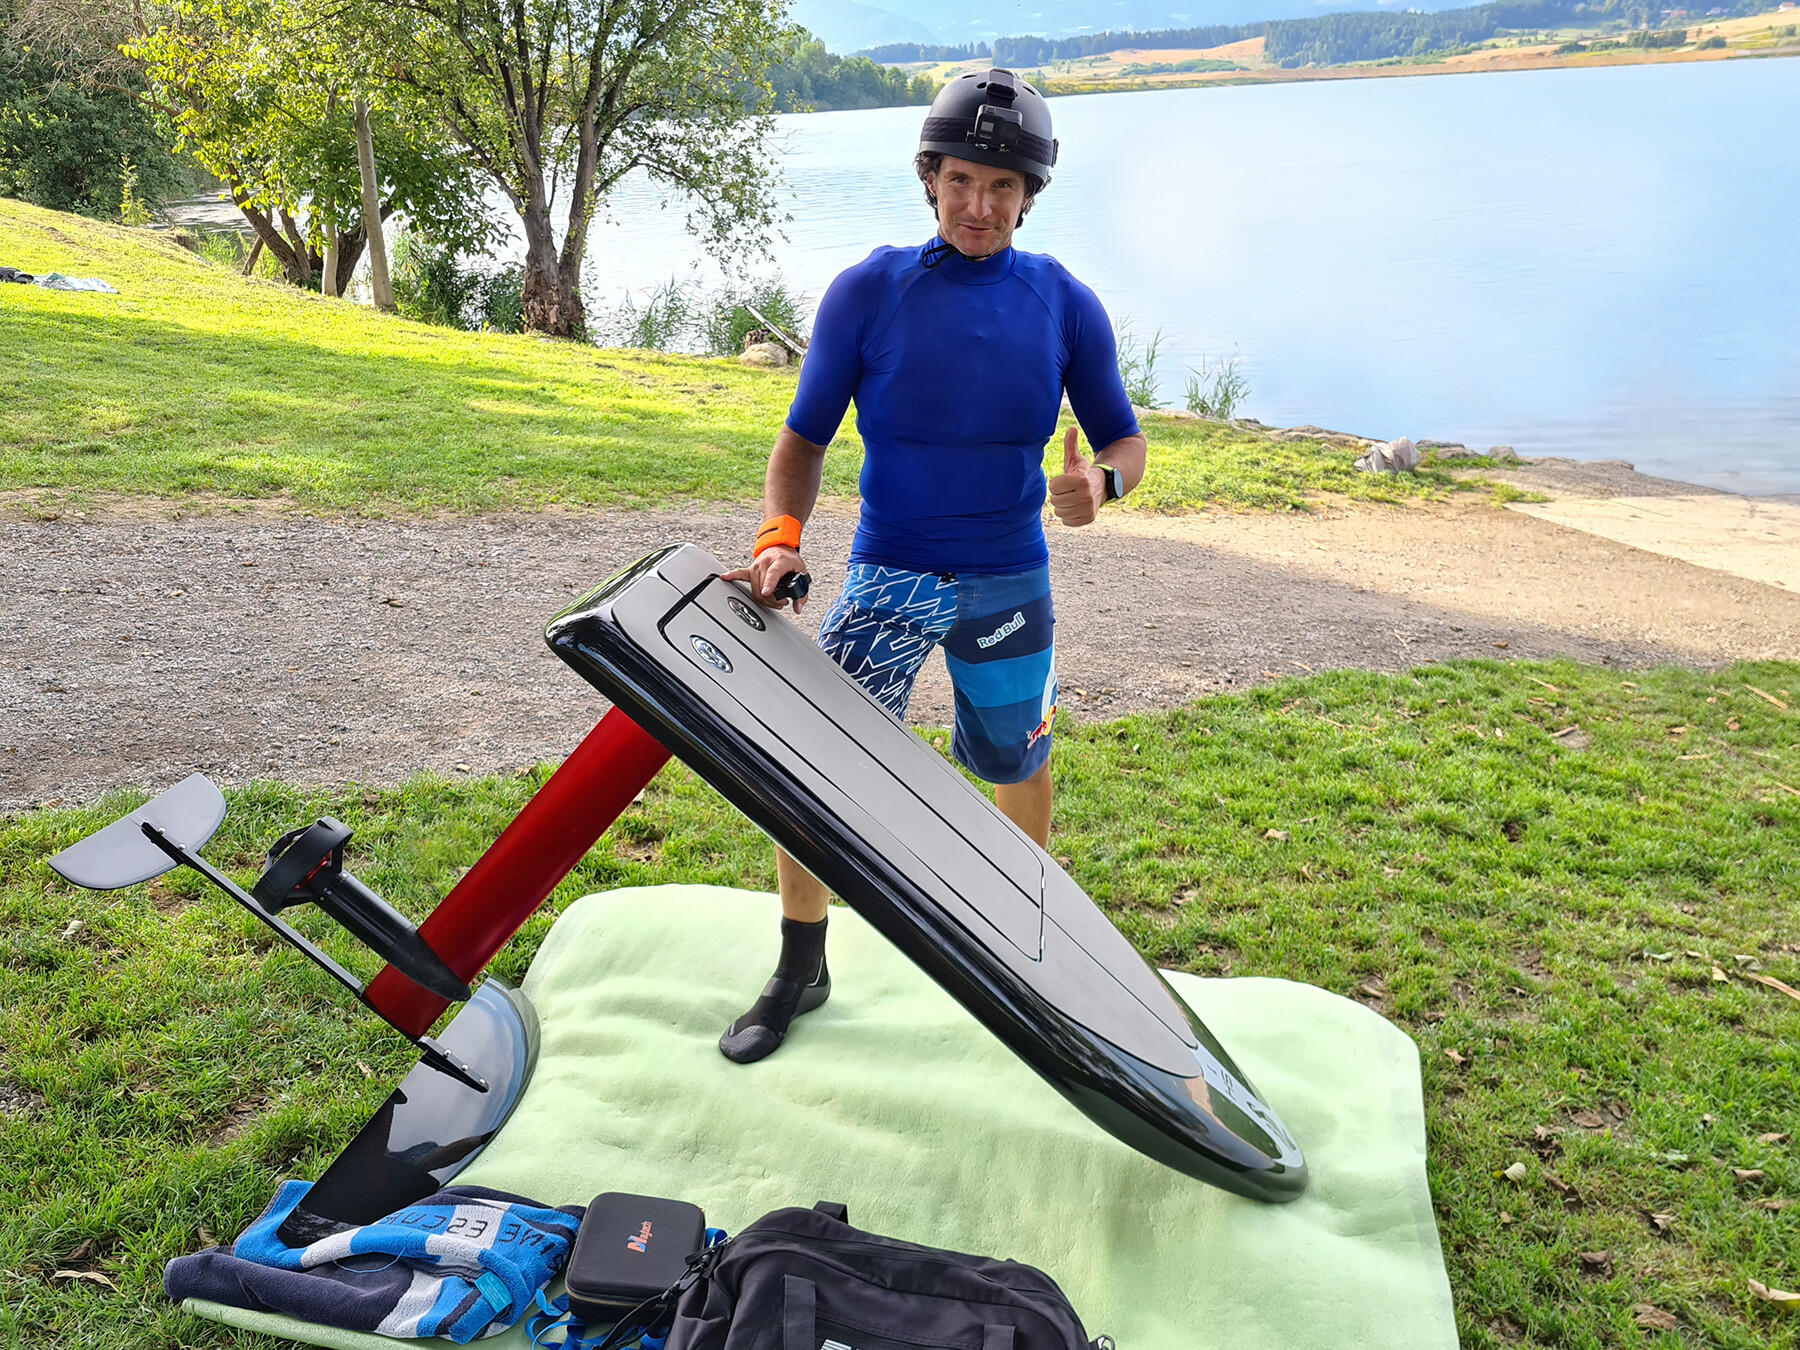
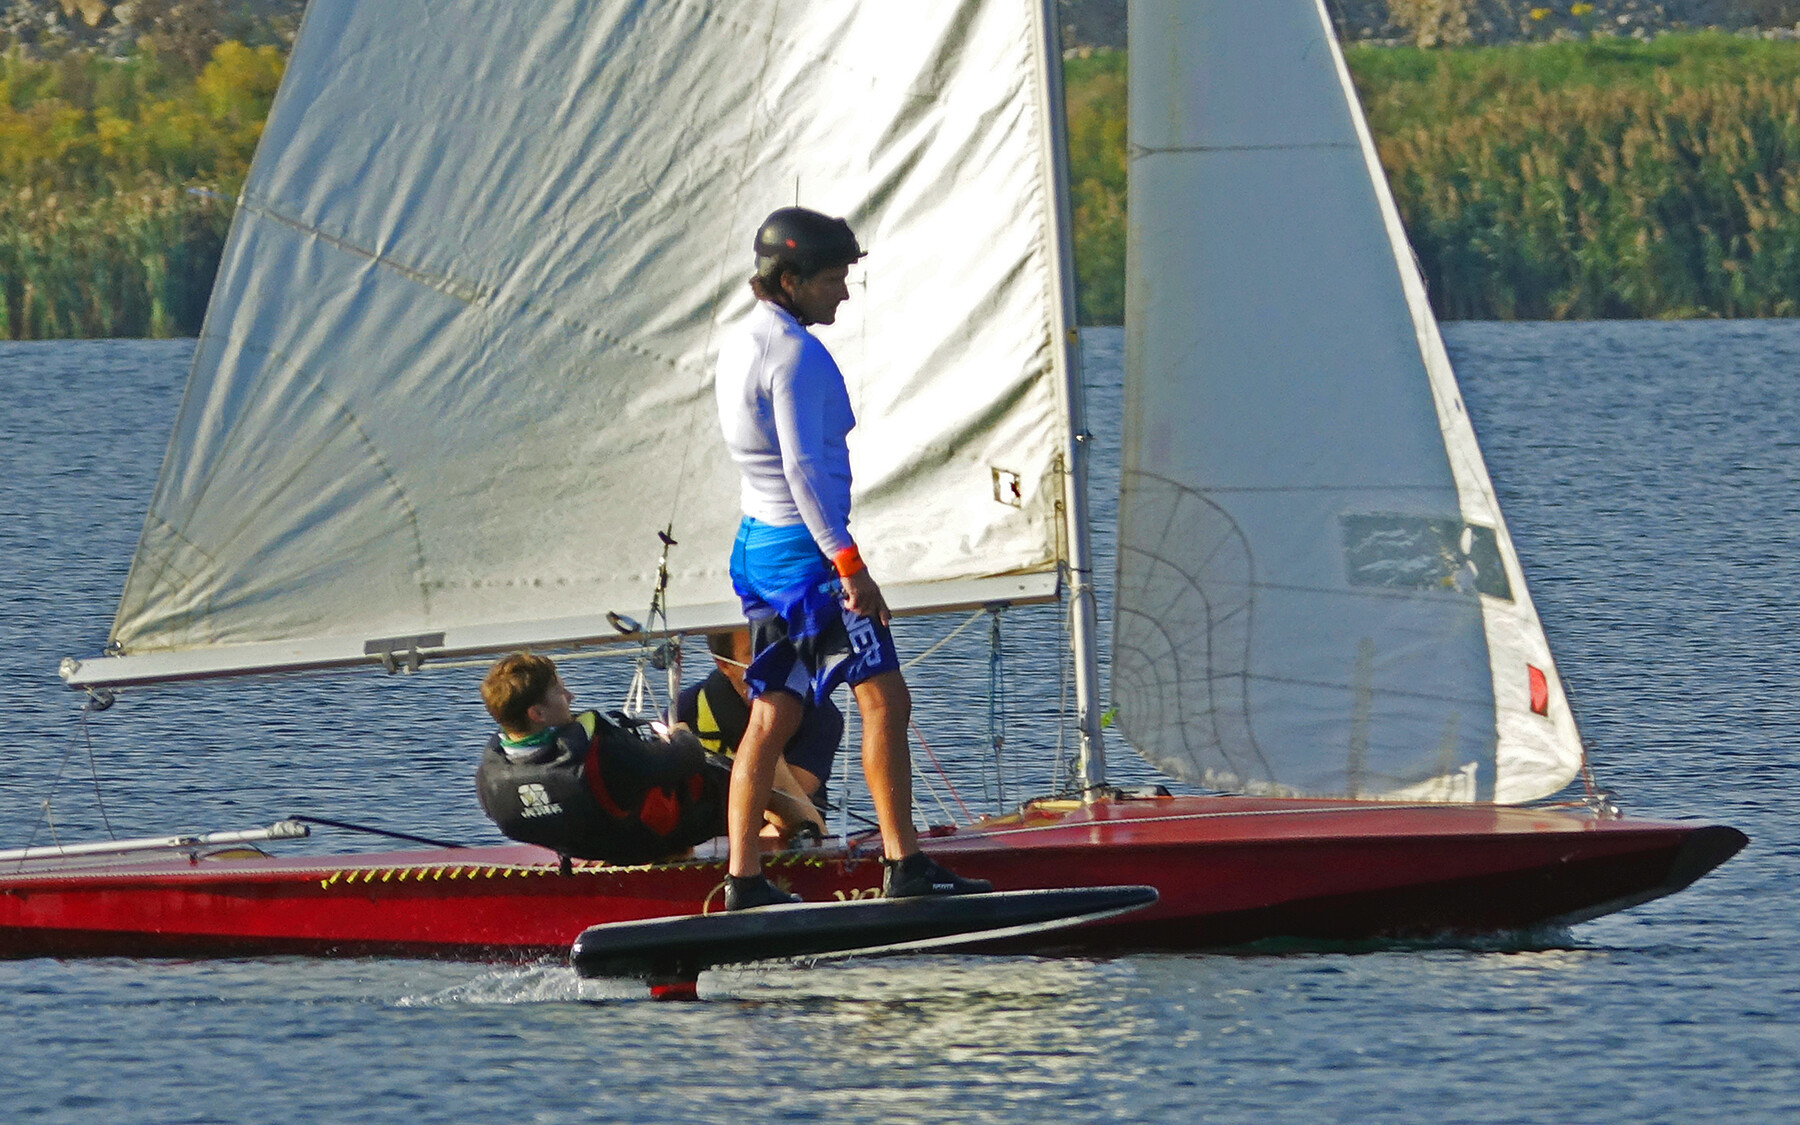
Peter was also the testing pilot for the e-foil. We have made a few e-foils by now and now we are ready to hit the market.

We specialize in carbon and all kind of composite materials since I am an industrial and graphic designer. Everything is made inhouse except the electronics and the motor assembly.

We decided to start selling our first two products, which are the carbon fiber board for the e-foil and carbon/Kevlar fiber battery case.

16 Likes

Wow, great work! Can you tell us more about the wing set you are using?

Any more details, dimensions and pricing for the battery box? Thanks! Good looking project.

Hello foilmore,

Thanks. I have designed some foils and I’m currently testing them. Also I’m migrating to the RTM mode of carbon production. In a few weeks when I finish I will post some pictures. The design on the wing set on the photo is from René.

Before the new year, we will add more of our products to the market, together with the launch of the new online store efoil.help

The e-foil board:
We are offering the start-up package, consisting of the finished carbon fiber e-foil board with battery cover, which are not assembled - the mounting of the cover on the board is required.
We can offer customized attachments for different masts, at the moment it’s optimized for FR Motor Assembly. The standard color is white, but we also offer a custom paint job. The product is not assembled and it does not contain the cover seal, hinges, inox handles for the hermetical closure of the cover and EVApad.
The special foil-zone price for the first five boards is 886 euros + shipping.
The e-foil board specification:
Length: 1480 mm
Width: 602 mm
Thickness in the widest part: 125 mm
Weight: 4.8 kg
(Upon request, the e-foil board can also be completed with the cover seal, hinges, inox handles for the hermetical closure of the cover with EVApad.)

The battery case:
The battery case assembly consists of two aluminum covers which act as coolers and the carbon-Kevlar sleeve.
The price is 427 euros + shipping.
The length of the battery case assembly with handles and lids is: 375 mm

(The length measure is for information only because it depends on the length of your battery pack.)

For orders you can contact us on the e-mail: orders@efoil.help

2 Likes

Hi Jasmin,

Looks great, I have a couple of questions :

Can you tell us a little more about the board you are selling ? Do you guys make the carbon fiber work in-house ? How do you make it look so nice and shiny ? Any technical process involved you can share with the community or is it done by specialized machinery ?

Also, any more pictures / video of the foil in action ?

What about the wing set ? You said designed by René, does it mean we can buy them on the RL foil store ?

Would you mind sharing some logs or average consumption values for the setup you are using to compare to what’s today on the market with the RL / other foils we tend to use ?

Thanks !

Good afternoon!Beautiful build! I have a question. Are the rotary lid locks leak-proof? Water doesn’t pass through the axis of rotation?

1 Like

Our board is CNC carved from a single block of polystyrene. Later on, we manually apply the carbon layers. At the and we vacuum-bag the bord and oven cure for 12 hours. When the bord is finished, we grind it and apply a protective coating of polyurethane based paint and UV protective varnish. The whole process is 14 days long.

All the carbon products we sell, are developed, and build in-house. We pay special attention to the details, high quality, and appearance. Currently, our production is migrating to the RTM mode of carbon processing, more about the new method of production will be revealed in January 2021. With this method, we will manufacture all E-foil components except the board.
Currently, only the board + cover is on sale, which you must assemble by yourself.

We have a lot of videos and we will attach YT channel links soon.

We tested quite a few different wings and based on our experience in nautical-hydrodynamics, we made our own wings, which we will present. We have developed a whole family of new foil-wing sets. We will produce them with RTM technology and they will be available for purchase in January 2021 exclusively in our e-store: efoil.help

However, it is difficult to compare the rides with each other, as there are a lot of external factors, from the wind, the way of foiling, water flow, etc. That is why we have developed a test facility. We are currently in the final phase of manufacturing a test facility for testing the performance of motors, batteries and propellers.

In the next step, it will be possible to test the wings up force and efficiency and have a monitoring of the propellers with a hi-speed camera (1.000 fr/s) to evaluate efficiency.
More about the presentation of the test facility will be written in an article on this forum in December.

For orders you can contact us on the e-mail: orders@efoil.help

3 Likes

We had a couple of drops in the chamber but anyway everything in the chamber is water-resistant and it doesn’t bother me.

We use this model from here:

4 Likes

We can move the locks outside of the padding, but this will increase the size of the hatch!

Yes, this is the path I will take to improve the design.
But with one minor difference. I will move the electronics compartment inside, right behind the Seahorse sign.

This way, the size of the lid will stay the same. And then I will separate the waterproof compartment of the battery from the locker catch cavity.

2 Likes

I am excited to see the wing options you come up with. I hope one is a very large high aspect ratio wingset like in your testing pictures.

Or use the Gemplus water tight locks LIFT is using:

2 Likes

Since our last build was without a hatch, I didn’t study this issue enough on the forum. Question to the community. Has anyone used a dishwasher door seal?

No , may be hard to use the other way around ( keep the water outside )

Best for the hatch so far : leave 5 mm around and under , use a foam Inside to erase the hatch to level and filled with a bi-compound silicon , this will give a L shape and so far works nice

2 Likes

I think this is how @michion did it very elegantly, L-shaped and blue :ok_hand:

1 Like

Yes, thank you! I studied the work of Michion, there are no more questions about it!

Jasmin,
How did you attach the mast to the board. In the earlier photograph it looks like an aluminum plate? That would make an excellent heatsink for cooling the ESC. What remote and esc are you using? Thanks. The board is beautiful.

Hello Kiteman54,

Since we integrate an FR motor assembly in the board wi have also bought an insert from them made of composite material and inox nuts. Aluminium is not suitable for using it for inserts because of the galvanic corrosion which occurred between carbon and aluminium. Because we are not tied to any manufacturer of motor systems, we also make custom inserts for any motor or mast brand.

Best, Jasmin RM

1 Like

Jasmin,
Thank you for that excellent explanation. I was wondering how to make a heat sink at the bottom of the board so that the ESC just above it could transfer heat to the aluminum mast. It seems like this would not work, and might not be needed, but was thinking of how to avoid the water cooling. I was not able to find your email. Could you please resend? giwarner@yahoo.com Thank you