I noticed the same issue with my parts that came yesterday. rightly or wrongly I used the new shaft leal but used the old stationary ring. I also used the old rubber seal as I ordered the 44 mm x 3mm as there no 45mm but they were too thick. I’ll re order the right parts and fit them at some point.
It was bloody lovely though to have a nice quiet motor running, forgot how quite they are…
Hello everyoneAfter three years of operation, noise also appeared.And I decided to replace the bearings at the end of the season. I could remove the motor, I have connectors in front of the mast. But I decided to try to remove the bearings without dismantling the engine. I made a puller from a tube and used a threaded stud. Everything worked out! the rear bearing rotates with jamming. ordered new NSK. There was no water inside, I will not change the seals yet!
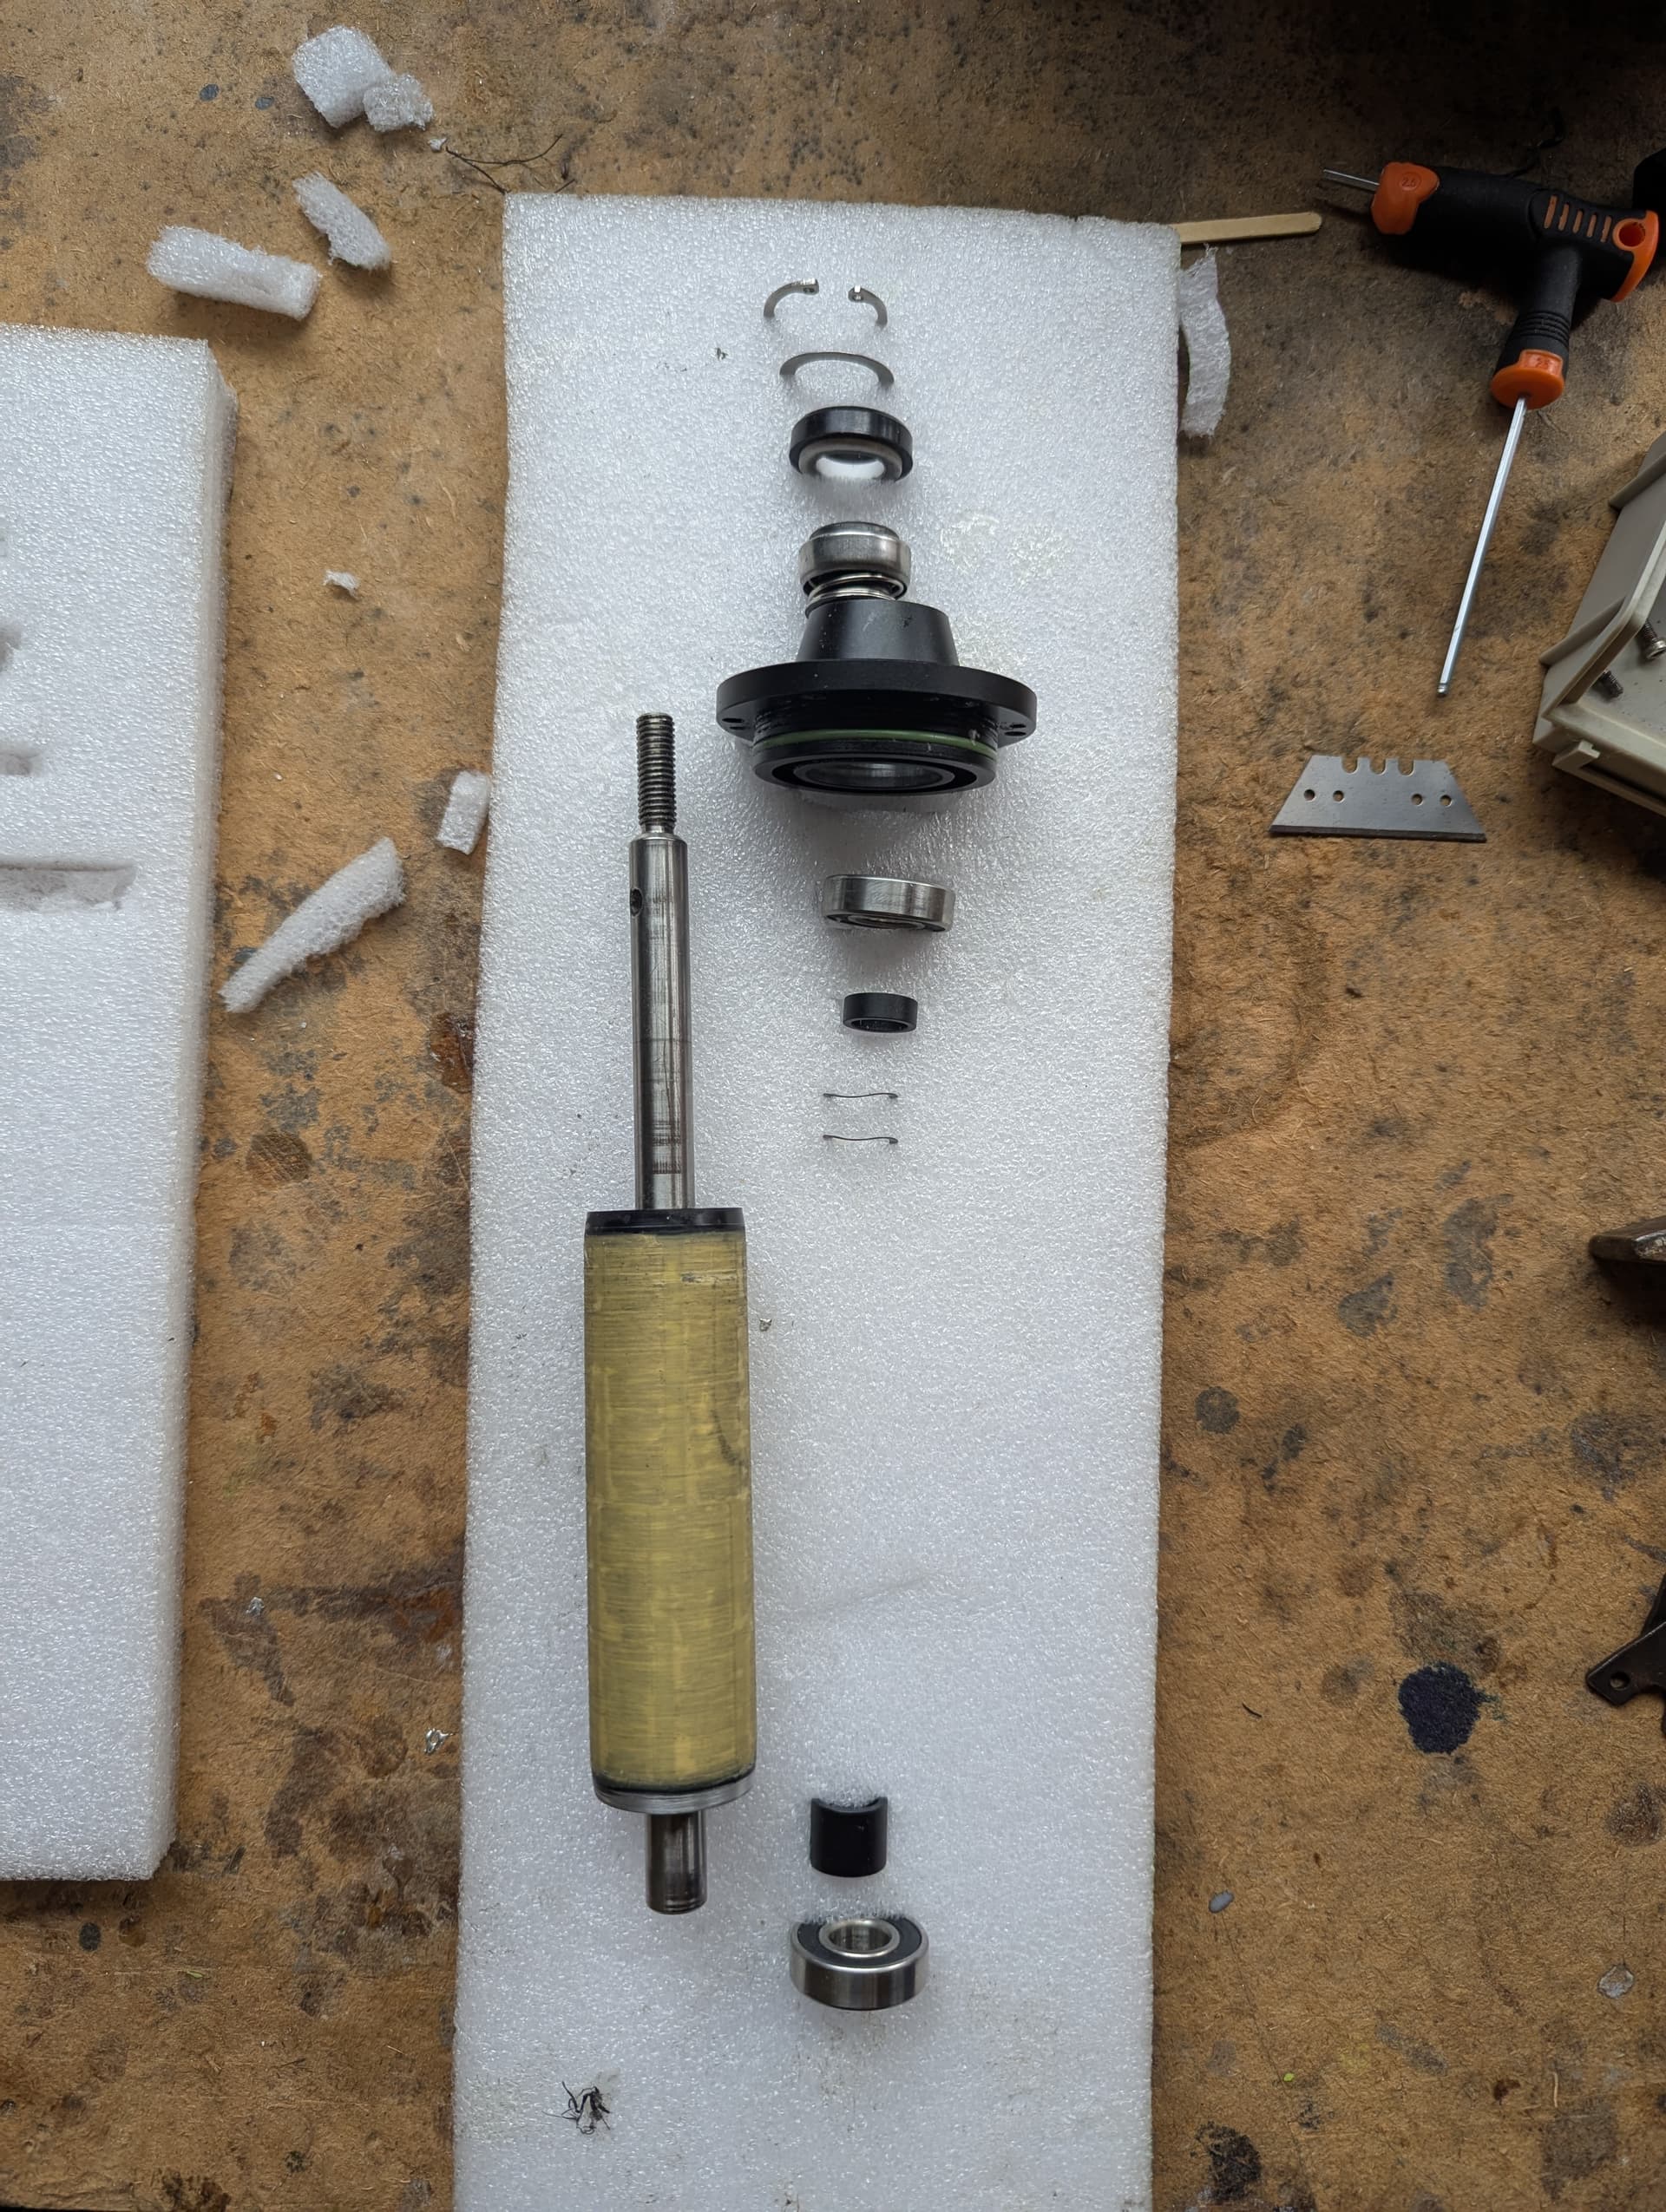
Sorry for reviving this old thread again, but my dad and I took a 65161 apart for some “maintenance”, and lost the order of the sealing part (we did make a note of if, but kind of lost it).
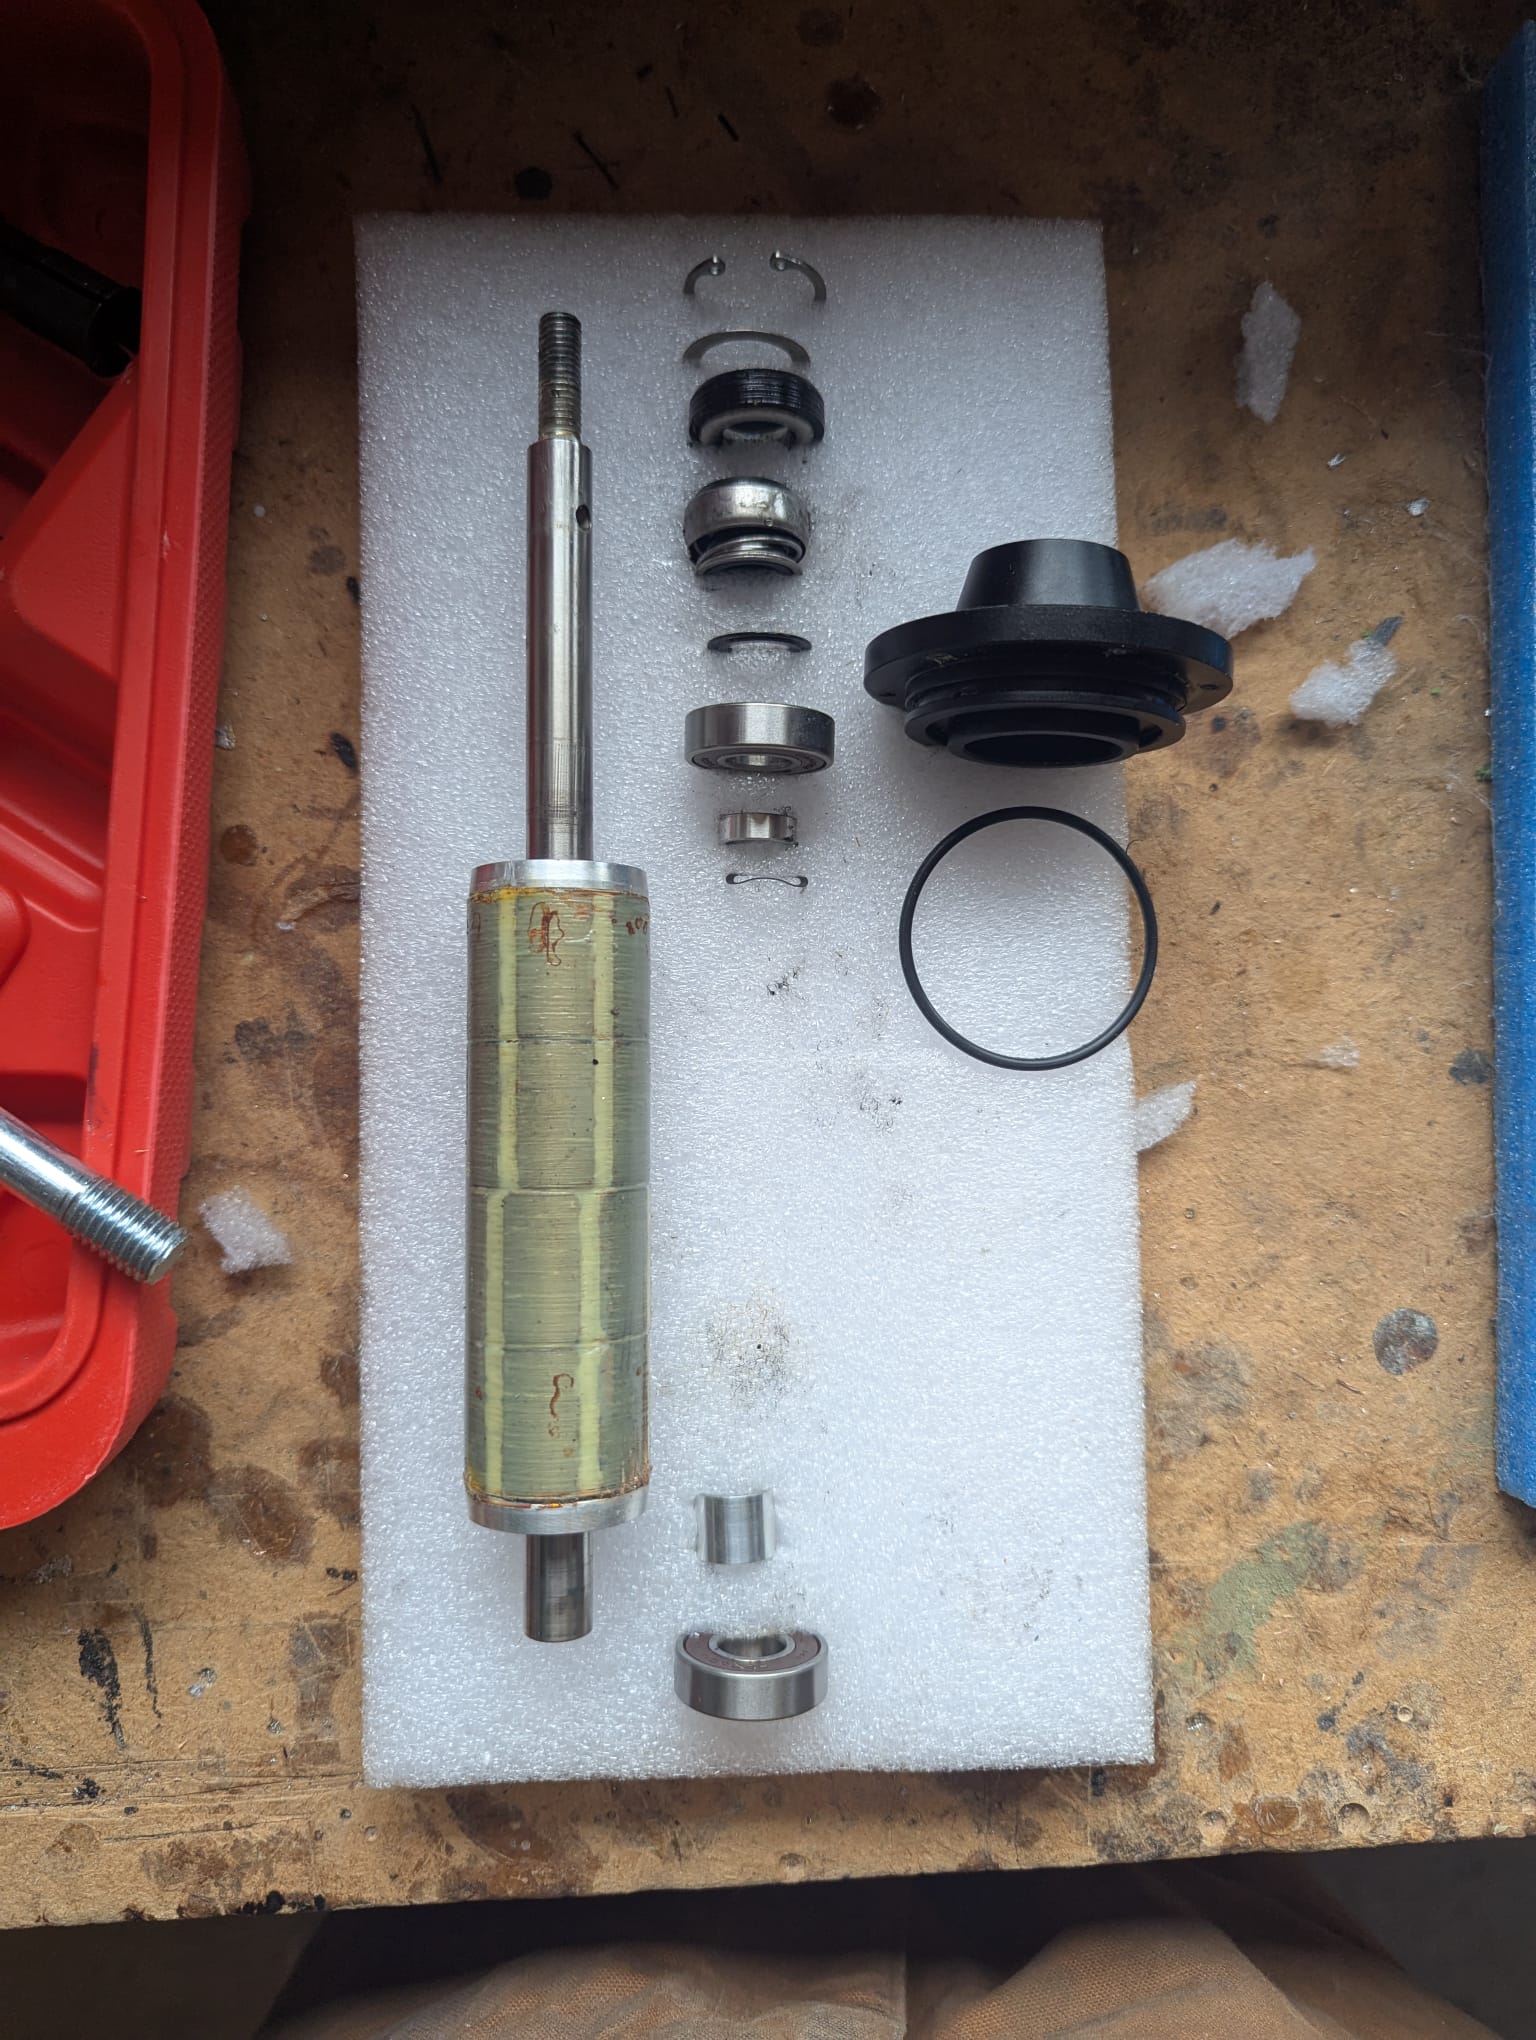
Anyone here who can verify if this (see pic) is the correct order?
Obviously the “lid” will go after the bearing, and than the rest will follow.
From right to left.
Spacer > bearing > cover > ring (with inner part a little bit thicker, facing to the cover/bearing) > stationary compression sealing rubber (springpart facing bearing) > rubber ring (white ceramic facing stationary compression sealing) > flat washer > retaining ring.
If someone has already made the changes and it works, could you please share the link to the parts along with their specifications so we can order them? Thank you!
However, I feel like the quality isn’t great since installing it, the motor has become noticeably harder to spin freely, even with no load. It seems like there might be too much friction or a poor fit.
Has anyone found a higher-quality gasket that works well with the 65161, without causing this issue?
And if so, where did you purchase it?
I sell them on my website, along with a puller, and some mineral oil to put inside the motor once you have done the replacement. The oil helps with cooling, and if water does get in will let the bearings last a little a little bit longer.
These are the original 65161 bearings and seals, sourced from the manufacturer of the motors.
Excuse the photos - I ran them through ChatGPT to clean them up a bit so loose a bit of detail.
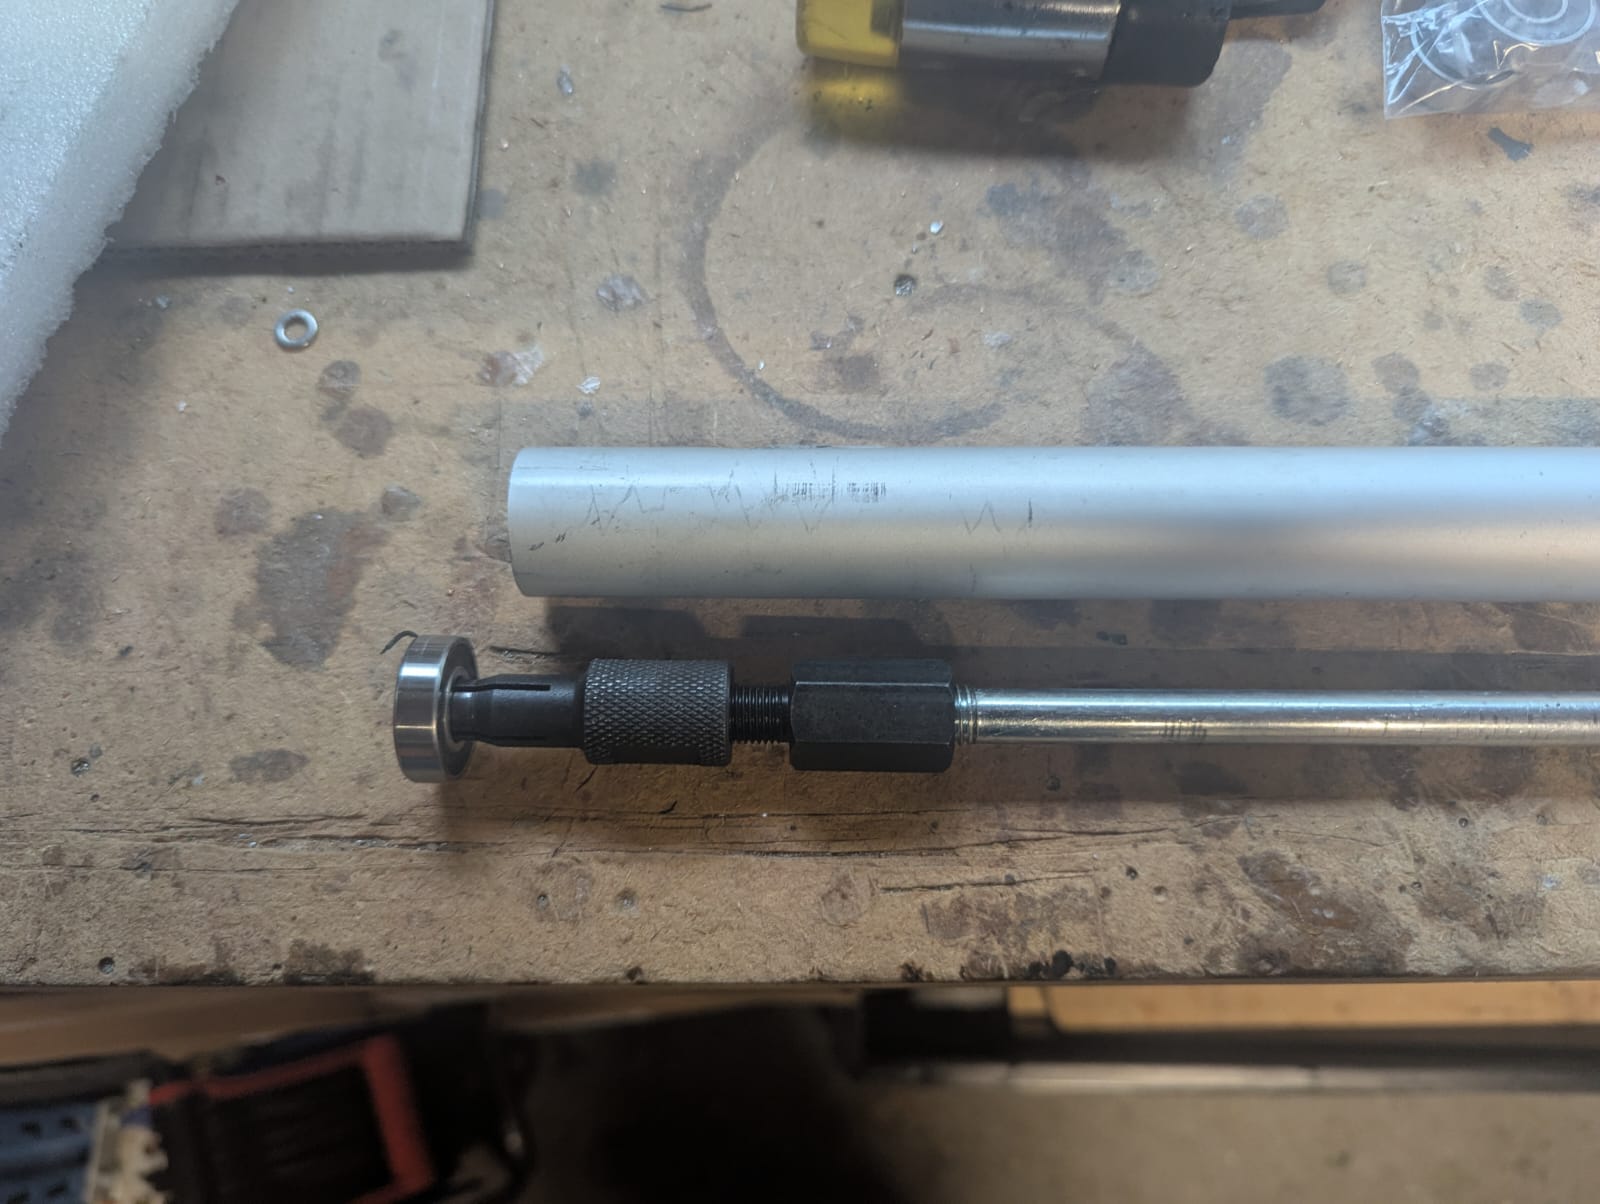
We use the “puller” again to hold the bearing and roughly align it at the bottom.
Once in place, we use a longer aluminium tube that slides over the “puller” and sits nicely on the rim (the outer ring) of the bearing.
When everything is aligned, we use a small rubber hammer to gently knock the aluminium tube what is sitting on the bearing into place.
Make sure you only knock the rim of the bearing!
Another way (but not really good for the bearing) it to fix the bearing at the end of the shaft (don’t forget the spacer) and try it that way. You might need some shims around the stator to keep it centered.
This definitely feels like the right way to do it.
But since I don’t have a longer tube that’s the same diameter as outer bearing ring, I used the second approach. Everything seems to work after putting the motor back together.
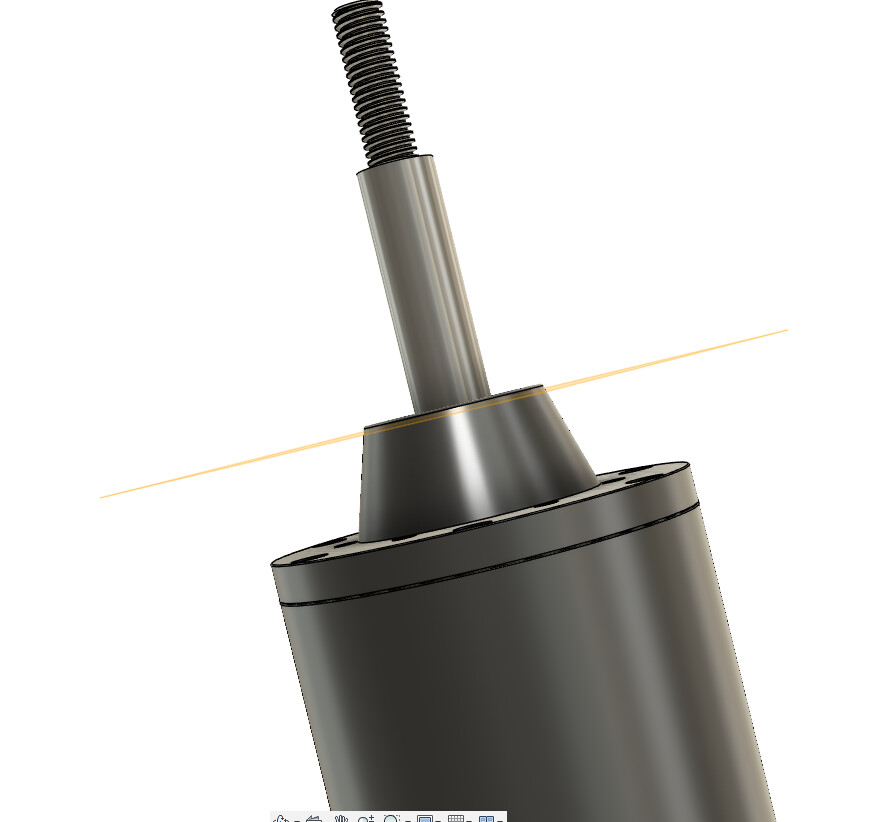
I need to mill down the lip that overhangs the circlip on this motor by about 2mm so I can adapt the motor for Liftjet. I wont disrupt the groove that holds the circlip but I will come very close to it.