Remixed model of @hangloose motor mount , suited for KT mast or of any, with some modifications.
The mount is slides on the mast by pushing. I don’t know if it is good or bad and how it should be, but if not pushing, it stays in place.
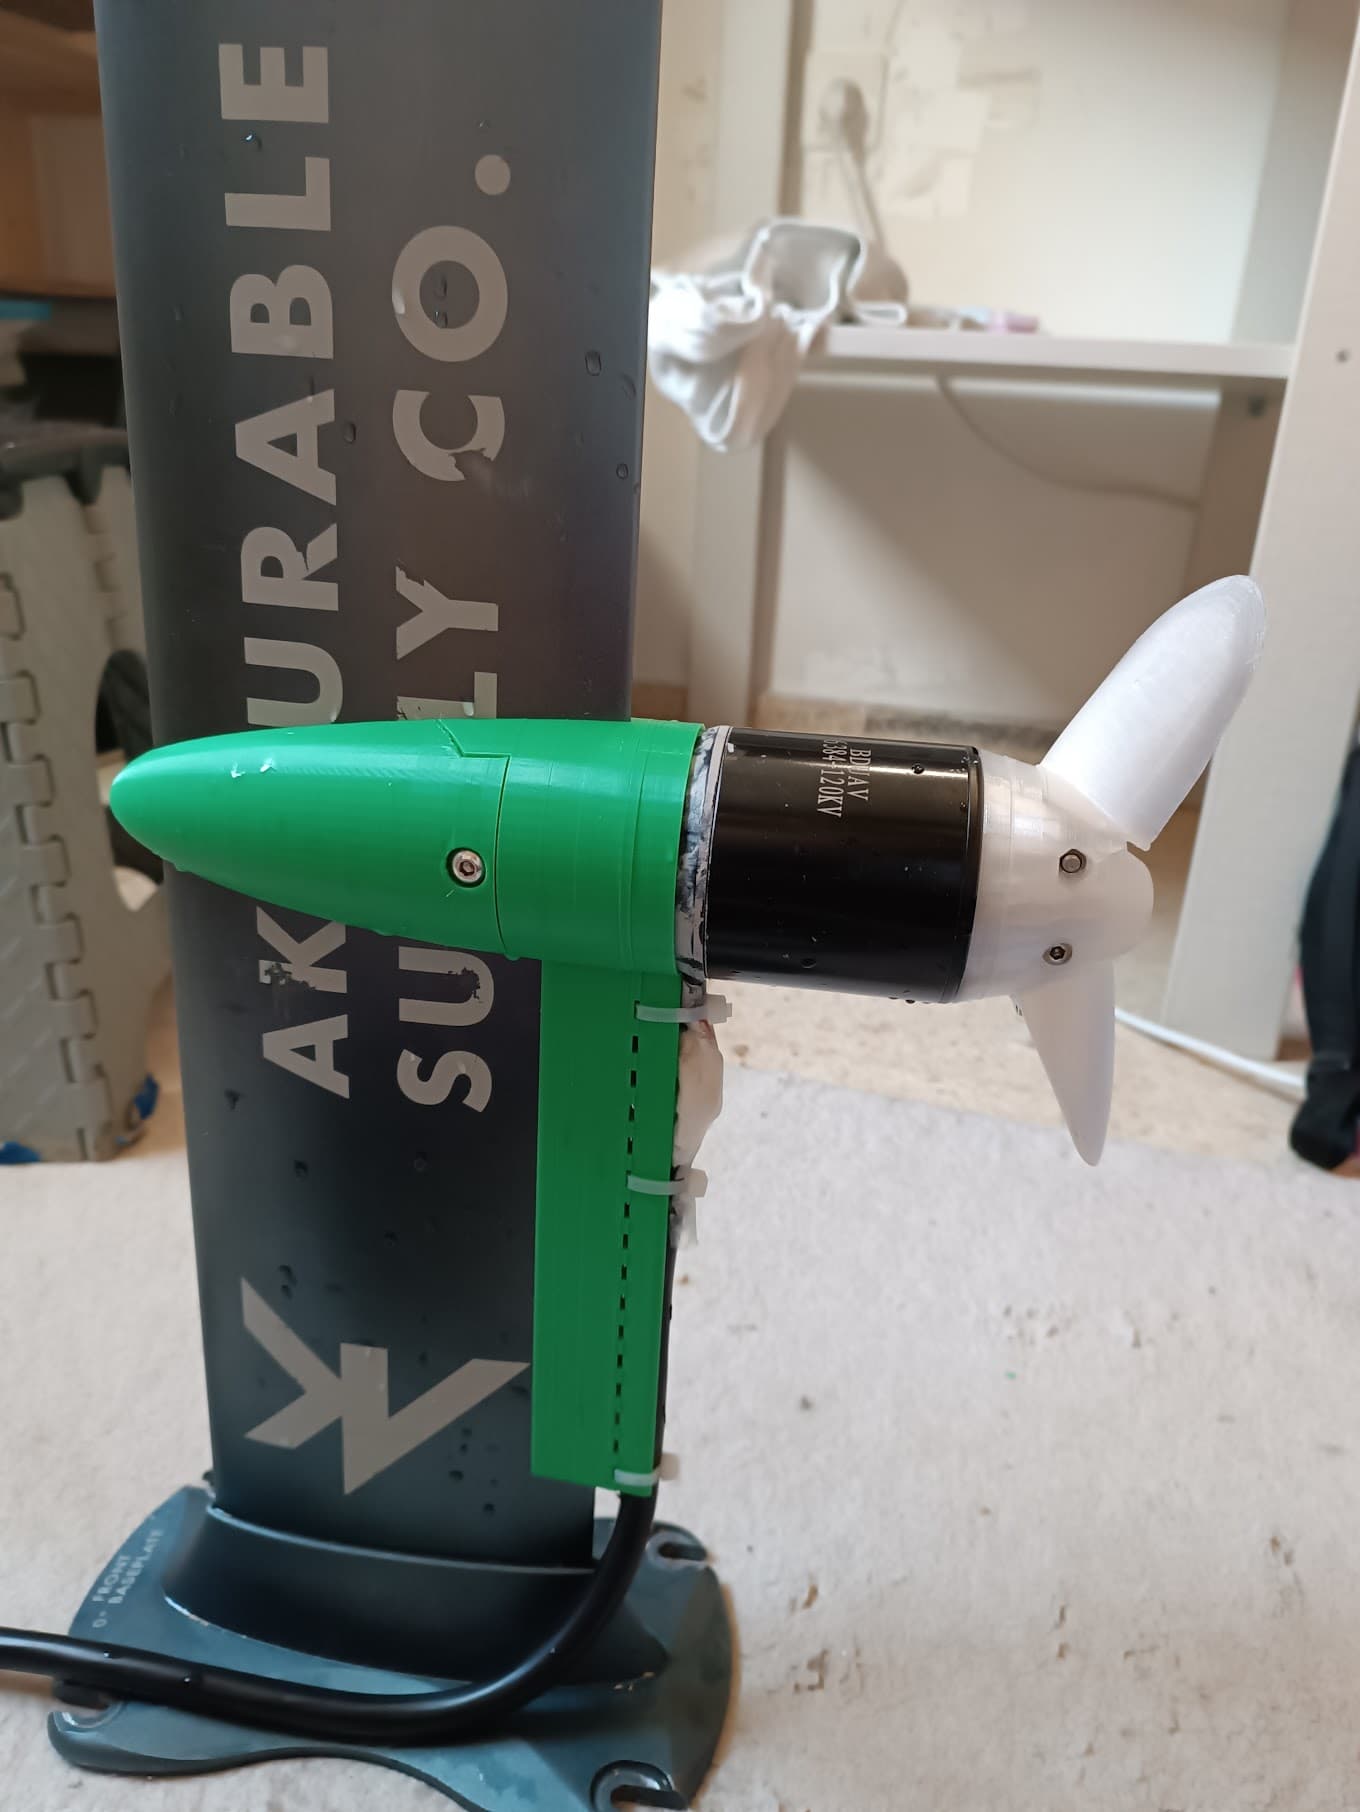
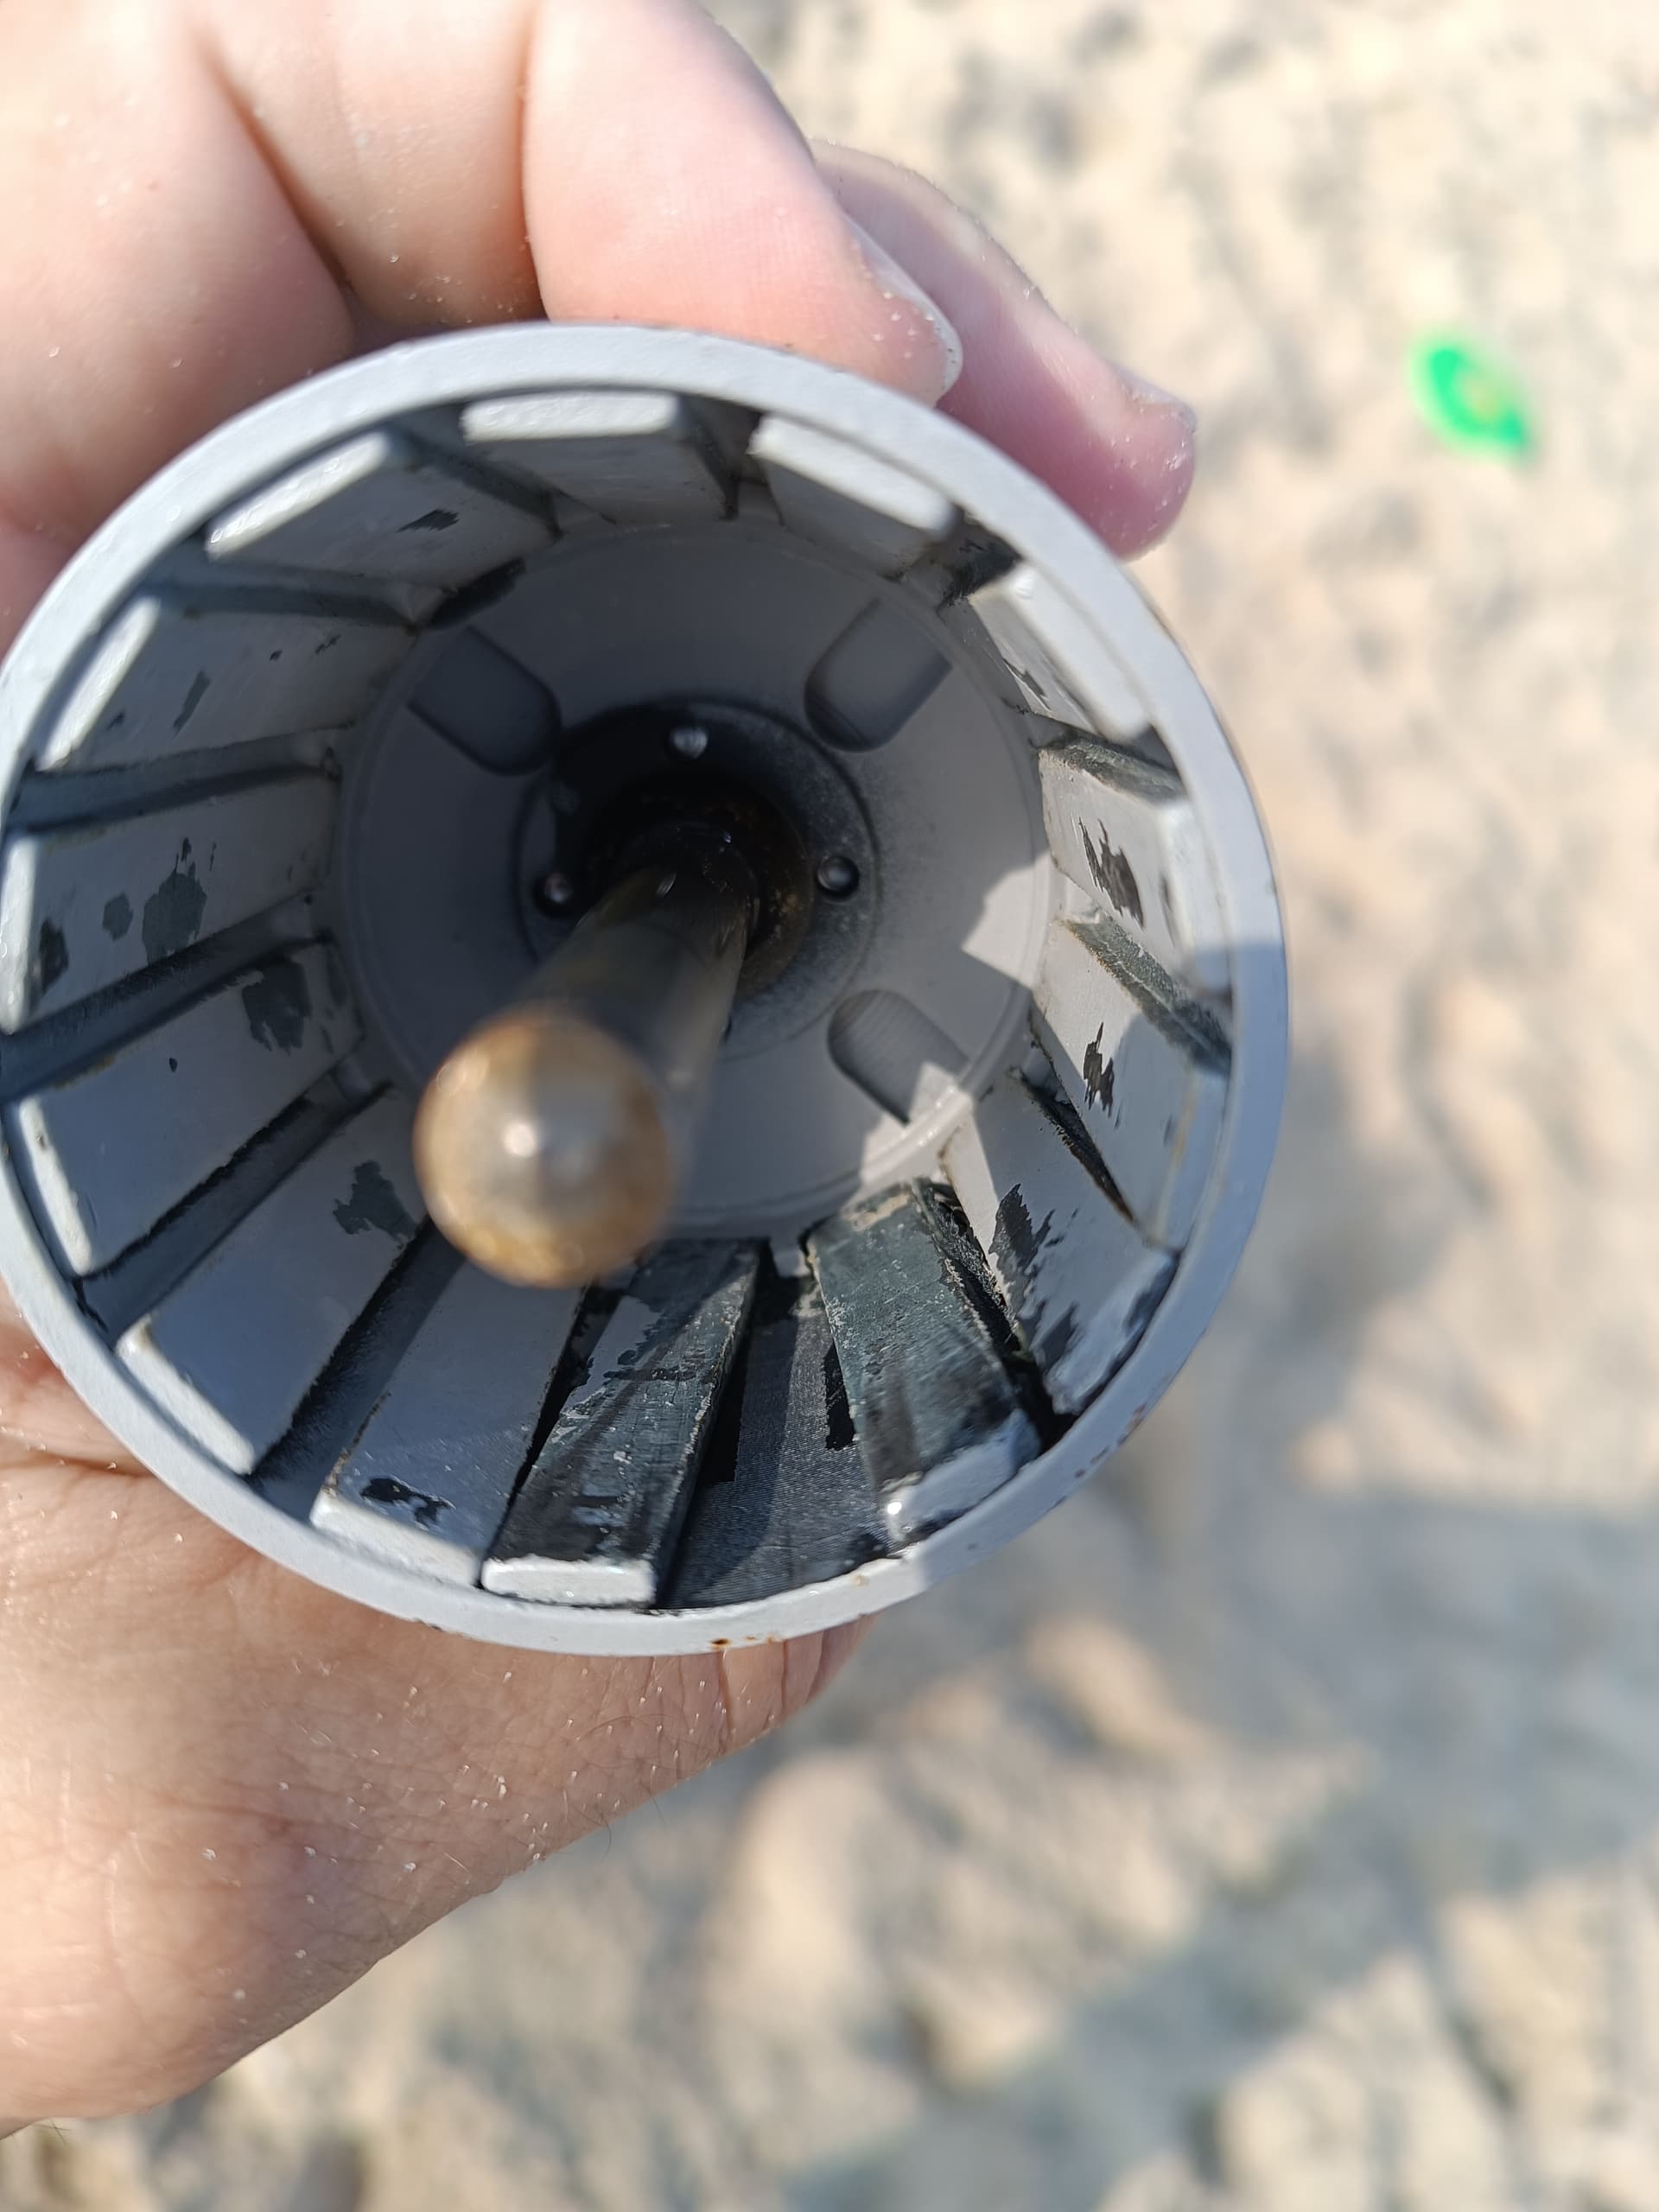
Remixed model of ThermikDreher two blade propeller:
Printed using PC 0.2 nozzle. The stl is set in an orientation ready for print and more printing instructions are there.
When I printed in low infill, it break in the second session. Now with 100% infill it held two sessions till far. Base with low infill also broke, now printed with 100% infill.
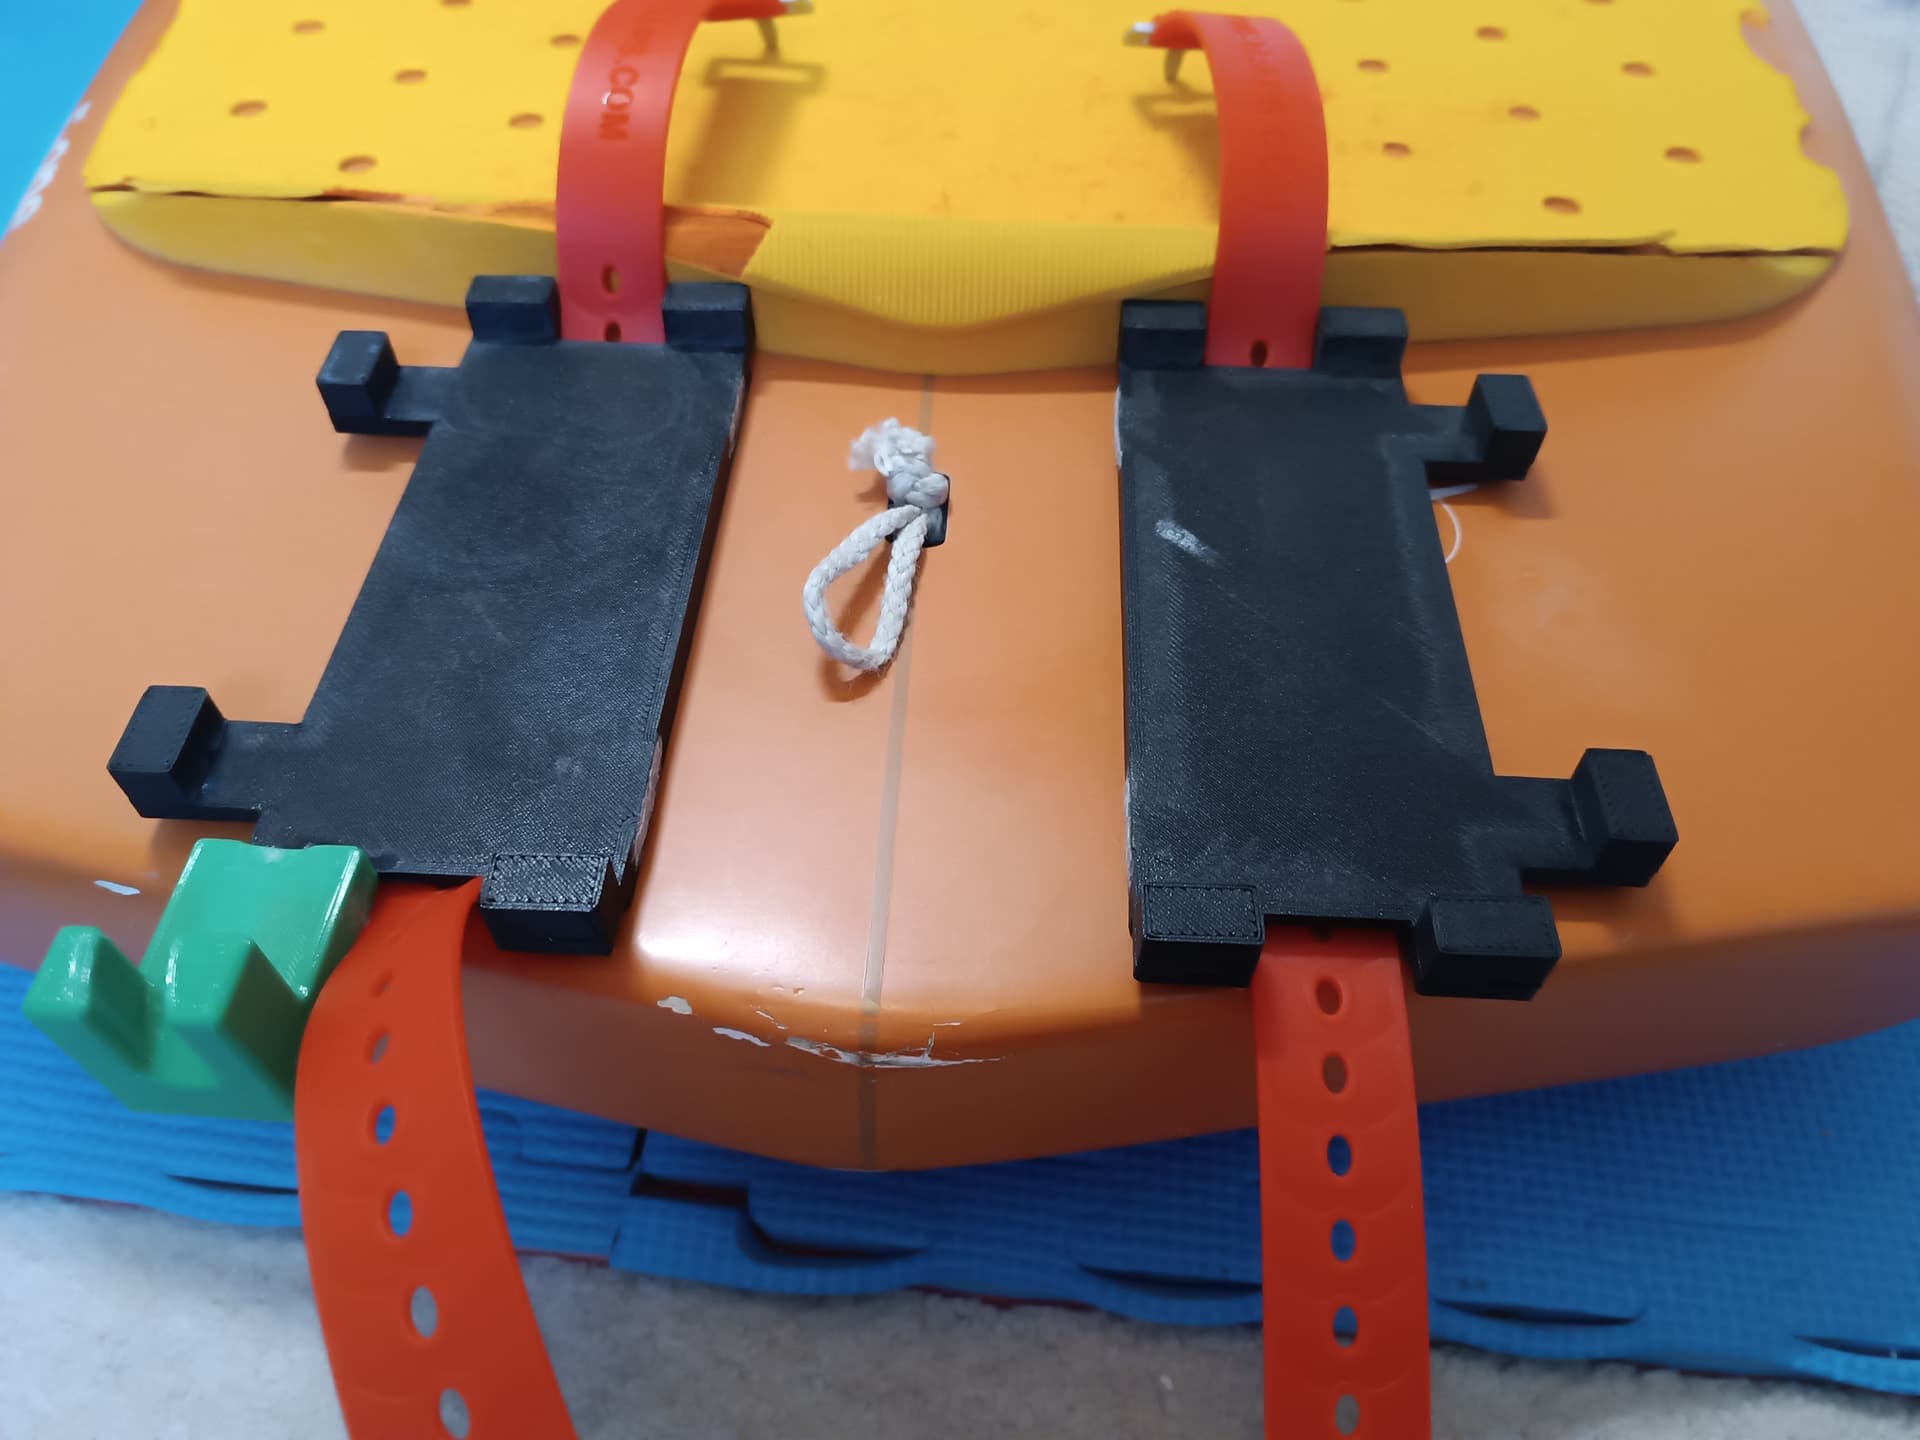
More parts:
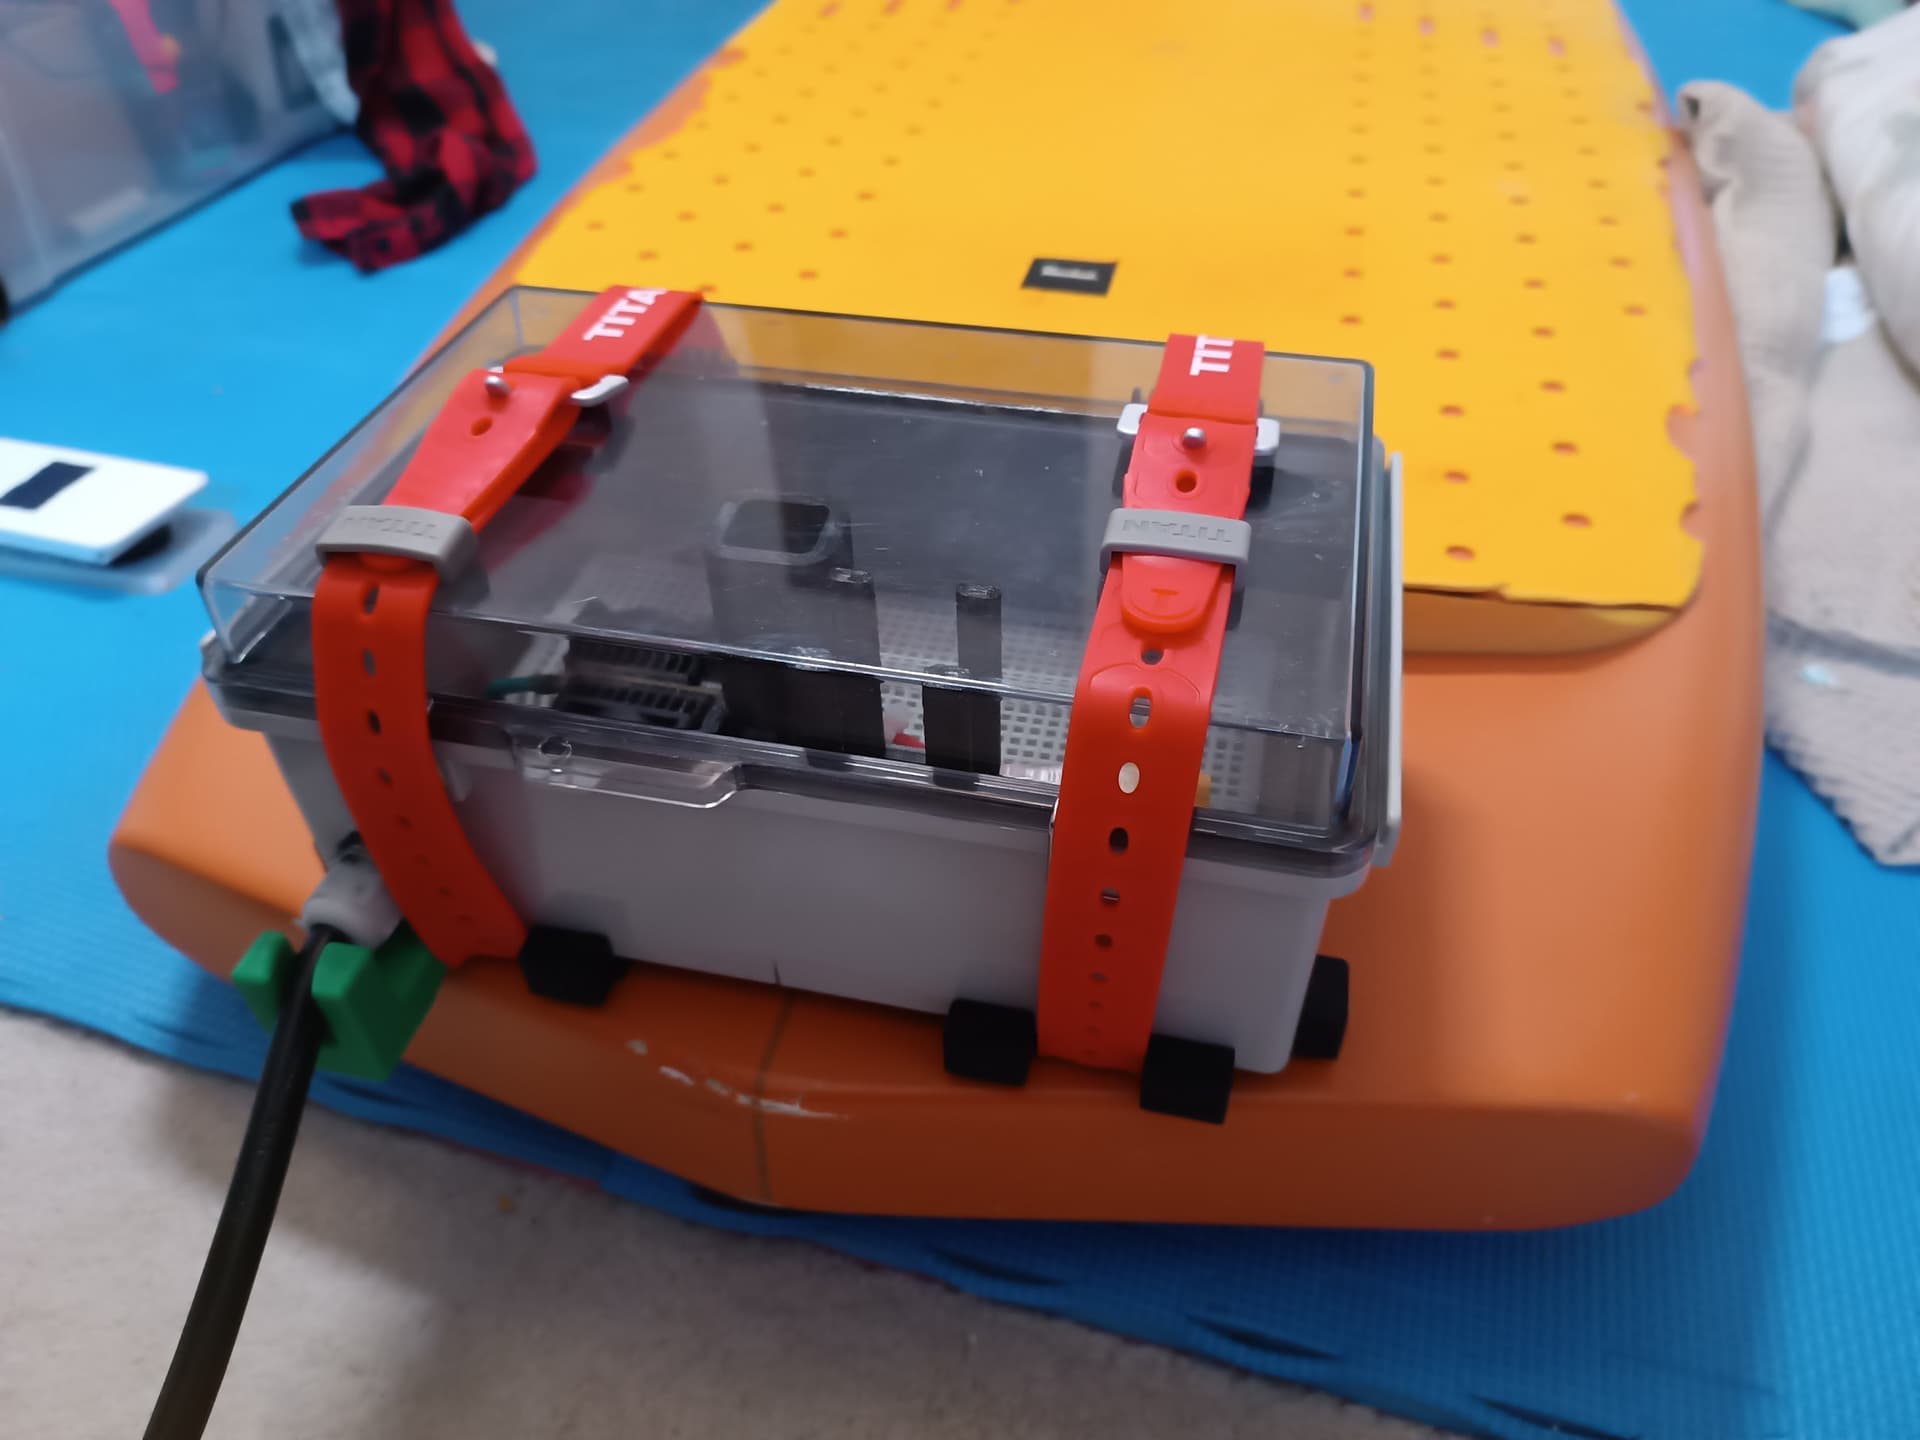
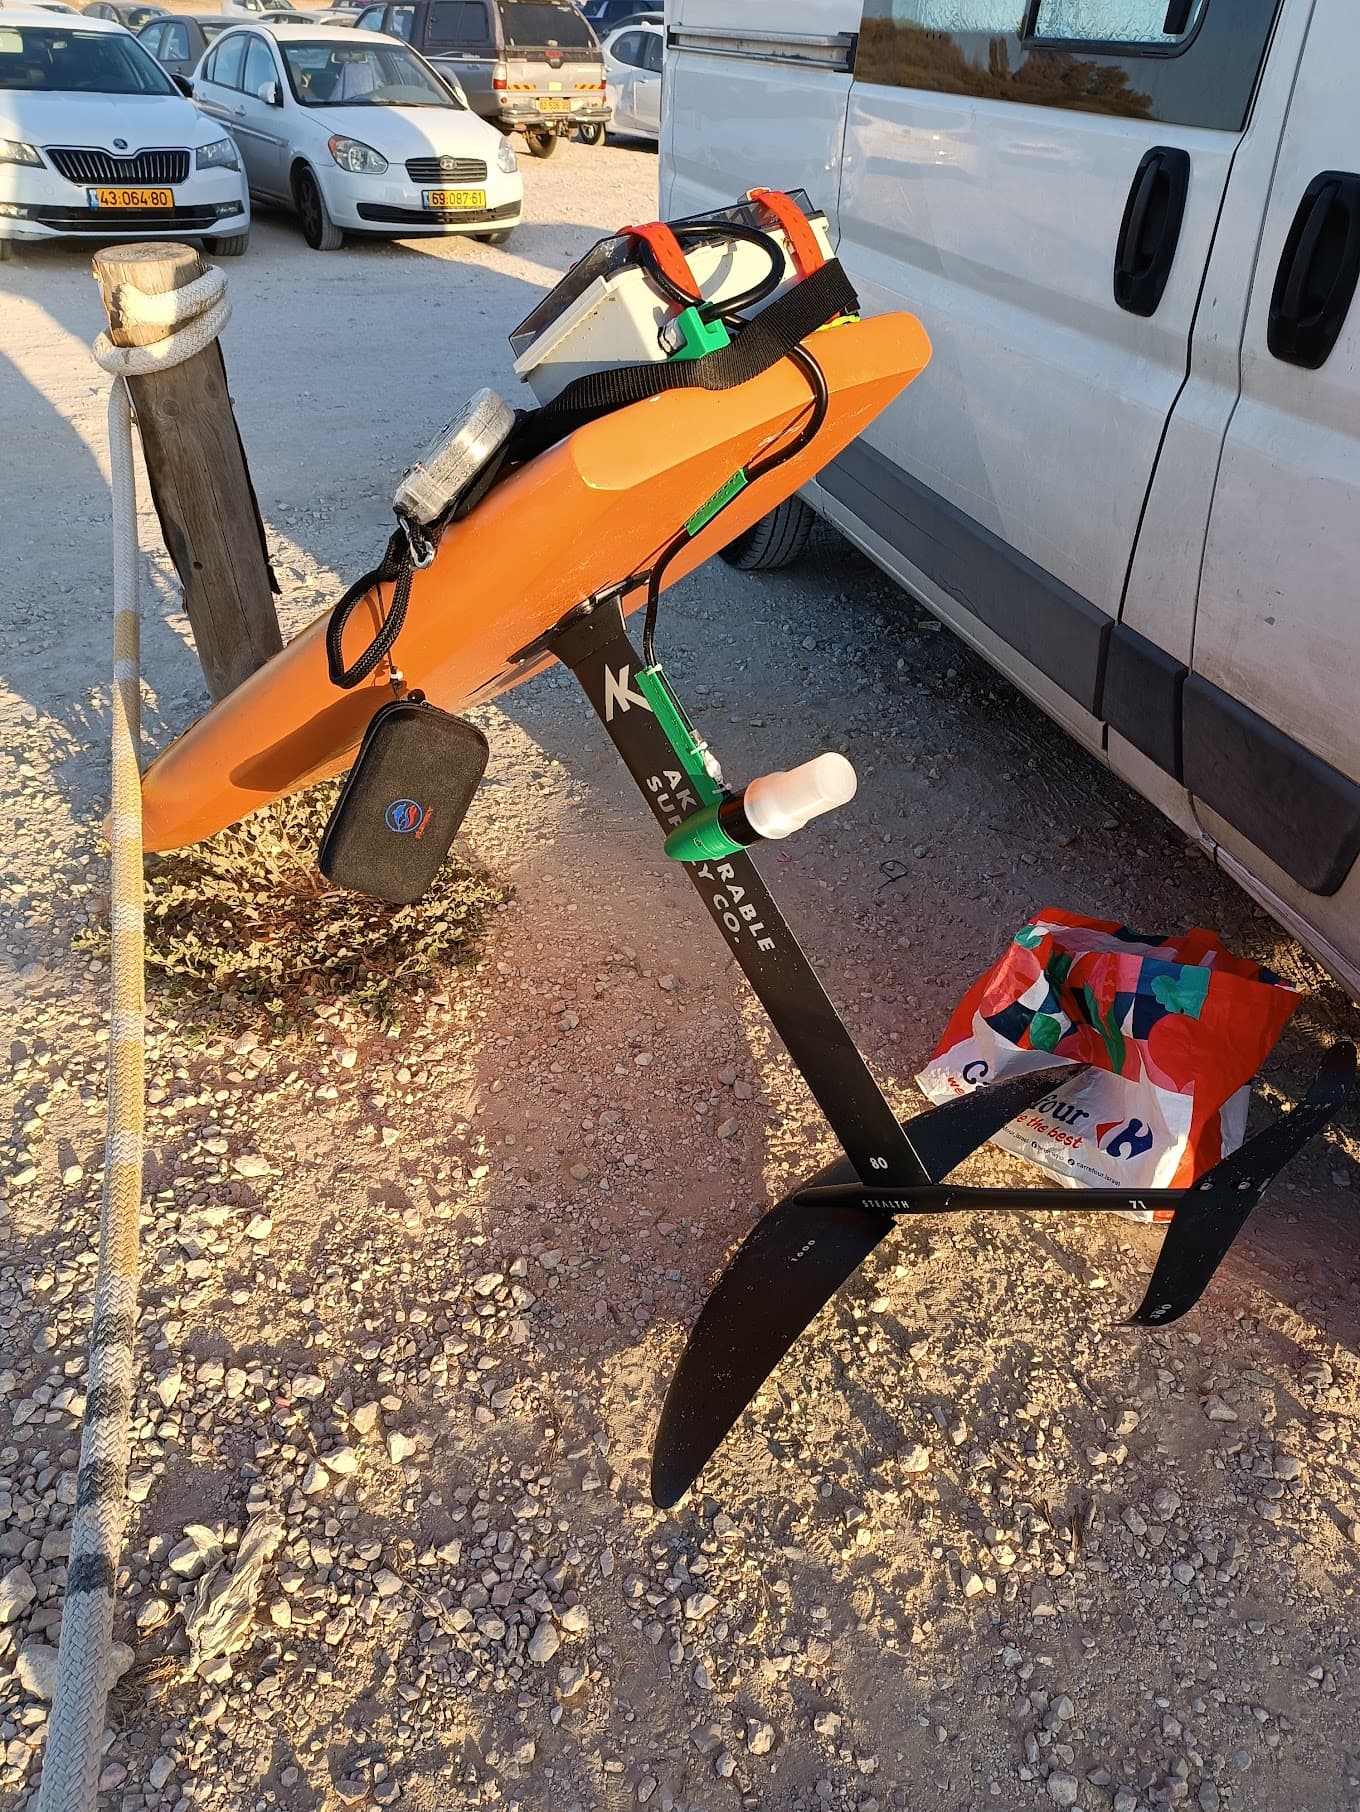
Box mount
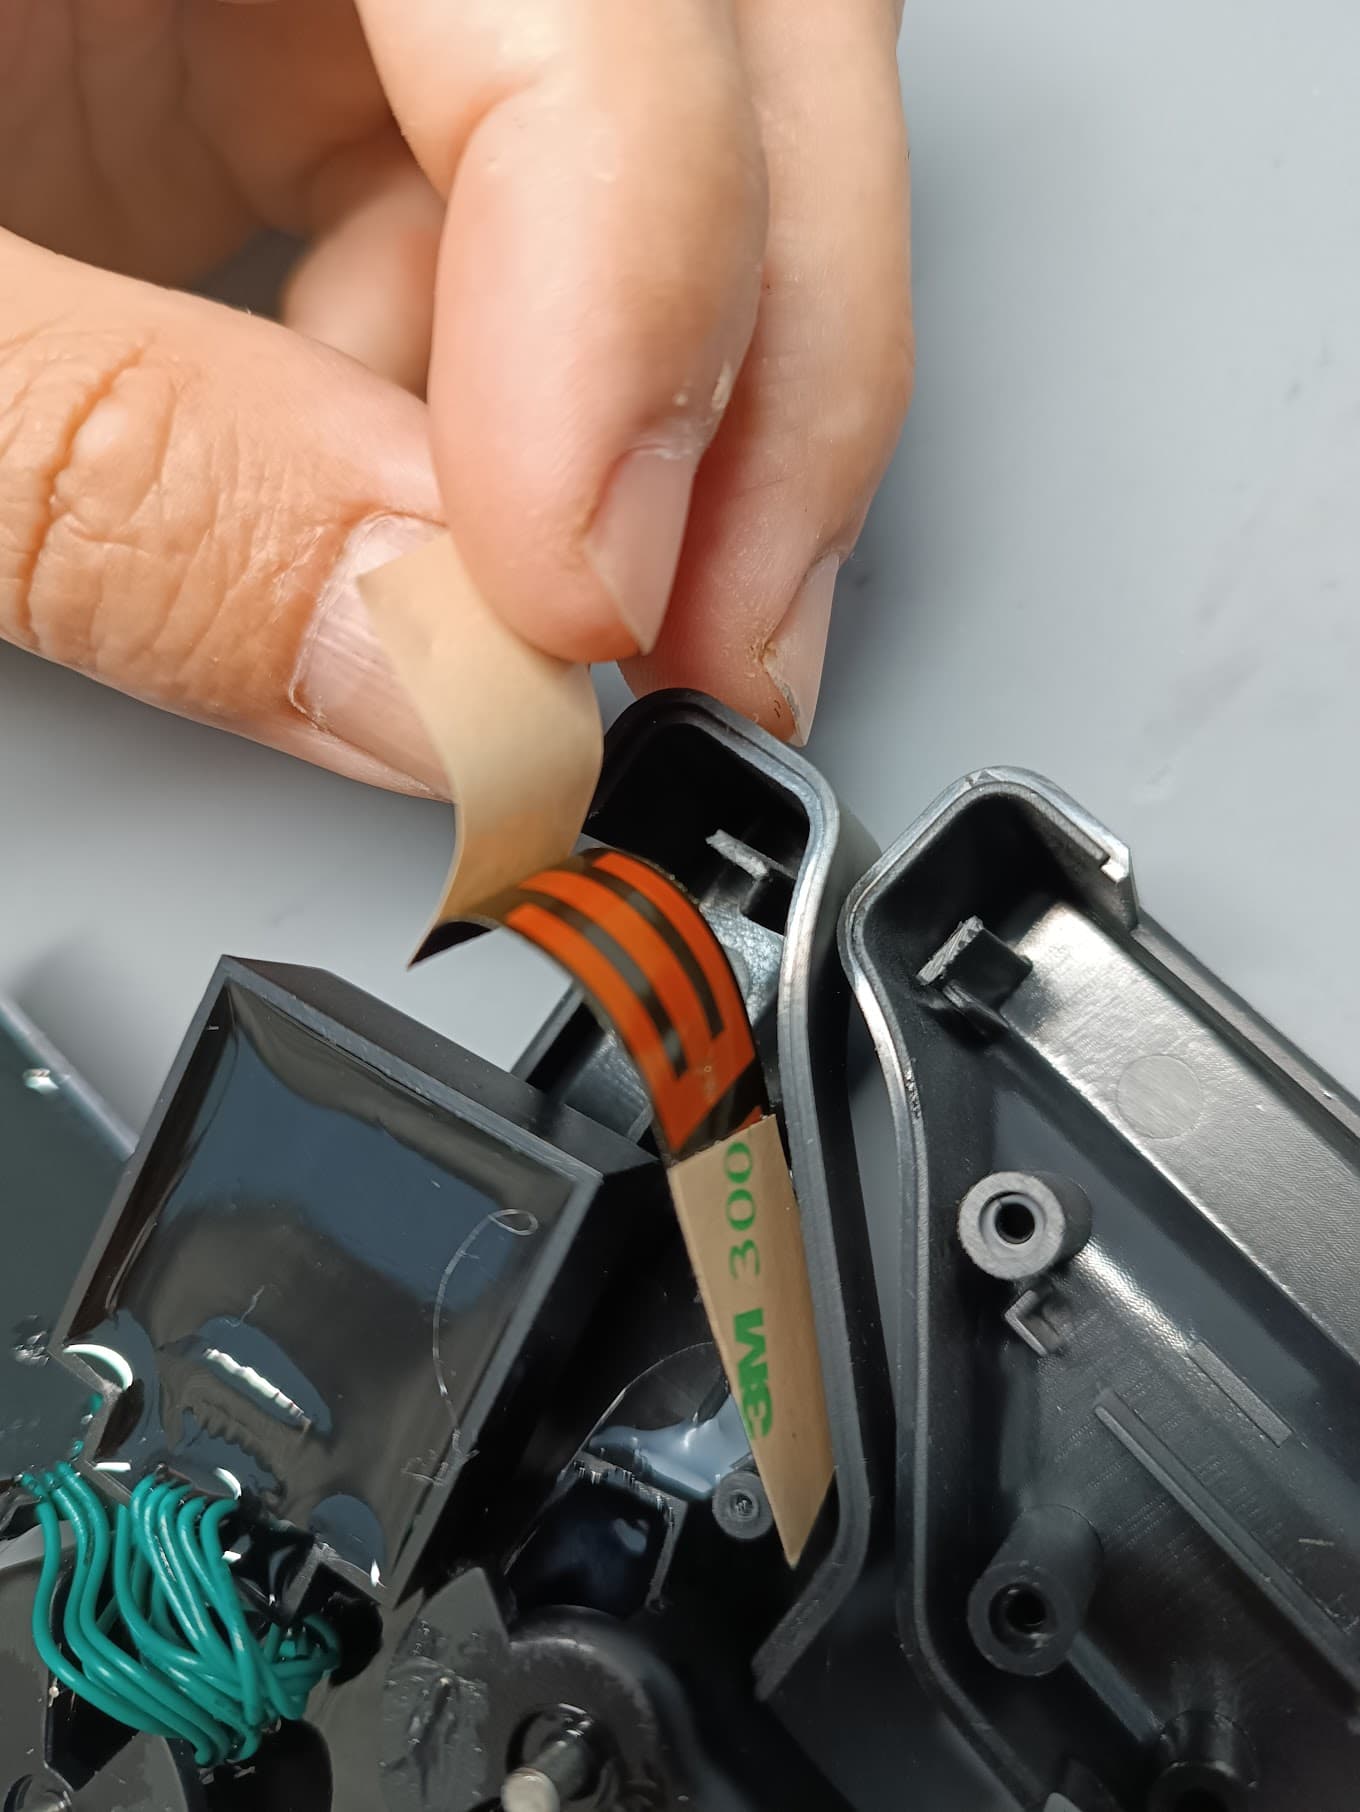
Cable exit from box holder
Prop protector
Super glue used to glue petg parts.
Perspex glue used to glue PC parts.
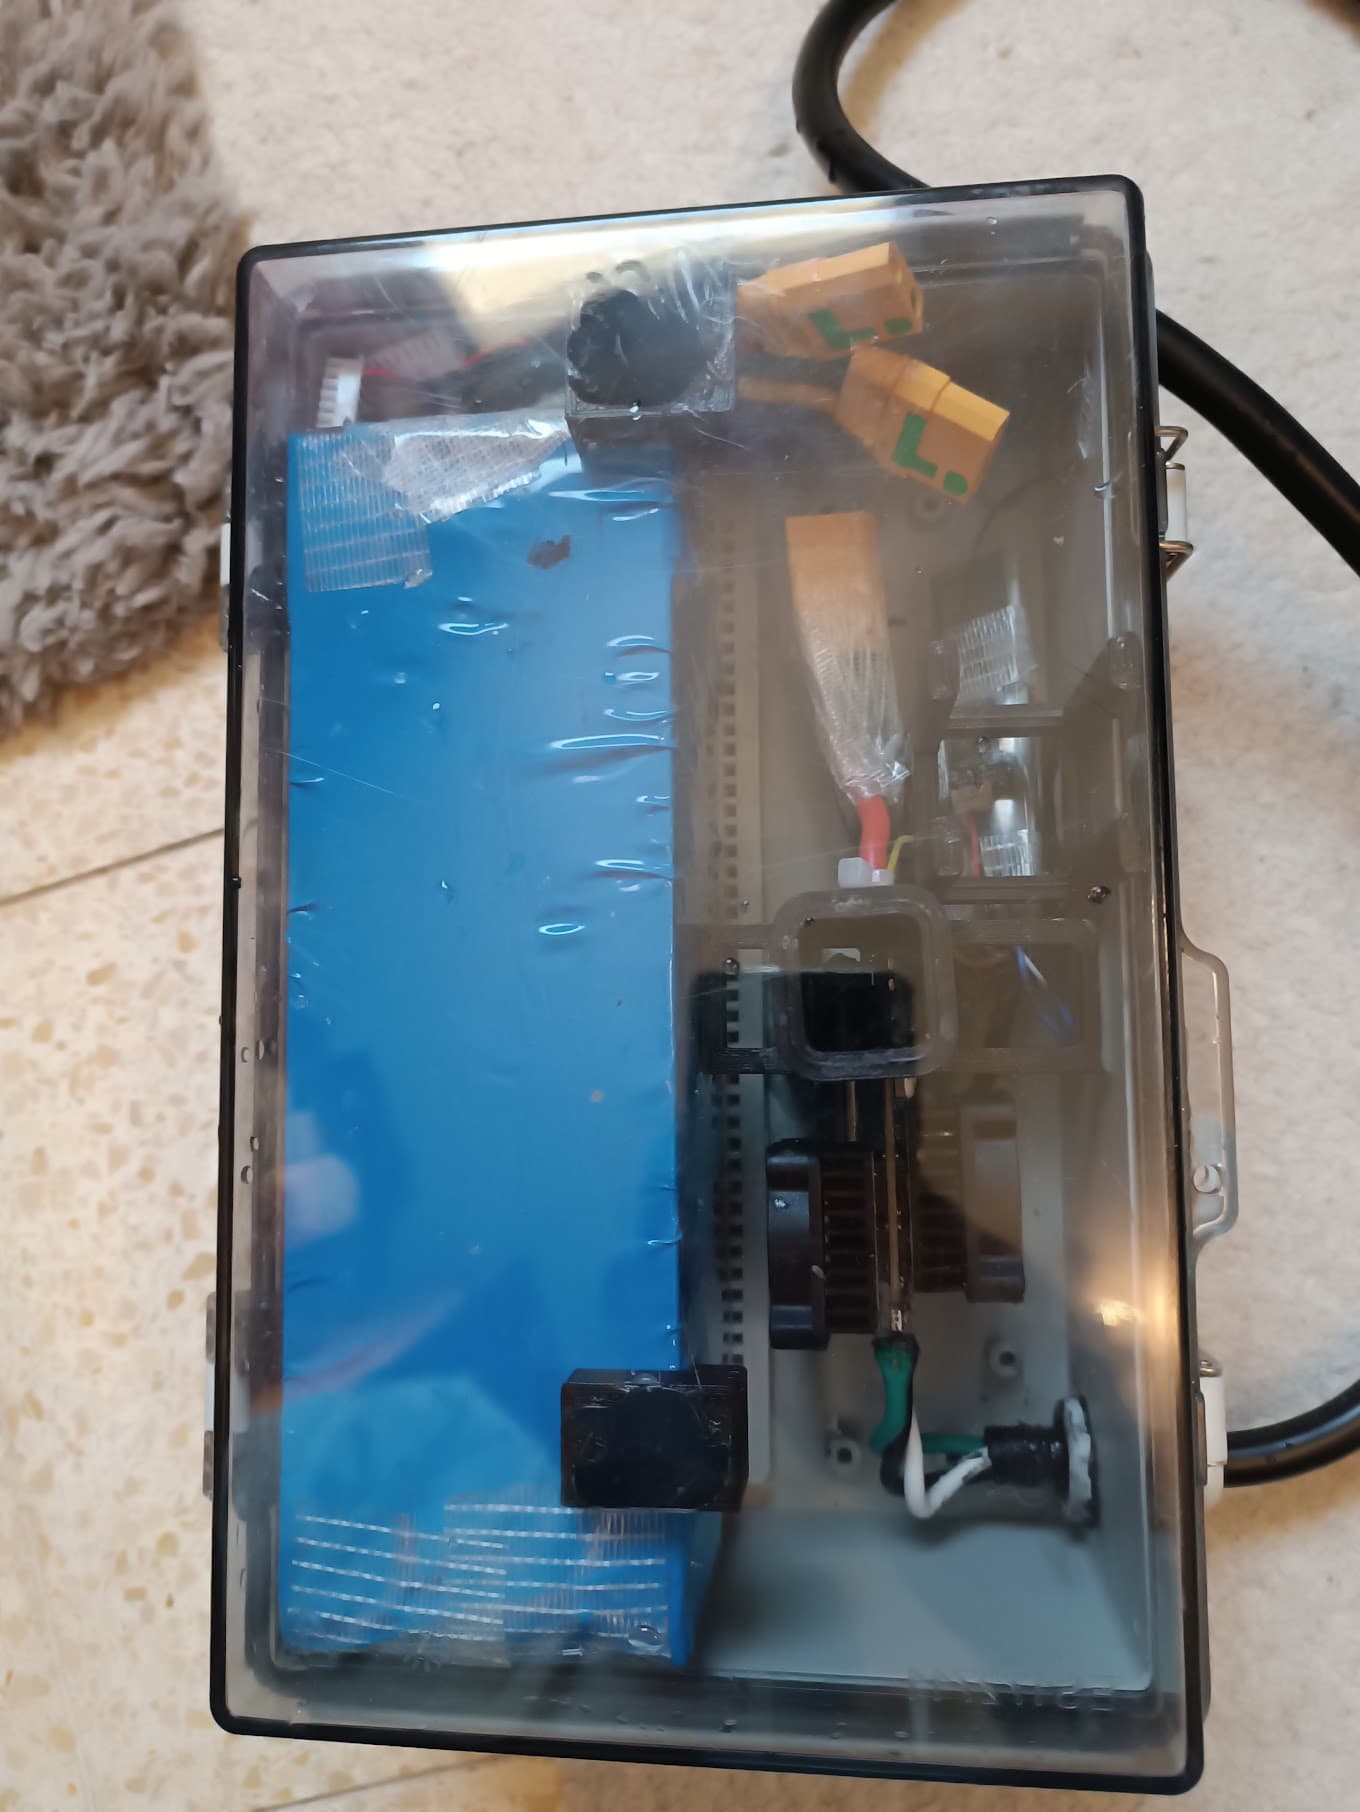
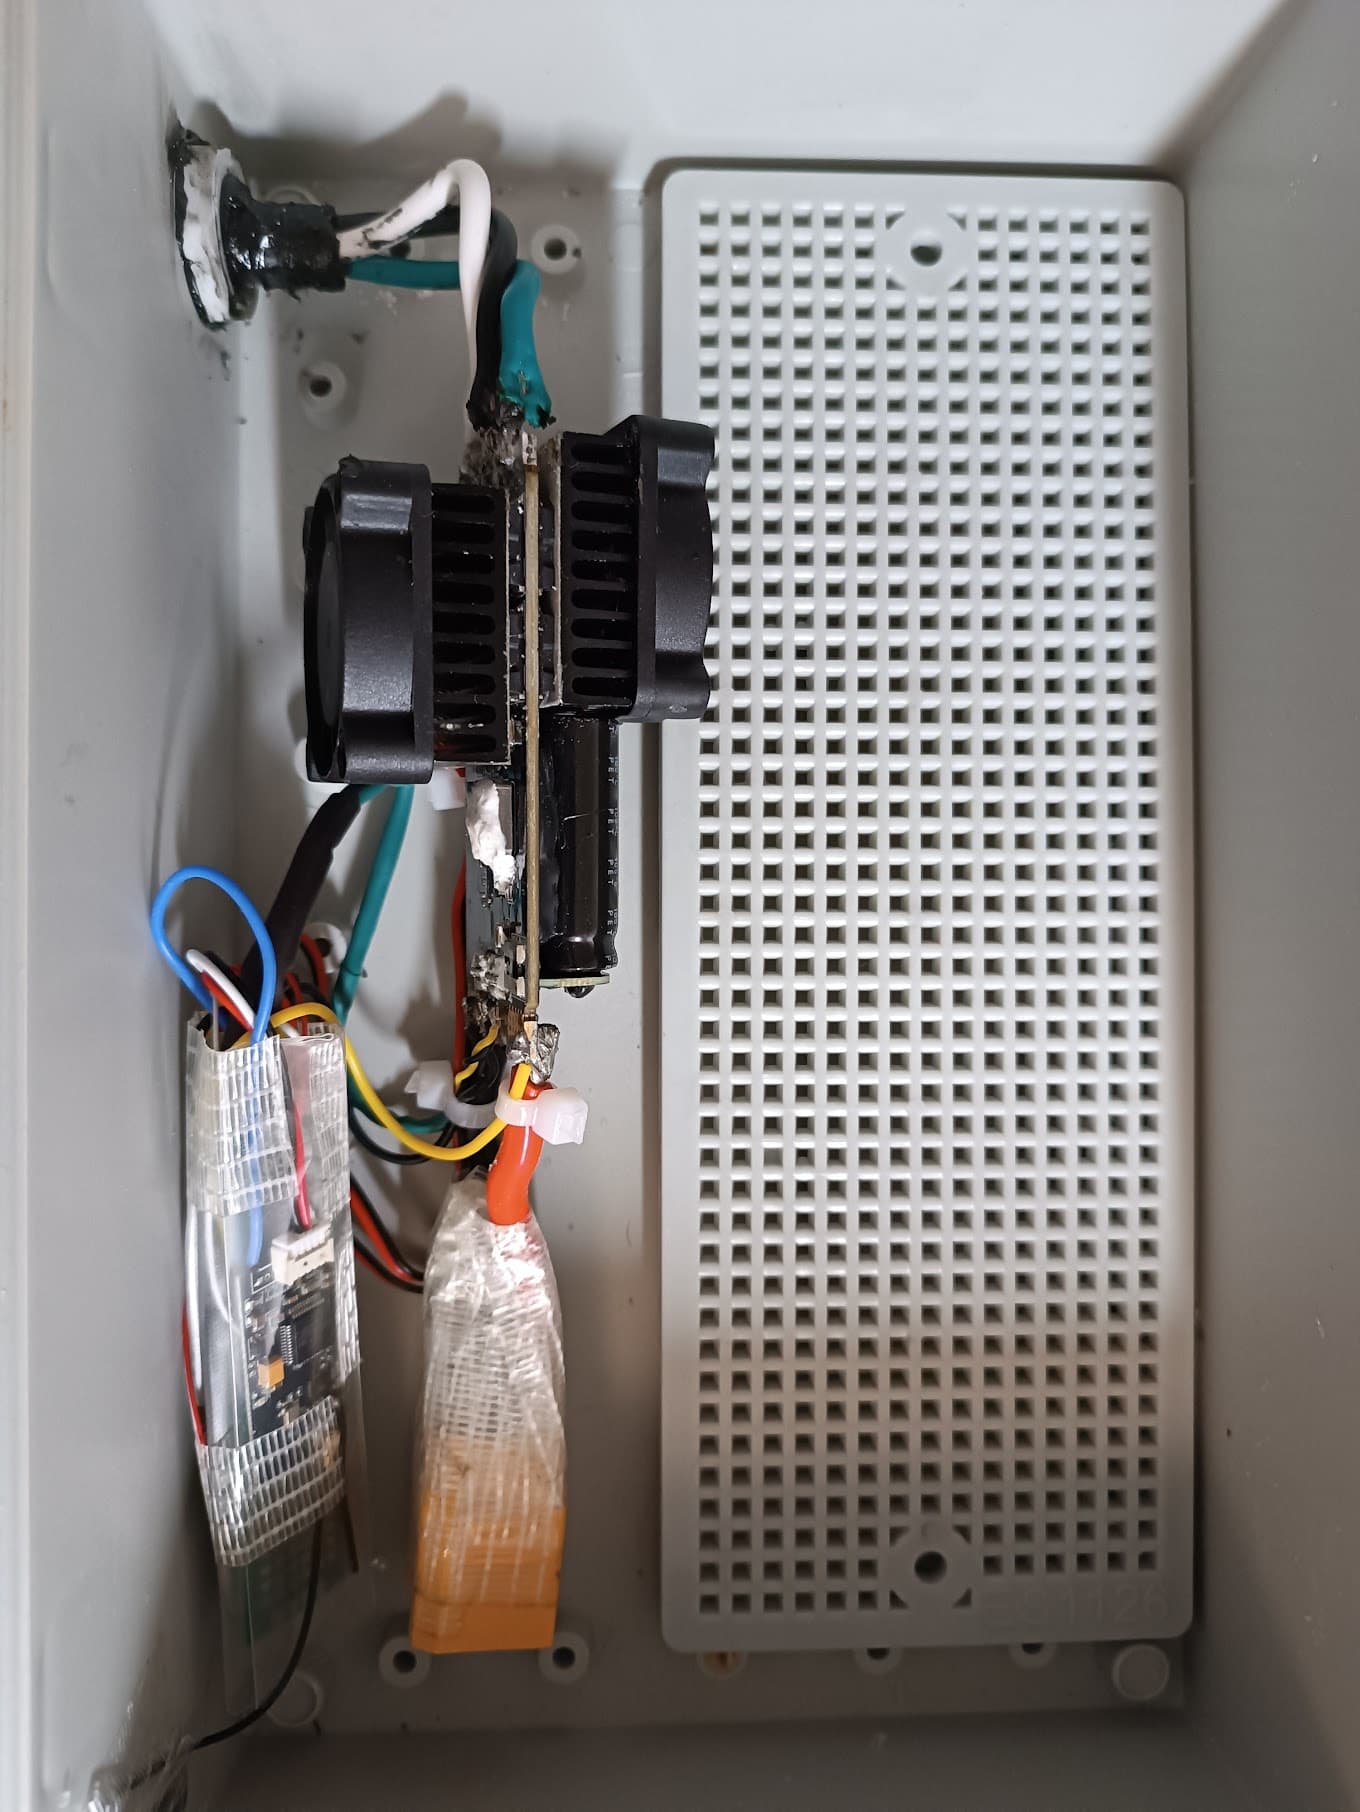
12AWG Cable soldered on the outside, covered with liquid tape and heashrink. (But I don’t recommend liquid tape - I think it does not adhere good to the cables and the size of the connection is too big. Need to find other solution)
Good to know.
It is when I start up on the knews on 90L board and hold both hands on the front and water covers a little the front at first seconds. Then the speed halted, but the remote not vibrates. Then I need to release the trigger and press again to engage.
After the first session I replaced the original antenna with longer one which I attached the closer side of the cover, It improved a bit , but I still have to be aware of water.
Impression:
It is pretty waterproof together with the titan straps. Seems that I got in 3rd session a few droplets of water on the cover inside , but I am not sure.
The problem with such a design when having to open a box is that while opening I everything else is covered with water so have to do it carefully. Also have to be carefull when closing to that nothing is there laying to on the o-ring.
It held well the board being thrown in beach brake.
Ergonomics:
The sharpness of the frame is not good with crawling on the board. Can be better.
The box at the back - makes harder to get knee over it and sometimes knee hits it.
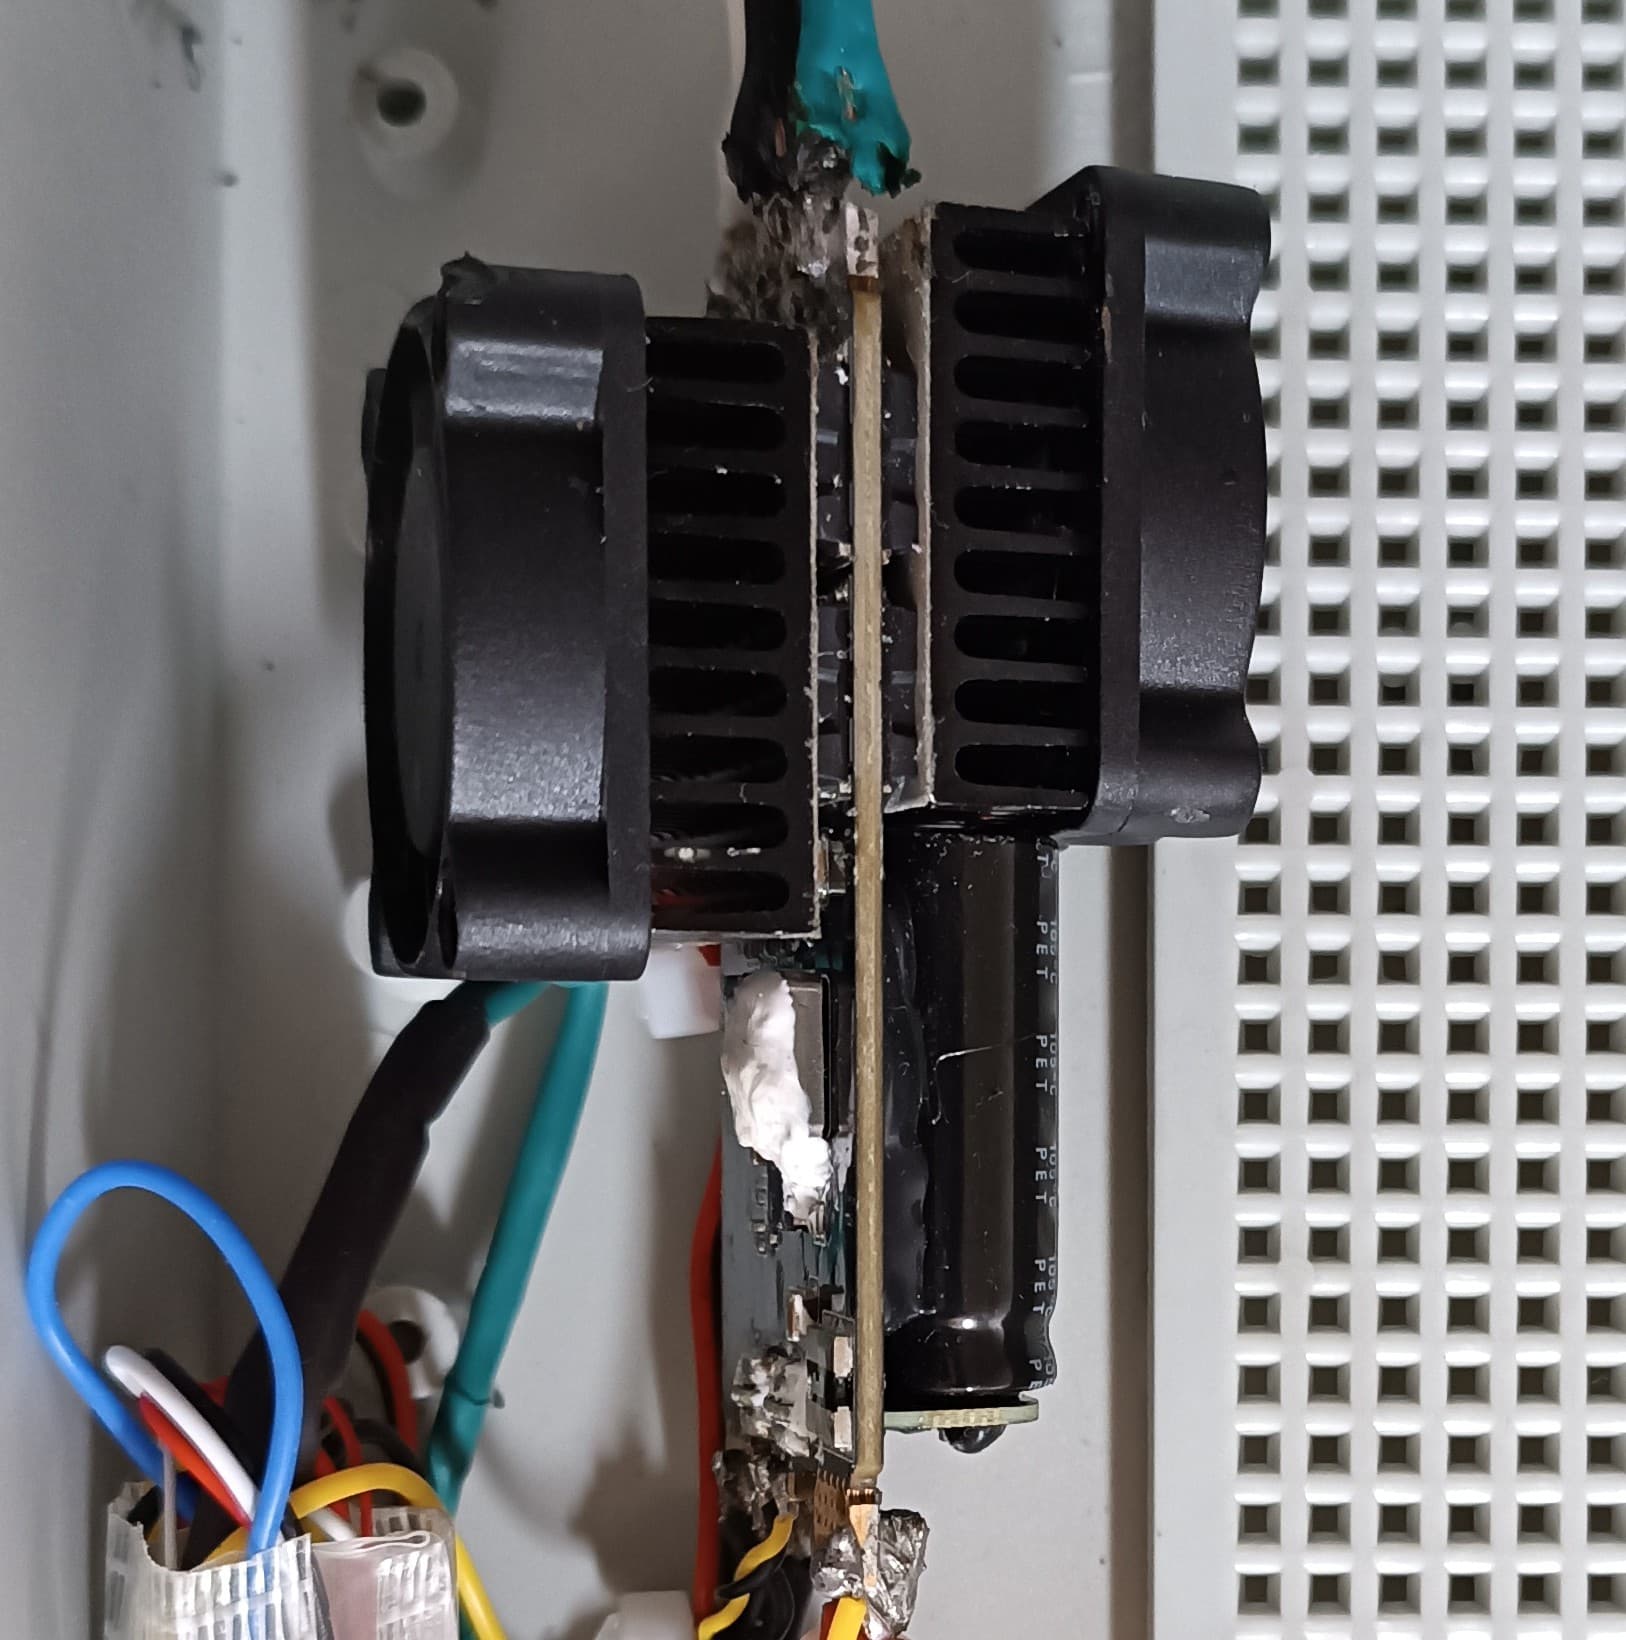
BLHeli 160A ESC
Being cooled by 5v small fans. So far so good.
Replaced the built-in heatsinks.
It was a long ride - 8 months weekends, weekdays, evenings. Researching, planning, ordering, building lab, learning and practicing 3d printing. Dealing with self perfectionism.
Thank you all the people in the forum , without you it would not have happened!
Eventually it flies, so all good, calling it a success.
It has shortcomings, so calling it V1.
Conclusions after 4 sessions:
BEC broke - have to add some protection, like caps on it’s input.
propeller broke - reprinted with 100% infill
It helps to learn foiling in less waves, less wind - less chop. Especially important first session.
That thing of leash tangling with the back leg when it’s being raised on the bord. I am still trying different options - connecting to calf/waist/ankle, spiral/straight/spring leash, exiting behind or before the box. Or attaching to front of the board.
The thing with remote gets disconnected with a little under water. Nice to see vx3 speed and pretty visible in sun
Sharp edges of the box support frame is not good
To turn on after the foil is in the water
When battery is close to finish , have to press more on the trigger. Idk if it is good or bad.
Shortcomings of the box and specifically box at the back:
harder to raise the leg above
leash tangles around the box
far from the remote
V2 in progress - flat box on top in middle of the board
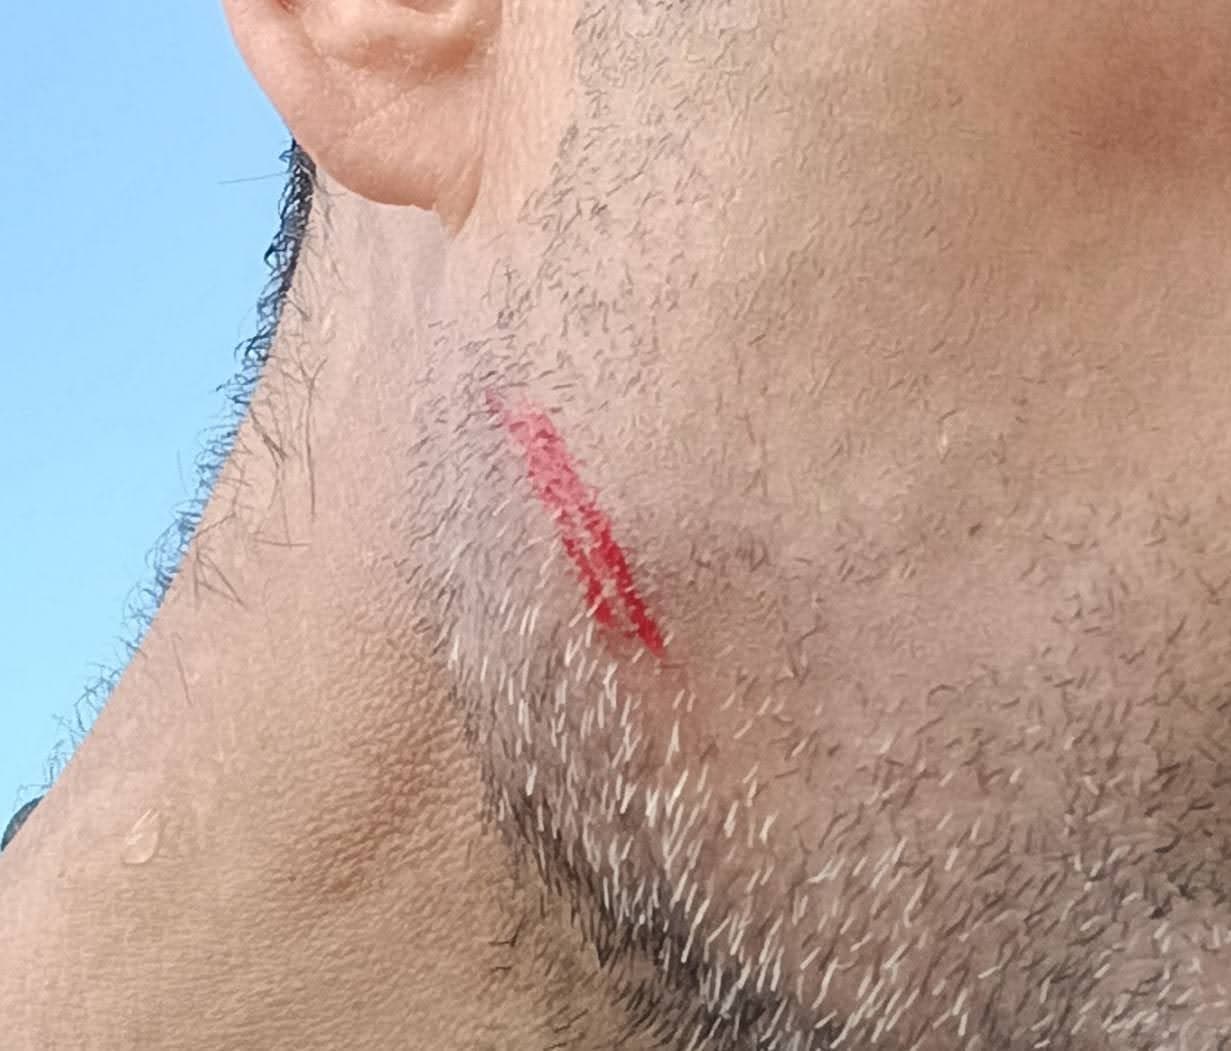
When entering with the board upside down suddenly got hit by something in the face. Then realized that it was a propeller. Apparently I pressed the trigger unconsciously.
Conclusions:
To turn on the remote only when foil is in the water.
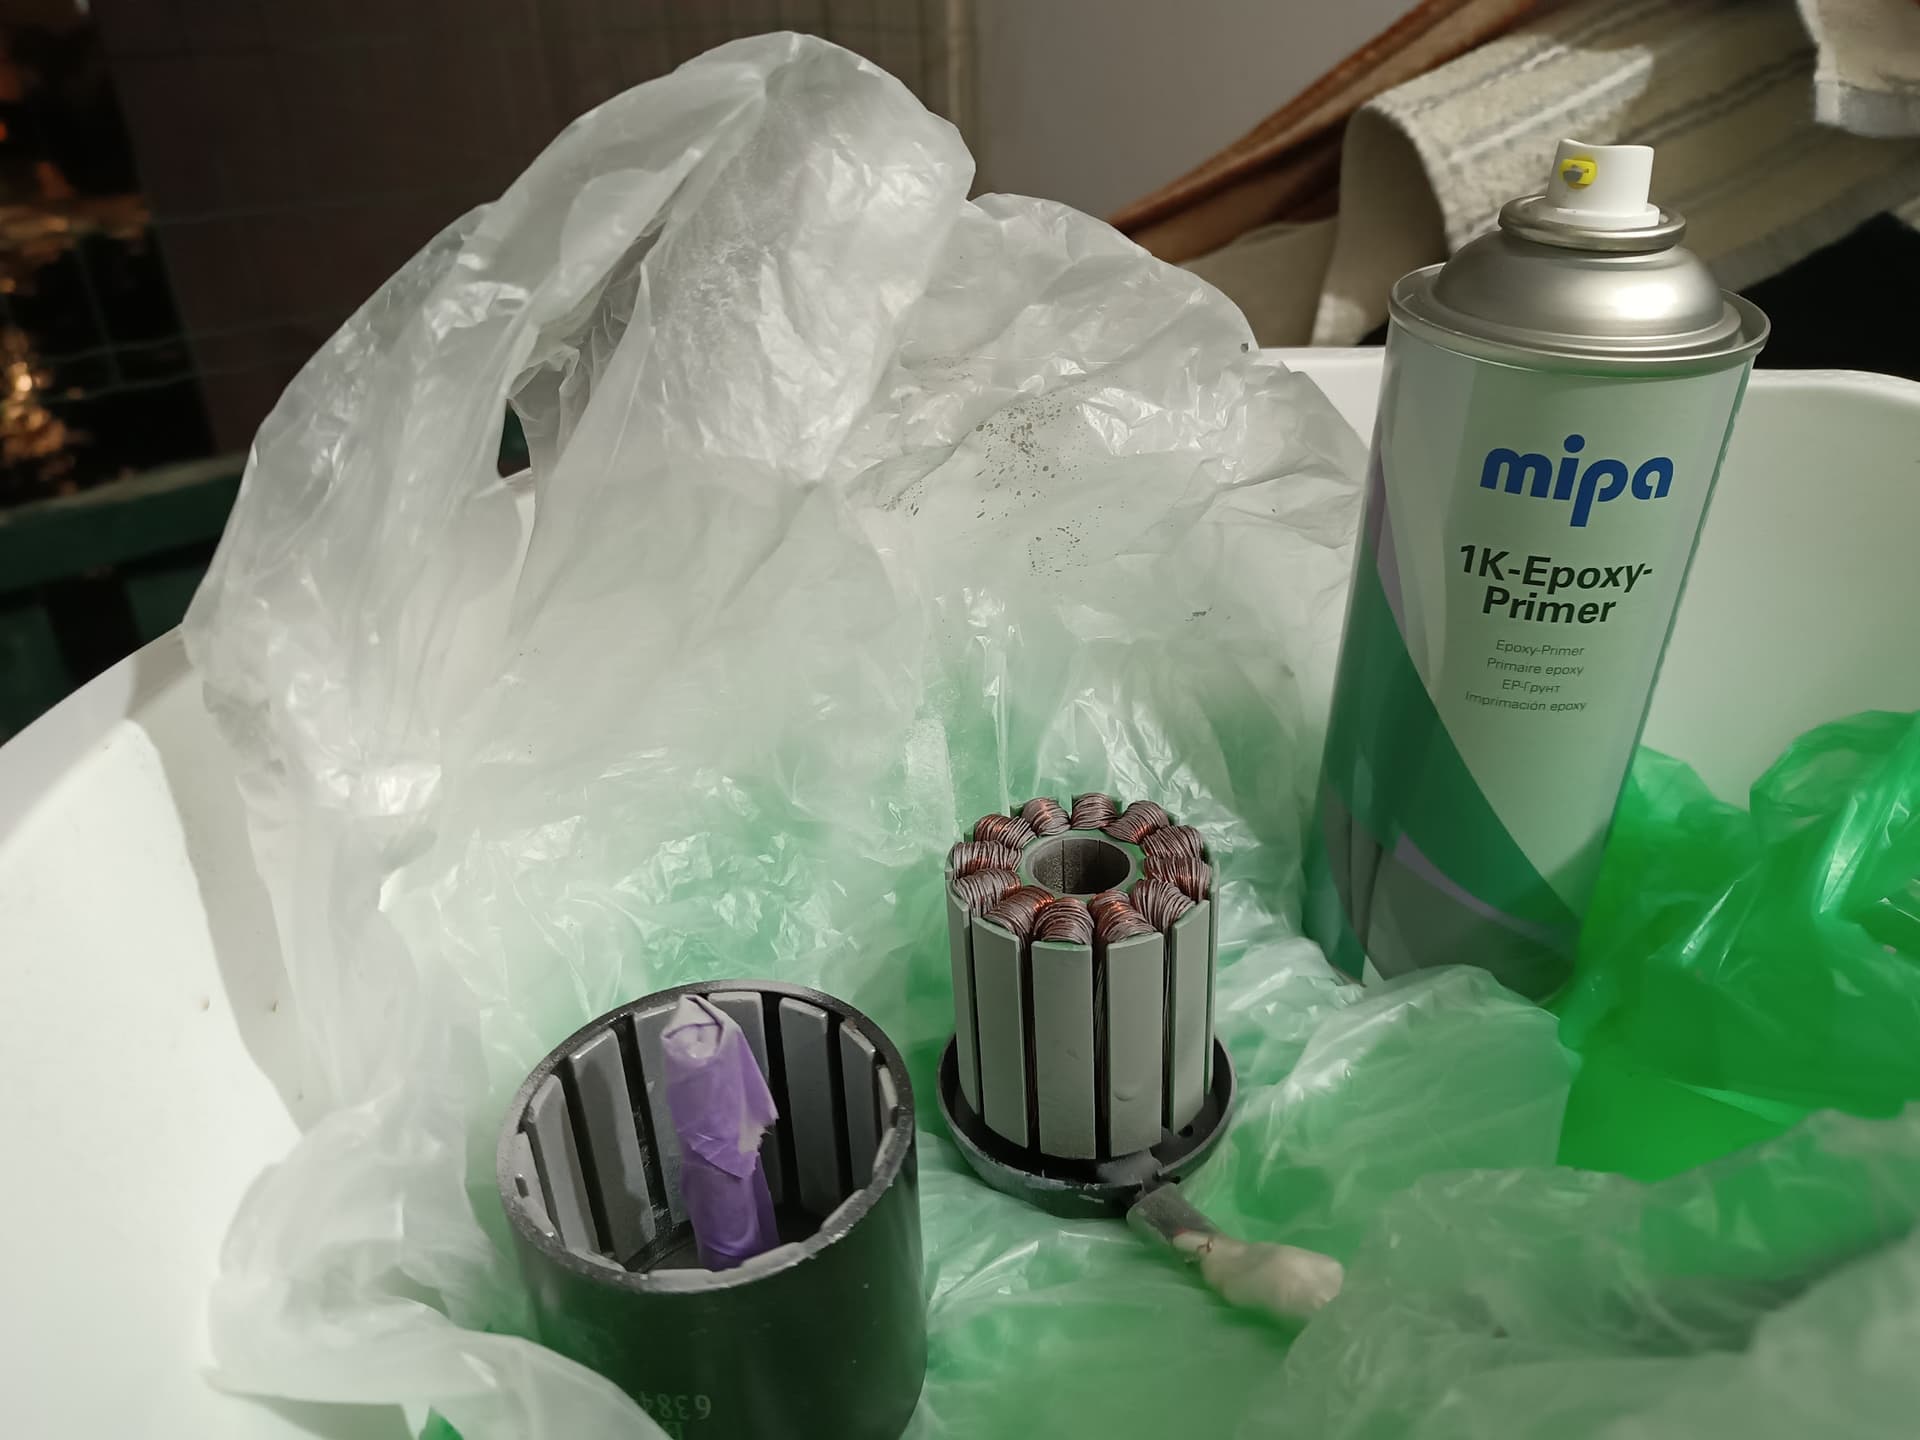
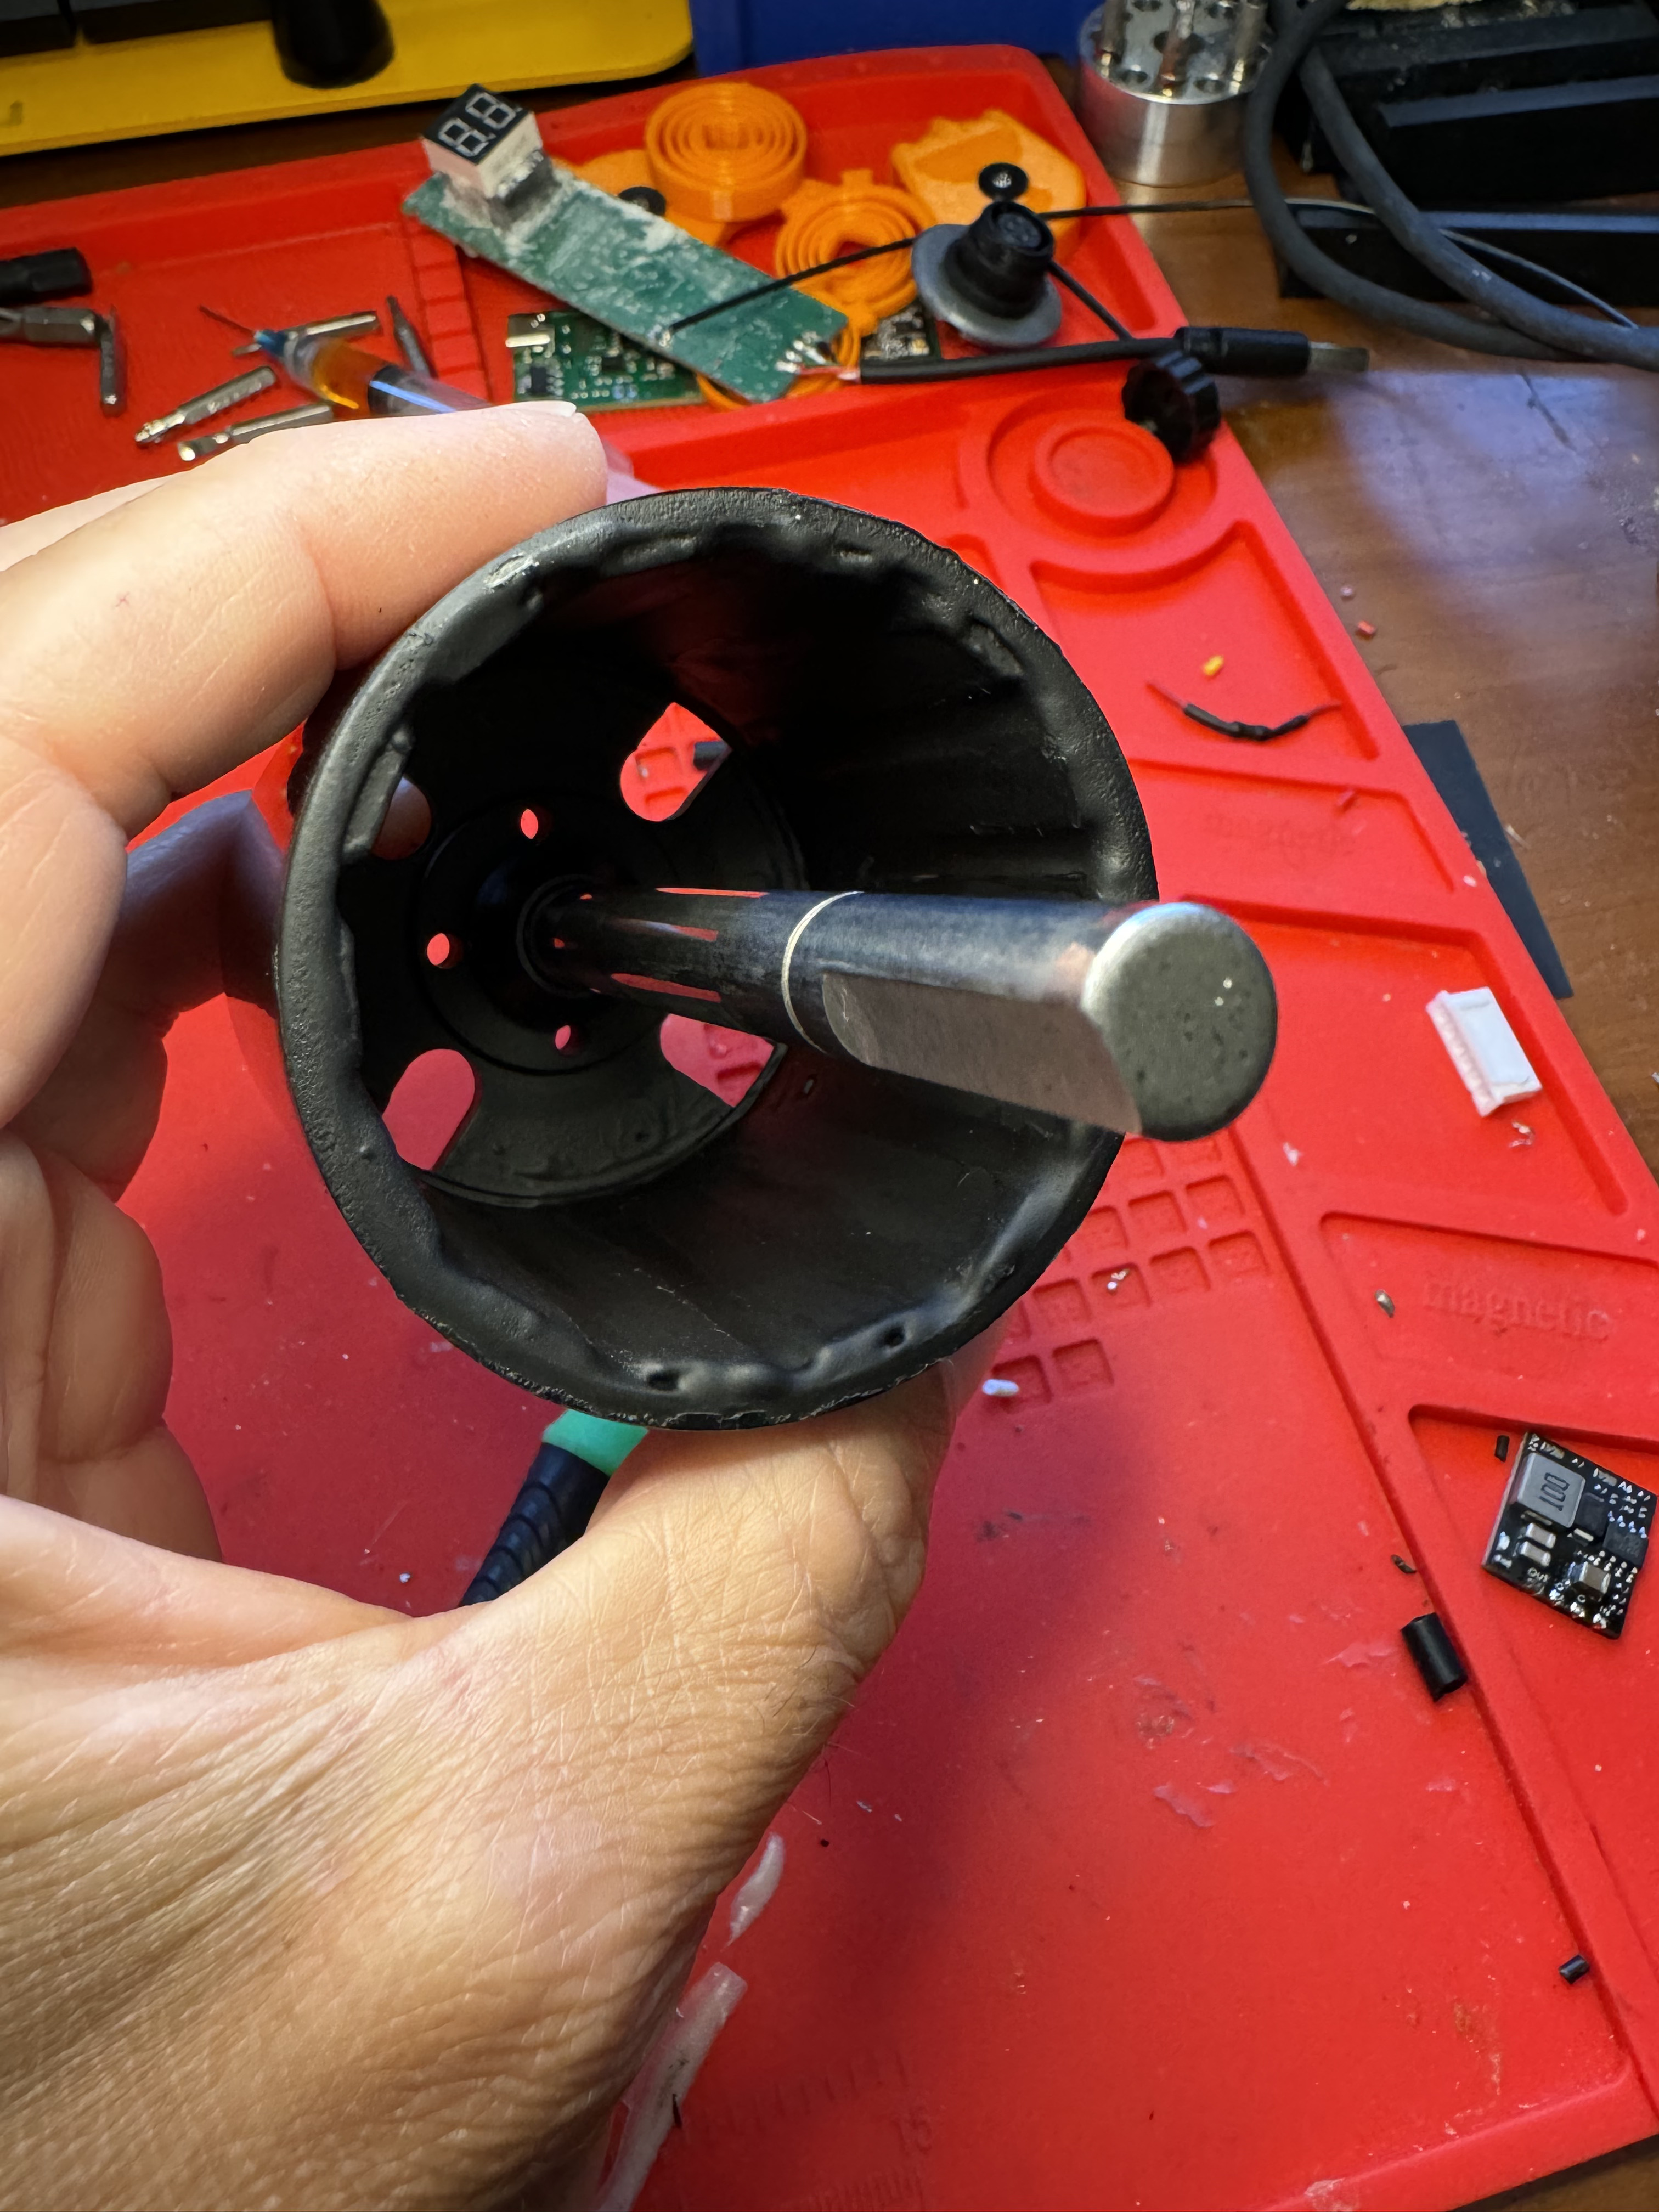
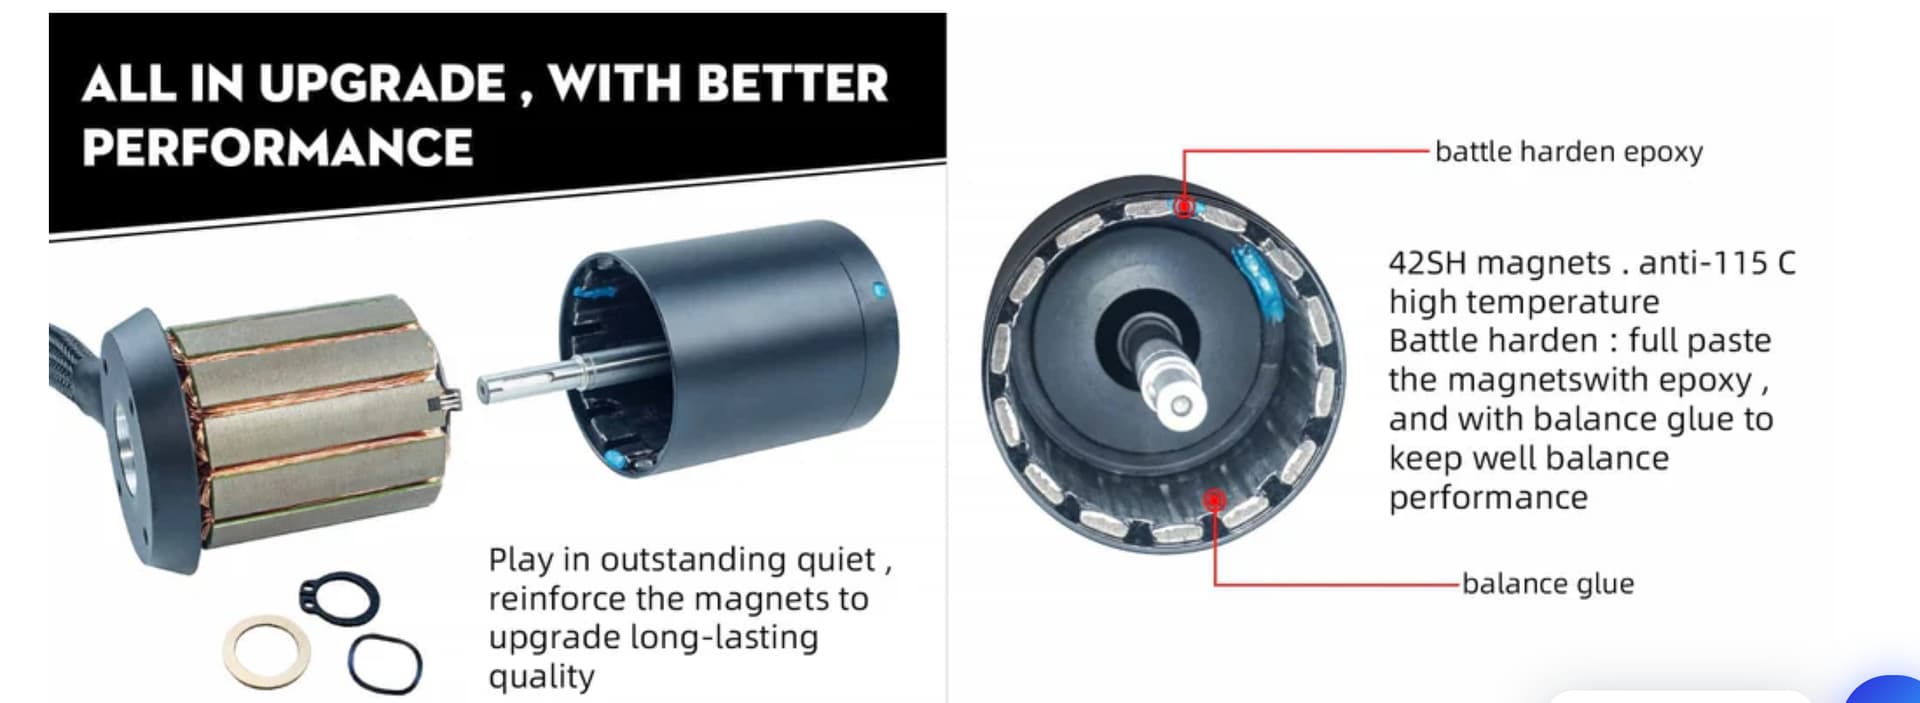
I always put epoxy with microballons in between the magnets for that reason. I mix it really thick almost like putty so I can do it all at once and it not be runny. It will keep the magnets from shifting like that.
Yes it can be fixed, just push the magnets back to where they are evenly spaced then add the epoxy filler between the magnets.
The black is just rustoleom spray paint. I don’t put epoxy on the magnet face.
I put the epoxy between the magnets and spray paint after.
I’m not sure what they mean about the quiet part, but they must put the rotor on a balance machine and use balance glue to smooth it out like they use weights on a car wheel for balance.
I have used super glue with baking soda to fix plastic pieces, but I’ve never tried bonding it to metal. That would be so much easier than mixing all that filler in the epoxy. I would definitely like to hear how well it works.