But but but… this build… why…? Seems so unlikely to be worth the effort😄
1 Like

It would be interesting to see if 2 5mm stringers, and 3mm Paulownia skins would make it worthwhile. A 3d printed core is less effort and cleaner for some than cutting and shaping foam.
1 Like
yeah, that would be a great option.
My largest concern with a build like this is 3d prints are rarely 100% waterproof, a ding with some infill gaps on the print might get the board filled with water that would take forever to get rid of
Or just a layer of cfk or gfk.
Perhaps also try inverted logic, 3d printed skin around a xps block with 1mm alu-profile as stringer ![]()
When installing a mast, i’m not so sure anymore about the rigidity ![]()

Update in the next few days.
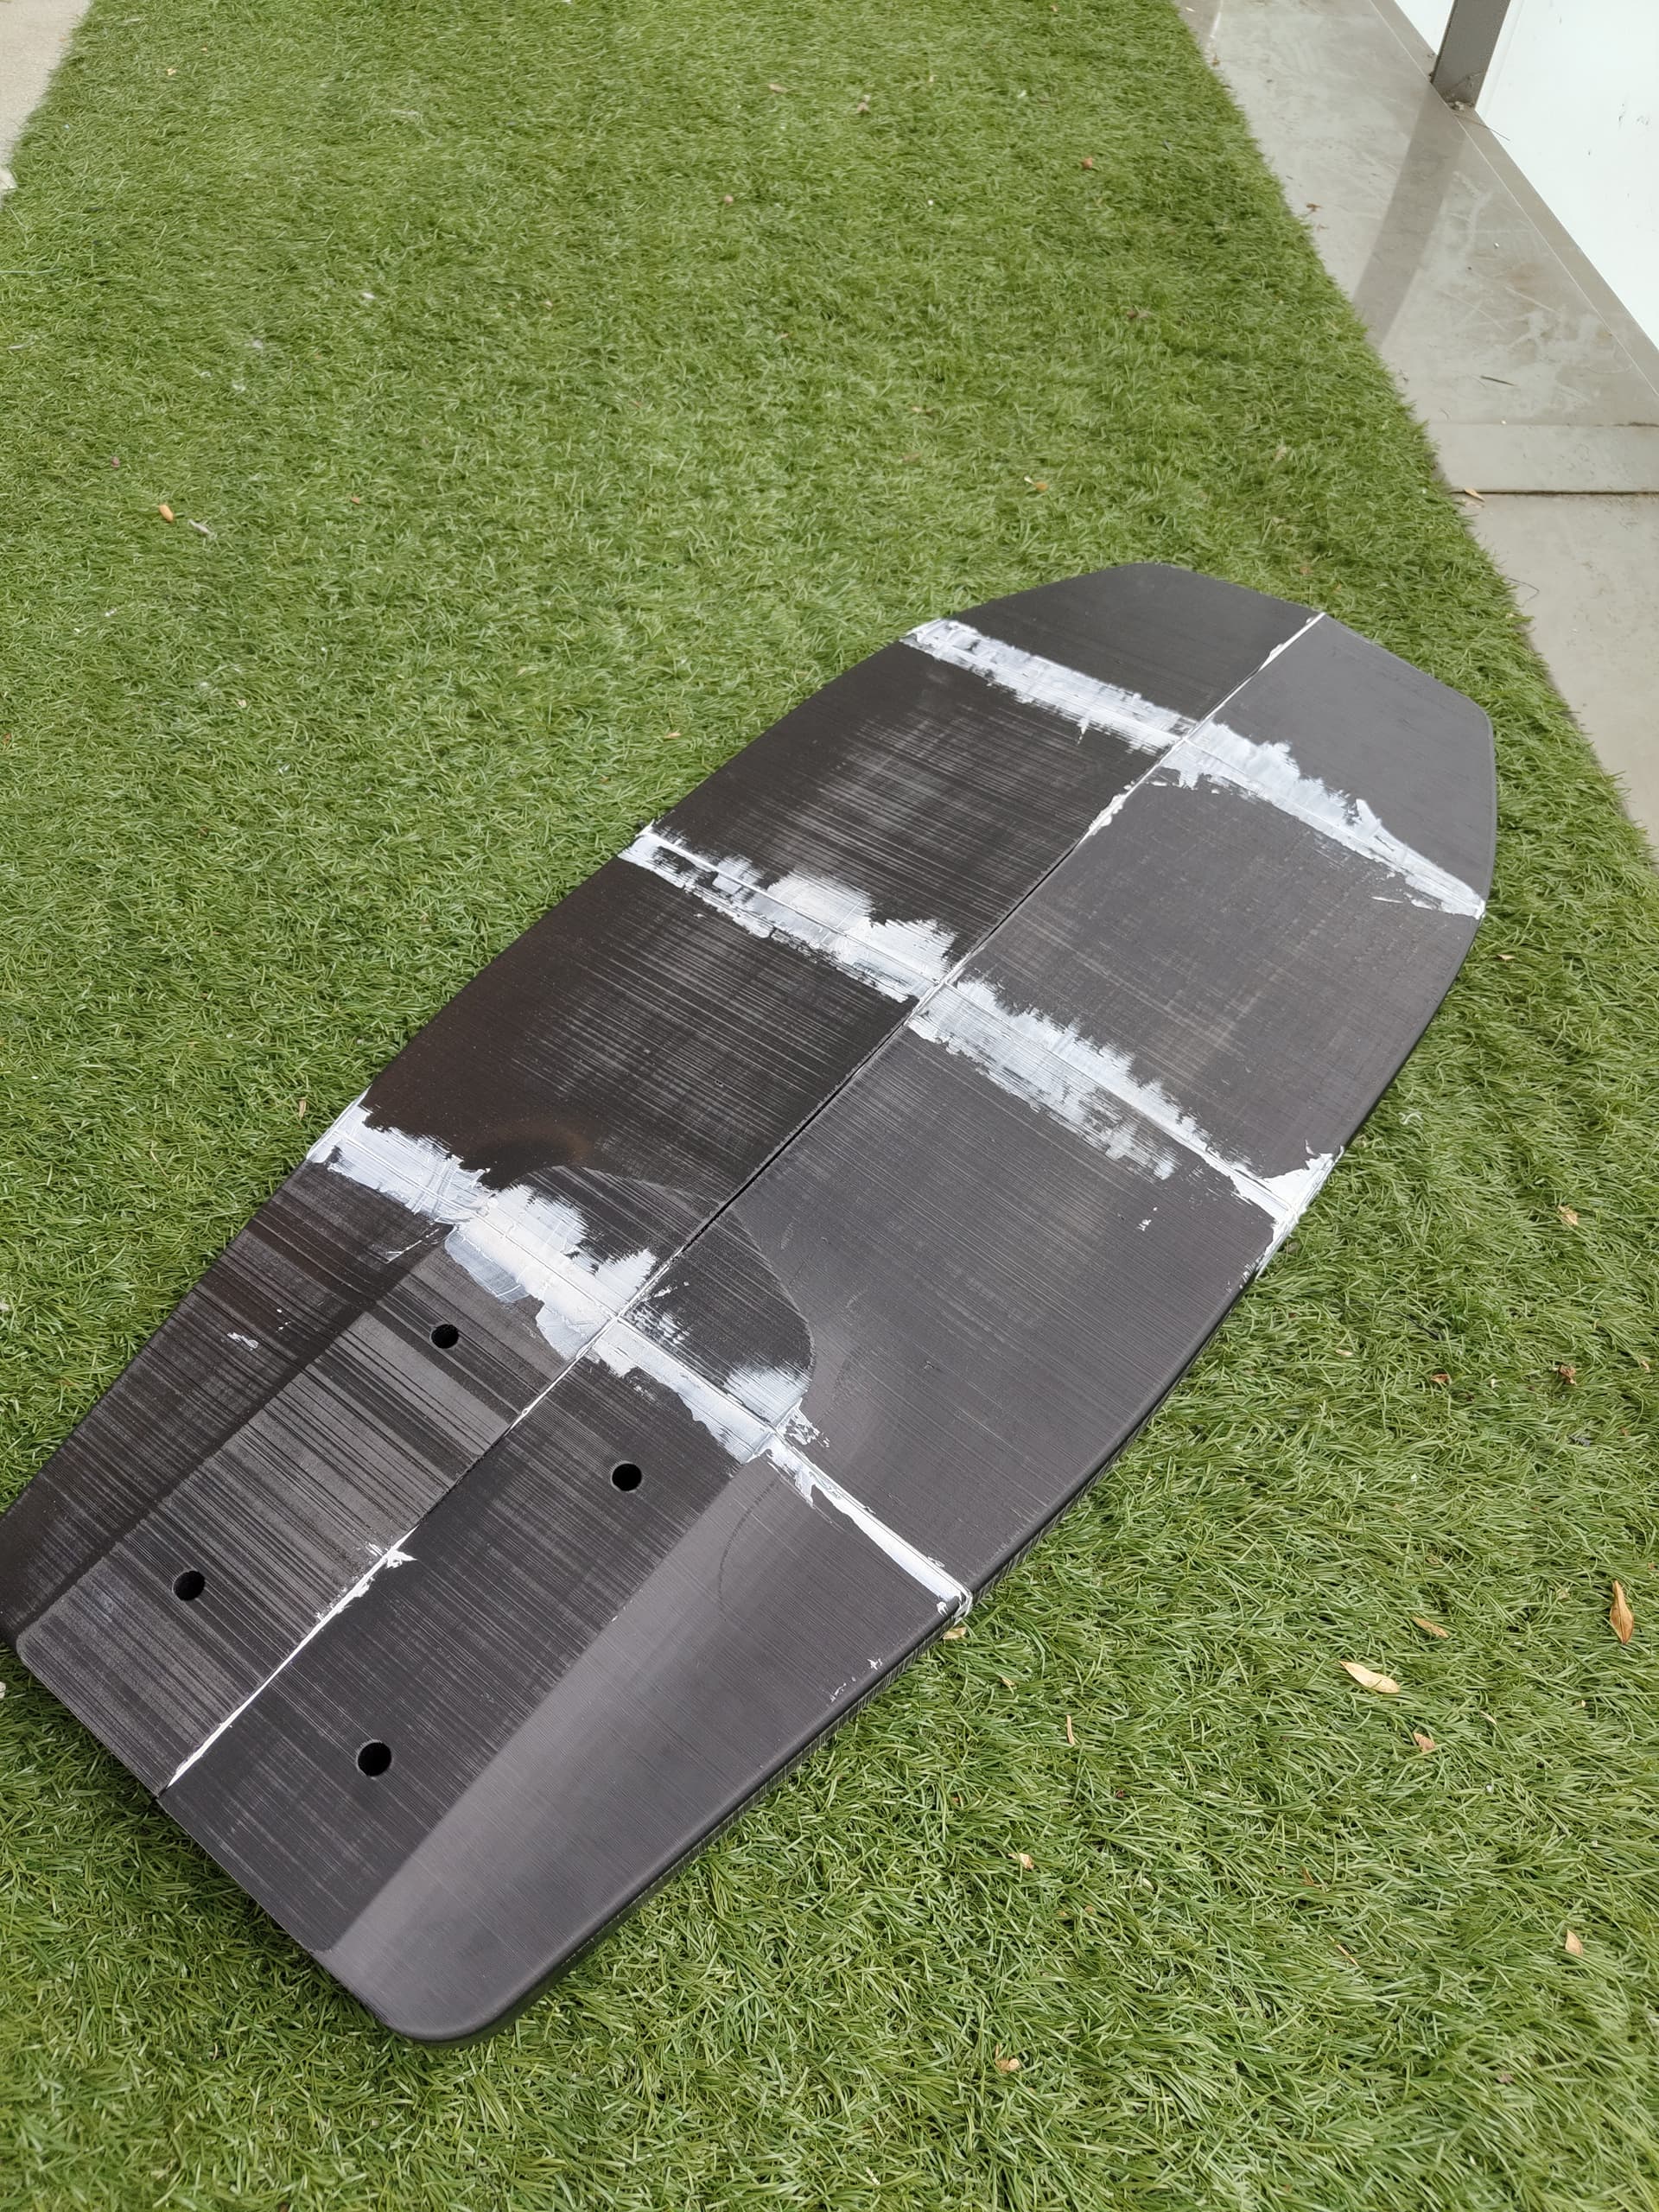
Had an issue as the holes do not Line with my new to me takoon foil.
M6 bolts fit.
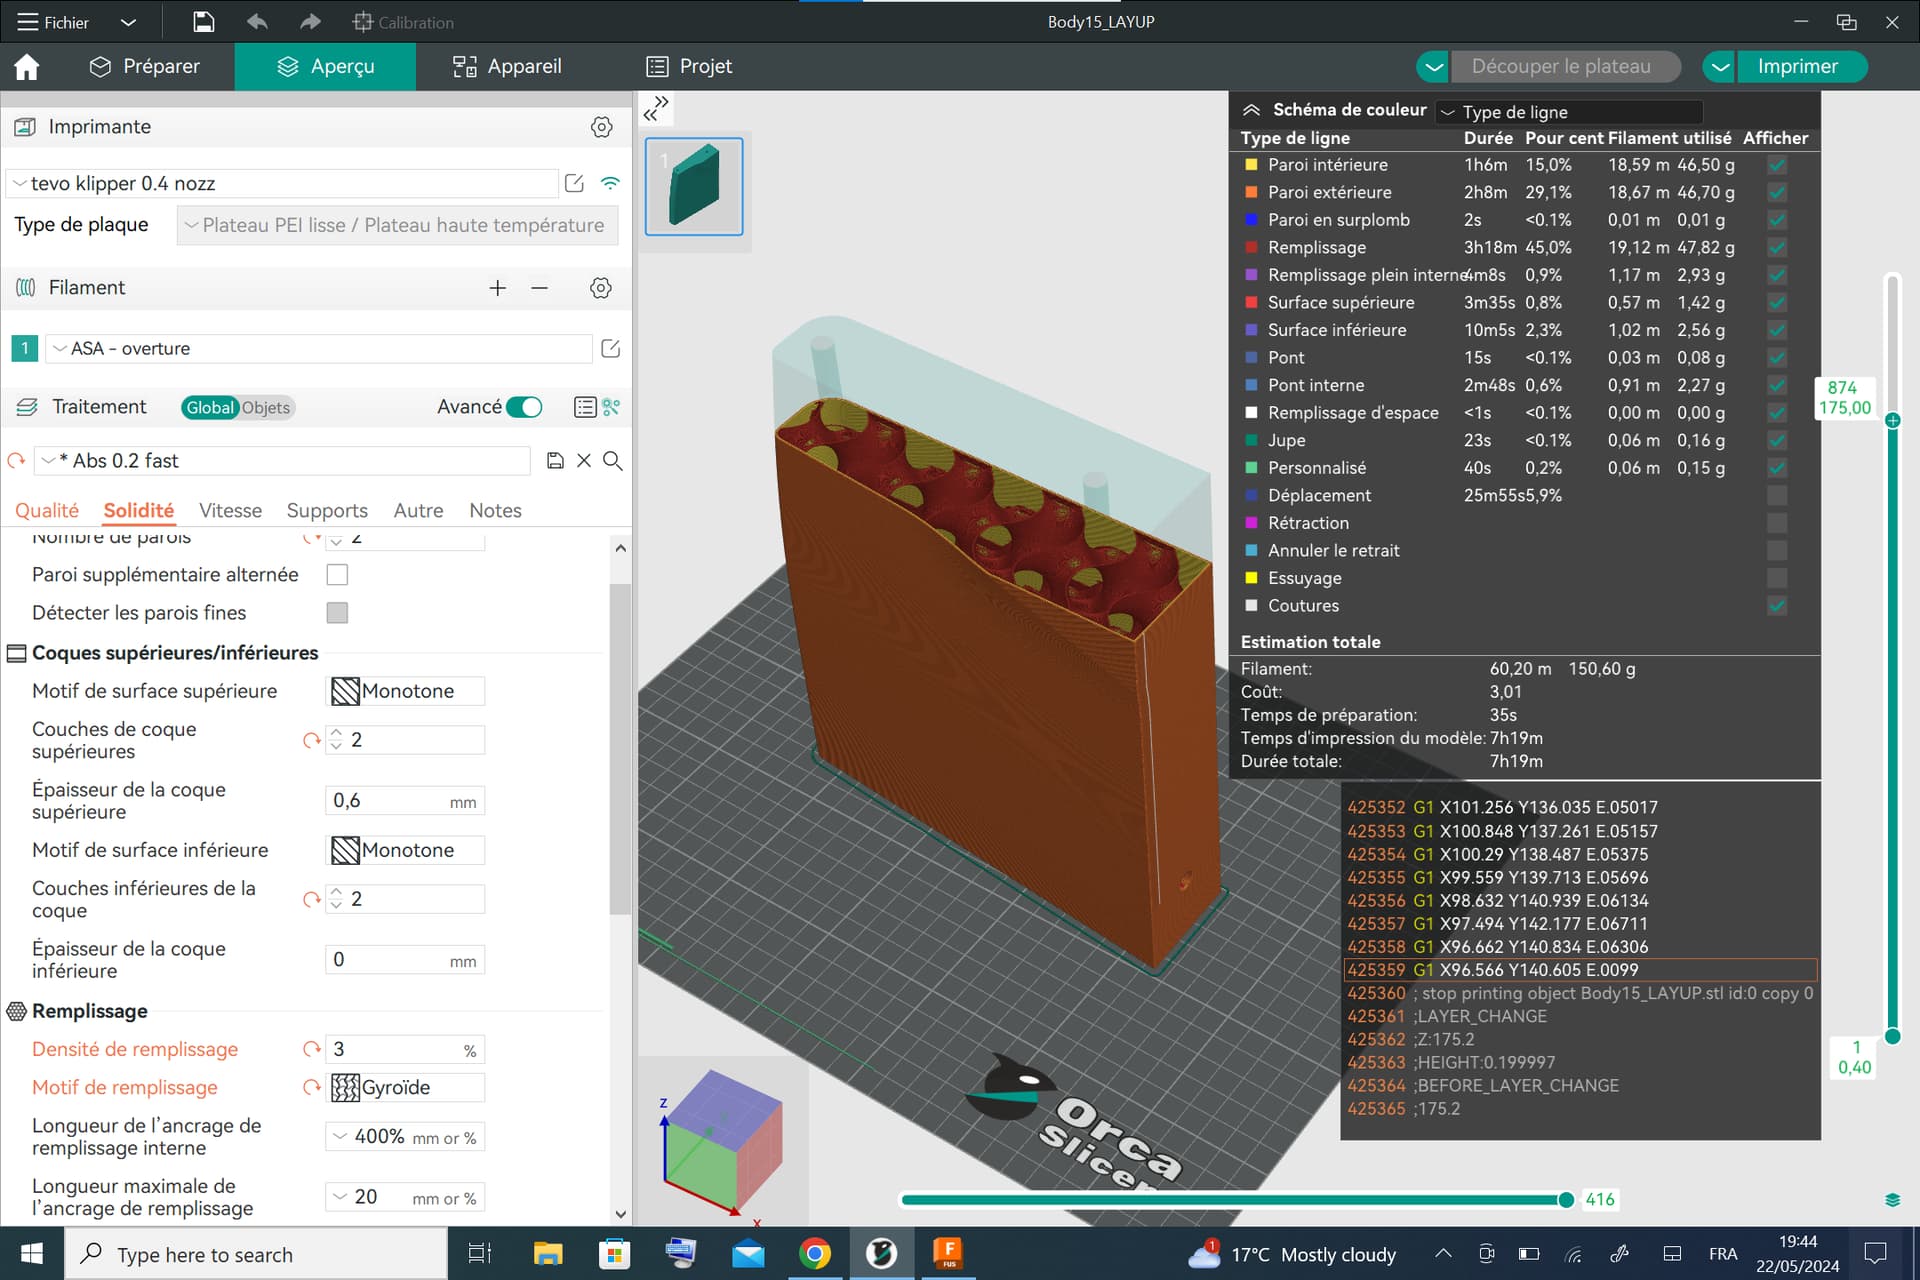
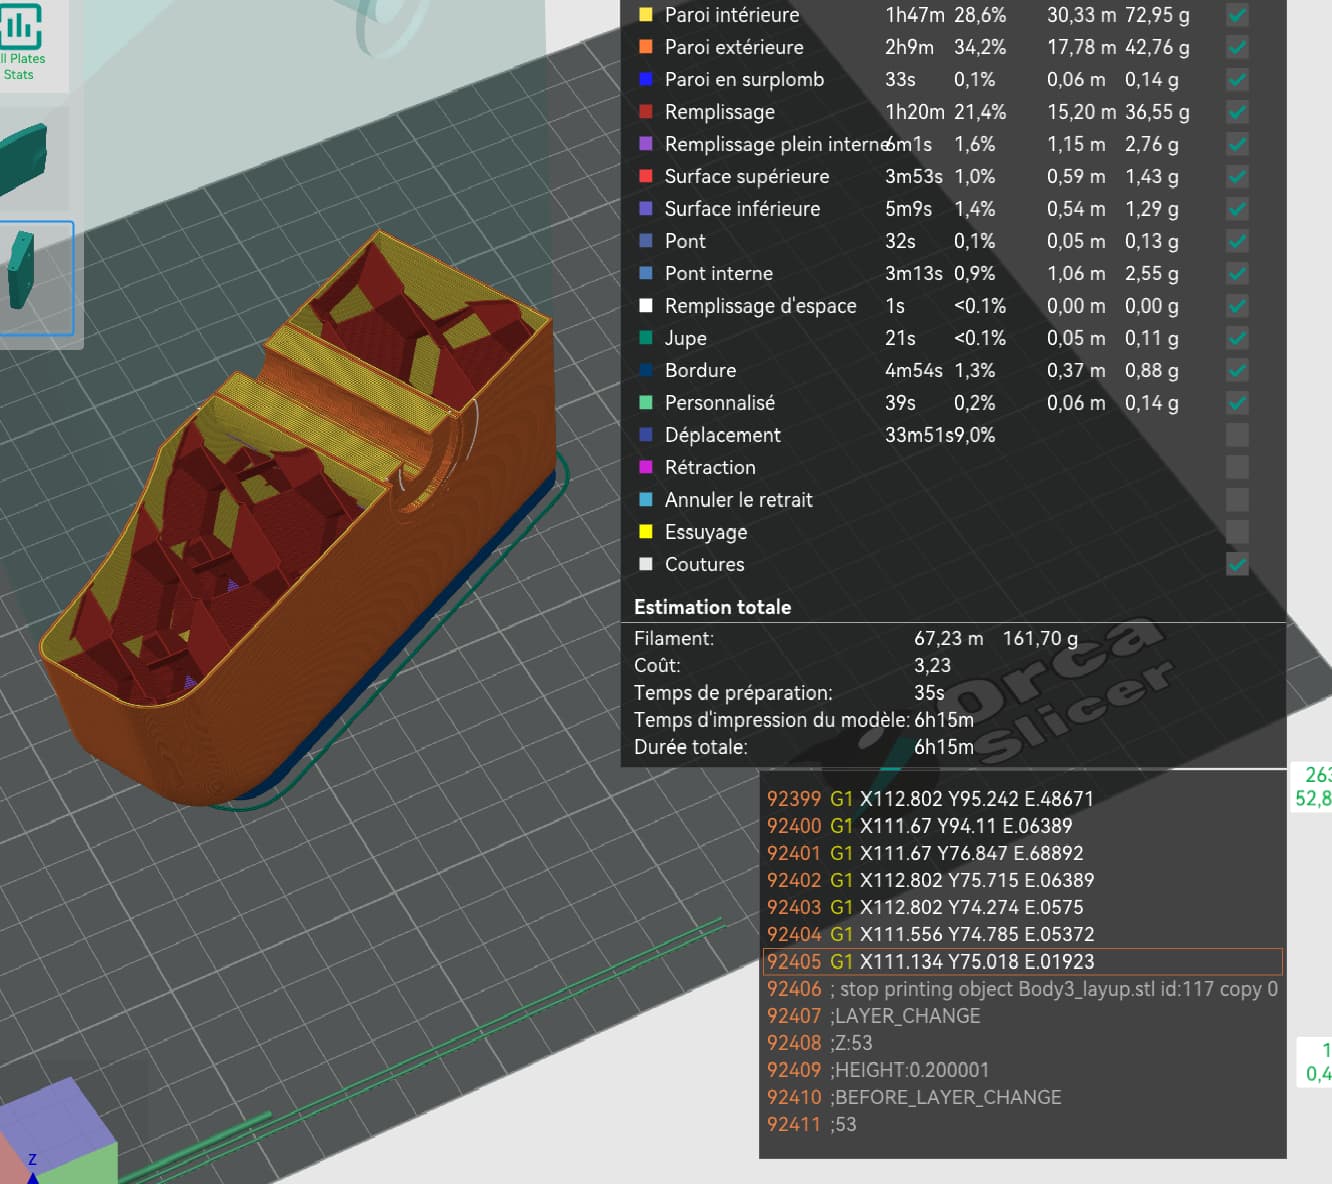
I should have used an infill or shells modifier for the bolt area, but just learned about this in orcaslicer.
3 Likes
The bolt holes should be running through the alu tubes, that way you have better rigidity. Your only real way forward is to use a carbon skin with wrapped rails to stiffen it up.
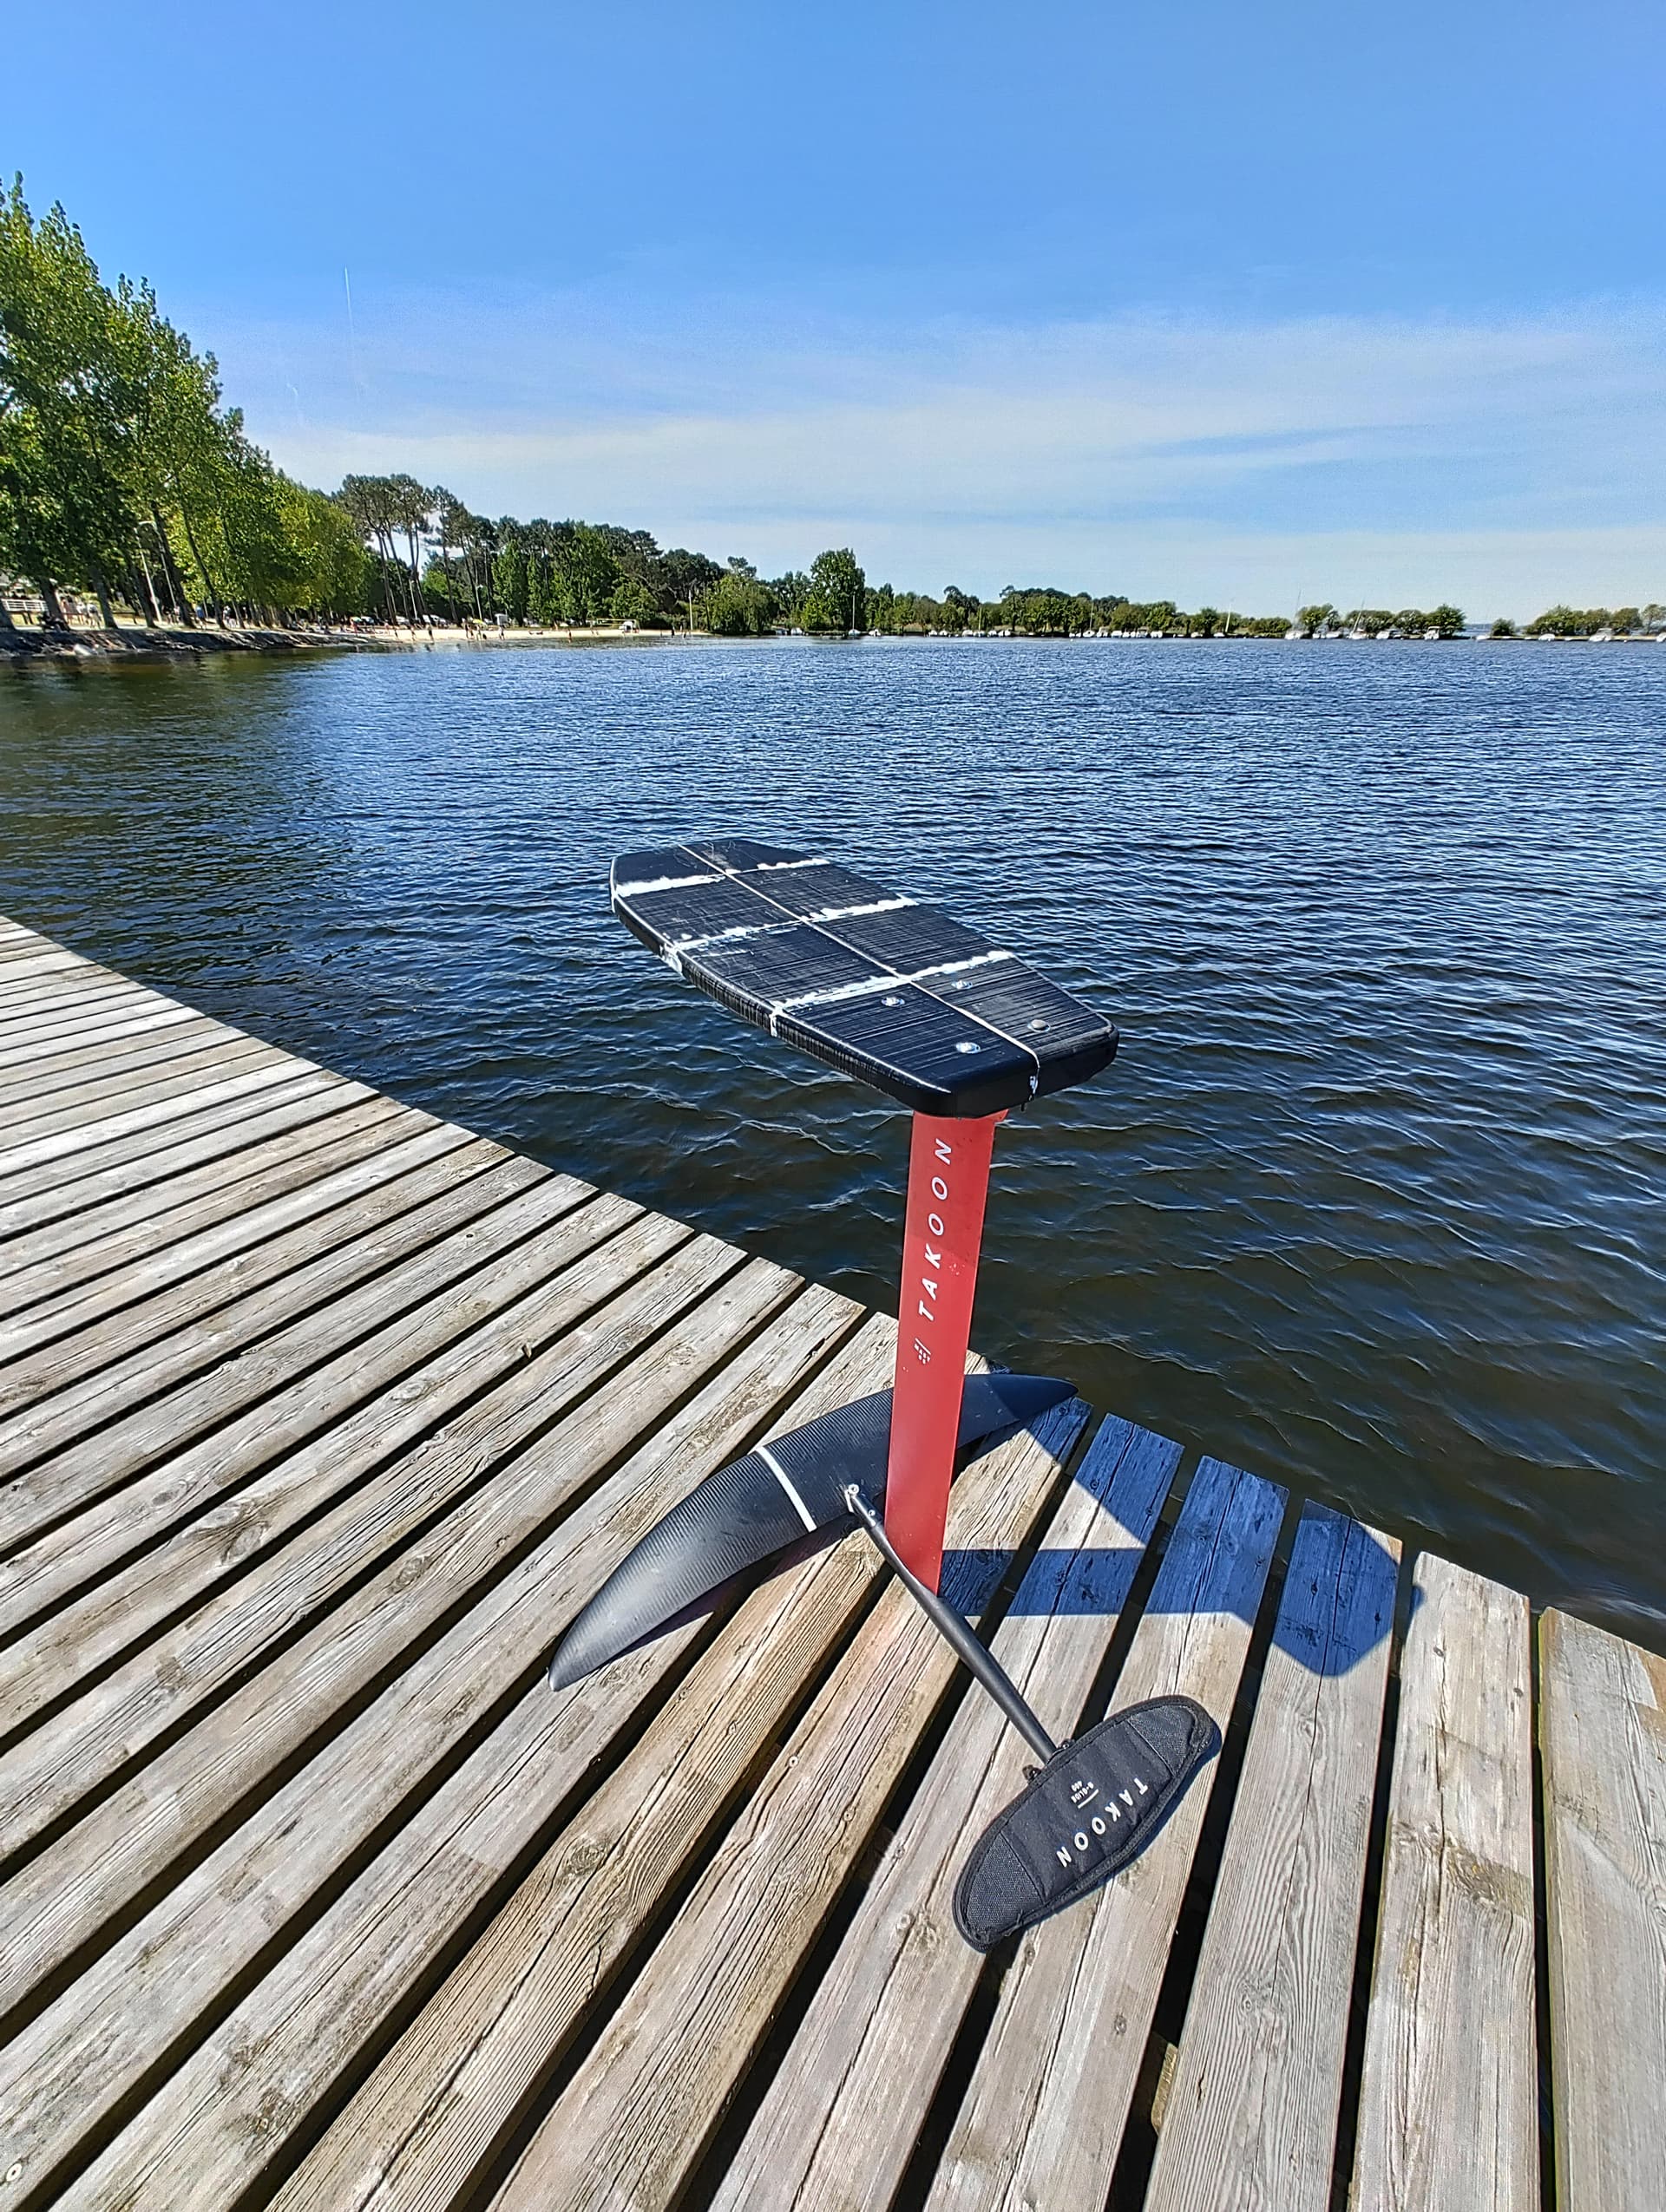
Survived first session just fine! However After almost 2h session, it has soaked some water.
I will have to find some way to seal it better.
Edit: board took around 1 lt of water After weight test. Now draining in the sun.
I also made some progress on my pumping despite using the 1450 and not 1950 I will receive soon.

8 Likes
Love your video ya man!!
maybe try coating board with stuff below…?
Also, I have had luck printing honeycomb infill pattern with a port to inject 4lb expanding foam. that may help rigitiy and waterproofing

I already had tried epoxy on asa, without great sucess, the epoxy was peeling off…
My best bet yet is acetone-asa slurry brush-on.
Board has been dried and ready to a second session today, back down below 3kg total.
I will wait to find some coating/waterproof solution, before gluing on the pad ![]()
A lot of improvements are possible for a v2, first things would be :
- dowels between all blocks near the edge and on the centerline
-infill modifier near the holes to have 100% infill connection to the tubes.
-replace dowels with printed features and glue with bolts
I haven’t had issues with delamination even in saltwater use - fyi -
The properties of XTC-3D that make it less likely to delaminate from a 3D printed object compared to general epoxy resins include:
-
Adhesion: XTC-3D is specifically formulated to bond well with the materials commonly used in 3D printing, such as PLA, ABS, and nylon. This strong bond reduces the risk of delamination.
-
Flexibility: Unlike some rigid epoxies, XTC-3D retains a degree of flexibility after curing, which helps it to move with the 3D printed object under stress rather than cracking or peeling away.
-
Low Viscosity: Its low viscosity ensures that it can seep into the micro-gaps and layer lines of 3D printed objects, creating a mechanical lock that enhances adhesion and reduces the potential for delamination.
-
Thermal Expansion: XTC-3D has a thermal expansion rate that is more compatible with 3D printing materials, reducing the likelihood of delamination due to differences in expansion or contraction under varying temperatures.
3 Likes
Interesting, will check if I can source it in France !
1 Like
By the way, cracked 25 seconds today ![]()
The board did not break !
Looking forward to test with 1950 foil, should be a walk in the Park compared to 1450 ![]()
5 Likes
Tested the 1950 Yesterday, could pump for 30secs with river current in the noze.
Managed actual dock start, hands then feet on the board.
Stoked ![]()
Board not dead yet. One of the glue joints has failed, will redo it before atempting acetone smoothing.
Xtc -3d is quite expensive, could be a back-up plan
3 Likes

Tested a paint with base coating, but it’s still taking a lot of water.
Told you:smile:![]()
![]()
Nice pumping, i need to start practicing!
added 8.1mm holes for the dowels and ordered some in 8x 50mm

Now wondering what material to use for a printed core with carbon lay-up if I decide to go this route. All tests of epoxy bonding to asa I did seemed to be quite bad.
I have a roll of “bad” abs I will use for some tests.
Seems like a printed core with 3% infill and two walls will be 1.2kg without the dowels
Polycarbonate would be interesting to try, two coats of heated epoxy to seal it would be enough i guess.
Have you tried flaming before using the adhesive? If you do it right it helps a lot.

2 Likes
I also found a papier saying epoxy bonding to asa was especially Bad. Anyway, preparing a blank IS not easy work, a lot of warping on my home printer.
I’m not using formfutura appolox but some ouverture asa, and chamber volume is bigger.
The pei sheet and brim really helped, I also changed infill to 3d honeycomb as I had extra warpage at the infill end points. Taped the enclosure door shut ![]()
Used 100% infill modifier at the foil holes this time, and dowels.
Thinking about 1 layer + renforcement of 200gr cf and 1 layer of 100g gf on top. Delamination is my main concern.
When I have progressed in pumping technique, I will try to record 1 min pumping with the original printed+alu board ![]()
2 Likes