Thanks, I will look out for that. My board had a deep tuttle box. It will work, trust the Engineer 
Free version here:
https://scholarsarchive.byu.edu/cgi/viewcontent.cgi?article=3150&context=facpub
You mean you used the B-spline function of your CAD program ? Right ?
Yes, exactly. As you can see here:
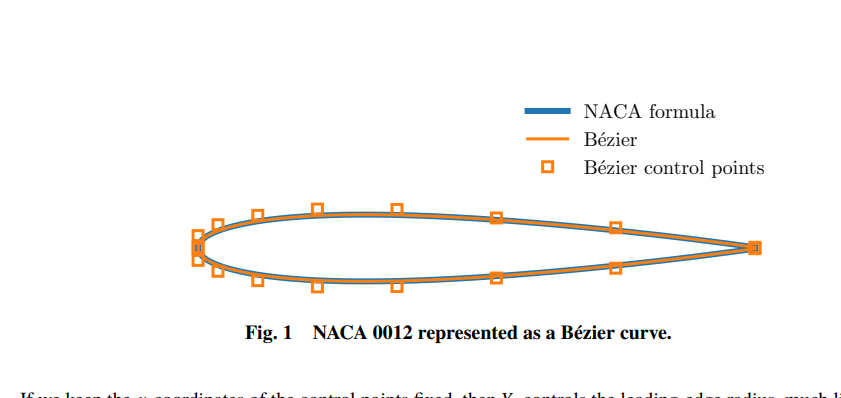
You can clearly see Bézier control points. Instead of staring into your CAD program, thinking, “wow, I will click around randomly and draw the airfoil”, you can instead use the control points pictured above.
As expected, the part is identical and fits perfectly. I printed one just to prove it.
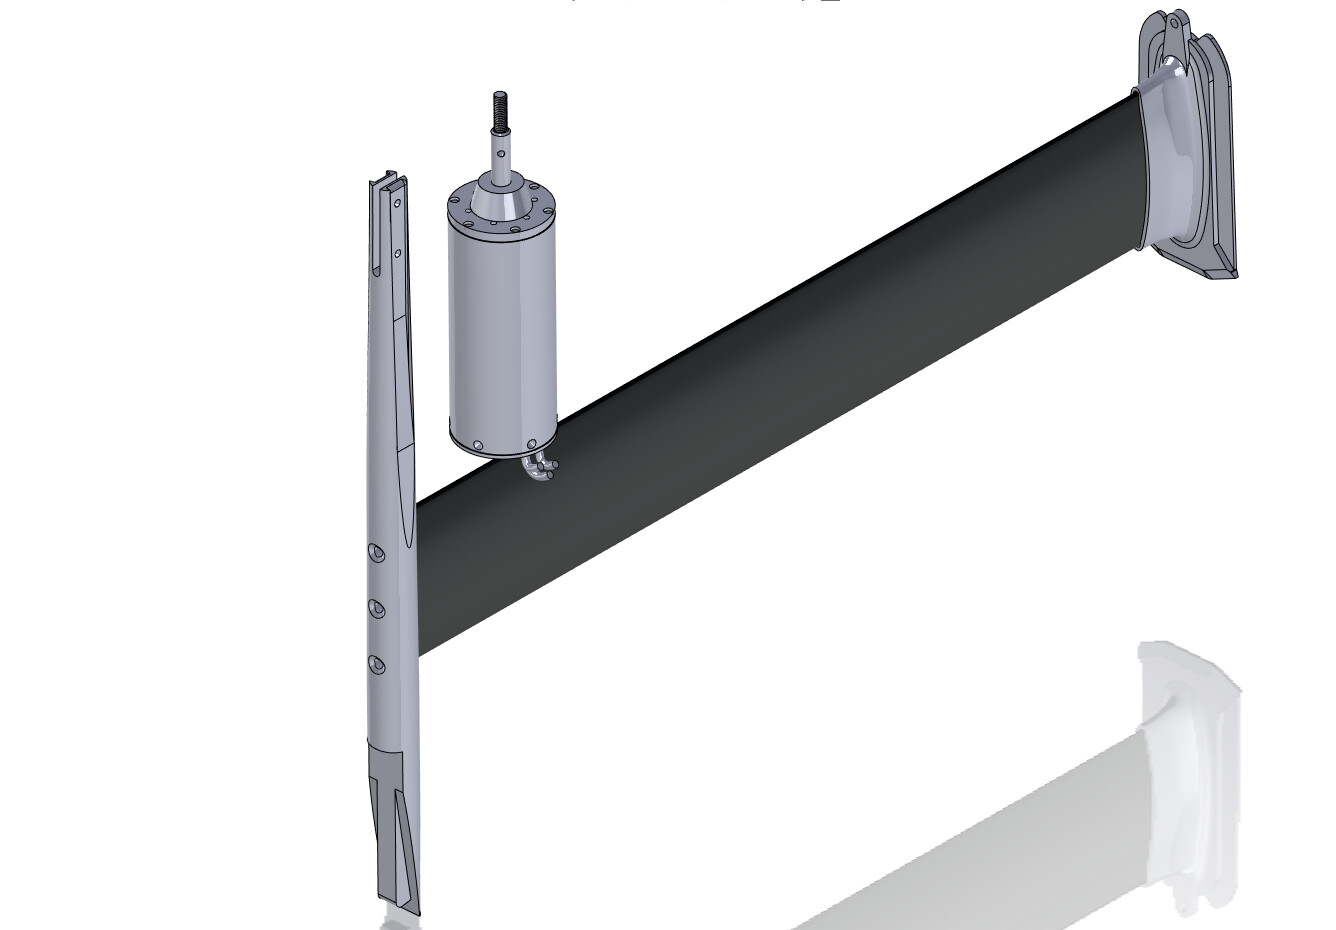
Moving forward, I will use this model as a base, if/when it requires modification. Very easy to modify the part and send STEP file to CNC quickturn shop. They can modify the NAISH part instead of starting from scratch.
edit: I added the cutout to extrusion for completeness.

Yes hello
just doing some modeling. I will not worry about dropping in fasteners to the assembly, but have marked their location with cut-extrude. If you like you can get a socket cap screw model from Yeggi or Grabcad.
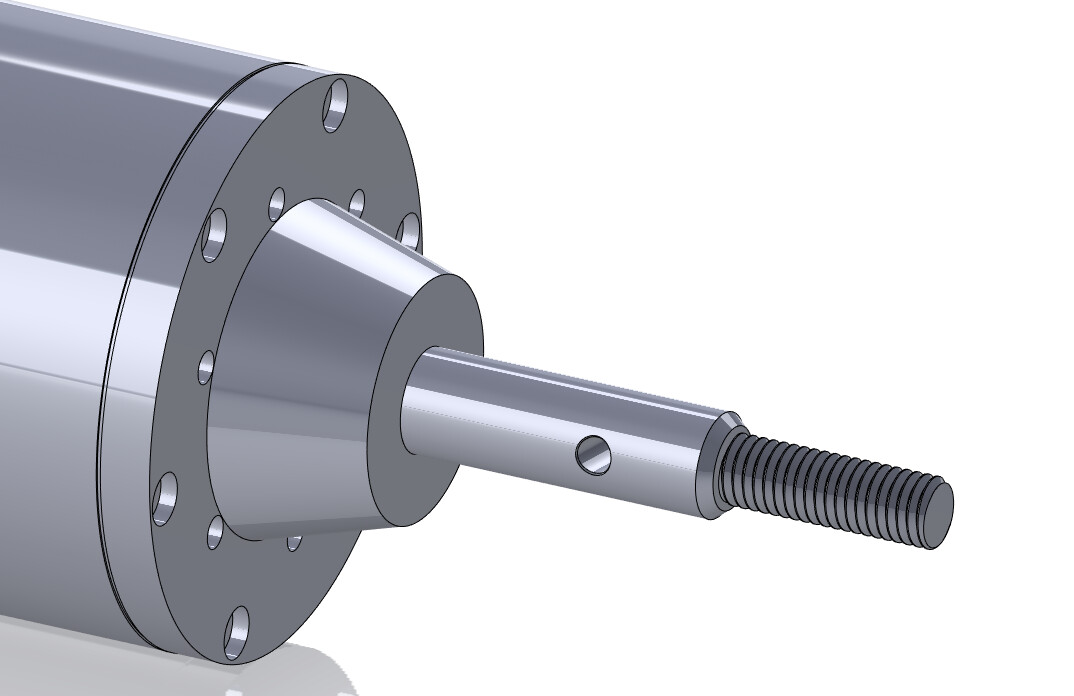
For the M8 thread you need the following equipment:
-Triangle
-Helix
click “sweep cut”
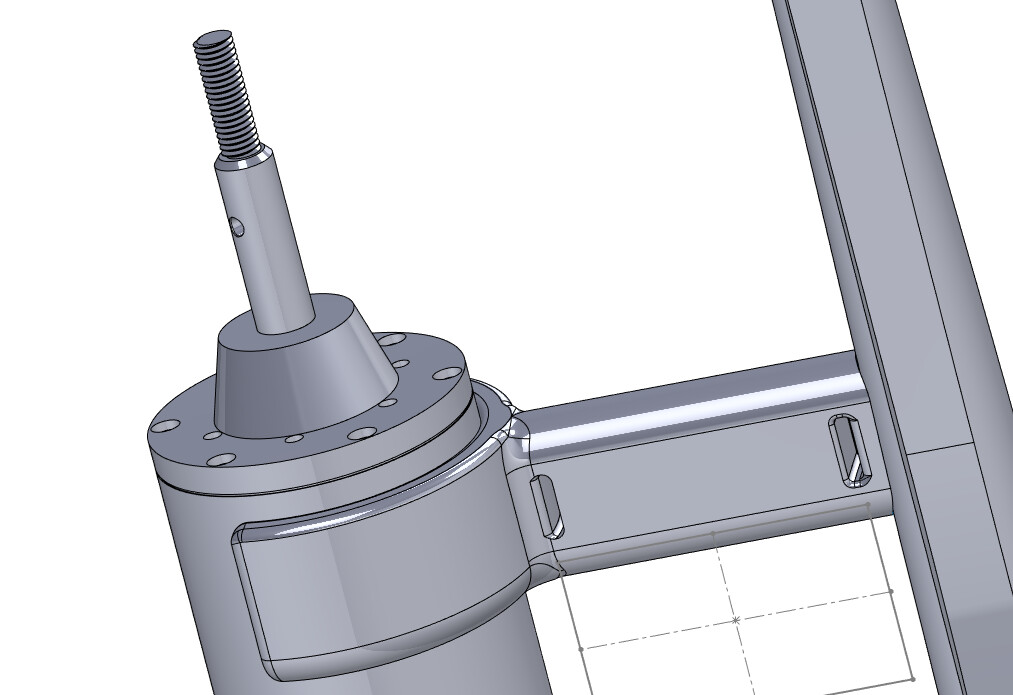
added shaft hole
1 Like
Yes hello
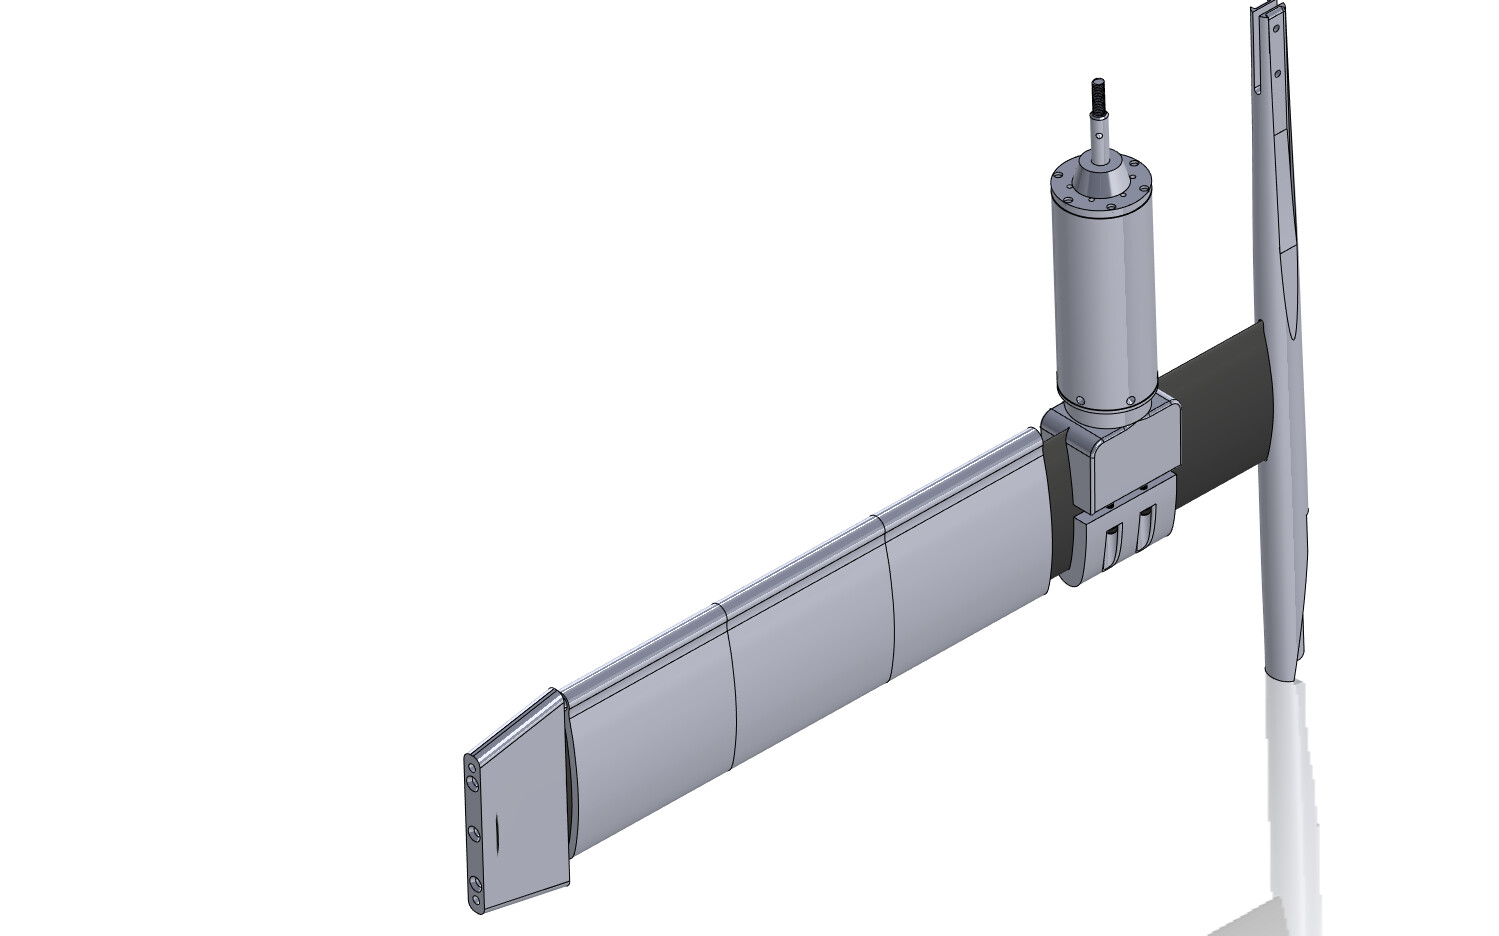
Fuse quick model. It has nothing to do with my fabrications so I spent minimal time replicating the key features.
I made sure the connecting piece to mast is accurate however.
action shot
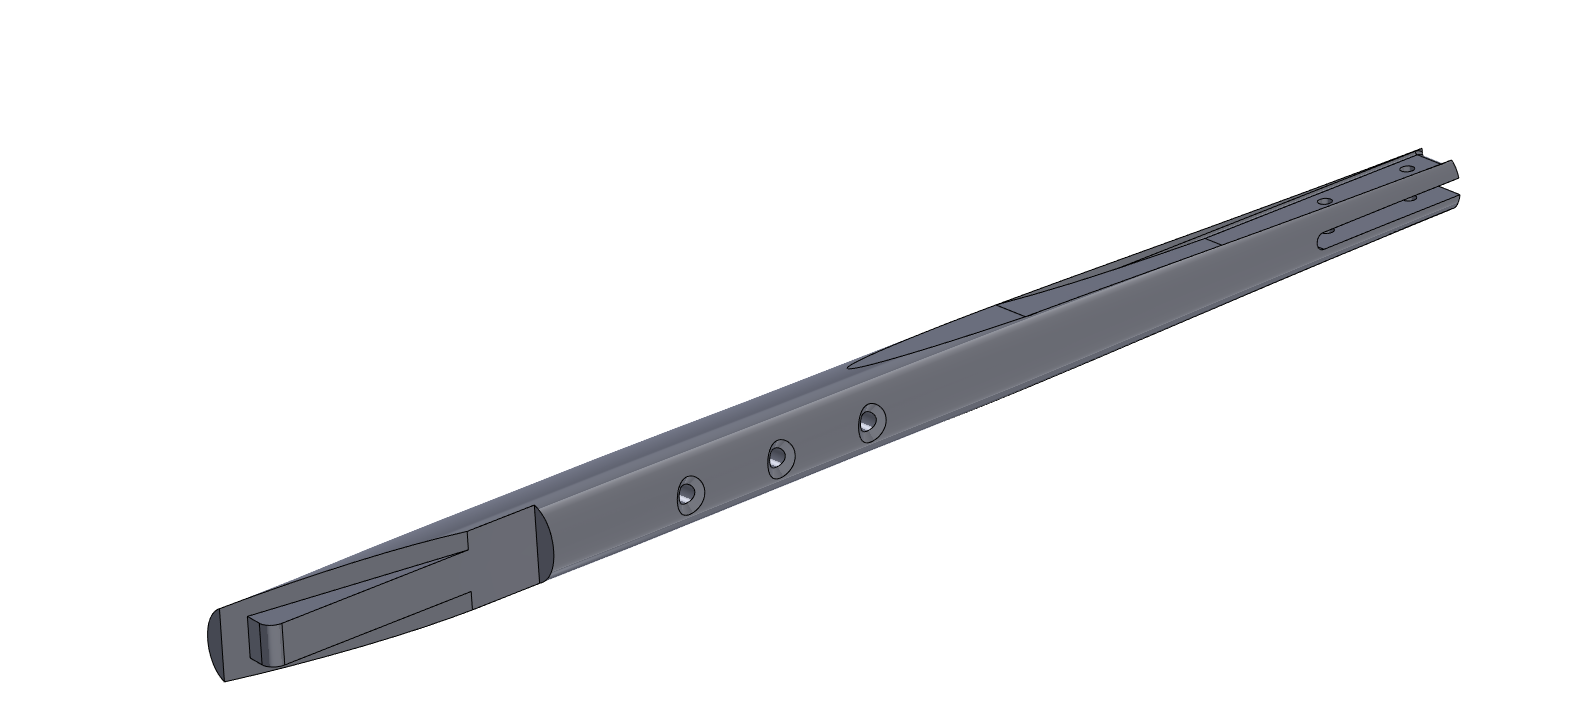
added more holes
Nice modeling of parts, but don’t you think that the holes are at an engineered ctc of 40mm? Measuring a tapped hole can not be spot on at 1/100 of a mm.
Hi, I agree the drawing ideally shows 40.00mm. But I am making parts to fit the parts I have in front of me. For that reason my final CTC is 39.90mm in the model. It will help down the road if I have to mail the Abracadabra part to CNC shop to modify the part. Practically it makes no difference.
Great CAD work. I am excited to see your build progress continue!
1 Like
Thanks for the kind words. I usually have to model each and every fastener at work, use simulation software to verify/modify/optimize design. For this fun project I can pretty much just eye it and test it out.
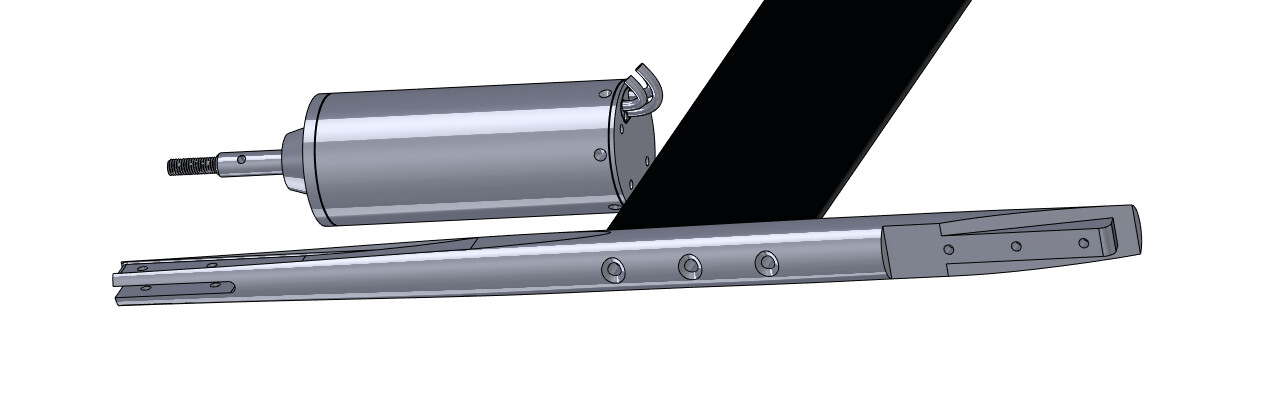
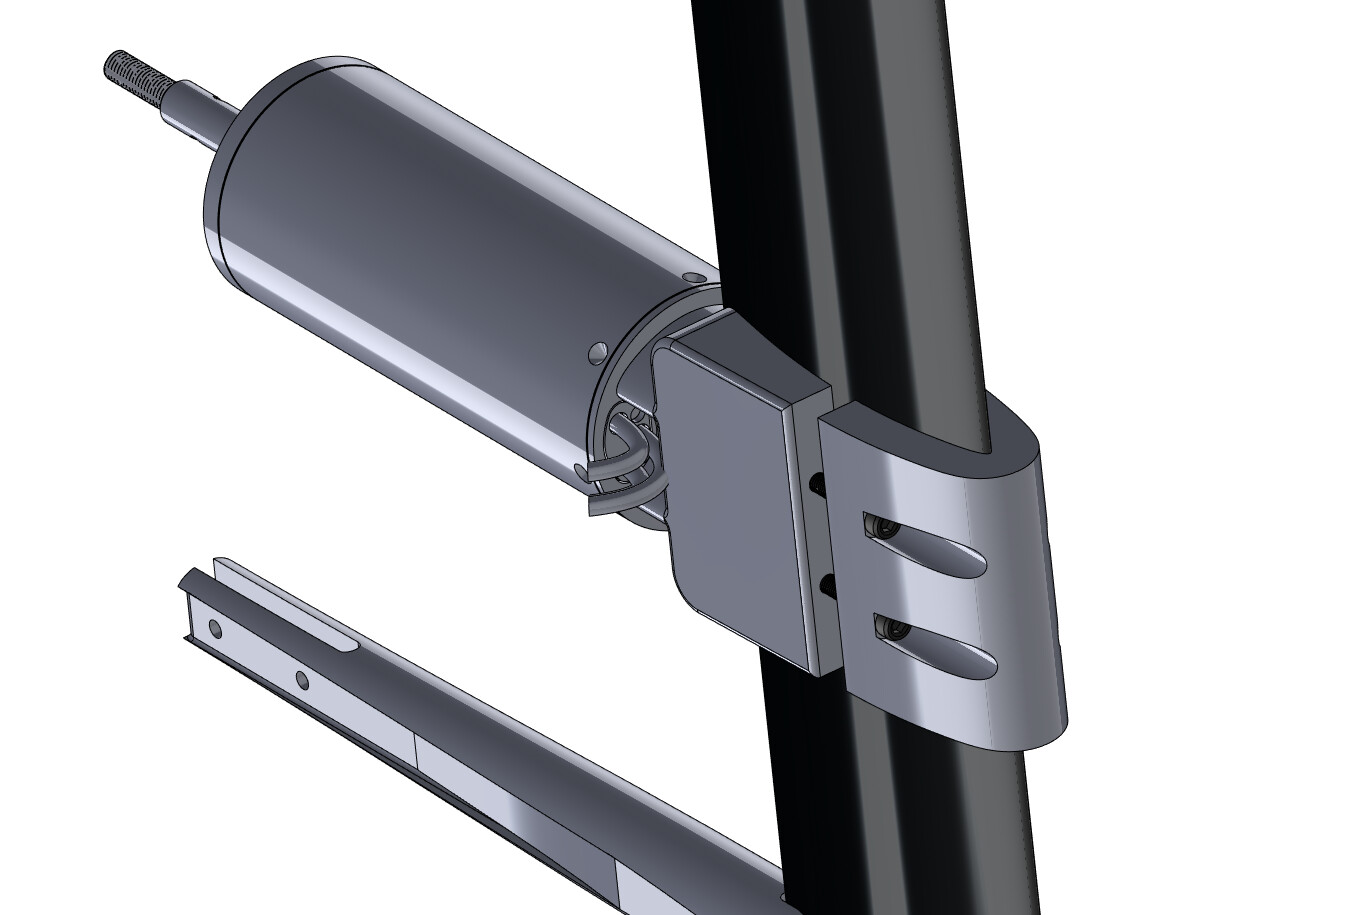
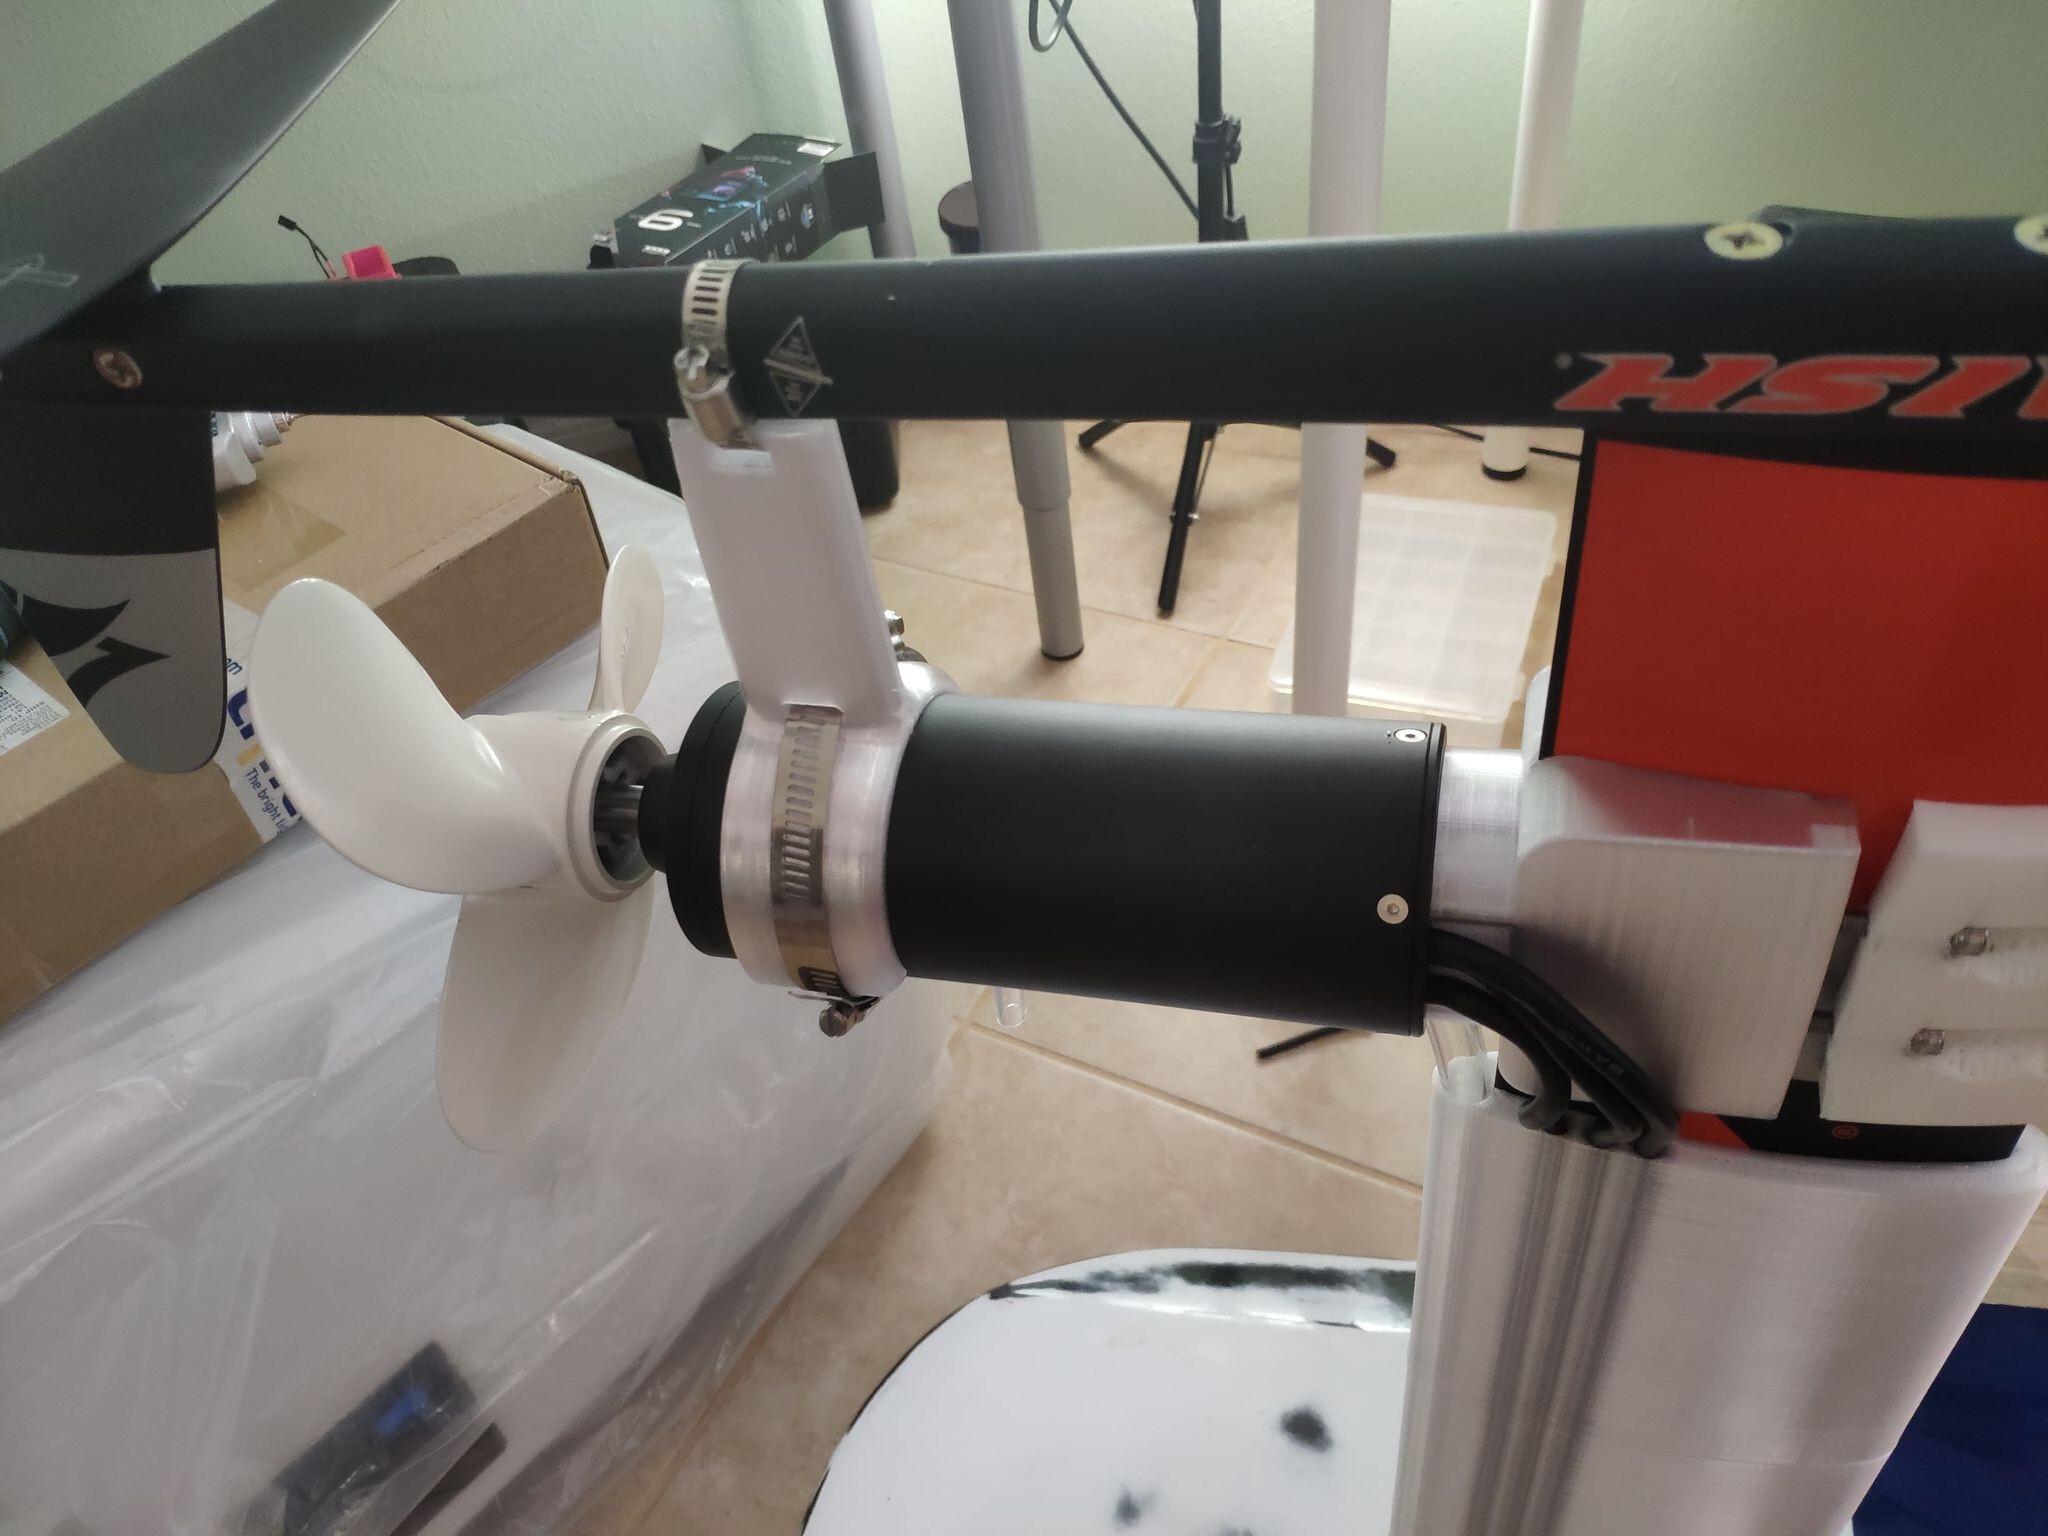
This is what I came up with for motor mount. Aft part is PETG. Fore part is TPU. Compression clamp style, I have had great success with this method clamping tubes. We will see if the leading edge is blunt enough not to cut the TPU part.
I saw someone use comically long M6 screws somewhere else, so I decided to amplify that effect - these are M5 x 100mm socket cap screws, LOL.
What about watercooling?
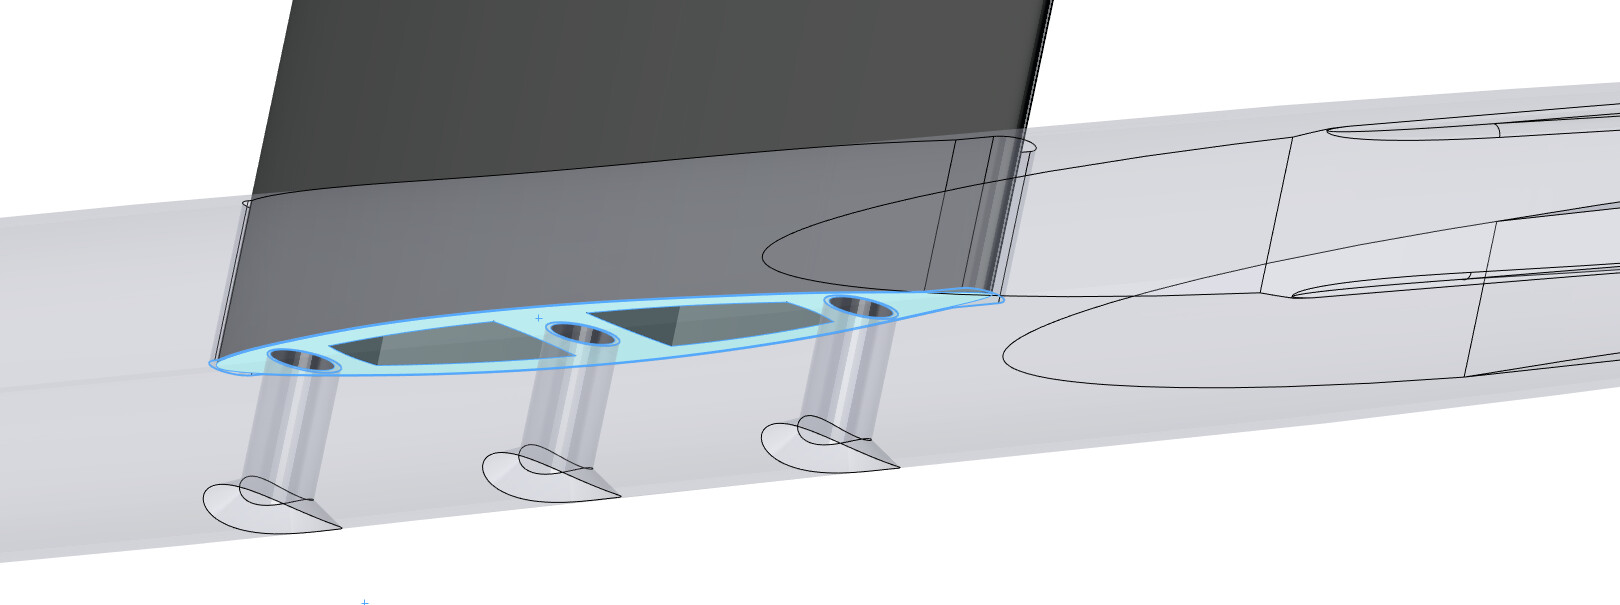
Also, don’t you think a more hydrodynamic shape where the top and bottom of the leading edges are rounded and trailing edges blend to shroud the motor case will provide more laminar flow and less drag?
I am interested in using TPU myself for some of these parts in my build. I have found one that is just incredibly strong and proven to be very durable with other parts I have made.
Will you be sharing some of these .stl’s? 
1 Like
My gut reaction is there is some induced drag, however vorticies generated by the addition should help to maintain or lower the thickness of the turbulent boundary layer. This is important because it has a chance to reduce feeding the propeller turbulent flow. I will happily simulate this model and make changes if necessary.
Traditionally, you want to maintain laminar flow over a wing to produce lift, but in this case it’s not lifting.
Yes hello
I have received more items
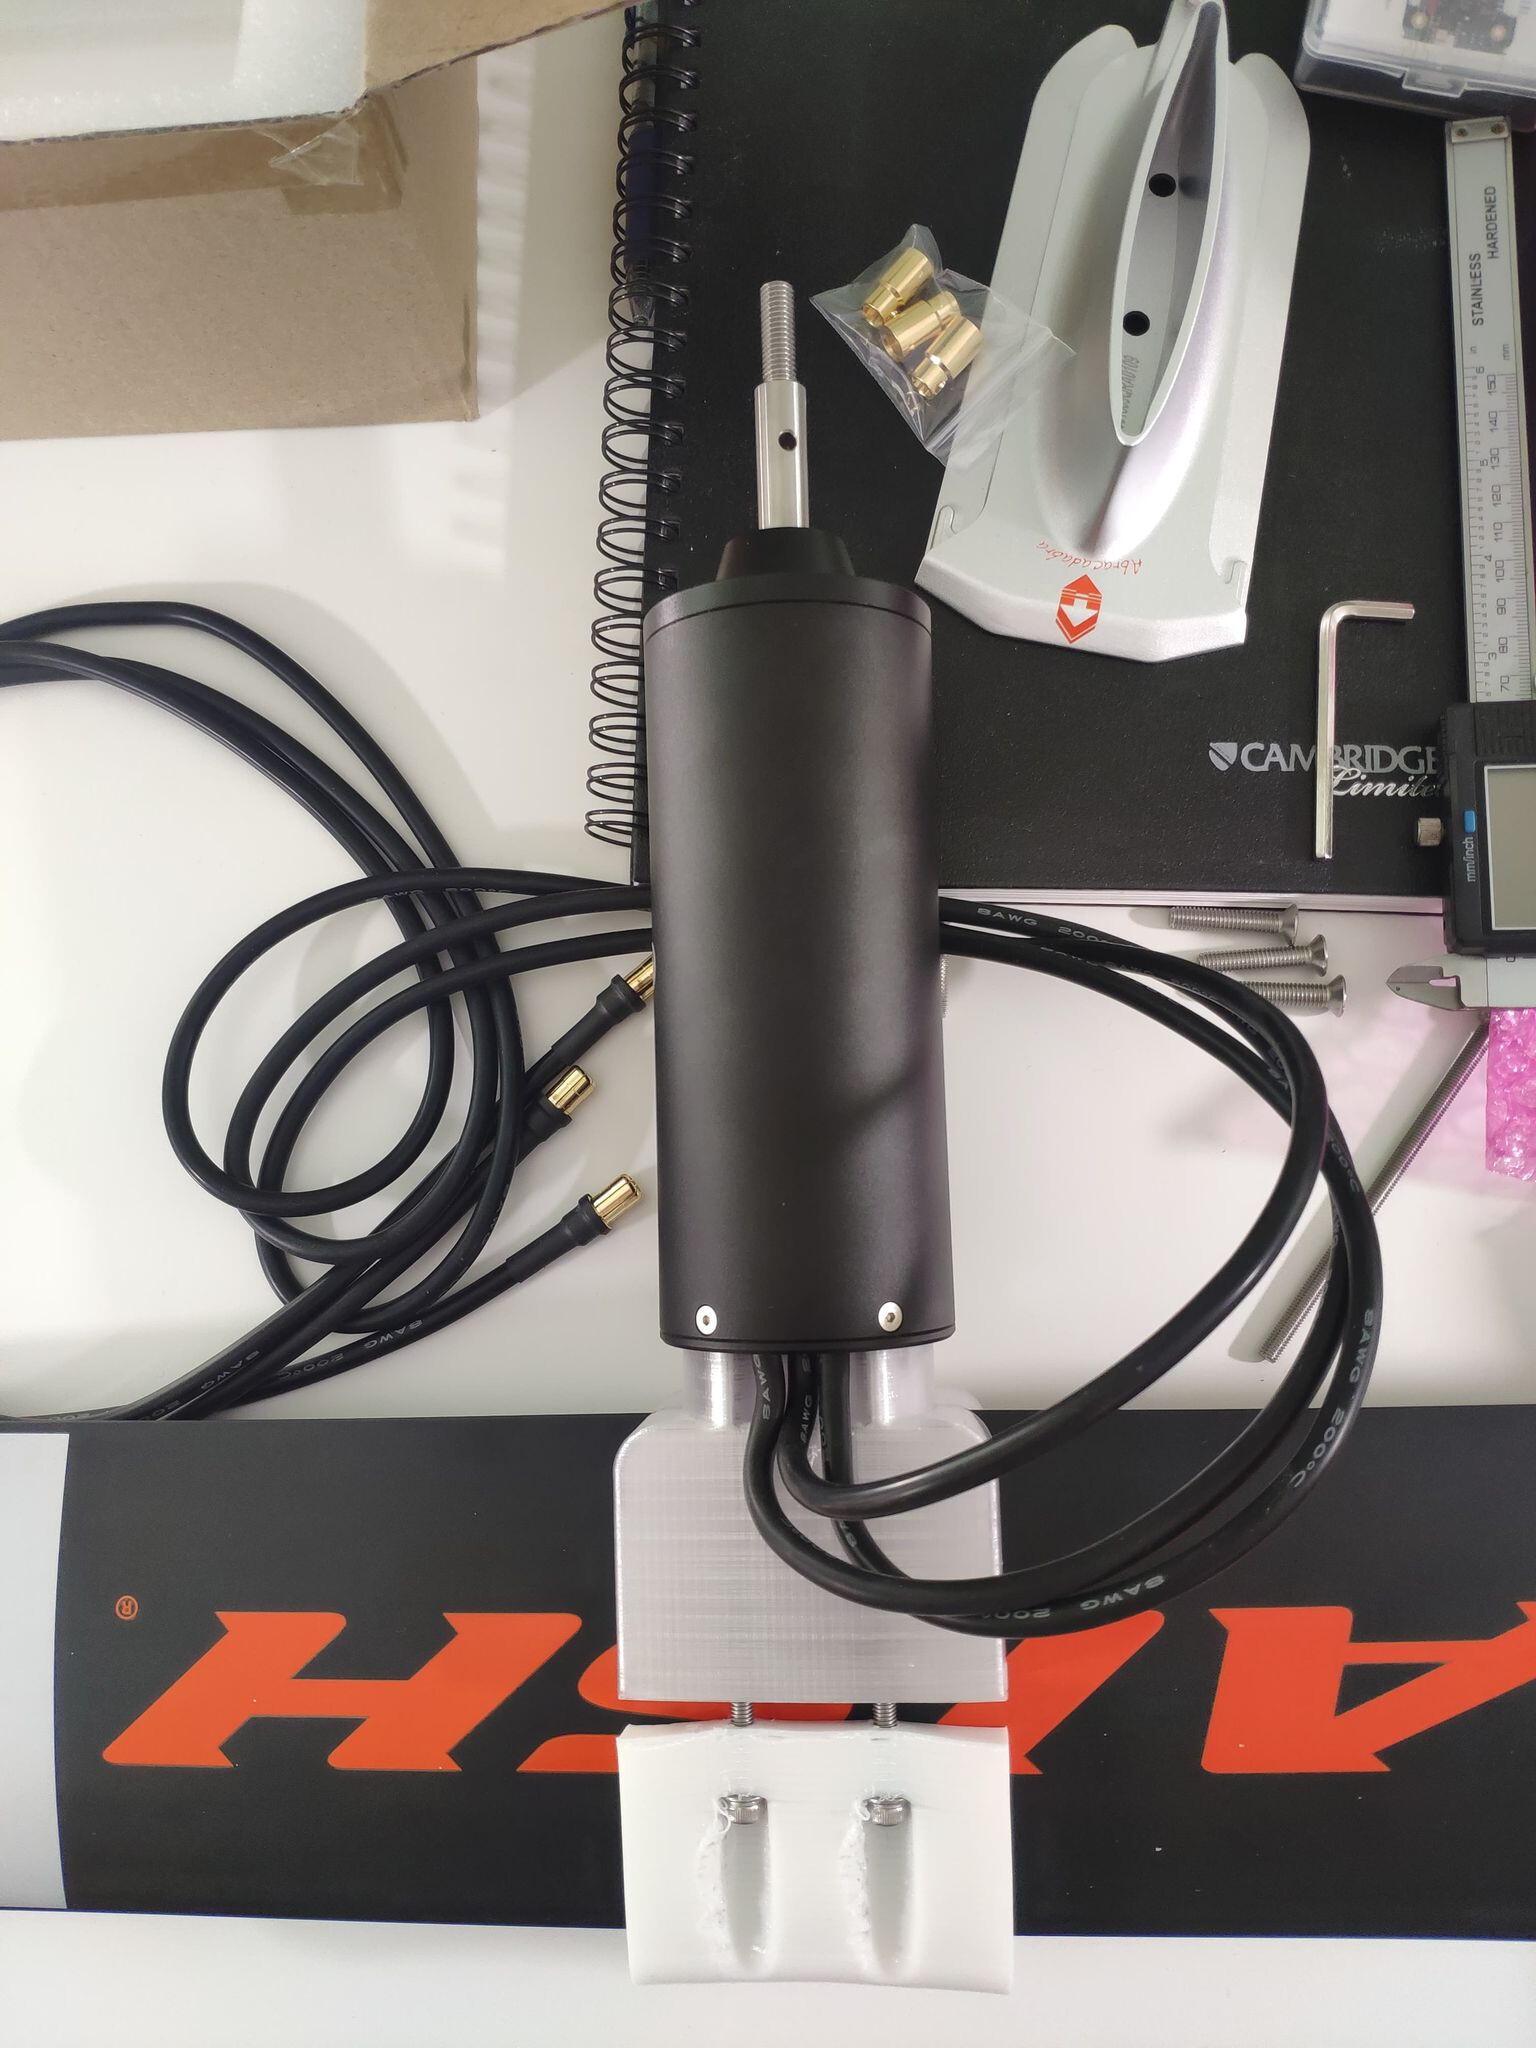
I have all the parts, excluding two 6S 16,000mAh batteries. I have plenty of smaller sized 6S that I can use for testing purposes. Only need a few minutes runtime to test for leaks and overall function.
The 3D printed parts seem to be correct the first time around. My main concern is balancing the propeller. Since it is heavy and aluminum I cannot take the shortcut method I usually use (apply tape to a blade) to balance propellers for R/C.
Yes hello
I printed DEEP TUTTLE adapter. My custom carbon board has an odd shape, 75mm deep cavity, about 15mm wide. The adapter I printed needs to have 1-2 degree draft angle applied.
For now I will continue, routing wire and water tube OUTSIDE the mast. If it does not work well, I can easily drill holes and route inside the mast. For now, I will click “print” and have parts with raceway built in.
1 Like
Printer is still printing. I have managed to mount the mast to the board. I am working on the electrical box.
I have ordered an hour-meter so I can register this watercraft in the state of Florida and receive a title, and hull numbers. I am filling out form 87002 and form 82040. I will also need a horn I think, and a whistle on my PFD.

I have ordered the batteries, total is 800 watt hour, should be fine for 40-50 minutes foiling. Or about 15 minute learning to get on foil.
Also, I installed brace with SUS304 tube clamp
I have ordered M4 Well Nut (Neoprene and EPDM variety, to compare) to secure Battery Box to the board using holes which already exist. There are pairs of 3 holes, so I will use the middle hole to secure box, and 2 outside holes for hand strap or handle.
For transport I can unfasten the tube clamp, separate fuse from mast, and the mast is hot-swap from the deep tuttle box. I am using both conductors on XT90 for each motor phase(3 total XT90) to enable hot-swap cable system for the mast.
For transport I will end up with
A) Fuse with wings
B) Mast with motor
C) Board with battery box
I will use a coupler to hot-swap the water cooling line. I used large internal diameter hose, i think this is 3/8 inches.
I hope you will be able to get on the wing with this setup. It is producing so much drag.
I think you will be surprised, I will try to datalog on foil and compare to a similar setup which runs cables inside the mast. Lucky I can buy as many batteries as I need, and charge them in under 2 hours.
I don’t think I will be surprised! But I am open to new experiences.
It will be interesting to see how long those 800wh last!
Please share some logs after your sea trial.