Danish Efoil build V2 - What I learnt and inspiration for others

Dear all foilzoners,

I wanted to share my latest Efoil build, for others to seek inspiration and to guide DIY’s - like myself, who wants to build their own Efoil.

Specs and components:

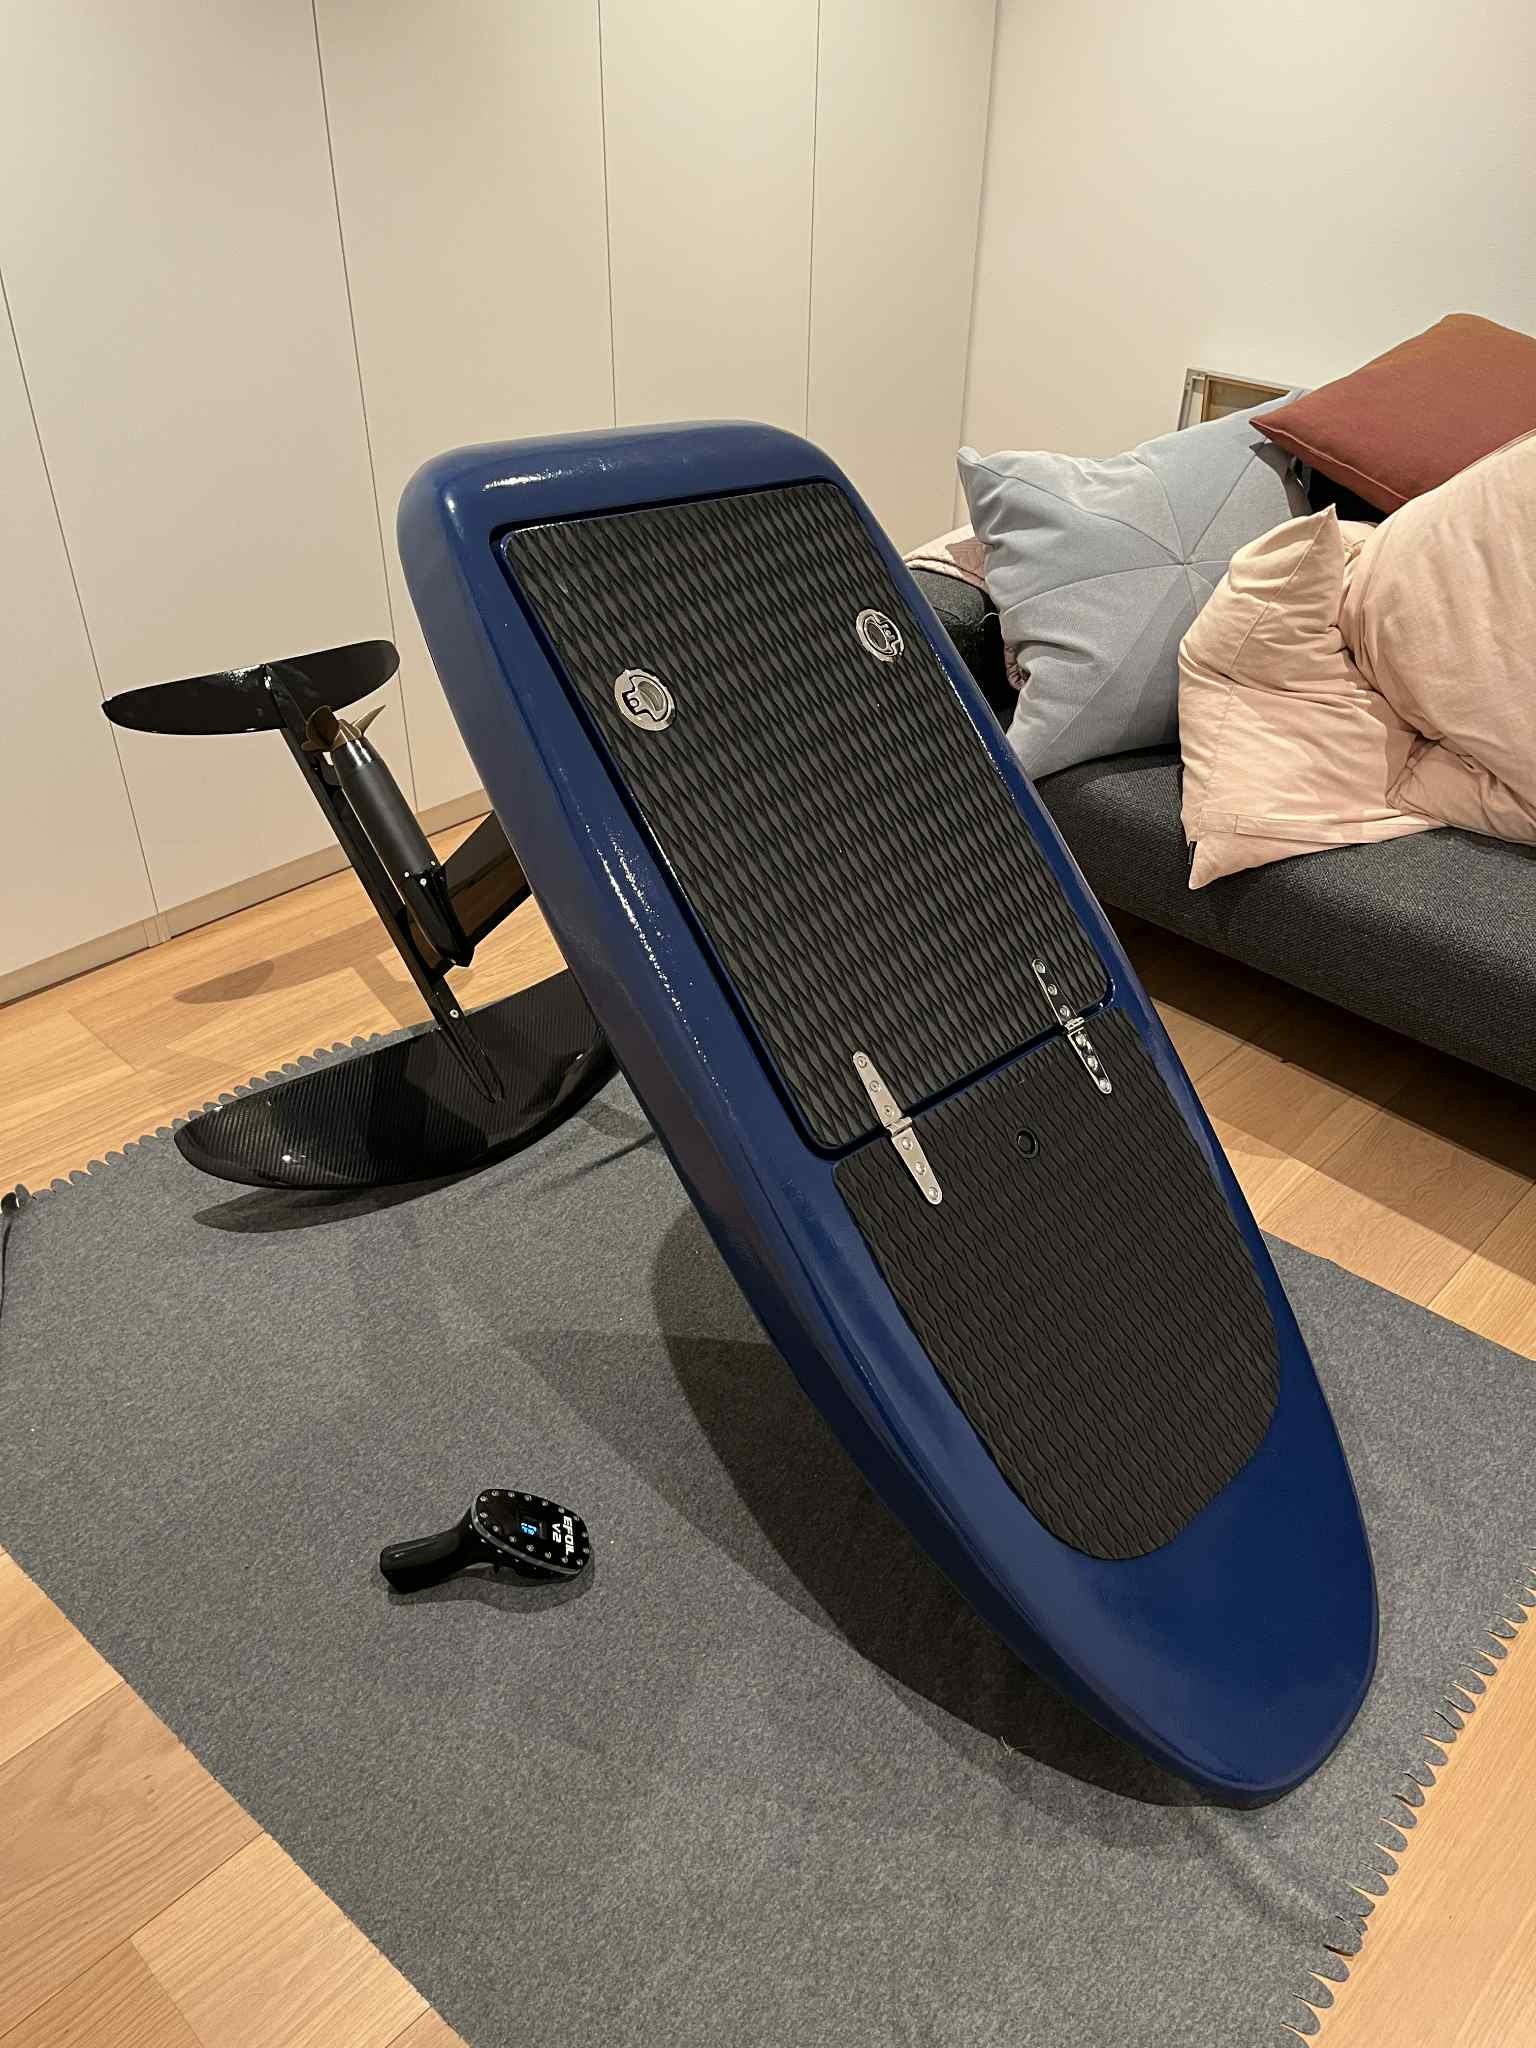
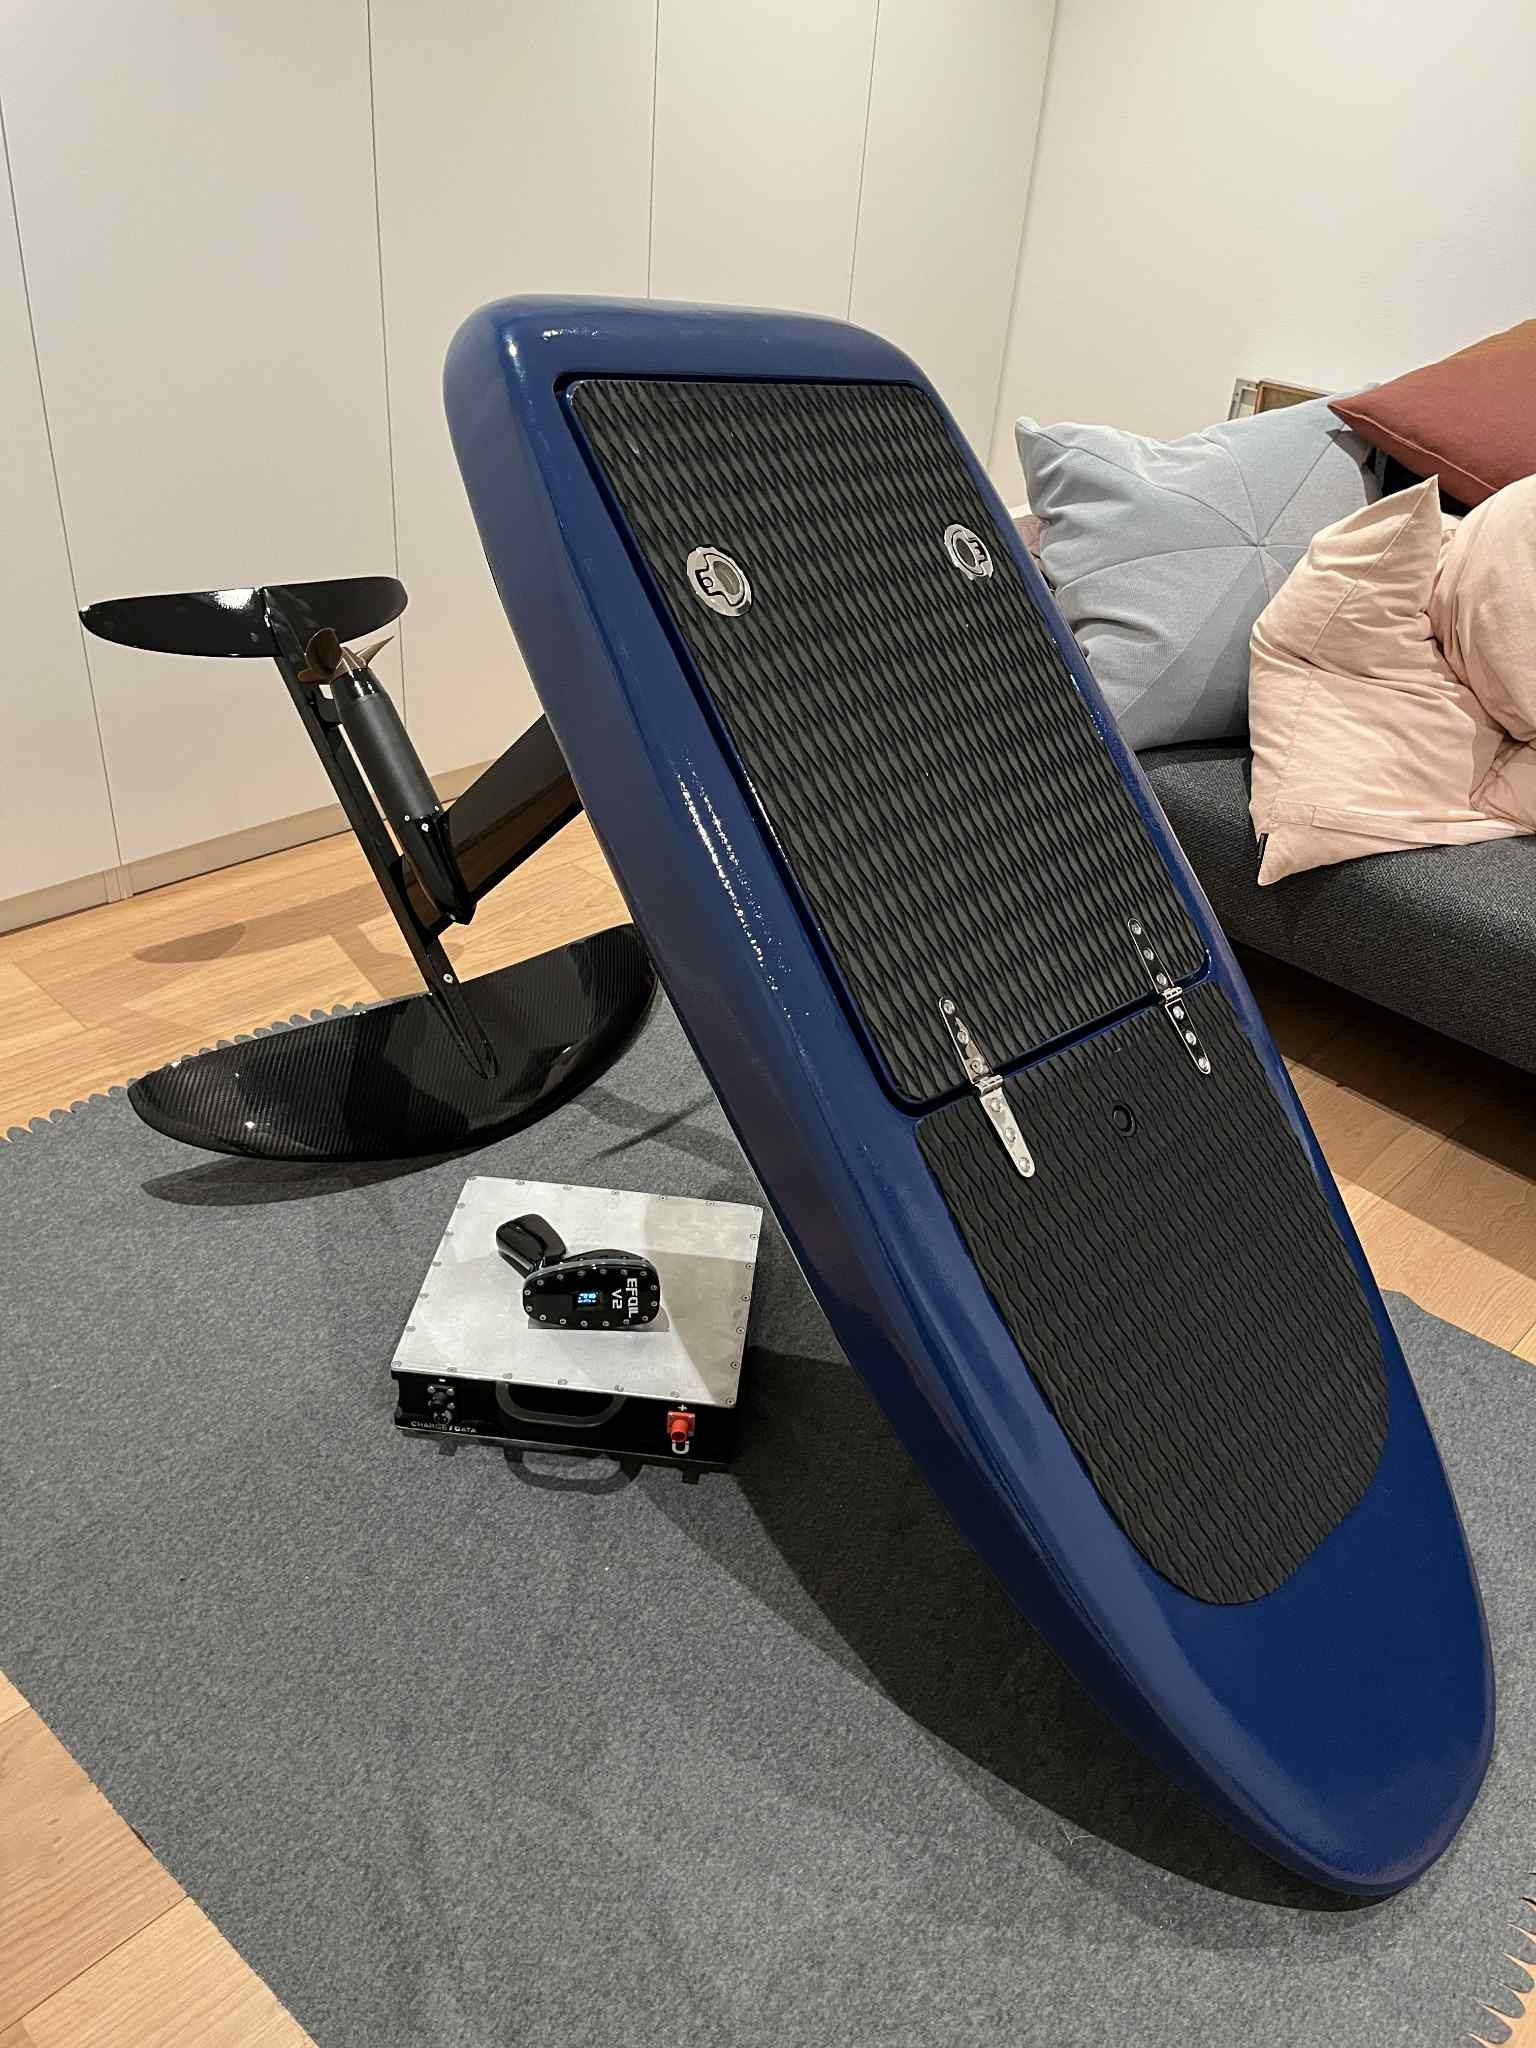
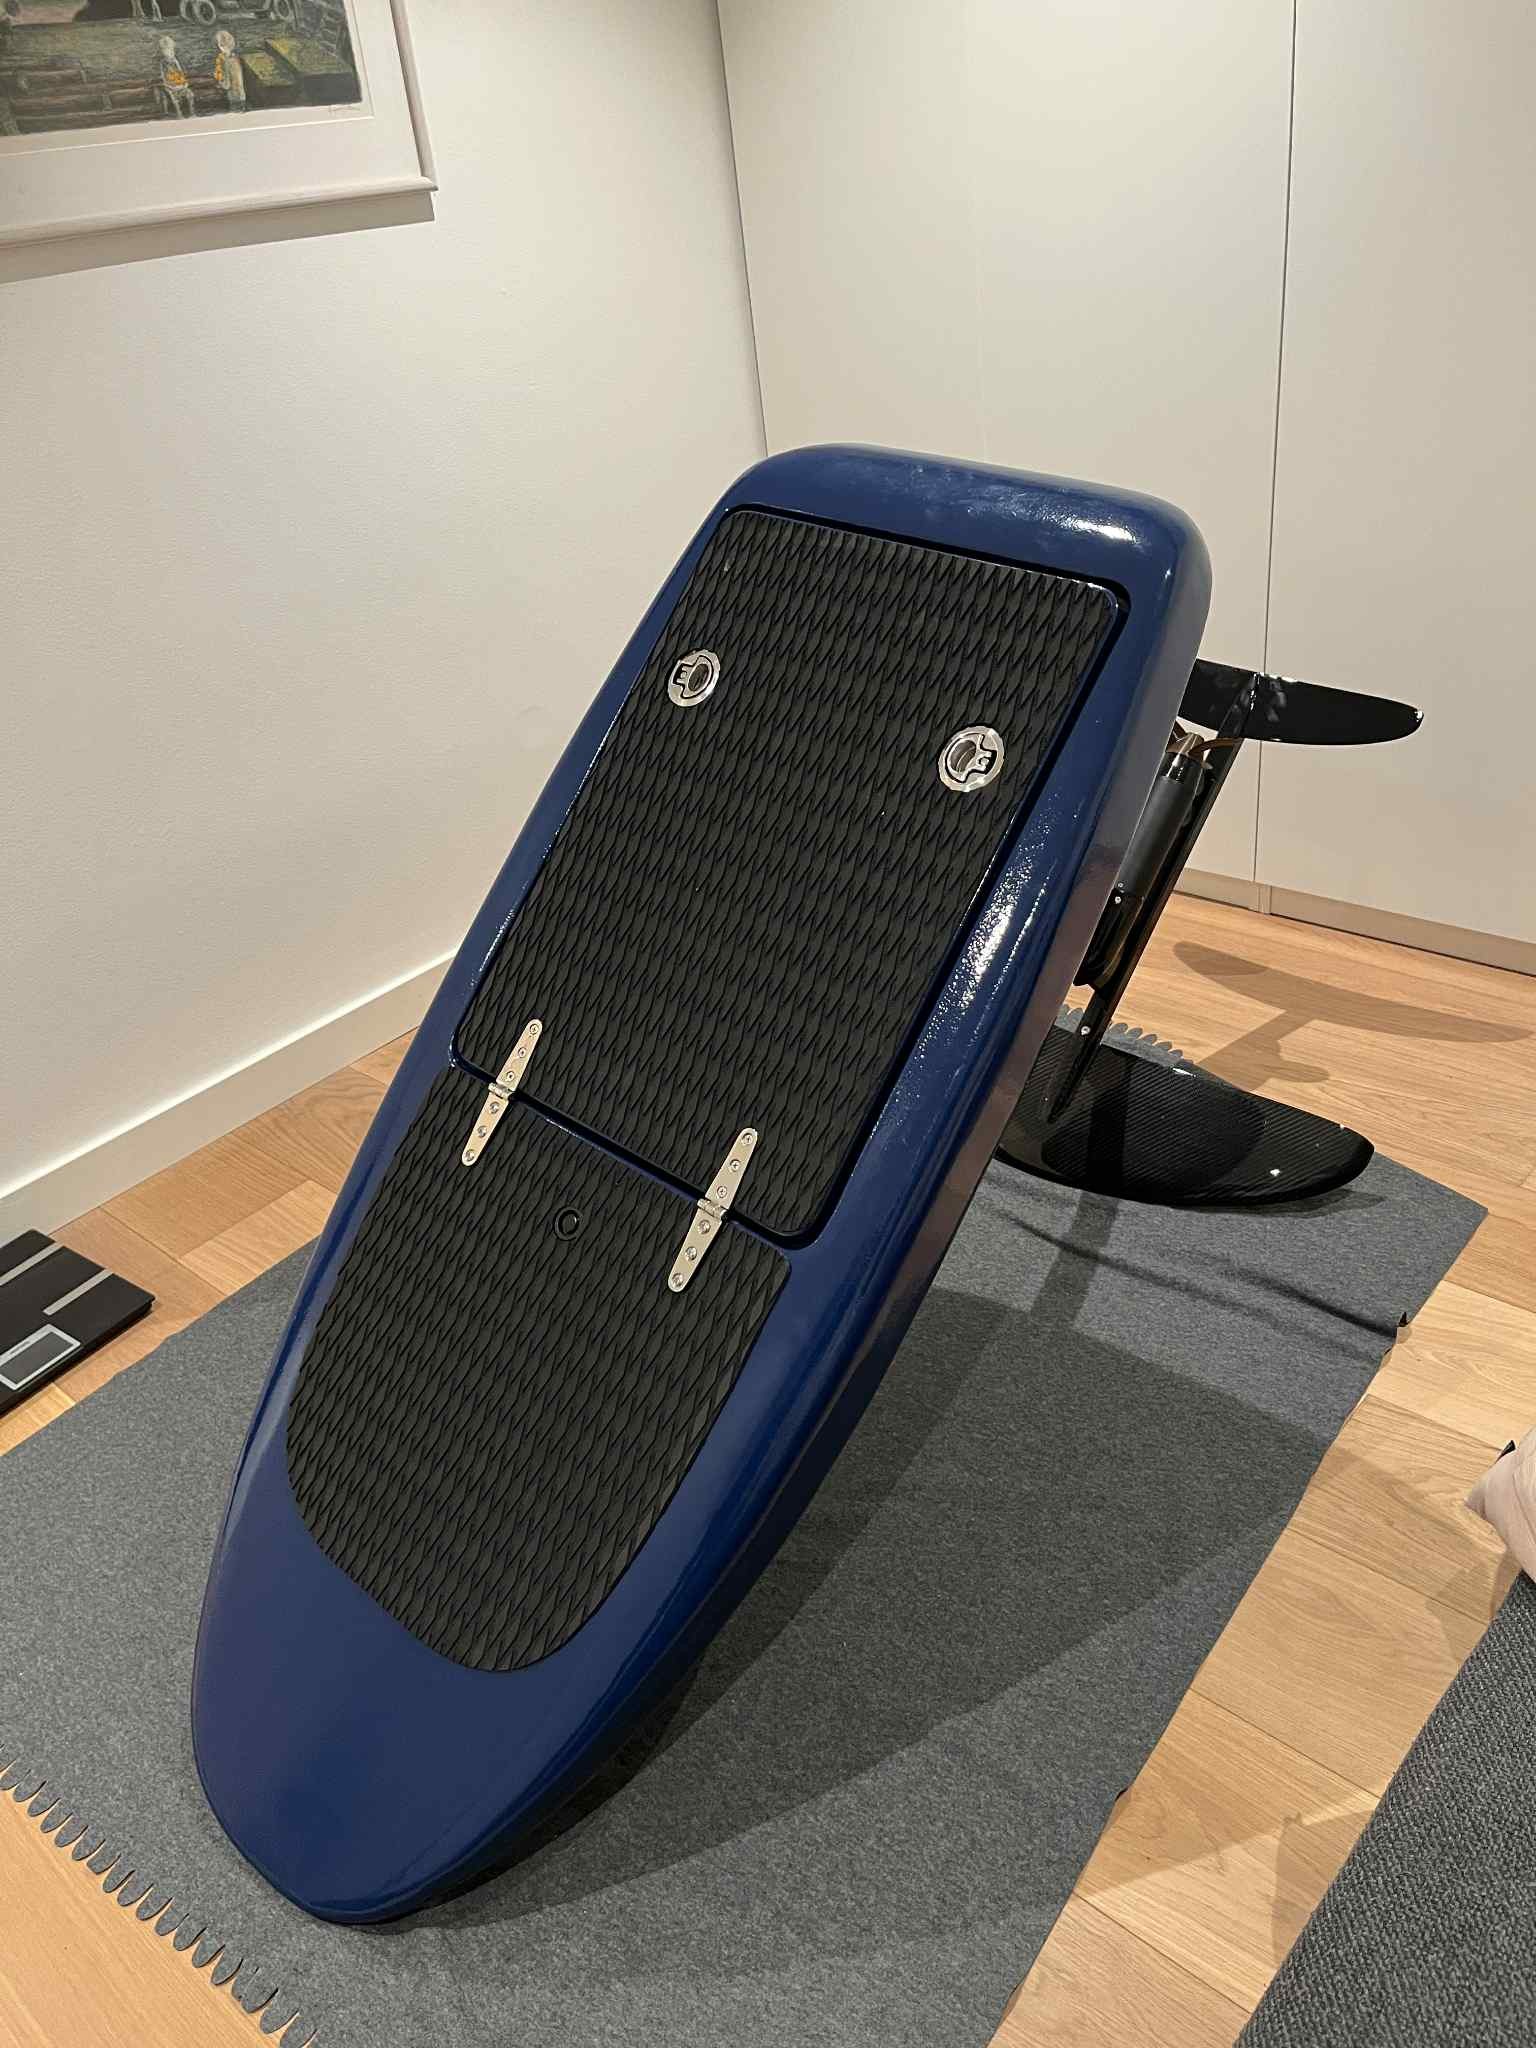
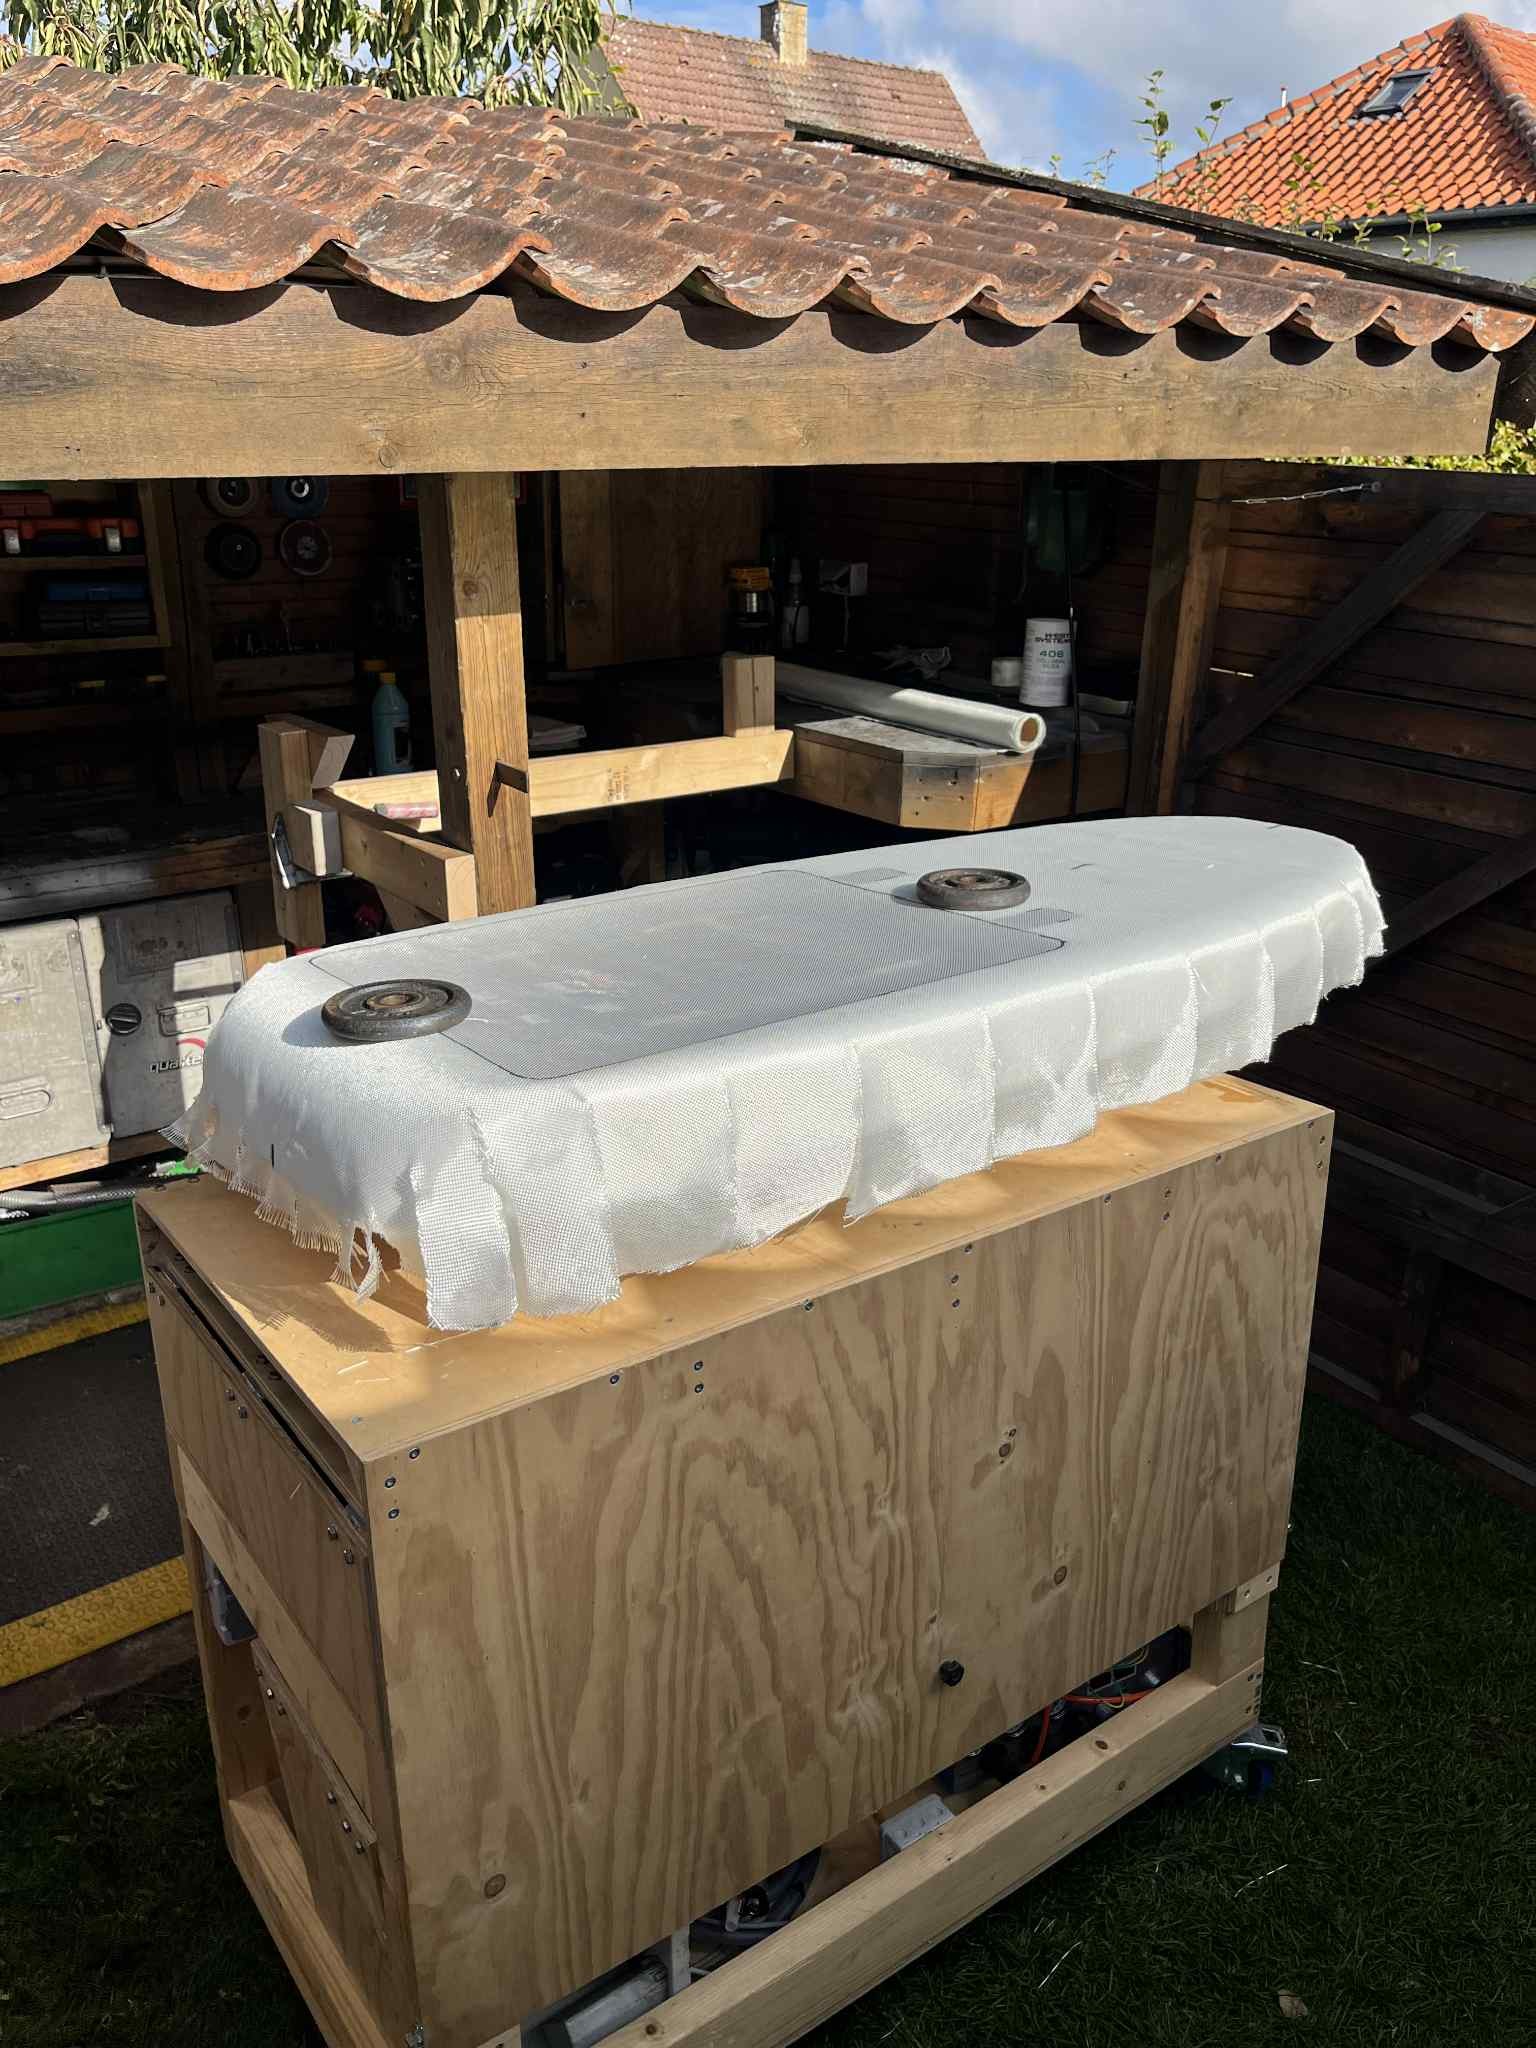
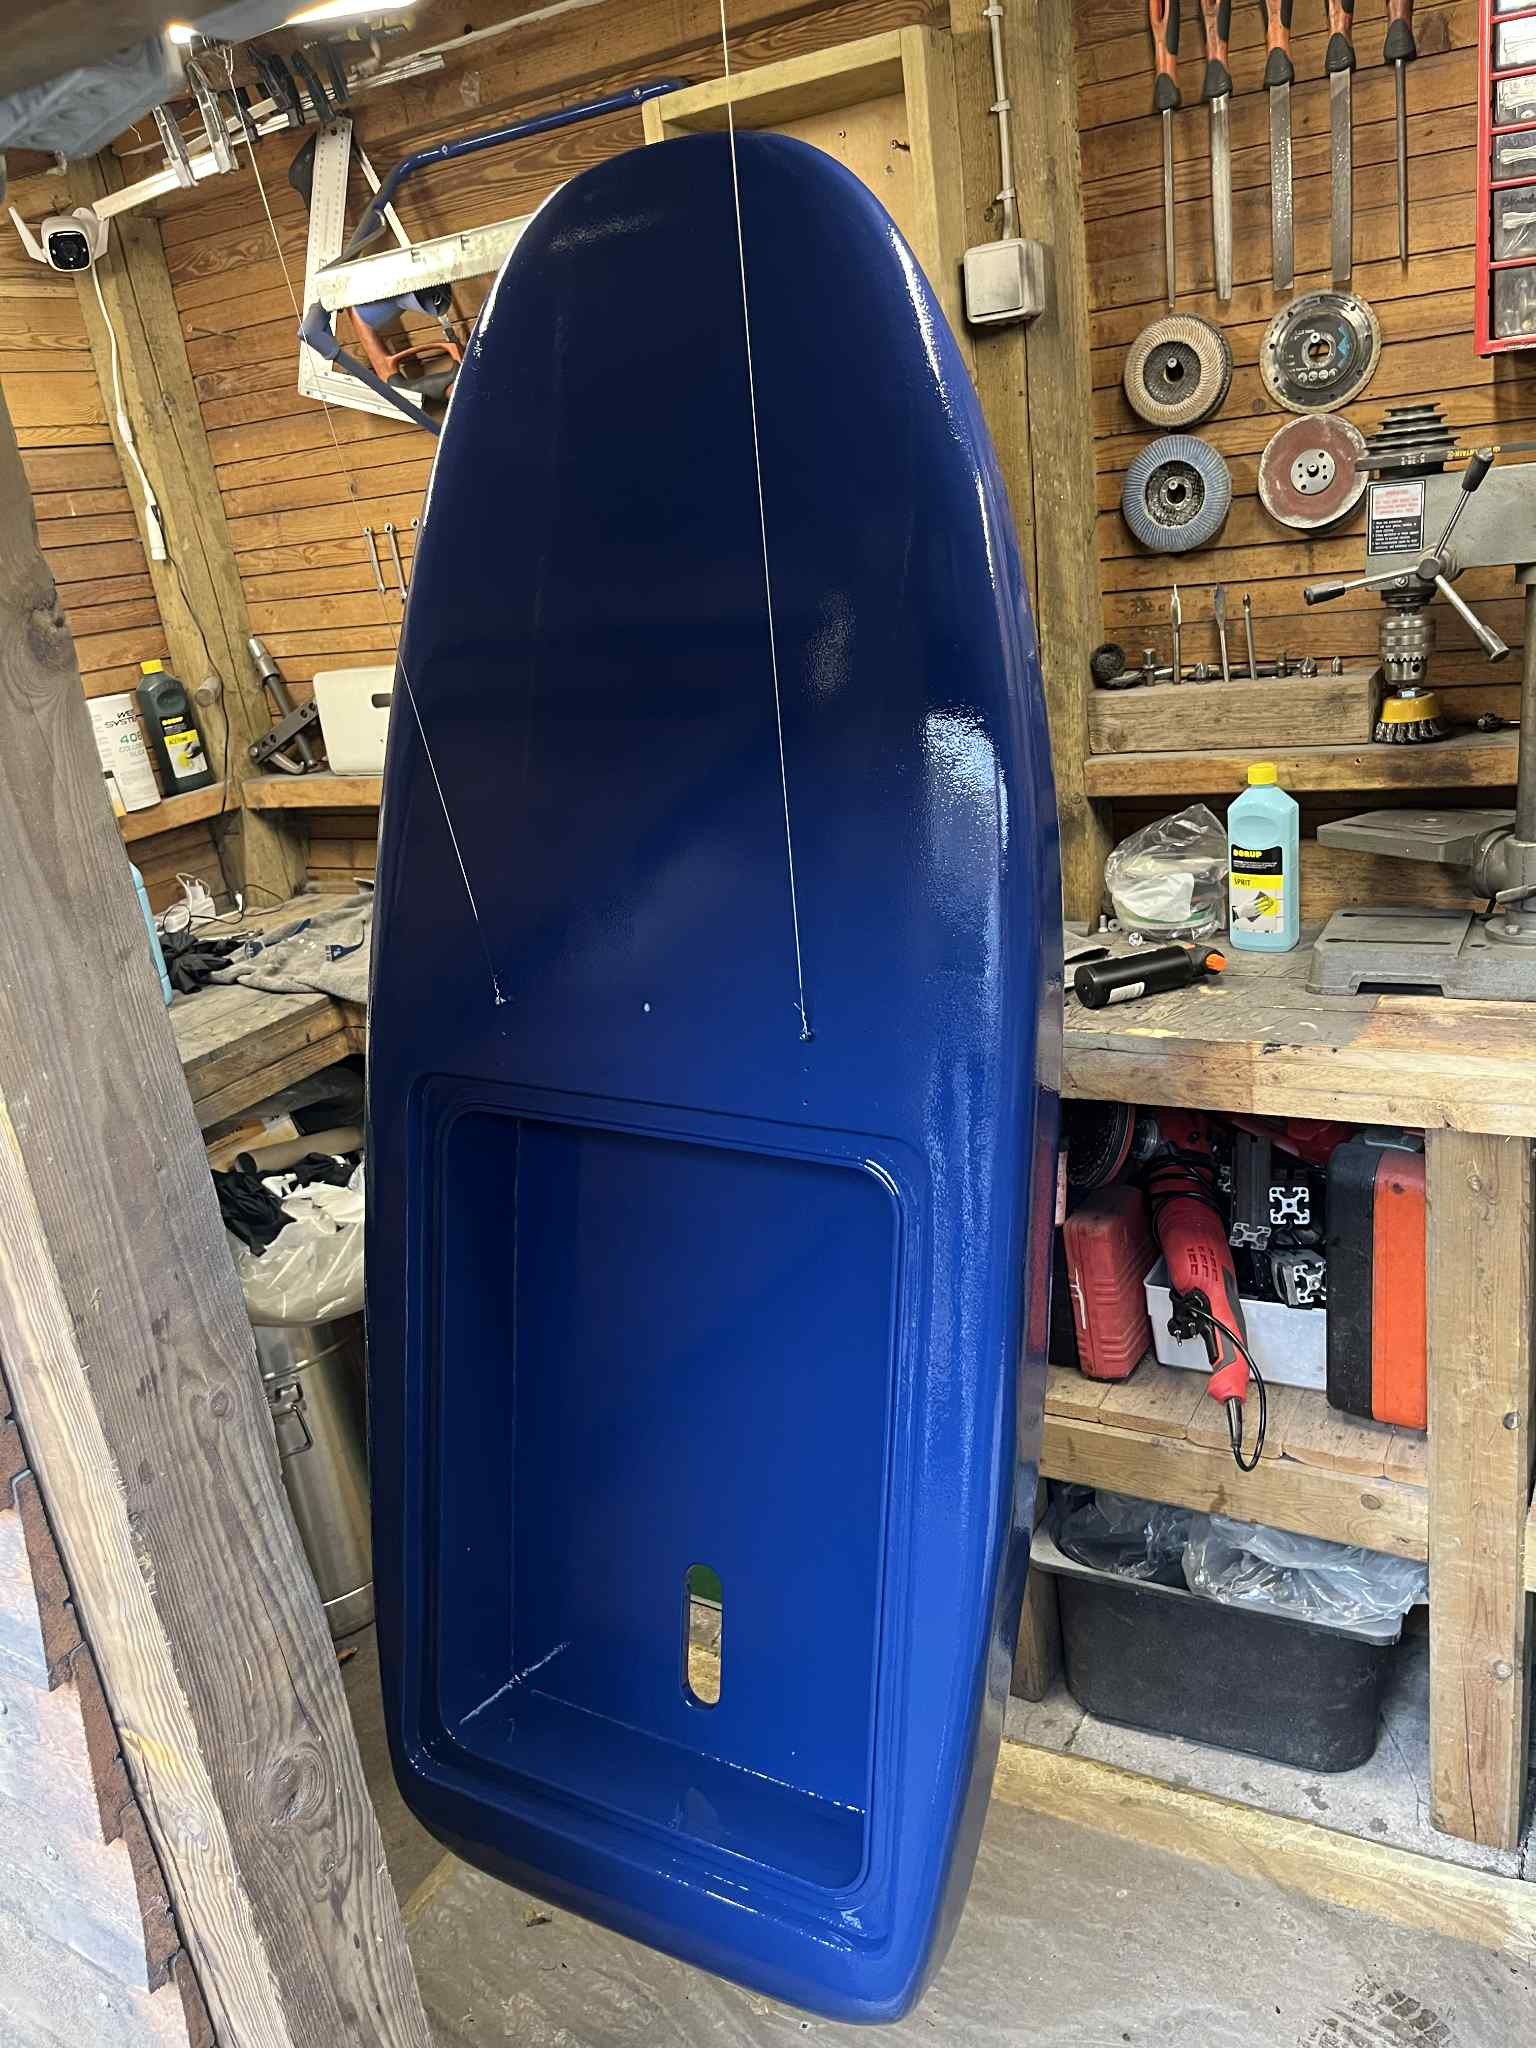
  • Board dimensions: 1600x600x120mm
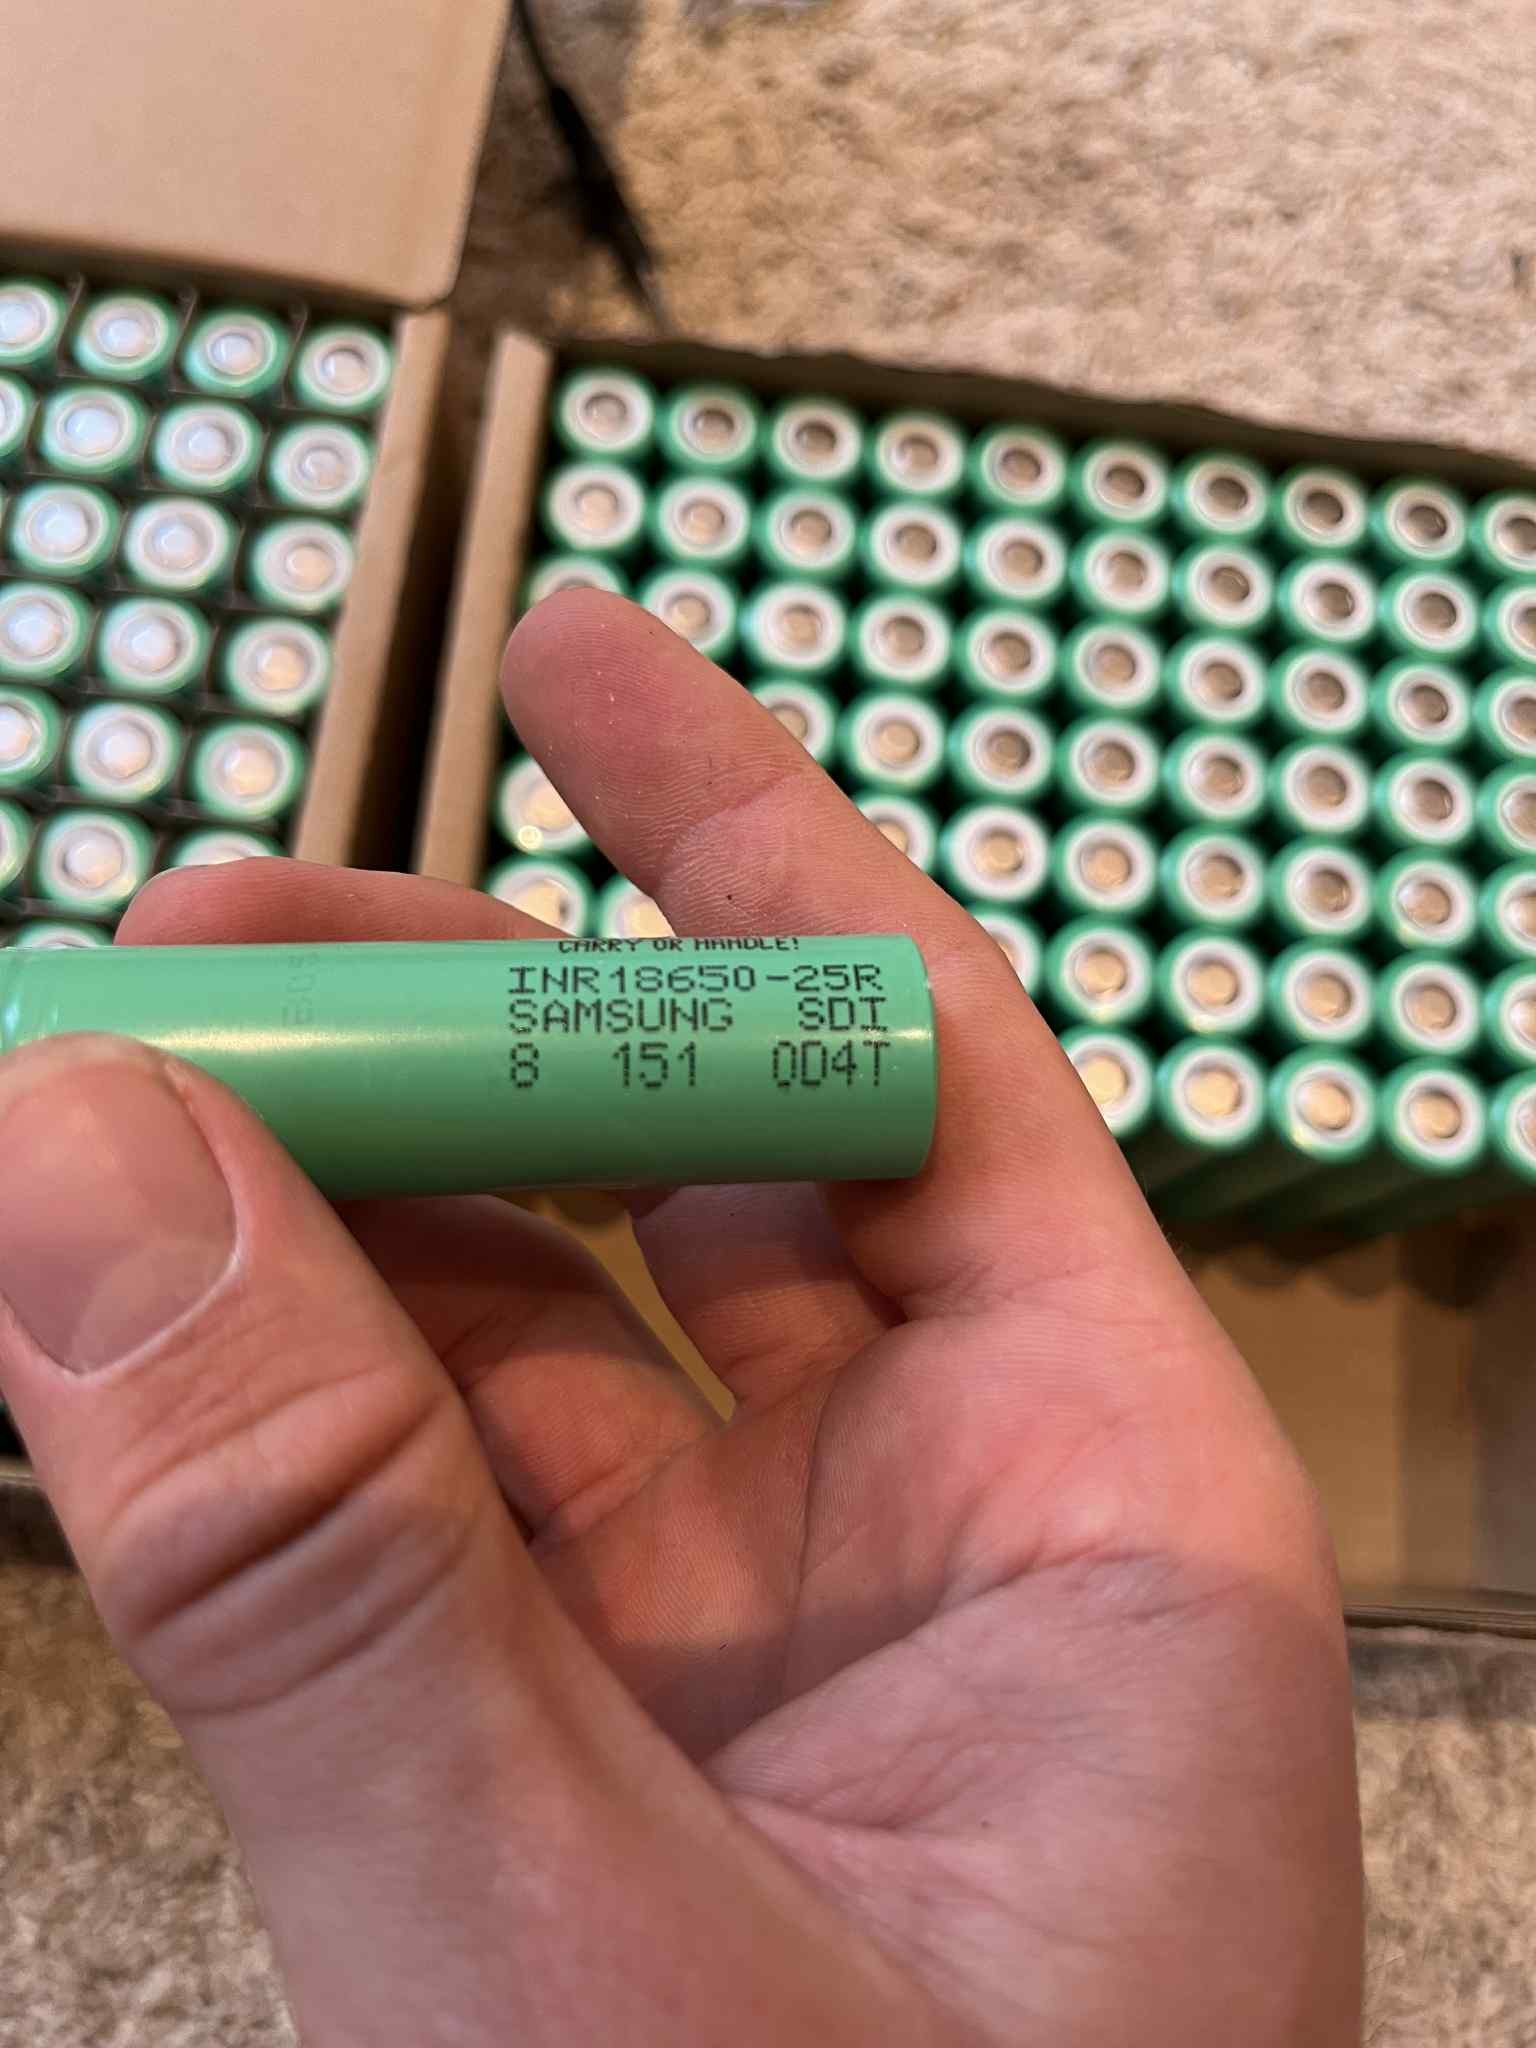
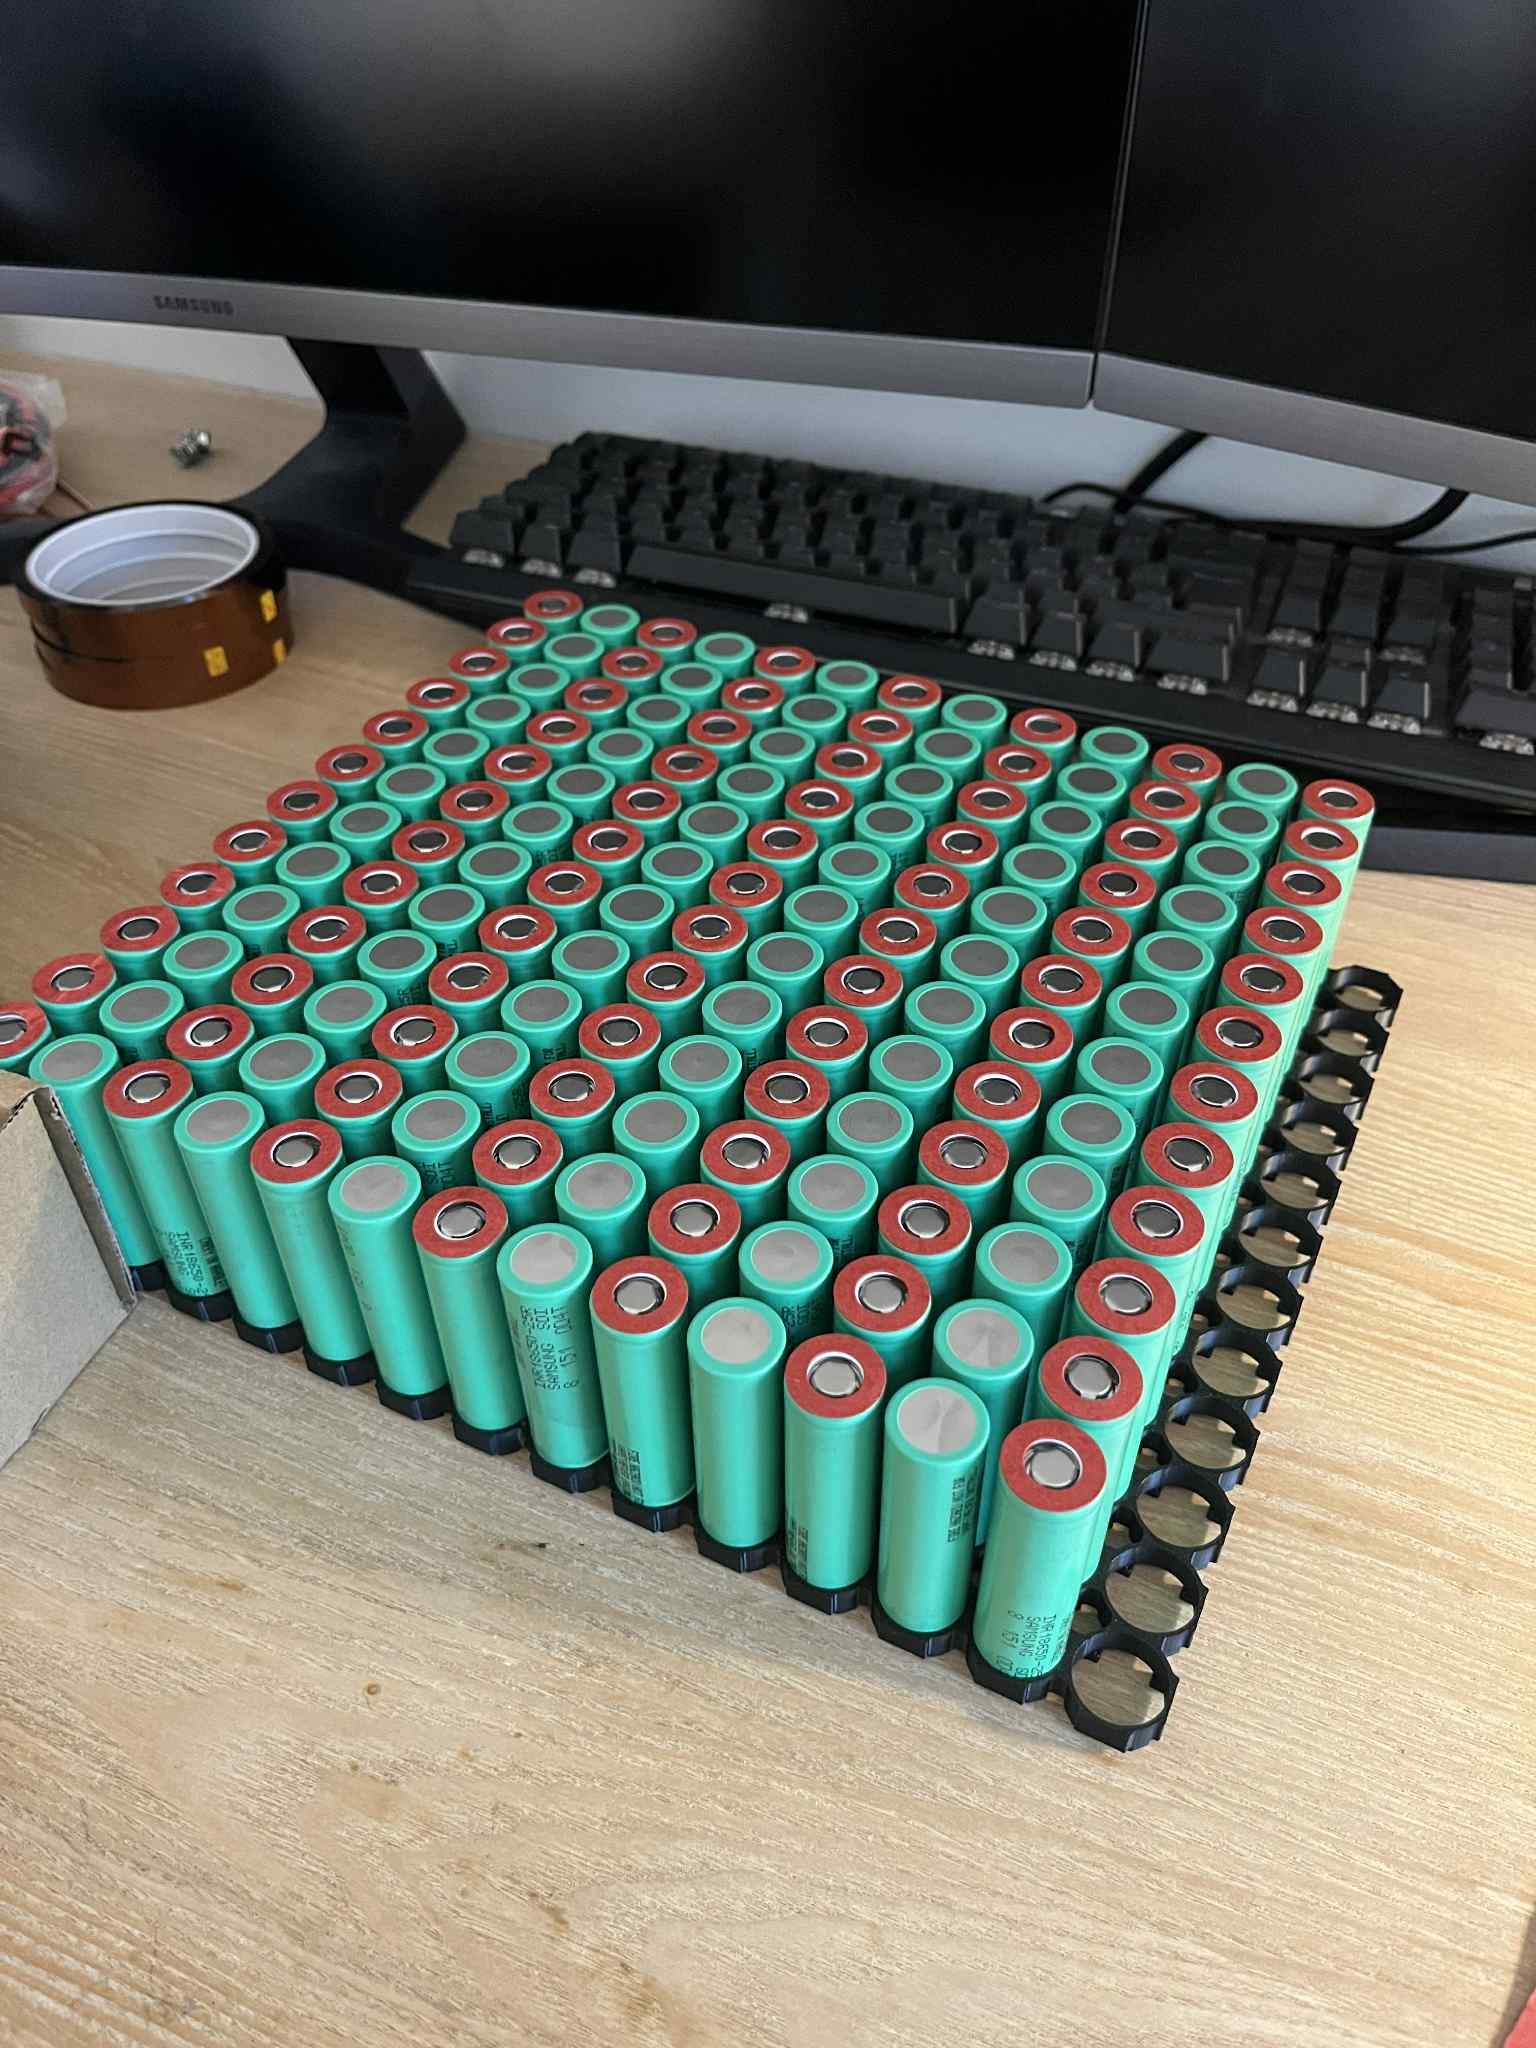
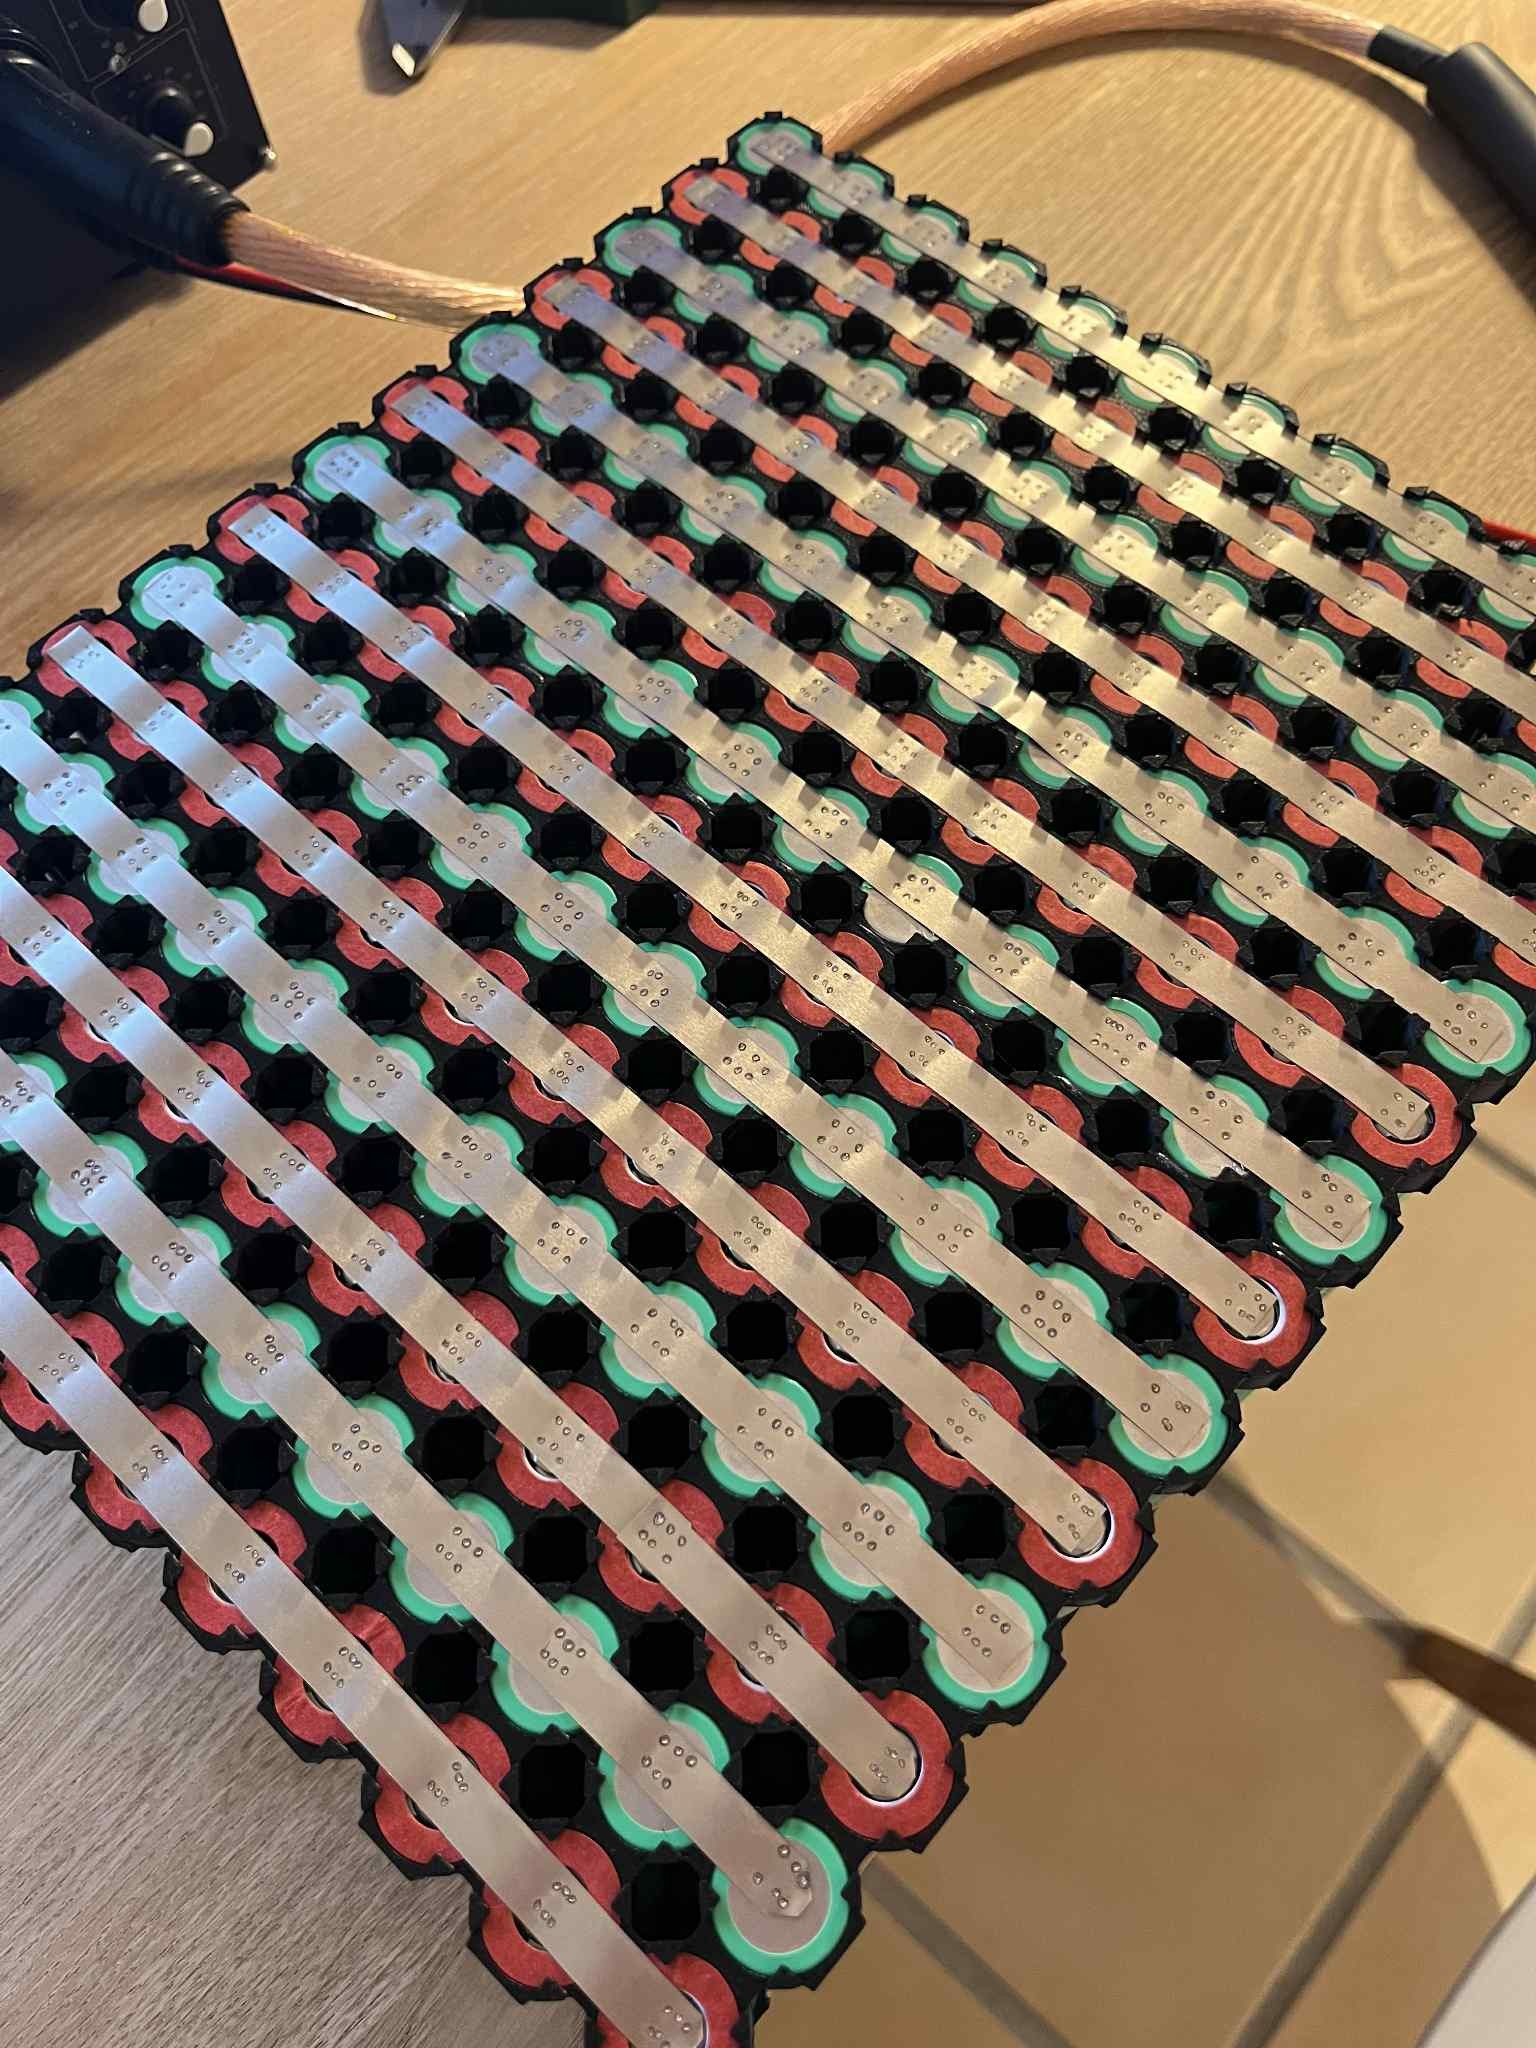
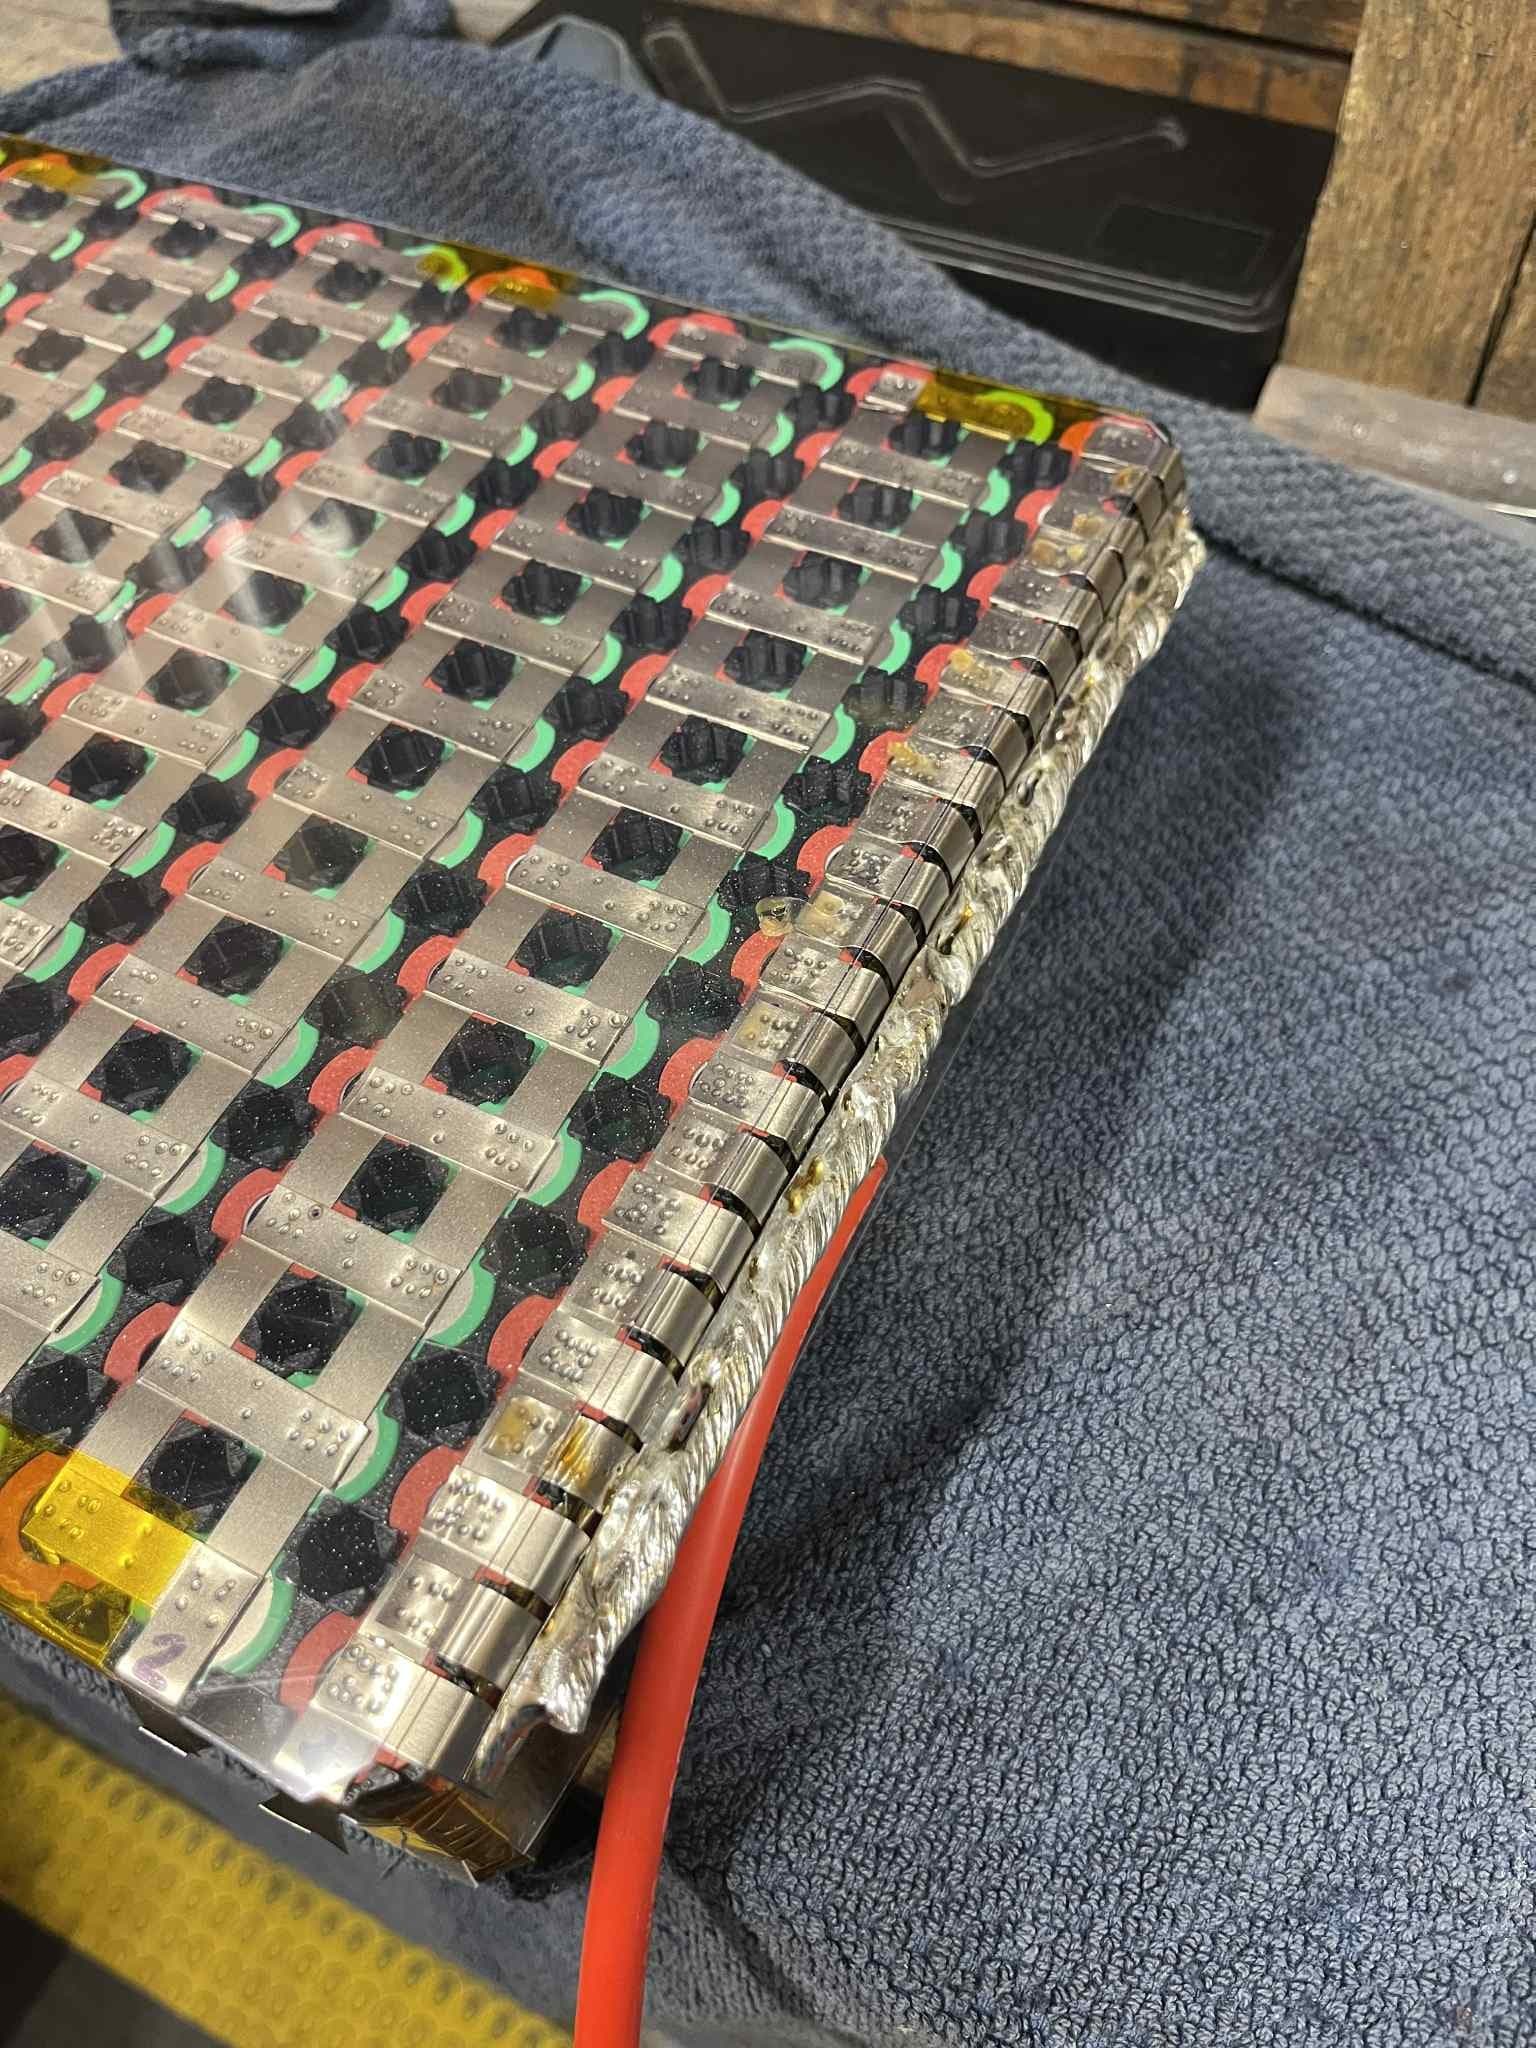
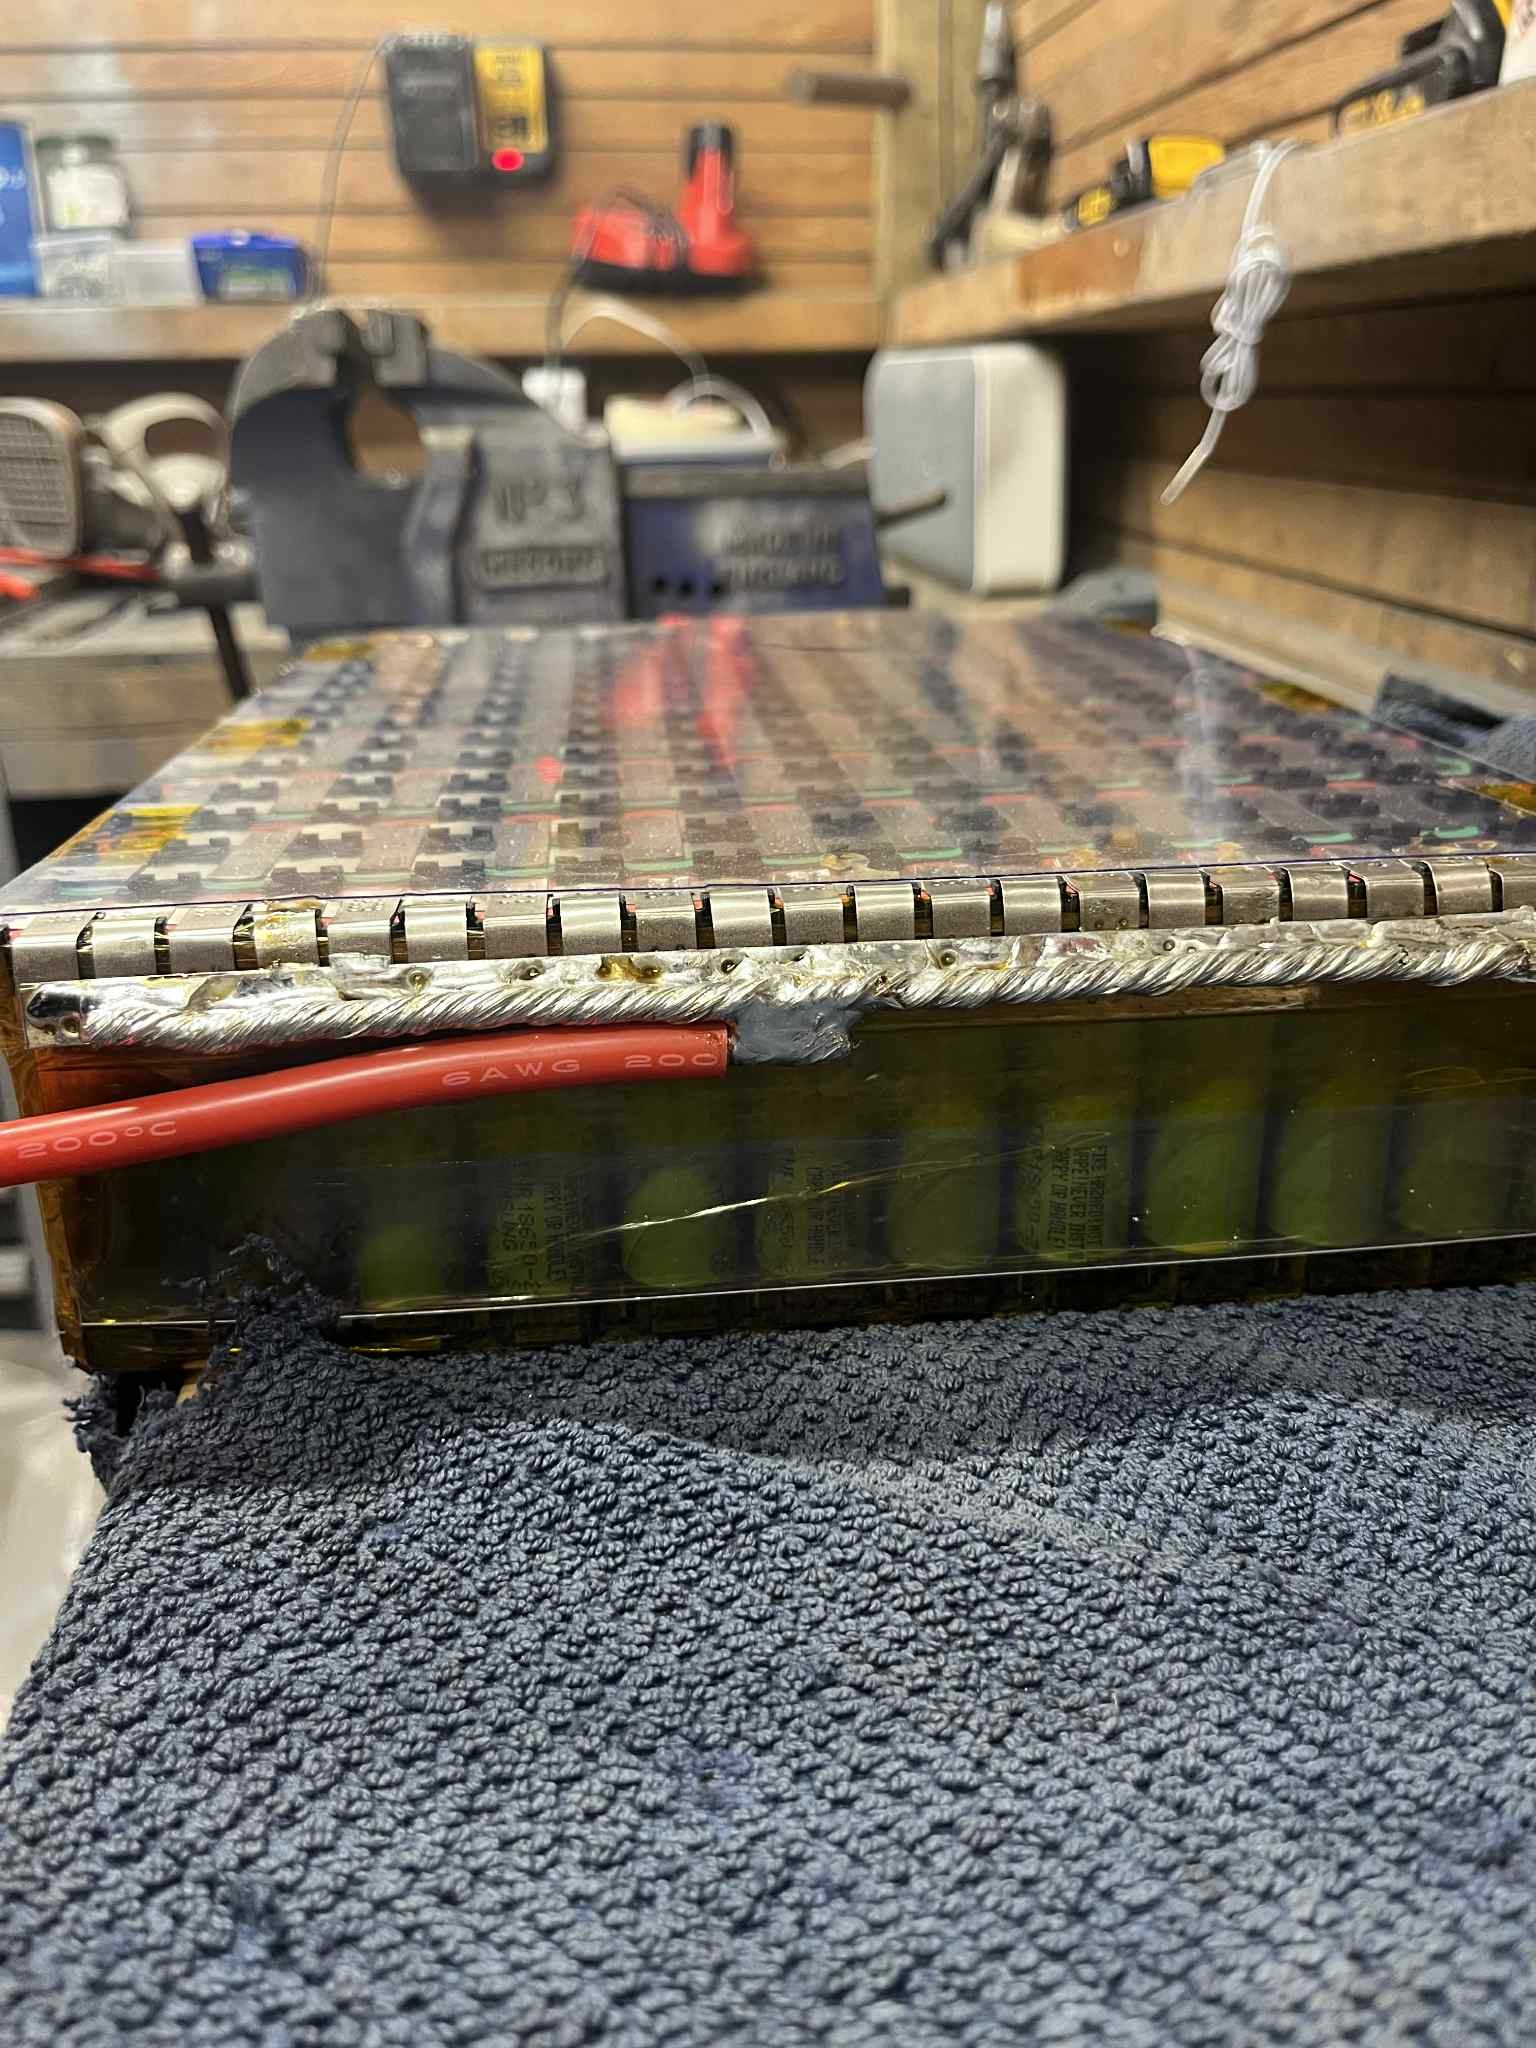
  • Battery: 14S12P 18650-25R Samsung litium ion. 1,5kWh with 100A fuse. 2 layers of 0,2x8mm pure nickel strip. 6 AWG wire from battery to VESC.
  • BMS: 100Balance 40A 8-17s with active 1A balancer.
  • VESC: MakerX Go-FOC 300 4-21s and 500A Max battery, 250A Max motor. With bluetooth module for data-logging. (This VESC might be overkill, but it ROCKS!!)
  • Remote: Sprintend Uni1 2,4GHz remote using UART for telemetry.
  • Motor: Flipsky 65161, 120KV, 6kW (round with thread shaft)
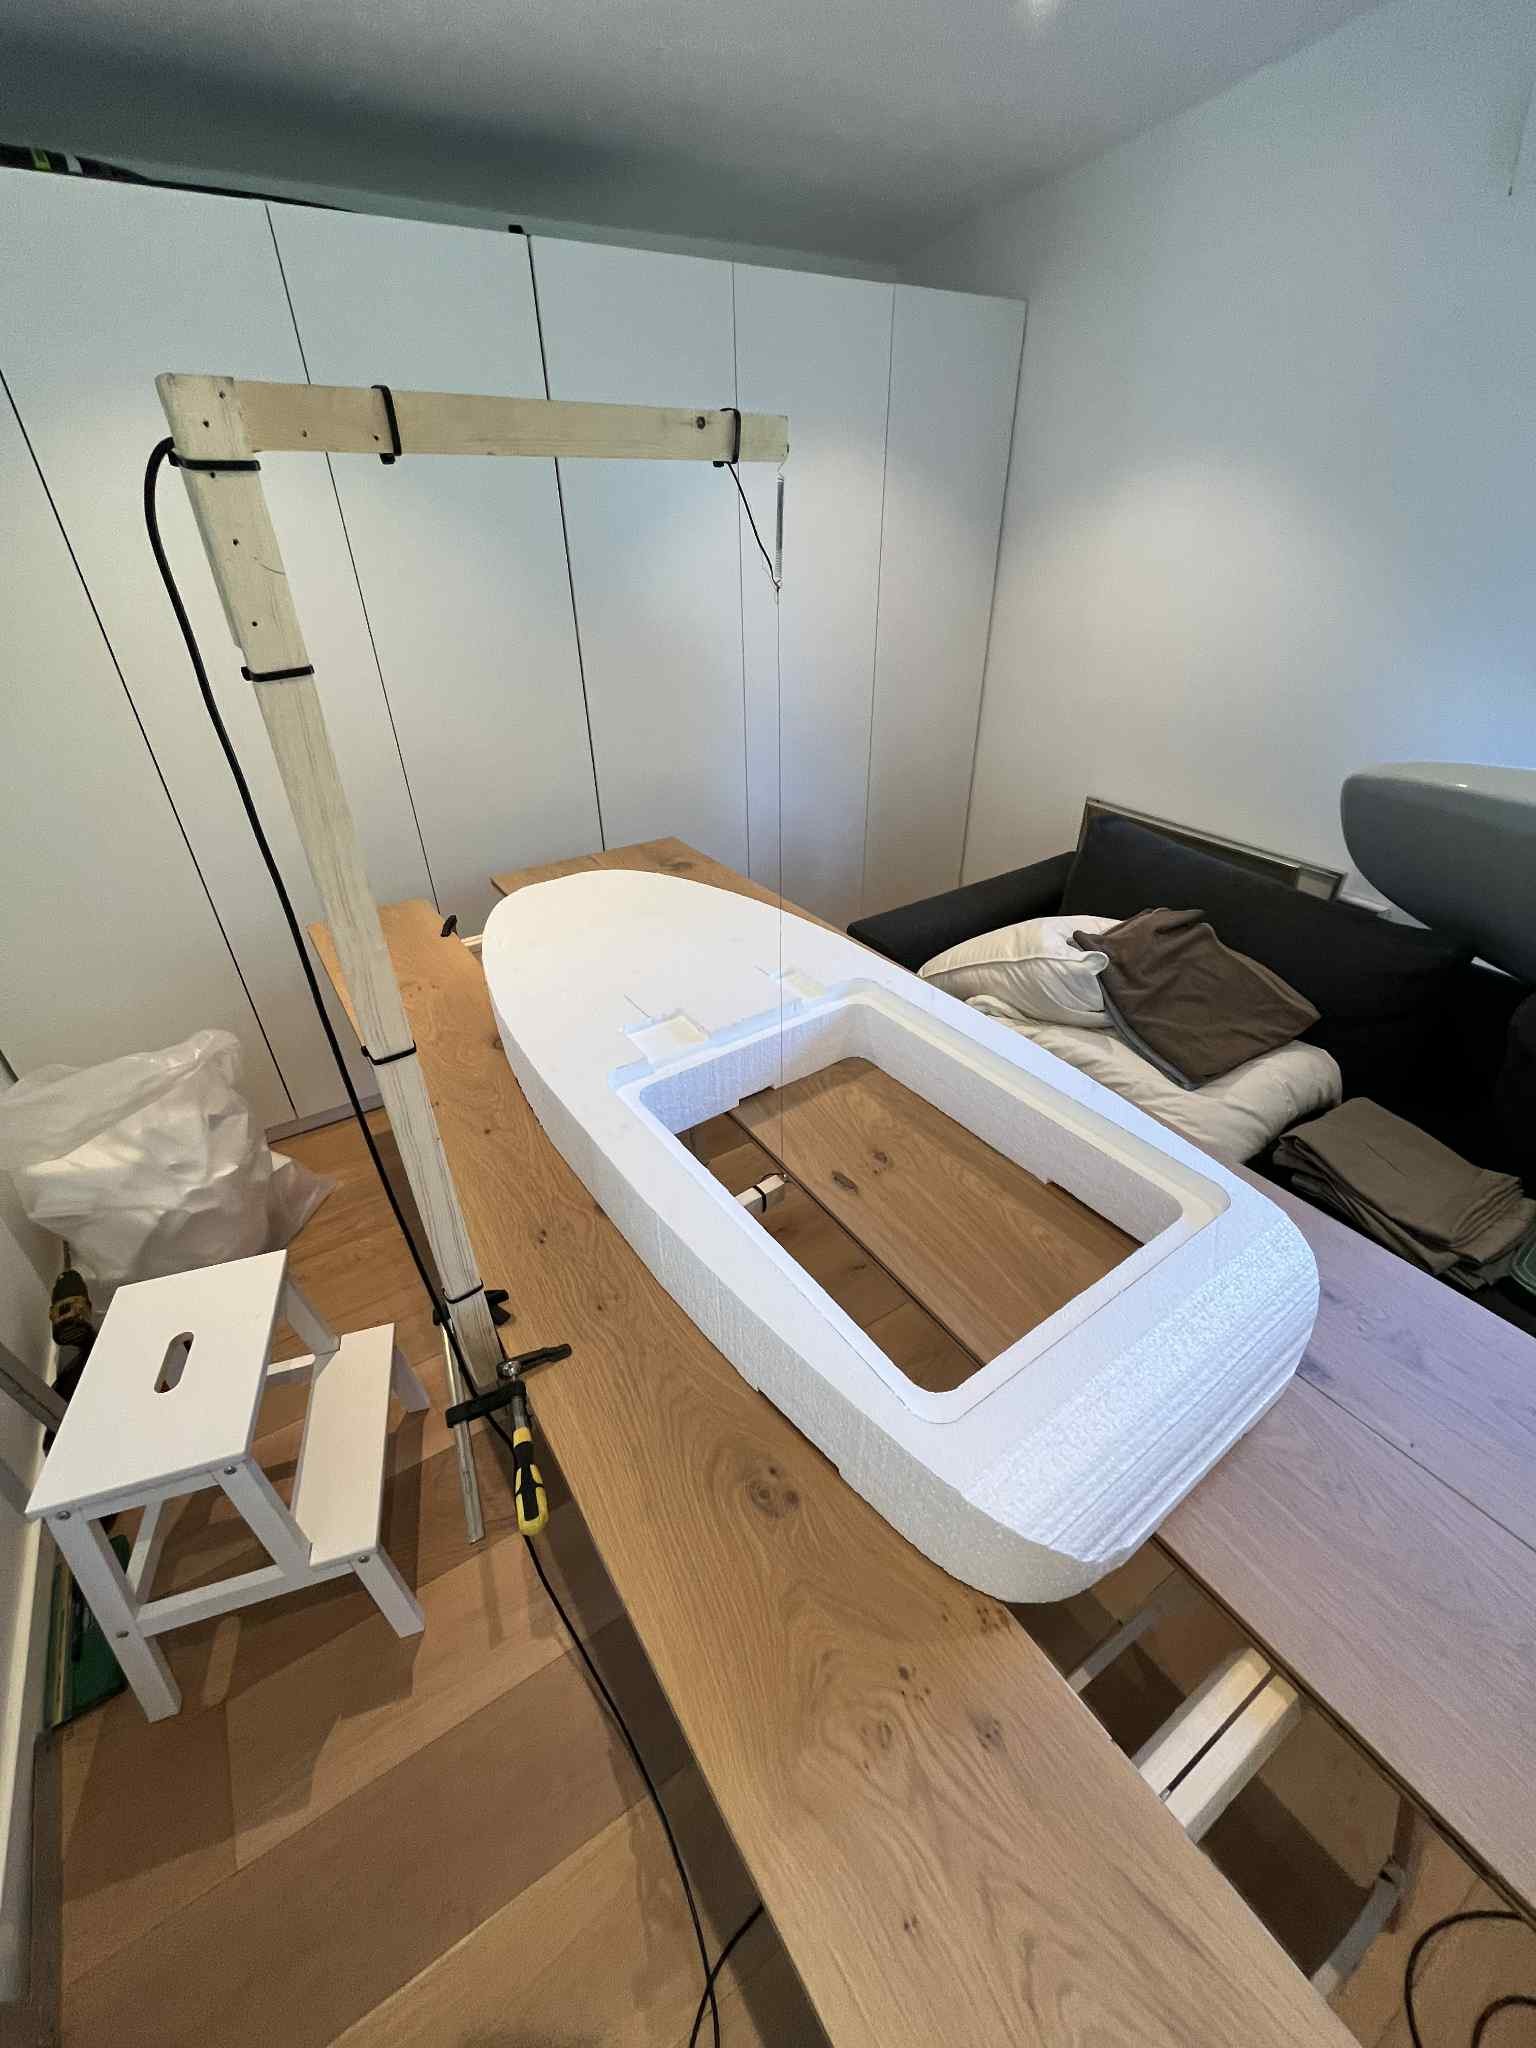
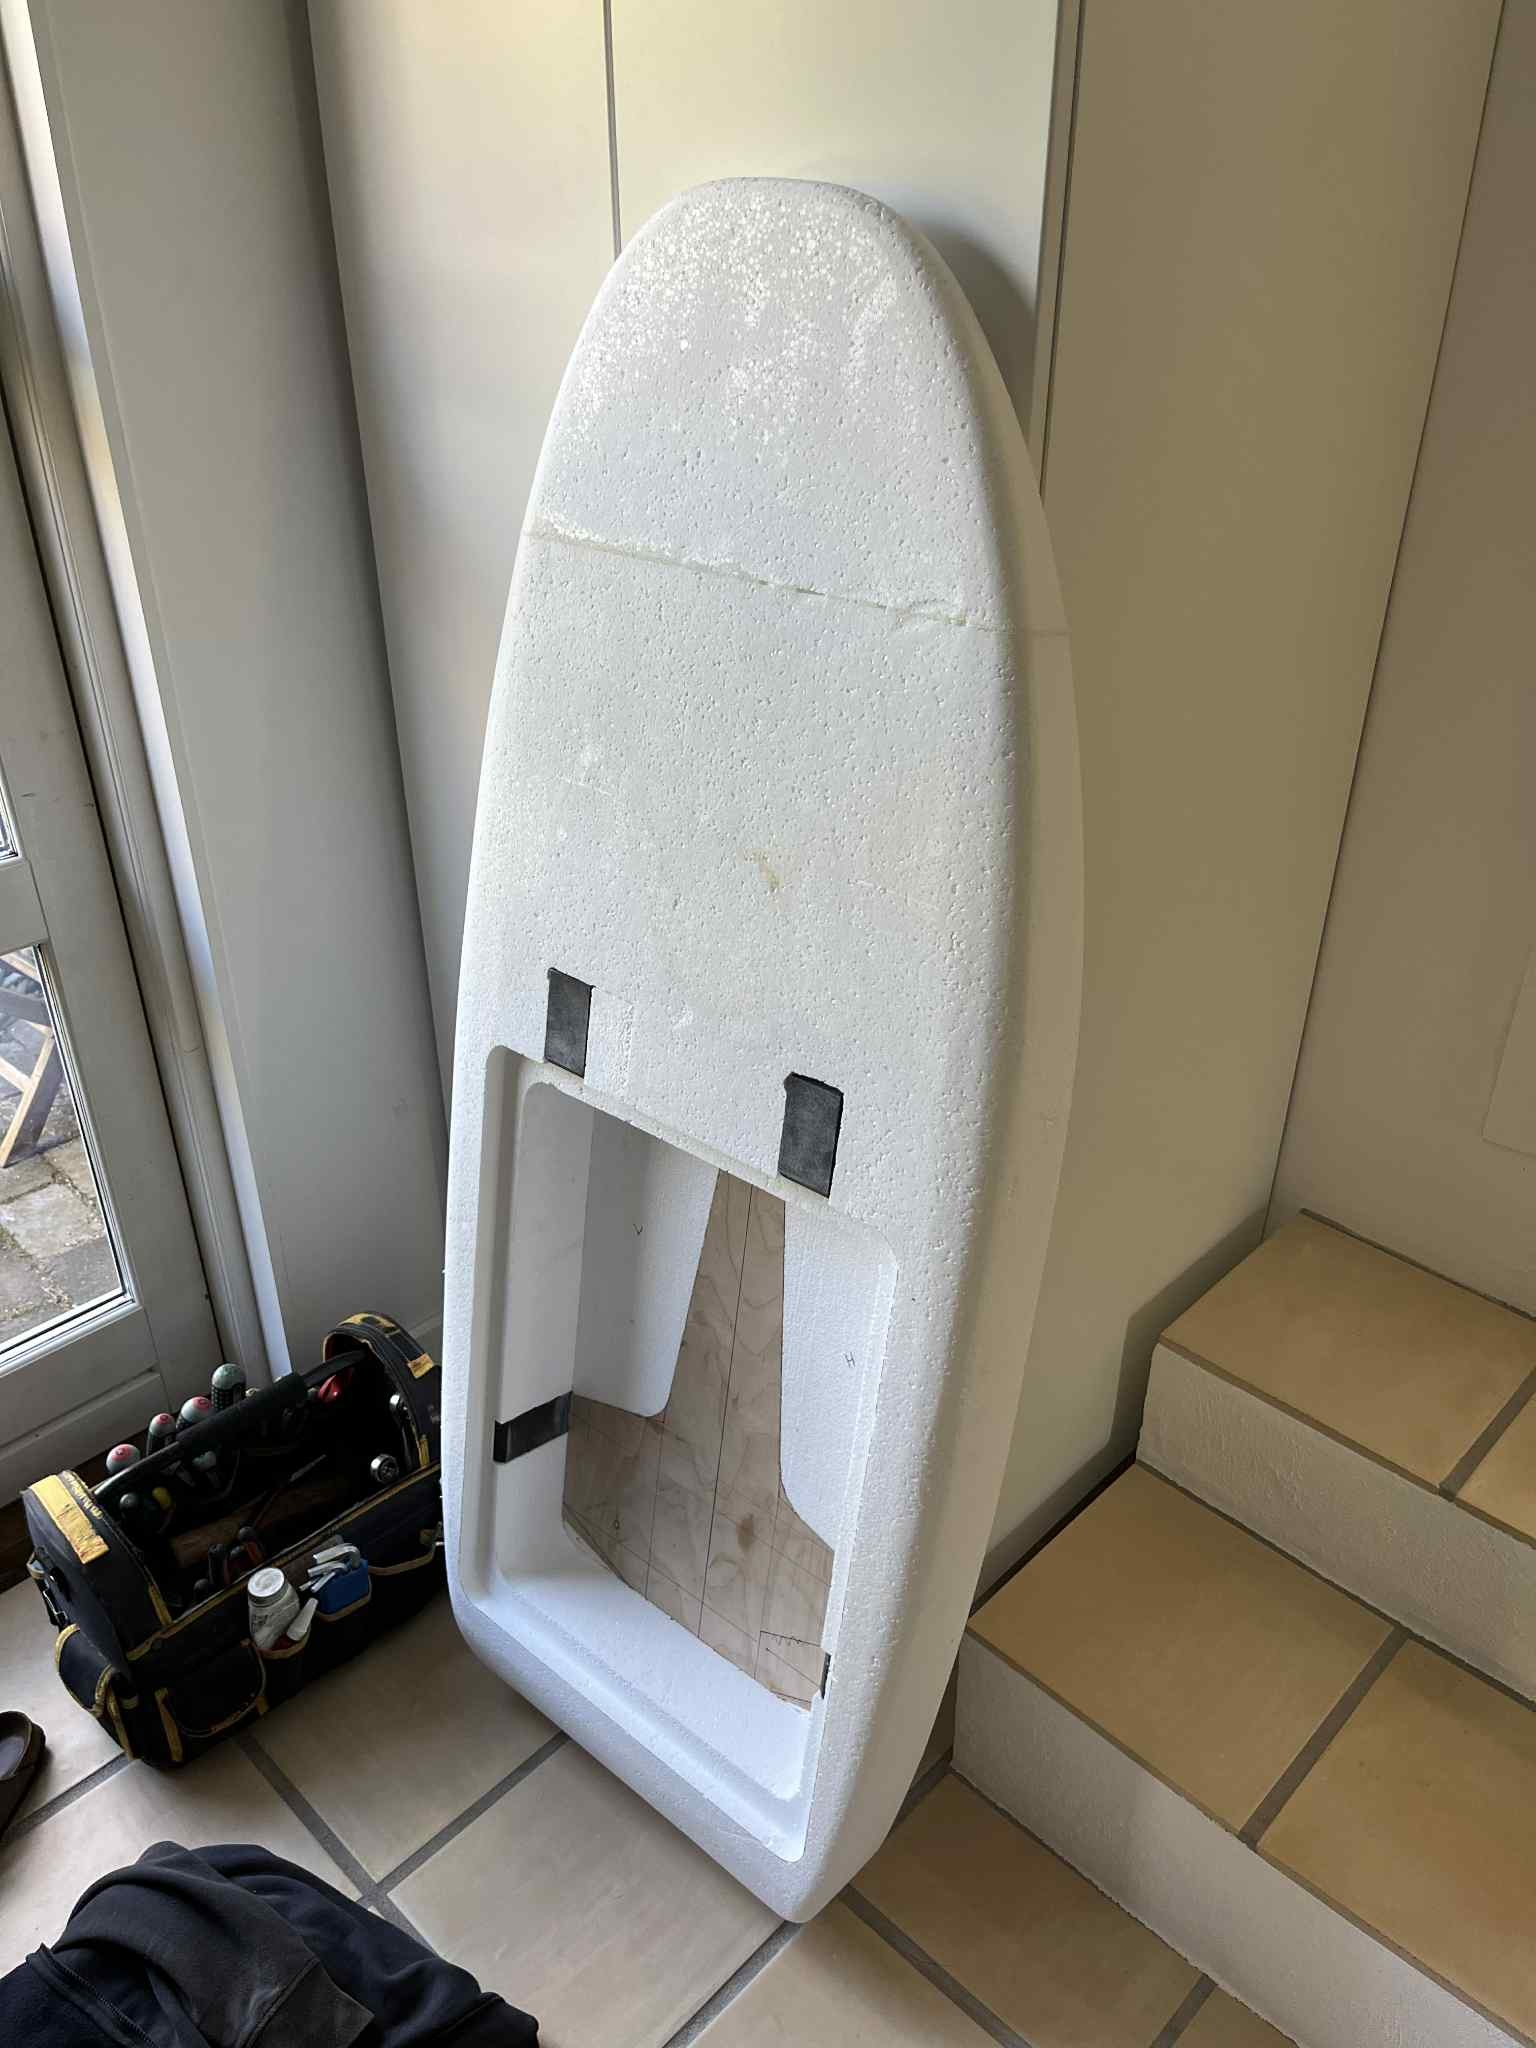
The board:

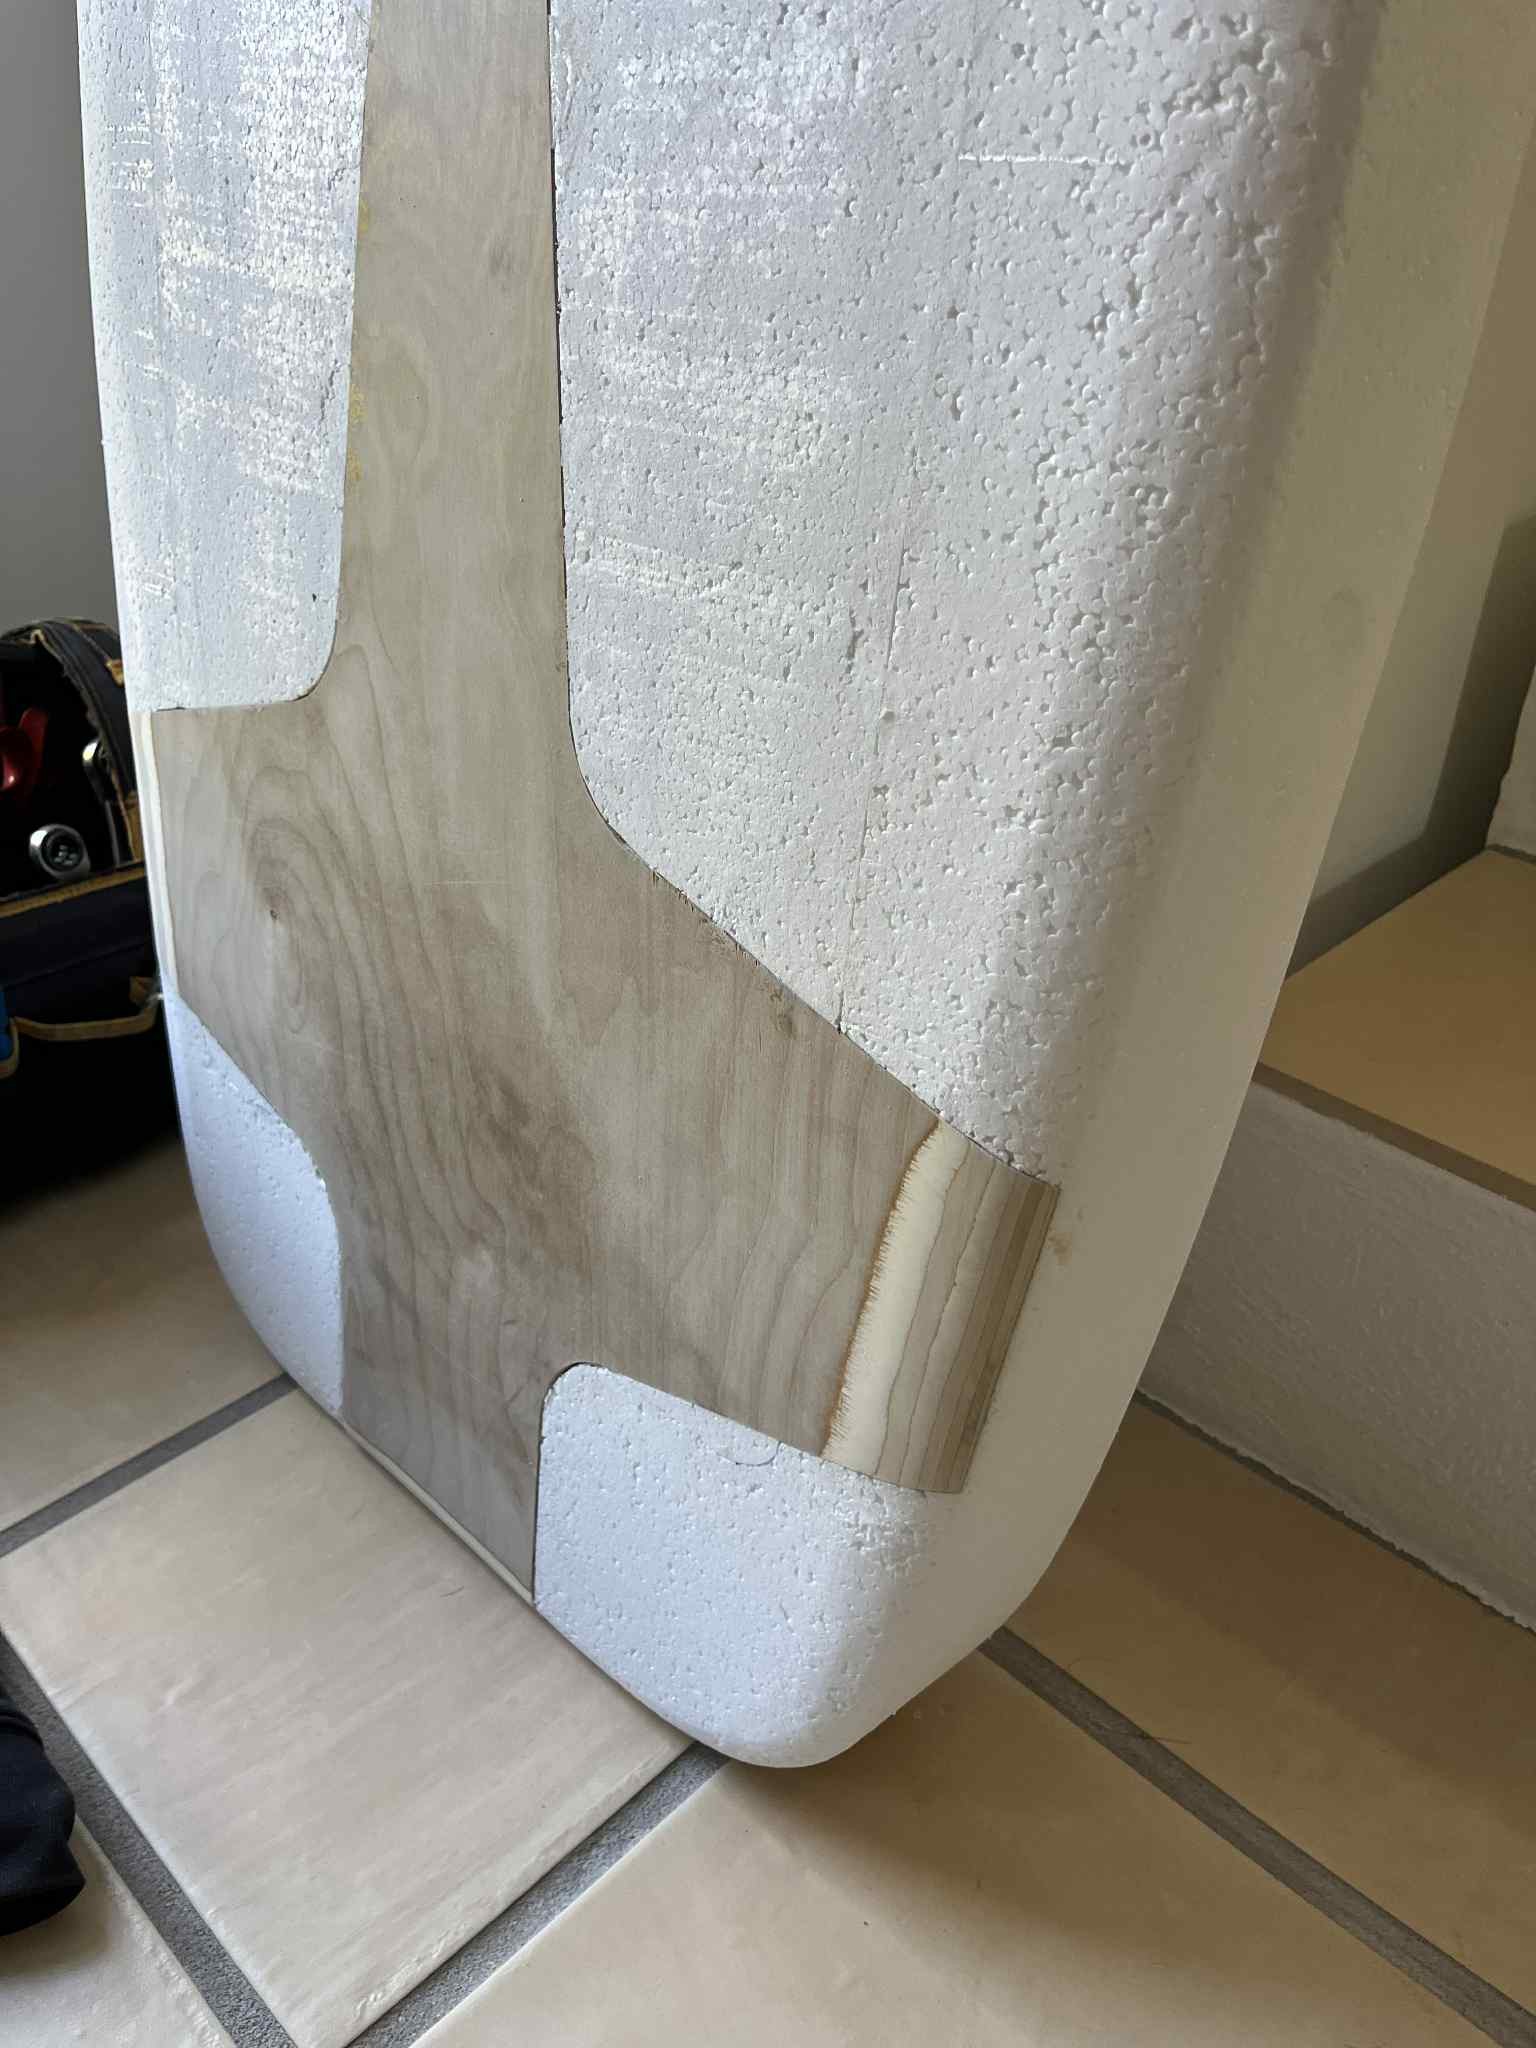
The Efoil was made from EPS insulation and cut using a hot nichrome wire mounted both parallel and perpendicular to a flat table. If available, I would choose XPS, as EPS soaks a lot of epoxy later. By printing a 1:1 template from fusion 360 on multiple pieces of A4 paper, it was easy to guide the wire cutter against the template.

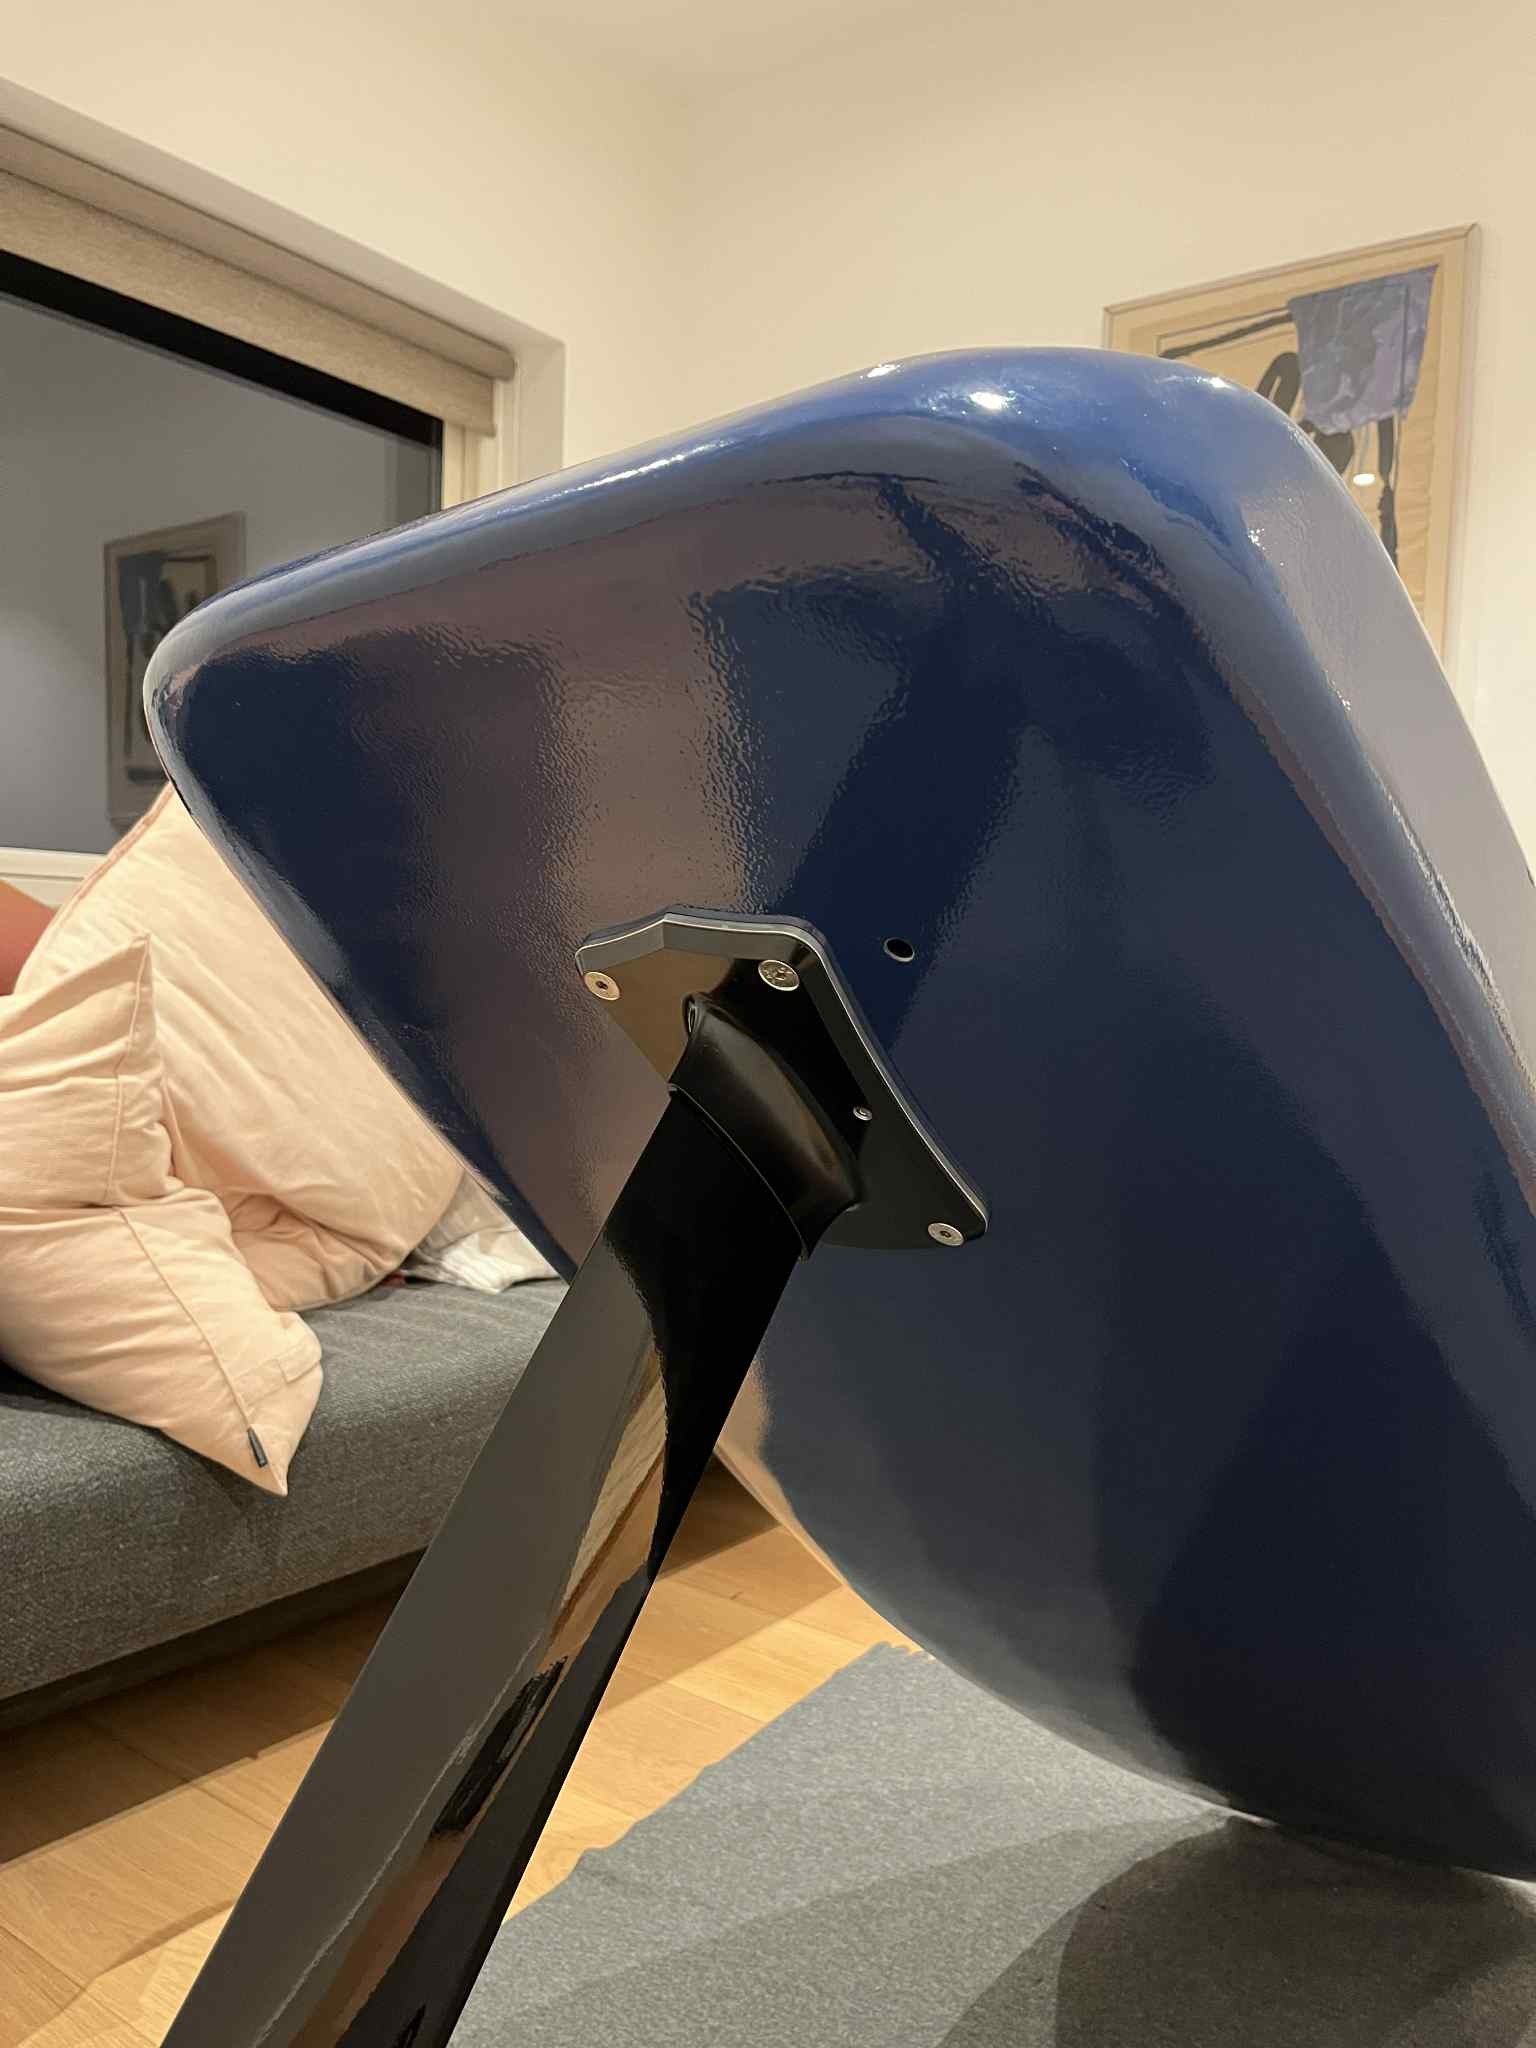
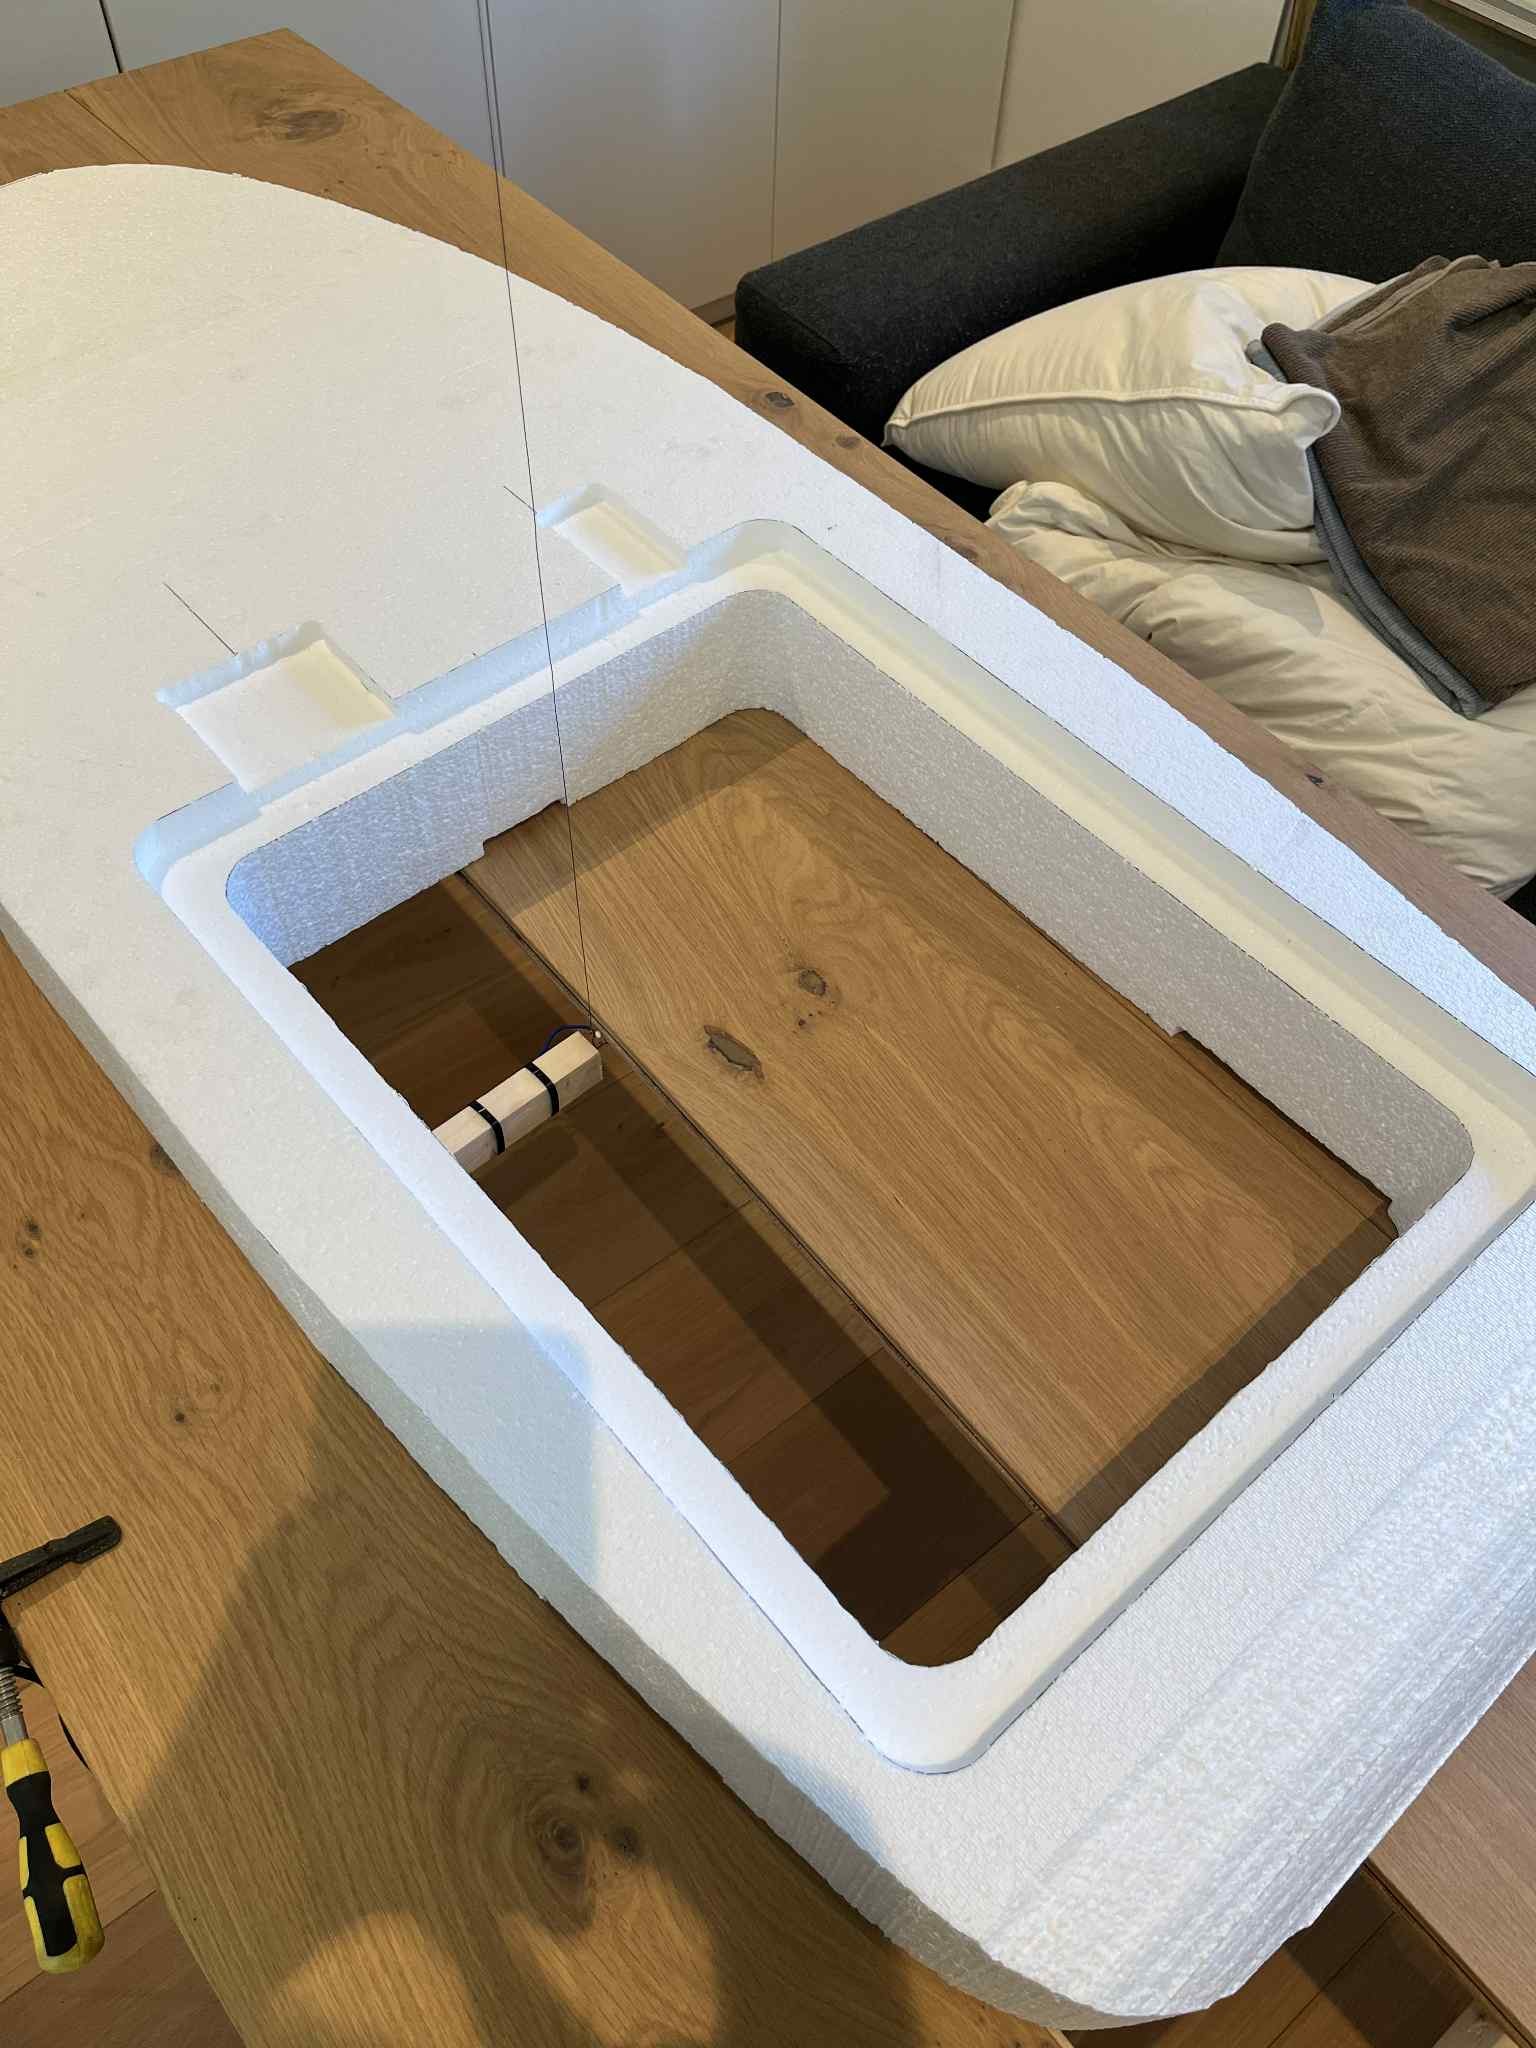
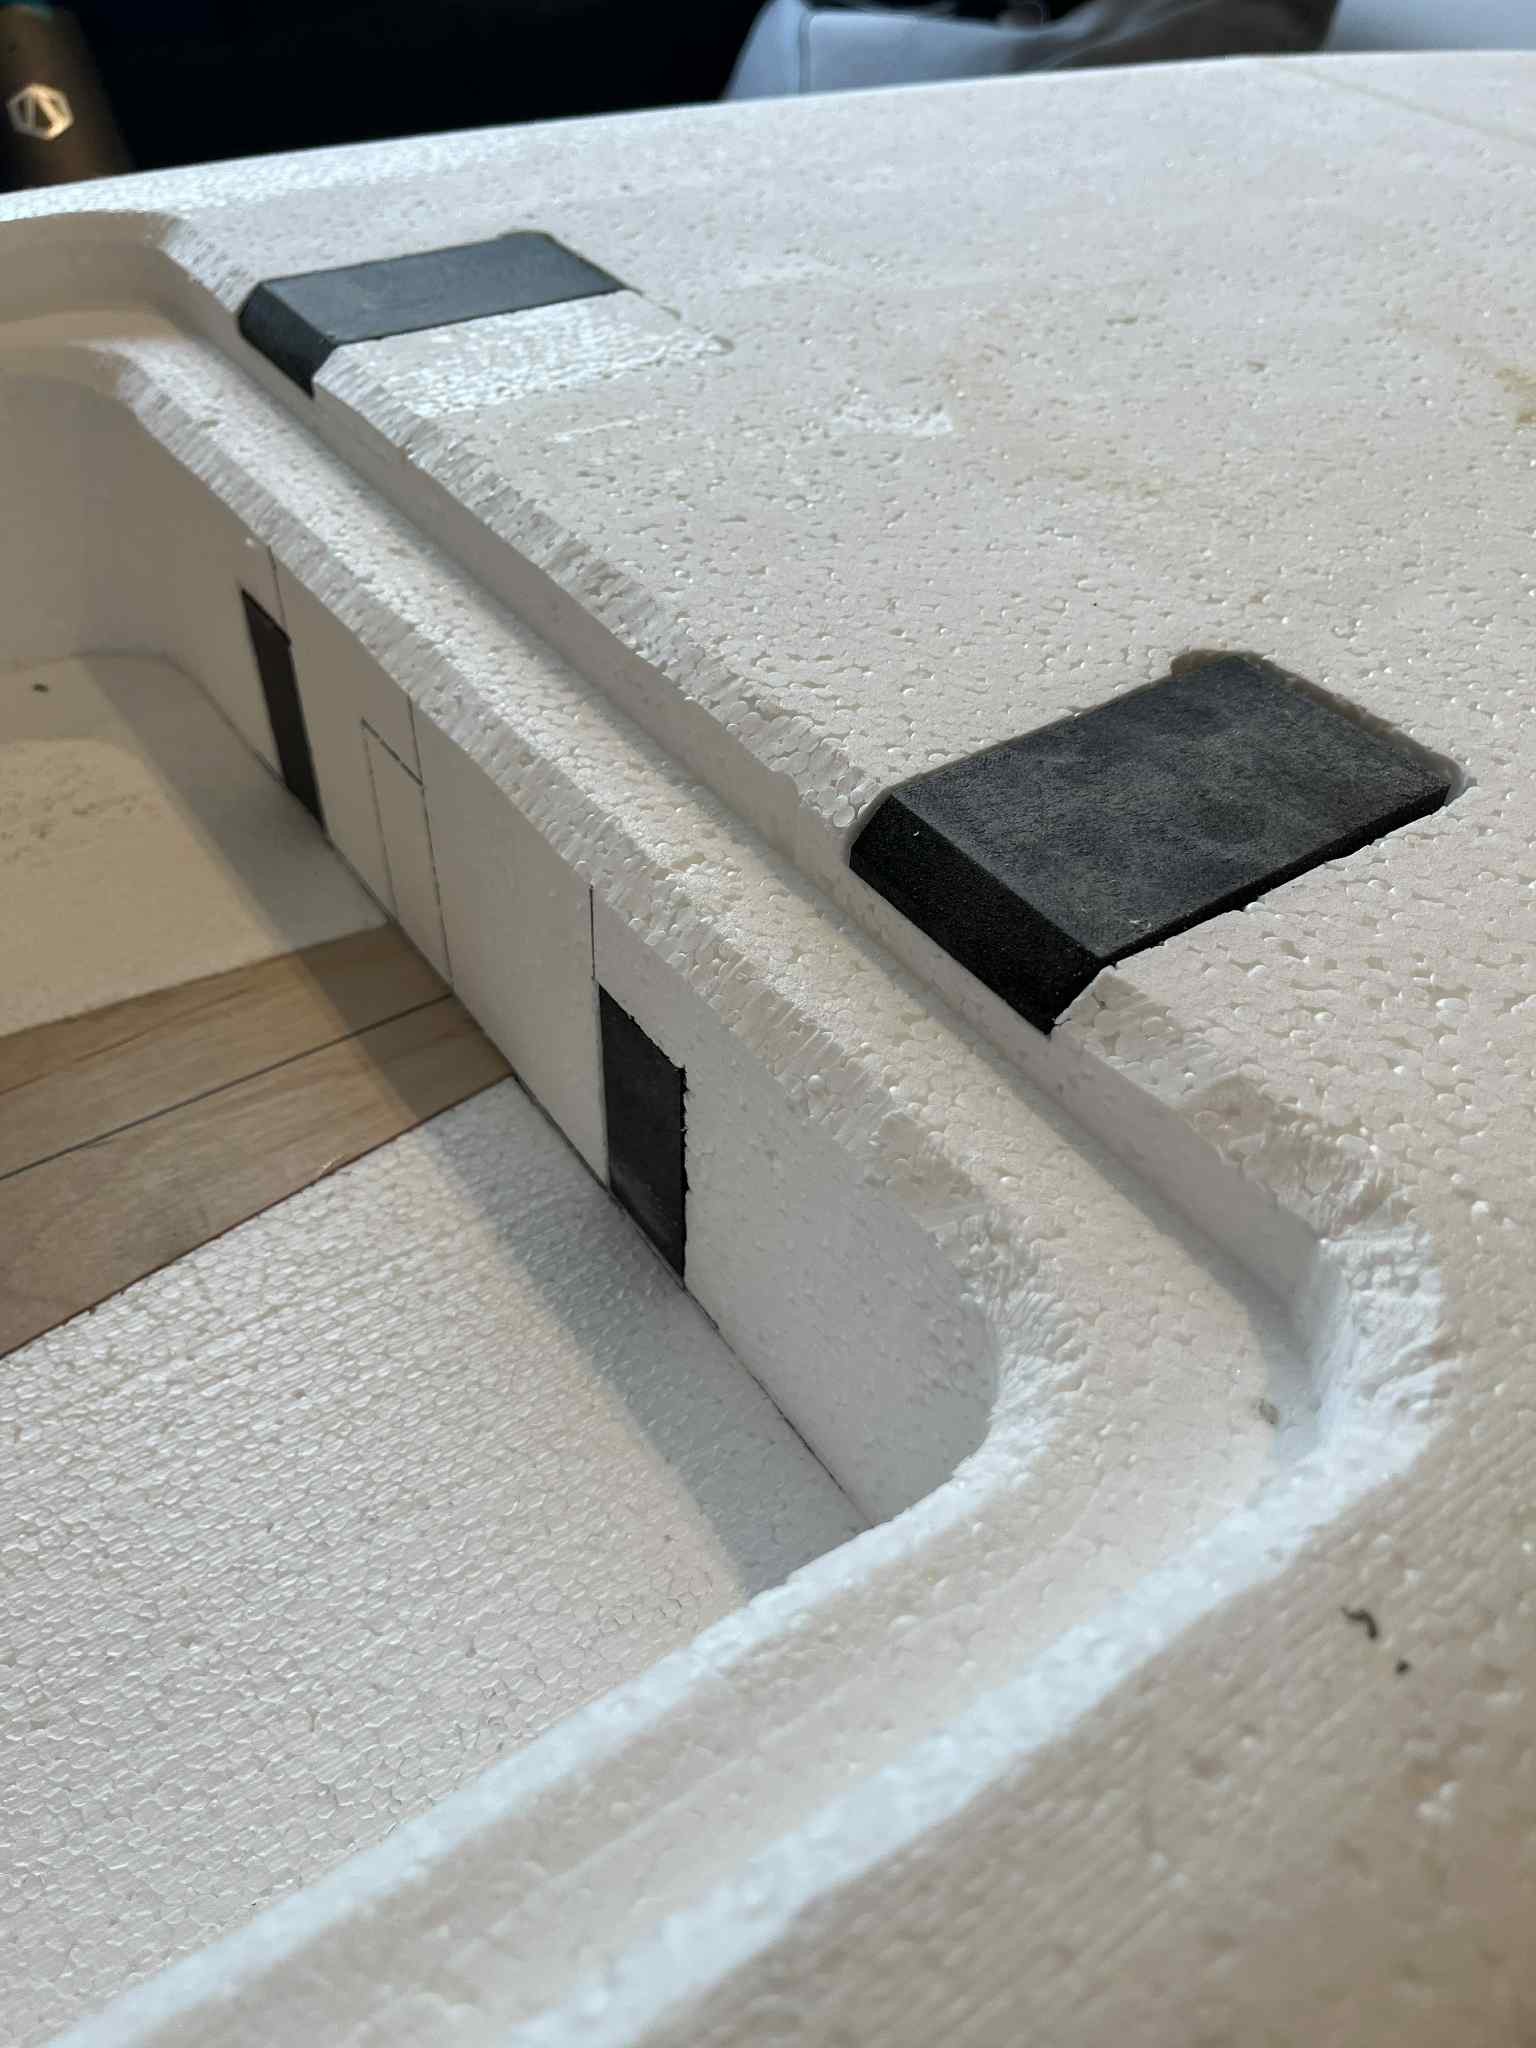
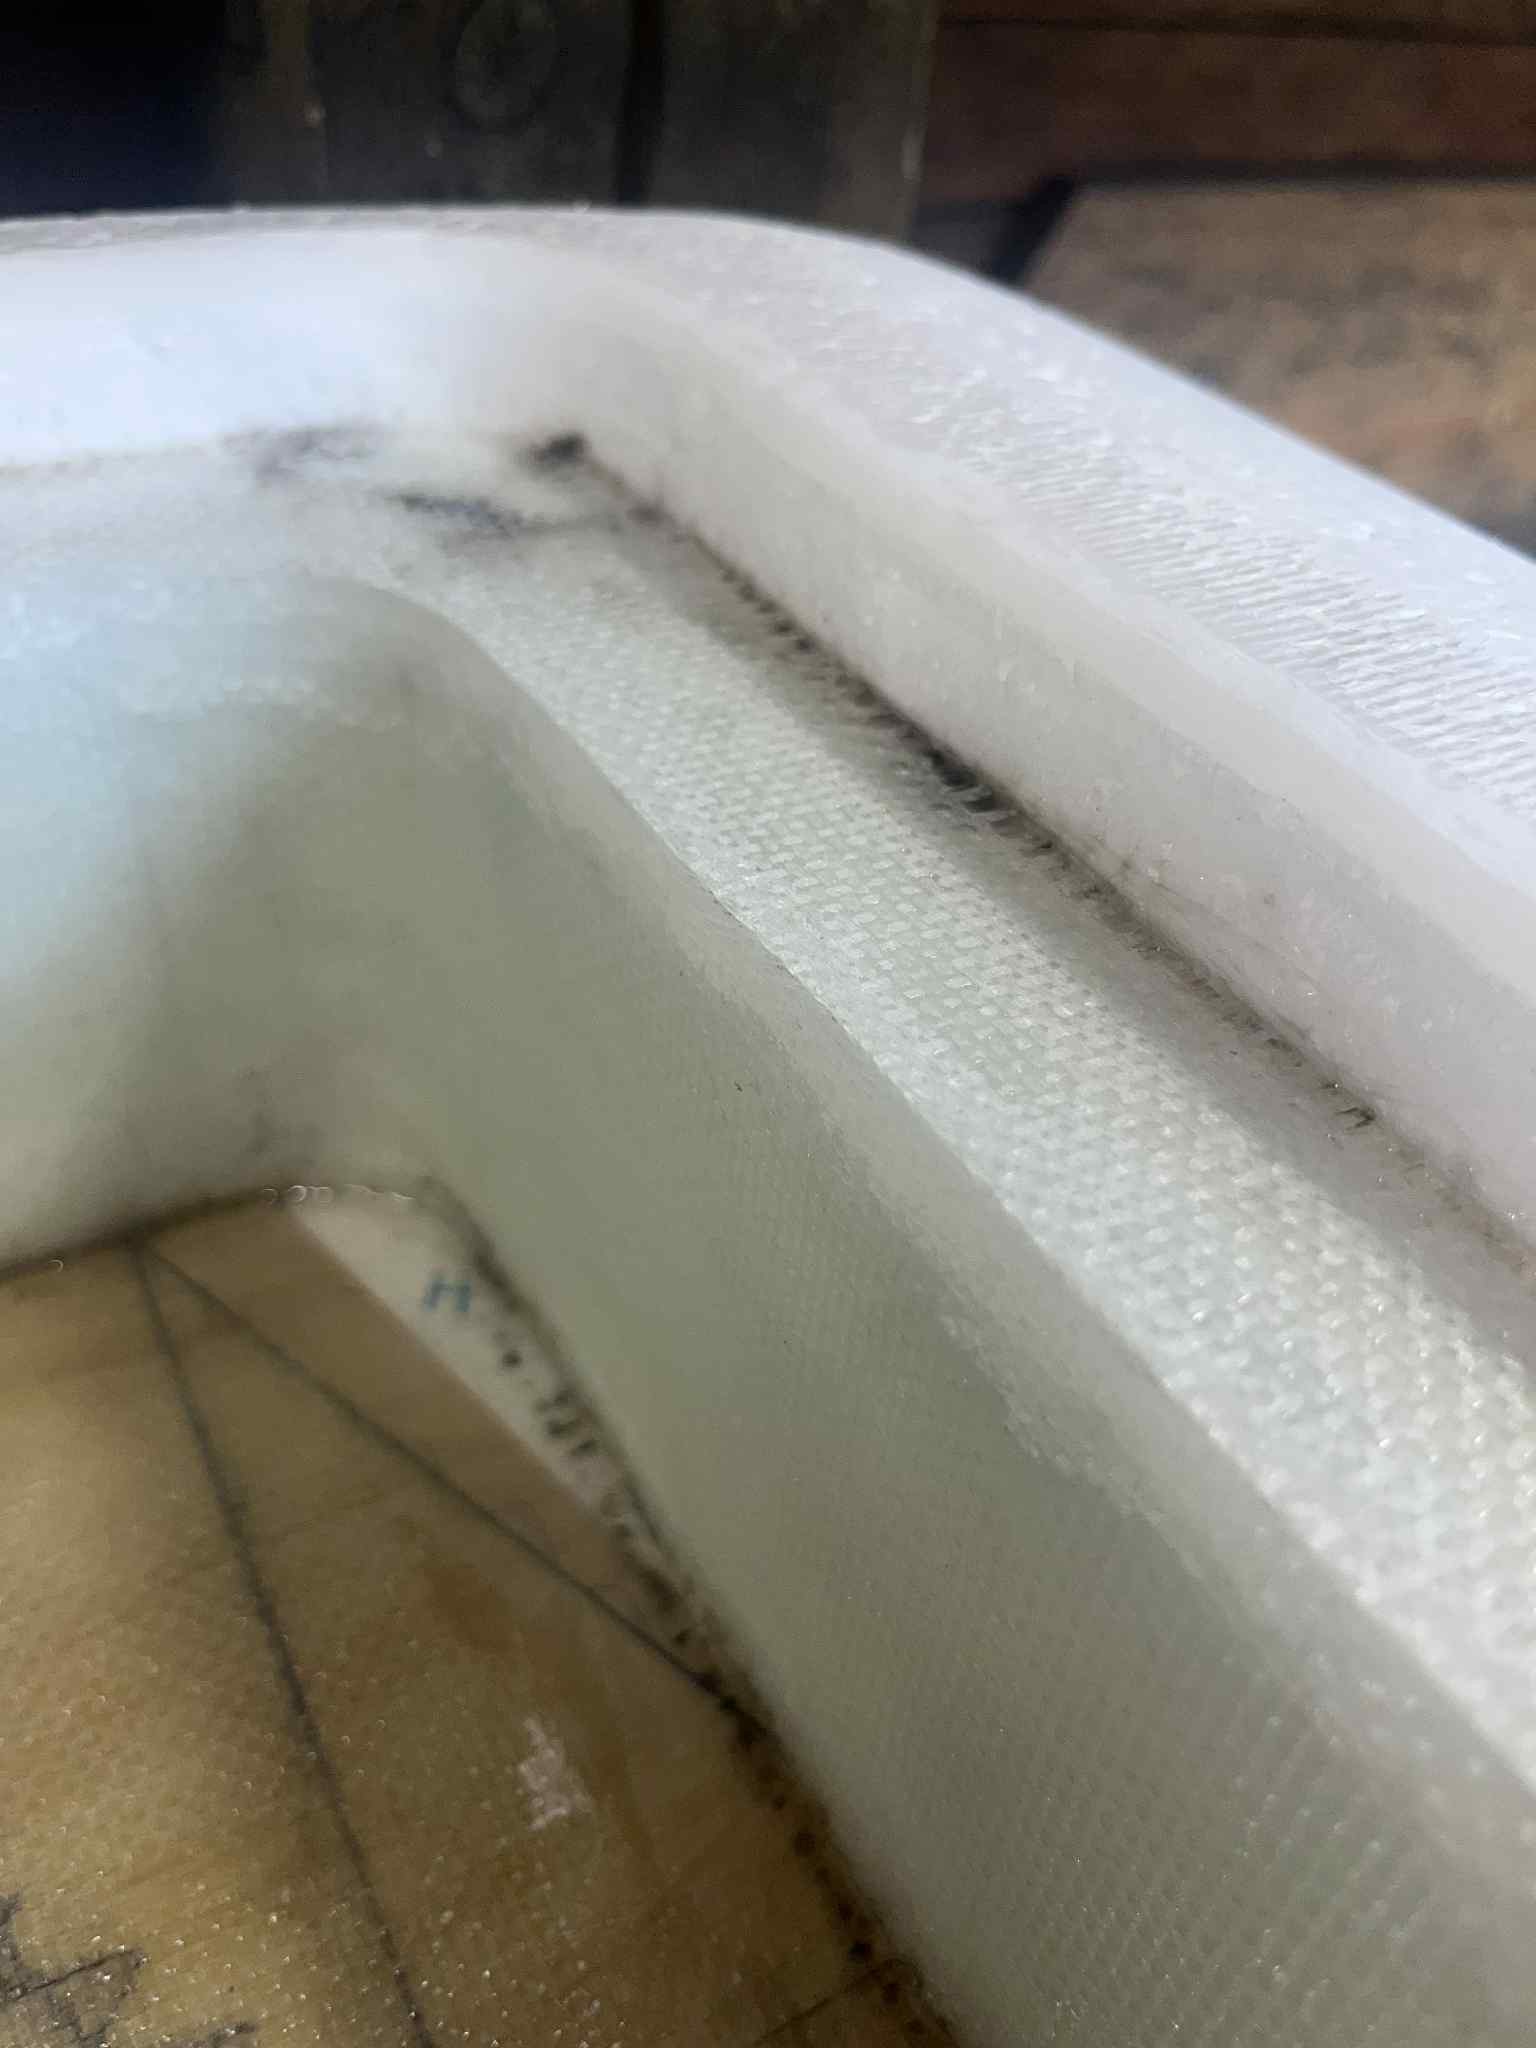
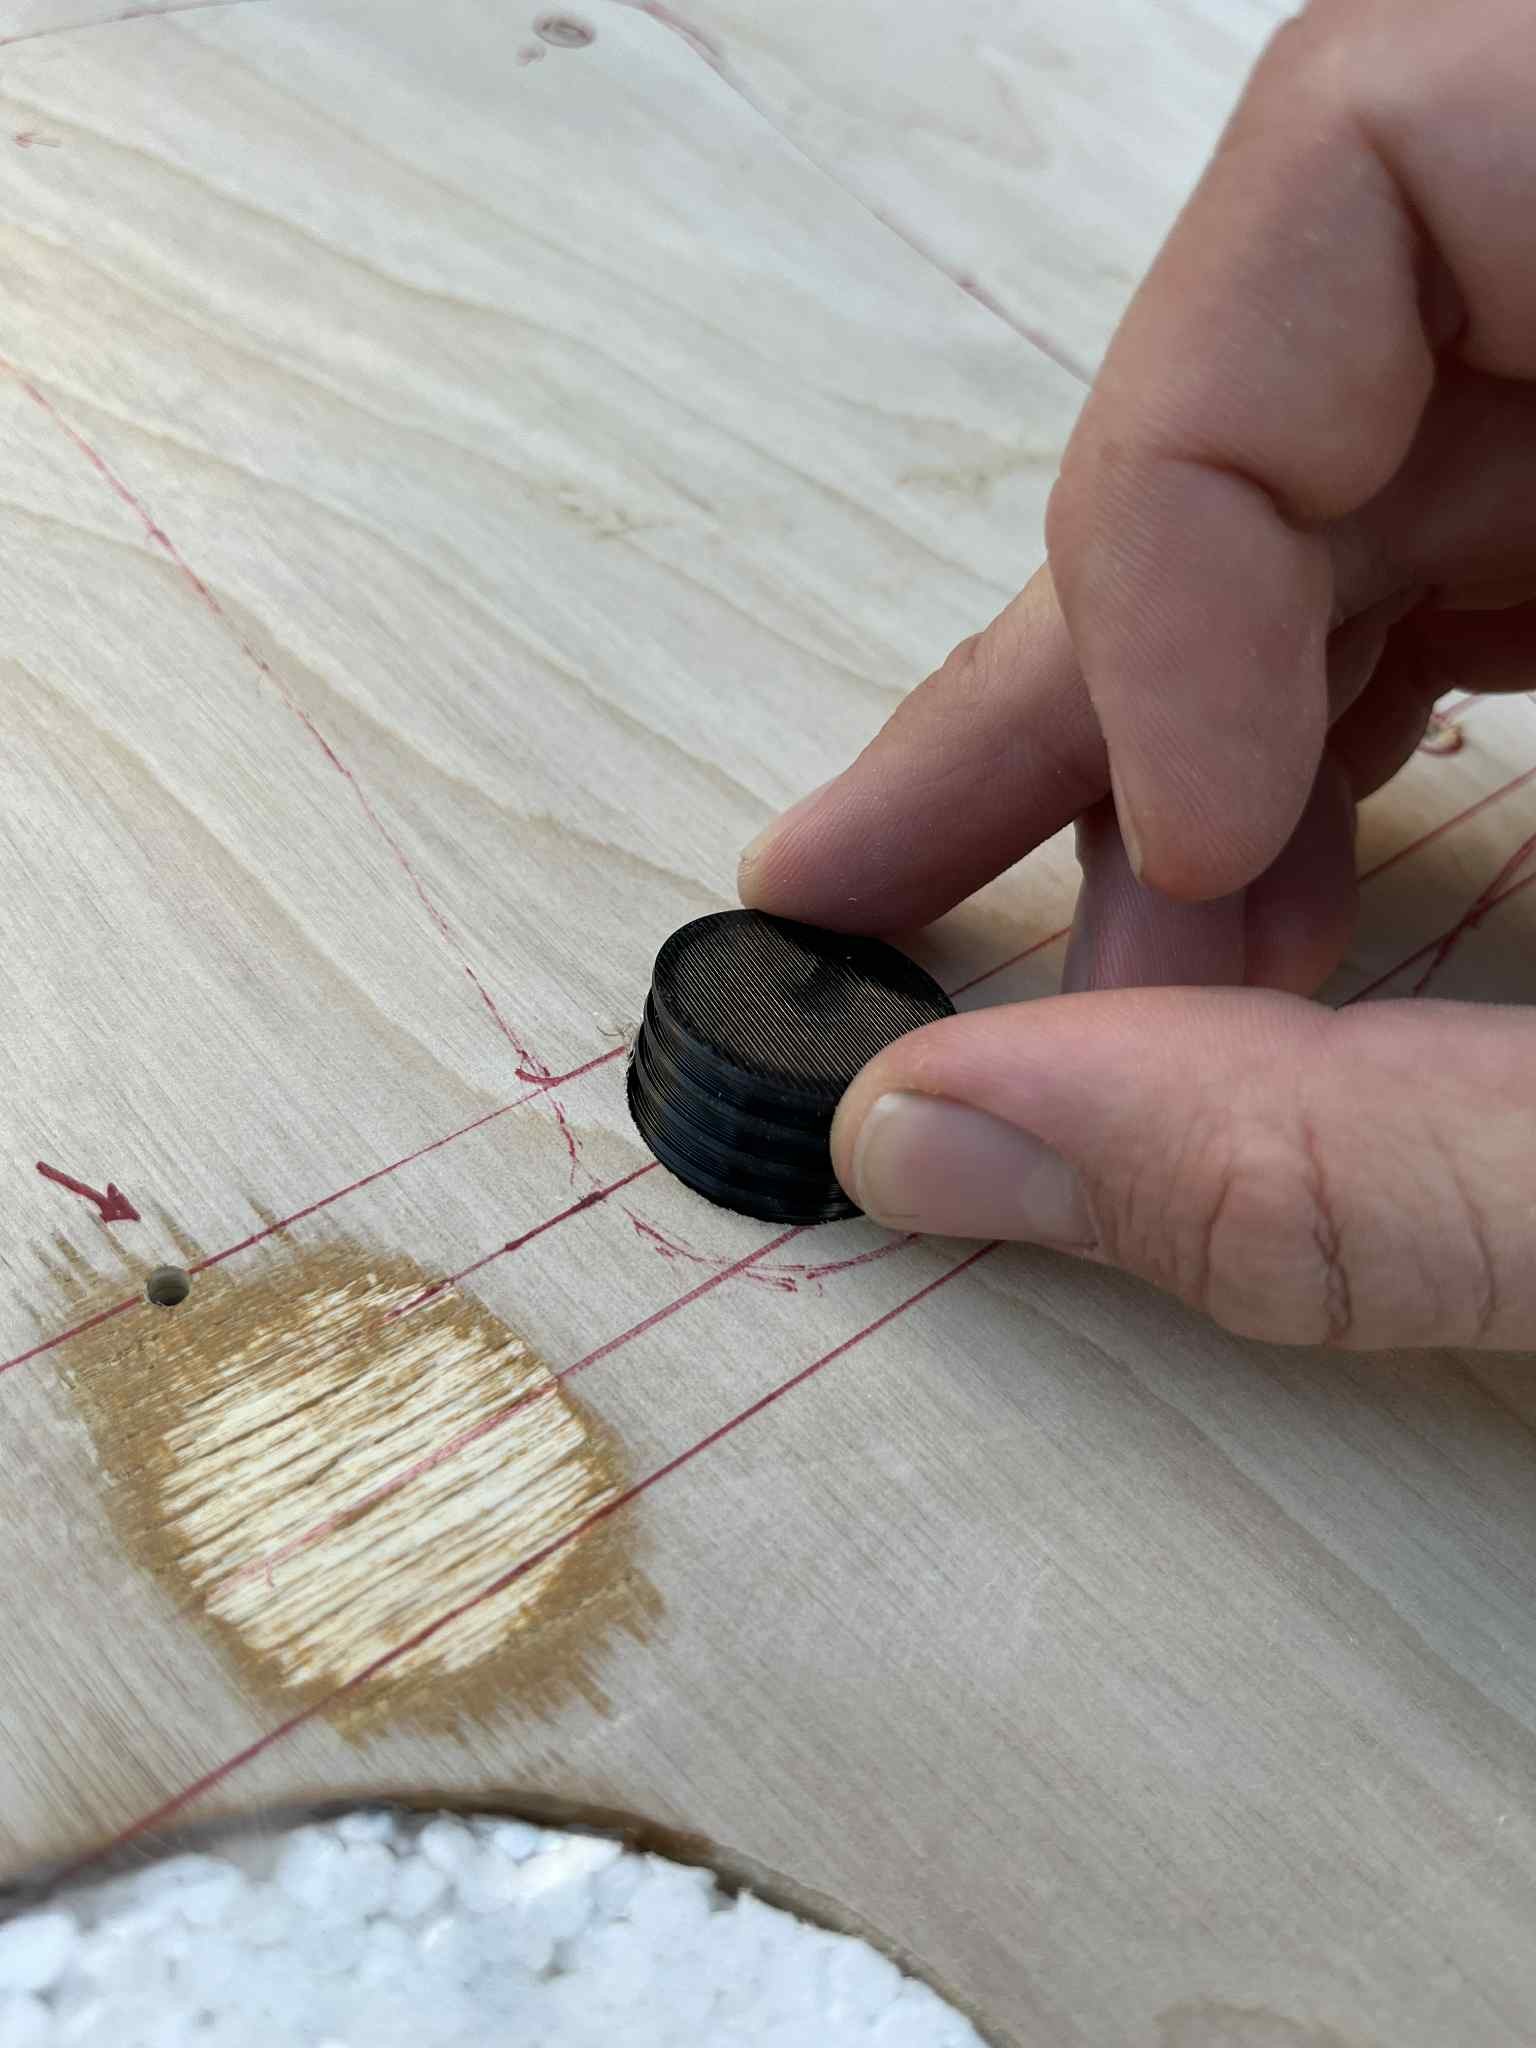
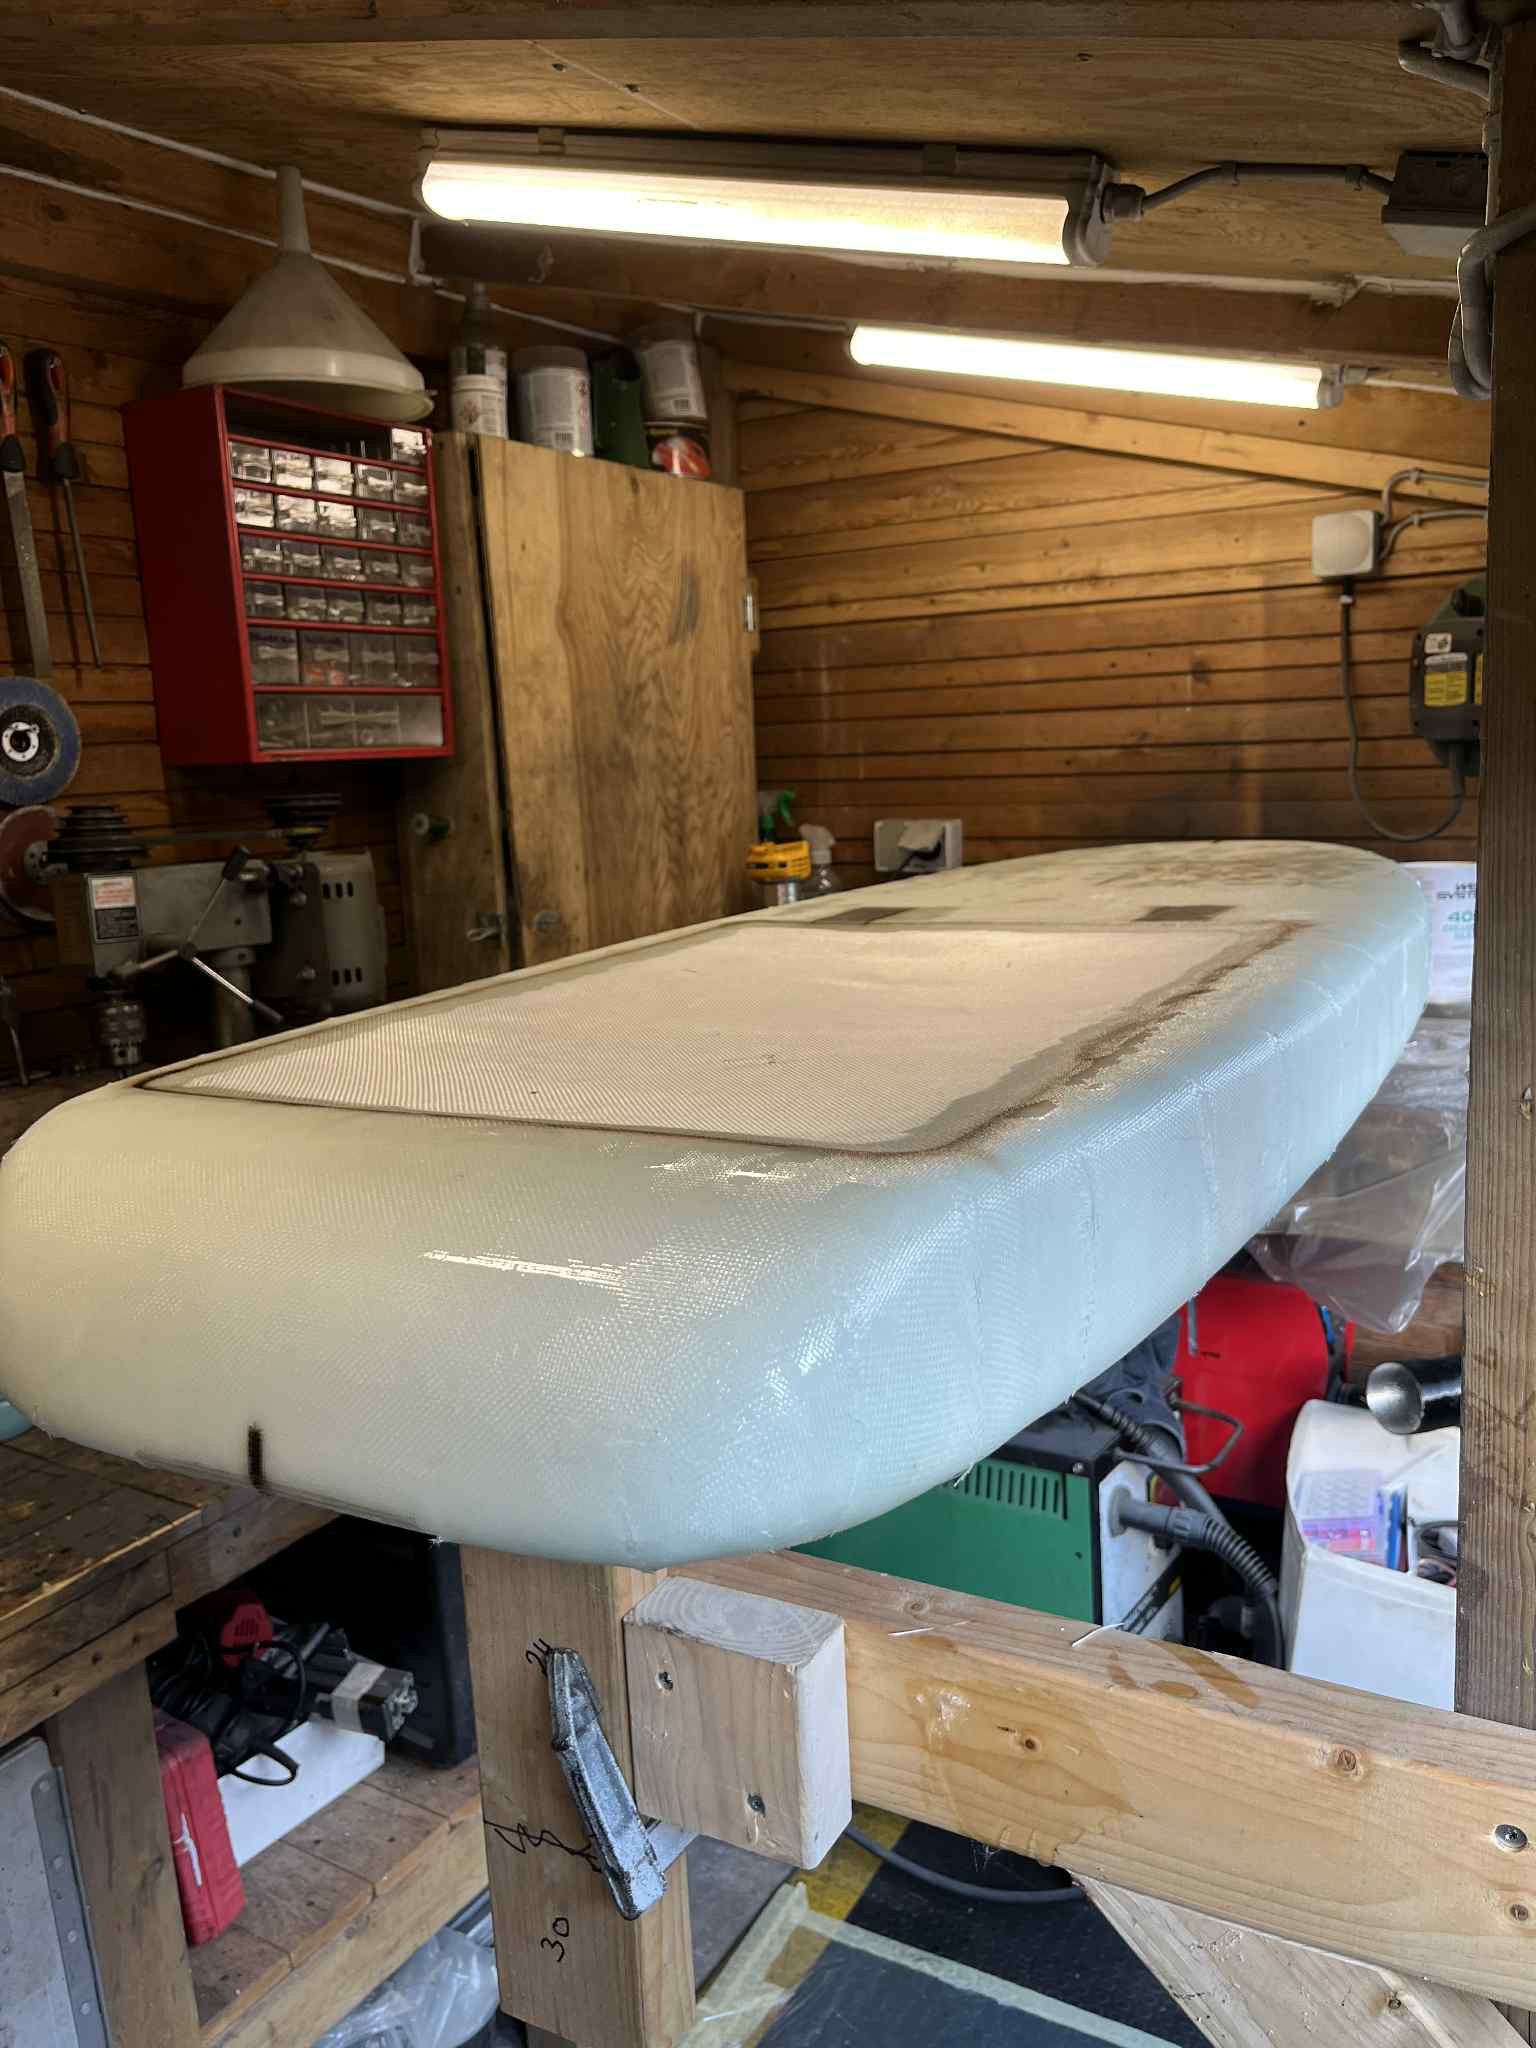
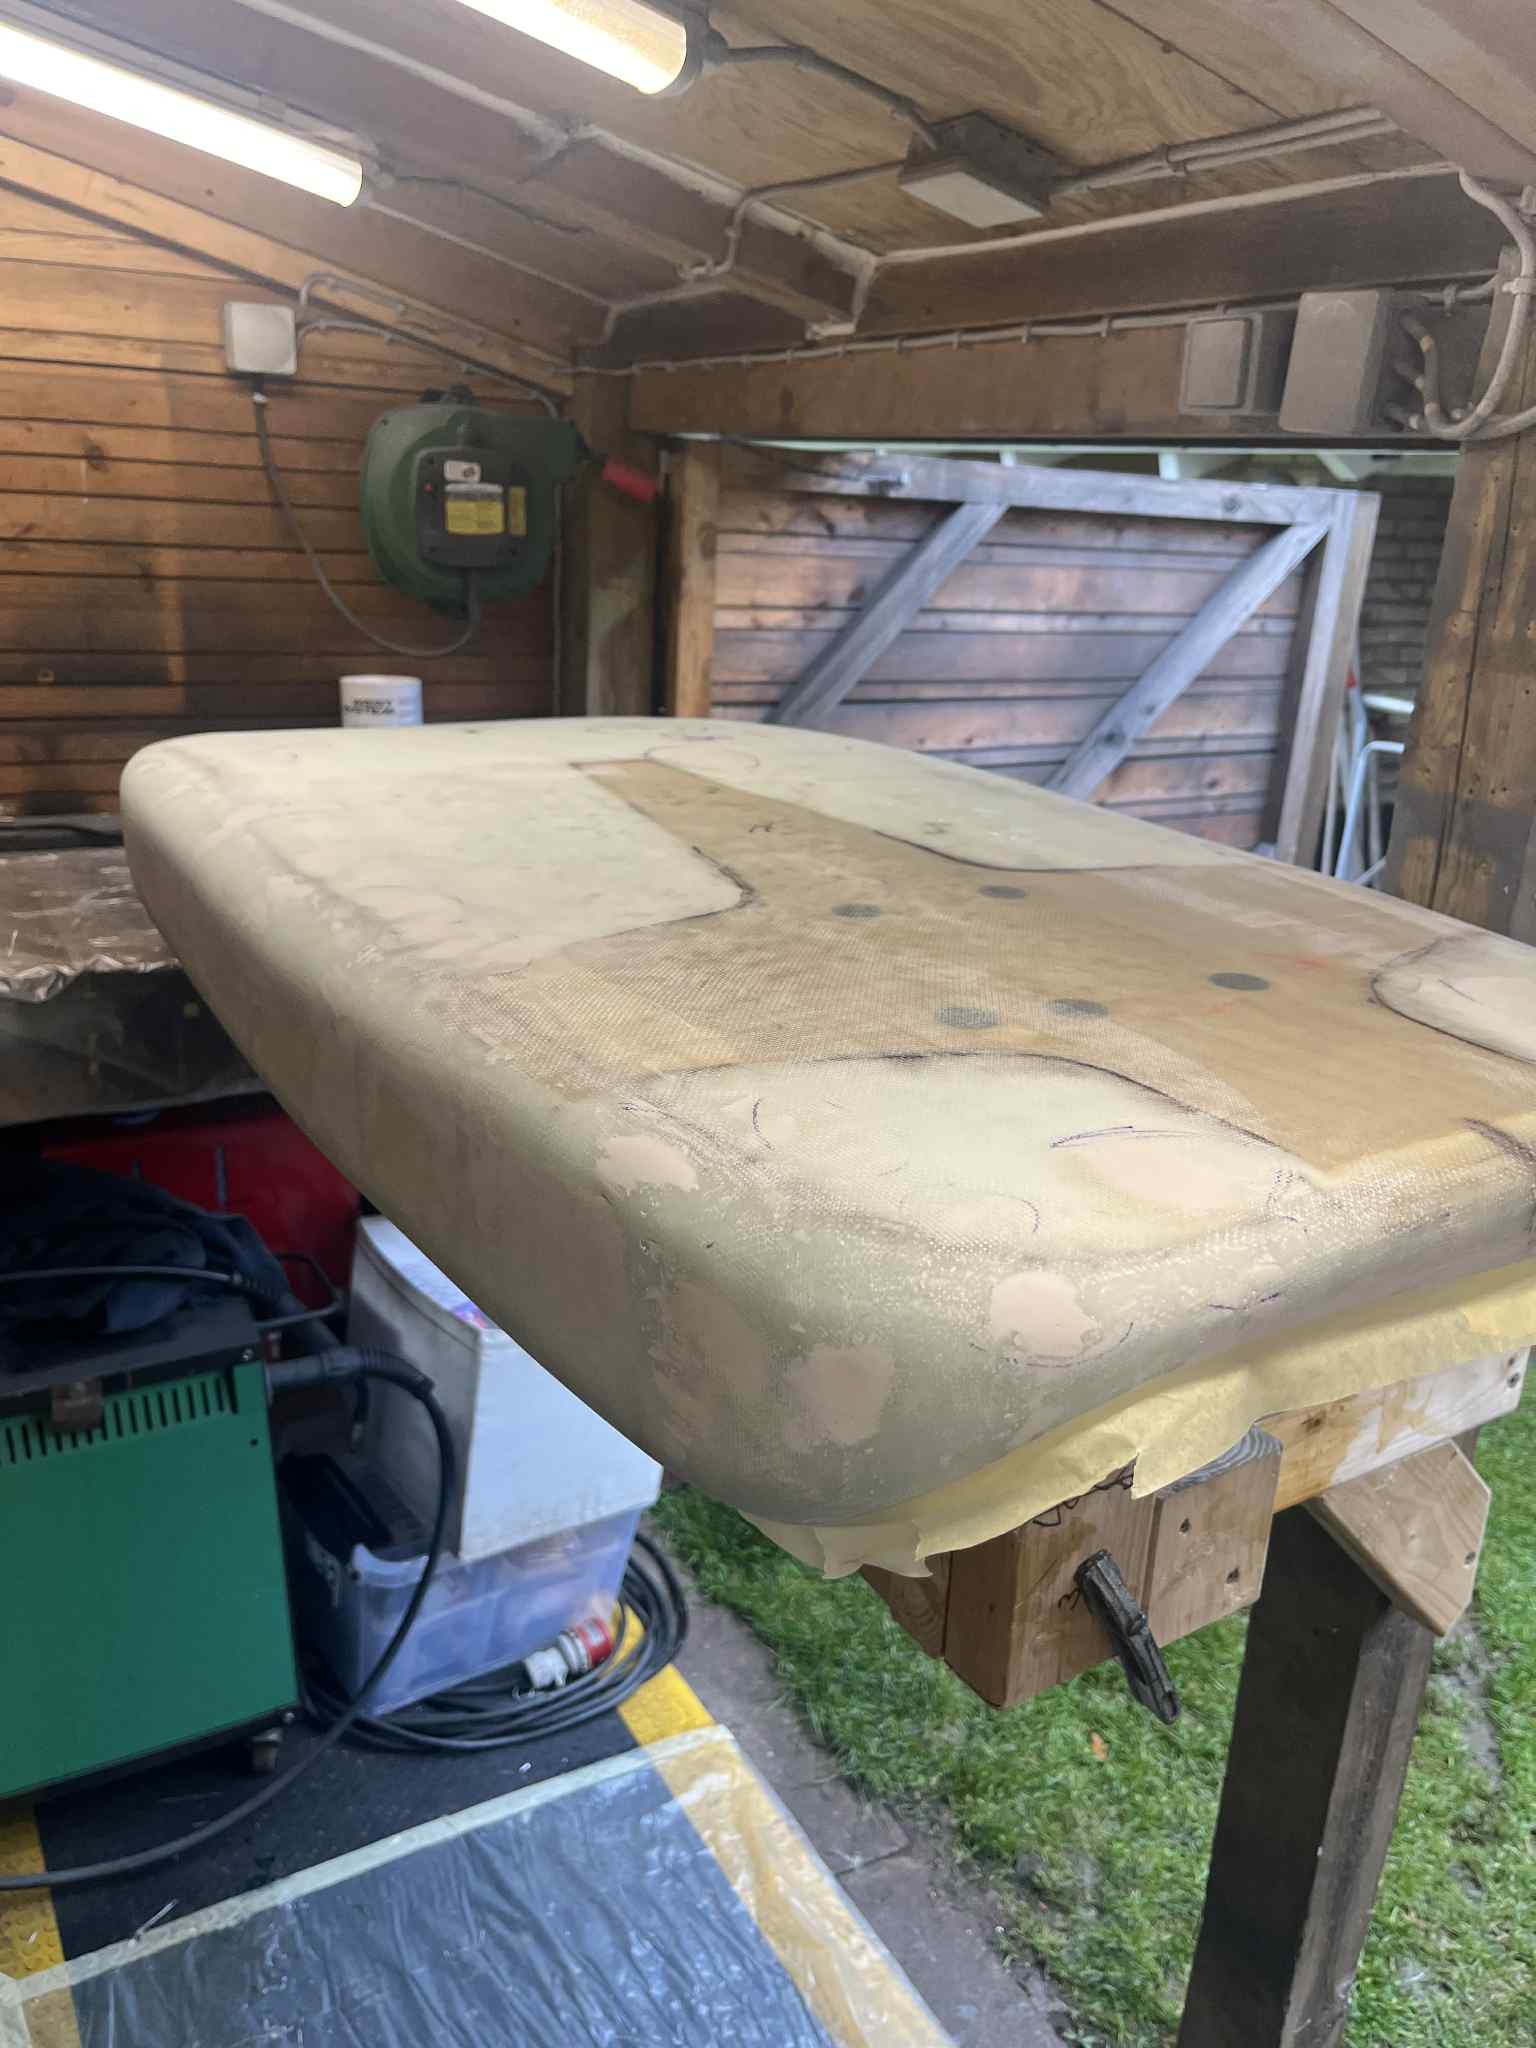
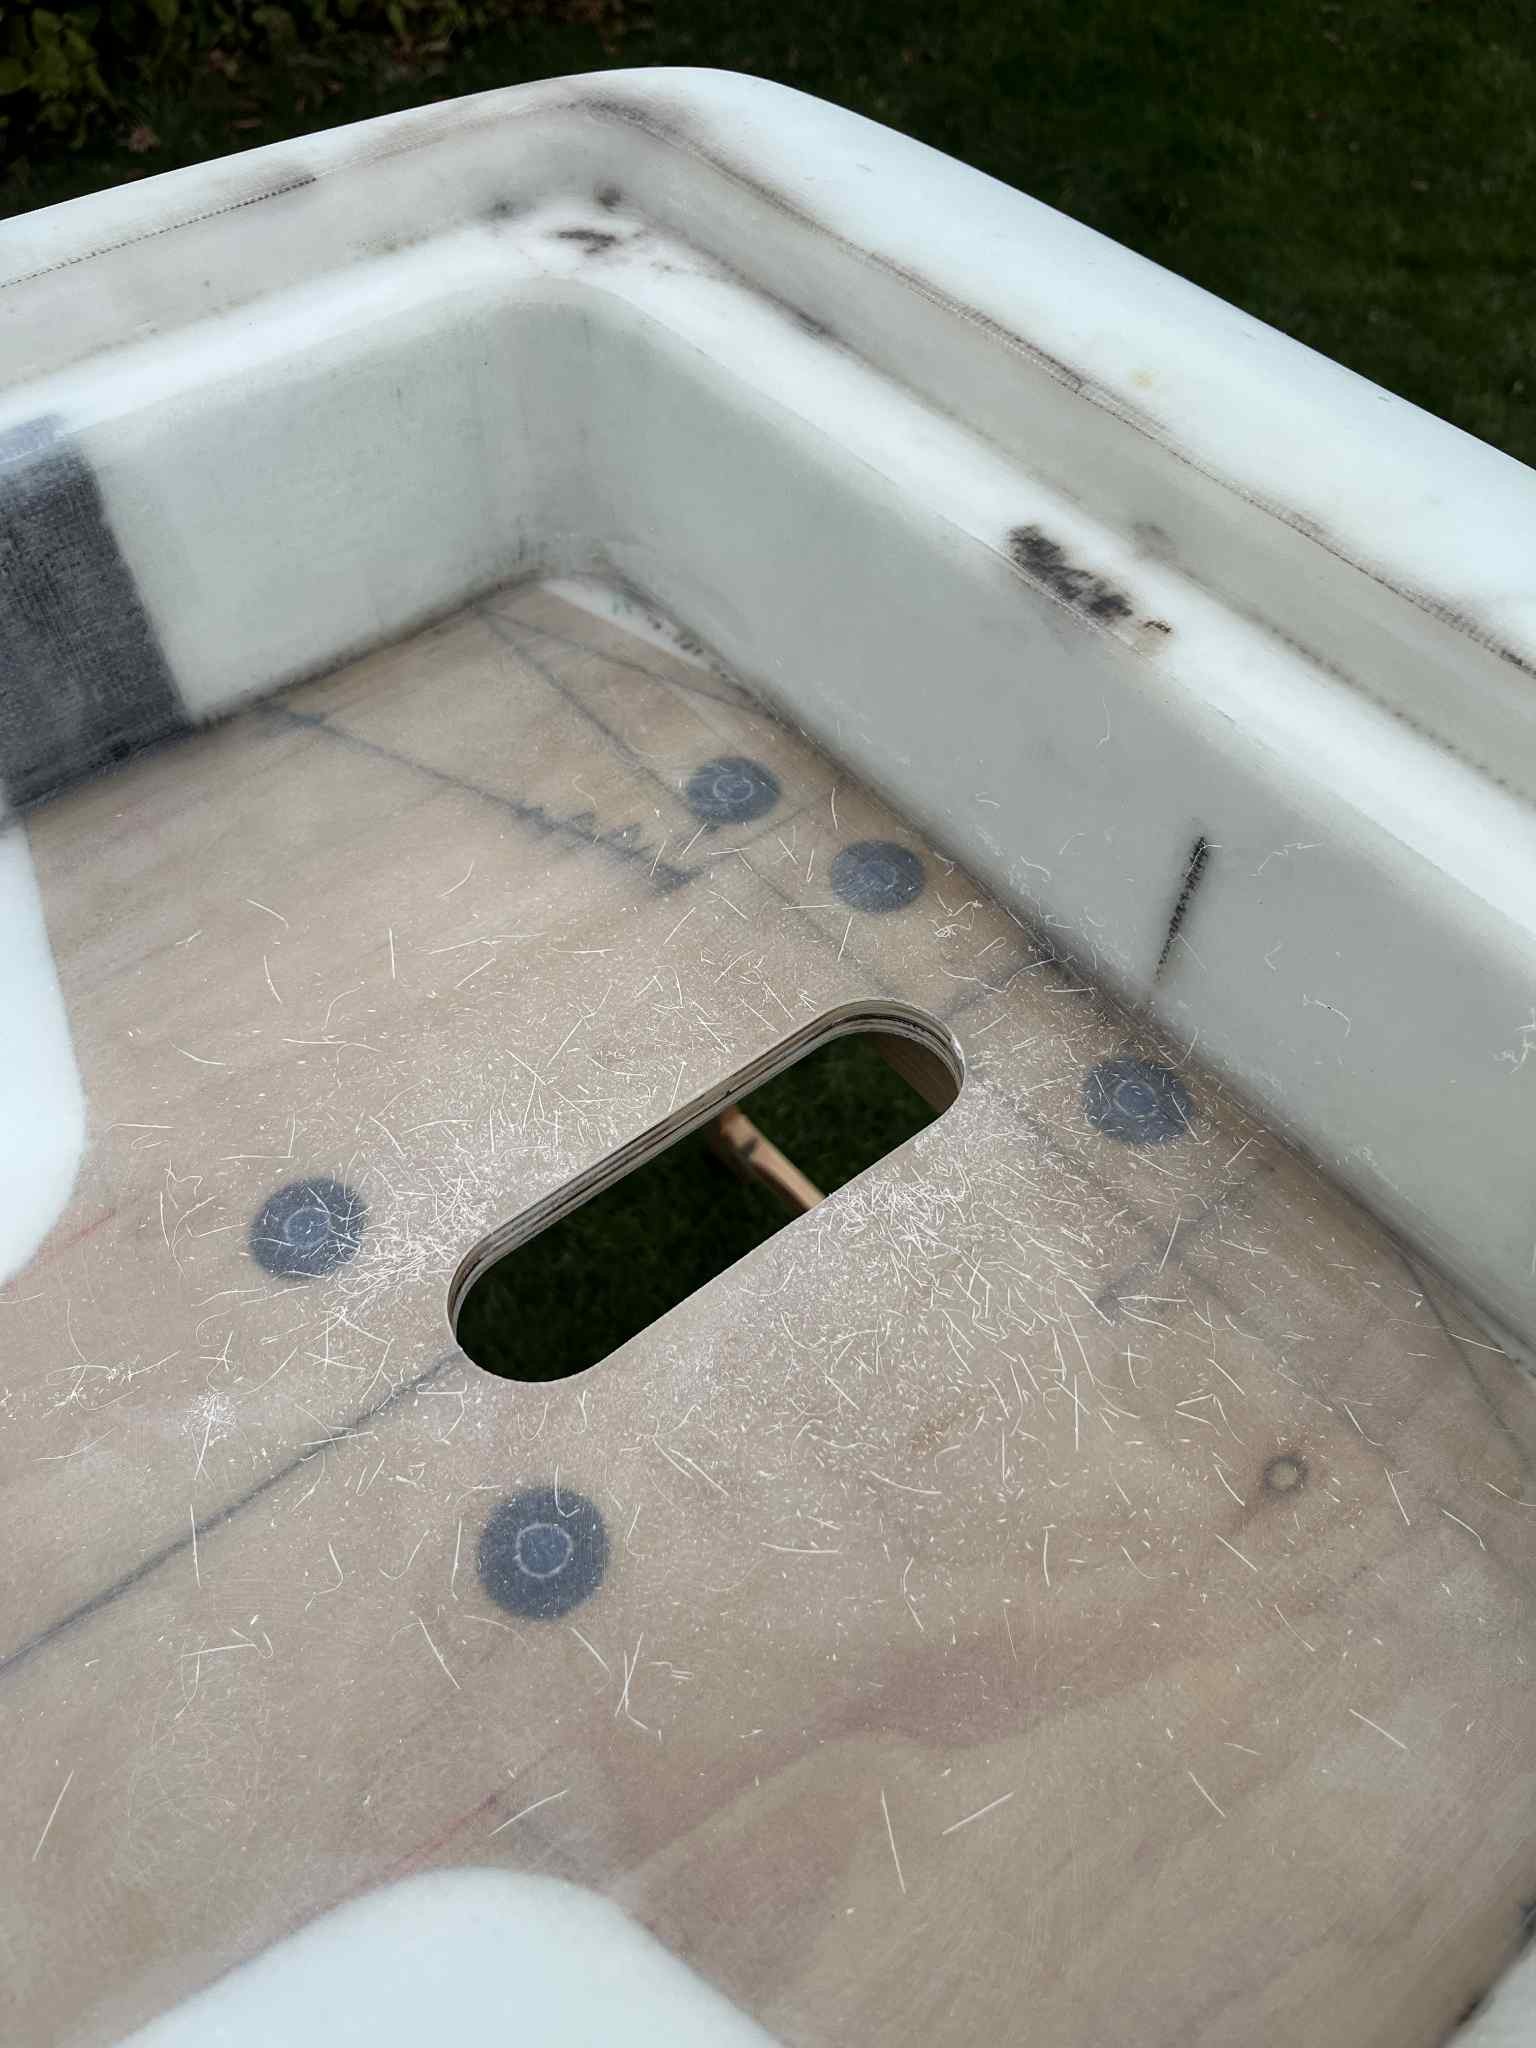
After cutting the rough shape, I used a handheld router to carve out the insert for the hatch and the wooden piece underneath the board, where the battery, VESC and mast later were mounted to. As sharp edges are difficult to warp fiberglass around, I cut a fillet on all these edges filled them with thickened epoxy before glassing. I glued a 12mm plywood board from birch to the underside, to give the board extra strength where the mast mounts to the board. Using a orbital sander and grinder with sanding discs, I shaped the board to the final shape. Before glassing I added solid 3D-printed PETG block, where woodscrews later can be used to mount hatch, battery etc. Don’t use PLA, as it will soften when exposed to the heat of the sun. When glassing to an edge, I found it easier to do one surface at a time. Although more time consuming, it is the only way to get a sharp edge without vacuum bagging or infusion. It is very important to prep the surfaces with low grid sandpaper and wiped with IPA where cured layup meets wet, as this bond relies purely on surface adherence and not chemically bonded. After this I could start glassing the entire board. I found from previous experience that 2 layers on both sides with 300g/m2 was insufficient and was easily dented when hitting the dock. This time I used 4 layers (300g) top and bottom, giving 8 layers on the sides where they overlap. This is plenty strong and will last forever. I was using PETG inserts where bolt for mounting the mast will go through the plywood. To avoid water from leaking into the wood, these solid plastic pieces will prevent this. The hatch was made from same plywood, but with small wooden braces to stiffen the hatch. Earlier experience taught me that the hatch must be very stiff, to keep a good seal against the board. I painted the board with a 2-part polyurethane paint made by Hempel (Polygloss in cobalt blue).
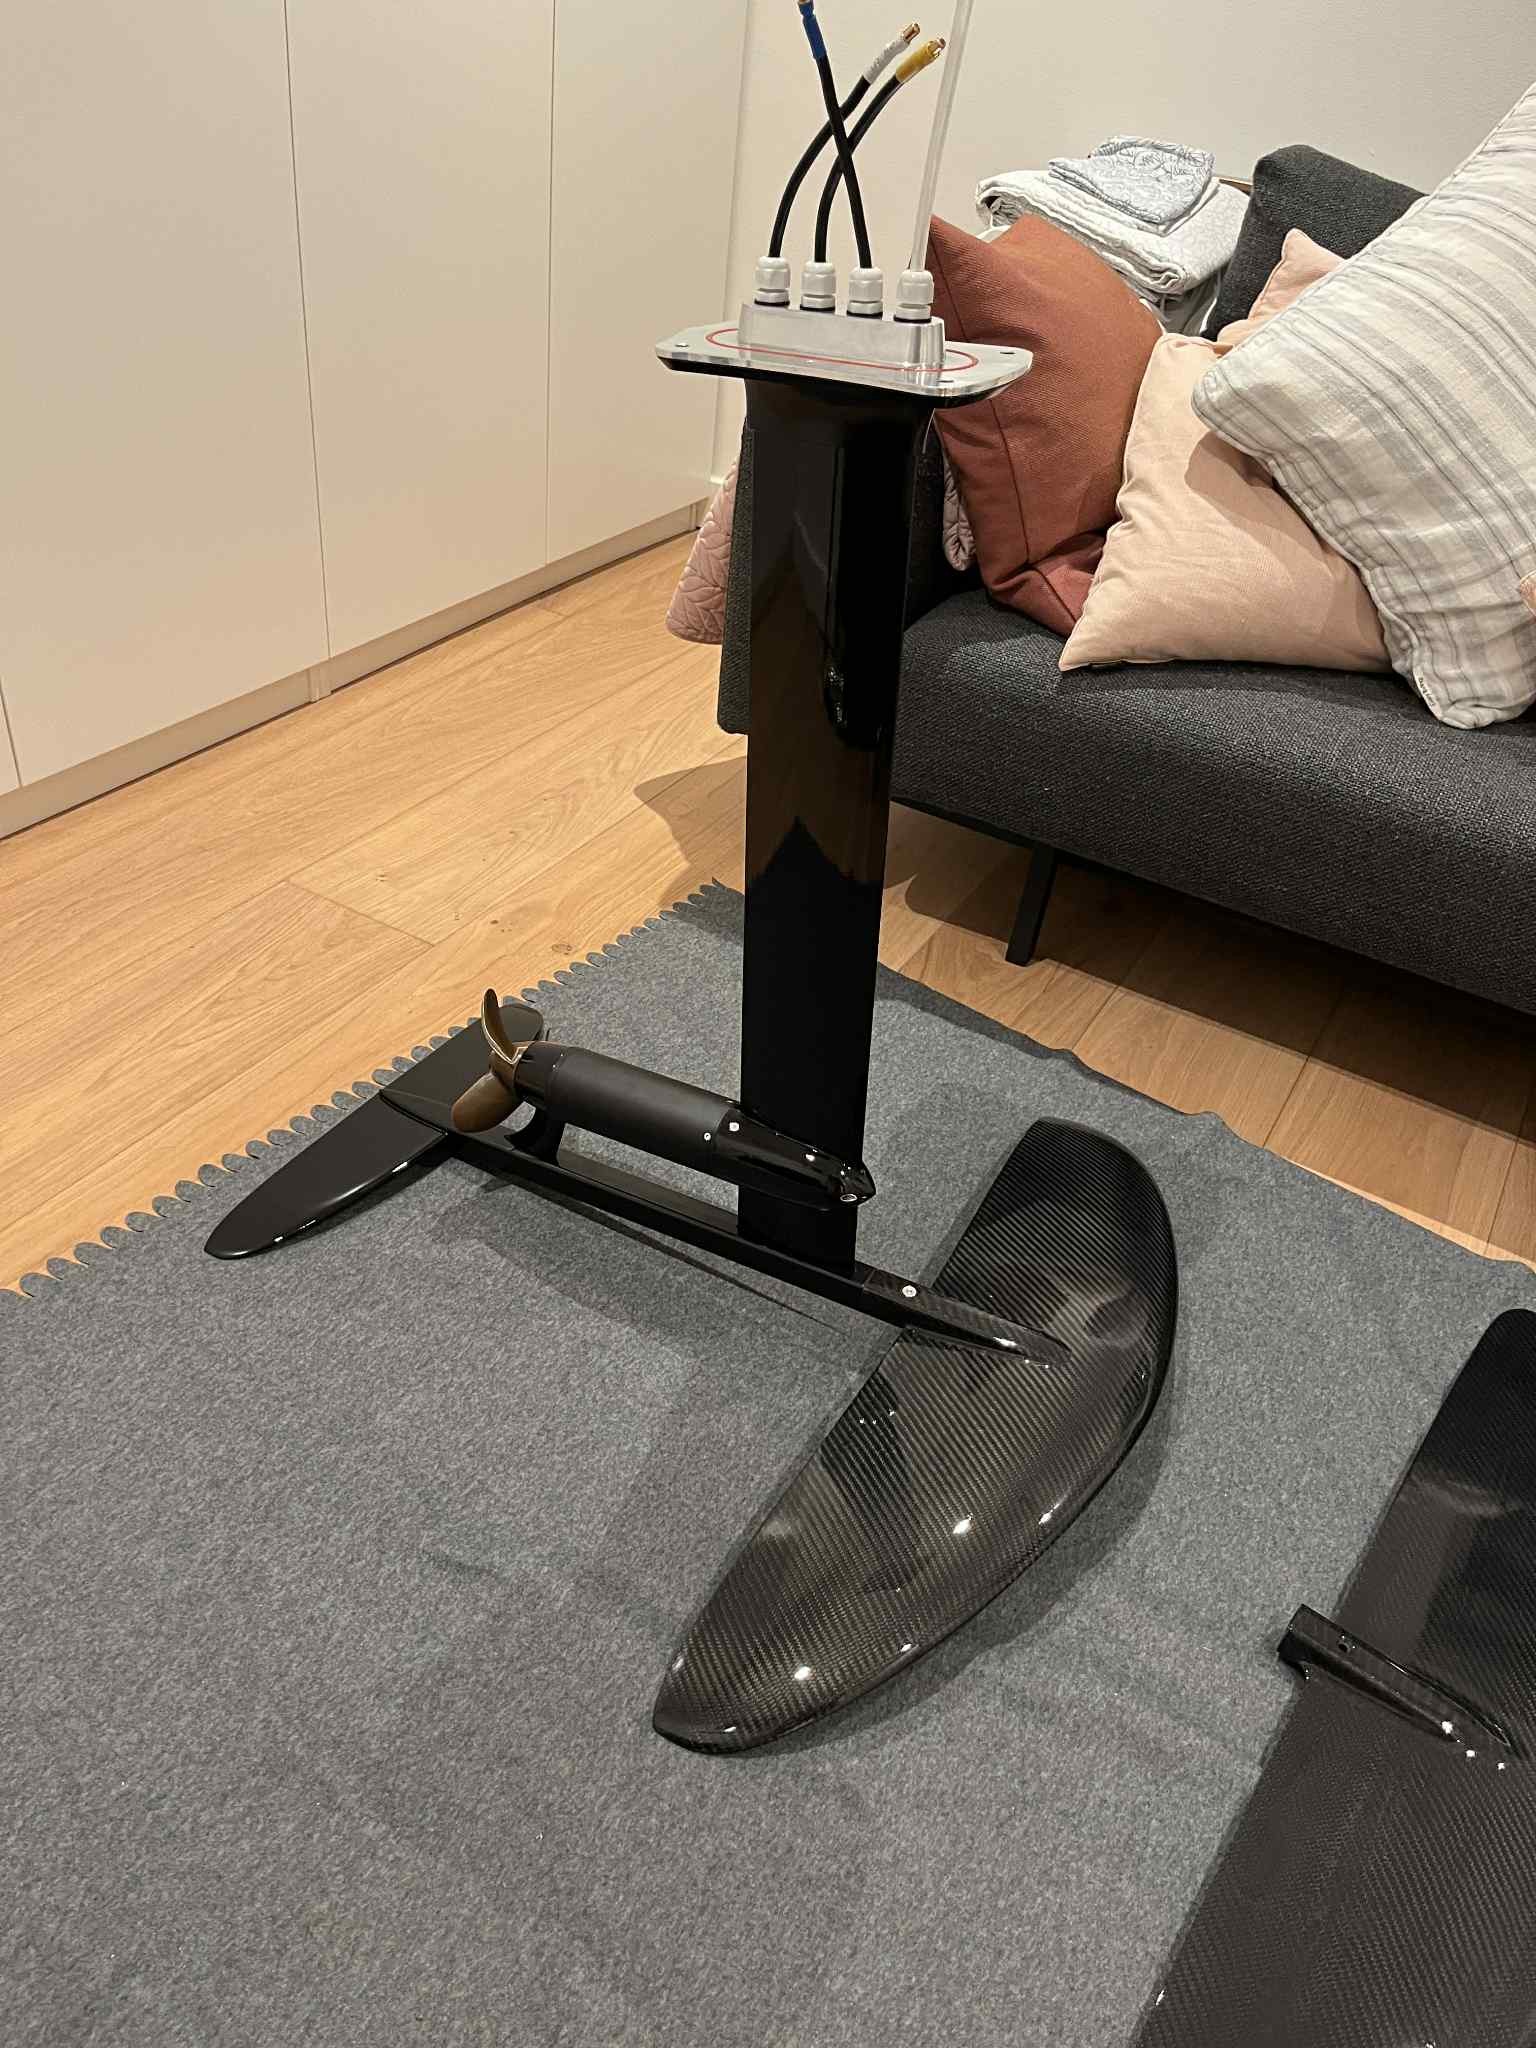
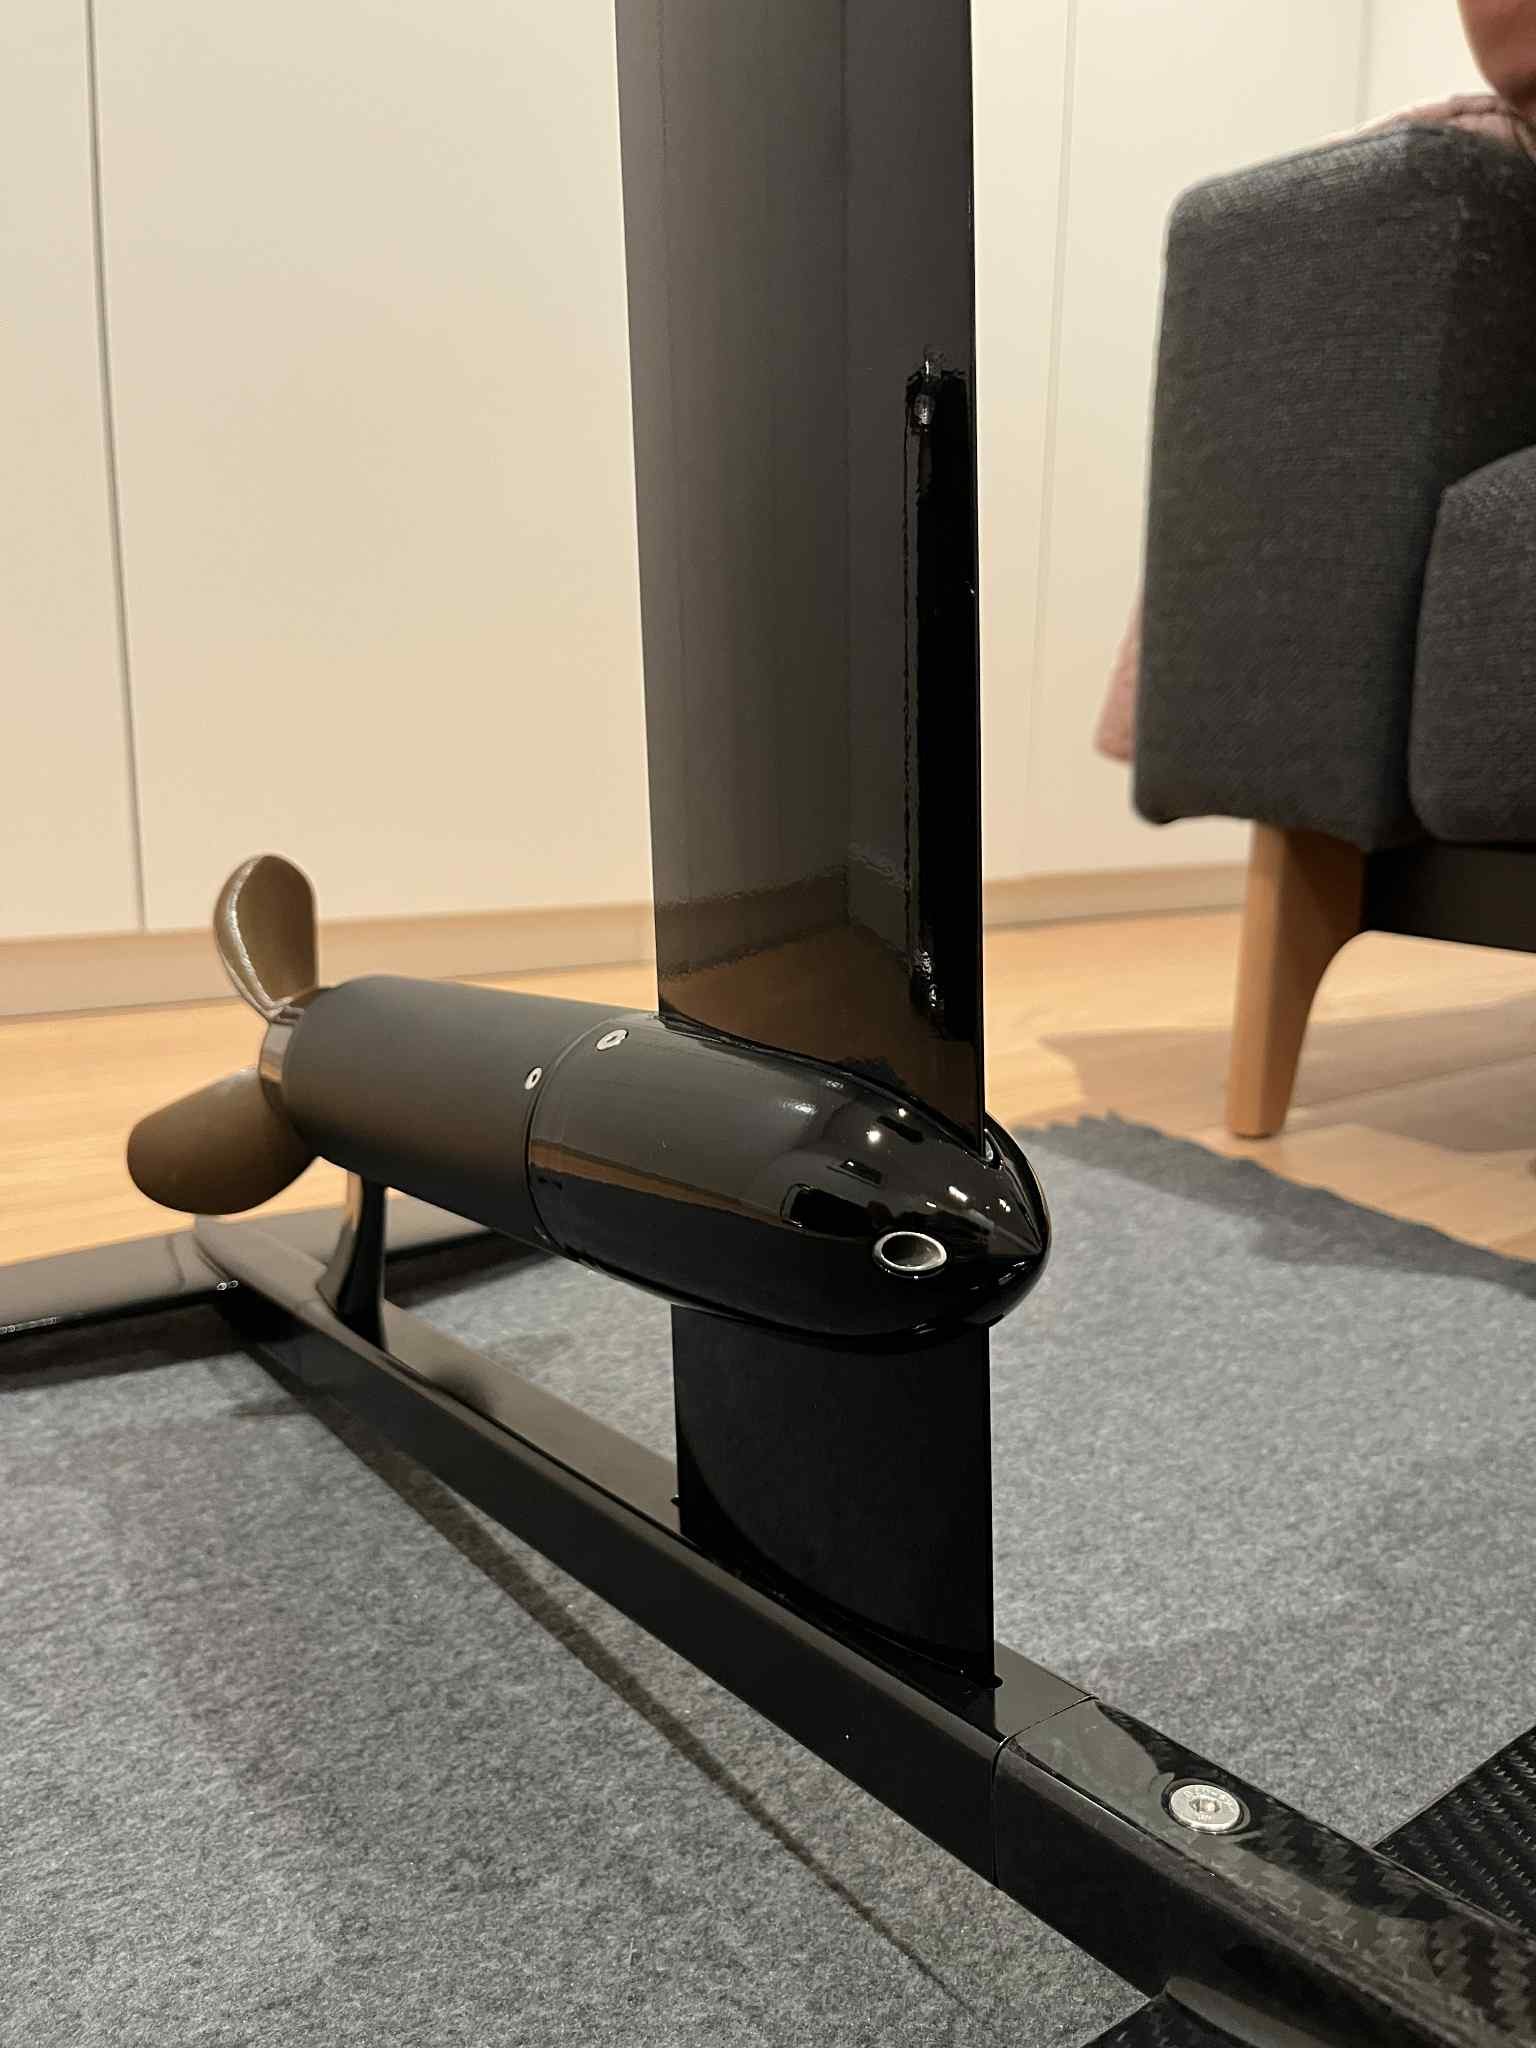
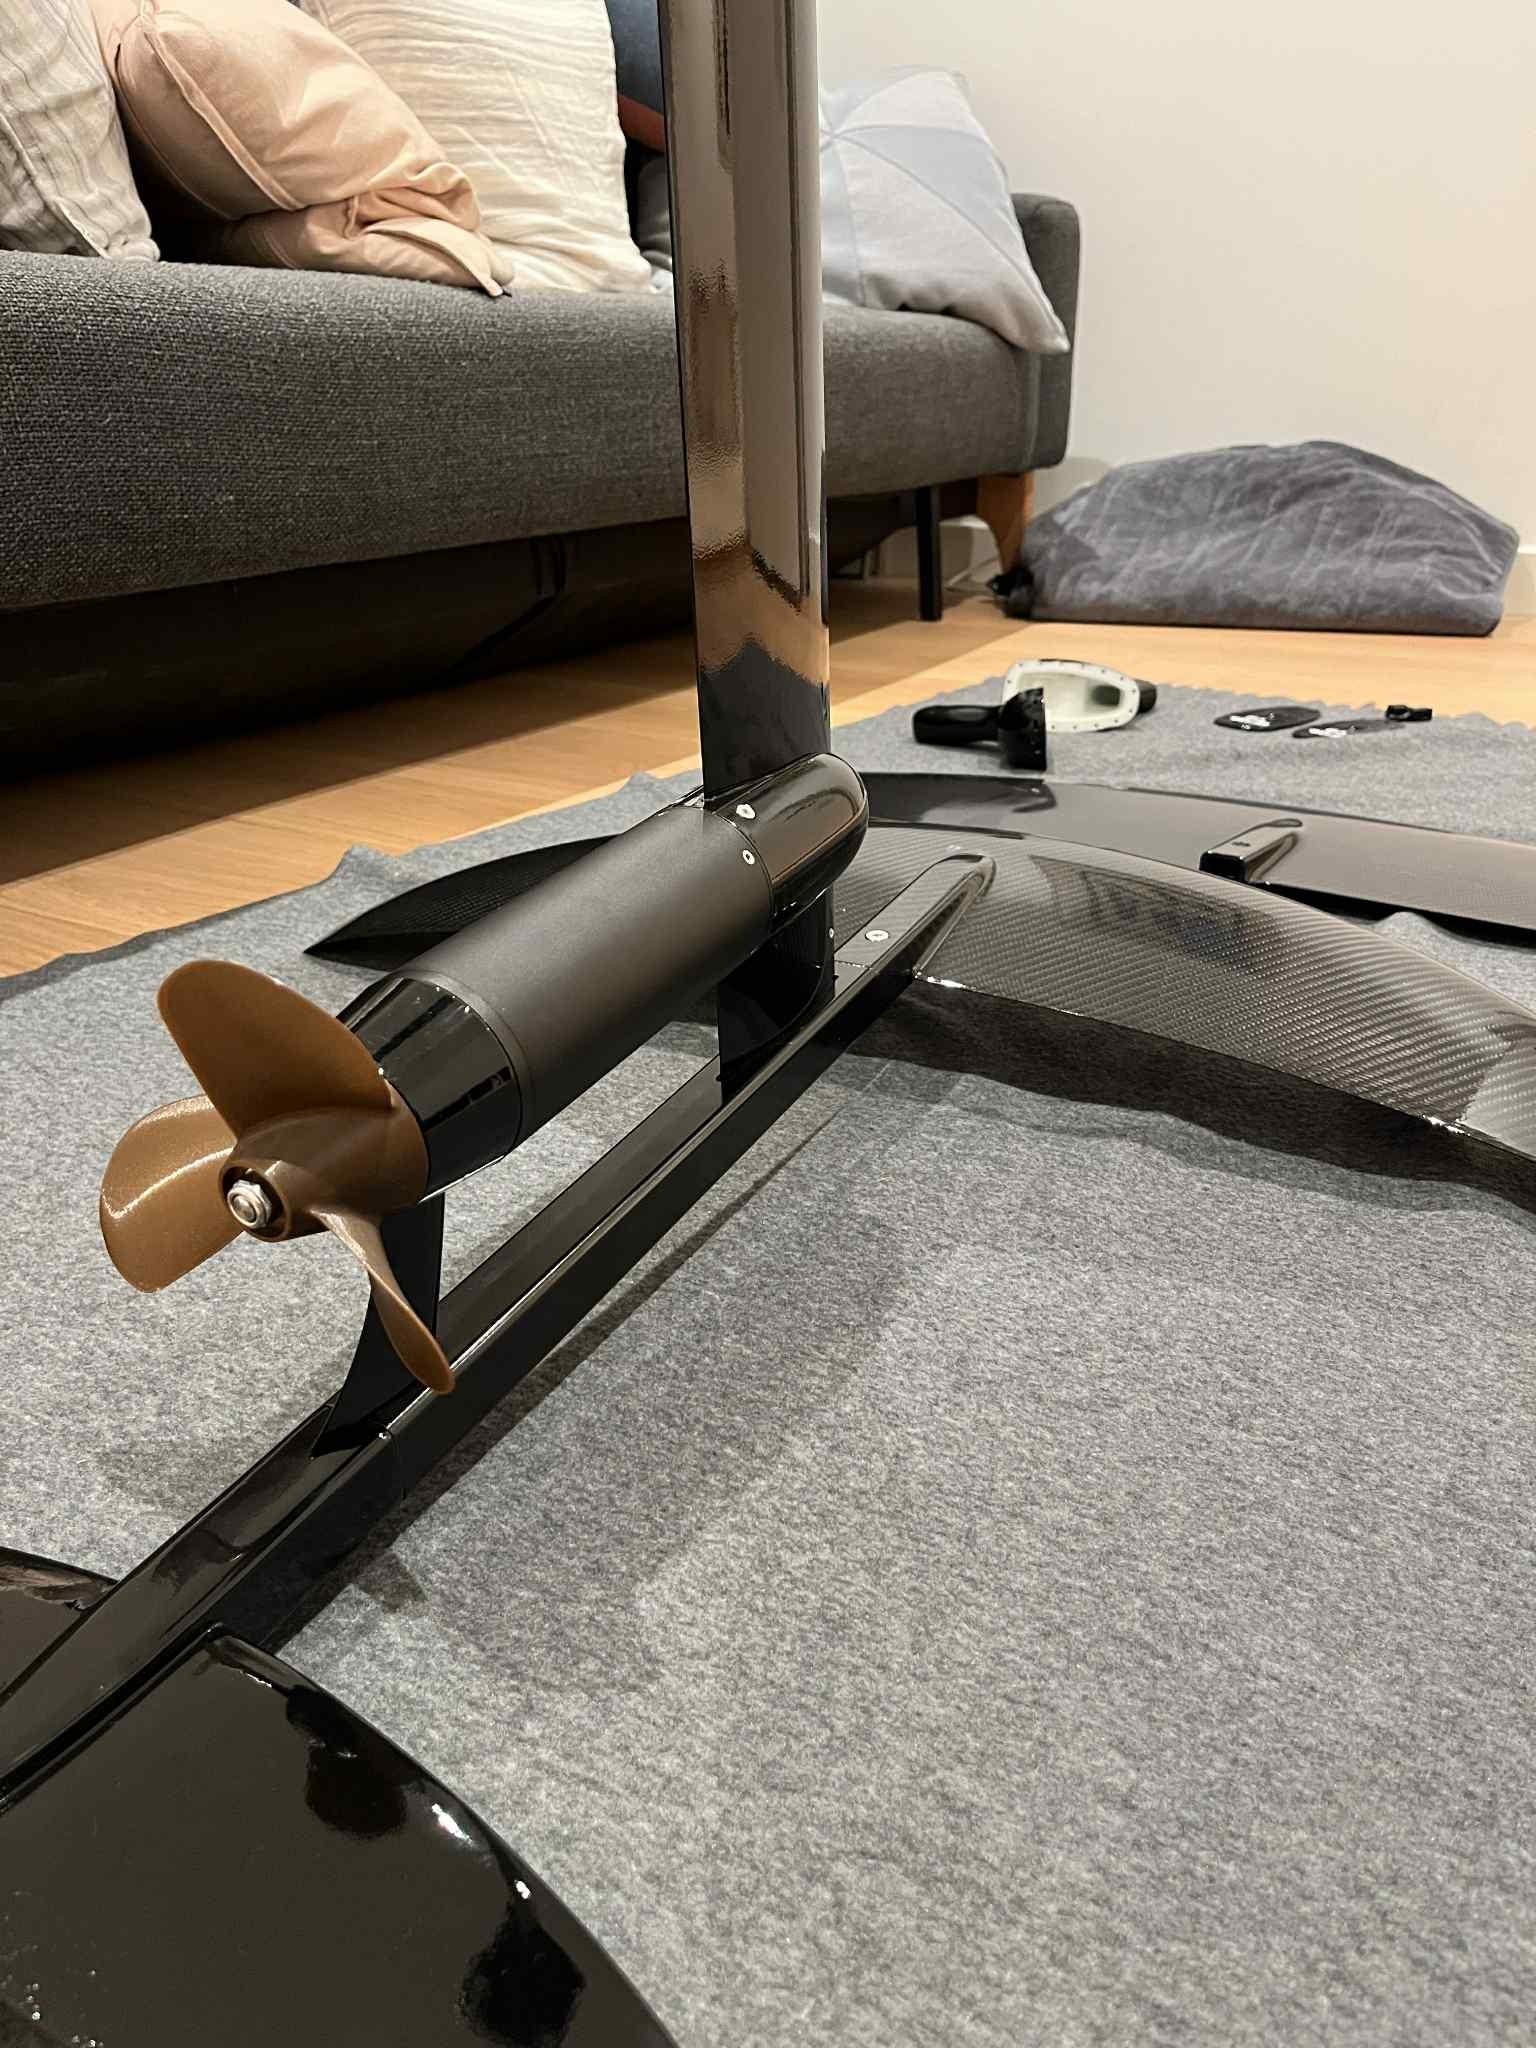
Foildrive:

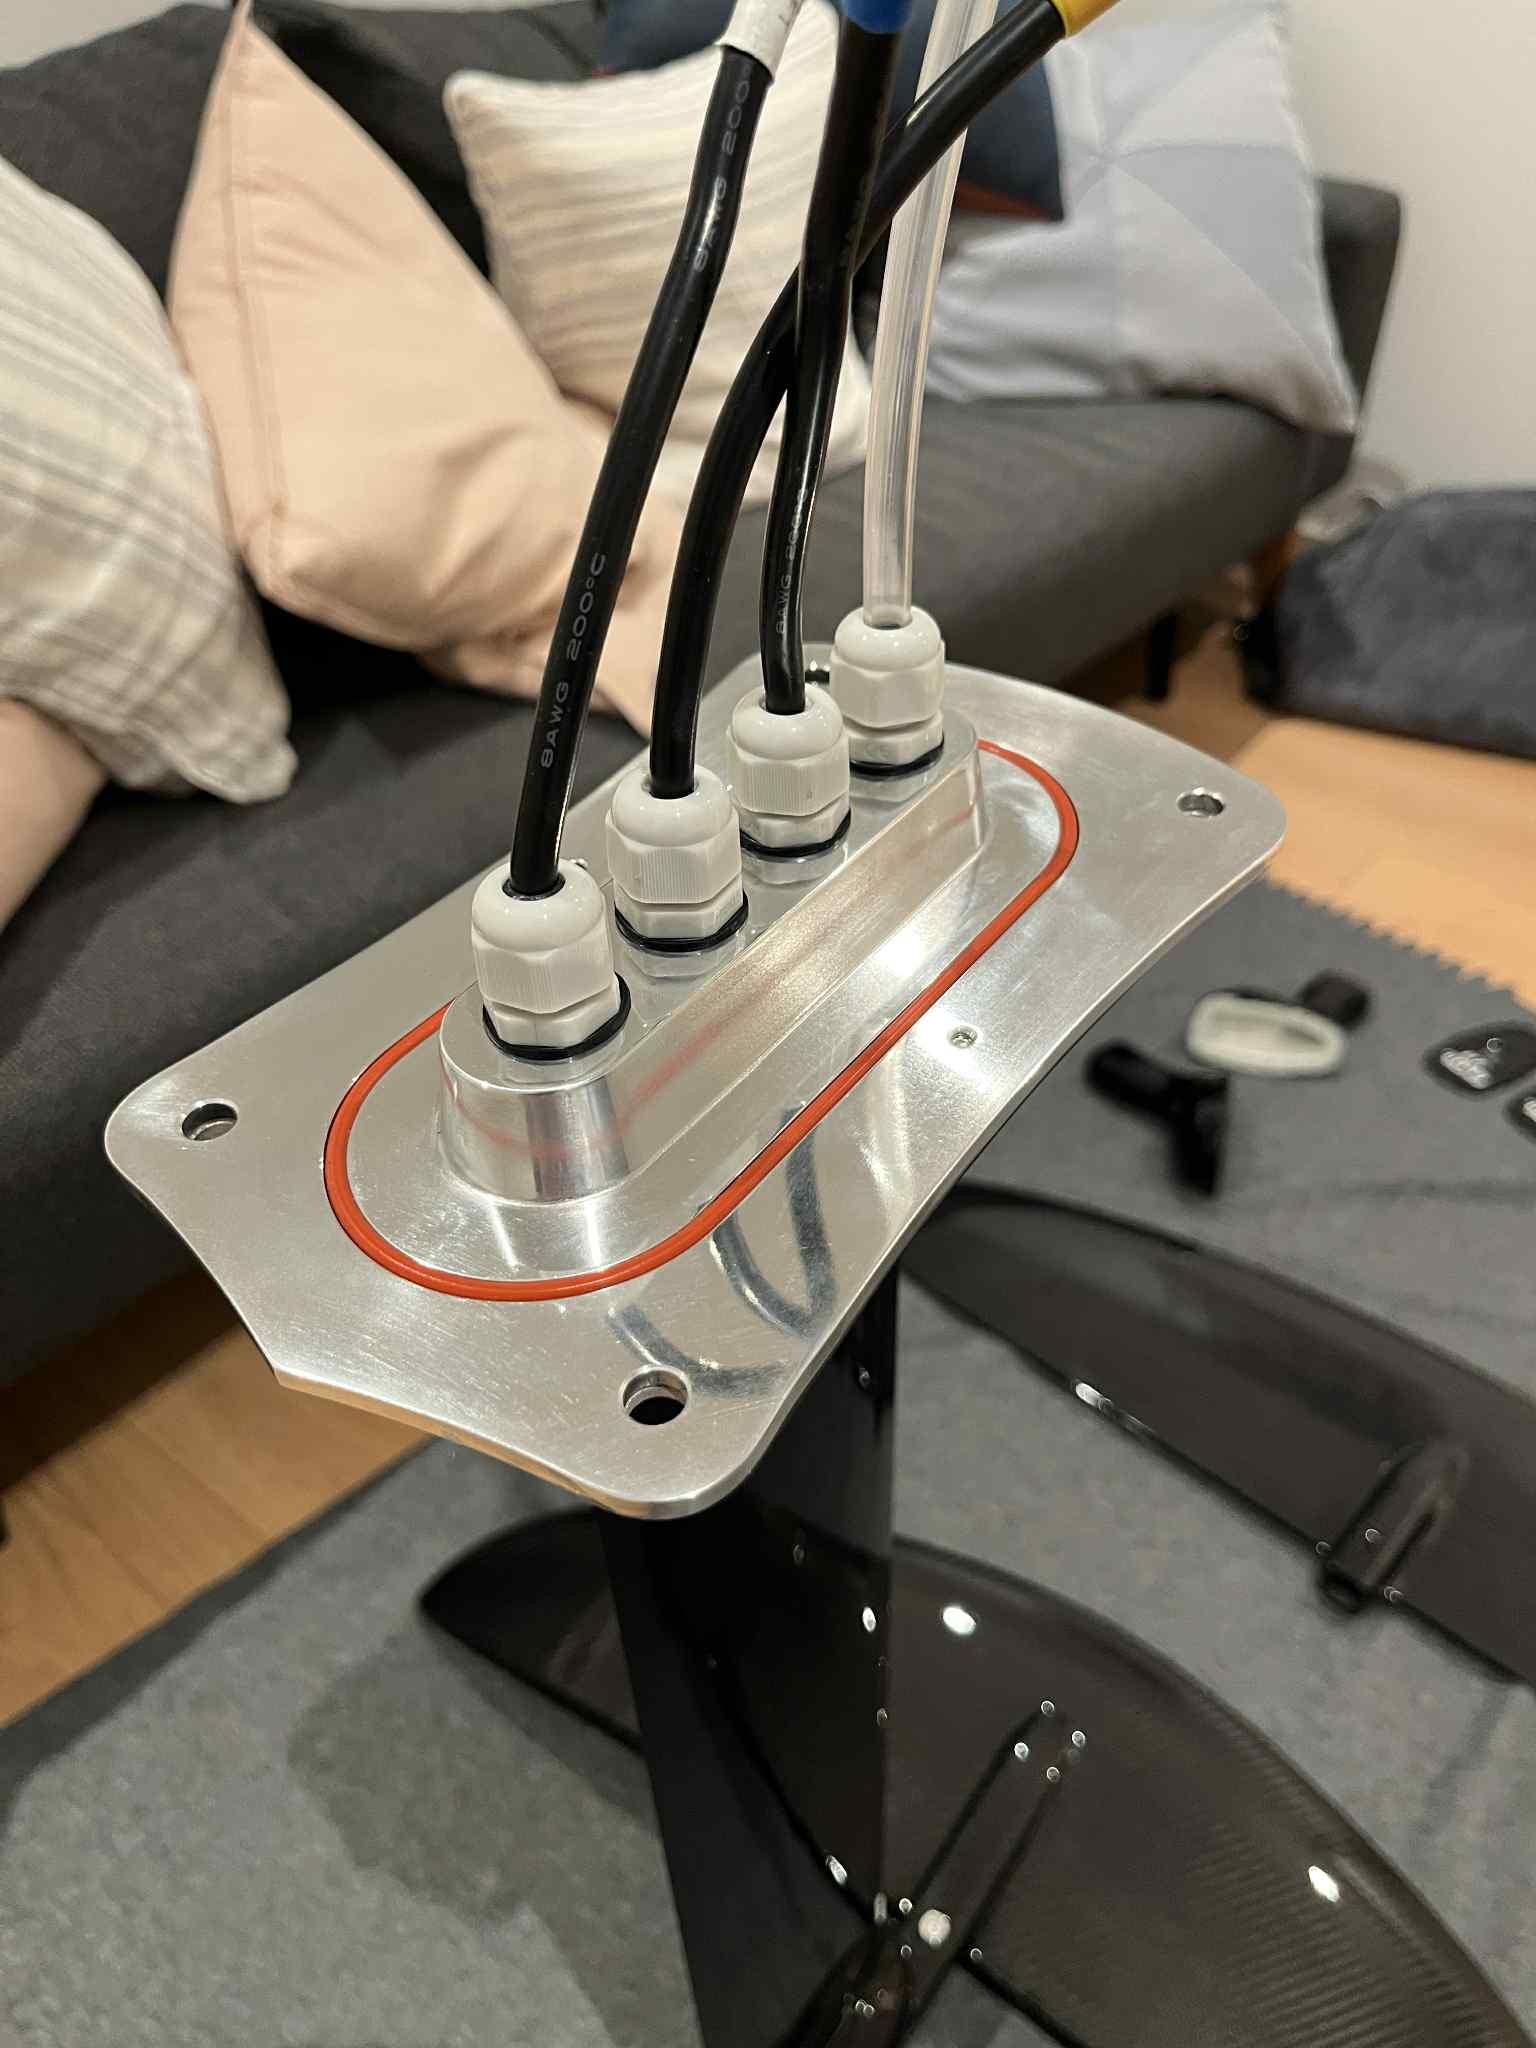
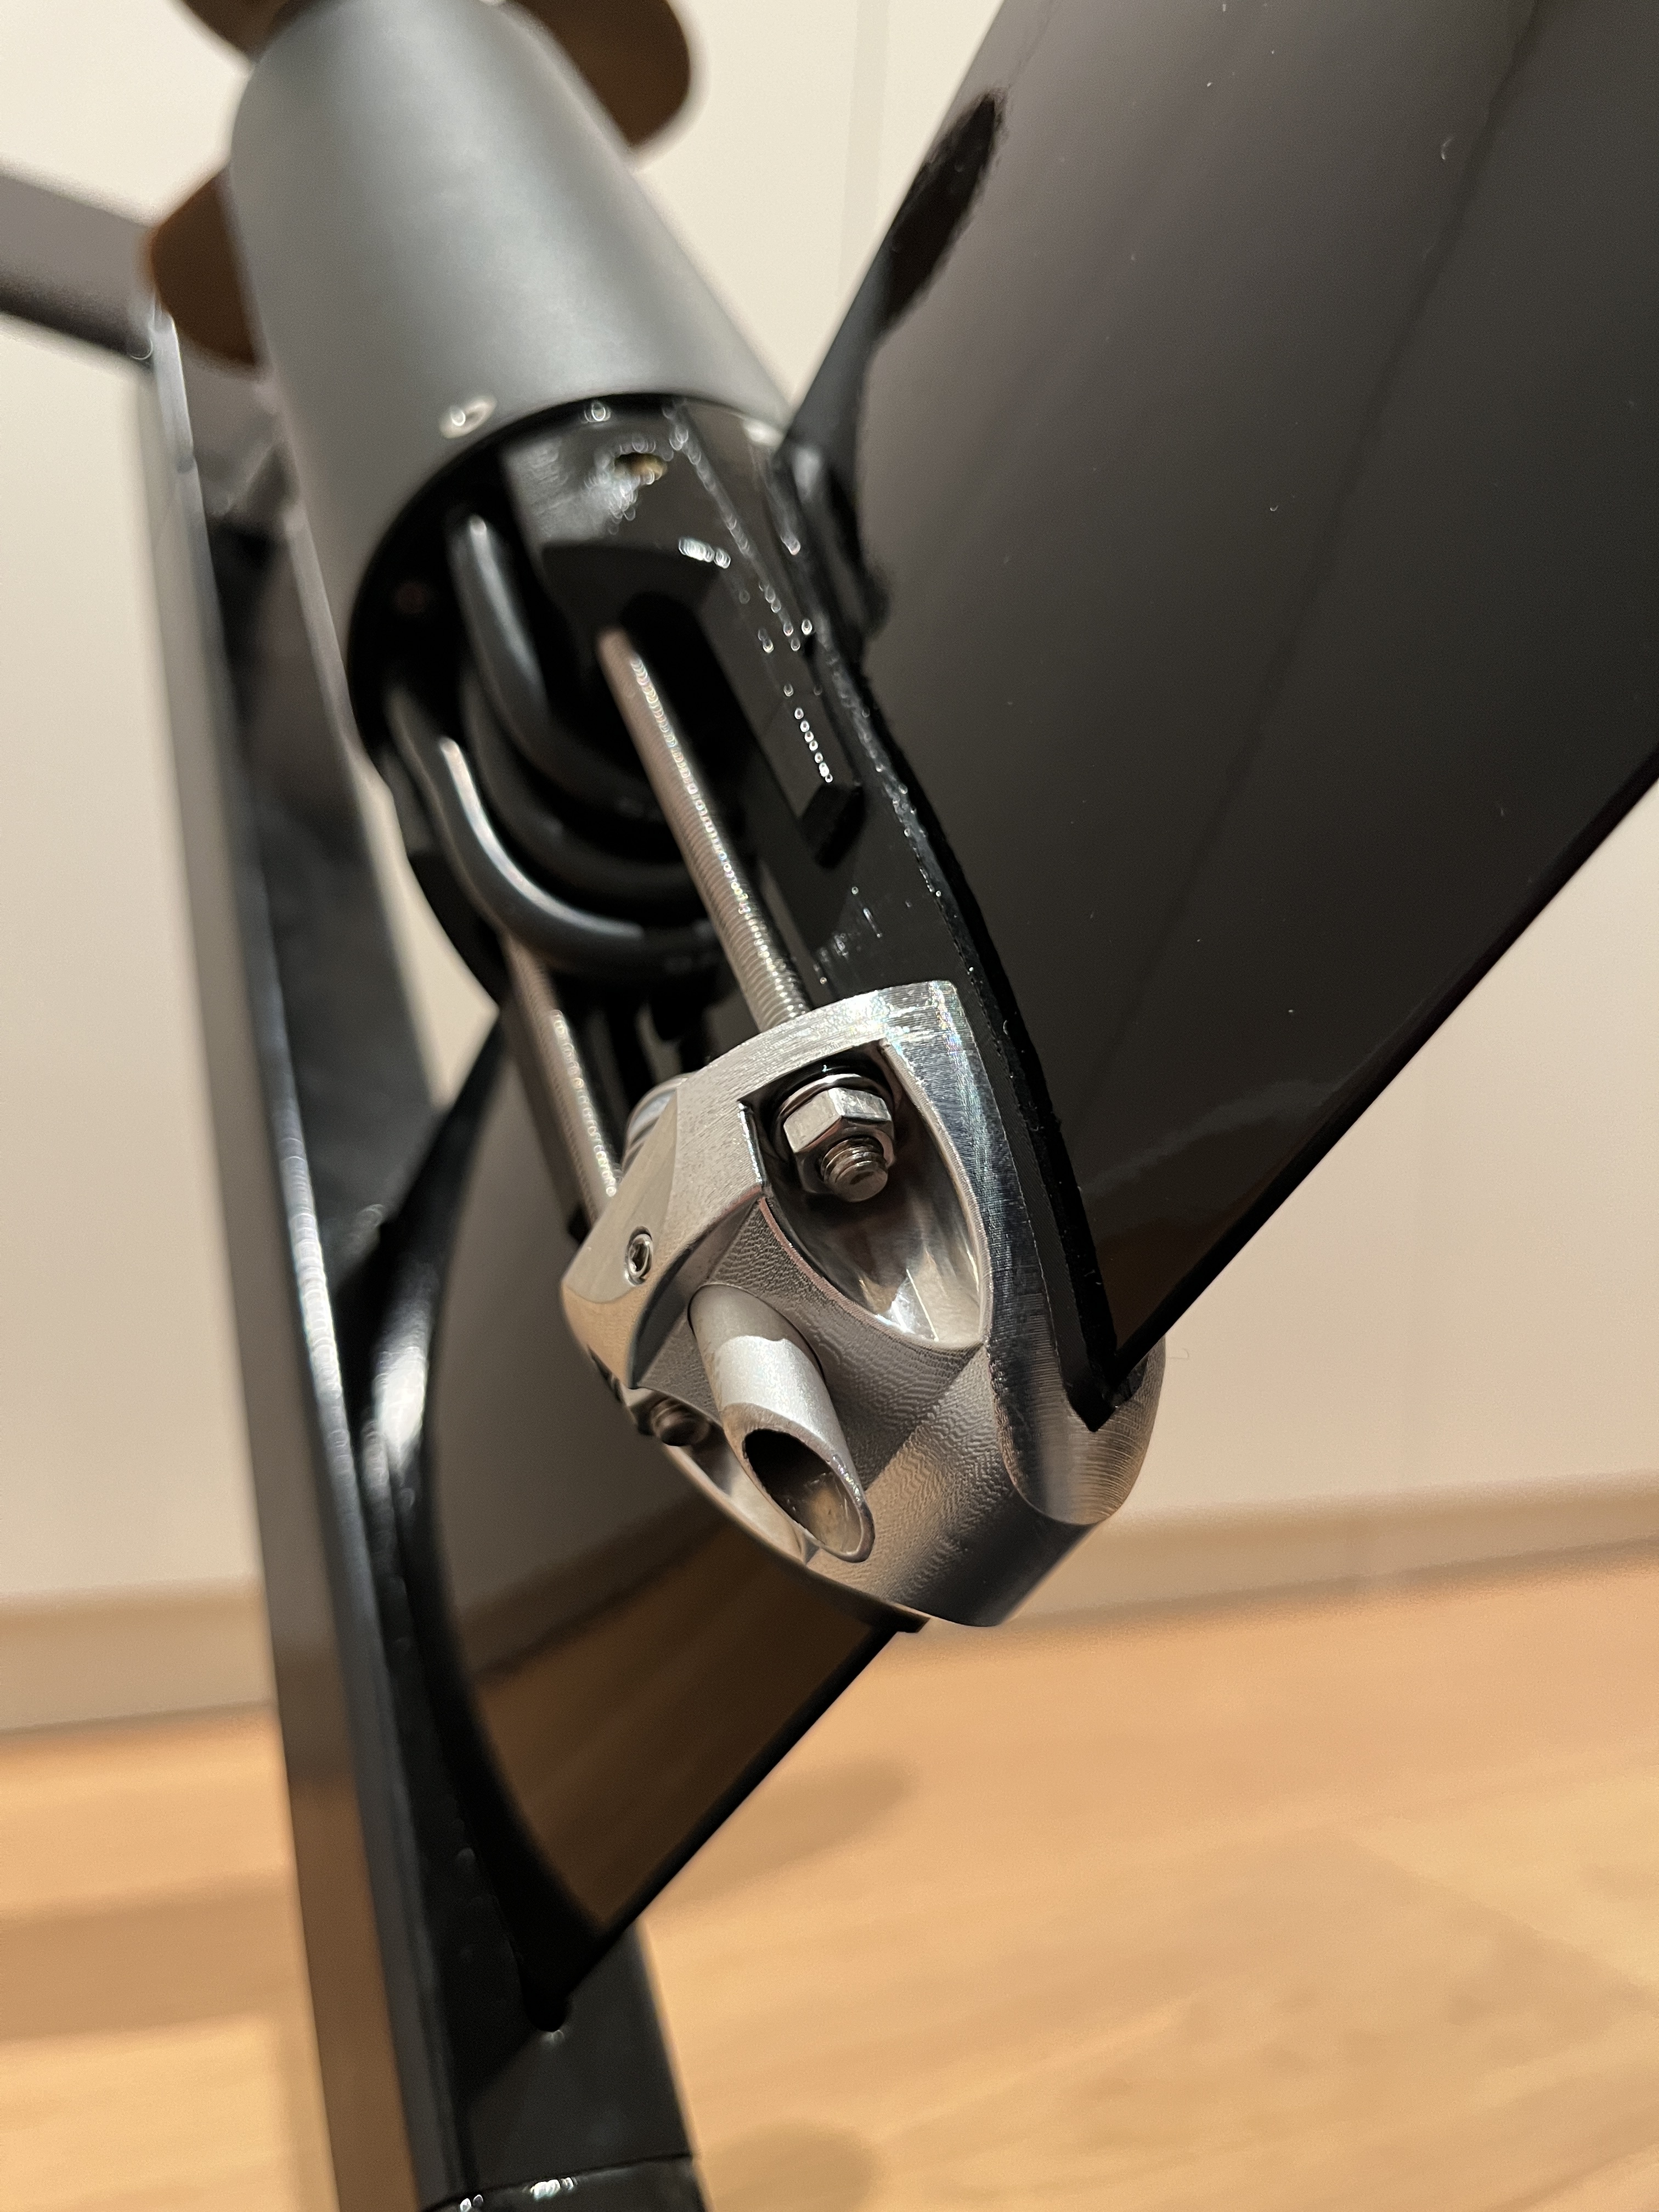
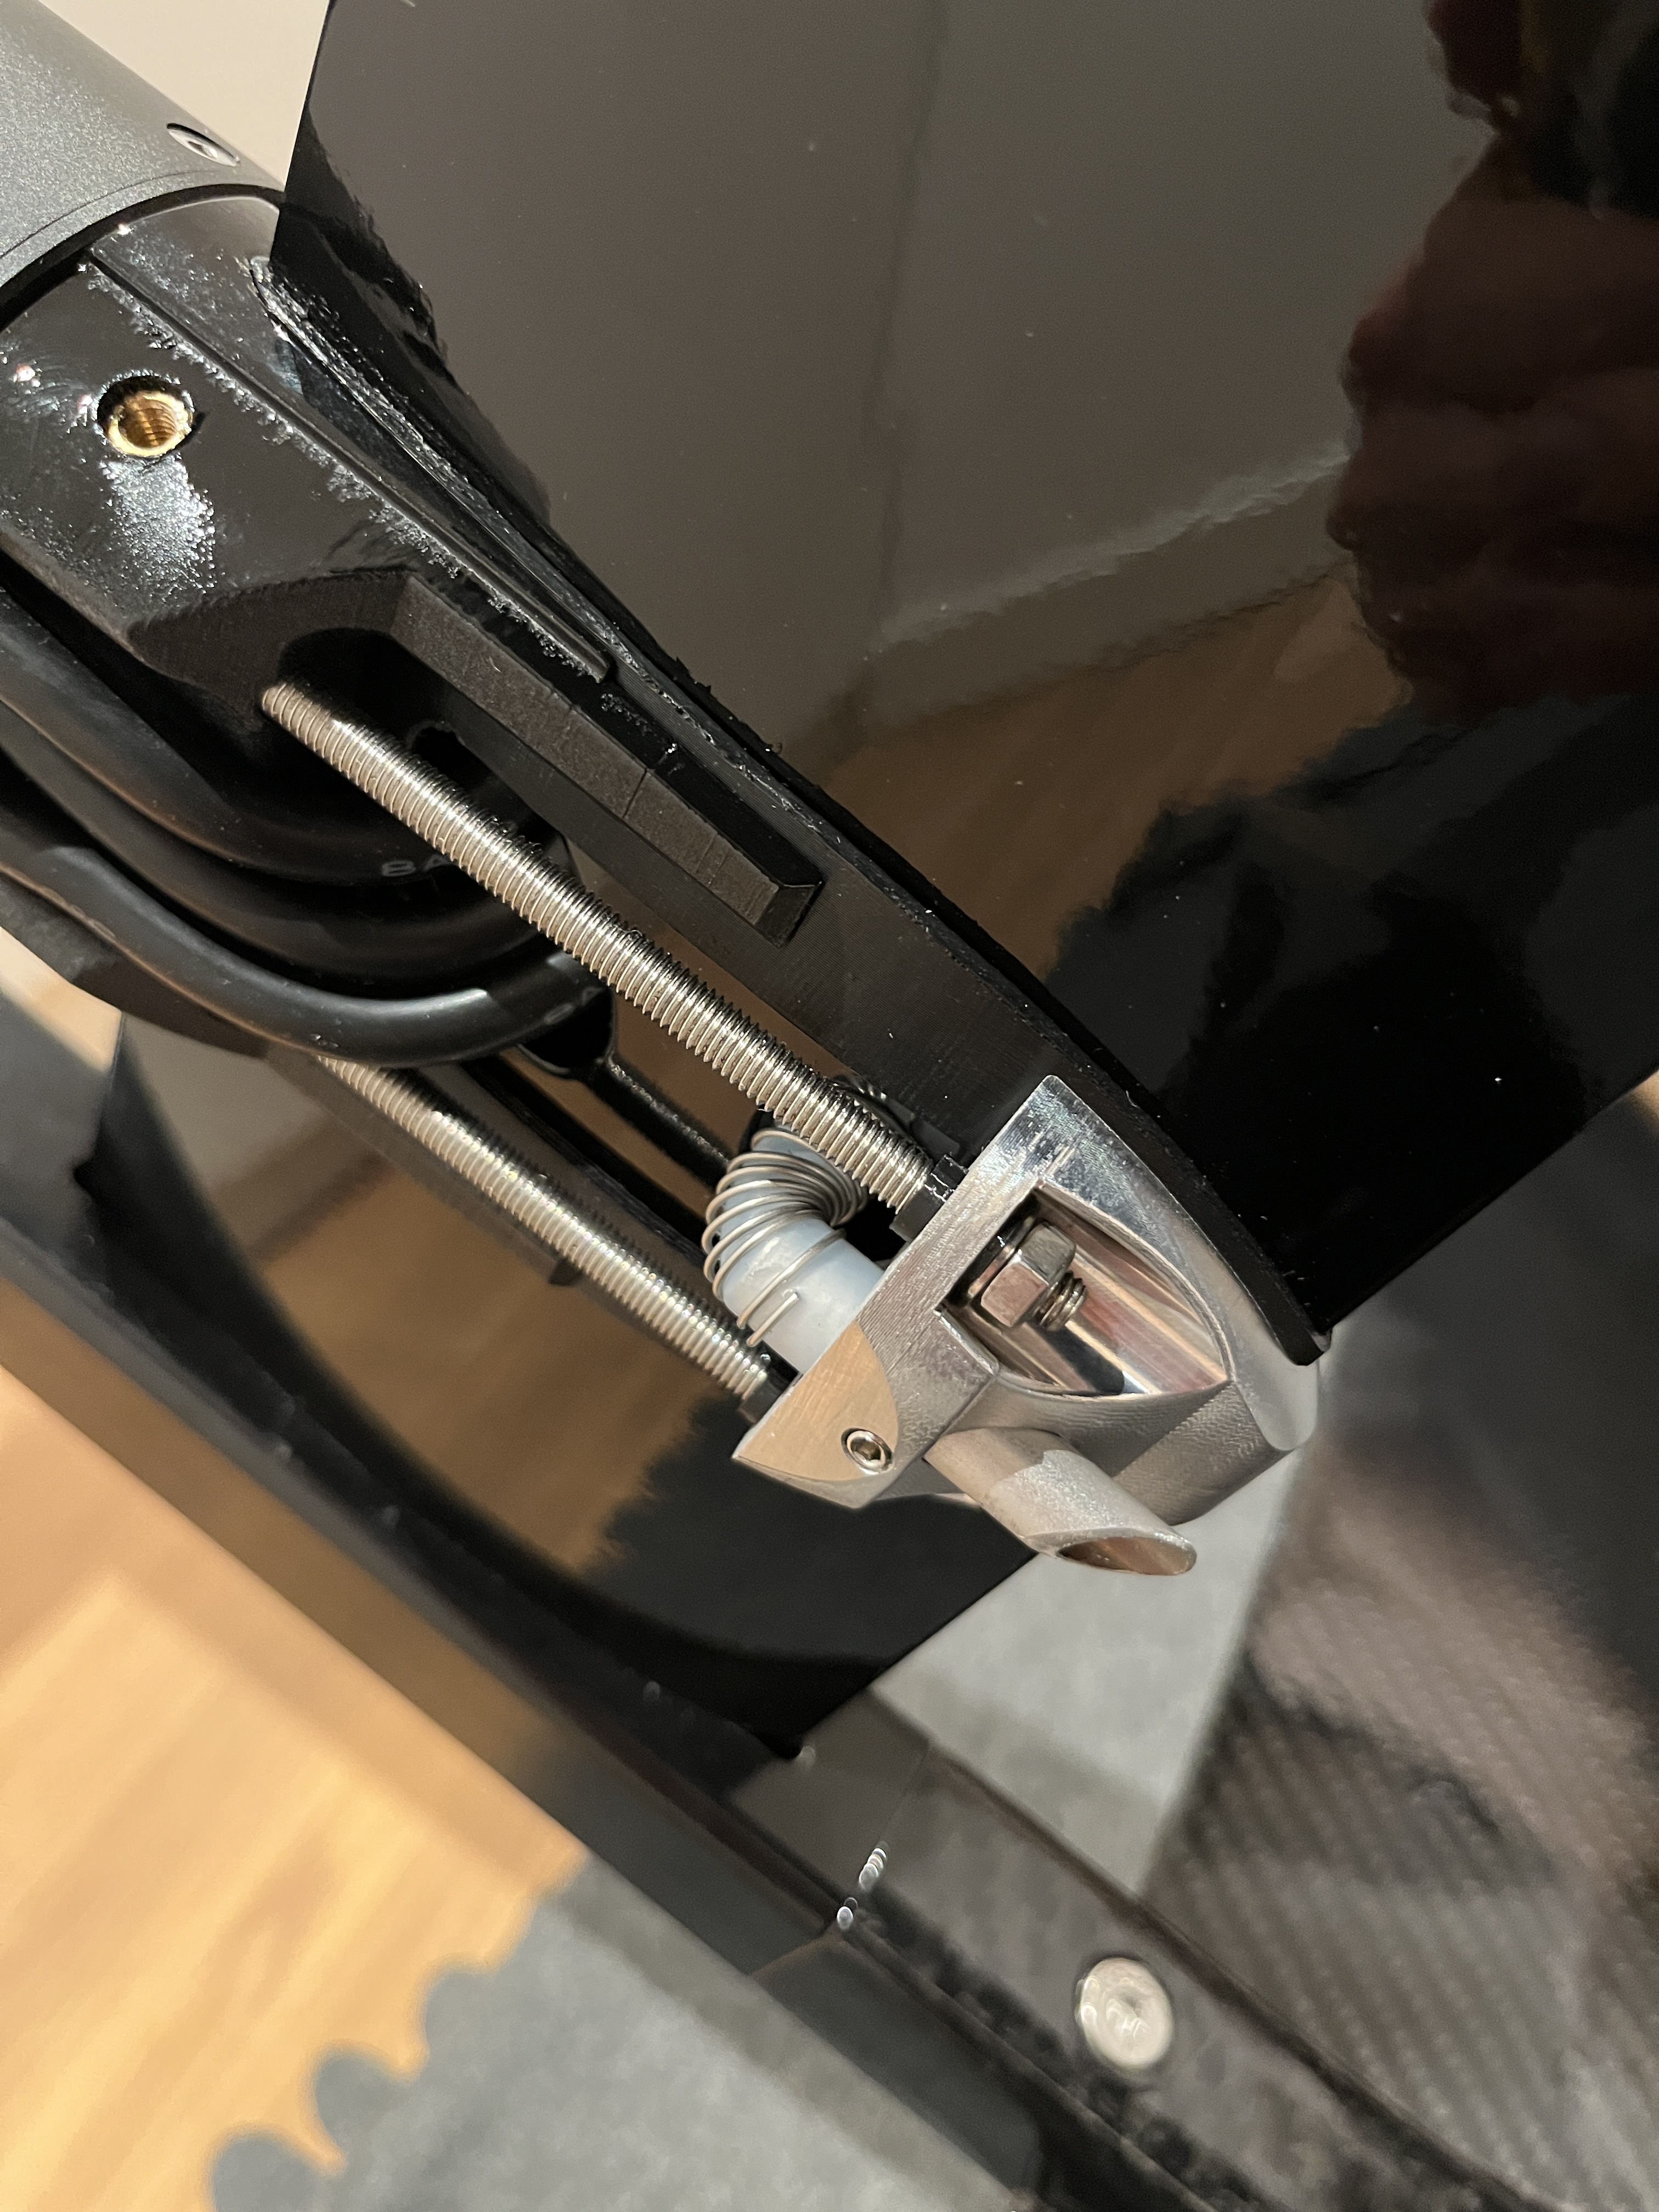
I use a 700mm GONG V1 mast with V1 fuselage and a V1 1350cm2 front wing and 400cm2 rear stabilizer. These were sanded and painted with an automotive 2-part clearcoat or glossy powder coat. The motor is mounted to the mast with a 3d printed motor plate, and a CNC milled aluminum front mount. These are clamped around the mast with a TPU 3D printed shim. The interface plate between the mast plate and the board is also CNC milled aluminum with a silicone O-ring and cable glands. Both were made by JLCCNC.
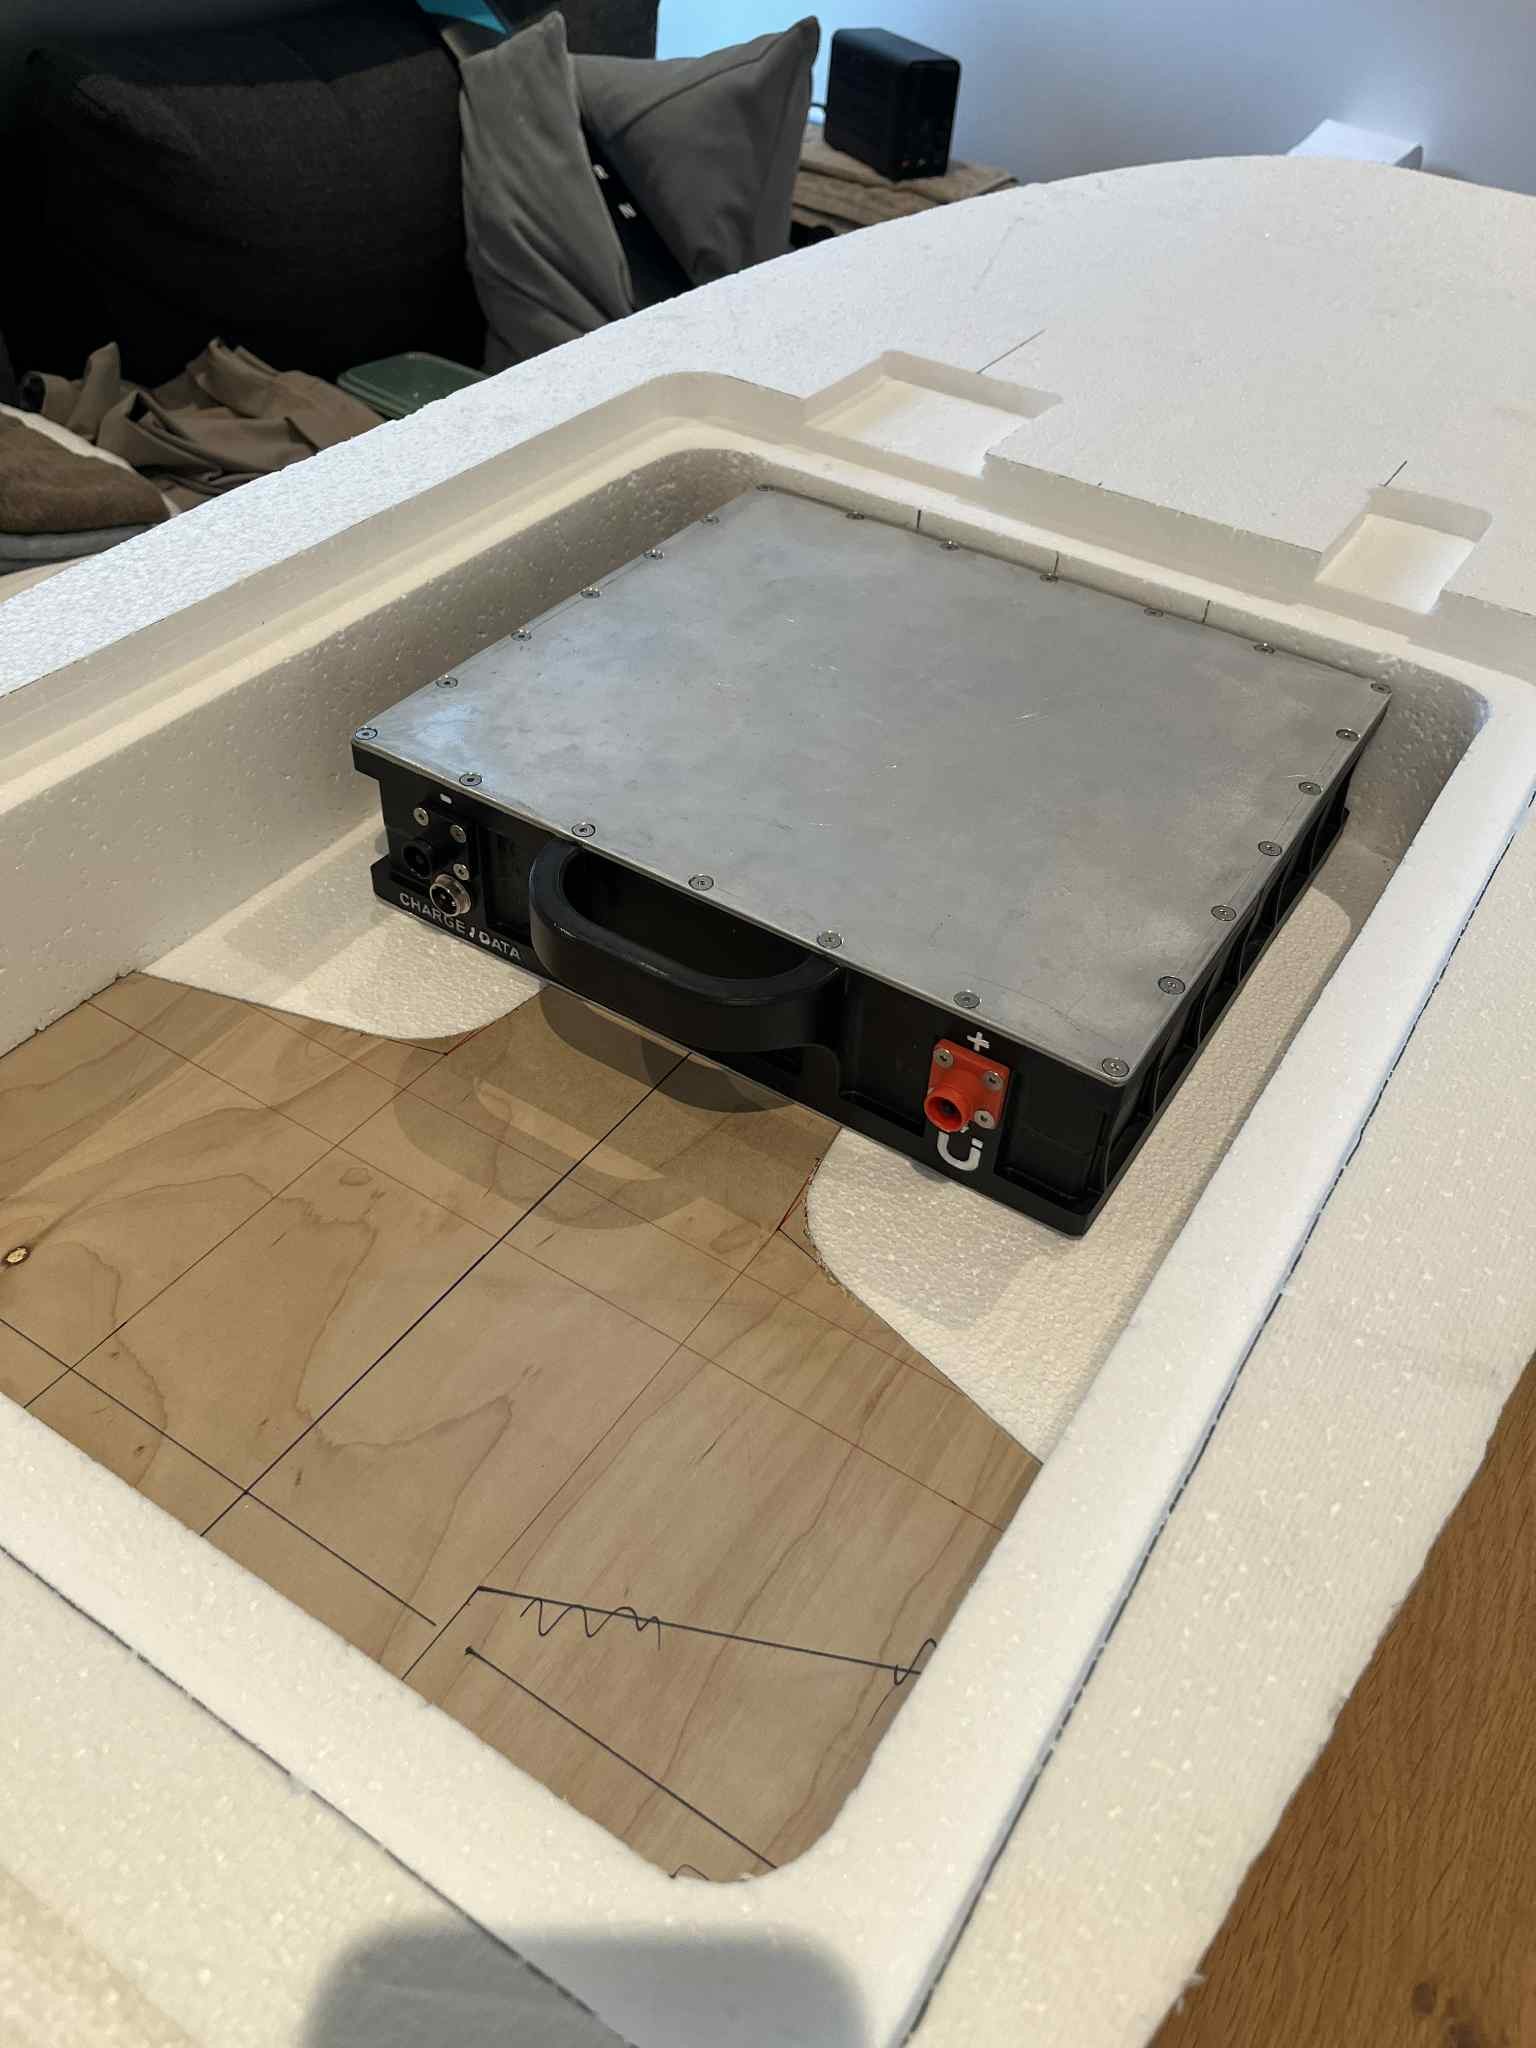
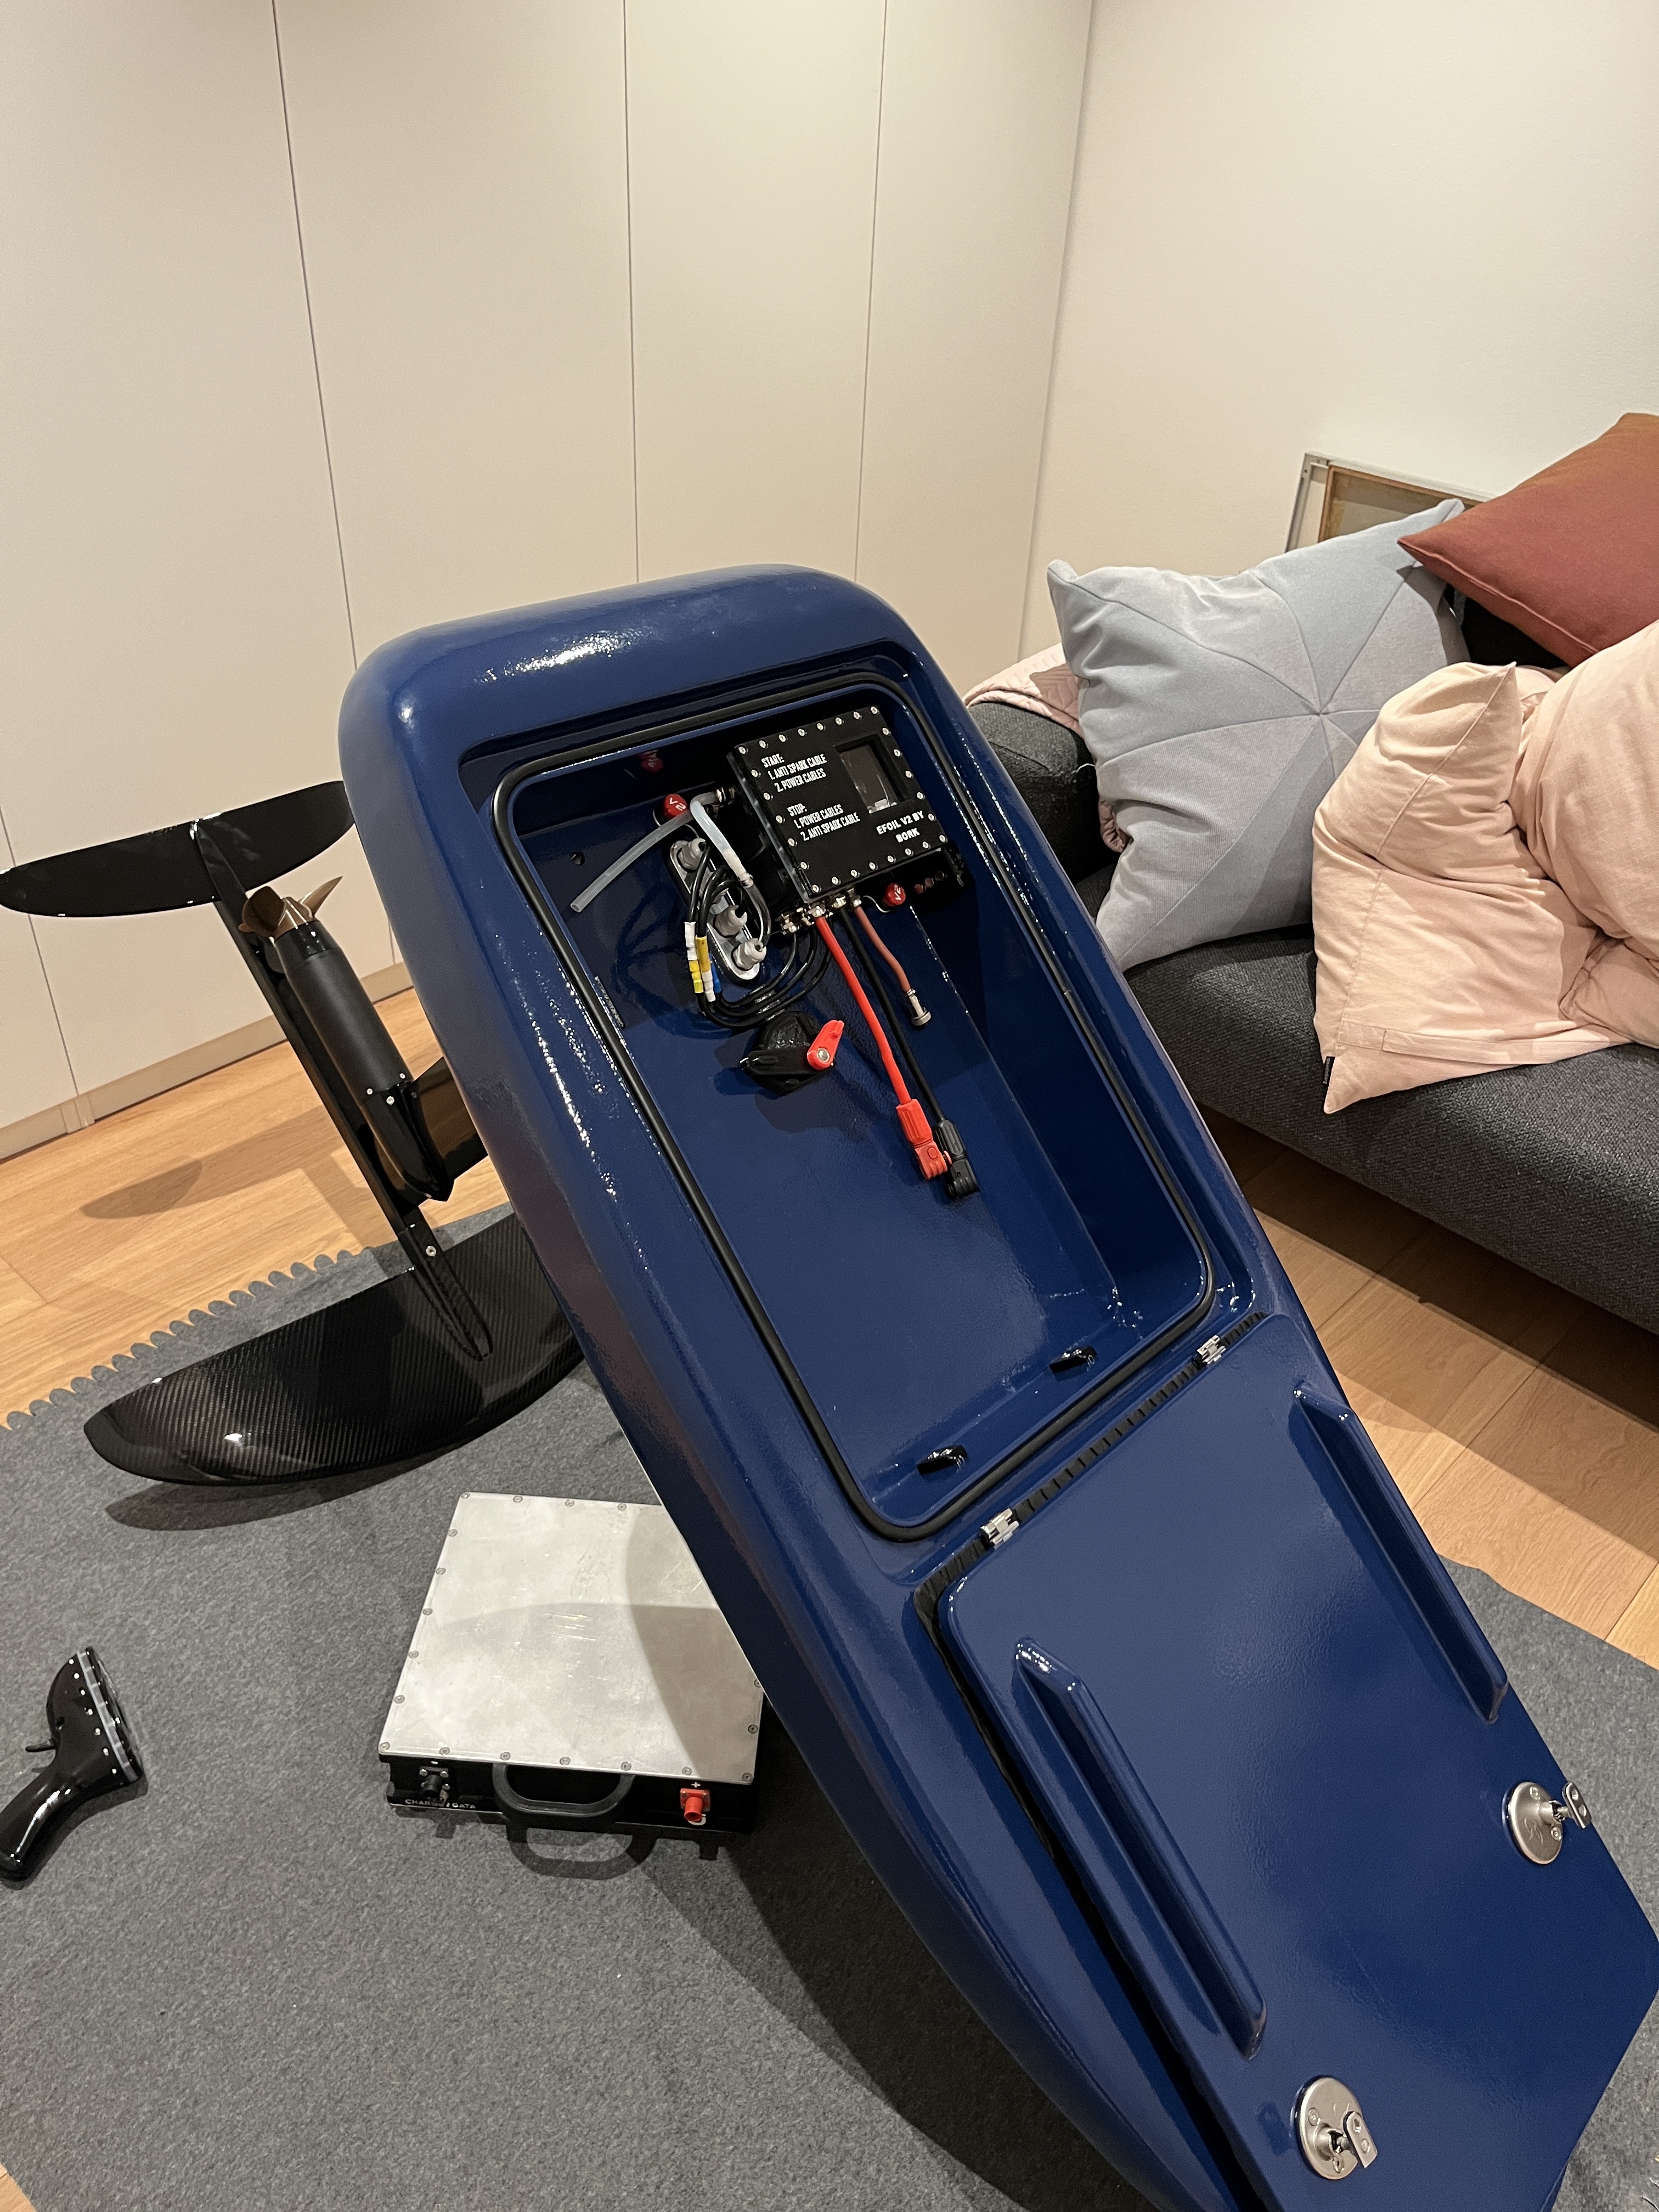
Battery:

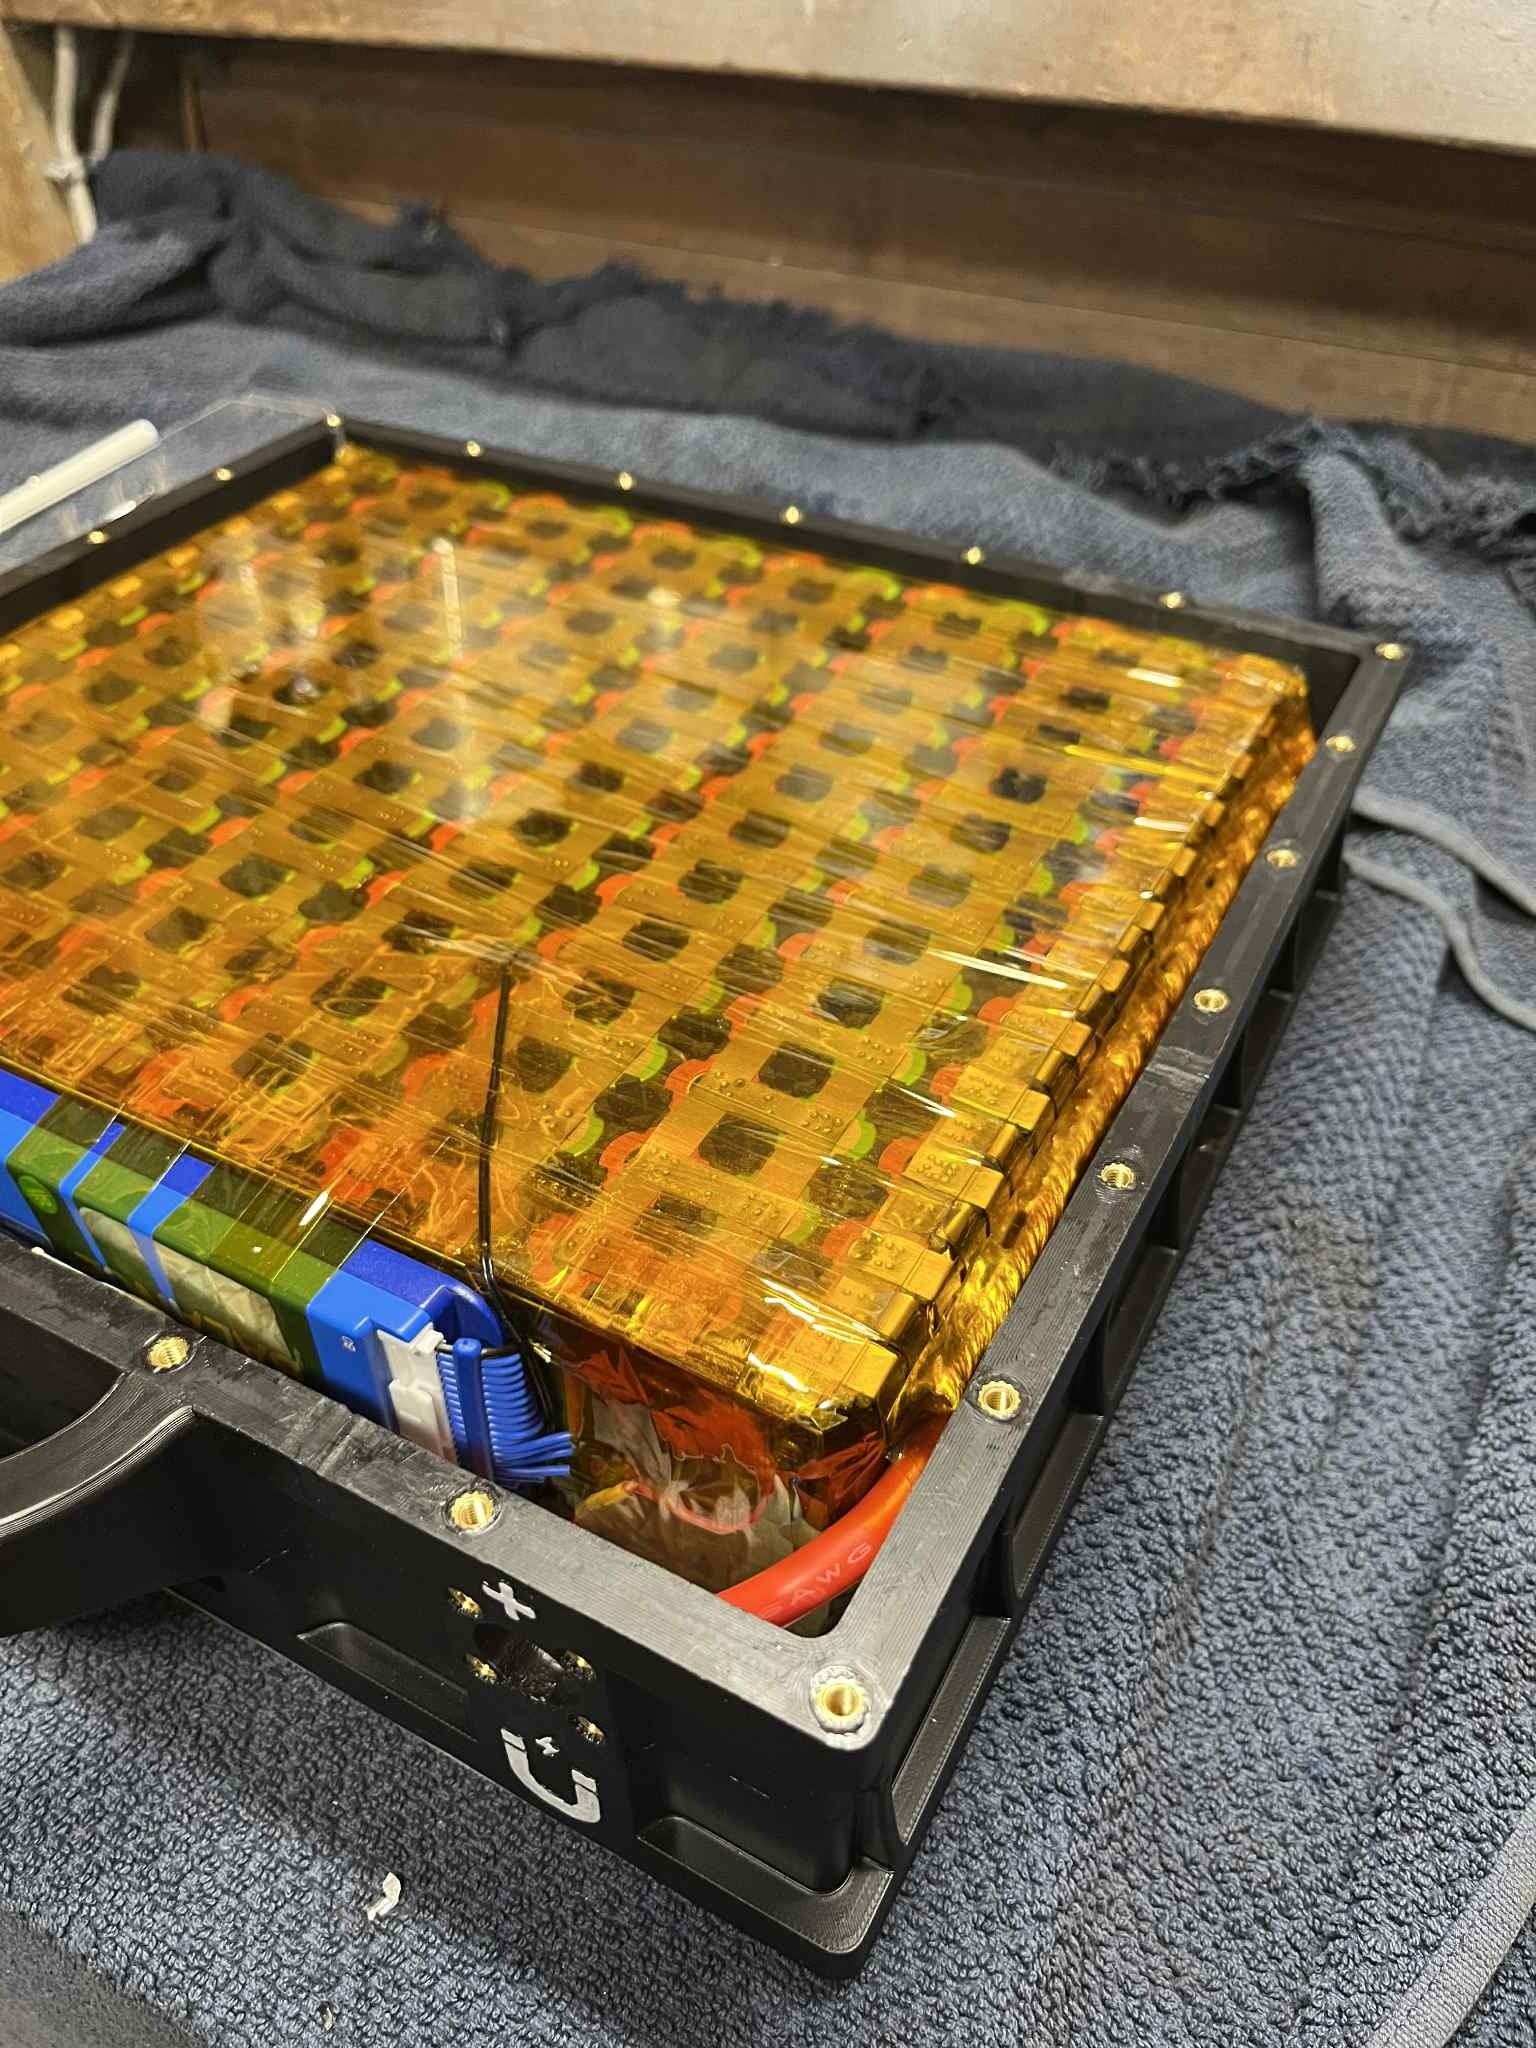
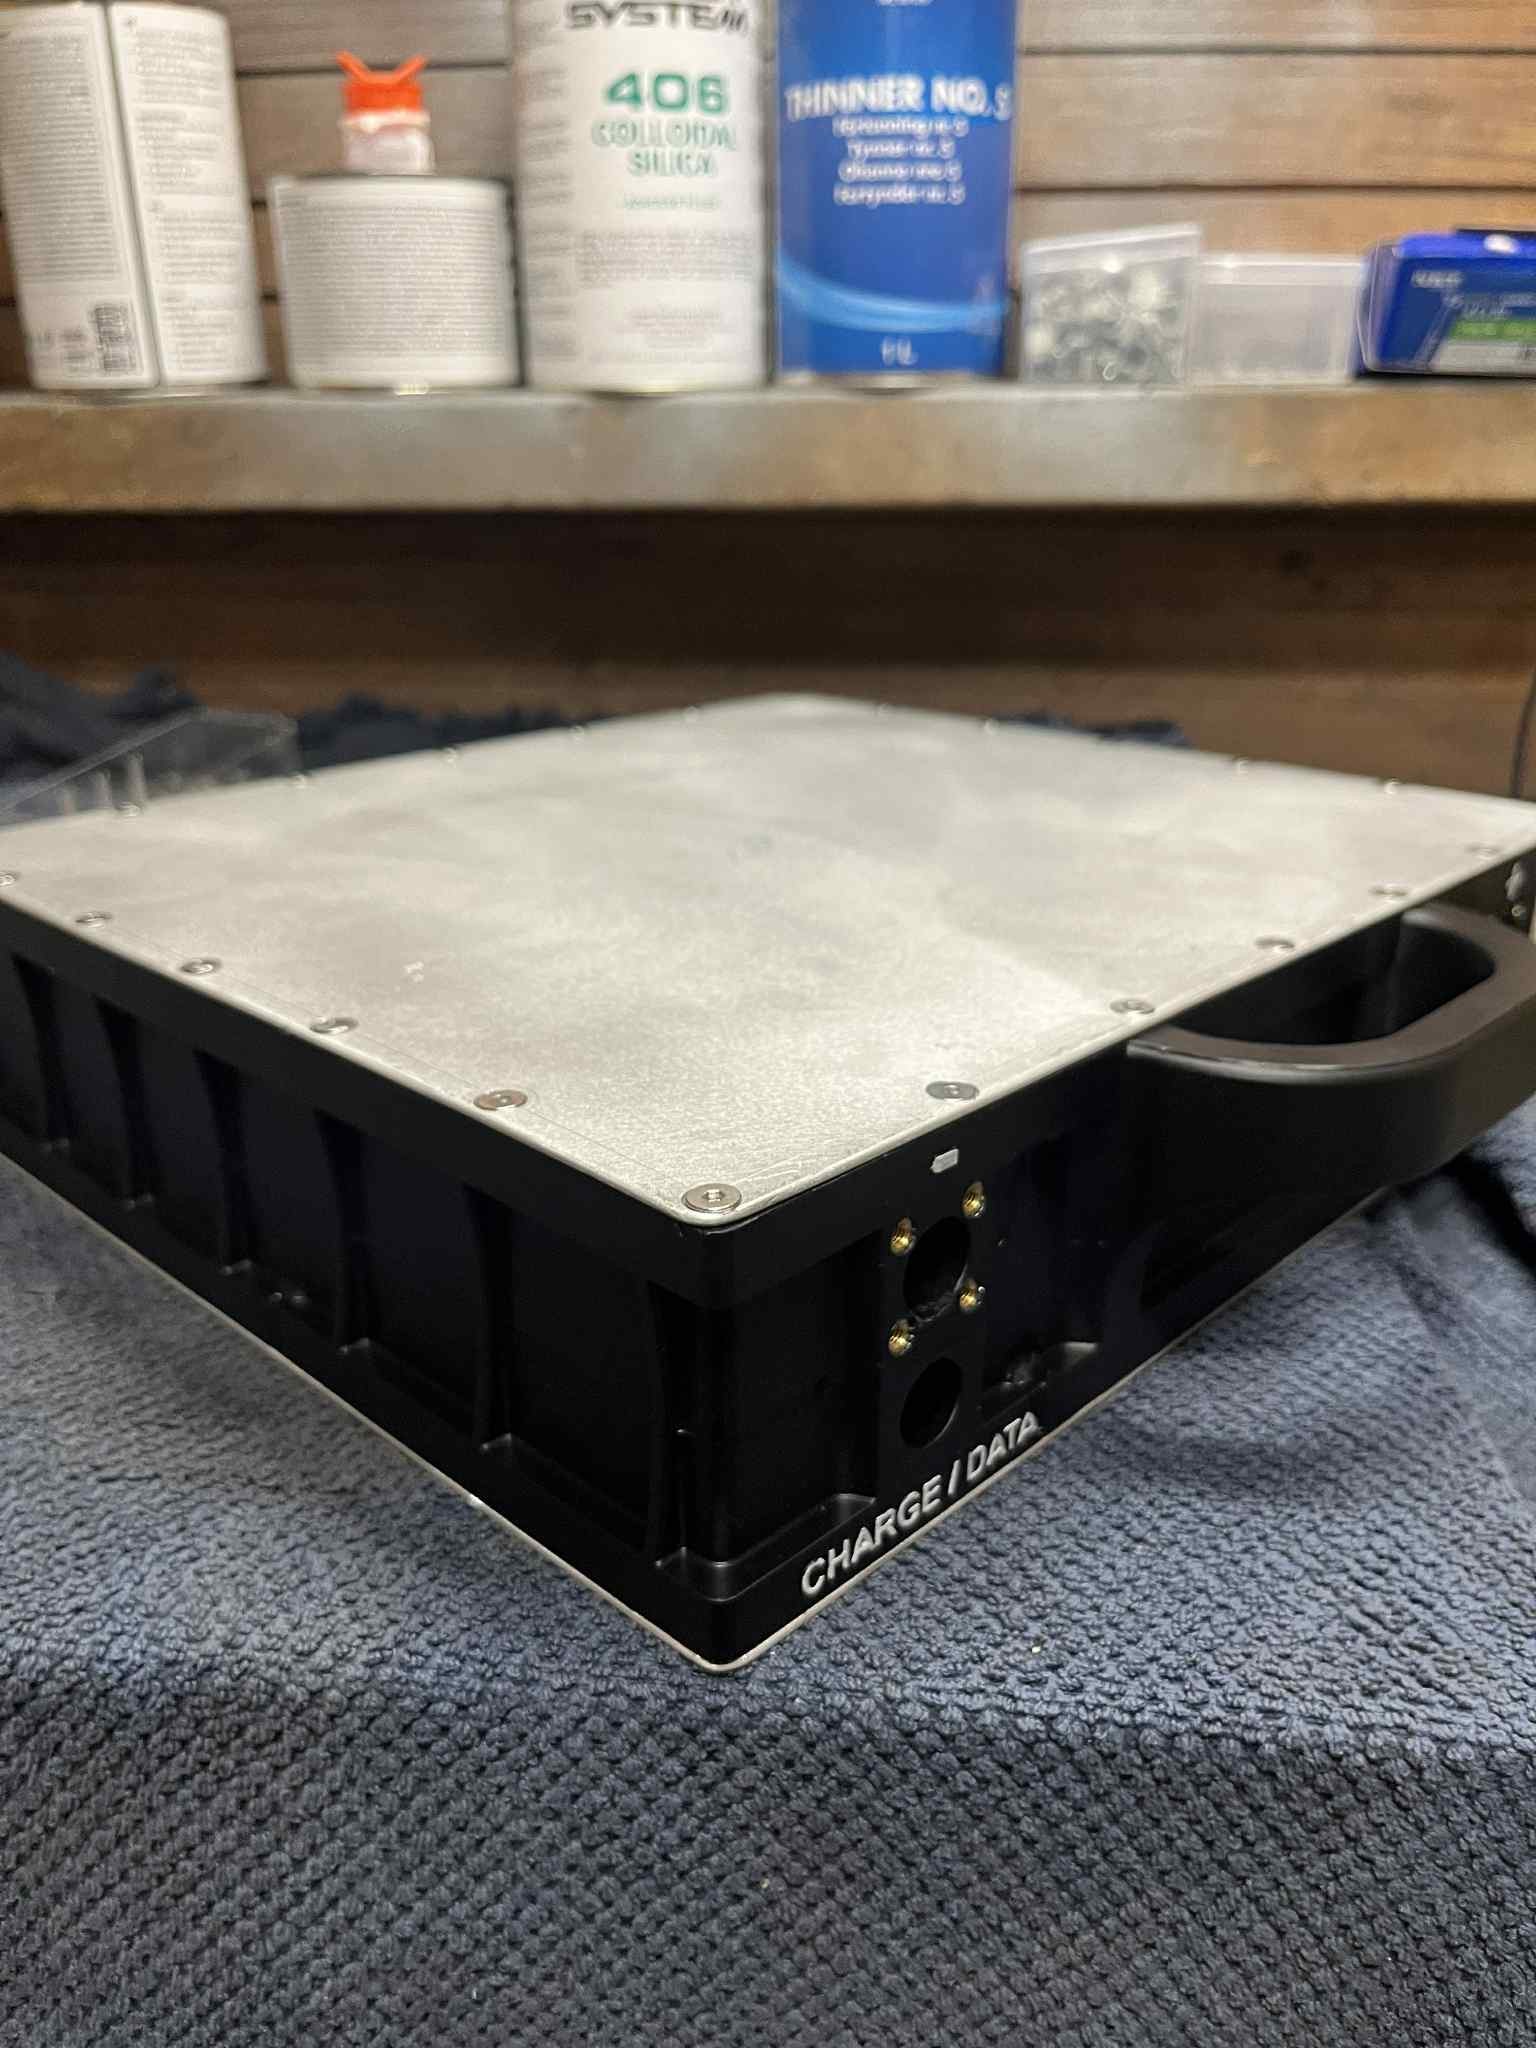
The battery is made from 168 lithium-ion batteries. This gives a 14s battery with 12 in parallel, giving a 1,5kWh capacity at 50,4 V nominal and 58,8 V maximum. It was spotwelded with pure nickel strips. It is important to add a fuse as close to the battery as possible. I mounted the fuse inside the battery, although I guess it would be alright outside too. I used a BMS for charging and bypassed when discharging. Although some prefer to discharge through the BMS, it then requires a bigger and more expensive BMS. I have not had a single problem, and all cells are always ± 0,005V to each other. The case is 3D printed in PETG, with M4 threaded inserts to screw the 2mm aluminum plate to each side. The inside is coated with thickened epoxy and sealed with silicone between the plastic and aluminum.
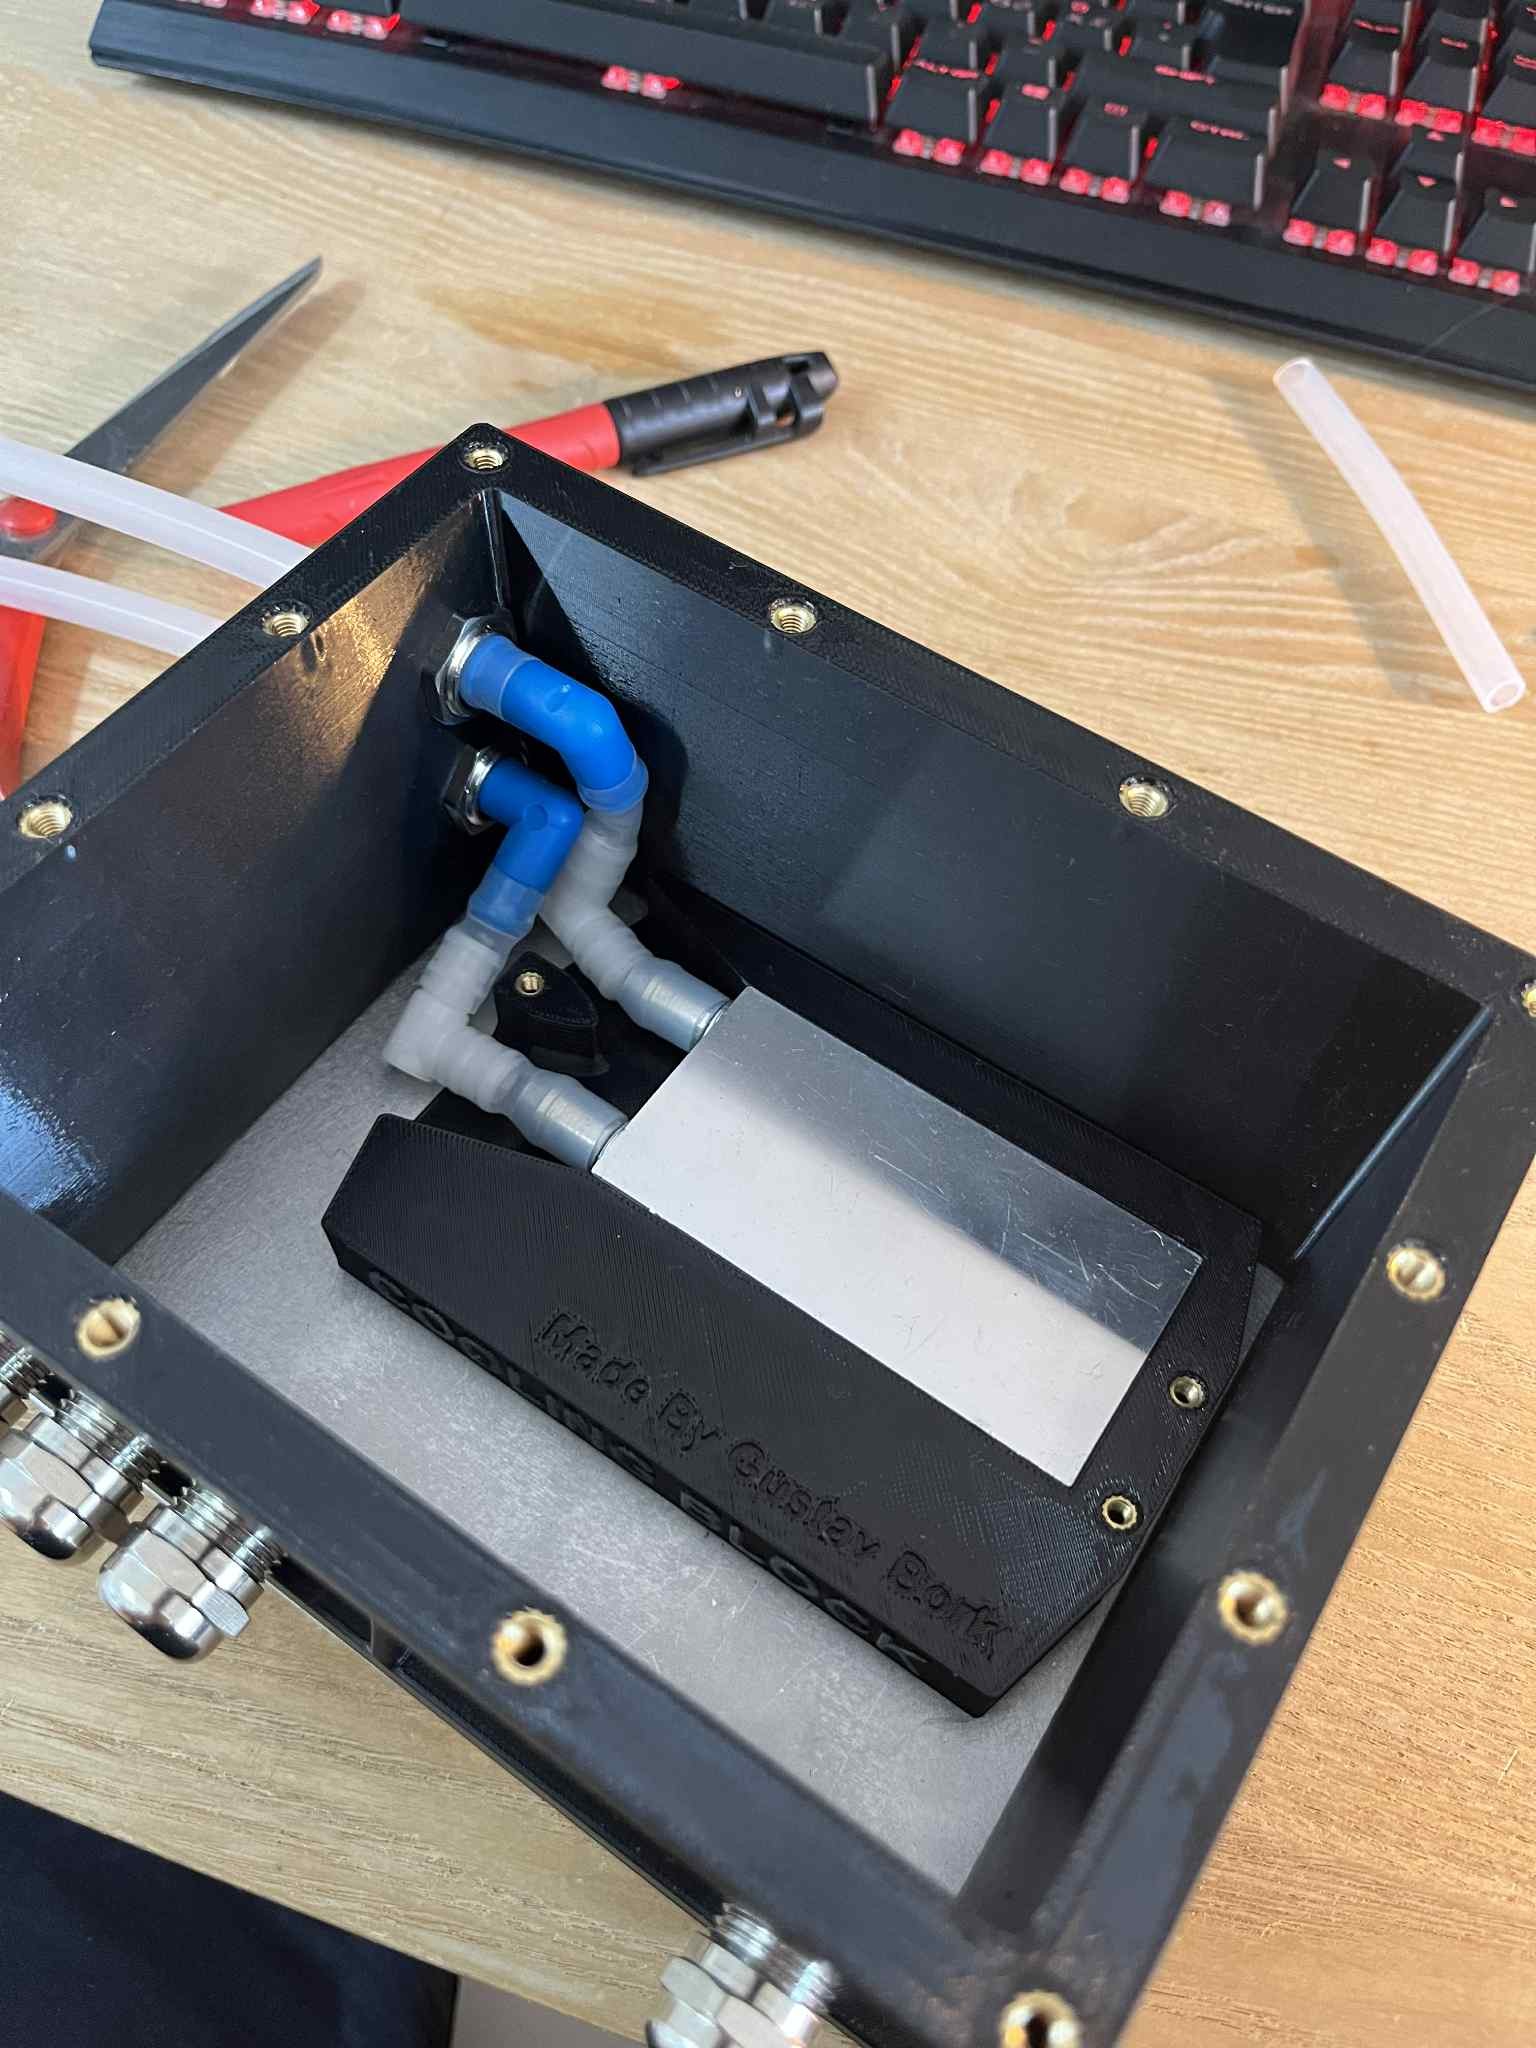
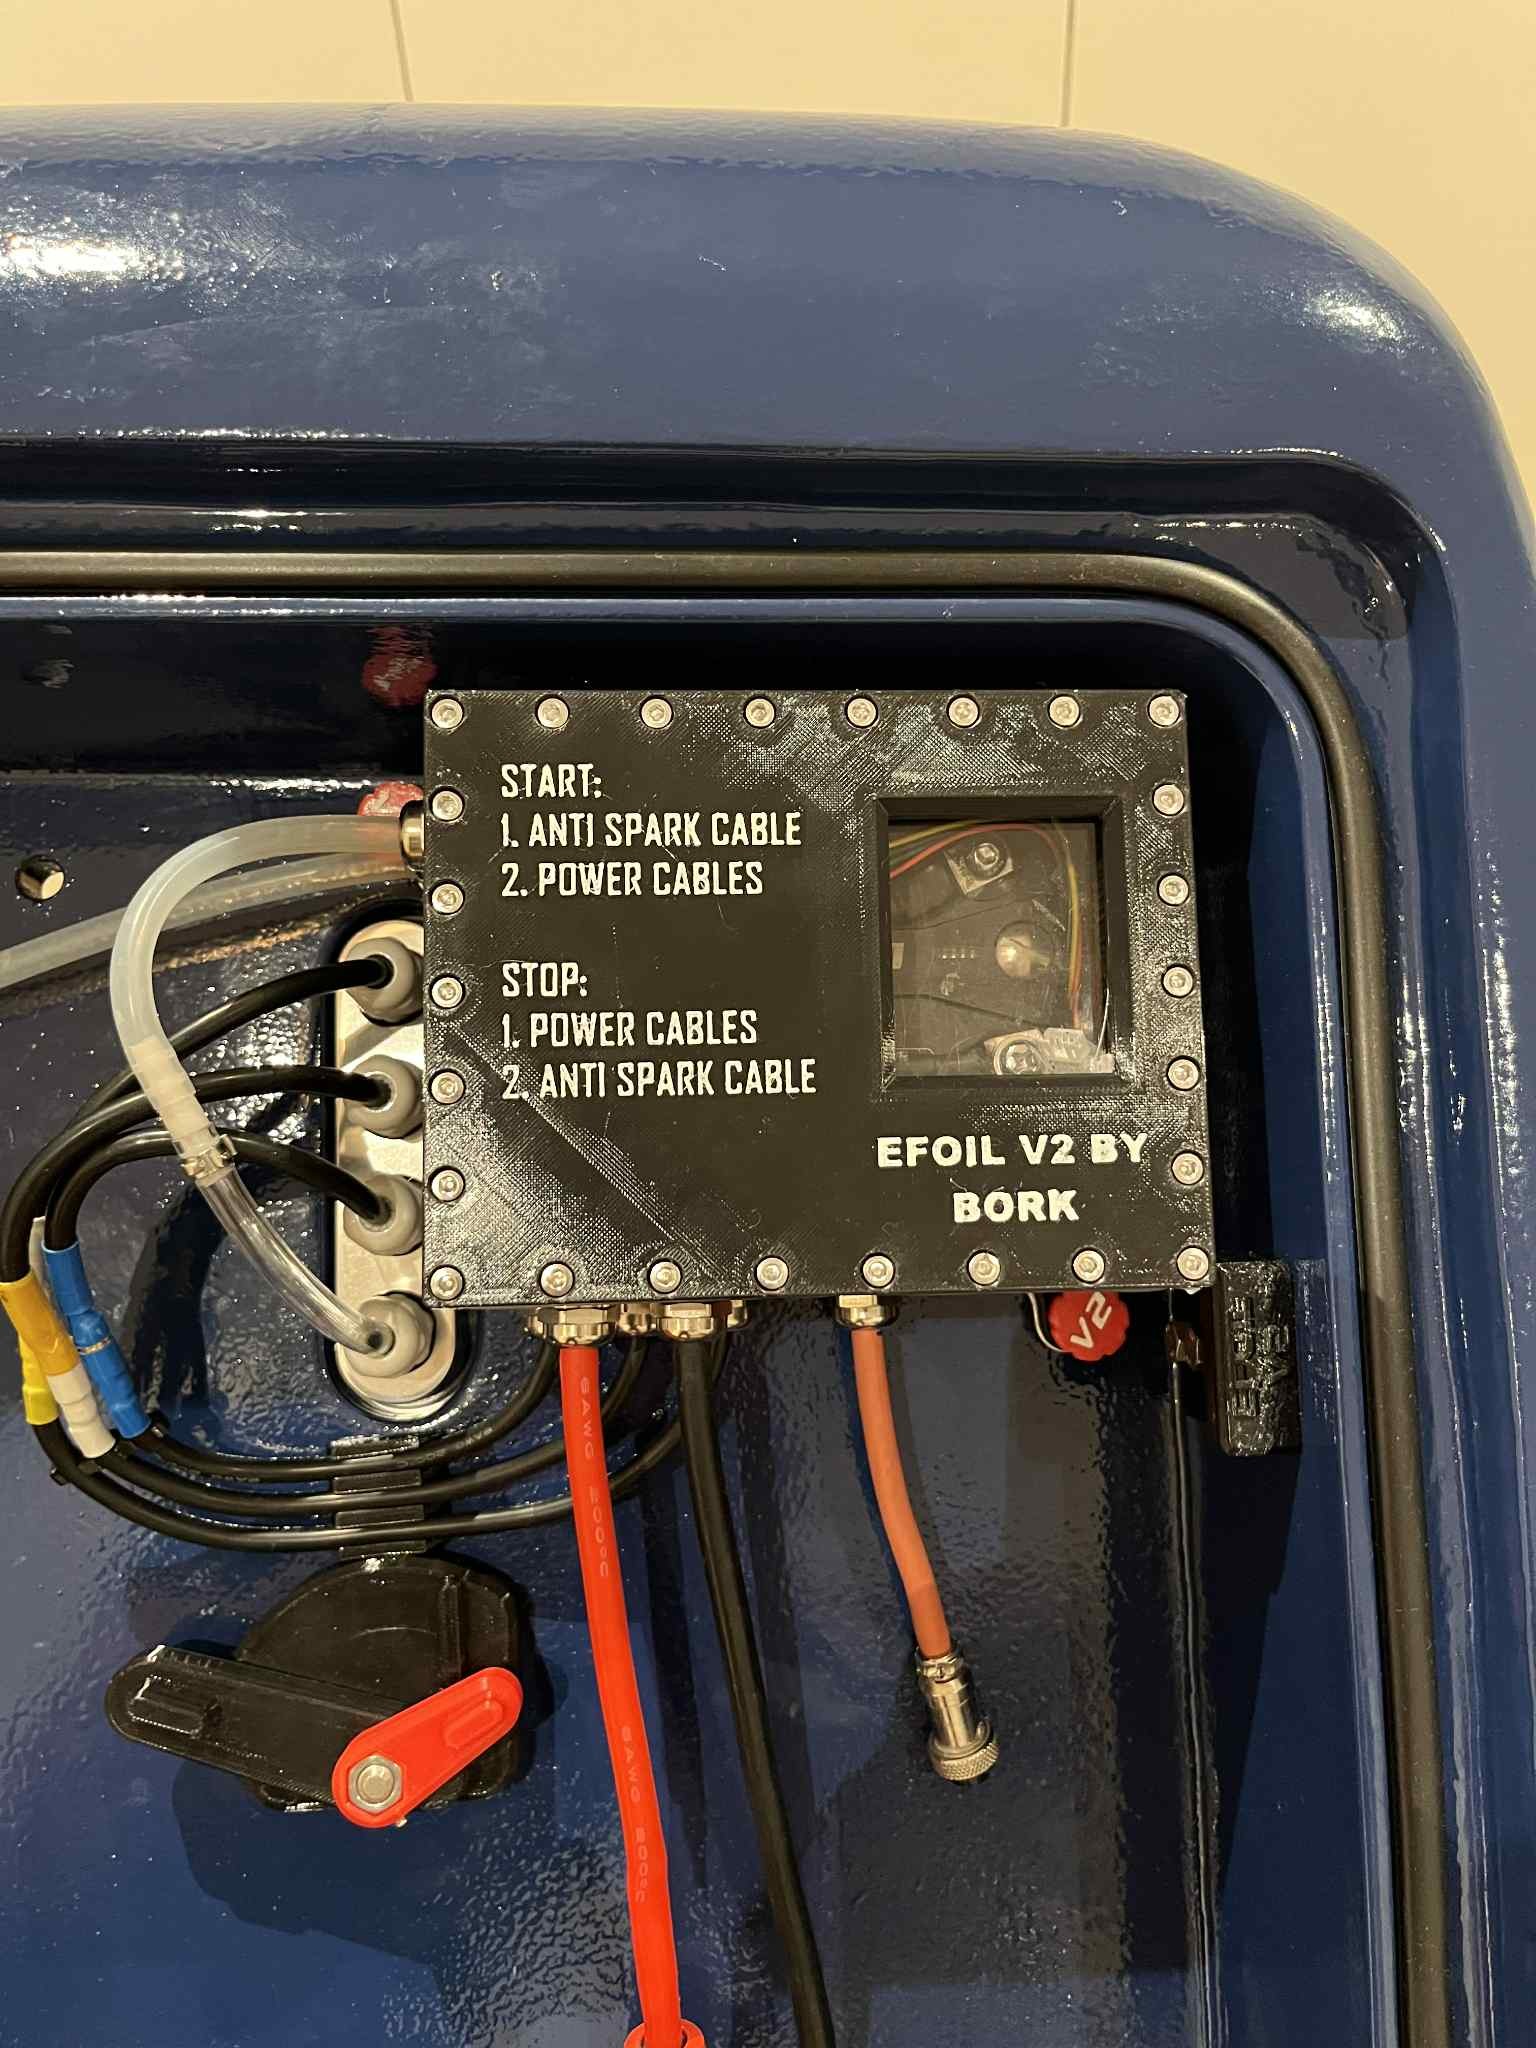
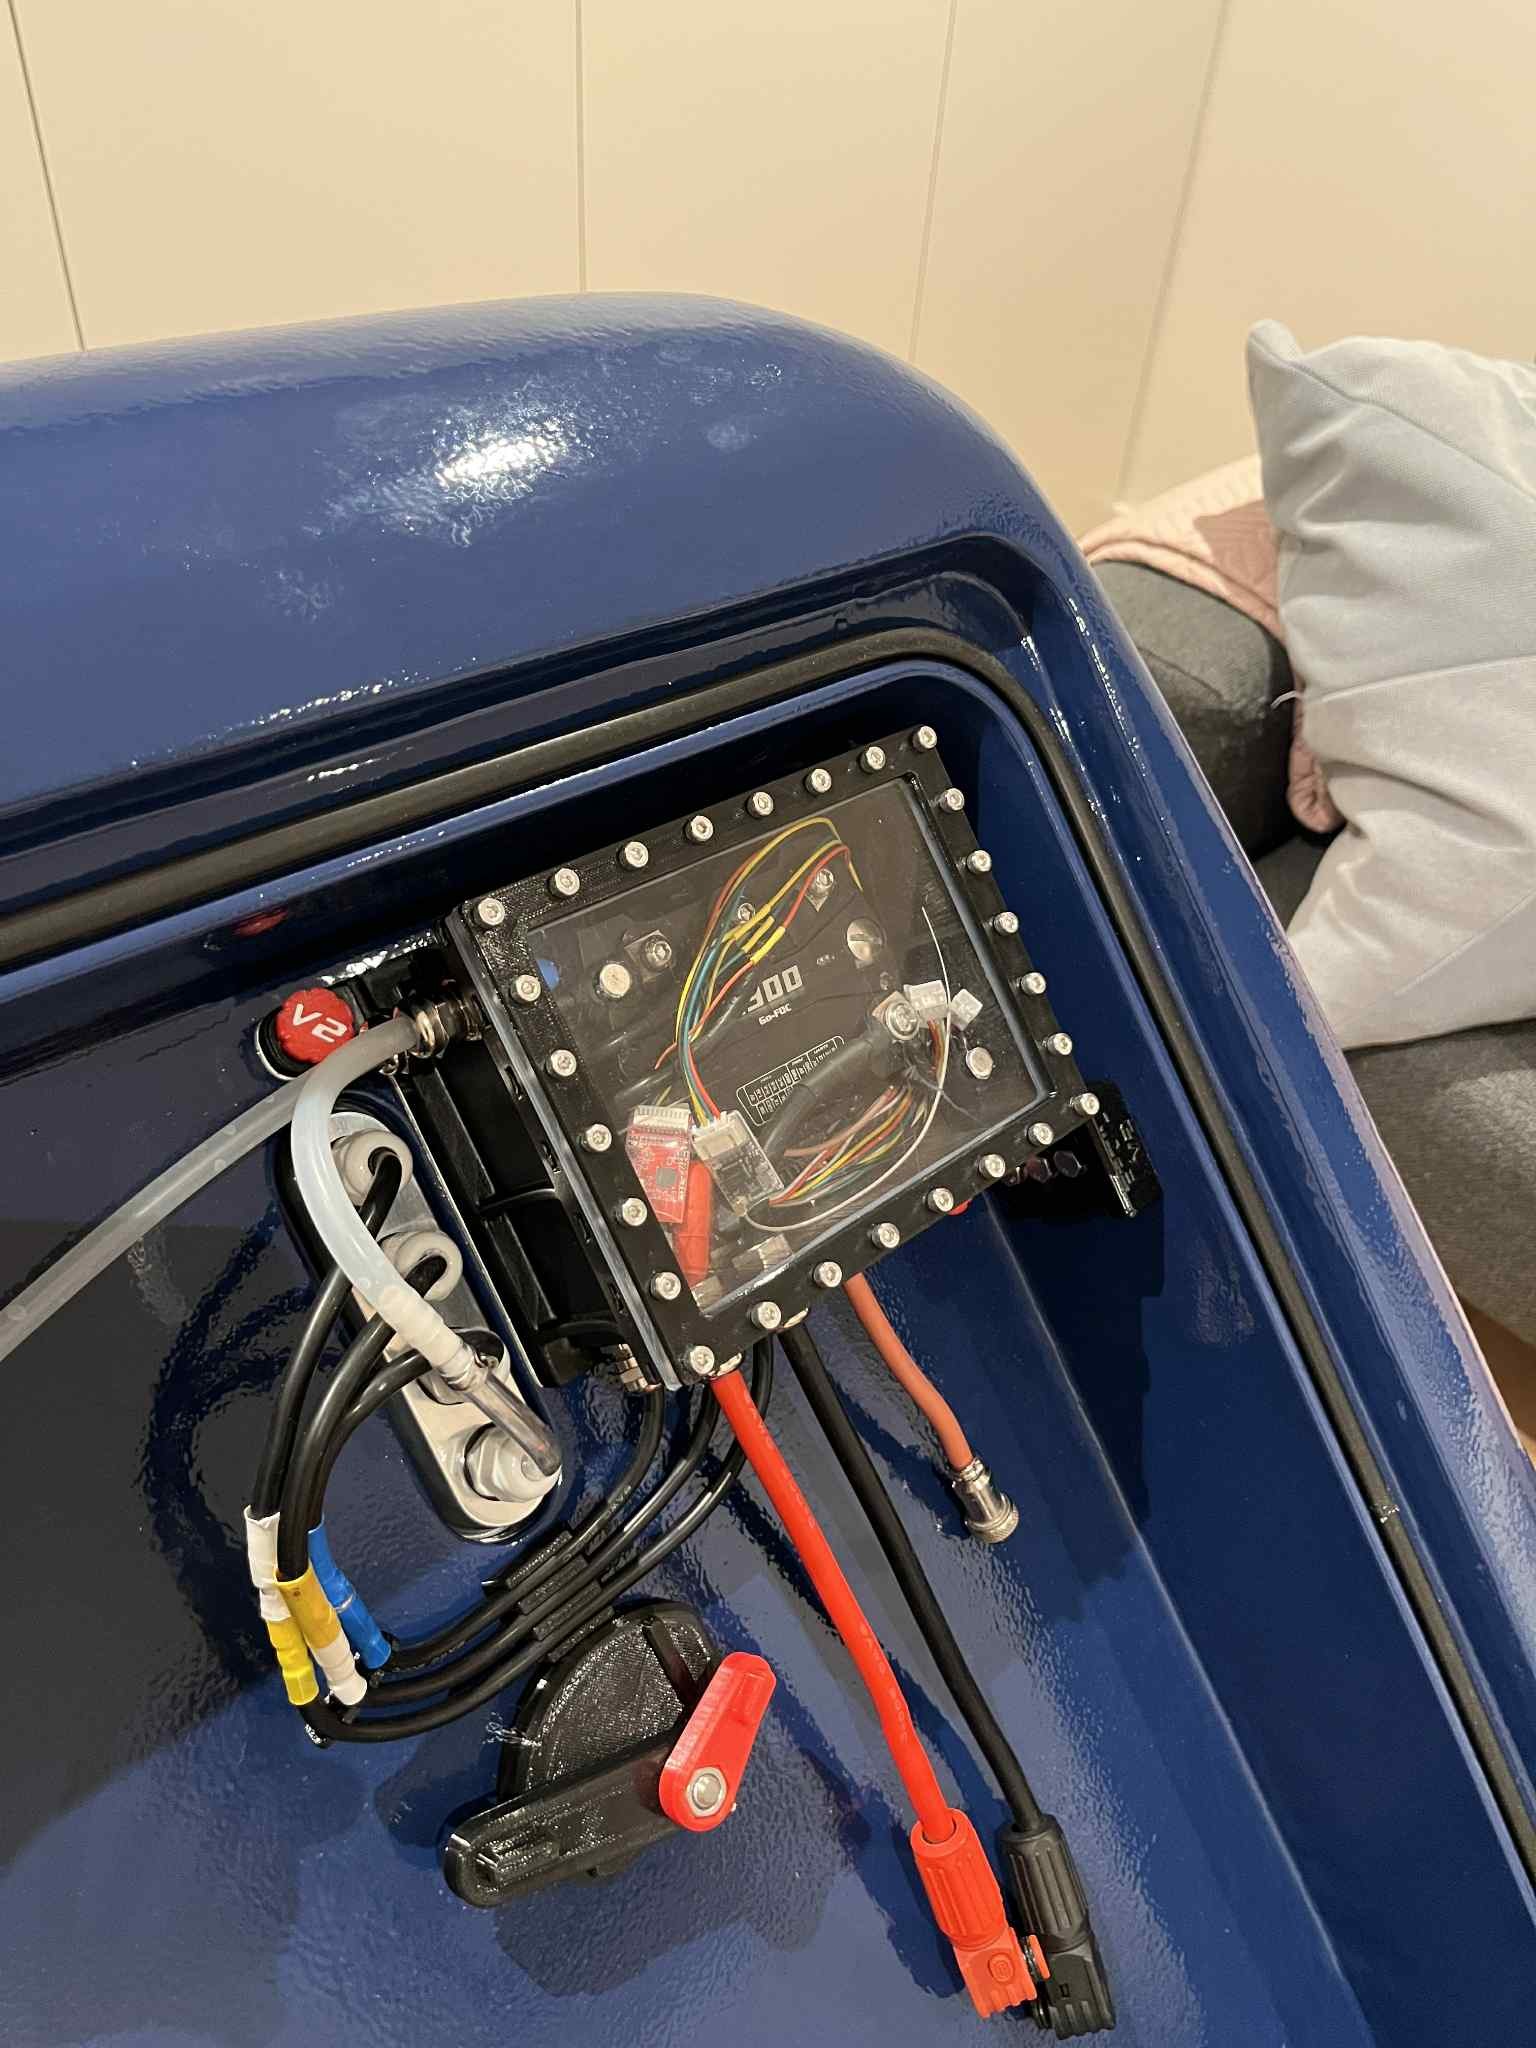
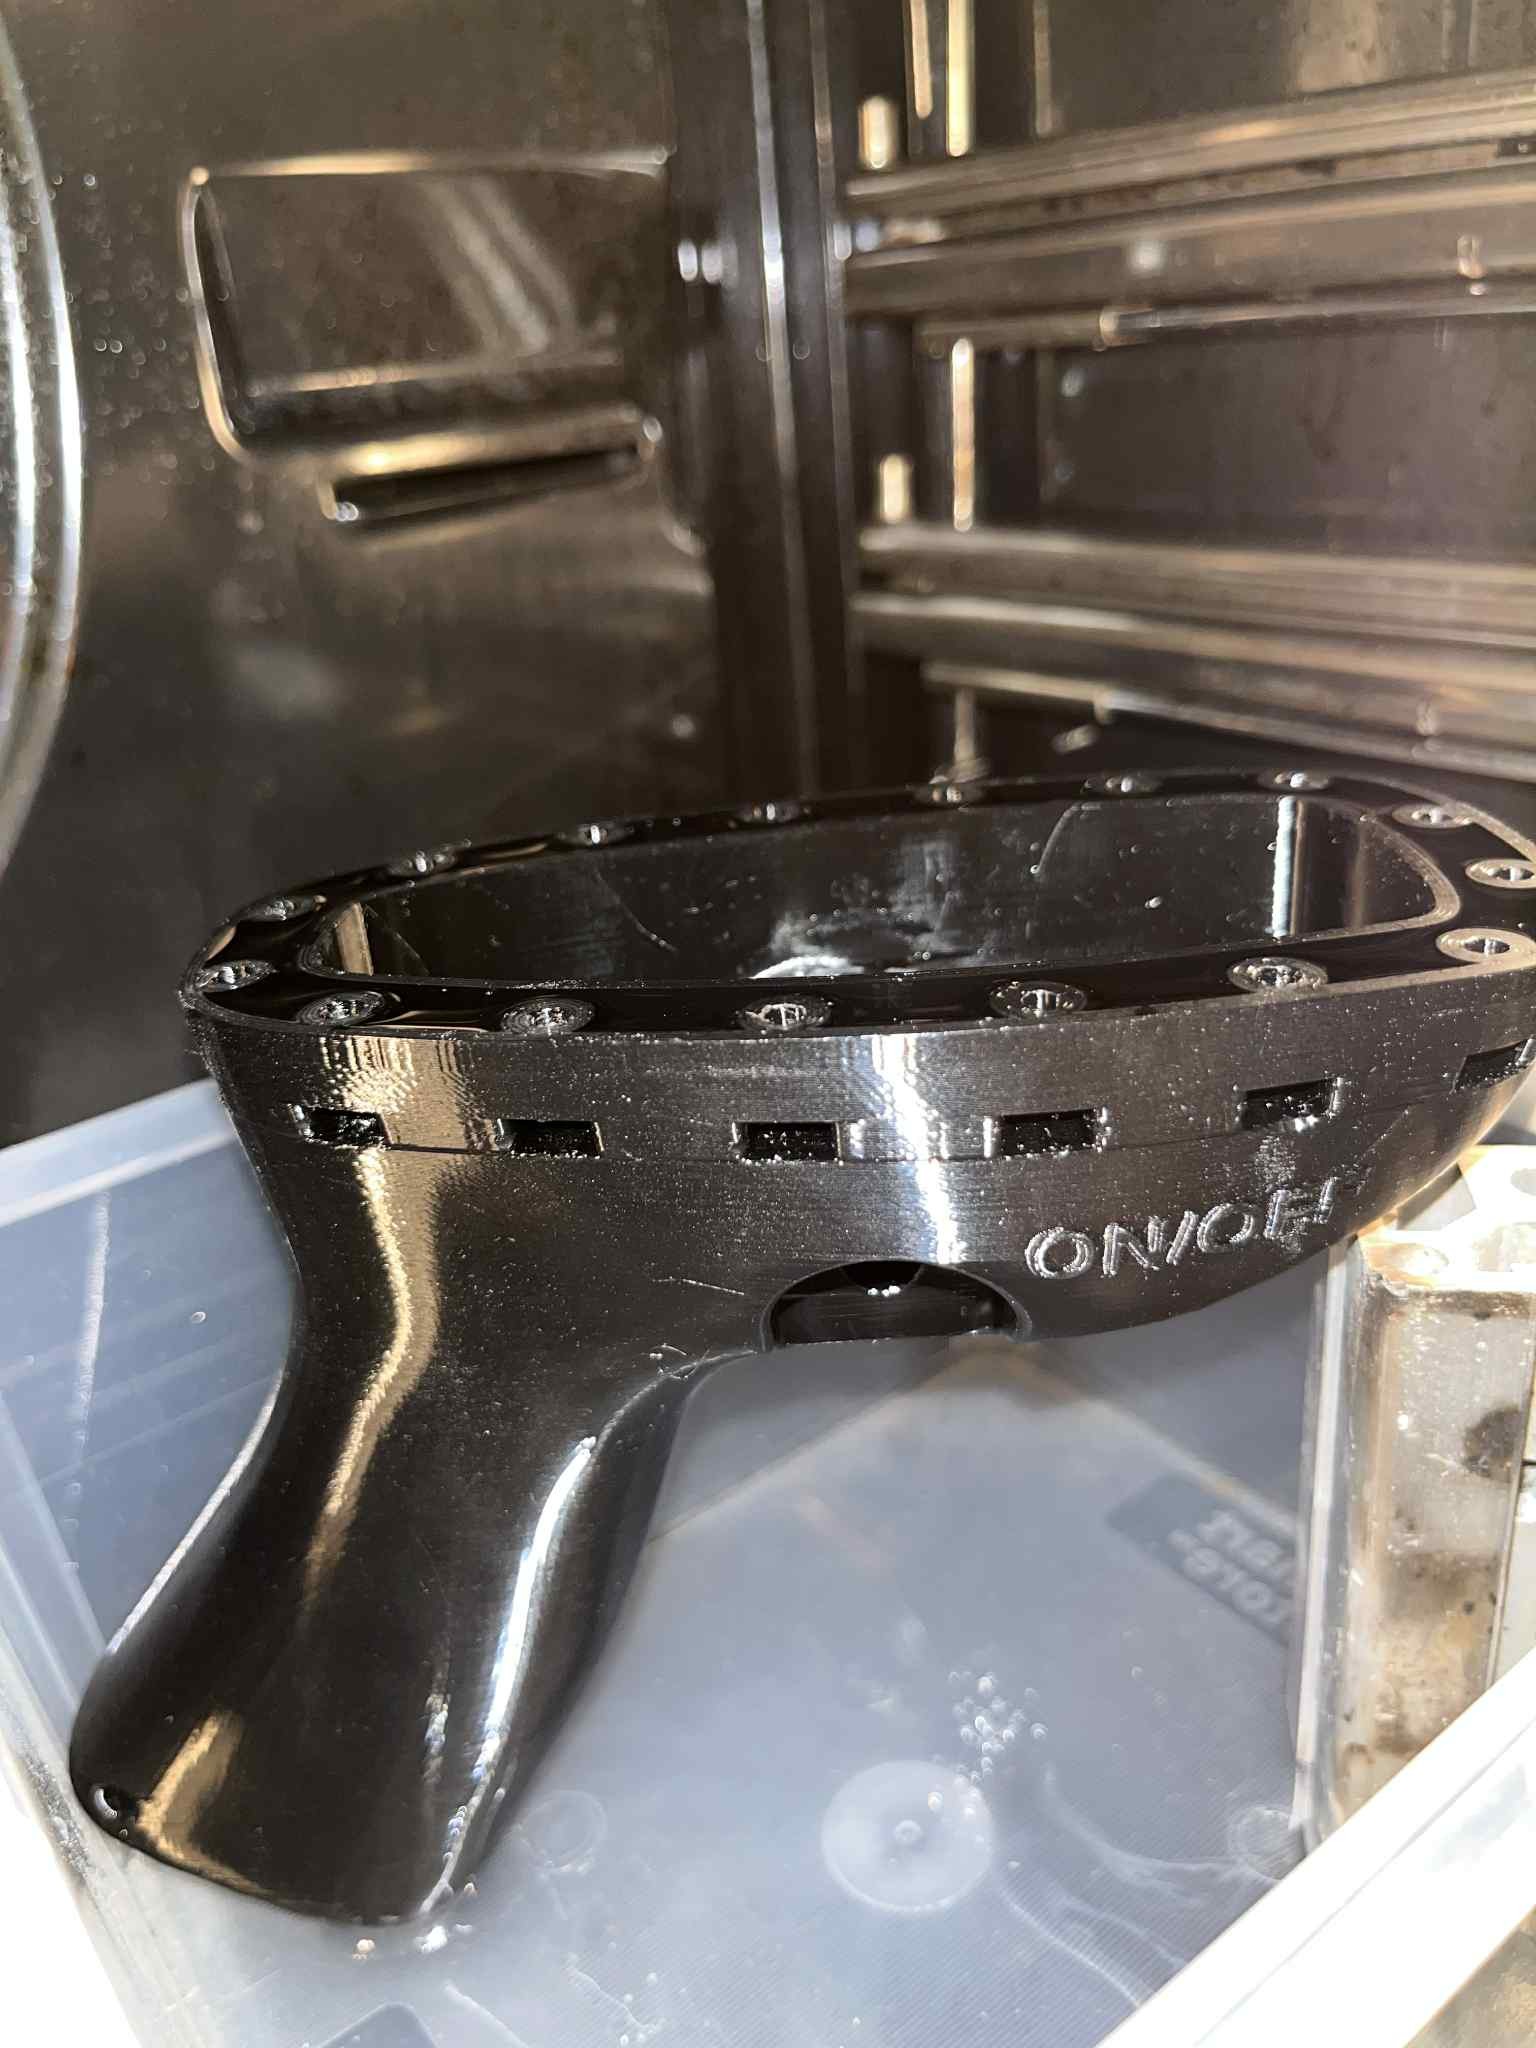
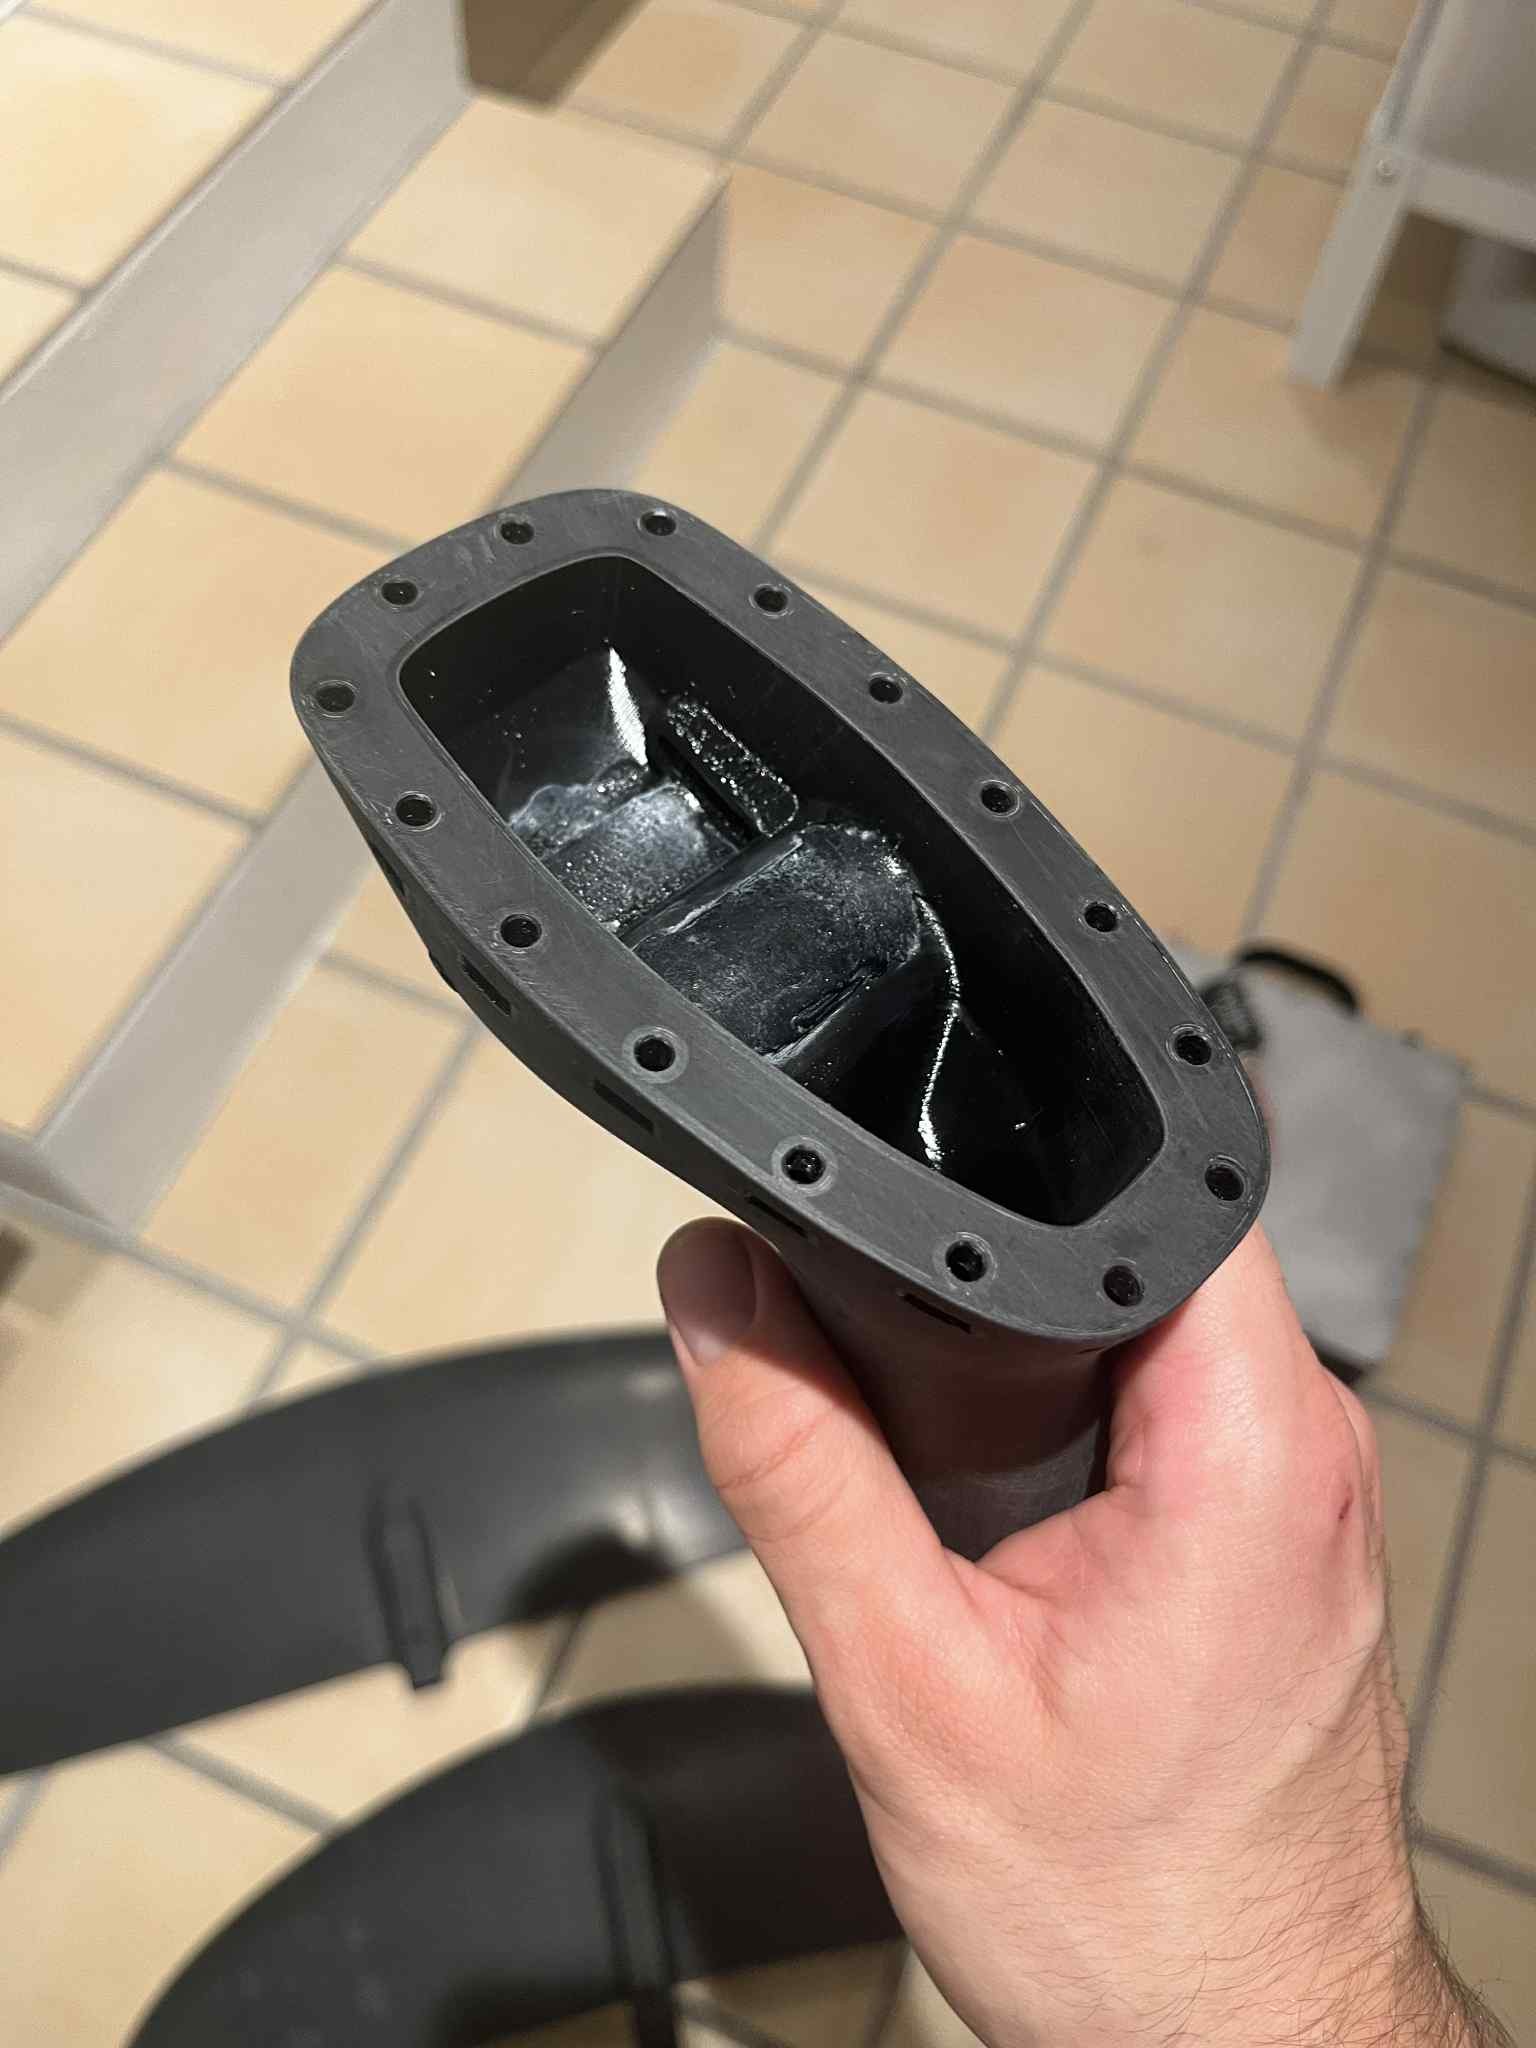
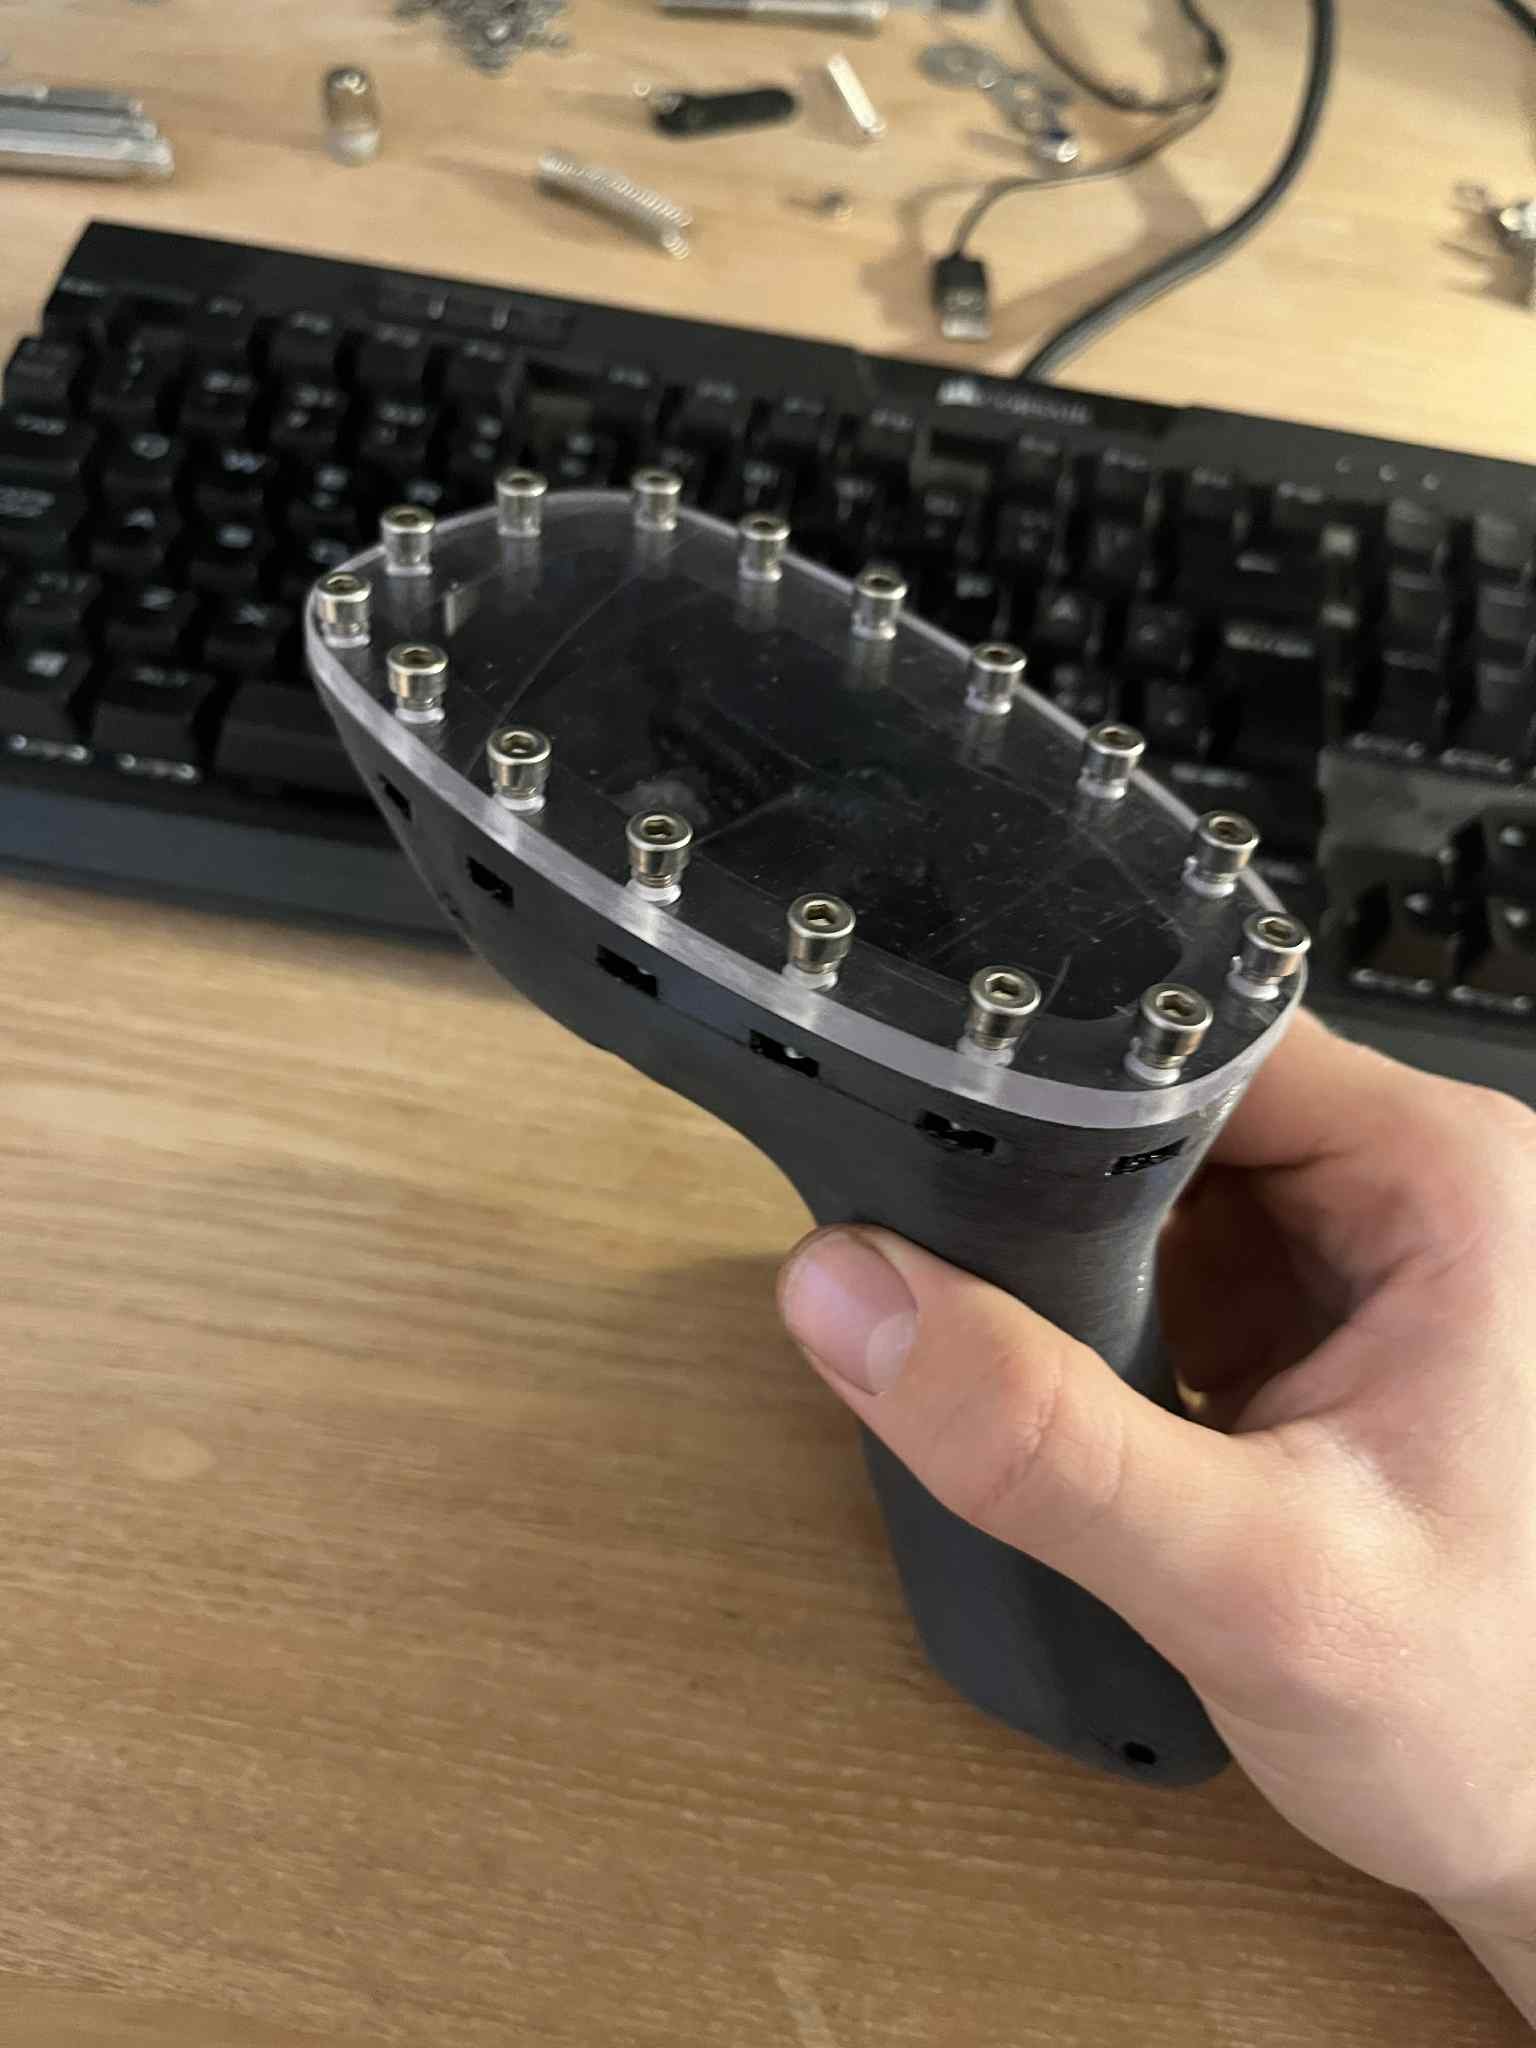
VESC:

The VESC box is 3D printed with thin walls and no infill. I filled the internals between inside and outside walls with thin flowing epoxy, to create a 100-pct. waterproof enclosure. The top polycarbonate sheet is screwed down with M4 bolts and nuts with a 2mm silicone seal between. The VESC is cooled with a single water cooled heatsink, which works perfectly and never leaked.
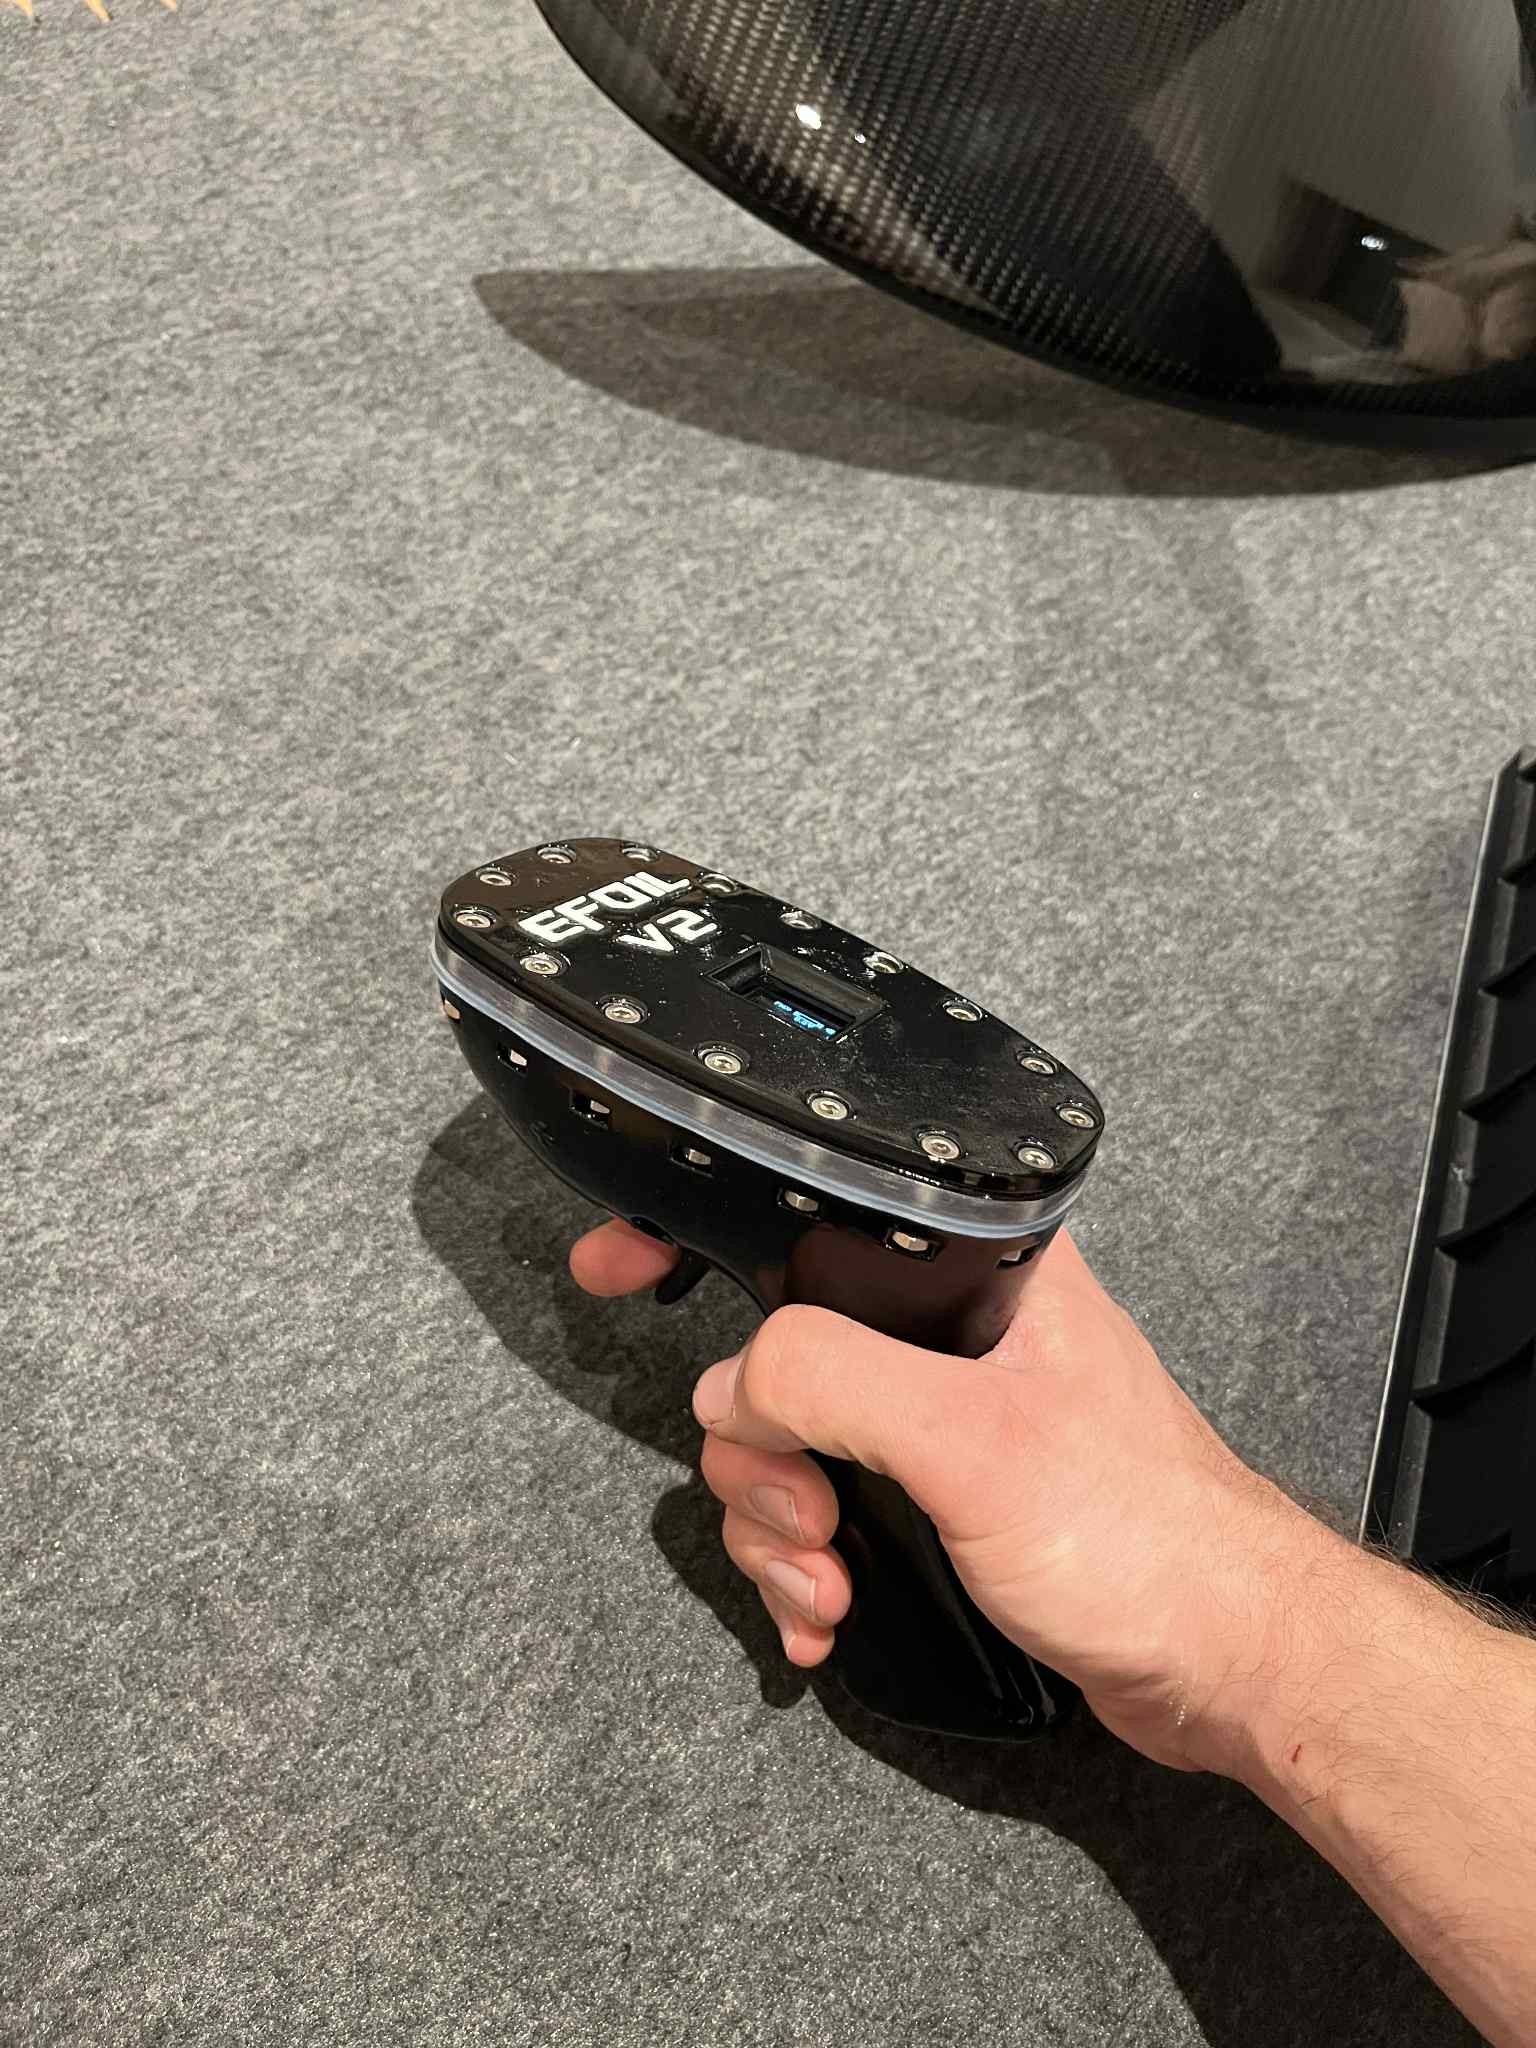
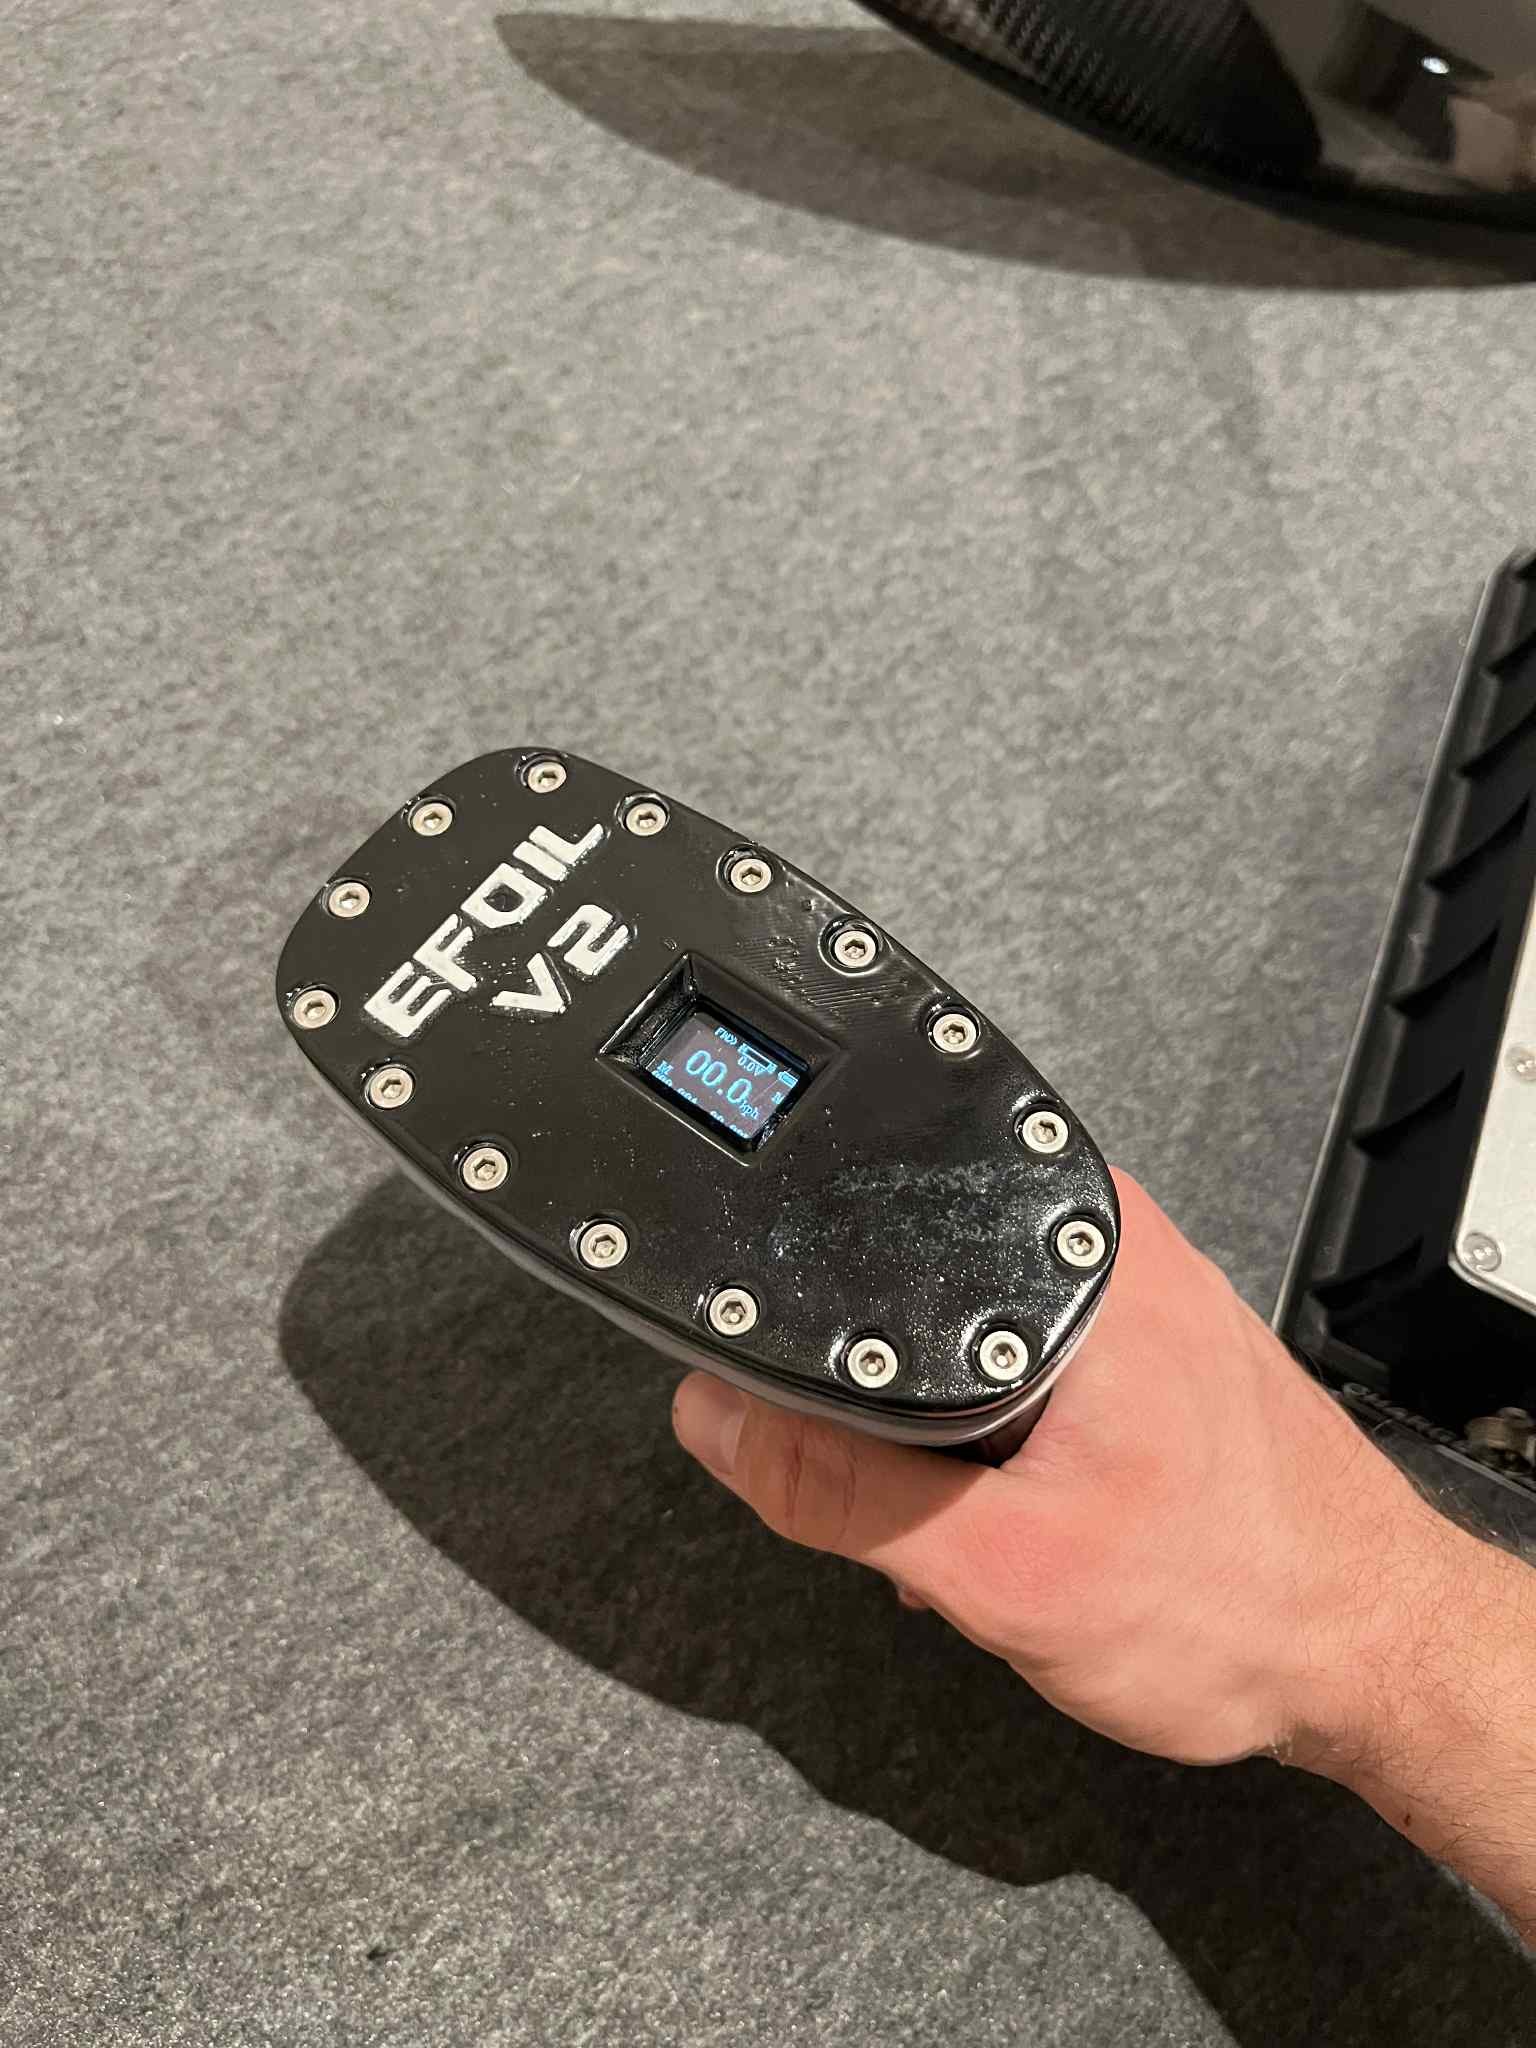
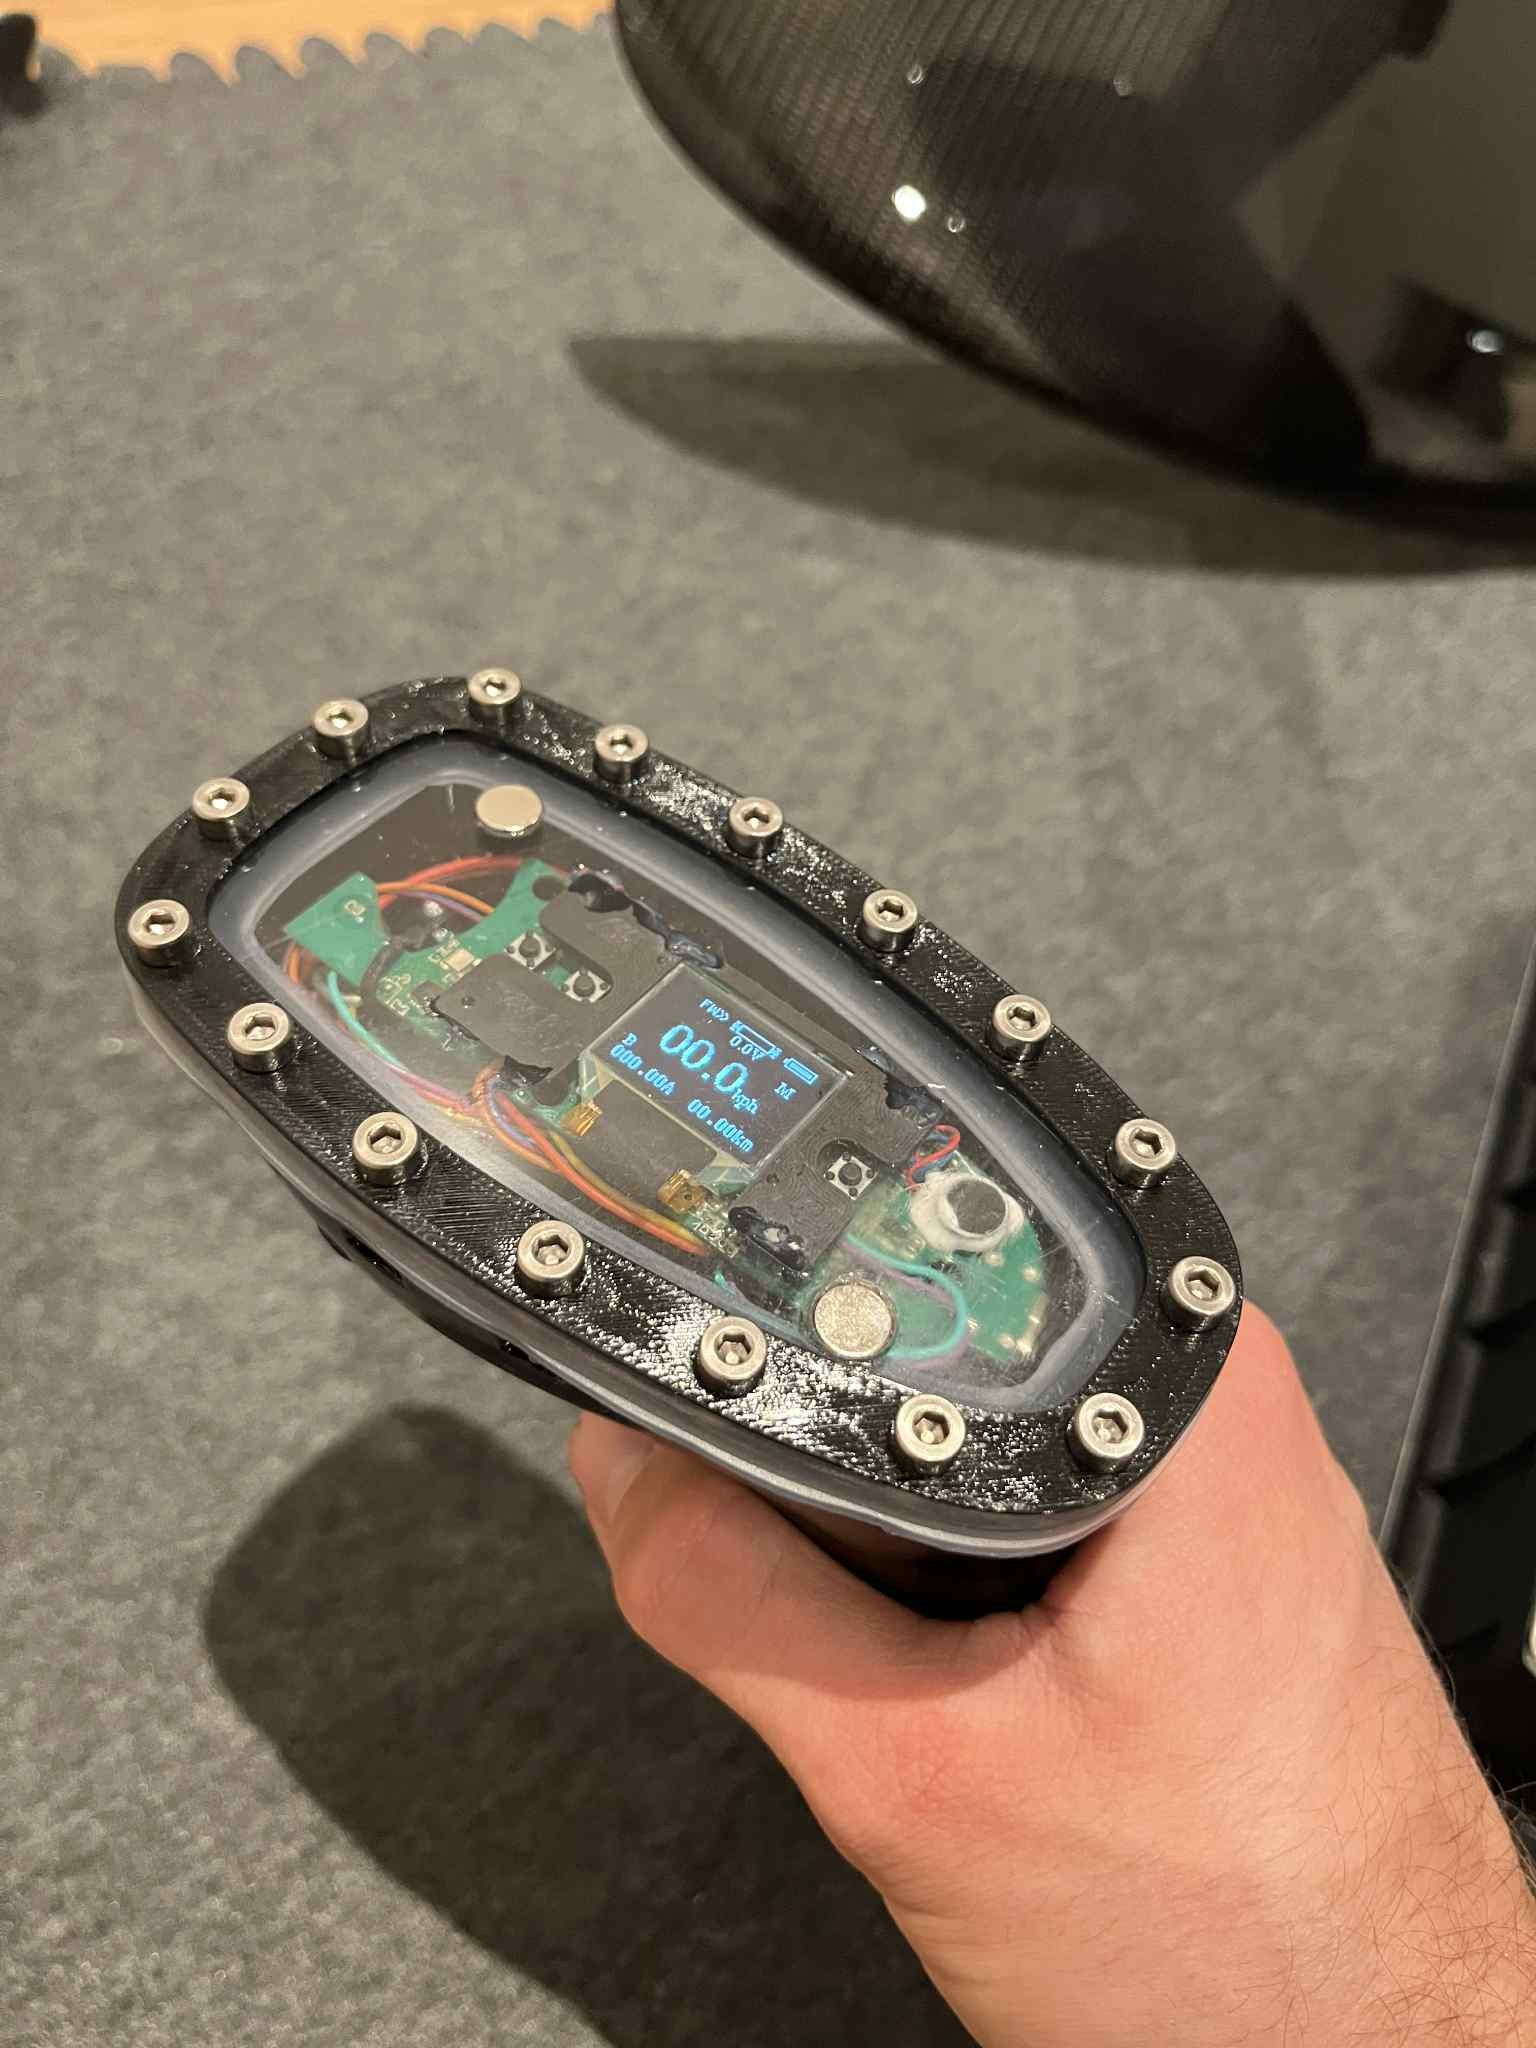
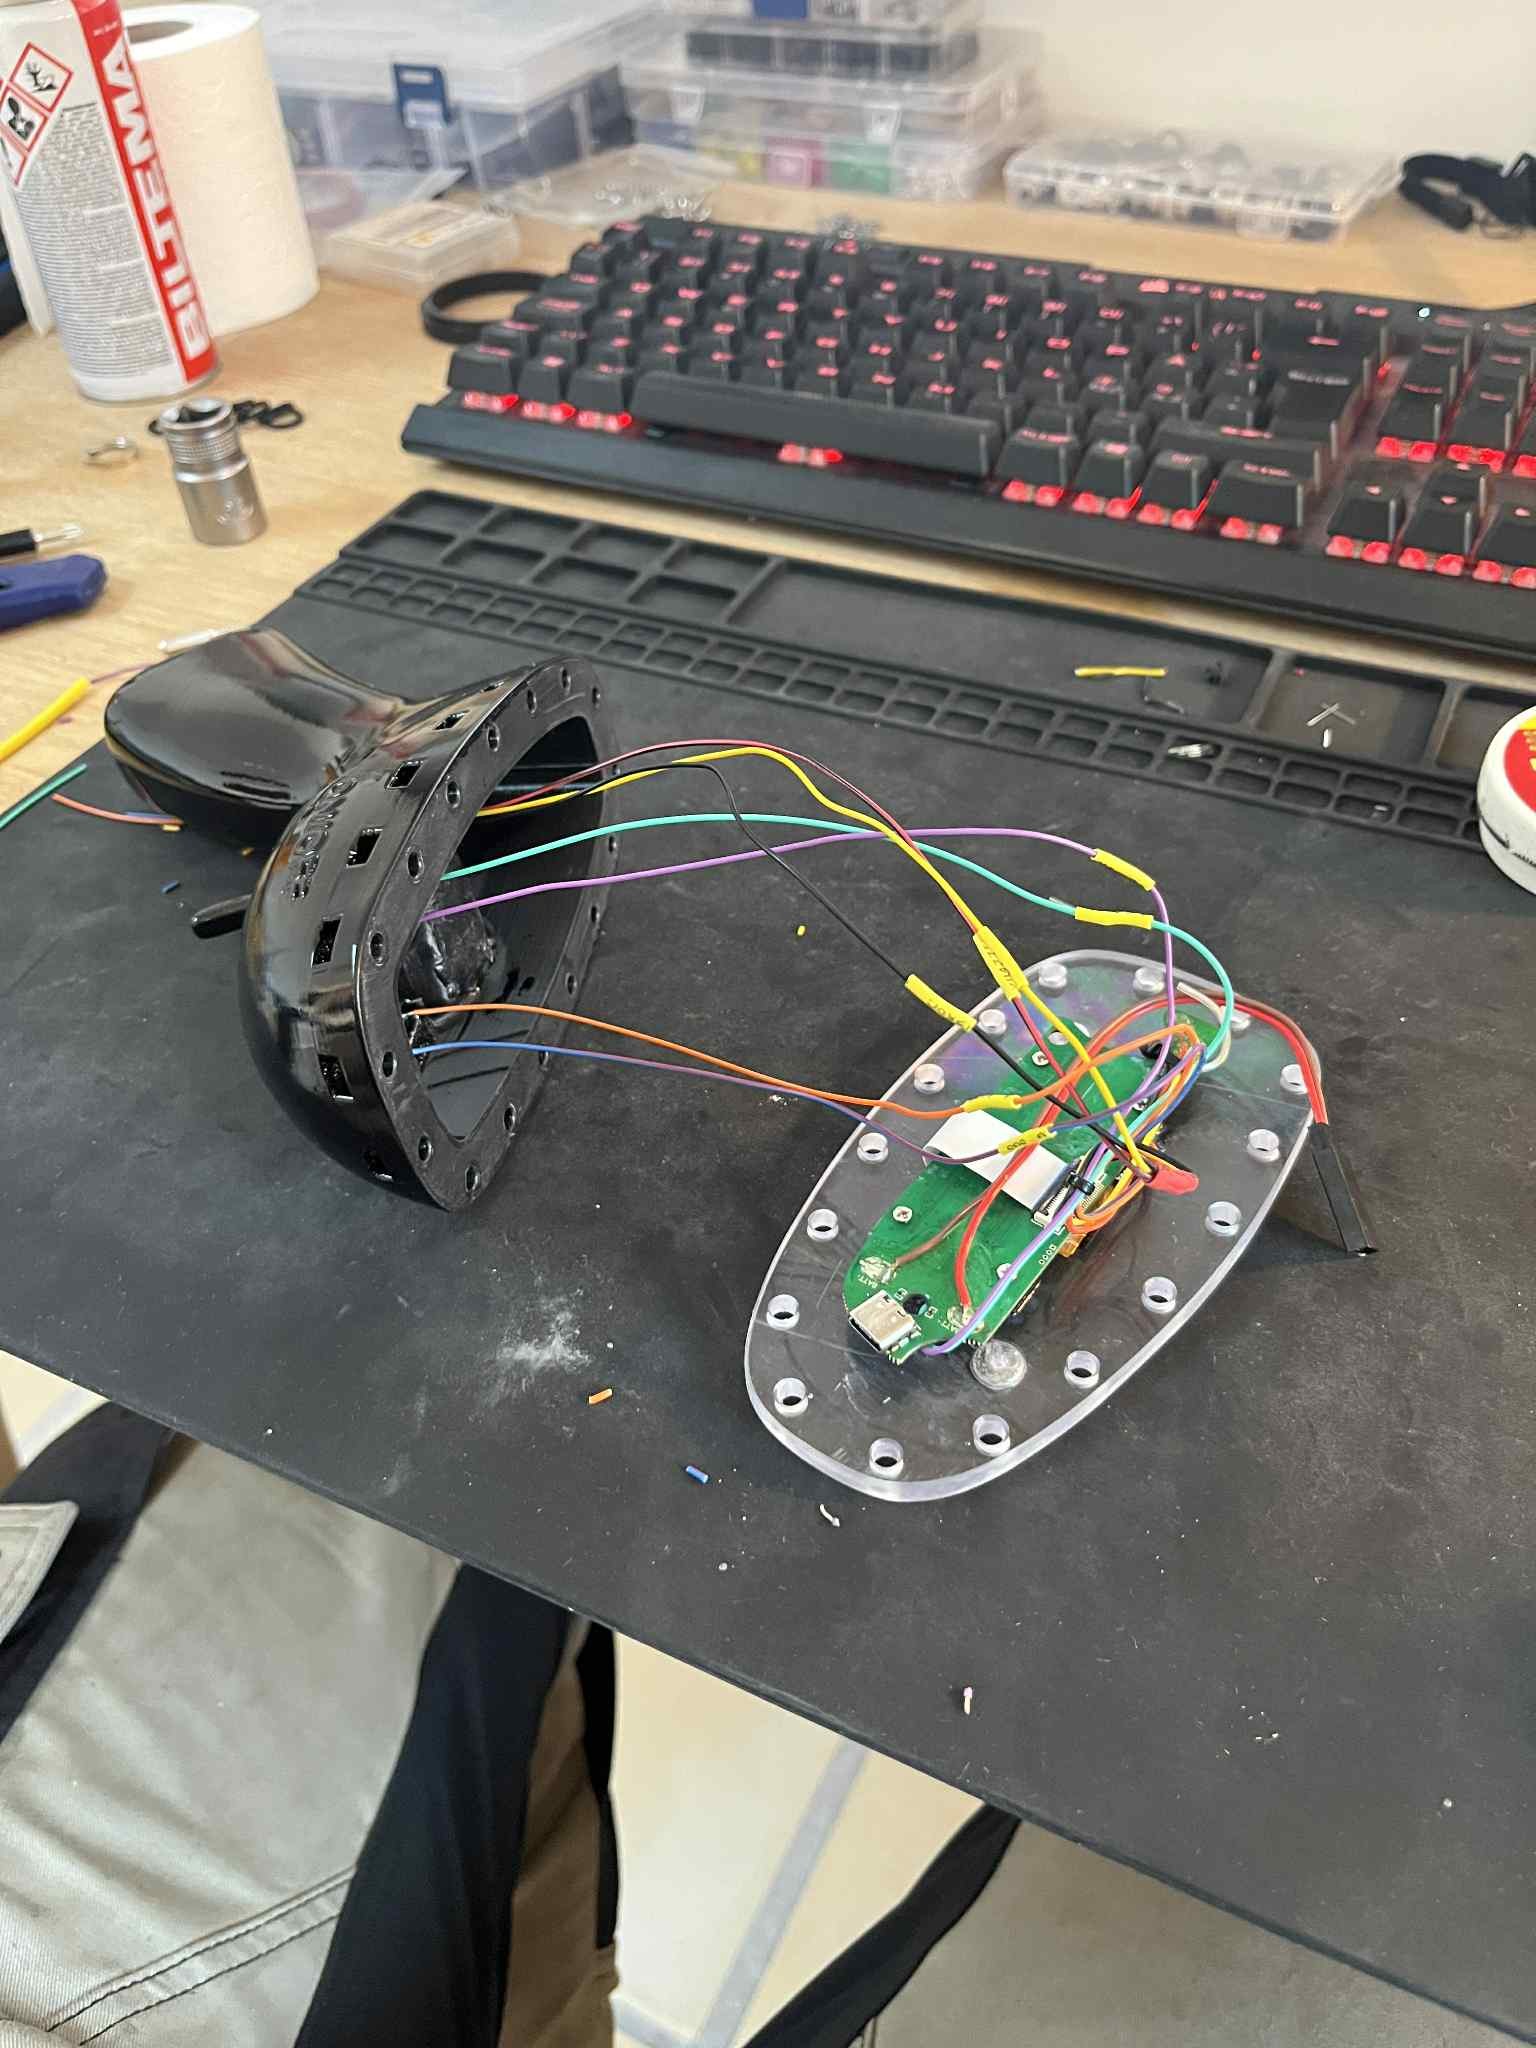
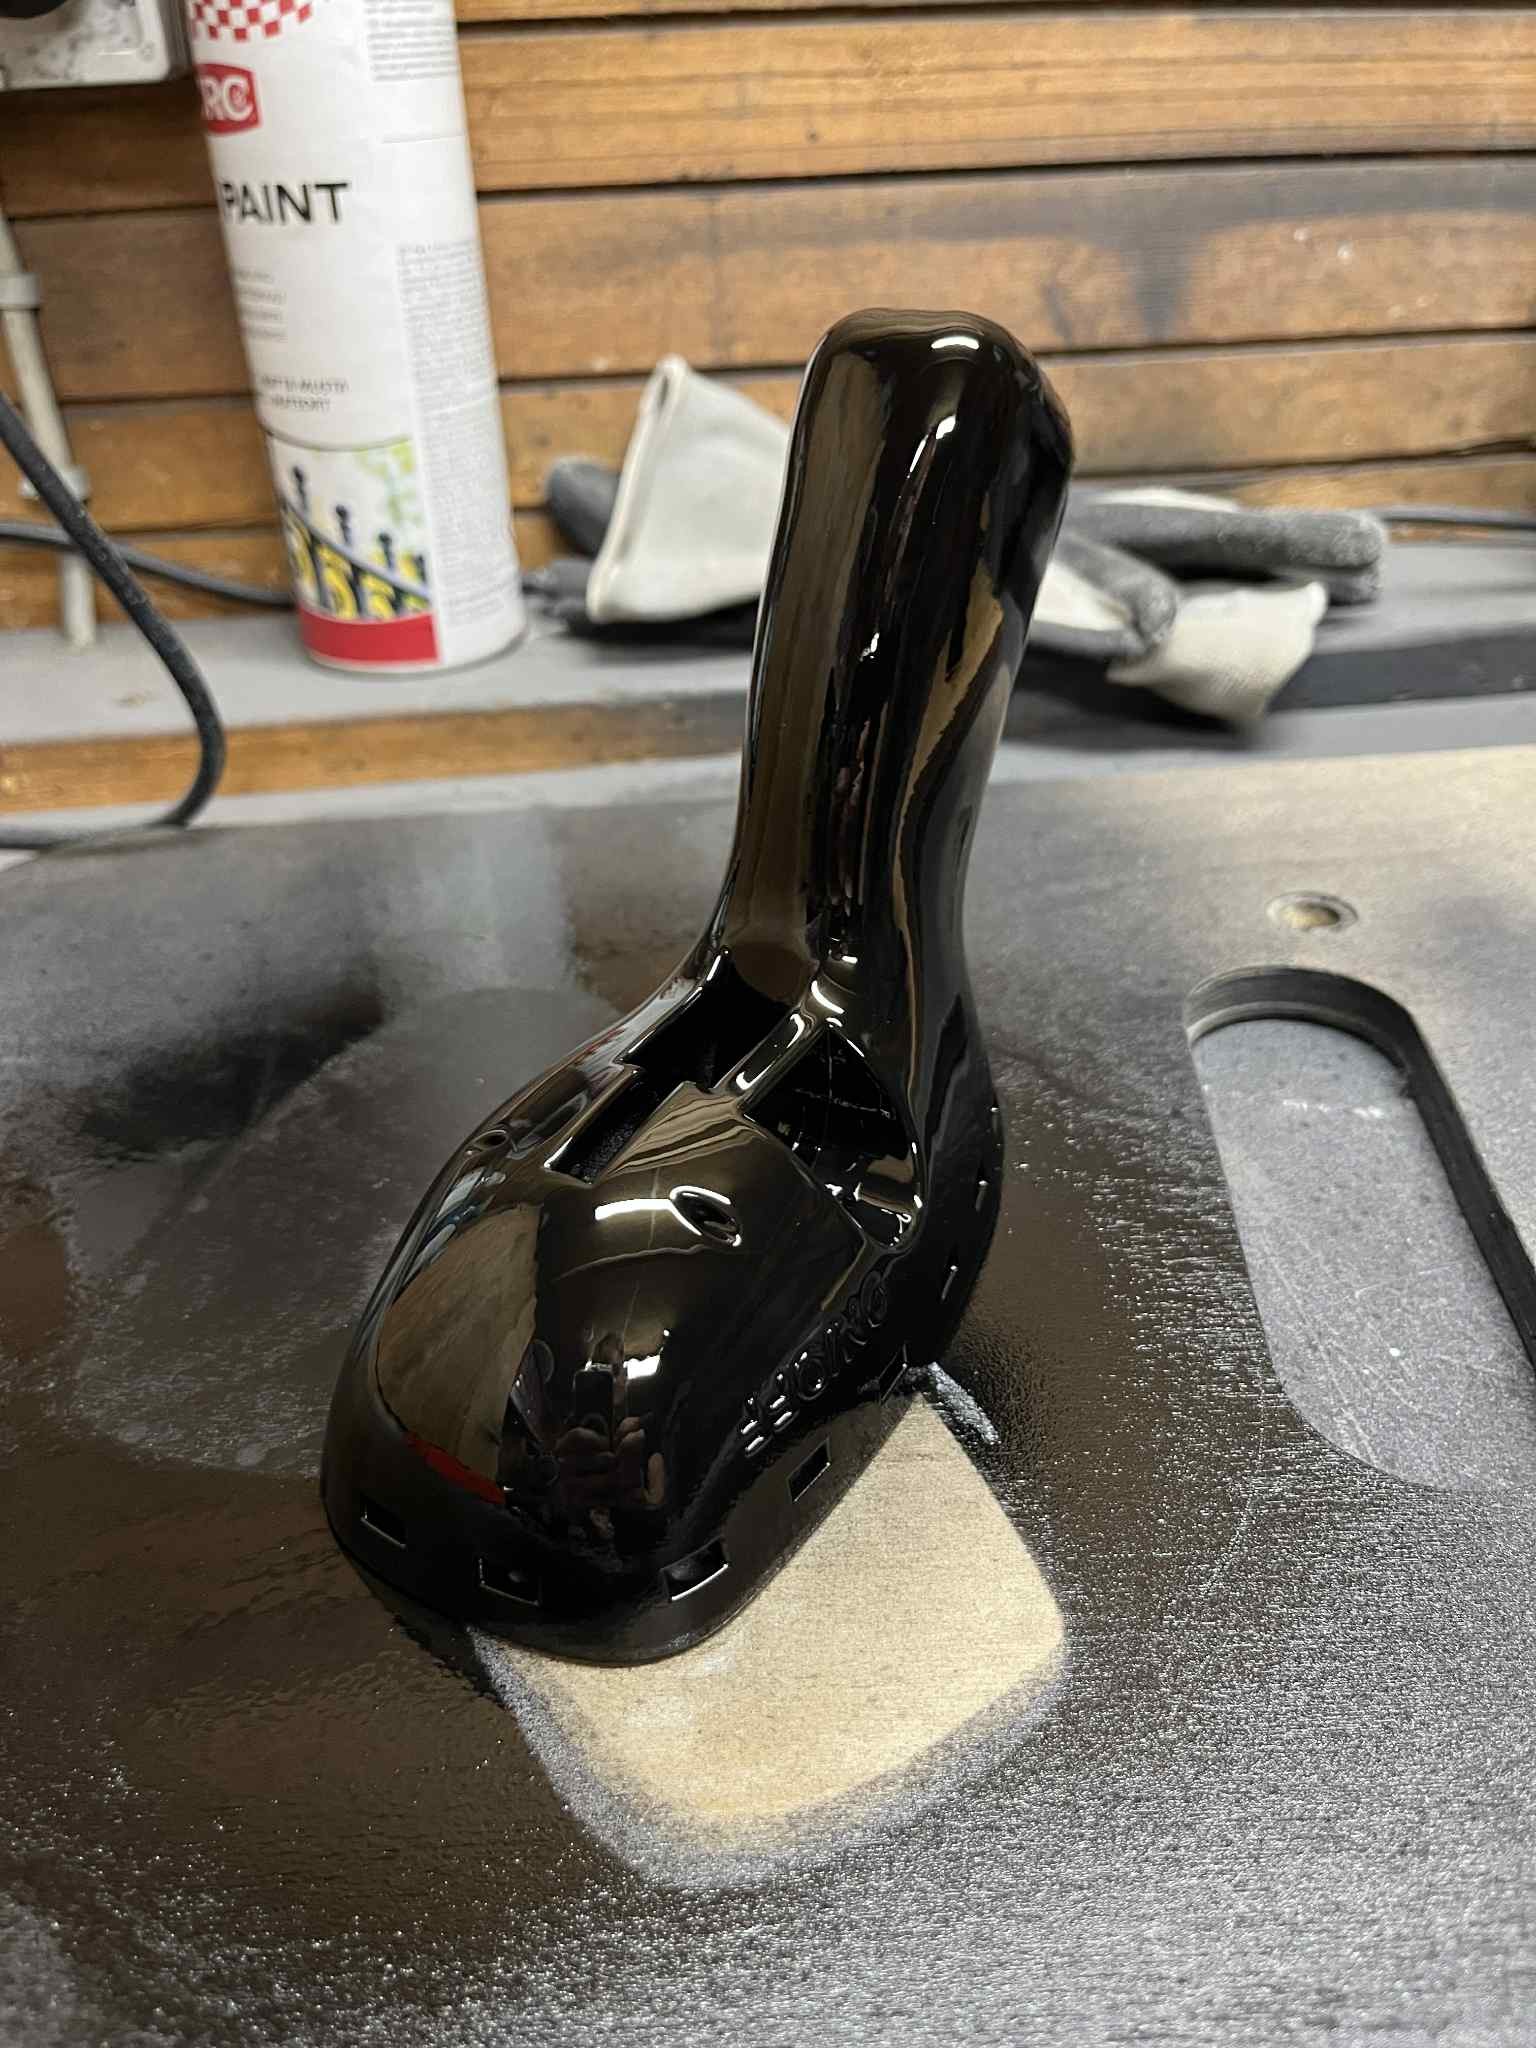
Remote:

The remote is made the same way as the VESC box and has also never leaked. The design is one I found elsewhere but redesigned it to have thicker walls and to fit the remote PCB. By using a hall effect sensor with magnets outside the remote, the remote stays waterproof. This uses one single lithium cell from the Efoil battery.

If you have questions or suggestions, feel free to comment. All STL and STEP files is also available if needed. Good luck:)


6 Likes

Nice!!

Can you provide an estimate of the total cost of learning and time invested in building just the board part of your build? This would include your beginning attempts that you indicate you learned from.

Very nice professional job!

1 Like

Very nice that diserves respect you really did everything from scratch!

1 Like

Building just the board is the most time consuming part but also the cheapest part. The V2 board without electronics and batteries was roughly 250-350$ and 40-60 hours of working time. The V1 board was about the same cost, but less time. The second build took longer time, as I layed up glass on one surface at a time, to get strong and nice sharp edges.

1 Like


top ! . for sure got some inspiration now

Thanks. :grinning:

So around $600 material and 100hours @ $30/hr = $3600

Your build and write up has exceptional quality - true craftsmanship. Congrats!

Looking forward to photos and descriptions of you out there rippin - gotta stop running into the dock though😉

1 Like

Nice build, I build batteries but run the discharge through the BMS for the various temperature, current and voltage protections, but have considered bypassing. How do you manage pack low charge level. What fuse dud you use in the pack?

Valid point, and I did also consider discharging through the BMS. Although that would be the safest way to do it, I wanted a battery that was as compact as possible. Now that I have a finished Efoil, I could perhaps make space for a more bulky BMS rated at 100-150A, with some sort of heat dissipation from the BMS to the aluminium top or bottom plate.

Pack low charge is managed by the VESC alone → cutoff start at 45V (3,2V) → cutoff end at 42V (3,0V).

I am using a 100A fuse inside the battery pack.

100A? That seems quite low. I can easily hit 100A when going full throttle from laying still in the water.

I use the 100amp model, it’s a bit longer but thats it. Only issue I found with running discharge through the BMS is some random shutdowns caused by the Precharge protection circuit. This seems to trigger on high inrush currents (ie 100+ amps), I’ve been working with Daly to find a solution for this as their BMS has no programming around this fault and it can’t be turned off. Better to use the BMS for protection but not when you get random shutdowns, not idea if you’re out in surf or a low way from shore

A 100A fuse can handle 100A or more for some time, so if you have short peaks it should not trip.
100A Might be a bit on the low side though.

1 Like

I have not yet blown a fuse, and I only use the medium mode on the remote, as high mode is to powerful for my skill - might want to change the fuse, as my skill level on the water improves.

Try a different BMS? Ive got two batteries with a JBD 120A / 360A peak bms (45 euro per piece). Works great, never had it cut off on me. And I hit 100A almost every session.

Yes have ordered one to test but my issue is the battery compartment is 80mm high, take out the base and lid thickness I only have about 74-75mm to play with and this unit is 76mm, on my heavy duty box I only have 71mm height

Ah okay, makes sense, ill measure one at home to be sure, got 2 pieces laying around for my winter projects.

The Daly units have been very good except for this issue. They need to rationalise and improve all their apps and pc software but todate I have not had a failure of a unit in service with 20+ in operation

I would agree with @sat_be that you might be a bit borderline on fuse. Should be OK but a trip where you are peaking could leave you a bit stranded - needlessly. To me a fuse should never trip if sized appropriately and only when things go very bad😉

I started learning by using the different power modes on my remote as well as it made starting a bit smoother. Over time I went to H all the time. That allows me full power IF I need it but usually just results in finding the trigger position I need to foil the same as a M setting does.
An example of needing H is when I bobble the start and end up standing while not planing properly. I can use H to power out of that situation into foil where M typically resulted in dropping and needing to start all over again. Food for thought😉

I also have 3 Daly BMS (blue ones) with bluetooth built in and found no issues so far. For my efoil I ordered 150A one and plan on using key switch to turn on and off the efoil. Anyone using that? A “reed” magnetic switch is my plan :wink:
I also believe anti-spark switch is not needed with the daly BMS? @Gustav ?

@Gustav Can you explain a bit why did you design a new mast adapter in between plate? I am planing on doing the same type of solution but i believe if i make a hole into the original mast adapter plate (gong v3) and then seal the wires directly with silicone and then when assembling i just pust a silicone 1mm thick paper in between it will not leak water into the board? Given that there is enough space between three gong screws, i have to wait and see…

Also is that 3d printed propeller? Mind sharing the stl or step with me?