Yes, I have an enclosure for my printer.
At ASA I go to 45°C in the printing room.
I chose the 8S3P setup for myself. That should be enough for me.
But it is also the first building for me.
Possibly I can switch to 10S later if I don’t have enough boost.
2 Likes
Hi Markus, love the highly detailed description of your work. Will follow your progress. Keep up the good job!
2 Likes
Hi Markus, great build! could you please share some pictures of your battery build? thank you!!
1 Like
Thanks.
Yes I will do that.
But right now I’m on Pod V3 & V4. After that comes the controller and then the battery.
I will document everything.
The pictures follow of course.
Step by step. The winter in Germany is long😉
3 Likes
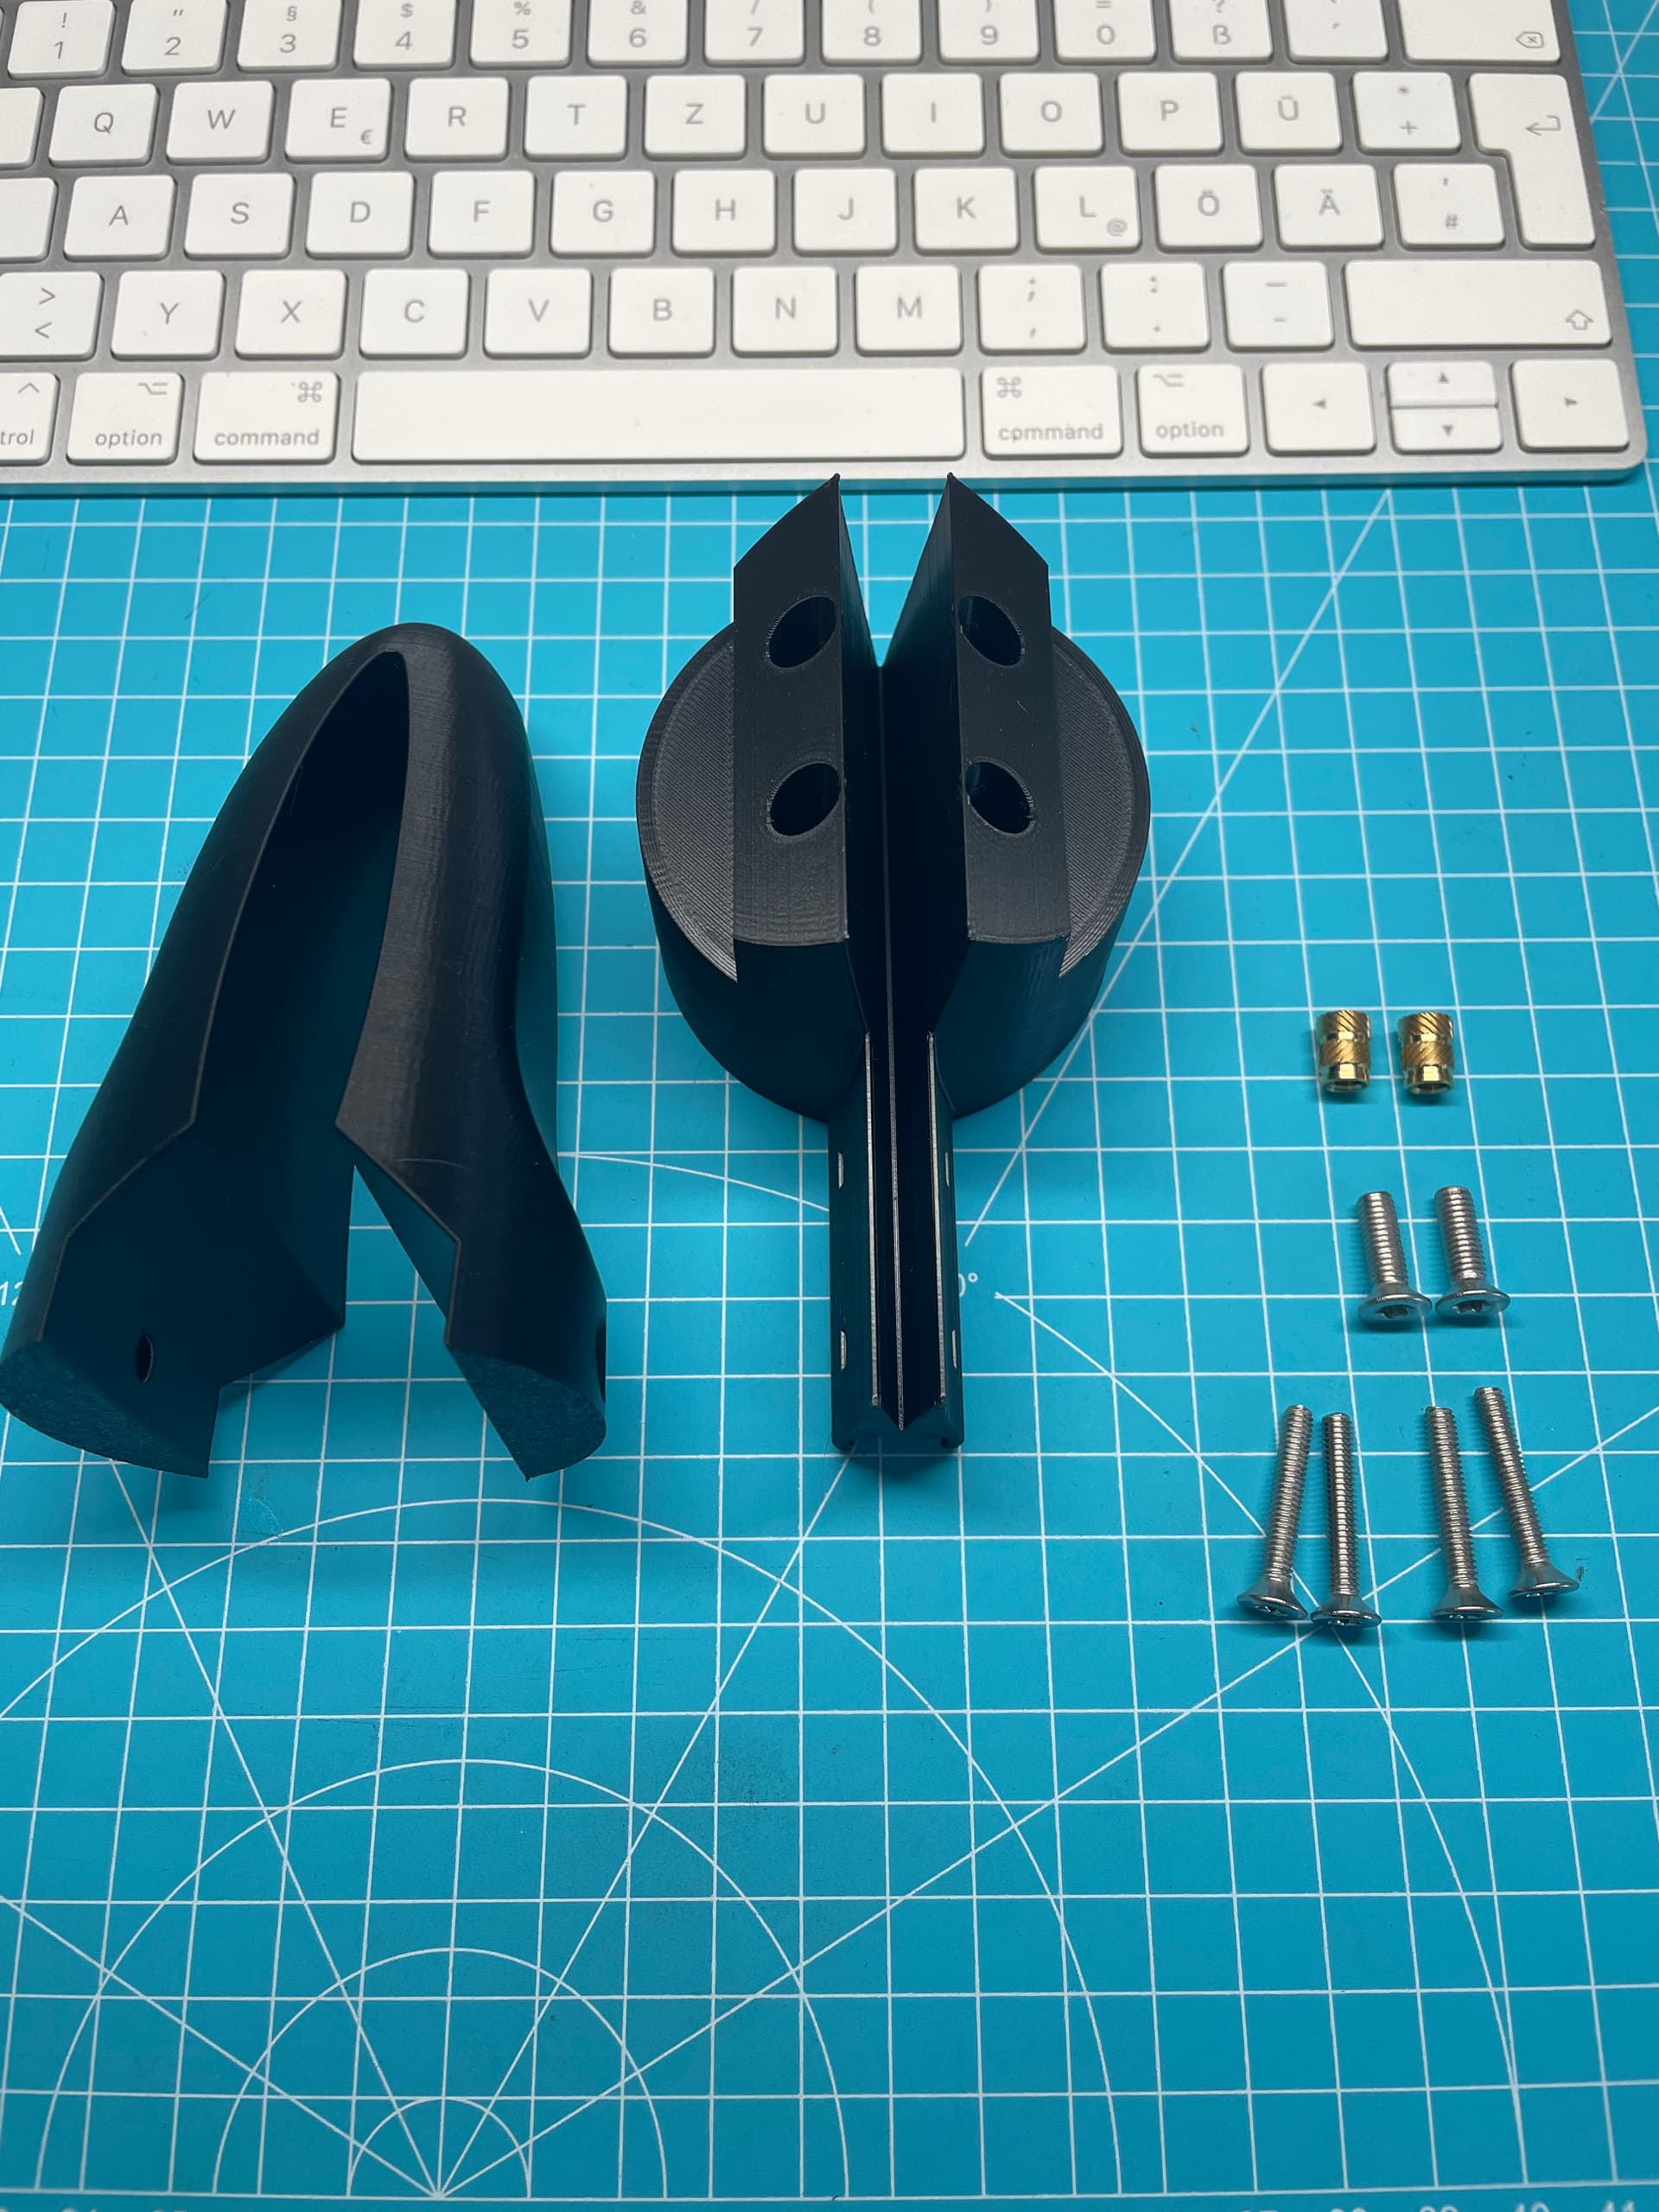
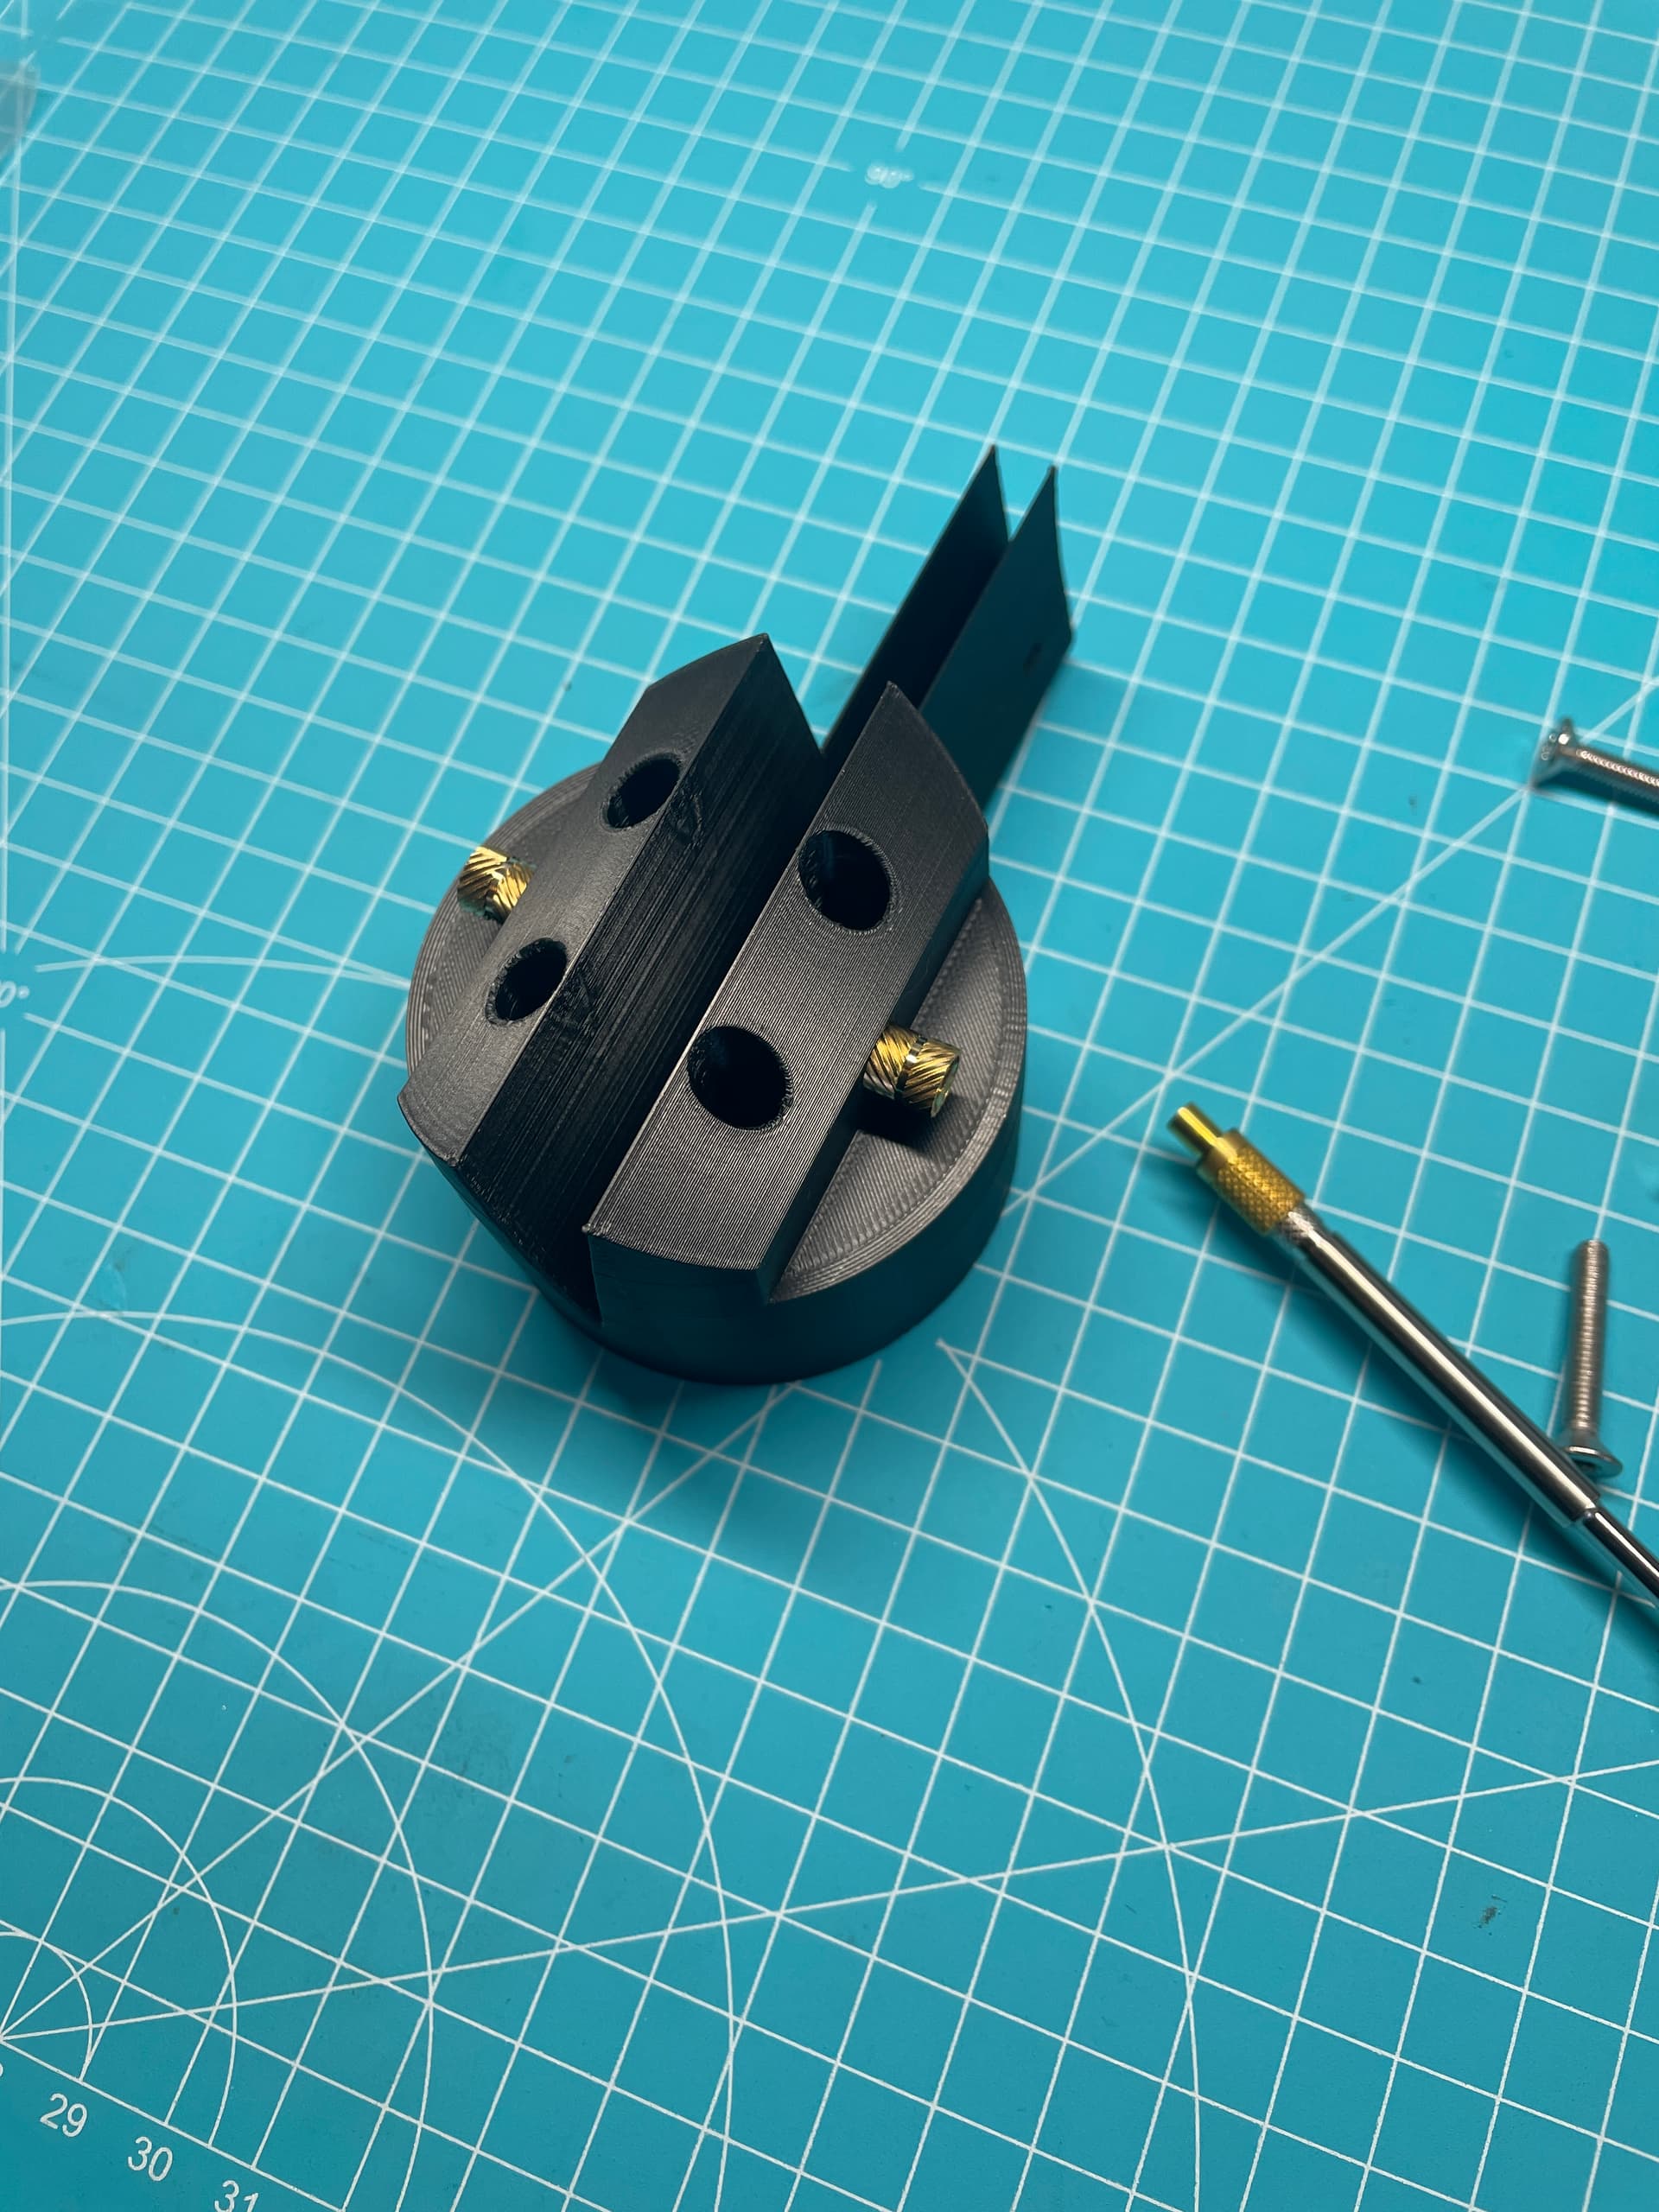
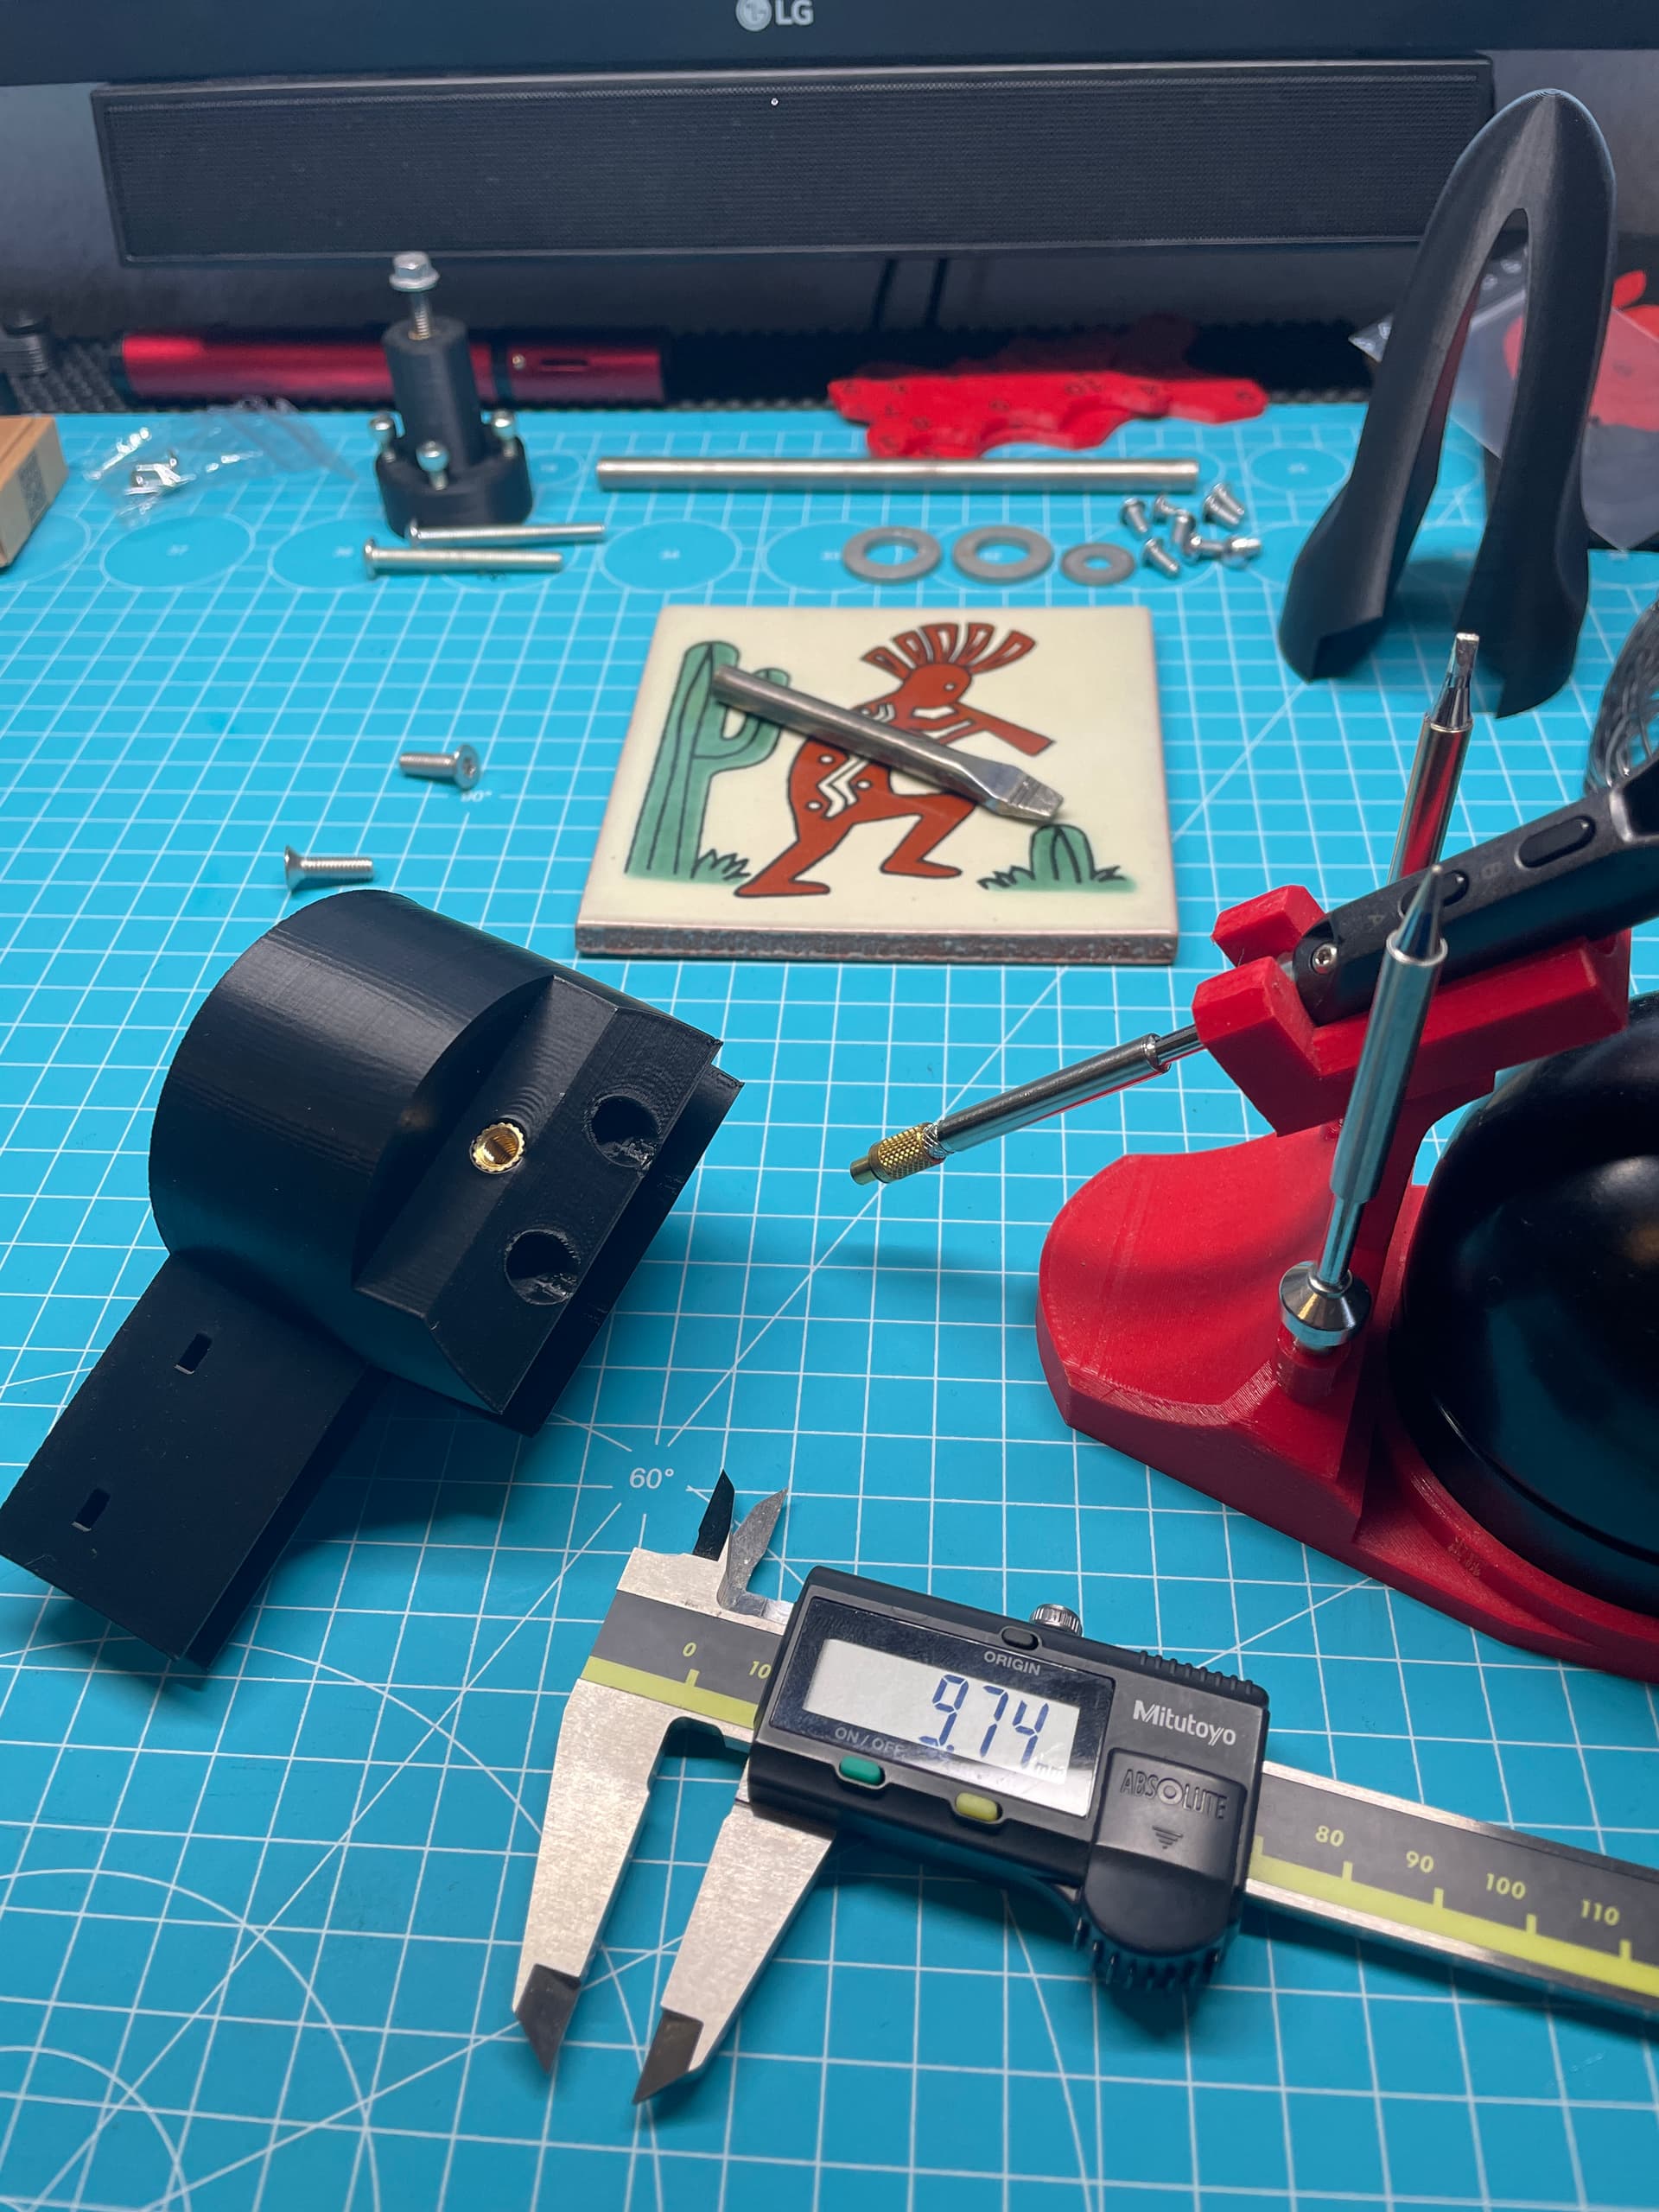
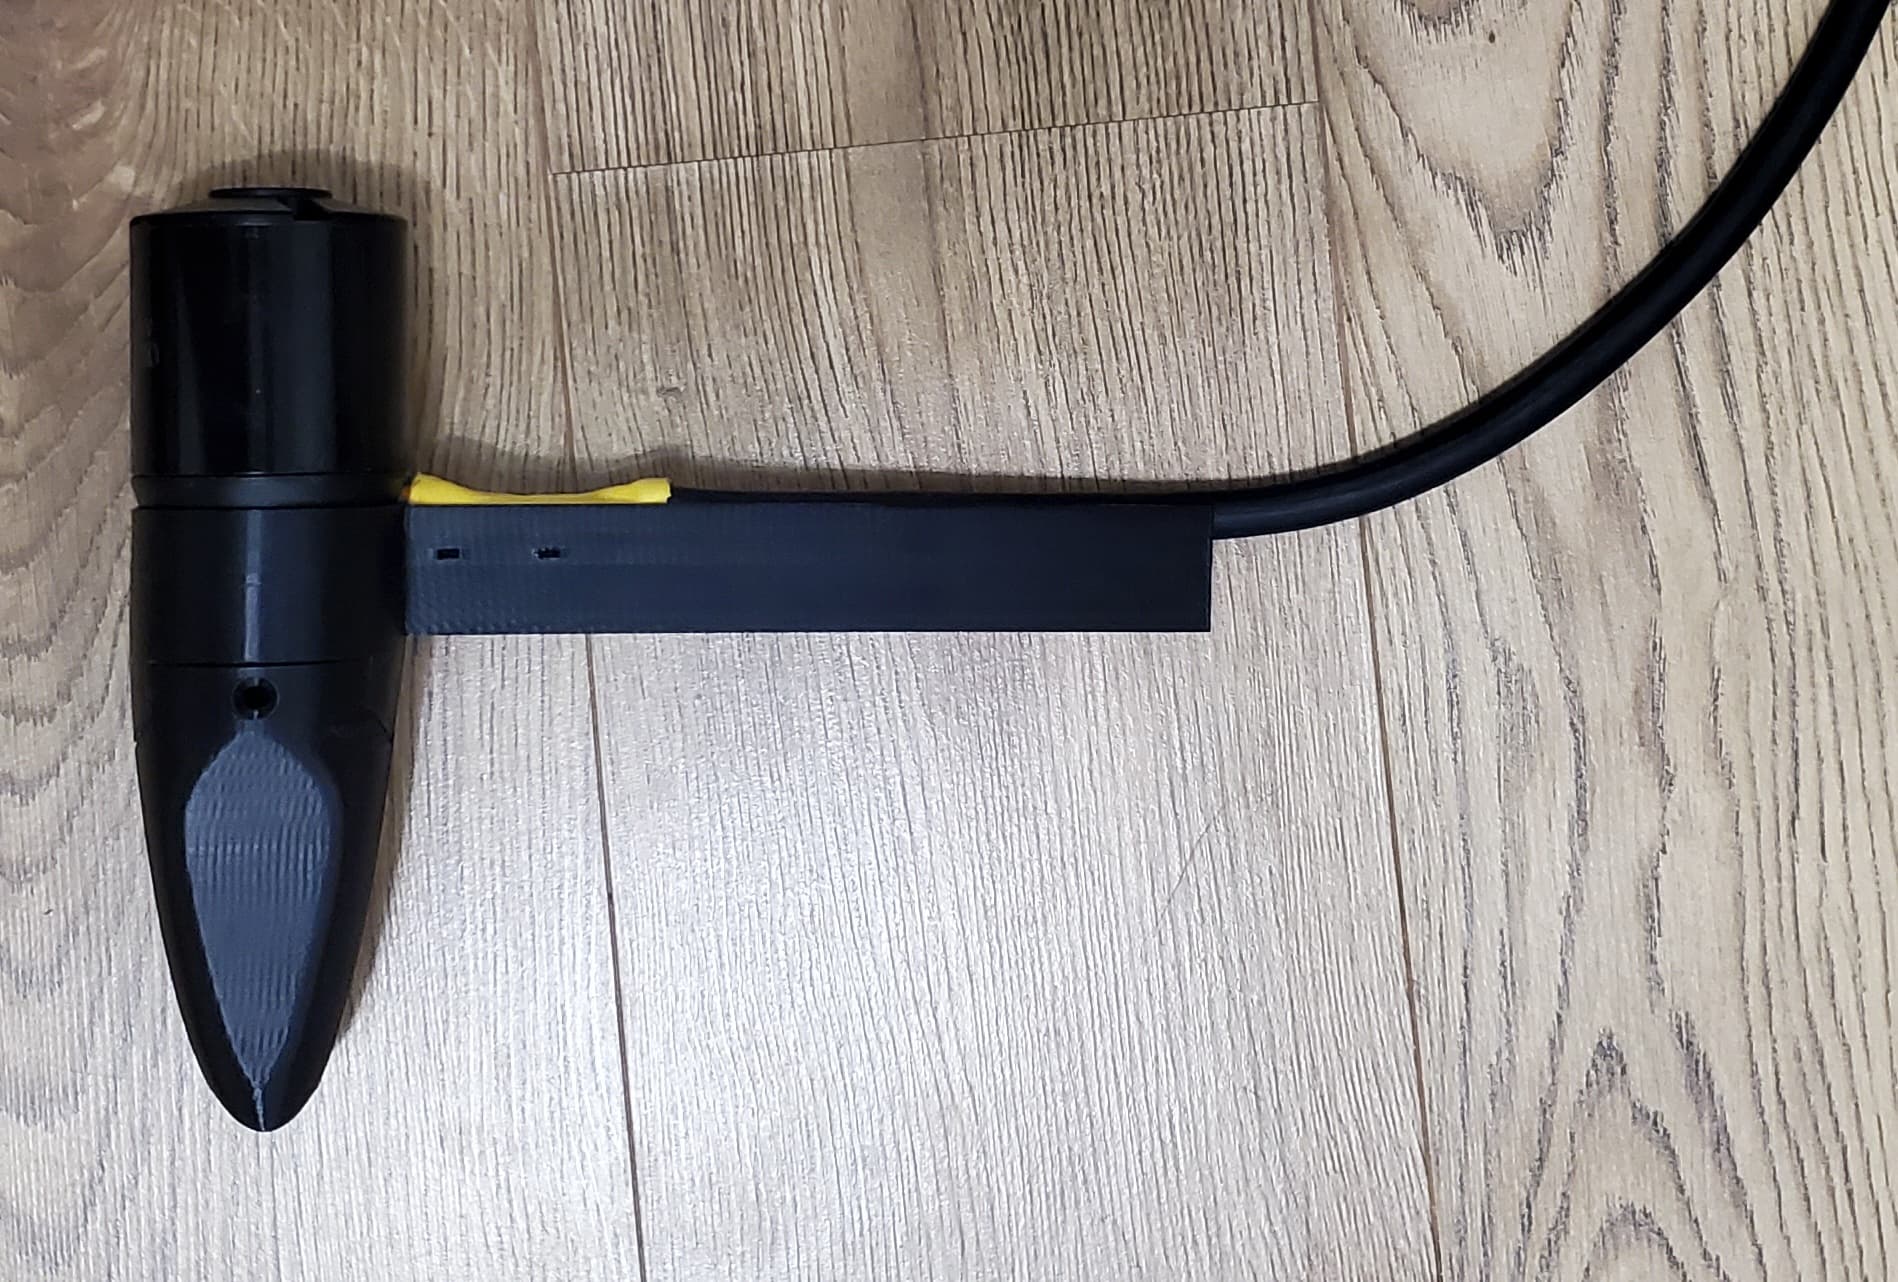
Motor Pod V4 is finish.
https://www.printables.com/de/model/620724-slingshot-hoverglide-motorpod-for-6384-and-unisex-
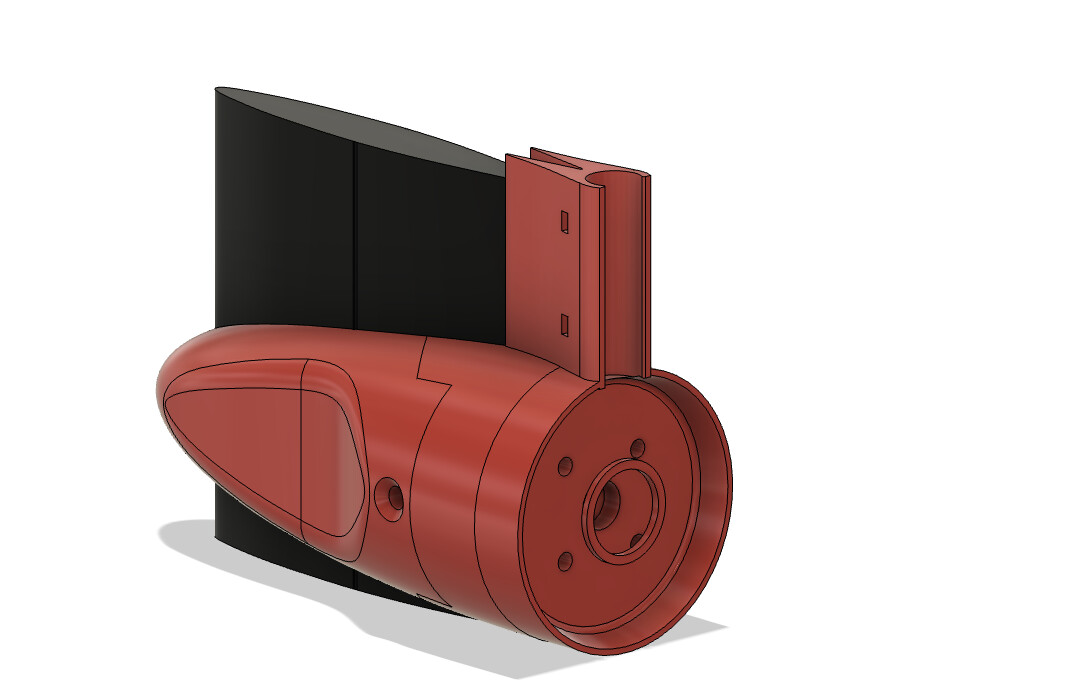
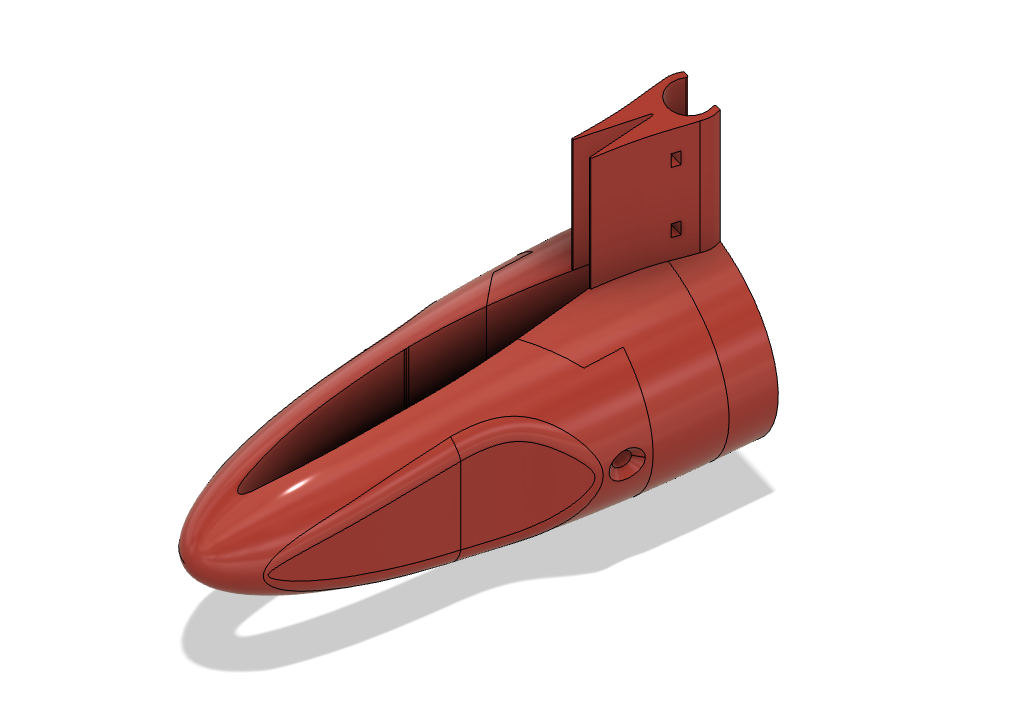
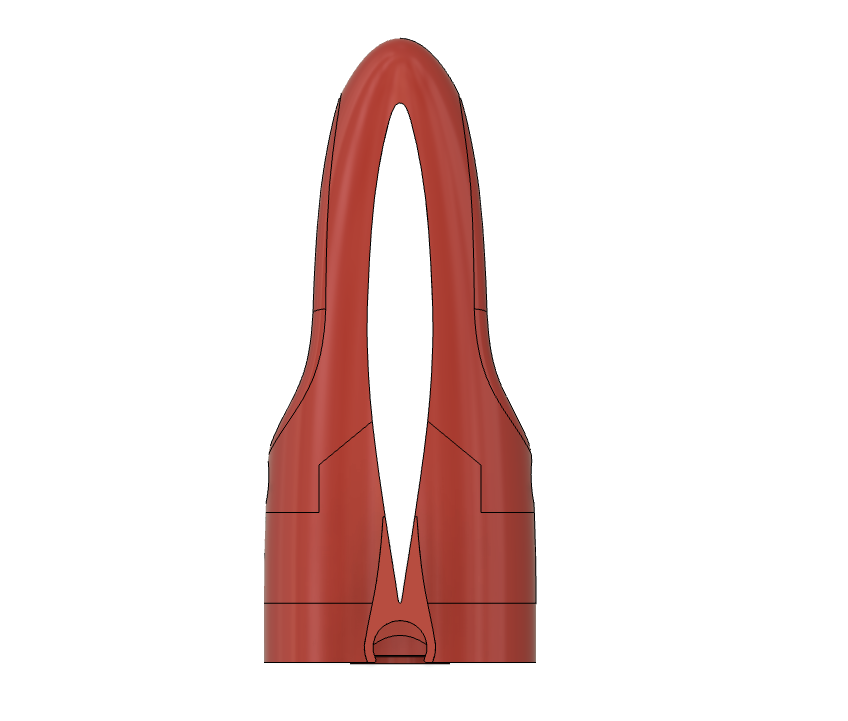
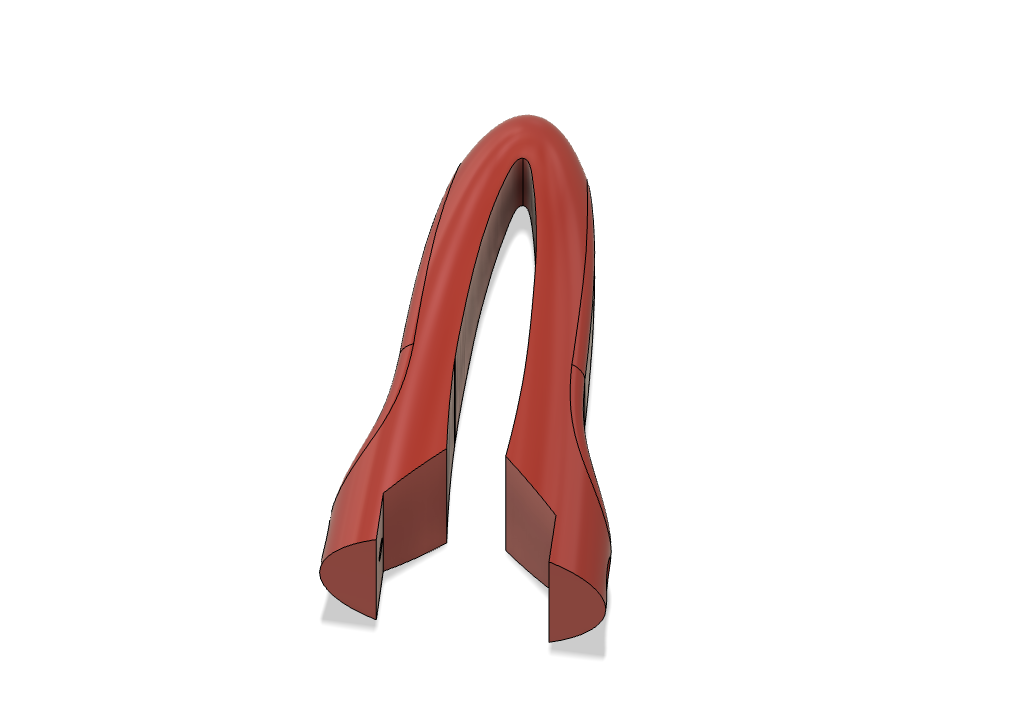
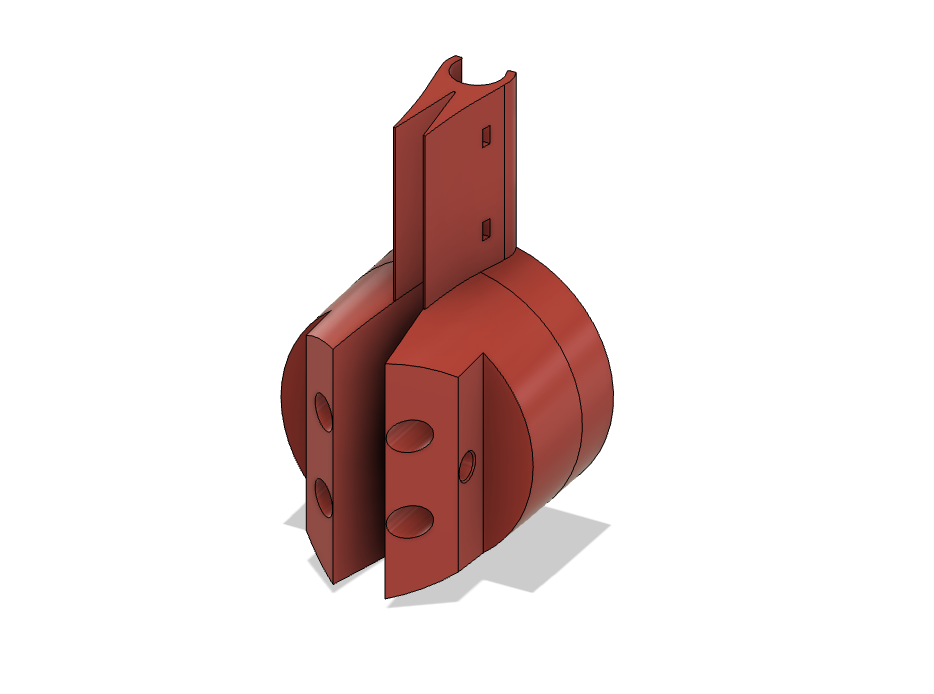
V2 XPETG, V3 PLA, V4 XPETG
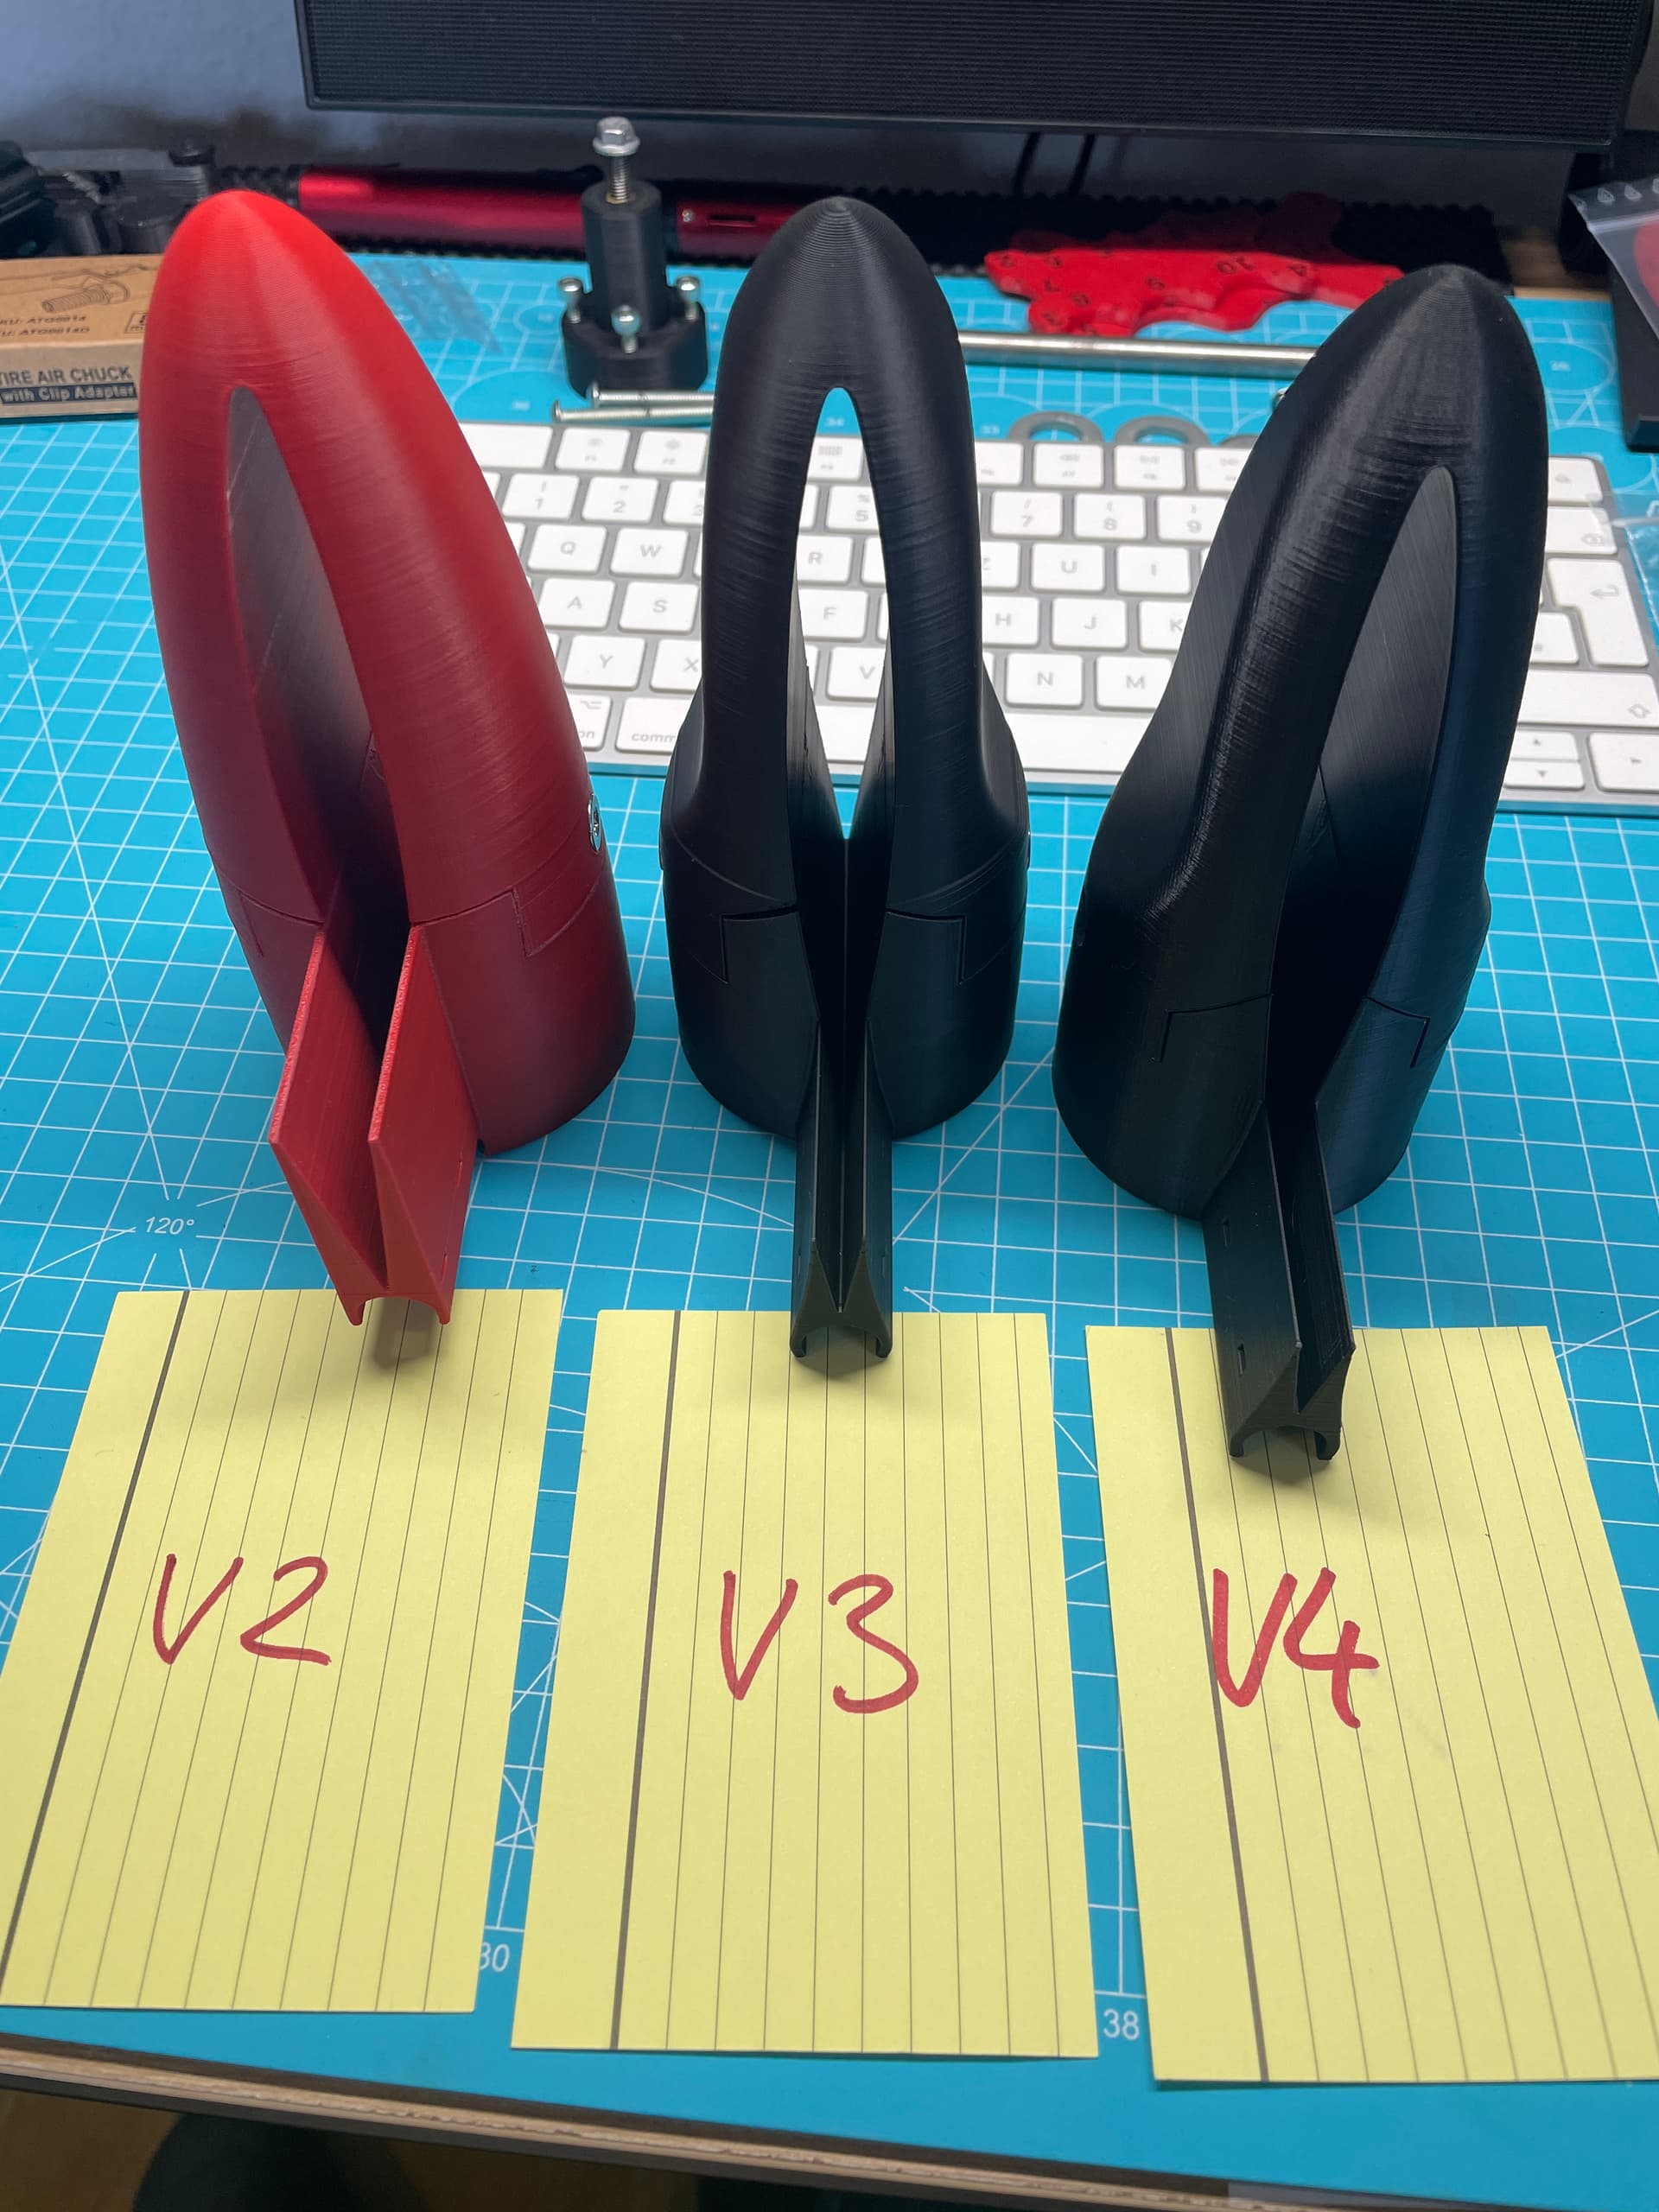
V4 the last one:
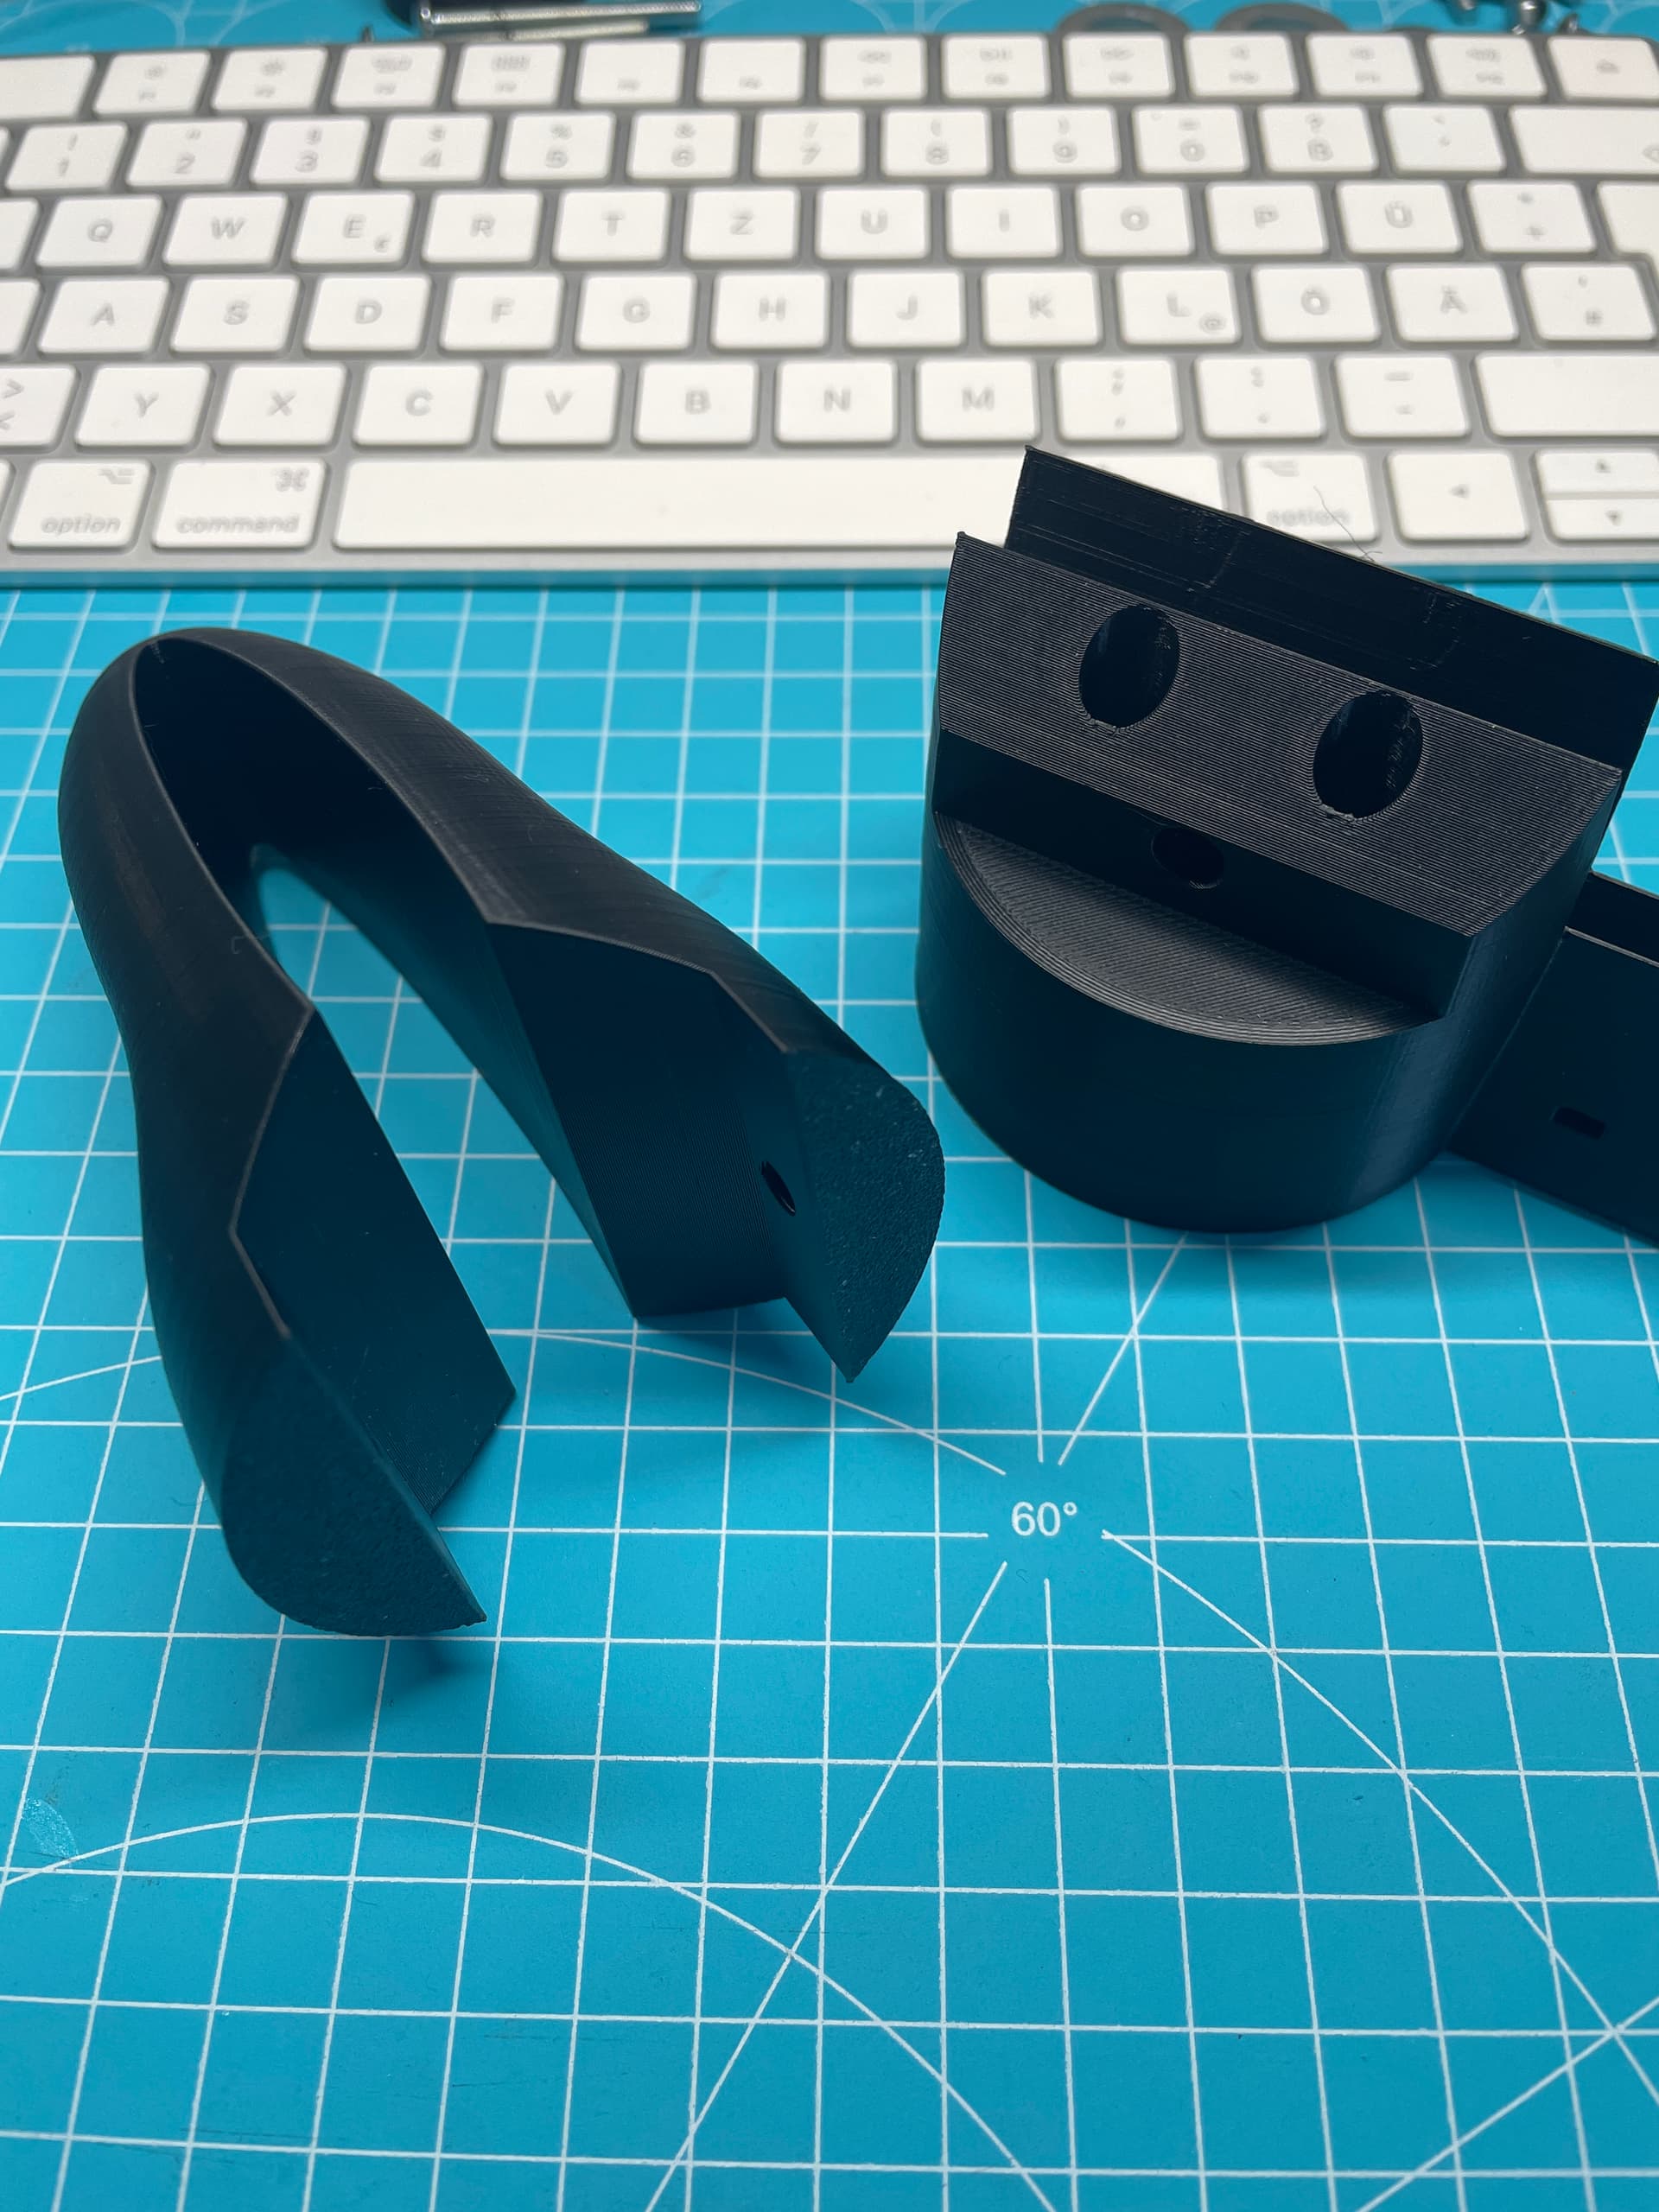
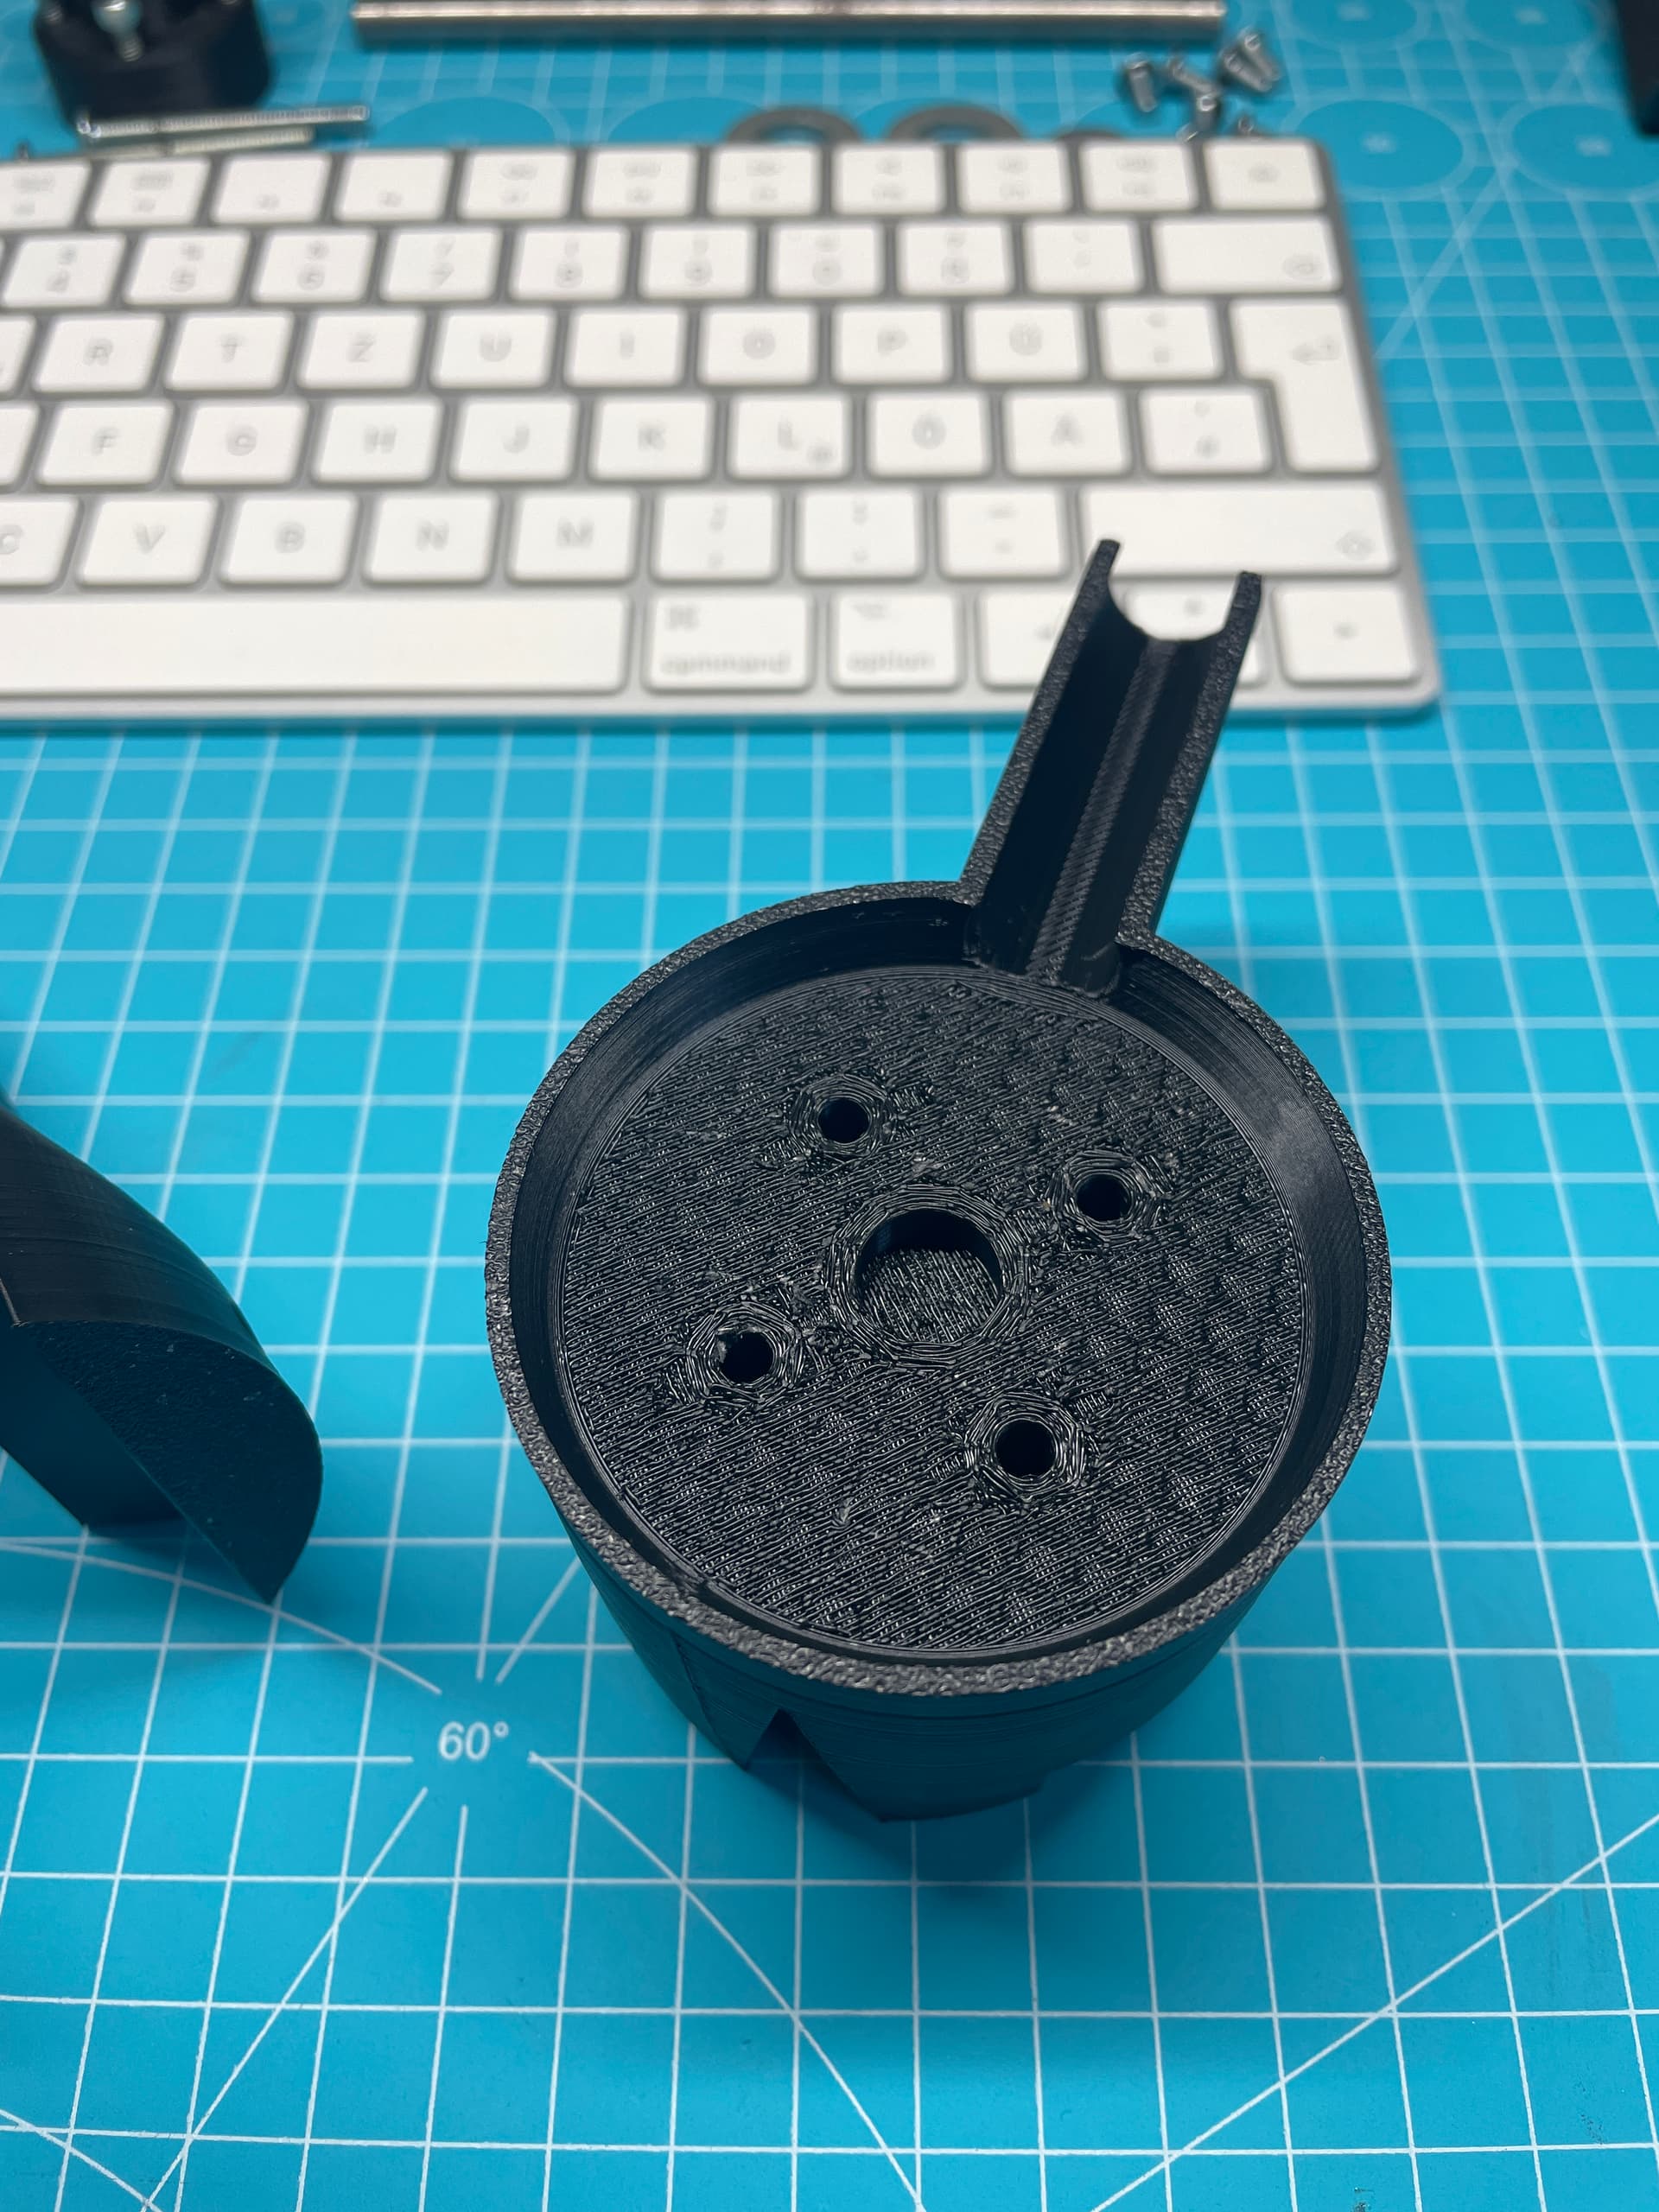

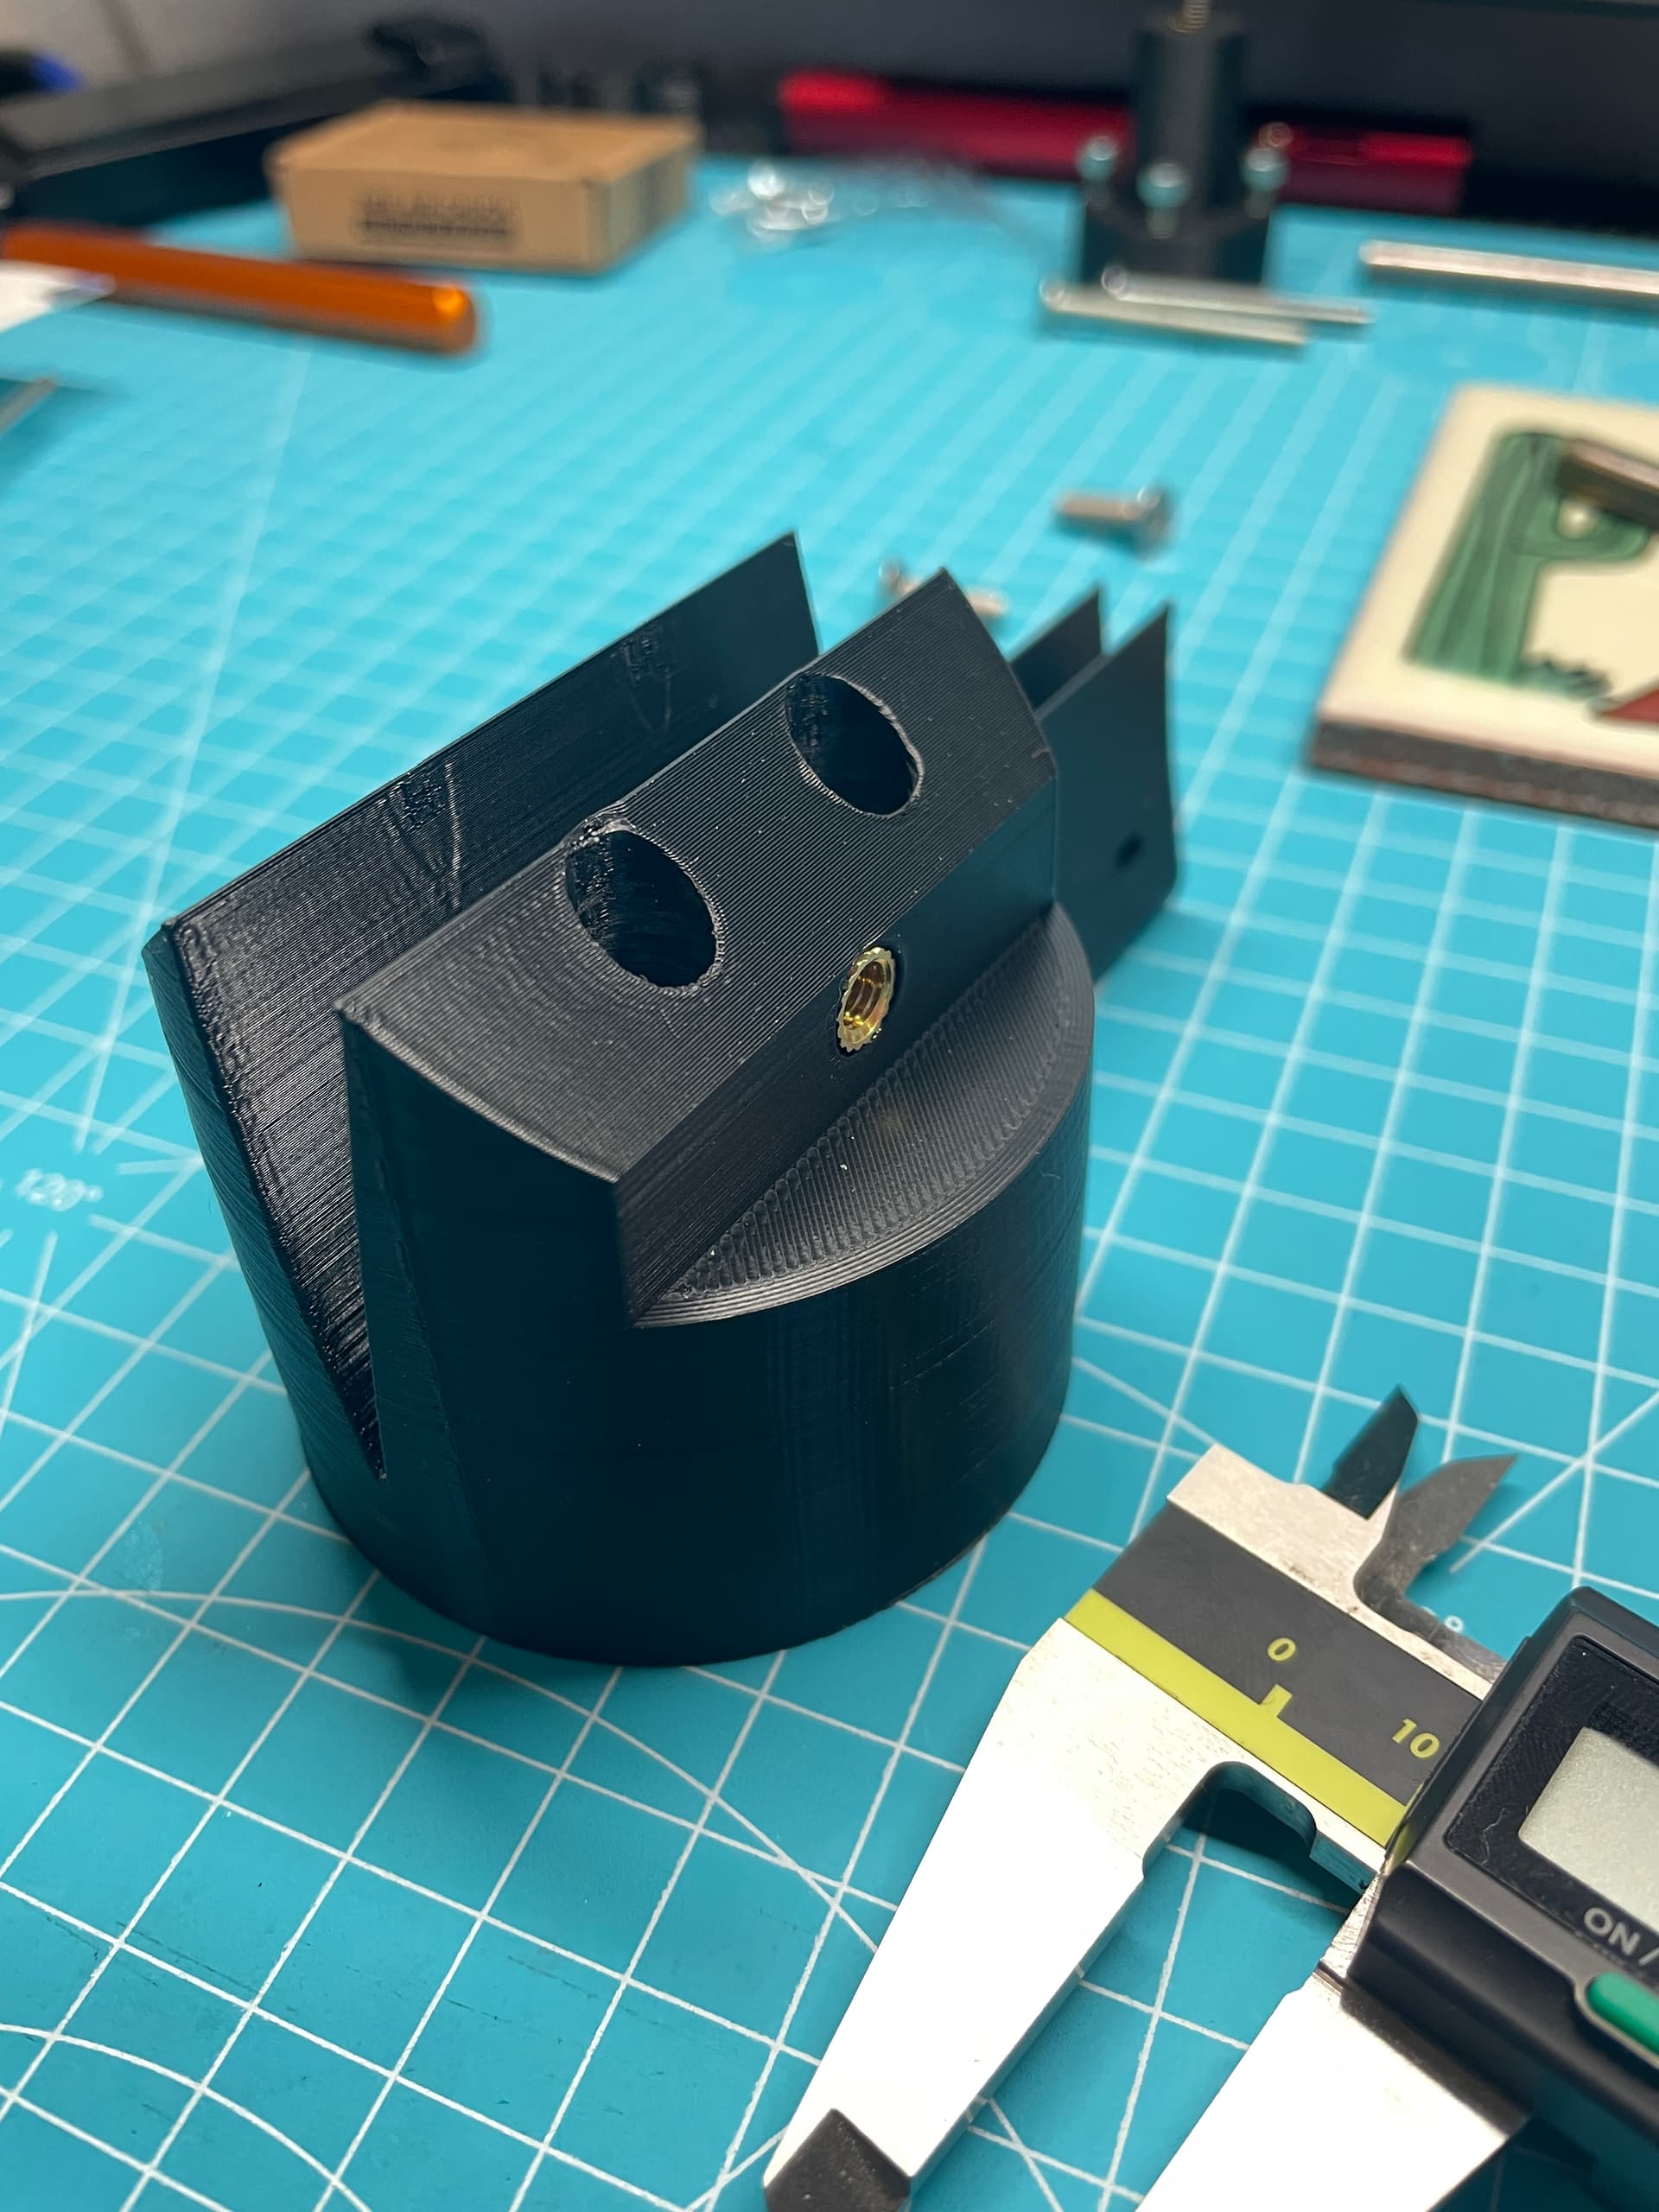
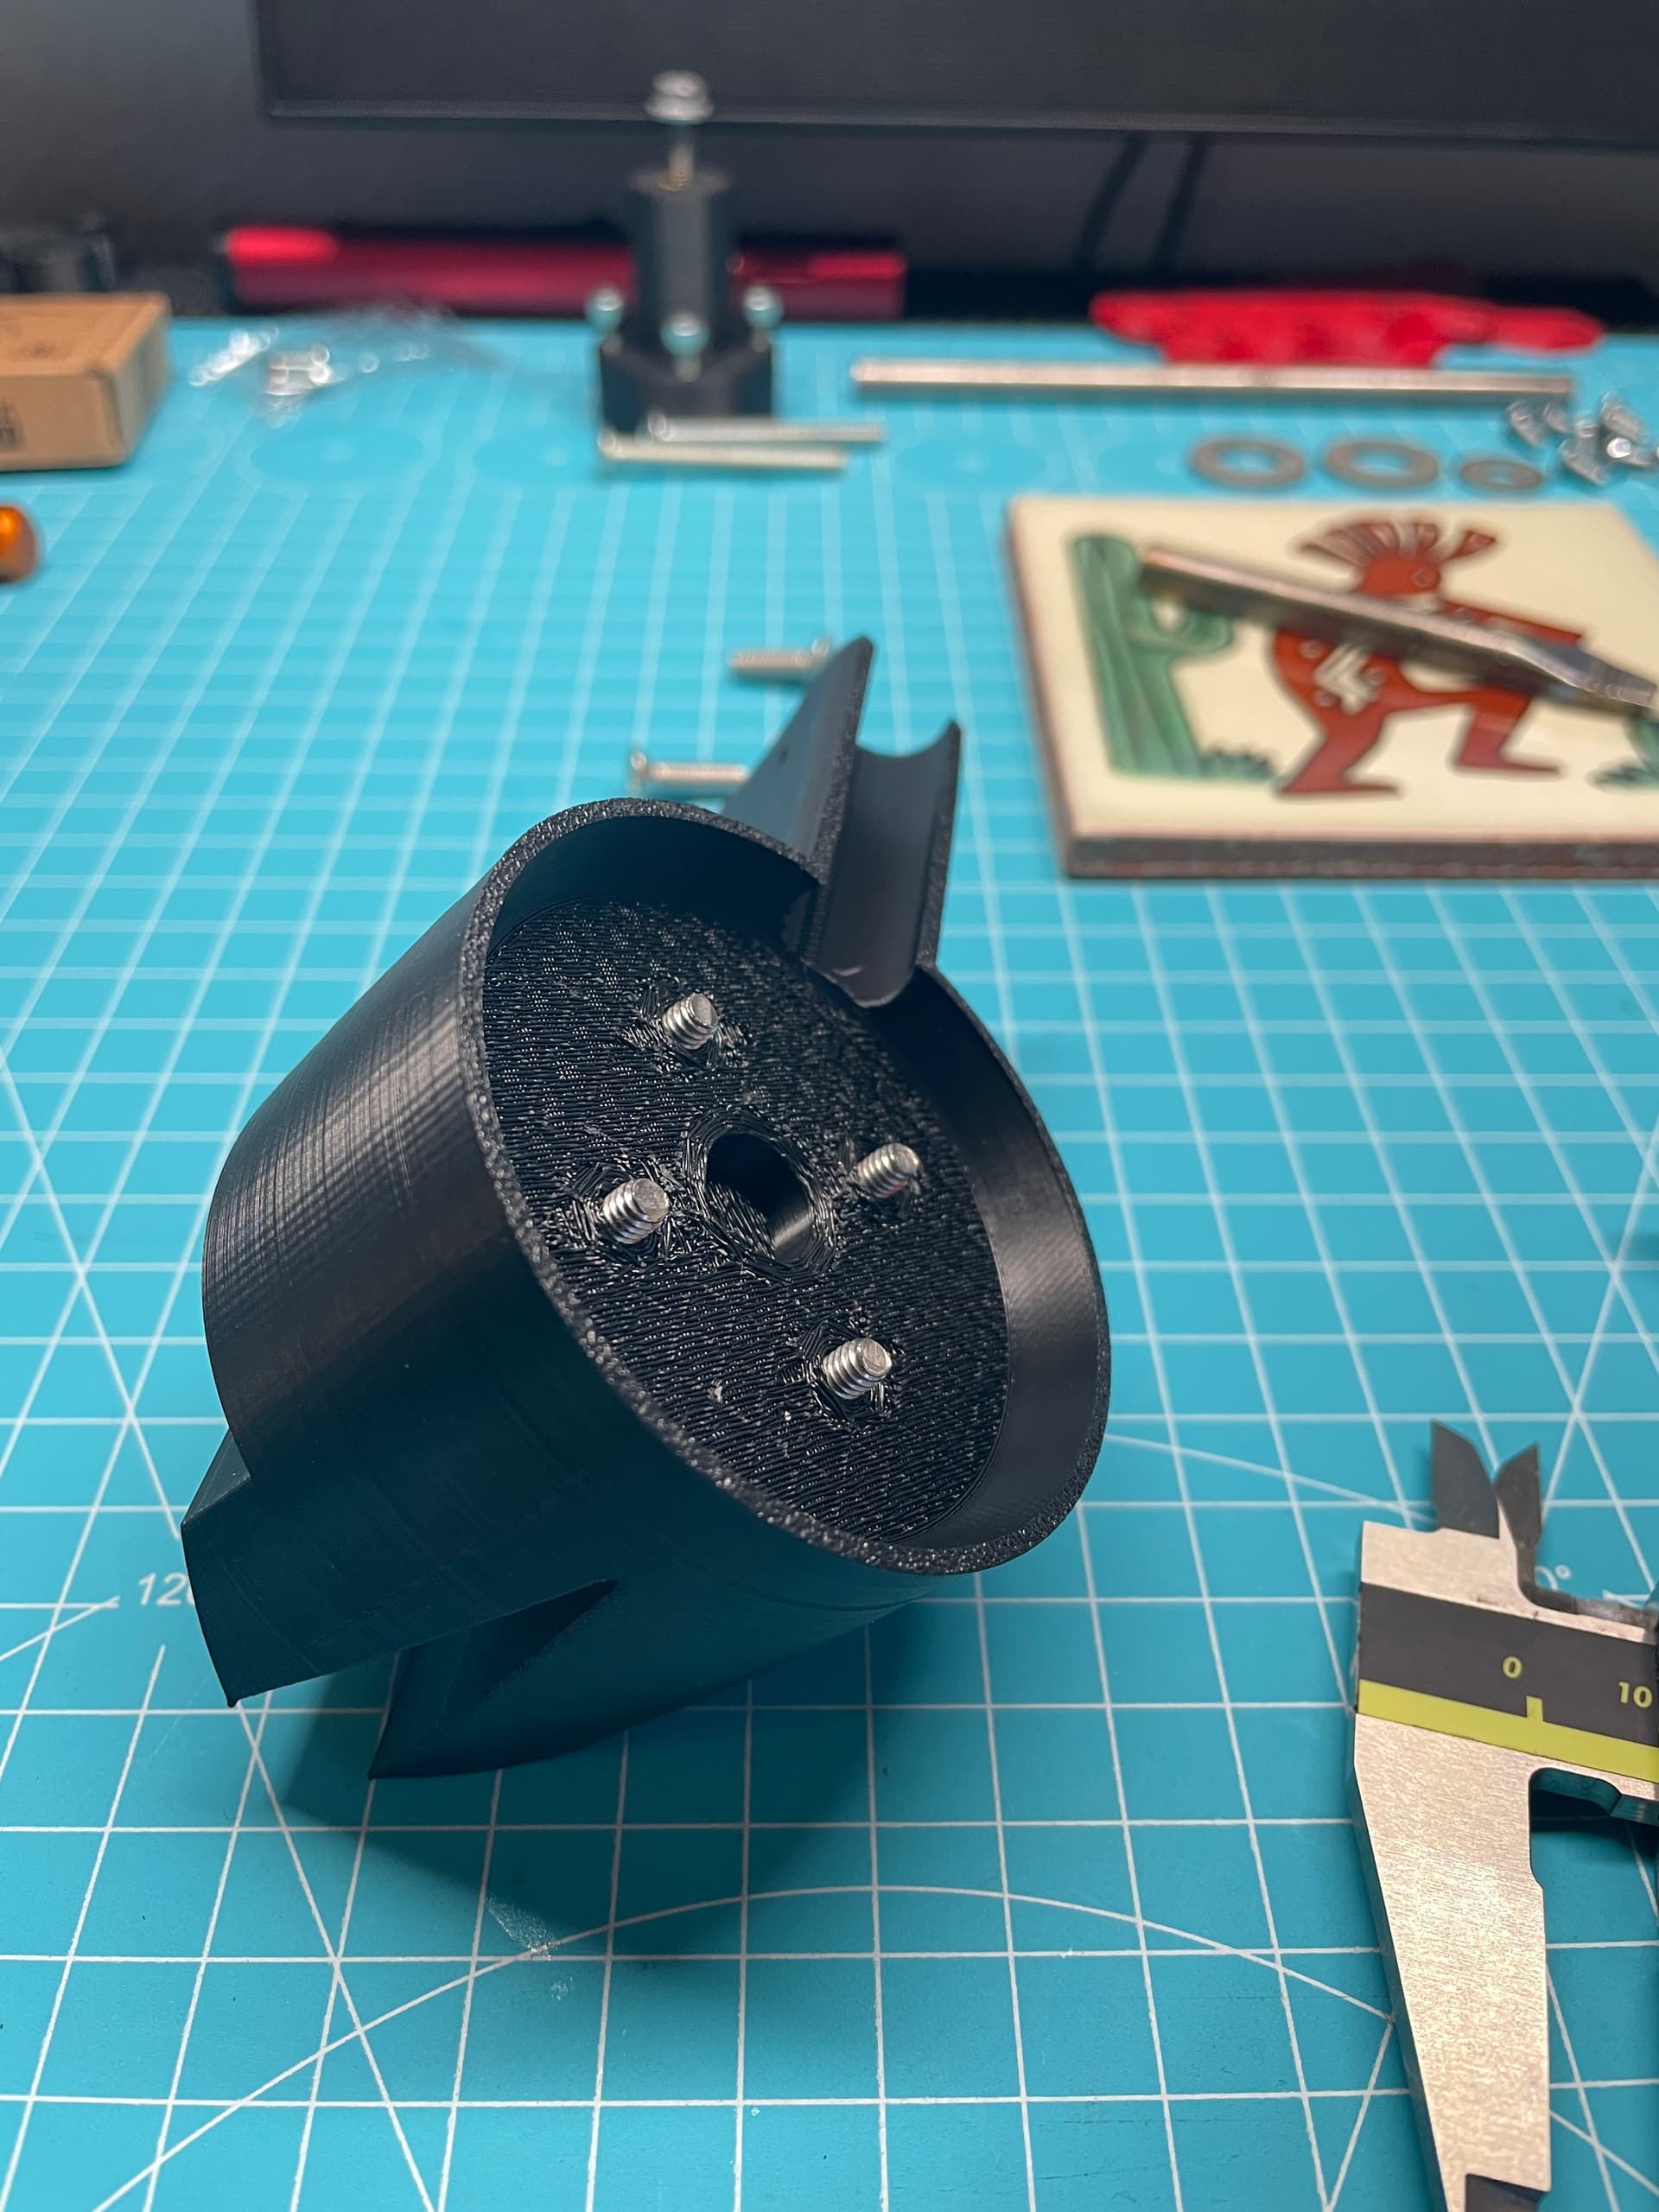

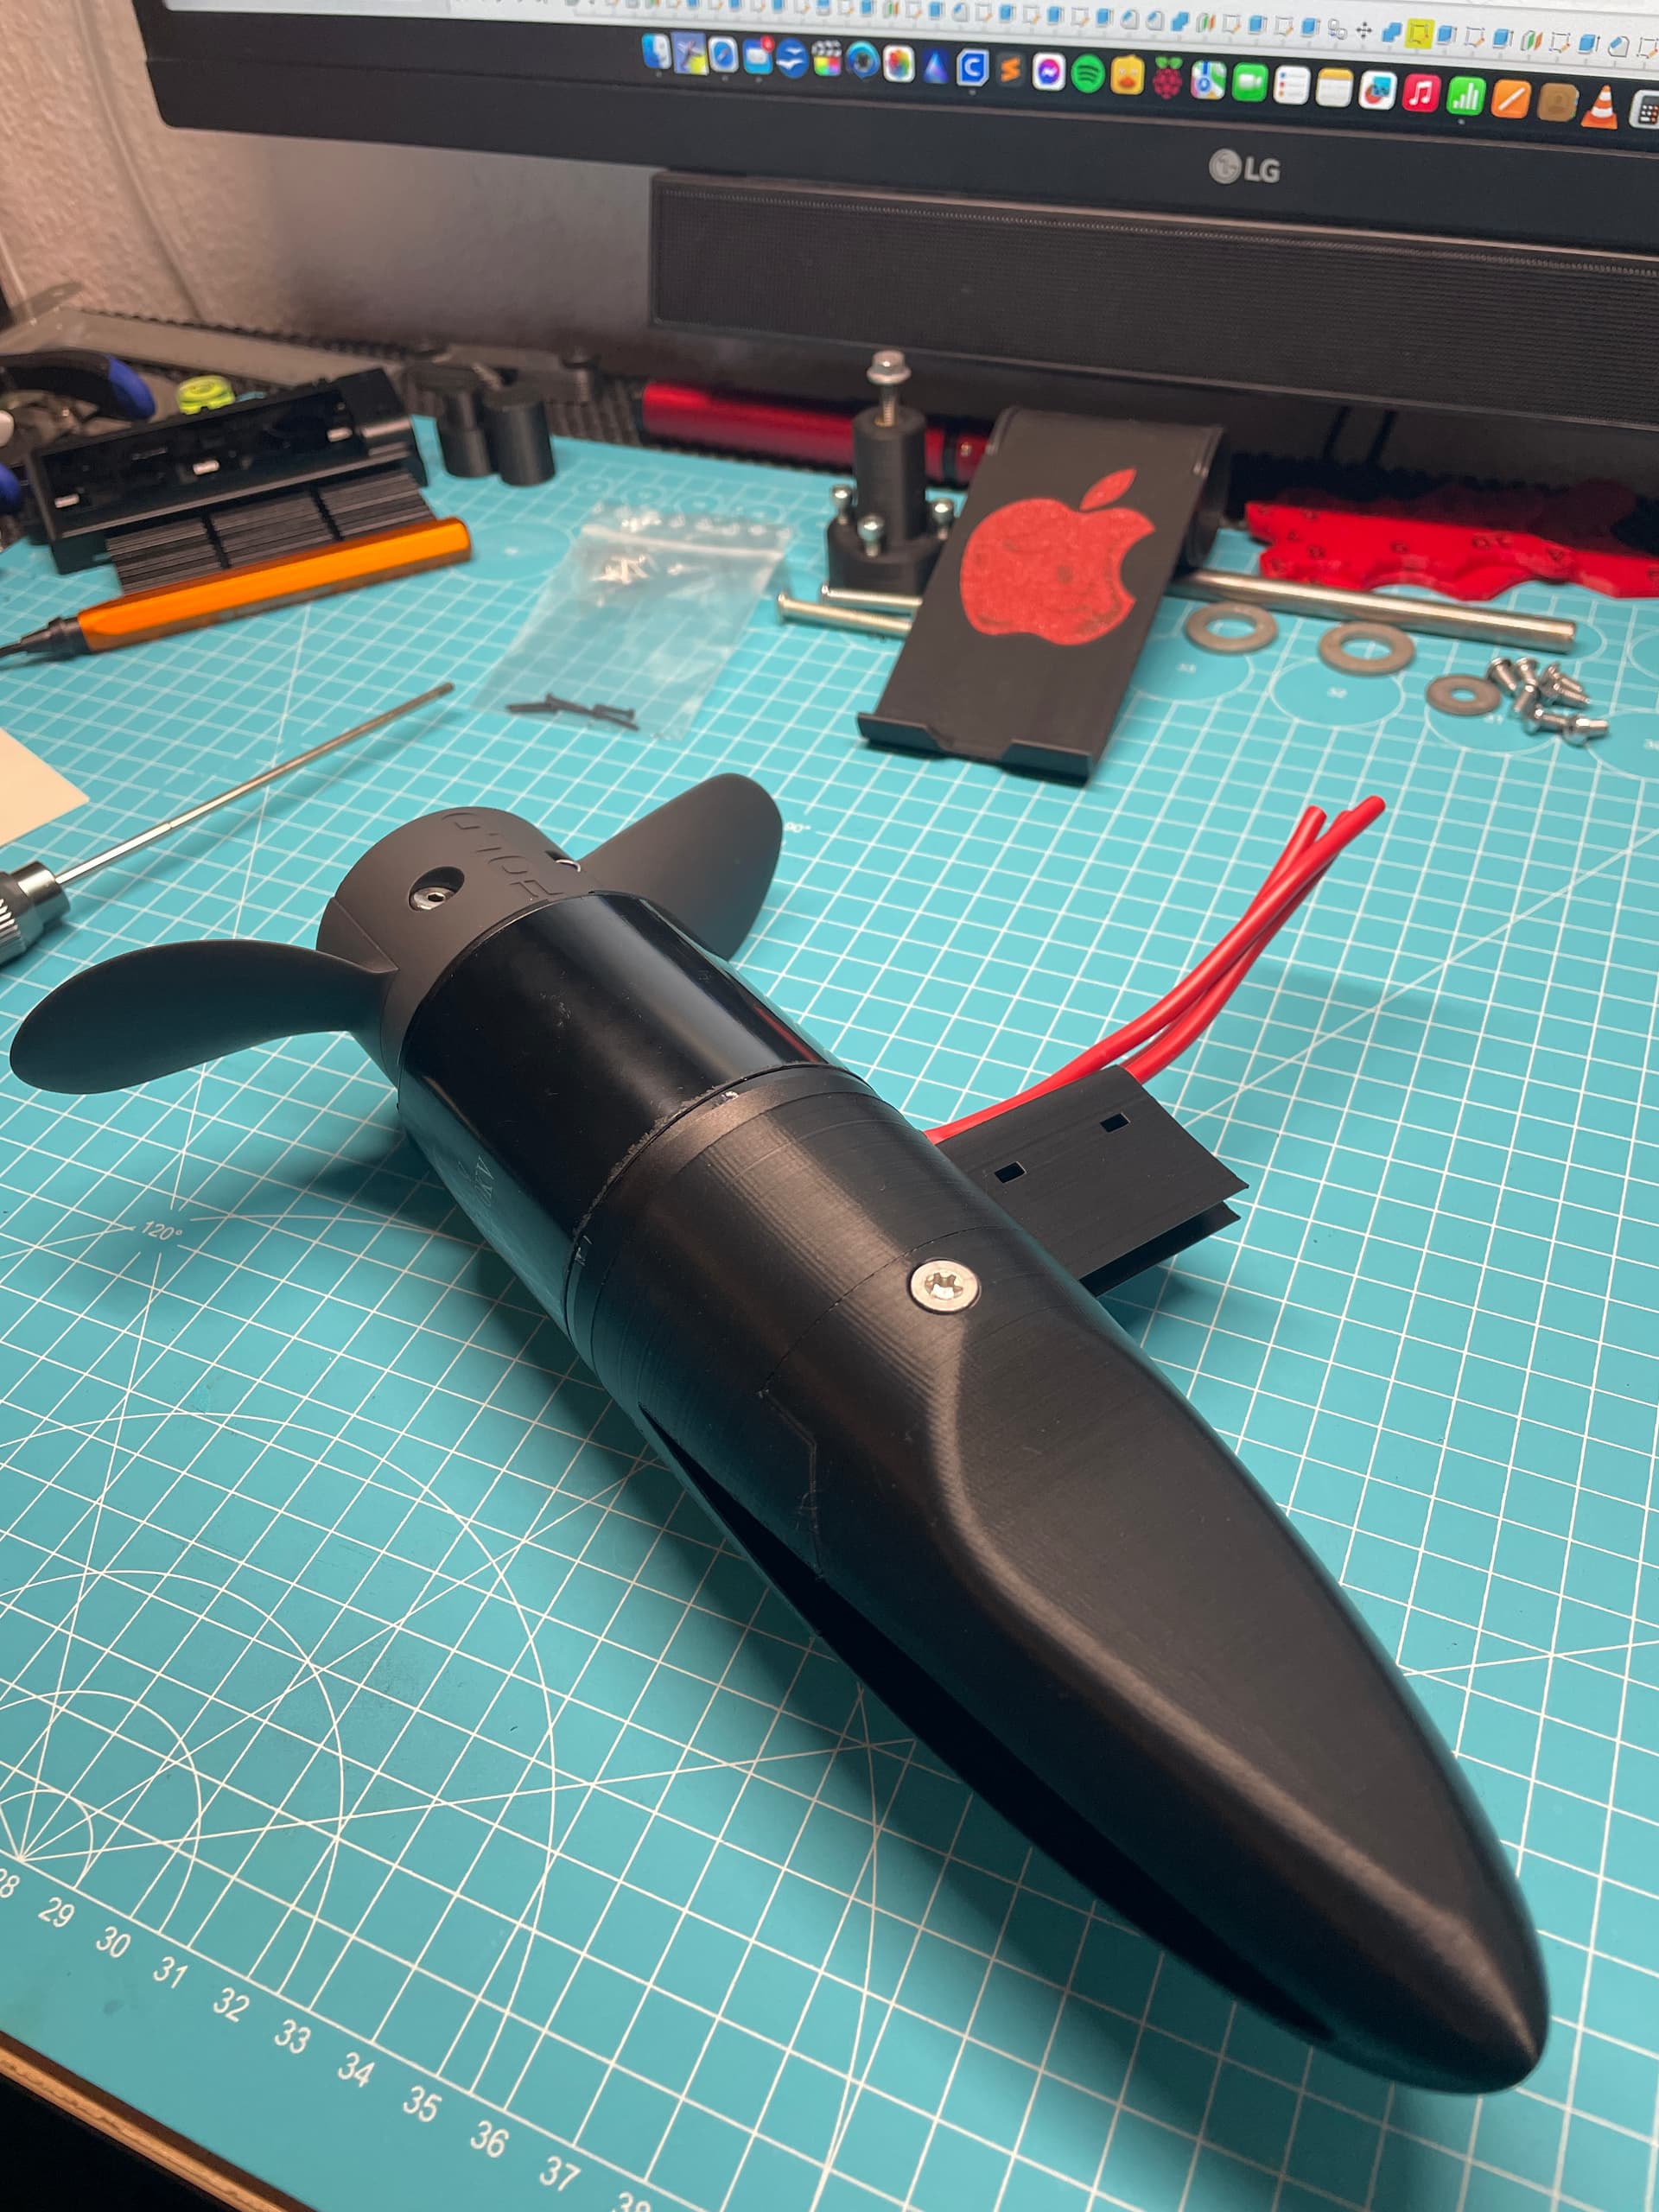


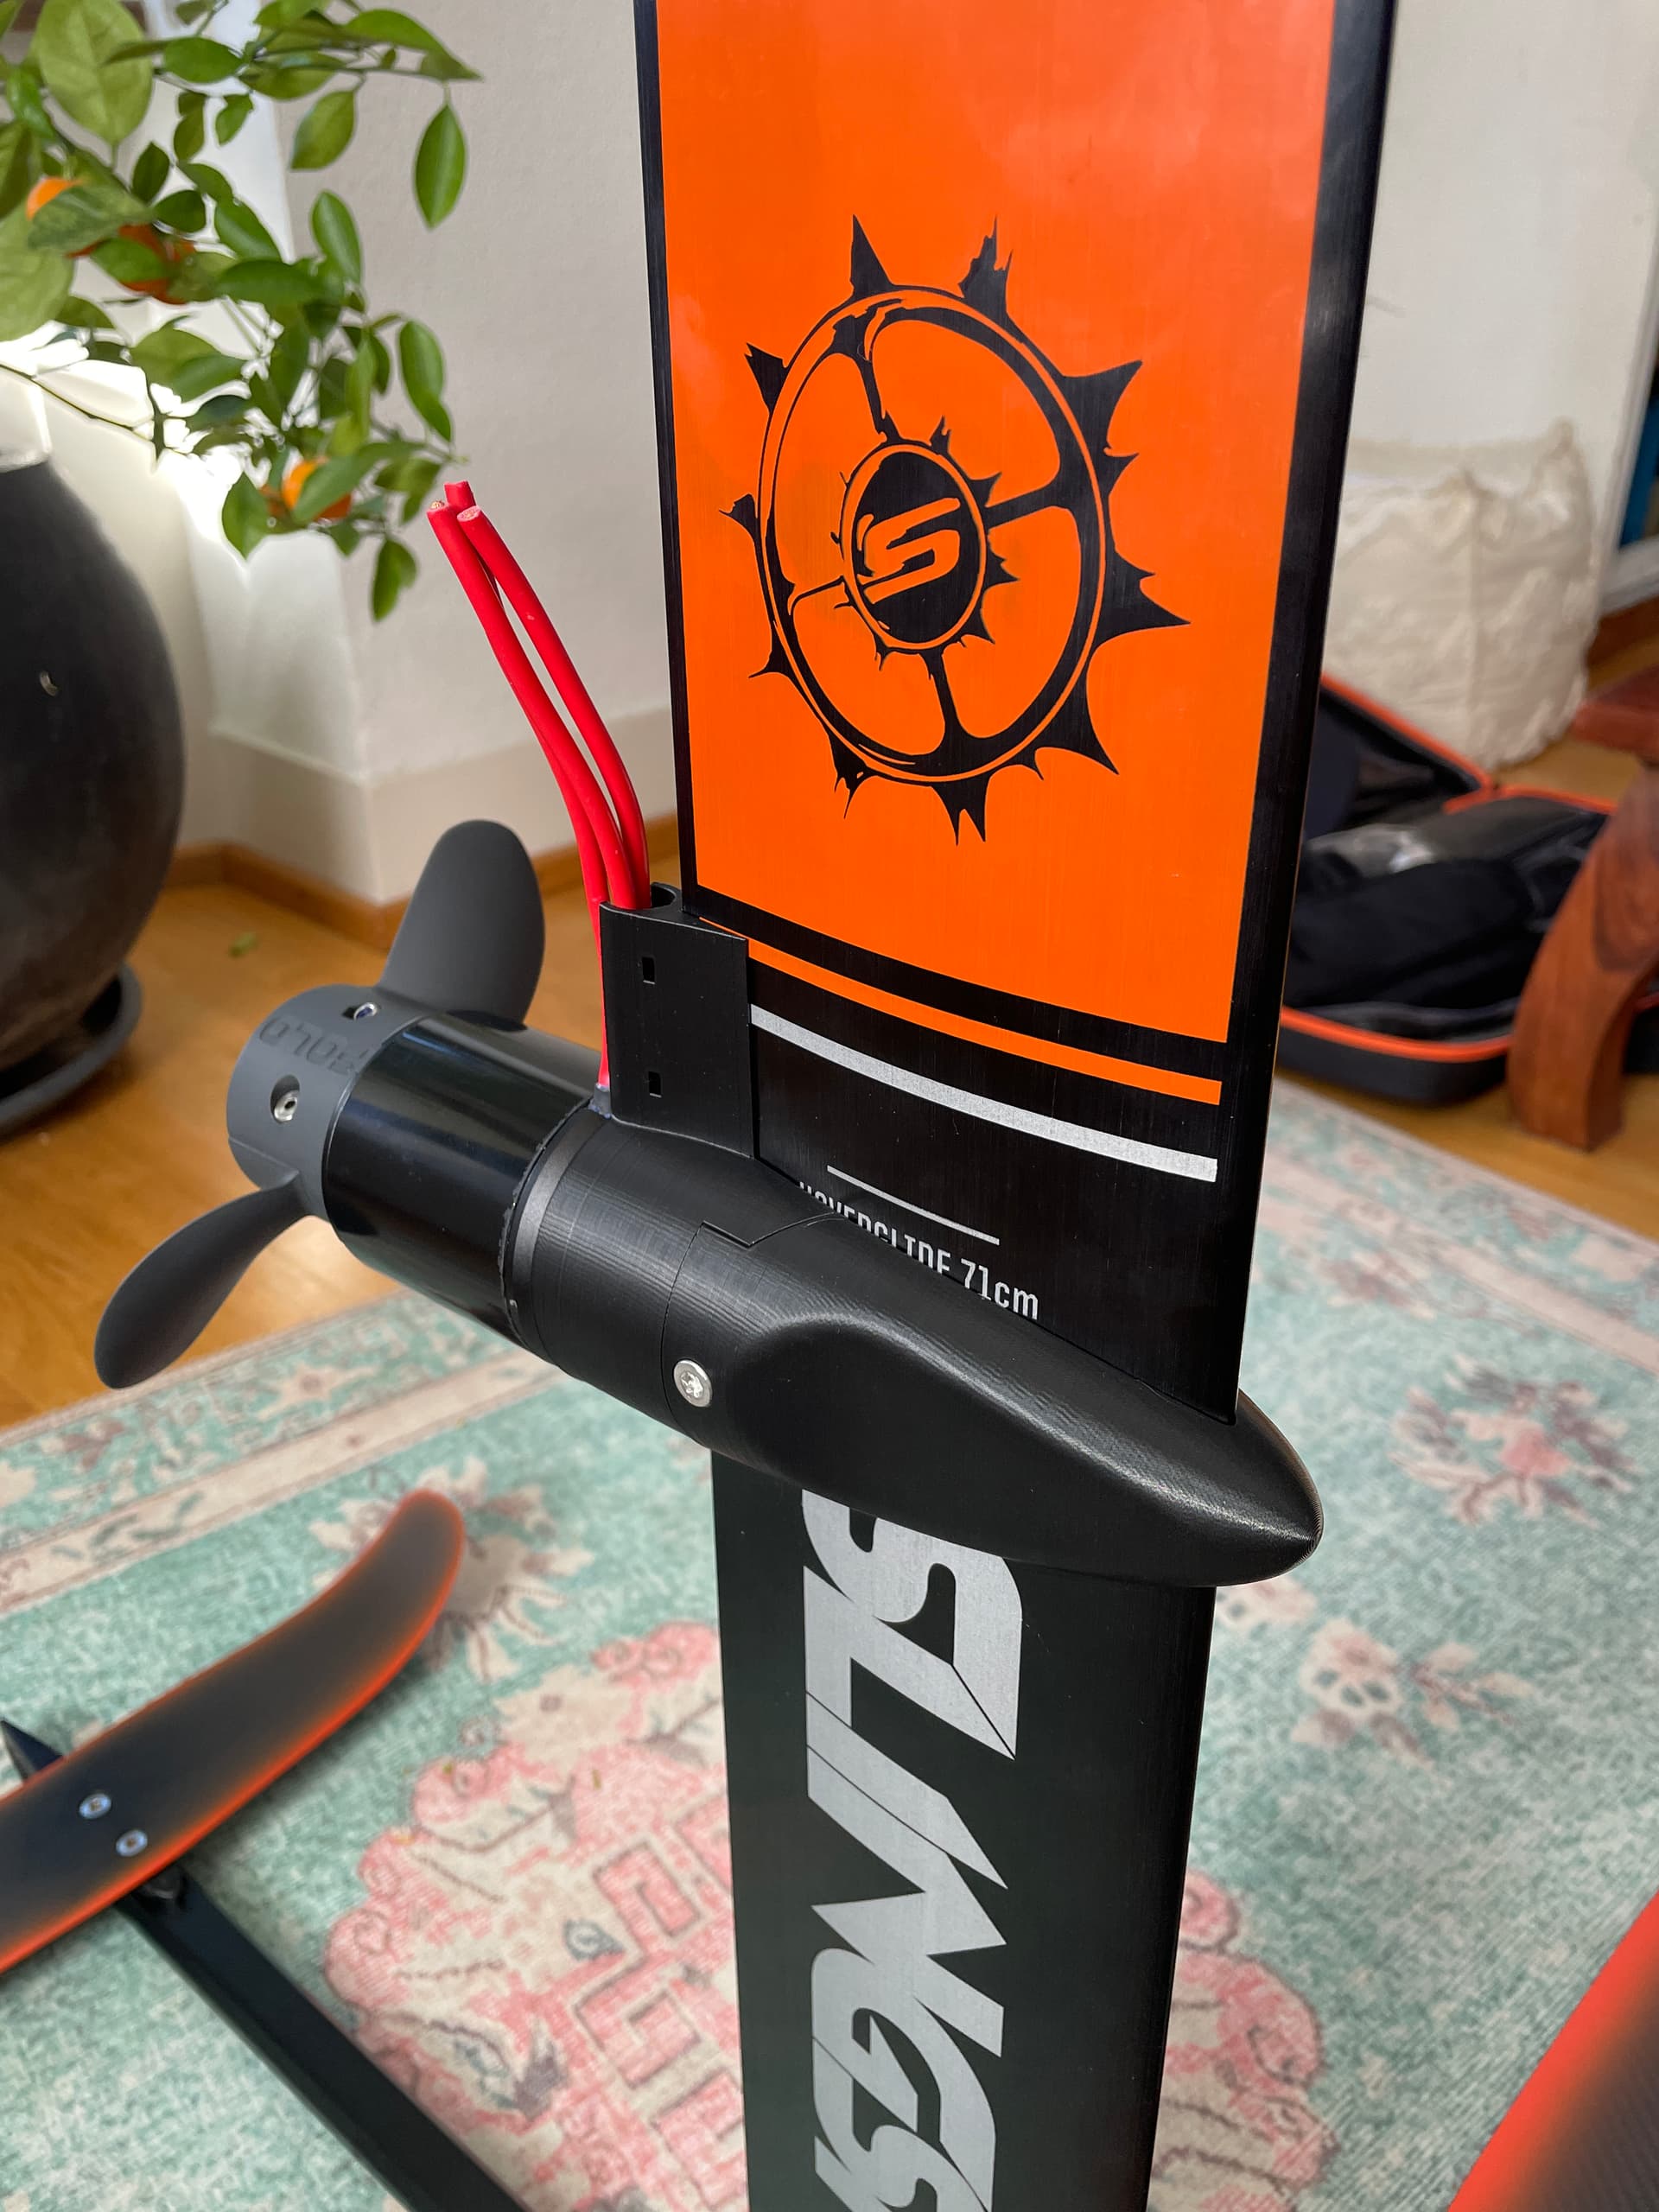
Next step is the controller!
16 Likes
This is ART. Kudos mate.
2 Likes
Did you coat them with something so that the epoxy would not bond to them?
Yes with grease. Or vaseline.
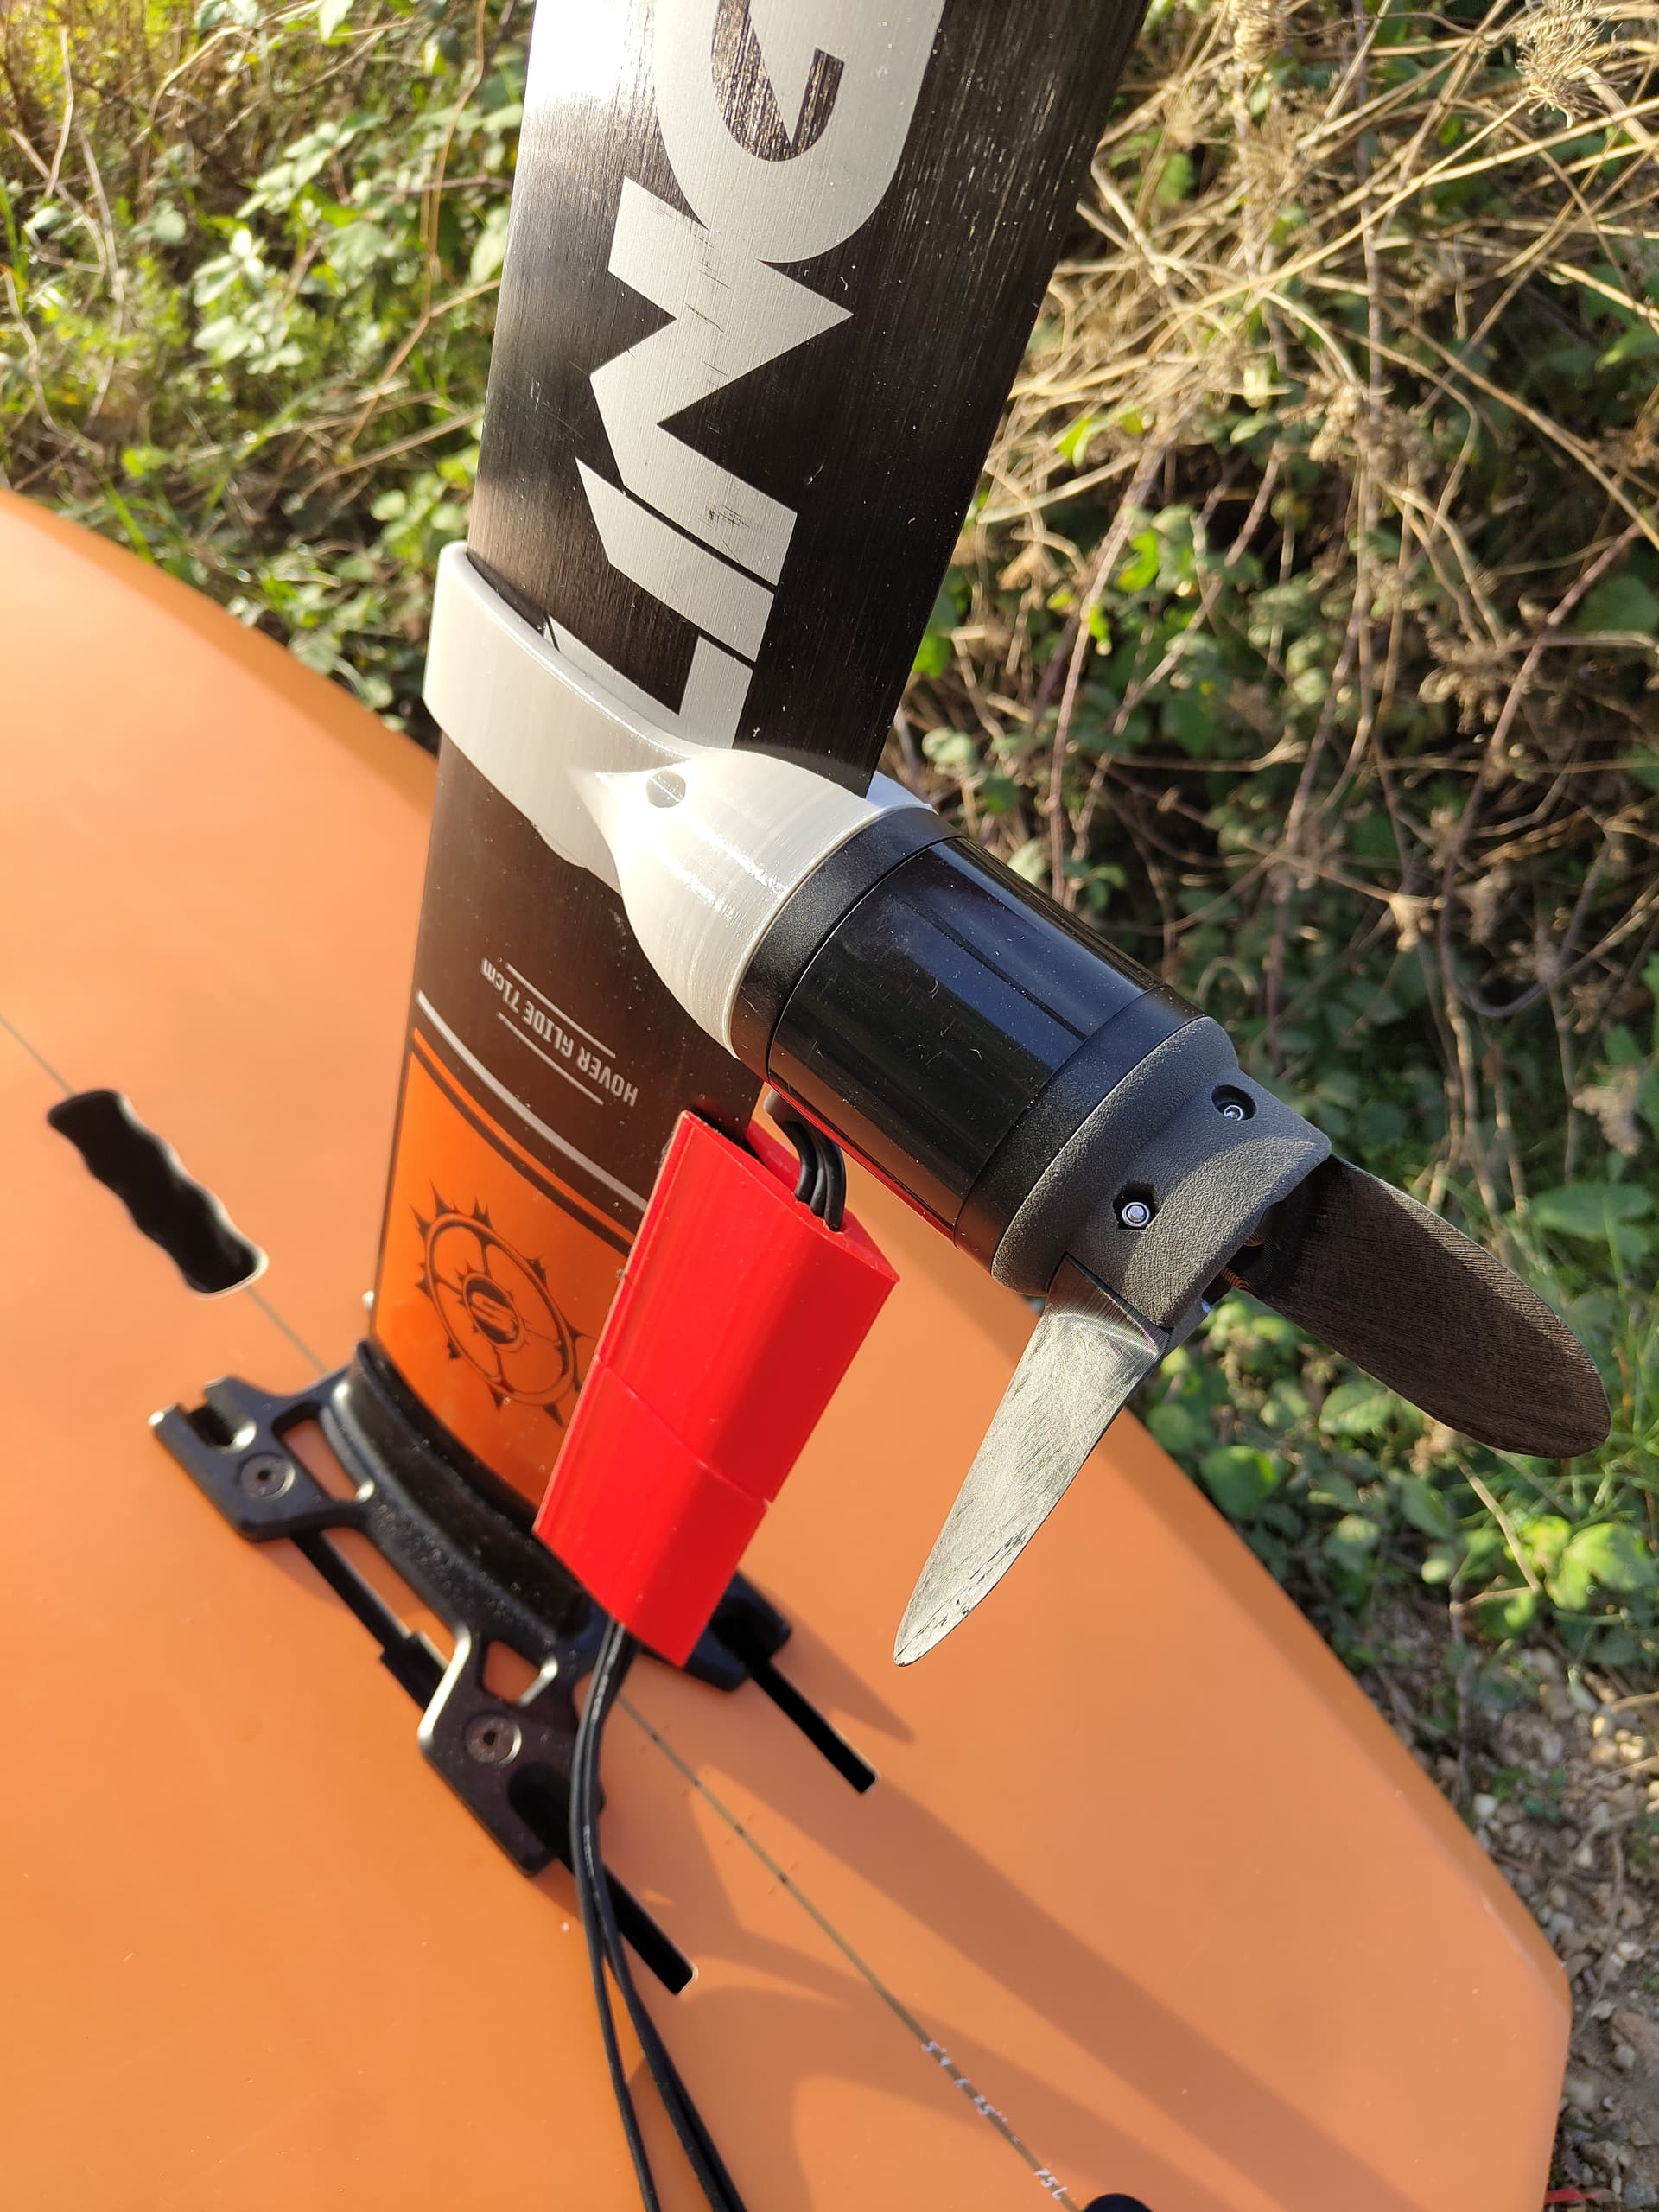
Sometimes I ask myself the question: why do I print out everything that is published on the forum. And I don’t find any other answer except: because I can. Changed it for AXIS, thanks for this elegant solution.
6 Likes
Very nice. I like it.
Good idea with the longer wire holder.
I have the same foil kit, and I just tested the 48 cm rear wing instead of 42, it makes a huge difference in lift. Got it for 120€ delivered from spain.
Nice mount by the way. If you Come up with a good solution for the cables and slingshot mast I would be interested.
1 Like
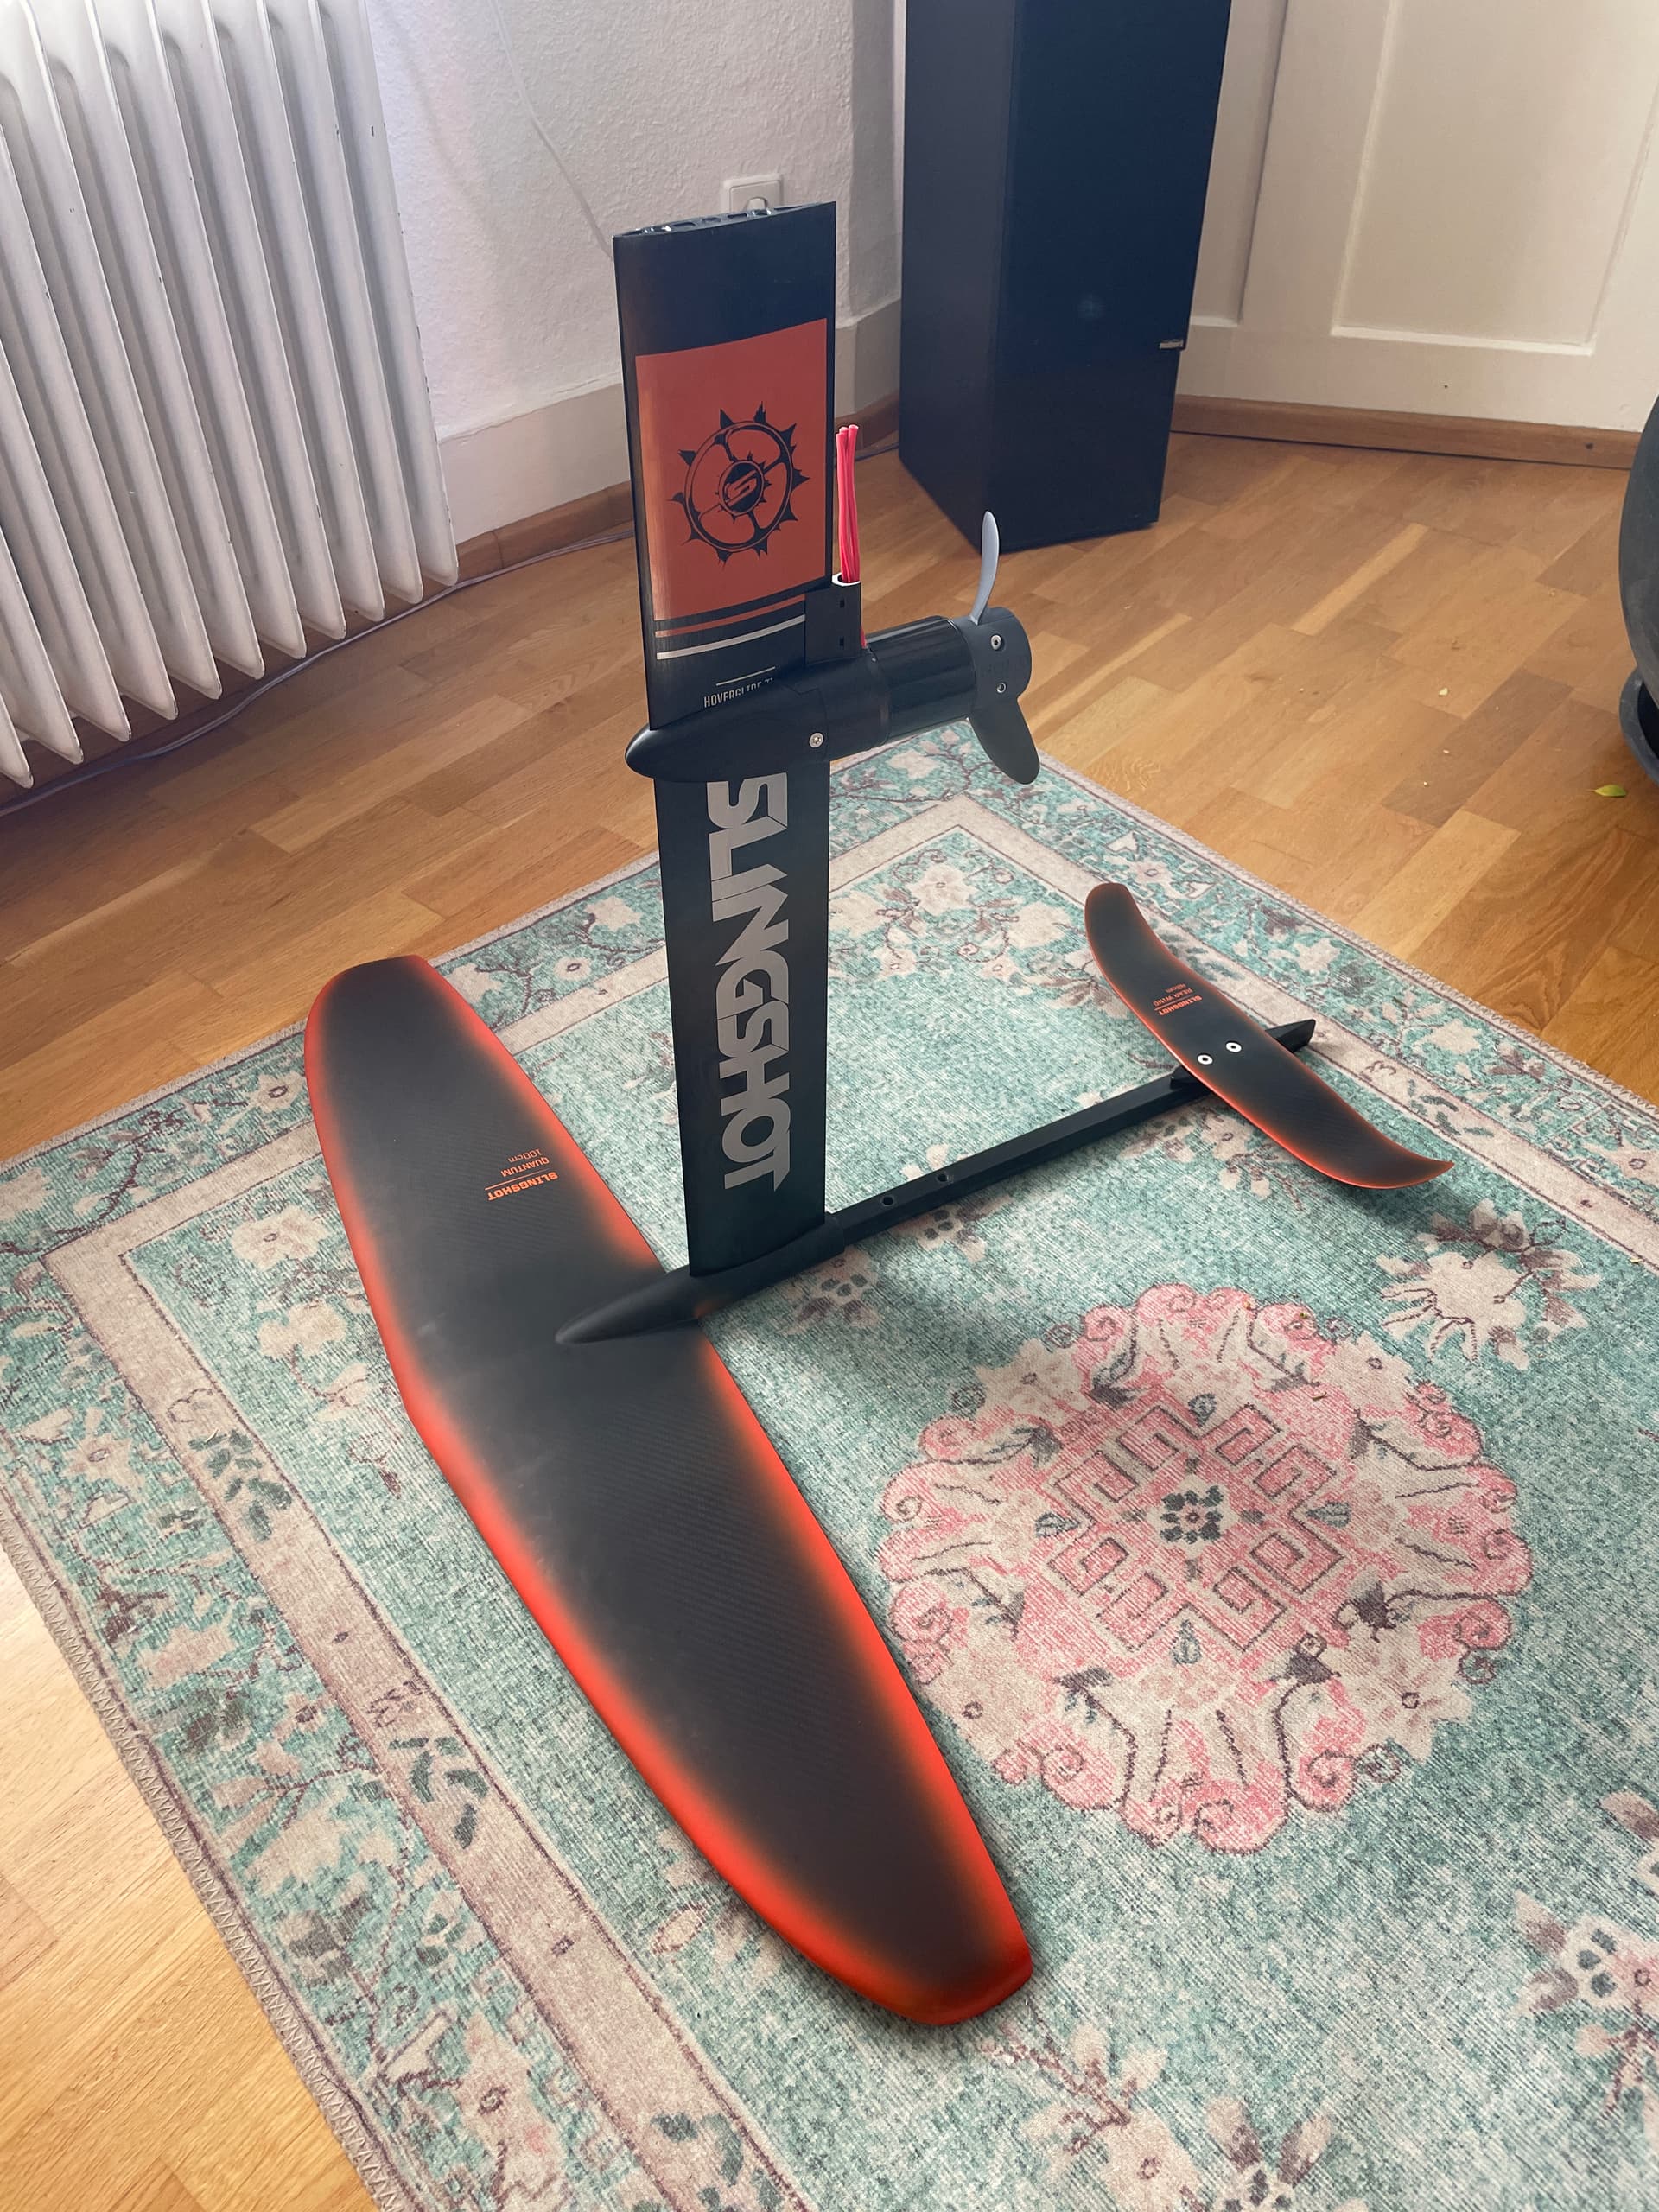
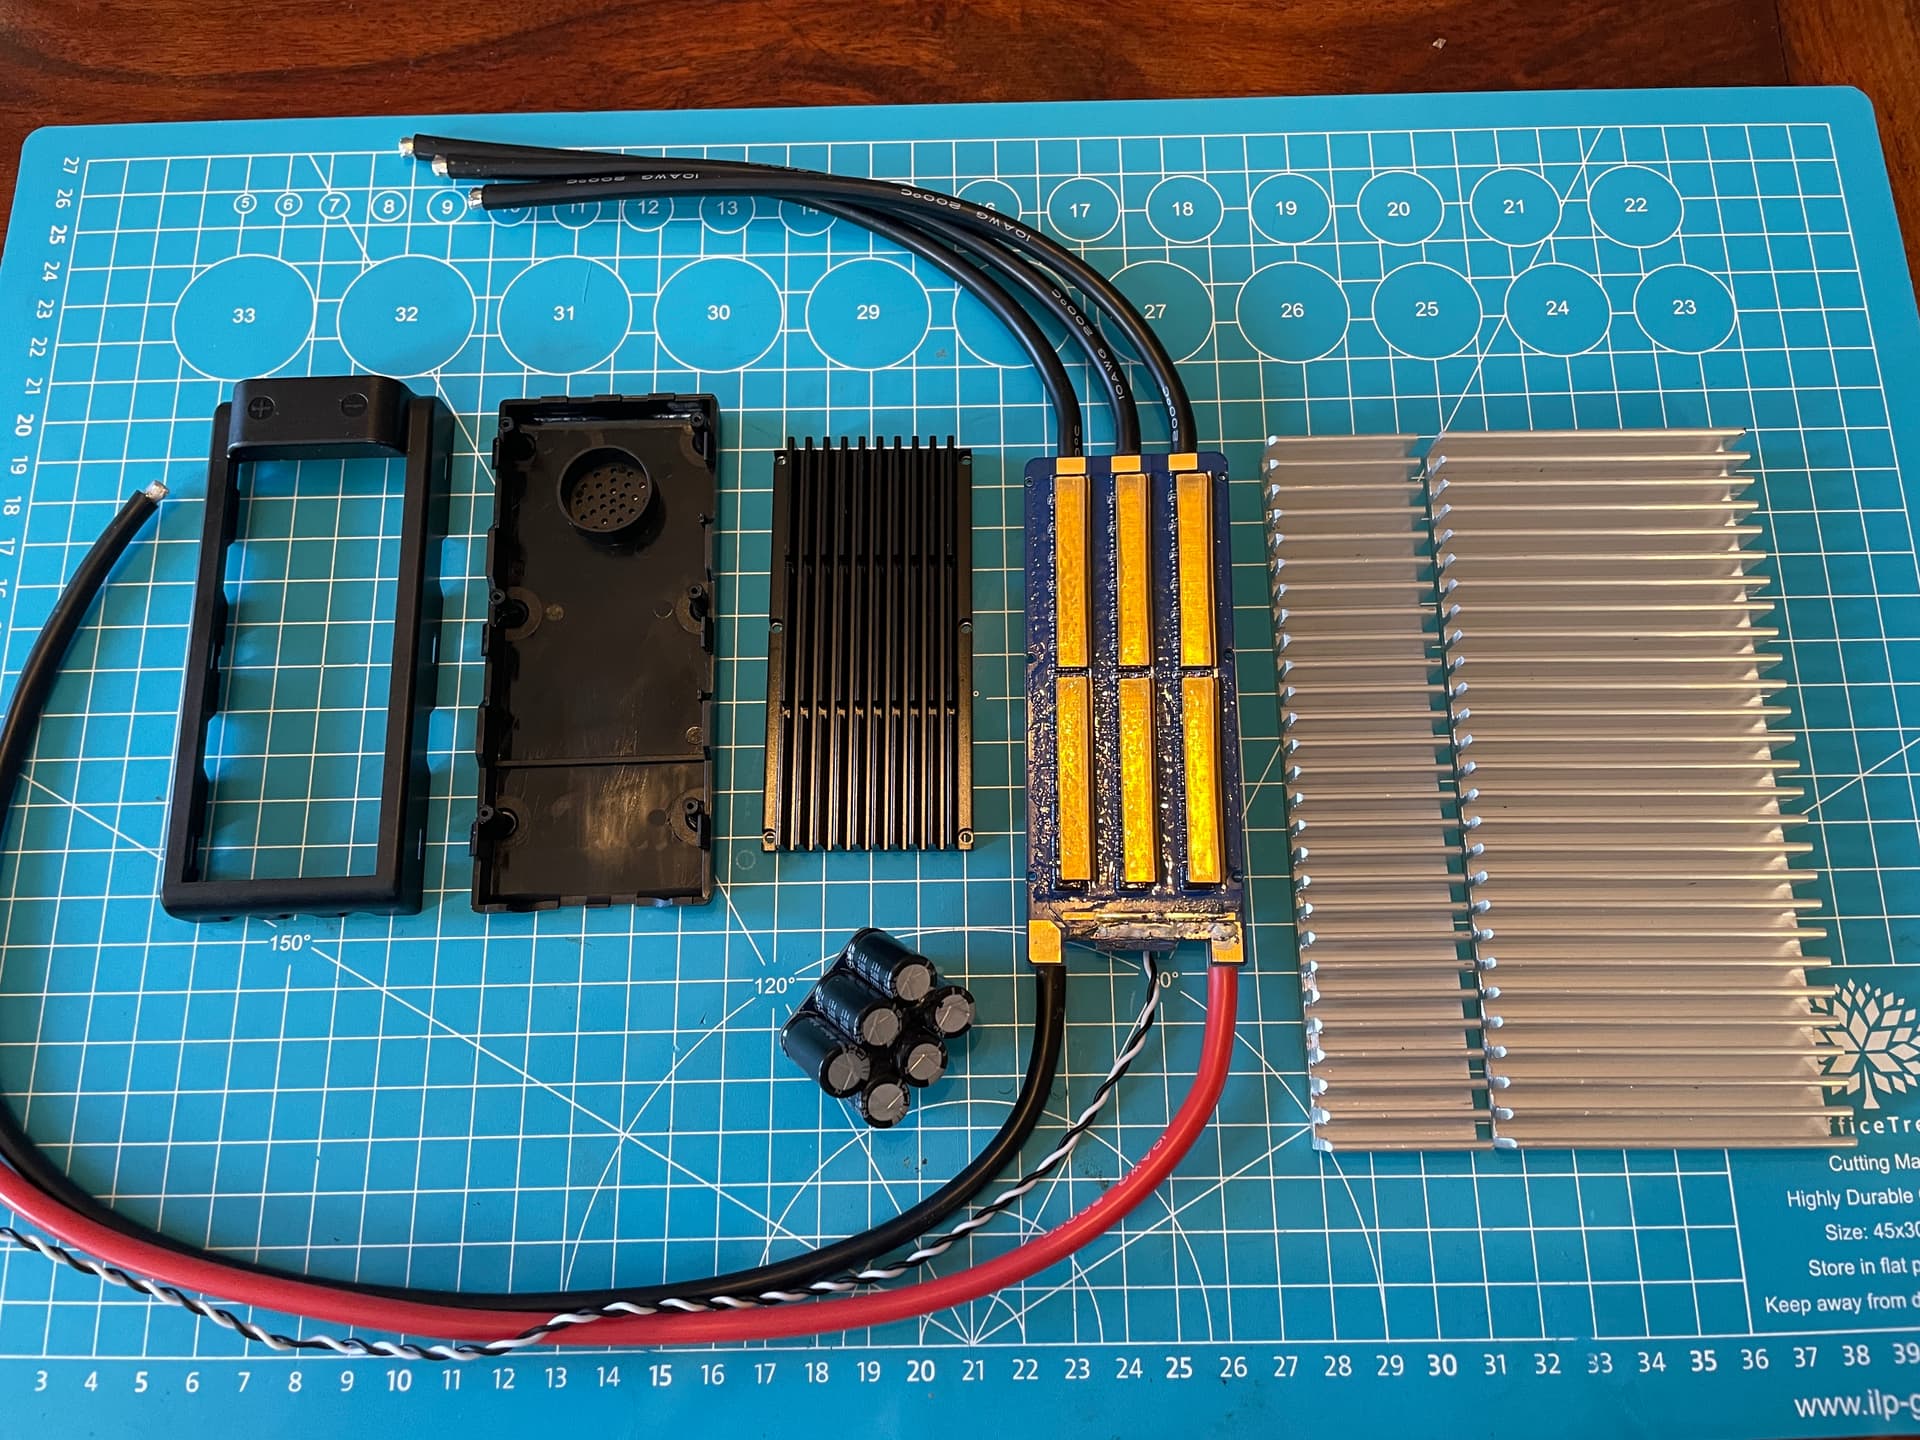
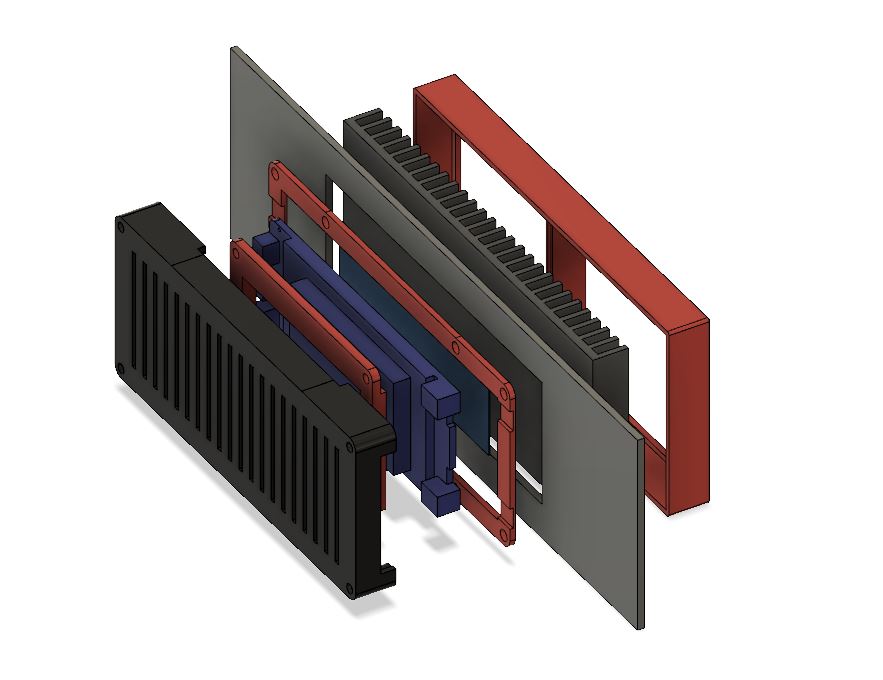
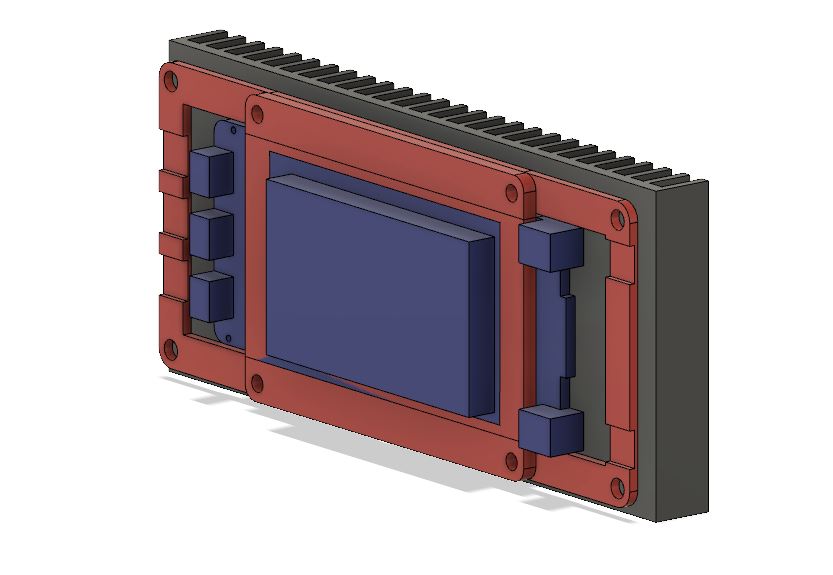
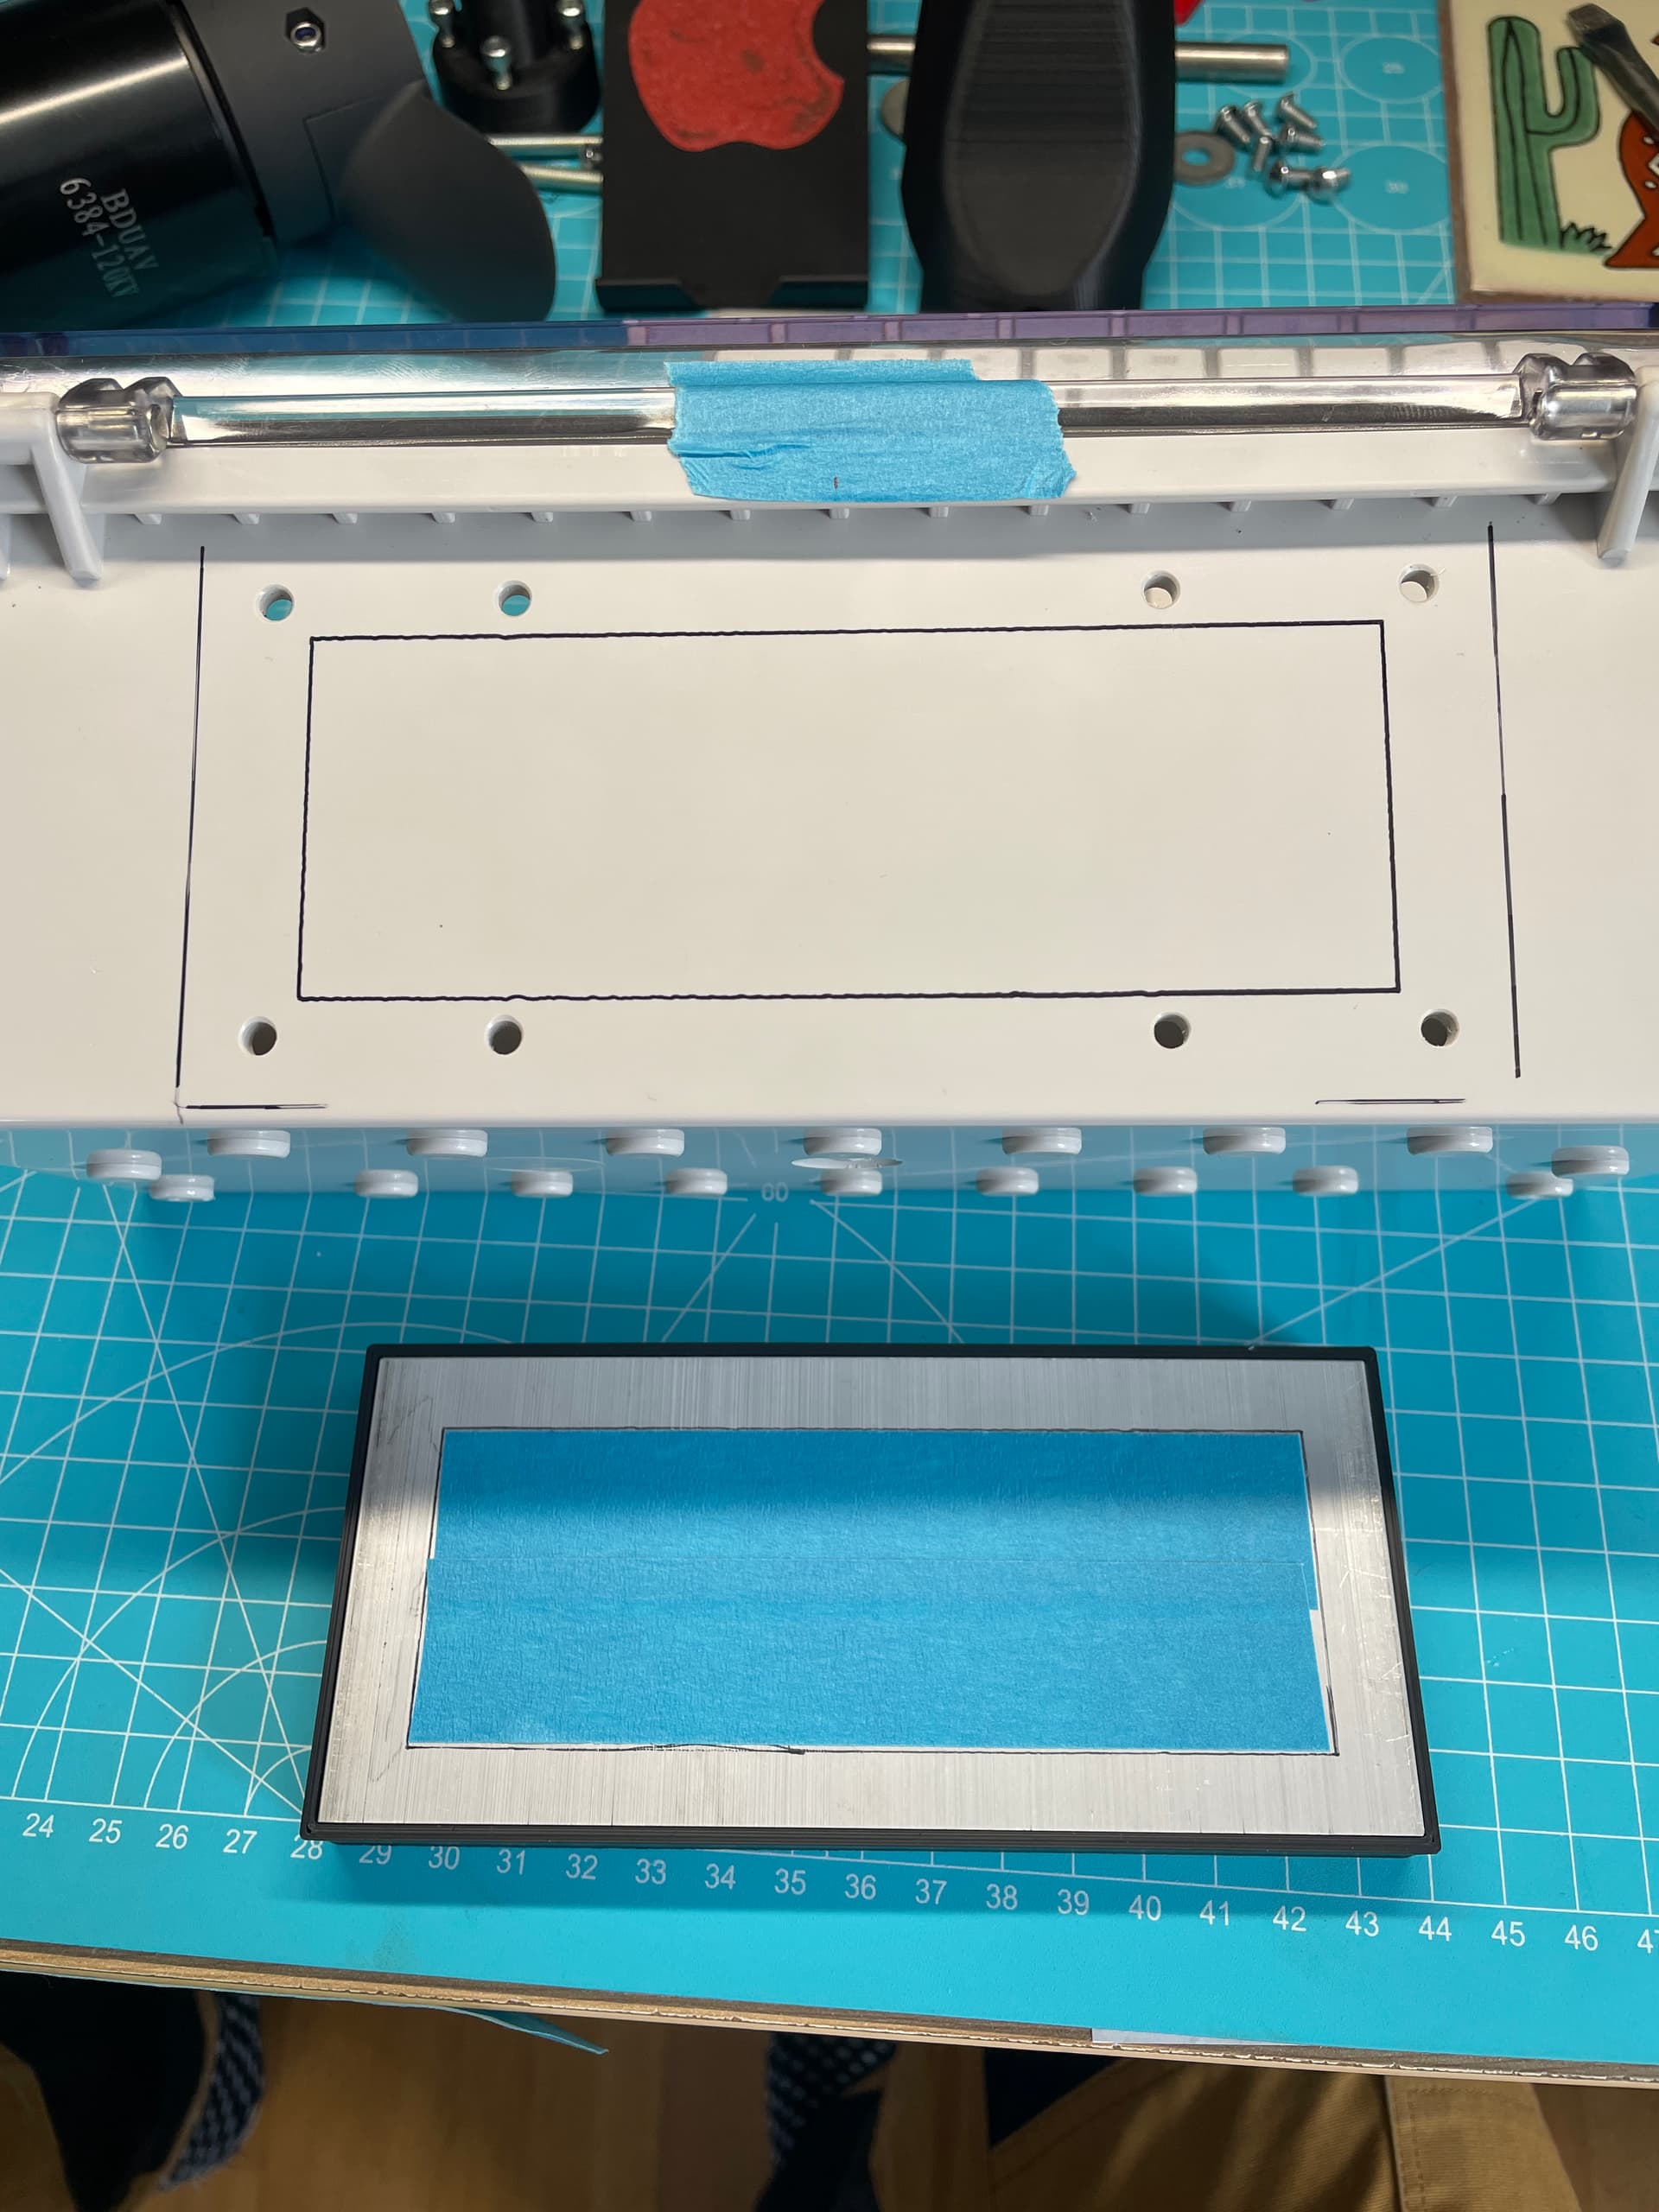
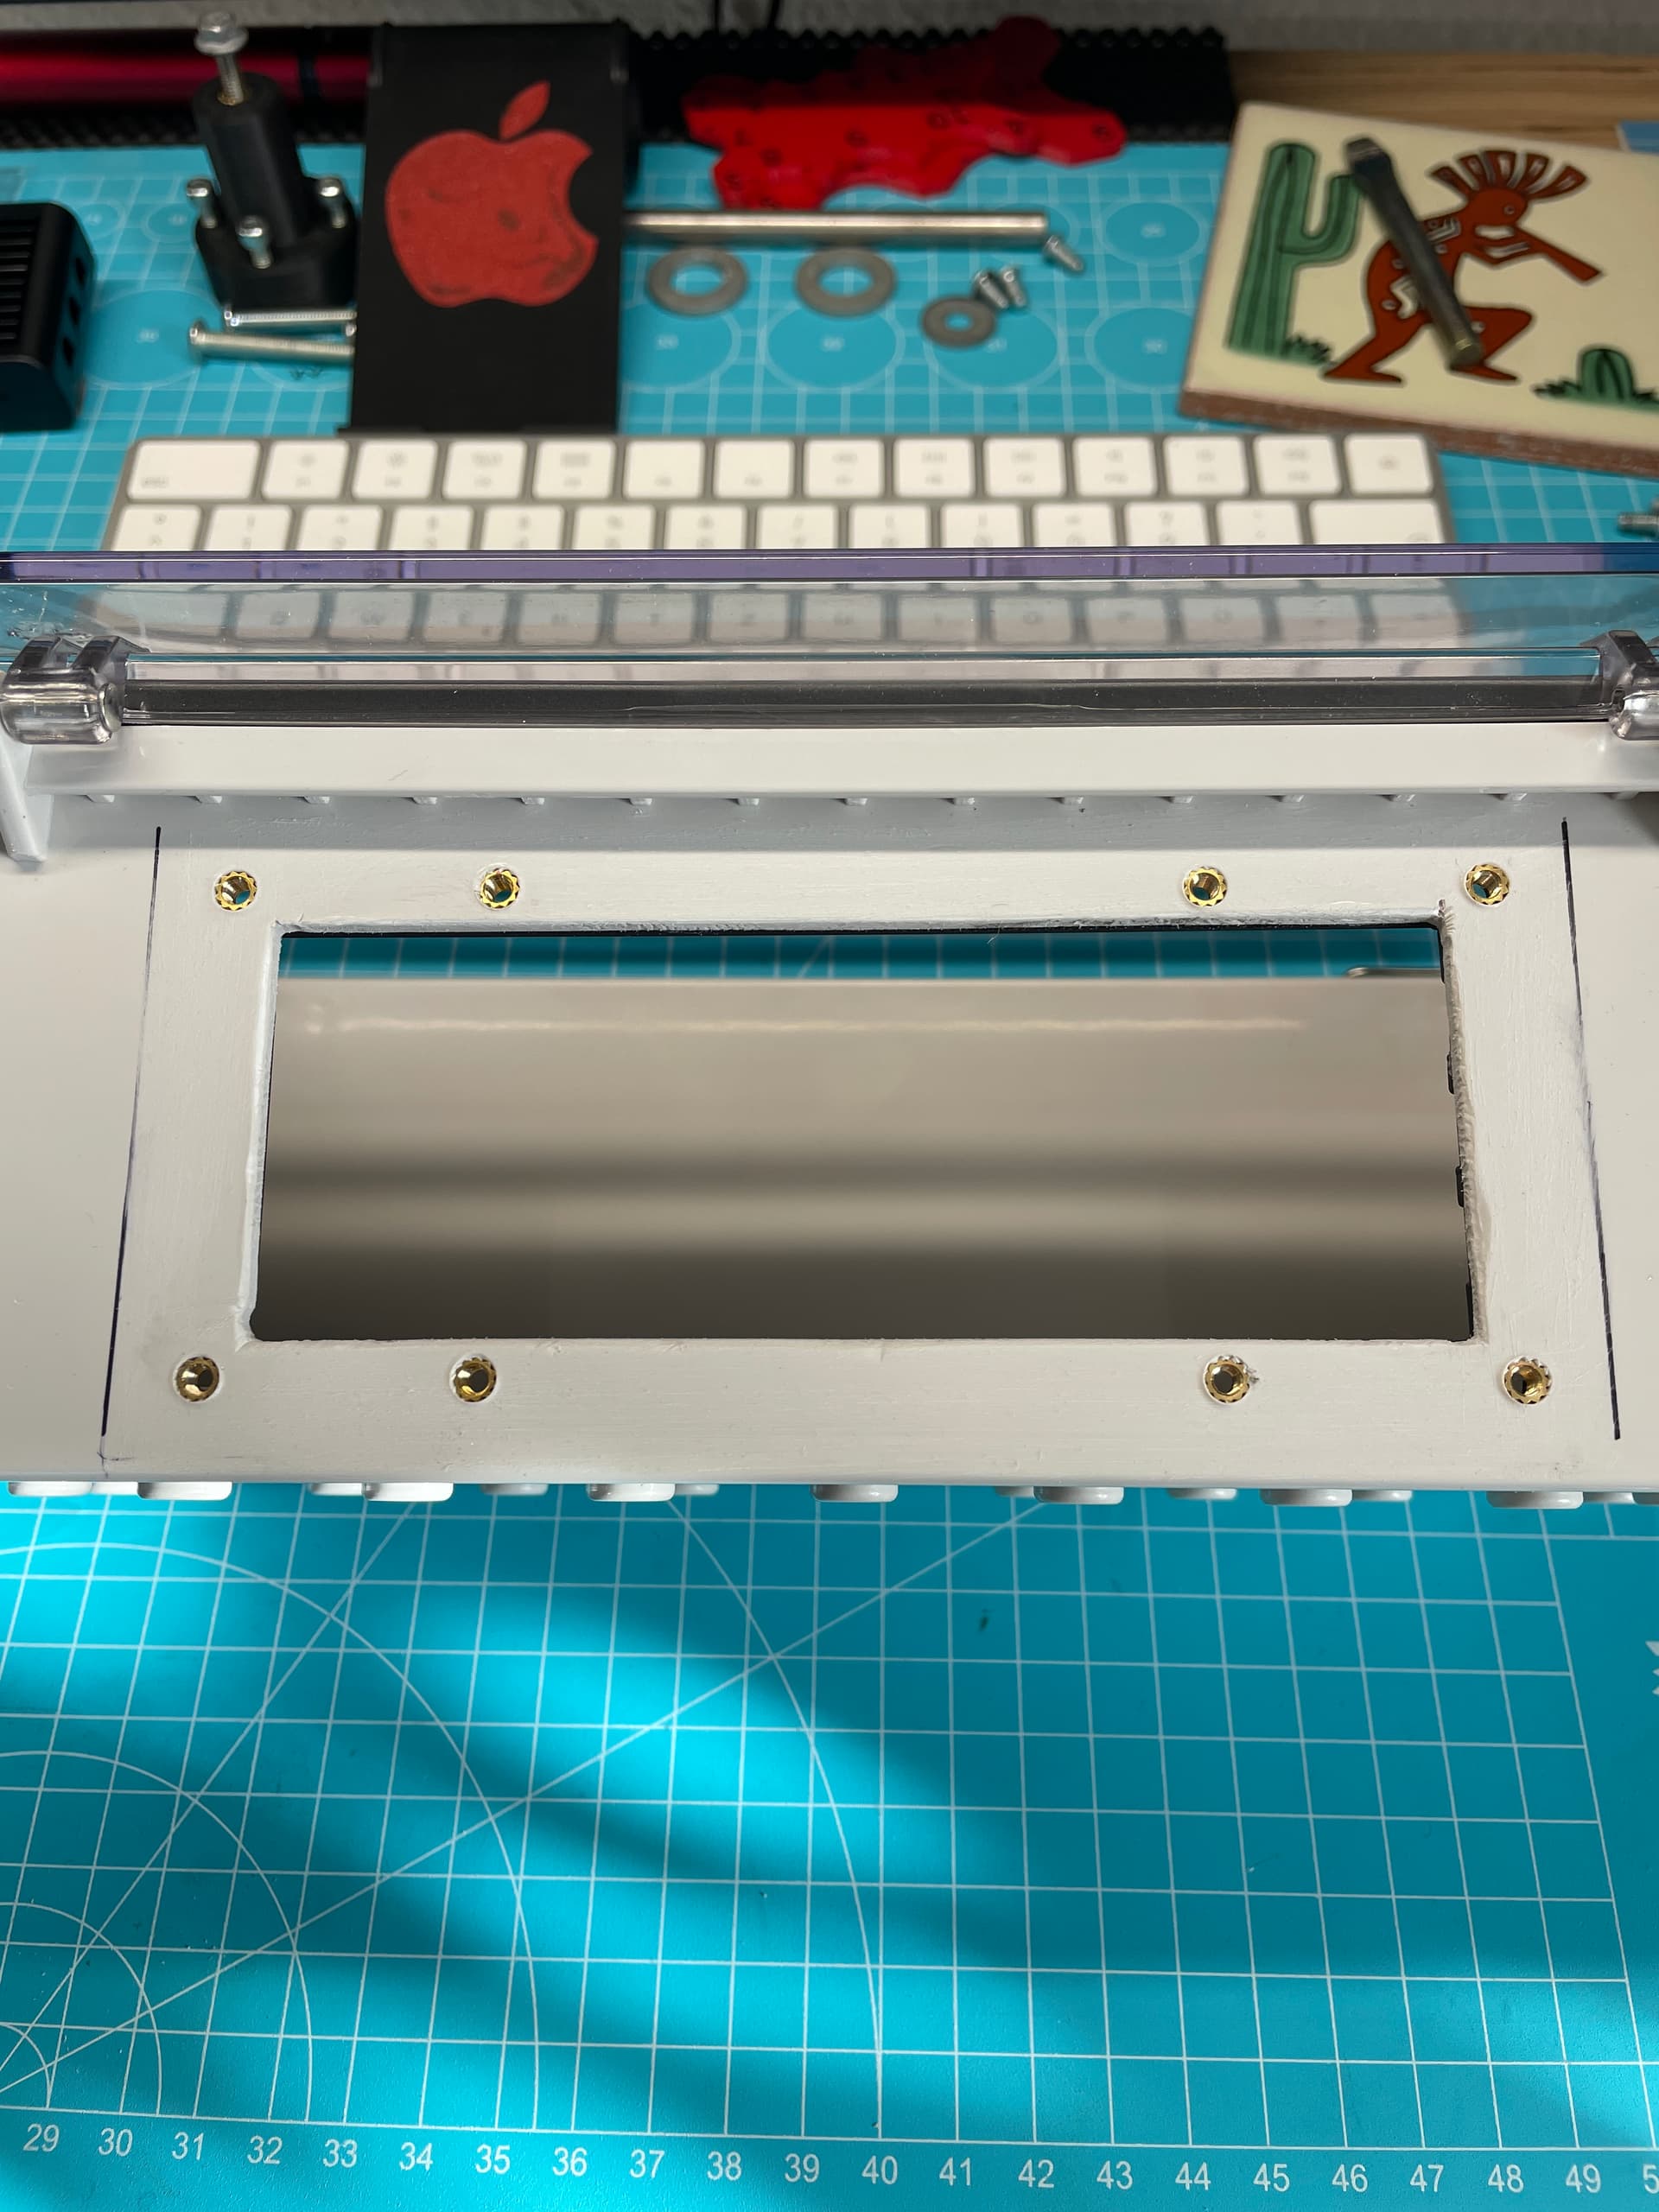
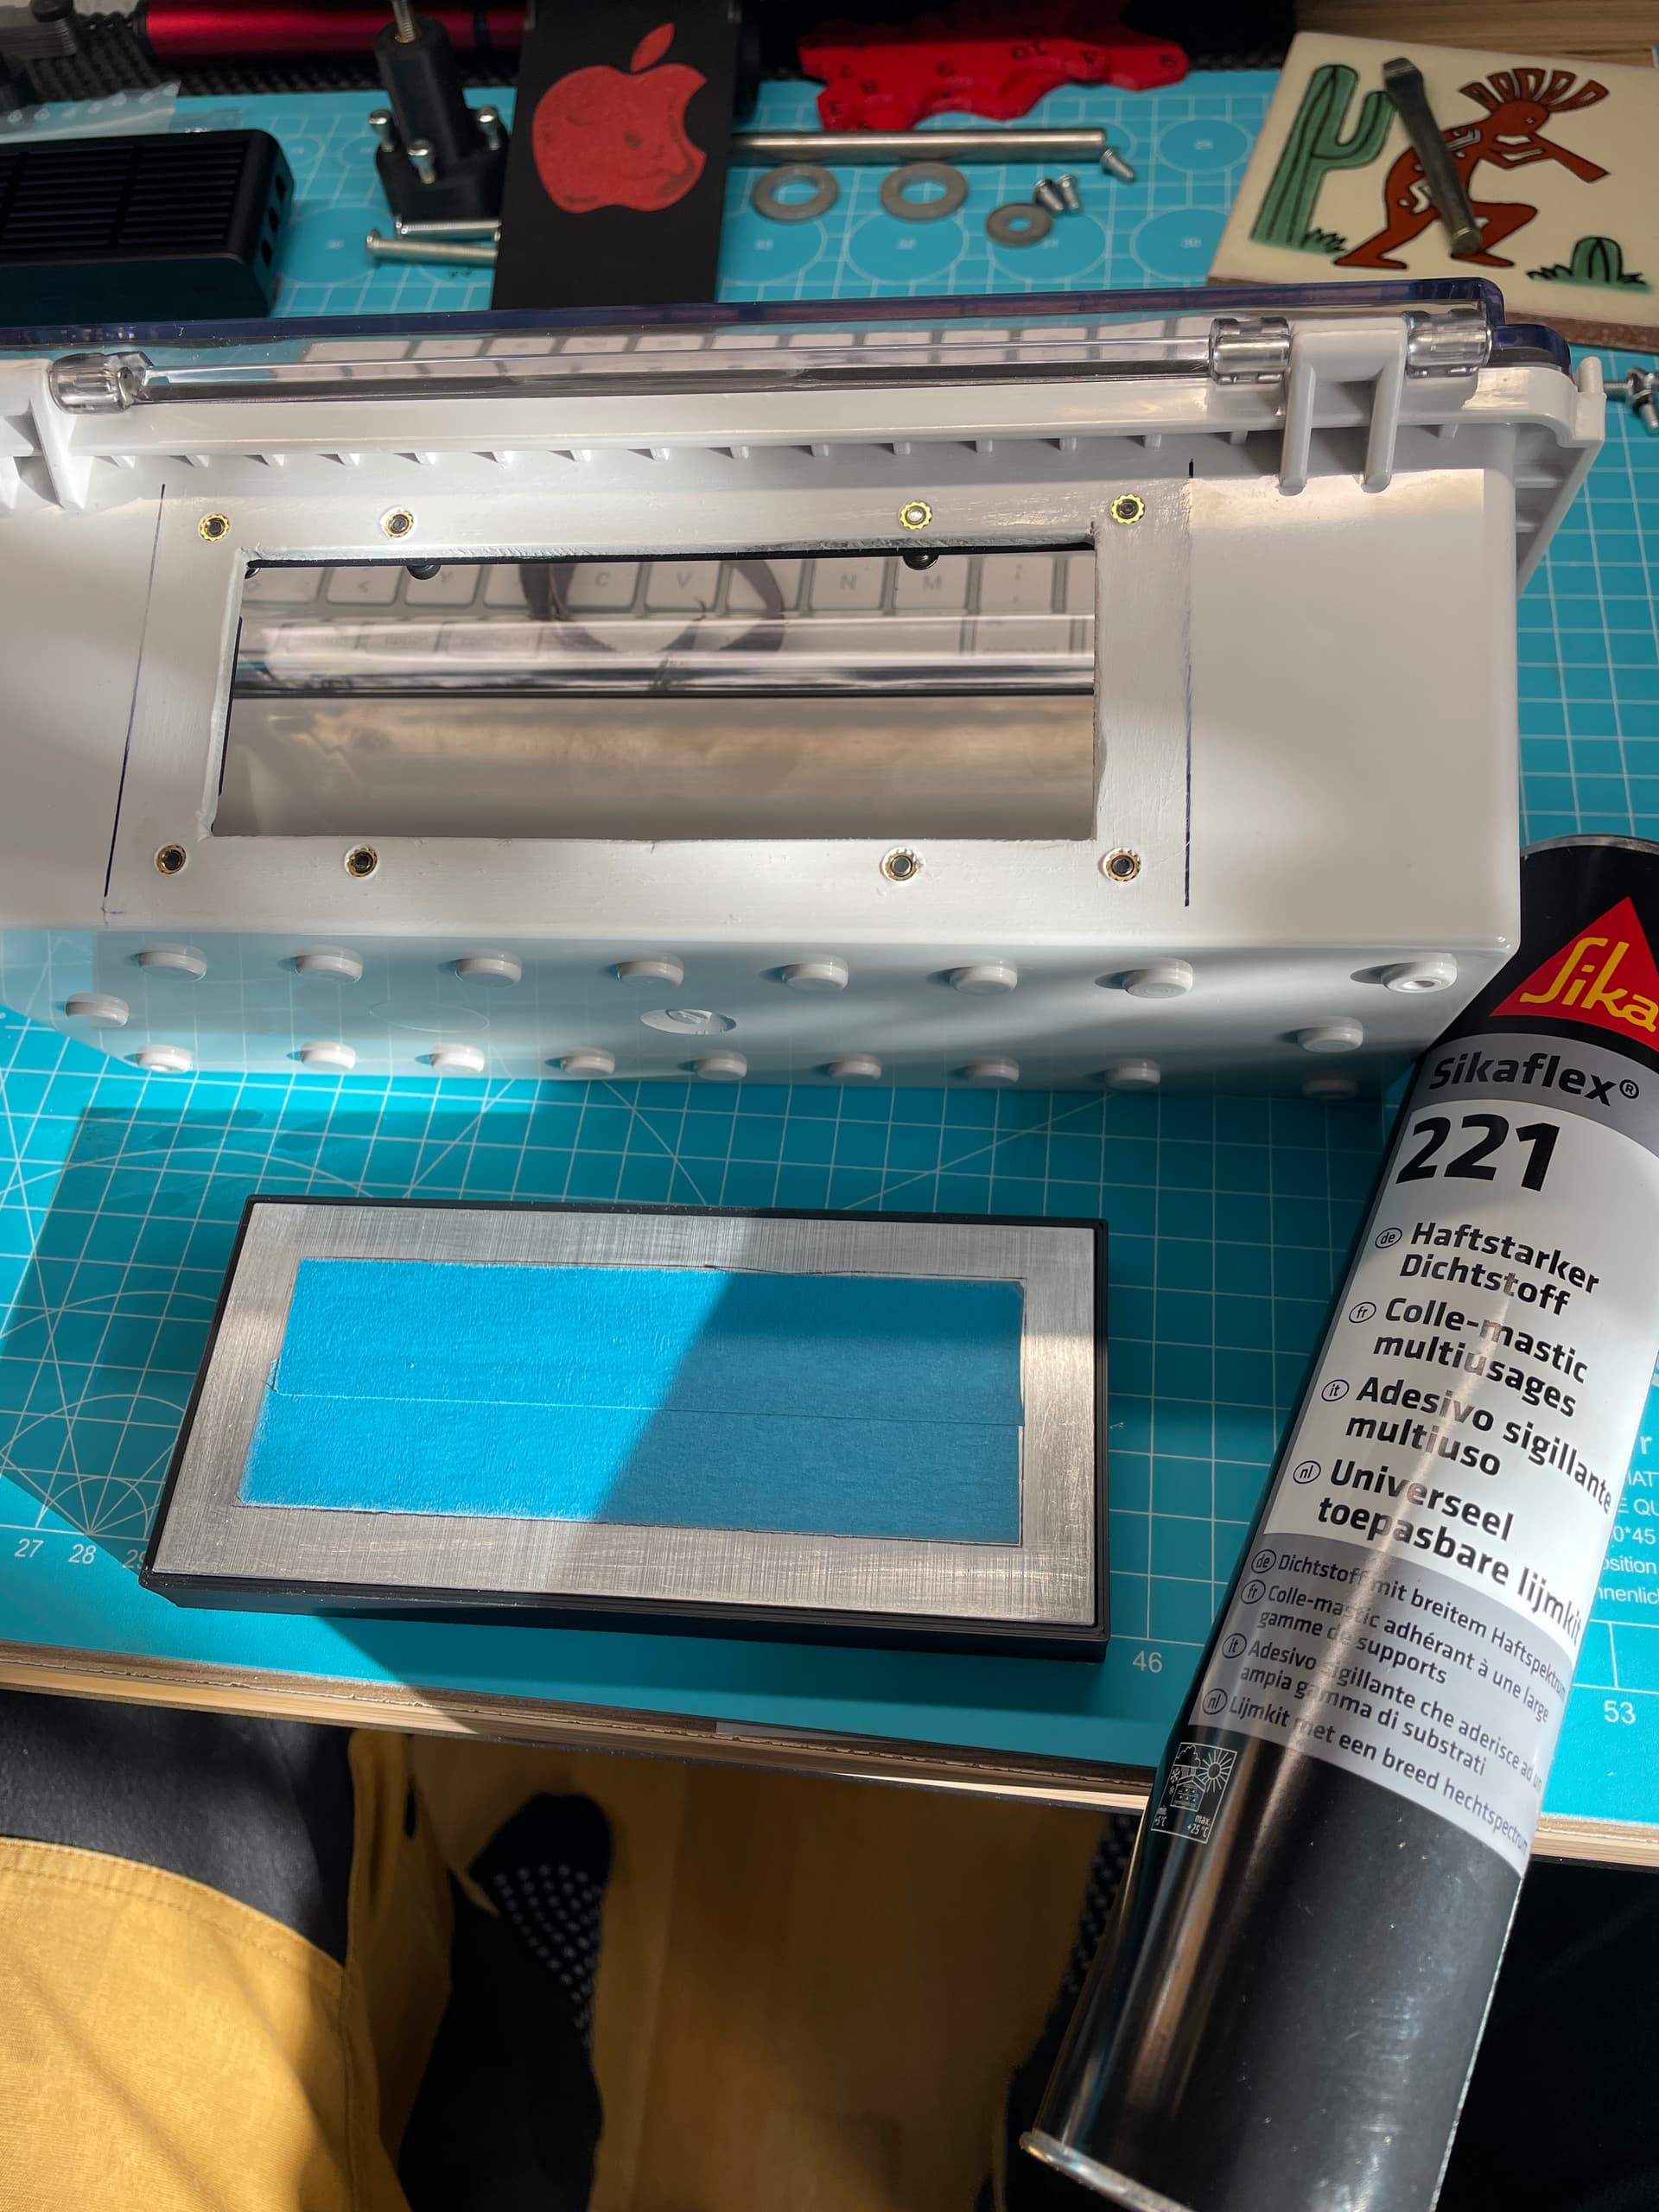
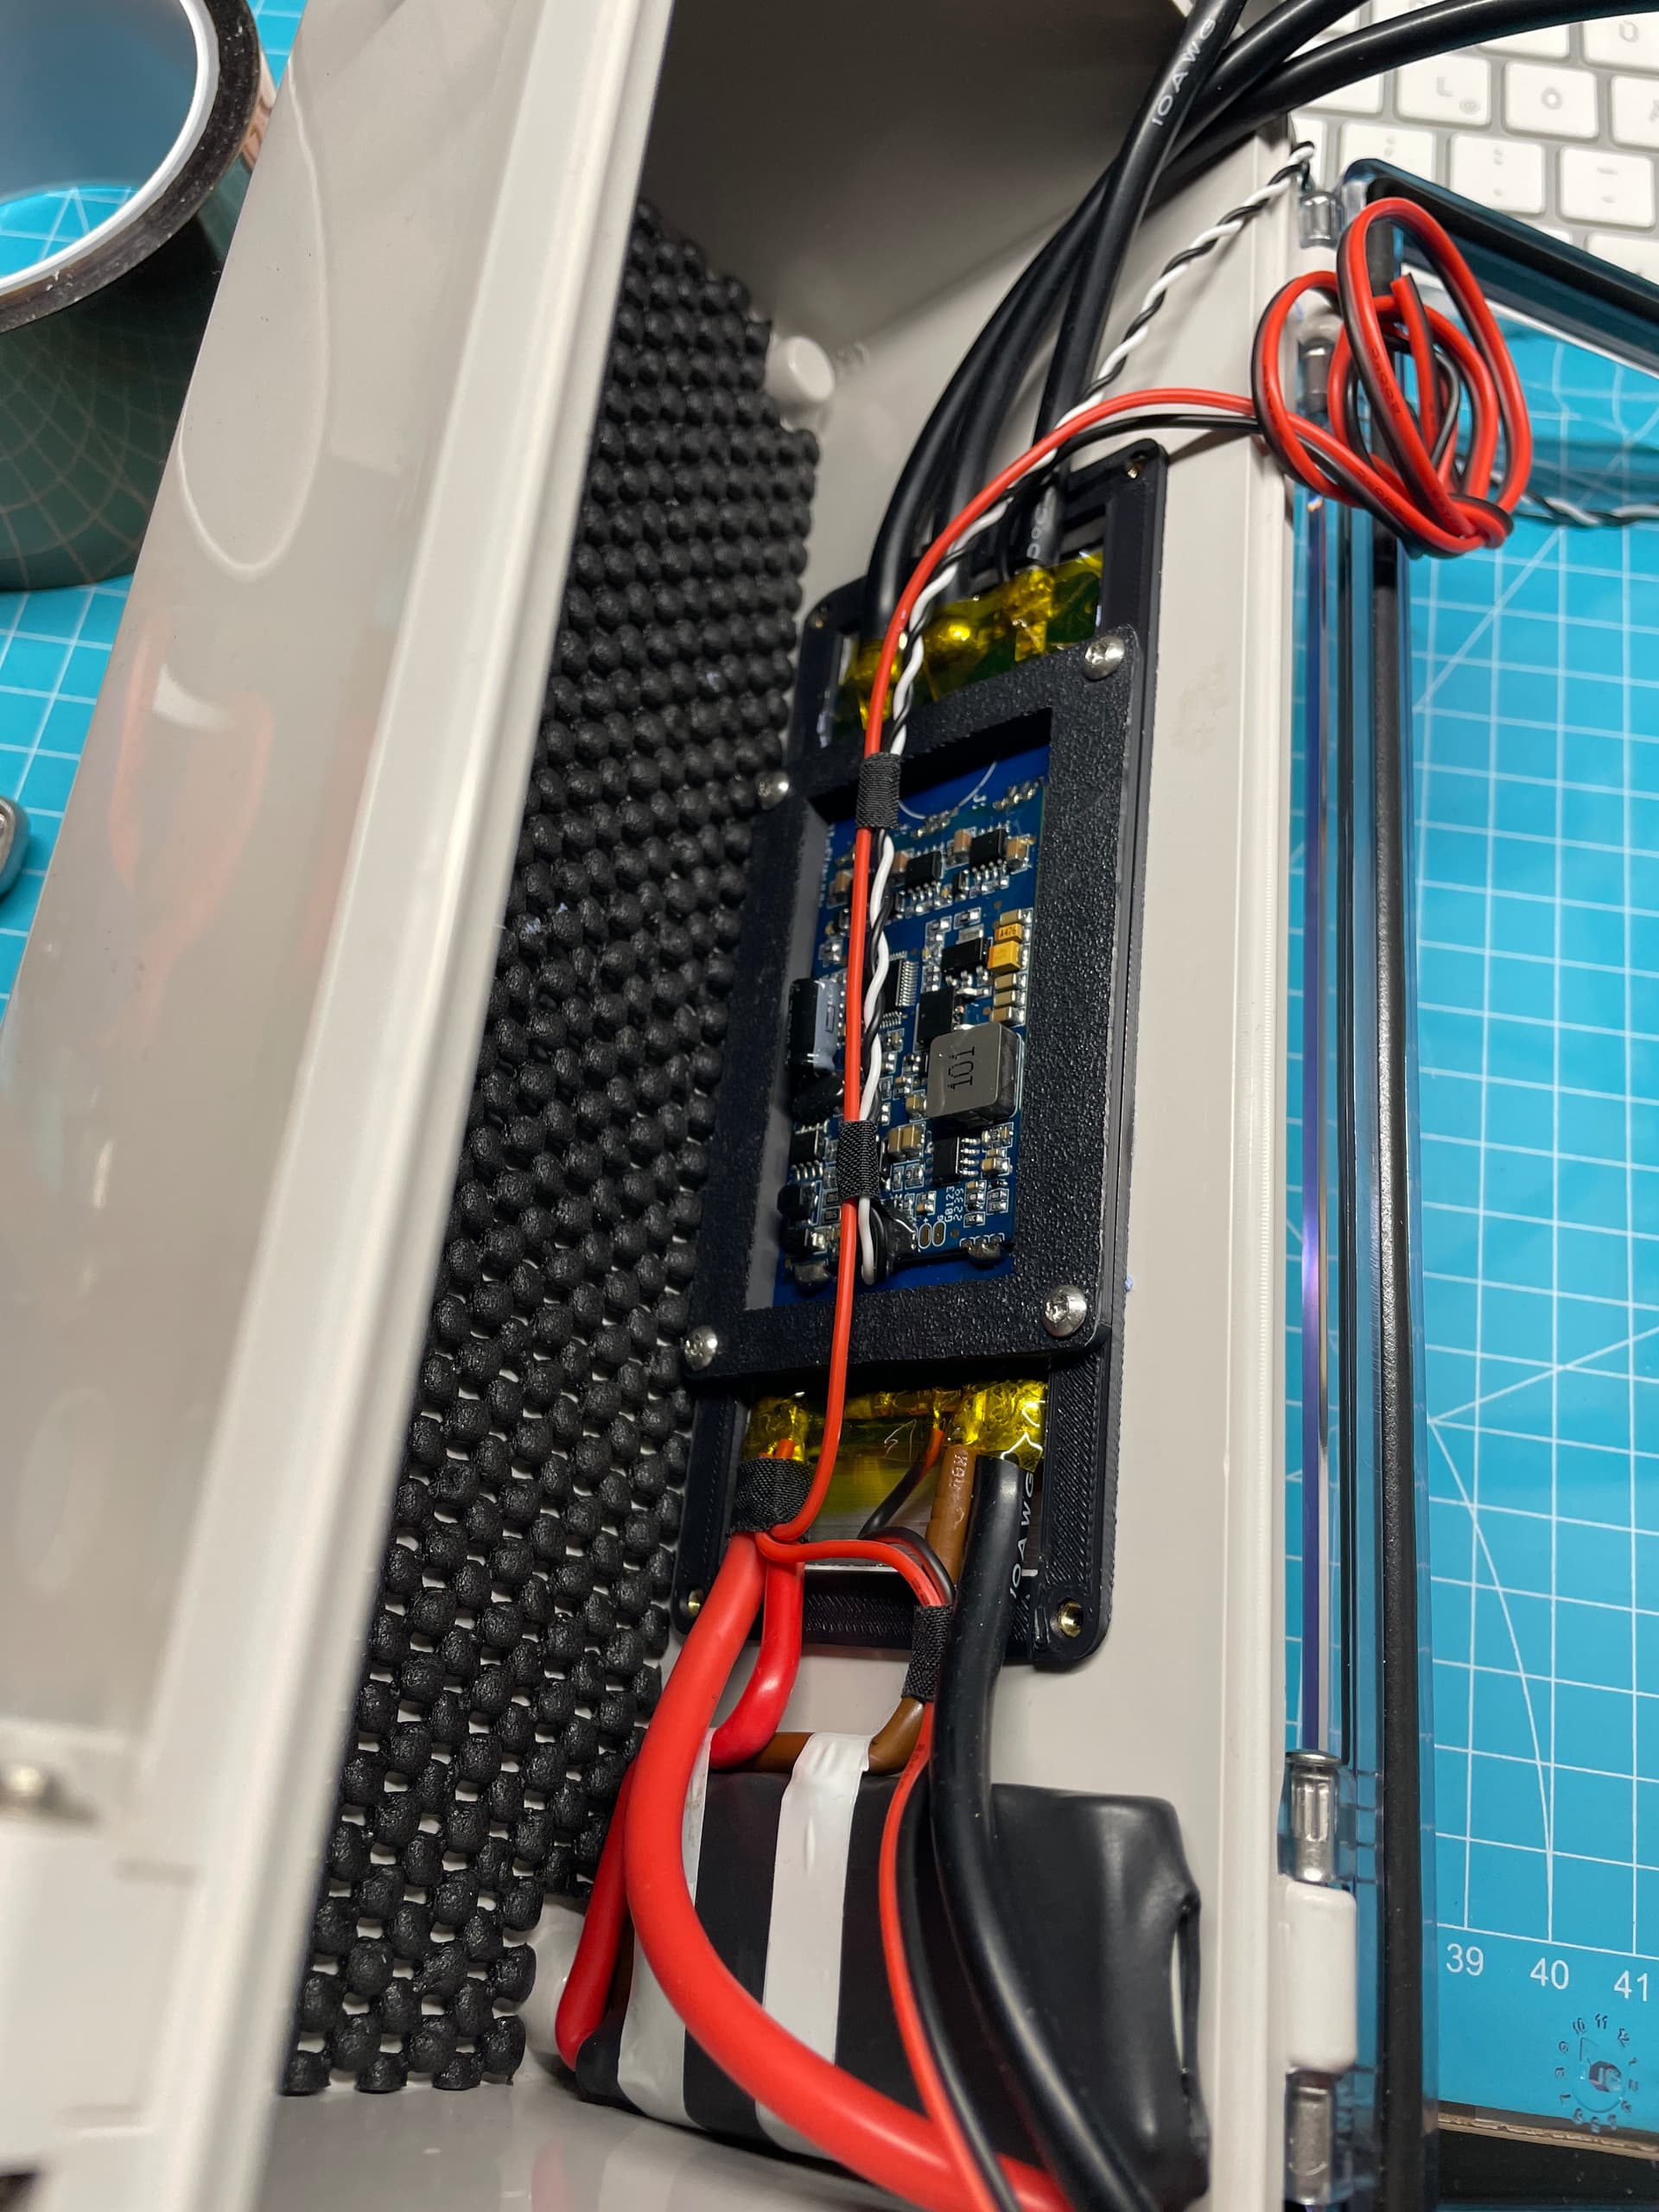
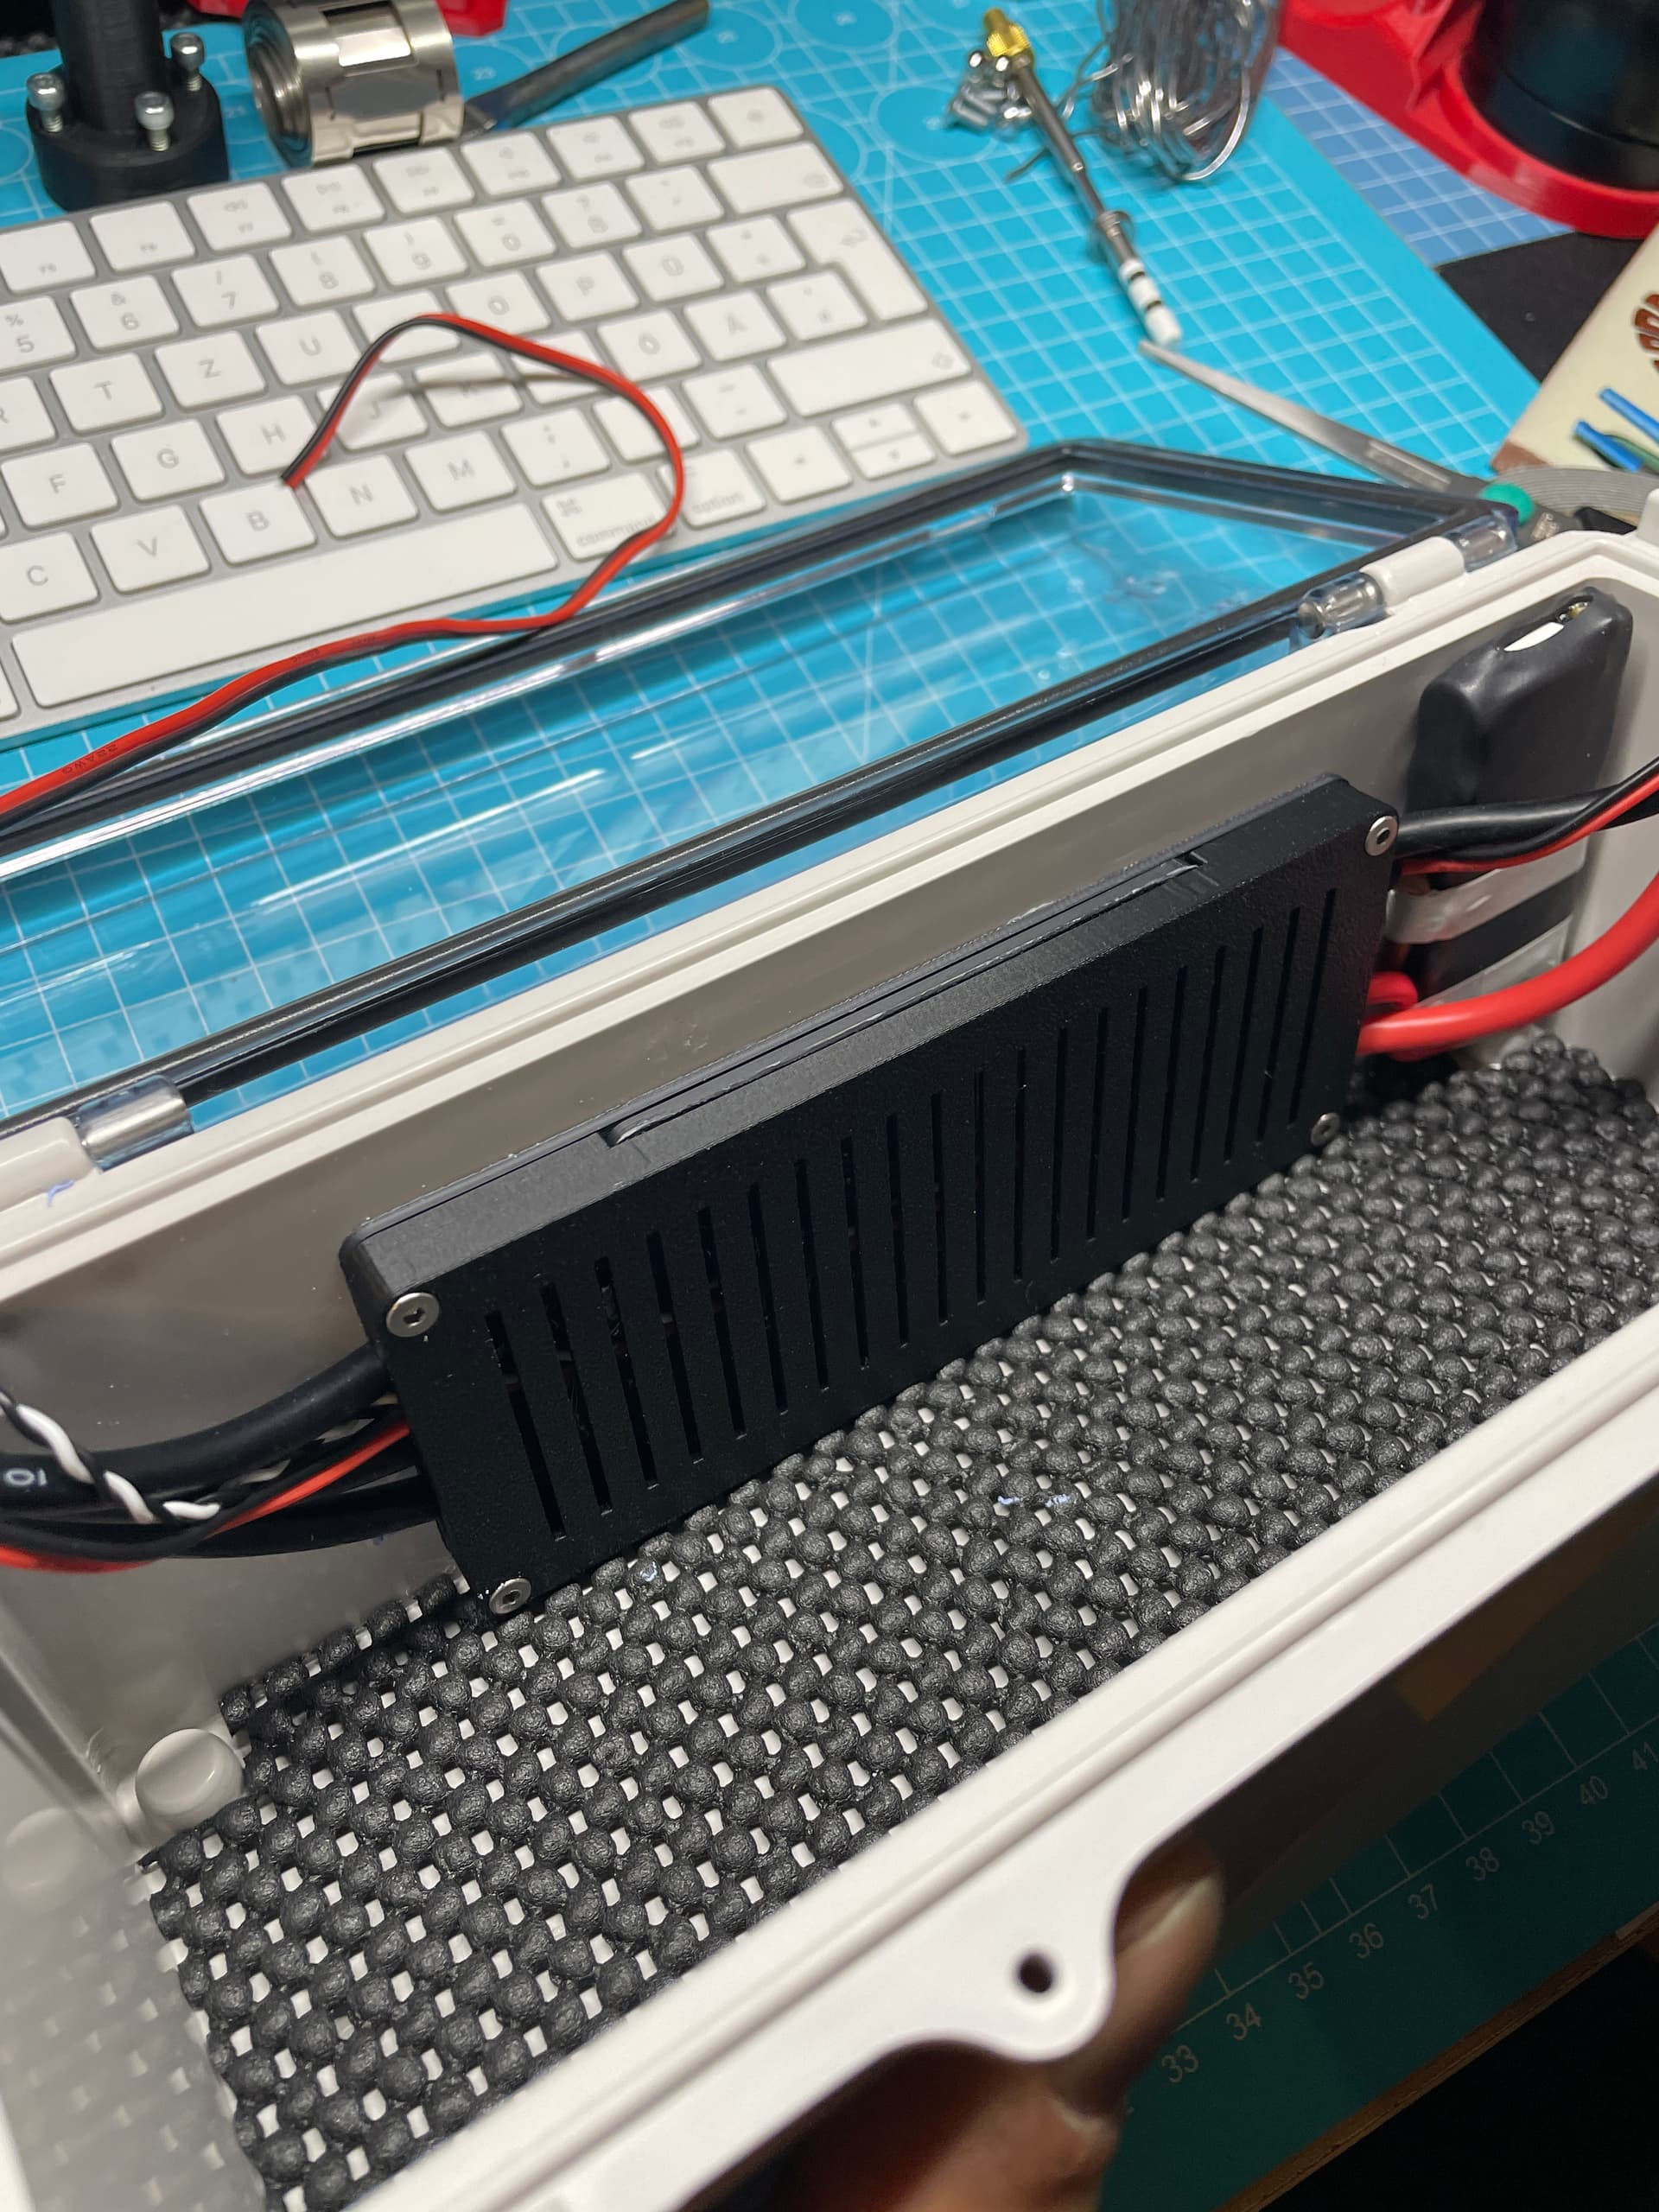
Flydragon 150 finally installed. 
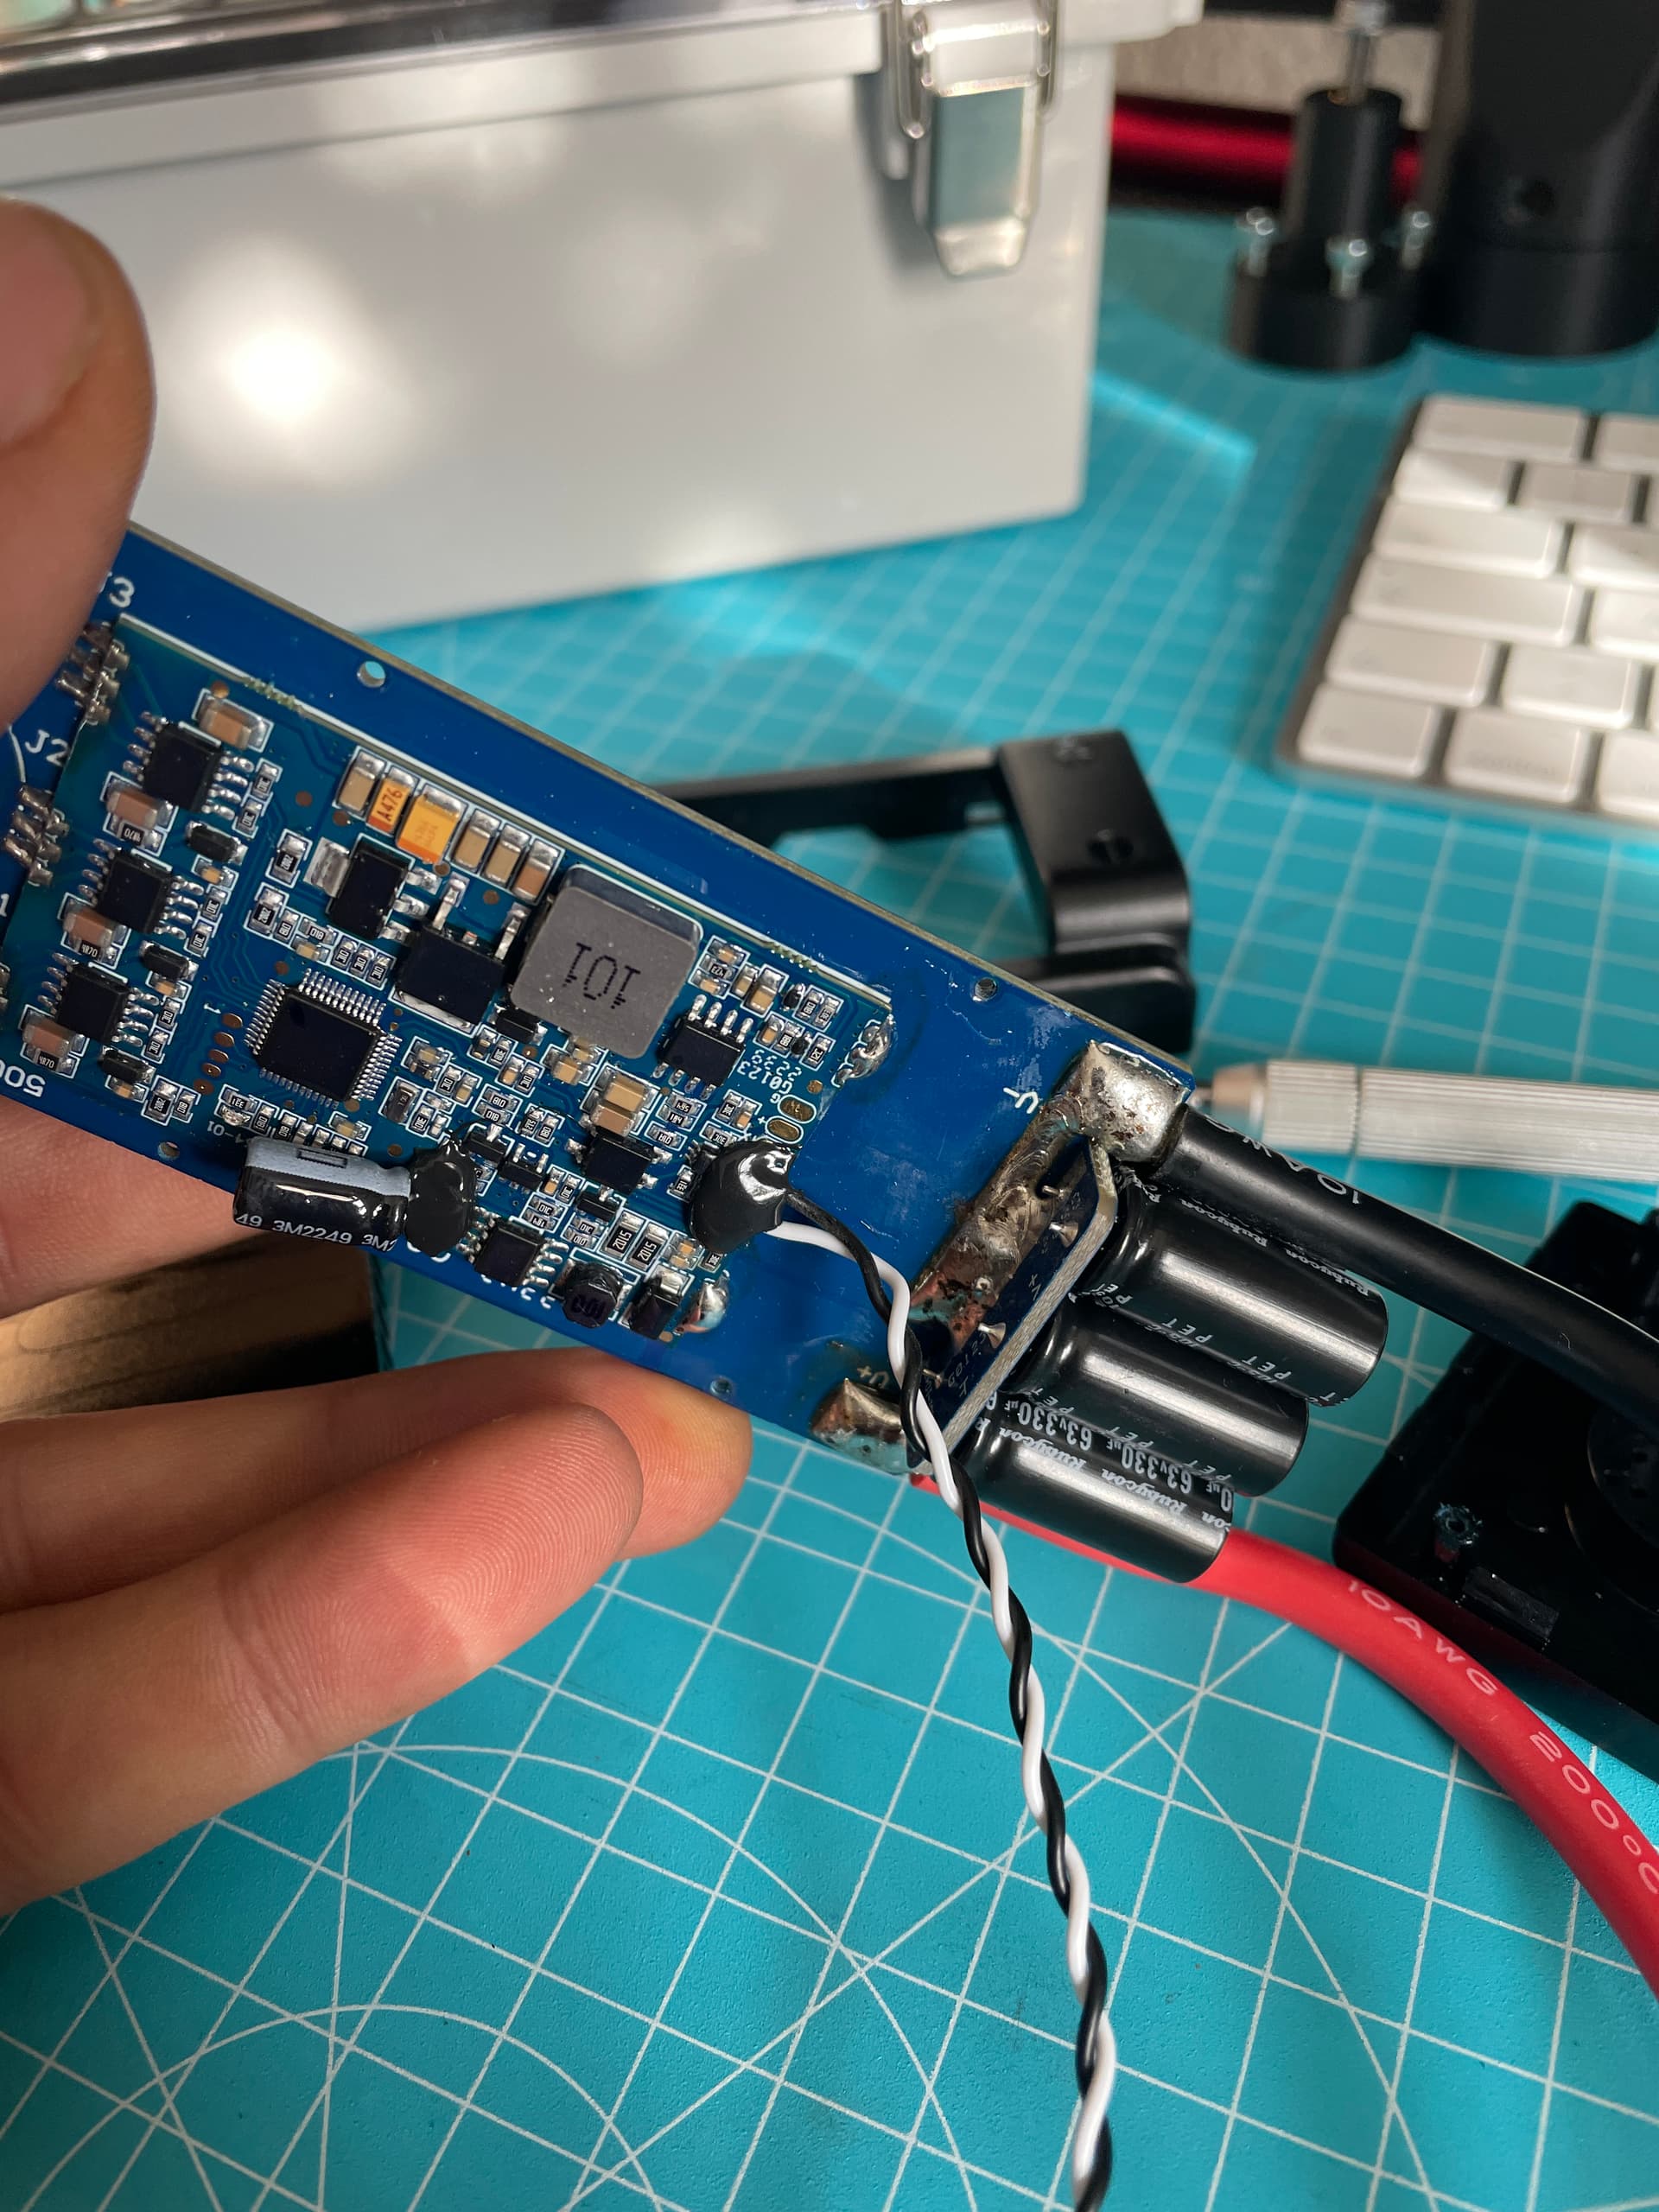
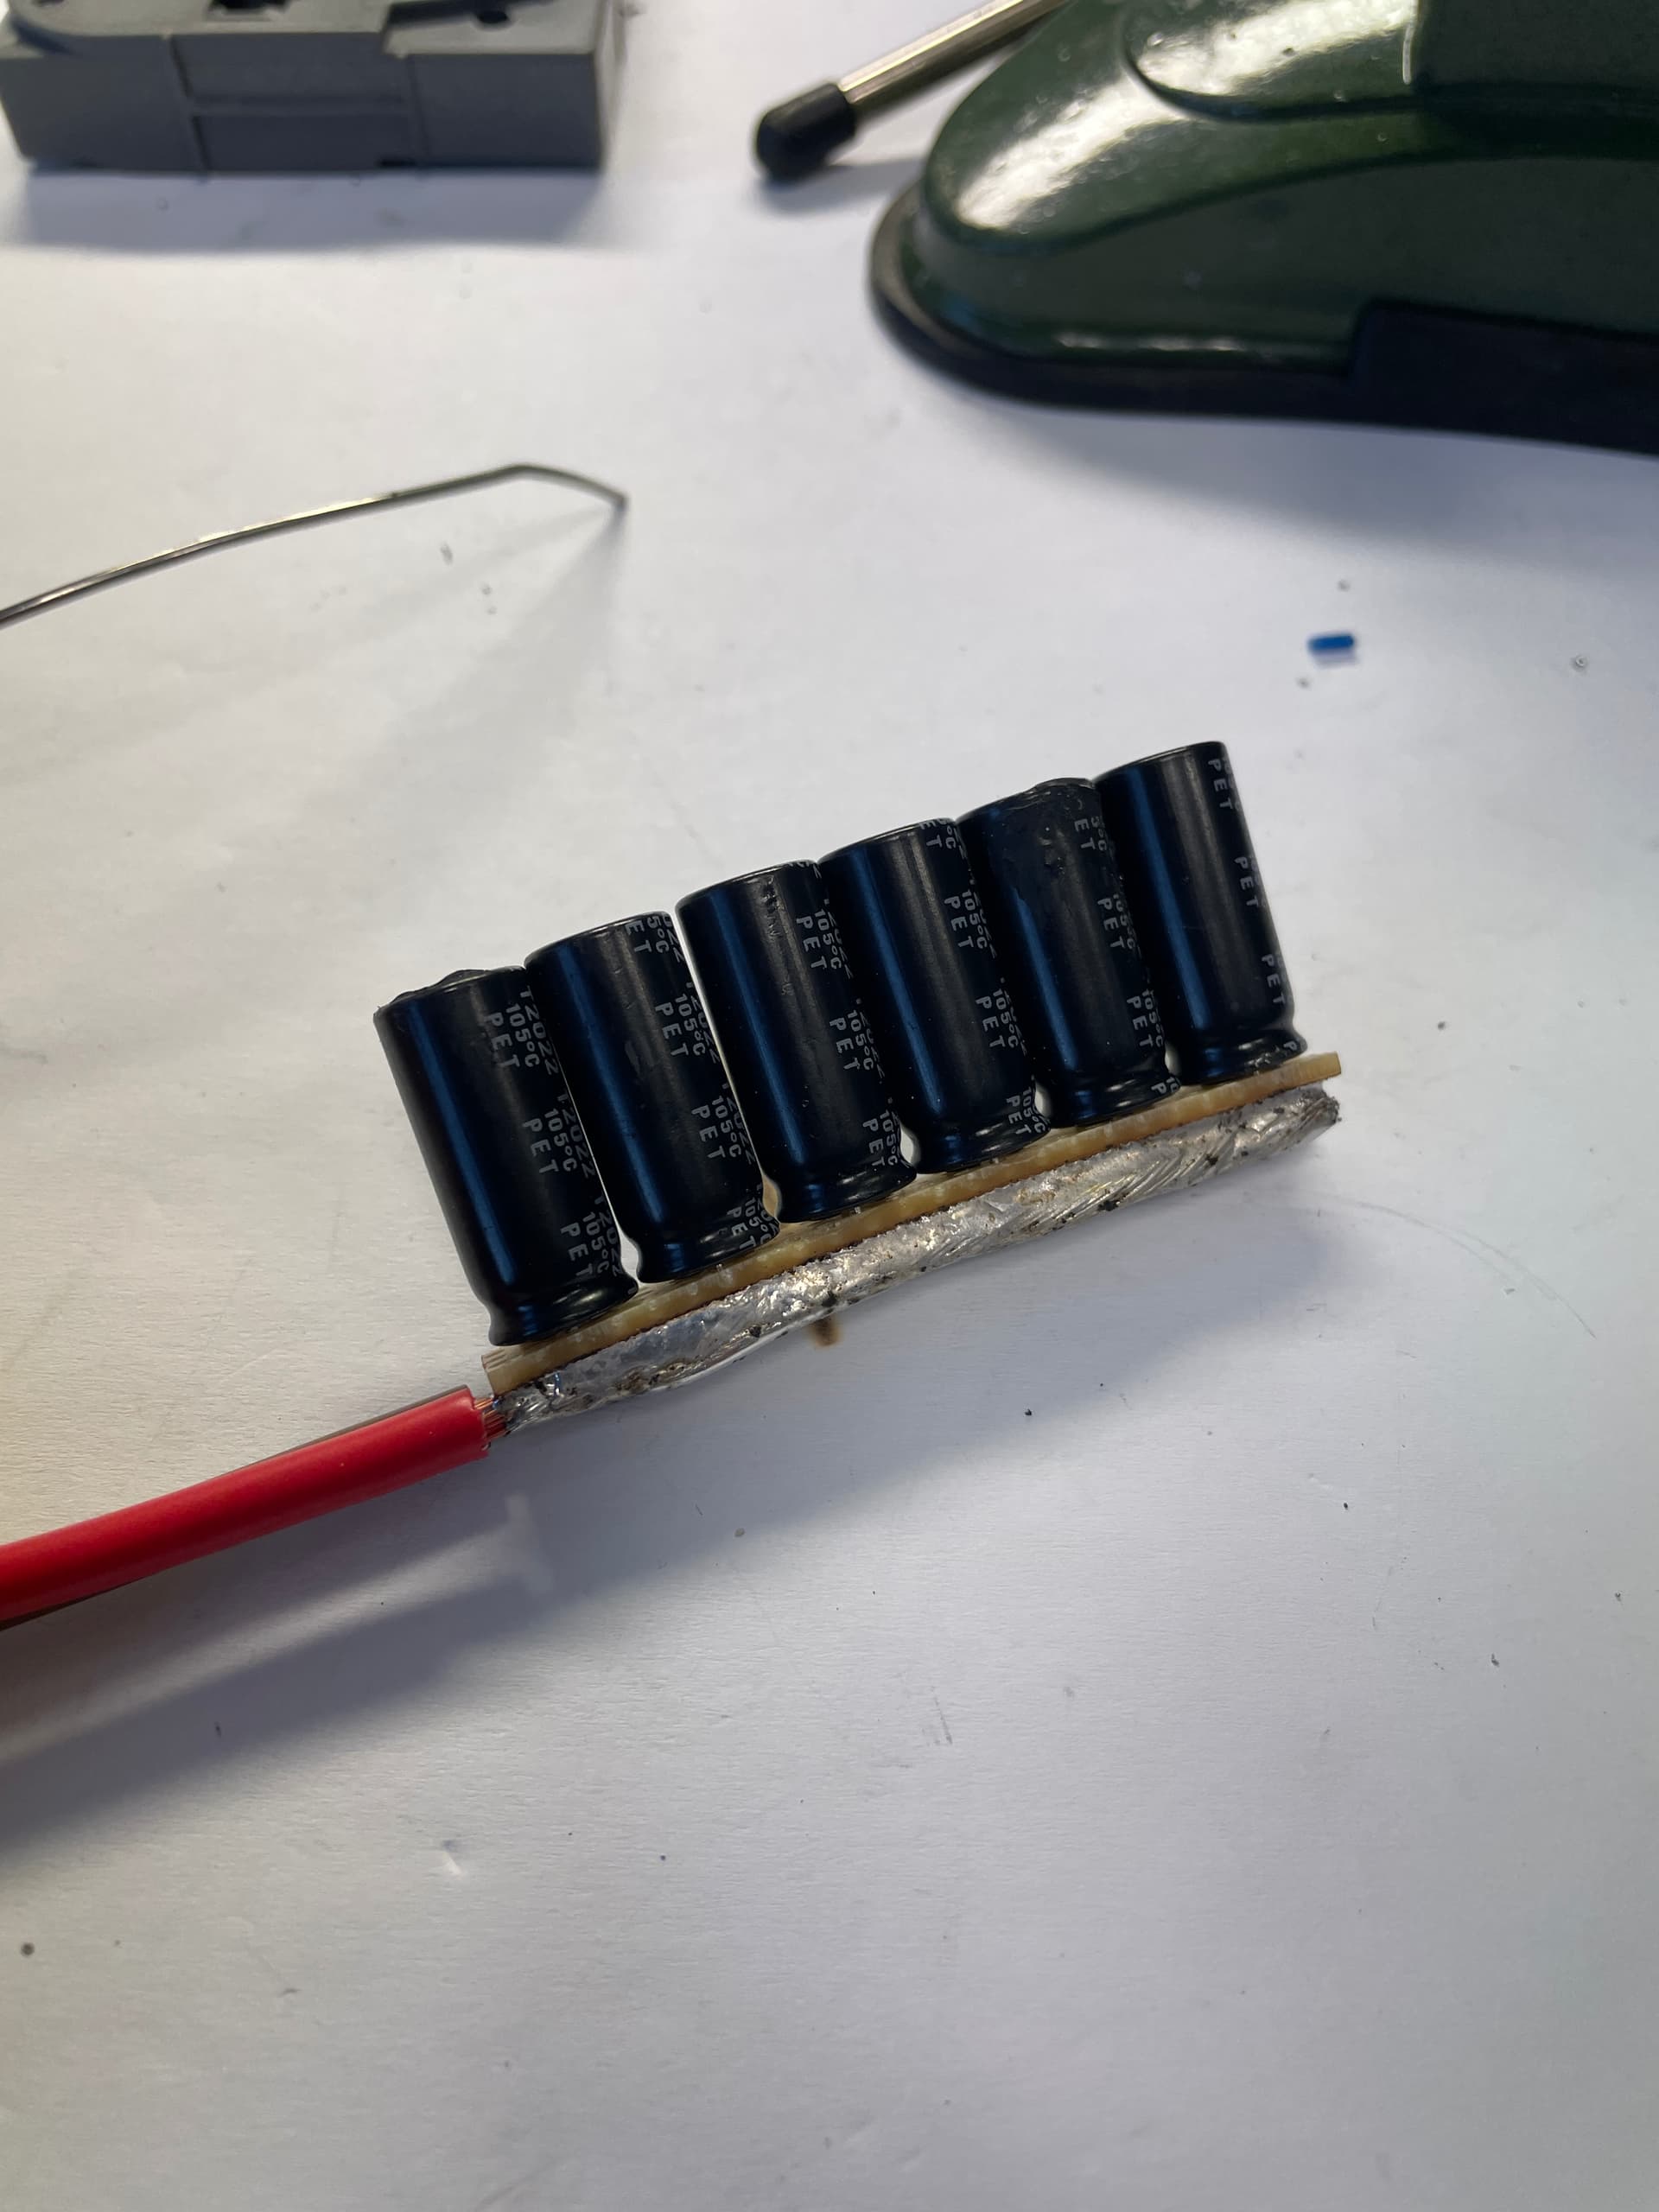
Since the controller doesn’t apply far inwards, I decided to go directly from 8S3P to 10S3P.
Higher voltage more boost and less current. 
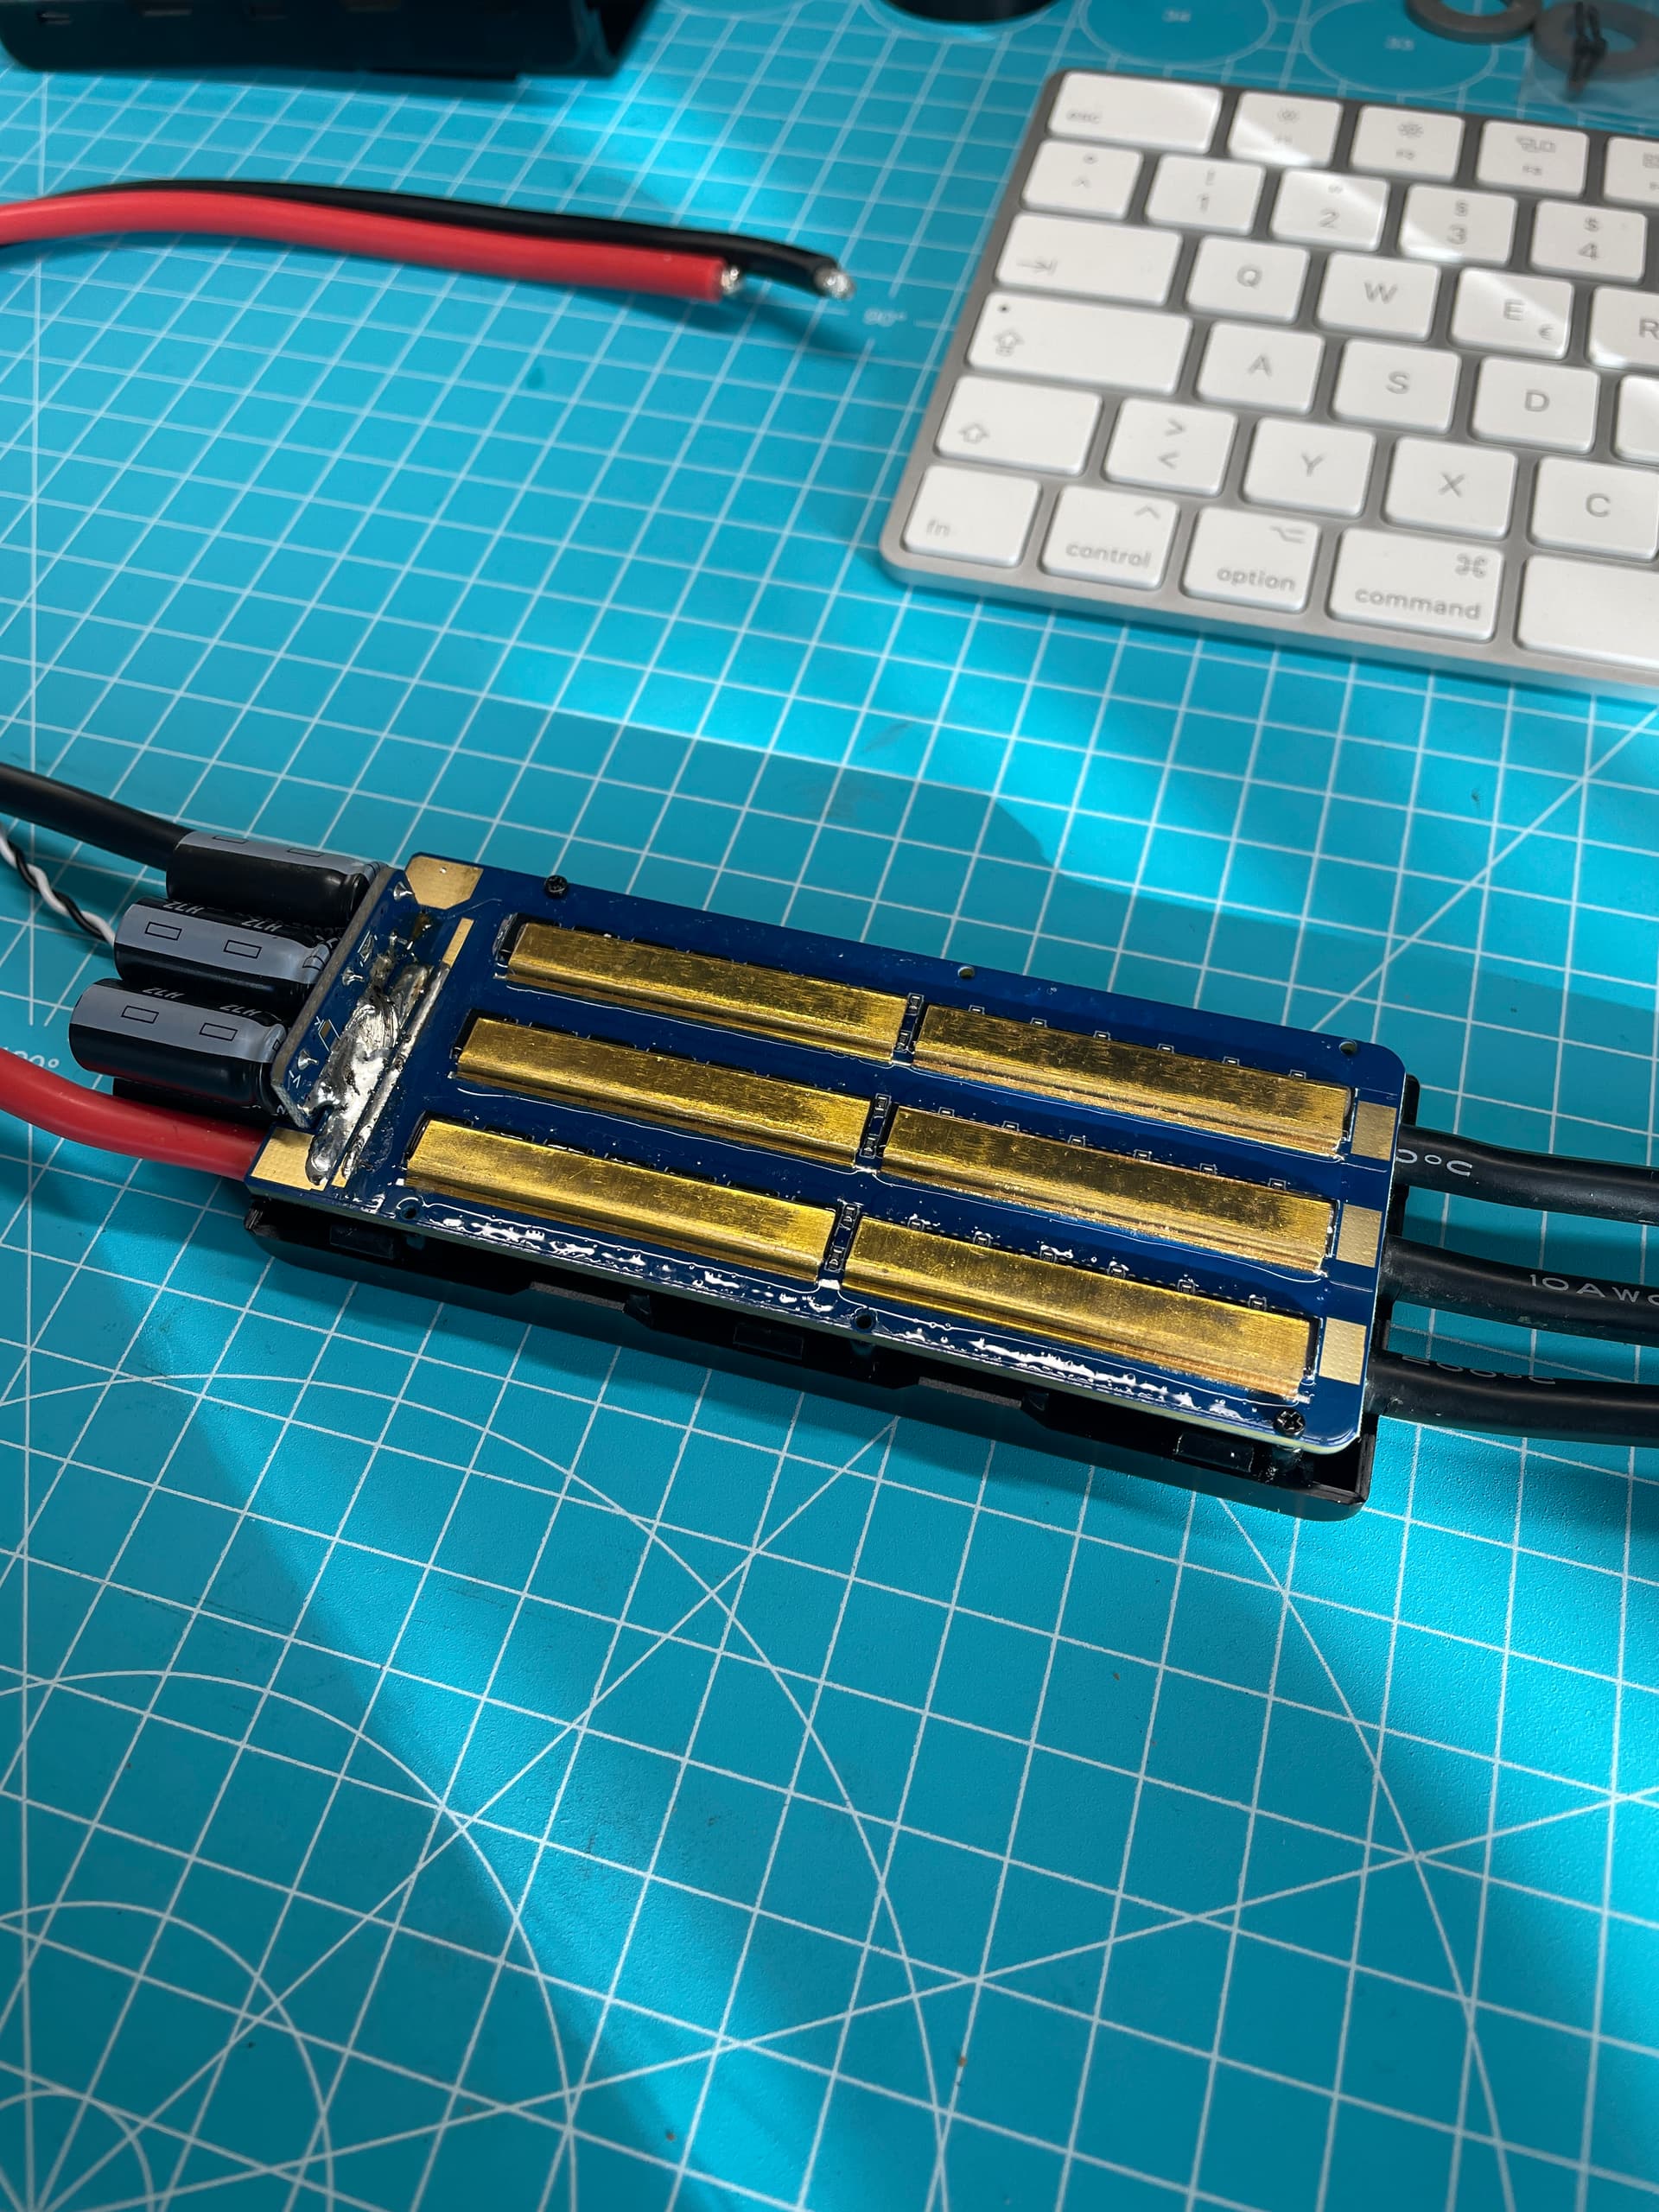
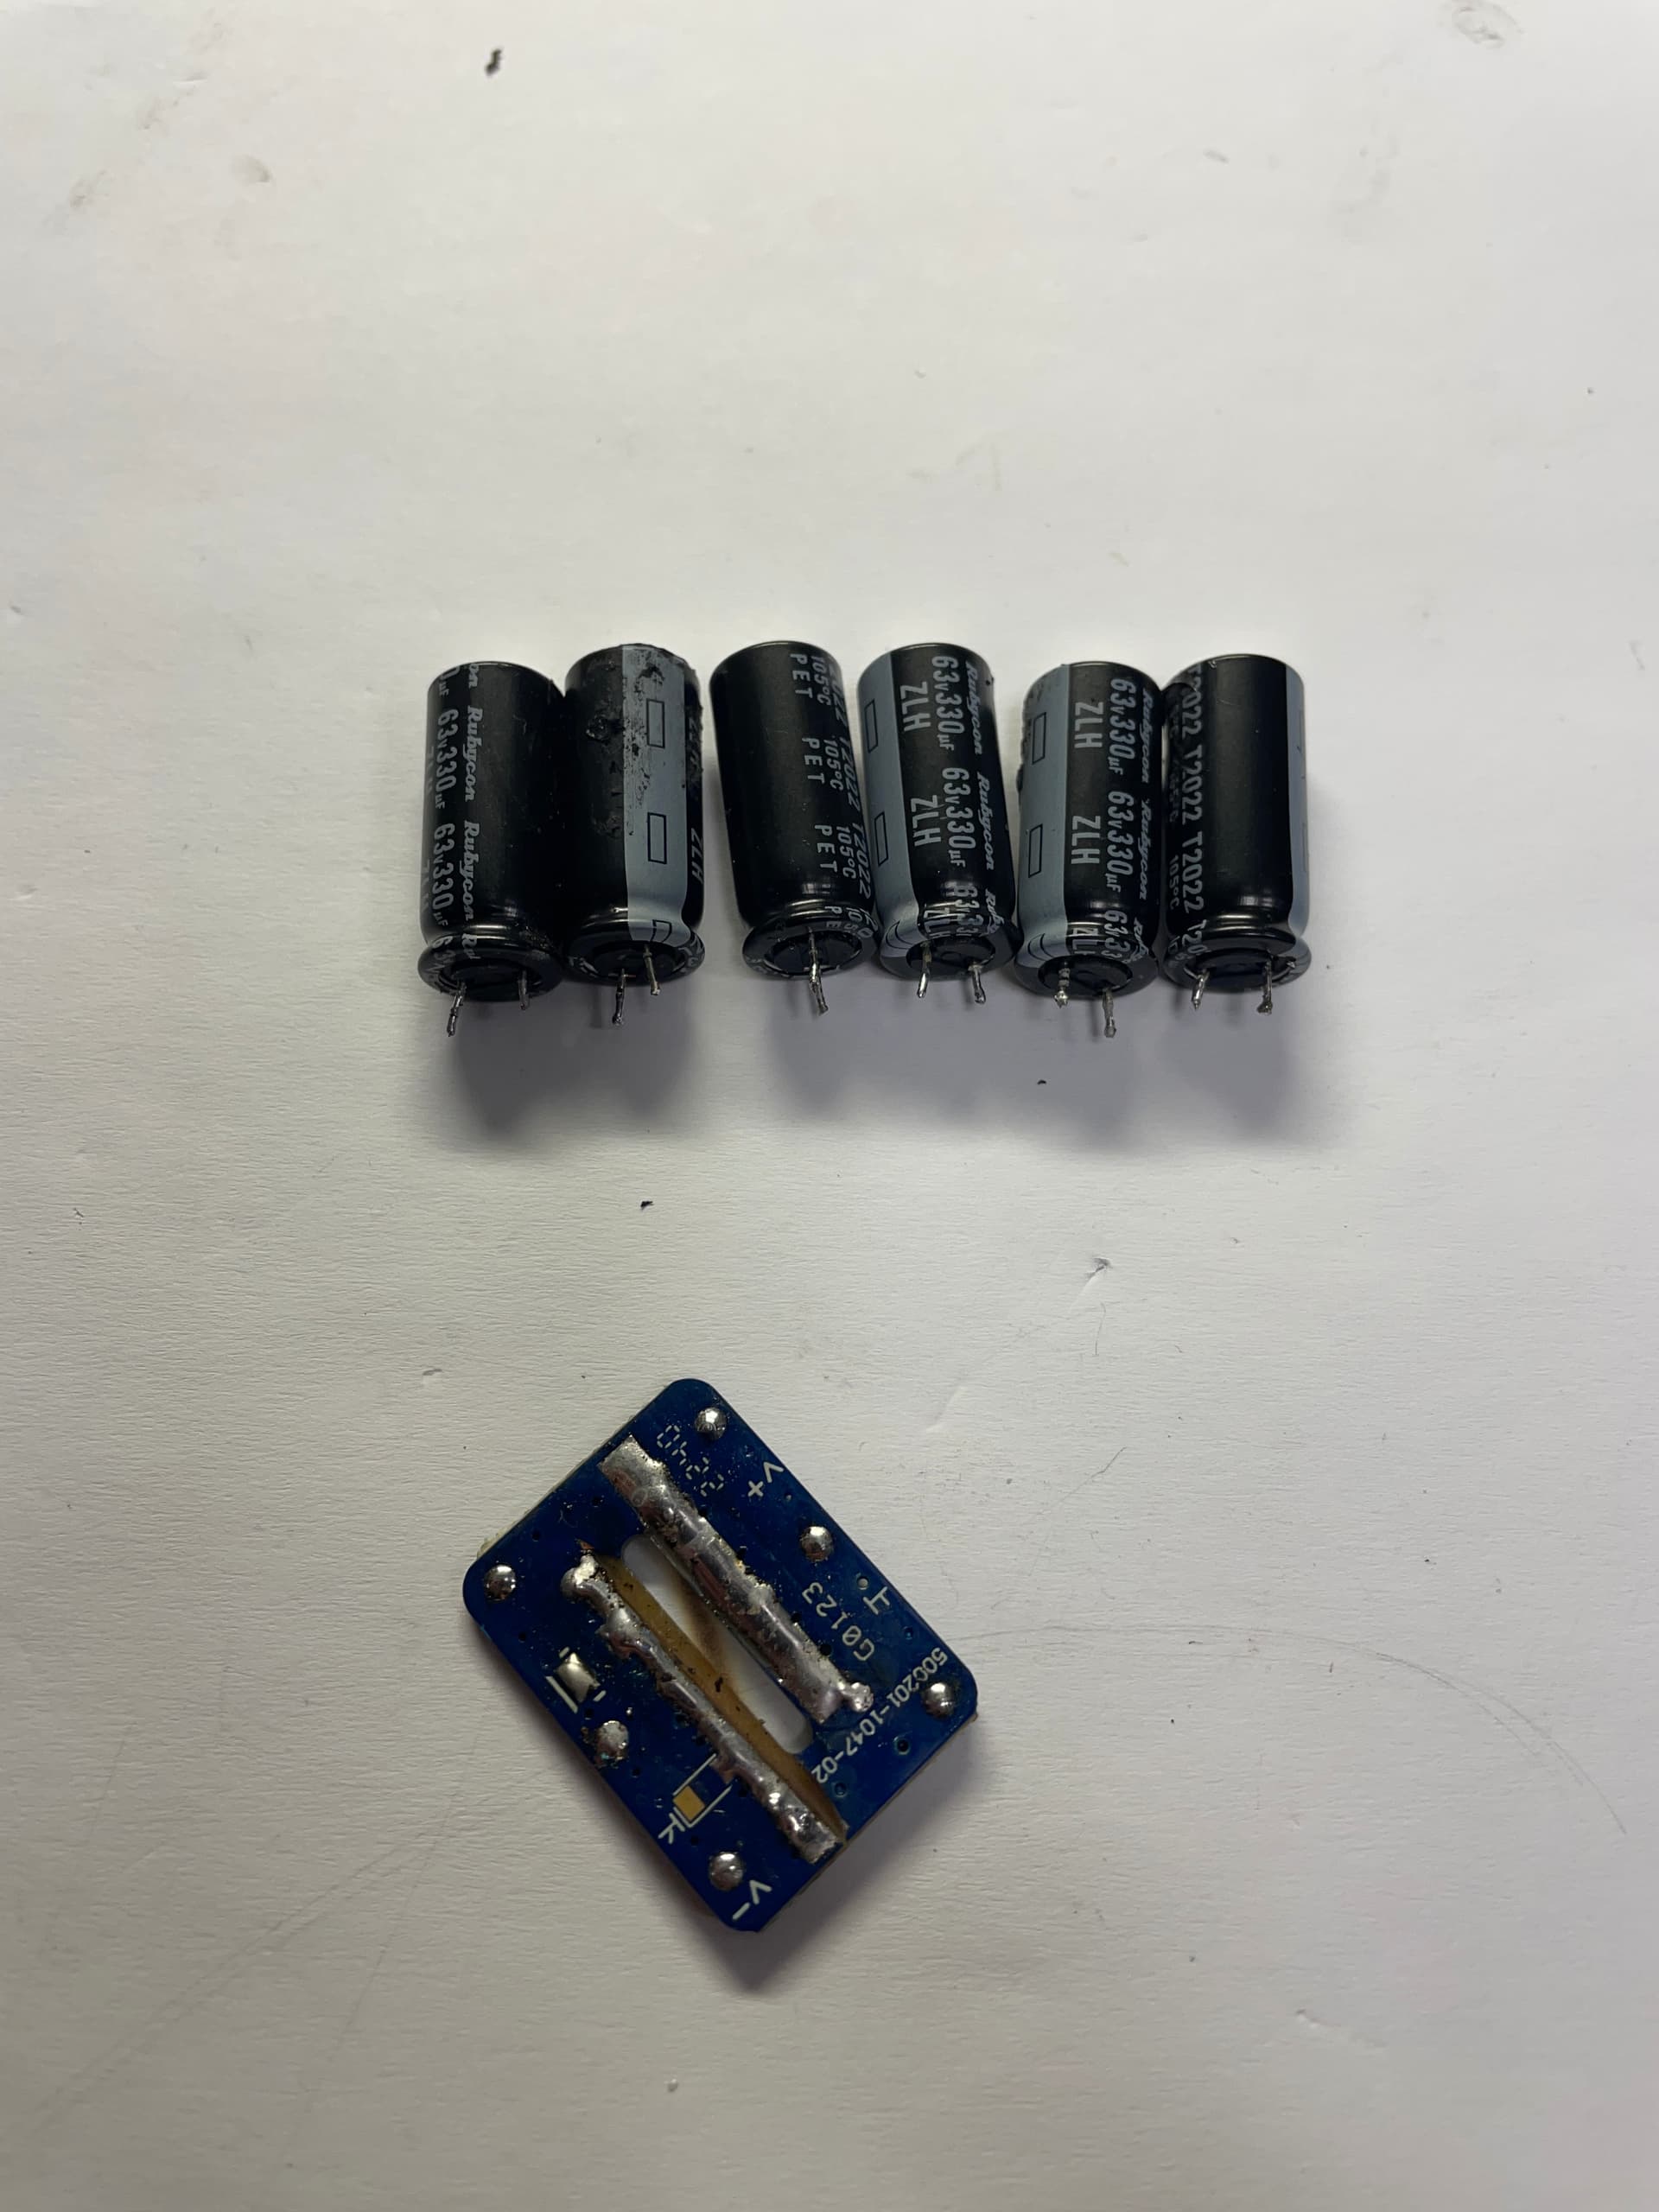
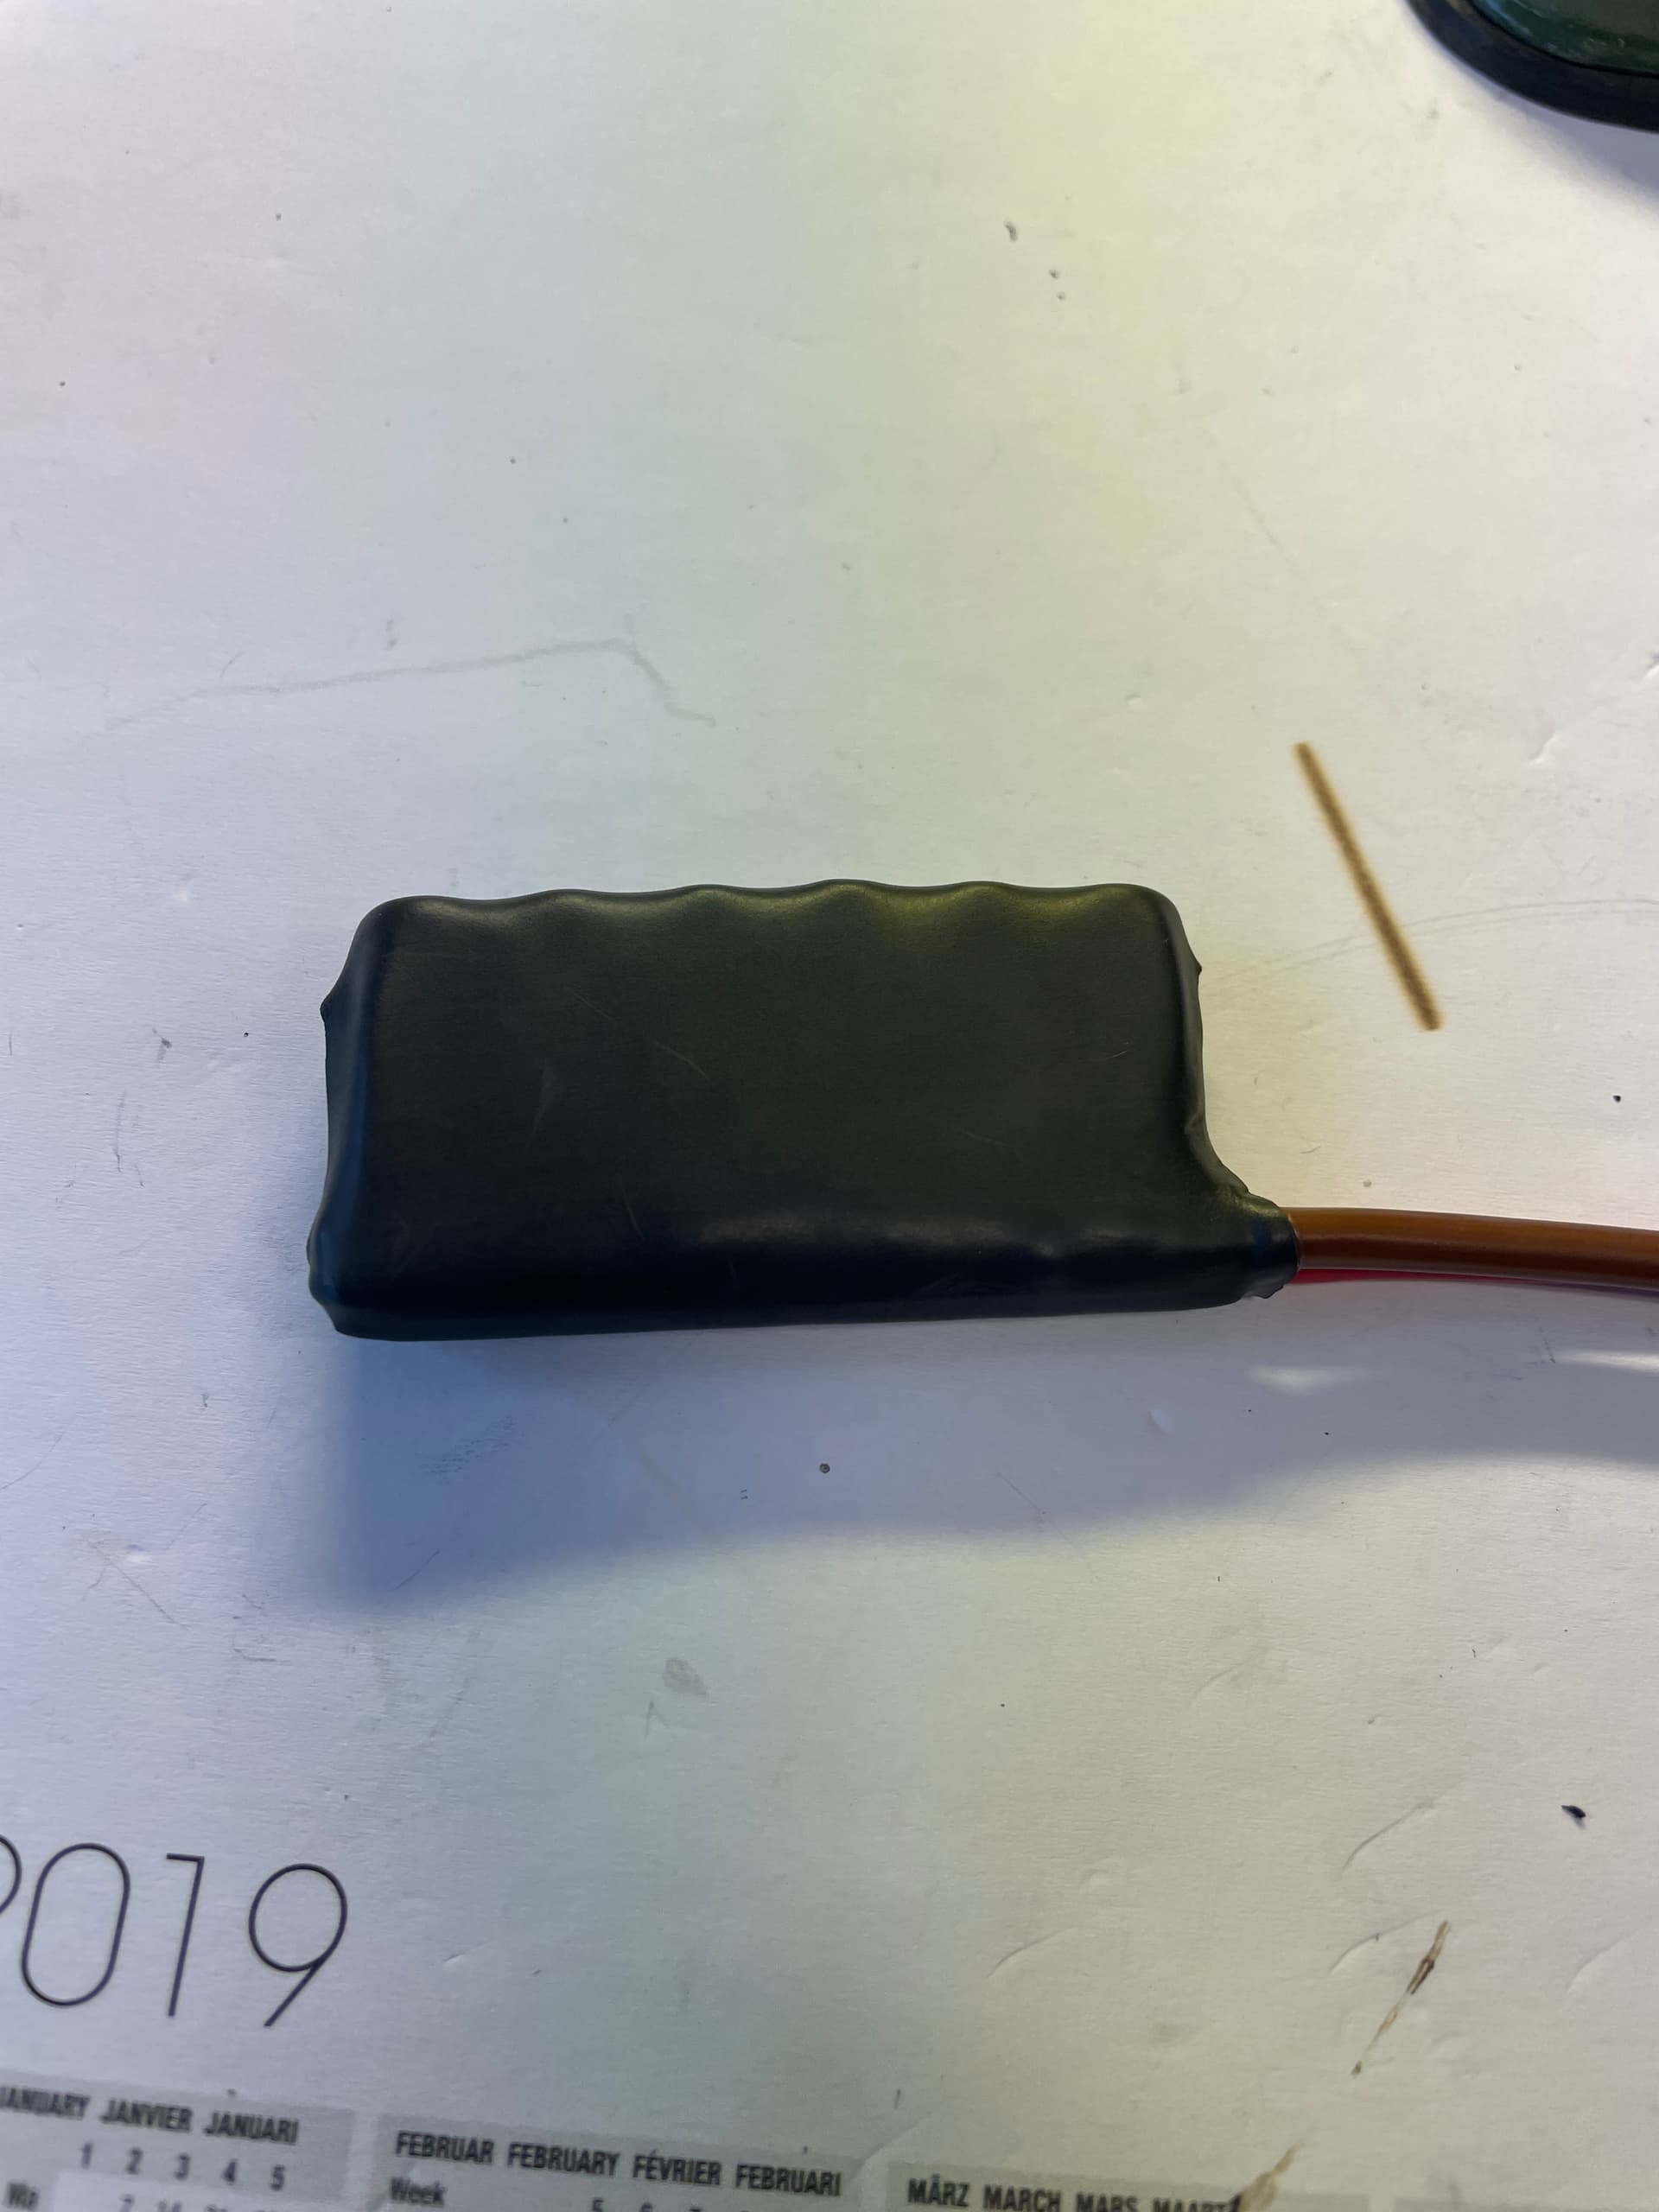
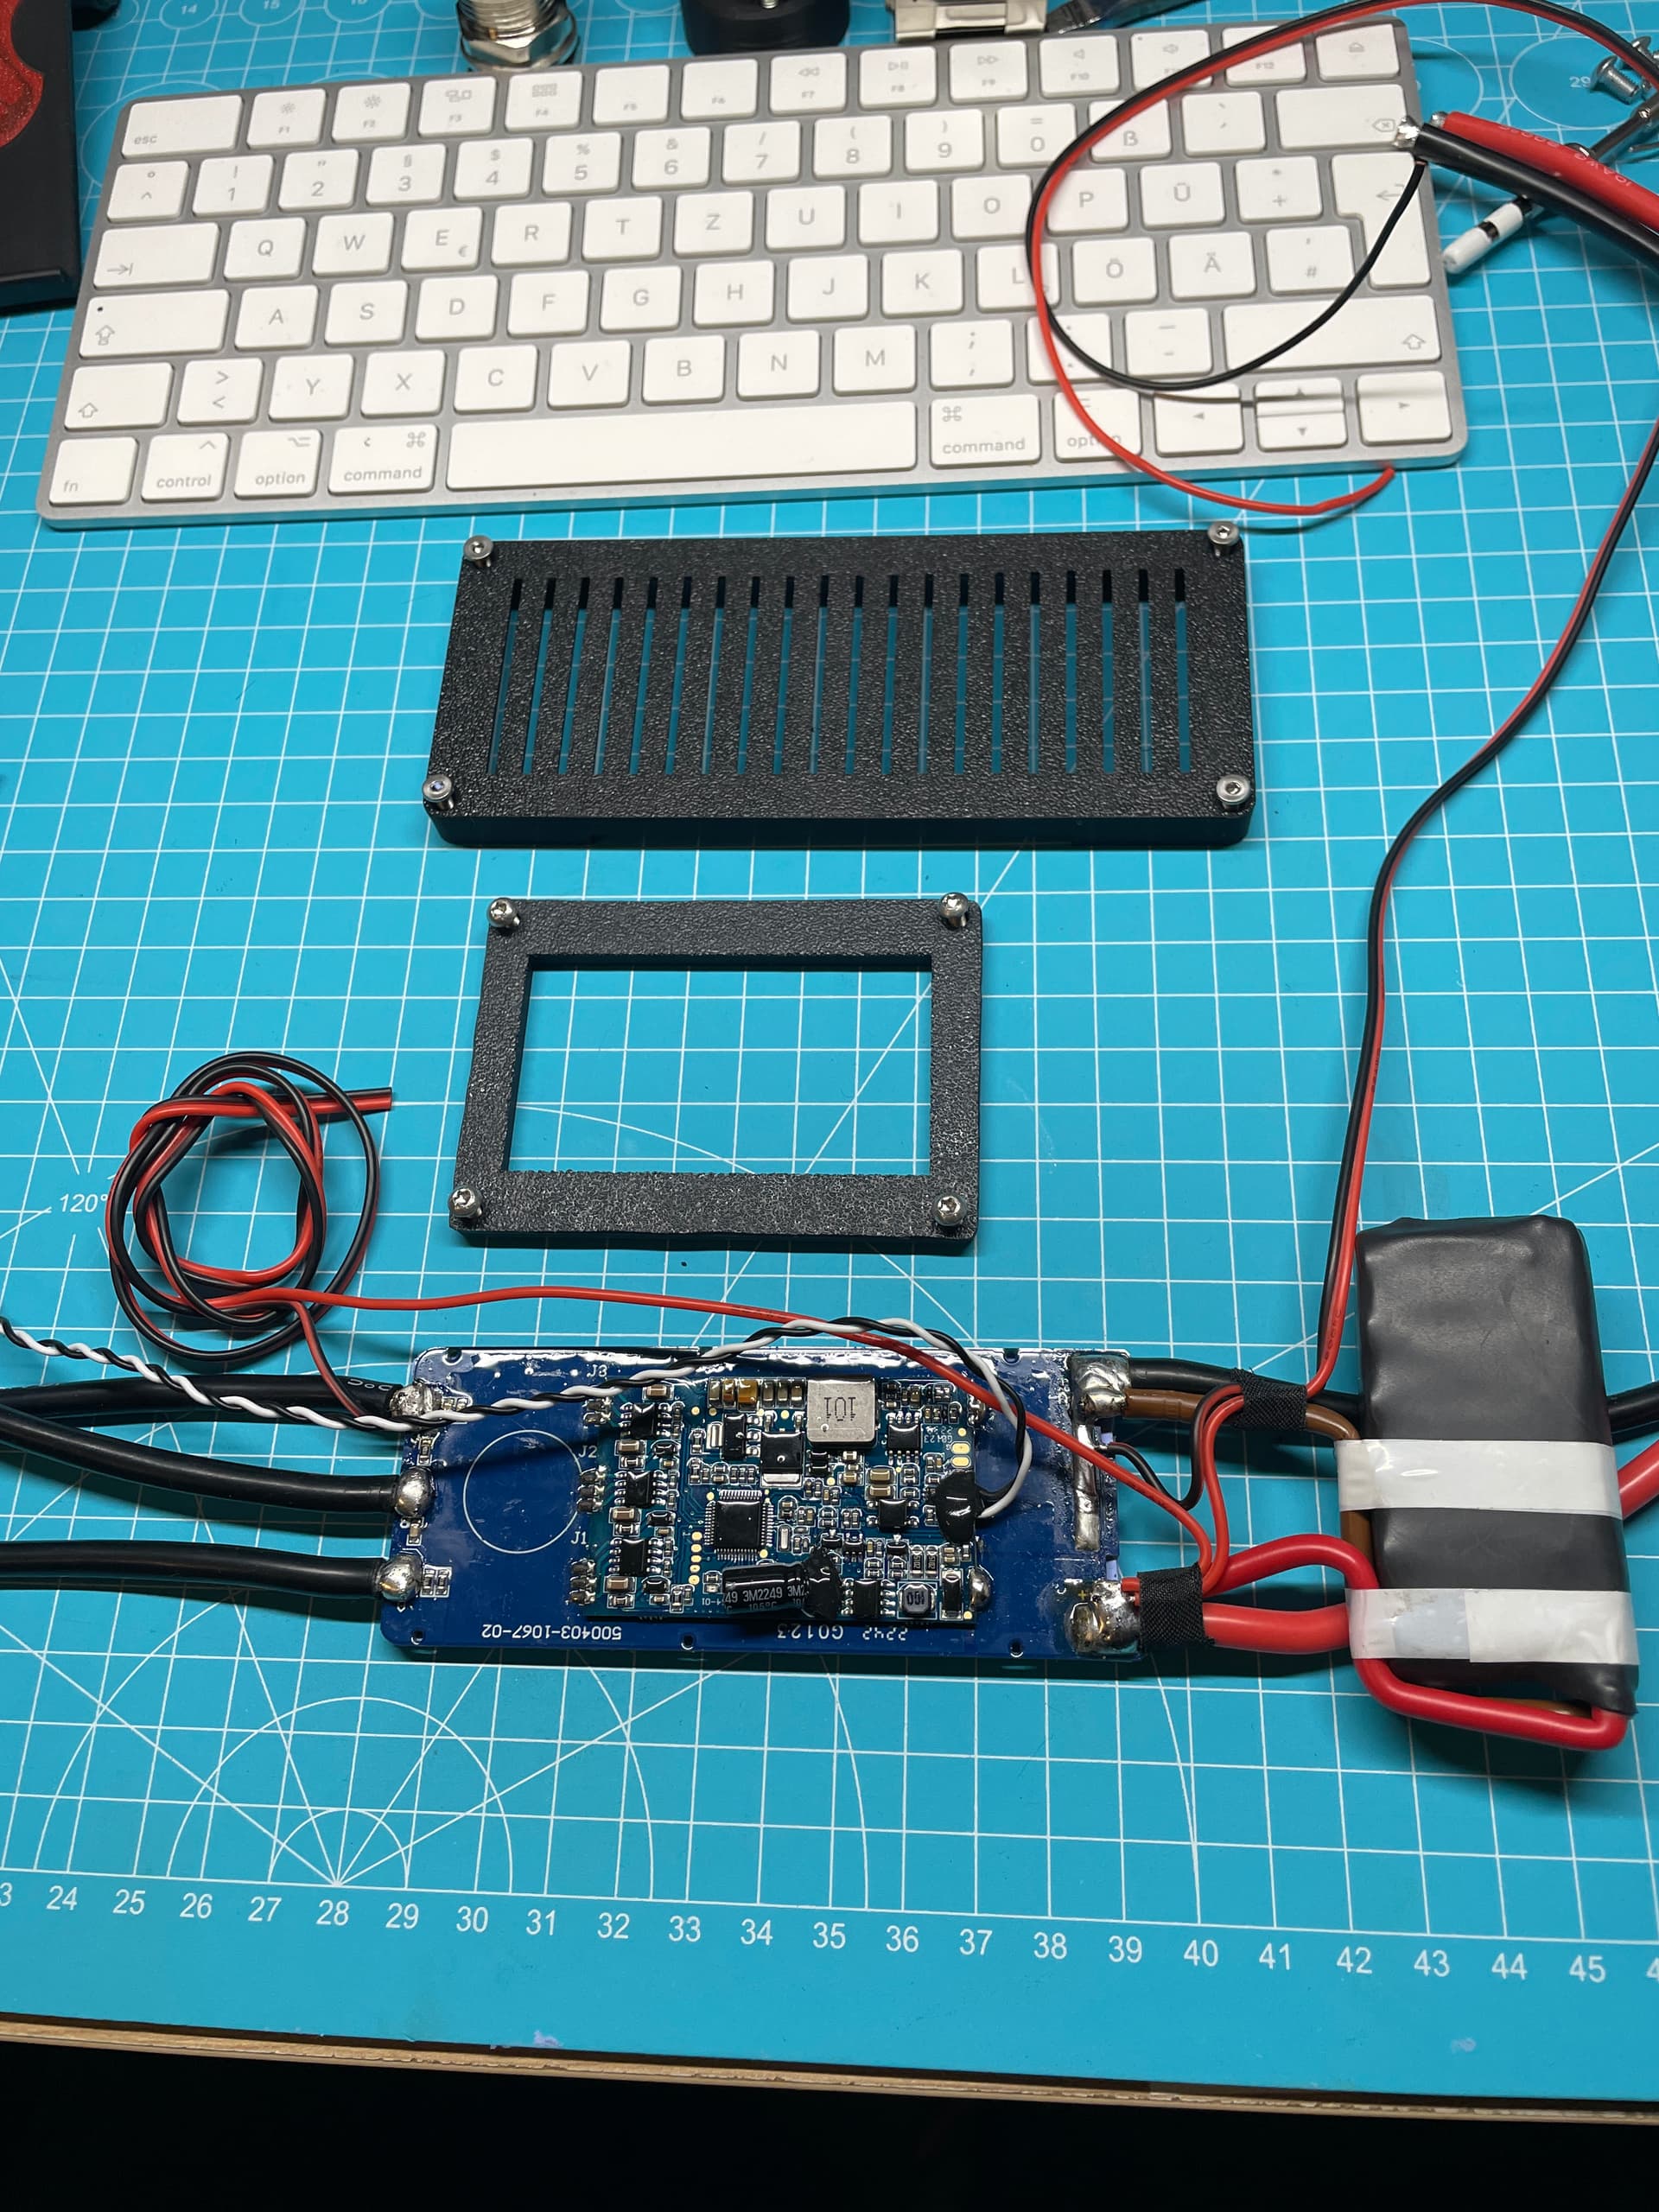
I removed the capacitors and connected them with cables.
I will upload the stls to printables.
All parts made from ASA.
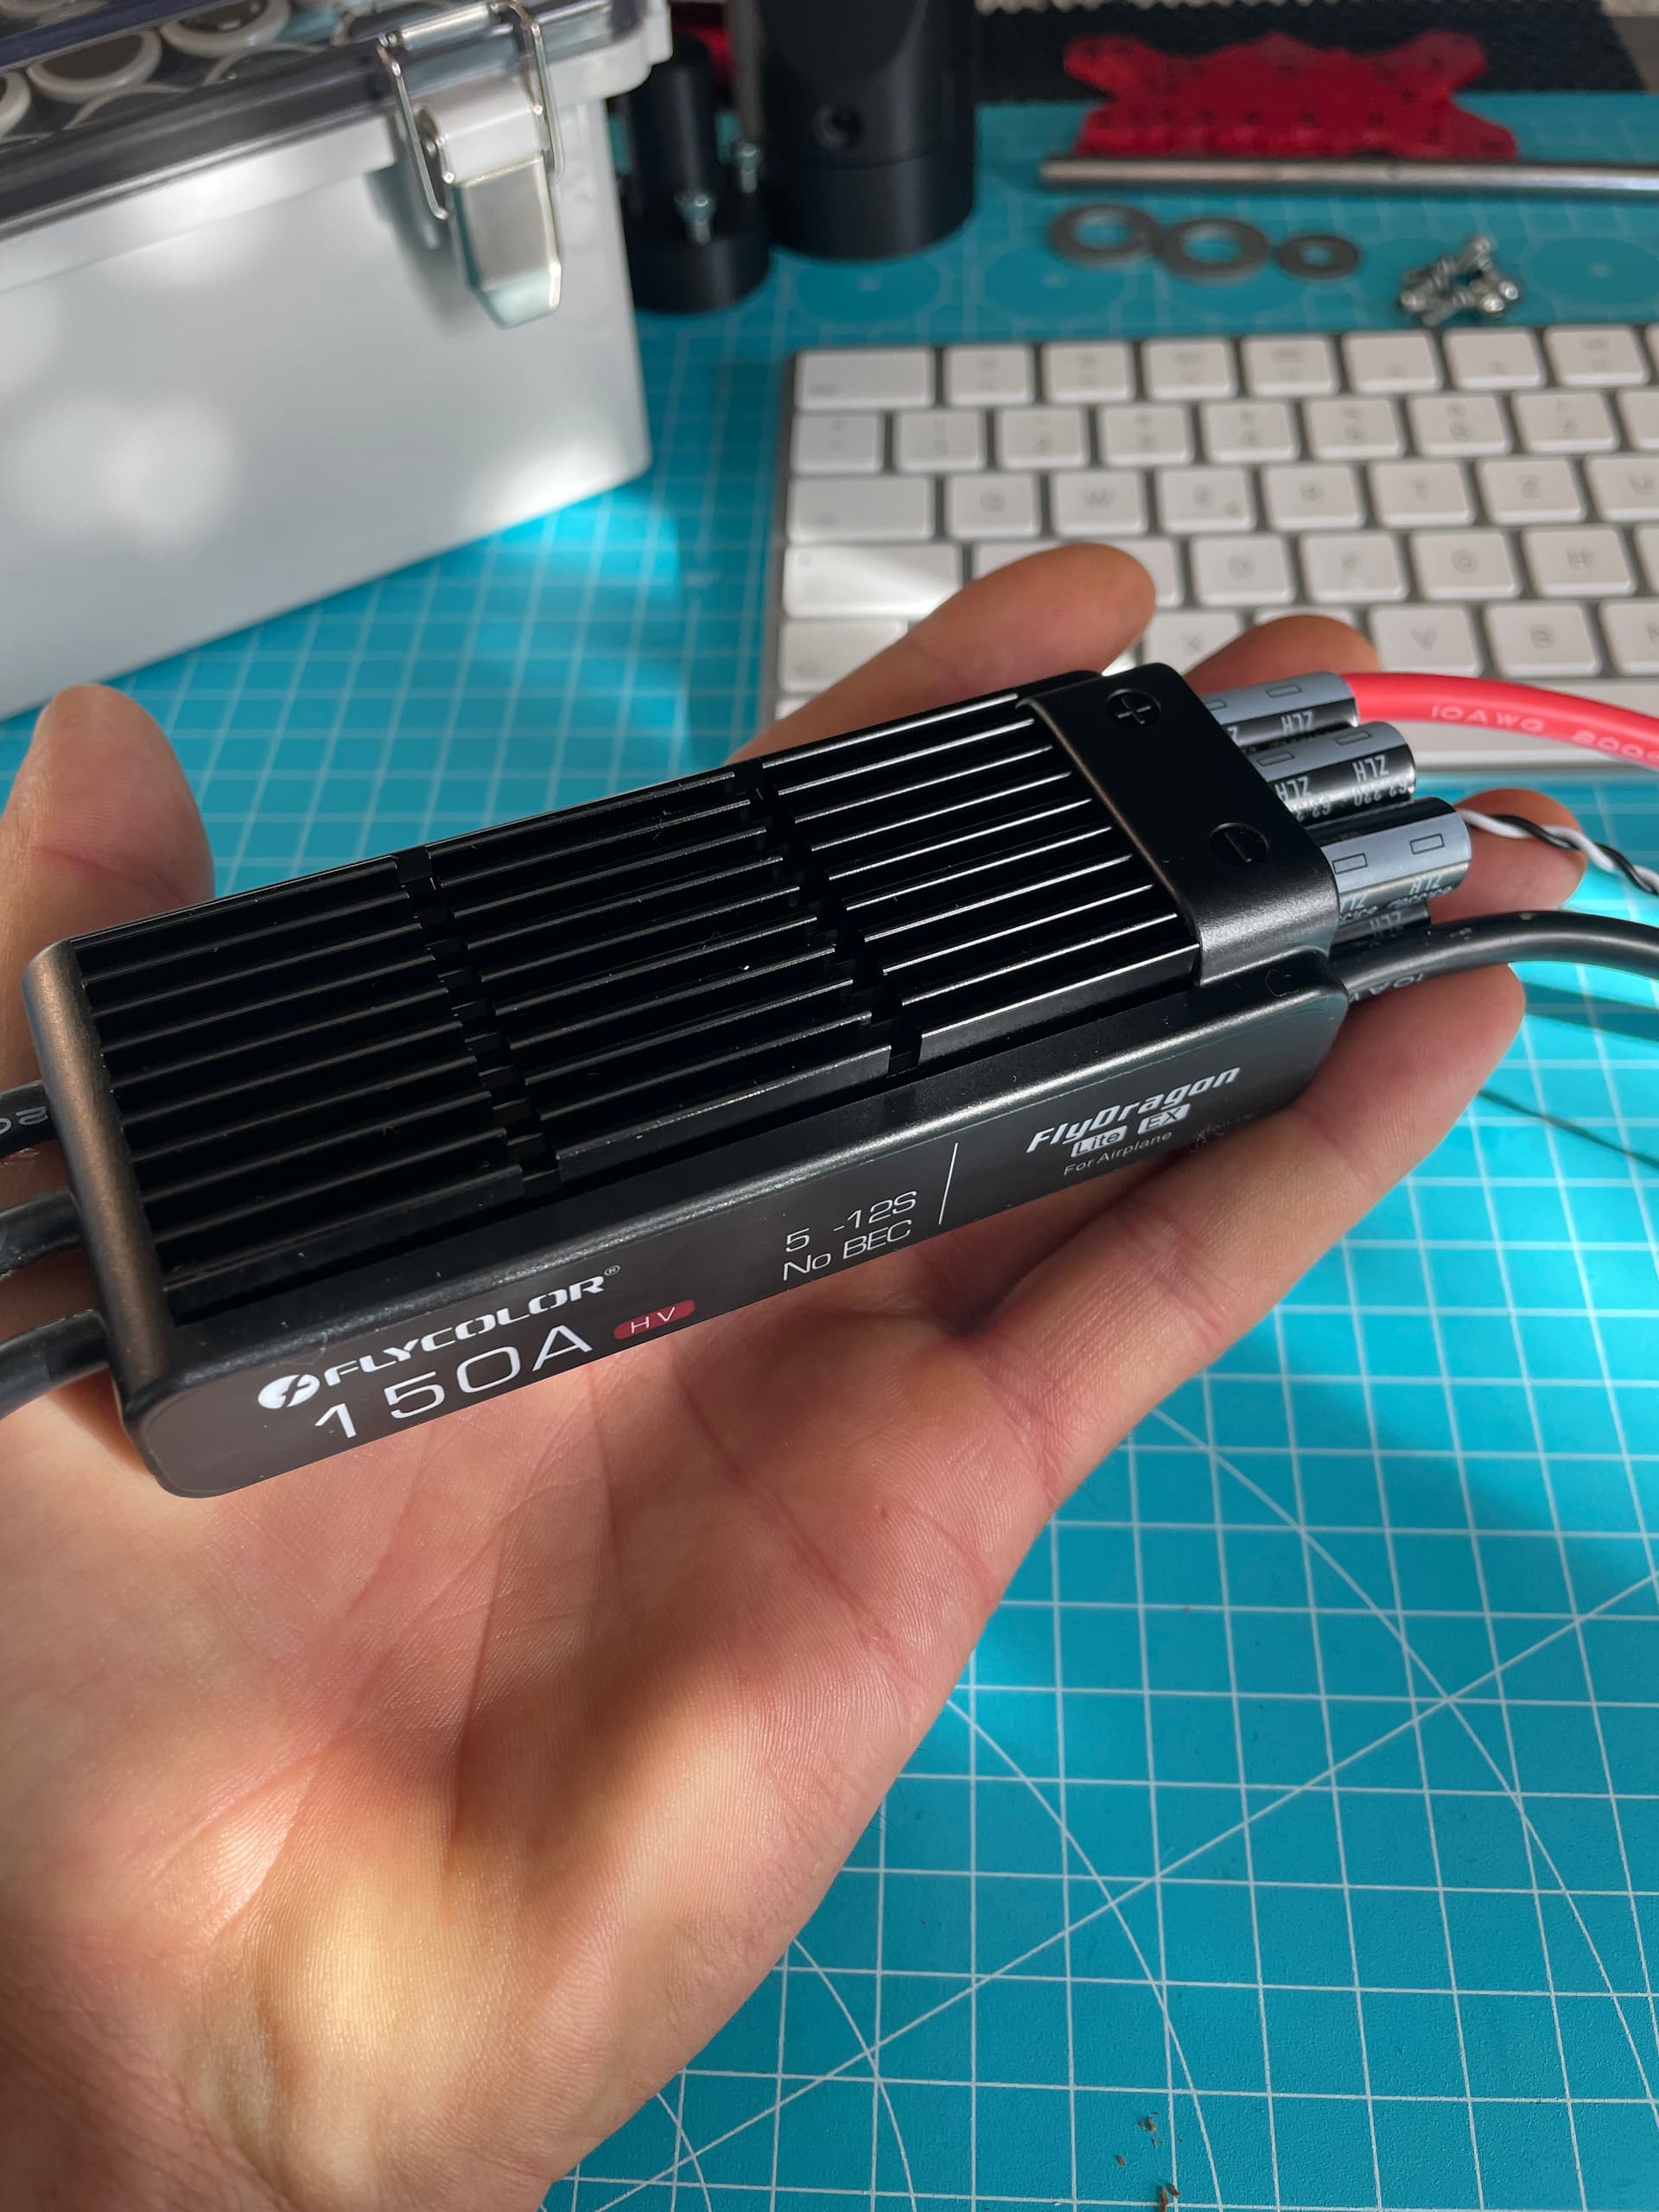


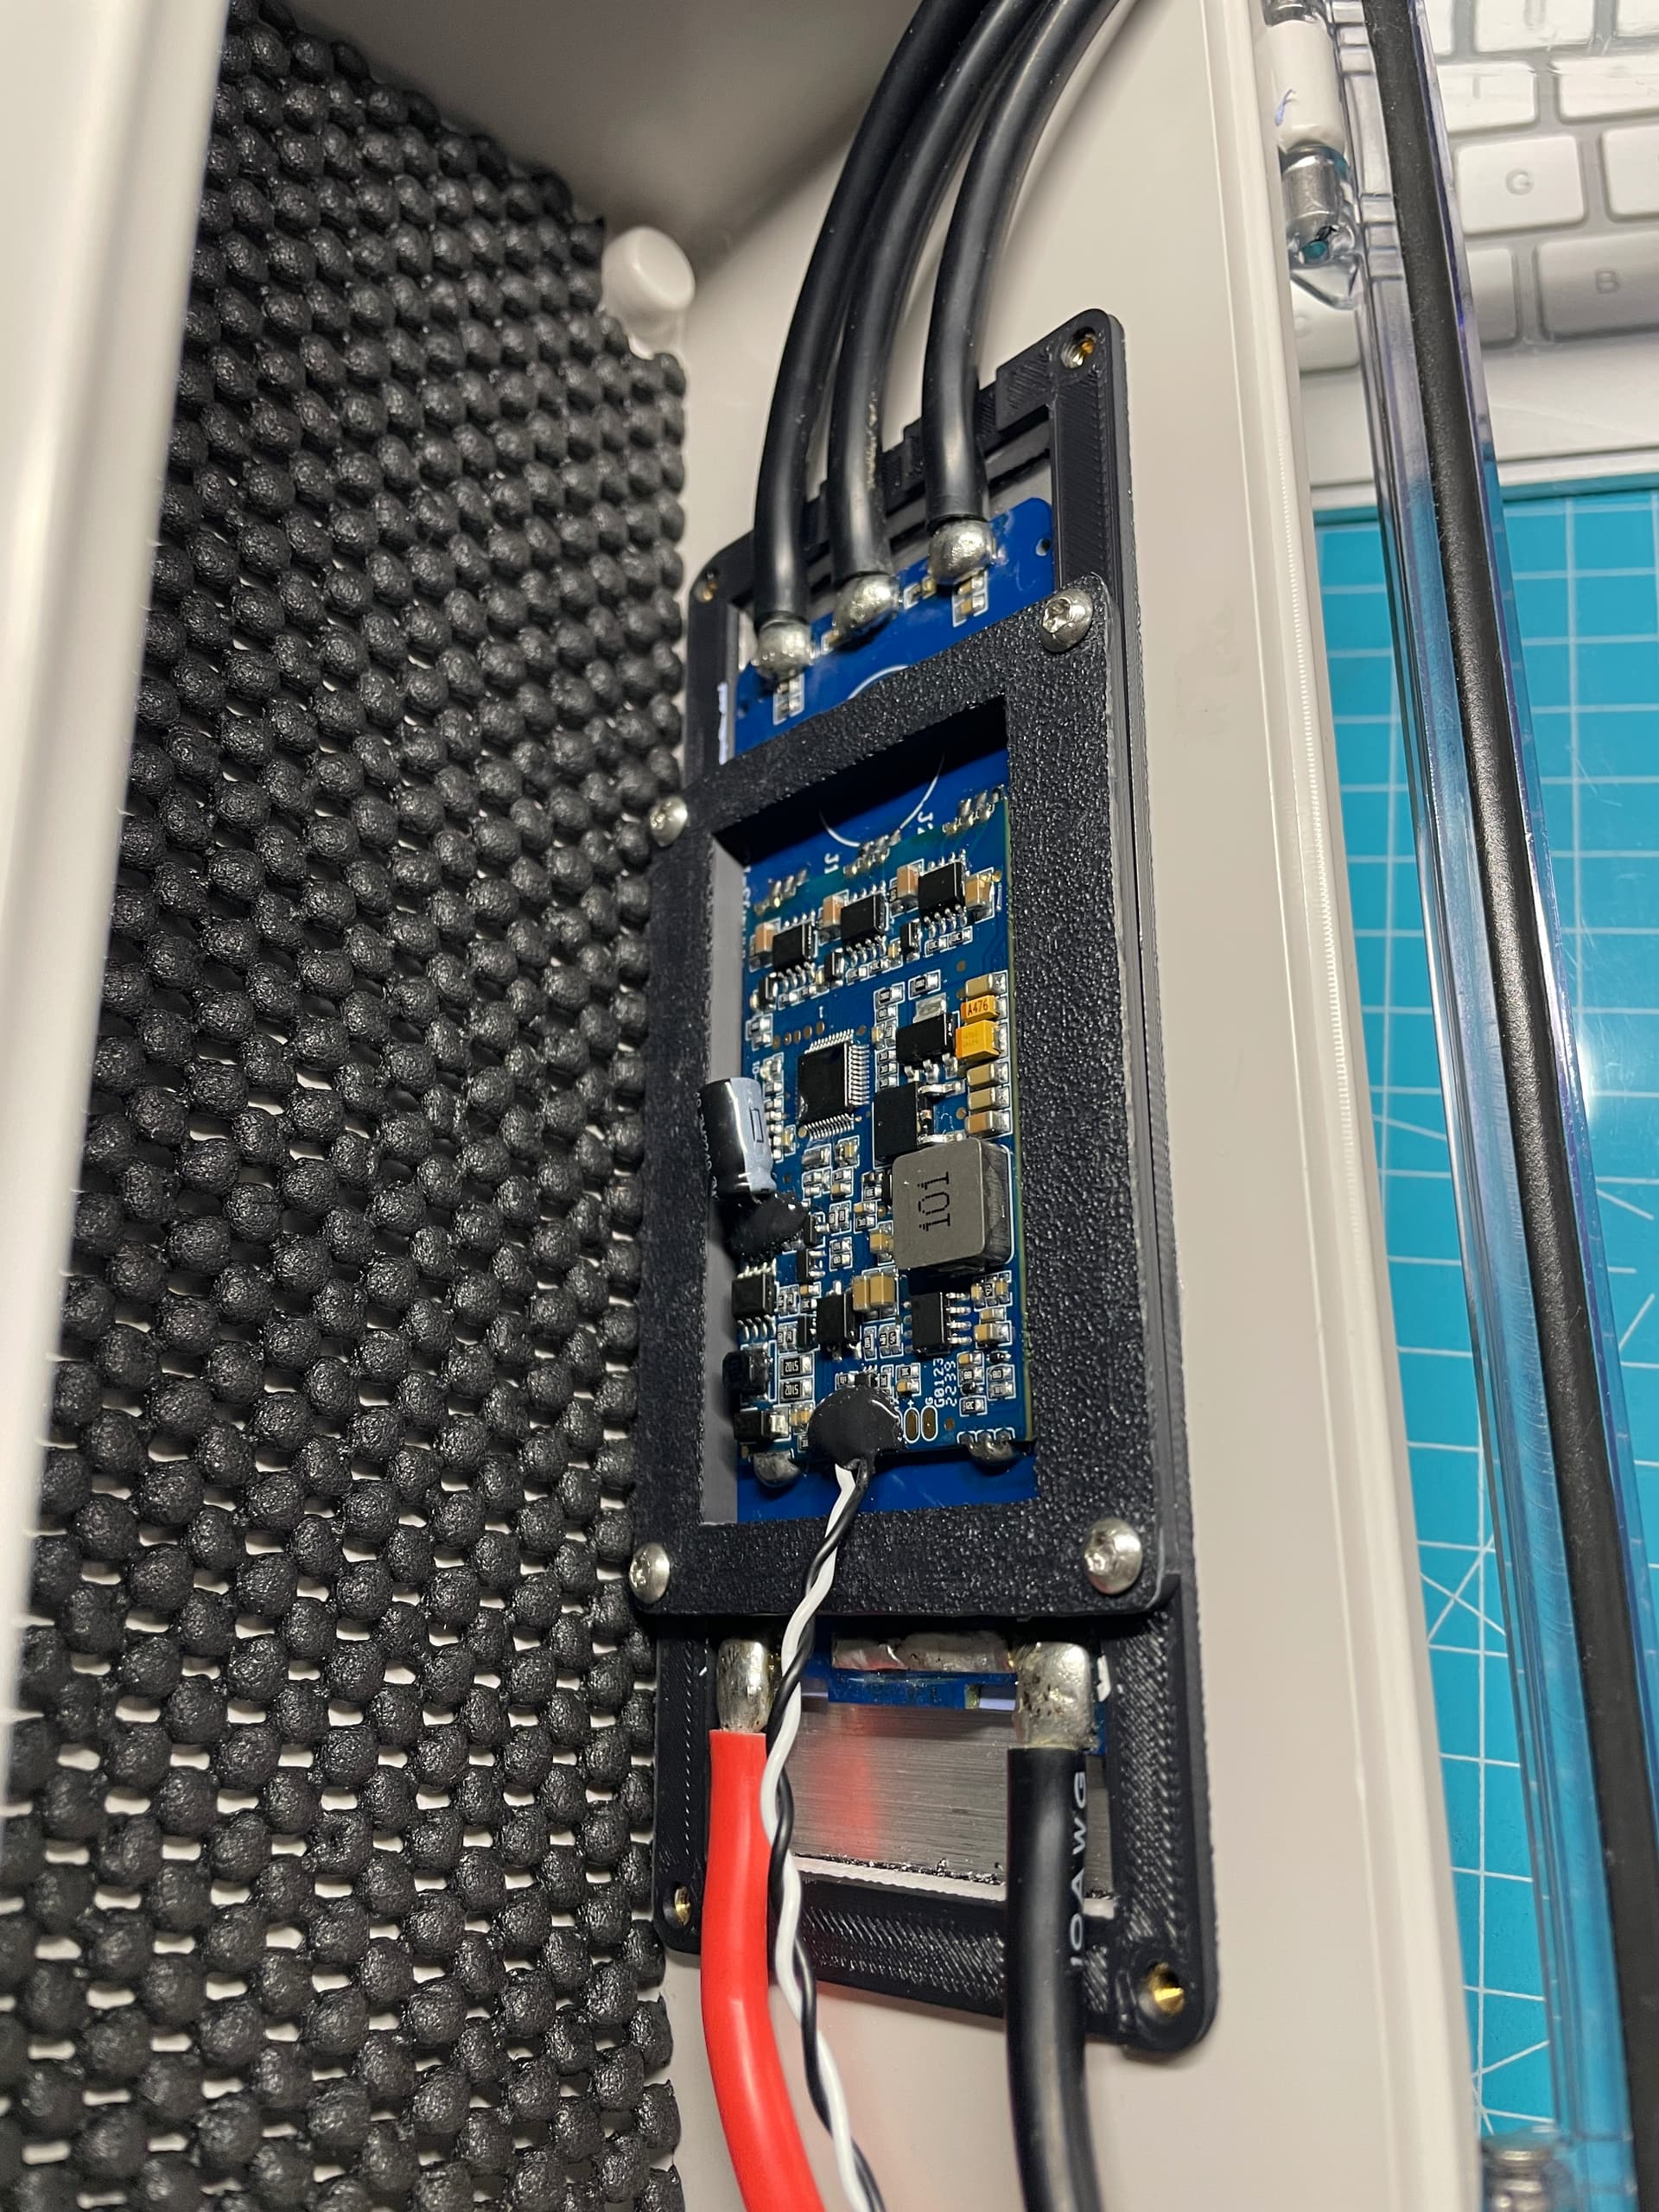
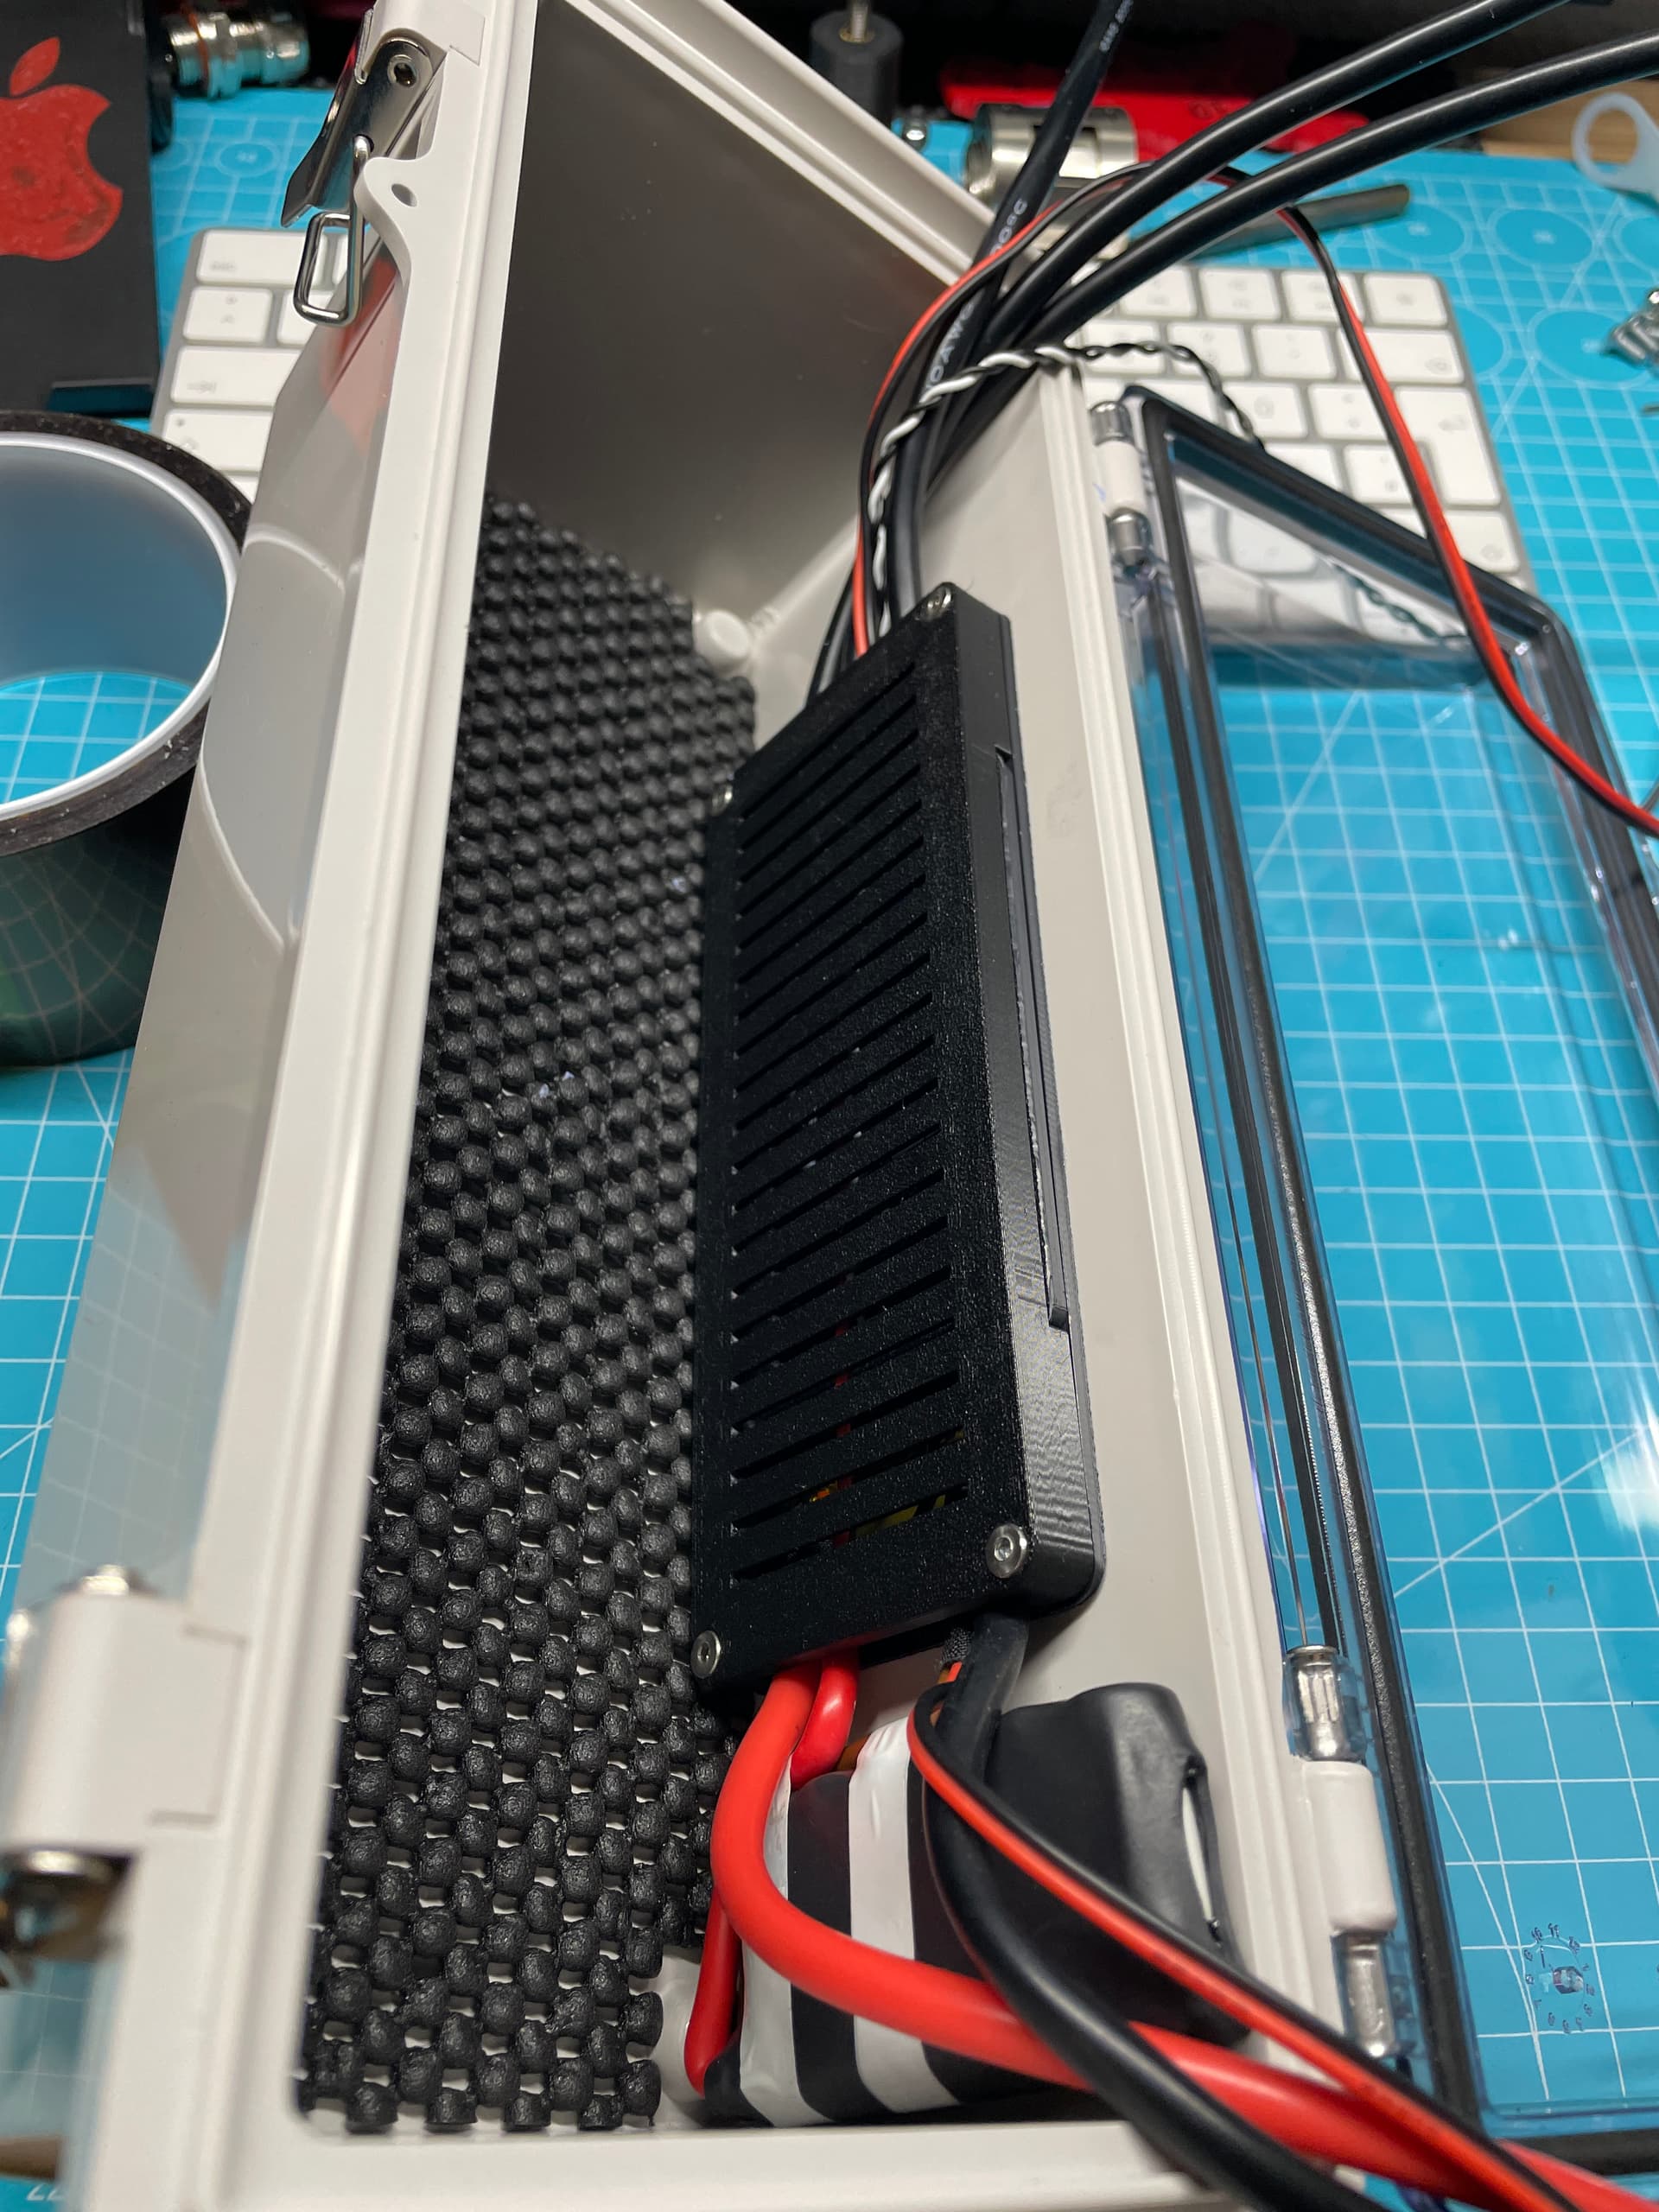
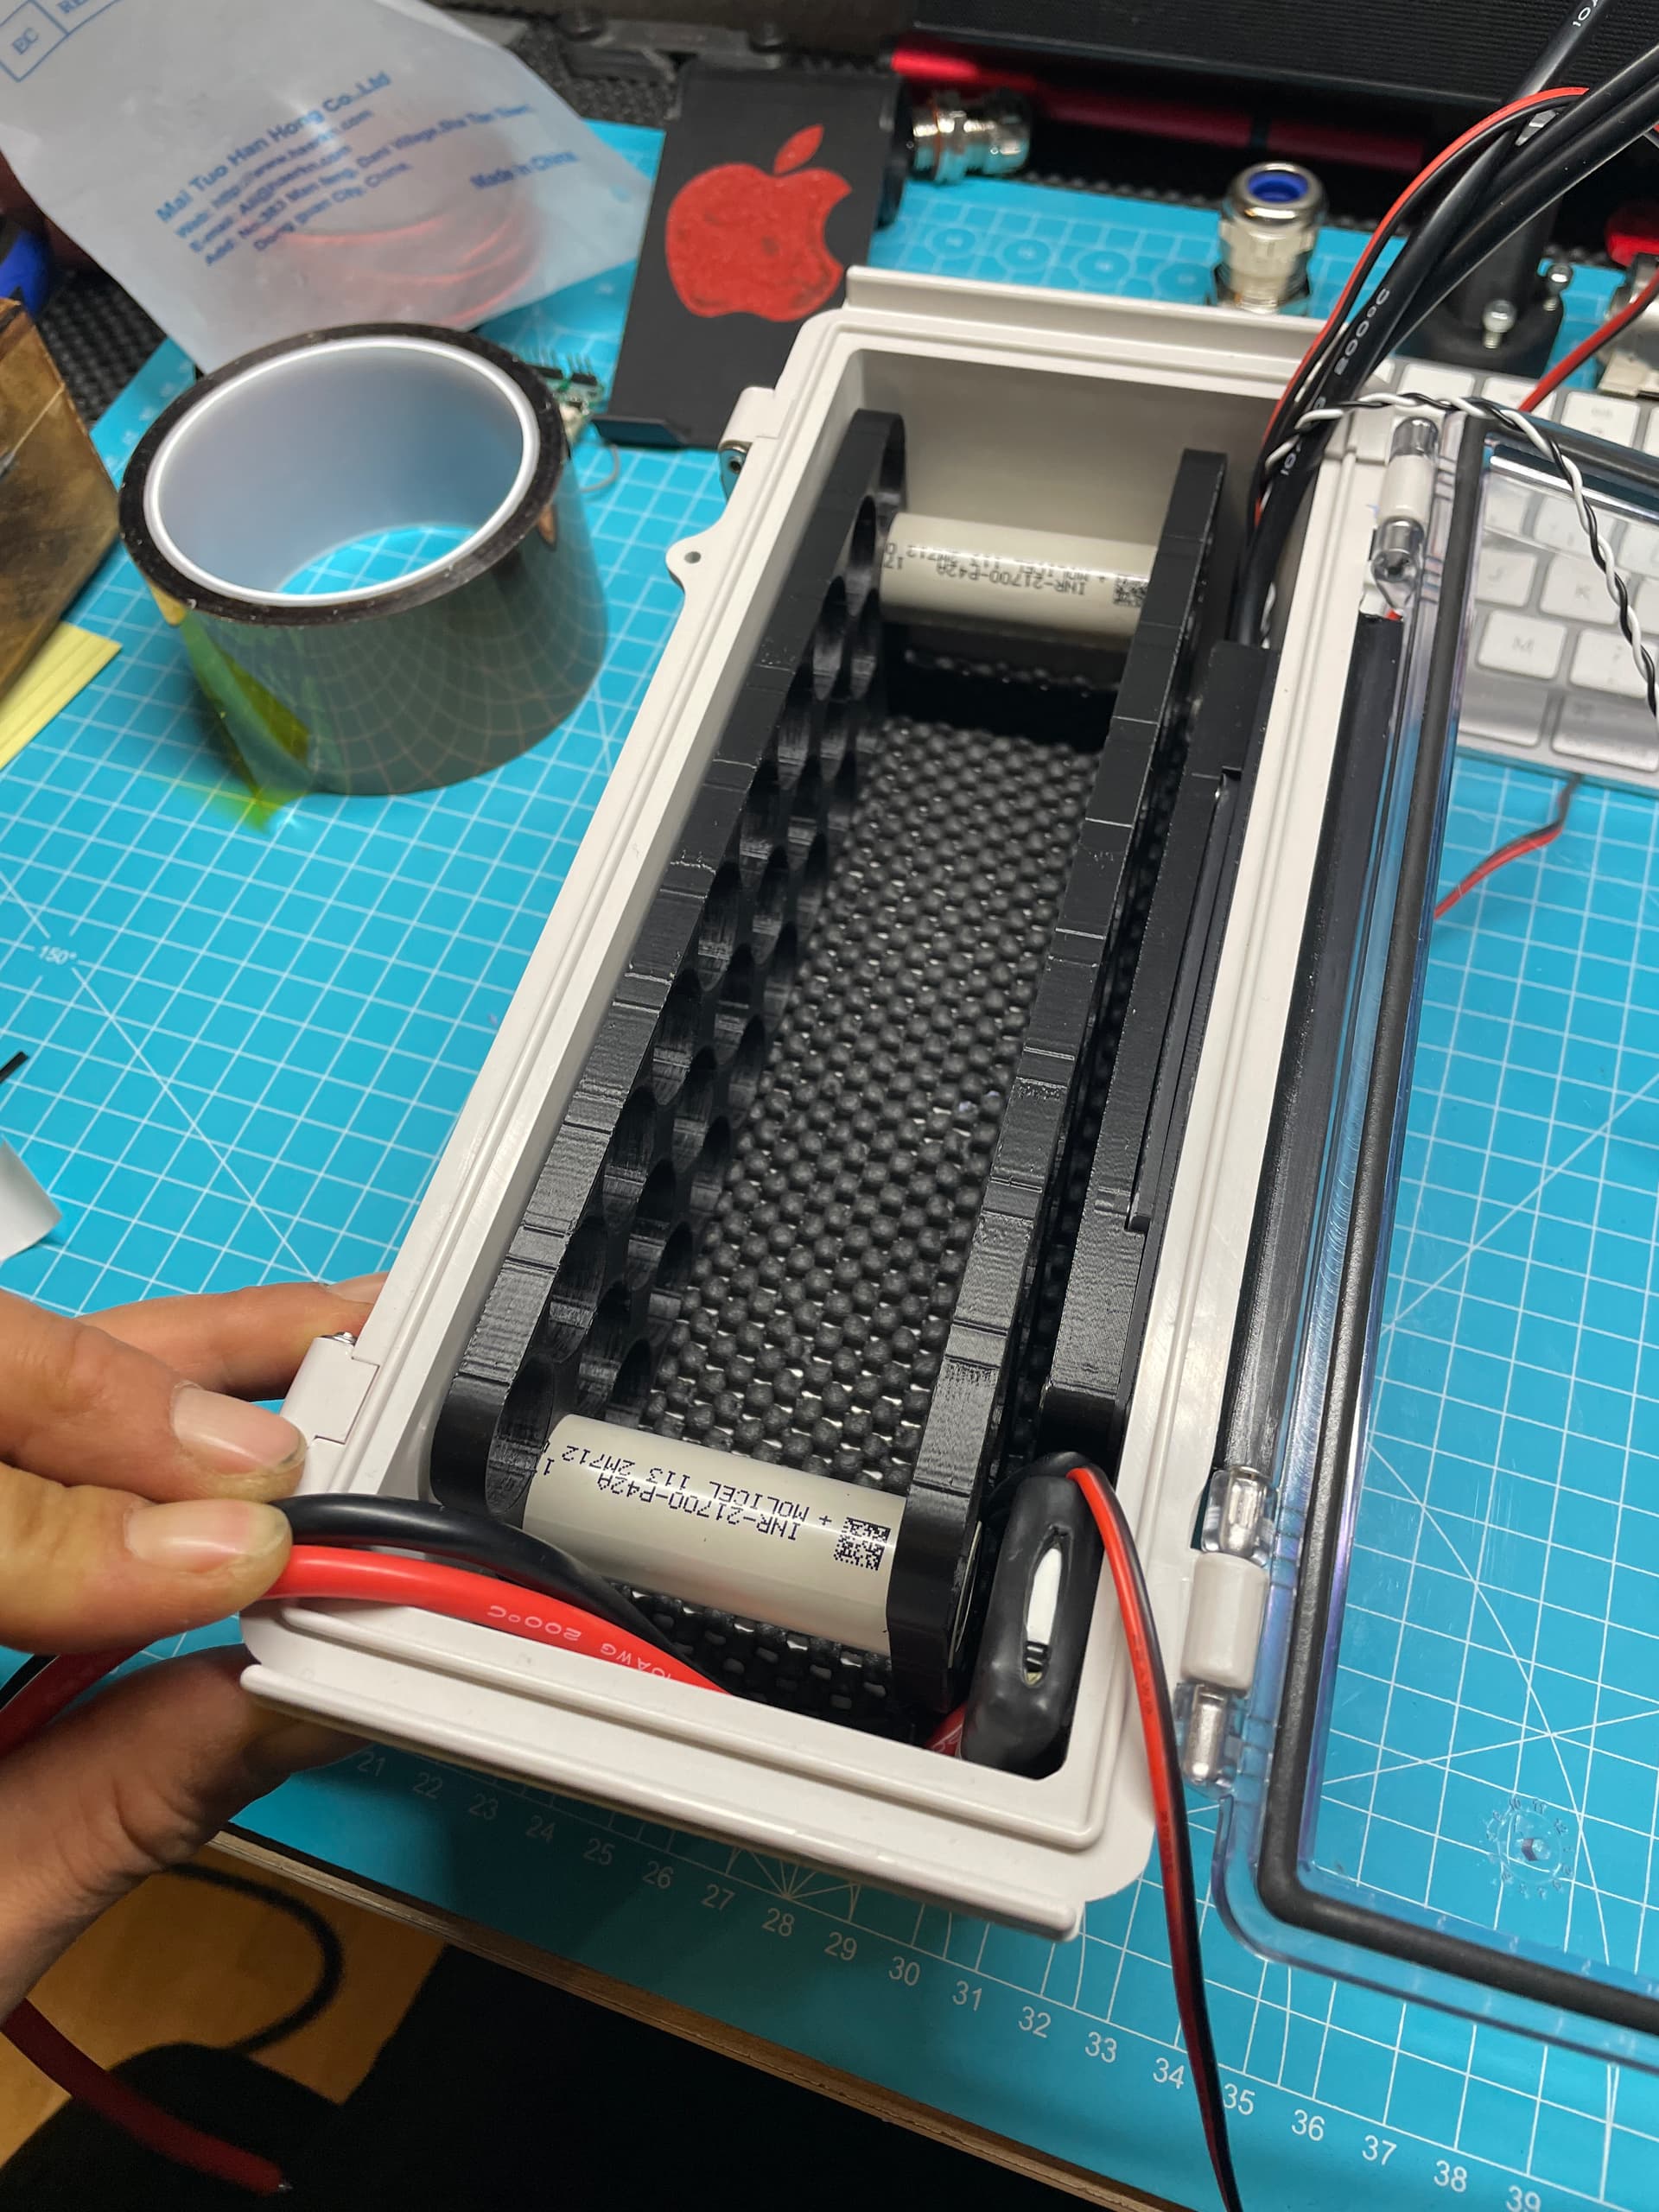
Next Step: 10S3P build
19 Likes
Gorgeous! 
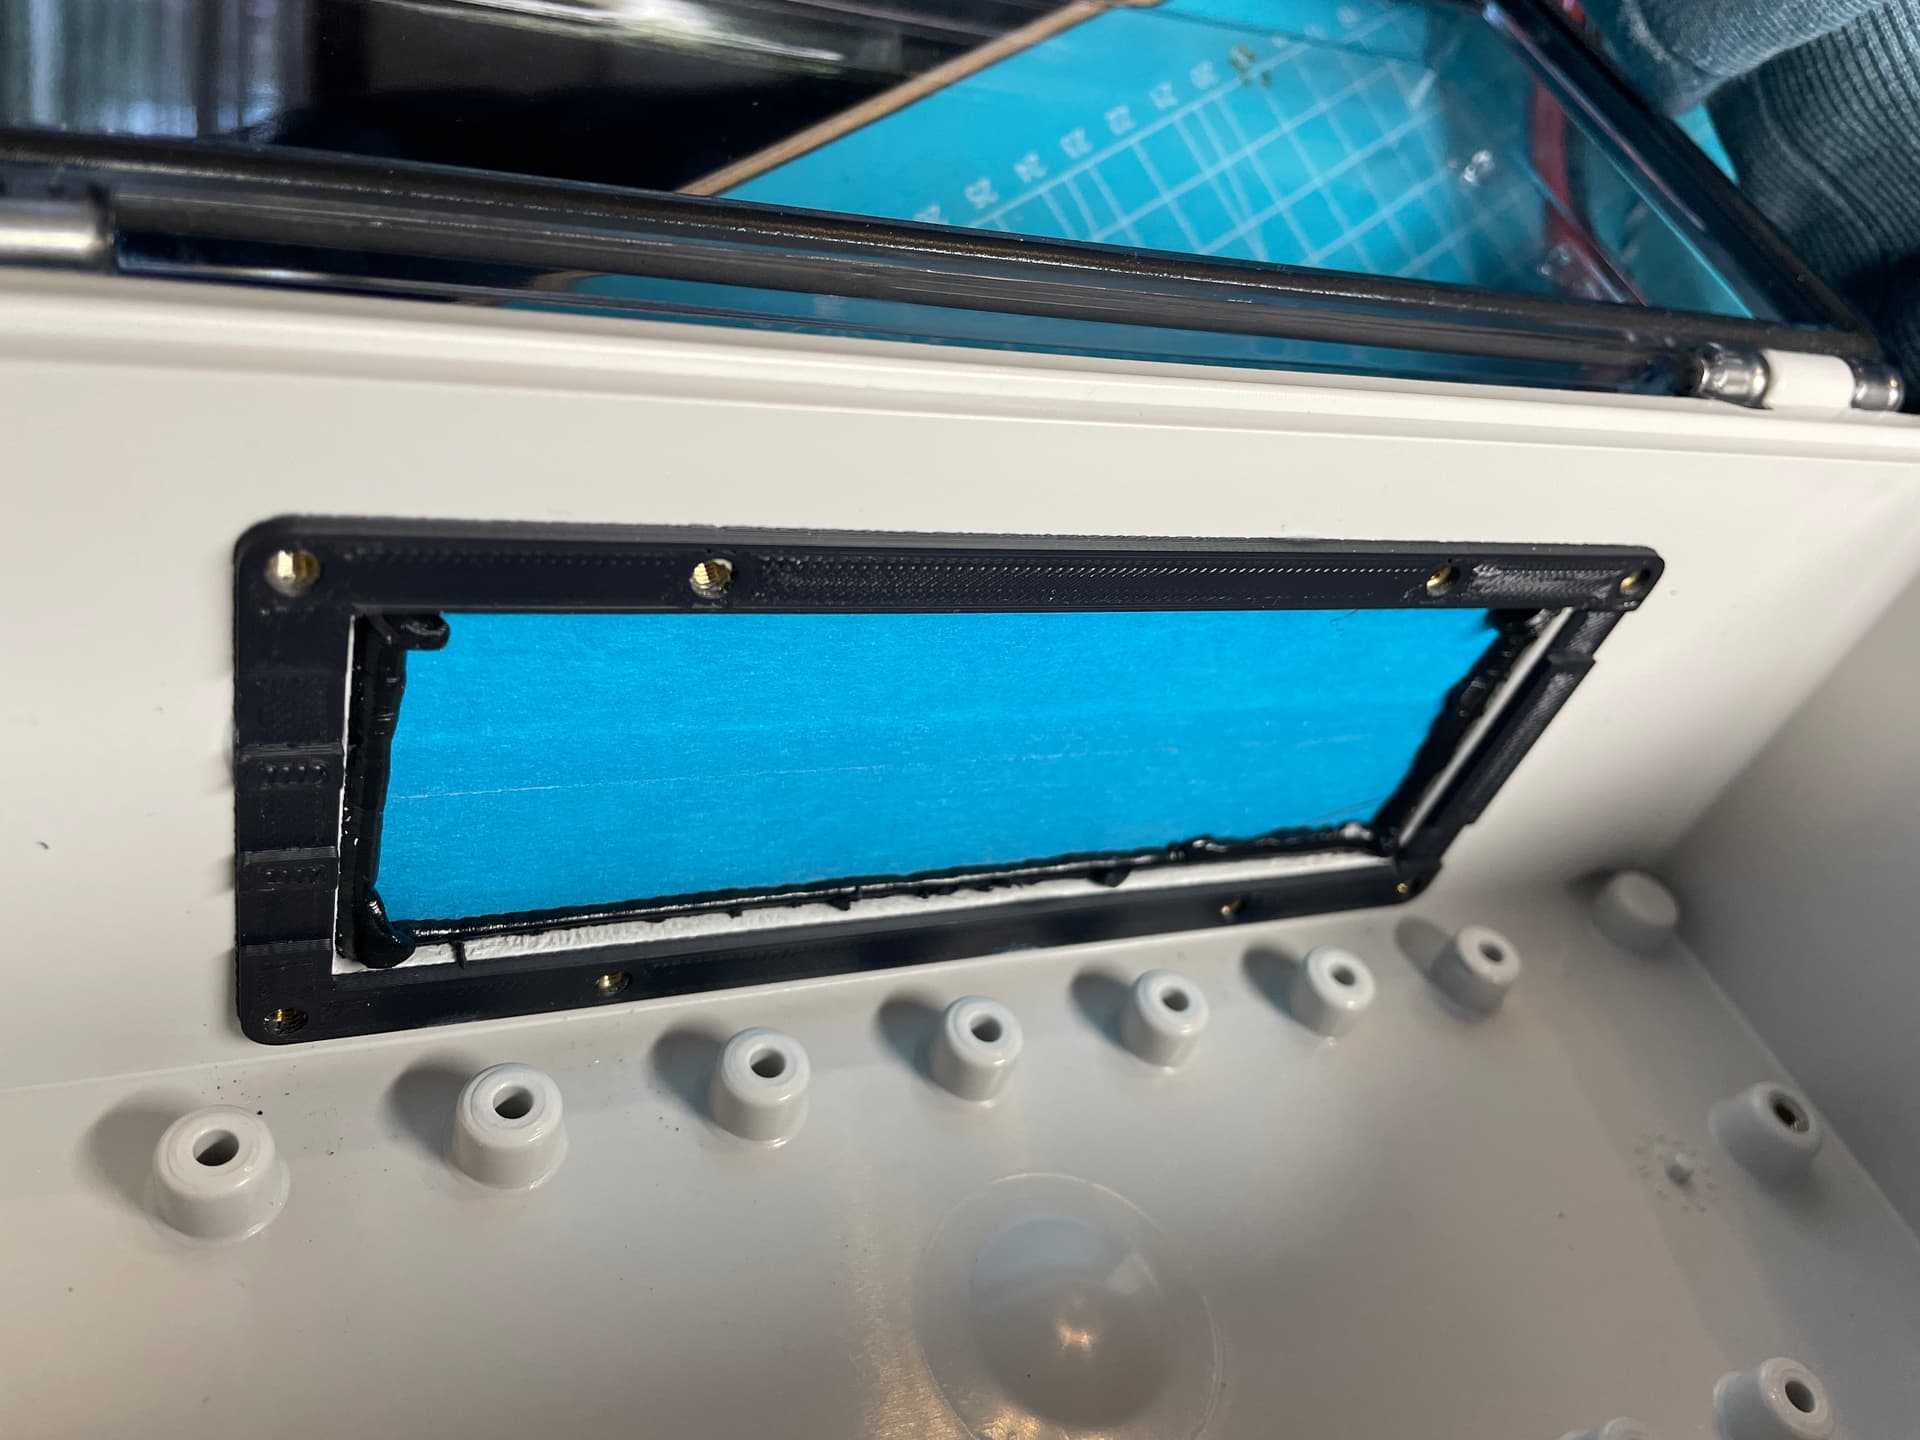
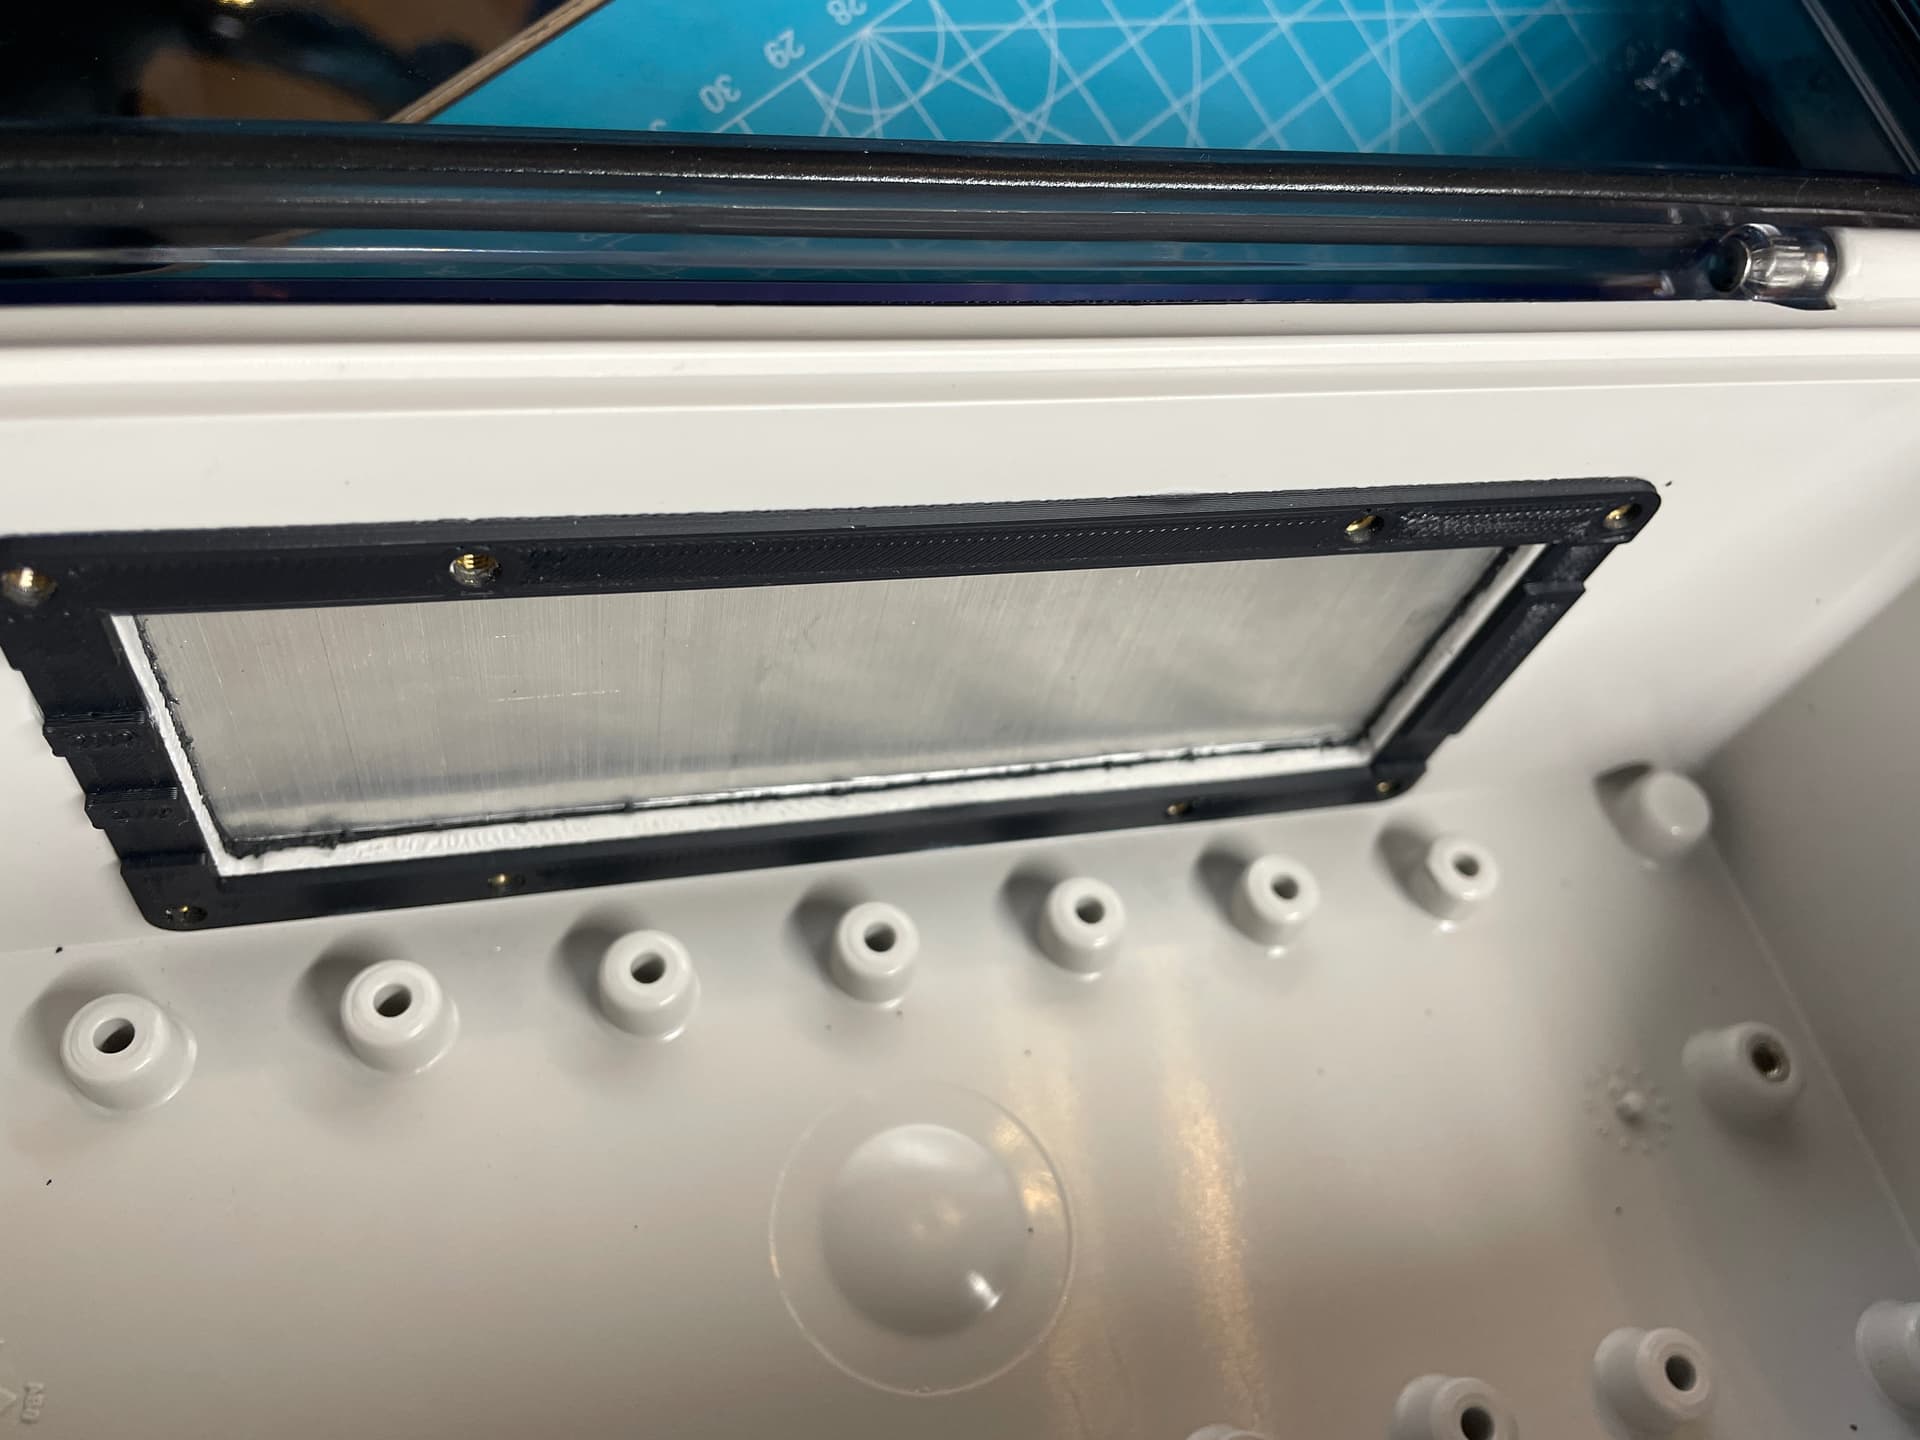
Through holes - makes me worry regarding water ingress 
Awesome build!
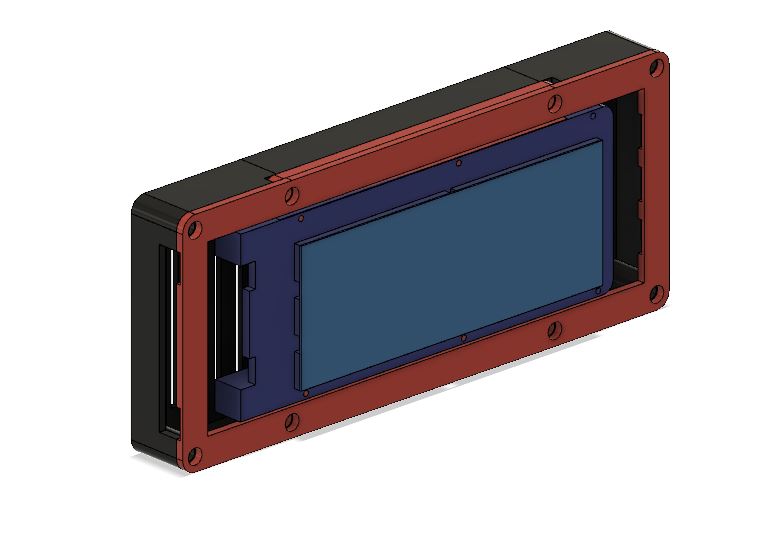
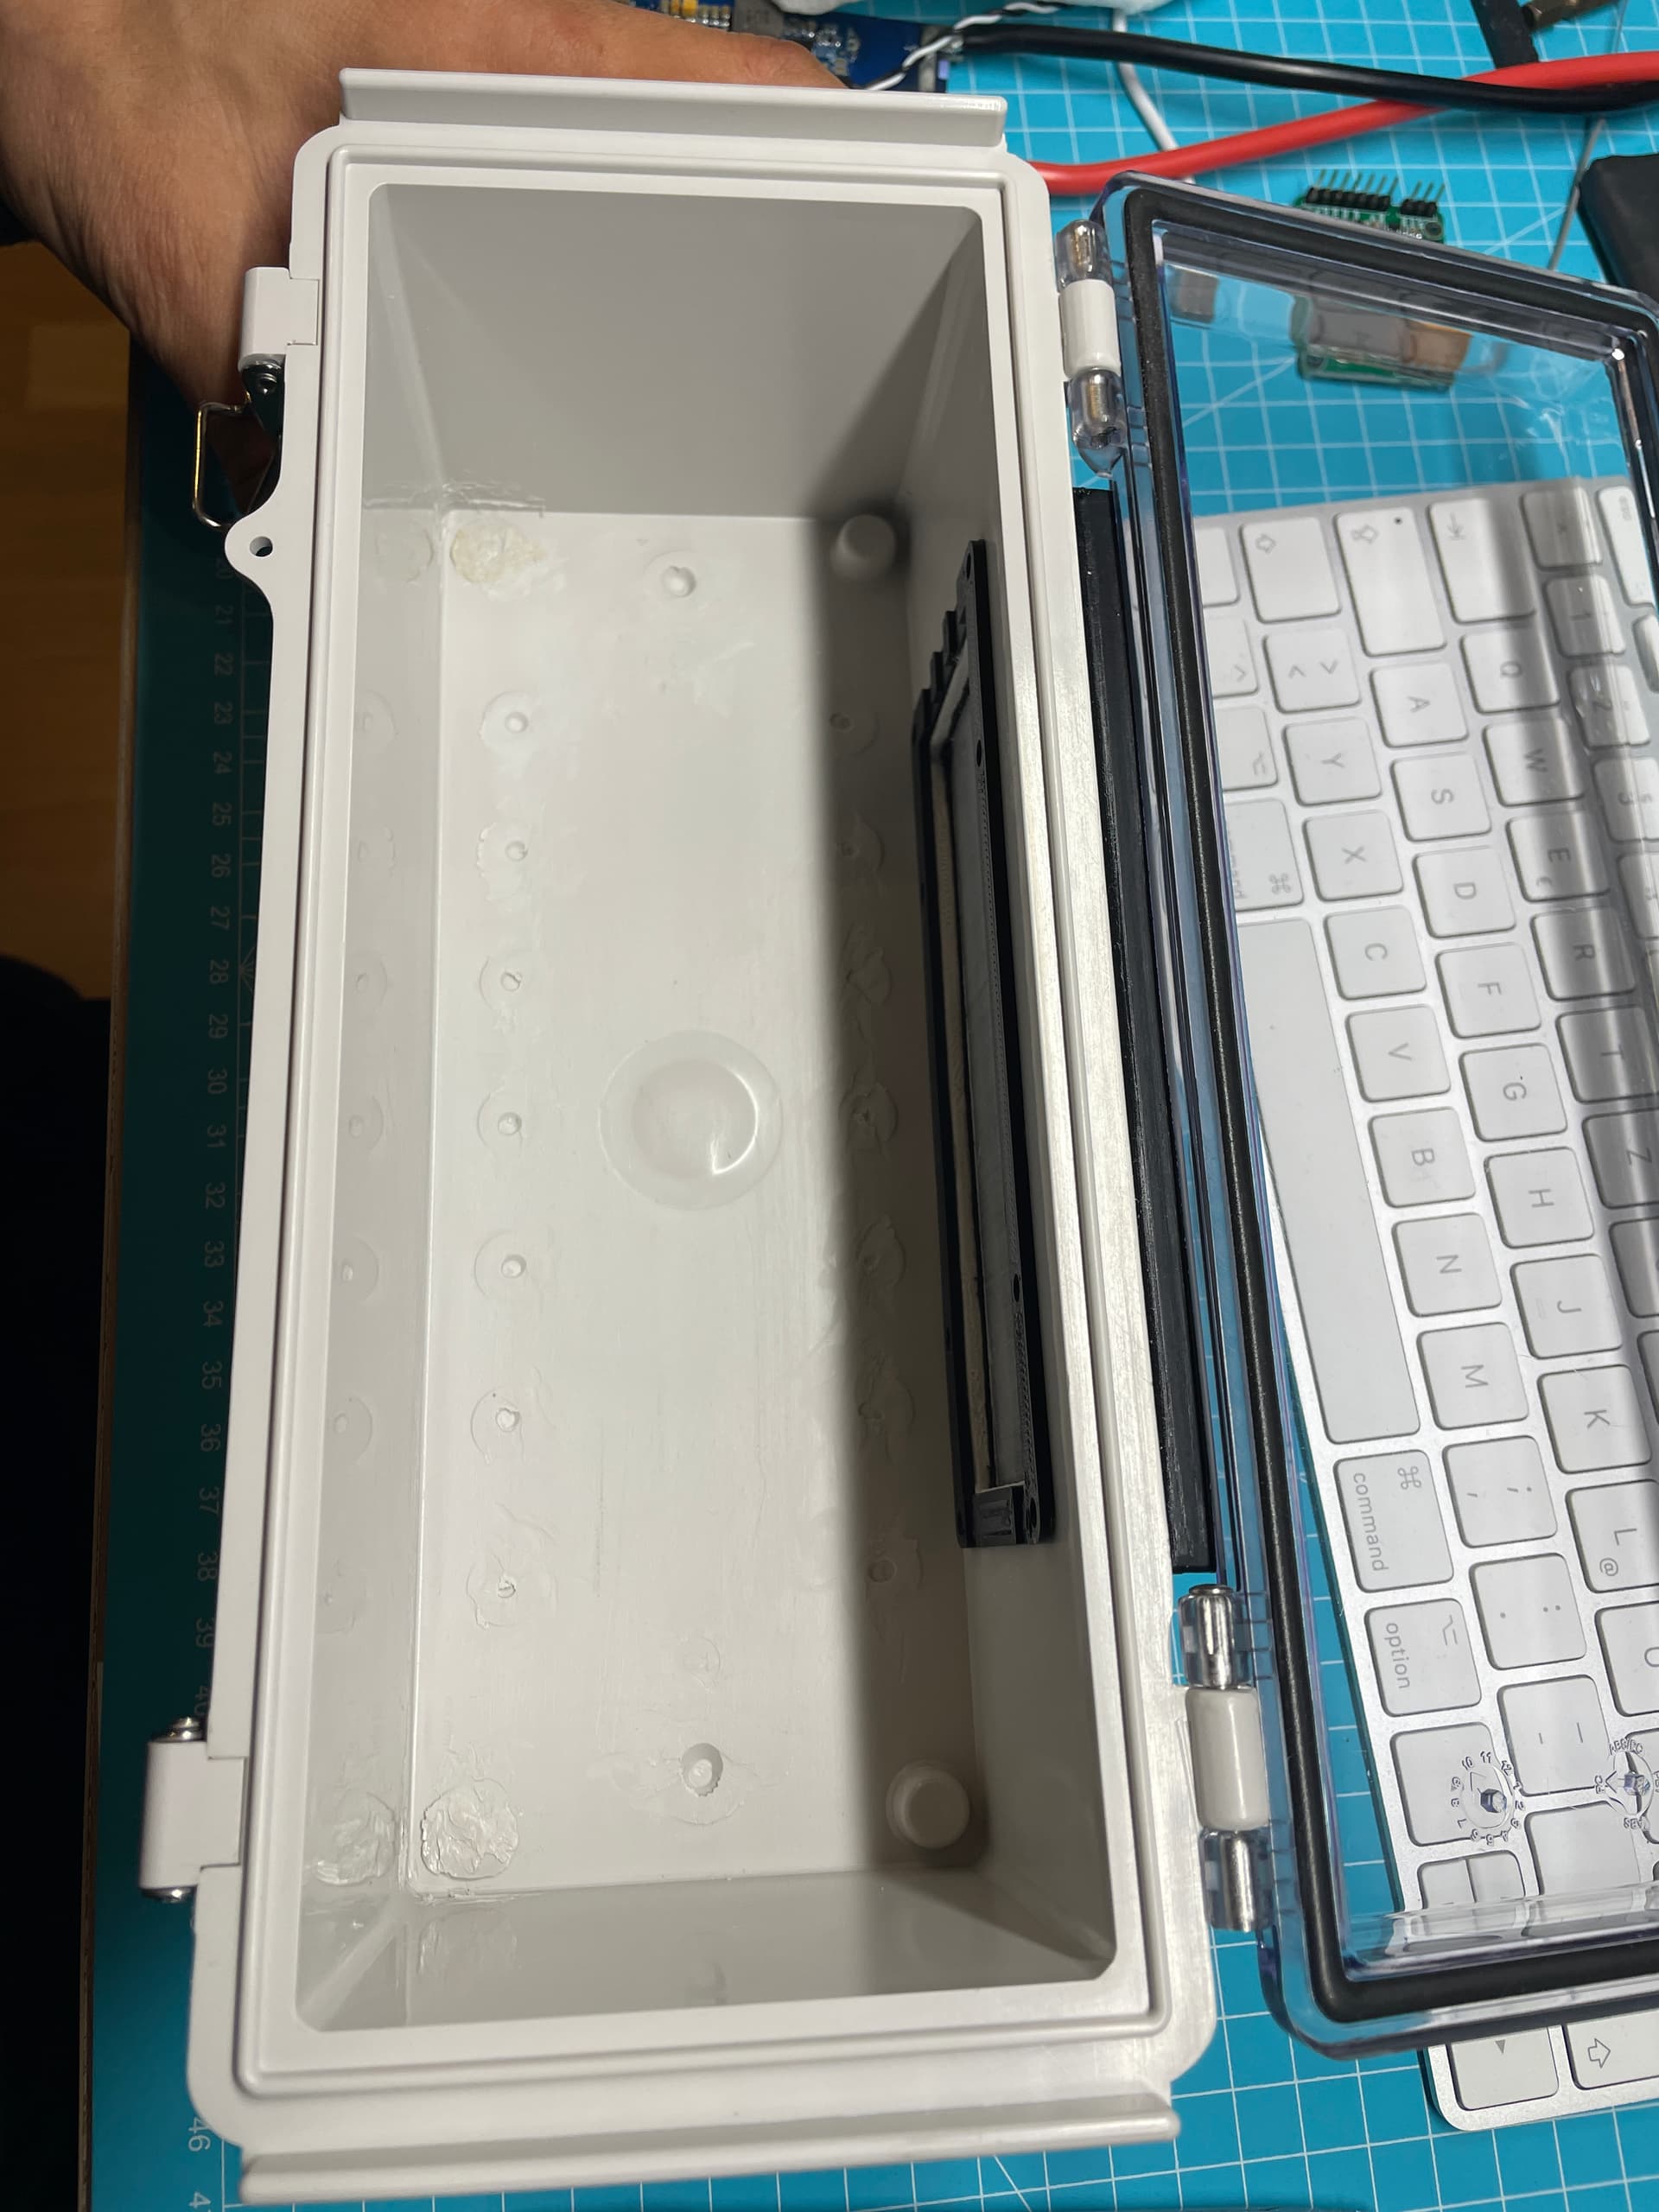
What are the dimensions of your case?
And where did you source it?
1 Like
@rttn could you please share the STL for the axis mount? @hangloose this is an amazing work of CAD skills btw!!
2 Likes
Nice work!
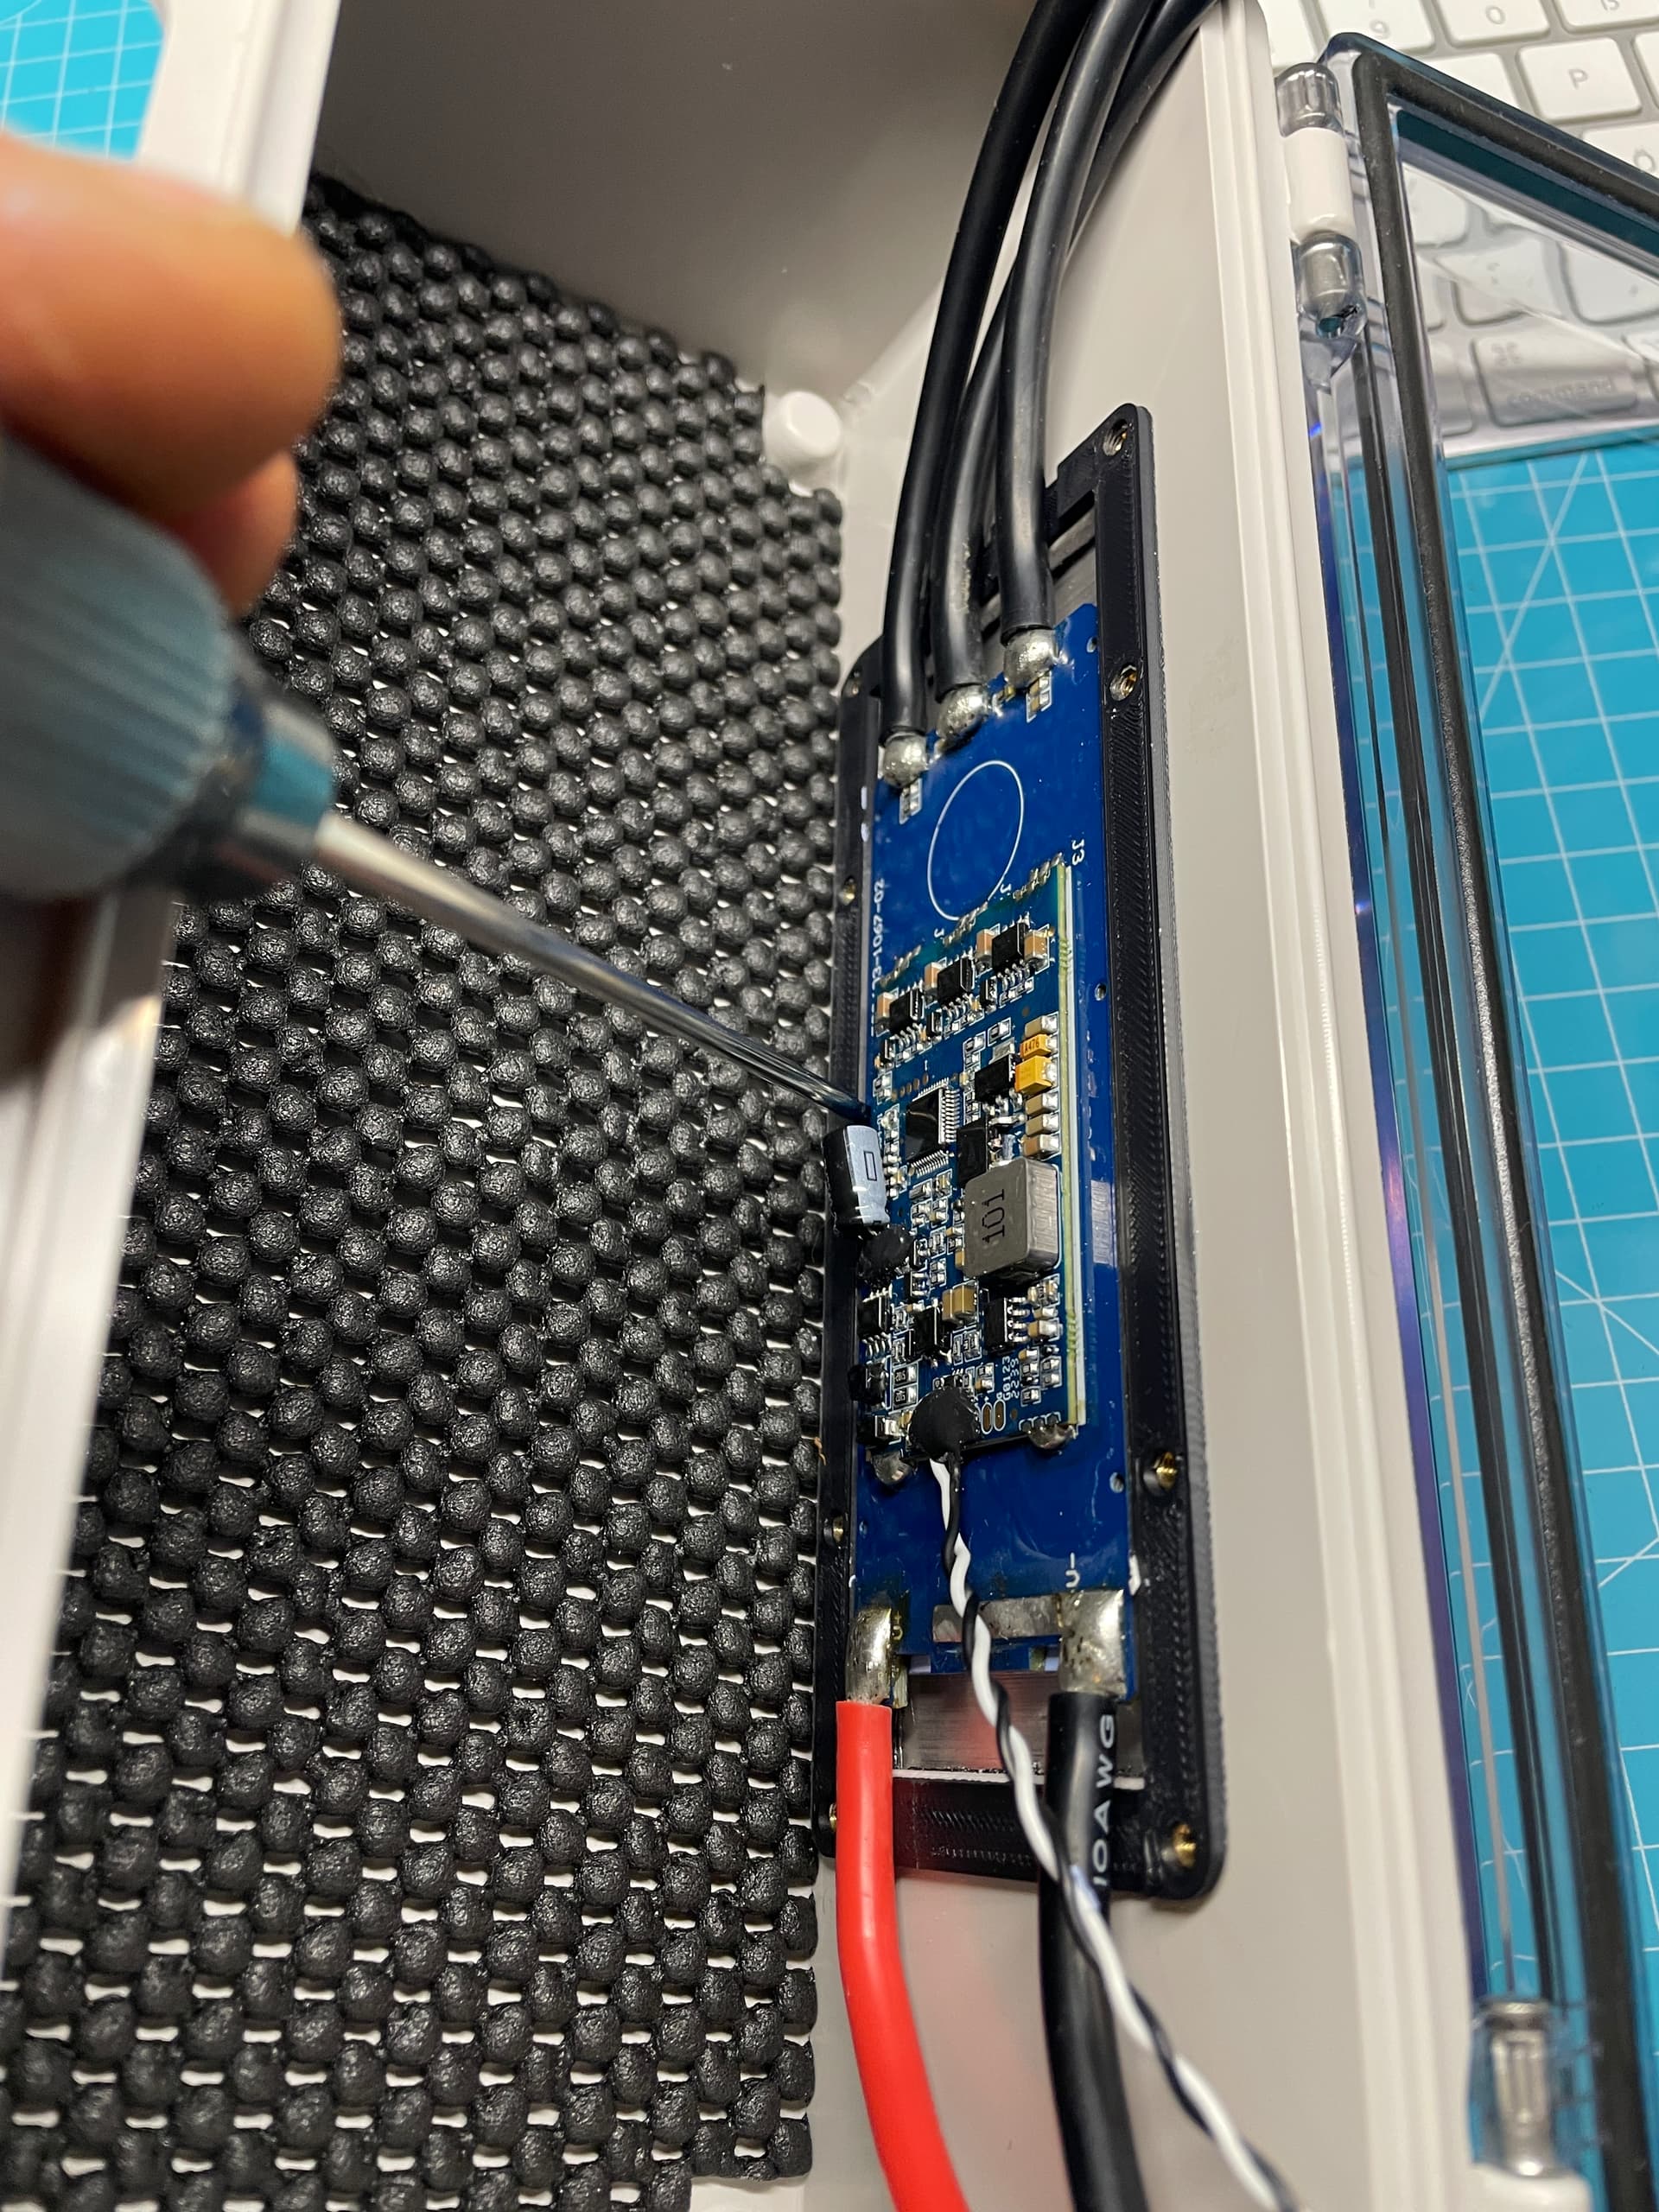
One question, mounting the caps on a cable lowers their function, couldn’t they have remained on (or at least closer to) the esc?
3 Likes
I sent the STL to Markus, he planned to make it public.
3 Likes
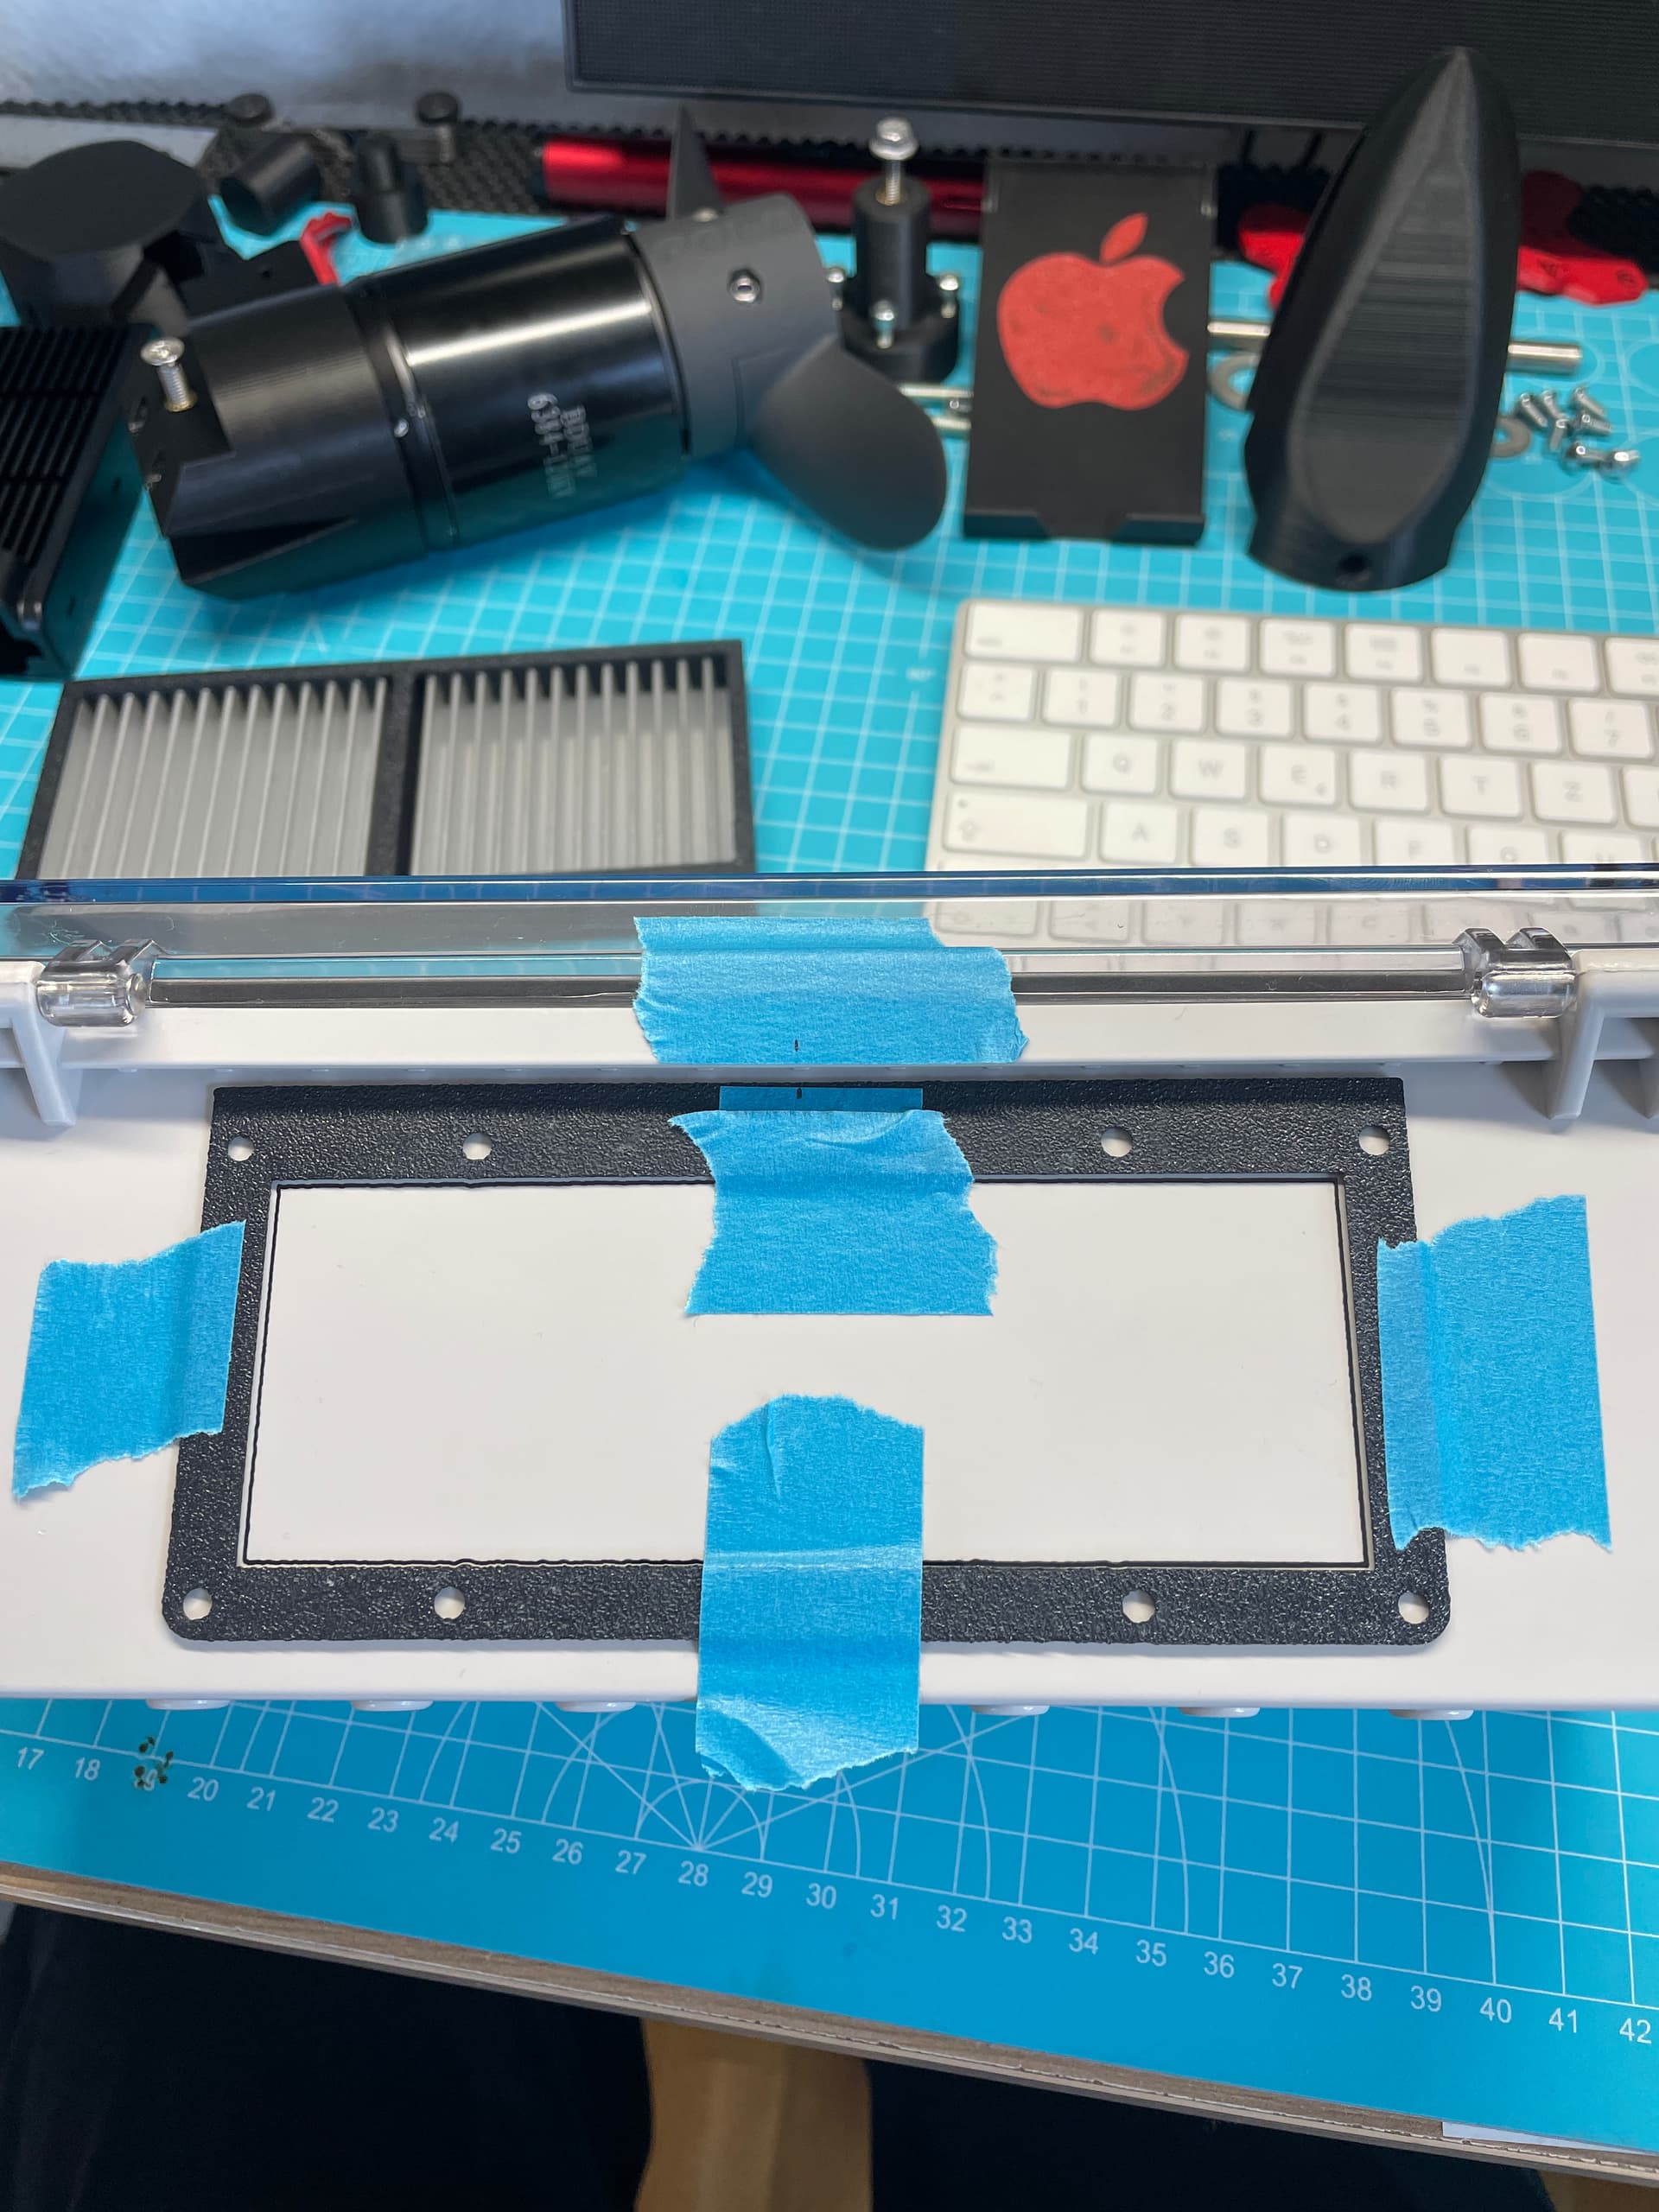
@lishine : I’m not worried about that at all. The box was in the bathtub for two days. Everything is closed!
@tkfoil : Thank you. https://www.distrelec.de/de/robustes-scharniergehaeuse-x8-110x260x100mm-grau-transparent-abs-ip66-ip67-camdenboss-chdx8-322c/p/30113298
@patfoil : Thank you. The files are now online.
https://www.printables.com/de/model/620724-slingshot-hoverglide-motorpod-for-6384-and-axis-un/files
@Larsb : Thank you. I don’t see any problem with that. I’m an electrician and have done this many times. I’ll also do a test without capacitors!
@rttn : Thank you for the modded AXIS Pod.
6 Likes
The capacitors should be as close to the ESC FET’s as possible, they reduce voltage spikes. The longer the battery cables, the more you need them. As your battery cables are very short, you will probably be OK. If you operate the ESC close to the maximum supported voltage, they flaten spikes to stay below that voltage.
5 Likes
Awsome build !
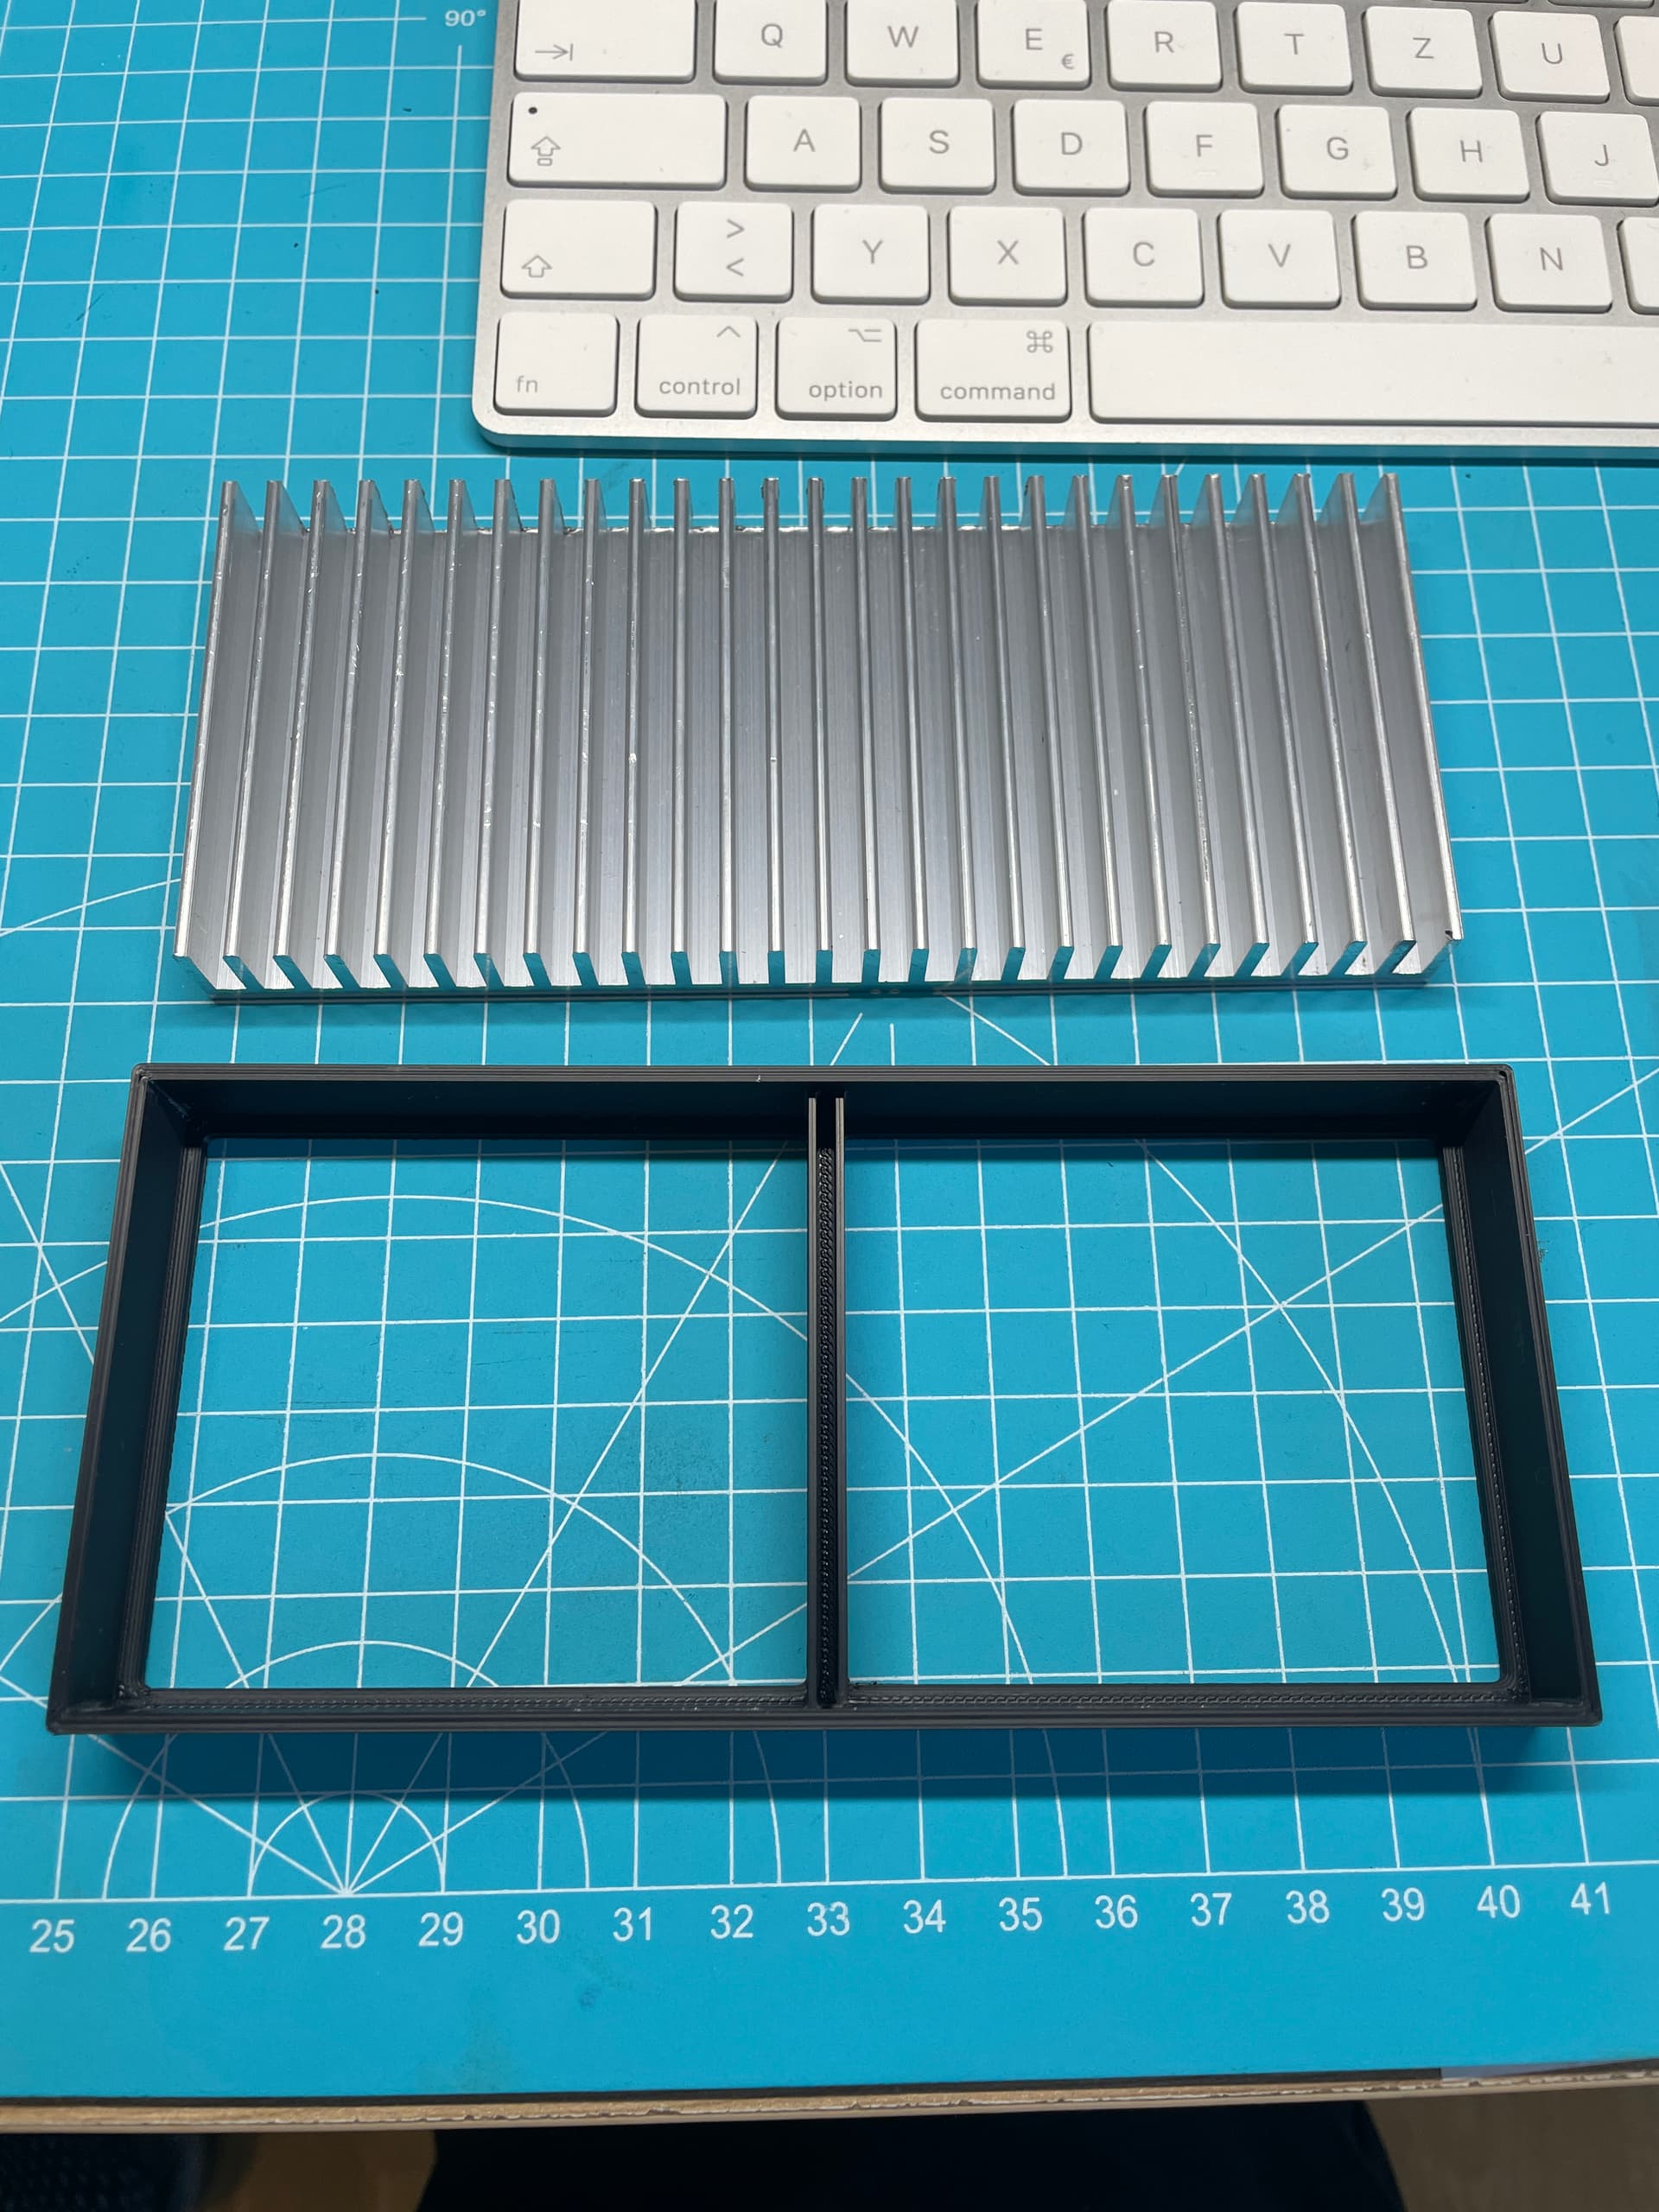
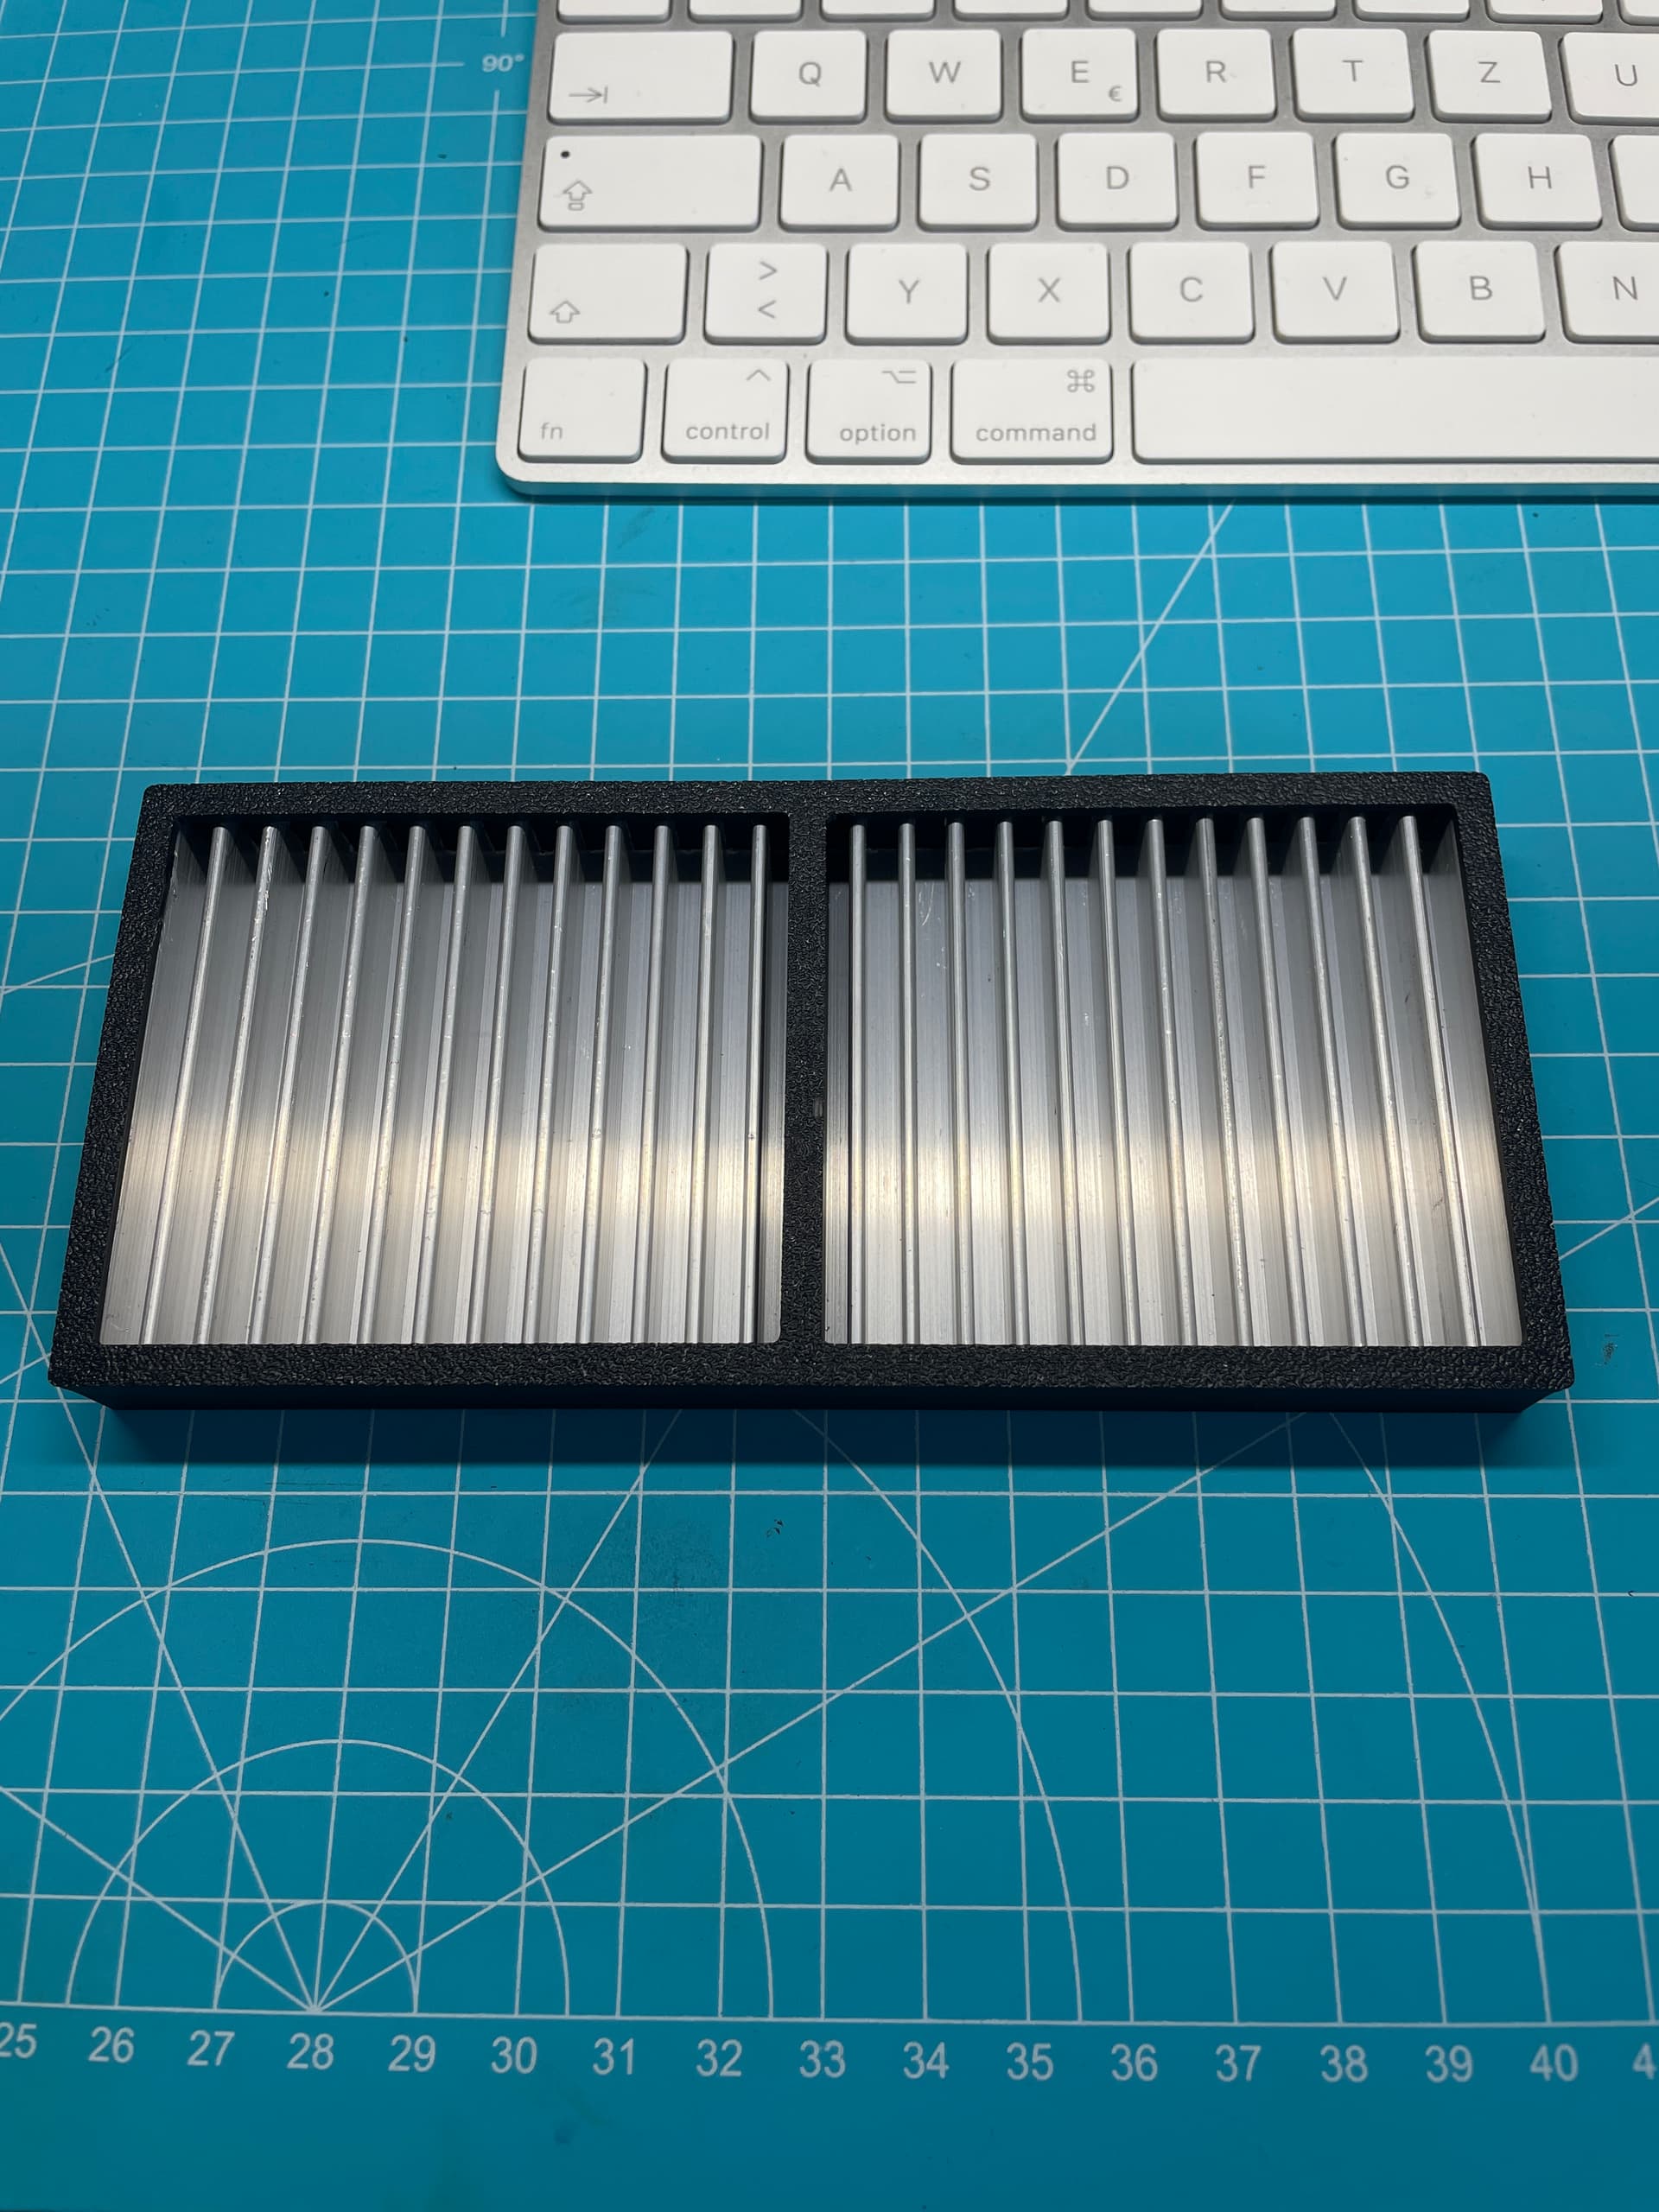
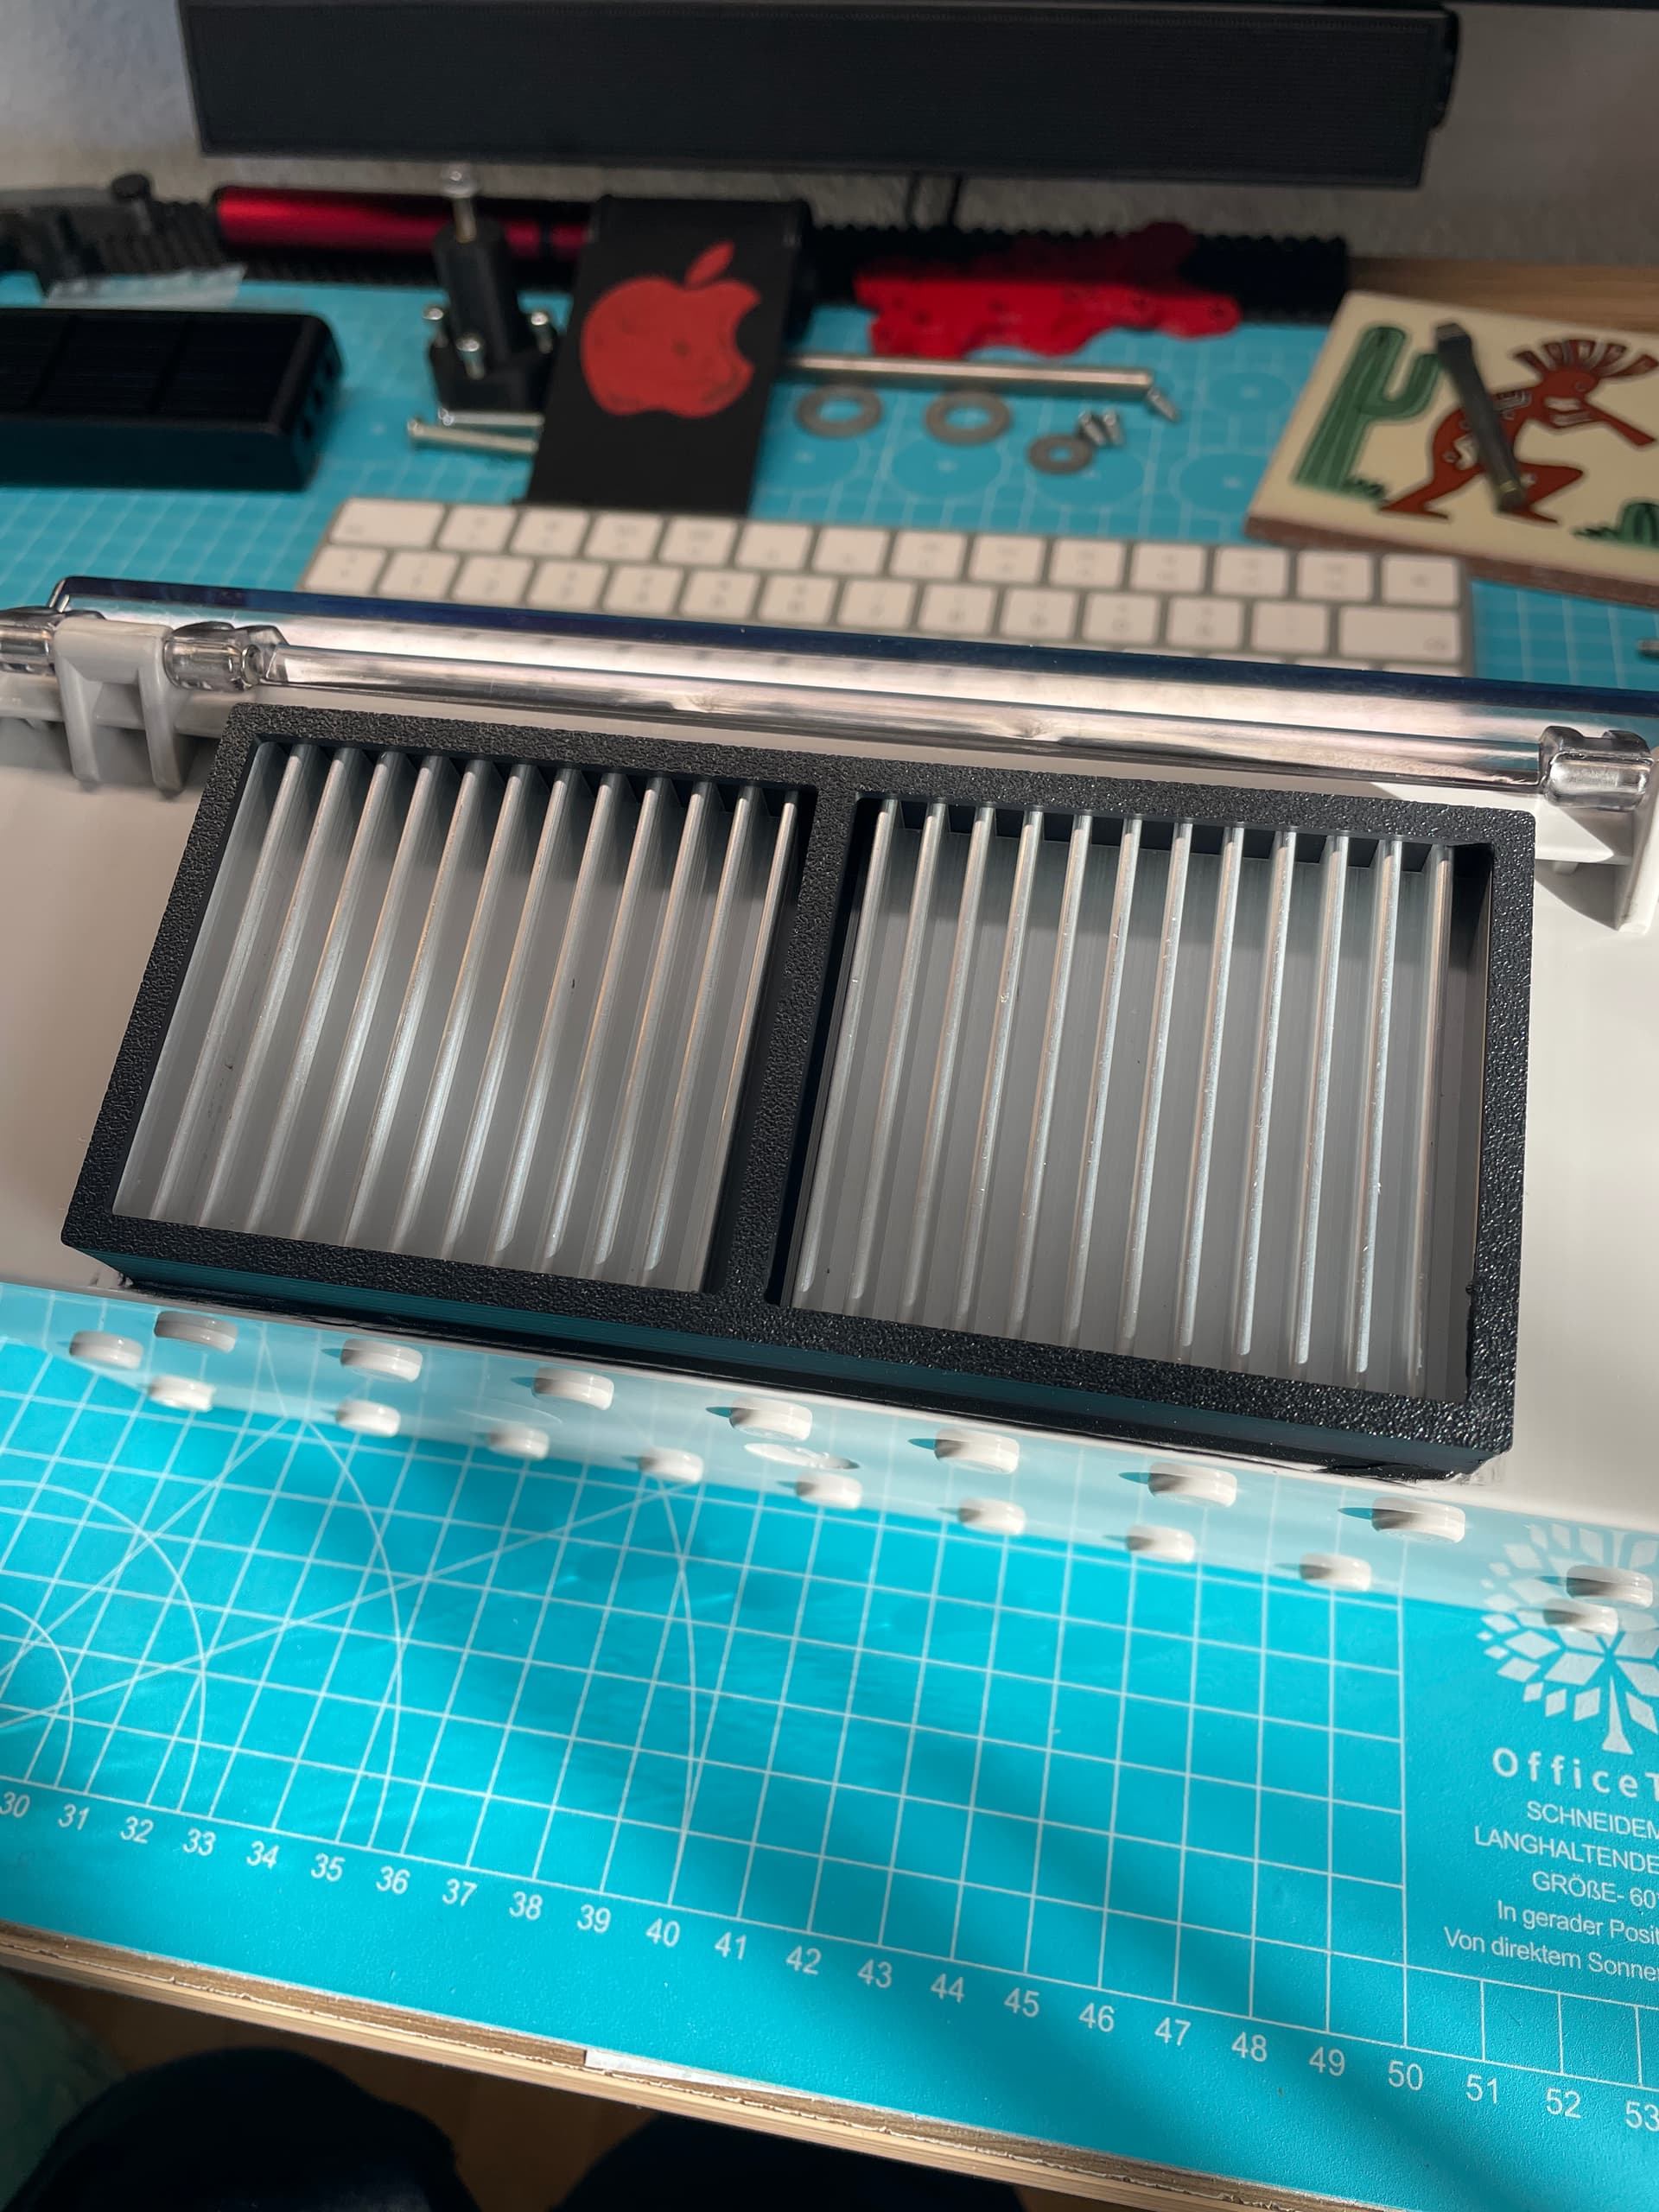
Could you please share the source for the aluminium heatsink .
Also the 3d printable files for the plates that hold the controller to the box will be much appreciated .
Thanks in advance .
I hope soon i can manage to test the whole setup.
1 Like