DougM's Puget Sound Build

I wanted to call this the Don’t Hate Me Because I’m Beautiful build but since it’s my first build no doubt it will be anything but beautiful.

Today’s post is an introduction with a couple of pictures. I plan on keeping it updated as I build the board and will break it up into chapters (chapter 1 will be the remote, etc.) followed by random thoughts, disasters, moments of clarity and finally, hopefully, some video.

While I’m not nearly as good as, well, any of you at keeping meticulous track of my parts and documenting my process I am more than happy to answer questions and post links.

So start with me (this will be short, I promise)

I come from an electric longboard background, so am familiar with most aspects of this project except waterproofing, which is clearly one of the major challenges.

I have built, maybe 6 or 7 electric longboards of which 4 survive to this day. They are Widowmaker (so named because it has tried to kill me at least 4 times), Farkasszem (roughly translated as Wolf Eyes) because of the monster but very short lived headlights (people on the trail hated them and I never ride at night anyway), and Princezna, my loaner/trainer board (underpowered, reasonably safe)

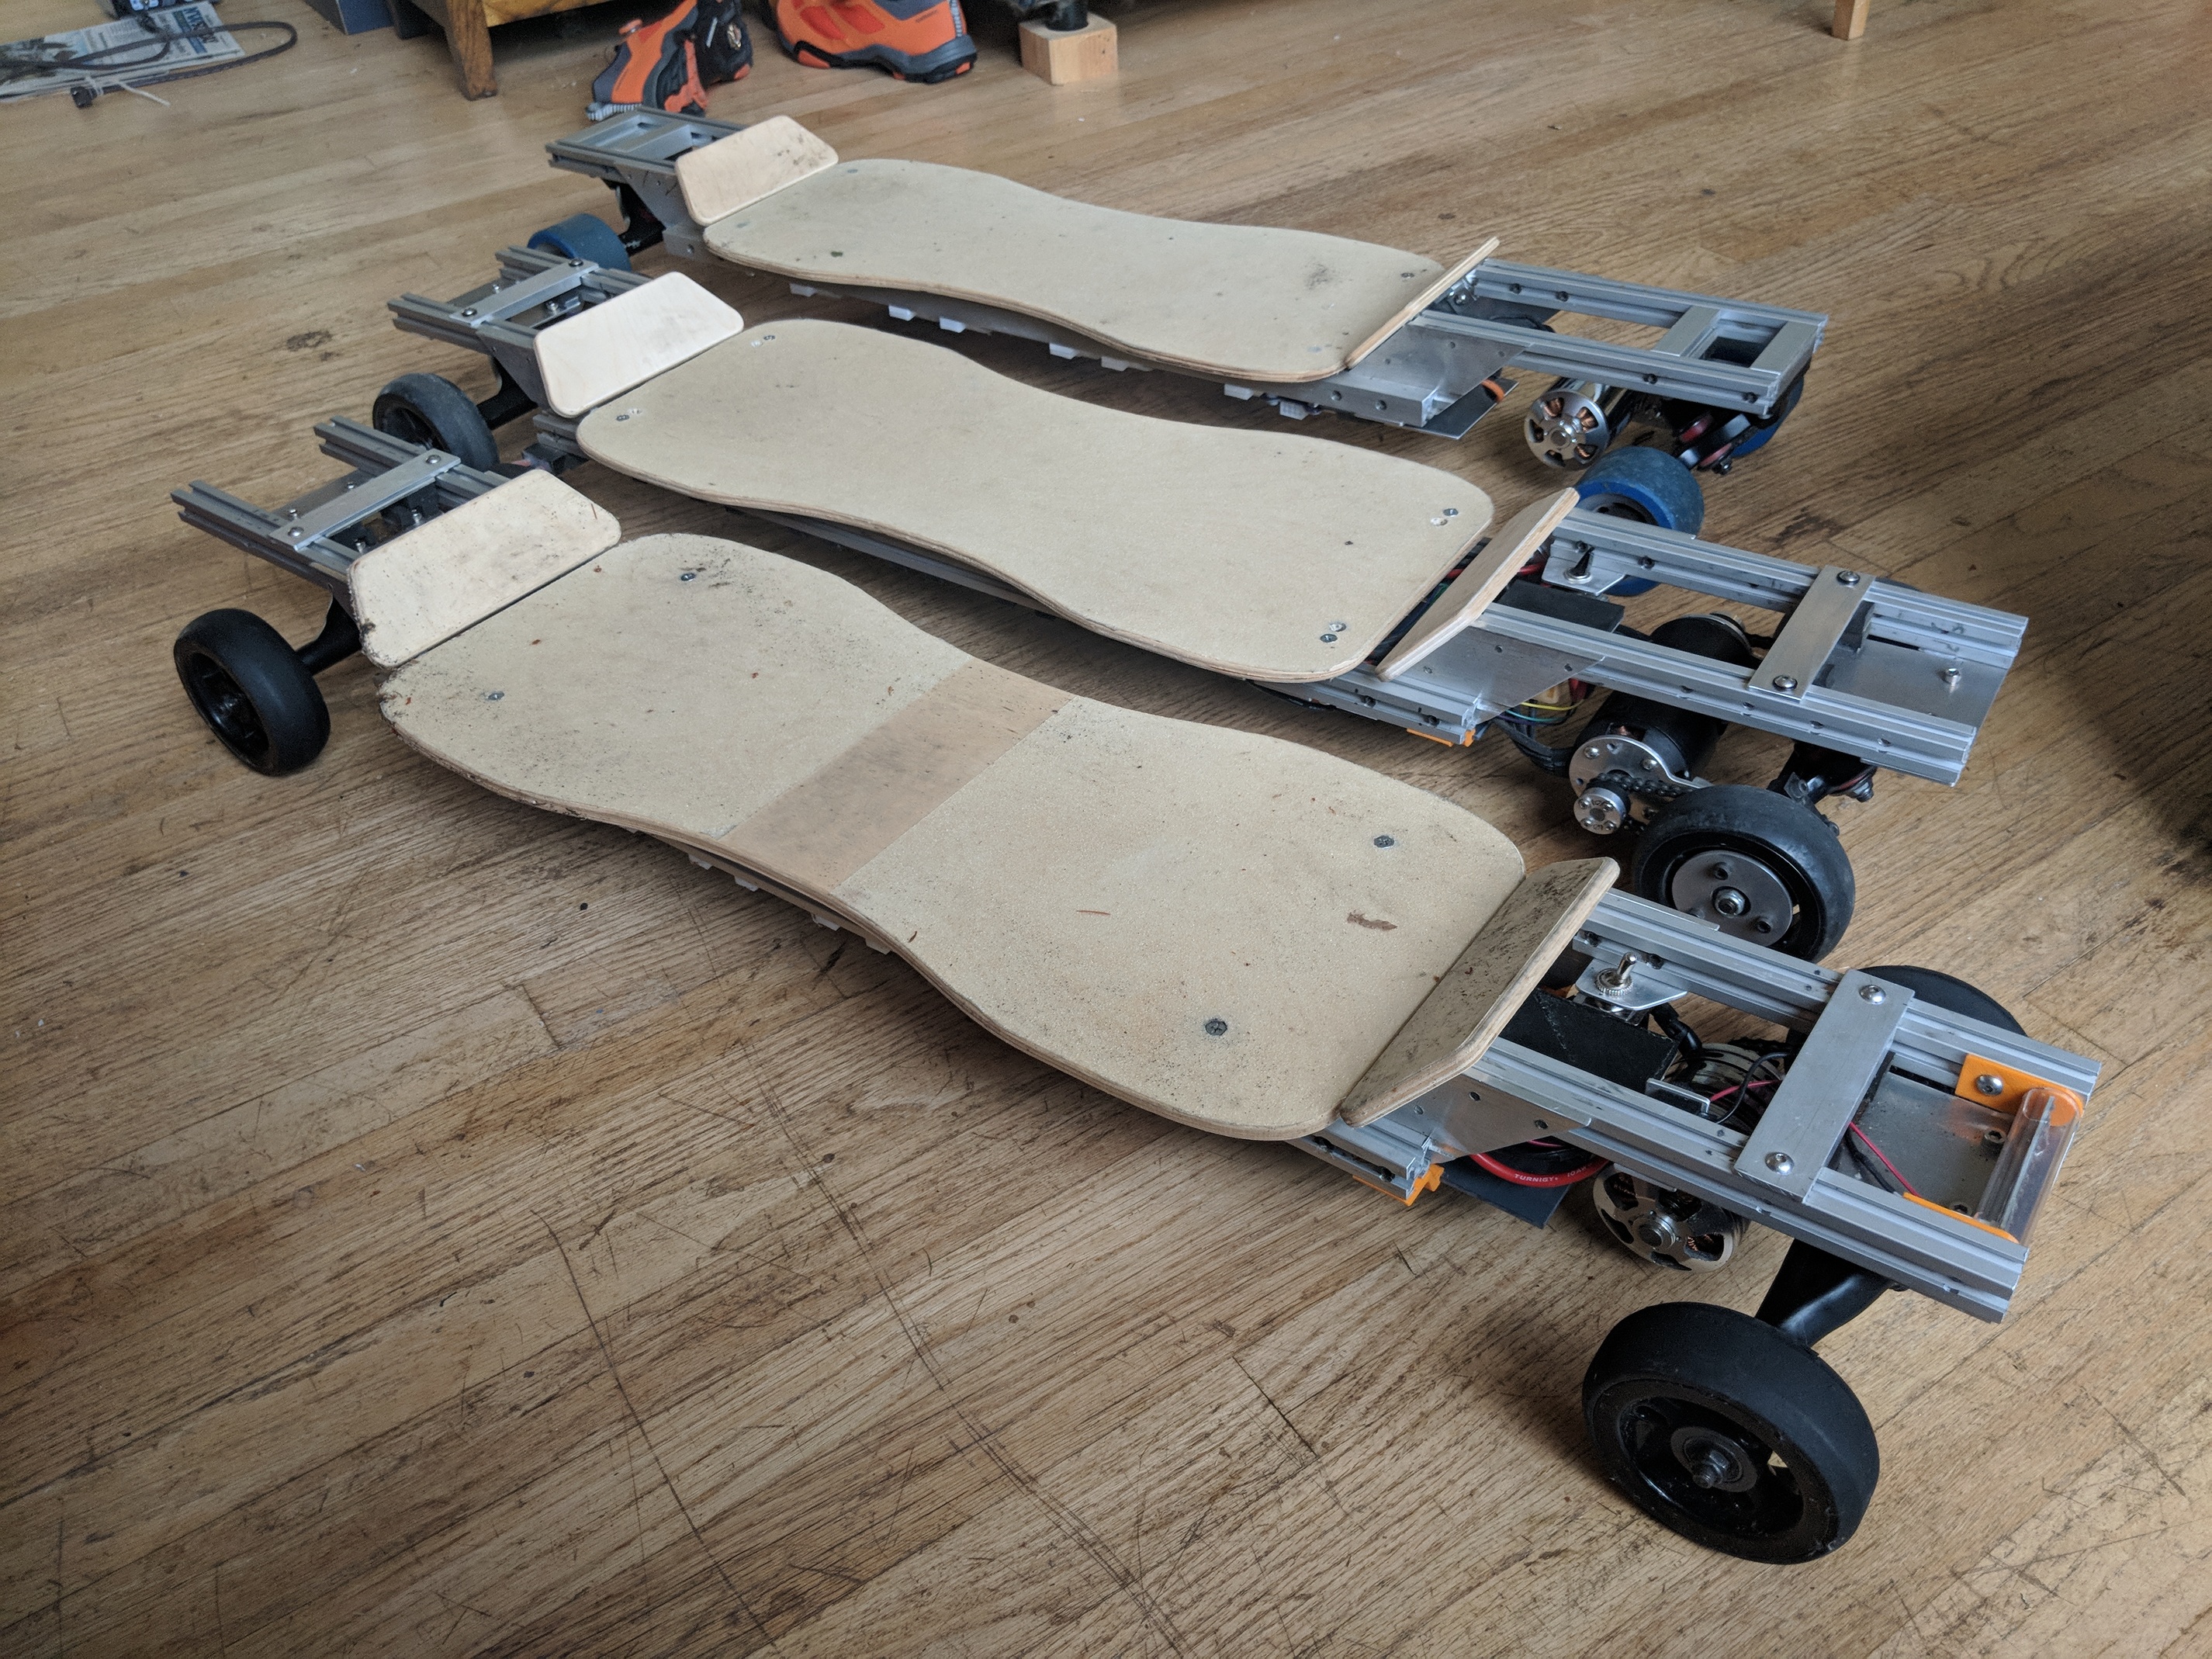
Of the boards in the picture the front one is Widowmaker, the middle, Farkasszem, has been upgraded to 5" pneumatics, and I have added a 4th board, Horská doska. It’s a full mountain board with 8" pneumatics, dual 6374’s and 10S6P of 20700’s. I have no pictures of the final board because as you’ll read in the build log, I got seduced by the siren song of eFoil right in the middle of the build, so I wrapped it up and started coming here.

When I’m not hurting myself on eSk8’s I’m a corporate cowboy at a startup where i do eerily similar work.

So eFoil. Let’s start with the board:

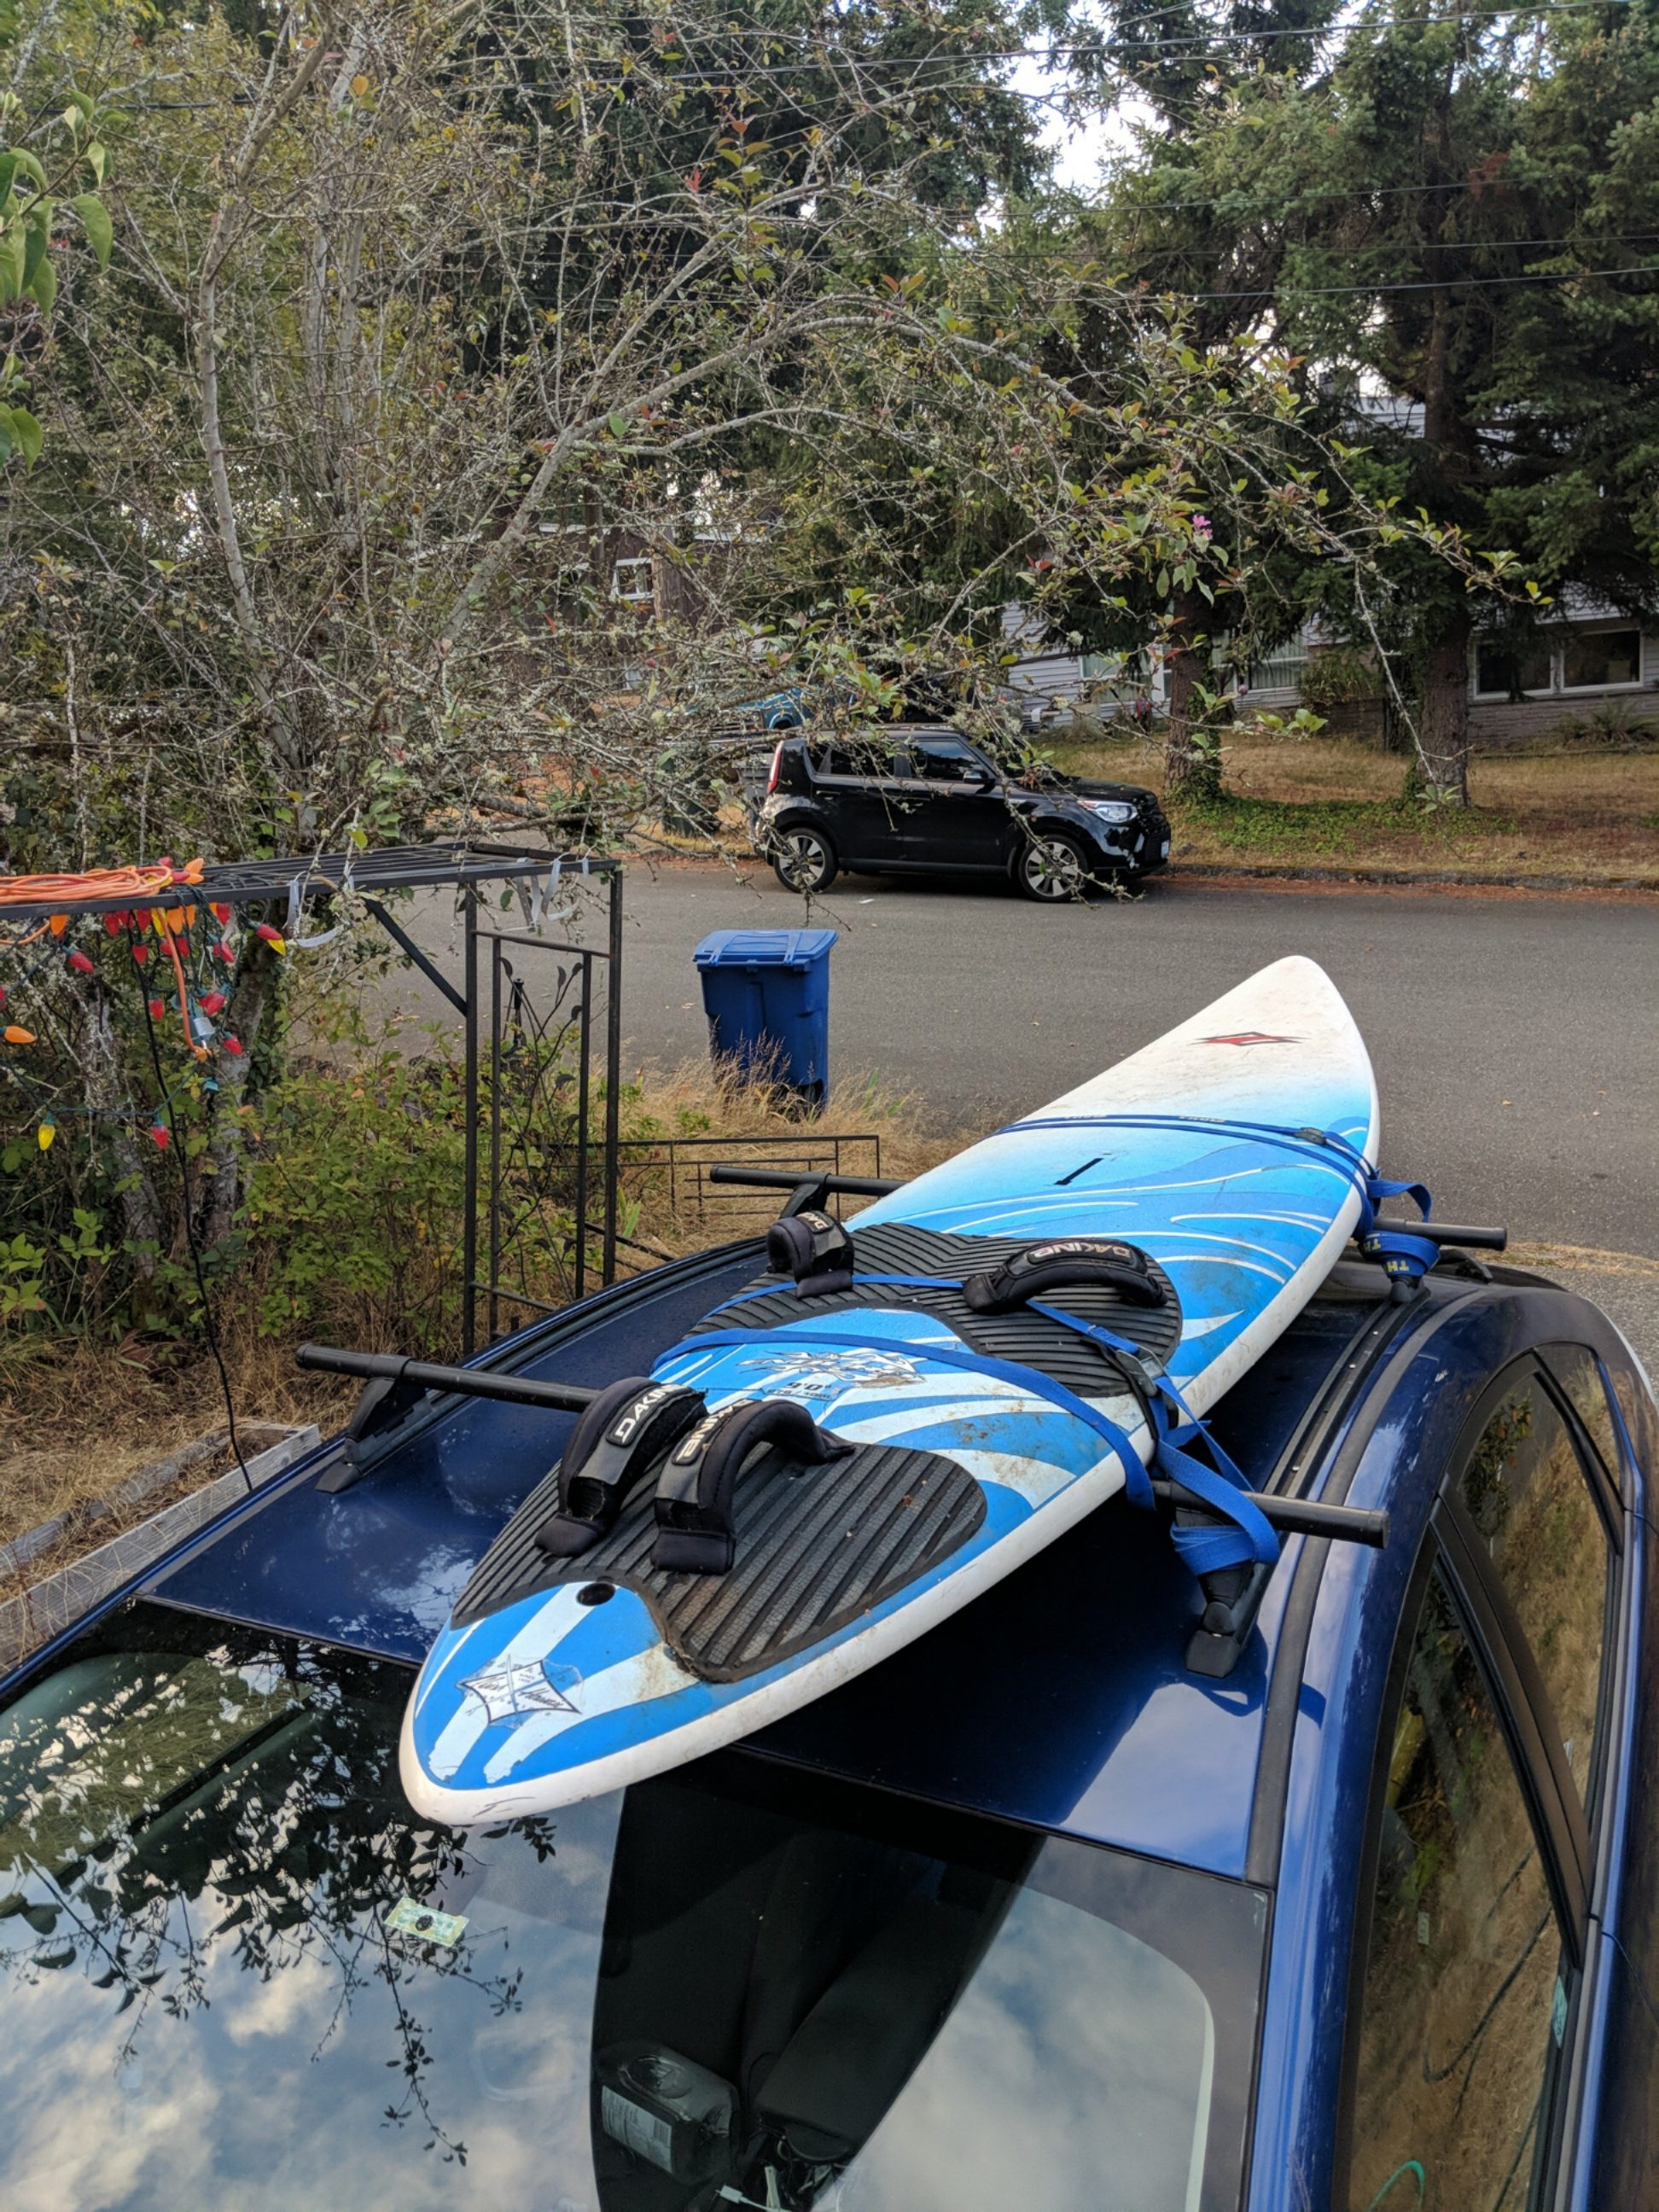
This is a windsurf board that I got in Hood River, Oregon, the windsurf capital of the world. Twice a year they have a swap meet and I just barely made it to the fall meet. I got there at 2:00 and everyone had left but the Columbia Gorge Windsurfing association was just loading up their trailer and I ran up with money in hand and managed to get this one. It was $40 and the only one that fit my weight range.

I figure for my first board I want something that will keep my weight (200 lbs) afloat when it dies mid lake. The board is actually remarkably lightweight - I actually think it’s hollow.

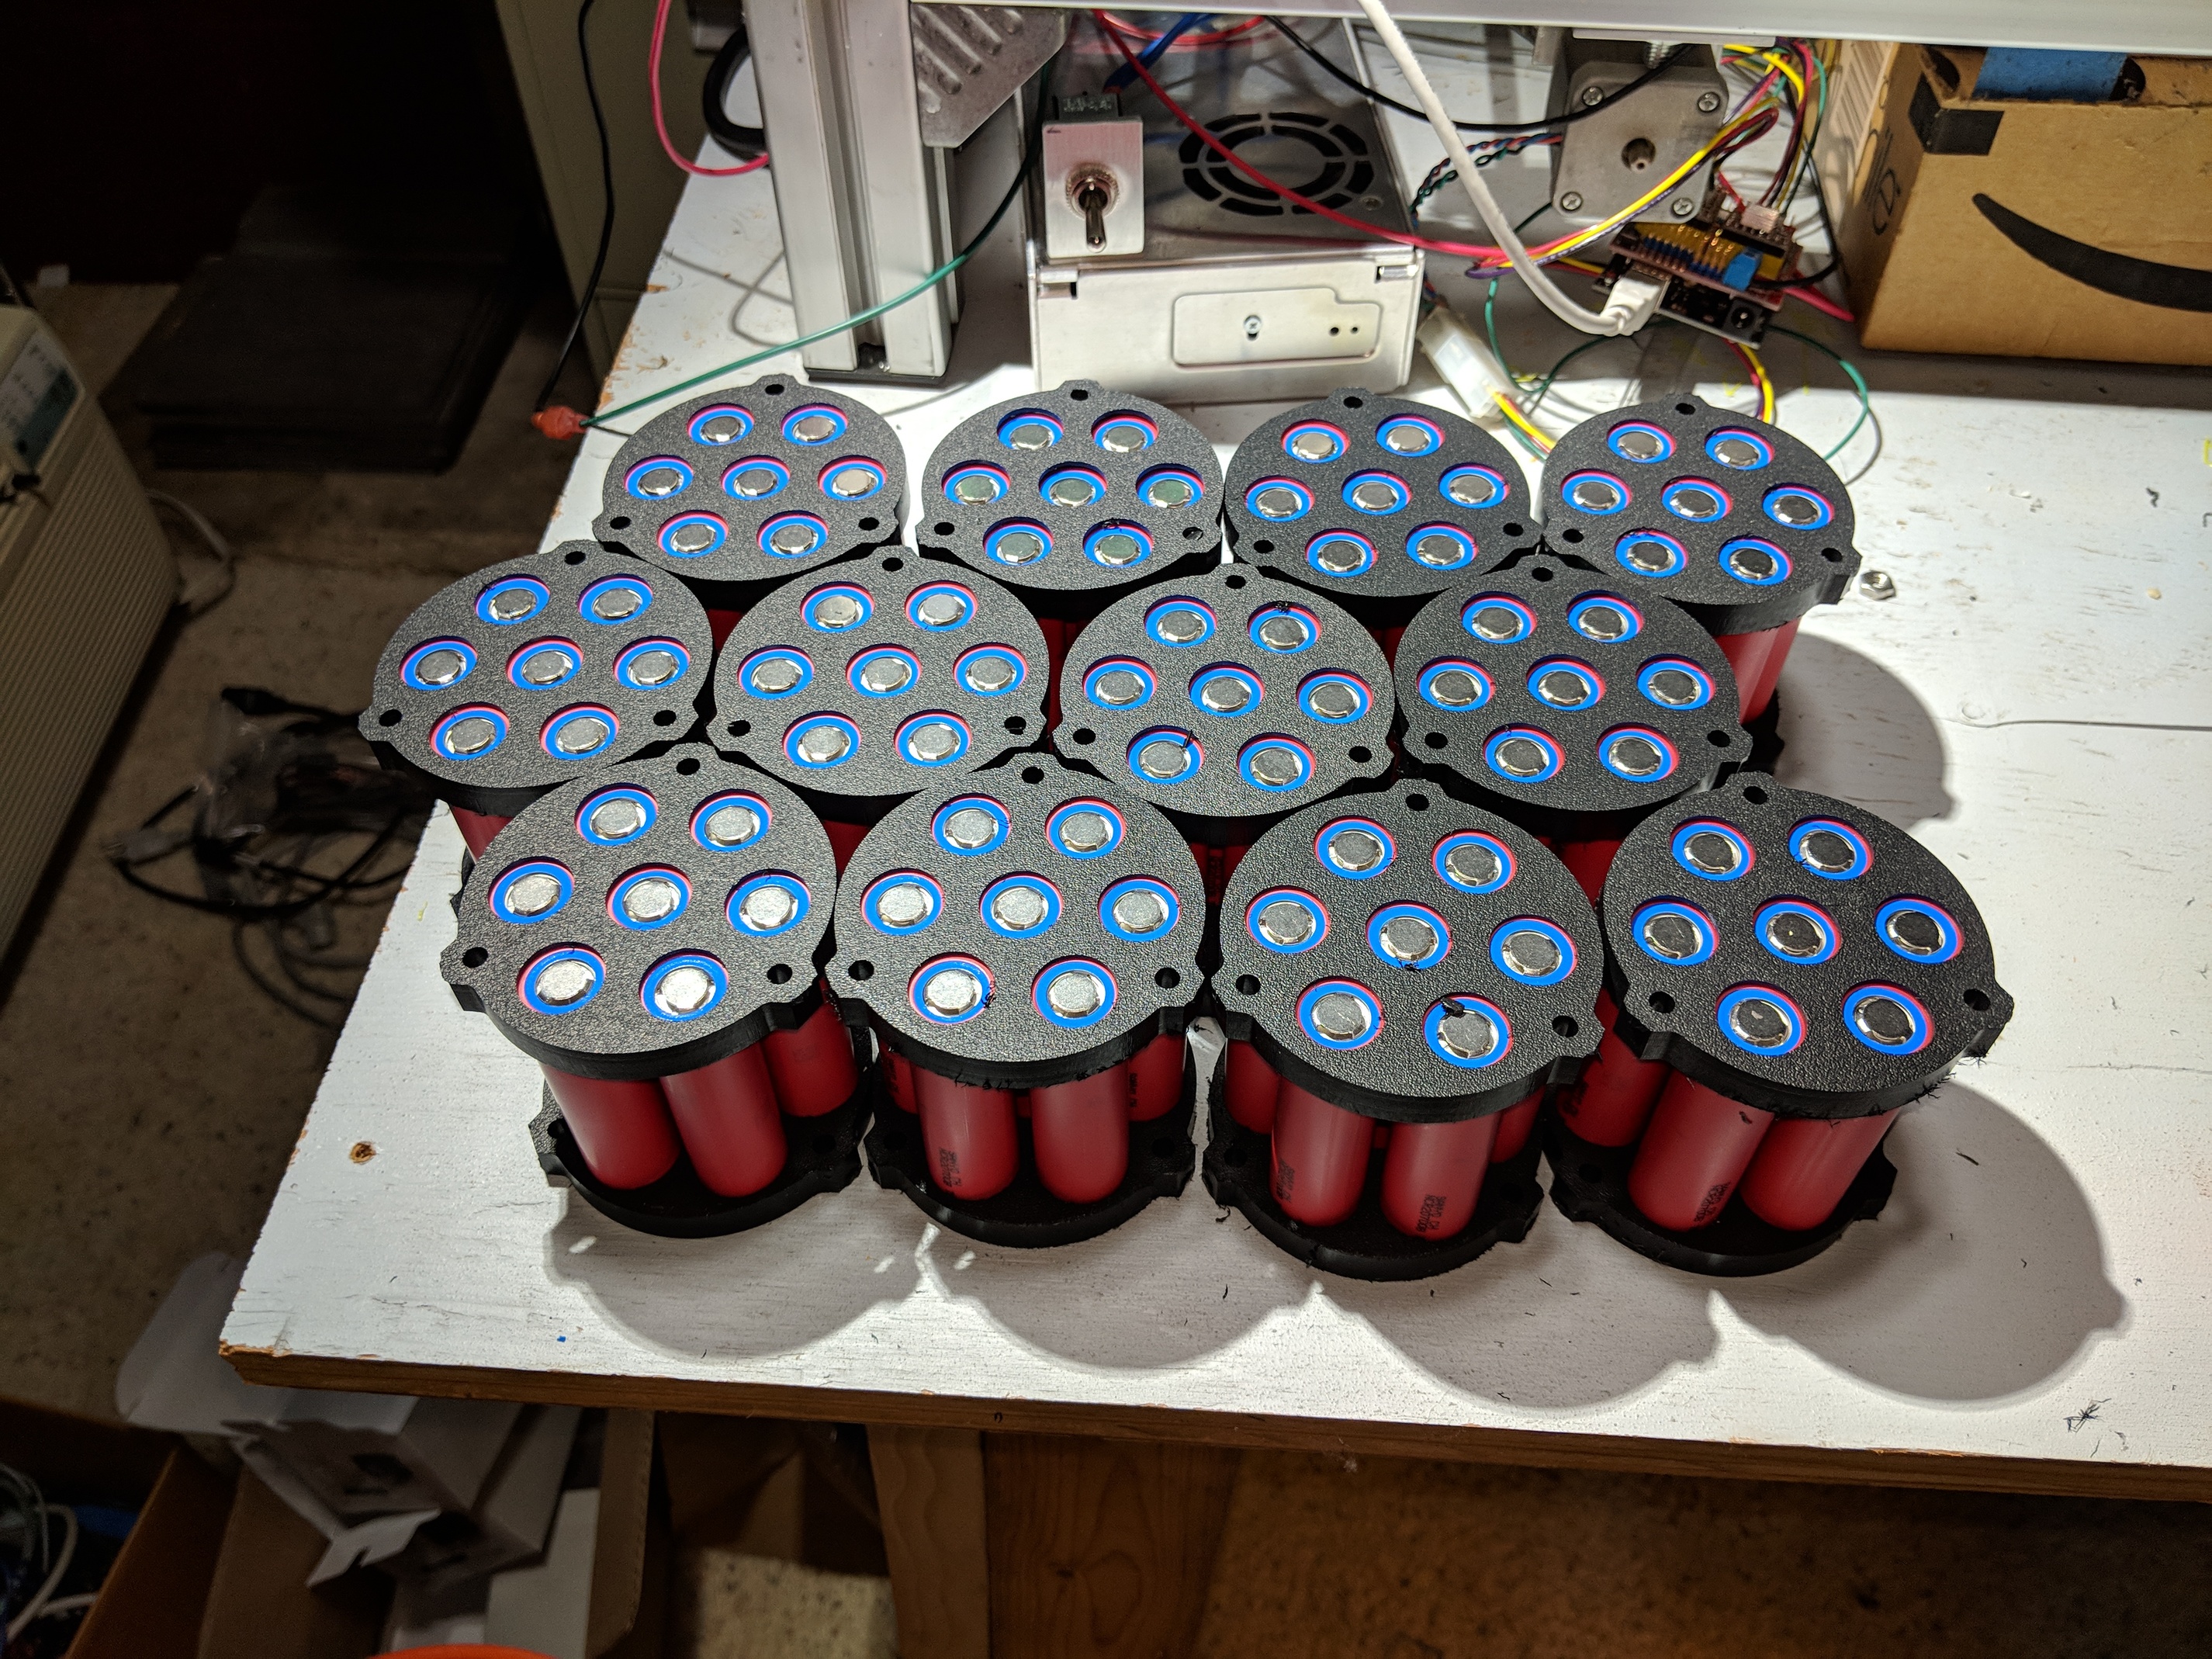
The plastic briefcase will be the battery box. I hope to have 2 of them so one can be charging while the other is running the board. I have purchased my first set of batteries (12S7P of the same Sanyo 20700’s that I put in the Mountain Board)

Here’s the briefcase proving not to be waterproof:

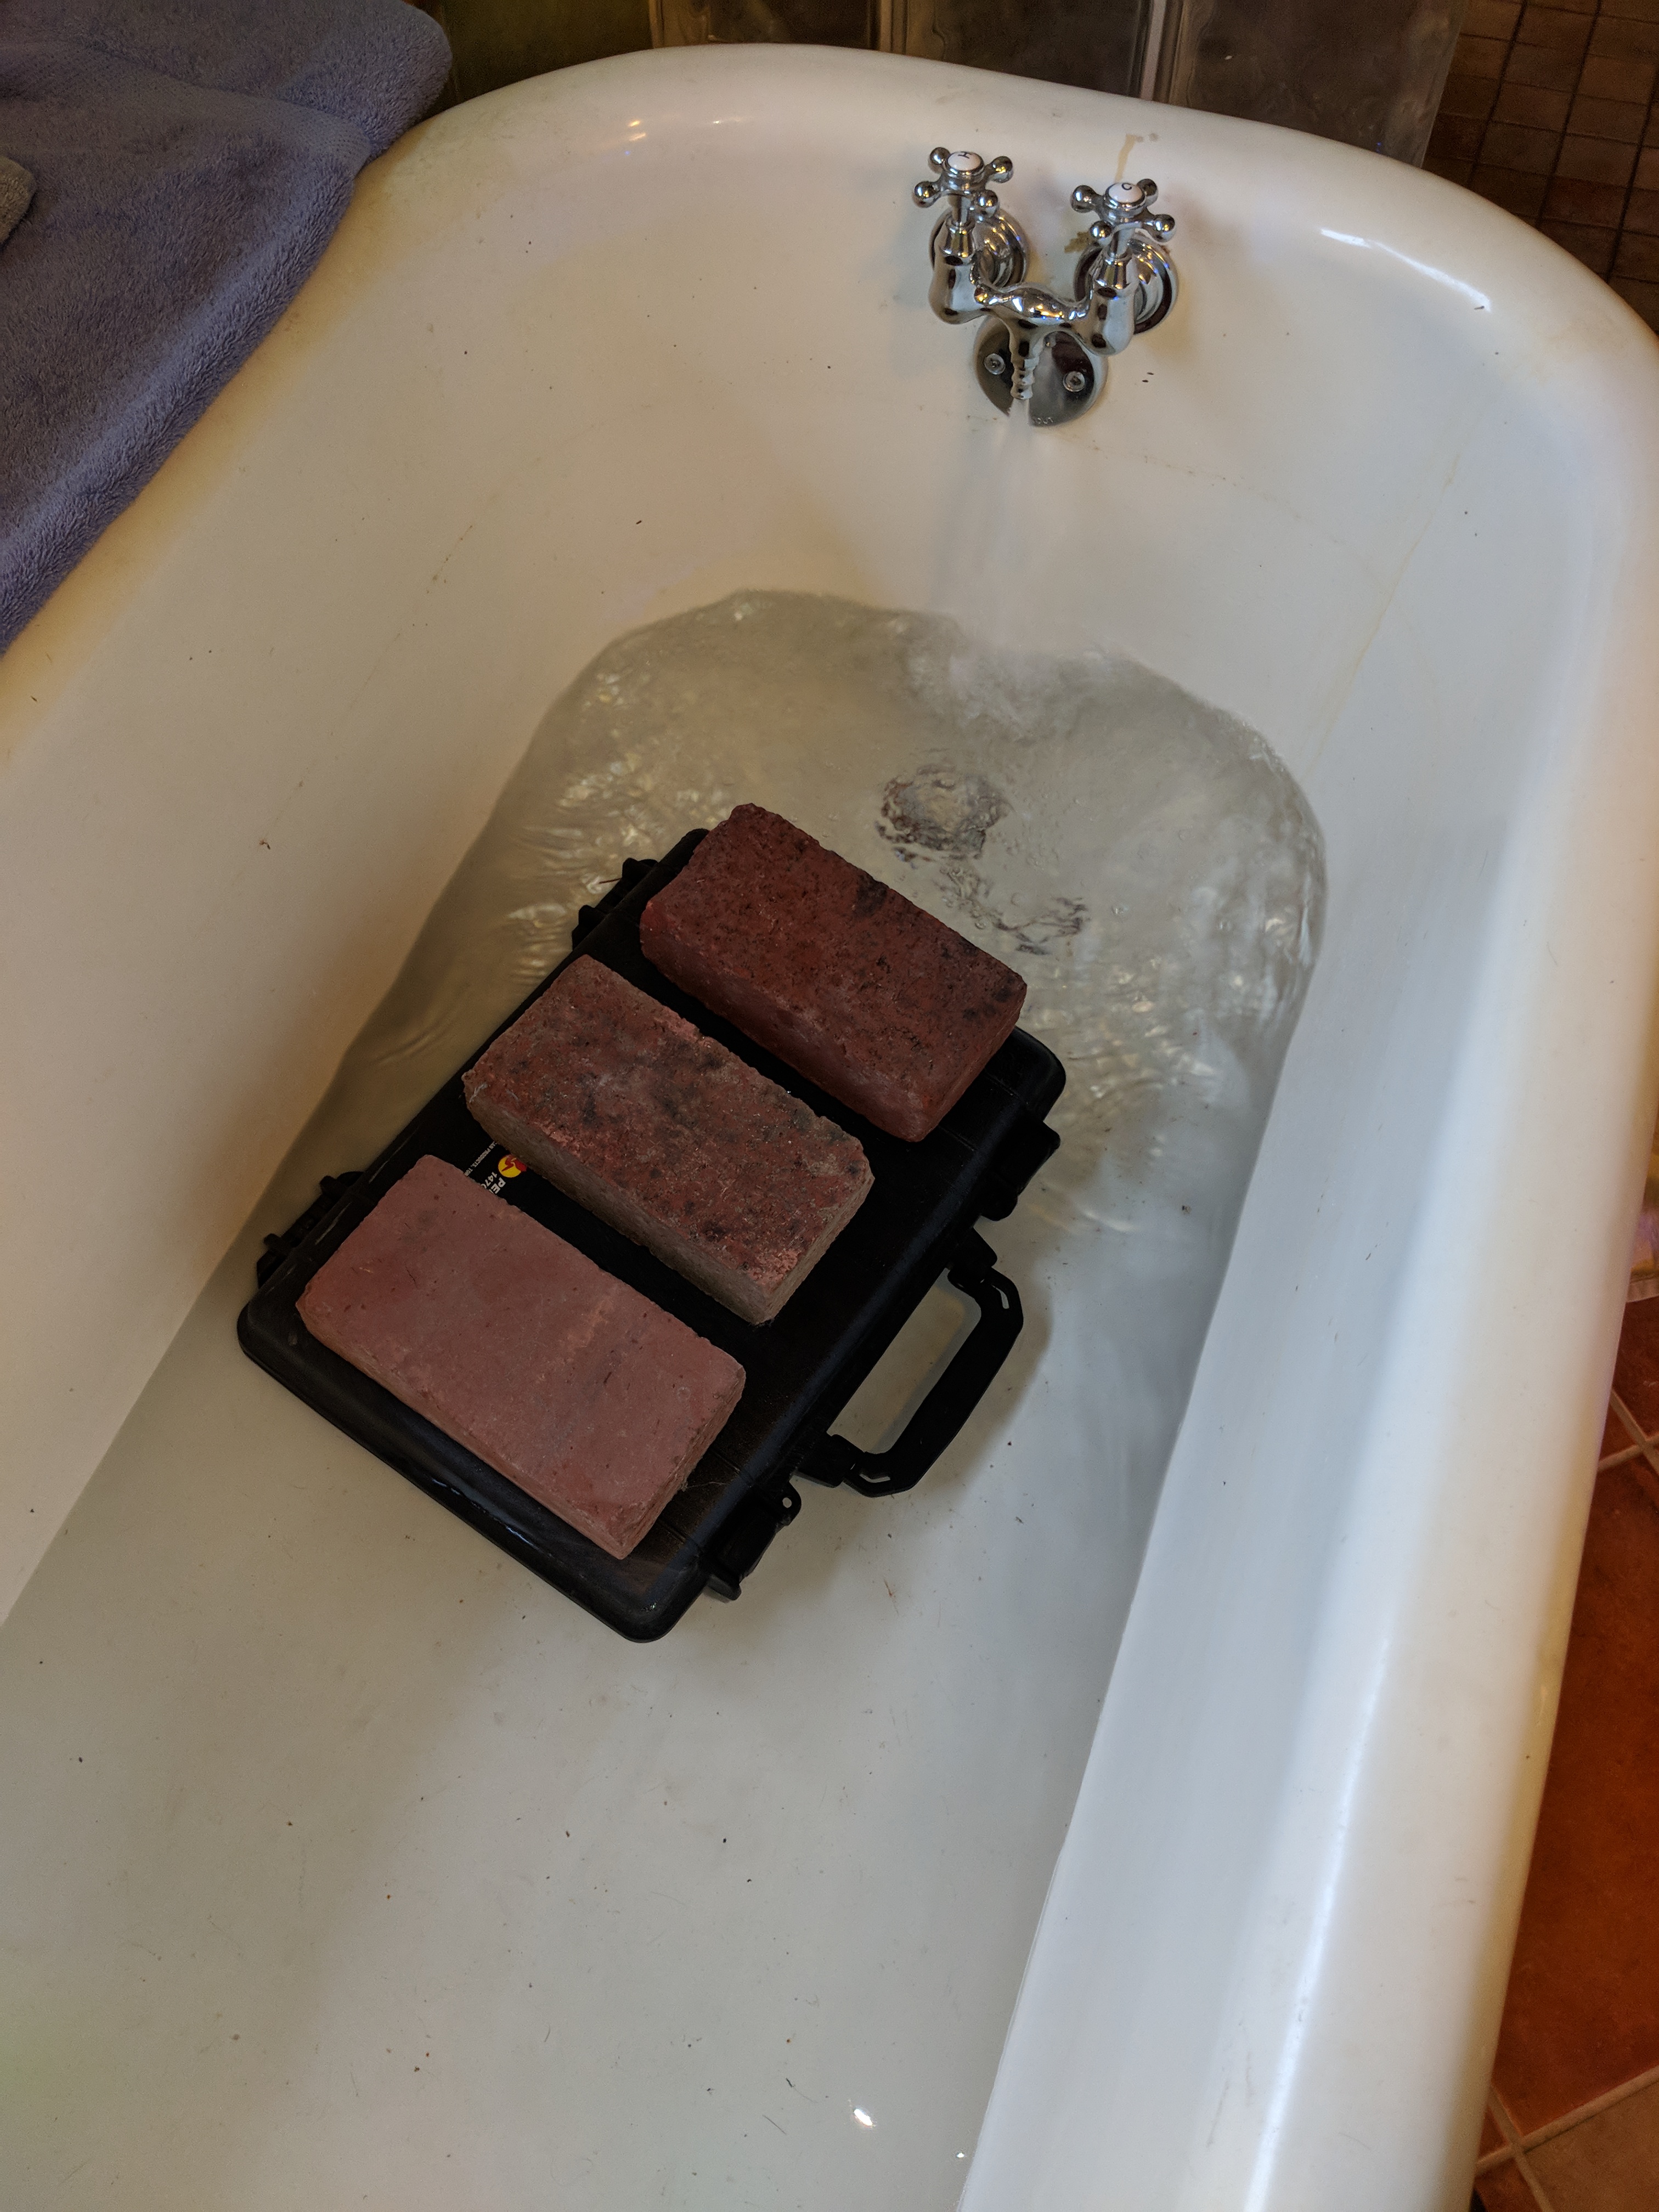
I did some initial underwater testing with a throwaway motor and ceramic bearings. It worked, but after a couple of weeks in the tub being run occasionally it started to sound pretty ratty.

I’ve had the Alien 80100 motor on order but haven’t received it yet. I’m starting to get concerned but not alarmed just yet since I’m not debuting until spring.

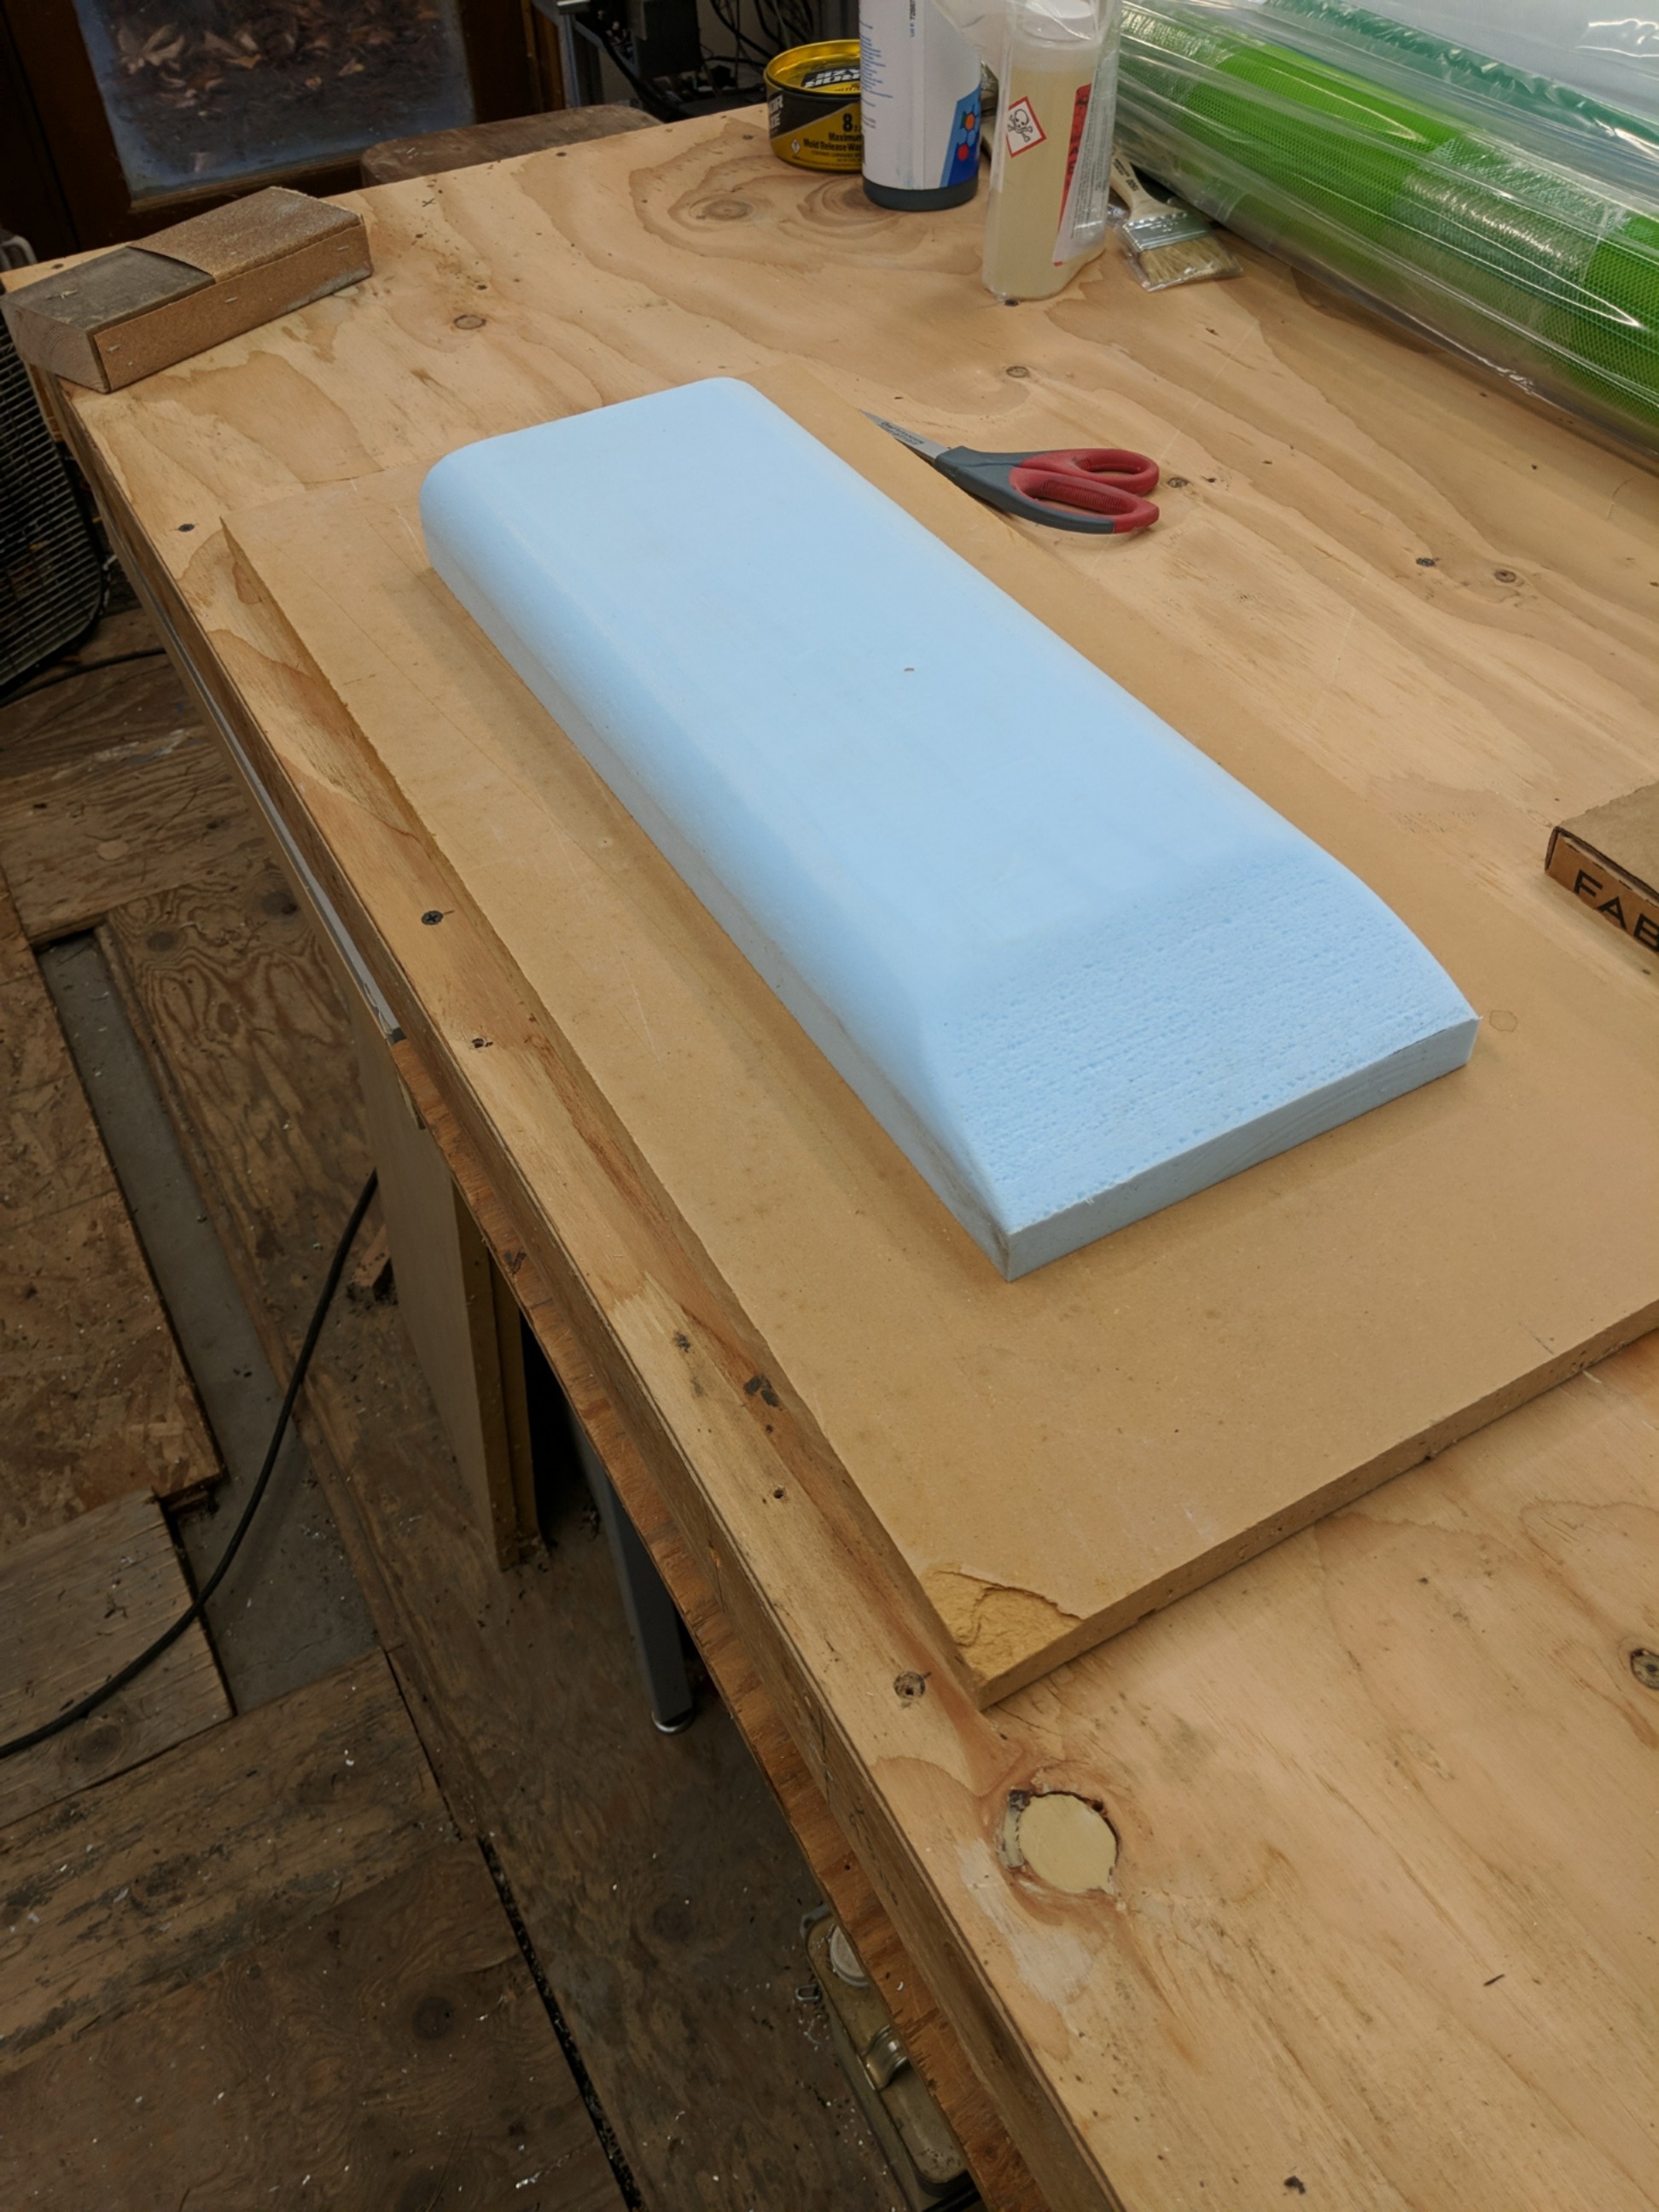
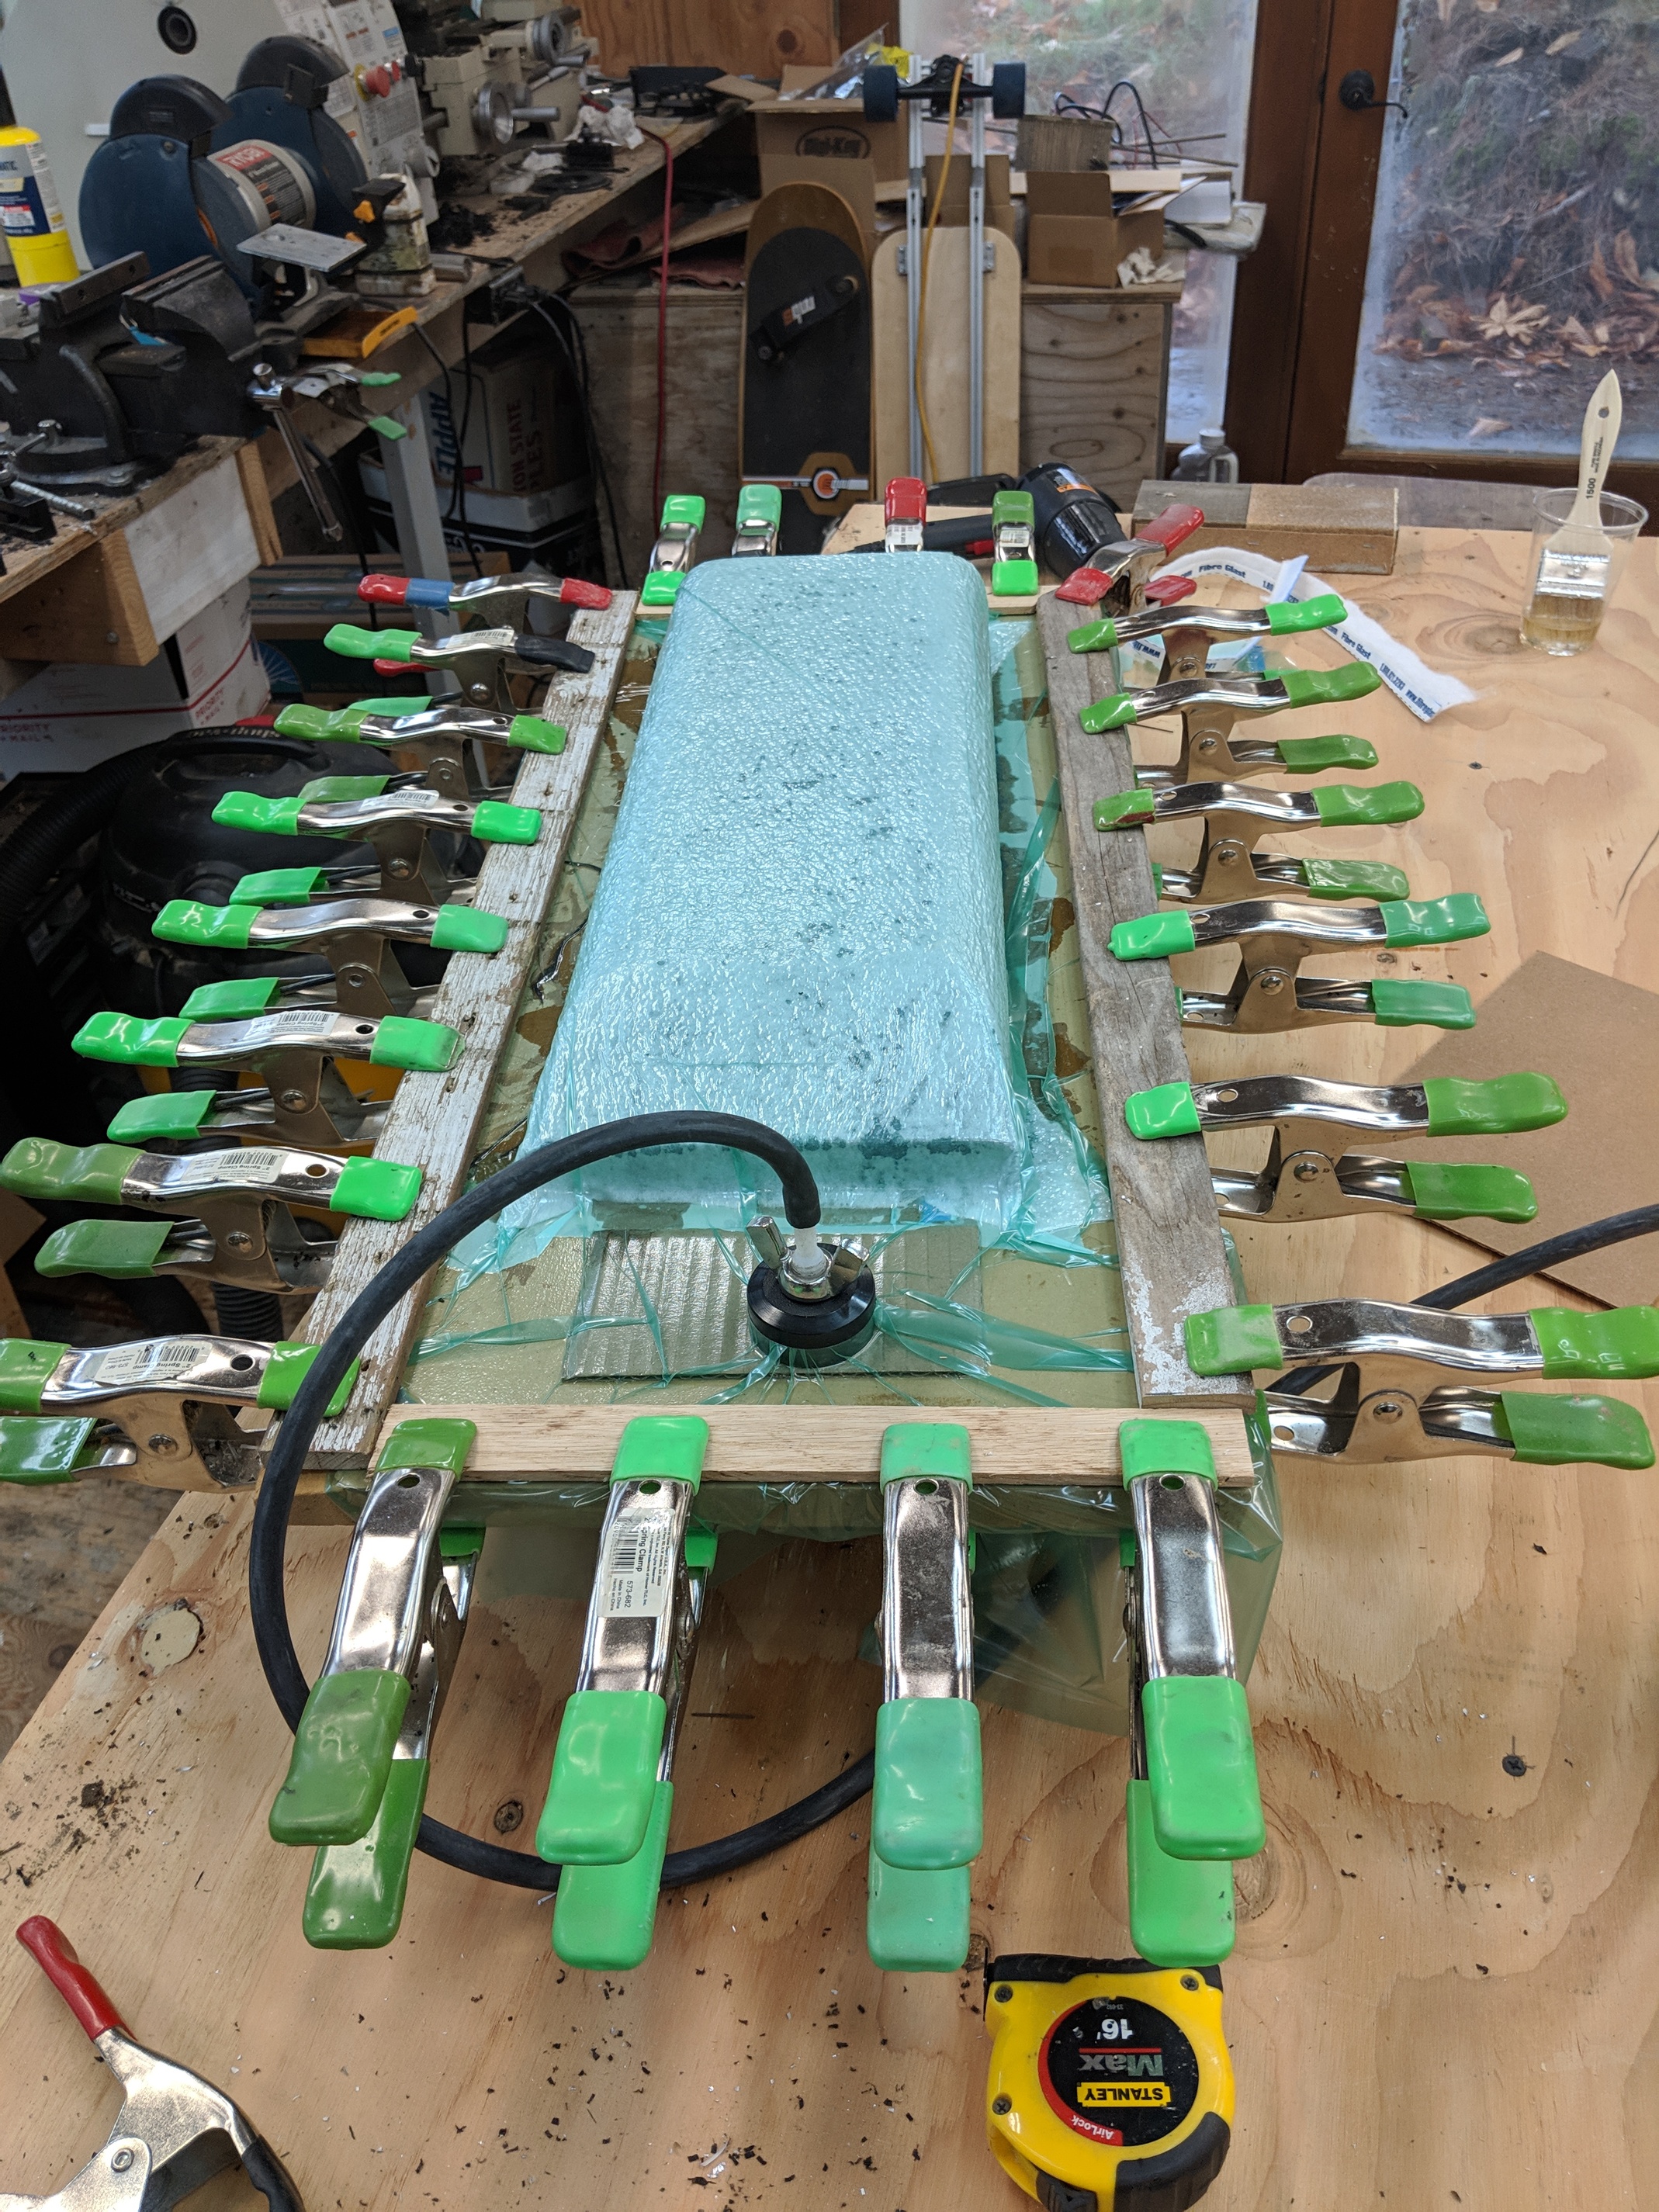
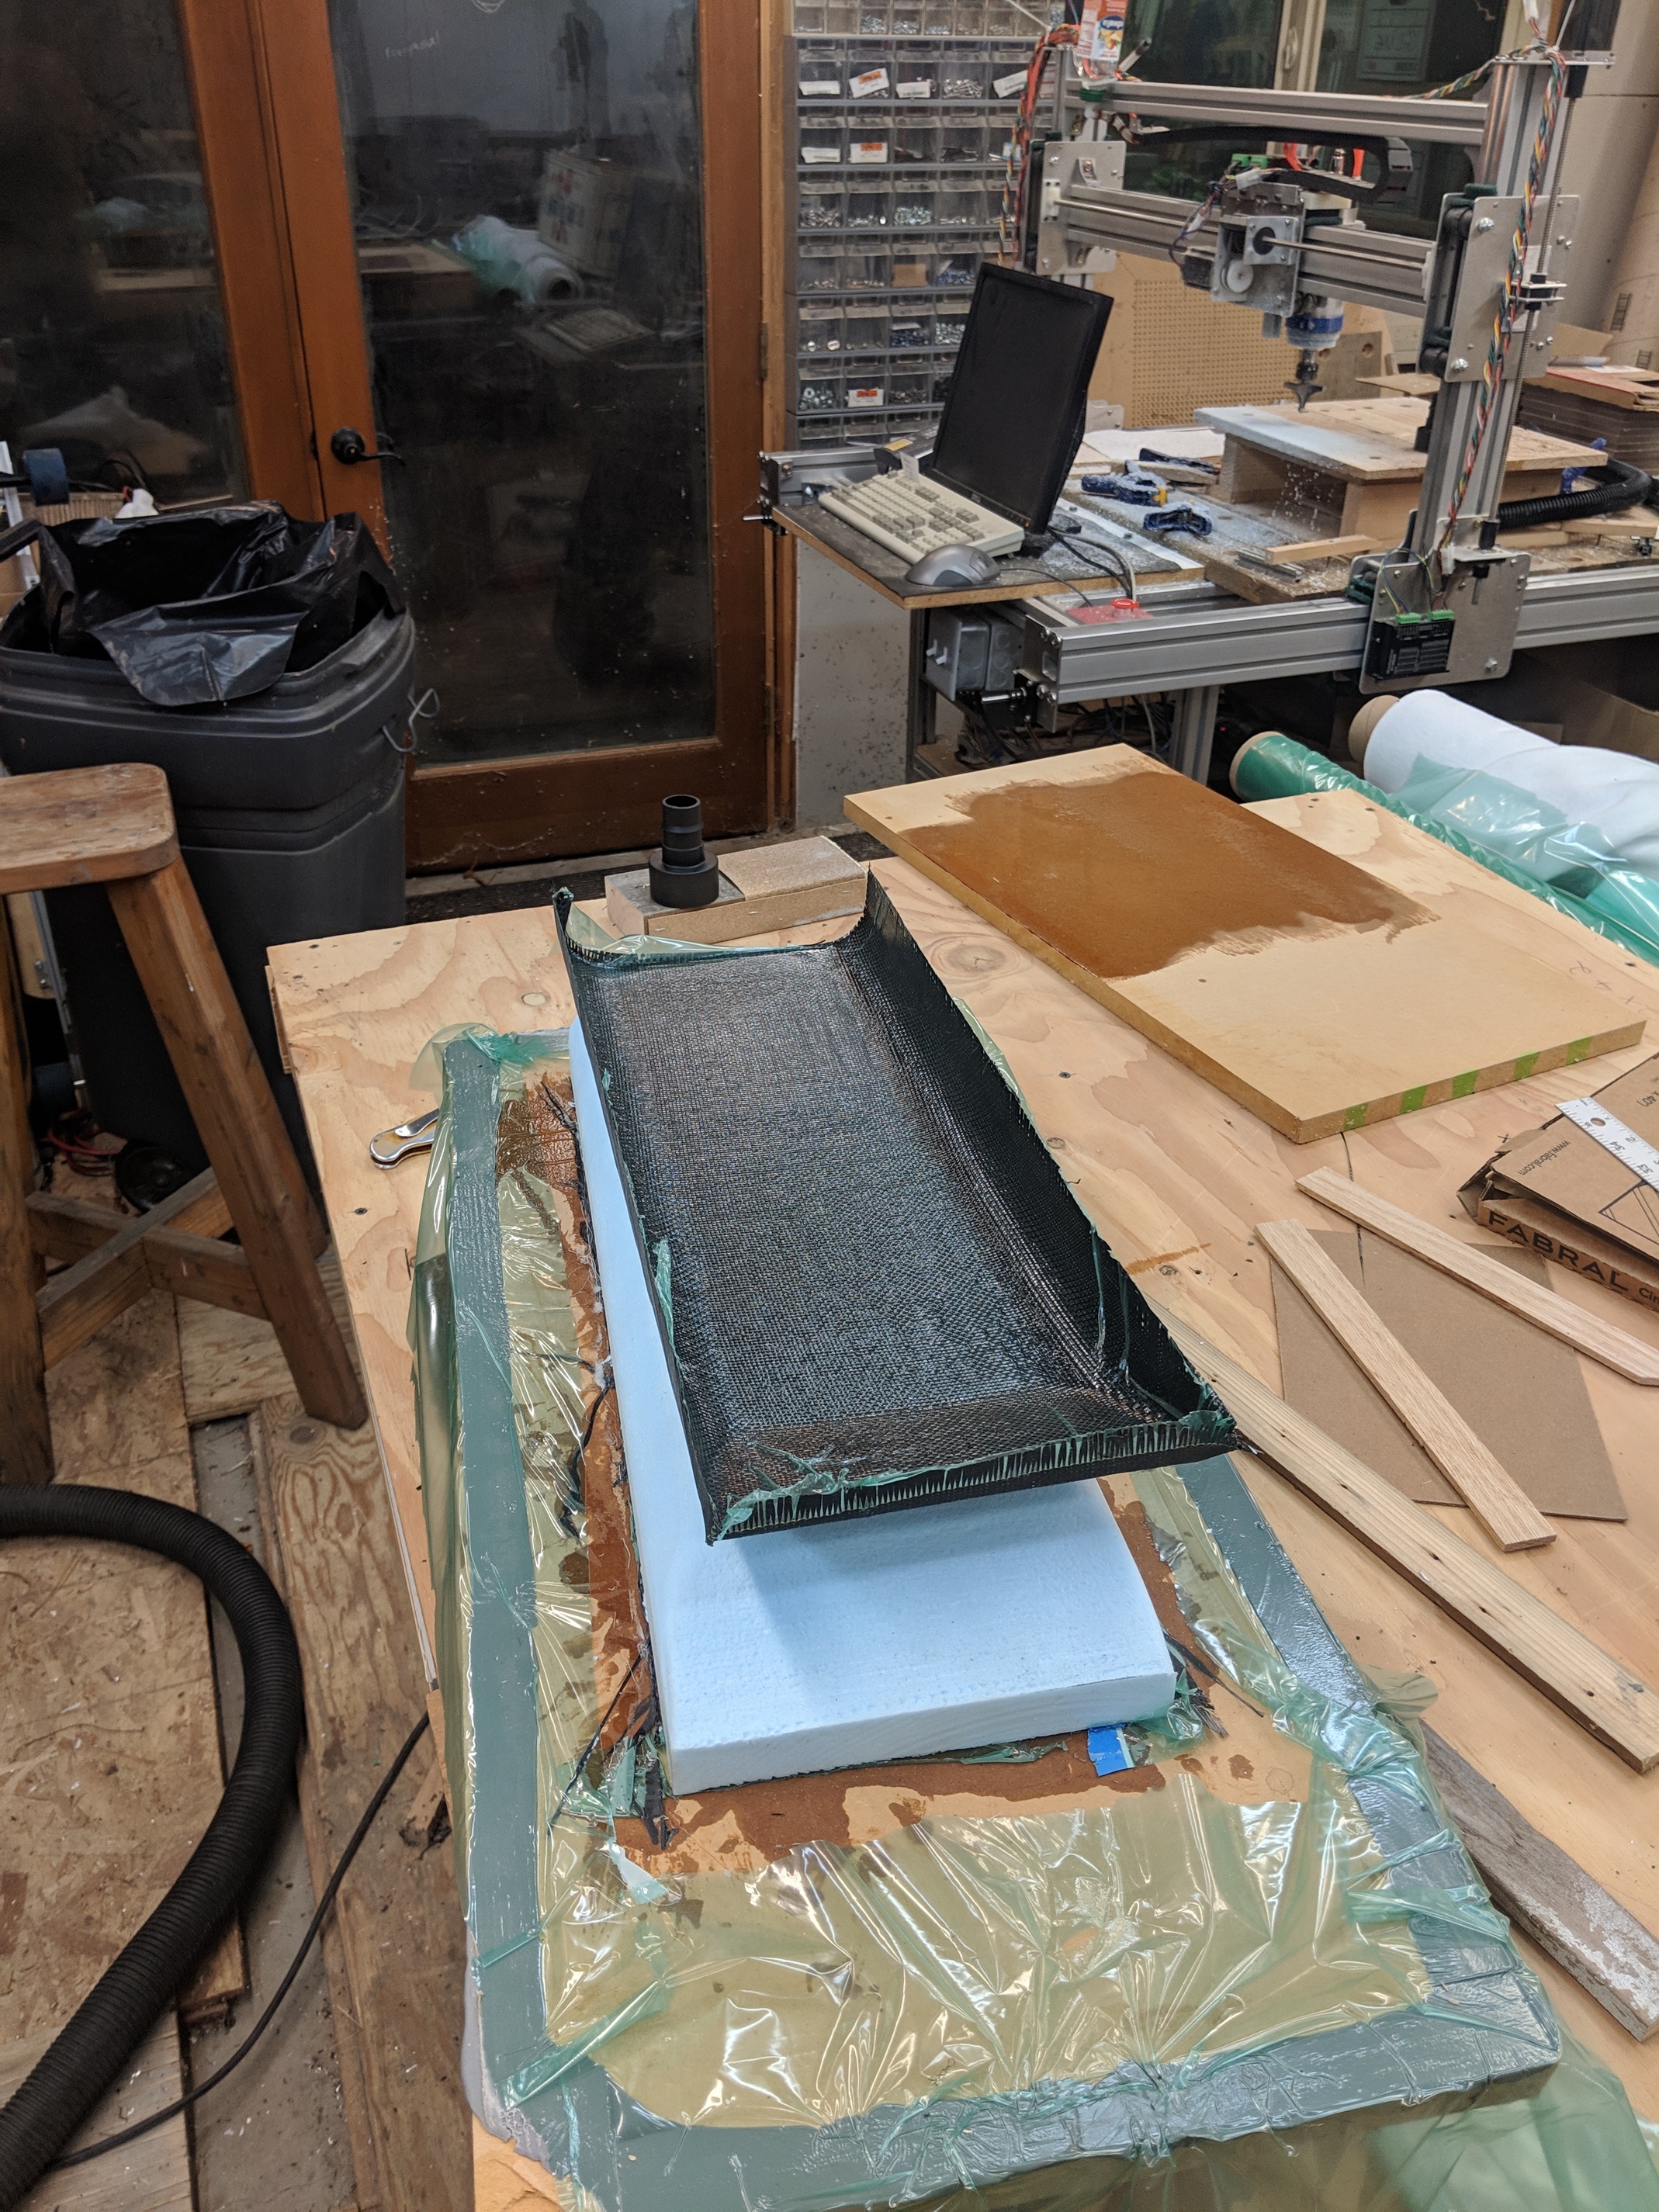
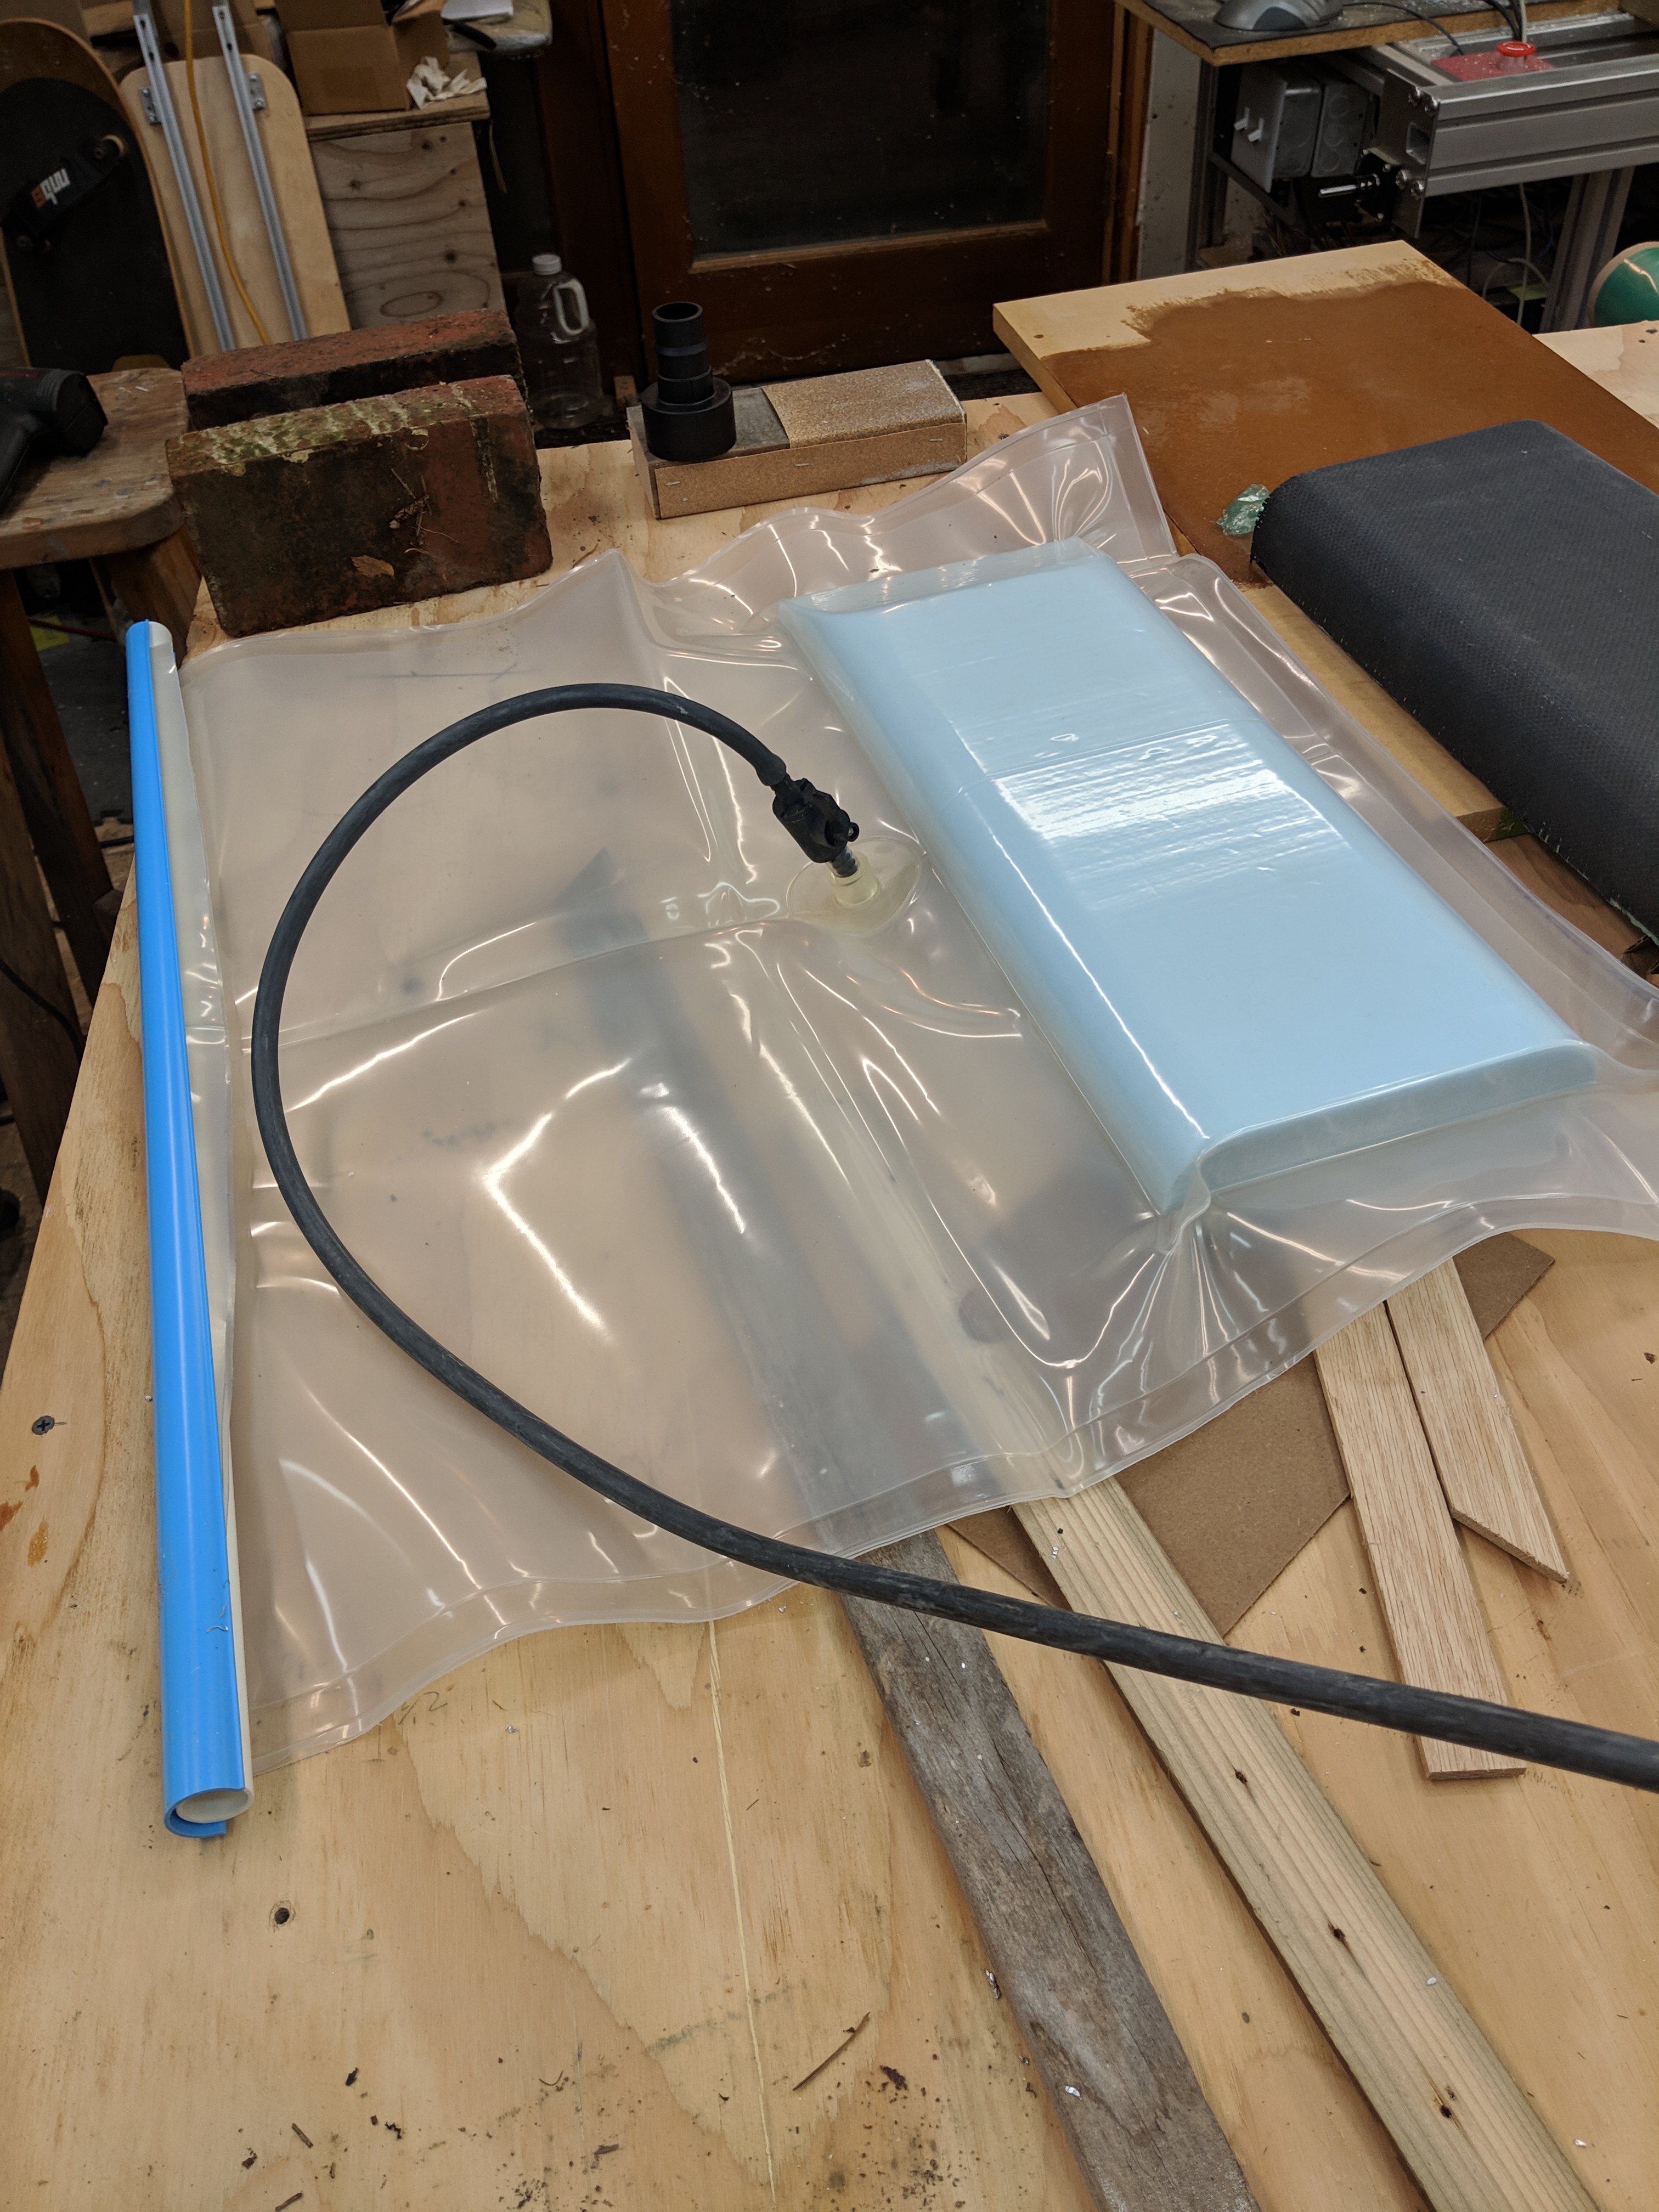
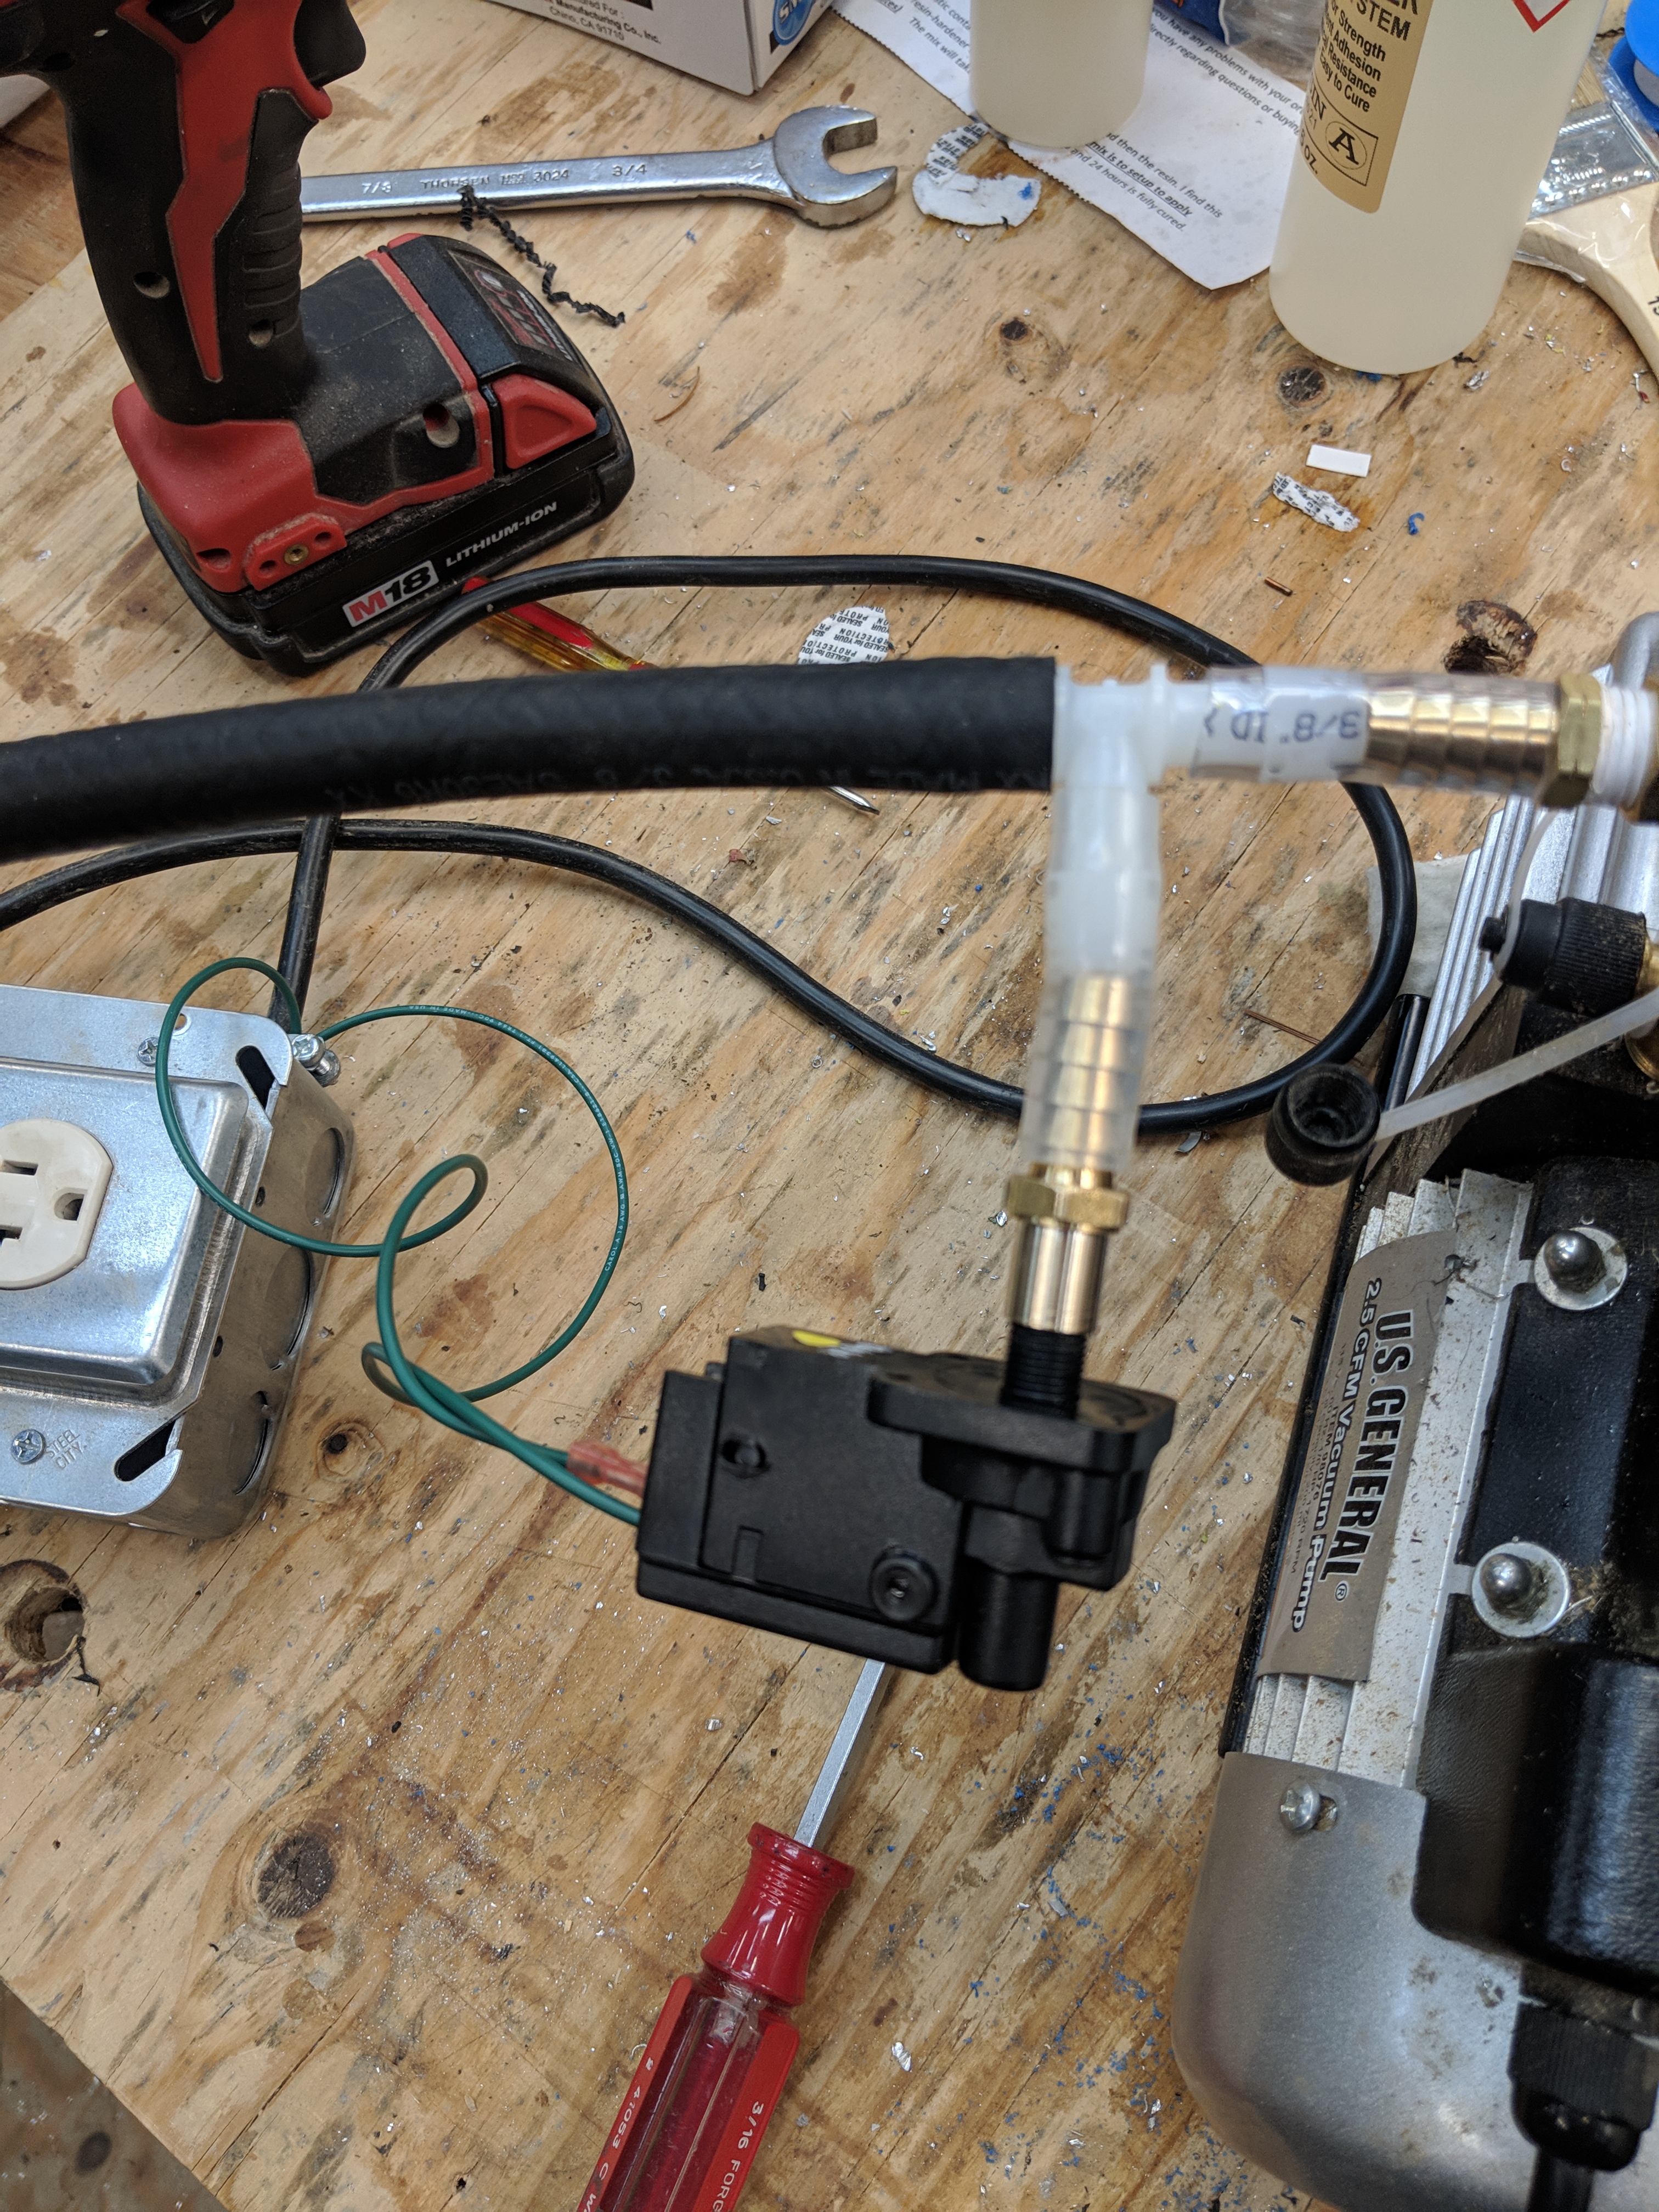
I’ve also taken short tentative steps into laying up carbon fiber (as in I bought some stuff off Amazon). My plan is to cut cavities in the board, add spray foam around the inside edges, then carbon fiber and vacuum it all back together.

I am thinking about building my own wing and mast, but it depends on how hard carbon fiber work turns out to be and how good I am at it. Probably I’ll end up buying both.

There’s a lot of electronics involved in this process as well, and I’ve just started accumulating parts.

Lastly, I have zero experience with any kind of surfing. However I am a snowboarder and a skater, but I’ve been told that absolutely none of that transfers. So I expect to be in the water a lot for the first few weeks.

Anyway, that’s it for the overview. I will go in-depth into every section of the build, starting with the remote design and build.

Thanks for following!

7 Likes

Mildly disturbing that the expensive pelicase is not waterproof!

True. But I had it totally immersed for at least a couple of hours. It will stand up to splashing a bit better. But the bad news is I had it immersed by putting bricks on top, which should have enhanced the seal. If I had put the bricks inside I predict it would have been worse.

I also think I could put a small bead of silicone or a very thin rubber gasket in the mating inset and that would help a little bit.

What I found out from a friend who works in the marine industry is that Pelican’s are great standalone, but as soon as you attach them to something and they experience twist loads they lose waterproofness.

I have a plan for this, but I need to explore it more.

I know I promised to talk about the remote, and I plan to get to that soon, but I got distracted by eStop. There’s a whole thread about it here:

Hard Power Cutoff

so I won’t repeat it in this blog.

Hi, nice build. Good luck with it! This could be the “medvekarom”. Greetings from Hungary.

@jezypeti - considering how many times it’s likely to smack me down and put me in the water medvekarom is probably a perfect name :slight_smile:

If you are planning to use tie-down straps to hold your box in place on the board (as I am) those straps can help provide additional compression for waterproofing.

1 Like

So let’s talk carbon fiber! I watched a bunch of YouTube vids, so now I think I’m an expert. Turns out I’m not, but more on that later.

I started by watching this video. It’s actually not that good of a vid in that he doesn’t demonstrate any of the skills necessary to lay up carbon fiber, but what he does provide is a list of all the stuff necessary. So I ordered some of the stuff and some of it I made myself because I’m stubborn and had a whole weekend free.

This is the vacuum tank. 3 gallons. It was later replaced with a 5 gallon tank that used to be a compressor until the compressor part died. You can see also in this picture the vacuum gauge I had to get because I only had pressure gauges in stock.

this is the pump and a dizzying cacophony of brass fittings.

This is the epoxy separator made from 3" PVC pipe, 2 end caps and still more brass fittings.

and this is the Vacuum Bag connector. It was a total failure because it was 2 pieces (black and white) and air leaked through the threaded connection between the 2. Later I made another one that was a single piece.

The hardest part of all this was all the various brass fittings to make everything go together. I had to go to several hardware stores to get just the right stuff.

Ok, now on to the stuff necessary to actually mold something.

For convenience here’s a list

  • Mold Release wax and PVA. You don’t need this unless you have a mold, which I sort of don’t.
  • Carbon Fiber. It was actually cheaper to buy this at TAP plastics locally than it was to get it online - $42 a square yard, which is a lot of carbon fiber.
  • Epoxy and Hardener. I bought the stuff recommended in the video. It takes 12 hours to set up so you have lots of time to fix your mistakes. This is both good and bad. It’s good because it gives you plenty of time to change your mind and/or fix your mistakes, but it’s bad if your setup leaks air like mine did.
  • Bagging Film - this is the stuff against which you draw a vacuum. It’s basically fancy green saran wrap.
  • release/peel ply. This is like high-thread count egyptian cotton bed sheets, except in Nylon. The idea is that the extra epoxy will flow through it but when the epoxy hardens you can still pull it off. Not sure yet if this is true.
  • Breather/Bleeder cloth. This is like a big thick shop towel that soaks up all the extra epoxy.
  • that gooey sticky tape stuff, which someone on this forum mentioned that you can get at Home Depot cheap (he called it TackyTape but the stuff I got had a different name). It’s in the roofing department.

So for this outing I was going for the simplest form ever, which was a battery cover for one of the eSk8’s. I decided to make it out of that blue foam insulation

Notice how I have this on a piece of pressboard. I’m positive I’m going to regret this. I think next time I’m going to get some Starboard from TAP, which should be epoxy-stick-proof.

I wrapped the foam in bagging film, which is why I don’t have a mold and didn’t have to use mold release. I then laid down the carbon fiber, painted the epoxy on with a disposable brush, laid down in order the release ply, the bleeder cloth, put down the sticky tape and laid the bagging film over it.

Then I pulled the lever and sucked all the air out.

This is the part where I’m totally not an expert because it didn’t work worth crap. Everywhere there was a fold in the bagging material air leaked in and the vacuum pump couldn’t keep up.

What I ended up doing was taking strips of wood and clamping them all the way around the board to get it to stop leaking.

I’m persuaded that the wood sealed everything up, but my vacuum bag connector continued to leak and also I think one of the sharp edges on it cut a tiny slot in the plastic. I made a new one-piece connector (this is where it helps that the epoxy takes 12 hours to cure) and it helped a lot, but still there was a tiny leak.

Notice the cardboard underneath the bag connector - this was another great hint I picked up in a video so the connector doesn’t get plugged against something. Also, make sure the connector isn’t actually on your part because it will leave an indentation.

I decided to just let it cure up without a full vacuum rather than tear it all apart and lay down new bagging.

So I won’t know anything until tomorrow night. I’ll post either utter success, abject failure or somewhere in between.

A note about vacuum pumps.

I had bought the Harbor Freight vacuum pump years ago for something or other, but never really used it. I dug it out and fired it up and it sucks, so that’s a good step, but as soon as it starts developing serious Hg’s it starts bellowing smoke (actually oil mist I think) out the little ventie thingie and the whole room gets stinky and my lungs start to hurt. Also, it spewed out like half the sump worth of oil.

So I went on a little side trip to try to figure out how to get it to stop doing that. I got one of these and one of these in the hopes that the first one will separate most of the oil and the oil mist out and the second one will sink whatever is left. I haven’t received them yet, and obviously I’ll need to put the filter in some sort of cannister but that shouldn’t be too hard - a little 2" pvc pipe and some end caps maybe. I was stunned at how much they charge for a full-on filter for one of these things.

Also, in one of the other videos the guy had set his pump up on a vacuum switch so it turned on whenever the vacuum got above some value and off again when it got down to -30inHg. This is a great idea, so I am working on a little circuit that will do this for me.

Now you know everything I know. Unless you already knew more.

2 Likes

Also, I checked in with AlienDrive and they said they will receive the 80100 motors that were on backorder on Wednesday and will ship out shortly thereafter!

Wow Doug. Good for you! I watched those same videos and decided it was more than I was prepared to undertake – at least in phase one. But I did come away feeling like it is a very cool process that I would like to try at some point. I was looking at kits from these guys.

I look forward to seeing how you make out.

i think the smoke is normal… i leave my garage door open when using it. But it shouldn’t drain the pump that fast…

To avoid leaks, it’s always easier to work with a full bag than sealing tape and a single layer… tube shaped sealed on both ends (I seal one side with clear tape and the other side is just sealed by rolling up the end on a length of wood.) just make sure it’s wide enough to fit everything you have in mind. I used that a lot on full surfboard to glue balsa layers.

If you get a setup with no leaks, as you have a buffer with your vacuum tank, if you set a threshold for the pump to start, it will work way less, and most of the time you don’t really need a very strong vacuum.
I used the same vacuum pump as yours, a few PVC pipes, and that kit : Project: EVS™ Vacuum Press Kit for Electric Vacuum Pumps

I did few projects that way and it’s still going strong.
Getting Wings on Vimeo that was the first one, you can see the pump at 0:23 … i was still using tape at that time.

Finally, depending on your parts, you can usually use faster epoxy. I’m usually working with Fast (25 minutes pot/ 2.5 hrs set) or slow (50 minute pot / 5hrs set) surfboards epoxy (resin research 2000CE).
I had a few close calls with the Fast one during texas summer :slight_smile:

1 Like

Thanks @Mat! This is great info. I checked out the veneer place and grabbed a bag as well as their auto-cycling sensor thingie. I’ll also switch to a faster epoxy, probably the 5 hour one.

Also, and more importantly, based on your video I think I can make my own foil and mast. It doesn’t look much different than anything else, just a matter of making the forms, which will be a bit of a learning curve (setting up 3D CNC double-sided is not currently in my repertoire, but figuring it out is just a matter of making the time).

So it worked! and it worked surprisingly well, with a couple of caveats that, in hindsight, are pretty obvious.

first, the thing!

caveat 1: the mold release does have a purpose. You can’t just stick the bagging film over the mold and the carbon fiber over that. the bagging film is never going to come off this part. Which is fine because…

caveat 2: you need more than 1 layer of carbon fiber. Somewhere between maybe 3 and 7? depending on the strength you’re after. 1 layer is strong but super-flimsy. This particular part I will probably go with 3. The downside to this is that that square yard of carbon fiber isn’t going to last nearly as long as I had hoped.

caveat 3: everything Mat said above is true. Especially the thing about getting a bag. This worked, but it’s messy. I’m going to throw that pressboard base away.

The bottom line is that for my first time I’m amazed that it worked at all, which means that it’s really not that hard.

As I alluded to in my response to @Mat, (and I highly recommend you watch the vid he posted) I am going to try to make my own mast and wings. The mast seems like an easy(ish) first step, the wings might take a bit more thought.

To make you carbon pars more rigid, you can go 2 ways: stack lot of layers, but the cost goes up quick, or space the layers with layer of foam or of thin wood… make everything very stiff. That’s kind of what i did for the box holding my batteries and electronics, plywood with fiberglass on both way, not too heavy and very strong.

Regarding making you own mast and wings… it’s very fun and you learn a lot doing it… but it’s not necessarily a cheap option. For the mast in particular you’ll be way better off buying an aluminum one. It will be stronger and easier to put your wires in.
On the foils i made, the parts were very rigid, but i had some flexibility in the connections. Commercial foils with alu mast and fuselage are in the end stronger and not more expensive.
@virus has some very cool videos on youtube about making a mast with integrated wires and motor pod if you choose to go that route :slight_smile:
Making wings is fun though… especially if you print them.

2 Likes

@Mat, is epoxy for fiberglass different than epoxy for carbon fiber?

No, same thing…

2 Likes

It’s exactly the same one.
Very roughly: carbon needs epoxy, fiberglass works with both epoxy and polyester.
I only use epoxy because i like the lack of odor… I did a few molds with polyester and really hated the smell :slight_smile:
You’ll find lot of different epoxies, other than cure time, they’ll have different mechanical properties, some will be much more fluid (if you want to do infusion).
But with our handmade process and rough designs, i’m not sure it’s worth going to very high tech ones…

1 Like

When you made the transition between the mast and the mast mount what did you use?

That transition was very stiff (and a bit heavy :slight_smile: )
I made a strong plate by itself and screwed it at the end of the mast for positioning only.
Then i “glued” them together with chopped fibers and resin.
After that i used resin mixed with talcum (natural one is grey and gives that color to the resin, you can find some cleaned up one that is white, but don’t use baby powder!) I added talcum to make the resin more viscous. If i was doing it today i’d use Aerosil to gain on weight and increase viscosity more…
Finally it was covered by a few layers of carbon vacuumed to take the stress.

The connections i had issues with are the mast to fuselage and fuselage to wings…
Those were not as rigid as the one i have on the foil i bough. May be due to the smaller diameter screw, resin staying a bit flexible, … not sure…

2 Likes

Some small forward movement.

I received the magnets for the hard power cutoff and they will do the trick.

I also received the vacuum bag

and the pressure switch

The pressure switch has a little adjuster screw to set the vacuum level. It works great except I wish it had a bit more hysteresis.

The vacuum bag is 24 x 24, but if I had it to do over again I’d get 24 x 36. With that blue and white closer thingie you can always make it smaller but you can’t make it bigger. And I wish they had put the vacuum connector in one of the corners. But it is really thick and seems airtight.

I also received the Remote Control Receiver board, but I already can see where another rev will be necessary to add all functionality. But I need to prove the functionality of this board before I do the next rev.

So my goal this coming weekend is these 3 things. Fully operational hard cutoff (minus the anti-spark because the resistor got waylaid somehow), vacuum form another battery cover with the right number of layers this time and testing the Remote Receiver functionality.

Also my 80100 is on its way!

2 Likes