Frontwing Split-Mould Advice

Hey everyone,

I’ve been lurking on the forum for quite a while and have found tons of inspiration here—now I need some direct advice!

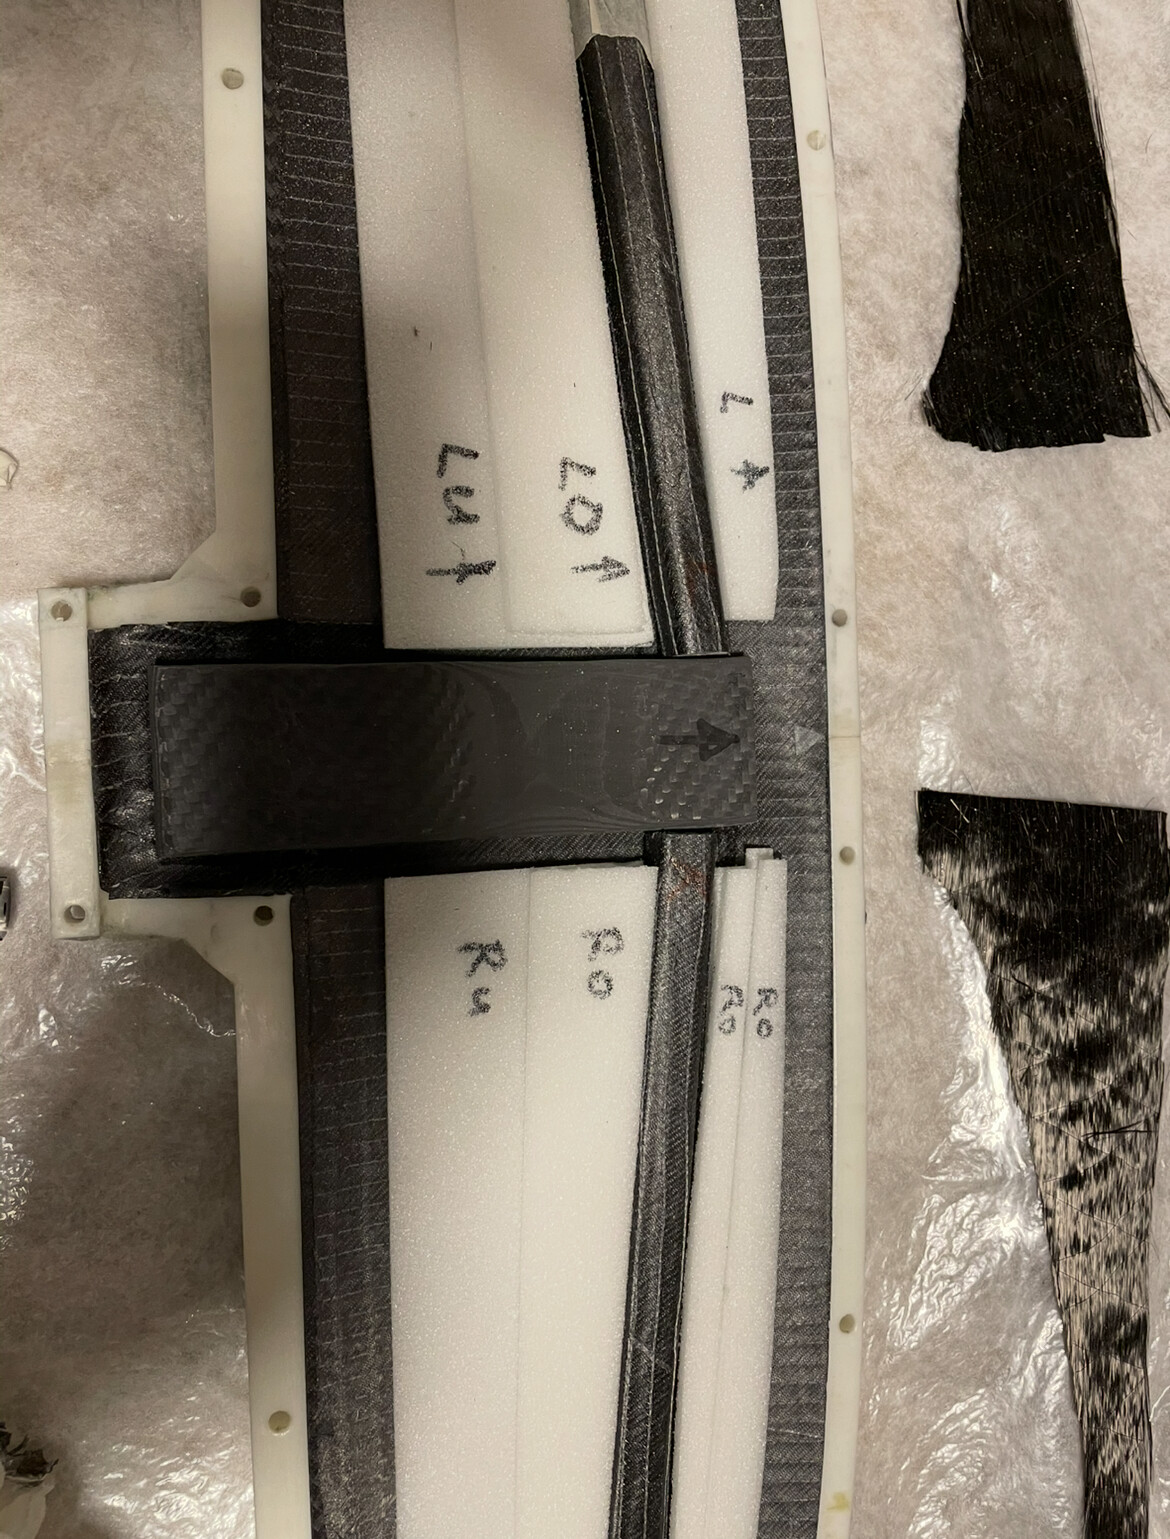
So far, I’ve built a few pumpfoil boards, rear wings, foil assist and even two front wings using a 3D-printed core that I laminated over, with decent results. This time, I tried something different: a high-aspect pumpfoil front wing with a 1291 mm span (~1200 cm³ volume, similar to a Fireball 1250), incorporating UHM UD in the layup and using a 3D printed split-mold approach for the first time.

What happened:

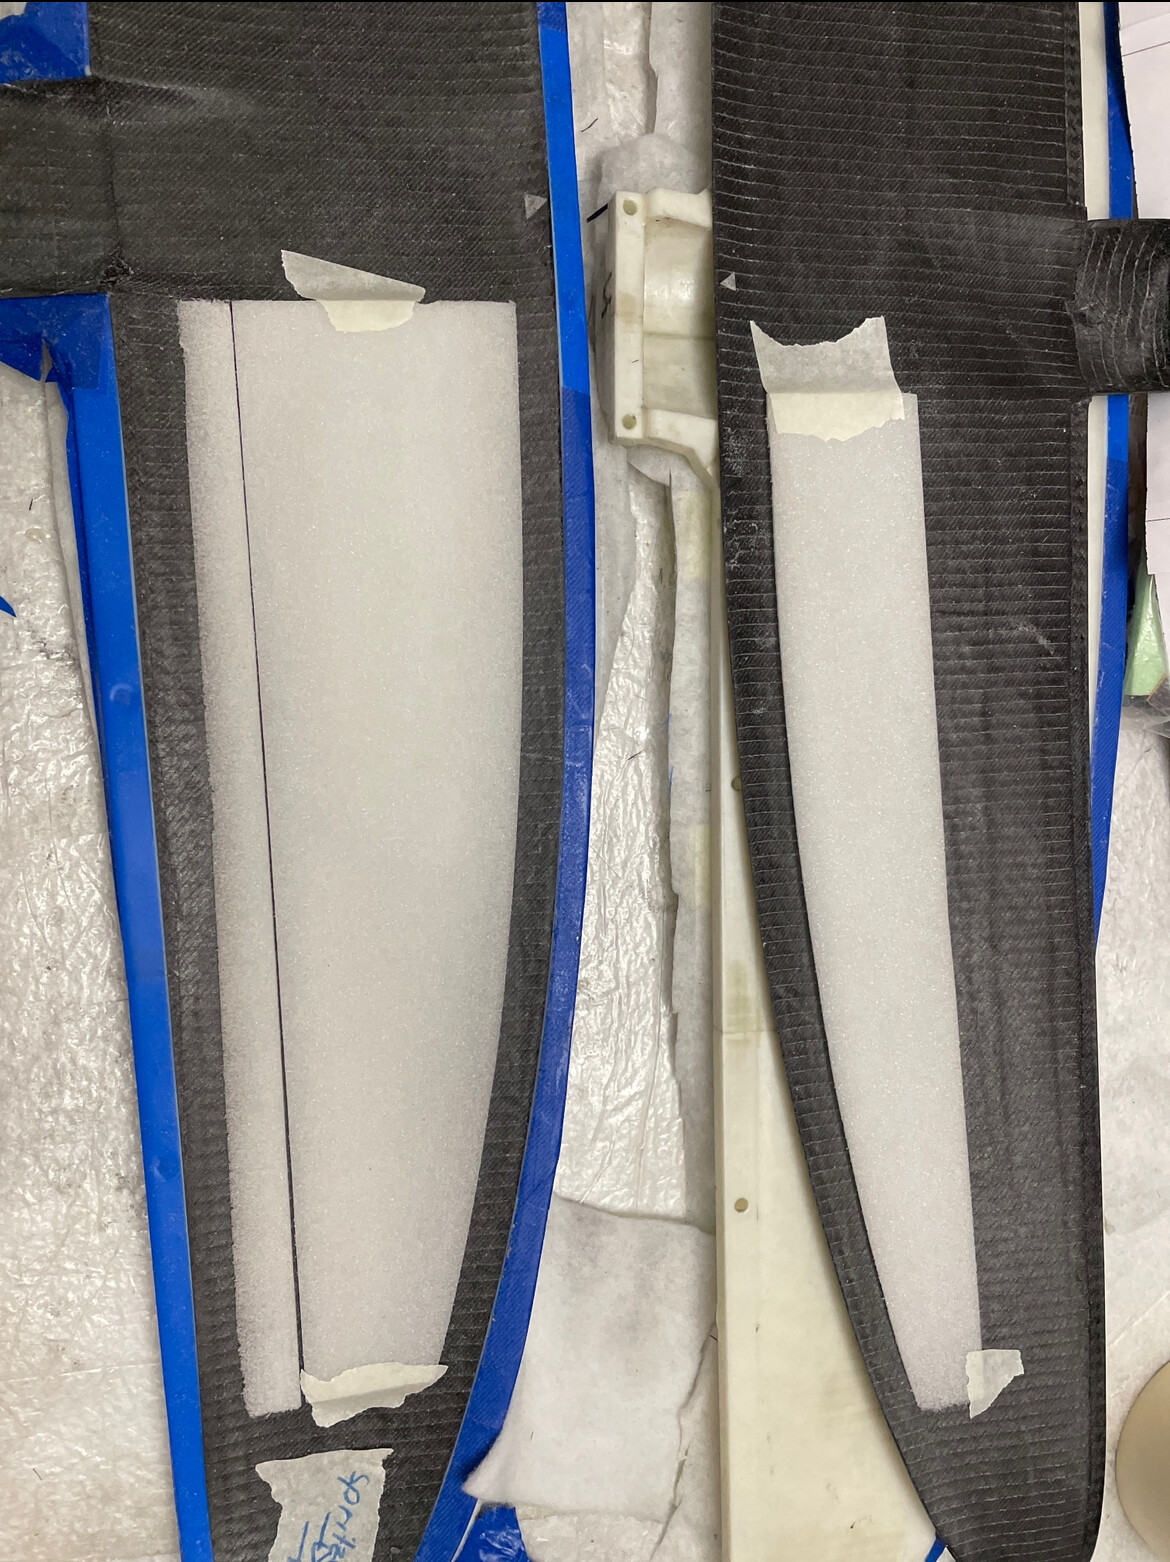
I laminated both mold halves (top & bottom), then poured Sicomin PB170 epoxy foam into the mold, clamped it shut, and tried to cure in one step.

Unfortunately, the wing broke after a few attempts. The foam never expanded correctly in the closed mold (almost closed,… two vent holes 8mm at fuselage mount), and it didn’t bond the two halves properly. The leading and trailing edges ended up cracking.

In further dry tests, the foam just doesnt expand in a closed mold. it didn’t generate enough internal pressure to fill the cavity thoroughly.

I still have these 3D-printed molds and would like to reuse them. Ideally, I don’t want to do any additional external laminations afterward (but I’m open to suggestions). I particularly need a robust leading-edge connection or strong enough bonding of top and bottom.

Questions / Looking for tips:

  1. Single-shot vs. Multi-step

Should I laminate each half separatly instead of closed mould and inner pressure?

  1. Bridging Fibers

How do you run ±45° or continuous fibers around the leading/trailing edges to avoid weak seams—especially with a split mold that makes it tricky to wrap fibers over the edges?

  1. Epoxy Foam vs. Solid Core vs. PU Foam

Thought about PU foam instead of Epoxy Foam, but too brittle? Also saw many videos of failed closed moulds surfboard design with lots of airbubbles and other issues…

  1. Bladder Molding

Anyone tried inflating a bladder in the closed mold first, then adding foam or a core afterwards?

  1. General Best Practices

Do you have a proven process for building front wings (especially high-aspect) or masts in a split mold so that everything bonds correctly, particularly at the leading edge?

I’m aiming for a stiff, reliable wing without major added complexity, but I’m open to doing multiple stages if needed. I’d love any insights from people who’ve gone through a similar process or know how manufacturers tackle this.

Thanks in advance!

Hi Michael,
I built several stabs, a front wing and a mast, see here:

I did not build them in one shot but several steps.
First I laminated the two halves in vacuum. For the bigger wings and mast I did that in 2 steps laying the two outer layers first and then adding
more inner layers of biax 45 degree and UD.
I then cut and sanded the two halves to fit the mould. You need also to make sure there is not too much material, especially towards the trailing edge where the wing is thin. If it is too much, sand down (nasty). For the last step I used a mix of cfk flackes, glass ballons and thickened epoxy and put everything together in the mold. No vacuum but a lot of clamps, see picures.
For the mast I used some carbon tubes for the phase wires between the two half shells, these also increase stiffnes. For the rest of the gap I put 60kg/m3 foam sanded to fit the space.
The amount off the filler mix is important. Too much and you can’t properly close the mould and trailing edges get too thick. Too little and there will be air gaps and bad bond betweeen the two halves. For the front wing I added a balsa bar wrapped in cfk and put it between the halves to strenghten the wing. The rest of the gap was filled with hard foam sanded to fit.
Although the front wing is mechanically strong, it is not very stable to ride, so I did not use it a lot.
I’m really happy with the mast though, I used it for one season and it did not break.
Mast: Daniel's 2nd build - #2 by sat_be

Hi Daniel,

Thanks alot for your explanation! From what I understand, your approach is to fill one mold half with hard foam and the balsa cfk stringer and then fill the second half with the epoxy filler mix (with CFK flakes, glass balloons, and thickened epoxy). Then you join them by placing the “dry” half onto the “wet” half and pressing it together? Did I get that right?

However, I’m wondering: doesn’t that mean the bond between the two halves relies mainly on the foam, rather than forming a solid connection between the two halfs with fibers? Or am I missing something in your method? What are the dimensions of your wing (span / volume)?

Really appreciate your insights!!!

Best,
Michael

It is a while ago, I think I used separate foam core pieces per halve and filled them both and then closed the sandwich wet on wet
The wing span of the front wing is about 1m, ar 9.8. I don’t know the volune, profile is Eppler817, so not a very thin high camber profile. I did not design it myself so I don’t know the volume.
You are right in the section with foam, the bonding of the halves is via the foam but the core does only cover the thickest parts of the wing, there is the balsa bar and an area near the edges without foam, espeecially around the trailing edge and the wing tips. The 1 cm between the foam core and the leading edge is important, there the bond needs to be good for a strong wing. In the center I used a piece of 5mm solid cfk board to hold the preasure of the fixing screws.


Hi Barmy,

I’ve built a few foils and here’s my 2 cents.

Outer skins of the foil carry mainly bending loads, the bond in between the two shells has to deal mainly with shear forces.

You can approach the built in various ways:

  1. Solid wing
  2. Foam wing
  3. Hollow wing.

Solid
This is best for very small wings or stabs. This methos relies on having a fully solid wing. Normally is done via compression molding where the two sides are filled with carbon before moving to a press or clamps for closing the moulds. Shear is transferred through the solid laminate.

Foam
This method makes lighter wings. Laminate is calculated to have enough stiffness on the wing, rest is filled with core to make it lighter. To make it in a single shot best is to have a core with the carbon laminate subtracted already, to transfer load on the leading edge best is to wrap some carbon (ideally biax) over the core before placing it on the moulds, therefore creating a continuous ply on the LE. Trailing edge is best to leave enough recess so the top and lower surfaces are touching together. Ensure you create solid parts where all the bolts are going to provide enough compression strength.

Hollow
Here you laminate each shell independently, prior to joining them you place structural adhesive on the LE and TE. Since you’re only relying on the bond, its nice to have a shear web (half way through the cord) to increase the shear strength.
This methos is prone to glue gaps, making wing leak and get water, since adhesive is difficult to control, benefits of hollow wing are offsetted by the extra glue added.

Composites need pressure to obtain the best mechanical properties. Although sicomin quotes it as expanding foam, this will not exert the necessary pressure to consolidate the laminate, hence why it has failed.

If you still want to use the Sicomin, I’d laminate each half independently under vacuum bag, create a shear web, and pour the sicominn foam before closing. You still might need to add 1 ply at the front to tie both shells to meet the shear required.

Jordi

1 Like

I had a similar thing happen. The foam didn’t foam enough and I got some nasty holes in my wing.
My wing is still super stiff has I basically used this technique.

I used a few layers of carbon as the outer skin and built an internal spar reinforced with unidirectional carbon fibers. This was the inspiration to it. I think it’s basically saying all torsion is on the skin and the bending on the spar. https://www.alexander-schleicher.de/en/service/technik/holm-im-fluegel/

So for my next wing I would use this technique again, but I would use more steps.
I’d vacuum the outside first , then add a spar and foam and then close it… but there are probably drawbacks to that aswell and I’m not as experienced as others here

1 Like

Hi all

thanks alot for all the insights! I also asked the composite supplier and got an answer that i would like to share:

"…
The following variants are possible:

Classic with a PVC core, e.g., Diab H80, which is fitted accordingly, minus the laminate (sanded, milled, etc.). The contact pressure for the laminate against the mold is created during wet-on-wet lamination by joining the two mold halves.

Or with the PB170 / PB250, the following process:

After the negatives have been prepared accordingly, laminate the laminates into the two mold halves and place them separately under vacuum.

As soon as the resin has set, gelled (the surface is still tacky), and the laminate can no longer be removed from the mold, remove the vacuum.

Apply 3M Scotchweld DP490 to the outer edge (front and rear edges) of the wing. Pour PB170 into one mold half according to the calculated volume, then join the mold halves together and allow to cure.

If necessary, secure it with screw clamps. Or you can install screw connections and centering dowels on the mold flange.

Another option is to manufacture the PB170 core separately with a spacer that simulates the laminate in the mold. Wax sheets act as spacers.

Sicomin PB foam resins do not exert pressure during expansion, but rather expand to the smallest extent possible. If there is no more space, this system stops expanding…"

I will probably go with a multistep procedure now and laminate each half which allows for more control…

Thanks!

1 Like