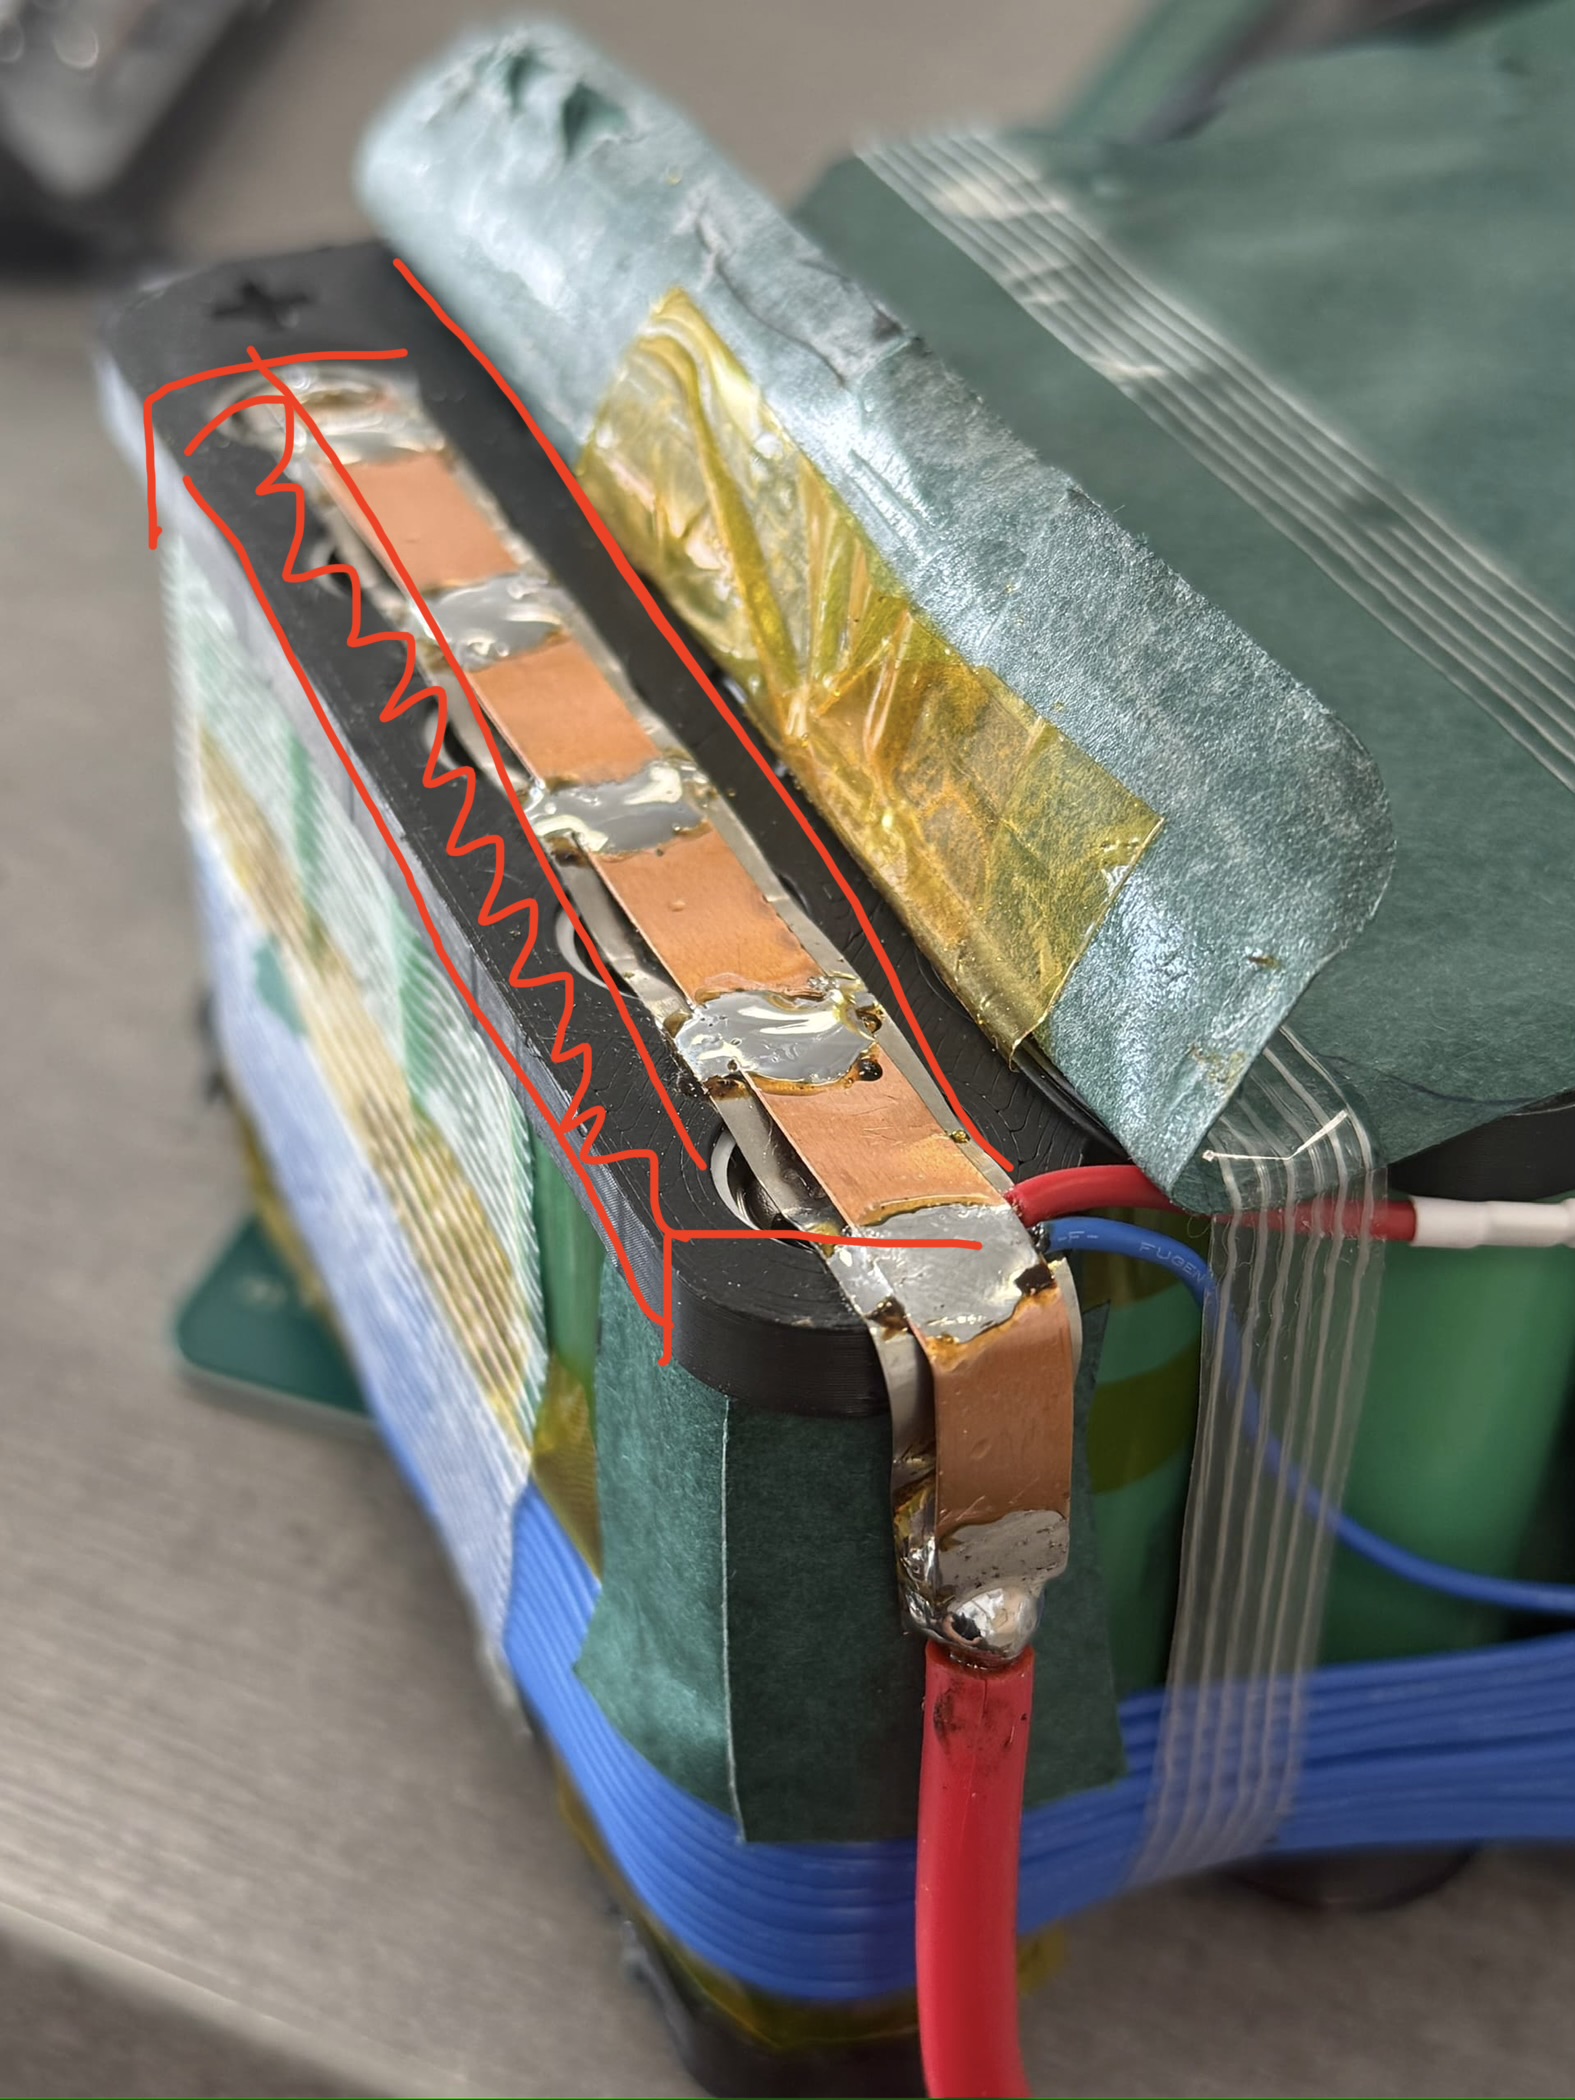
Nice. That will definitely help. But just a small tip, next time solder the wire across the whole length of the battery. This will make sure all batteries are equally drawn. Usually I pre solder the wire to the nickel (nickel or copper needs to be extra wide). See my drawing for example. That extra bit of material you simply bent over the cells on the side. Like this:
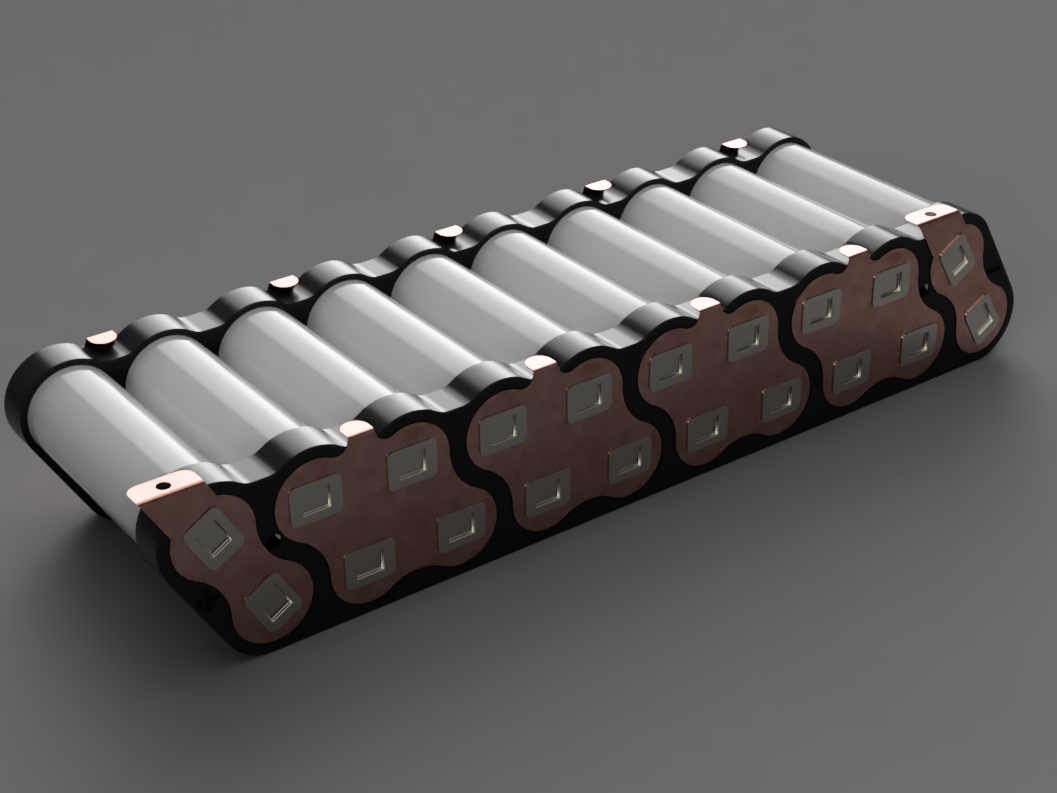
Yeah, makes sense. For next battery ill also order the custom made copper/nickel cell strip, aliexpress has a lot of them and im using them for my other gadgets as well.
I used dichtol AM Hydro, bought directly from them. I applied it with a brush but i did not use it on the battery compartment that went into the board.
It truly does not stick afterwards so I only used it for the battery alone.
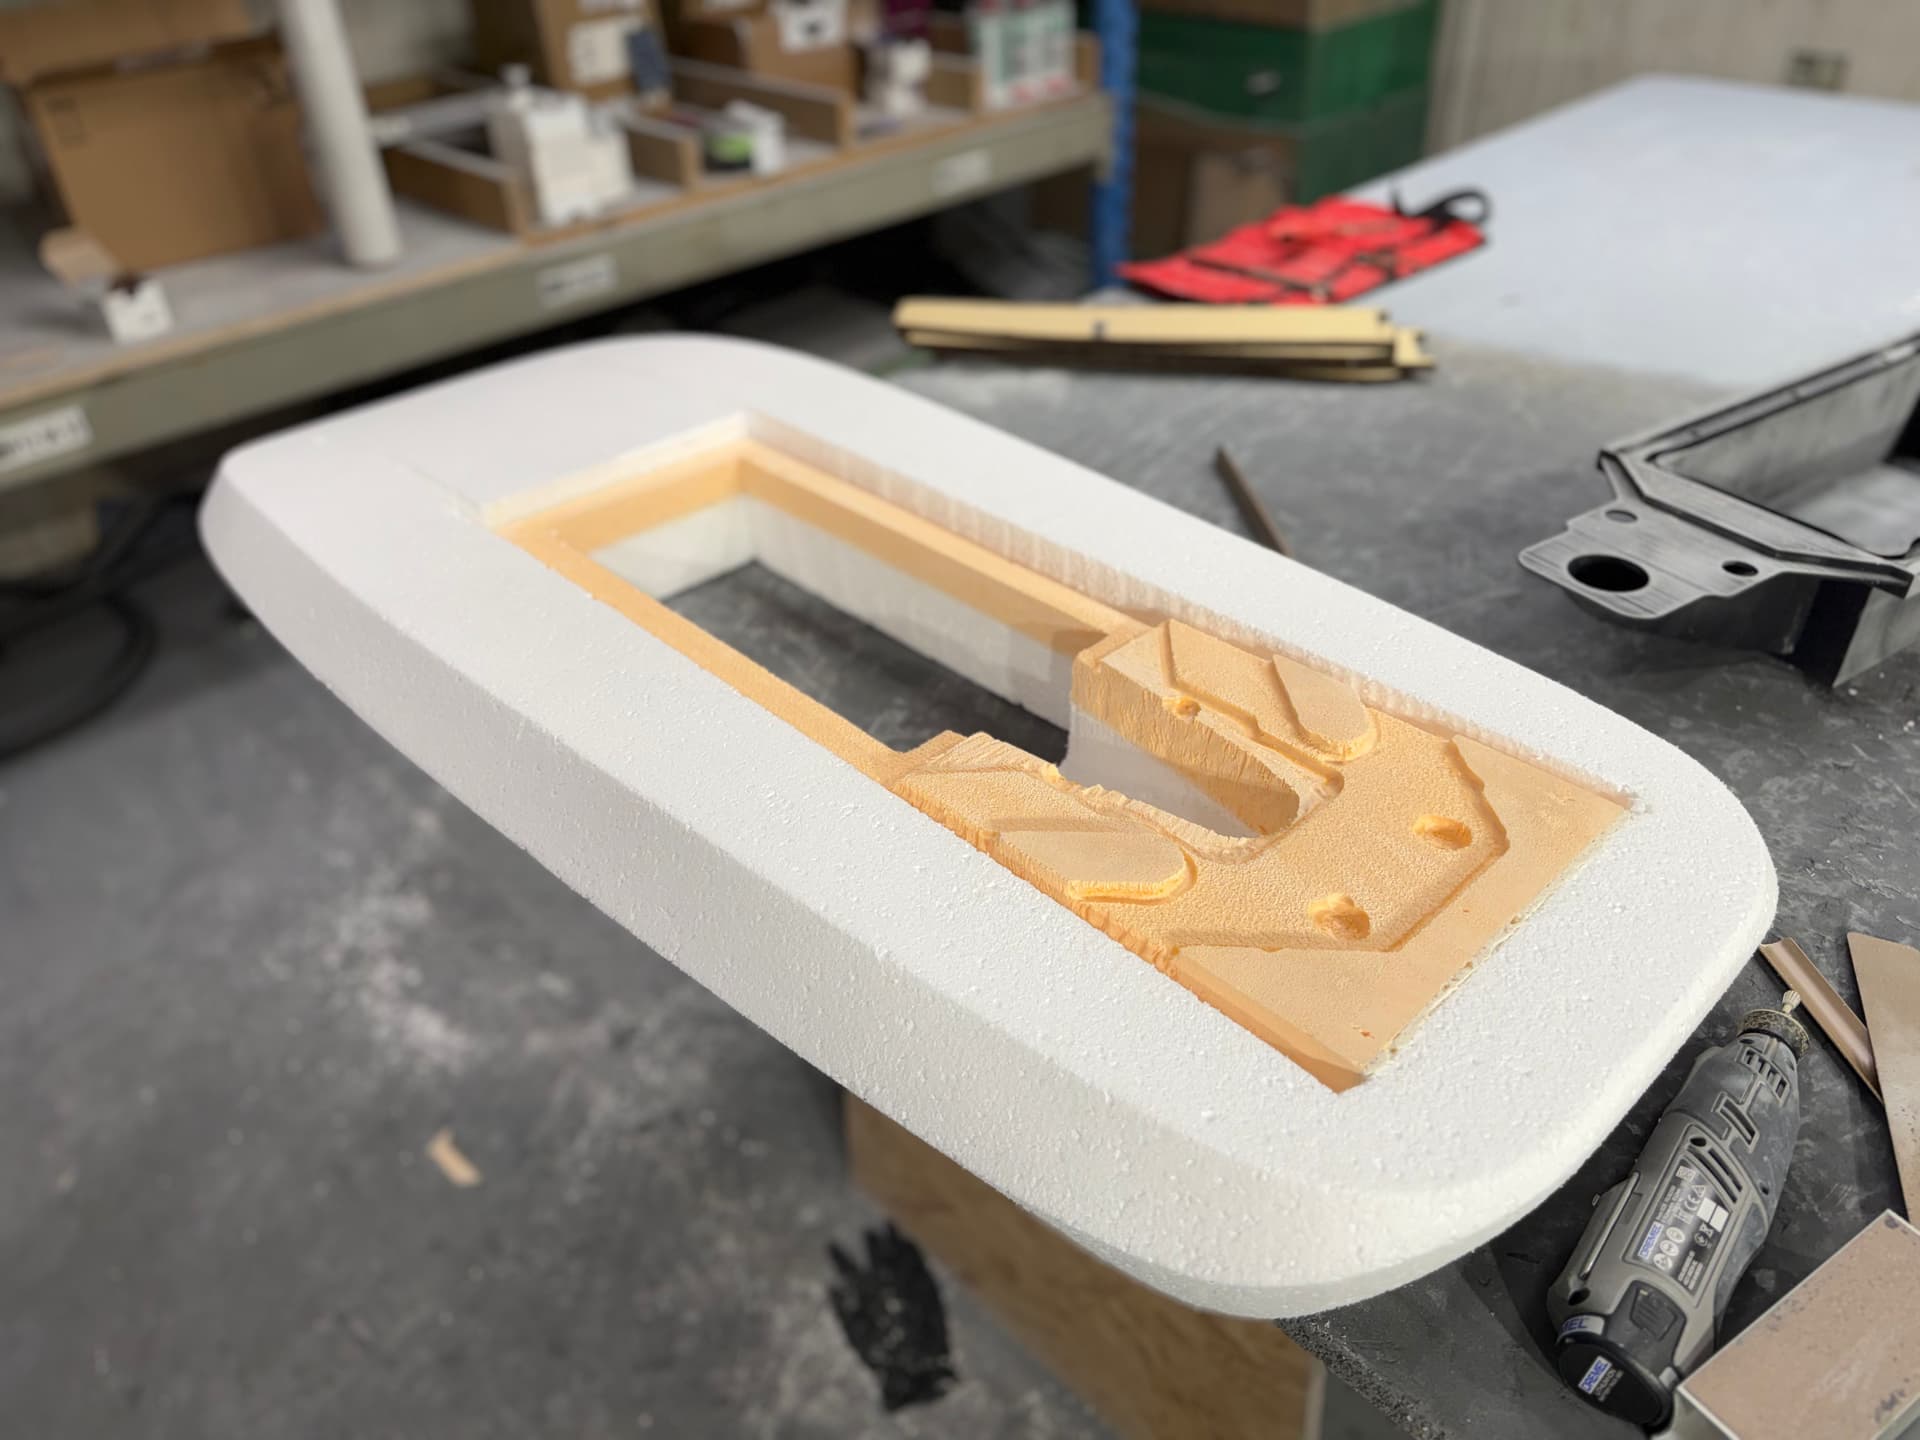
The foam battery compartment was sanded and then spayed with base color and in the end with clearcoat at the same time as the whole board.
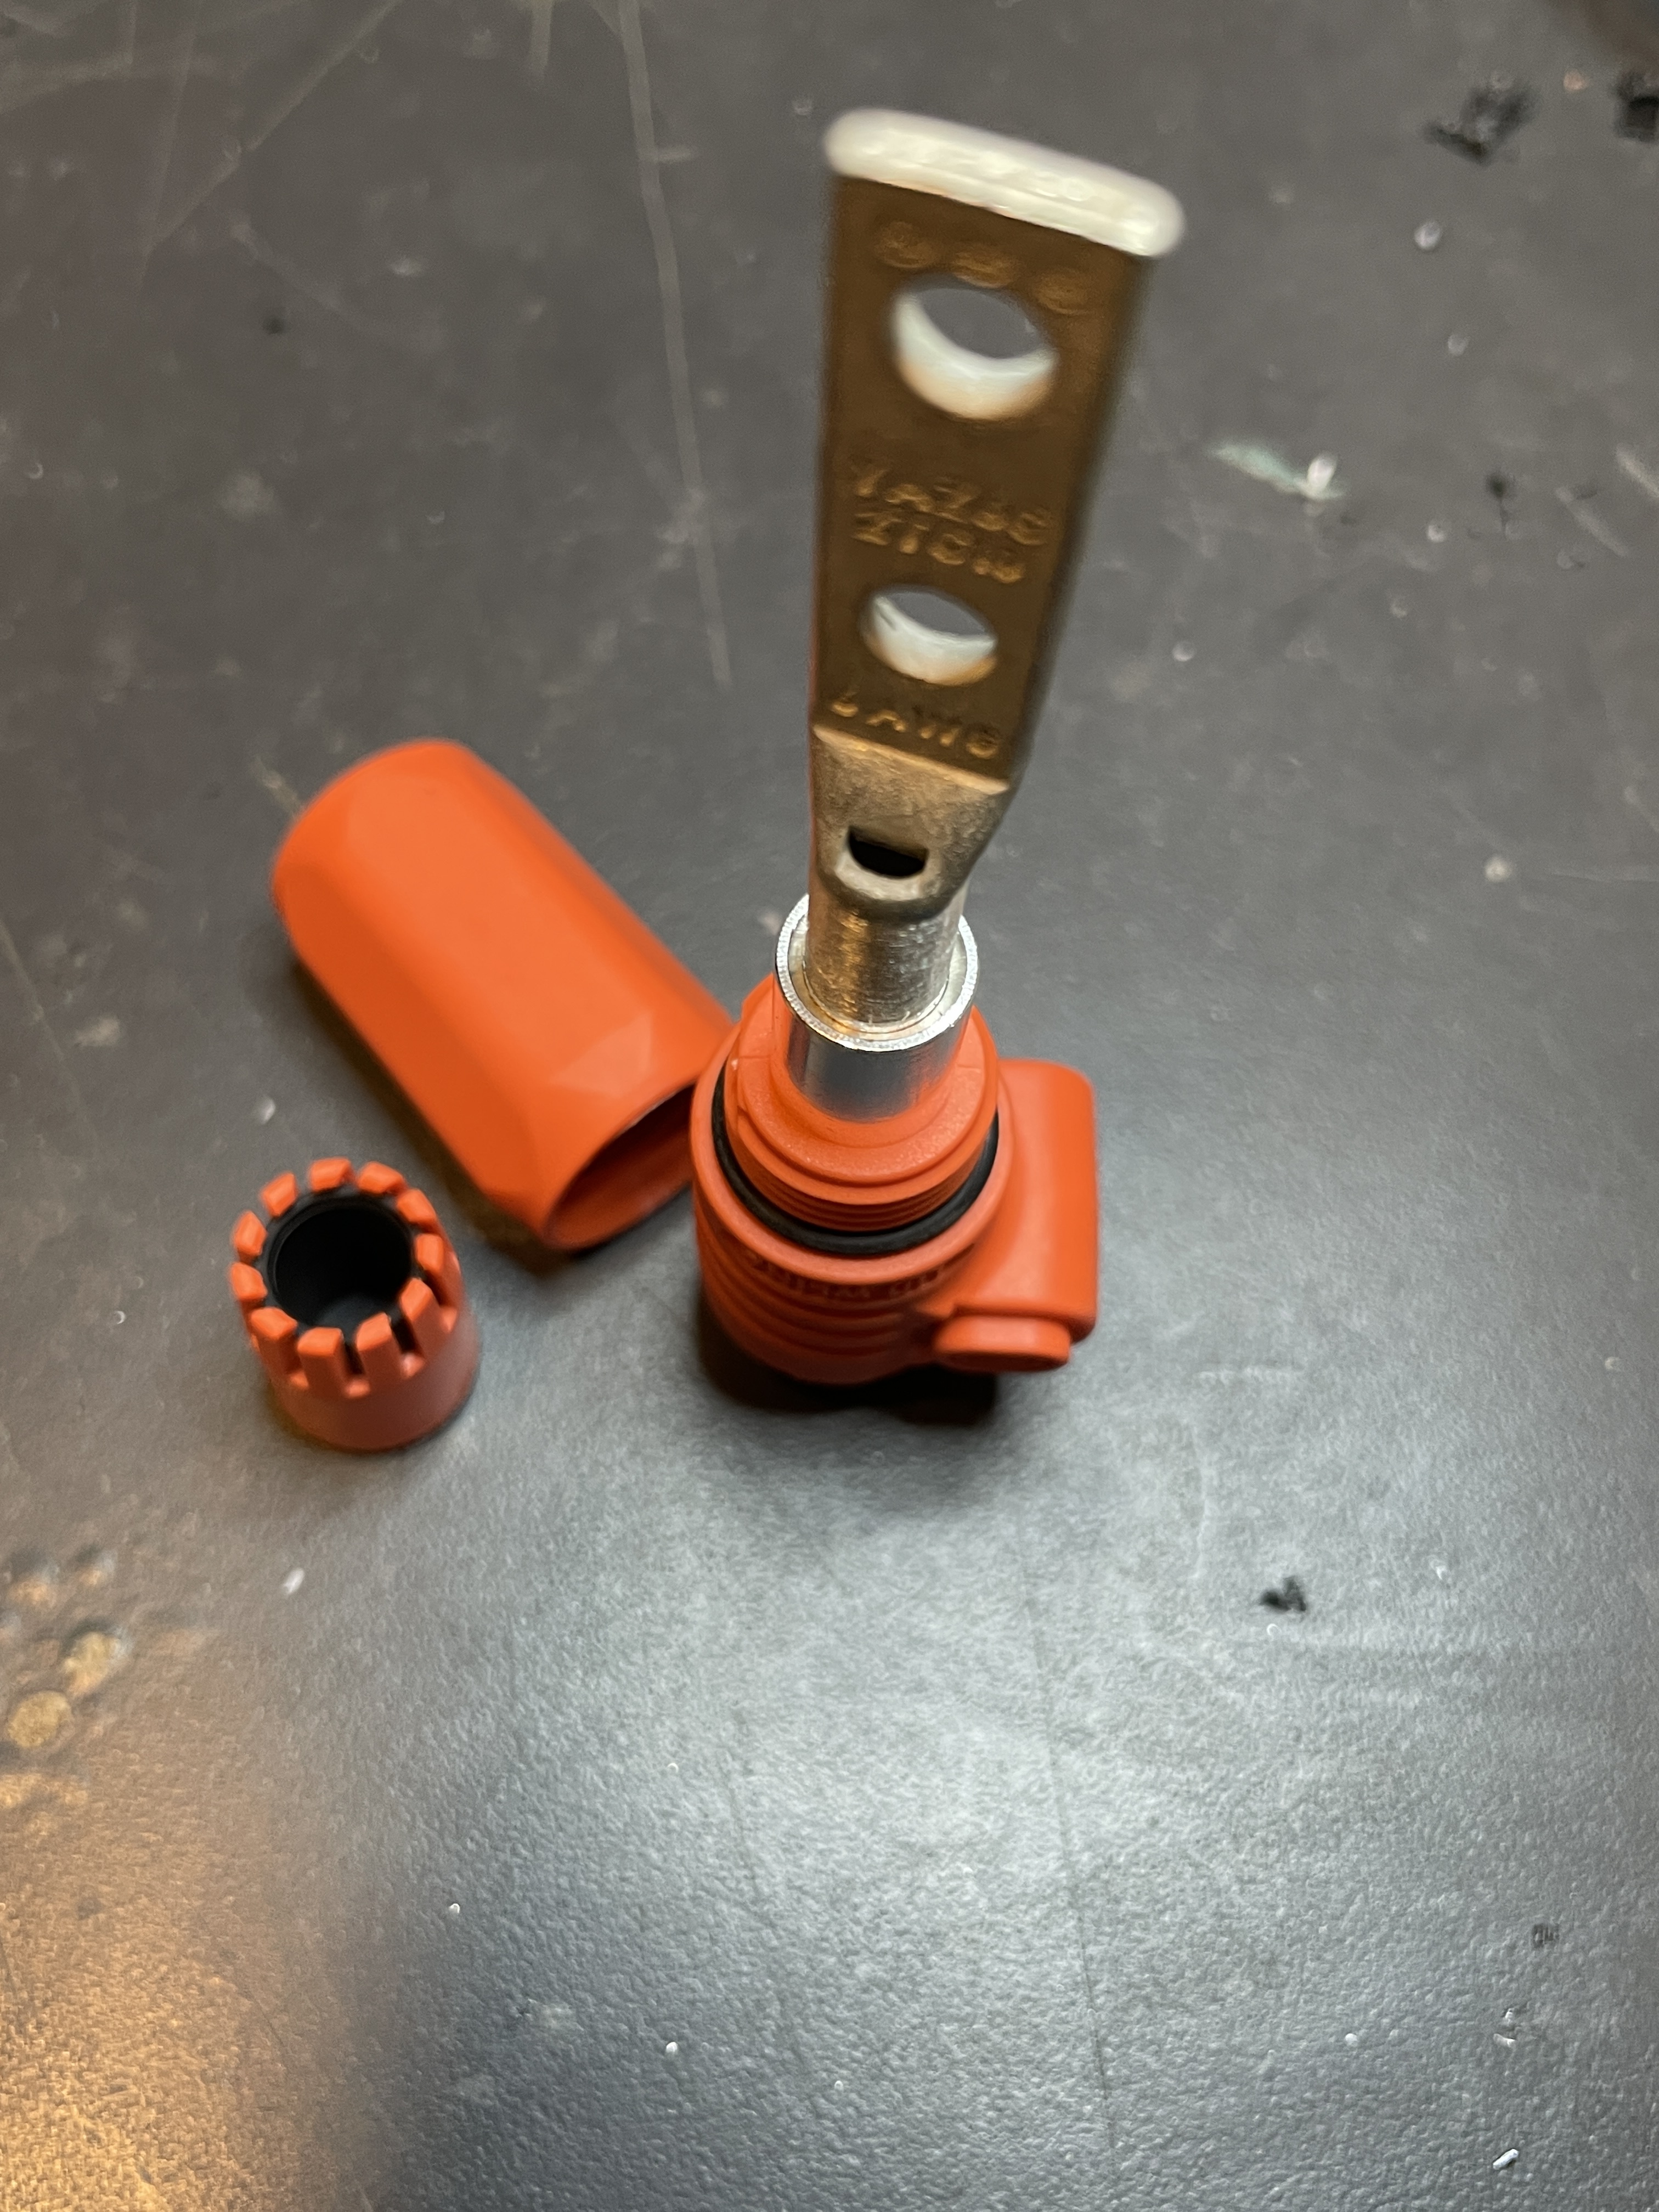
Nice build. How were you able to crimp the connectors on the 8 AWG battery cables? I just bought some connectors like those, but the inner diameter of the barrel is 8.5mm, much larger than the conductor diameter of 8 AWG.
No problems so far, installed them 2 years ago in my old board, haven‘t heavily used them though.
I also have the originals, 3rd season, used a lot and they are still in good shape. Not cheap but good quality. You get what you pay for.
You have two options, use 10AWG and fold the exposed wire so its double in there,
Second option is to solder them, i used this method with charger cables that were like 20AWG, very thin…use something like TS100 and be fast. No issues.
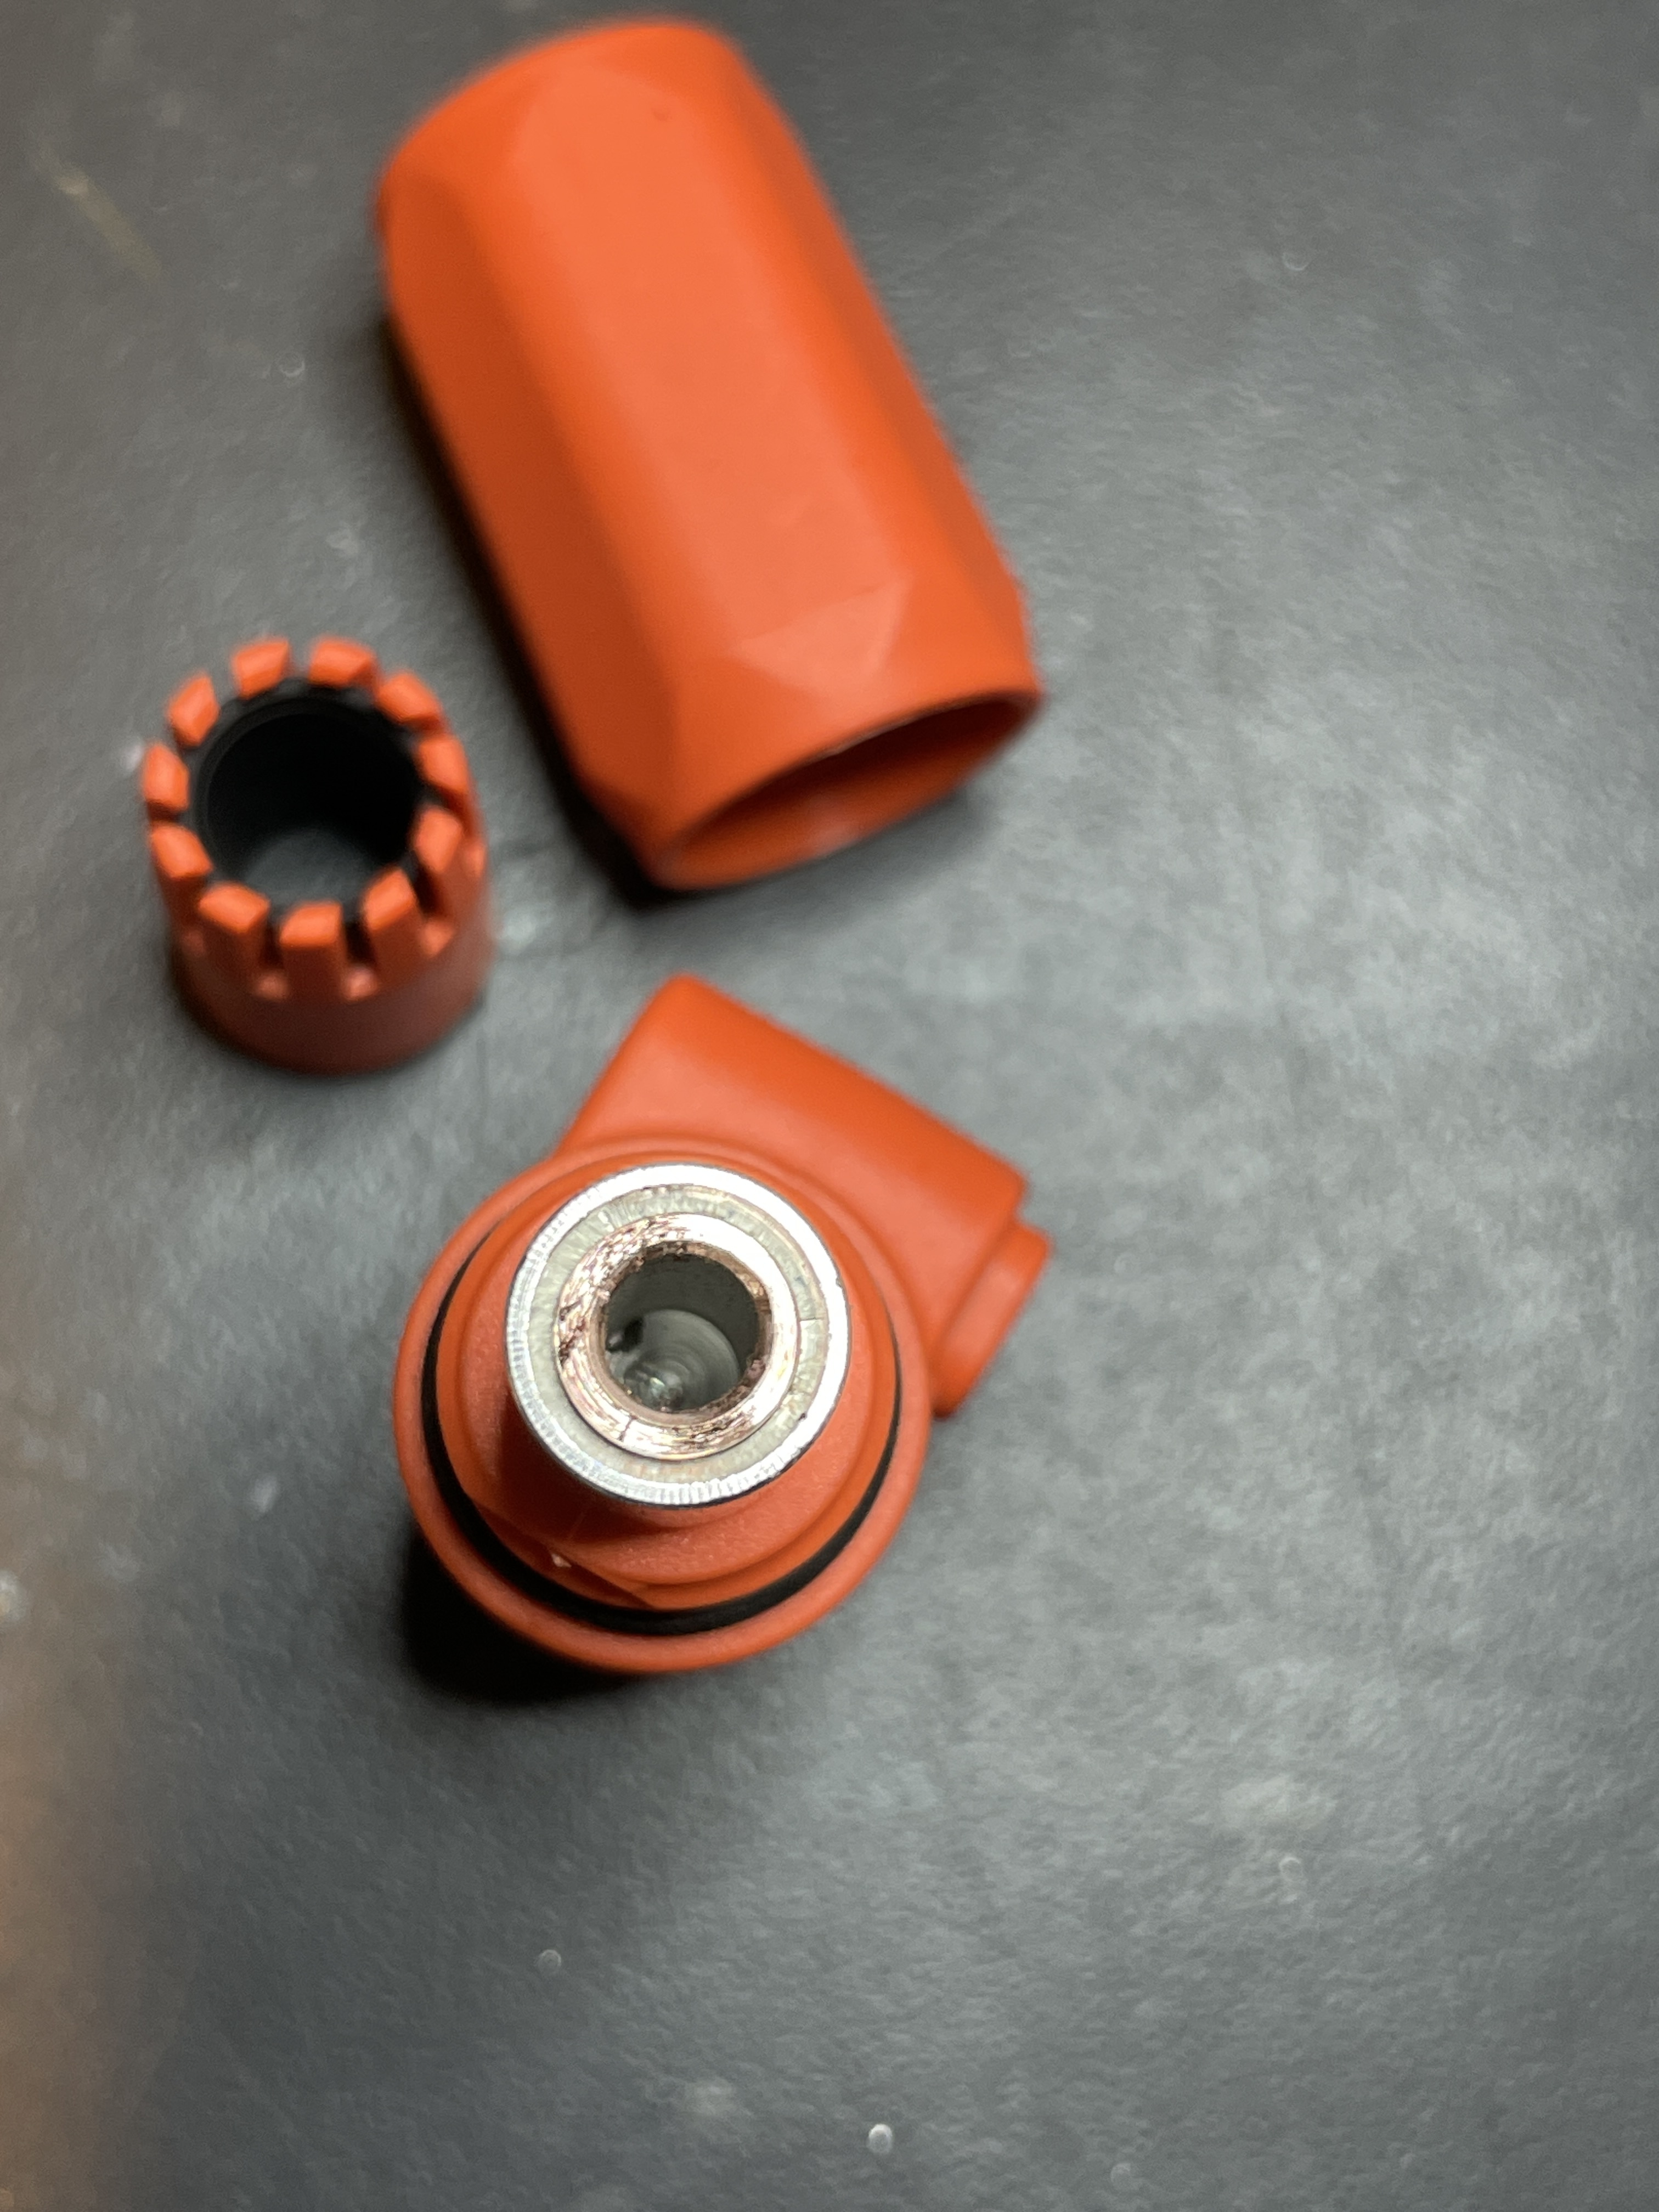
And for the seal behind it i used a very small O-ring to seal the end and in between i put silicone.
The board is 139cm long and approx 64L big, follows same principle of the last one so the build is not complicated and pretty straight forward. The only change is that there is no kill switch anymore, as soon as you put in the battery the magnet fixed in the foam will turn on the MOSFET of the BMS.
During testing last month i lost a kill switch after doing some crazy seating positions and i had to swim back to shore - lesson learned.
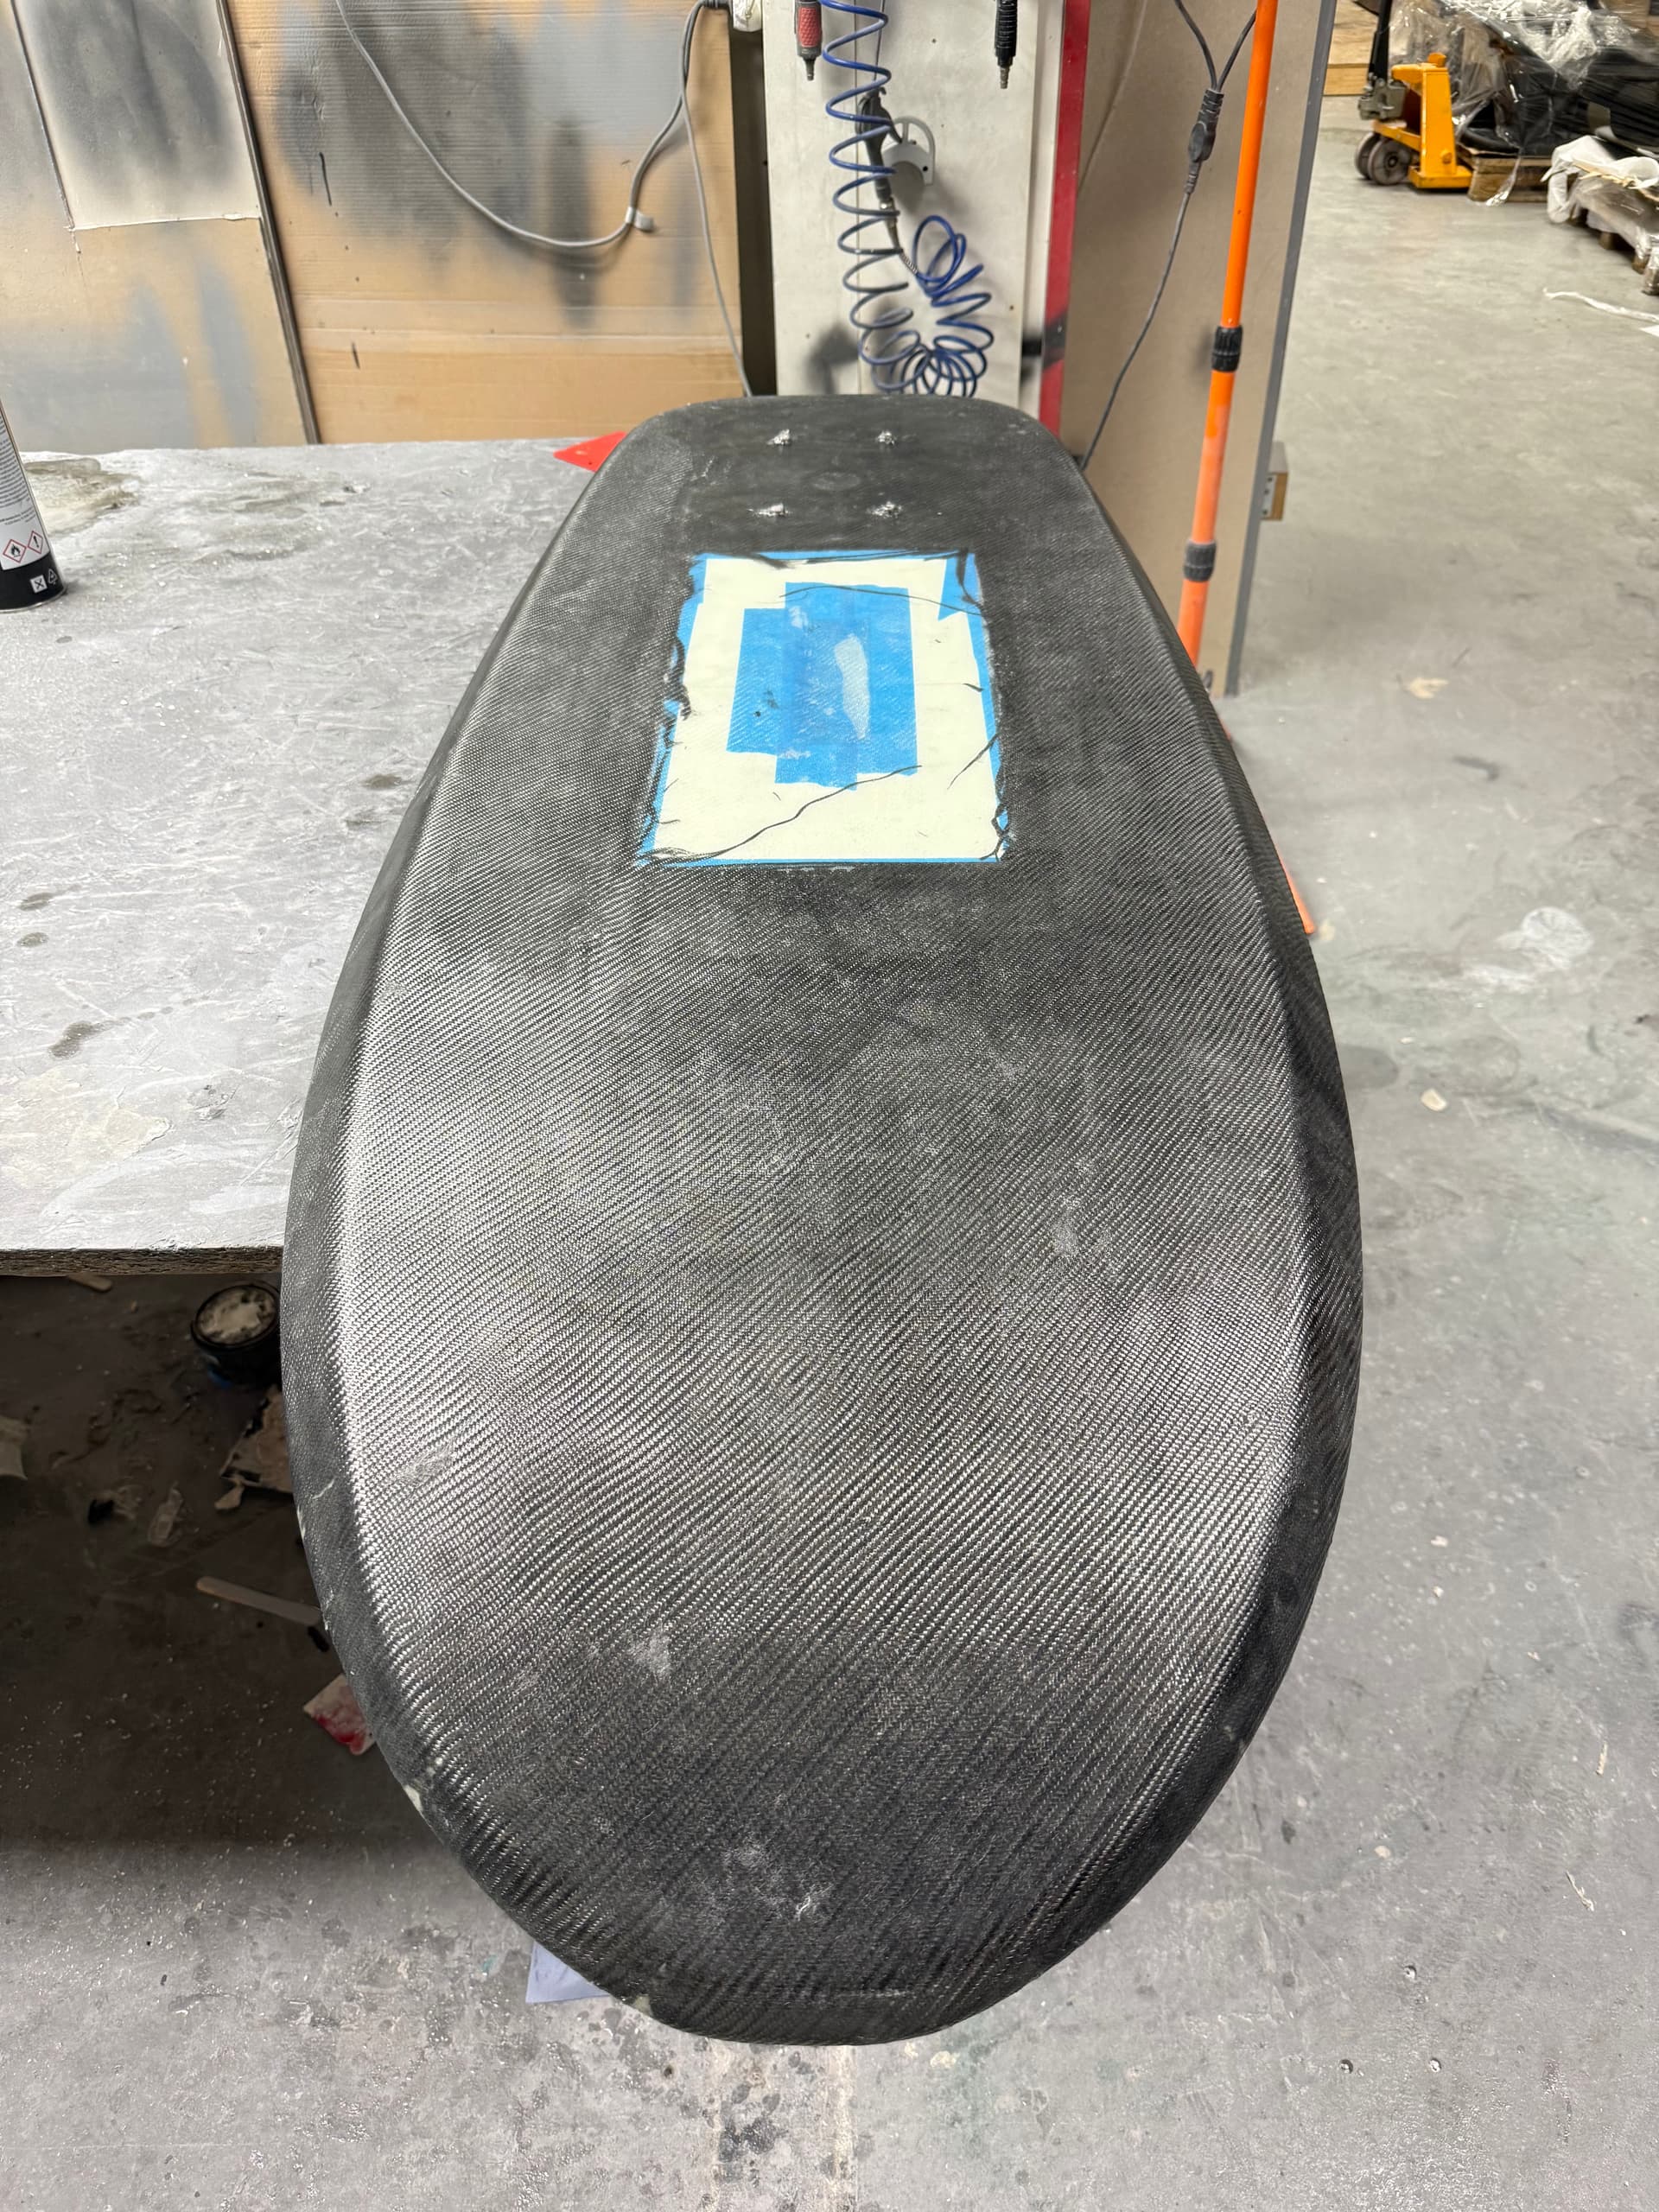
I did however change the lamination process. I avoided vacuuming and decided to add one more layer of carbon fiber 240g between the 4 layers of 280g glass fibre. So bottom thickness should be around 1,5mm while on the top 1,2mm.