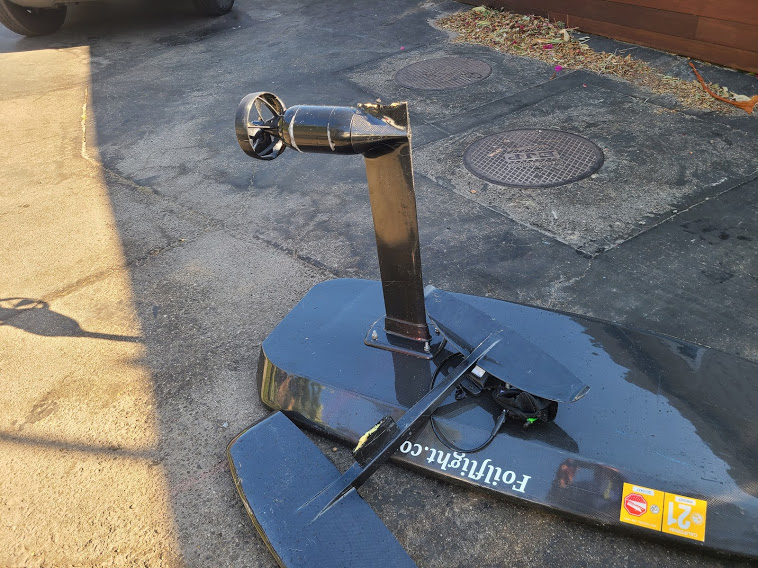
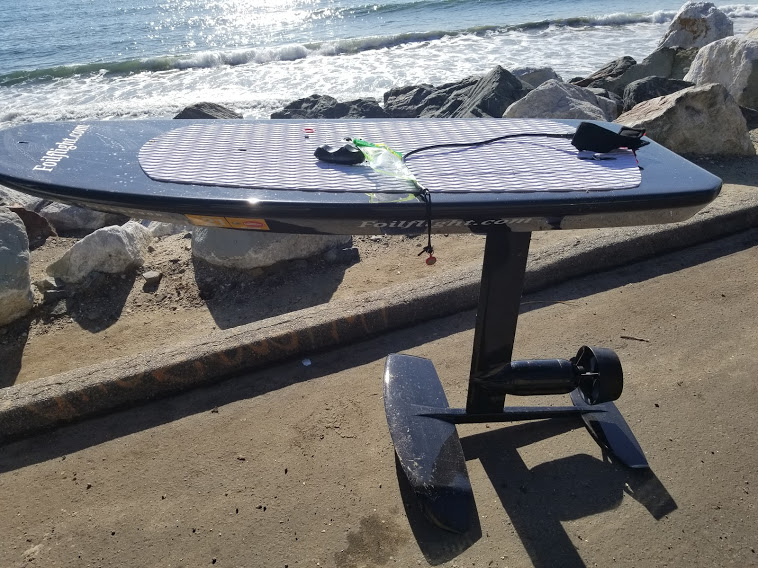
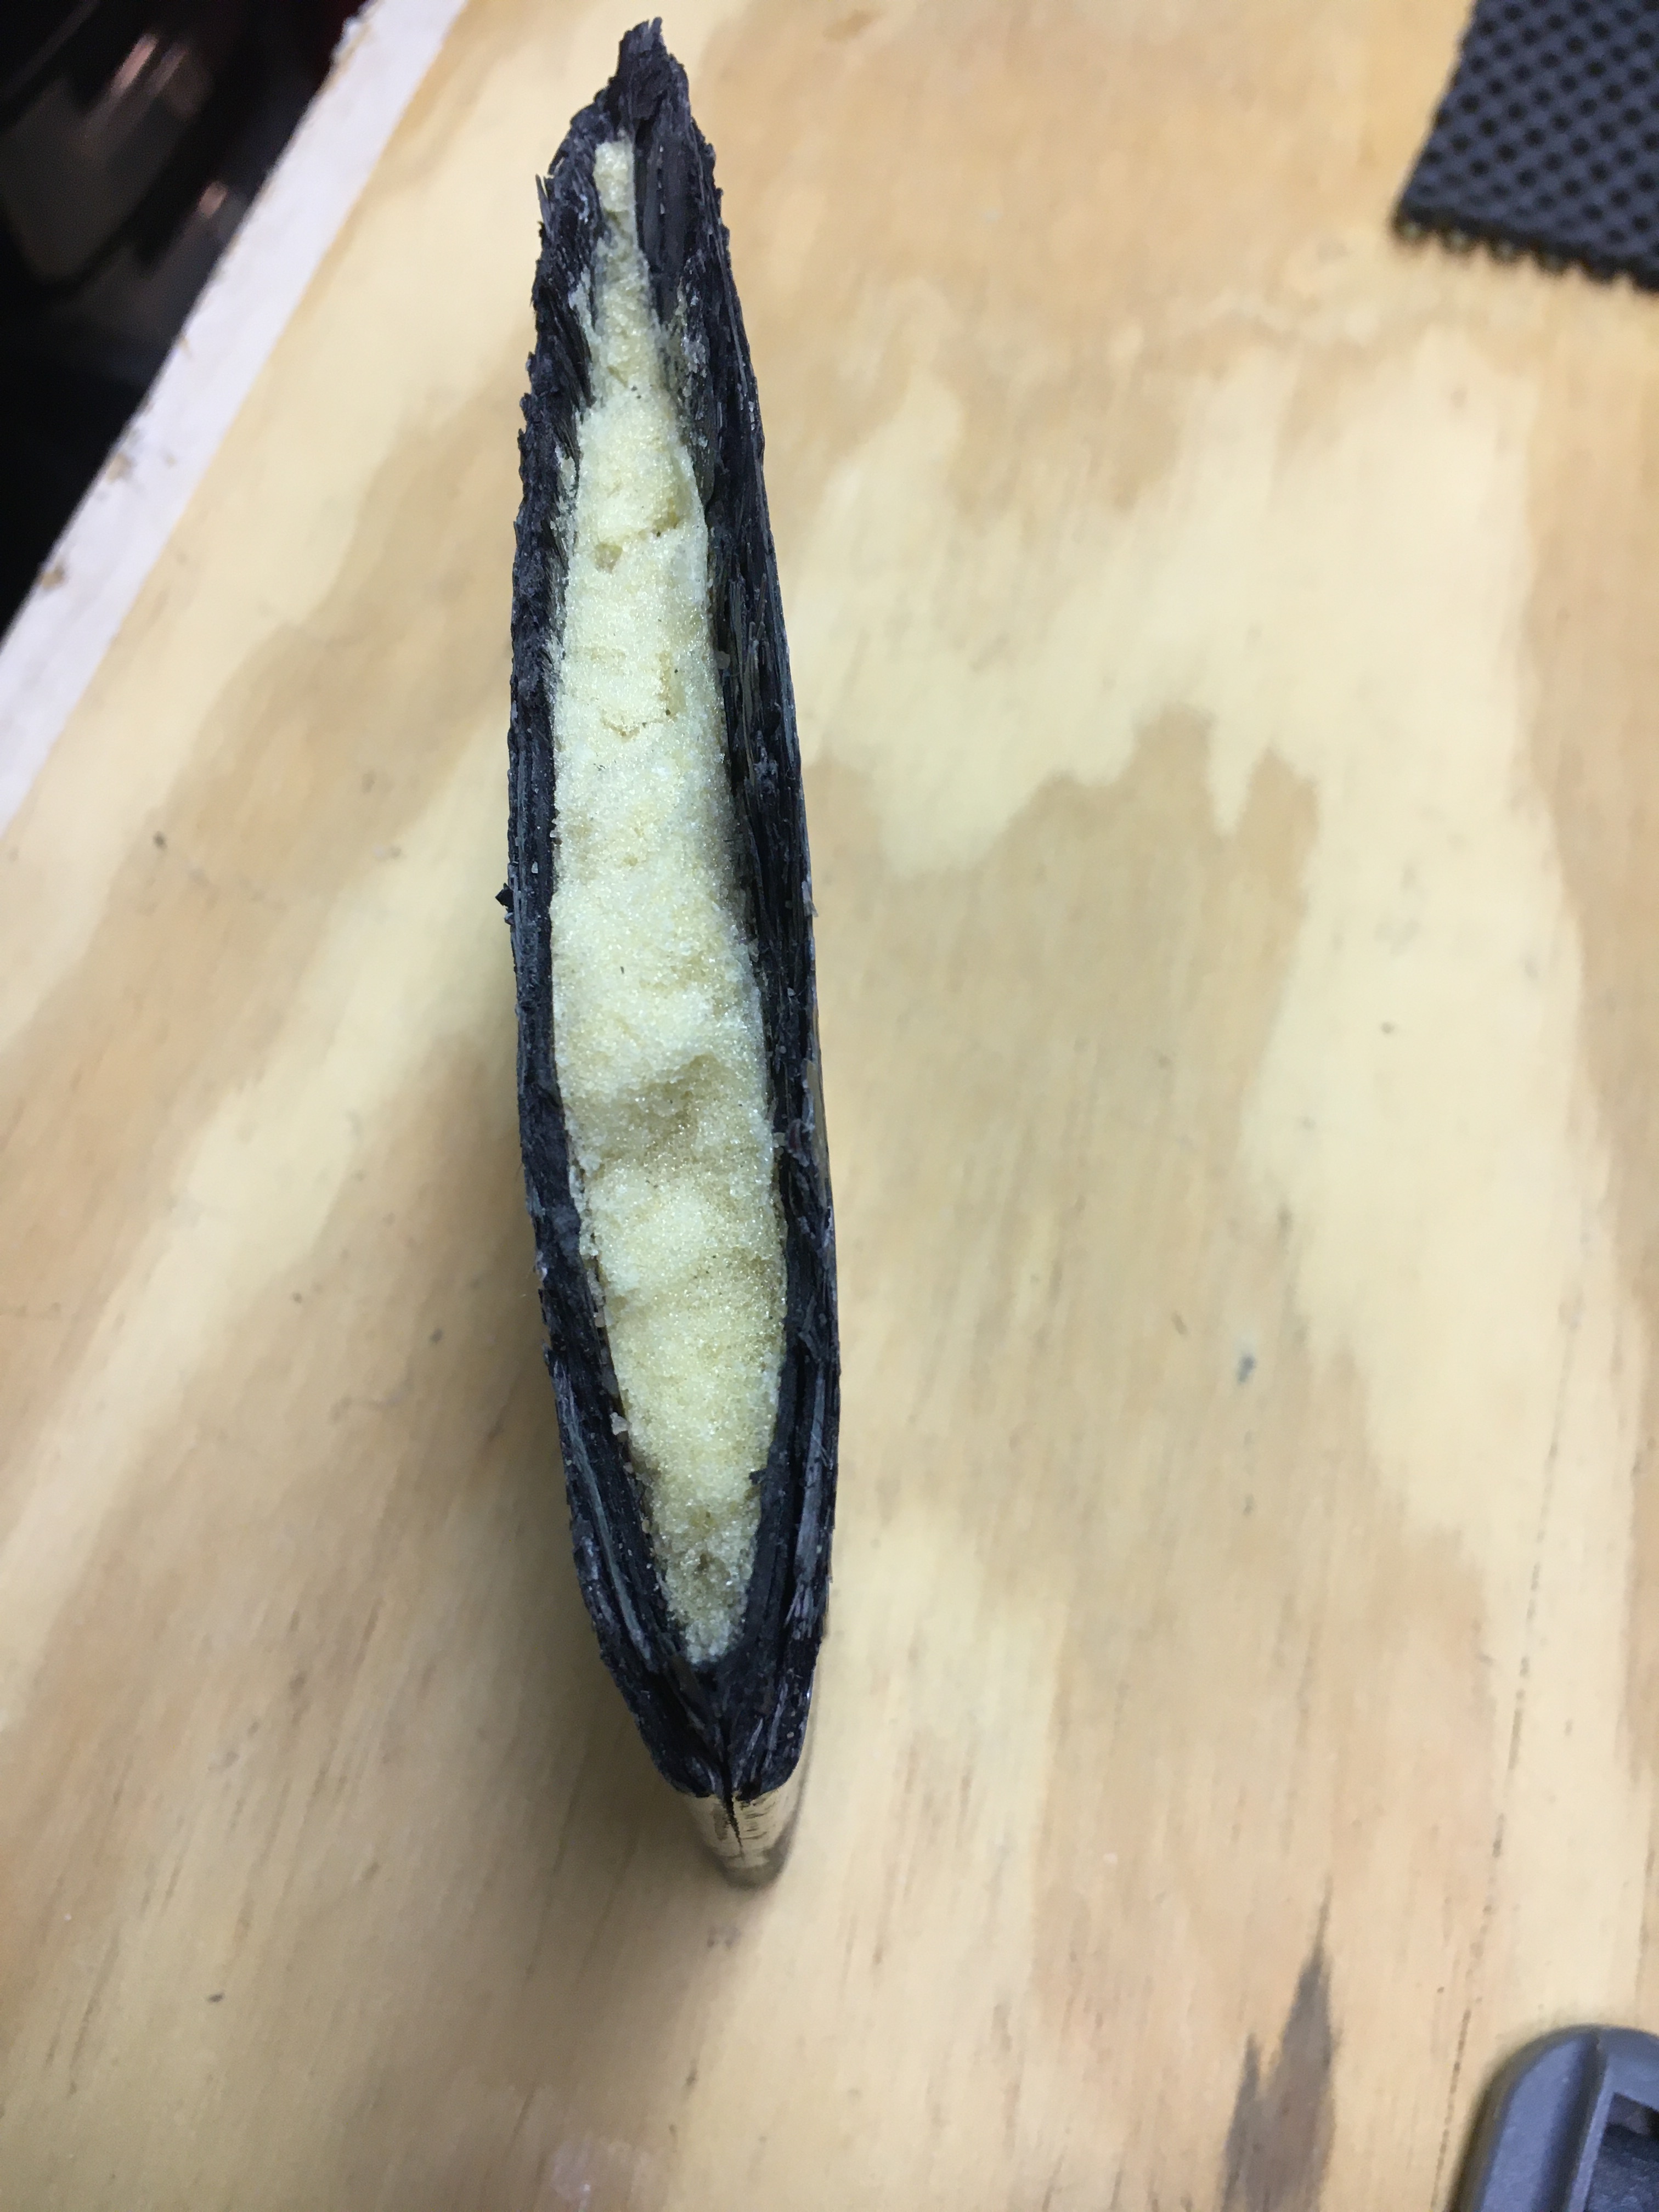
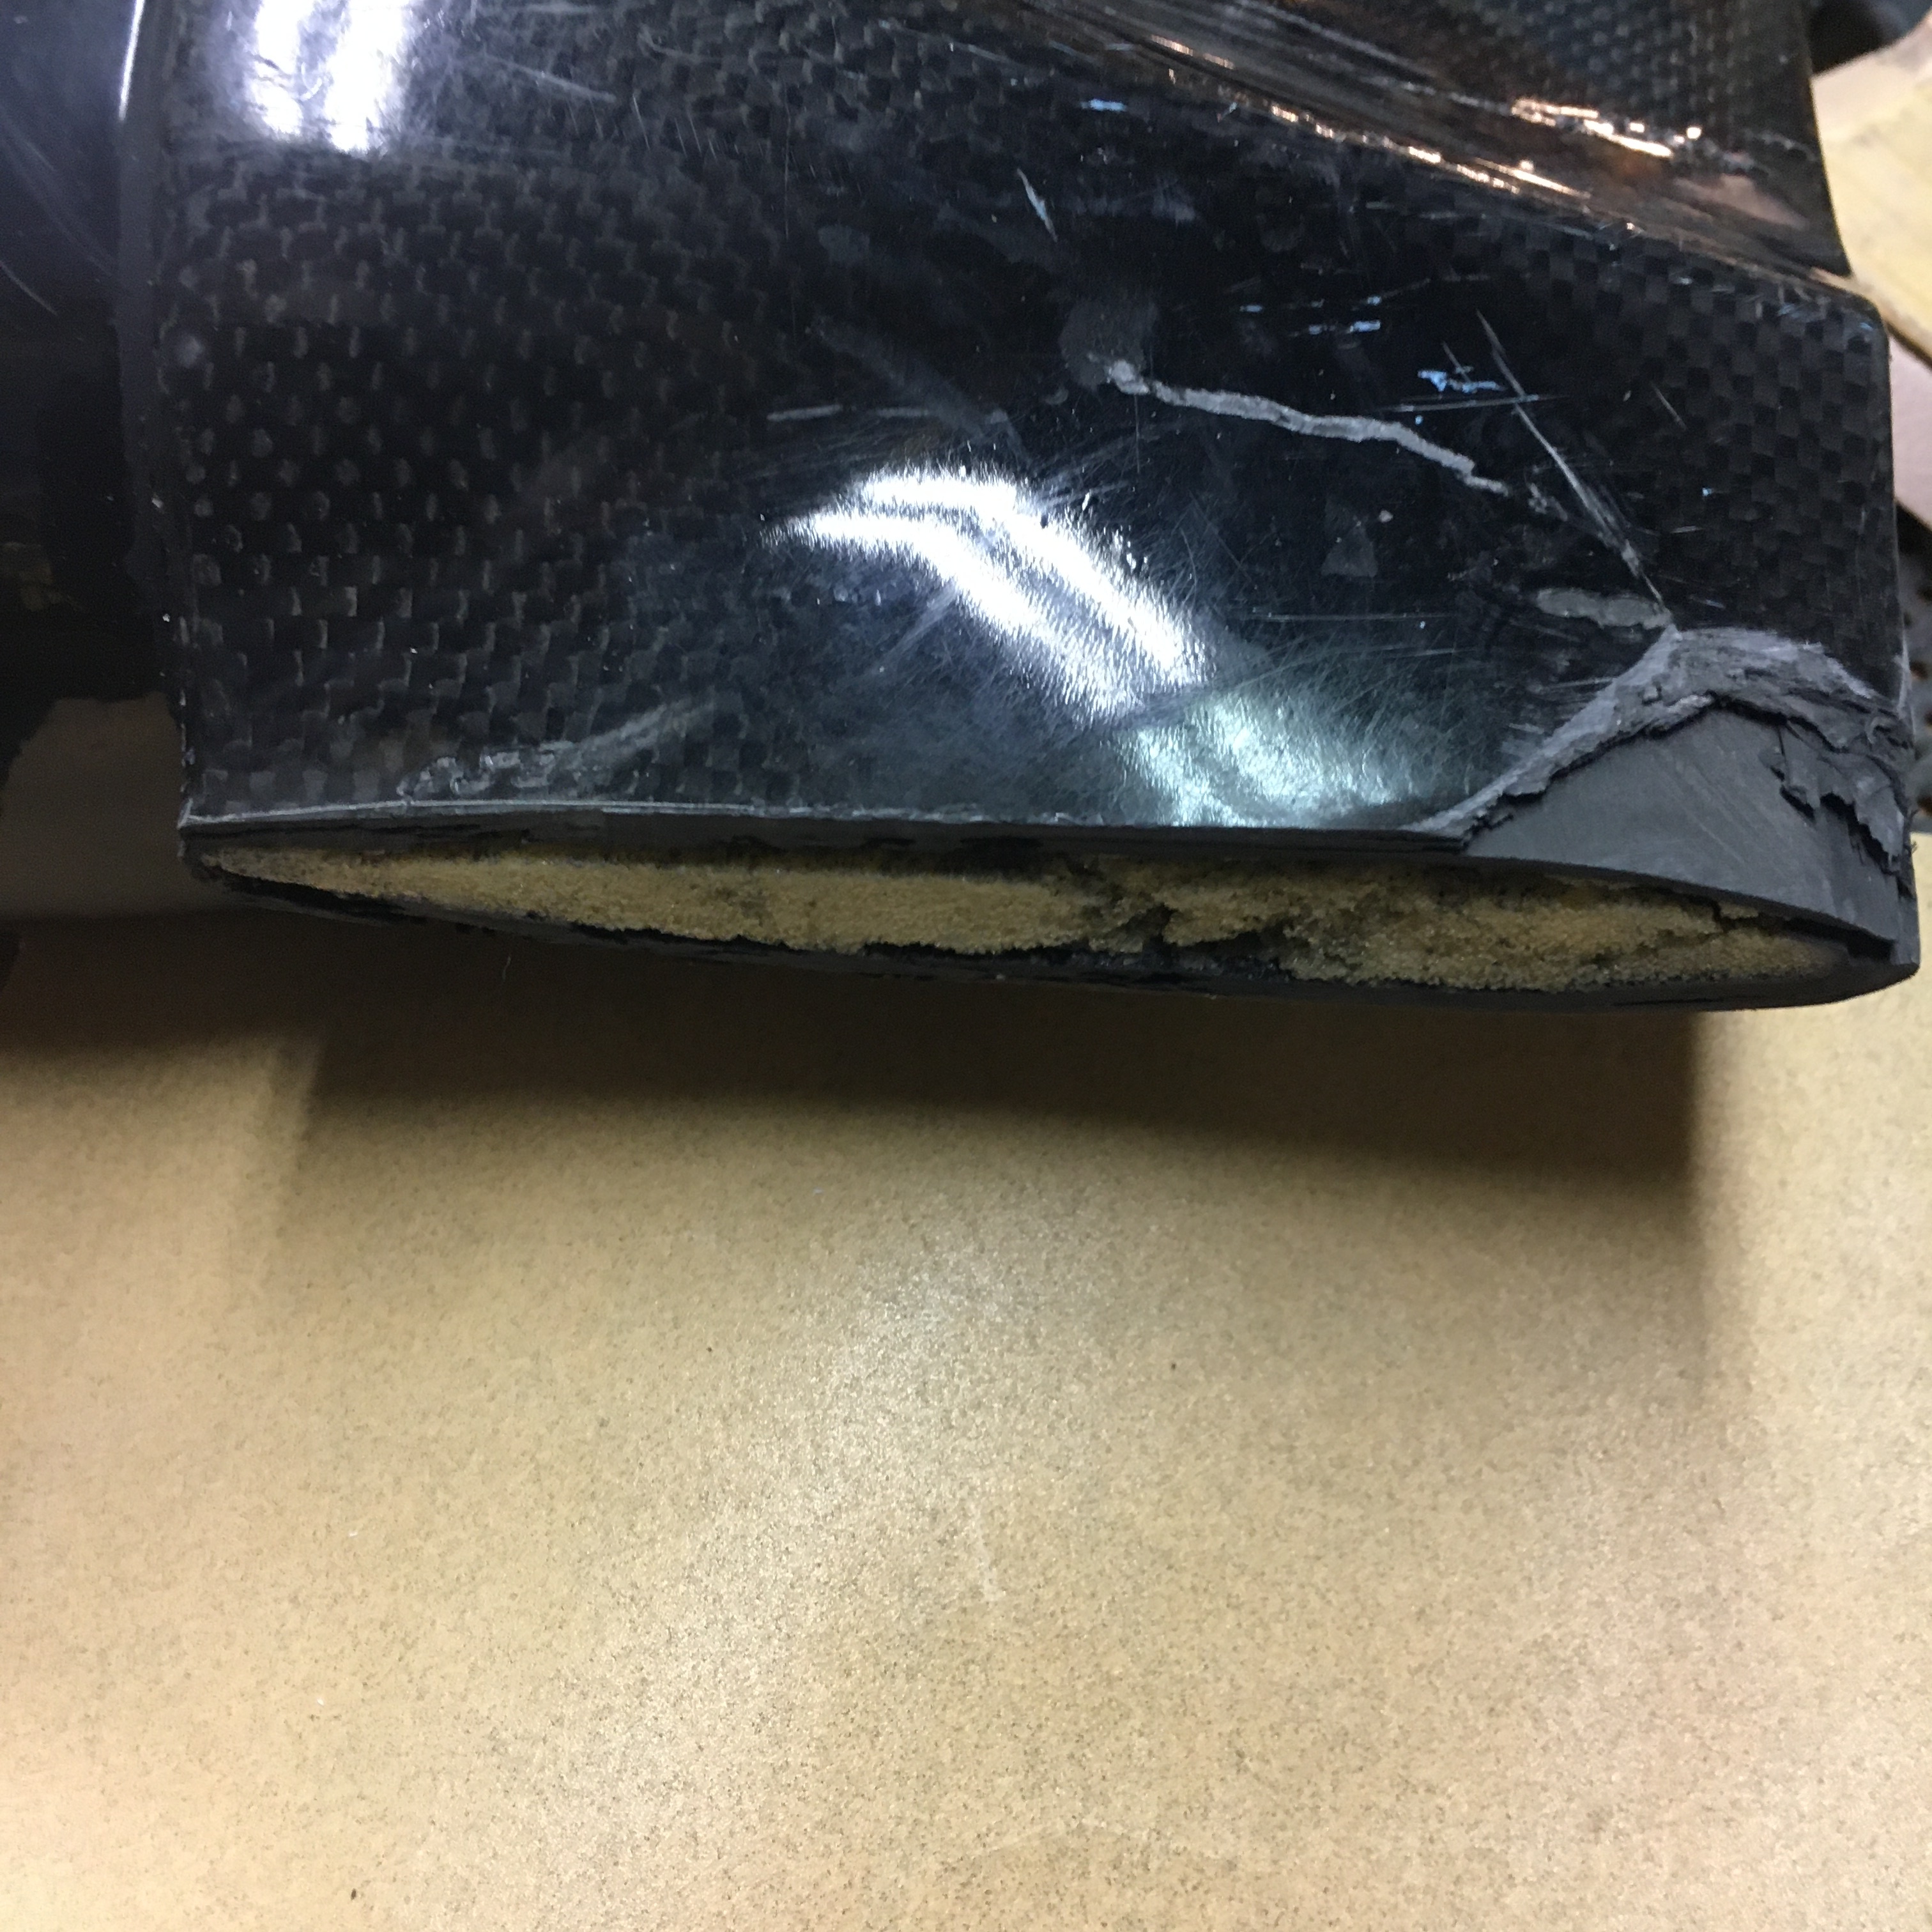
Anyone ever repair a broken efoil mast before? Mine snapped after getting caught on small shorebreak today, Motor is fine, but mast just distal is broken. We are thinking about wrapping carbon around the motor and reattach the small broken piece, then bolt it together. Any thoughts??
Would love input from any other builders.
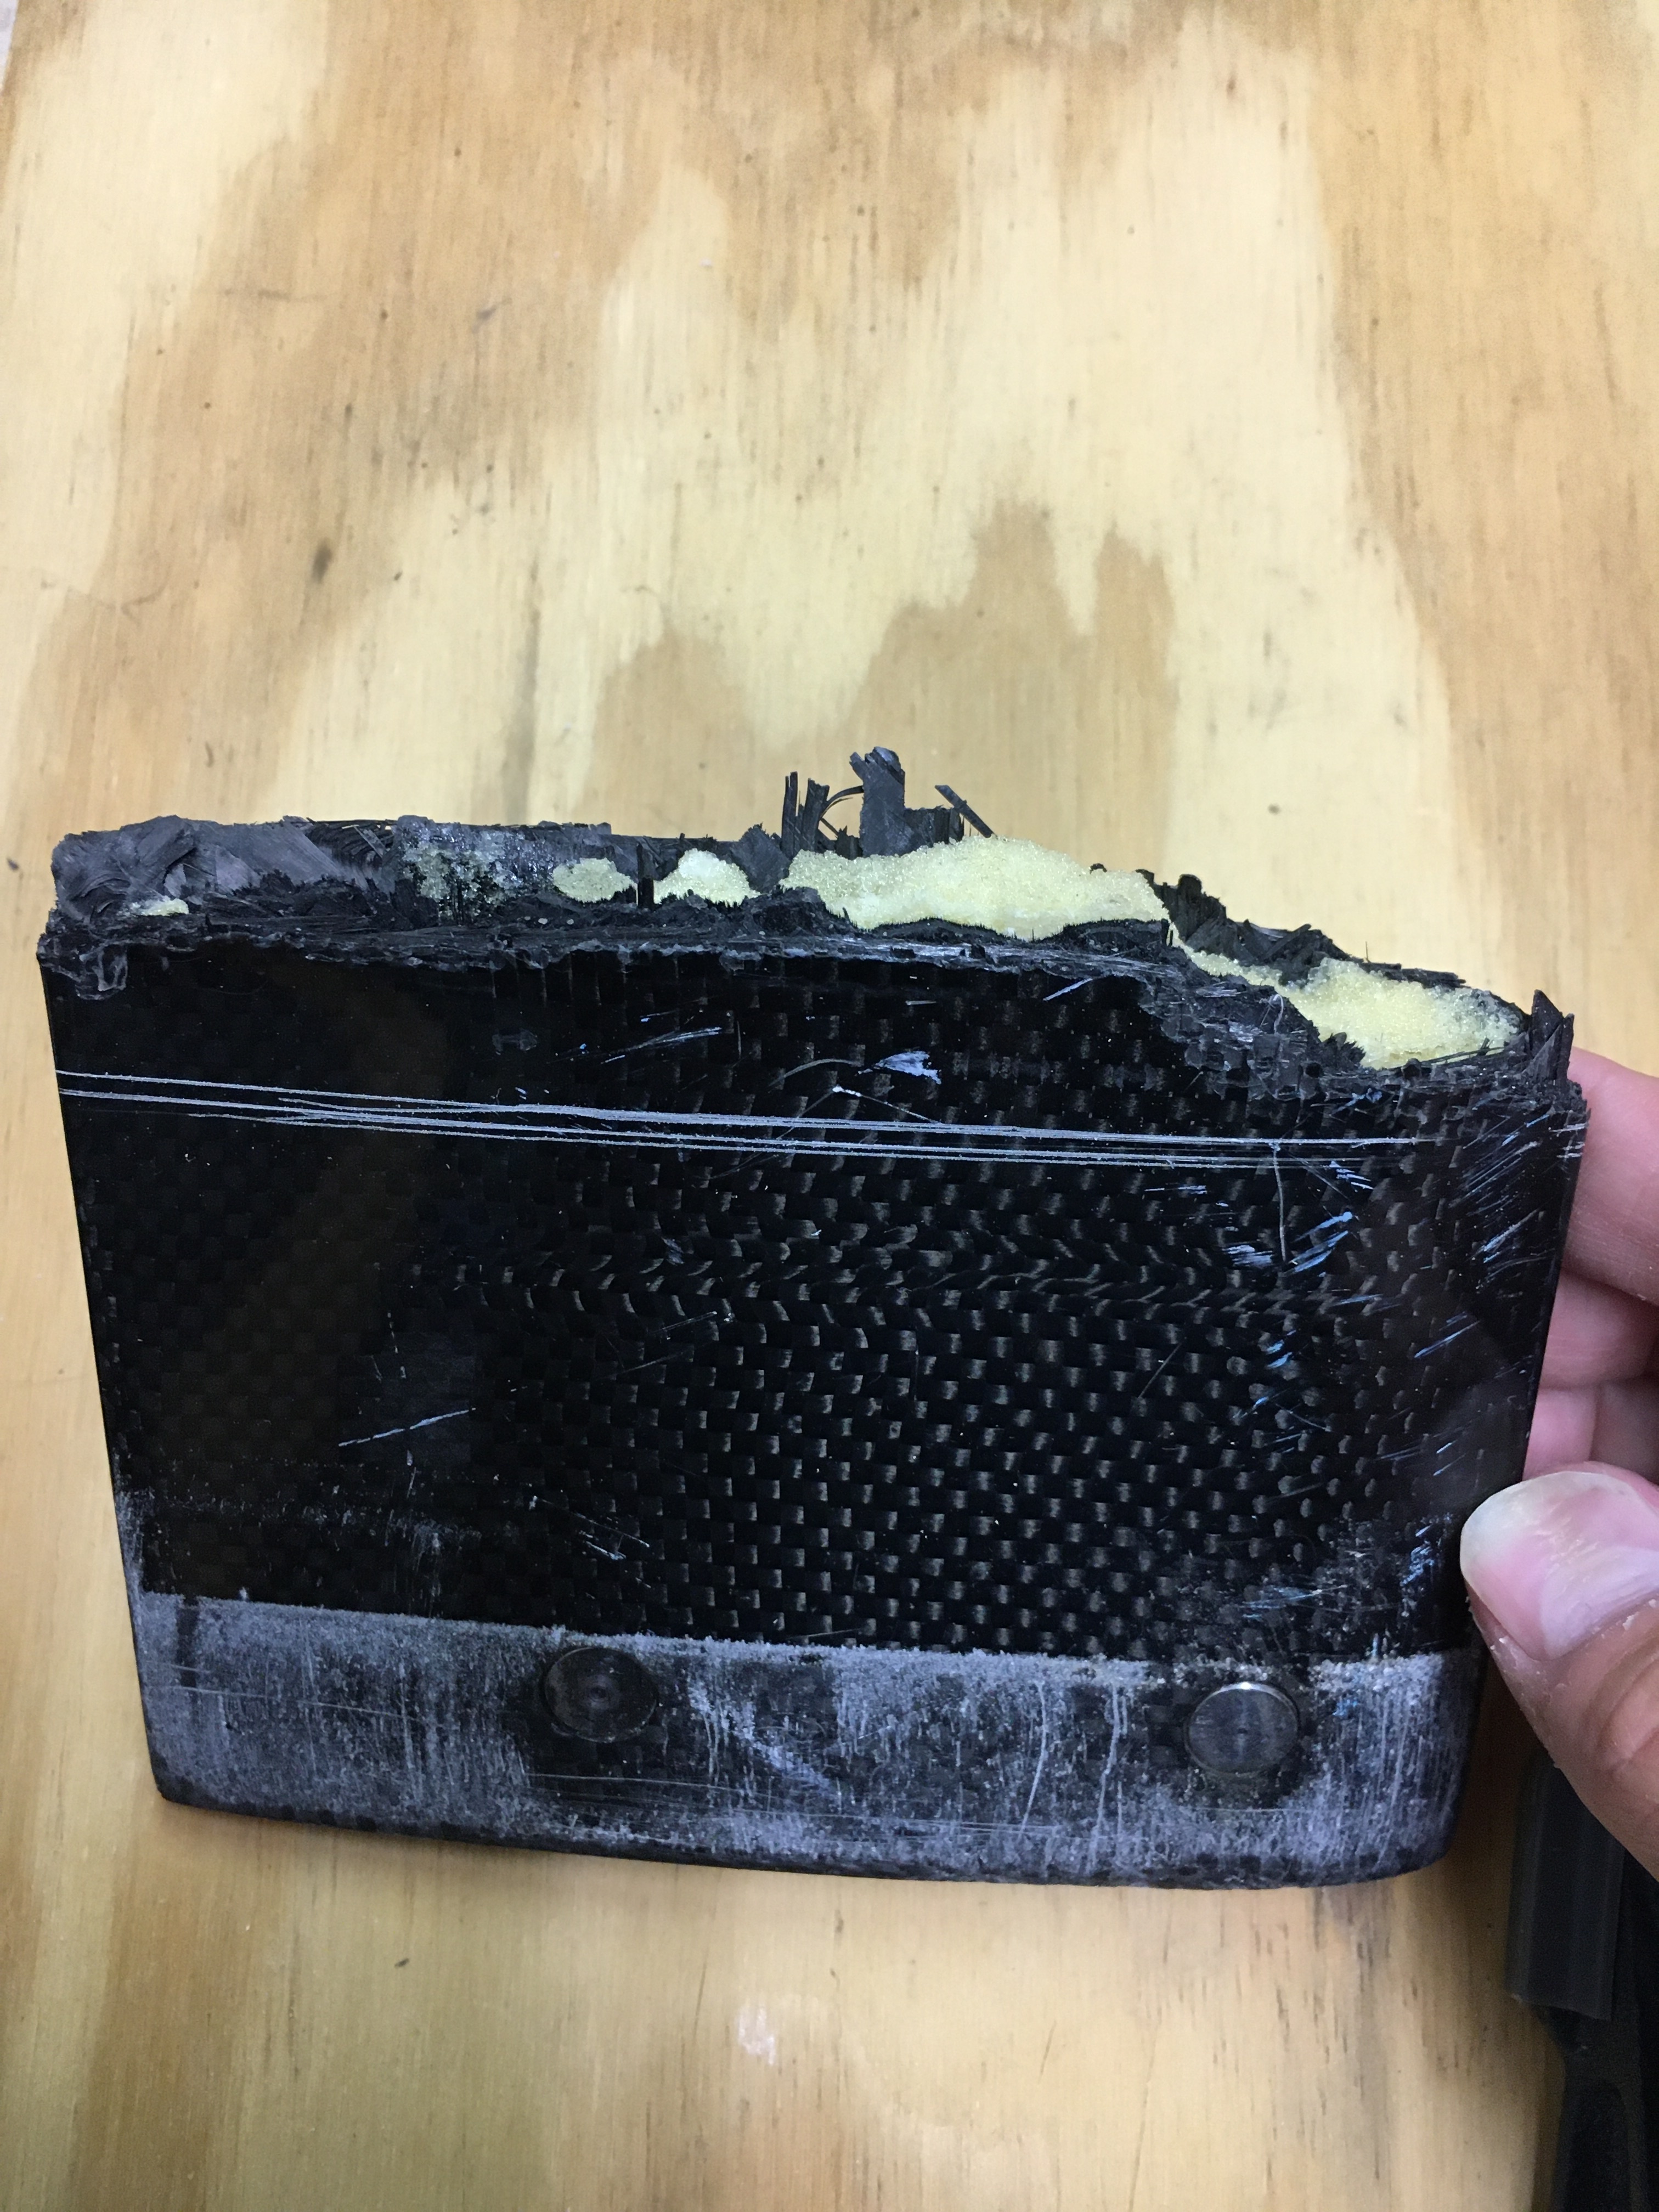
It actually looks like it might not be prepreg which could explain the break. When I built my weird homemade foil I layered up carbon in multiple orientations to get torsional stiffness.
Anyone see a reason we shouldn’t just fare it down for say 2” (5cm) and then bag it (or Saran Wrap it?) I’ll use the original thickness as a guide to how many layers. And yeah, this is gonna need pics and videos.
That won’t be so hard to fix. Cut away all damaged material, likely 2cm on each side. be careful with aligning the pieces and just wrap it with some fresh carbon layers
Sand it to perfection, spray it with 2k clear coat. Done.
Thx larsb, I’ve got it marked to cut and then I’m going to fare (fair?) it back about a half inch to an inch and then build it back to a bit over original thickness. It looks to be about 20 layers of carbon so I’ll see how bagging goes, I’ve never done that many layers at once. Might need two rounds.
Interesting, the HiSun isn’t prepreg. It’s just laid up fabric (bag or infusion) so it looks fixable. Also reassuring for all the home builders. You can do a good job on this stuff.
Considering making a carbon bar to put inside to reinforce it. Thoughts on that?
My main worry is that this part of the mast carries so much of the weight, (65 lb. board and battery) and feels the torque when the board is placed upright on the wing.
More carbon!
Cut the edges clean, but at an angle. Drill some 1/4” holes in both pieces and insert some metal stainless steel rods in both sides, so there is support along the break. Use some quality epoxy and wrap strips of carbon fiber around the break, alternating the bias between strips for strength. As long as you get a good wrap, you shouldn’t need to bag it.
Bagging and infusion would be ideal, so you get epoxy everywhere, but adds a lot of complications.
Make sure the strips are well saturated with epoxy. You can literally dip the strips in a bath of epoxy before wrapping around the break, to make sure you have a good saturation of the cloth.
Add some milled carbon fiber, flox, or milled fiberglass to a small portion of the epoxy, making a thickened paste, and apply that to both sides of the inside of the mast. Ideally the stainless rods are covered in this paste as well, creating an internal bond.
Don’t see how you can distinguish prepreg from cloth+epoxy?
And why would prepreg be harder to fix? I’ve never had issues with it.
thx noahark.
Larsb I’m assuming not pre-preg because it’s loosely bonded. The layers are not very well joined and it flakes apart like a croissant. I could be wrong. But if you’ve seen a high quality foil wing that’s molded with pre-preg you know what I mean. I wouldn’t try to duplicate that in the garage. Anyway.
Cleaned up the ends and am starting to think of a clamping jig to hold it together. I like the idea of 1/2" steel supports. But even sure if we need to screw them in. Might be able to just Marr them up and epoxy them in.
By the way, this filler foam has to be 8 lb. It’s so dense it’s crazy. So I can use that to stabilize any supports I use.
Noa I’ll likely keep the epoxy mix lean for strength. Can I ask where you are getting the epoxy bath idea from? Typically you want a 50/50 mix of cloth to resin but I’m always curious.
I guess I should say that I have a lot of composite experience for a home builder. I’ve made 5-6 boards and even my own homemade foil mast, fuse, and wing. But I’m not that familiar with efoils so thanks for the assistance and advice. Keep it coming.
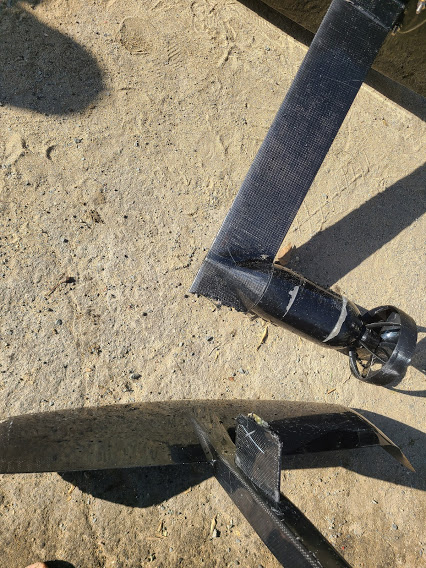
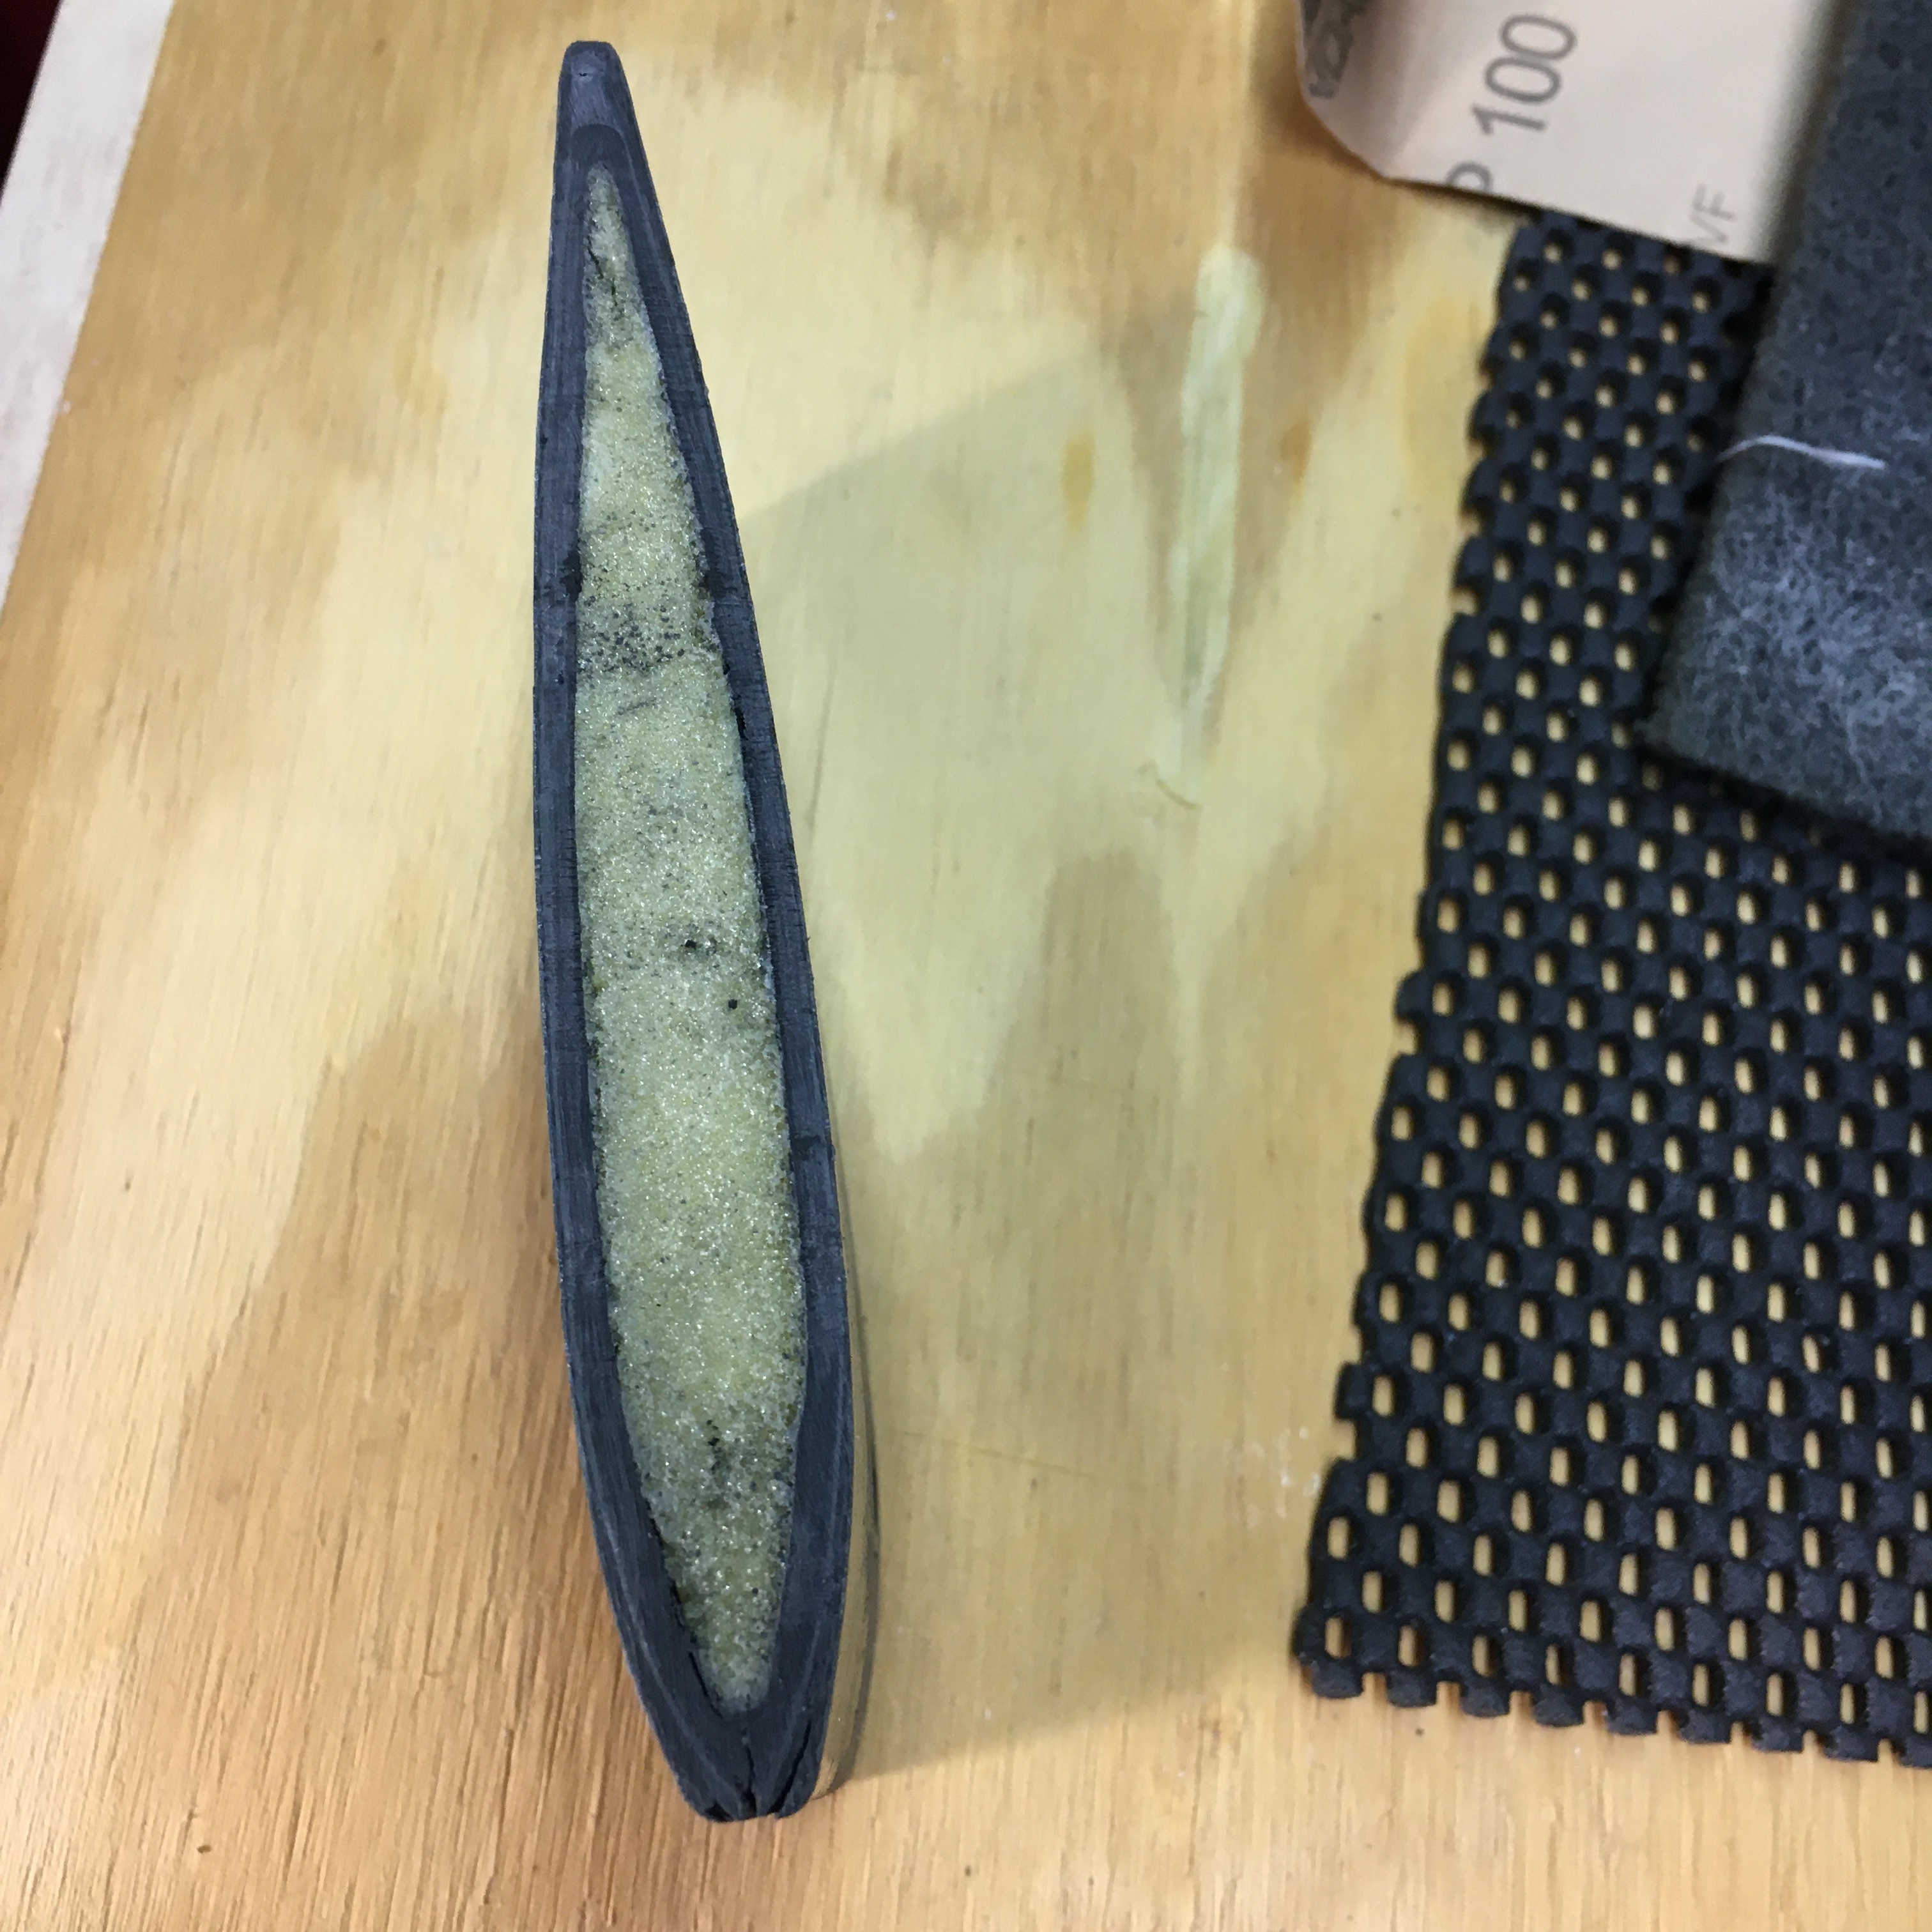
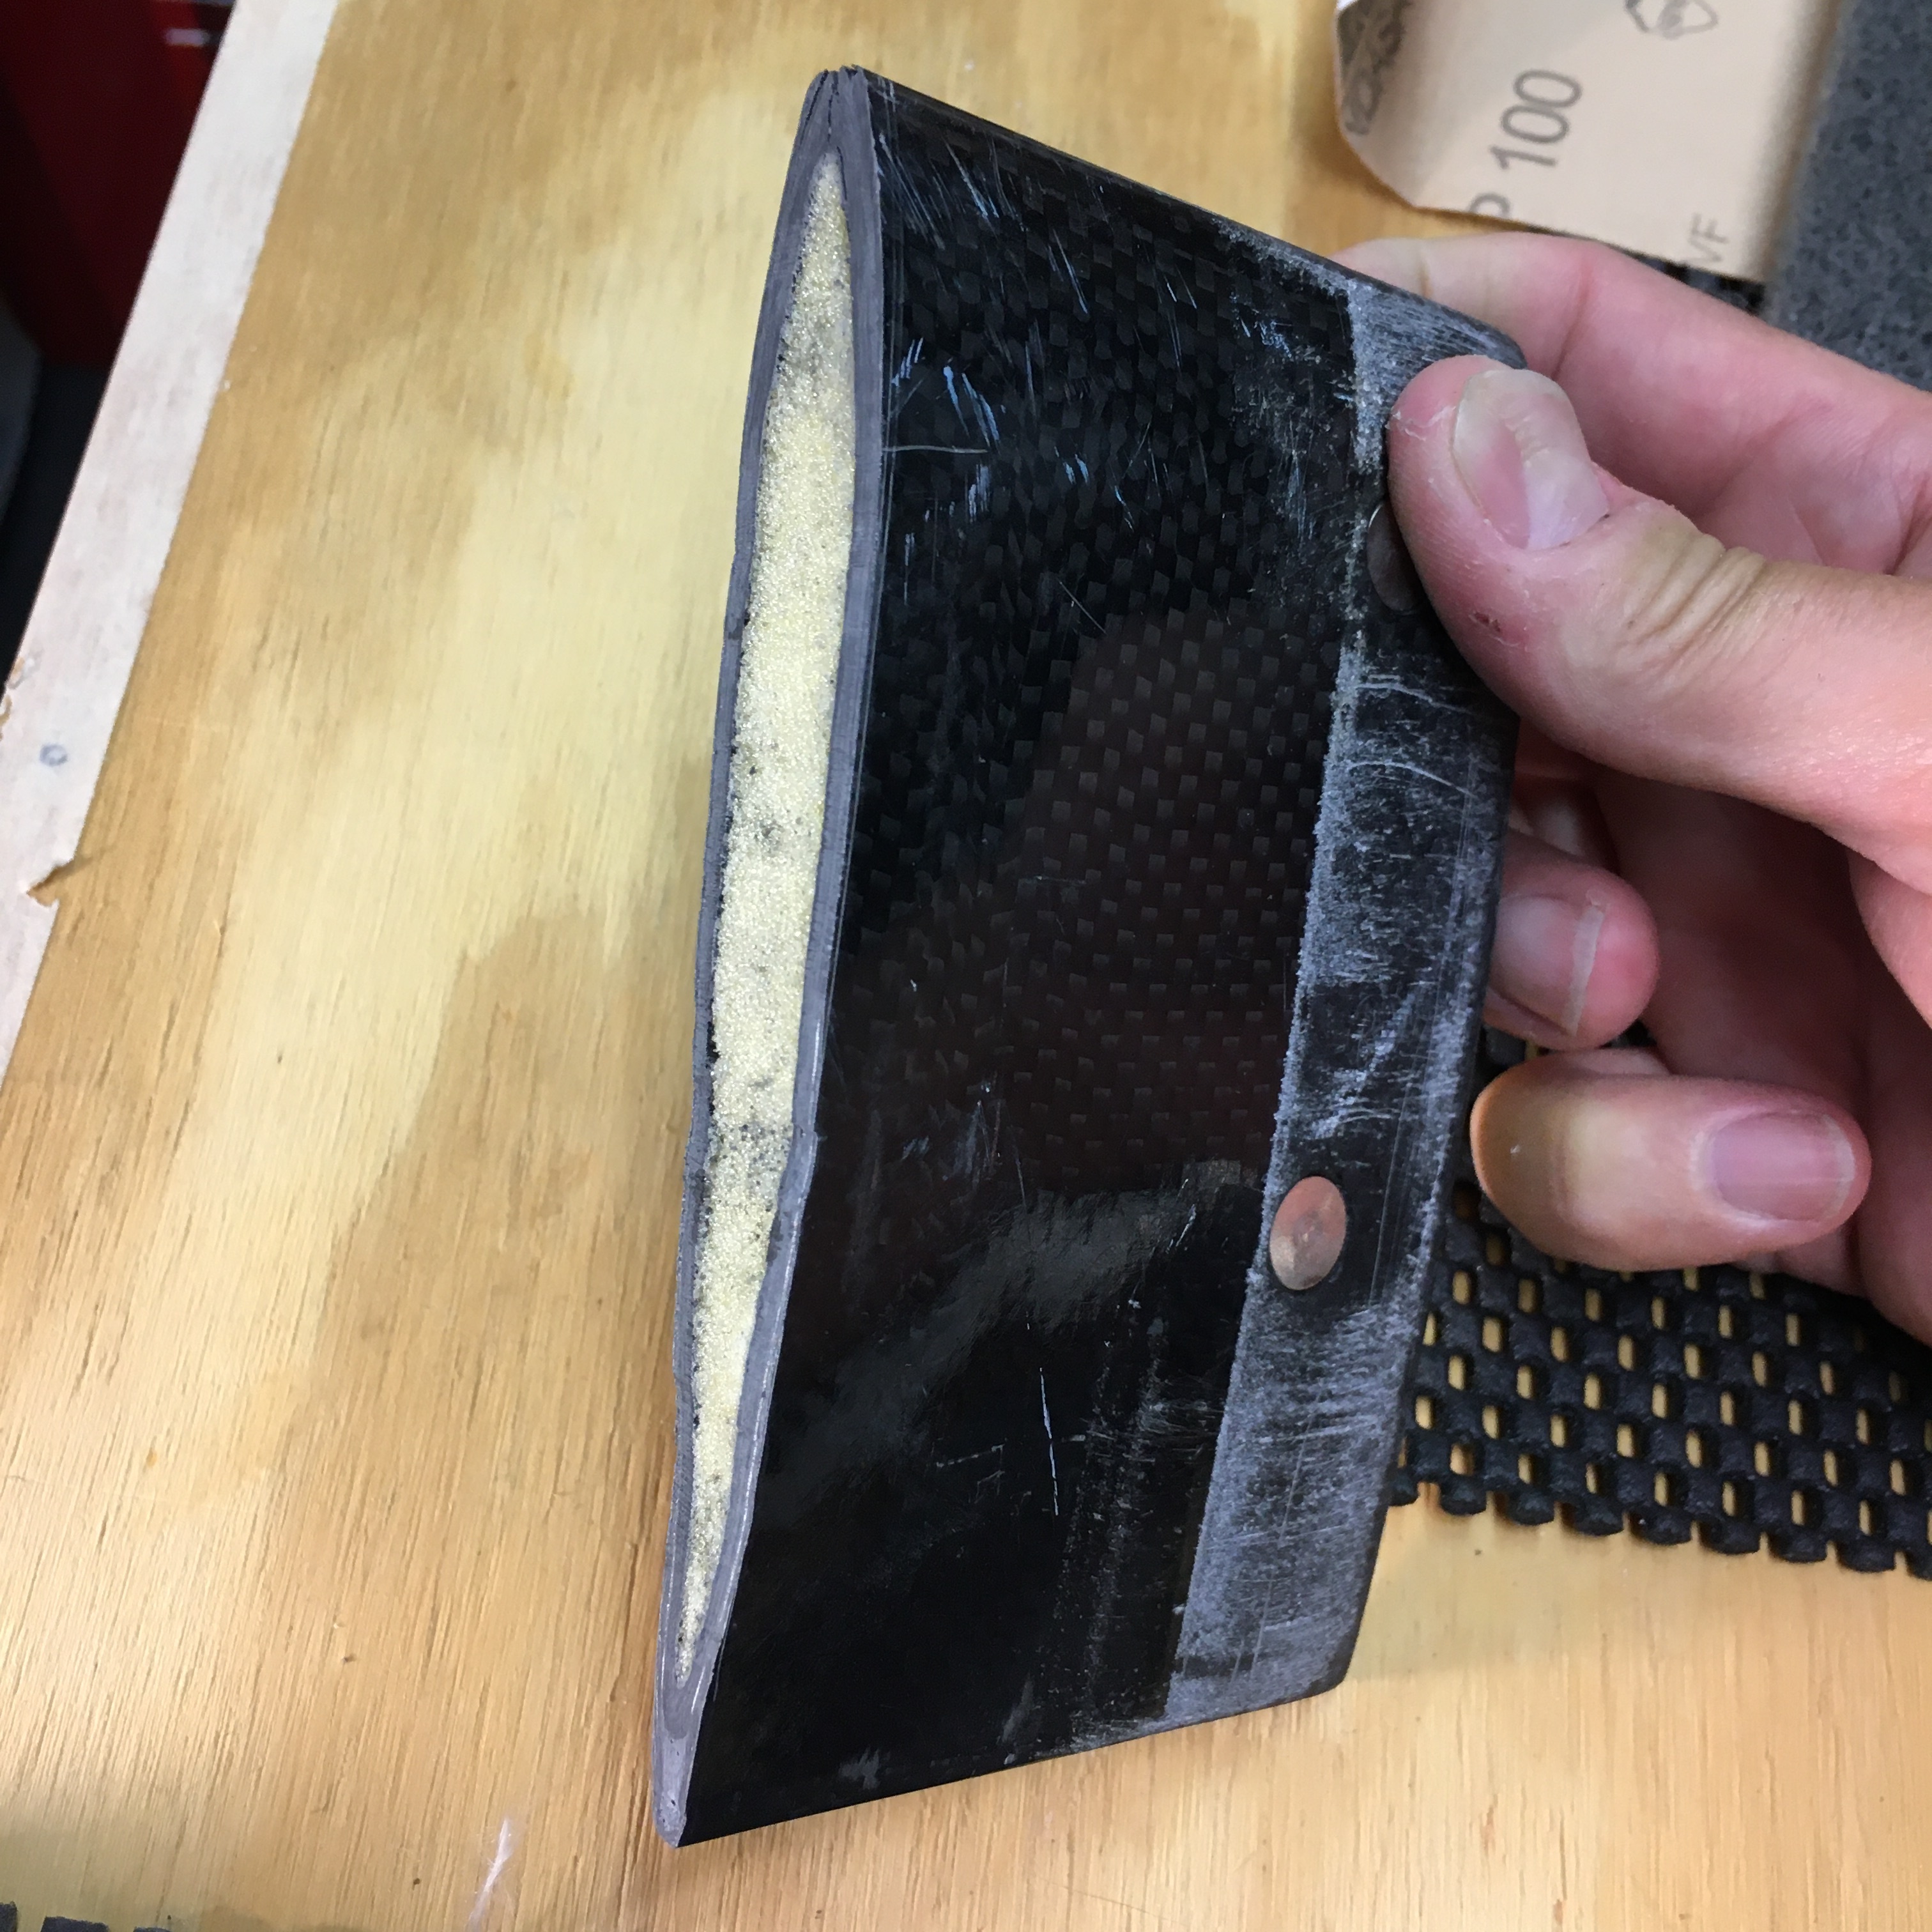
Here’s the before and after cut shot of the broken piece of the mast.
Back to the operating table.
And the other side is clean. I sand them truly flat next session but it feels better is nothing else now.
Ok last one.
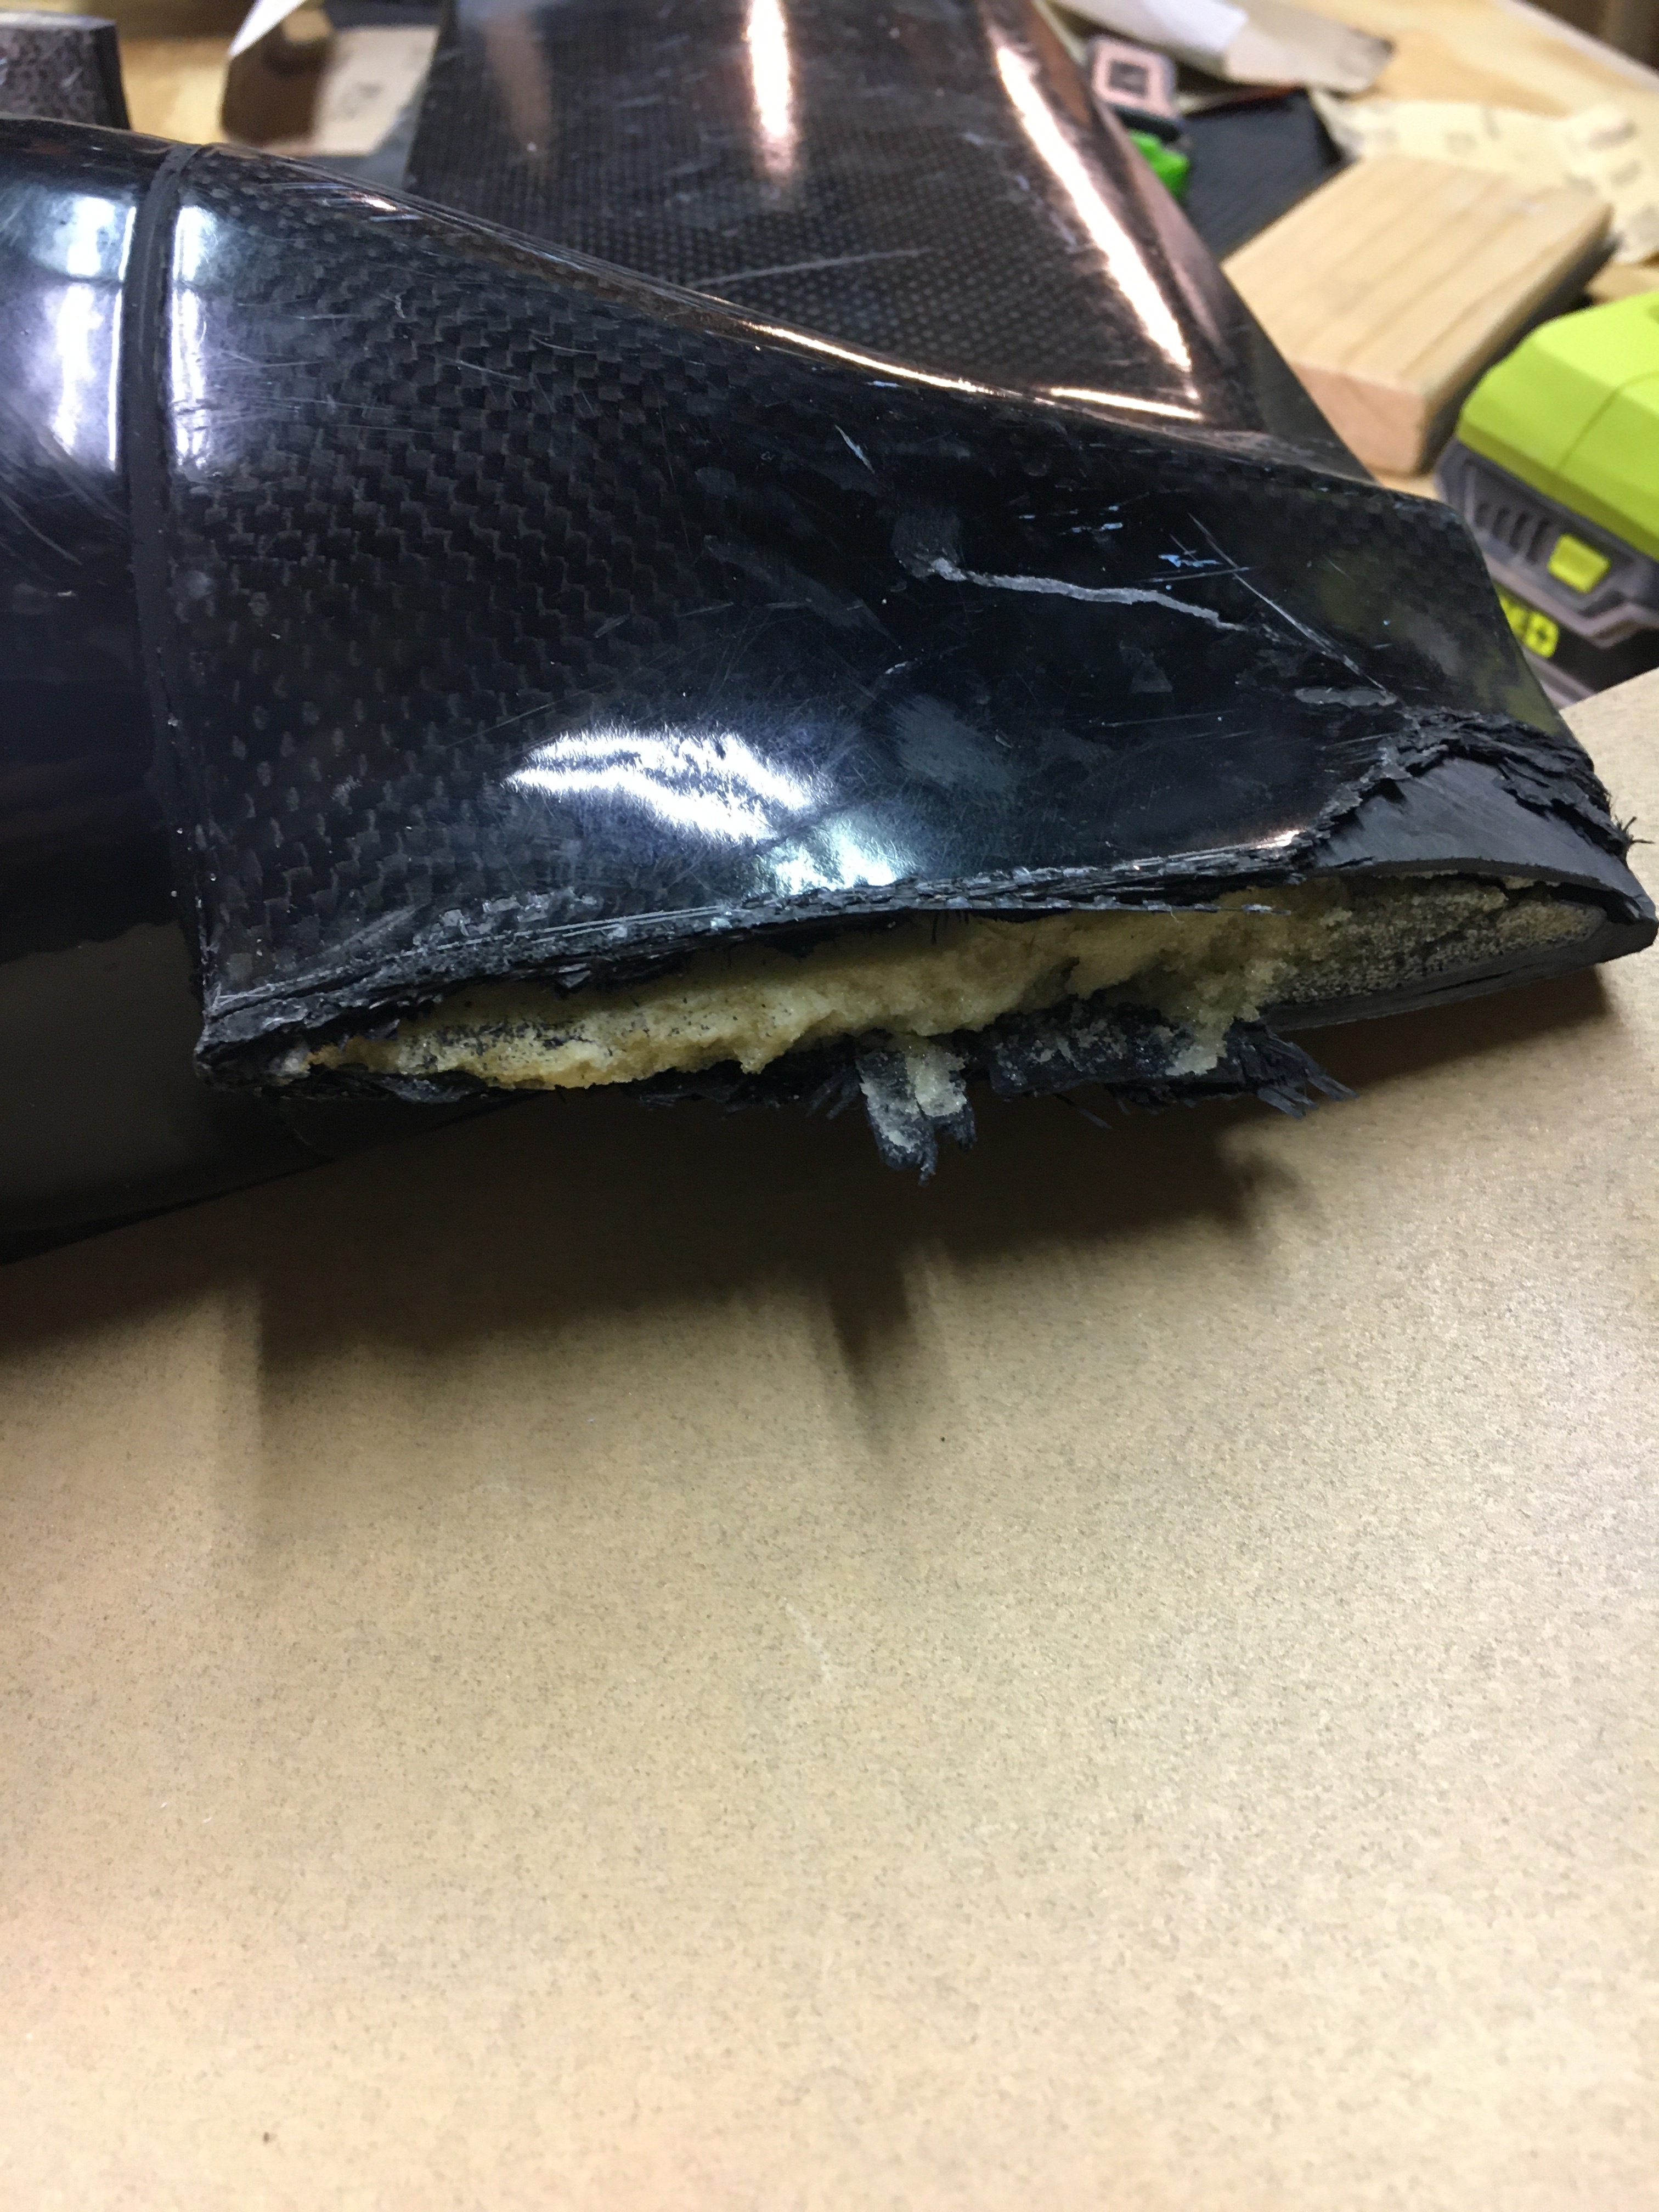
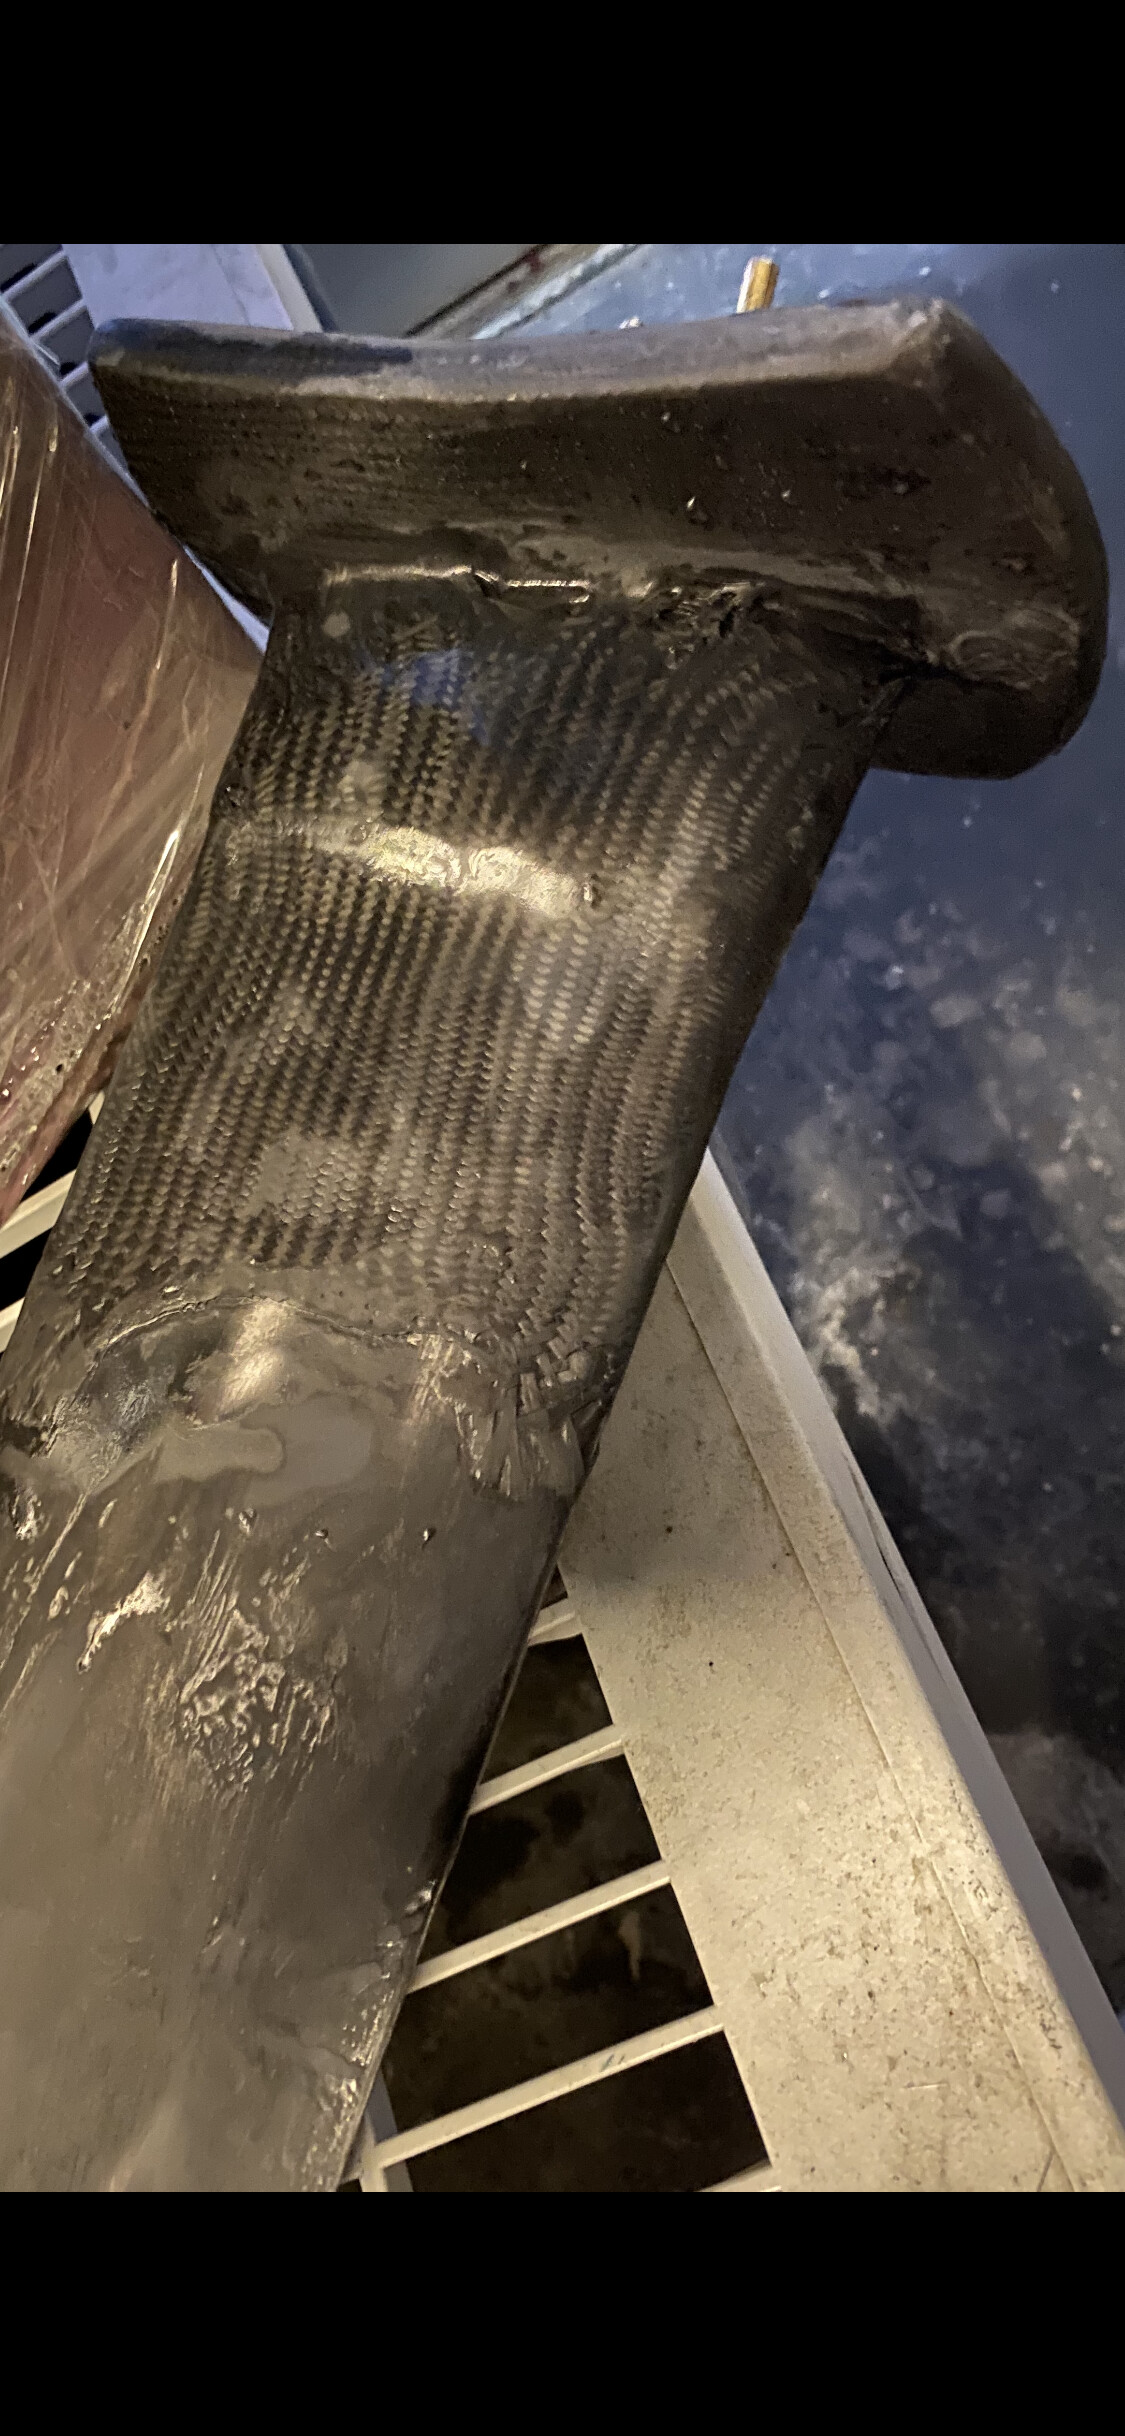
Regarding cutting at an angle, sadly the break was too close to the motor housing. I think the jam is carbon or steel rod inside and taper the walls and bag on 10-15 layers of 6 oz carbon at crossed angles 0° and 45°.
The walls are 2.79mm thick and my tests show that 10 layers of 6oz carbon (unbagged) make a 2mm plate. So hoping 15 gets us there though we will see when laying it up.
Going to stagger the patches starting thin in the inside (.5 in) and getting larger as we go out til it’s wrapping the housing and just above where the mast inserts into the fuselage. It’ll be bigger than it is now but the mast tapers anyway so the motor side is already larger than the lower part so this should match up nicely with the patch.
1 Like
We have faith in you Dr. Bryson, the patient is unconscious so they will not feel anything.
I guess air bubbles is a no no to avoid also correct?
Yeah you wanna bag it if you can
I just ordered some 10mm carbon fiber square solid rod to epoxy inside and reinforce the mast. So this thing is about to get stiff AF.
I’m feeling pretty good. Last night I was sure you’d brought me a “gomer.”. 
CF rod idea is great - better than steel for weight, but certainly a budget buster. Check out flox (cotton flocked fiber) if you haven’t already. It cures hard enough to drill and tap, assuming you mix it with a high quality epoxy.
I just started the bath recently when not wanting to go through all the efforts for an infusion and guaranteeing to get the cloth fully wetted out. I’m happy with the results as long as excess resin / epoxy is squeezed out by wrapping tightly, vacuum assist, (around the mast) or substantial pressure (for a plate).
This is a unfinished picture below of 30 layers in the plate, 15 layers around the mast (used to make the mounting plate), and another 5 layers permanently fixing the mounting plate to the mast. The goal being to make the mast/mounting plate/motor mount all one piece.
1 Like
I see it in your pictures but this is not prepreg vs cloth, it’s poor surface prep between layers and no pressure added. They missed wrapping and/or vacuum of these layers, could be to lower cost also (lower carbon content per thickness with this poor laminate, looks good but…)
Got it larsb. By the way, your build is great man.
Noa, I got it on the bath and yes that works. I use the wet out table same idea and as long as you let it soak in you’re fine. Nice work on that mast and plate.
1 Like
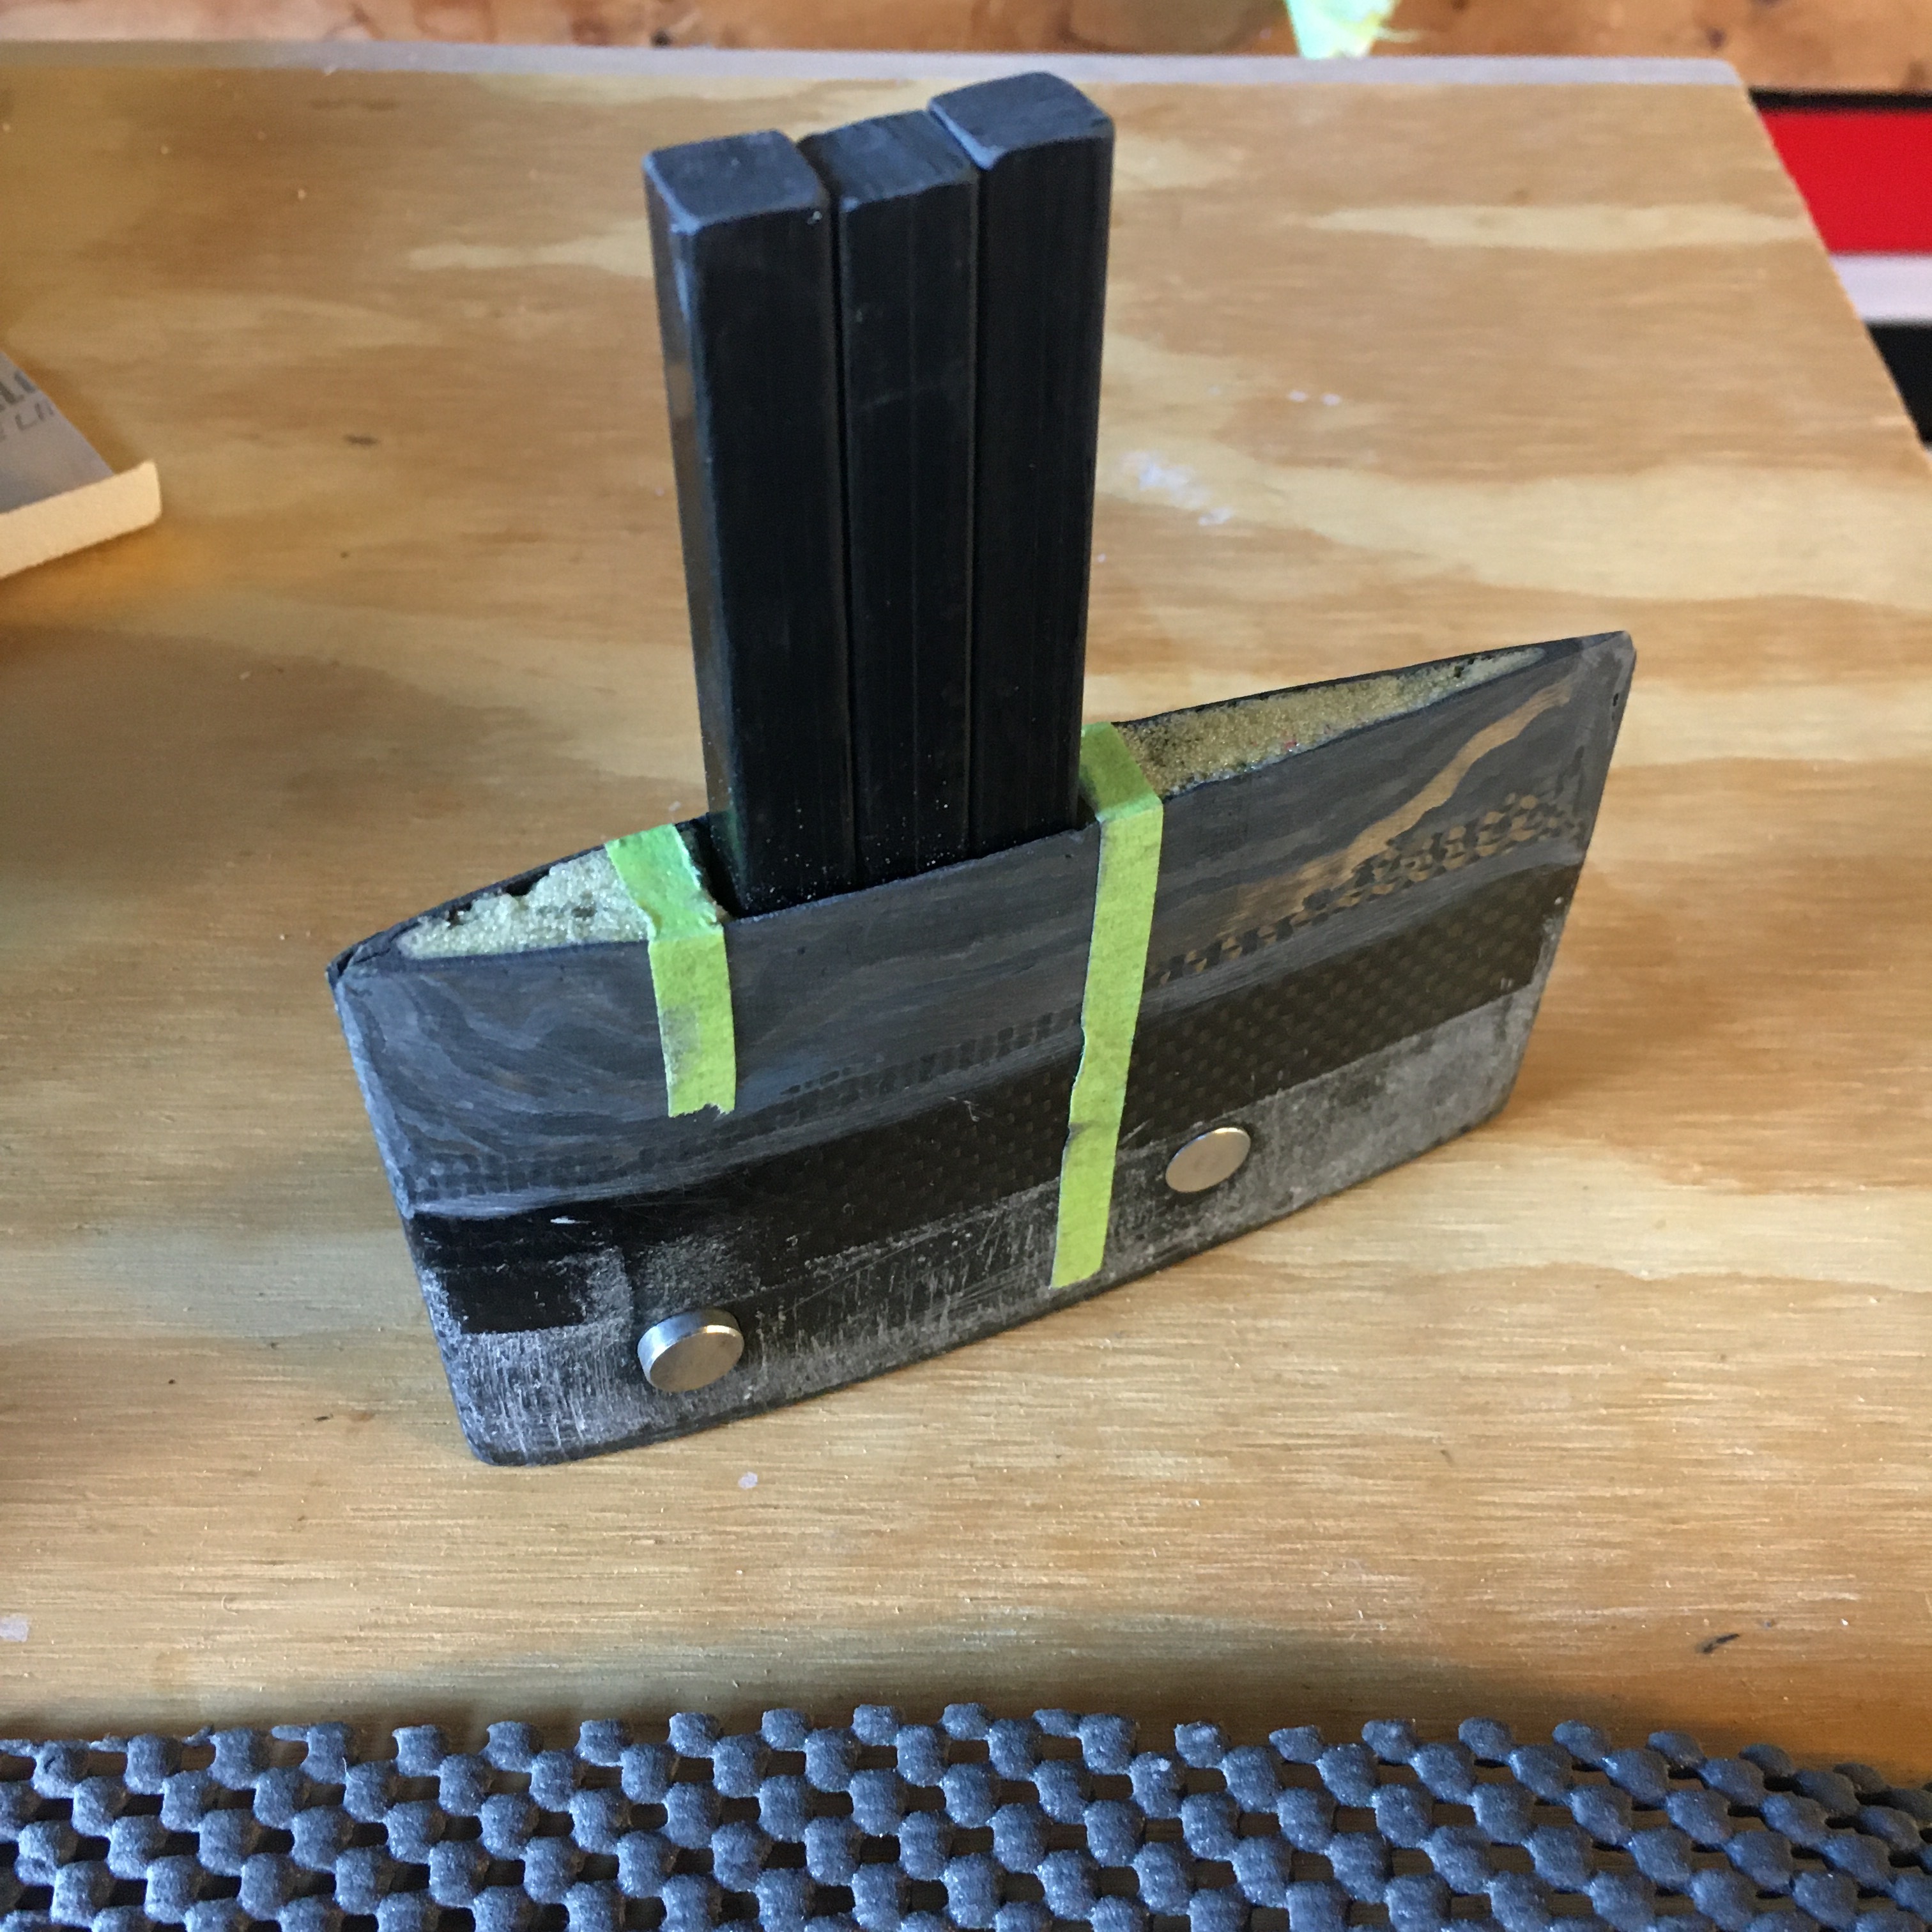
1/2" by 1 1/2" of solid carbon rod. Test fitting. This mast may break again, but not here once this is set in place.
Next up is to epoxy this in place with both sides perfectly aligned for original angles.
Then we build up carbon around the outside and re shape it all. Trying to see if I’ll need some foam to support it or not. Might add some to keep weight down if the two sides don’t marry up perfectly. But I think they will at this point.
1 Like
Looking pretty strong, Dr. Cowboy. Main thing will be whether the epoxy bonds well to the CF, and can we get all the weaker bubbles and air out?
The rods will be set in epoxy with filler (chopped fiber.) Pour in stages and that will kill bubbles.
Cloth will be bagged. No bubbles there either.
Think HiSun will give me a job after this?
it’s good to fade out the thickness in the ends of those rods and use only one or two. Otherwise the stress concentrations will be huge during loading and mast will probably break again just above where the rods end.
Good call. The walls are fared out.
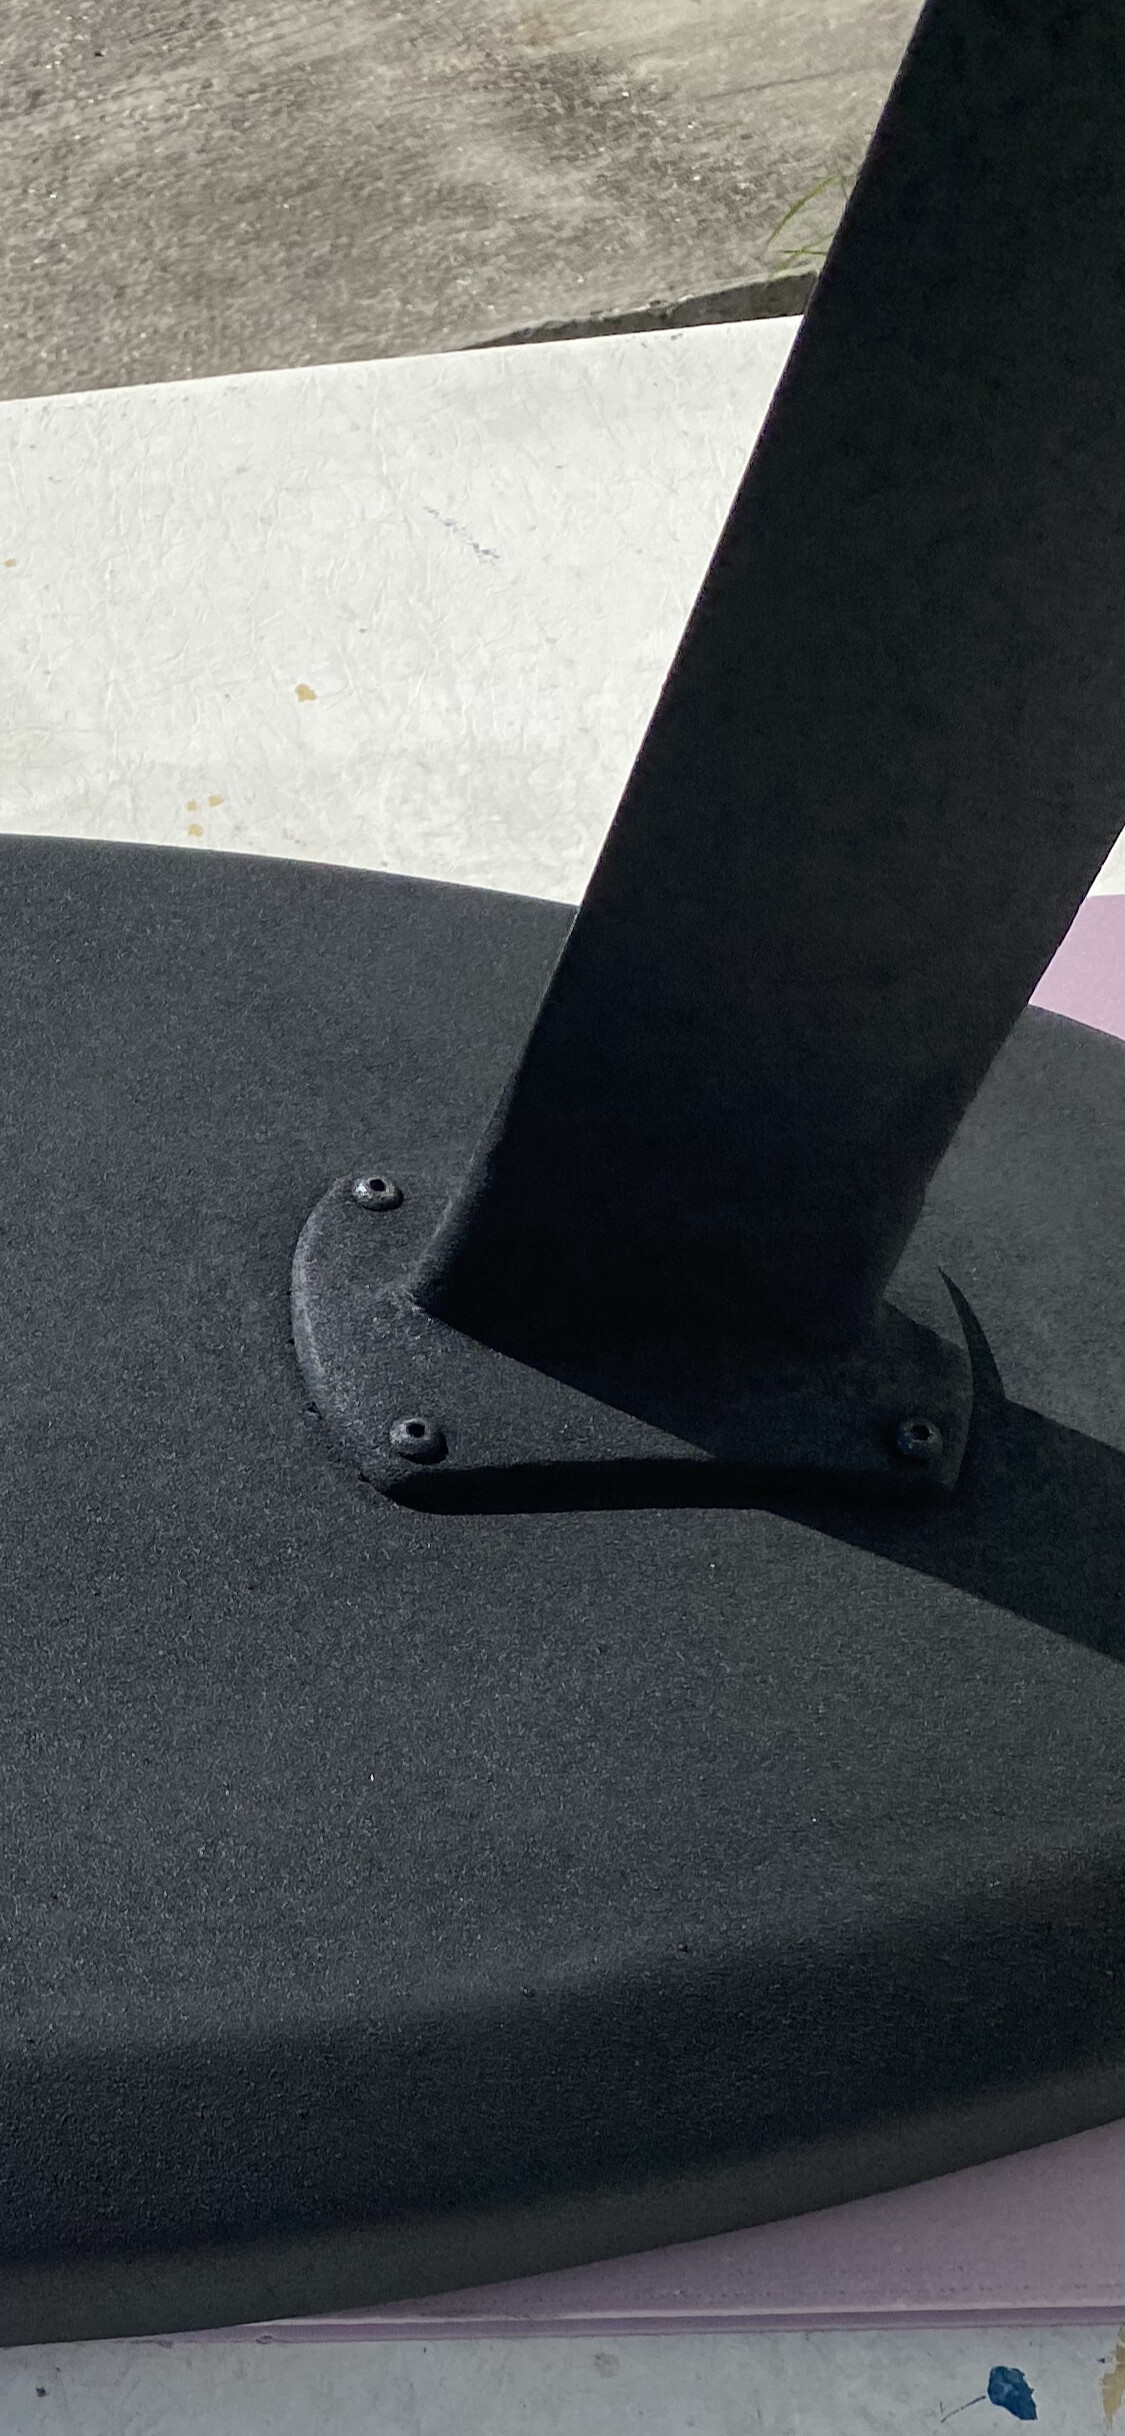
On one end (the fuselage end) the rods actually butt to a solid carbon end piece. The mast is solid for the first inch. (Which you think would cause a stress concentration, right?)
But I might do that at the motor end of the rods. But good point, if you notice, this totally broke at the stress point of the motor housing.