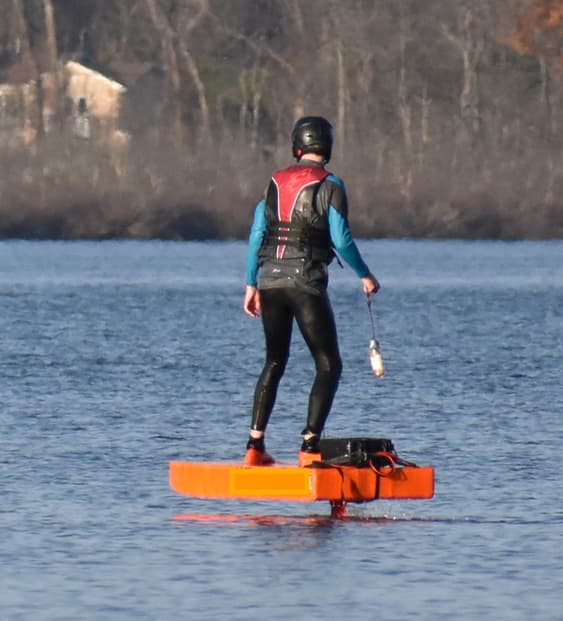
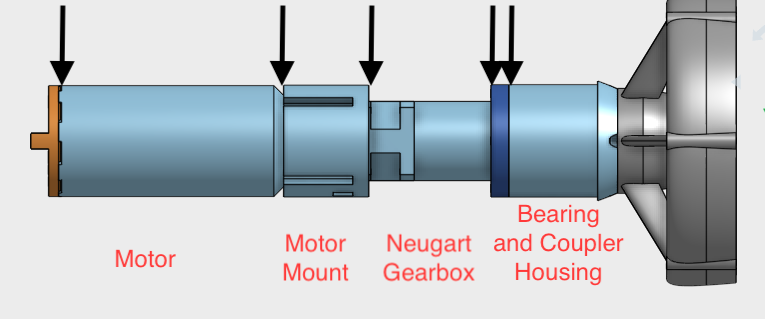
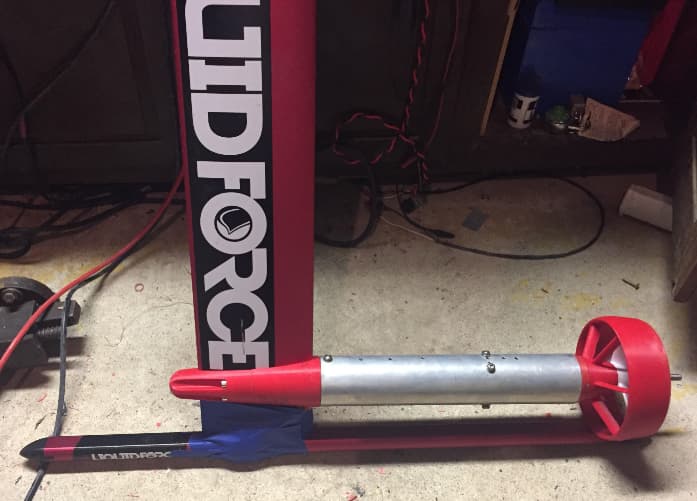
Hello, here’s a long post that’s long overdue on my strategy, mistakes, and learnings building the Hermit Craft, my first electric hydrofoil. It’s based on the PM power plant (SSS56114 / Neugart gearbox in an aluminum pipe). My goals were to simplify cooling by running parts of the motor pod wet; eliminate the tricky circumferential seals between pipe/mast clamp/bearing mount, and finally reduce sensitivity to printed part tolerance/warpage by replacing moving seals to pipe with semi-permanent silicone between select parts.
You can hide or view parts using the panel in the lower left corner.
Full Assembly Drawing
OnShape CAD Files:
Bearings and Coupler Housing
Motor Mount
Mast Clamp
Gearbox Flange Clamp
Board
PM 3 blade propeller
PM propeller guard / duct
3D Print Info:
Hatchbox ABS
FlashForge Creator Pro / Flash Print slicer (basic but good enough for me)
Print temp 220C
Bed Temp 70C
Glass Bed with “ABS Juice” to help with adhesion
Skirt: Yes / Raft: No
I was new to 3D printing with this project so I had to do a lot of trial and error - especially the errors. Naively, I chose ABS with 100% infill for mechanical strength and resistance to heat. Contraction of the cooling plastic hopelessly warped seal faces and made it very difficult to print accurate dimensions. My prints are not pretty and required a lot of hand finishing with sand paper. I would definitely not recommend ABS. Lower infill might help relieve some of the internal stresses at the part cools
Flash Forge Quirks:
I had many problems with jamming. This printer is very sensitive to even the slightest deformation of the PTFE hot end liner. Also, the direct drive stepper motor and gears sit right near the hot end and can overheat. Prints would often fail to extrude after a few hours and I eventually determined that the filament was softening in the feeder teeth and getting stripped - a type of heat creep I guess. I had to lower bed temperature and print with the top off the printer to reduce temperature inside.
Seals:
The circumferential seals were very difficult for me. The pipe wasn’t perfectly round. Too loose and there were leaks, too tight and the O-rings tore. If it was tight enough to seal out water, then disassembly was hard.
My seal architecture is as follows where /S/ denotes a bead of silicone gasket maker. Silicone seals well and is easy to cut when repairs or maintenance is needed All seal faces are clamped together by screws or nuts/bolts through the mating faces. This way, seal is always held in tight compression. Also, the screws make a strong connection between sections. The seals are only for waterproofing and have no other requirements for mechanical strength. Yes, there are more seals, but I think these are much easier to do reliably.
Metal Plate /S/ Motor /S/ Motor Mount /S/ Gearbox /S/ Bearing Mount Flange /S/ Bearing Mount
I don’t have any magic for the prop shaft seal - just copied PM’s double lip seal method. I loosely packed the Bearing and Coupler Housing with food safe light grease in hopes of displacing any water that gets inside. It has to be inspected and repacked periodically.
Cooling:
Initially I tried beer-can shims between the motor and pipe with thermal paste like PM. This was a mess when I had to do maintenance. Boy are those edges sharp… Also, my friend used his lathe to make a collar to fit around the barrel of the gearbox and conduct heat away. But this too was messy and also added weight. Instead, I drilled holes in the pipe around the motor and around the gearbox. Any cavity between the aluminum pipe and the gearbox/motor can fill with water to carry away heat. As described above, I seal between all the parts individually so water inside the pipe is ok.
Board:
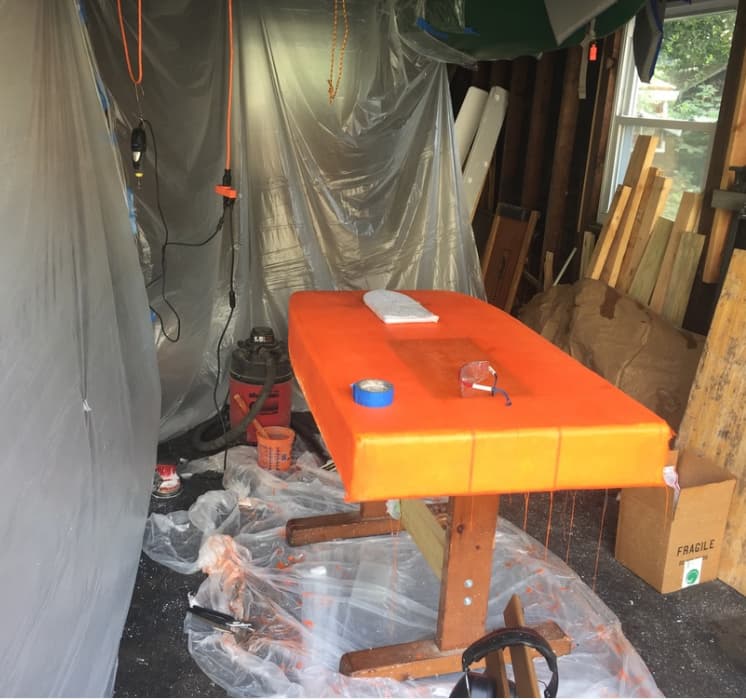
I wanted my board to have plenty of buoyancy (~200L) to float me and the batteries. I didn’t have any windsurfing equipment to cannibalize, so, I kind of eyeballed other boards on this forum. Overall size is about right but I should have done more research first. There is enormous drag until I get up on plane and the edges tend to dig into the water hard whenever they touch. I wish I had asked for advice. In any case, Green Light Surf Supply CNC’ed a stand up paddle board blank for me and sold me a fiberglassing kit. They were great! It all went pretty smoothly for my first attempt at fiberglass work. Definitely glad I wore a respirator mask when sanding!
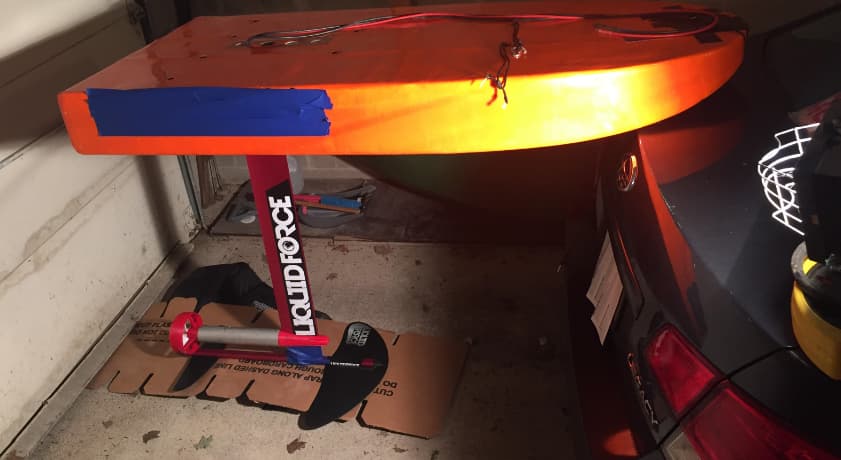
The foil mount bolts on to an aluminum 1/8" plate under the fiberglass and anchored to the stringers in the board. I wasn’t sure where the mast should go so I made several sets of bolt holes and wire channels to experiment with wing position.

Wing:
I started with the Liquid Force Rocket Foil 2 like PM. I weigh 80kg but I could not get out of the water on this wing - probably due to my crude 3D printed propeller and duct or maybe my sluggish boat. I hacked the aluminum fuselage bar to fit the largest wing I could find - the Slingshot Infinity 84cm. With this wing I can fly. Speed is not a big concern for me and the large wing is easier to learn on.
Counter-Torque management:
The gearbox flange collar prevents the gearbox from rotating and is screwed to the aluminum pipe. The pipe is screwed to the mast clamp. The motor is screwed to the motor mount, which is screwed to the gearbox. The prop guard is screwed down to the wing fuselage.
Electronics:
Nothing special here. Even though the SSS56114 motor is rated for 93A (continuous), I bought the water cooled 400A(continuous) flier boat ESC. Judging by wire sizes, I suspect these ratings are not so much optimistic as they are boarderline arson. But so far they have both worked ok for me. I am hoping that running the ESC with enormous margin will buy me reliability.
My remote is a generic waterproof 2.4GHz thumb throttle. The wireless charger broke and battery swelled. I cut them out and attached external batteries. Aside from the battery, the remote circuit itself looks pretty good. Both the on/off switch and throttle controls are sealed magnetic sensors - not water vulnerable potentiometers. The board is conformally coated but the screws and throttle return spring are rusting.
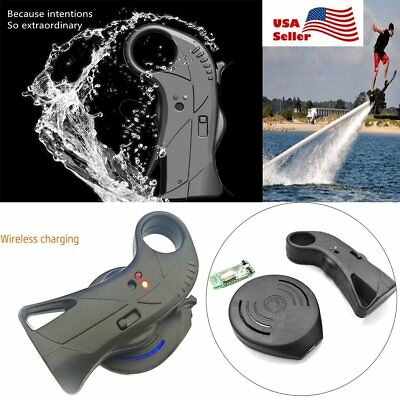
I was using an old hard drive magnet on a lanyard and a magnetic reed relay to operate the killswitch if I fell off. I thought this was very clever because it could work through the electronics case without drilling any holes. The magnet is a little too strong and has a tendency to magnetize the switch itself… so this will have to change.
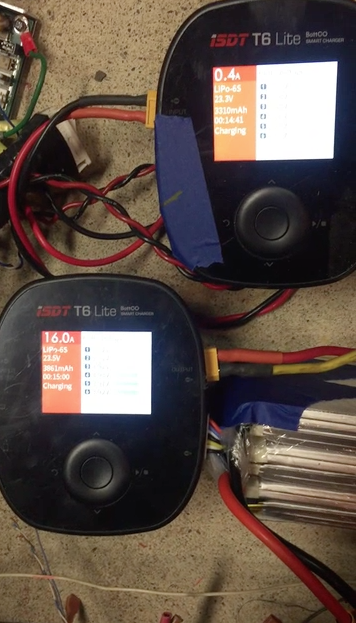
My chargers are a pair of iSDT T6 Lite. They are inexpensive, powerful, and monitor each cell individually. Unfortunately, the fan circuitry in one of them stopped working. Thankfully it detected this and shut down gracefully. I could complain about this, but instead I choose to complement iSDT on implementing good protection circuitry. Everybody has field failures now and then. This could have been a smokey disaster but it wasn’t.
Hobbyking Trouble
I will, however, complain about Hobbyking. I tried to contact them about the warranty on the charger but it was a gift and I did not have the receipt. They adamantly refused to process a warranty claim without the receipt. I spent a long time talking to support and got absolutely nowhere. Their website proudly proclaims the iSDT T6 is a HOBBYKING EXCLUSIVE! so I don’t know where else they think I got it. Now, I am stuck with a hobbled charger. Prior to this, I had also purchased my batteries from Hobbyking, but they will not get my business in the future.
Special thanks to @pacificmeister for the original CAD plans and inspiration. And thanks to the forum for ideas and help along the way. Lastly, thanks to OnShape for their great tools and tutorials.