If I remember correctly it was 1,5mm m59. The tube was 63mm oD
Hi, I was wondering how you got the wires to work when using a threaded connection between the mast clamp and the aluminium tube. Did you install the wires only after threading the tube?
I was looking for a solution which allows removing the tube easily, without having to re-seal everything every time.
Hi!
I followed hjorts build. The cables go through the mast, through the threaded 3D printed part and to the motor. Everything is mounted to the motor and gearbox before the alu-tube is screwed on to the threads.
Hi!
Another update. Changed the AOA on front wing by approx 1,5 degrees. Made a big difference but it had an negative impact on the capacitors on the yep. I pushing very close to the esc:s limit now. I’ve ordered new 630uf 63v caps that hopefully will help.
The plan is to change the AOA to 0,5 and run another test.
On the positive side I got a lot more airtime today.
Videos are on insta wildtech.eu
Thanks!
Hi!
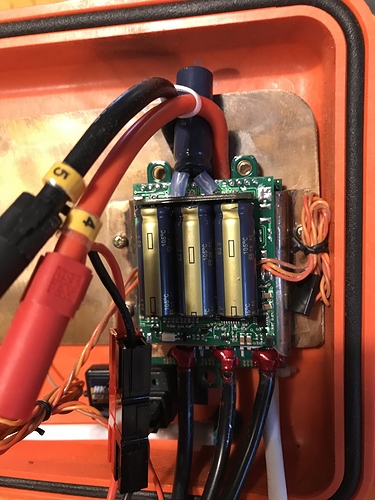
I noe have a ner setup. The esc has been equipped with four 690uf caps instead of the original three 390uf.
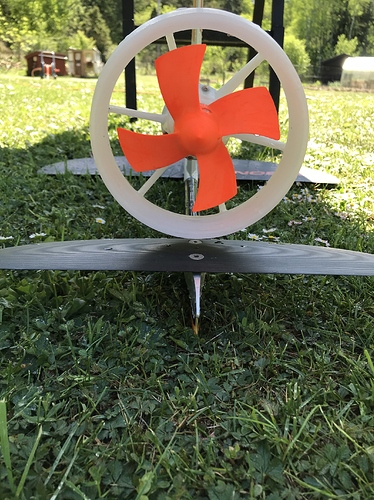
I also made a new prop that has a diameter that is 20mm smaller than the original.
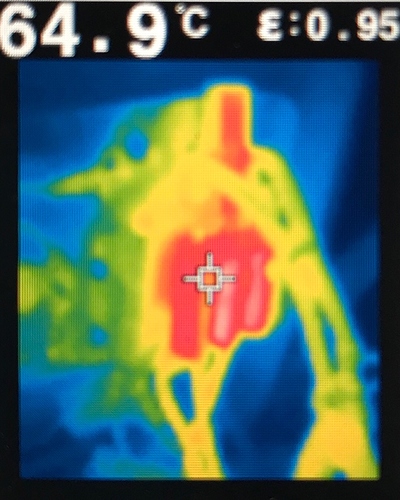
I made a test run and the caps reached 65C after 12 minutes. The smaller prop works fine to.
I used a flir camera to look at the esc after the run, a very nice tool to track heat.
Oh, and the AOA is back to ”factory default”.
Panasonic low ESR caps? I added 2 of them but 105V type, 2cm from the ESC, never considered to monitor temp, though… Why did your wing A.o.A. affected the caps temp? I’m asking because I varied stab AoA to make the foil a little more positive, I know that it could add little more drag but stability and steady airtime will improve…
Hi, not sure about the low ers. The Increase of aoa affects the power needed to propel the board. I took away the washers because it didn’t really do anything. I can control the lift by shifting my weight.
What ESC are you using there? I take it is air cooled with custom aluminum plate on waterbox?
Great job getting up and riding!
That’s the Hobbyking YEP 120A.
Yep, that’s the yep. The BIG copper plate is water cooled on the backside. Want my advise? Don’t use the 120A. It’s not strong enough. I saw a 180 that might work better.
I used this YEP120A and it worked as long it was watercooled well. I got 3200W through it as peak. If you loose the watercooling it is going to desolder and burn. Maybe we should go this way:
Take a YEP120AWC and build a µc around it to make it perfect. Temperature, voltages, current supervision and pump control and throttle in/out, UBEC, tranceiver.
The YEPs are not so bad, rather cheap for their peak power. But the promised, advertised protections are all missing. And efficiency is low. Parts are cheap, the RDSon is bad. With good water cooling and maybe additional air cooling it should work for 80 - 100A continued. We should build a device around. Where can we find, support and use such project? What is the best one?
We could control any cheap dumb ESC by this and open a space for new designs.
Shall we open a new thread?
Your pal may have been experiencing issues with aeration with higher coolant flows. In this case, less flow could be better. Air is a very lame conductor of heat in comparison to water.
I haven’t run the YEP120 for a long period, but I did pull 4KW through it for around 2-3 minutes. I have modified the heatsink substantially, but never had any watercooling. The only items that were hot were my batteries and their connectors.
Hi! An update on the build. Everything holds up except for one of the 6s 16A that has been changed to a quantum sls. The quantum LiPO is a bit bigger so the cooling plate has been cut to half size, cooling is still good. The new caps really help the esc. I have had no swelling of caps and temp is stable around 80 degrees after approx 18 minutes runtime. Max speed so far 32kmh, average 22 kmh.
I still use a prop that’s 20mm smaller than the duct, I made a smaller one after burning the esc. Most likely I will print a smaller duct in order for them to match.
I’ve now started to practice turning, a whole new ballgame ![]()
New videos on https://www.instagram.com/wildtech.eu/
Very interesting Jezza, especially from you. Any diy tutorial about those modifications ?
There are some pics of it on my build page I think http://efoil.builders/uploads/default/original/2X/7/7e0eb17497e66e3e8a63bd93355c8f4e80ef2643.jpg
I used a hammond case as the base, cut some grooves in it so that there could be air-flow. Then bolted down a 0.9mm copper plate so that it would cool the FETs on the other side. I did use some very thin silicone heat transfer pads between the FETs and the heatsink. It seem to work really well so I am happy.
Hi Riwi, I’m going to a similar project and I have a Nobile hdyrofoil version All-Round. Which version do you have (all-round, freeride, race)? Do not you have a video, how does it work with your engine? Thank you 
Hi!
I use the all around foil. Its hard to use but when you learn you can foil on anything ![]()
Lots of movies and pictures here:


