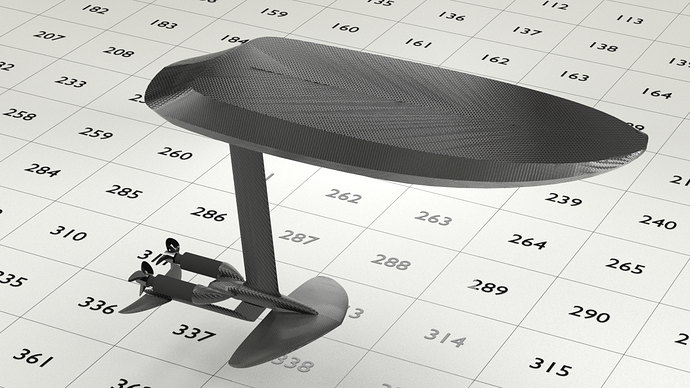
New build from 3D printed molds (very low cost, but high performance !)

Hi everybody!

I’m sharing with you my build. It is not finished yet … I started this project around 9 months ago, most of the work was the designs, simulations, testing and optimization (building one is quite easy and fast).

Summary

3D printed mold for wings, mast and fuselage

3d printed molds

Wings

Mast and fuselage

Board

Electronics

Conclusion

3D printed mold for wings, mast and fuselage

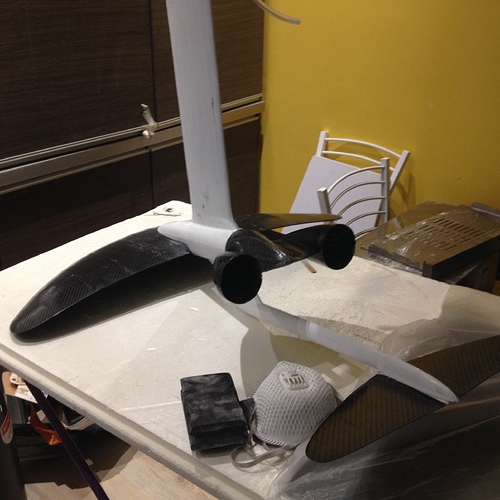
Those part are full carbon fiber and fiberglass and very inexpensive! There is no 3d printed part inside, the front wing is actually hollow. The parts also require the use of vacuum bagging for the outer layer (nothing crazy… easy to use and cheap vacuum bagging for less than a 100$).

3D printed molds

The molds have to be design in a very specific way in order to avoid any kind of distortion, bending, warping but also strong enough for vacuum bagging. When the plastic cools down, it retracts. And if the mold is not designed properly, it bends and have the wrong shape (which is bad when you spend month optimizing parts with CFD analysis, mechanical analysis, etc.).

The gcode have to be optimize, because you want a mold that has a great surface finish so that there is no need for post processing (also easier for demolding and sanding the part after demolding). So, each layer has to be printed smoothly at the right speed. You don’t want crazy acceleration/deceleration when printing especially at the top, when the part so tall and thin.

I’m using the cheapest PLA from amazon, nothing special… the molds are super inexpensive and can be used once (2 - 3 times if you are lucky).

Wings, mast and fuselage

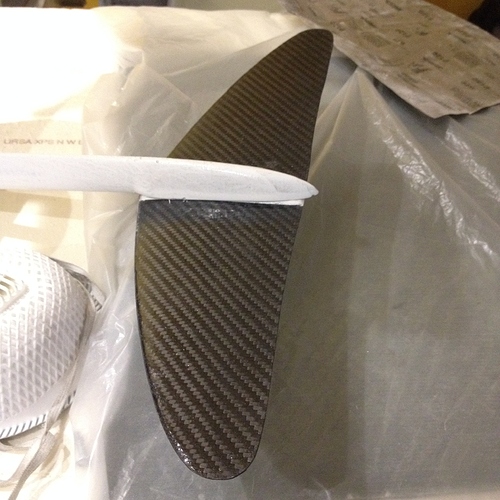
The rear wing is made of carbon fiber, super easy to make and very light and strong. Also, it’s not expensive at all. I’m planning to make a YouTube video to show you how I build the rear wing. If first need to solve the problem of making better molds for the front wings.

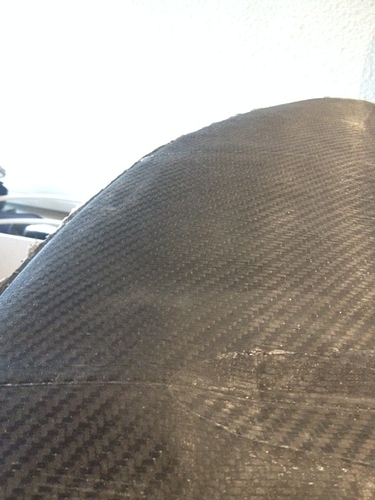
The front wing is hollow and only the 1st outer layer is carbon fiber; the rest is made of fiberglass. It’s extremely stiff and strong! I can stand up on the wing tips, it doesn’t bend and I weight 85kg. I’m designing a new mold for the front wing. It will look much better, be cheaper, faster and easier to 3D print.

Same thing for the mast, I can stand in the middle of the mast and no bending at all! The mast is fully made of carbon fiber. It can be made of fiberglass, but for only 50 to 60 more dollars I could make it in carbon fiber so I decided to make it in carbon fiber. The mast has 4 tubes inside, 3 to pass electric cables and one for water-cooling. The fuselage is optimized so that is has low drag at different angle of attack.

Board

I designed and shaped the board myself. The board is also not finished, I will post more picture later.

This is the 1st time I shaped a board. The only power you need to make it is a drill… It’s very easy to shape. I used XPS as a core, big mistake! It delaminates way too much. Plus, I failed with the vacuum bagging process (it’s different than the vacuum bagging for the wings and mast). Because of that I had to grind it, fill it, sand it over and over again… Next time no vacuum bagging and no XPS!

The board has a nice design, it has volume were needed, nice shape and only need a few cut and little bit of sanding to shape it.

The battery box is under the board for more safety and because I knew I won’t change the battery pack. To charge the battery, I connect it to the charger via a connection box at the top side of the board. I believe it’s more secure this way.

Electronics

Because I knew new and better electronics system will be made, I decided to finish the efoil before buying any electronics. I’m still doing some research to understand why there is some much problems with the electronics.

The original prototype was supposed to use a reducer. Now I’m planning to use a direct drive system. I’m also planning to use a twin propeller system to make a high thrust to weight ratio efoil. Having a high thrust to weight will allow to do nice maneuvers in the water. You can also go at much higher speed but I guess it would be super scary and quite dangerous.

Conclusion

This is a cheap, easy to build efoil (once you have the right molds and processes). But it is very strong and optimized for our need. The new molds for the front wings need to be tested. I still have to choose the electronics I need. While I’m doing the research for the electronic, I will finish the sanding (to a mirror finish) of the board, the wings and the mast & fuselage. Once the coating and sanding is done, I will post more pictures!

I’m planning to make a YouTube video where I explain a little bit how I make the rear wing first, and other part later. I’m also planning to make an online course where I explain in details (in videos) how to make each part, with all the STL files needed to make the molds, how to print it, prepare it and all the links to buy materials. I cannot give all my work and knowledge for free (for obvious reason), but I believe that an online course like this will help a lot of people! I will post more details about it later.

I hope this post was not too long to read haha. Tell me what you think about this build! If you are interested by the STL files for the molds and the easy and cheap process to make those parts, you can send me a message or write something below.
19 Likes

Very interesting! Did i understand correct? You print the mold and use without sanding and instead do some sanding afterwards with the finished part? What do you use as separate agent?

yes exactly, no postprocessing on the mold and the parts.I just applied some clear coat on the wings and paint on the mast and fuselage. I use the easy lease chemical release agent from easycomposites

I also did not sand the parts before applying paint or clear coat. But I should have applied a layer of coat before painting …

1 Like

Congratulations. What a Wow project ! It opens a new page in the life of this forum because members will be able to customize their wing surface/chord thickness/airfoil section and aspect ratio. Extremely useful for the coming design of foils with both wings with positive lift… canards or not, not yet totally suited to our amp-down needs.

To increase the cycle life of your molds, you could apply some (PVA) release agent before any fabric wetting. It is like oil or soft butter. The mold saturation, therefore the strain-free release, comes after application of 8-10 thin layers applied with a clean cotton cloth (an old clean T-shirt will be fine), 2 layers per day. Yes, it is a patience work. For a nice surface finish of your wings, you could first apply epoxy epoxy gel coat with a brush, leave it cure then apply your layers of fabrics. The release noise is a nice smack noise.

1 Like

Thanks SoEFoil :slight_smile:

I’m actually going to try PVA with the chemical release agent. I already tried PVA alone but I had some problems. It is really hard to make a “3d printed only” mold that can be re-used.
So it’s better to make one that is quick, cheap and easy to 3D print.

Yes this the best way I think to make a composite part that is cheap but have great quality.

Have you watched @charlieuk wing making method with foam between the wing skins ?

yes, I wasn’t a big fan of this process. Because he is using the 3d printed part as a plug so the shape is not the right one. I thought it was possible to make better wings and in an easier way. I like his idea of using wax on the 3d printed mold, I didn’t test it, could be interesting !

The benefit to that method is it is fast and easy , I ended up with them just being hollow so super light. This method was actually taken from a process that is used on a lot of race cars. yes you don’t get a moulded surface Finnish but if you take in to account the skin thickness in the mold and have good laminating skills you can easily get within a 0.5mm tolerance which for prototypes is more than good enough for me. Printing a full mould is easy enough but cost and printing time is about 4x the amount.

1 Like

Hi charlieuk, sure the process is quite simple. I just think that we can do things much better. Again, my goal was to make an easy process to make fully 3D printed molds that will allow us to make, in a cheap way, composite parts with a pro finish.

It doesn’t need to be so fast; we are not mass producing here haha. Actually, for each large mold (front wing, mast and fuselage) it only takes few days to print so it doesn’t take that long (which is pretty much the time you need to 3D print a plug, especially if you use infill). Making the right 3D printed mold and having the right molding/demolding process is the trick, so that it takes minimum time, minimum material and good dimensional accuracy and result.

As an example, I’m using 542gr of filament to make the 3D printed mold for the front wing which only cost about 10$. If you use only fiberglass to make the part, the total cost (mold + composite part) is less than 30$ of material. Then you just have to sand it and that’s it, it’s done!

Also using this method, you are not limited with certain shapes. You can make almost any complex shapes you want, the same way you would with a traditional mold.

1 Like

All depends what your goals are as to how you go about it. For One of prototypes, speed and low cost the method worked extremely well and I prototyped many large and different shape wings. Tooling cost for moulds are higher and creat a more complex layup with joining the two half’s. I had no worries about getting a wing to within a .25 tolerance with my method and experience but others people may not. Of course things can be done better just throw more time and money at it. If you want to do it properly machine your moulds in tooling board and use pre preg carbon in a auto clave simple But not cheap

This sounds really interesting. Is there an update on those videos? Or can you share the process in photos here?
I’ll be laminating my own wings soon - these are printed core with carbon around them but I’m more interested in this option.

Hi Visor360,

Very interesting project. Great work done with the wings.

I’m currently making a design for a front wing. My plan was also to use a 3dprinted (female) mold. I’m thinking of using a bladder to pressurize the mold an compress the carbon layup. By this creating a hollow wing. Mounting points to the fuselage are still not clear in my design.

Could you give some more insight in your process and the details (maybe with photos)? Did you use also a bladder? Or did you make two wing halfs with a vacuum, if so how did you create one wing afterwards.

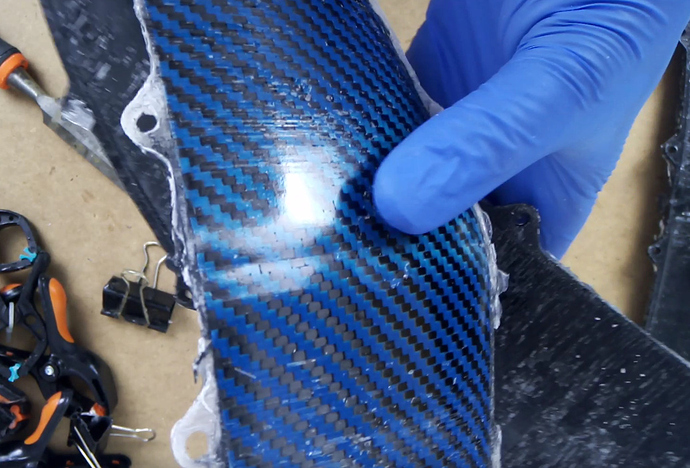
Hi ! Sorry it takes a little bit of time because I’m still trying to make the process better (I just need to test few ideas I’m done). But so far the results are excellent, I worked on a better mold for the front wing. You can see here the results you get when the part is demolded (no sanding or anything).

all you need is a little bit of sanding and add clearcoat. This method is much better than having a 3d printed core with compistes around them. Because the 2 parts are joined together while curing, so it’s super strong ! I will hopefully post a video in 1 or 2 weeks with more details.

2 Likes

Thanks Nylez !
I don’t think you need a bladder (maybe the part will be a little stronger this way but it’s more complex and expensive). My front wing is hollow but so strong that i can put all my weight (90kg) and jump at the tips of the wing and there is no noticable deformation (and it’s made of fiberglass, the ouside layer is carbon fiber for esthetic only). My suggestion is to wait 1 to 2 weeks until I release the video online (for the rear wing). And if you think you have enough informations, you can try to make your own molds. But if you want to know more, I will have my website with every single detail needed (every step of the process with details, how to design small and large molds, all the links for the materials you need and all my STL files). That way you will learn from my mistakes and not loose so much money and espacially time !

5 Likes

Thanks for your reply! Very nice results again. I’m looking forward to watch your movie and visit your website. Let us know when the movie and website are online. Meanwhile I will continue with my own ideas and the design process and if I have some results I will share them.

1 Like

That looks the business! Interested to see that footage. I’ll be doing my first wing on Friday and will probably go ahead with the laminated PLA core for now but might make some new wings with your technique once you have shared the videos.

1 Like

Sorry for the waiting guys ! I tried to change few things in the process and it made some steps easier, but it made the demoulding too hard. So I did more research and testing, and now it’s good to go. Here are the results from the mold :

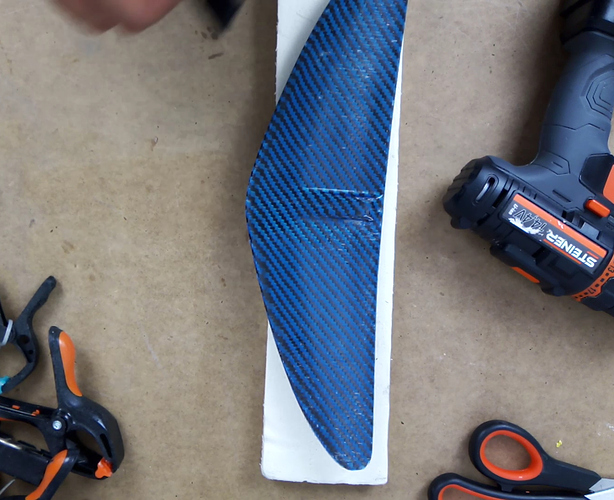
And thats how to part look like after sanding the edges :

Now what is left to do is adding some coat and sanding it to have a very flat surface

6 Likes

Hi Stijnhof ! Did you make your front wing ? hopefully the video will be available next week. It took time because I had to make a new mould process and 3d print another mould and record everything while doing it… it take so much time haha. But it is much better now so i’m happy !

Hey Visor,

Not yet! Really interested to see the results. I already machined a MDF mould for the front wing so will be making my wing in that (maybe this weekend) but would like to redo the rear wing with your technique!