Are you planning on putting “inside” the mast?
I have mine on top of the VESC that is “inside” the cavity of the Fliteboard and don’t have a problem.
Are you planning on putting “inside” the mast?
I have mine on top of the VESC that is “inside” the cavity of the Fliteboard and don’t have a problem.
One of our boards is a Ultra from carbon .
Receiver is located in the same box as where the VESC is.
With this board we have 0 issues concerning the aignal
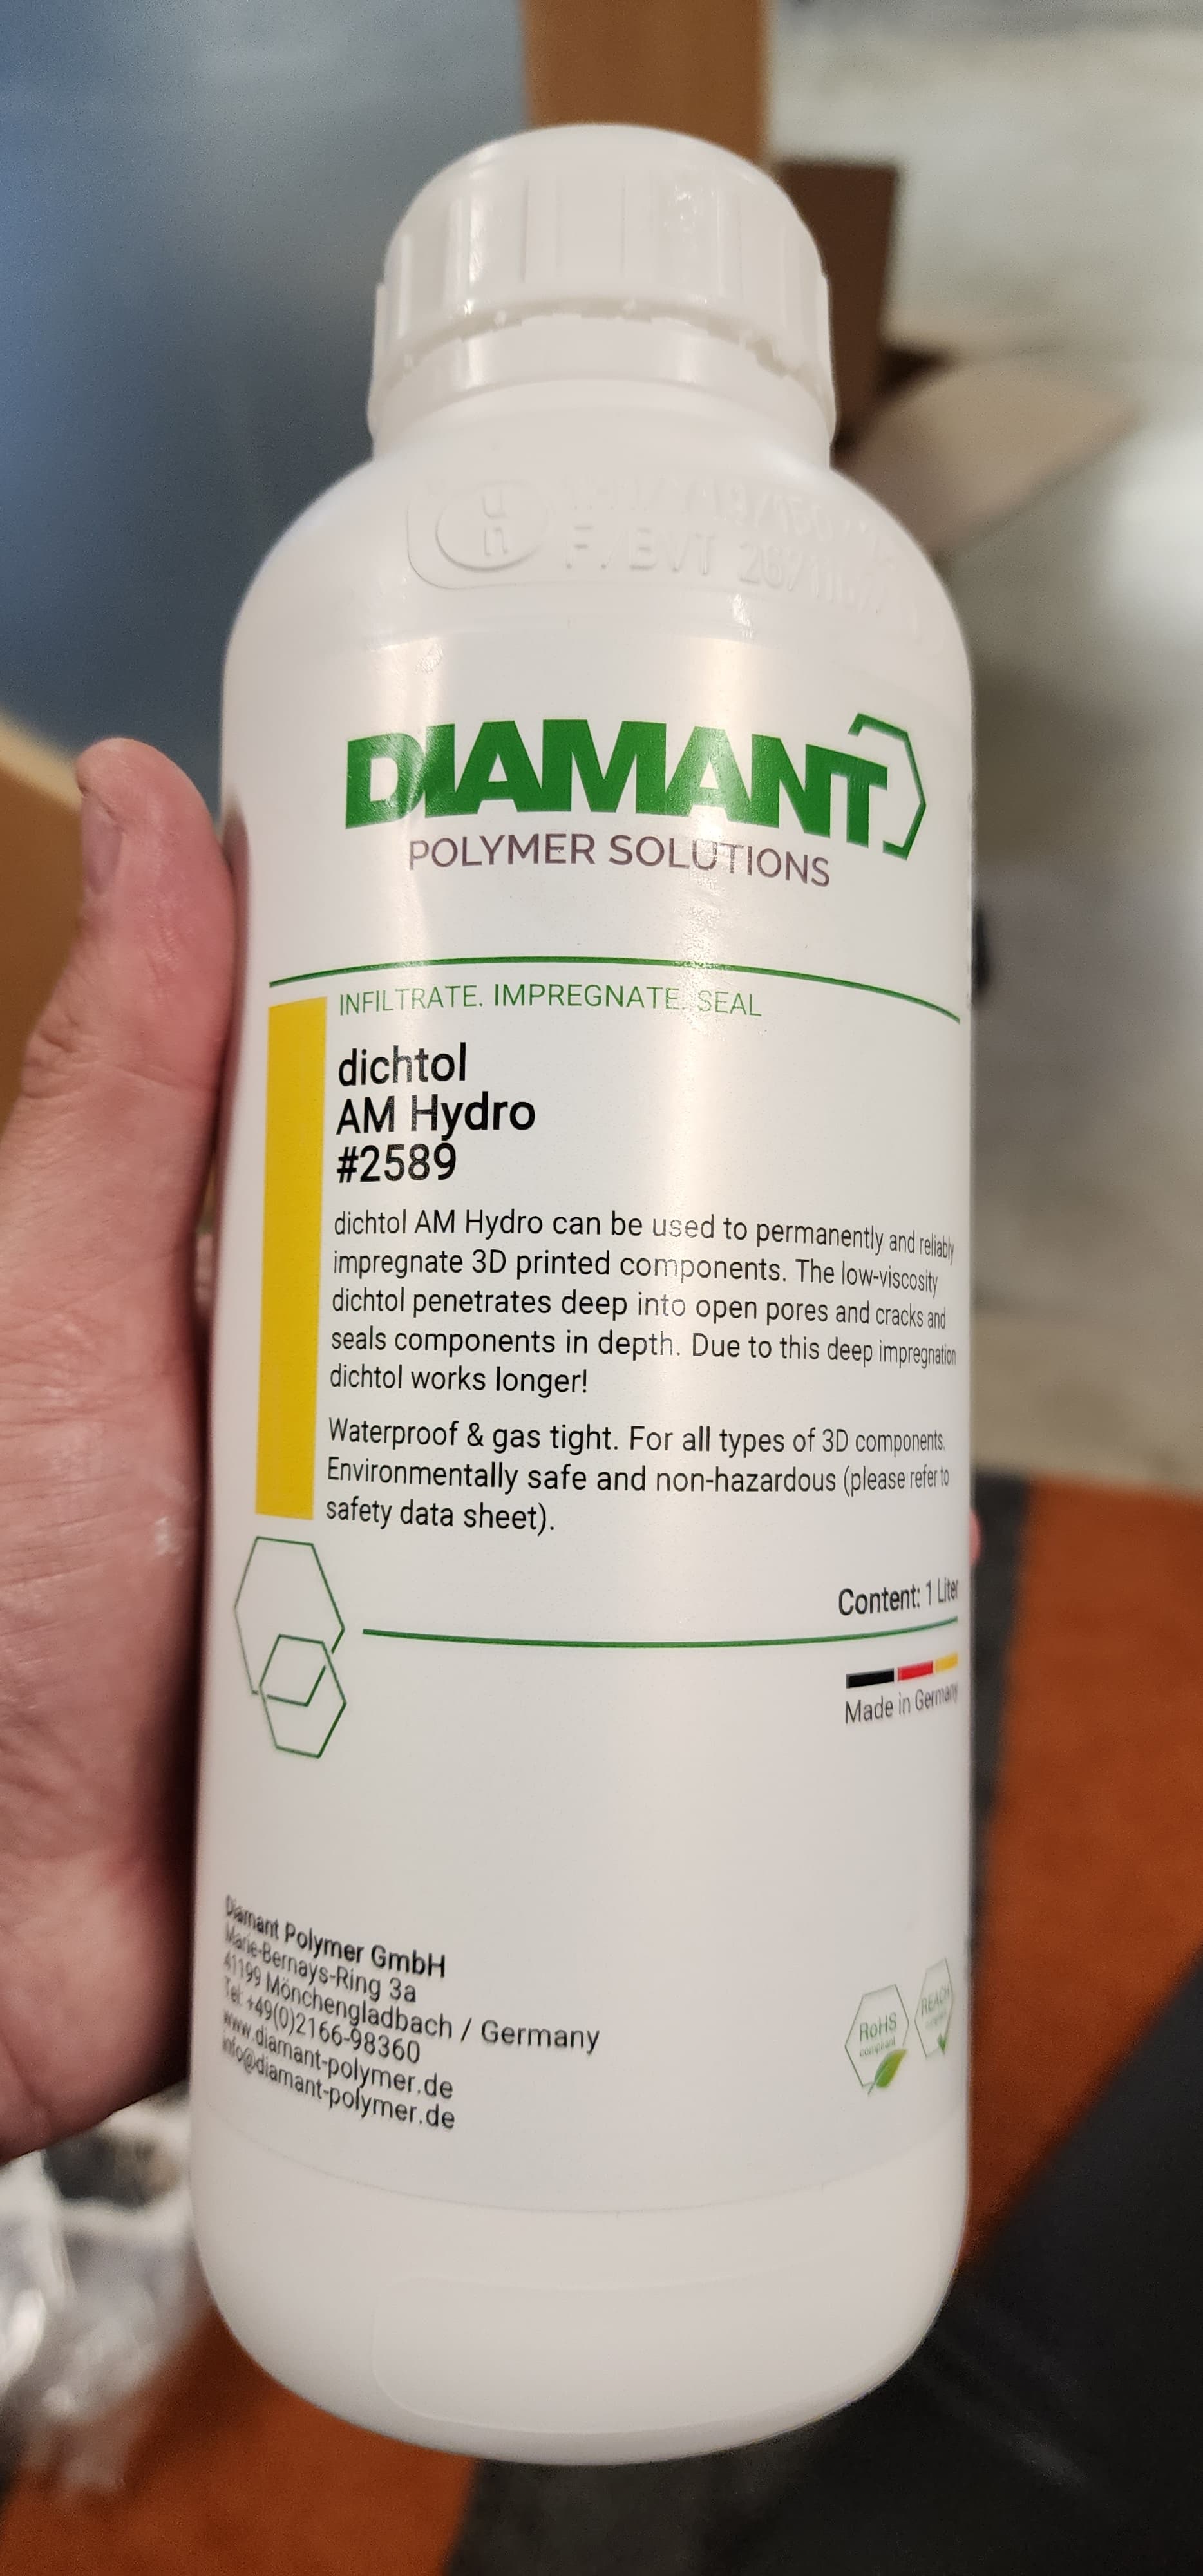
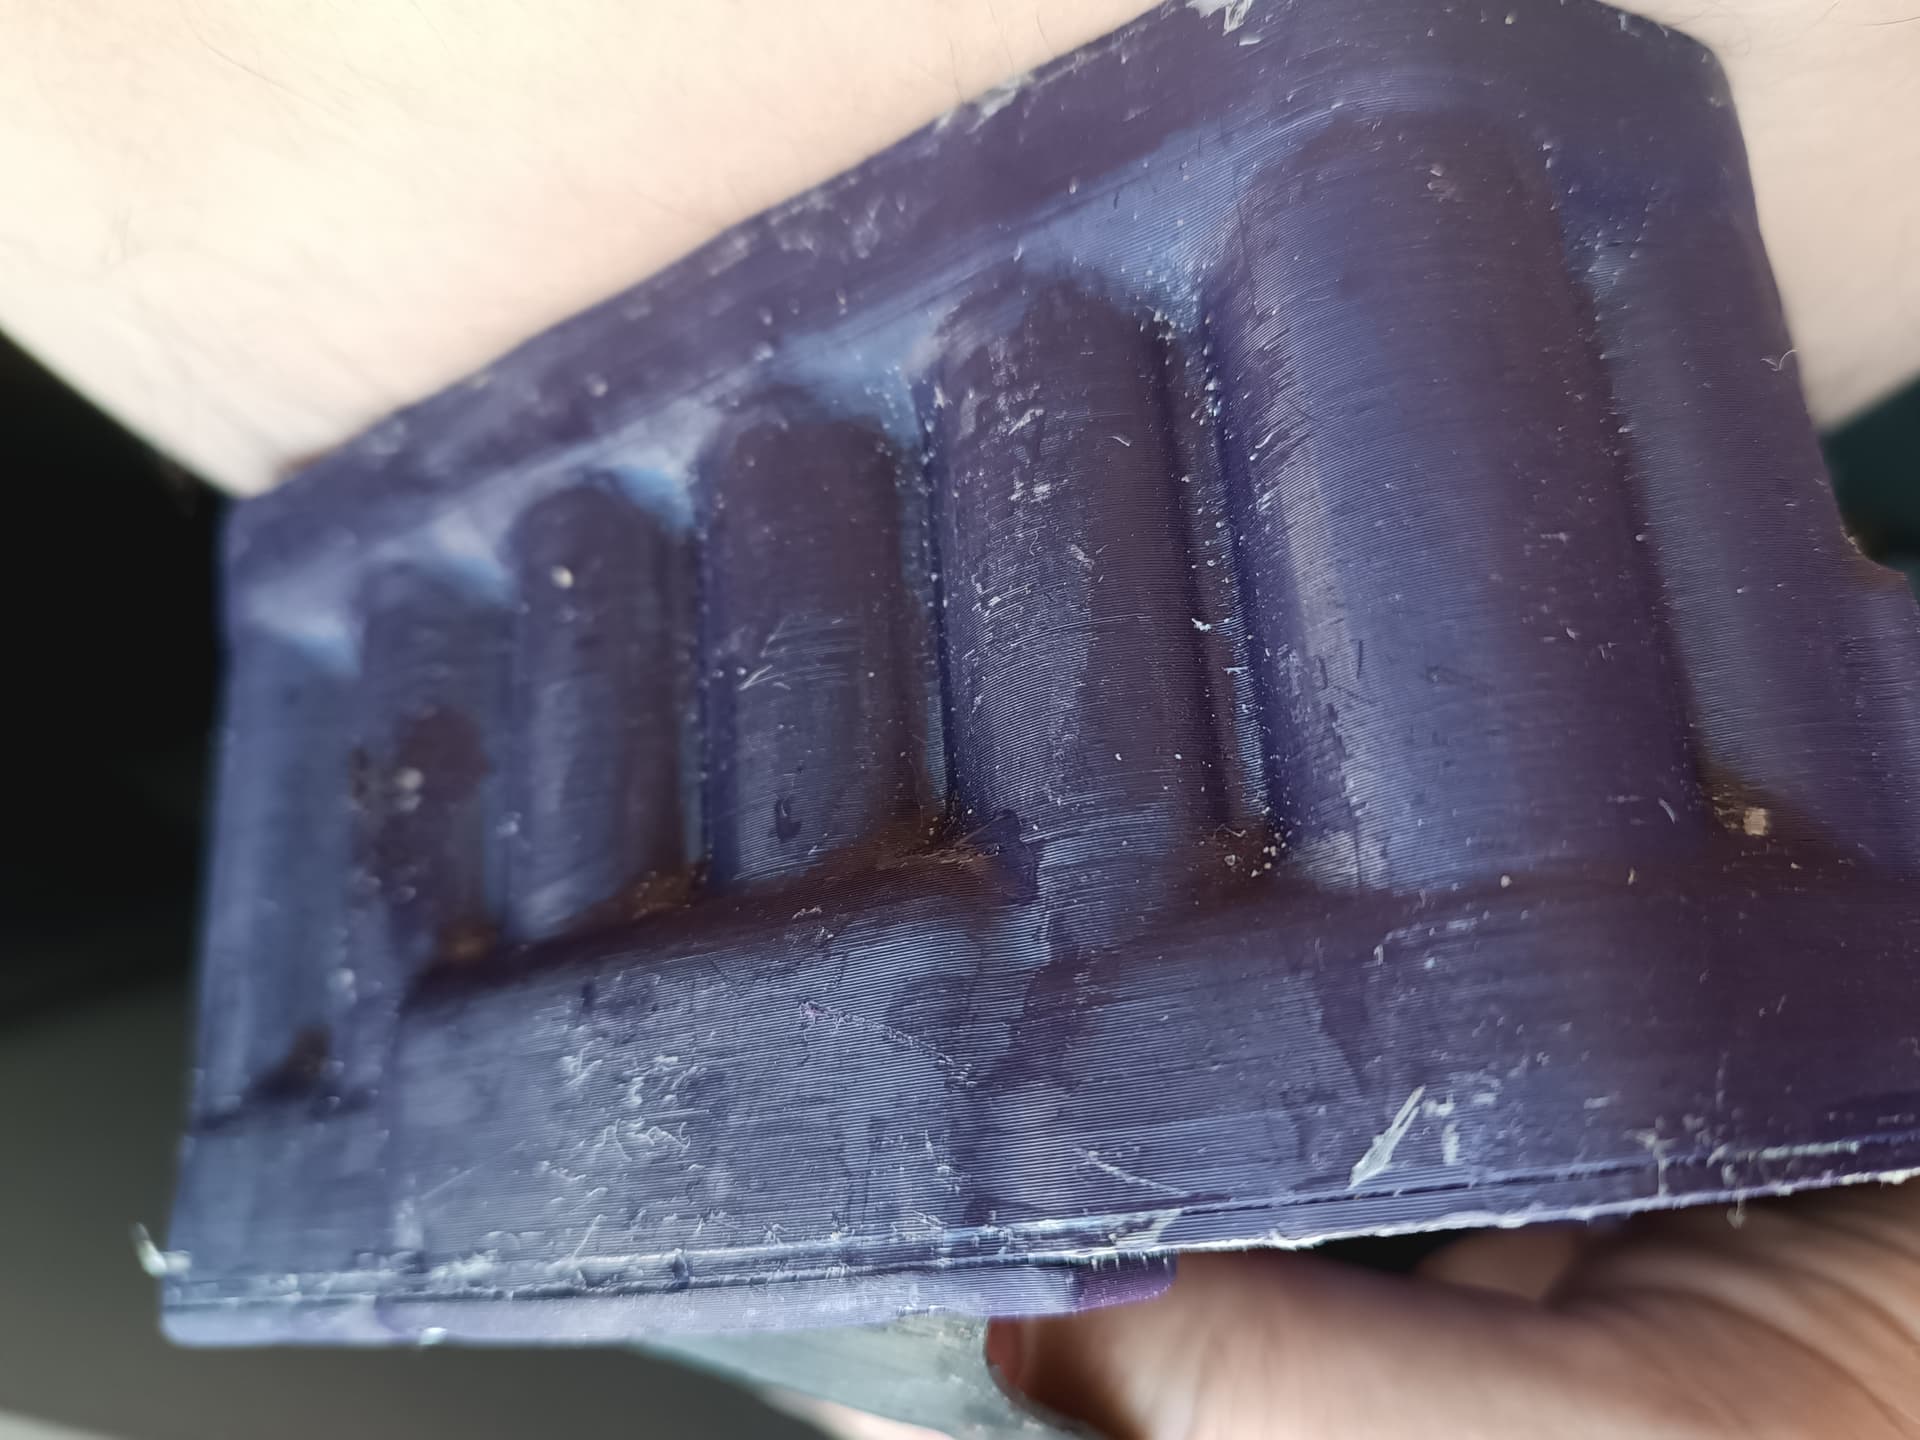
It’s been a while, but stuff finally arrived. The dichtol am hydro is done interesting stuff. Sort of reminds me of cactus juice resin for wood infusion, but way thinner. It visibly enters the part, which is just weird. Some of it pooled on the bottom, which I was able to remove in a sheet, so I’m not sure if this is a good idea on a load-bearing surface like in a structural part of my board, so I will be skipping those areas. That being said, I did make a fitting for our model hydro turbine, and it didn’t leak at 80 psi. It’s not a cure-all, but it is certainly useful.
The mast will a t as a shield for the signal. I also have mine on top of the mast in the Flipboard cavity it works great. I also build a Foil drive like unit with a box between the mast and board and it works from quite far away even if the box is under water.
Battery system completed. I need to do some potting of the charge port as the ip68 rating of it is entirely based on the slip on rubber cover. Ialso should take the pack out one more time but it is really a pain as i should have flipped the fuse to the other side so i could acces the bottom bolt easier. The reason for the disassembly is to apply the dichtol. I got the vx3 connected and working but it feels like it drains fast. I’ll need take it apart and try to fix some of the issues people have had since this is an older one i bought about a year ago. Next up is board design and ordering carbon. Going to ask again about tips. The local surfshop gave me a few pointers but they didn’t really know much about foils.
I see that you still have the on/off switch attached to the VESC.
If you need more space in the VESC box, you can remove it. You’ll need to short two wires, but I’m 100% sure you know how that works.
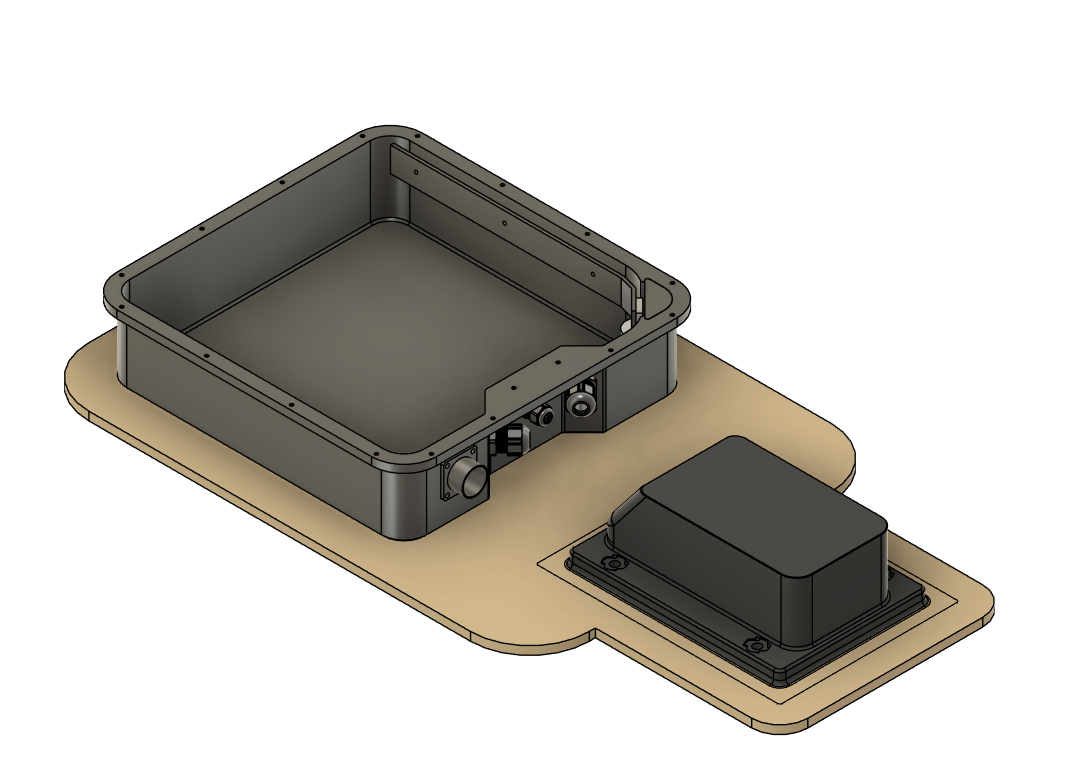
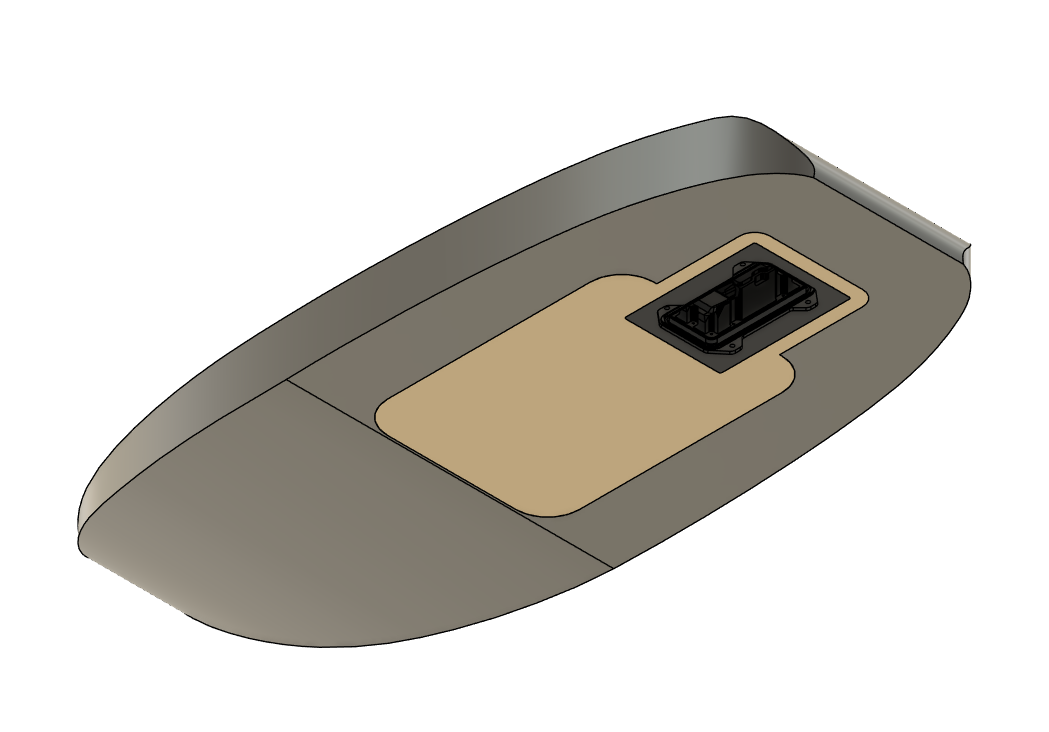
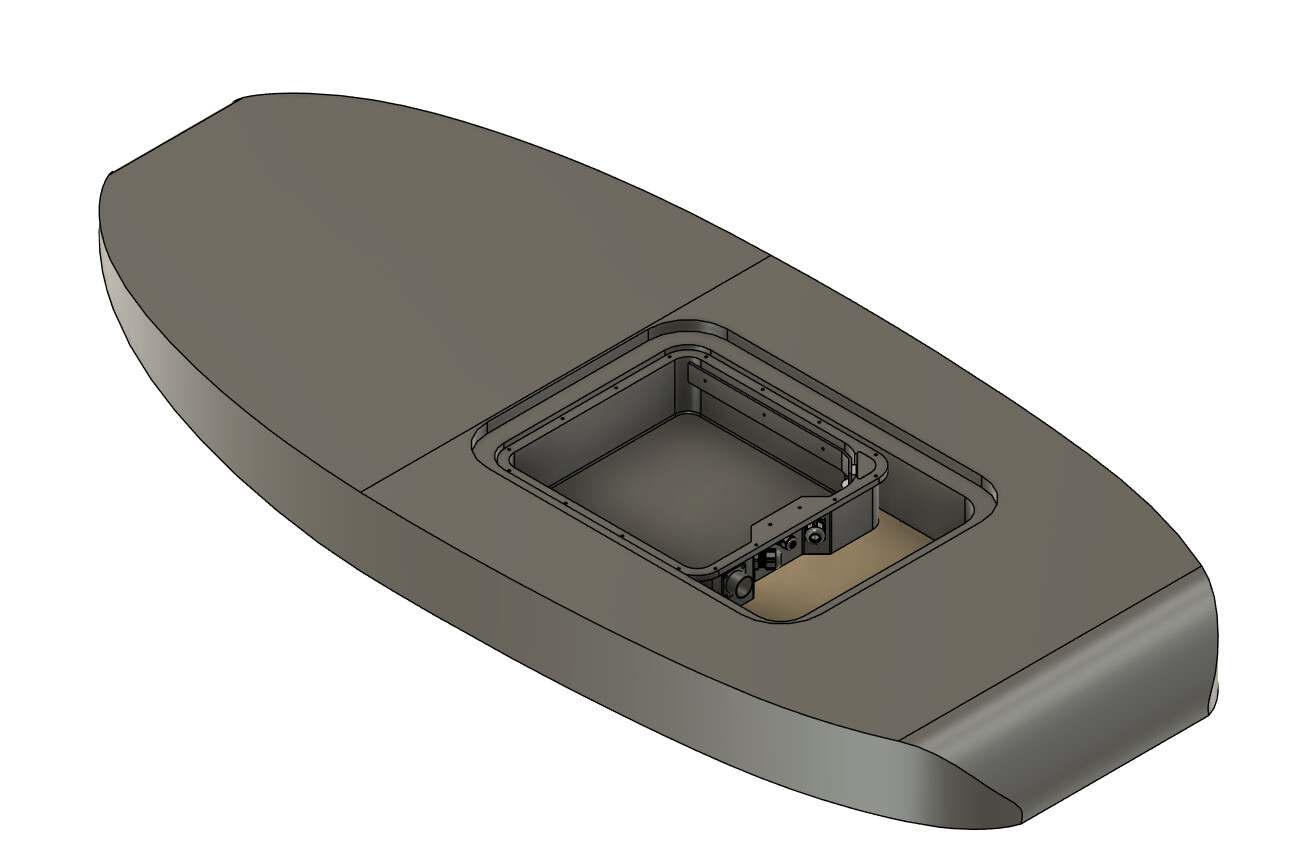
Yes, I haven’t sealed it up fully yet either. Until I get the board built, I don’t want to lock it in 100% until I get my base plate figured out. I also realise I need to figure out how to hold the battery down since I didn’t model a locking feature on the outside of the battery. As for alignment, I was thinking of placing the mast box and the battery on a CNC’d plate that will be laminated and epoxied in advance of the board, then covered over, effectively doubling it up in those areas and making the fitting of the main power unit easier. It also allows me to screw through it to secure the locating features for the battery. I’m debating on what material to use for the laminate core. I was thinking divinicel, but it ain’t cheap. I was considering using a wood core or attempting to laminate some PVC foam board from Home Depot. I only have about 9mm for the bottom, and 15mm is reserved for the top hatch; I don’t want to worry about a pinhole causing rot. Has anyone tried this before? I’m still working out how to lock the hatch, too. I have cam locks coming, but this feels like a massive door that will be tough to seal.
I made a bottom plate for the board from solid carbon and 5mm 80g/m3 Diab hard foam.
Top plate is a cfk sandwhich from 5mm foam as well. See here:
Bottom: Daniel's 2nd build - #4 by sat_be
It’s a bit hard to see but if you scroll down you get the idea. I laminated the sandwhich with one layer on each side, glass on the inside, carbon on the outside. Then I glued it to the bottom of the board and laminated over. In your case I suggest you reinforce the area where the mast attaches with aditional carbon layers, or put some stripes of full carbon in the sandwhich of the bottom plate to distribute the forces.
Top plate: Daniel's 2nd build - #6 by WeightShift
@sat_be that is extremely helpful, that’s really close to what I’m planning. I will pull put a layer of uni down on the plate then cover with a 2nd layer during the full layup. Did the 5mm foam work well? Flex is my concern if going that thin with the hatch. I will be thickening up the epoxy around the mastbox, it’s a lot of surface area so i hope it distributes the weight well. I was thinking about doing a traditional seal and lock with marine cam latches but i do like the securness of yours. For the bottom i was thinking of a 6k twill inside and out. I will be painting this like a car with a 2k clearcoat on top as i know how hot plain carbon can get.
When I applied dichtol with a brush on my petg battery housing, it gave it a bad look and also peeled a little. So I will not use it next time. The petg was dark.
For the hatch you can also go a bit thicker, like 8mm. As my lid is fixed with screws, it does not flex, but I also do not stand on it while foiling. To counteract flex you can also support the hatch with your battery, if you build the battery case stable enough. If you use one of those stainless boat latches to close the hatch, better place it ouside of the seal in a “wet zone”, most of them leak around the shaft.
Hi, I used a product called neviprim I believe it does a similar kind of thing but it worked really well but I thinned it down with acetone (4:1).
Have a look at the Fliteboard hatch as I don’t find any flex in mine.
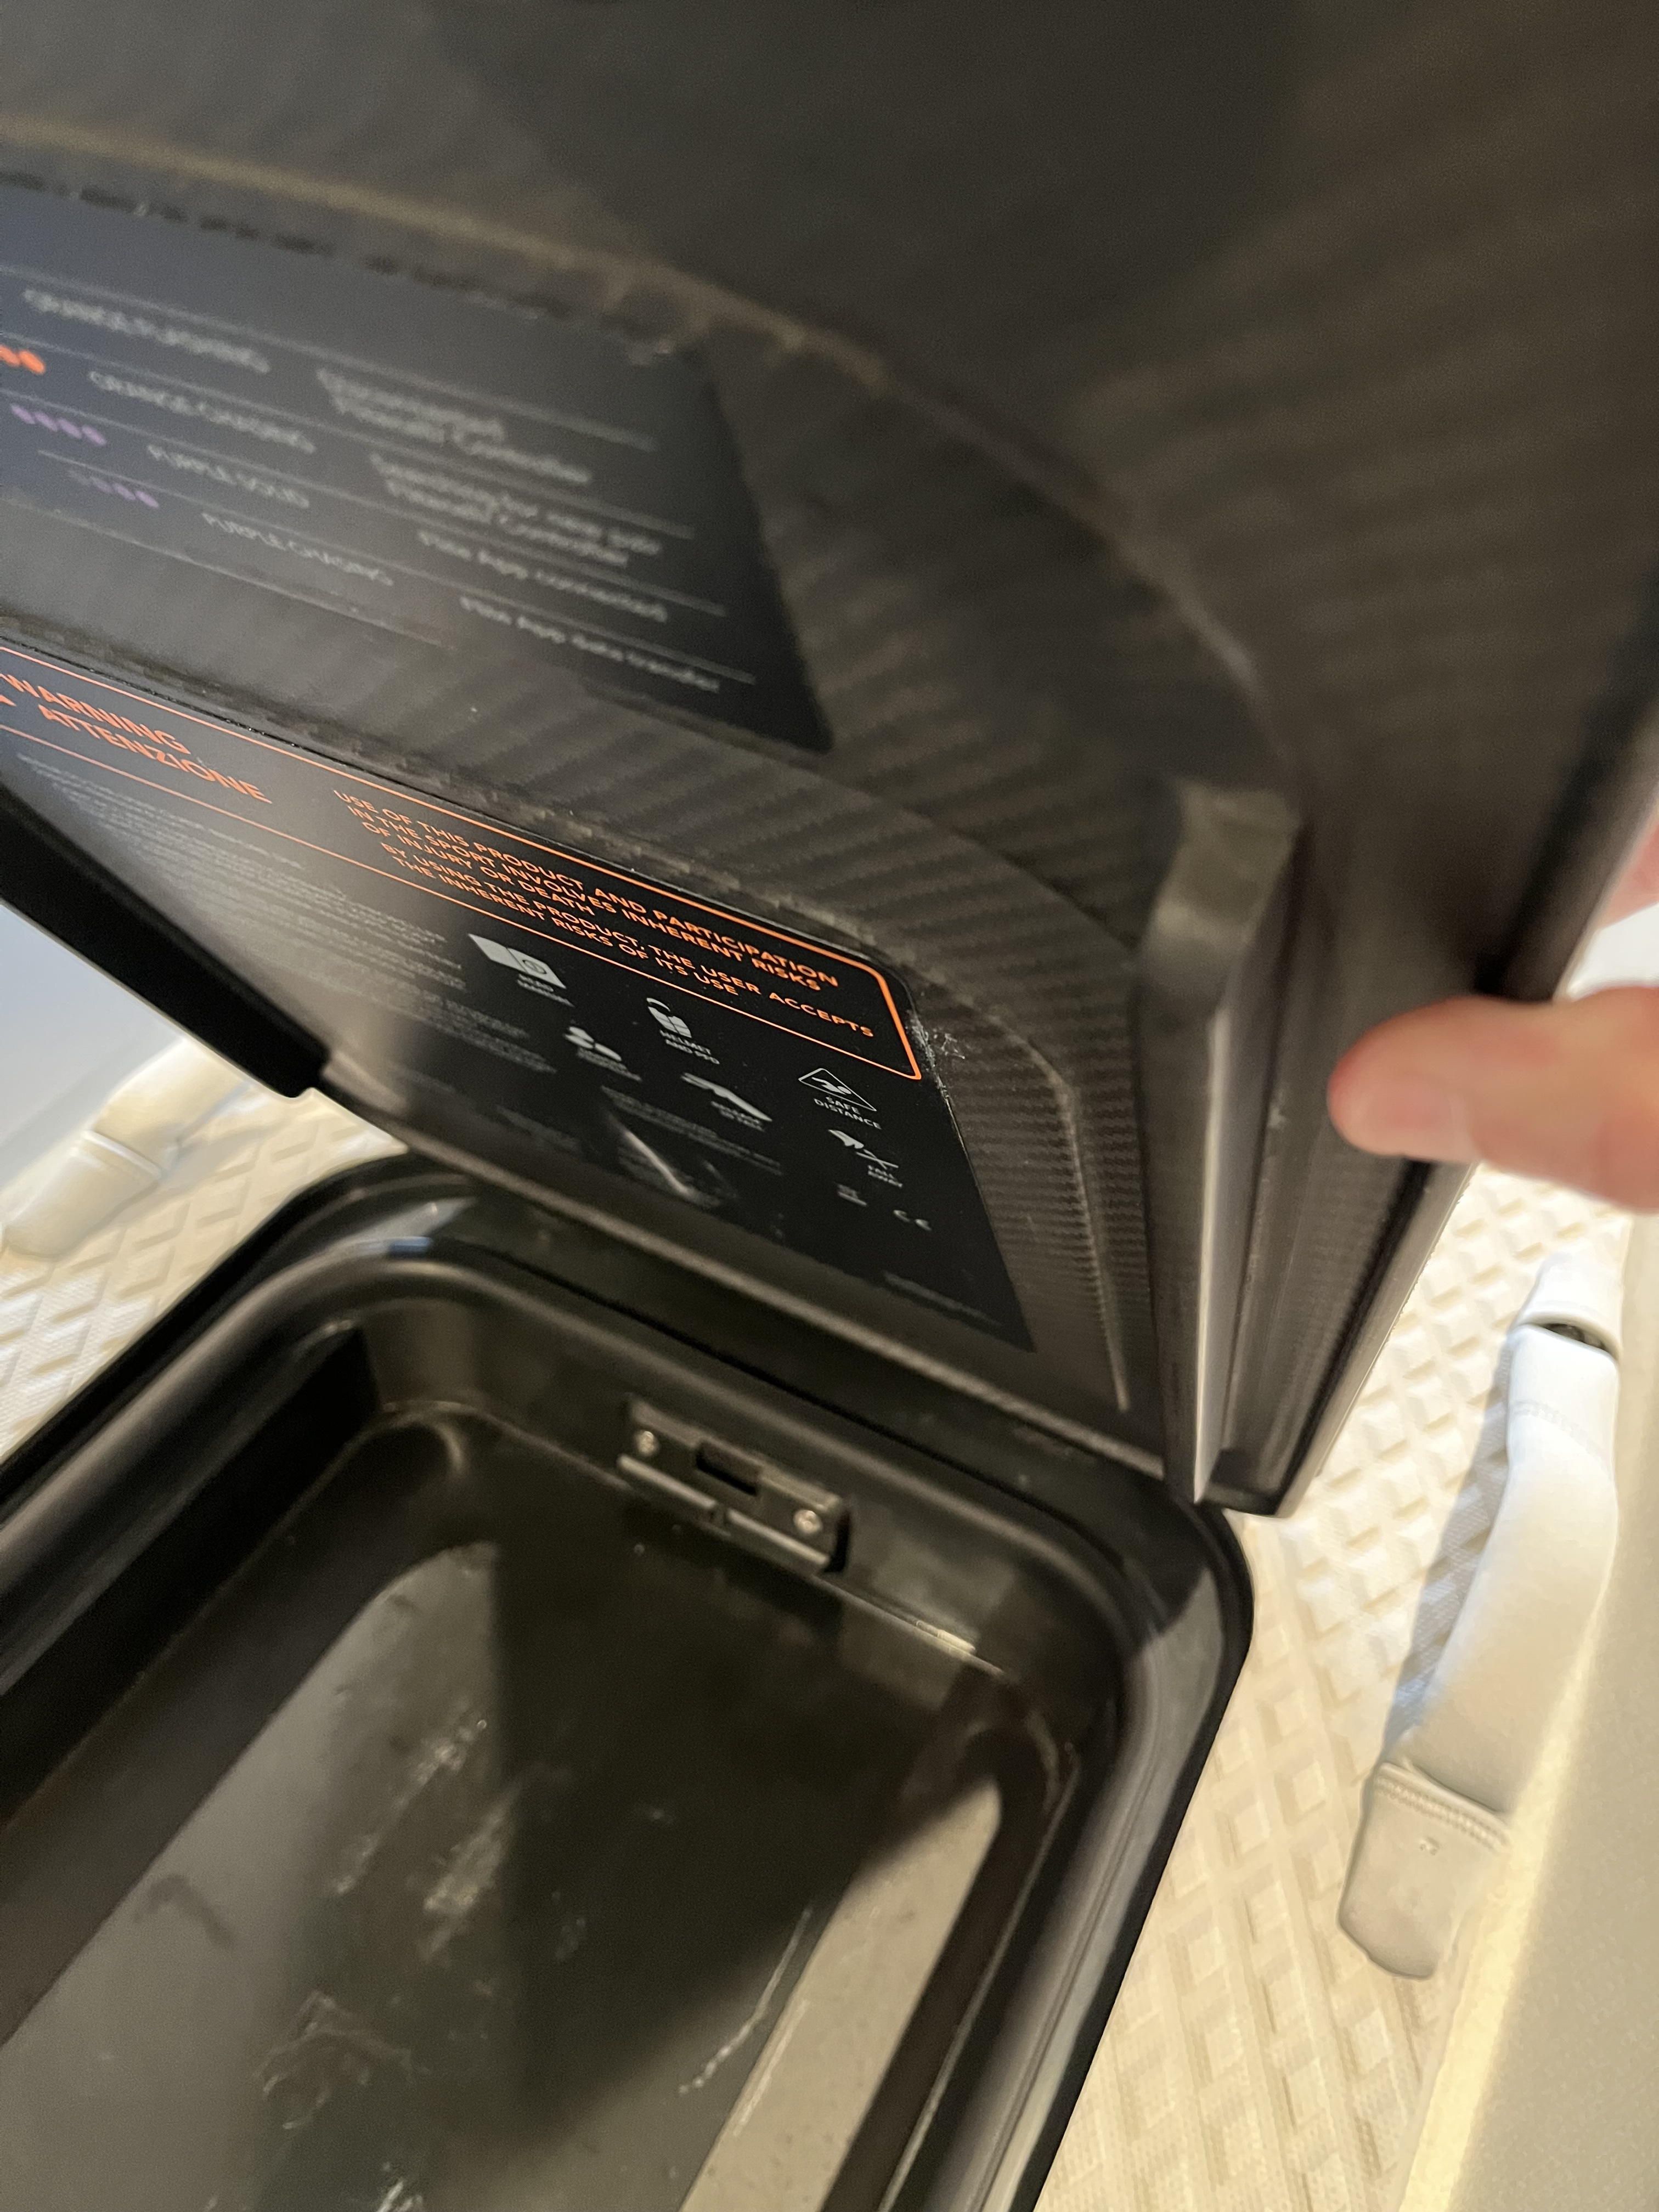
The inside of the lid has two “splines” that rest on ledges inside the compartment which I assume are there to stiffen the length dimension.
Interesting. I know there is a few types of dichtol. I used the am hydro version as it was the only type i could get in the US. Ihad to keep it wet and apply it in one go. The only spots it peeled was were it pooledup without me noticing it. I’m going with a 3/8 " (8mm) foam and will likely vacuum impregnate it. To prevent getting bogged down i will make wooden placeholders while materials ship. If anyone can take a set of photos of a thier hatches in curious to the seals and holdown systems. I’ve only seen the Lift gen 4 in person.
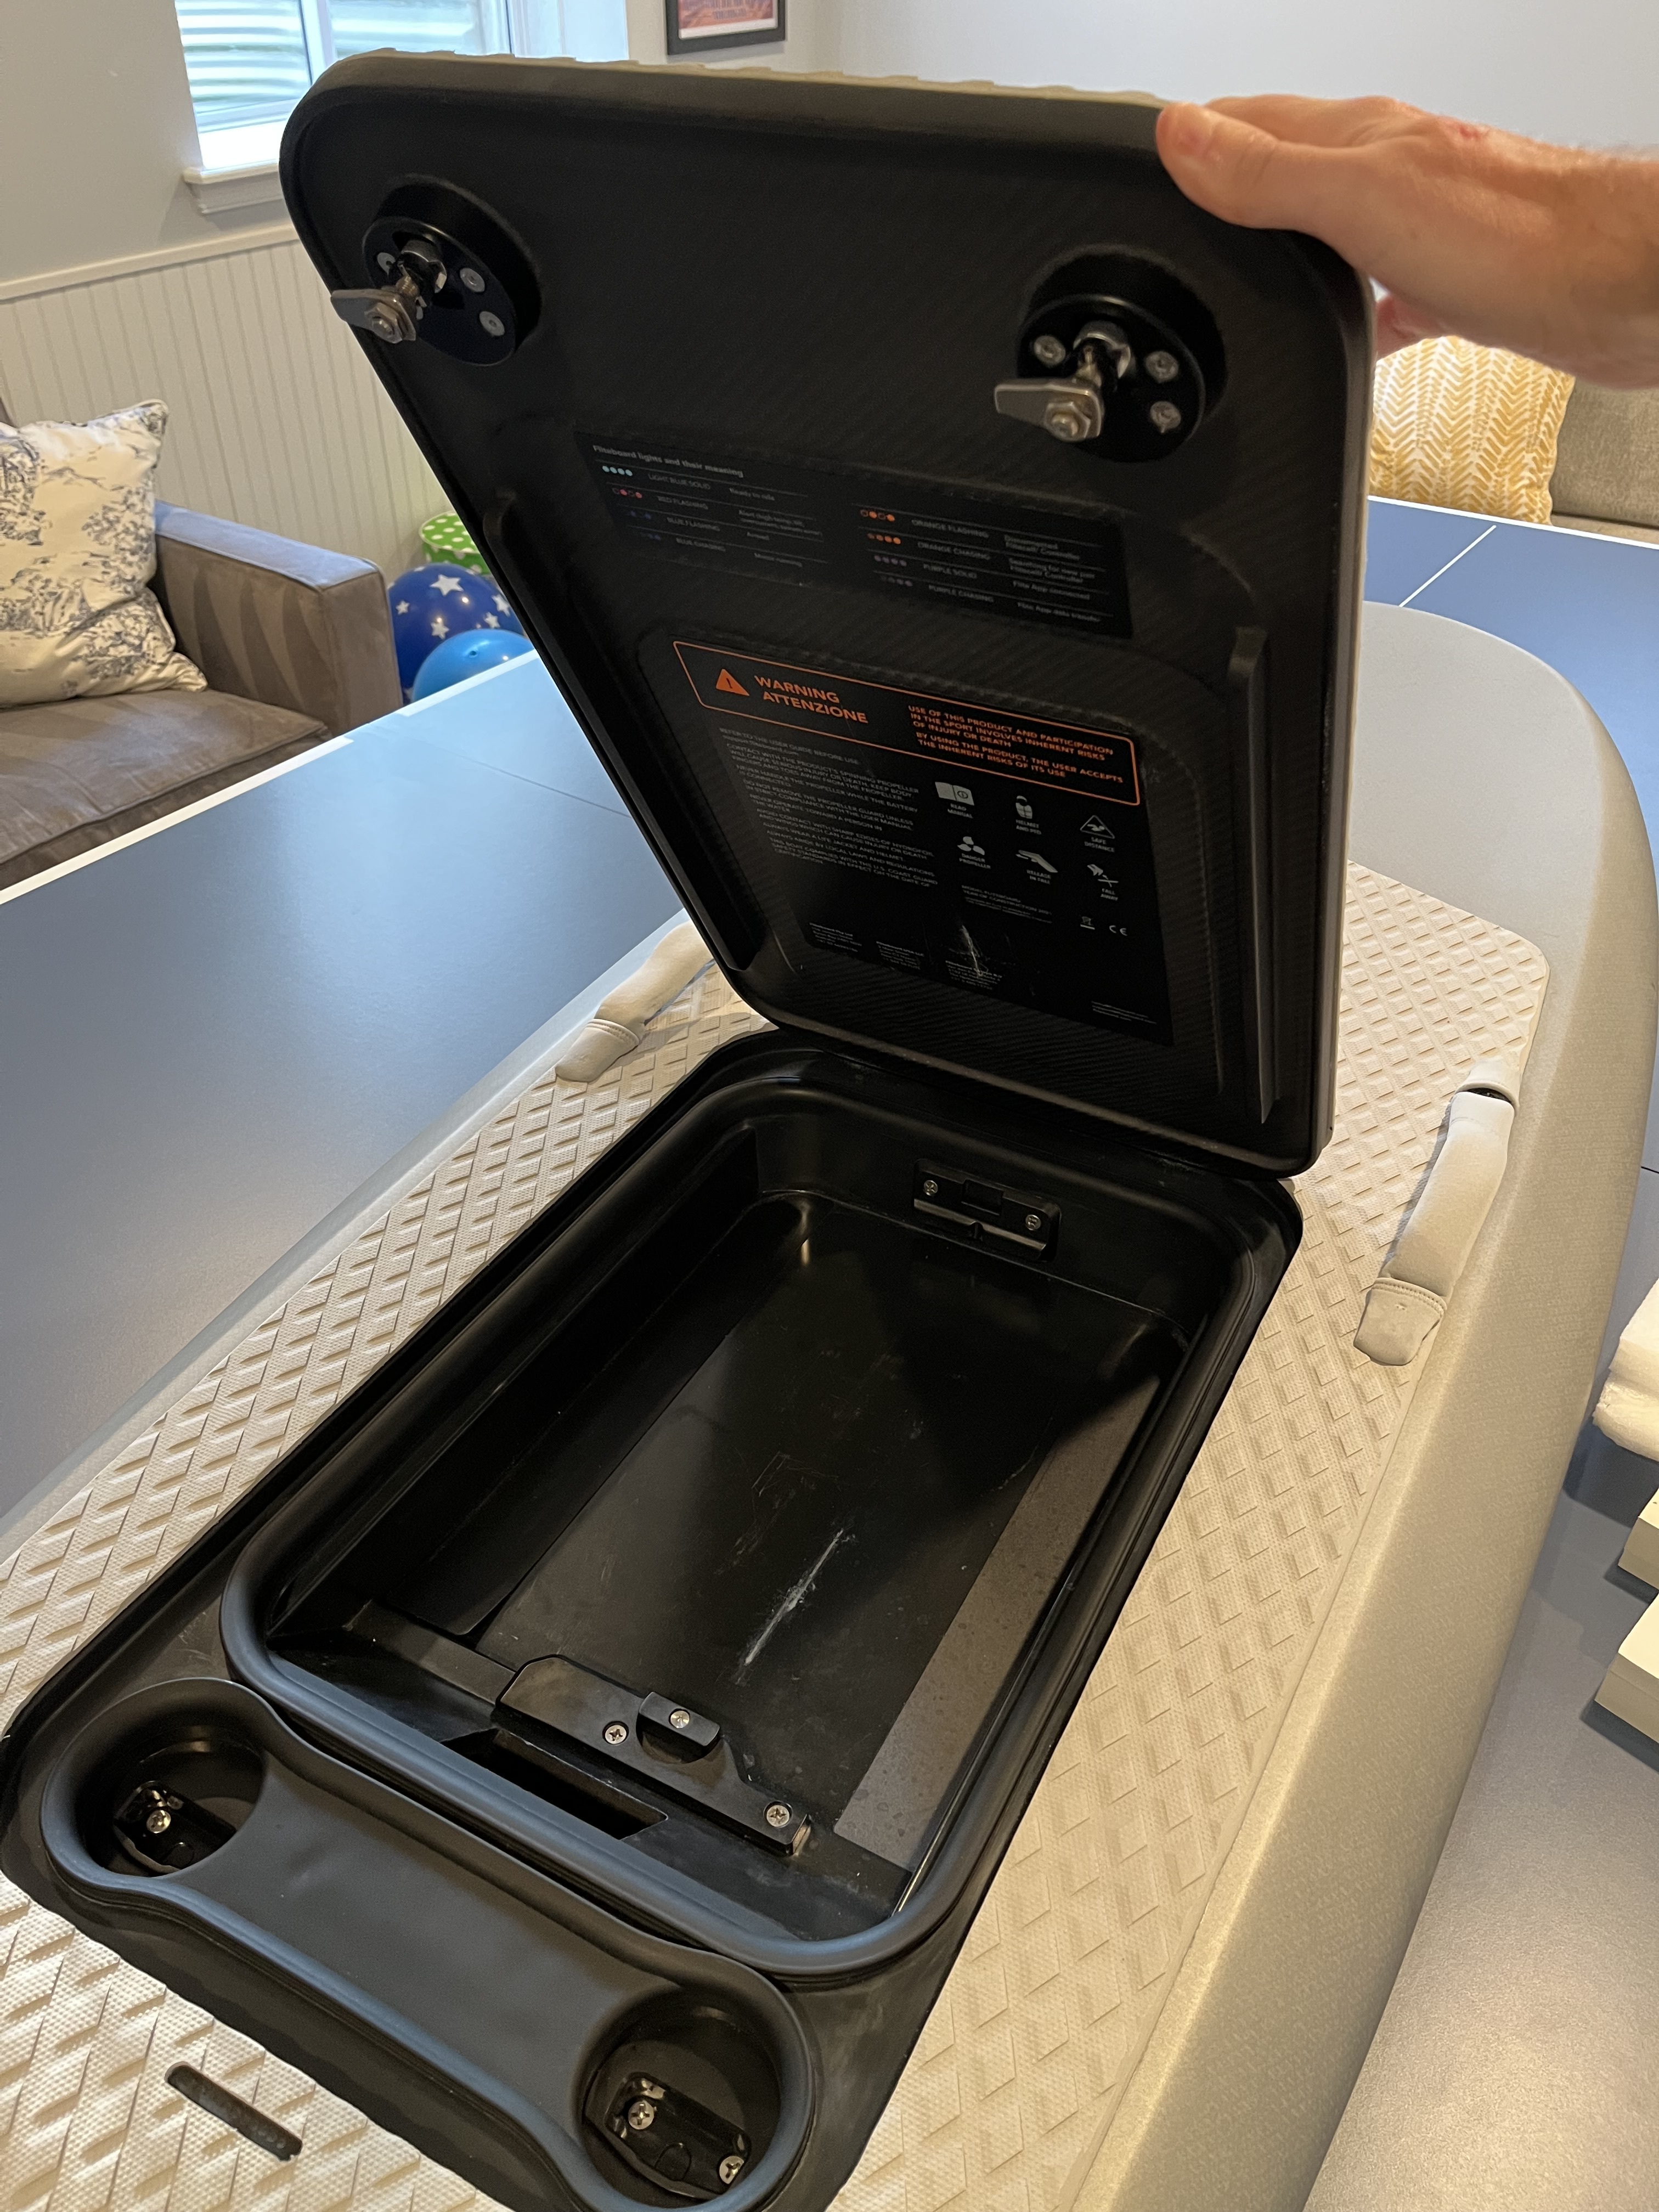
Here’s a few photos of one of my Fliteboards.
Let me know if there’s anything in particular you want to see
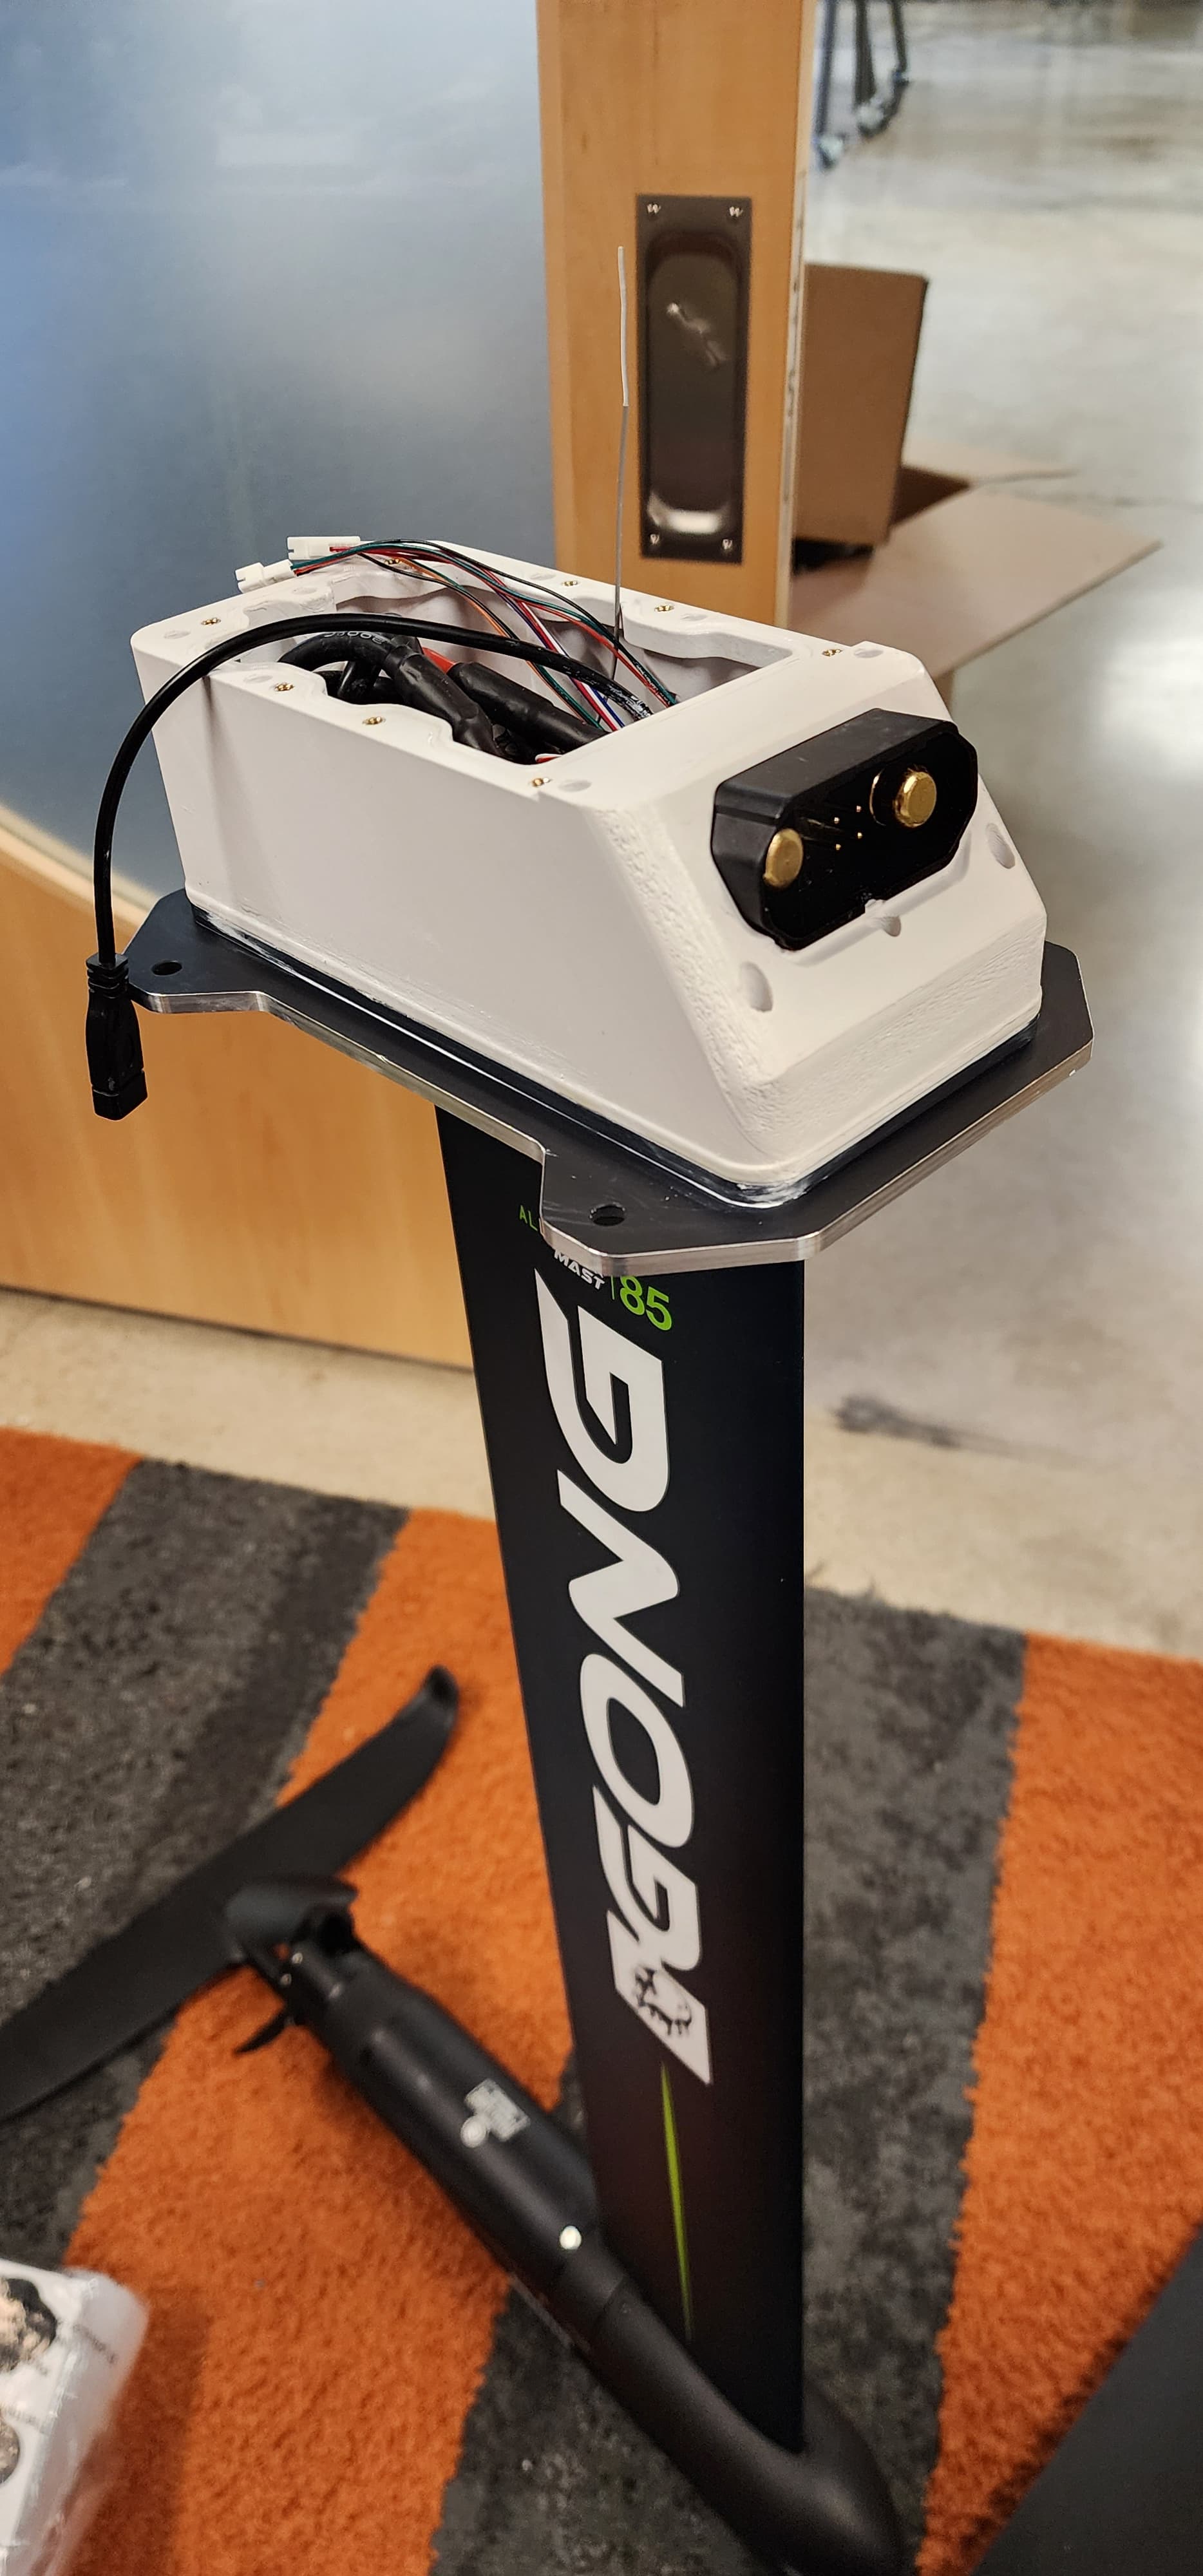
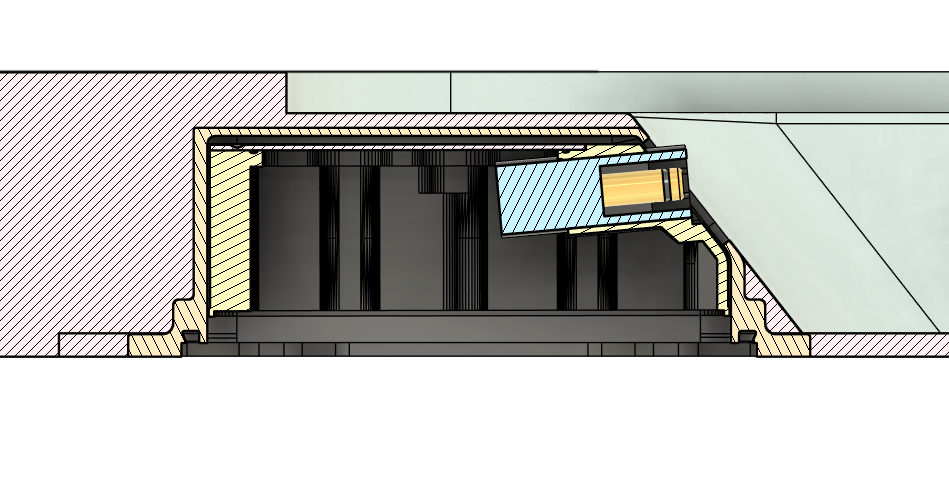
Also, the top of the “box” where the mast/esc goes definitely has plastic (from your question earlier). That little black strip on the left is where leds shine through to give a few status indications. Not sure if this is also meant to help with remote connectivity
I see some subtle features. The long support strips look like the are there to prevent over compression of the seal. The latch cups appear to have their own sealed compartment and spread the load from the mast right to the cover. There is also a small lip on the top cover which I’m guessing aligns with the cardoor style seal. I also see what appears to be a battery locating feature. Guess i need to figure out the seal next, in going to guess i need more compression and conforming than a oring can provide for such a large opening.
I’ve never built my own board, but seems like getting a good hatch seal is one of the more challenging things to get right. I think I’ve seen a few builds that used a pour in place approach with silicone to get a nice wide and level seal.
For reference, this Fliteboard actually has a suction effect at the end of a ride and I have to give it a bit of a pull with the other hand against the board to get it open.
It appears that Lift sells an EPDM-based seal with 3M VHB on the back. I think I will go with this first as it’s the easiest option. If it doesn’t work, then I’ll try a Moldstar 30-based one. I don’t have a Lift board in hand, but I will try to source the dimensions of the seal so I can keep moving forward. The key measurements are the width and height of the seal. The thickness of the hatch top and the depth of the seal seat below the hatch top. With that, I can get the compression ratio and set the depth of the seal seat in my design, which will have a double-sided 6k carbon hatch with a 3/8" divinicell core.
It looks like I will need to do some reinforcement along the bottom of the battery compartment. I will likely sculpt a fillet around the bottom of the battery compartment during assembly, as there is a significant butt join there that needs some attention when looking at the section analysis.
Just really need the hinges to arrive so I can get those modeled in and set the rest of this. Starting to wish I lived in a more marine-friendly area. Shipping times are killing me.
The start of school is rapidly approaching. I’m hoping to get this done before going out on orientation trips, so stay tuned. It’s been slow going due to a rather unfortunate back injury lately, but the show is about to start back up. I need to make some small alterations. I couldn’t get Divnicell at a reasonable cost shipped, so I’m going with some Edura 207 marine board, but it is a bit thicker. Never used it before, so… this could be fun.
Hey, how is this coming along? Thanks