I’ve seen foil drive gen 2 riders out having a blast at my local, I wish to join them but can’t afford the price tag. I’m an experienced wing foiler & surfer, but not prone foiling.
My first attempt will be a classic bolt on, I appreciate this has been done many times before but its my first foray into hobby electronics. I have done a small amount of 3D printing at my local library, so could do that or might investigate setting up my own printer.
My requirements are:
85kg rider
85L mid length board to start, hopefully on a smaller prone board in future
axis art v2 939 foil
ability to efoil to get out the back, but primary use is foil assist
My planned parts list:
flipsky 6384 waterproof motor
flipsky VX3 pro remote
80A flycolour flydragon ESC (this is the part I am the least confident about).
12s2p or 10s3p battery made by a local builder. He said he could make it out of multiple 10s1p batteries so it could be split up and transported.
waterproof housing (any waterproof aluminum options that easily dump heat?)
Any glaring issues with this plan? From what I understand, two of the big issues are overheating and water-tightness of the box.
The battery builder said he would be using:
LG HE2 Cells 2500 mAh 20A in the 18650 package, with a BMS.
He hasn’t built them for this exact application but has built packs for ebikes and eskate.
For the ESC, I can see that there are numerous options within each model, 80A up to 160A, would you recommend going for something like 120A?
On your original build I see you used a box mounted on top, how did you keep the unit from overheating, or is that not an issue as long as you aren’t trying to constantly efoil around?
Hey, are you in Christchurch? I am, and I’ve just finished an Assist Box style build and also a Tow Boogie, both in need of good testing and improvements. I started in a similar position to you with hobby builds etc. I’ll PM you.
I just ordered my motor, prop and remote from flipsky. For others who want to get flipsky gear, I emailed them asked them for a discount and they gave me 10% straight away.
I had literally nothing to build with, so I ended up buying a cheap soldering iron kit which came with a few extras including a voltmeter, and also got a set of helping hands.
Shoutout to @seagull_nz for 3D printing the motor pod, and giving me a whole lot of bits and bobs such as XT90, 4 pin connector for the BEC, as well as a bunch of practical build and wiring advice. Same to @marcoz for the advice.
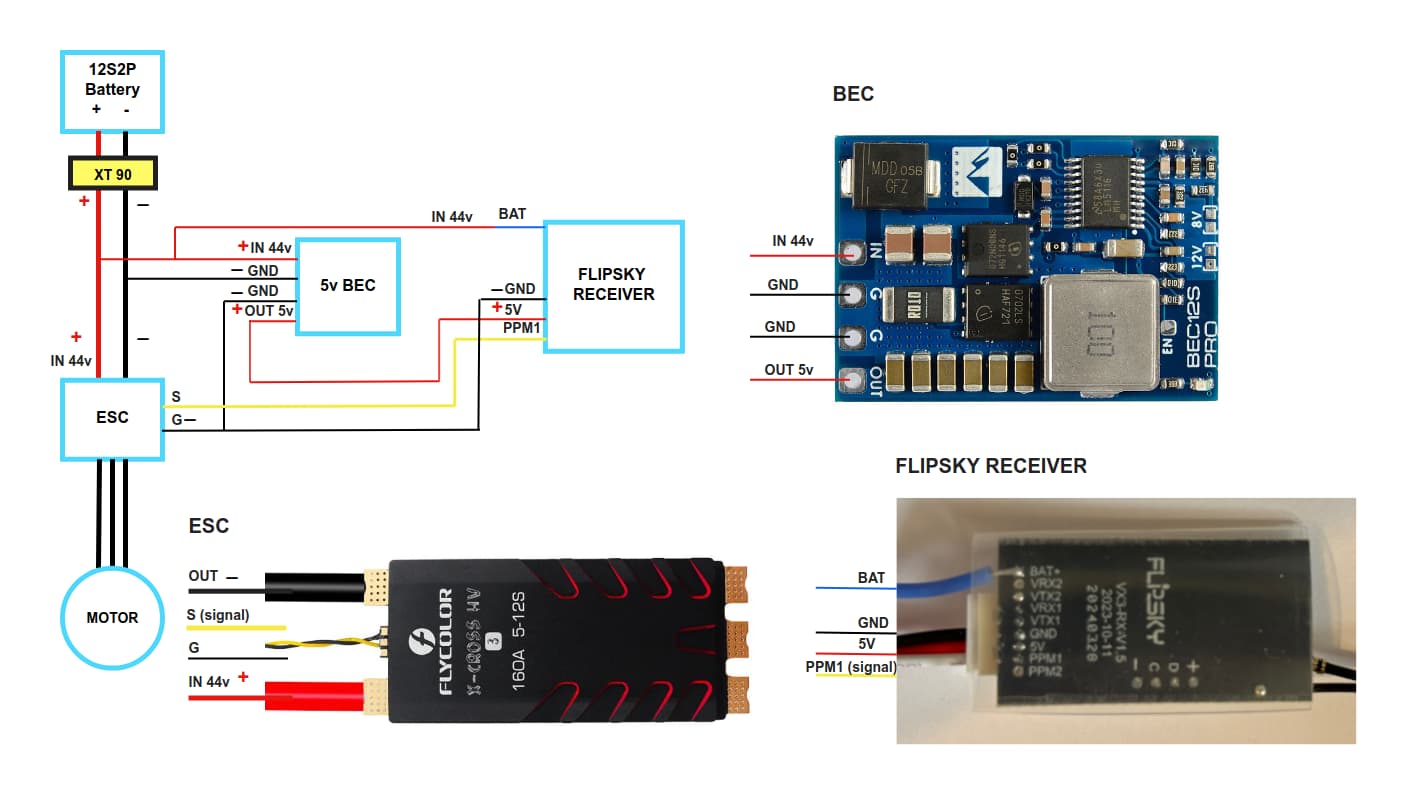
After reviewing other notes on this forum I made a ‘simple’ wiring diagram for my specific components, which I’ve attached below if anyone is interested.
get a hotter soldering iron so I can actually work with the battery and motor cables.
wire up all connectors and test the functionality.
drill the hole for the cable gland and figure out how to bring the separate 3 phase cables through in a watertight and secure way. Also need to get a locknut for the cable gland as for some reason they are sold separately??
figure out which connectors to use to attach the motor cables to the end of the ESC.
get the screws and strap from Bunnings required for the 3D printed motor pod.
I have almost an identical build I’m working on right now. I also used a cheap soldering iron with 60w. I couldn’t get the thick cables to the Esc with it. For me a cheap soldering iron with 150 watt was key to get those soldered to the esc.
Word of warning… be very careful with these guys, they do not really know what they are doing when it comes to high current draw batteries. I won’t get into details other than to say good luck, and inspect the welds and assembly in general.
Thanks for the tip. They are sending me the cells and @seagull_nz is going to help me build the battery.
I’ve ordered this gland to bring the separate 3 phase wires from the flipsky motor into the enclosure, the M20-3Holes-5mm variety, should hopefully be a snug fit.
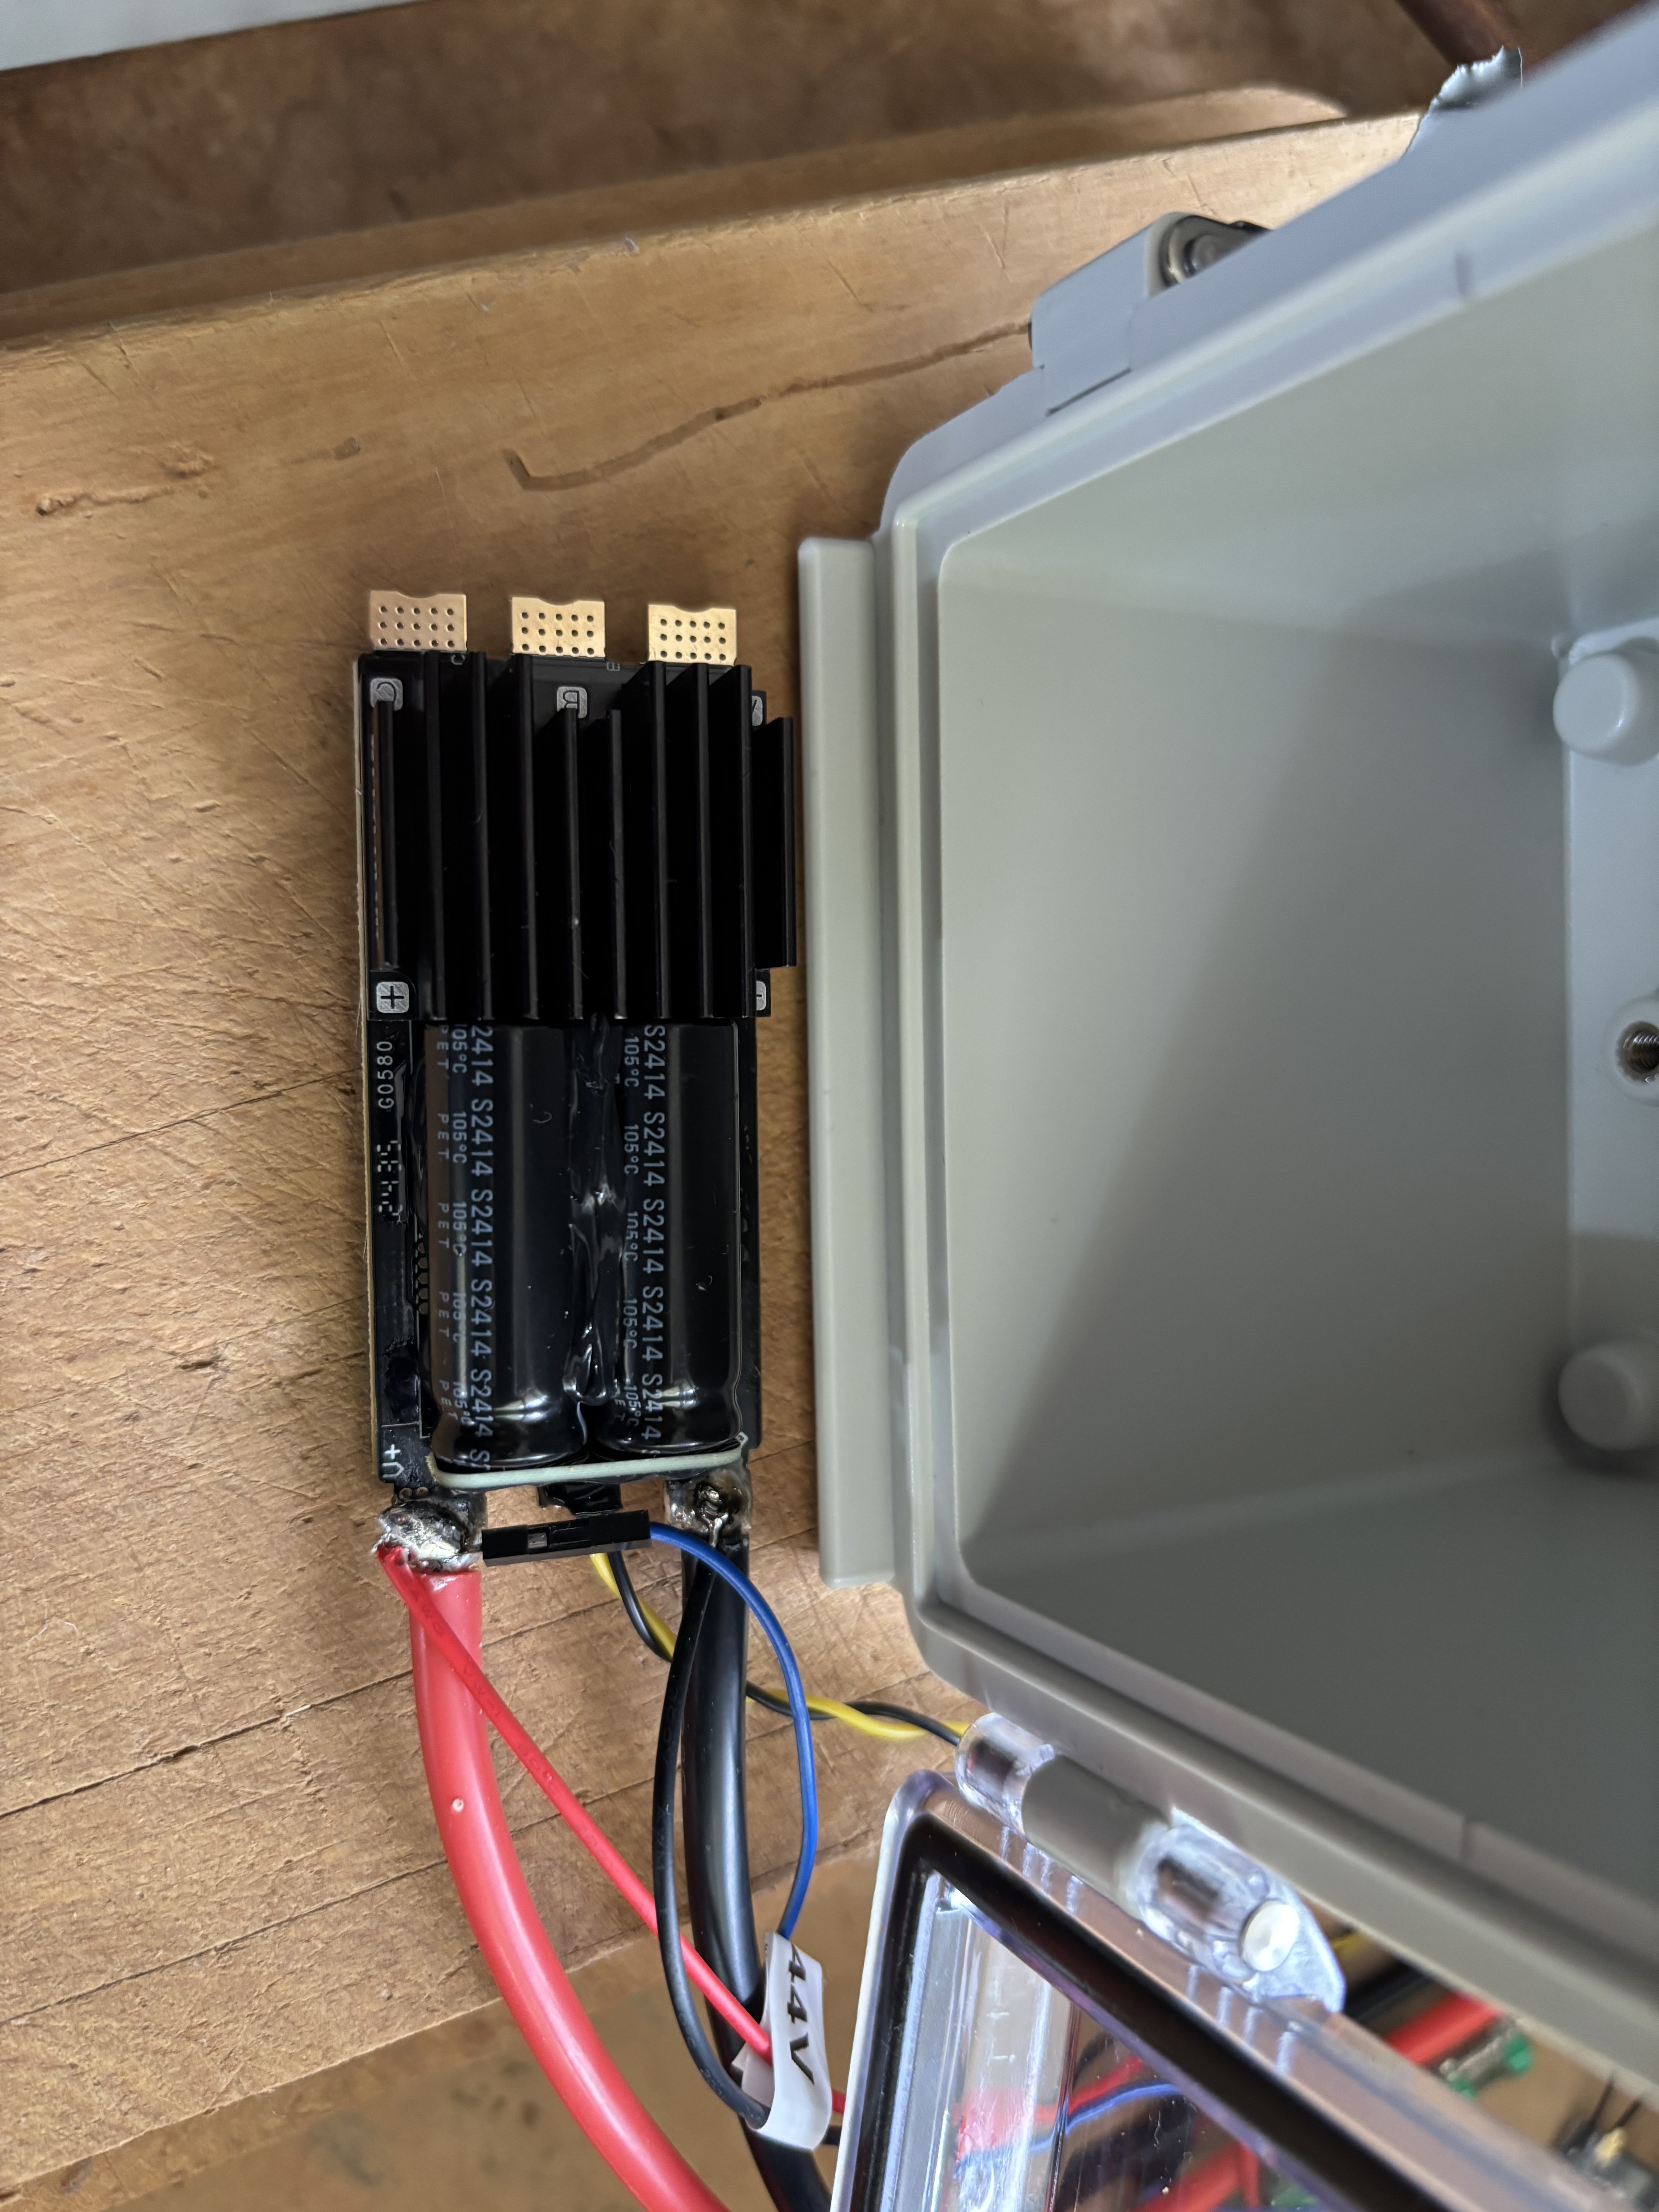
There it not a lot of space in my box for the flycolour hv3 ESC, so I’ll need to connect the power and motor cables at right angles to the tabs. Does anyone have recommendations on a connector interface which will allow me to cleanly connect to the ESC rather than big bubbles of solder? The power inputs will also need to accommodate the BEC and receiver connections.
The flipsky motor cables currently have male 4mm banana plugs and the power cables are just raw 10AWG.
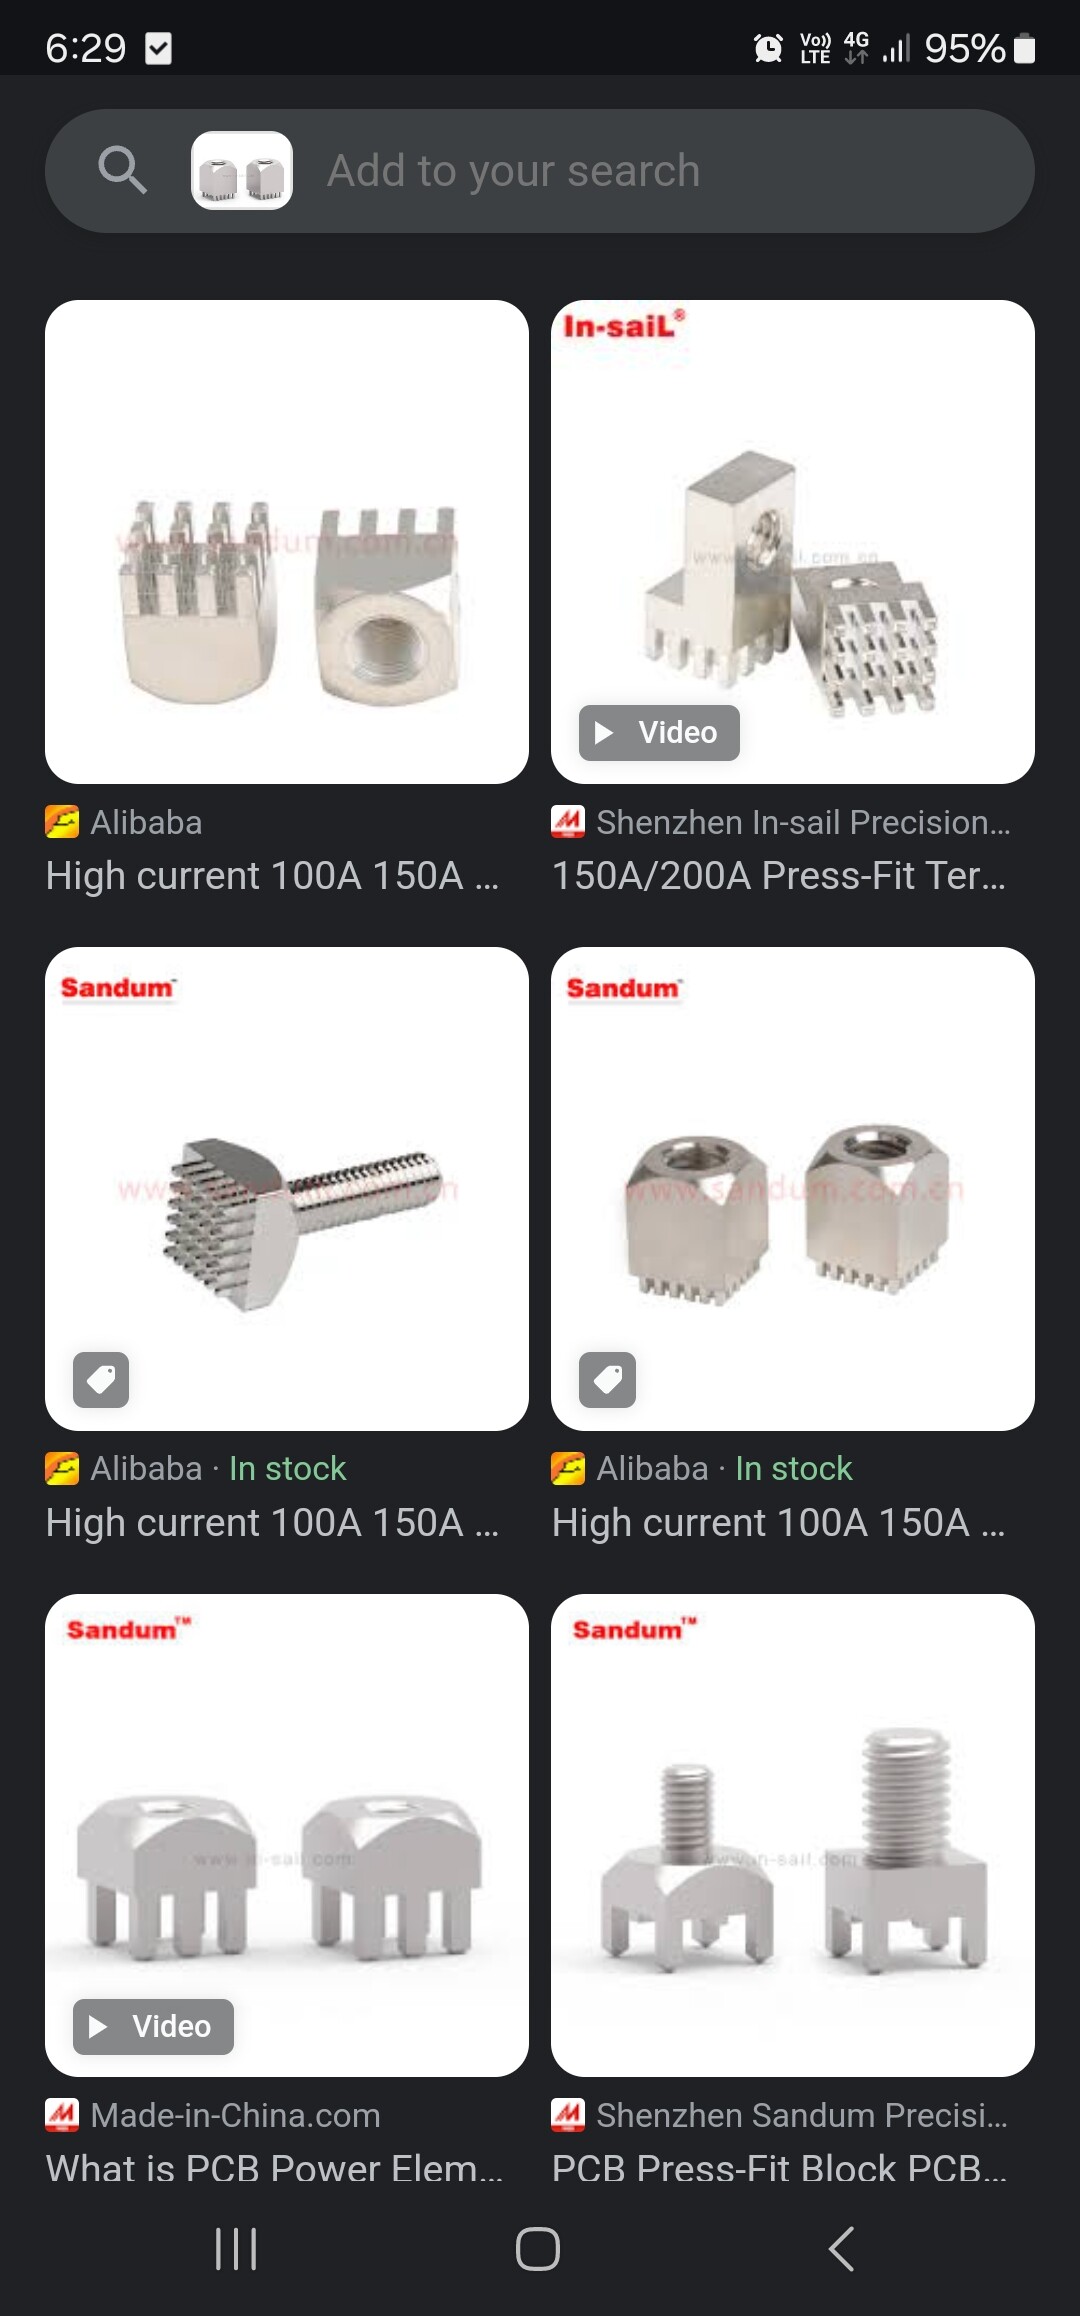
Solder is probably the best option, chances are you’re going to cook a few of those escs over time so the hassle of making it more user friendly to pull apart its probably not worth it. But, if do want something more profesh you can get these
I’ve also had to solder to my ESC at a right angle to make it fit and didn’t think it was a pain considering how large the pad on the ESC are to accommodate the 10awg cable I used. I tinned my wire, made a nice puddle of solder on the pad and used a strong soldering iron with a big tip to have good thermal mass.
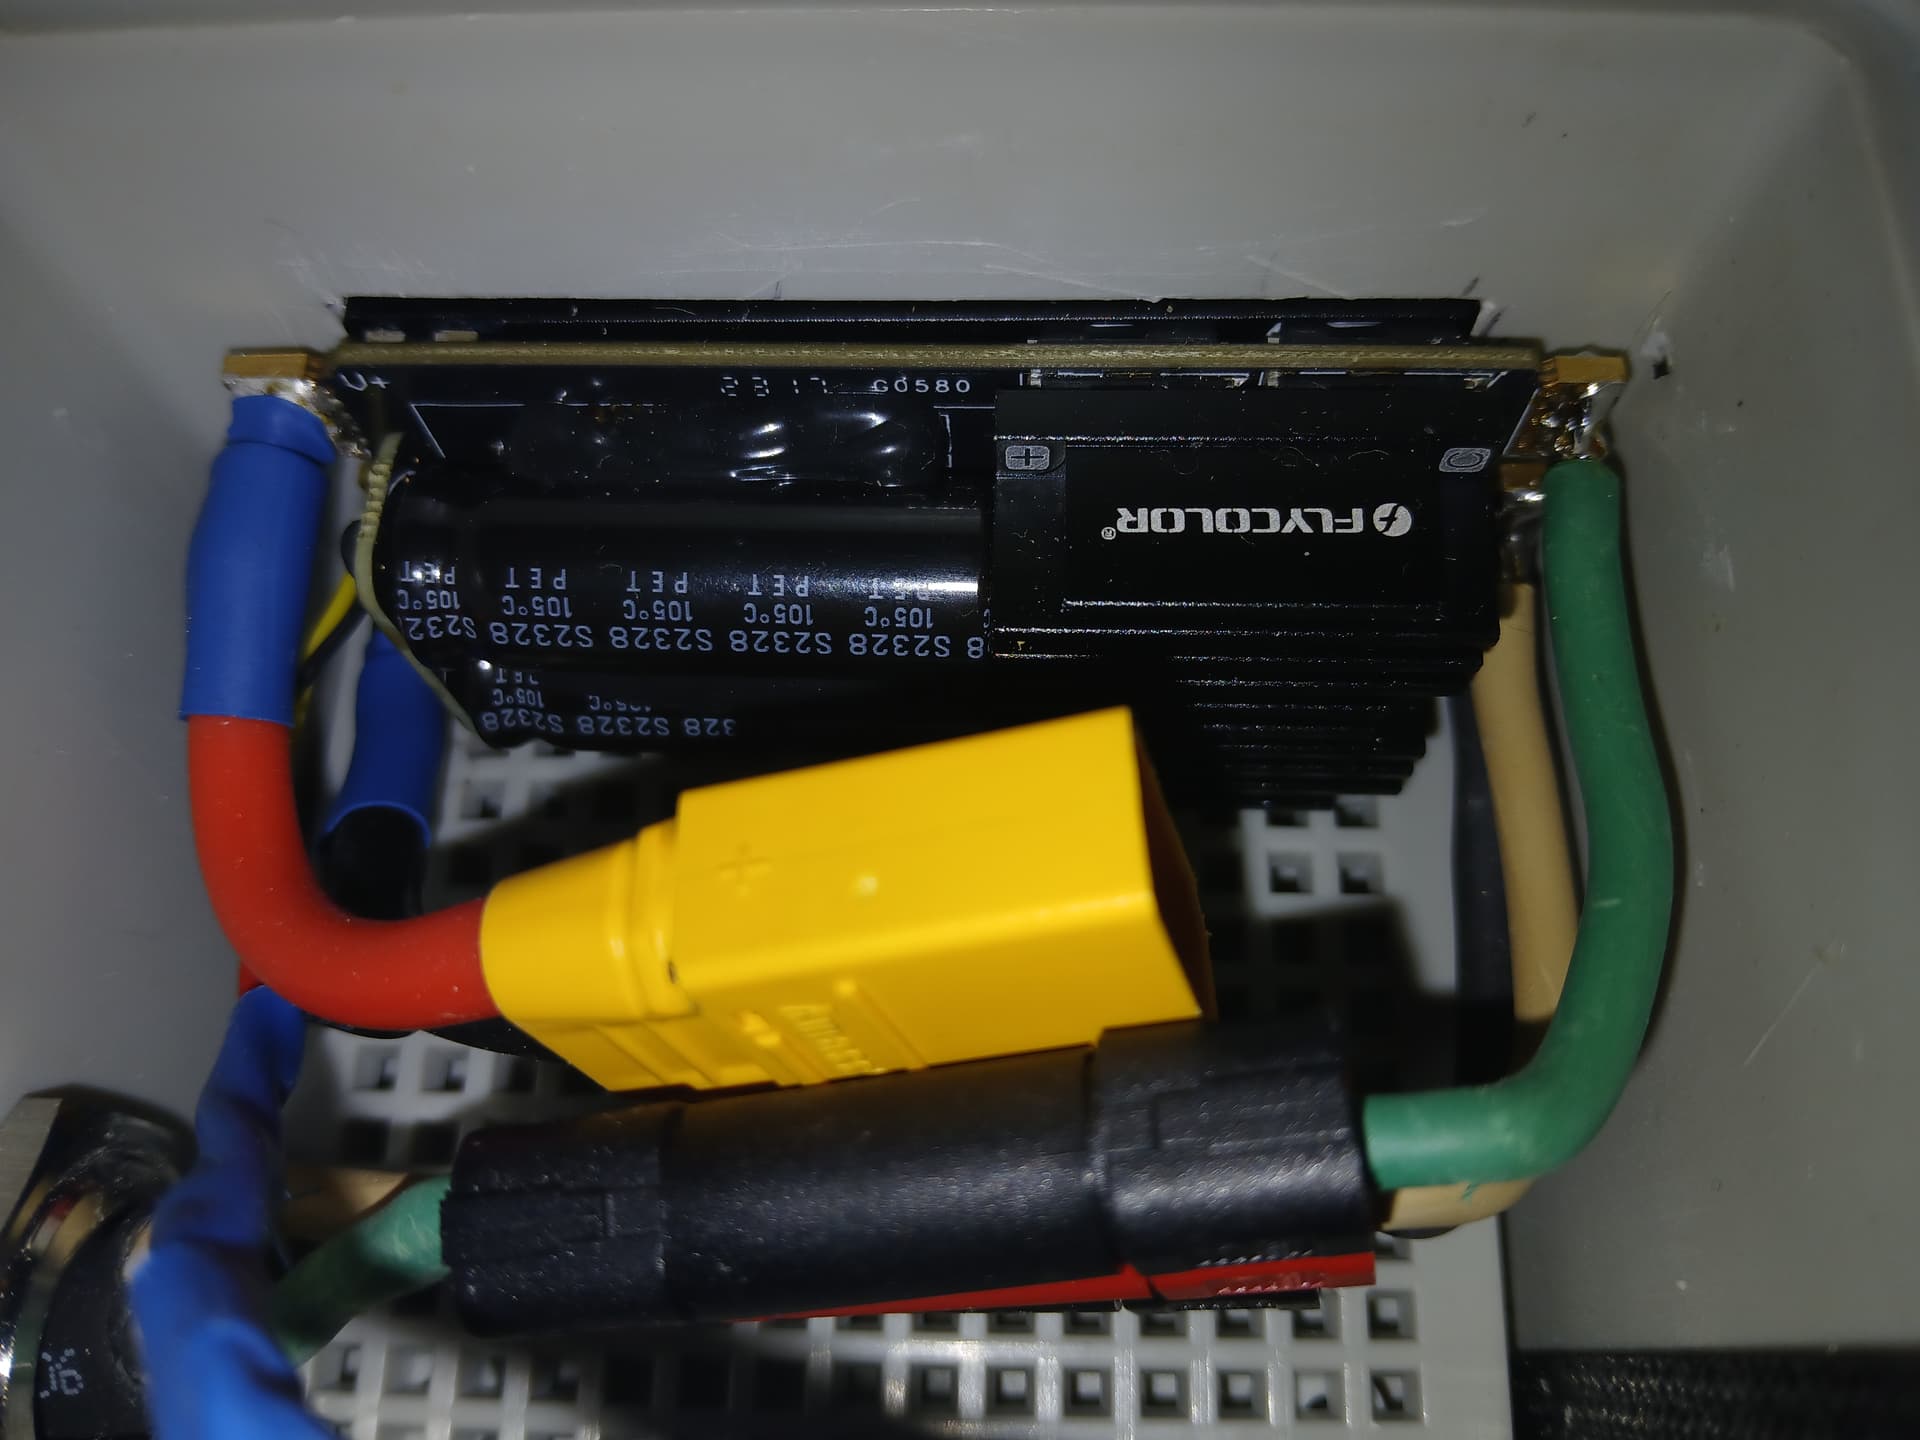
Yeah nice option, looks tidy. I’ve since re-soldered the power cable connectors on vertically without issue.
Regarding the motor cables, I think I will bring the cables from the ESC out through a gland and then into a MR60 connector, which I will connect to the flipsky cables. I don’t think it will be long enough if I want to mount the box on the nose of the board, so I might need to splice the flipsky cables into a longer one before bringing it to the MR60.
Looking good. Did you cut a hole in your enclosure and glue an external heatsink?
If so, did you permanently attach the ESC to it with thermal adhesive or make it detachable?
Yes, the ESC is stuck to an external heat sink through a hole in the box.It’s bonded to the external heat sink using thermal tape (linked below). It’s not a permanent bond and I did remove it a couple of times without much trouble.
This setup working well, and is shedding heat adequately when using it in assist mode, I can go for hours using it to get up on foil downwinding or in very light wind winging. However, if use it to efoil on flat water (air cooling only), I do hit the 100 C temperature limit after about 10 - 15 minutes. I don’t know if the tape is limiting the heat transfer rate, I will investigate this when winter is over and can I can start foiling again.
Nice option using thermal tape I was just considering how I will attach my ESC to the external heat sink as I don’t want it to be bonded in so strongly that I can’t remove it.
I don’t plan to efoil around so sounds like the tape will meet my requirements.
What made you choose that thermal tape over traditional thermal paste? I would think thermal pastes are generally more thermally conductive than such tape.