Yep - similar settings - I run ERPM at around 24k and max motor amps 80A (on an 8S system). This feels similar to FD+ but maybe slightly more power.
2 Likes
Thanks. Yeah i use the balance wires and get my charger to balance the packs.
Actually… on this topic… is it worth adding a BMS? And if so can anyone recommend a make/model for 6S2P pack of Molicel P42A 21700 cells? I have read of people having issues with aliExpress BMSs.
1 Like
Thanks for this.
Funny… when i asked ChatGPT about percentage throttle and efficiency it replied stating why on earth would i consider throttle percentage when the real question relates to current draw, RPM, prop pitch and size, etc.
So once I replace my ESC with the VESC it sounds like I need to do a deep dive into VESCs (of which i know very little).
Thanks again, i will read about these settings.
1 Like
About 60 amp is the same as FD Assist Plus for me at 8s, I went to 70 and felt more power, maybe it is closer to 70 amp if 80 feels similar for you.
I now have a High Power motor and 14s, and 80 amp feels just crazy for power. But I’m still on a big board.
I have an repetitive strain injury, and out for the last 3 months and 6 months more, so not going to need a smaller board for a while.
1 Like
The more you know about something, the better ChatGpt is. But even as a beginner it was great for me. Lots of chats about how VESCs work.
I think the problem you had was the exact terminology, which when I started meant even searching online to solve problems was an issue.
So you knew what you wanted, but ChatGpt didn’t.
Well done for a nice build, my first two failed. I’m up at Rainbow Beach and the isolation was a challenge.
Thanks guys.
Actually after fixing the initial problem (motor phase wire solder joint) the system works flawlessly. So i am a little hesitent to replace the little 80A ESC.
Ive just ordered a HOTA D6 Pro charger which can charge 2 6S packs in 1/2 hour or so… so i am committing to 2x 6S packs. I’m just not sure if I should add BMSs to my new packs
A friends 13 year old son had a crack and got up after a few attempts. And had few others interested so suspect i will build more.
@ZedMan oh you are faily close… i am on the Sunny Coast (Bokarina). I would love to take it up to DI once i can ride waves (yet to try the surf).
1 Like
I am from 2. to 9.1.2026 with my backpack and tow setup in noosa heads. If you are close and want to compare your setup let me know. Regards Robert
1 Like
Tim you don’t need BMS if you are charging with the style of charger you are using. Had good success with the Daly BMS if you want to use a simpler charger.
1 Like
Thanks. I had read that some time ago too.
How often do you need to do a balance charge vs a regular charge?
I’d do it every charge, just a matter of plugging both cables in so worth a few seconds
So after using this I have the following updates…
It works really well, however the Molicel P42A cells I am using are not up to the task as I am running 12S2P (2 x 6S2P packs in series). The cells get very very hot and voltage sag is evident after about 6 minutes motoring resulting in having to stop around 10minutes. To be fair I am new to foiling and end up using a lot of power a lot of the time… rather than what this system is designed for (assist only). Ie I am not doing a lot of foiling/surfing. Also worth mentioning is that i am likely killing the batteries as i am riding an Axis ARTv2 999 foil… which requires a lot of speed. So i will try another session on a slower and bigger wing. I should probably rebuild using 3P but I find the 2P setup manageable weight-wise and think more might be uncomfortable.
So I will order some RS50 cells and use those. And will repurpose the P42A cells for a 12S4P setup (I will post details - will be an on or in board setup).
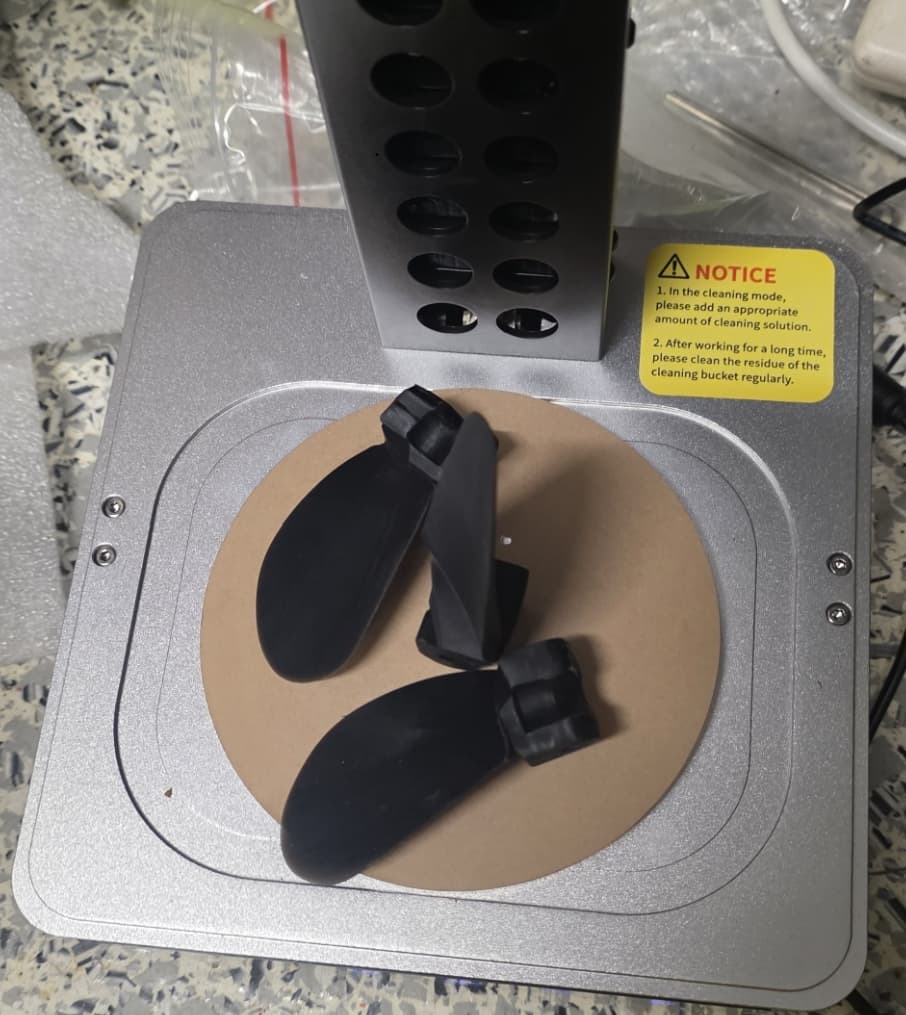
Also I have ditched the original aluminium Flipsky 2-blade folding prop as it is too noisy and I have been using a 3D printed 3-blade prop. This works incredibly well - it is much quieter and has more torque and less battery use.
I got the model from here: Propeller for E-foil / ASSIST - Share Project - PCBWay big thanks to @Bzhwindtalker !!
I printed the hub with an FDM printer (Bambulabs P1S) using PETG-CF (6 layers and 50% infill).
And the most amazing discovery is the Siraya Tech Blu resins - I have used the Black Lava - this is incredible - it has a very high tensile strength and tensile modulus - I am sure on par with the Formlabs printers/resins that the FD team use. So I have printed the props in this resin on my very old AnyCubic Photon printer. I haven’t even sanded them - just washed in IPA (5 mins), dried with a paper towel and post cured for 15 mins (in an Elegoo Cure station).
I have printed spares… but not needed them (to be fair I have only used it 3 times).
3 Likes
My original BDUAV 6384 motor died… I had mistakenly crushed the wires coming off the coils against the housing when reassembling and this caused rapid oxidation and the wires broke too short to salvage.
So I have replaced it with a new waterproof Saite 6484 motor… this, it turns out is much better. I can cruise on my high aspect foil (Axis ART v2 999) at 50-55% throttle - where as previously I was cruising around 60-65+% which was causing my batteries to get very hot.
Now I find the batteries only get warm (quite warm) and I don’t experience the dramatic voltage sag I was getting (well, not nearly as badly).
So it was a very positive change (although at 4 times the price you would probably expect that).
hi Thuffam: Really interesting your achievement. I am new in this area. I would to know how you join the cable and the leash together. Can you post a detailed picture? Thanks in advance.
Hi. Nothing special here… just used some 25mm webbing. That is tied to the waist belt and attached to the legrope attachment point on the board. These are held together with loose mesh cable tidy thing like these: Keji Mesh Cord Concealer 2m Black | Officeworks
A couple of updates…
-
i have snapped a few props. No a prob as a quick change on the beach and i have printed loads of spares. I initially though i had hit something but turns out it was whebln i hit the throttle too hard when coming off foil. As im currently using a ESC so no chance to do a slower rampup. But now i am aware of this i simply dont slam the throttle and i havent broken a prop since. It was interesting to see the props all broke at the base but not staight on the layer lines which confirms what ive read that UV printers layer strength is far superior to FDM printers. I print the blades vertically so no post finishing required (it produces near smooth finish right of the machine).
-
Now ive got much better at foiling my run time is greatly extended. My last session (on my 12S2P pack) was 30 minutes! Super stoked.
I have done sla blades as well using magforms rigid 100. Super stiff and prints beautifully vertically as you did. Not much time on them yet to say they are bomber but time will tell.
1 Like
The ones I did FDM print, all broke at the base.
And I had them setup almost horizontaly, so it was almost 90° to layers.
Only ones that did not break were PA12, but those were too soft.
Mine always broke when something unusual happened, like when a wave pushed me backwards or something like that.
So I gave up eventually. Guess there is a reason most commercial vendors have completely switched to alu. For me the ratio between money saved and hassle switching props really did not work out.
Hi, it looks like your phase cable also became a leash, is that right? thanks in advaced
No… as per my reply to your earlier question New waist belt foil assist build from Queensland - #31 by thuffam
I have had a few people ask how I went about building this… so here are the steps I used…
Steps to build DIY Foil Assist - Waist Pack setup
- Decide on battery configuration (?S?P). I chose 12S2P and I was using Molicel P452A 21700’s. In hindsight these are not suitable cells for this configuration. If I was to do it again I would use RS50 cells or similar (>= 45mAh). I would also look at 12S3P as this spreads the power load across more cells and give more run time. But then it would weigh more. I also did 2 x 6S2P that were joined with harness to get 12S2P (because I had a balancing charger that can charge the two 6S packs at the same time - FWIW this 6S charger is 650W vs 12S chargers which are usually 1200-1500w - something to consider - especially for at the beach charging).
- Also decide if you want to use a BMS. I didn’t as my charger did the balancing part.
- Find a waterproof electrical box that can hold your battery pack, ESC, connectors etc. This is critical. I chose a CamdenBoss Box - incredibly strong. This is what makes this particular build super easy as waterproofing is one of the hardest things to get right. Remember these boxes are usually tapered.
- Now you know the space you need to fit the electronics and battery into… Order everything.
Then you can build everything in the sequence it arrives.
Battery build.
Watch videos and read on this forum for instructions.
My sequence was this…
- Check each cell’s voltage - they should all be the same or very similar. Ditch ones that are not (I always order a couple extras).
- Put fish paper rings on each end of each cell.
- Use spacers (store bought or 3d printed) to space cells out in desired configuration. Note that I didn’t use cell spacers for my packs and they can get very (too) hot which will no doubt shorten their life.
- Solder on the balancing leads and main power leads to the nickel strips before spot welding them to the cells. This takes planning! As I was using double nickel on the series connectors I could spot weld the main layout and do the power lead strips last.
- Spot weld nickel strips. I did this with the cells standing upright in a square wooden box packed with foam, to keep in place.
- Wrap pack with fish paper (can do this earlier if your spaces hold cells in place).
- Check your leads all work and make sense (polarities and voltages are as expected). I was making 4 of my 6S packs and mistakenly soldered all the balancing leads on backwards on one pack - fail. Way better to check things early!! Do not miss this step!
- I sprayed the ends of my packs with conformal coating (3 coats) but you could prob use something else or not at all.
- Shrink wrap the pack(s). I also wrapped my packs in 2 layers of wide insulation tape just to help protect them - the shrink wrap isn’t very tolerant/durable. Just remember this also insulates them… which they prob wont like if they get hot.
Electrical box build
- Some (most?) boxes come with little upstands on the bottom - Im assuming this is to keep electronics off the bottom incase of water ingress… however… grid/cut all these off if you need every mm of space (I did). i used a dremel cutting wheel then a sanding disk.
- If there are any holes made by this process (a couple of my upstands had threaded inserts - so left a hold in the bottom once ground down), full them with something very strong like epoxy glue.
- For the phase cable I used and off the shelf plastic waterproof cable gland. Figure out where this will exit and drill an appropriate hole. For me this was just to the right of the left side latch (on the front panel - which will be facing down once waist mounted). In hind sight… I mounted the ESC on the left side and battery on the right… but as I am regular footed I should have reversed my layout and had this cable on the left side of the right latch (and had the ESC on the right side and battery on the left).
- Mount the ESC. This sits flush on one of the sides of the box with a hole in the side for the heat sink to poke through. This is glued (with a very good quality thermal paste) to an bigger external heatsink. This external heatsink is glued to the outside of the box with Fix15 which creates a waterproof seal.
- Solder ESC wires and follow with double walled heatshrink.
- Solder the ESC battery wires to your battery harness (10AWG wire and XT90s with a 130A fuse)
- Solder the ESC phase wires to your phase wire. I have since changed to crimps for this instead of solder.
- Solder RX and BEC
- Consider another heat sink for the battery - or at least an aluminium plate to help pass the heat from inside to outside.
Motor Assembly
- Phase wires. First loosely attach wires and power up and test the motor direction! I didnt do this and my first outing it went backwards! hehe. Solder or crimp the phase wires and do very good waterproofing. I used crimps filled with di-electric grease then coated in hotglue then each wire covered with dual-walled heat shrink then the whole bundle covered with dual walled heatshink with extra hot glue squirted around inside each end before shrinking.
- Buy or 3d print the motor mount - and assemble. I used a “micro pod” which uses a Grunt strap (from Bunnings) to attach to the mast.
- Attach propeller
Waist harness
- I used a cheap, webbing and velcro weight lifting belt. This works a treat but its belt guides are starting to unstitch.
- I used Grunt straps for holding the electrical box to this belt. These are amazing.
- I used a 25mm webbing strap as a leash which, along with stainless steel sliders (the thing that the webbing loops back through for attaching/adjusting). I attach this to the surfboard each session and adjust so it is at least 100mm shorter than the phase cable.
- I used a loose weave, velcro “cable tidy” thing (from OfficeWorks) to hold the leash and phase cable together.
That’s it - I reckon if you were focused you could make the whole setup over a weekend - I did mine bit by bit over 3 weeks.
An additional note worth discussing… battery heat.
Battery heat dissipation should be a major consideration. As mentioned I did not add cell spacers to my packs and I should have. I would also consider adding a battery heat sink to the electrical box or at least an aluminium plate to allow heat to transfer out of the box.
Also, I found that having a better quality phase connection and the Saite waterproof motor (over the cheap BDUAV one) and the 3 blade prop and being conscience of using less throttle all made the system more efficient and less demanding (less amperage load) on cells so helped dramatically keep cell heat down. Also using a more efficient foil setup or larger foil. This is also why I suggest not using P42A cells for a 2S pack (although they are fine for 4S and possibly 3S as the load is spread across more cells), hence my recommendation for a cell like the RS50 which has a higher C rating (can handle higher discharge).
The 2P setup, while super light, cost effective and just generally super easy to use (less weight is a significant advantage) it is probably more suited for better riders who only use it to get up on to foil - not for riding around under power which I notice many FD riders doing (basically using them as efoils). If you want to ride under power more, then go with a 4S (or at least 3S) battery configuration. As an example. If I use the motor a lot, ie 3/4 of my foil time, then this will last 15-20 minutes or so. However if I am waiting for sets to come and use it to pop up then it’ll last 40 minutes or more especially if I do all the paddling back out to the line up (and this gives the cells more time to cool) eg I had a 1 hour session on the open beach recently but it was more like a regular surf session where I spent a lot of time sitting on my board. But most people use these systems to get back out to the line-up - to avoid pumping (and pumping with a heavy system on board is difficult). Note that I have 2 sets of battery packs (2x2) so I just keep the spare set on the beach and swap over mid session to get a good length session - so 2P isnt too bad in this scenario. It also means you have a spare set in case one dies (I had a bad solder connection on one - easy repair, but at least I could get on the water while repairing). So if you really like the light weight/small size of the 2P setup, just make more packs - they are cheap and takes seconds to swap over - just go with a higher C rated cell than the P42A’s - even the P45Bs would be better.
My next build will be a 4P on-board system - a flat (1 cell high = 21mm + box) that mounts between your feet that you can lay and stand on. This is because I want a system for longer riding (Mooloolaba bay requires this - super long rides) and I will use the 2P system for the open beach. After that I will prob build a 3P wasit system with RS50 cells - basically an upgrade of this 2P setup.
4 Likes