Mold progress: closing, release, the layup and cut templates. And a watch that logs the VESC
Two things since the mold post above. The mold now has the parts I listed as missing, and building them showed that some of what I told you was wrong. And, at the end, a teaser for a side project that started with not wanting my phone on the board.
Corrections first
- I said the 1.5 mm hub skin was three woven plies. At 50 % fibre a 200 gsm ply cures to 0.22 mm, so it is seven.
- I said about 60 g of carbon. That figure was the cured laminate, resin included, and the test prop has changed since. Worked from cloth weights, the 150 mm four-blade as it stands is 26.6 cm³ of laminate, 39 g cured, 24 g of it carbon.
- I said each blade’s root plies splay onto the hub as tabs. Two of them can. There are twenty UD plies at the root, and twenty plies is a 6.7 mm stack going into a 1.5 mm gap. The rest stop at the hub’s surface.
- I said each sector pulls straight out. The root sectors do not. More on that below.
Closing it
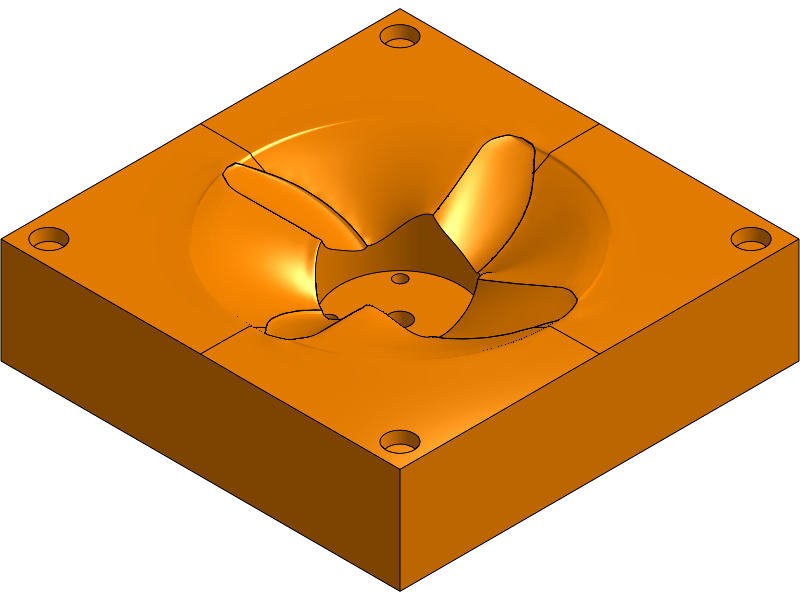
The mold closes the way my wing molds do: clamps on the flanges against a board each side, or the whole block in a vacuum bag. No bolts. Round every blade there is now a 3 mm land and a 4 by 1.5 mm groove, from the hub well along the leading edge, round the tip and back, so the excess resin has somewhere to go: 2.6 cm³ of groove for about 1.1 cm³ of flash. Under a bag the groove gets a vent from each tip to the edge of the block, and the model gives the closing force, 3.4 kN on the 200 mm block at 85 kPa.
Getting it apart
The sectors have their own release check now. It moves each sector a little along its pull and measures how much of it ends up inside the part. A root sector pulled radially grazes the blade root. Turned 10° toward the leading side it comes out clean. Turned the other way it hooks, and the further the worse.
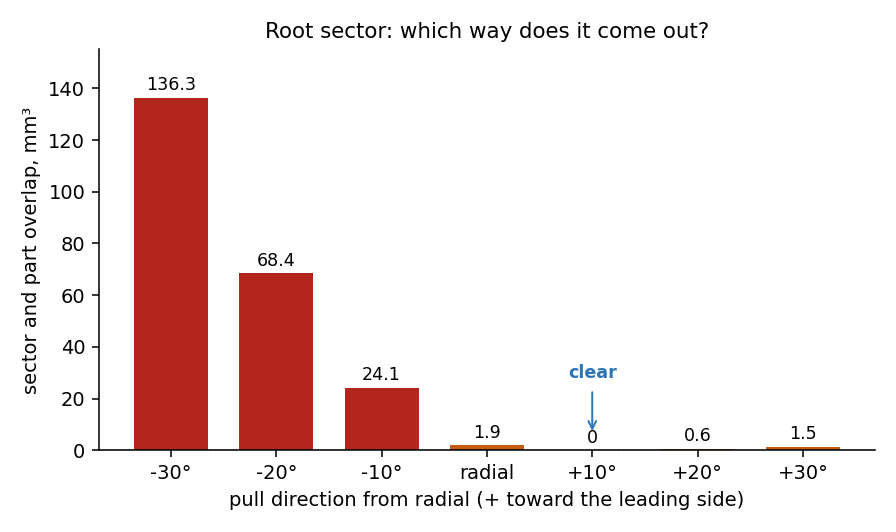
Caption: a root sector pulled in seven directions: how much of it collides with the part. Clear at 10° toward the leading side
So each sector has a blind hole in its outer face for a pull screw, drilled along the line it actually releases on. The gap sectors between the blades come out any way you like.
The layup
The layup is a set of fields now: cloth weights, fibre volume, overcharge, waste. From the section thickness at every radius it counts the plies: one 200 gsm woven ply on each face of each blade, 300 gsm UD between, twenty plies at the hub thinning to four near the tip. It also checks itself against the cavity it has to fill. The first version put every root ply onto the hub as a tab and the check said 120 %, which is how the third correction above got found. It reads 103 % now.
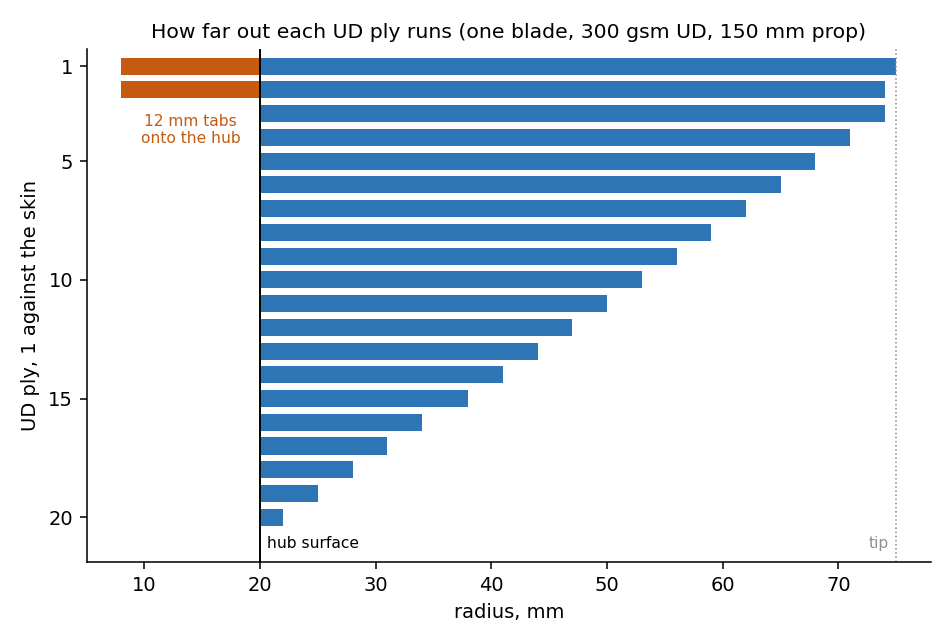
Caption: how far out each UD ply runs on one blade. Ply 1 lies against the skin and reaches the tip; ply 20 is a 2 mm sliver at the root. The first two carry a 12 mm tab onto the hub
Cut templates
The same thing my wing molds do: every ply laid out flat on one thin plate beside the mold, cut through, and the plate’s face exports as a DXF for a cutter or prints as a paper pattern. The blade skin is the expanded outline. Each UD ply is the region where the blade is still thick enough to need it, so they shrink toward the thickest line and end in a point. The two tab plies have a notch at the fold. Then the hub’s side panel between two roots, and its face disc. A row of holes under each shape says how many to cut: 23 shapes, 130 pieces of cloth for one prop.
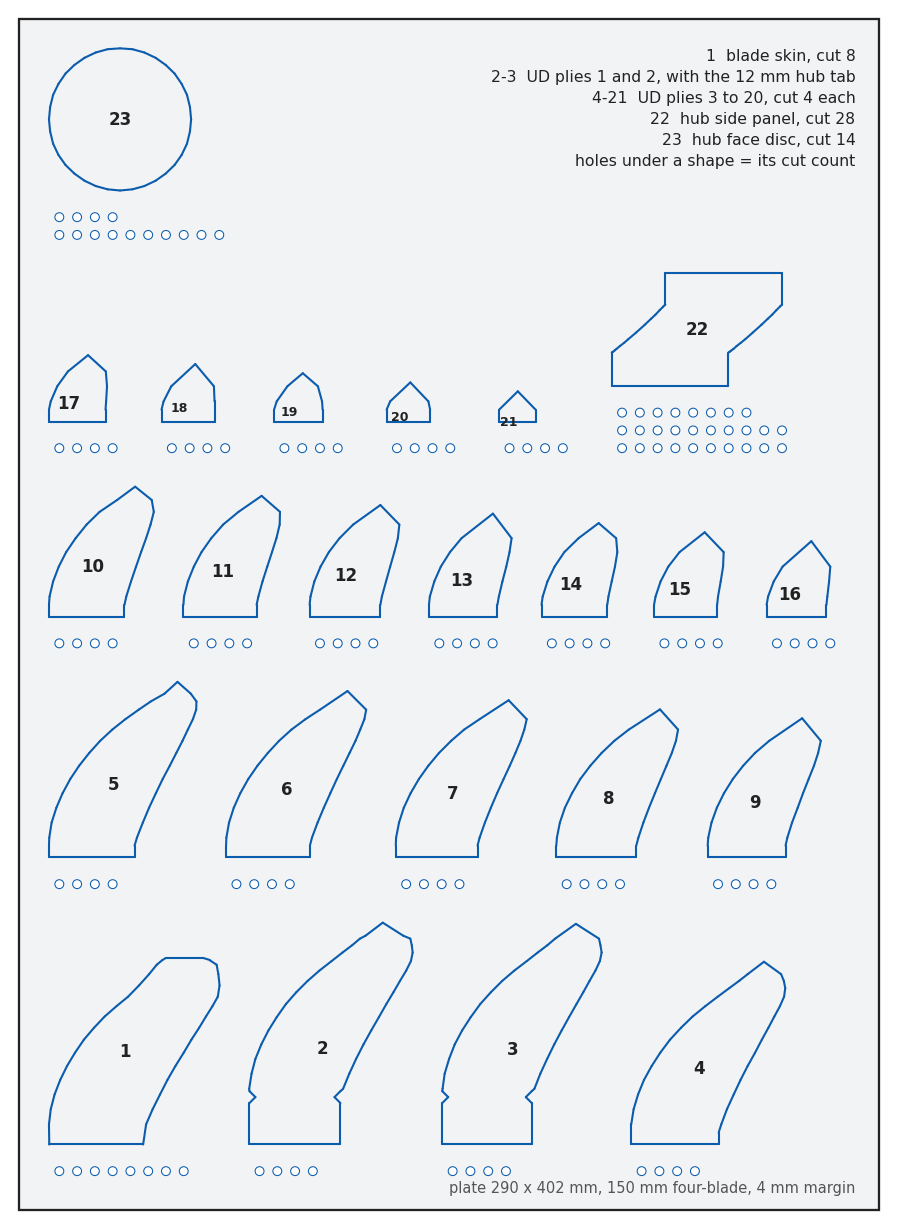
Caption: the cut templates for the 150 mm four-blade on a 290 by 402 mm plate: skin, twenty UD plies, hub panel, hub disc
One thing the templates showed. I allow 25 % cloth waste, which is about right on a wing. On a prop the plies are so small that a 4 mm trim margin round each one is more than that on its own.
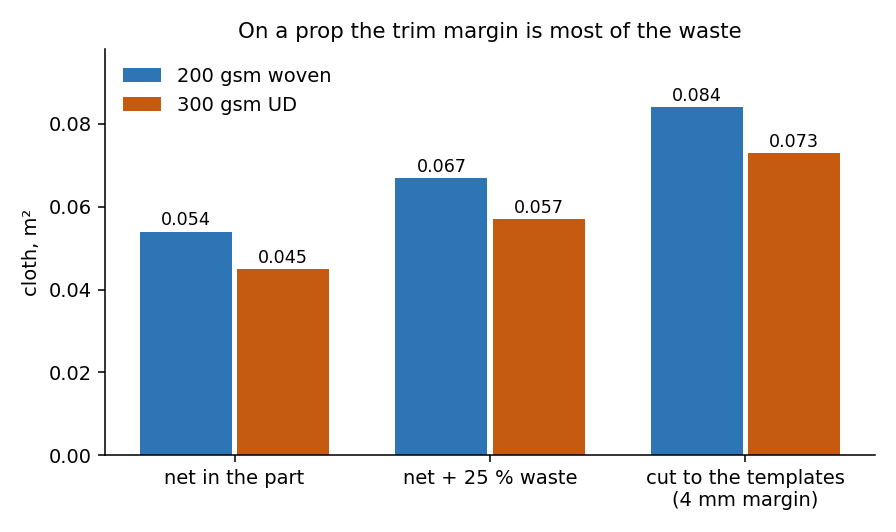
Caption: cloth for one prop: what ends up in the part, what a 25 % allowance would buy, and what the templates actually cut
Still nothing printed or laid up. A single-blade coupon mold is next in the generator, then a sector and its seat off the printer to check the fit. The propeller feature and the mold are still not in the public document.
A watch that logs the VESC
A teaser to finish. Half the discussions in this thread get settled by a VESC log, and getting one has meant taking my iPhone out on the water. I would rather not.
So last night I have written an Apple Watch app that is the logger. The watch connects straight to the VESC’s Bluetooth module, logs the ESC’s data through the session with the watch’s own GPS, and when the watch and the iPhone are back together the session syncs across by itself. The phone stays in the car, and afterwards it shows the ride: the track, the timeline, lift-off speed, energy by speed band, faults.
It will work on most modern Apple Watches, and the Ultra 2, 3 and 4 work best. It will be on the App Store when it is complete. More when it is.
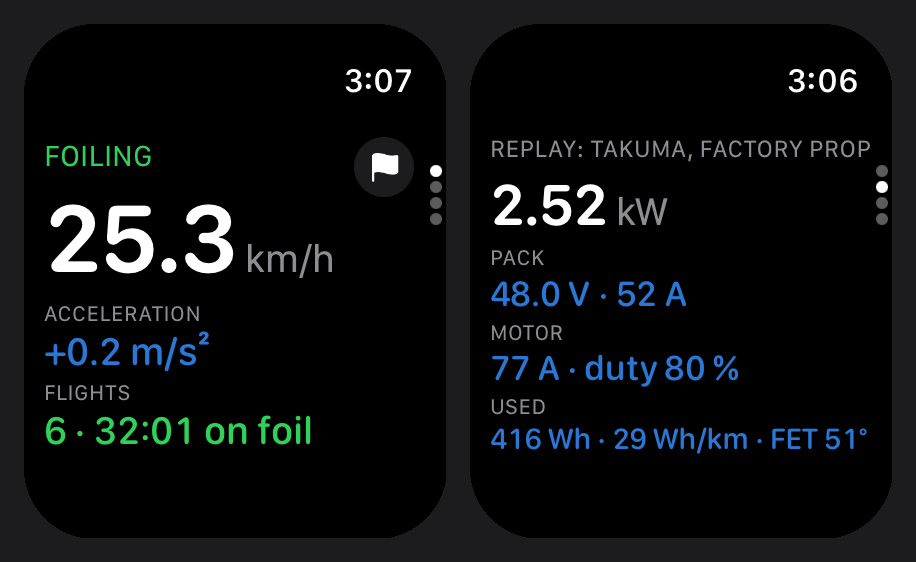
Caption: two of the watch’s pages on foil: speed, acceleration and time on foil, and the drive page with power, pack volts and amps, motor amps and duty, Wh used and Wh/km.