You sir, have my subscription 
I really like the idea with low infill and epoxy. I will try this for sure. Thx for sharing.
Regards,
jan
You sir, have my subscription
I really like the idea with low infill and epoxy. I will try this for sure. Thx for sharing.
Regards,
jan
For my older front to back clamps, I used a slightly different method with the screws. I used 4 screws to attach the rear section of the clamp to the motor, then 2 larger screws to attach the front clamp to the back clamp. I made sure that the screws overlapped each other so that if the clamp ever cracked it could still not fall off. Now I just buy mast clamps from Flying Rodeo (±£45 for injection moulded) though and then CNC adaptors to the motors. Its faster, easier and more secure.
He did
I have not tried this with polyester but with epoxy, carbon fiber flock and micro balloons. Like you said it is rock solid. But be carefull with just PLA as it´s very hard to get it waterproof. Maybe Poly Max filament and epoxy is better. I´m using that for my mast mount and it is really stiff and not as brittle as PLA.
I have not had any problem with the heat when the epoxy cures, I´m using epoxy with long cure time.
You could also try to 3d print a mould in PLA or PVA and use epoxy glas/carbon fiber or with polyuretan (hard solid one or expanding foam when you don´t need max strength). PVA is really good when you have complex parts when it´s impossible to peel of the PLA-mould when the epoxy cured. Just put the part in warm water and let the PVA-mould disolve over the night.
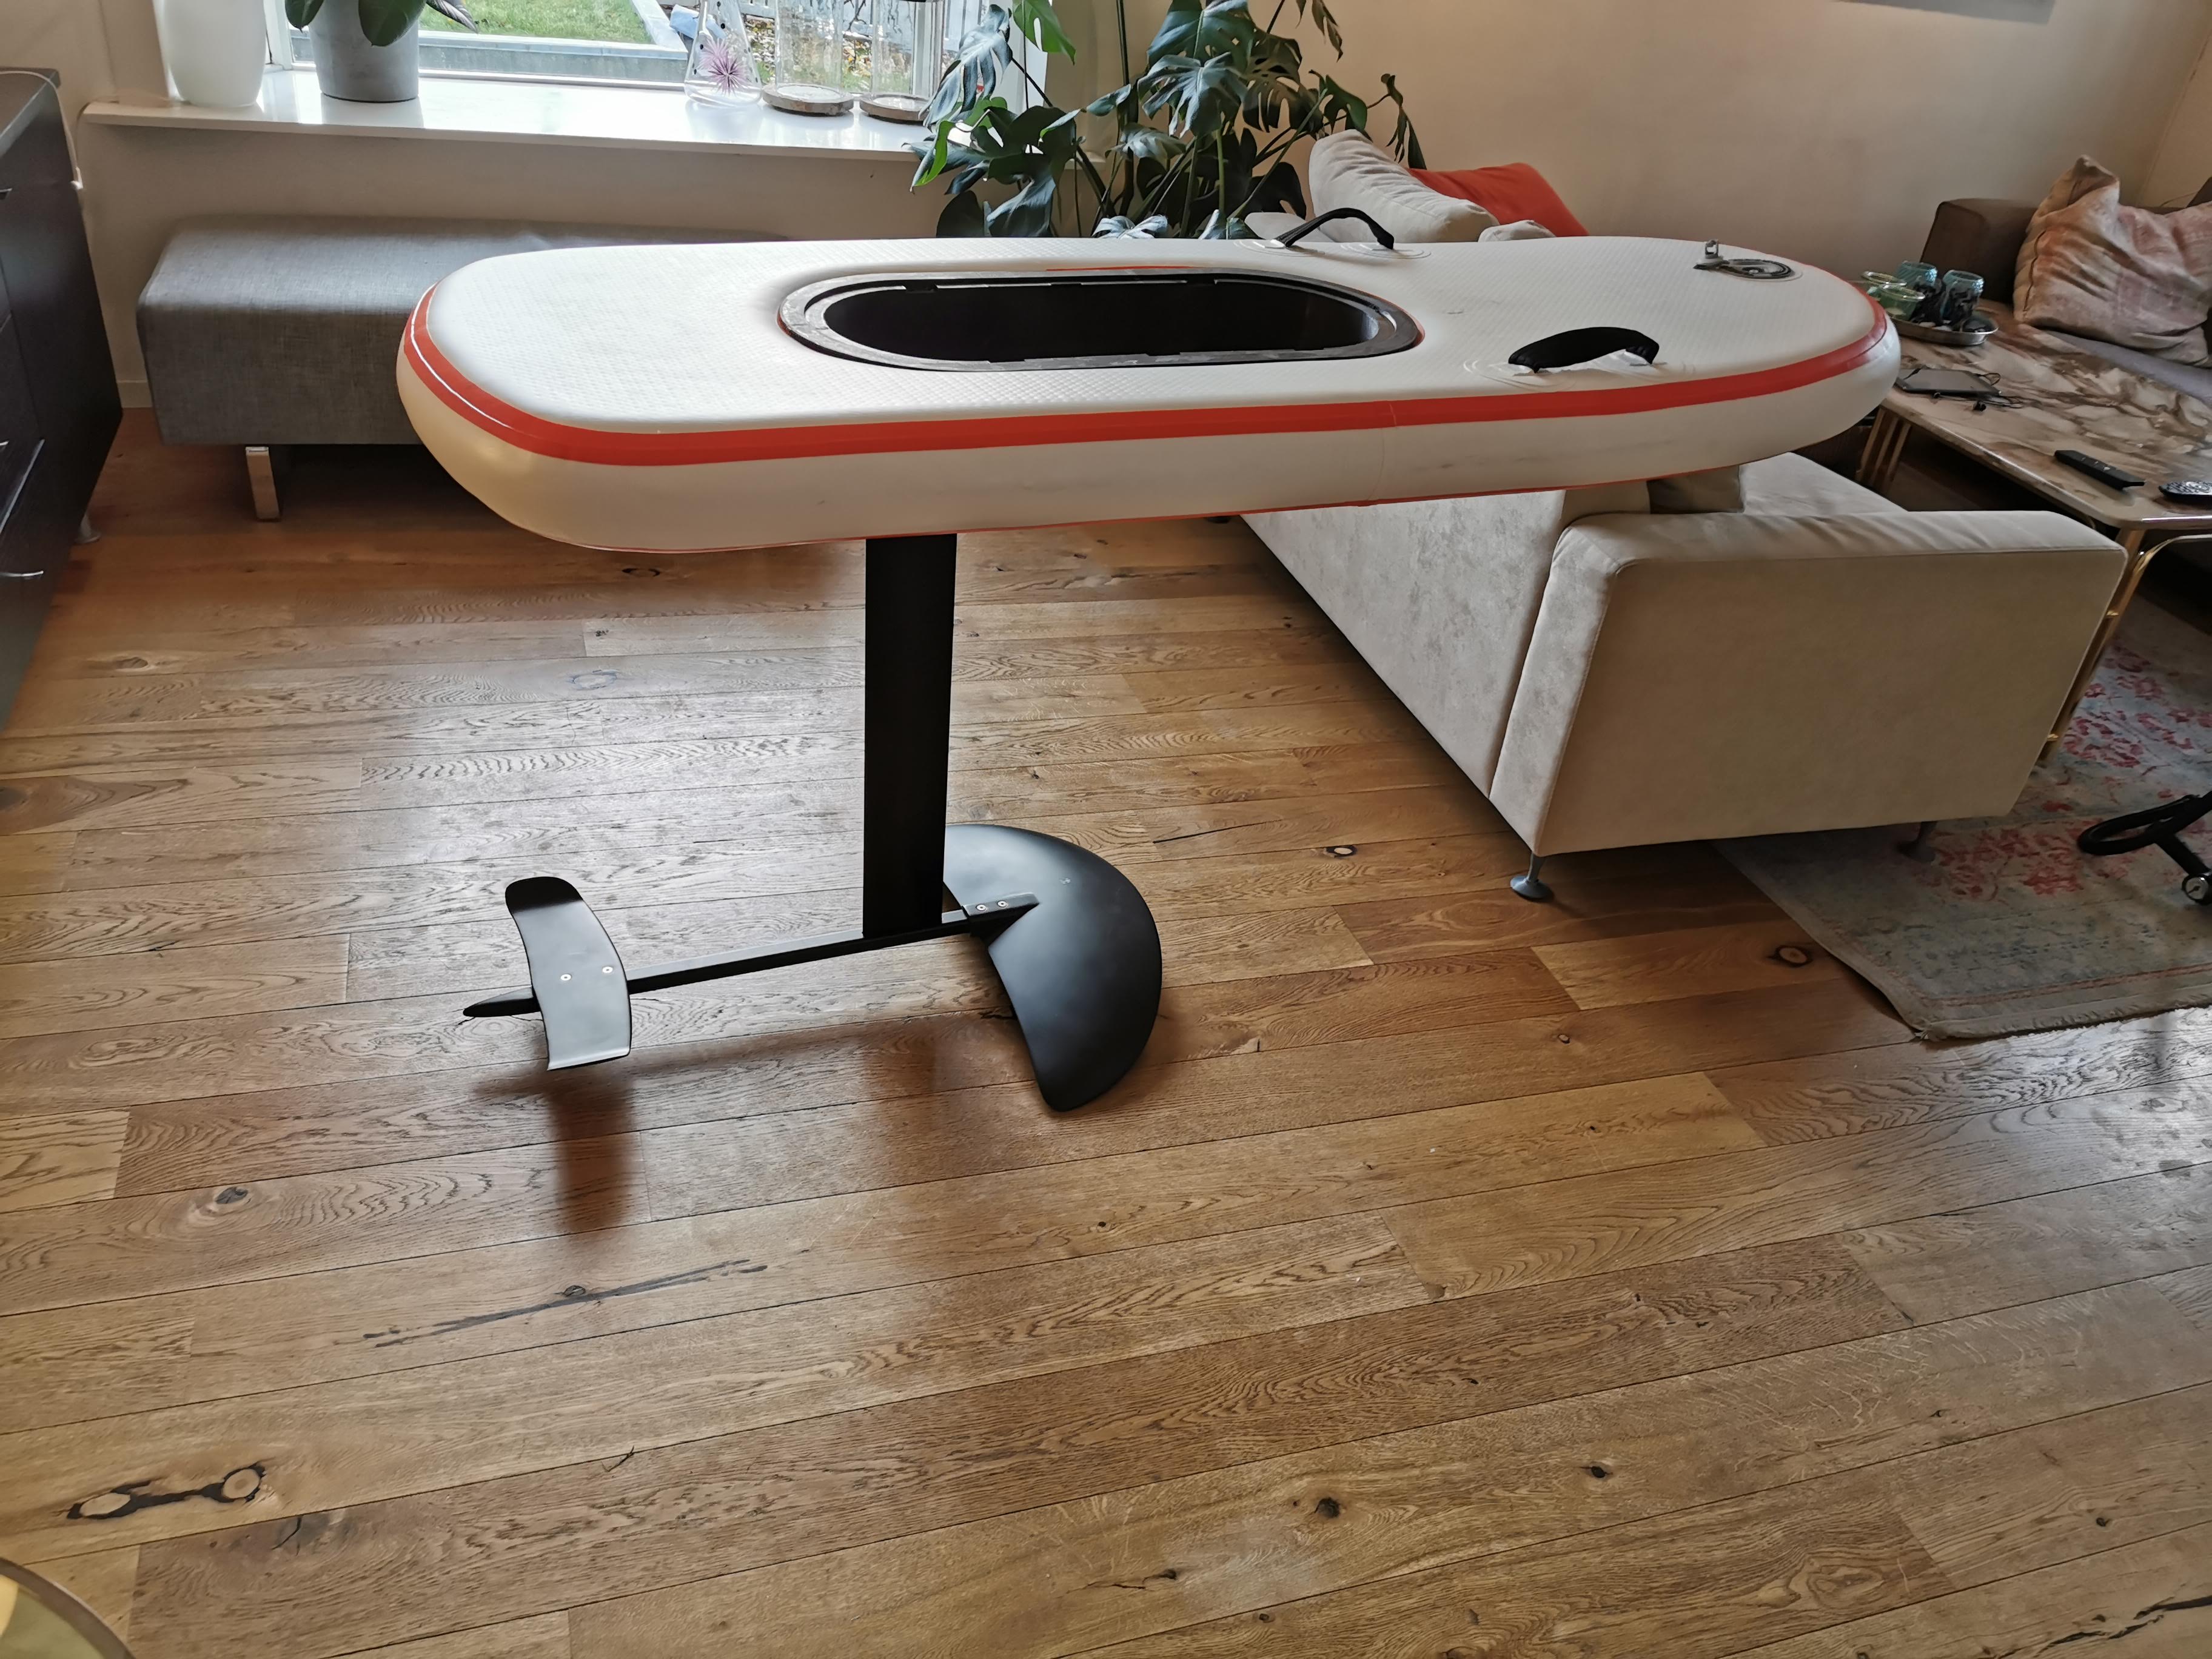
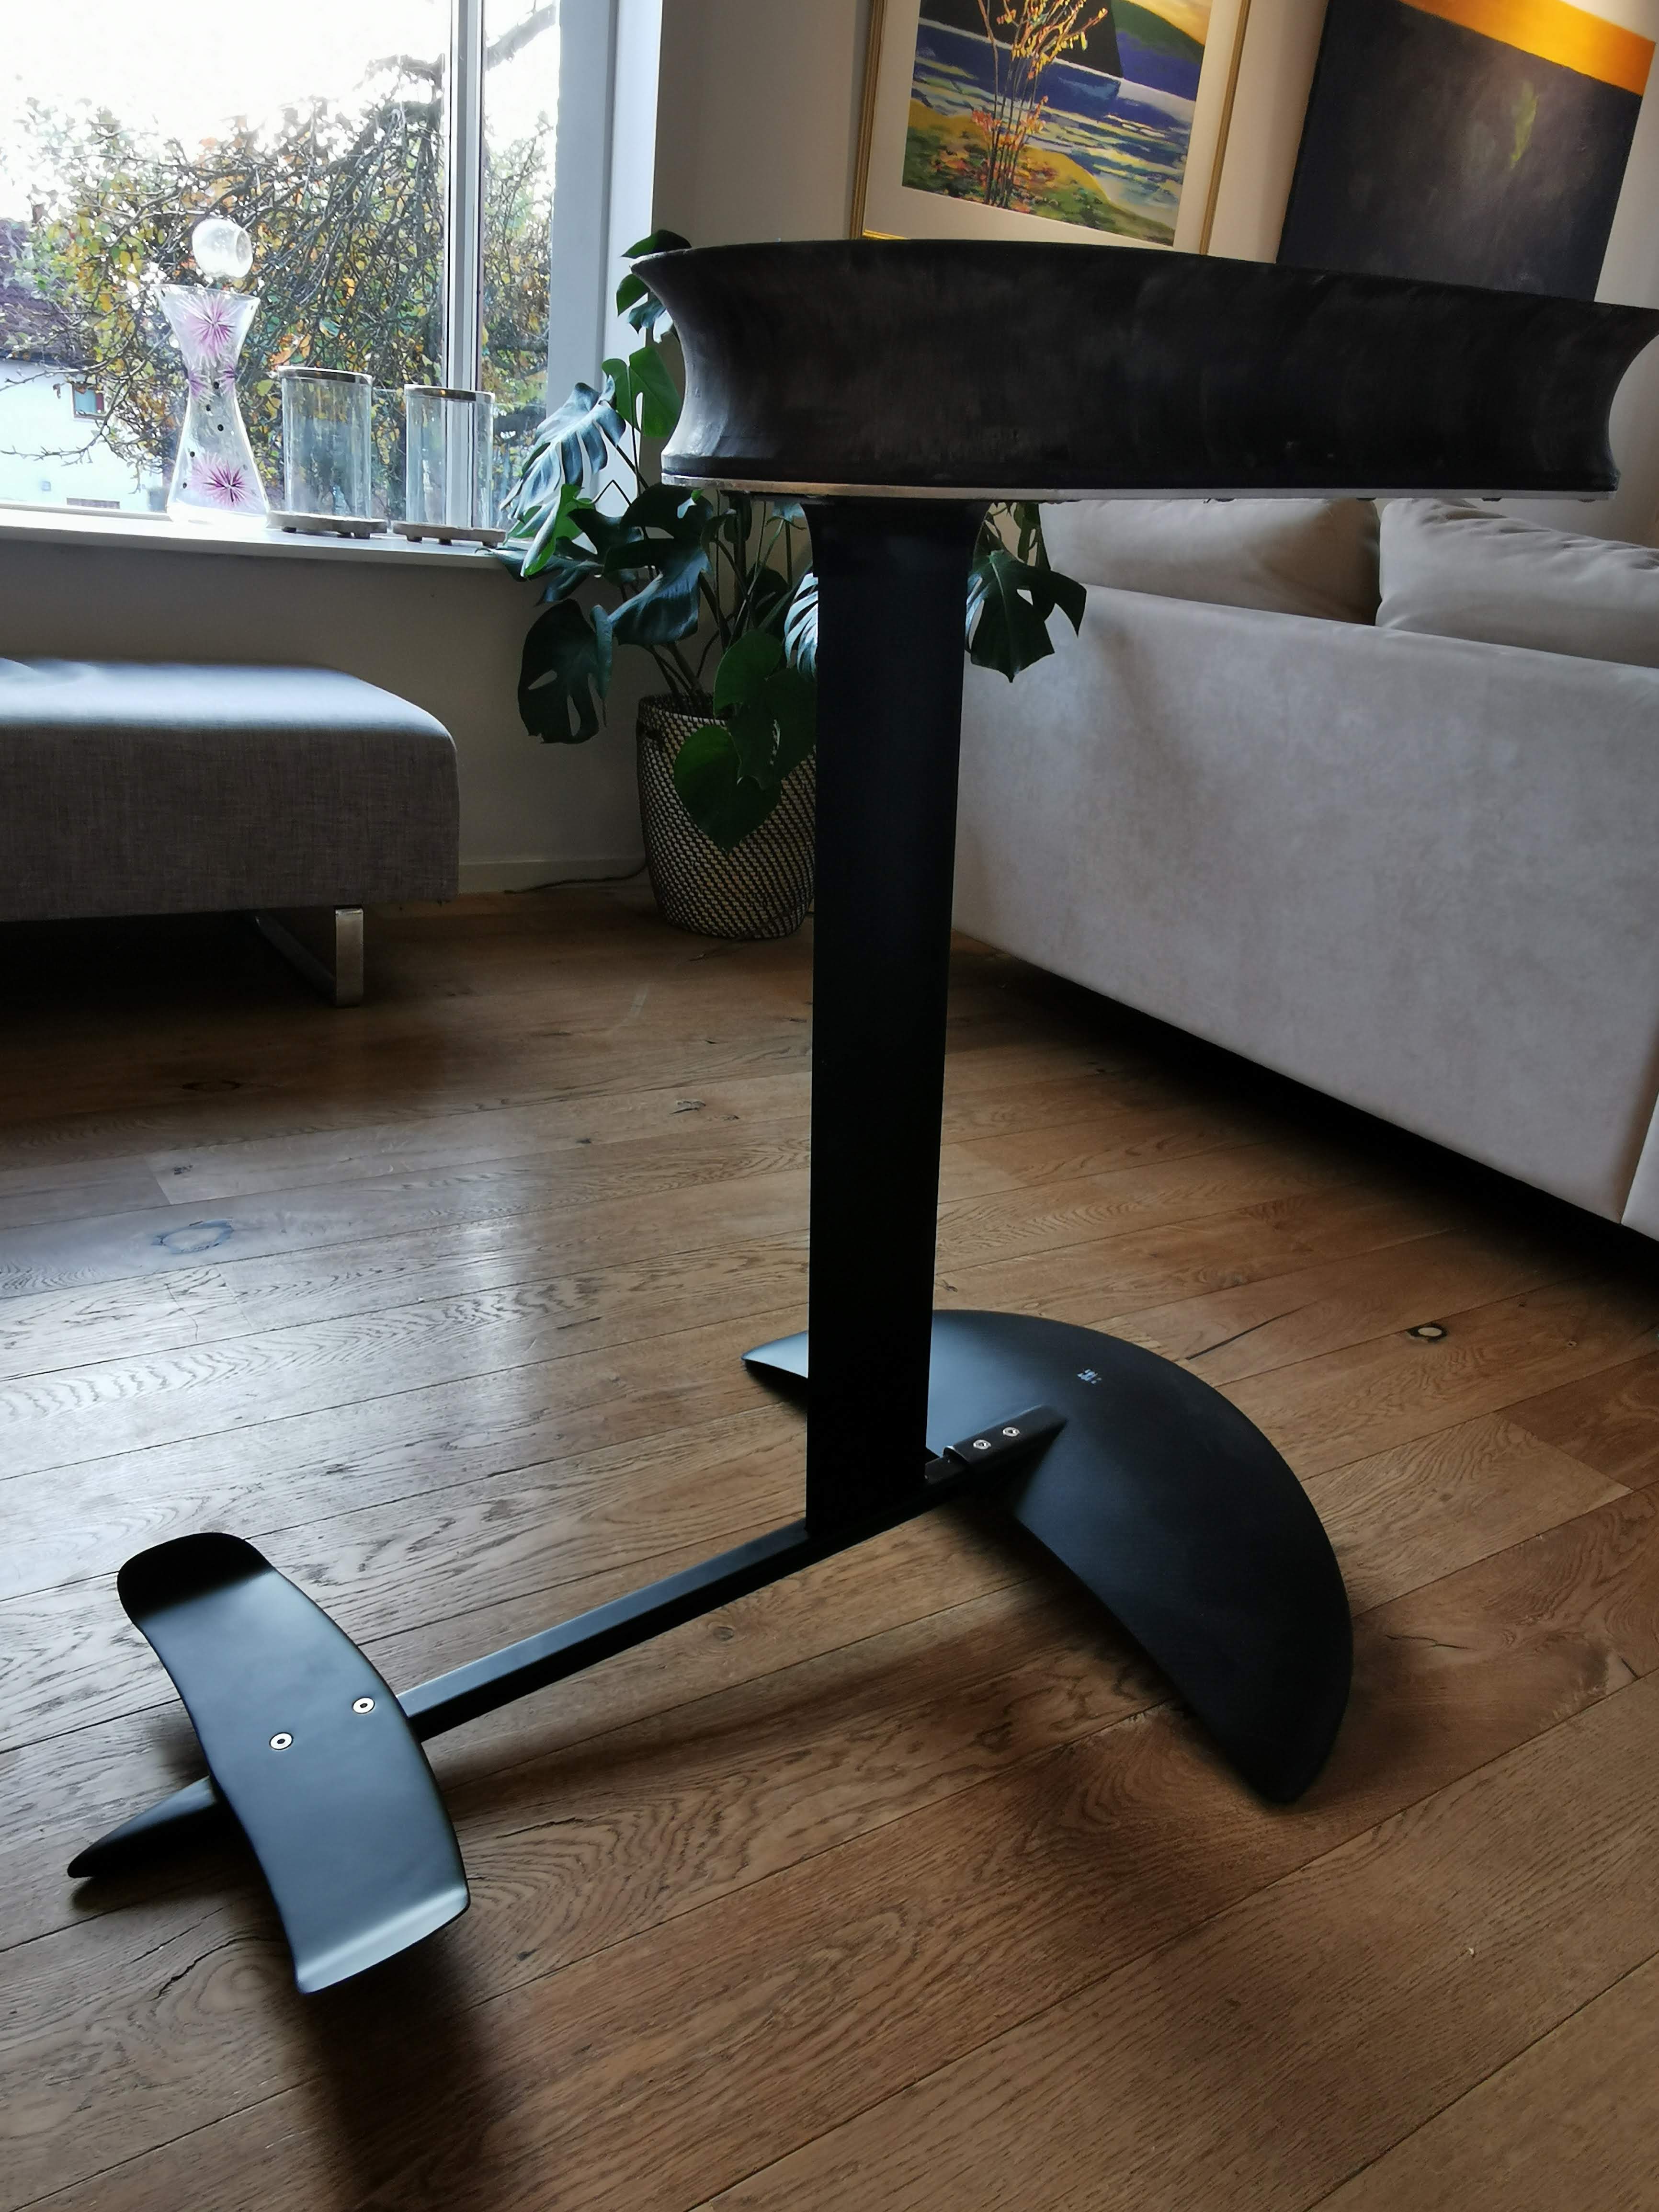
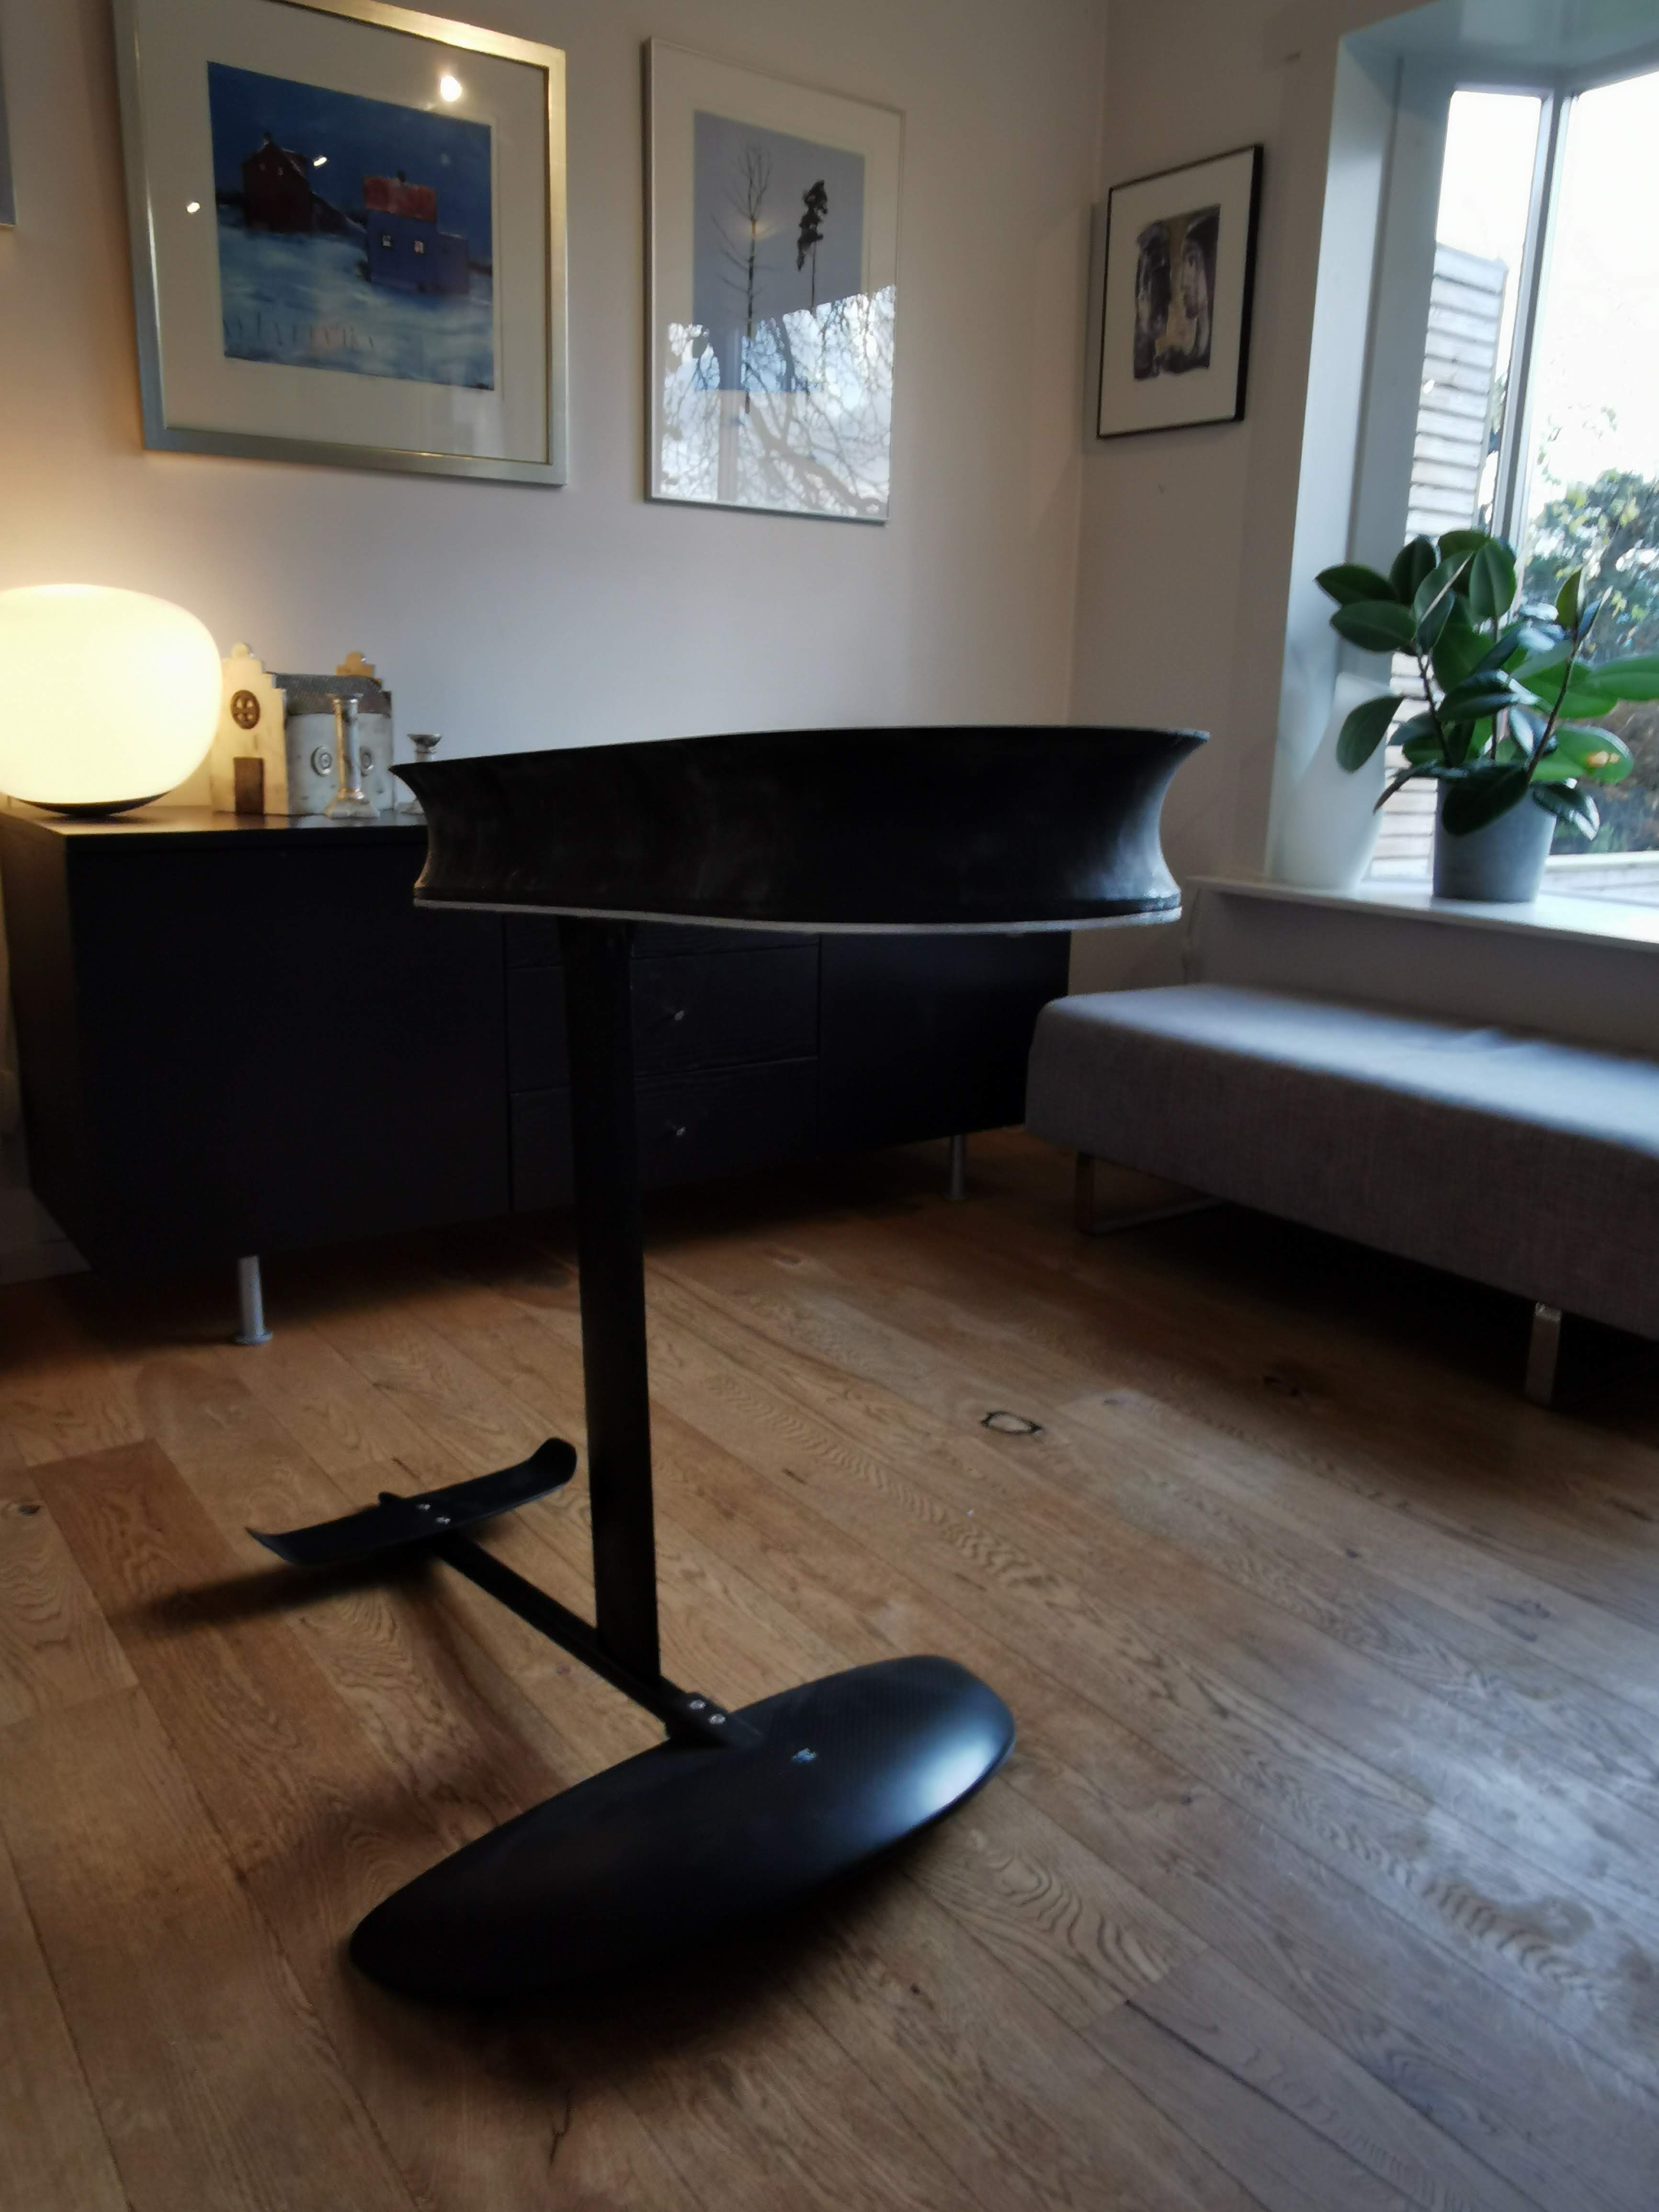
For my foil wings I 3d printed a bottom and a top mould in PLA. And then vacuum molded the wings in glas fiber for the front wing and carbon for the stab.
To make the fuselage I think you would need a lot´s of directional carbon fibers as you do not want the fuselage to flex. And there is lots of stress around the mast mount in the fuselage.
Thanx for the tip, I will definitely also try the combination of epoxy and PolyMax.
Time flies. More than a month since last update. This turned out to be kind of a slow build but I’m in no hurry since the winter is starting to get a grip of Oslo. No efoiling for me until spring.
First of all I’m happy to see that others found the way of creating the mast clamp useful and even developed the concept. Thank you guys for that.
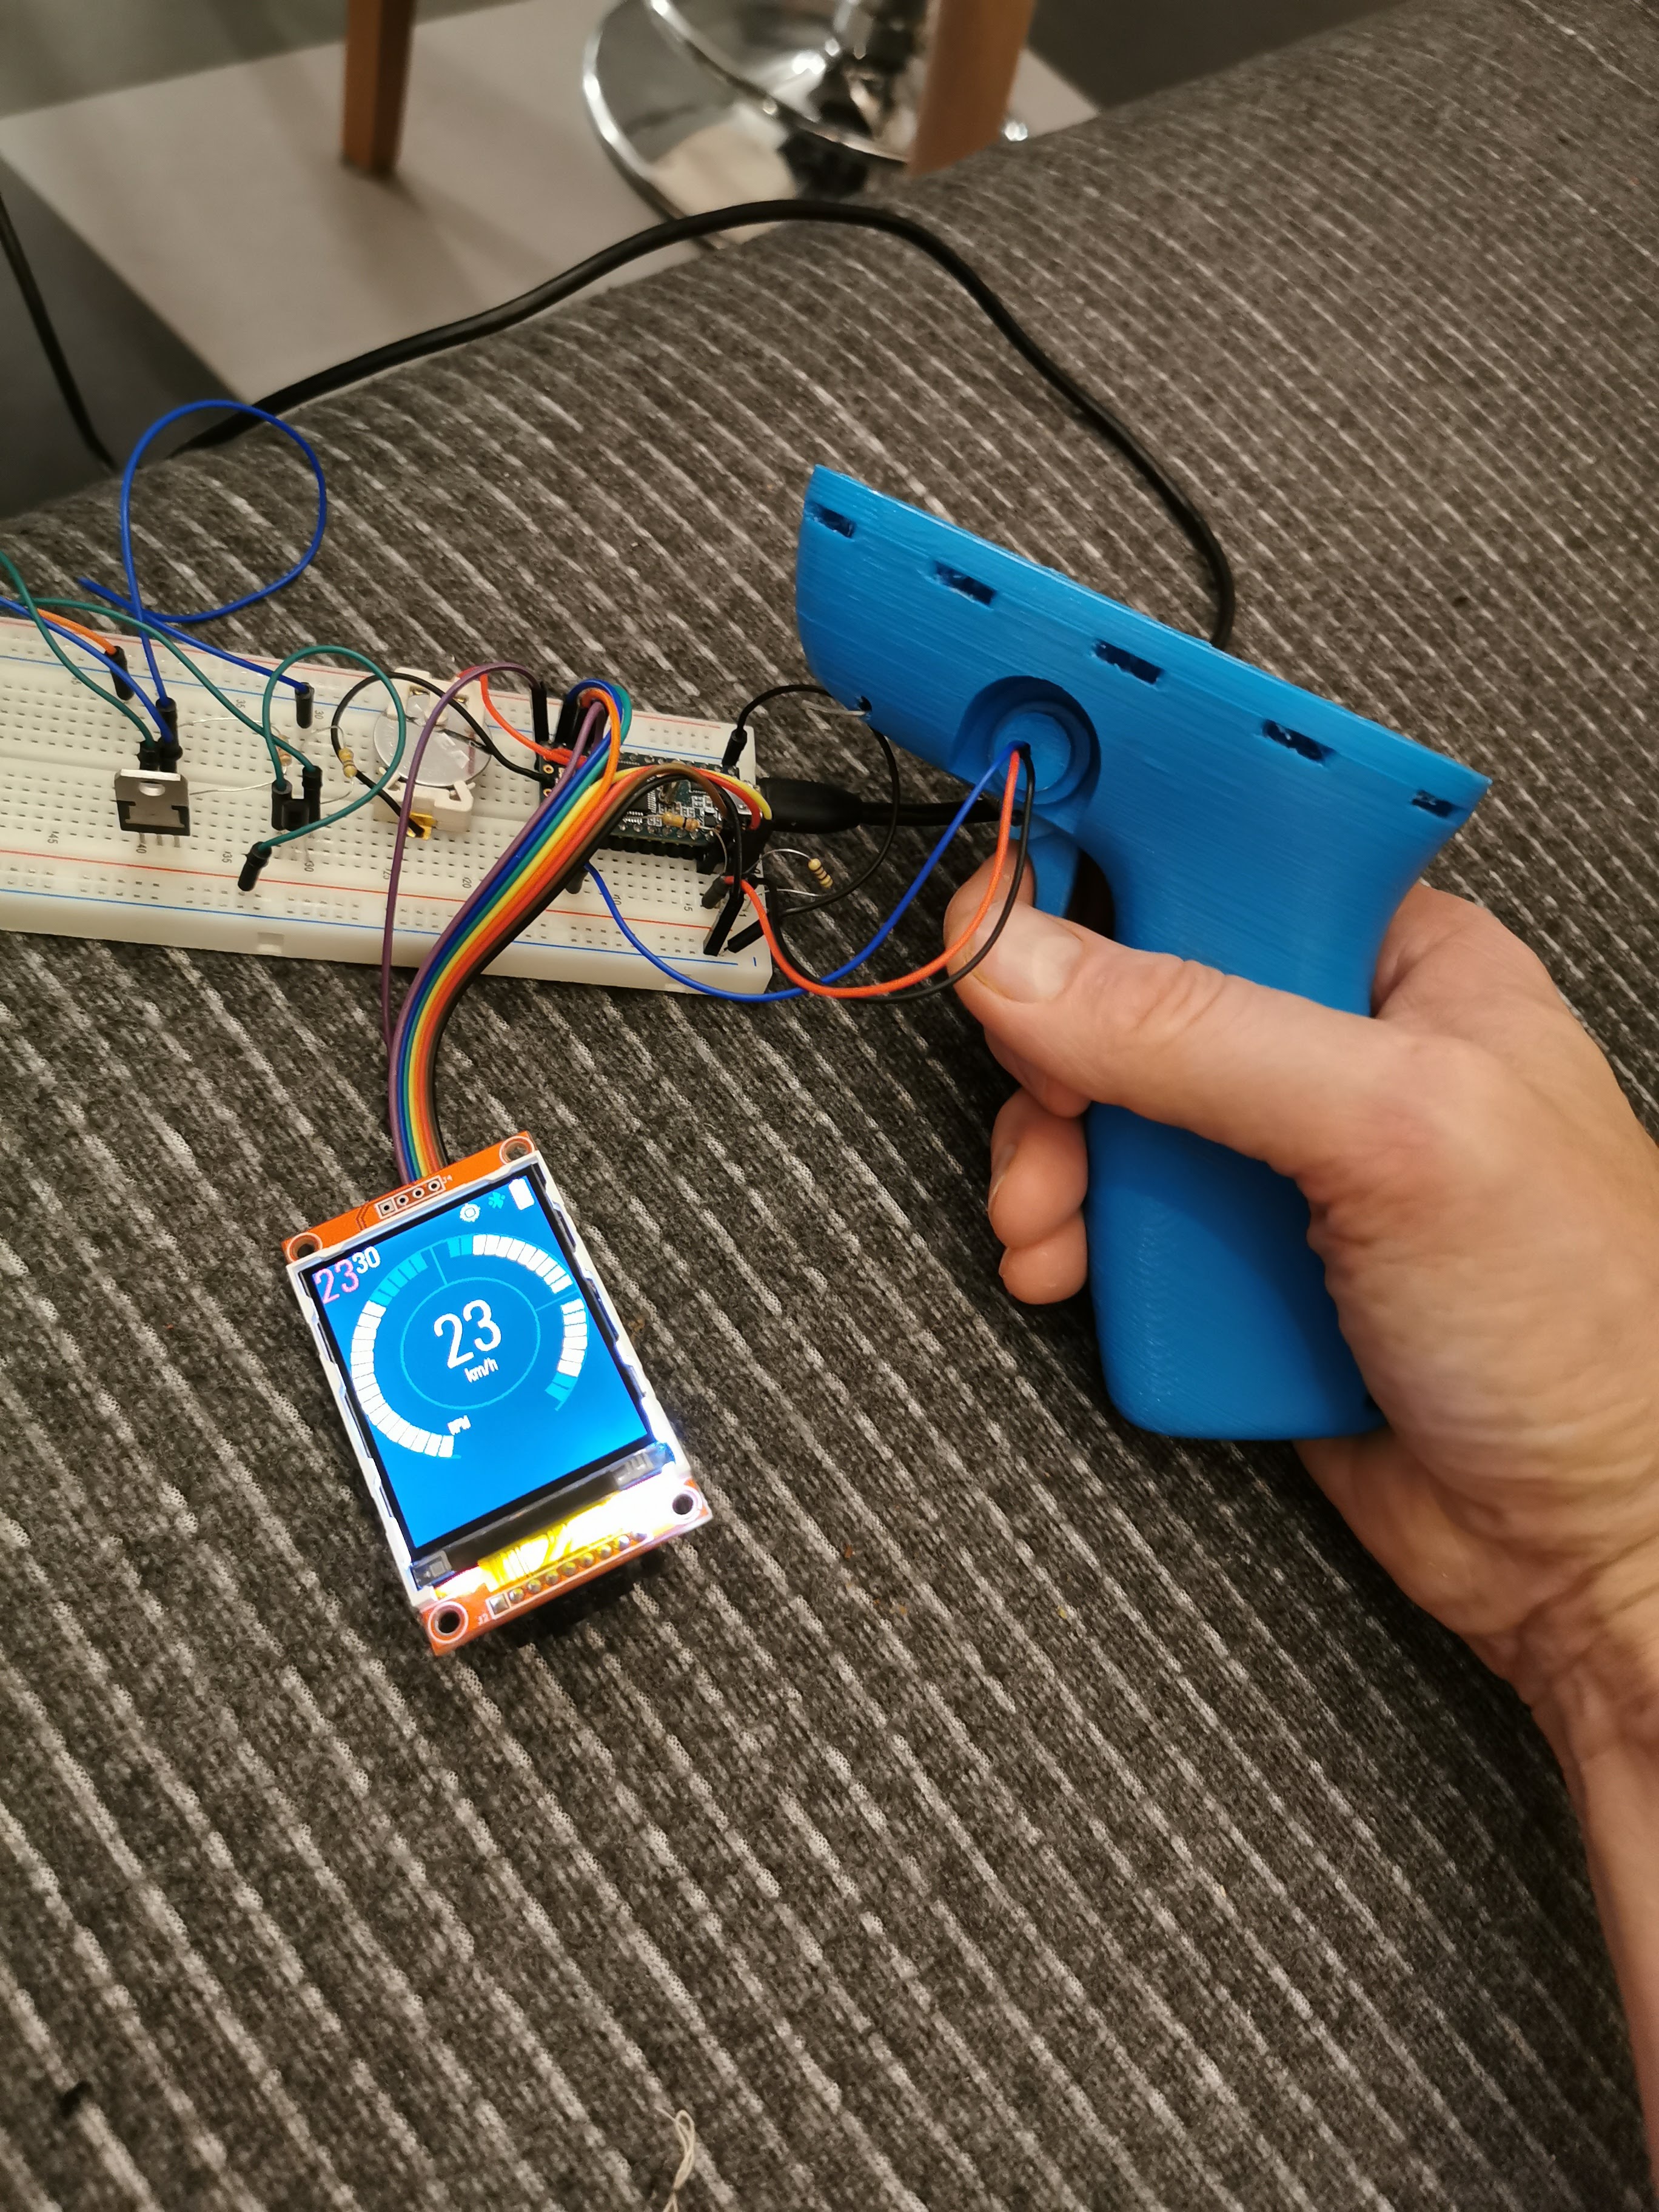
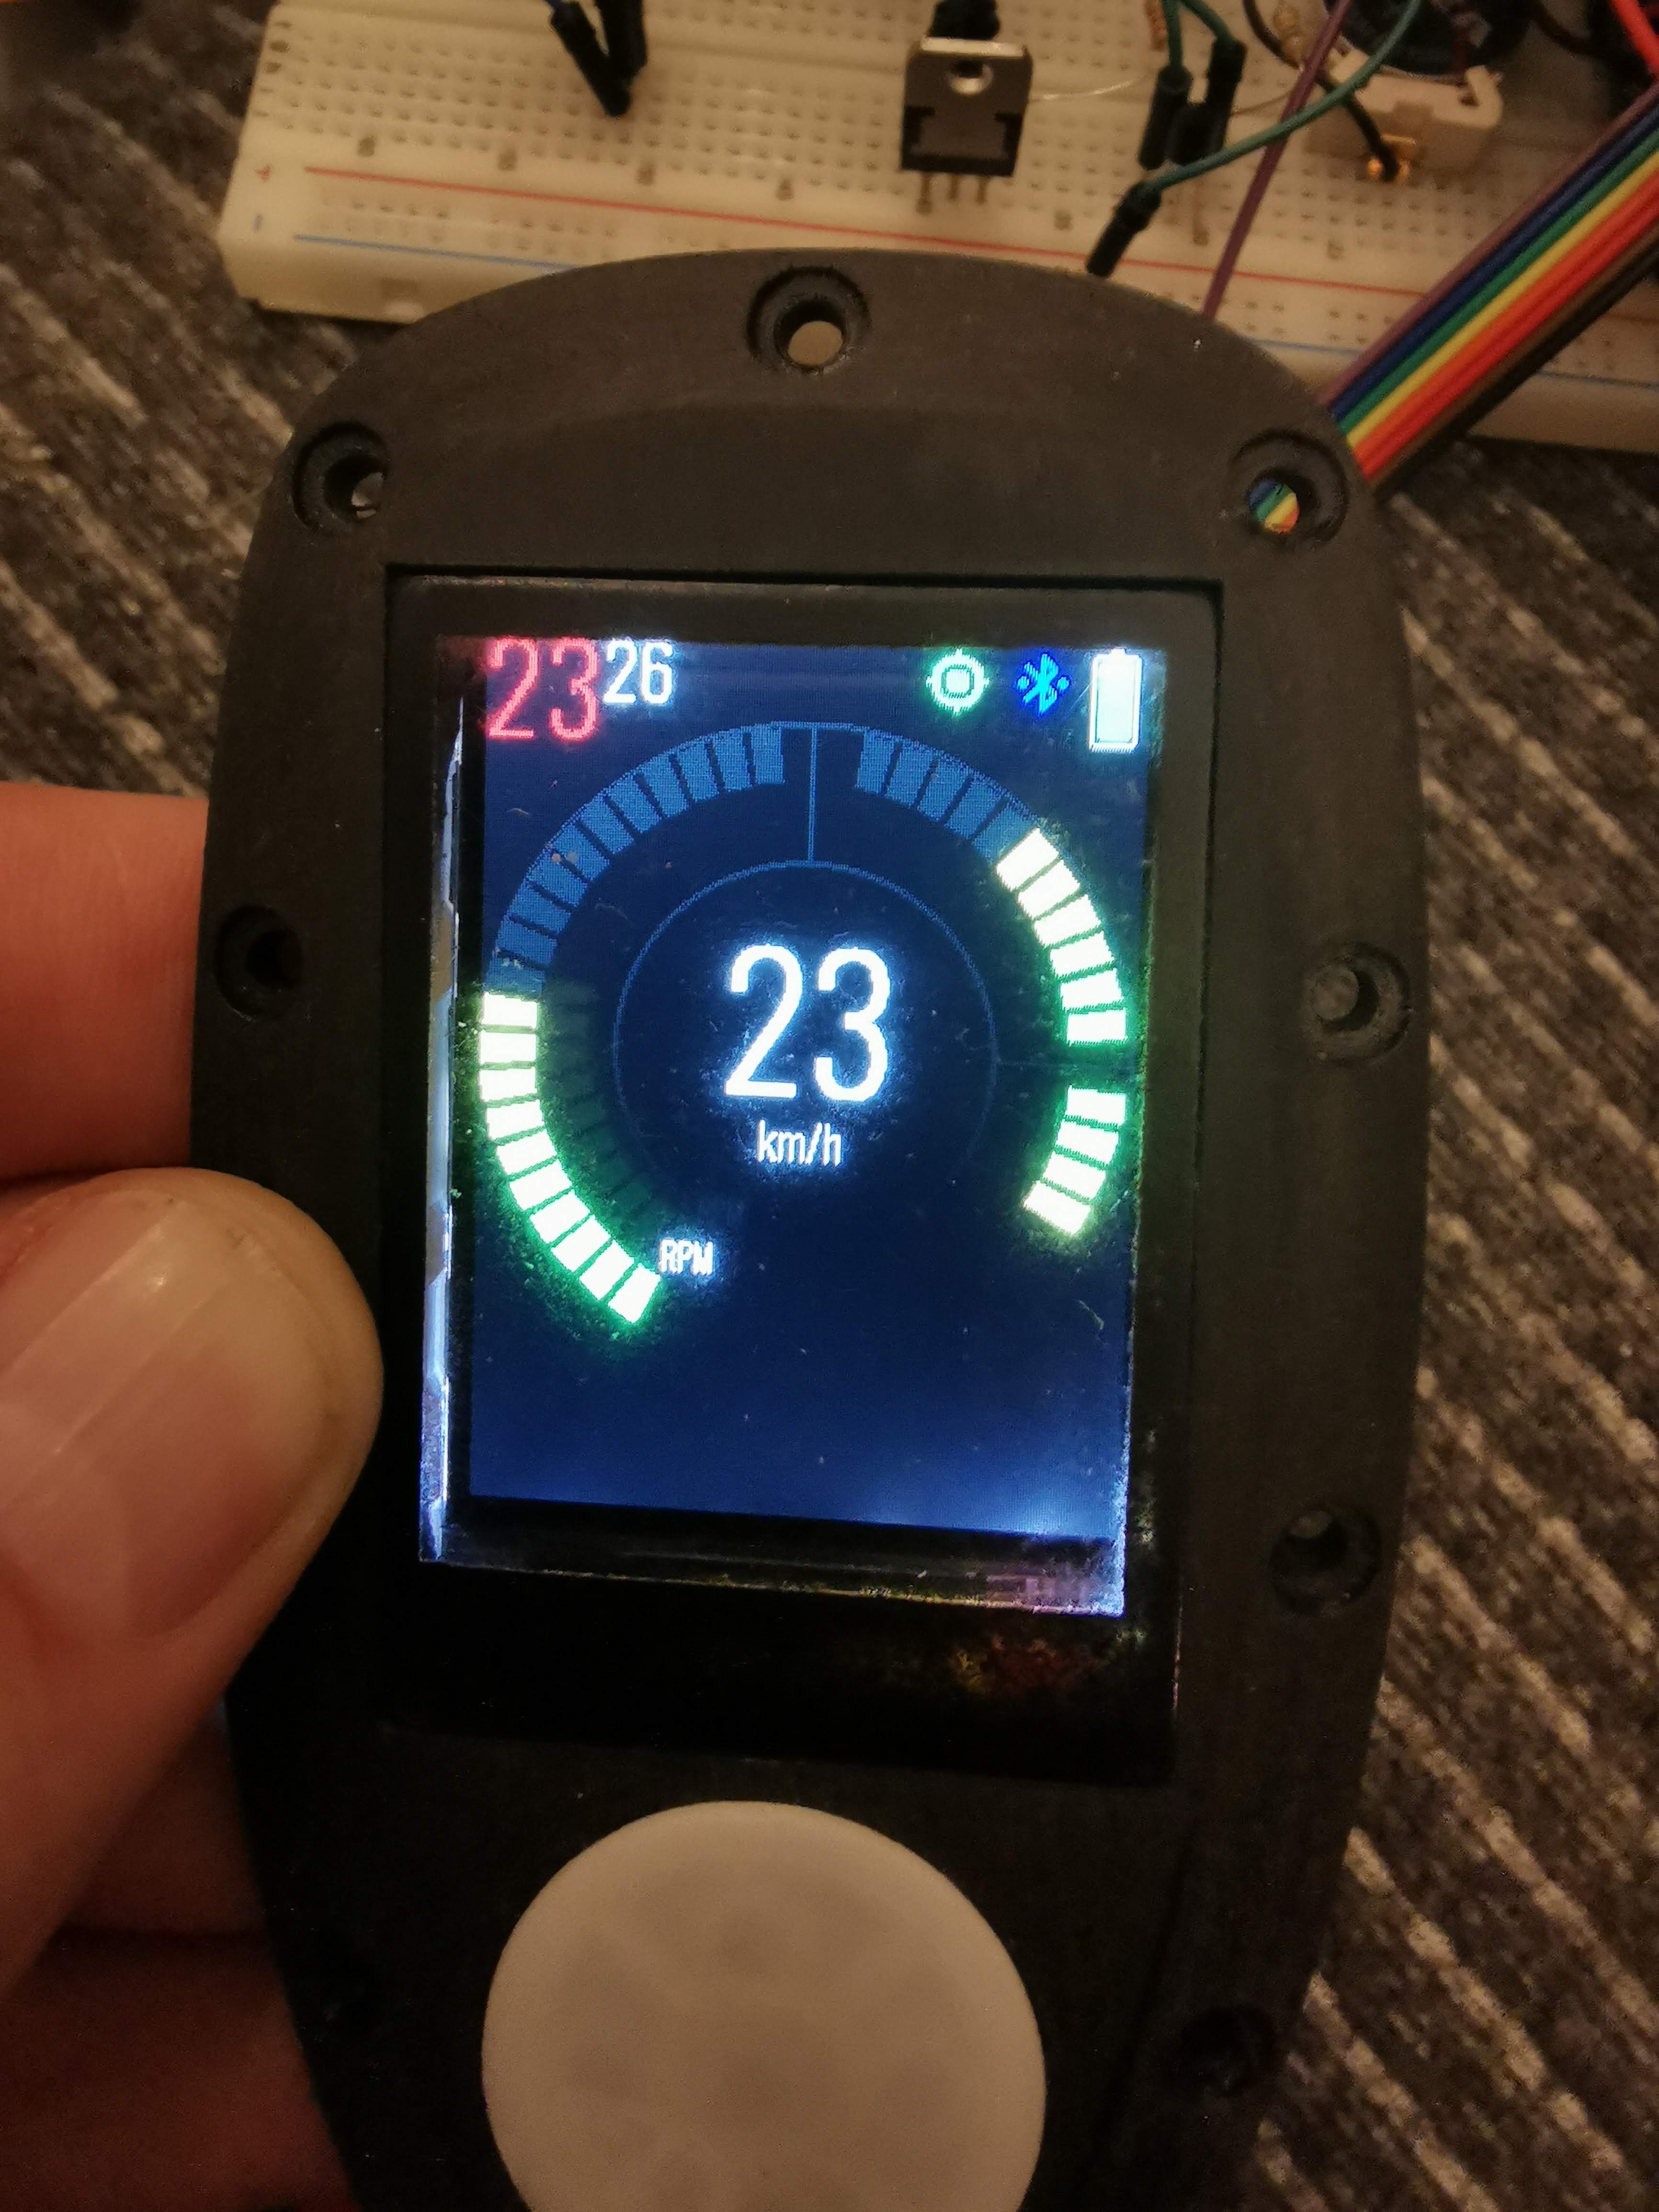
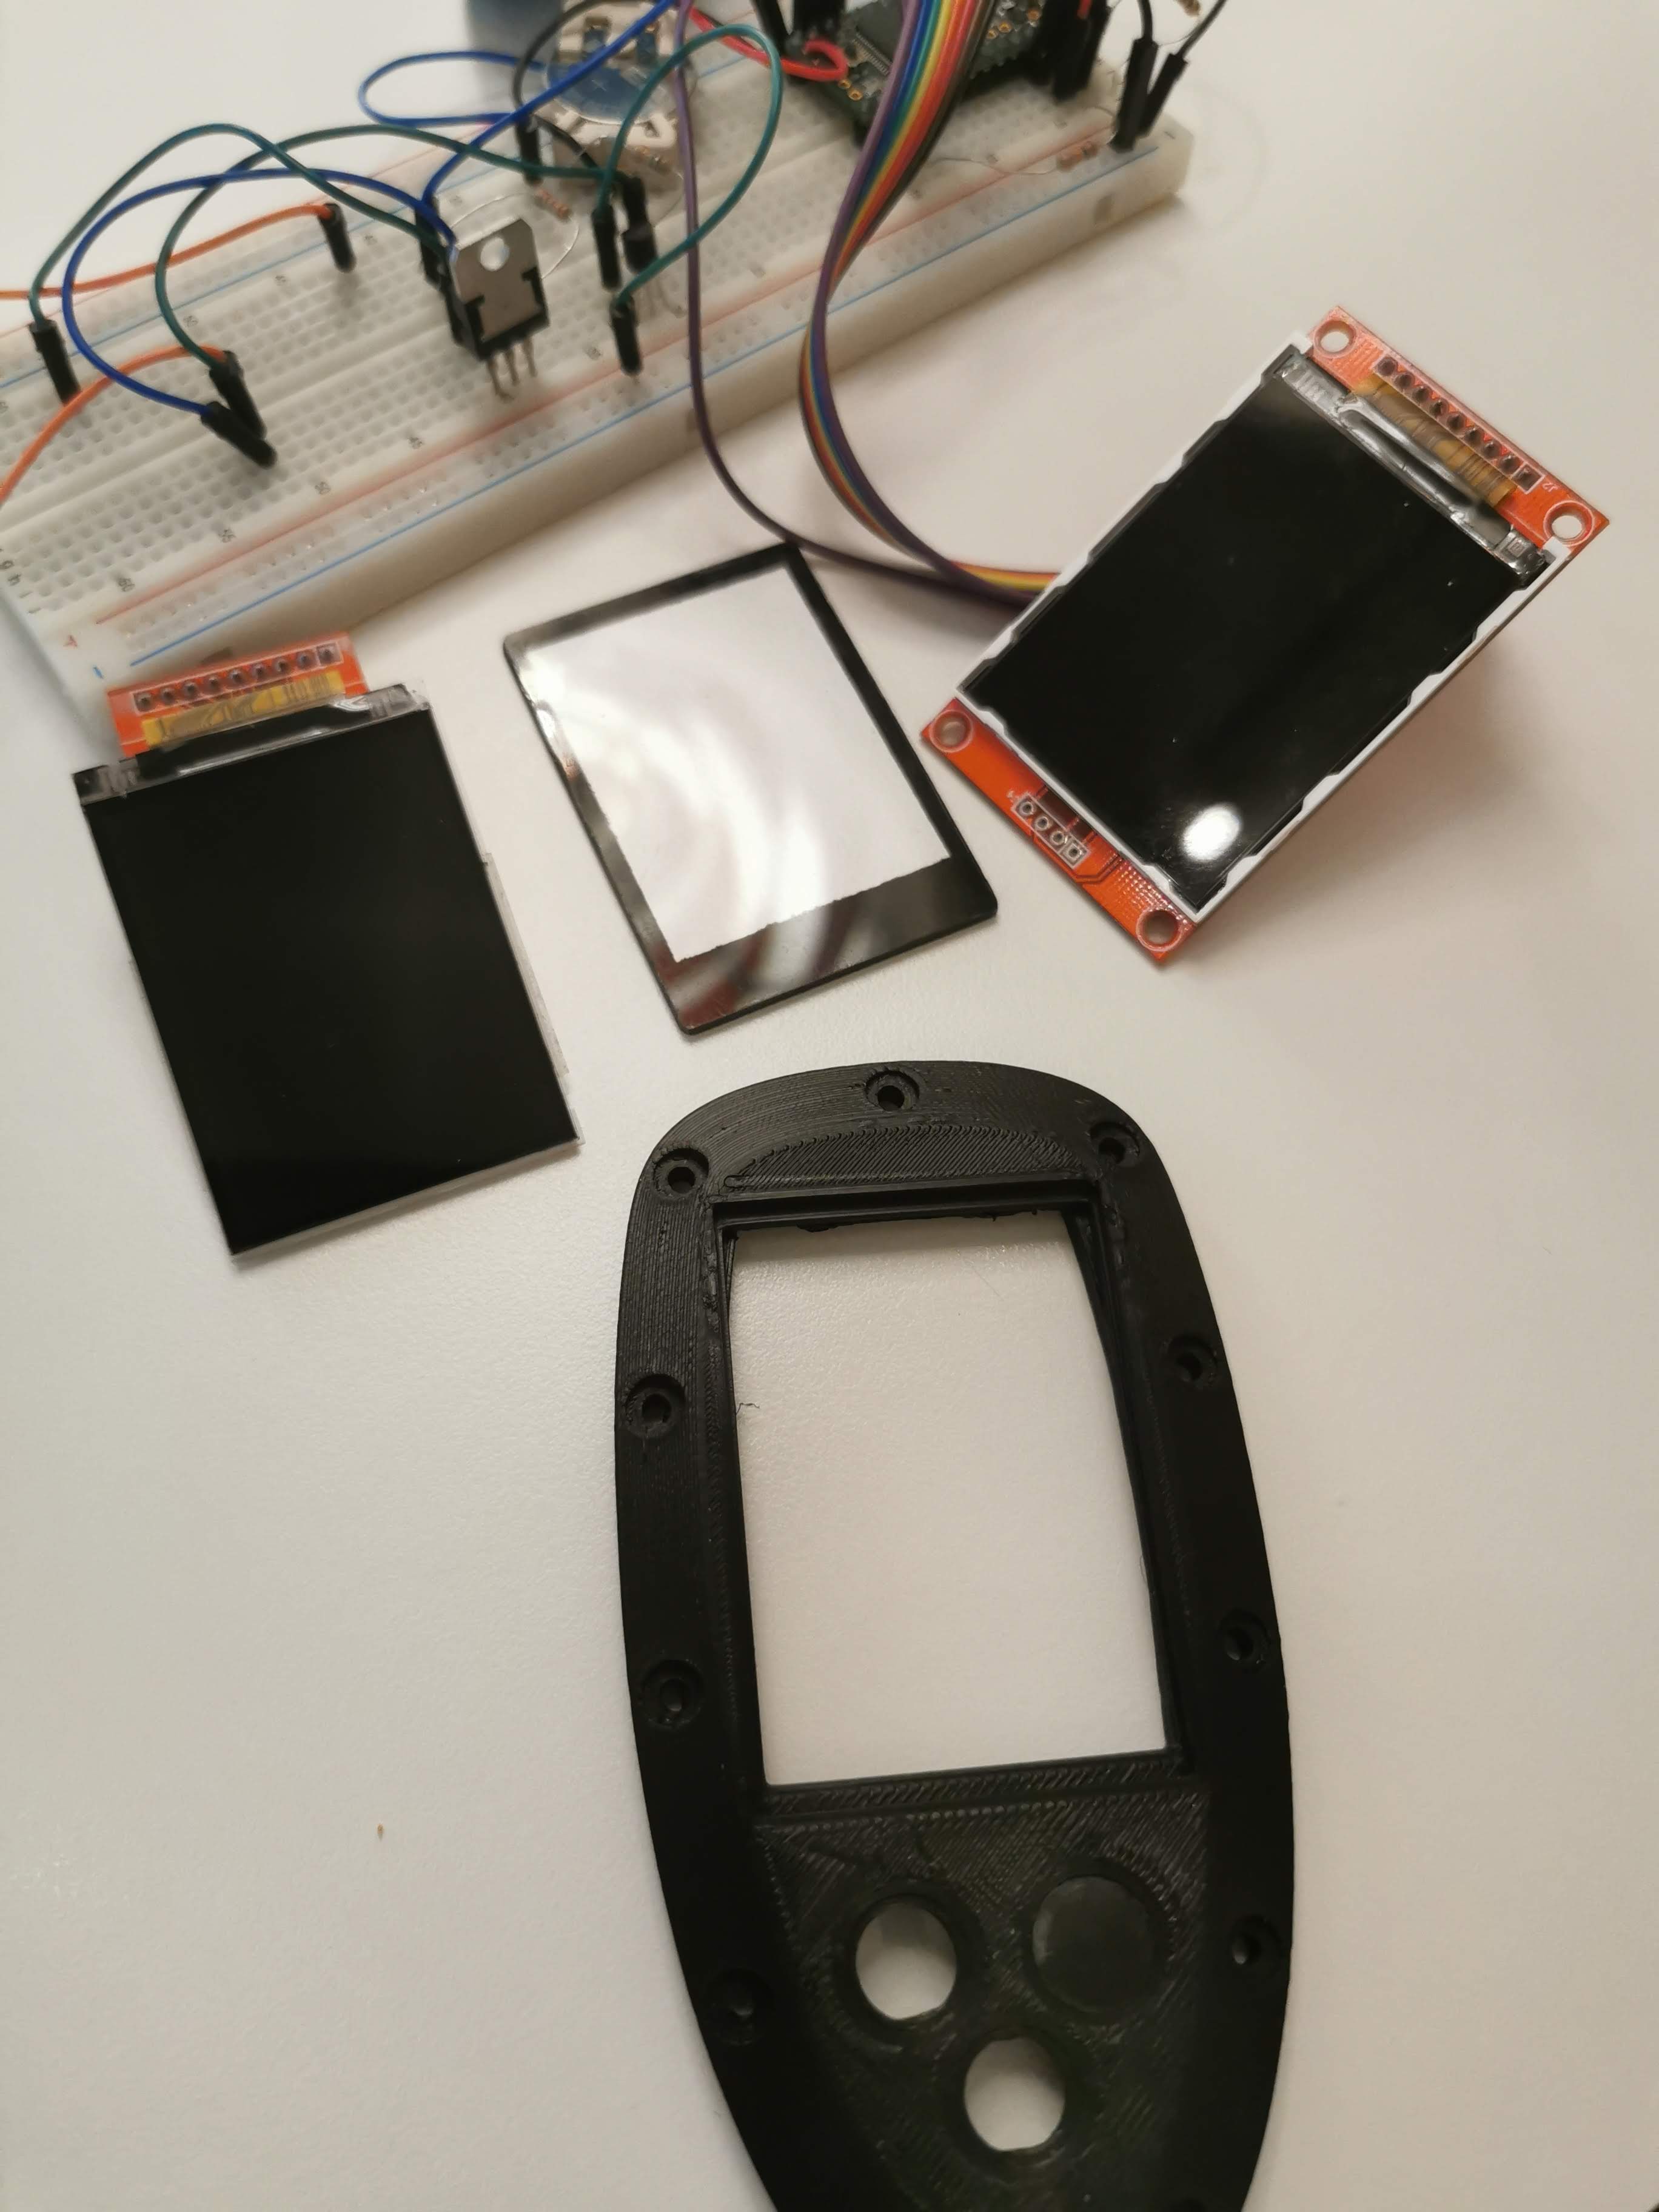
The last month I’ve made some progress on the remote control. The remote will be quite similar to @samisin excellent approach, but I’ve chosen not to all the electronics into the remote, only basic things like the hall sensor, display, bluetoooth communication, IMU and CPU. GPS and SD-card will be inside the electronics box and the data communicated to the remote.
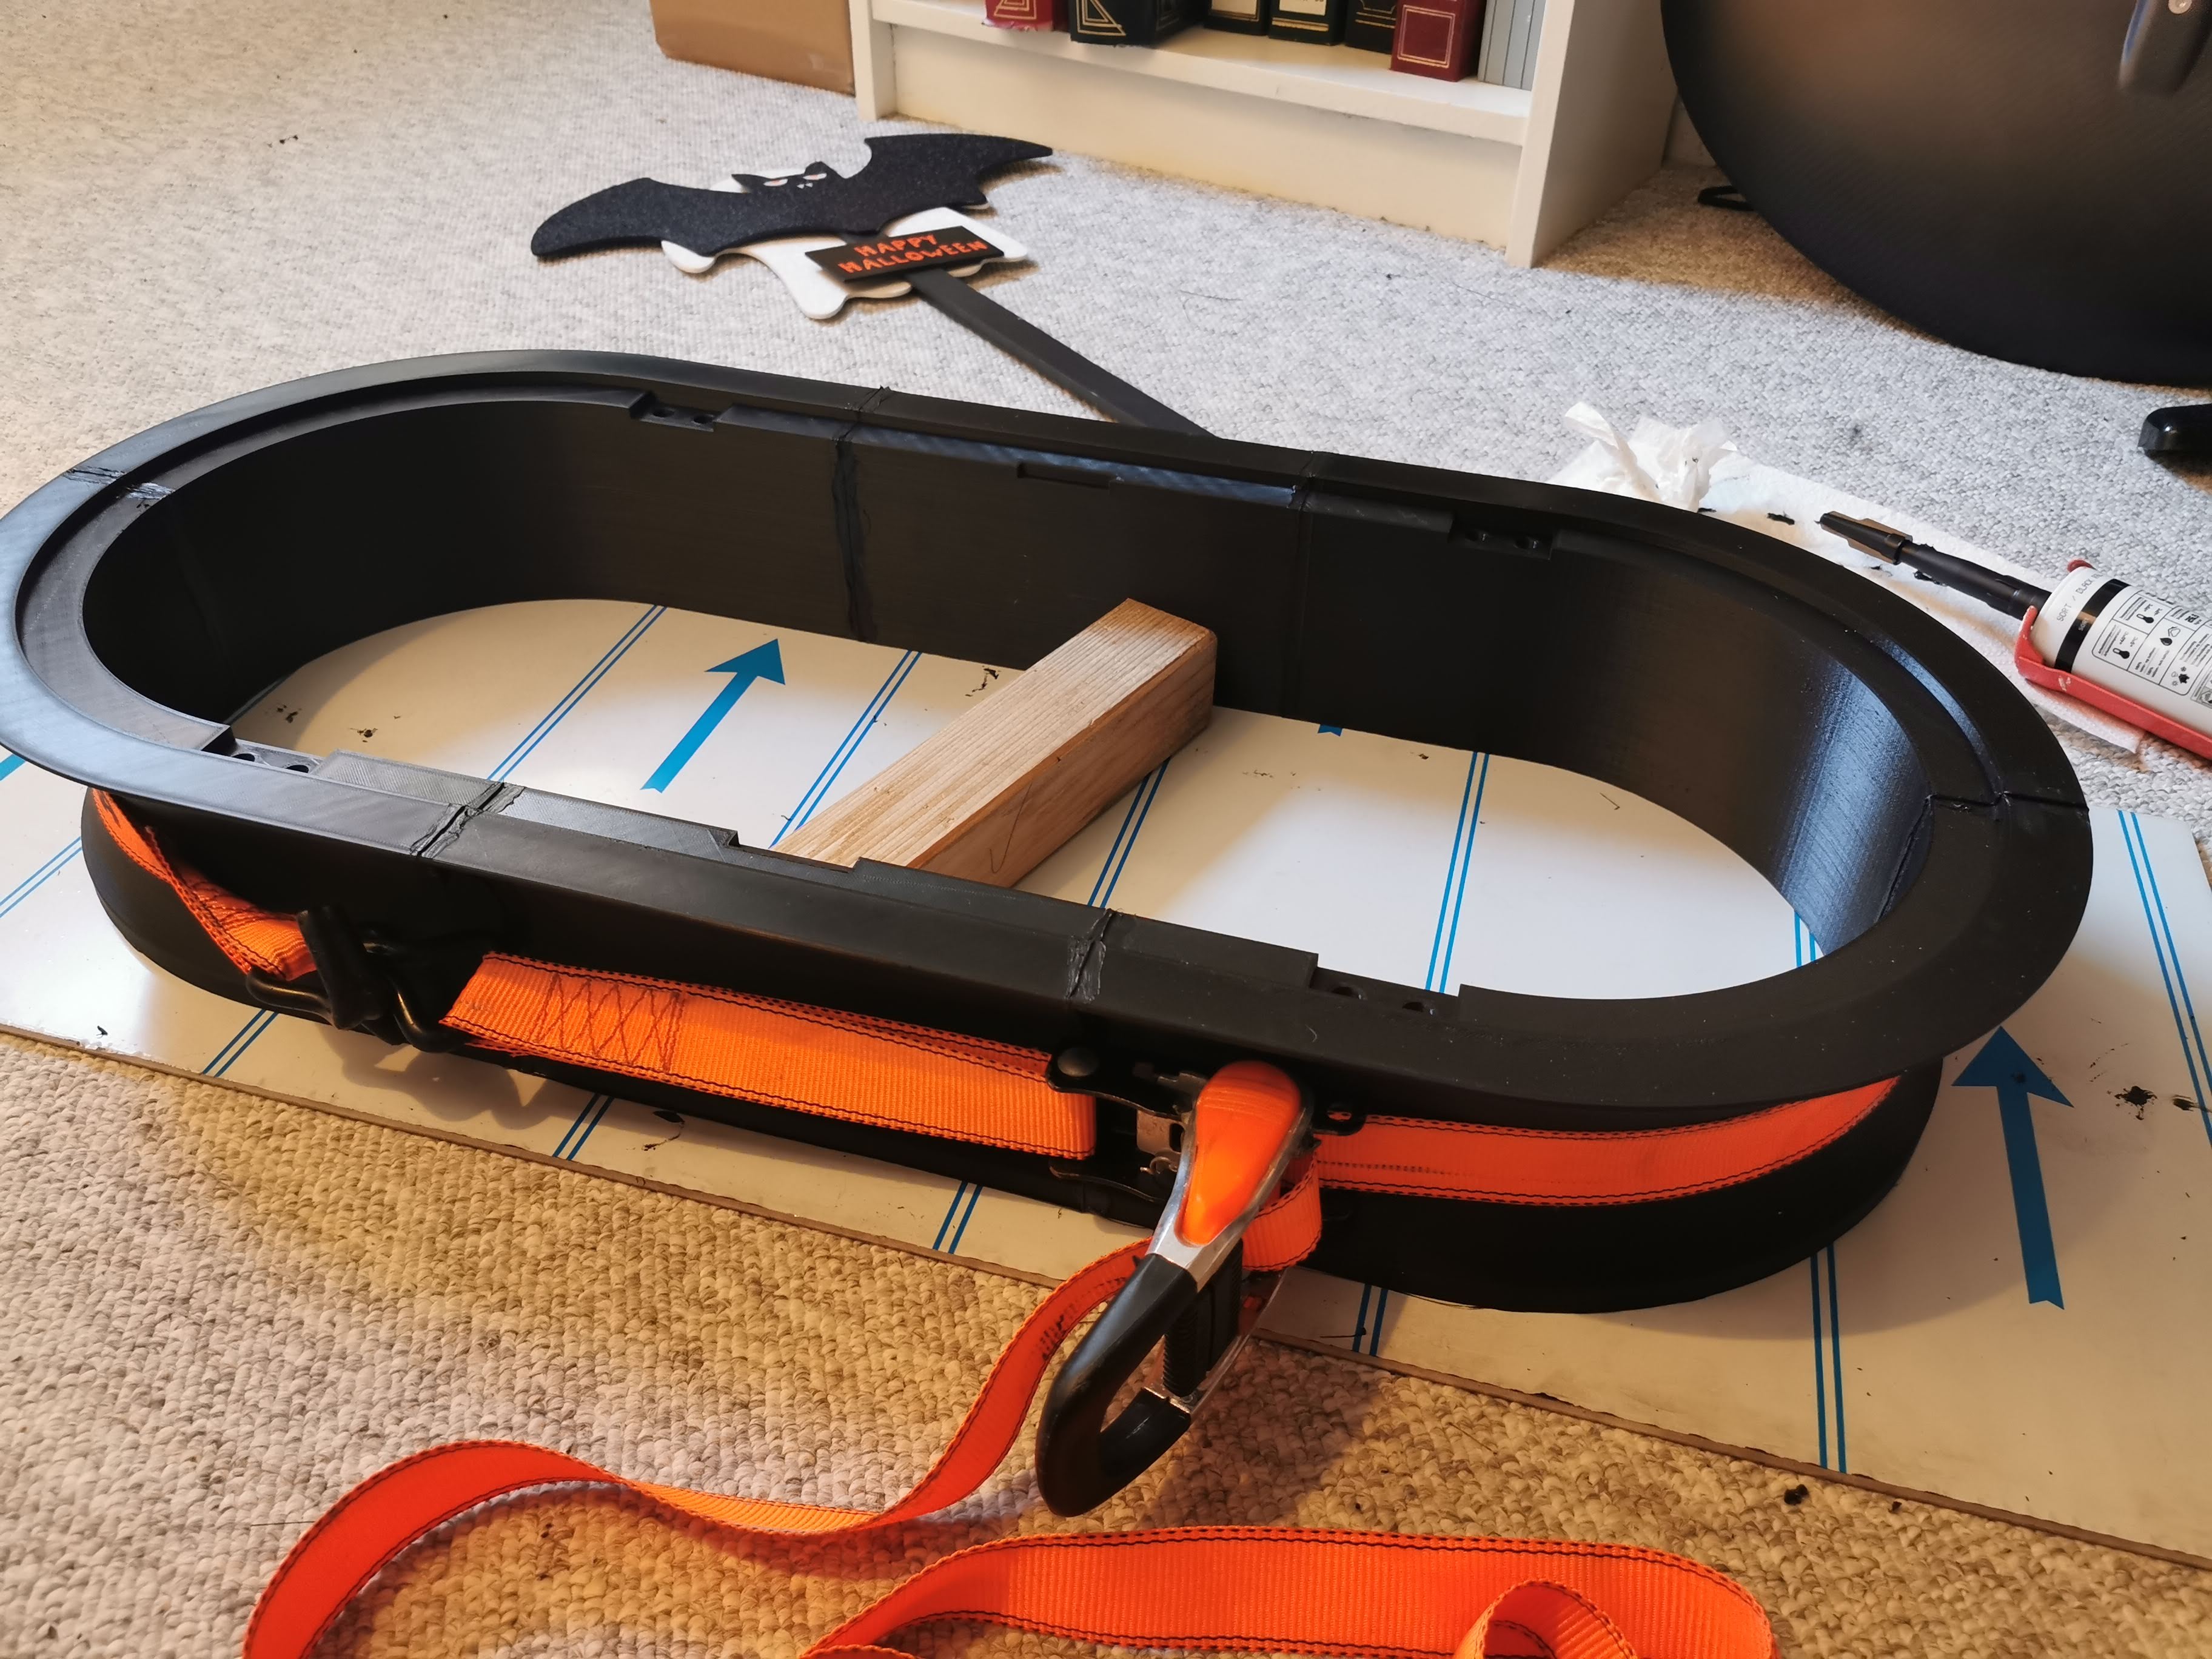
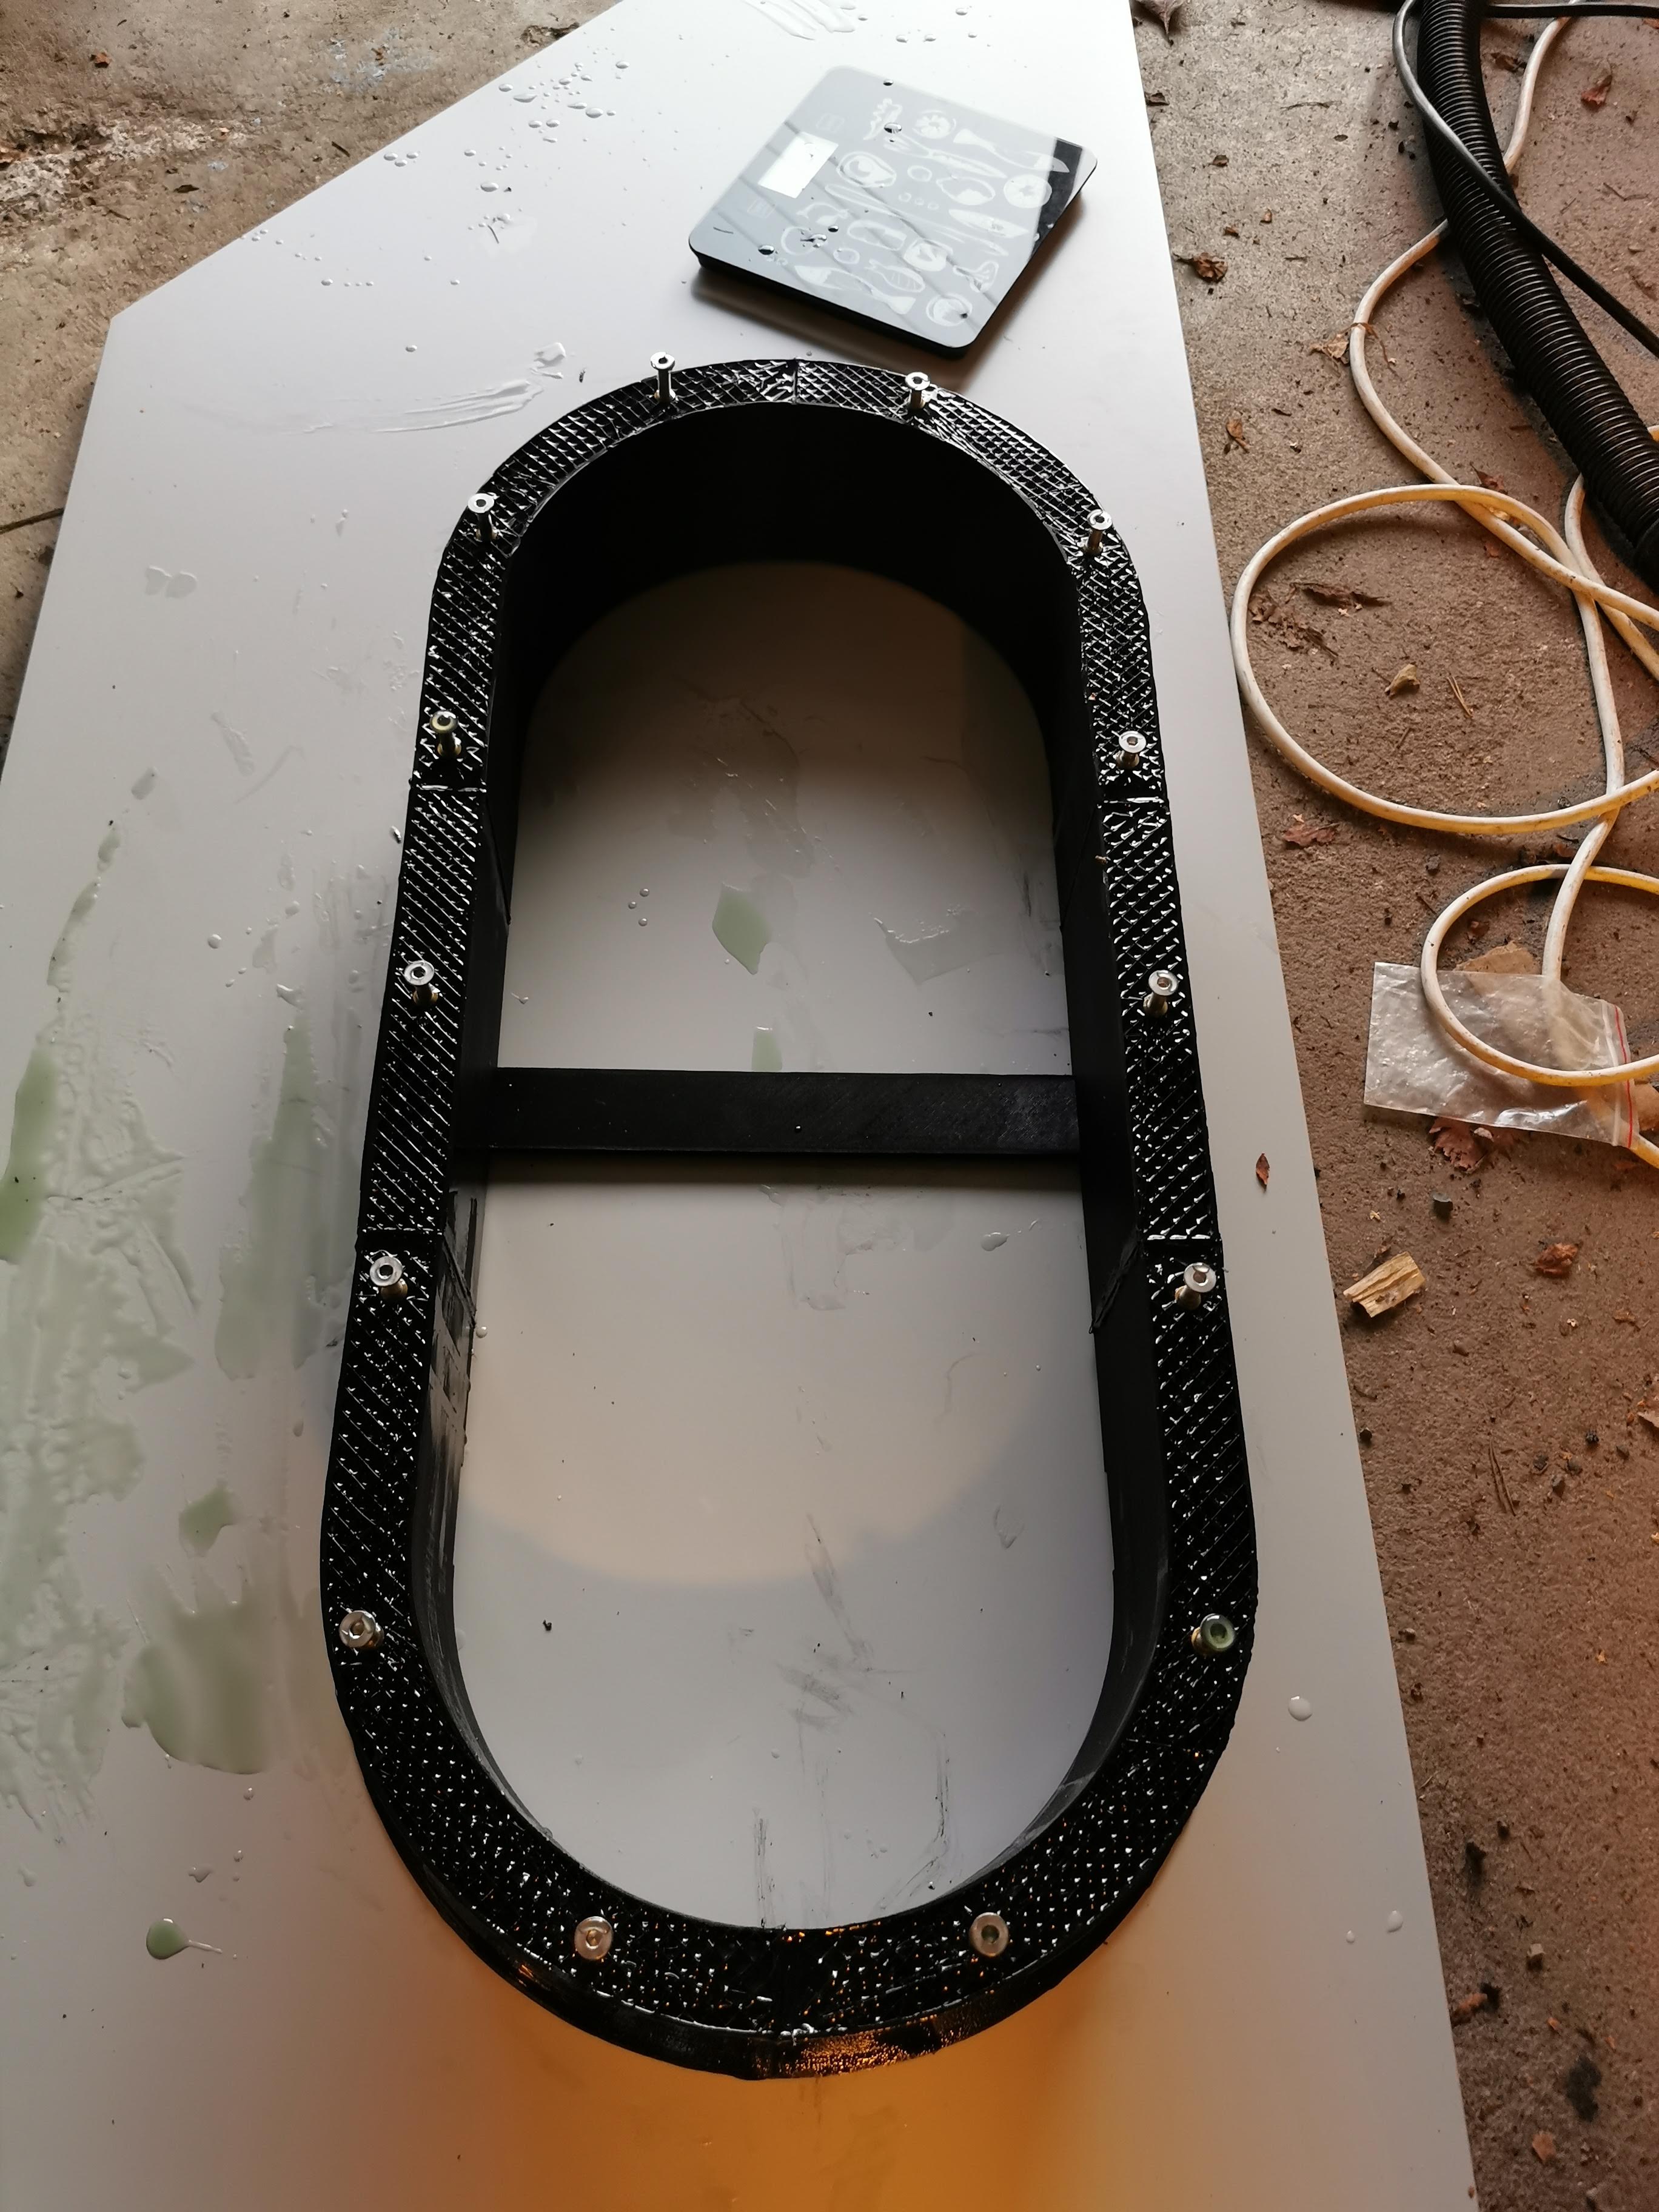
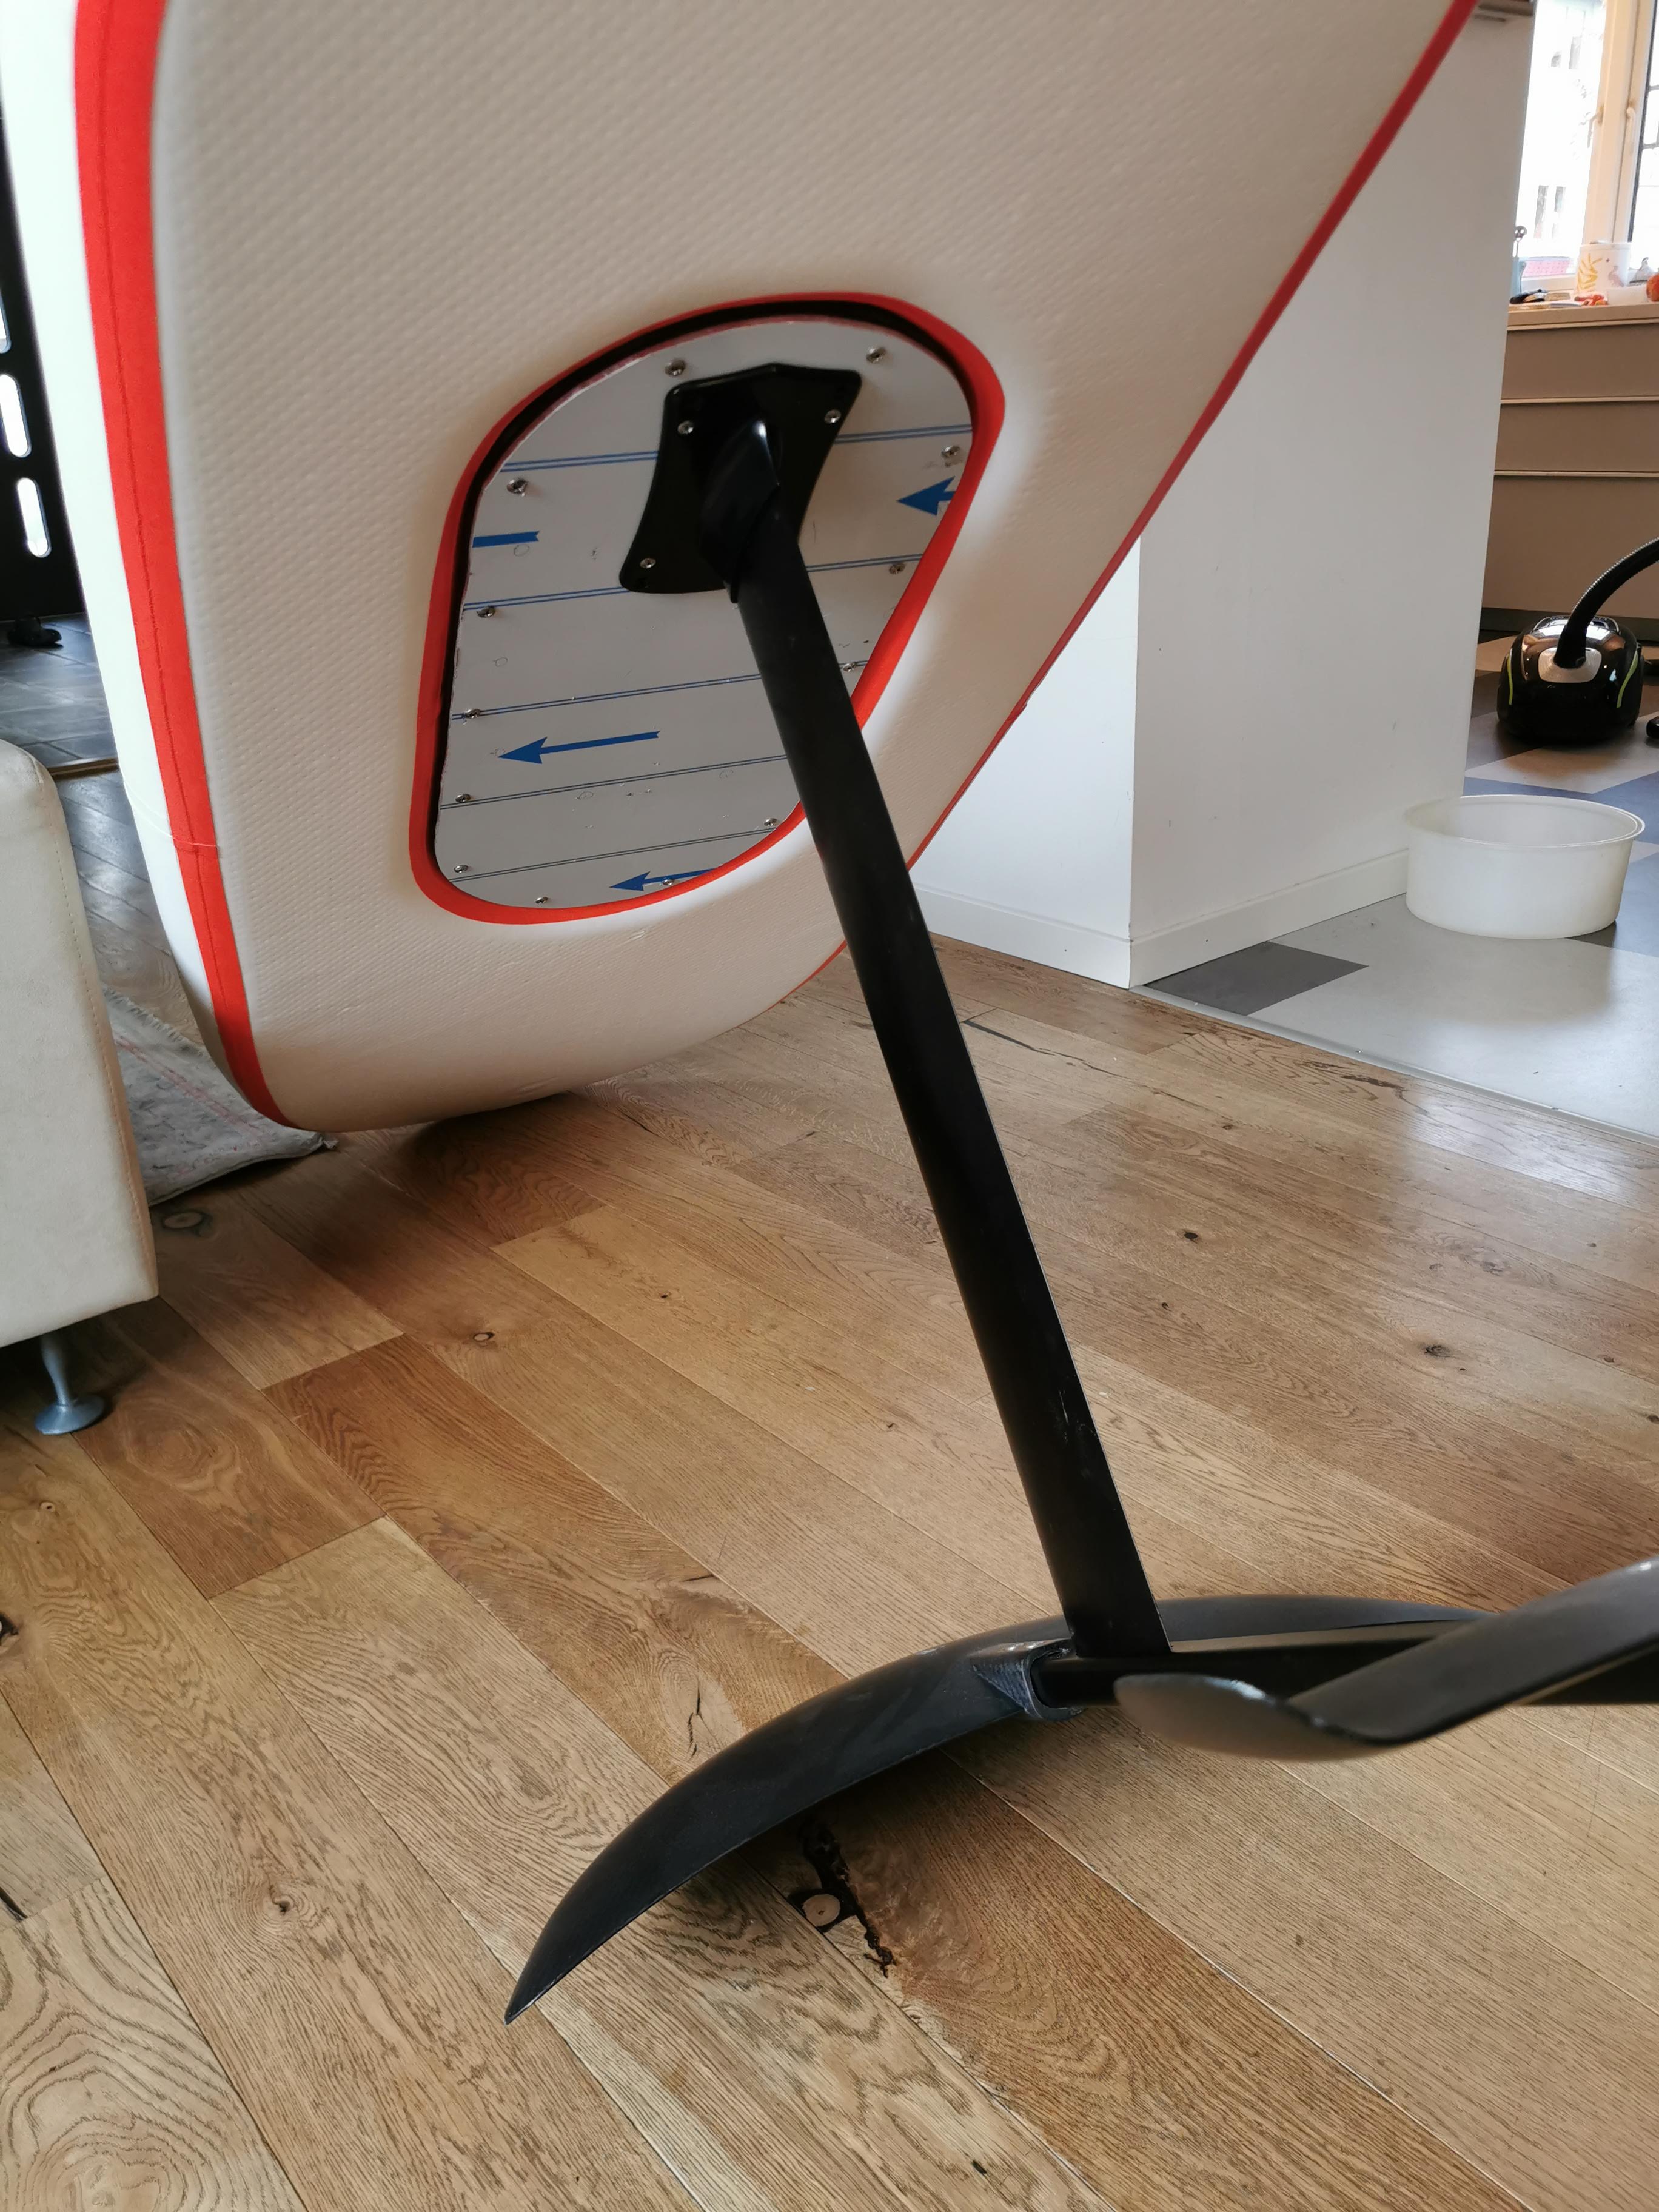
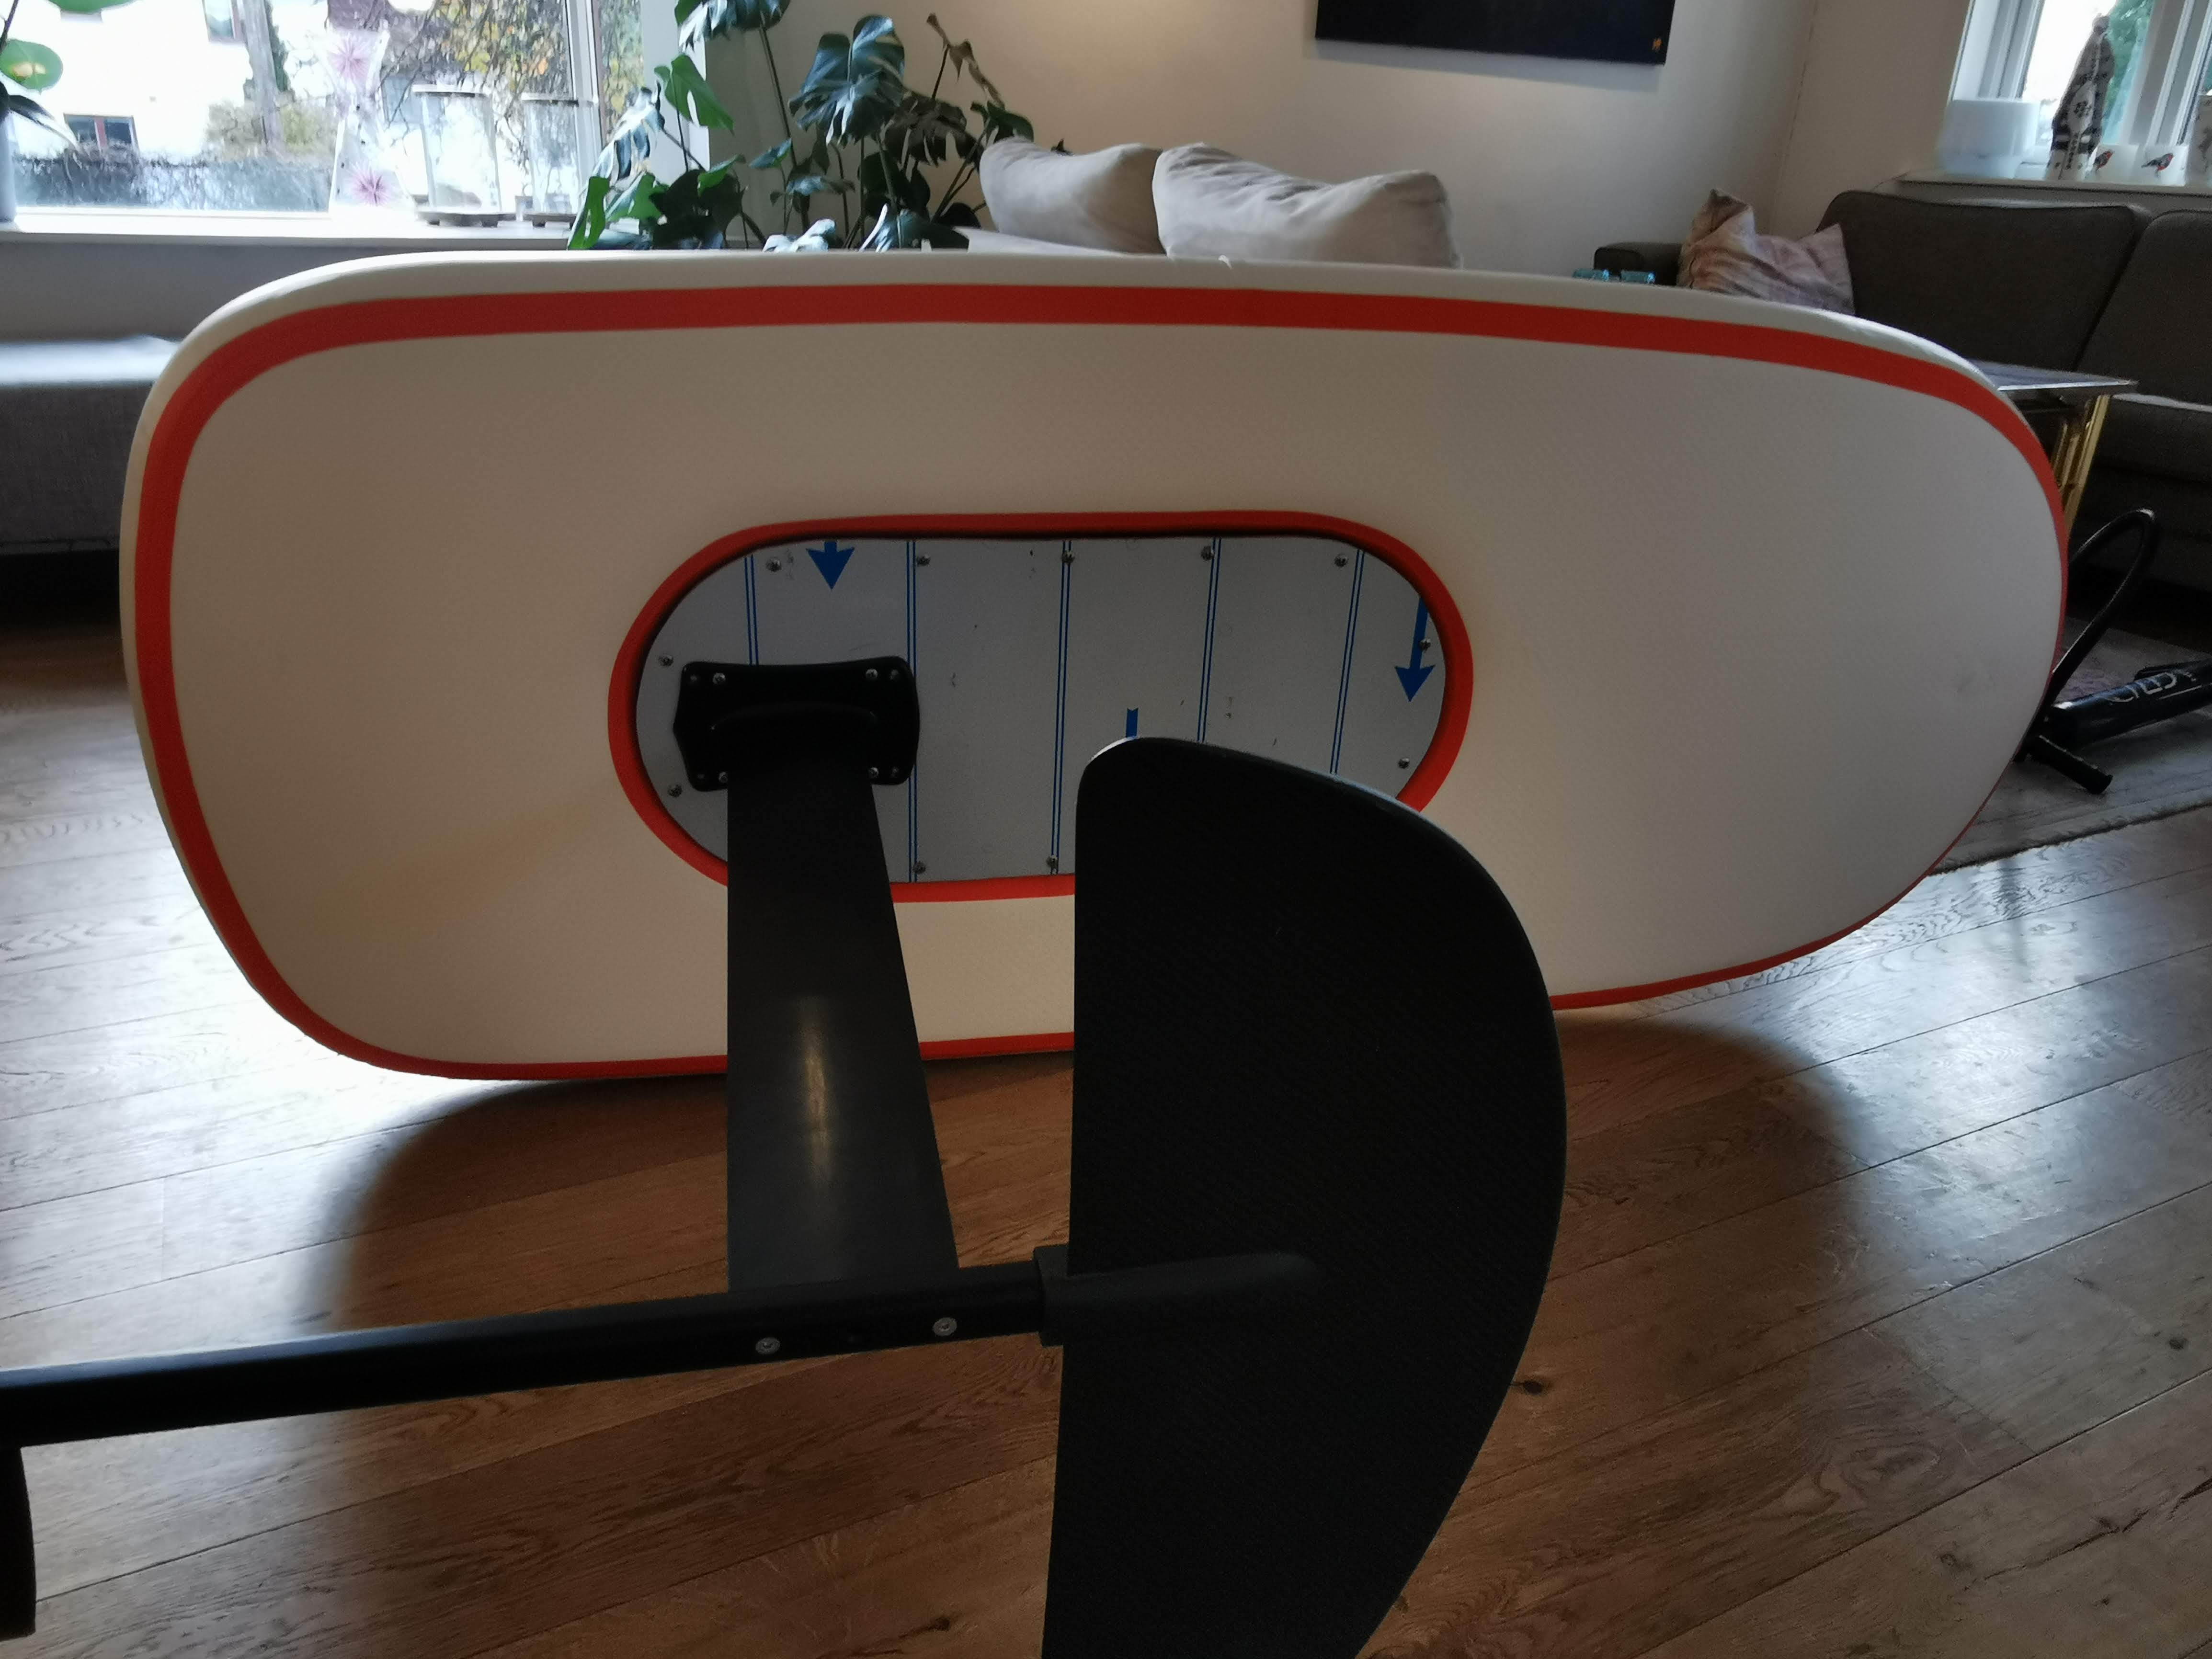
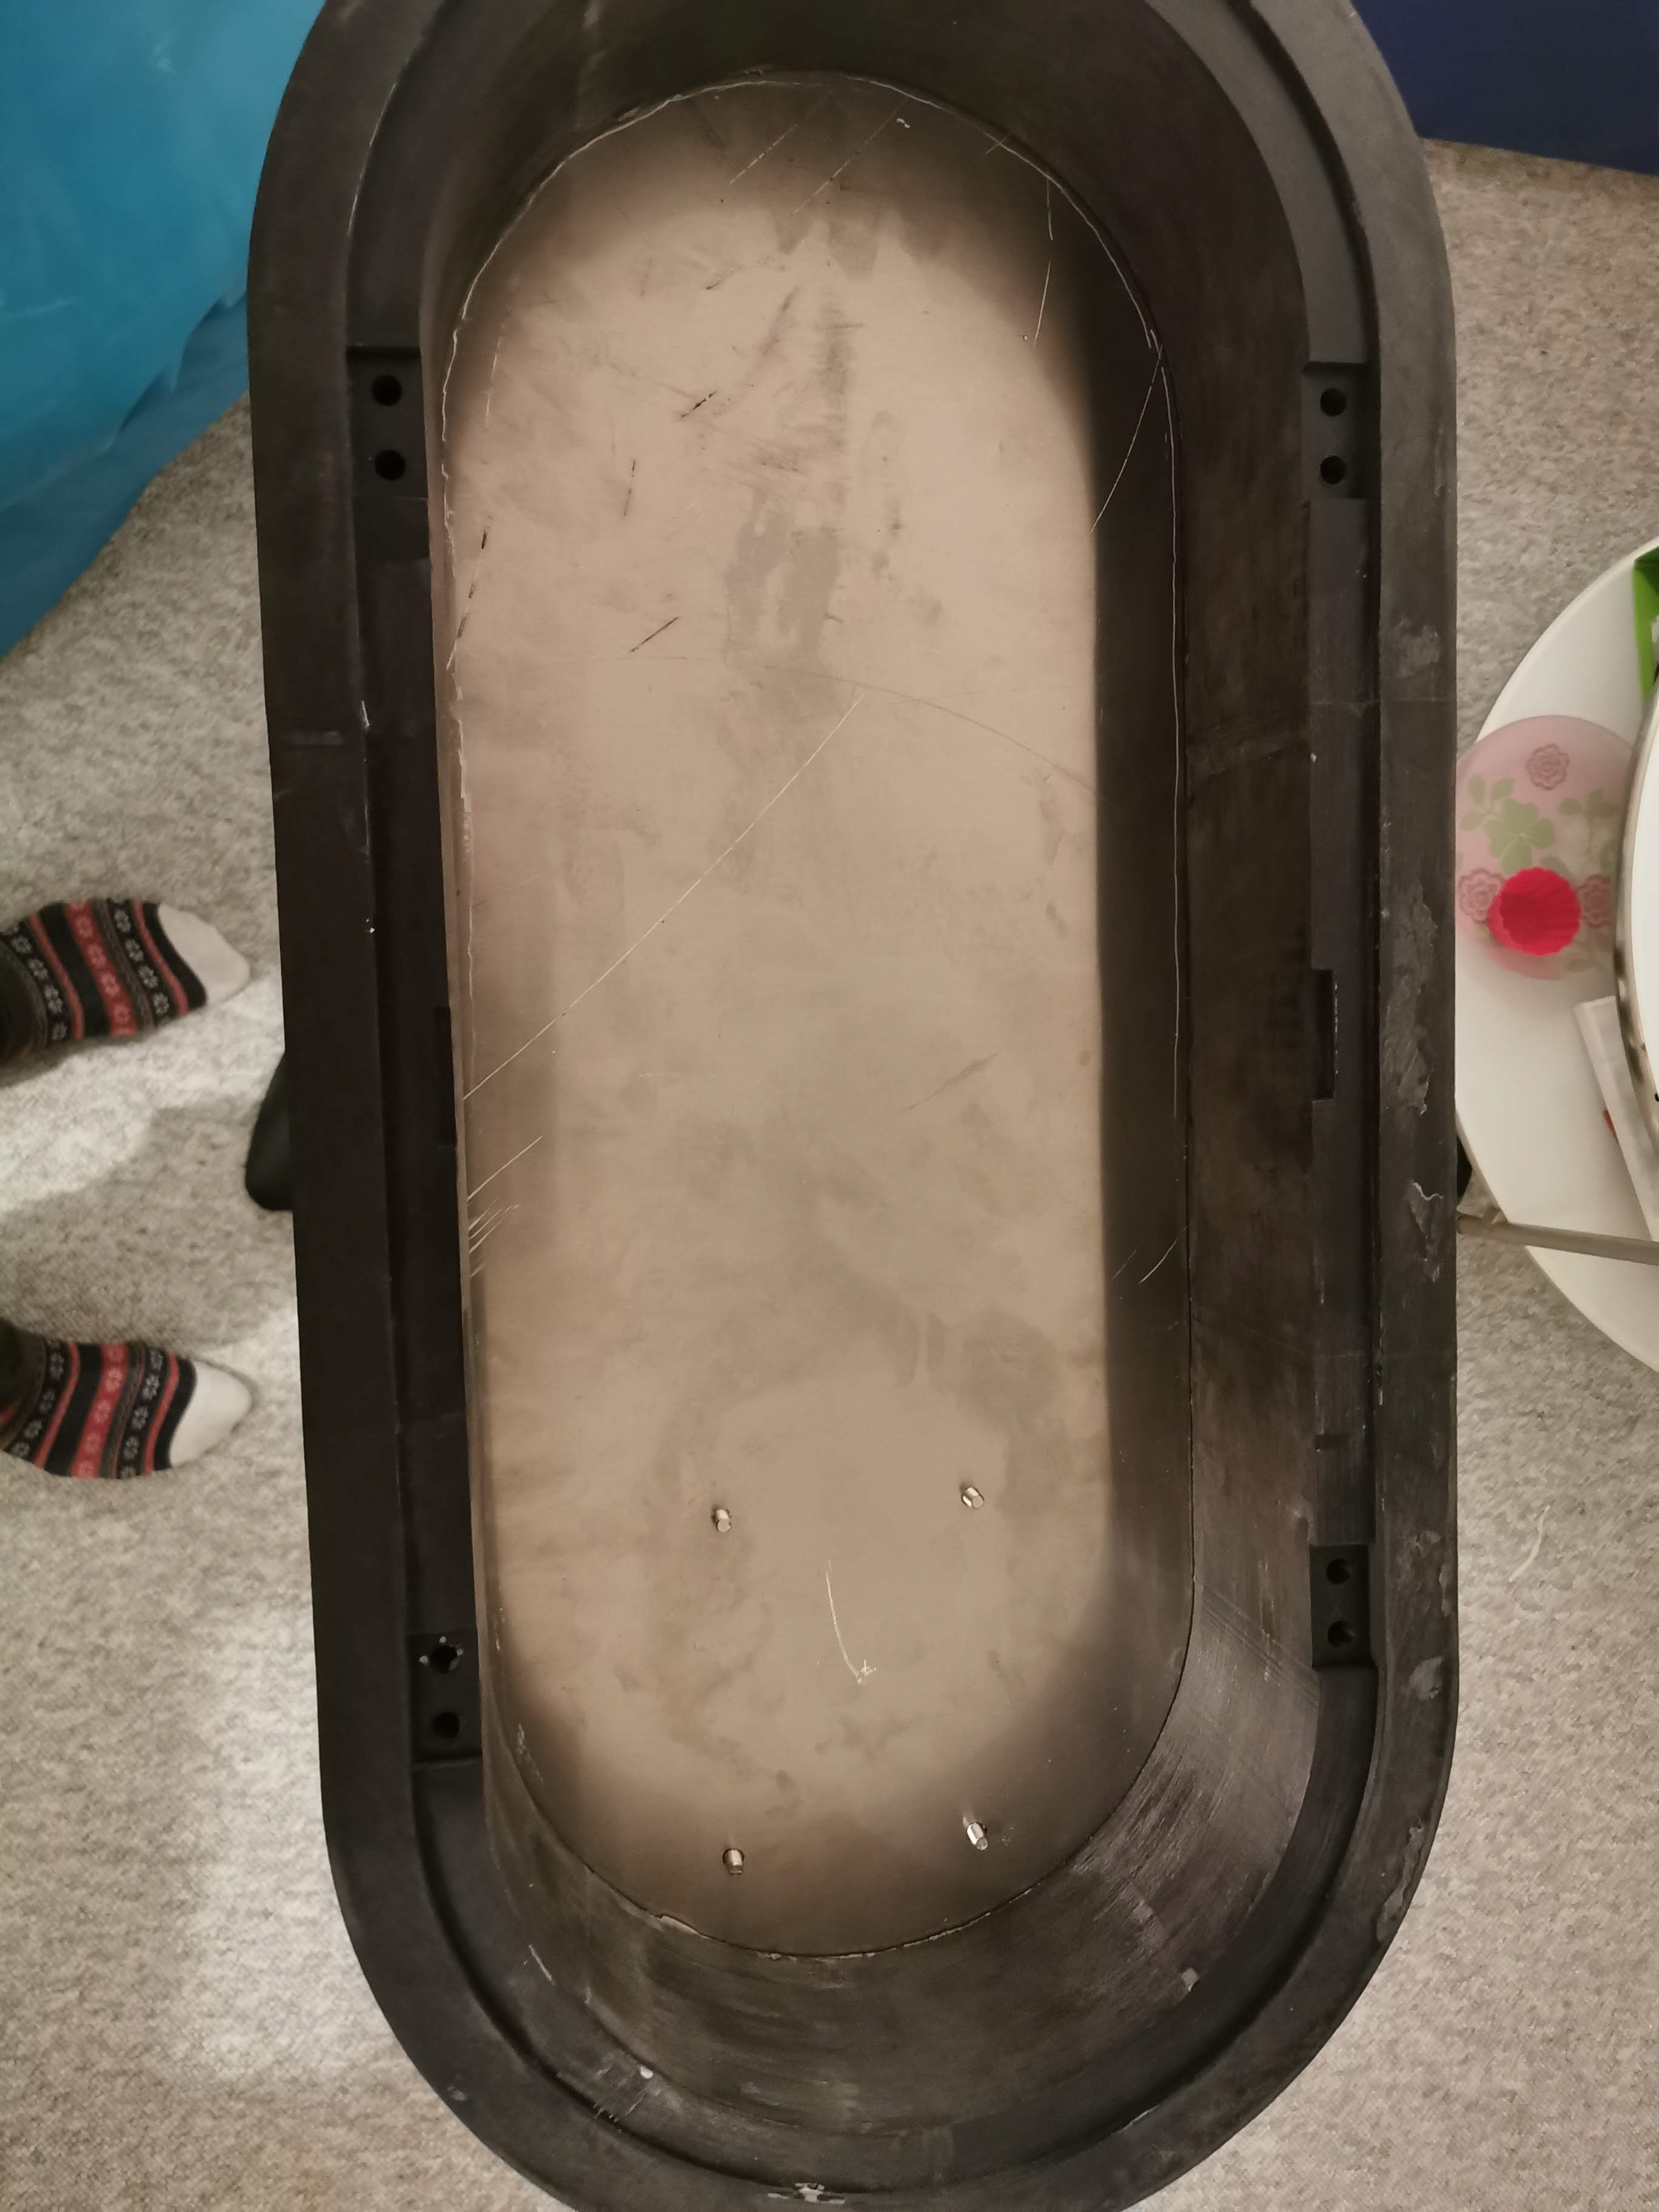
But the main thing this last month is the the frame for the box to fill the hole in the inflatable.
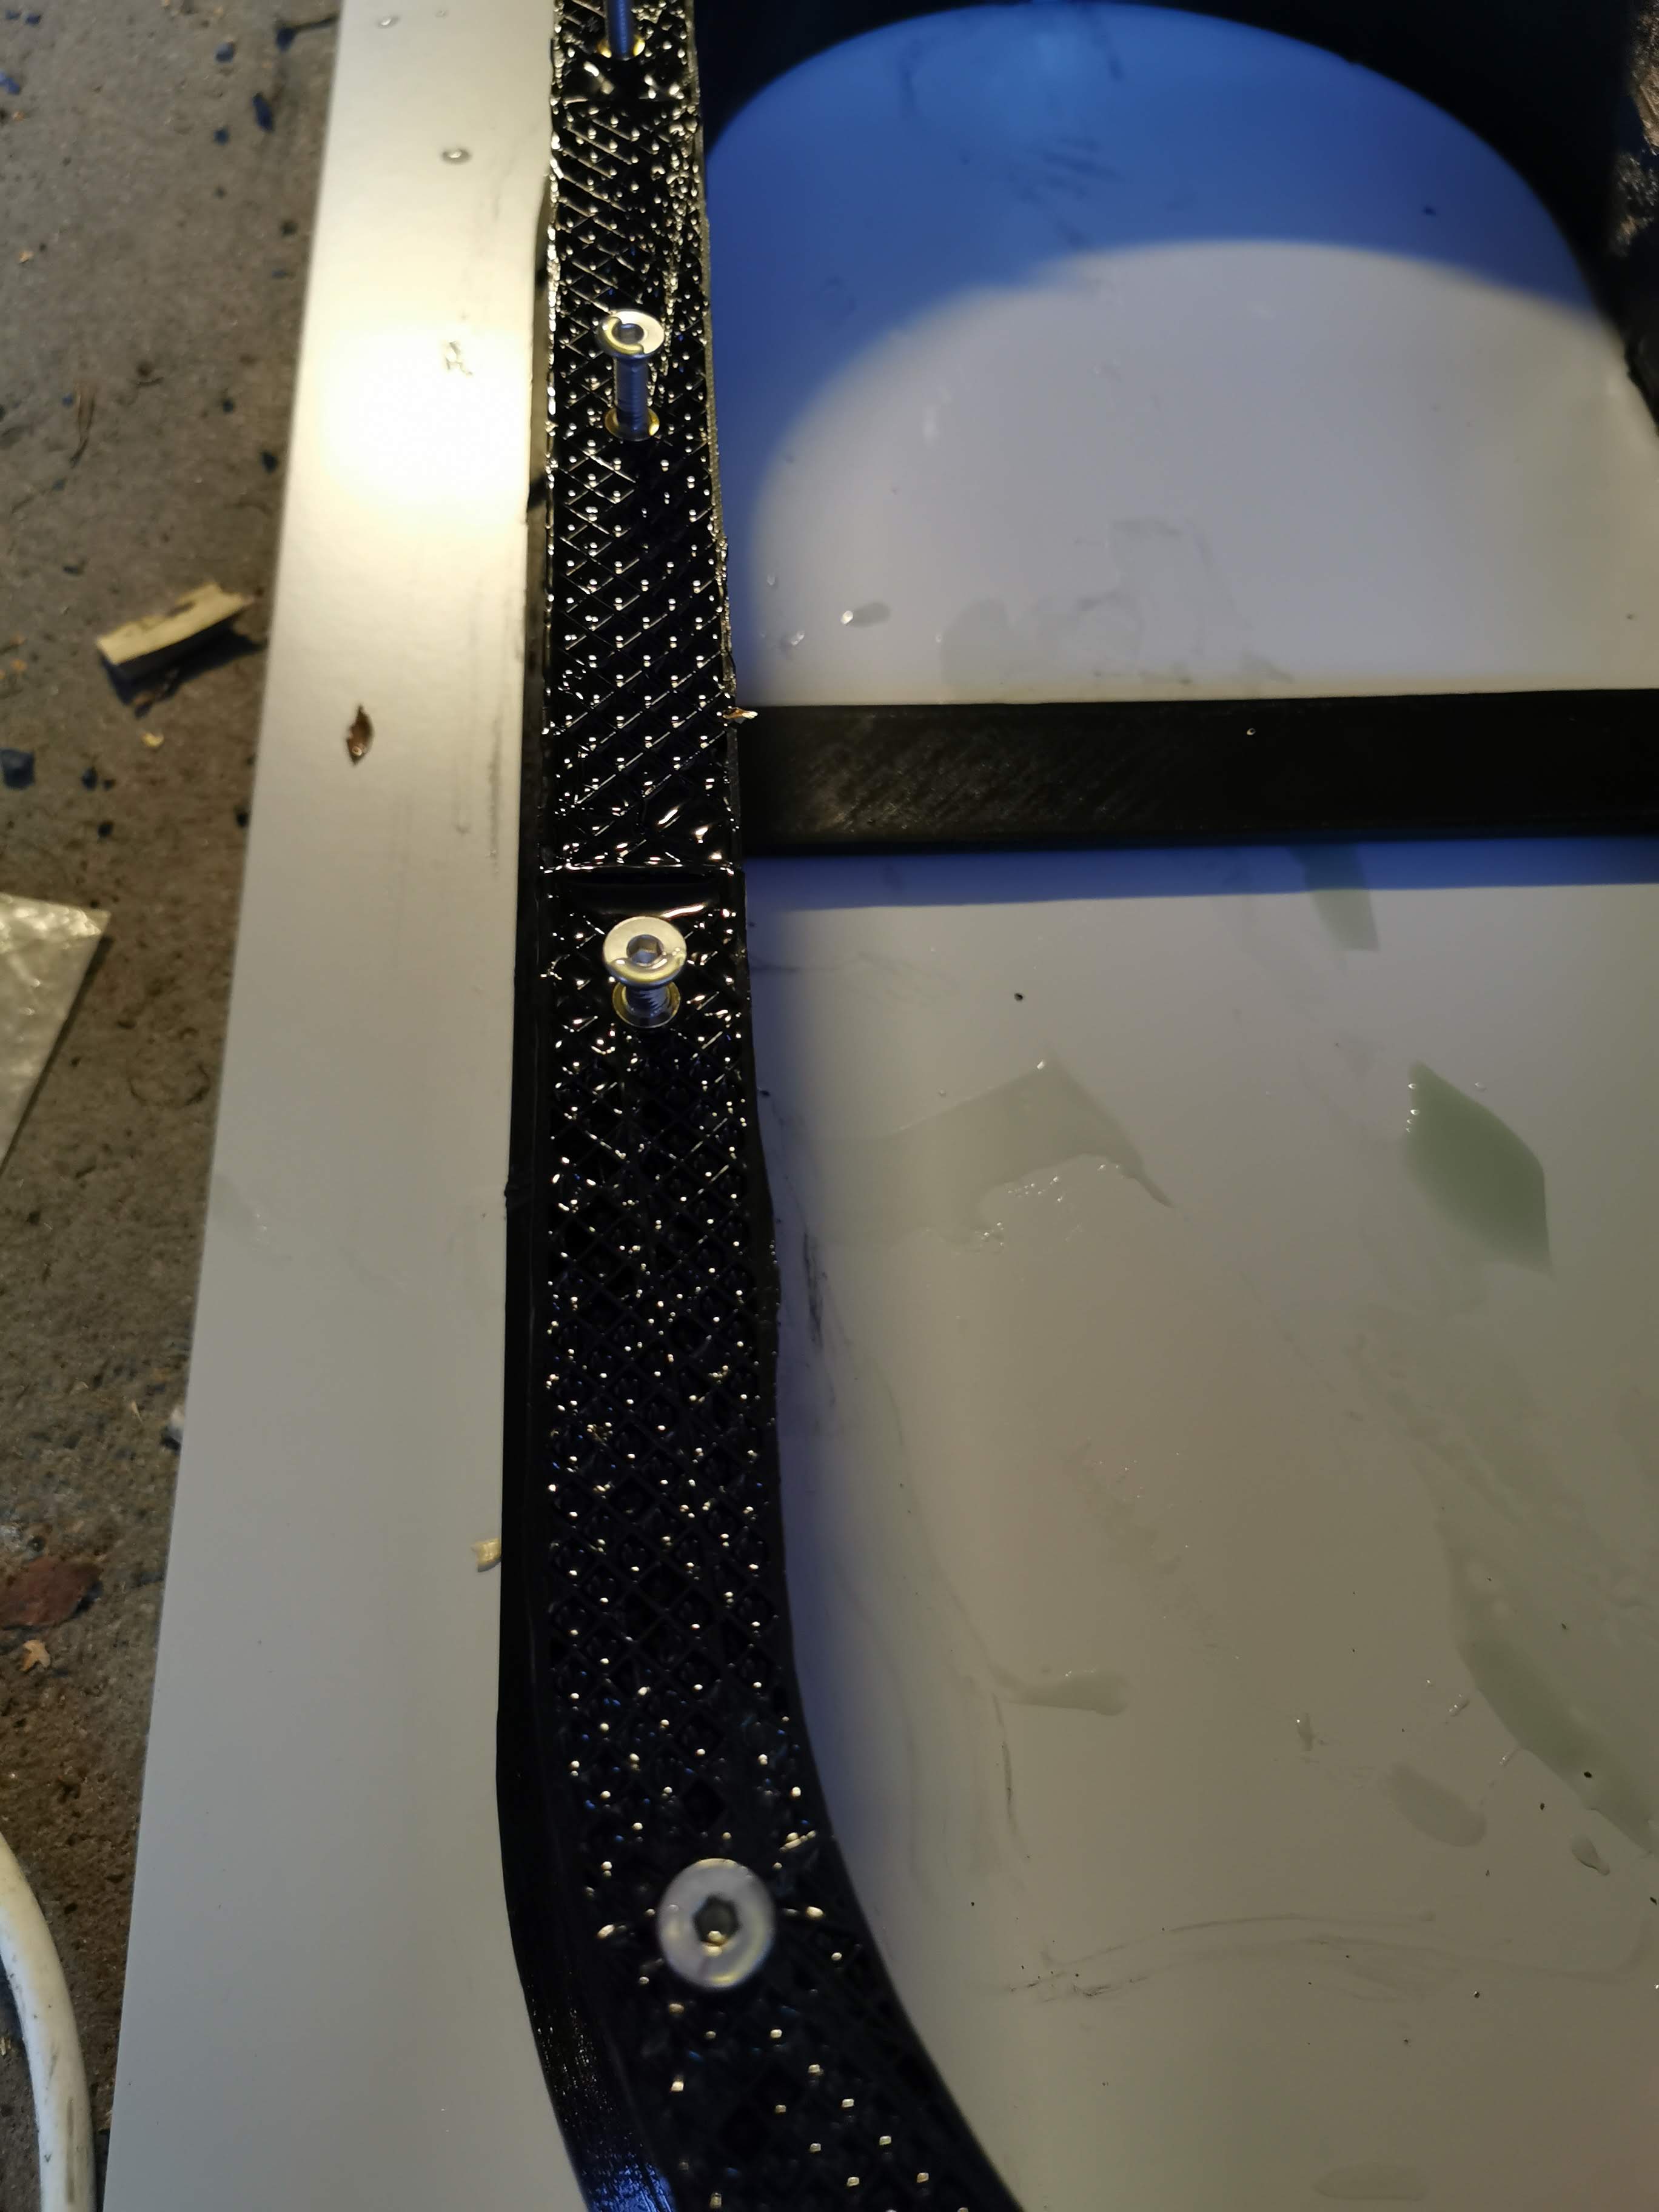
The frame is basically created from a profile sketch and the option Create->Sweep in Fusion 360, kind of the same way as the mast clamp. Also added holes for threaded inserts to fasten the aluminum bottom and some support on the top.
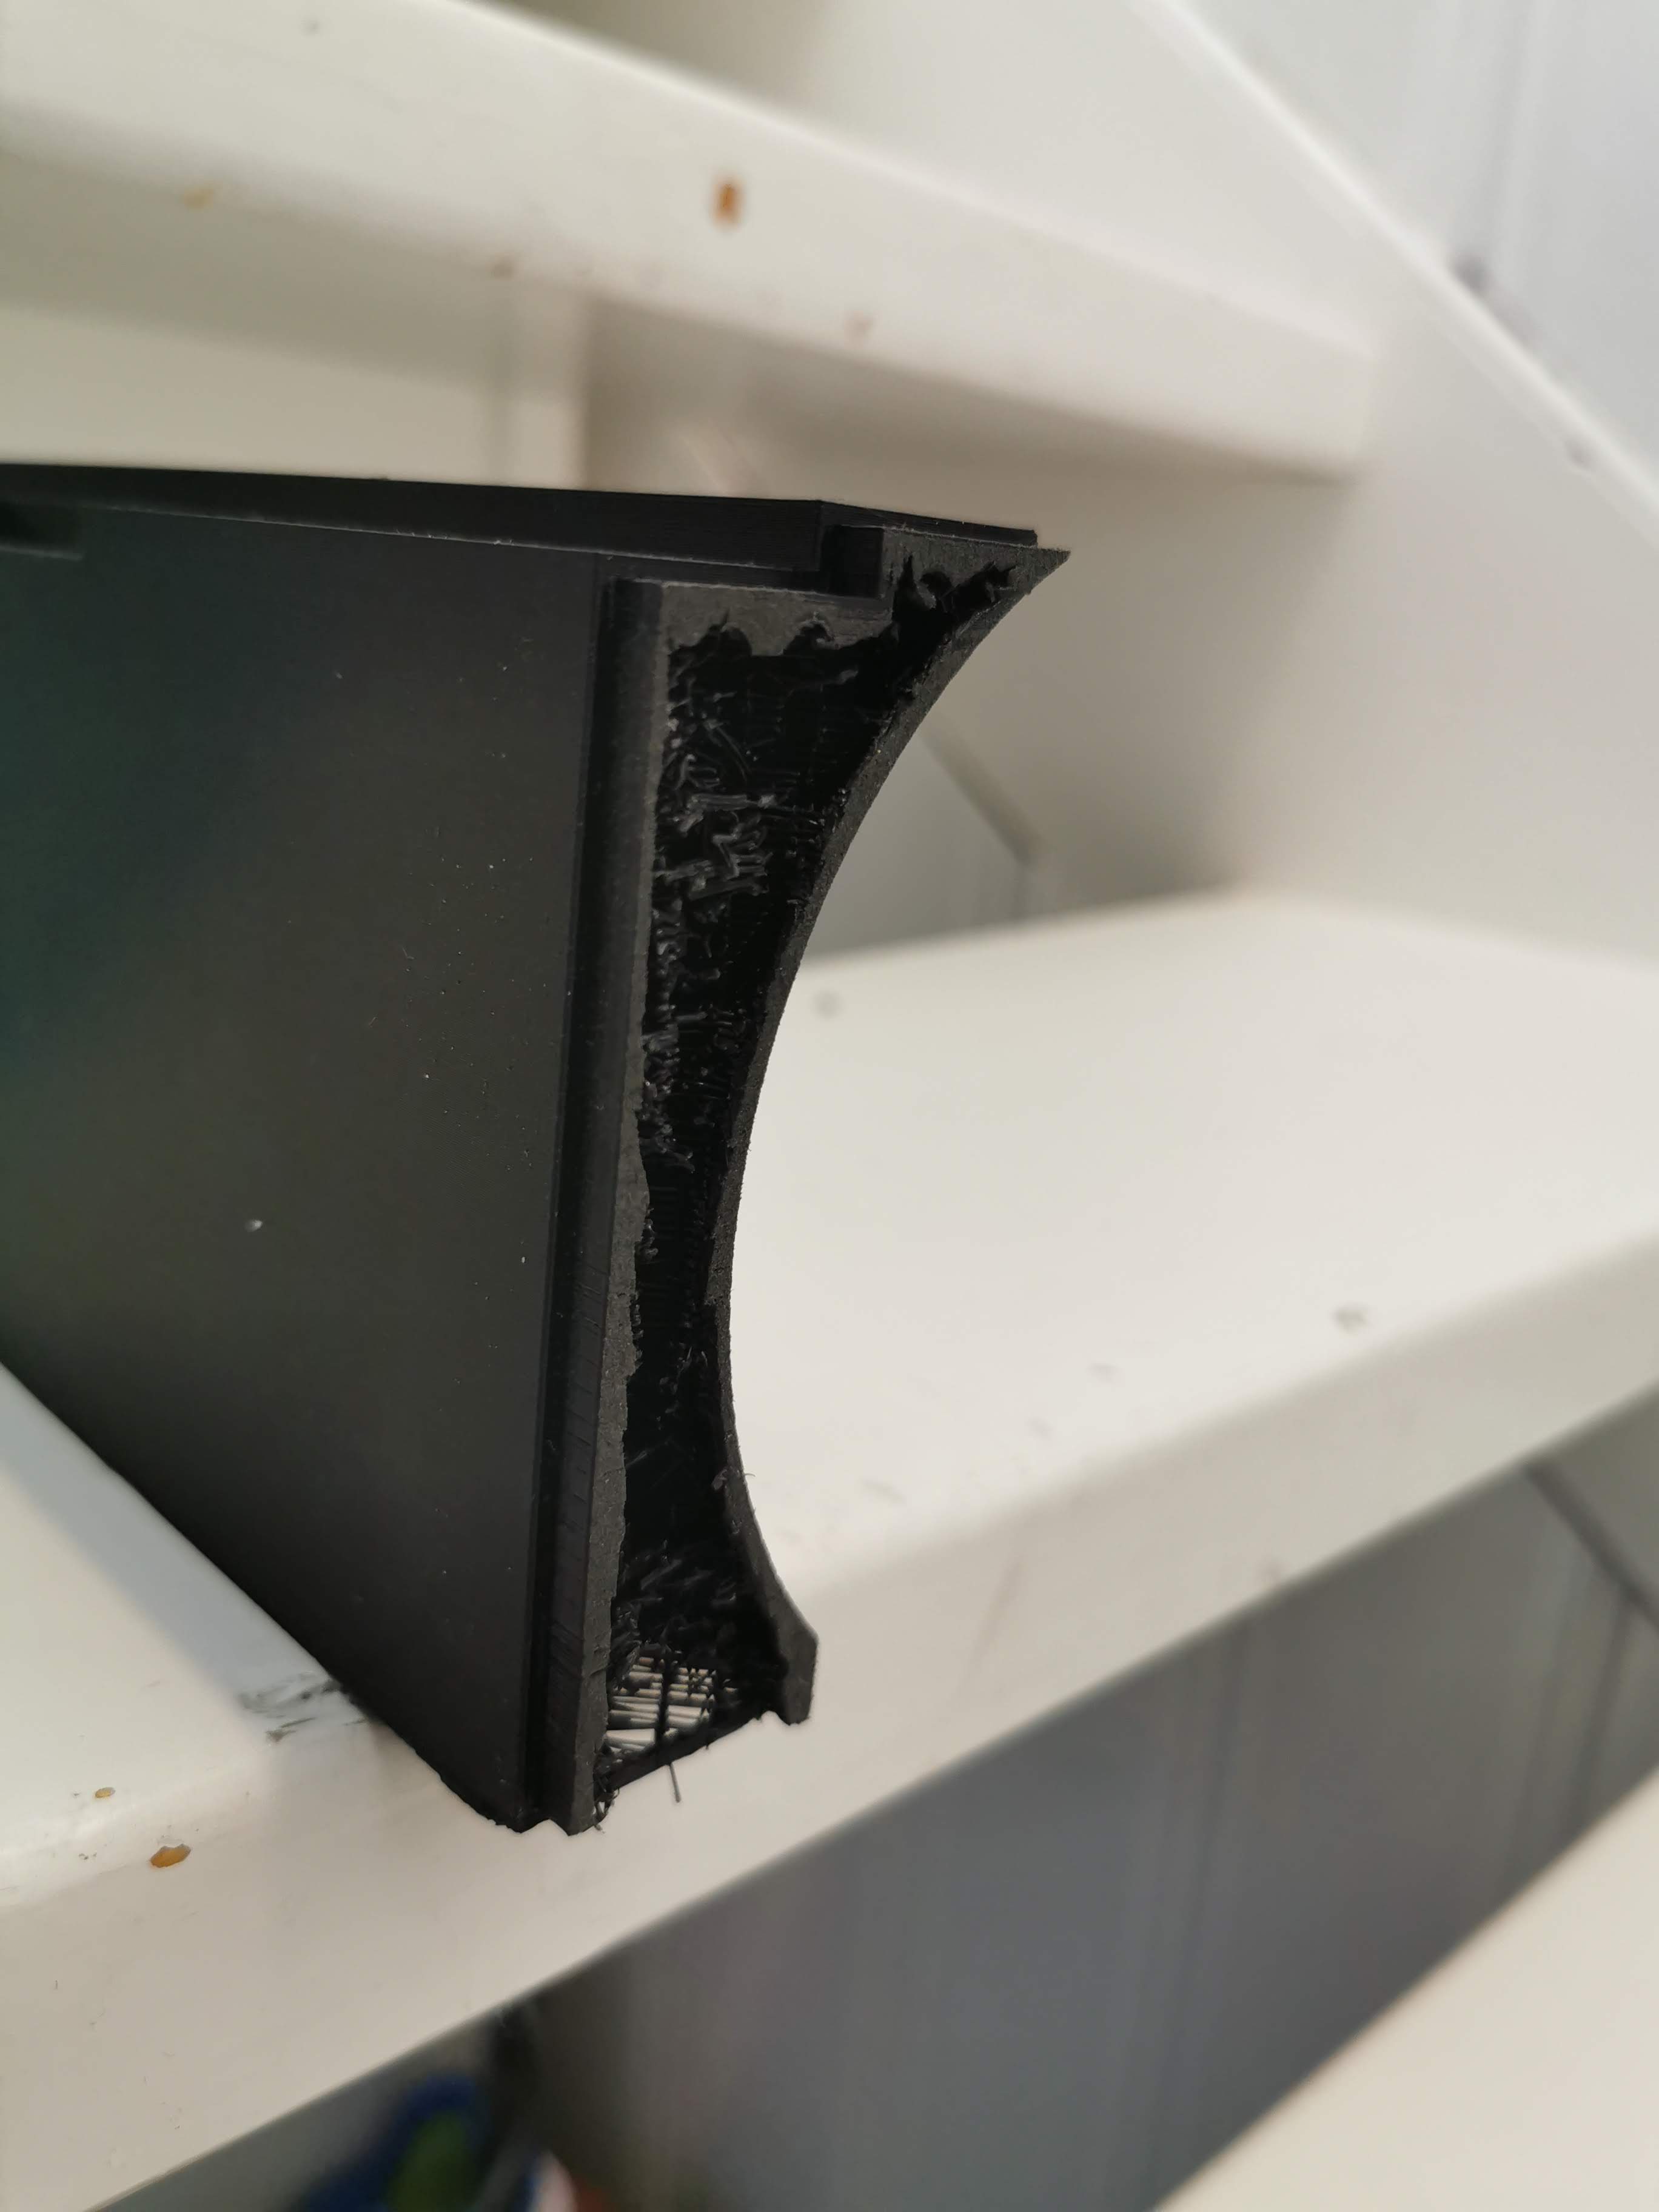
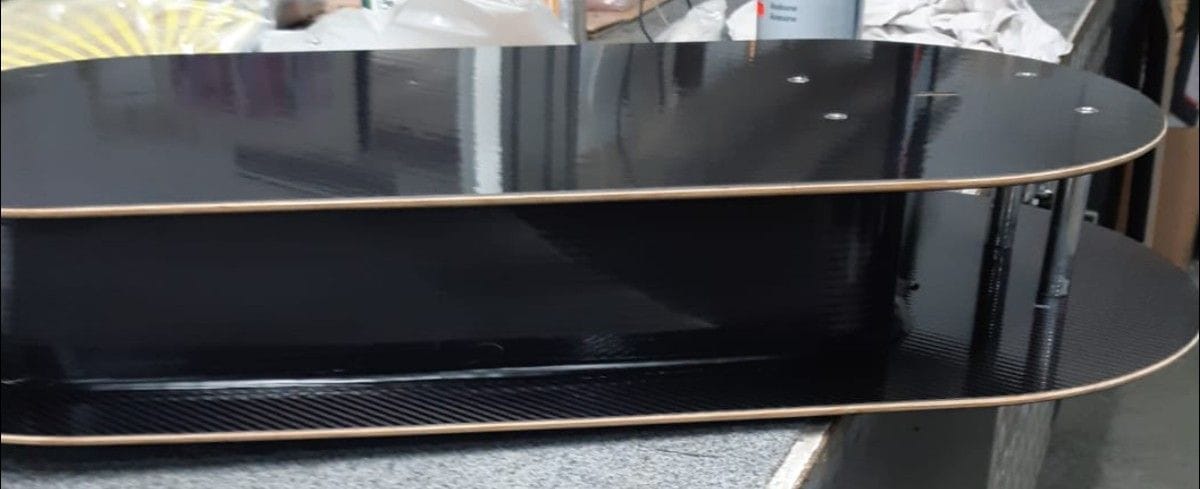
I have used the same concept as for the mast clamp. 3D-printed the frame in 6 parts with 5mm overlap to join the parts and with low infill. It’s a monster printout, almost 3 times 24 hours. Some extra manual work with cutting the side walls open, for the resin to float seamlessly between the printed parts, making the frame almost homogen. The parts are first glued together with Tec7 for the resin not to escape.
When the 5mm aluminum bottom is be screwed and glued to the frame the strength will be really solid, no need for extra reinforcement. The only drawback I can see is that the entire box with both bottom and lid will becomes quite heavy, around 6 kg. If or when I do this again, I will make the profile a bit thinner to save some weight. I believe it will be solid enough if I cut the profile with 1cm
Also, the 100mm stainless screws has arrived so in the next couple of weeks I will be able mount the bottom to the frame, the motor to the mast, the mast to the box and have a testrun in the bathtub.
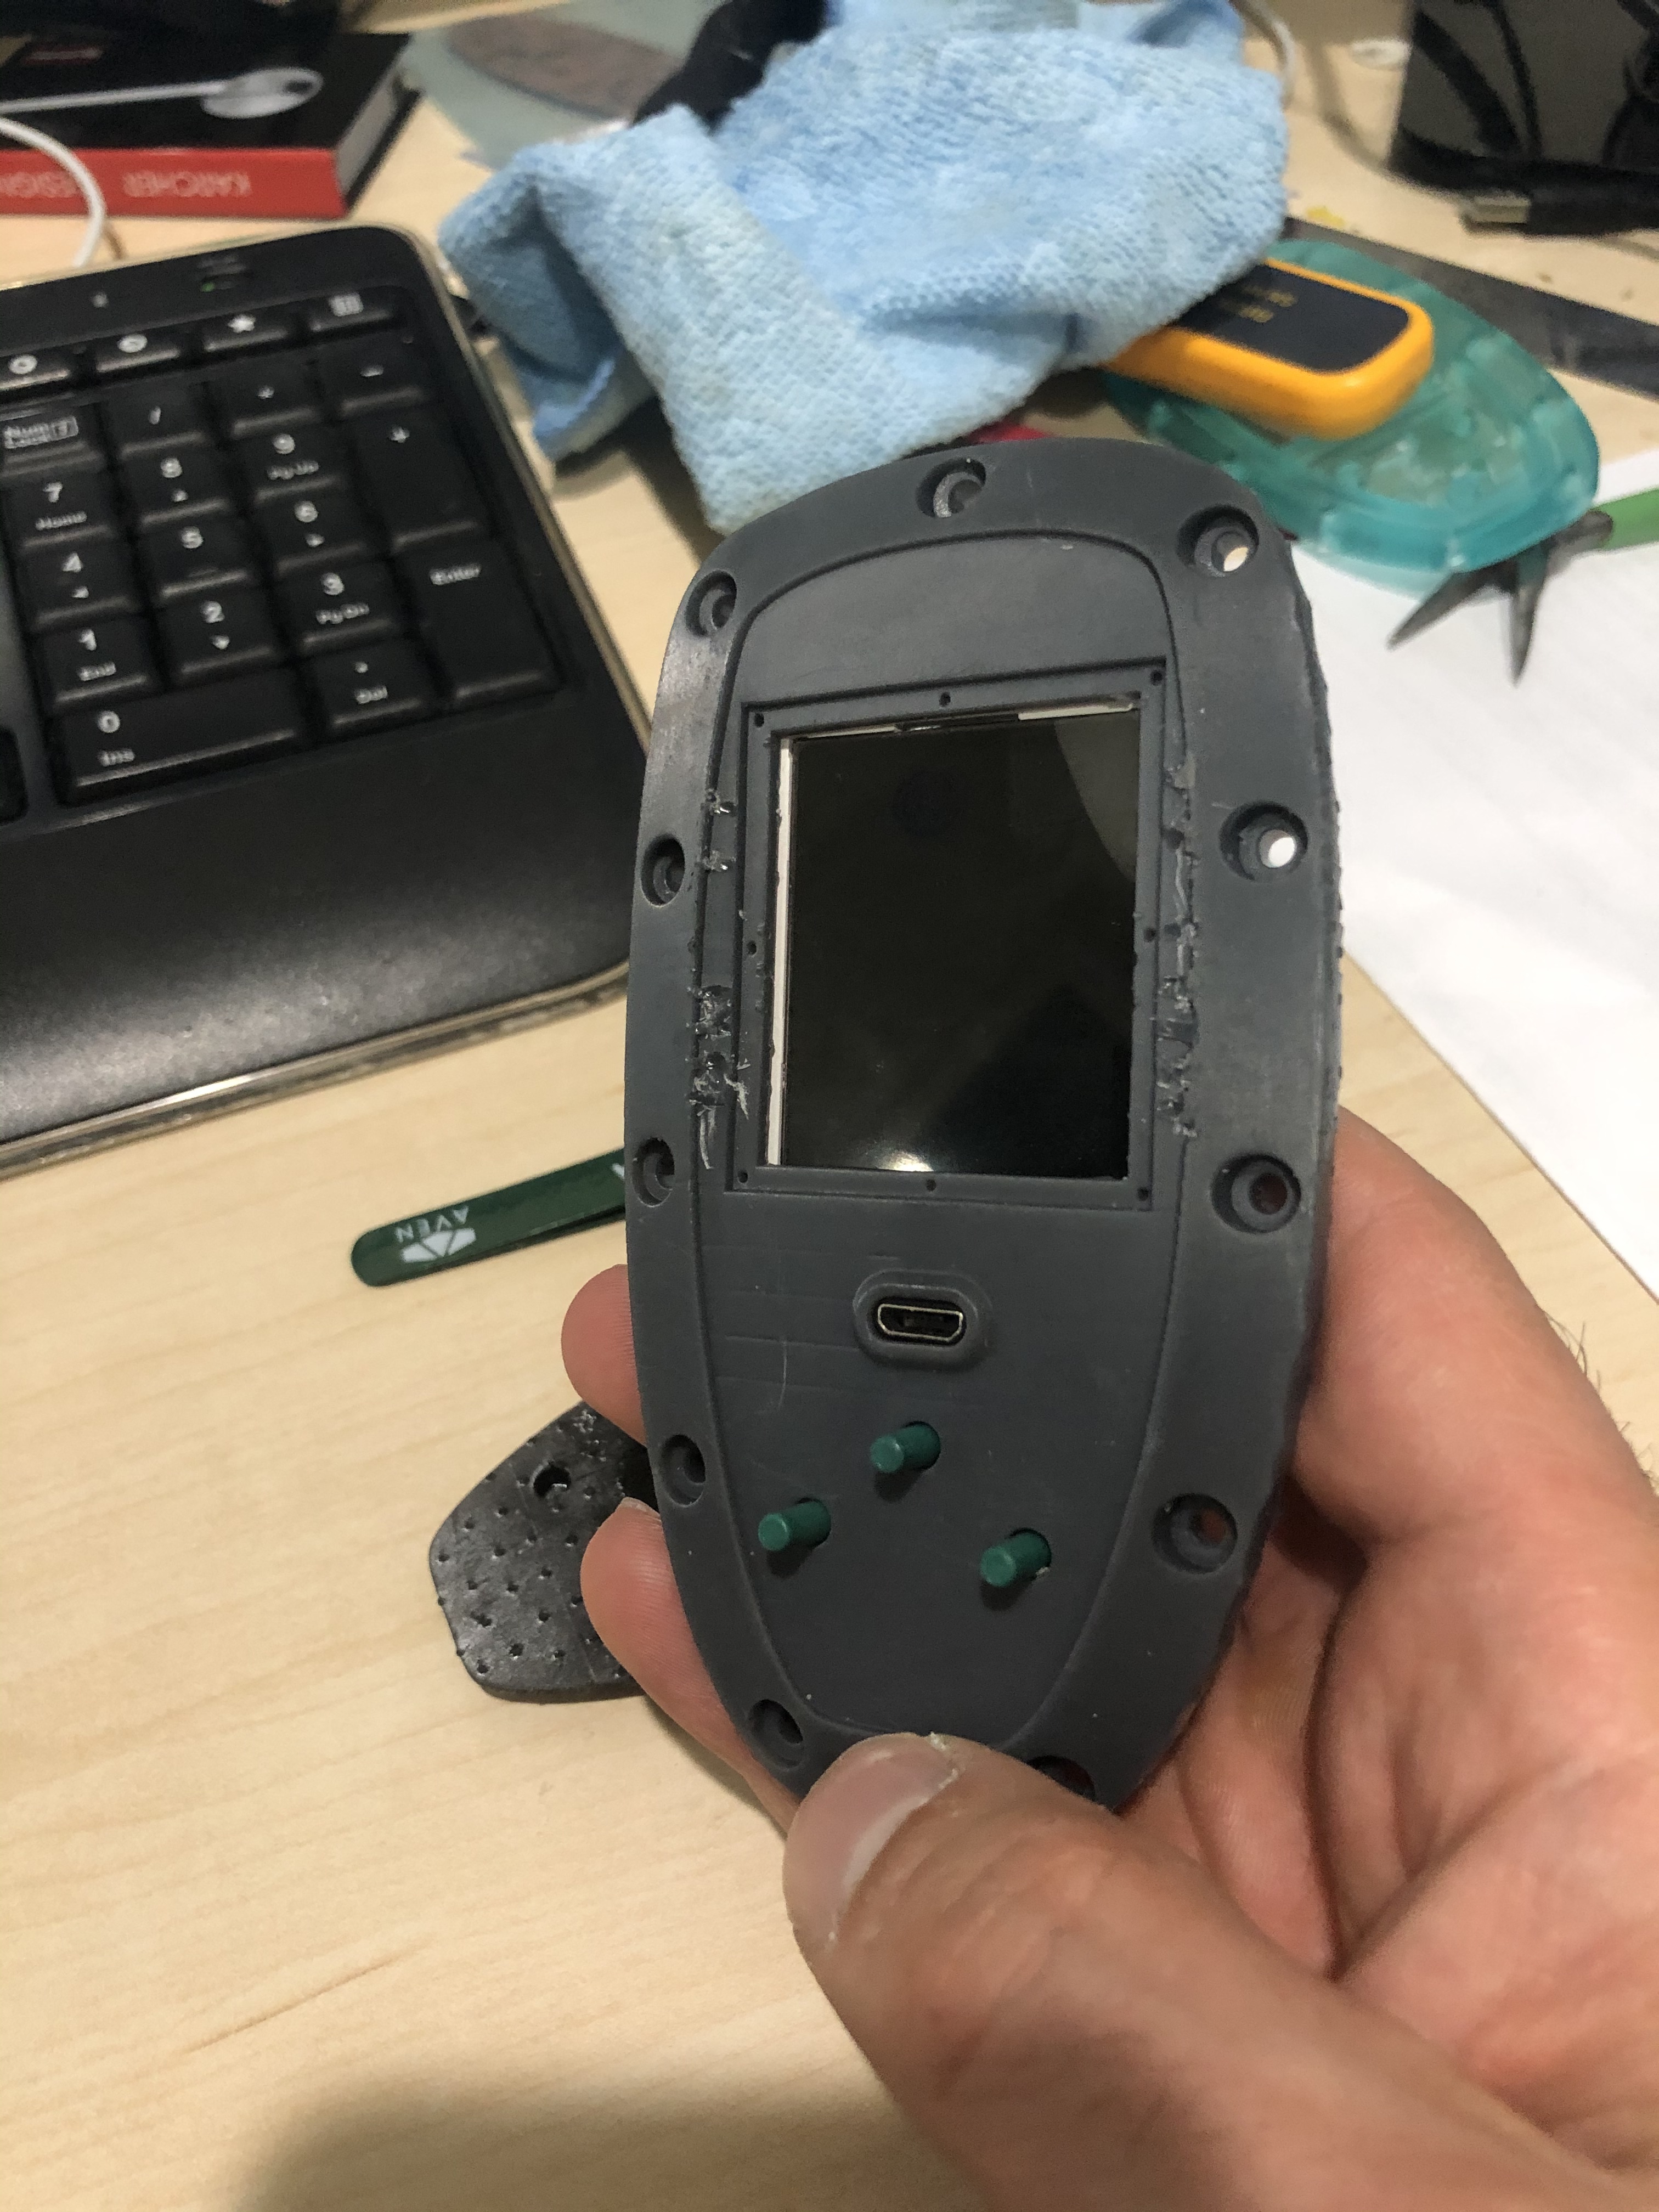
Liked the display! What is the part number for the dpsplay?
Seems very bright display. I am using st7735 1.8 inch. Even 1.8 inch was challenging to fit. Good job on fitting the display there
It looks realy professional!!!
You filled in polyester, how and where you do it?
Why you dont print it with 0% infill?
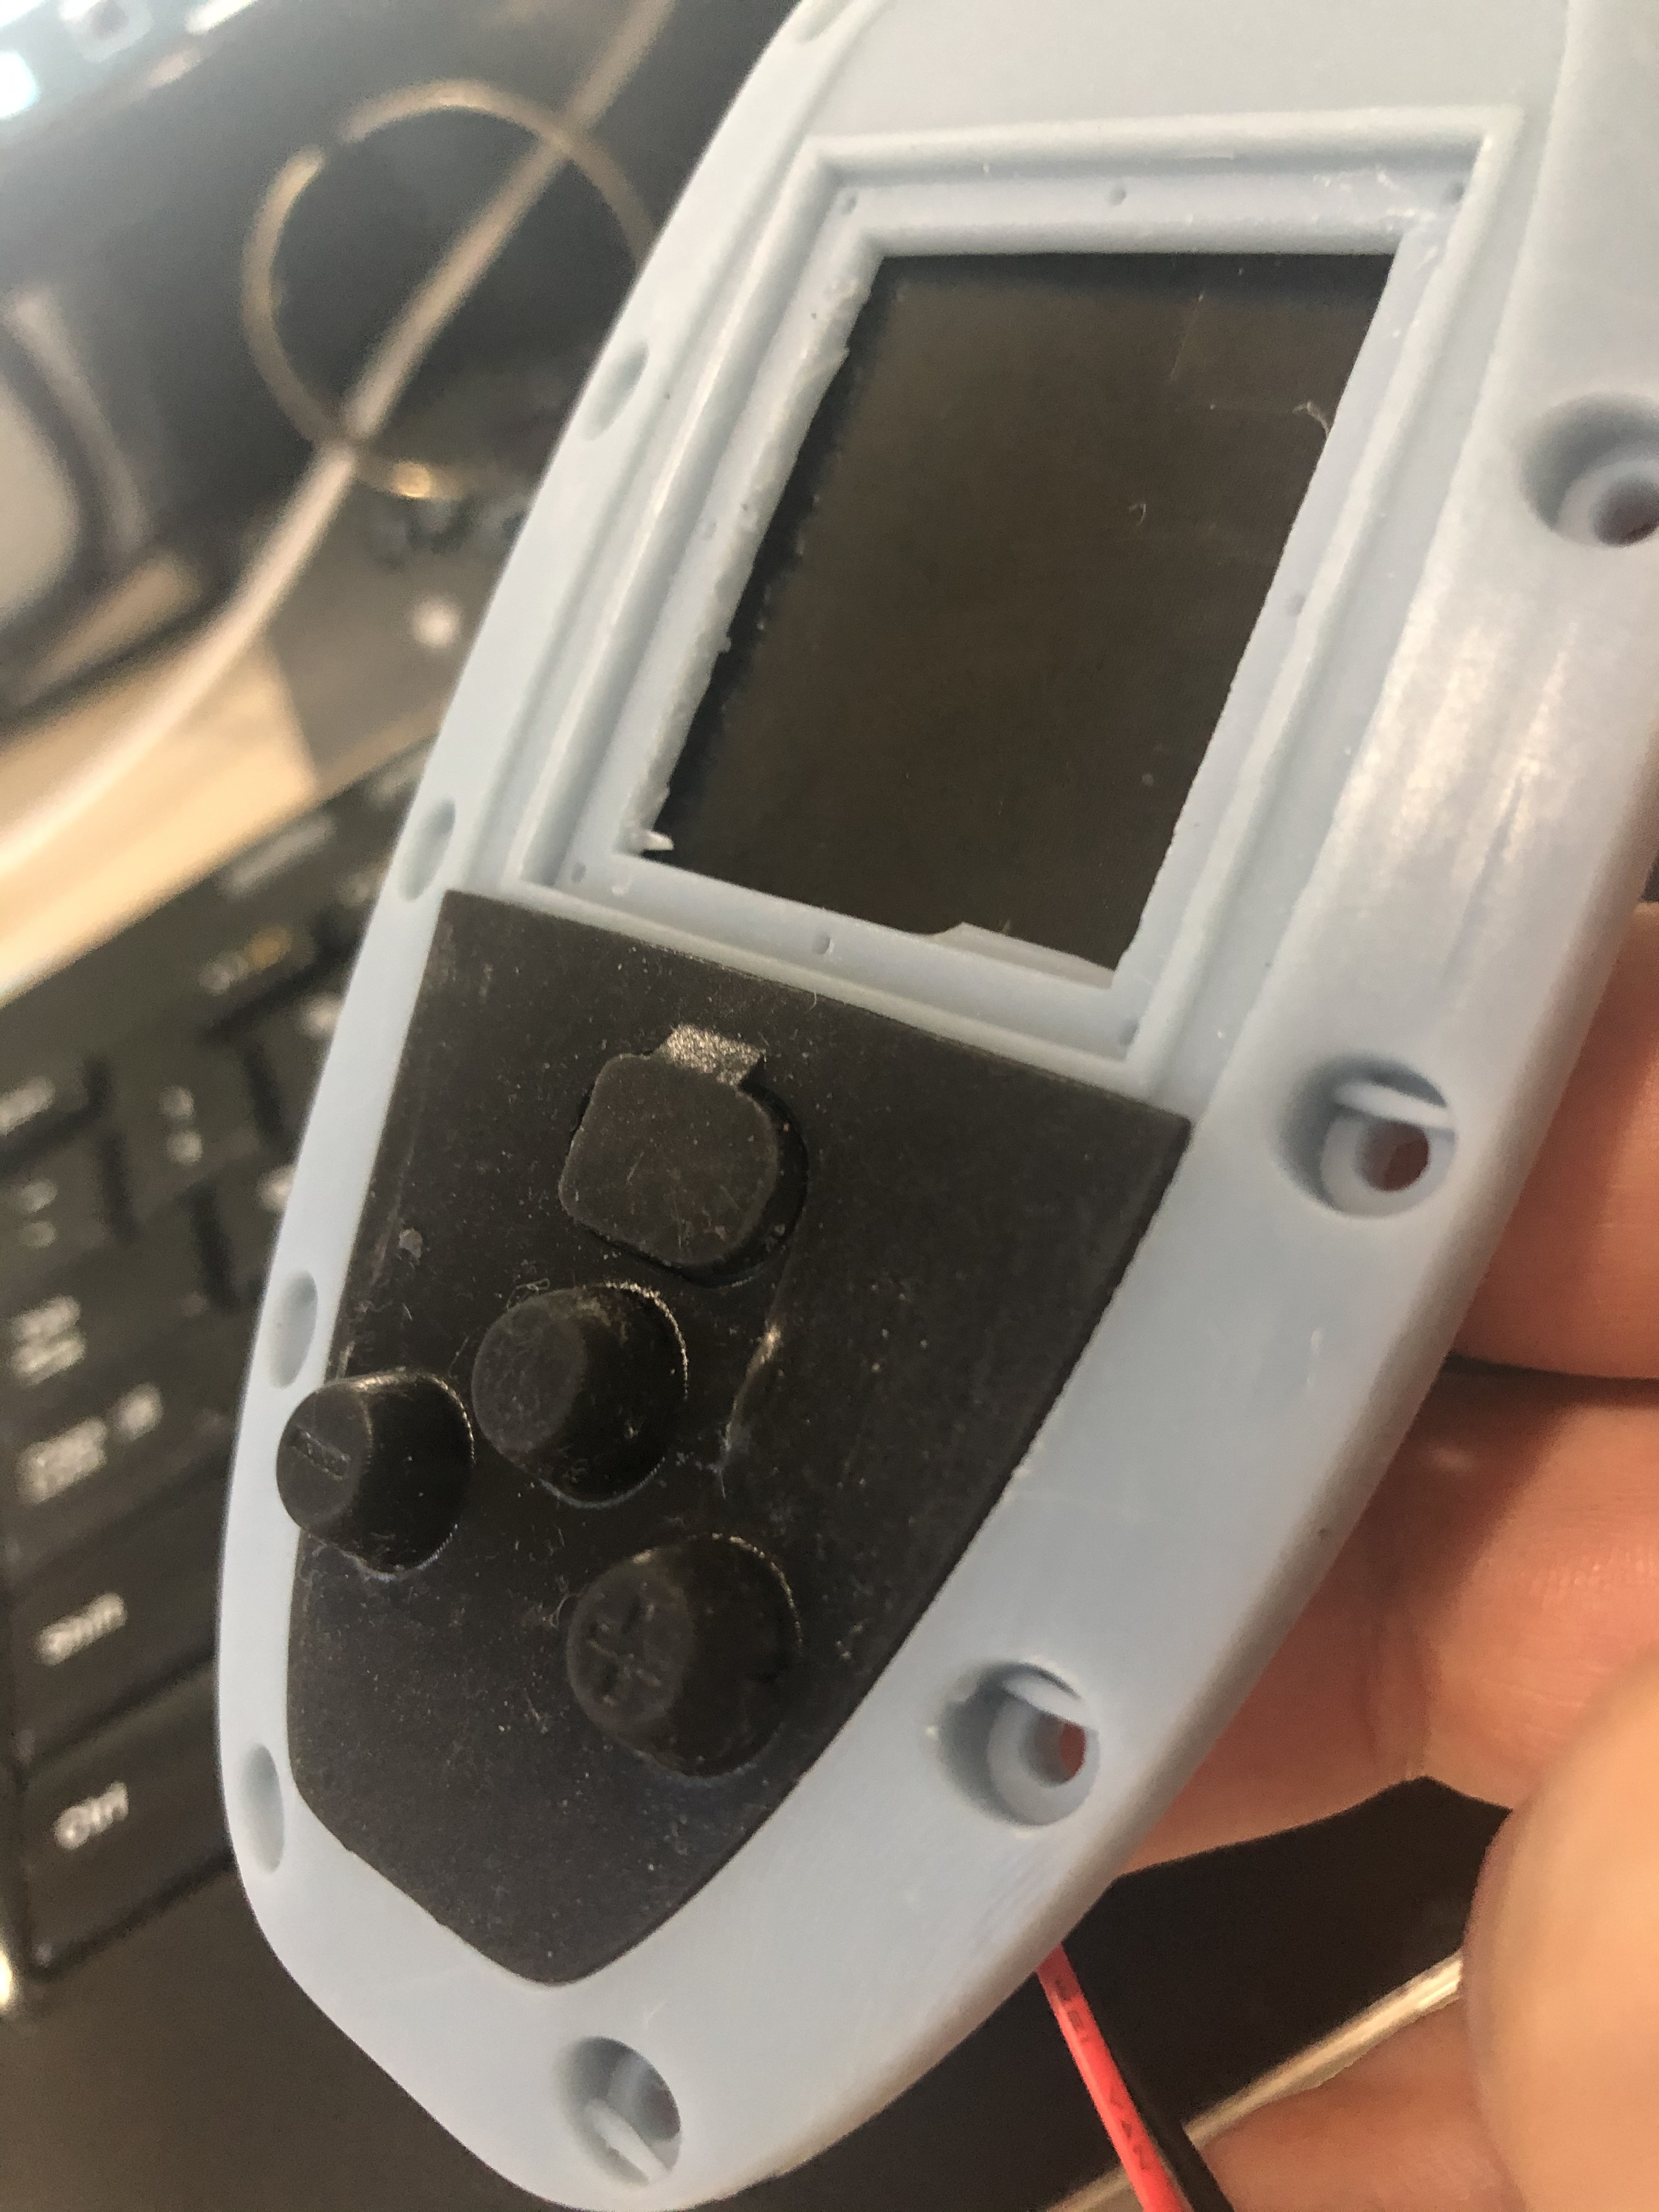
The trick is to peel off the white frame around the display, leaving you with only the display itself. Then there is the acrylic glass, painted a black frame making only the pixels visible. The two parts then goes into the modifyed @Hiorth lid.
Then I have a question for you. How did you make your navigation buttons?
Thanx Robert. Yes I filled the frame with polyester in my garage pouring it in little by little and yes, it smells like hell. Make sure to use a mask. The alternative is to use epoxy, which doesn’t smell that much but costs 3 times as much.
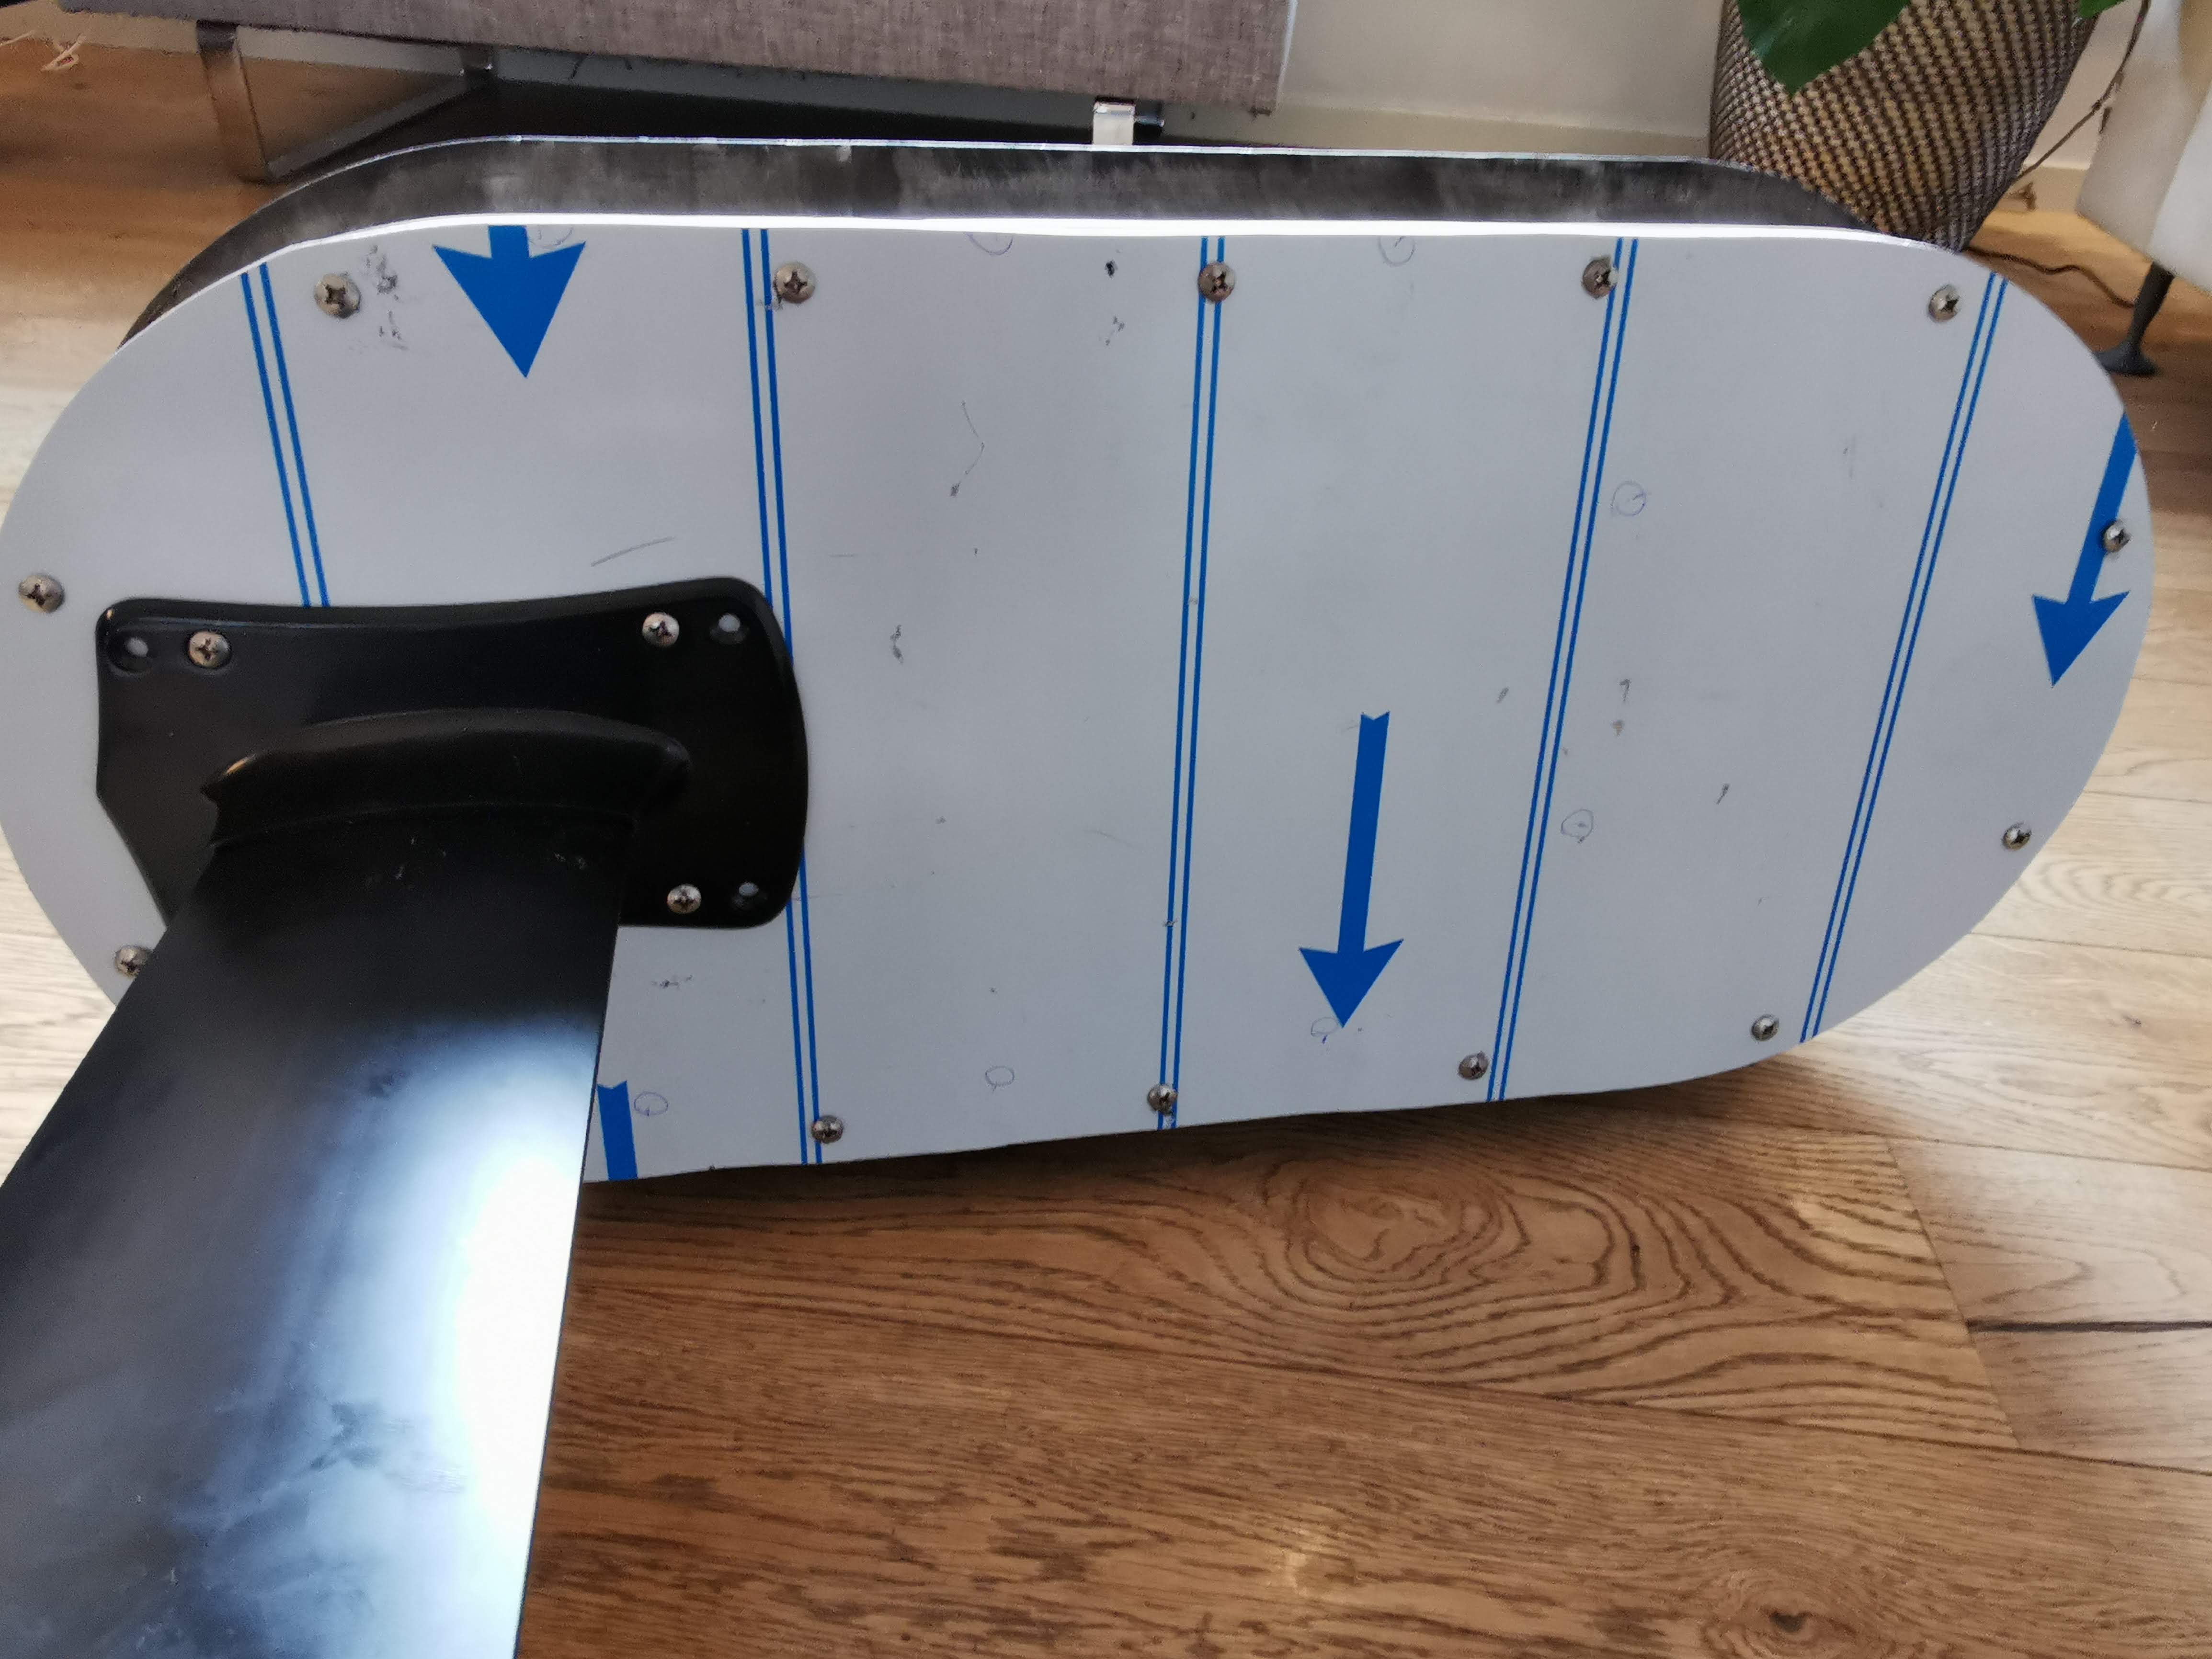
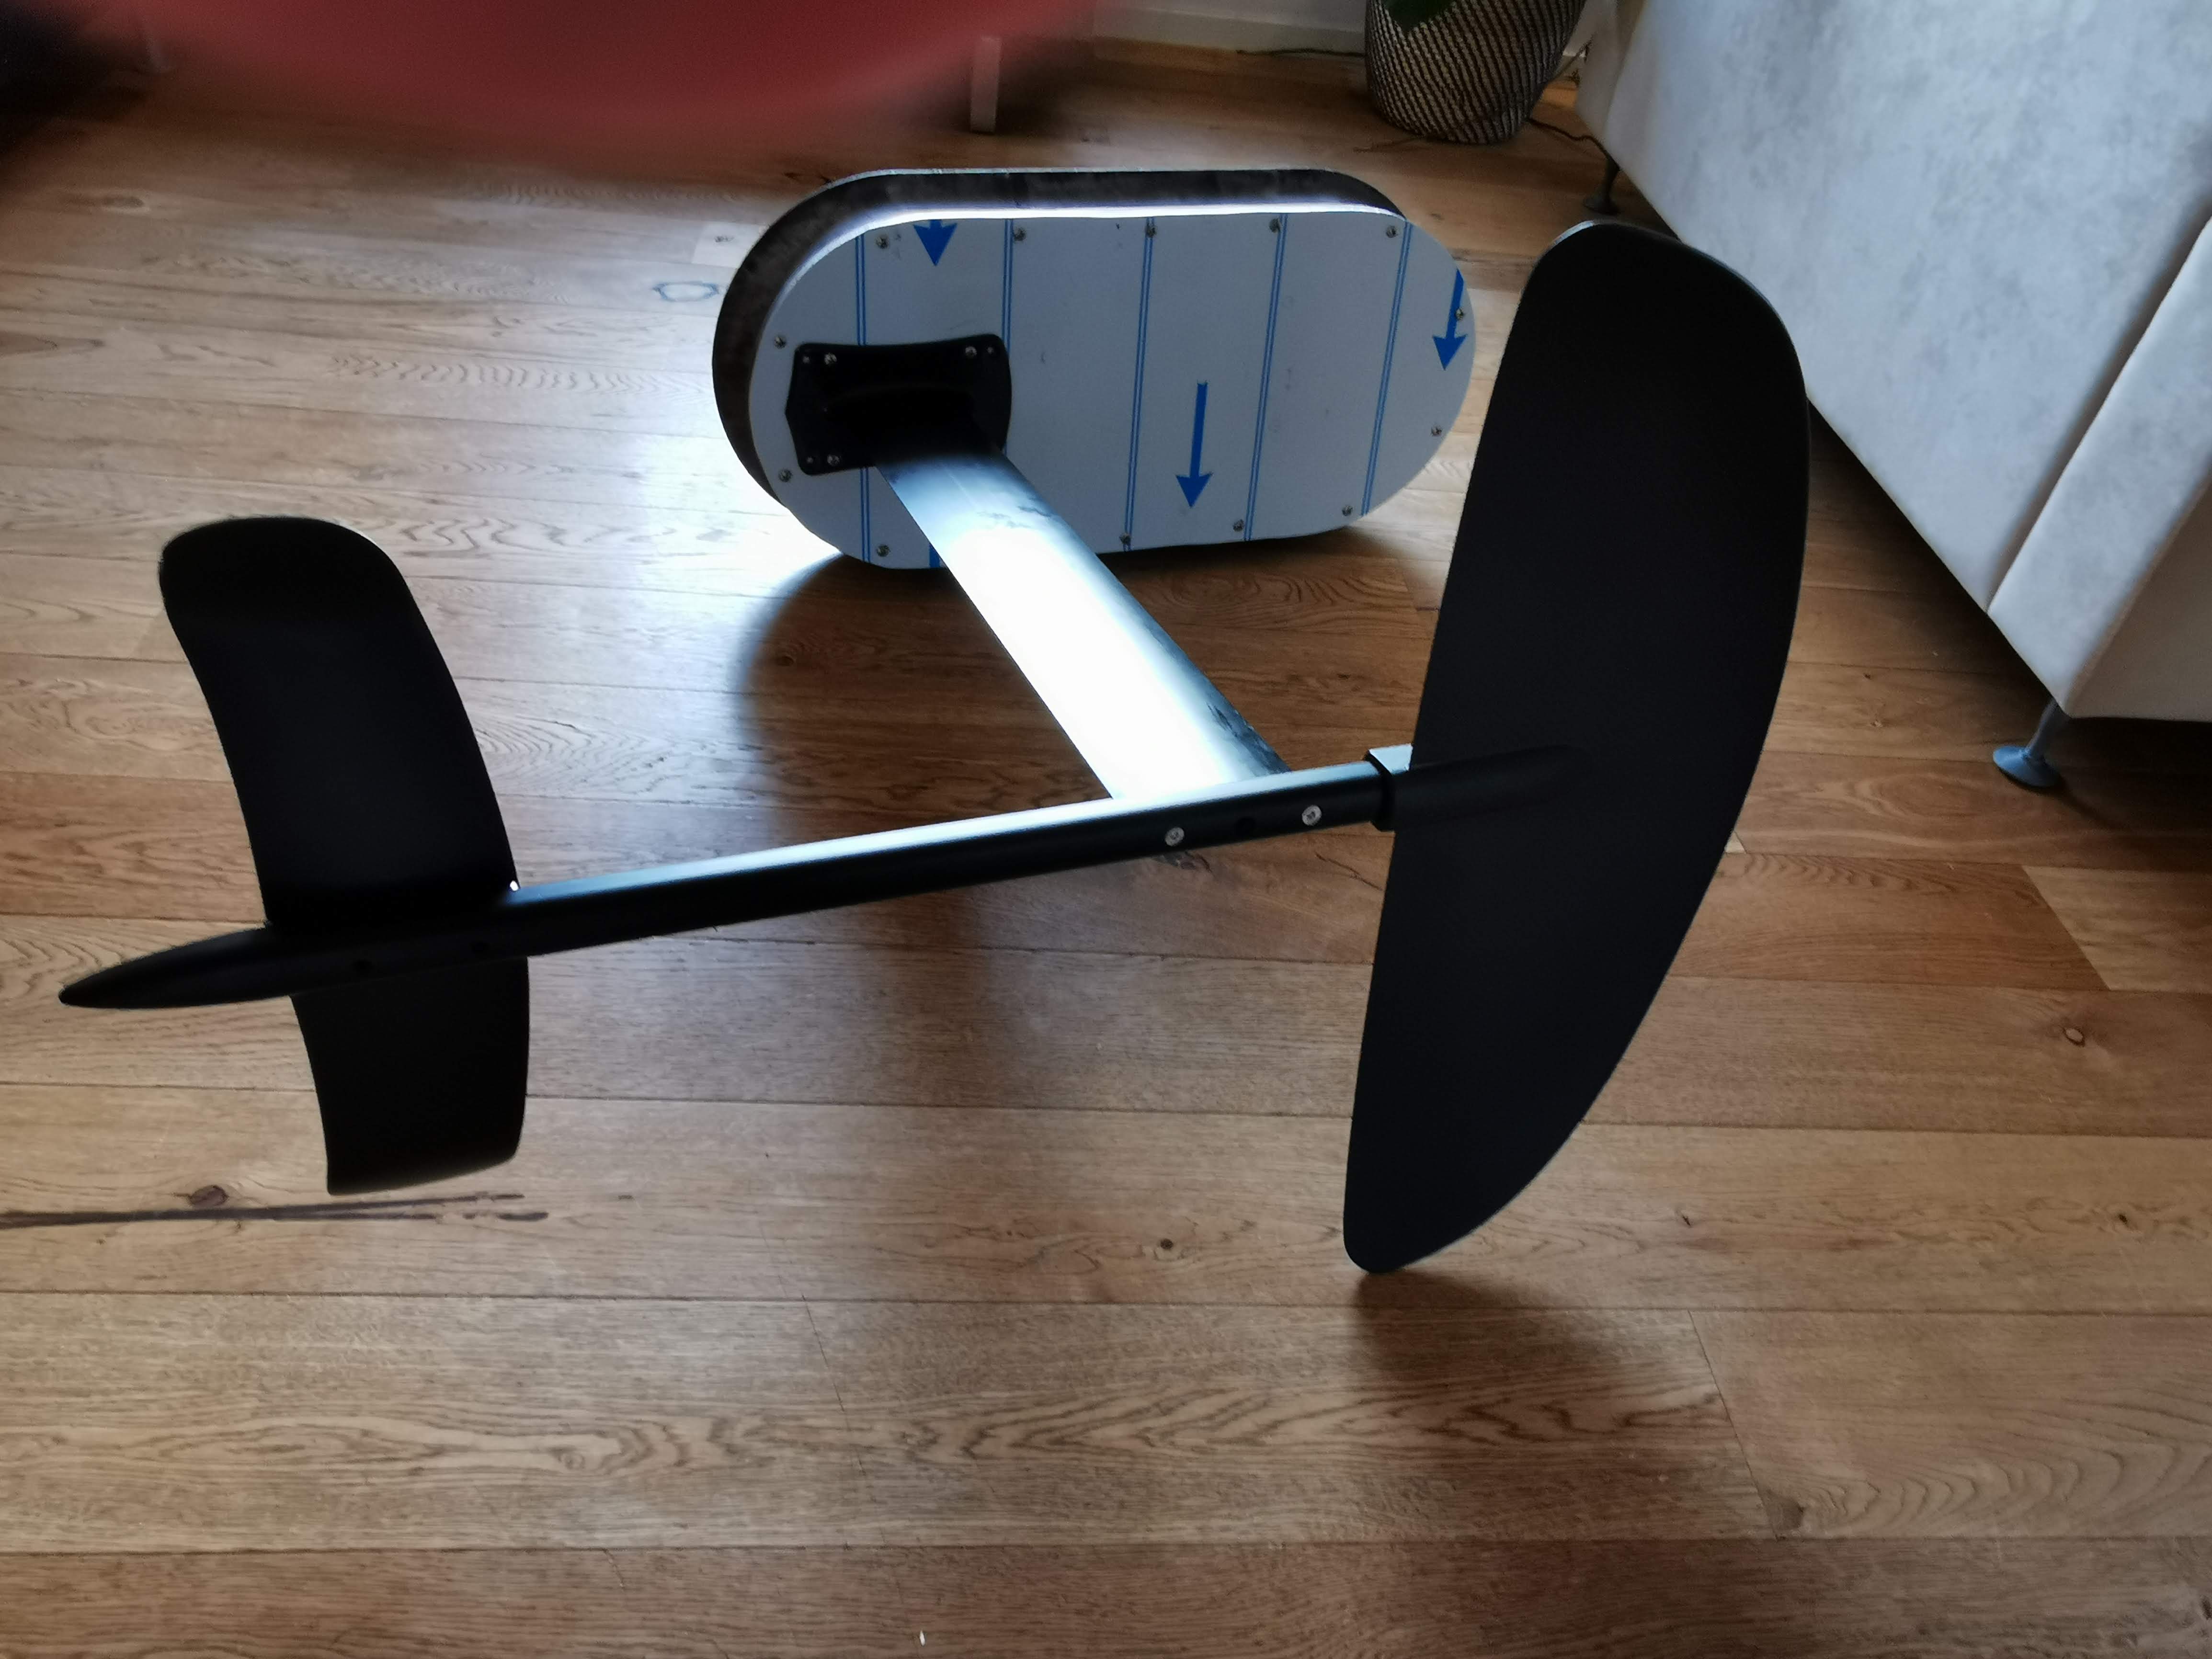
The parts are printed with 8% line infill
Nice work yahef i have to try it 
What is the thickness of the aluminum bottom plate? I’m on the same route and planned to use 4mm. How do you fix and seal the mast to the box? Picture from the inside would be interresting.
Hi Daniel. Well, it’s not very exiting inside the box just yet. It’s quite empty but the next thing will be to get the wires and the water hose inside the box. I’m not sure yet how to seal everything. I want it to be easy to take the mast on and off, so we’ll see. I will post my findings as soon as have something.
I’m using a 5mm aluminium plate but I’m sure your 4mm will be enough. I just wanted to be on the safe side.
I see that elevate.rocks takes another approach. Their box seams to only have the bottom and top plates touching the inflatable. That is definitely another way to go. Upside, less weight, easier to print. Downside smaller box, but obviously big enough.
There are two clever parts in this Elevate design:
It wouldn’t be the case if the four mast plate screws were fixed to only one surface (even 5 mm) right below the inside of the box.
@SoEFoil, you are right, good spotted! I will seriously consider to alter my design slightly. Either by adding 4 aluminium cylinders, connecting the bottom to the top or move the plate slightly back, making it possible for the rear screws to run through the solid wall and the two front ones connected to the top with aluminium cylinders.
The third option is of course to start from scratch and have a go on elevate.rocks proven design
Edit
The third clever part with the Elevate design is that the wires doesn’t have to go directly into the box from the the plate. They can enter the box with real through hole connectors from the side, making it easier to waterproof.