Thanks for the info. I don’t really see myself with a need to “remotely” manage/monitor the printer although I can see why that capability would be useful to others.
Nice equipment from both vendors - analysis paralysis plus trying to justify the investment has set in
I point a blink webcam at my prints nice to check if its still rollin. Gotta say my elcheapo ender 3 neo has been dam good so far…1 year. Its almost disposable cheap.
Qidi xplus3
Unique advantages are 350c nozzle and 65c heated chamber.
I use it as well for drying. Put the filament under cartoon box onto something on the bad. For example 65c chamber + 85c bed gets me 65c filament temperature. 100c bed gets me 75c filament temperature.
That is a real measured drying temperature , not confuse with bamboo prescription for it’s printer.
So I print PC at 300-330. Depends on the blend, Gizmo-dorks is problematic, because it is more pure PC, will see if the chamber and the bed temperature in xplus3 is enough.
I plan PC for the propeller.
Recently fall in love with Torwell petg , it does not brake, only flexes.
I’ve been using an Ender v2 with Cura for some time. Never did much - and I guess thats the beauty of it - it just works and was cheap (so you never have to spend time messing around with settings). A bonus of this printer is the volume of help online (do not underestimate this if you’re new to 3d printing). A big help has been the youtuber CHEP/FilamentFriday - he has loads of free profiles which have greatly improved quality and, more importantly, speed.
However now I’ve started this project I am now reverse engineering the decision on which printer to use/buy based on what are the best materials (filament or other techniques) for achieving the strength we need - for props, motor mounts etc. This seems to be somewhat debated. I always thought that PLA was weakest and ABS stronger and PETG in between but more forgiving (so more durable), and PETG-CF a bit stronger again. However, I just discovered this very interesting filament guide by Bambu (obviously its about their product) -including toughness, stiffness, strength and all the printing properties.
Something mentioned at the very end of this document is annealing… never thought about this for 3D printing but it makes sense. Anyone doing this?
Based on reviews, I’m certain my next printer will be a Bambu (P1S or newer).
After a long period of analysis/paralysis I purchased a Bambu X1 C with their AMS and am printing lots of fairly useless items at high speed while getting to know the new setup.
I am now looking at 3D scanning and would prefer to use my IPhone 13 Pro ( with lidar) as the input device rather than buy a dedicated scanner device.
Would appreciate any guidance on this scanner device😀
You will have a lot of fun with this printer. I have mine pretty exactly one year now and more than 3600 hours on the clock. Except for replacing the bowden tubes and printing with the third nozzle, nothing else had to get replaced.
At one point I was also considering buying a 3D scanner. I investigated the subject and figured out that you need a dedicated HW Scanner to get half way useful results. Costs around 1000€. But for the model I was looking at, you also needed a gaming PC or laptop because of the graphics adapter requitements so I would have ended up spending roughly 2500€. That was too much…
Thanks for the feedback. Based on my web searching it appears the dedicated hardware solution are all quite spendy for my likely frequency of use. I’m a hobbyist not trying to make a living with this.
That’s the primary reason to try to utilize my IPhone as the “scanner” as the $ is logically less but a number of the apps are based on a type of subscription model so that could add
up as well.
I have just tried the MakerWorld AI scanner which is accessed through my existing Bambu account. Basically take a video of the object with my phone, upload it to their site, wait until it processes and then download the STL and it’s FREE!
First attempt was pretty bad but I had my video setting at 720p 30fps so will try again at a higher resolution. You also have to circle the object while taking the video - not rotate the object on a turntable so the video was sort of shaky.
Very hard to find unbiased reviews online of any of the phone based options
Thanks Polycam is on my list of apps to try, your guide although very detailed is a little outside my current skill set (think Tinkercad ) and I don’t have access to the dusting powder you recommend as I’m currently in prison
A little followup on the Makerworld AI scanner results.
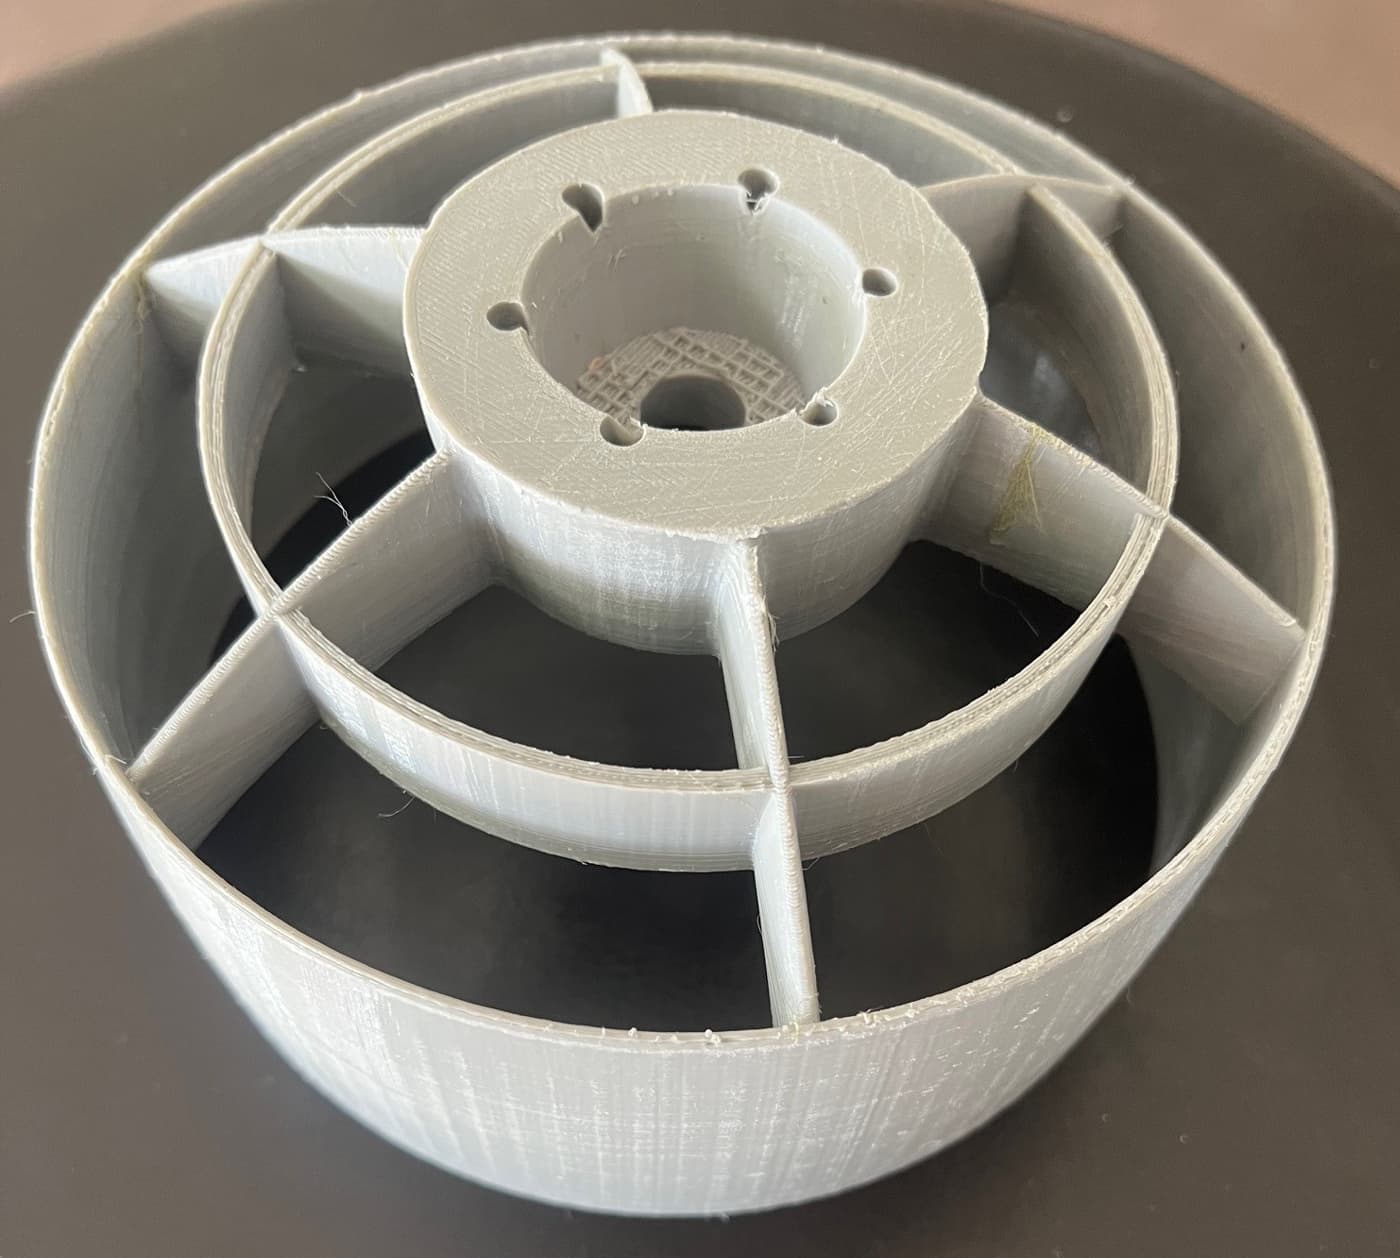
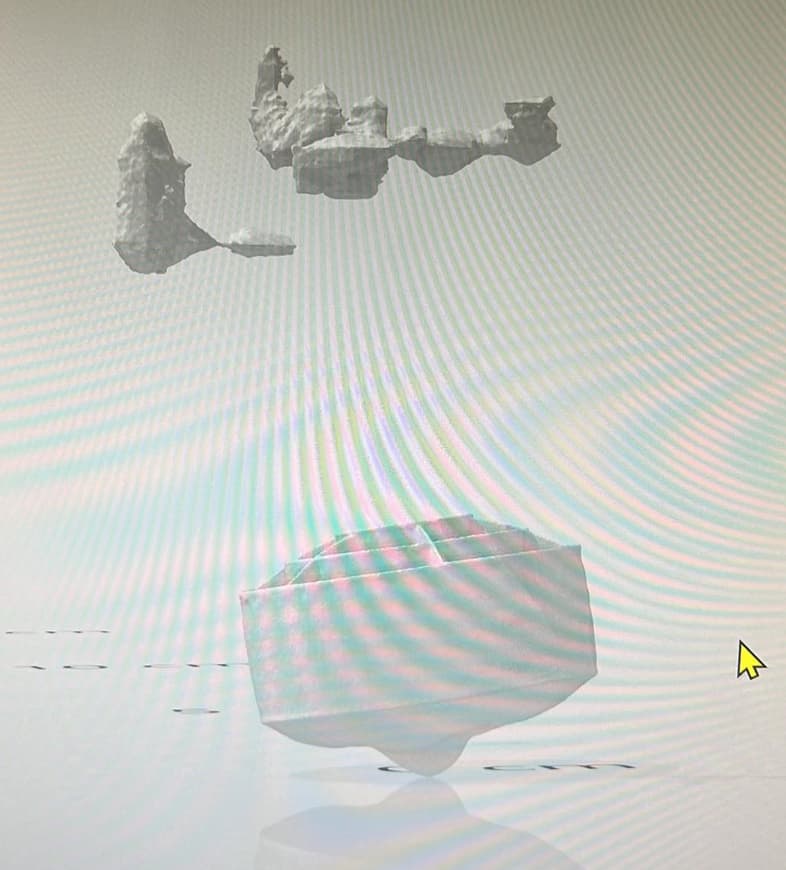
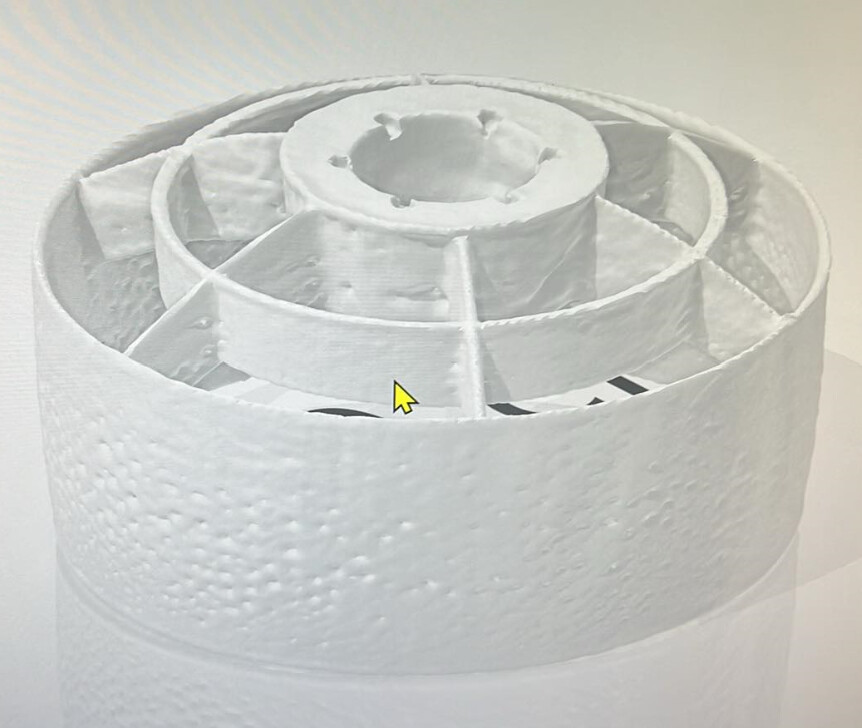
I have made 4 attempts to create a useable stl file using a duct I printed as the object, the first three were all pretty bad but the 4th showed some promise although it left the surface of the duct full of little dimples.
The improvements along the way I think were a result of better video recording keeping the duct center of frame as I moved around the object. I’m not convinced that a high resolution (4K) video would improve things.
I also used a light colored background and a “mask” to highlight the object before processing the 4th one. The size of the STL files generated are a lot larger than the one I actually printed the duct from (original about 800kb and the processed files were all around 25MB) this size of stl approaches the limit of Tinkercad to import ( there are programs to address this but I can’t understand how the processed files are that complex. The size of the IPhone videos are also quite large so storage management can be an issue.
My opinion at this point is the AI isn’t quite up to the task to produce printer ready files. Perhaps with a phone holder that could rotate around the object or using high res video better results might be achieved. I may continue working with it as the price is right and they may enhance the capability but I think I need to look at alternatives such as Polycam and/or KIRI to see what they produce. I would like to minimize the amount of “post scan” tweaking if possible so having a good quality stl at the end of the scan process would be desirable.