Hi every body, sorry for this weird title, but I figured people would be more likely to read my post this way.
I’ve been thinking about building an eFoil for a while, so now is the time to take the big plunge! My training and experience is in signal processing for fax modems (for those who remember, yes, that was a long time ago), so I need all the help I can get.
I am starting my build with the following elements, the challenge being to make it as cheap as possible, while optimizing its performance:
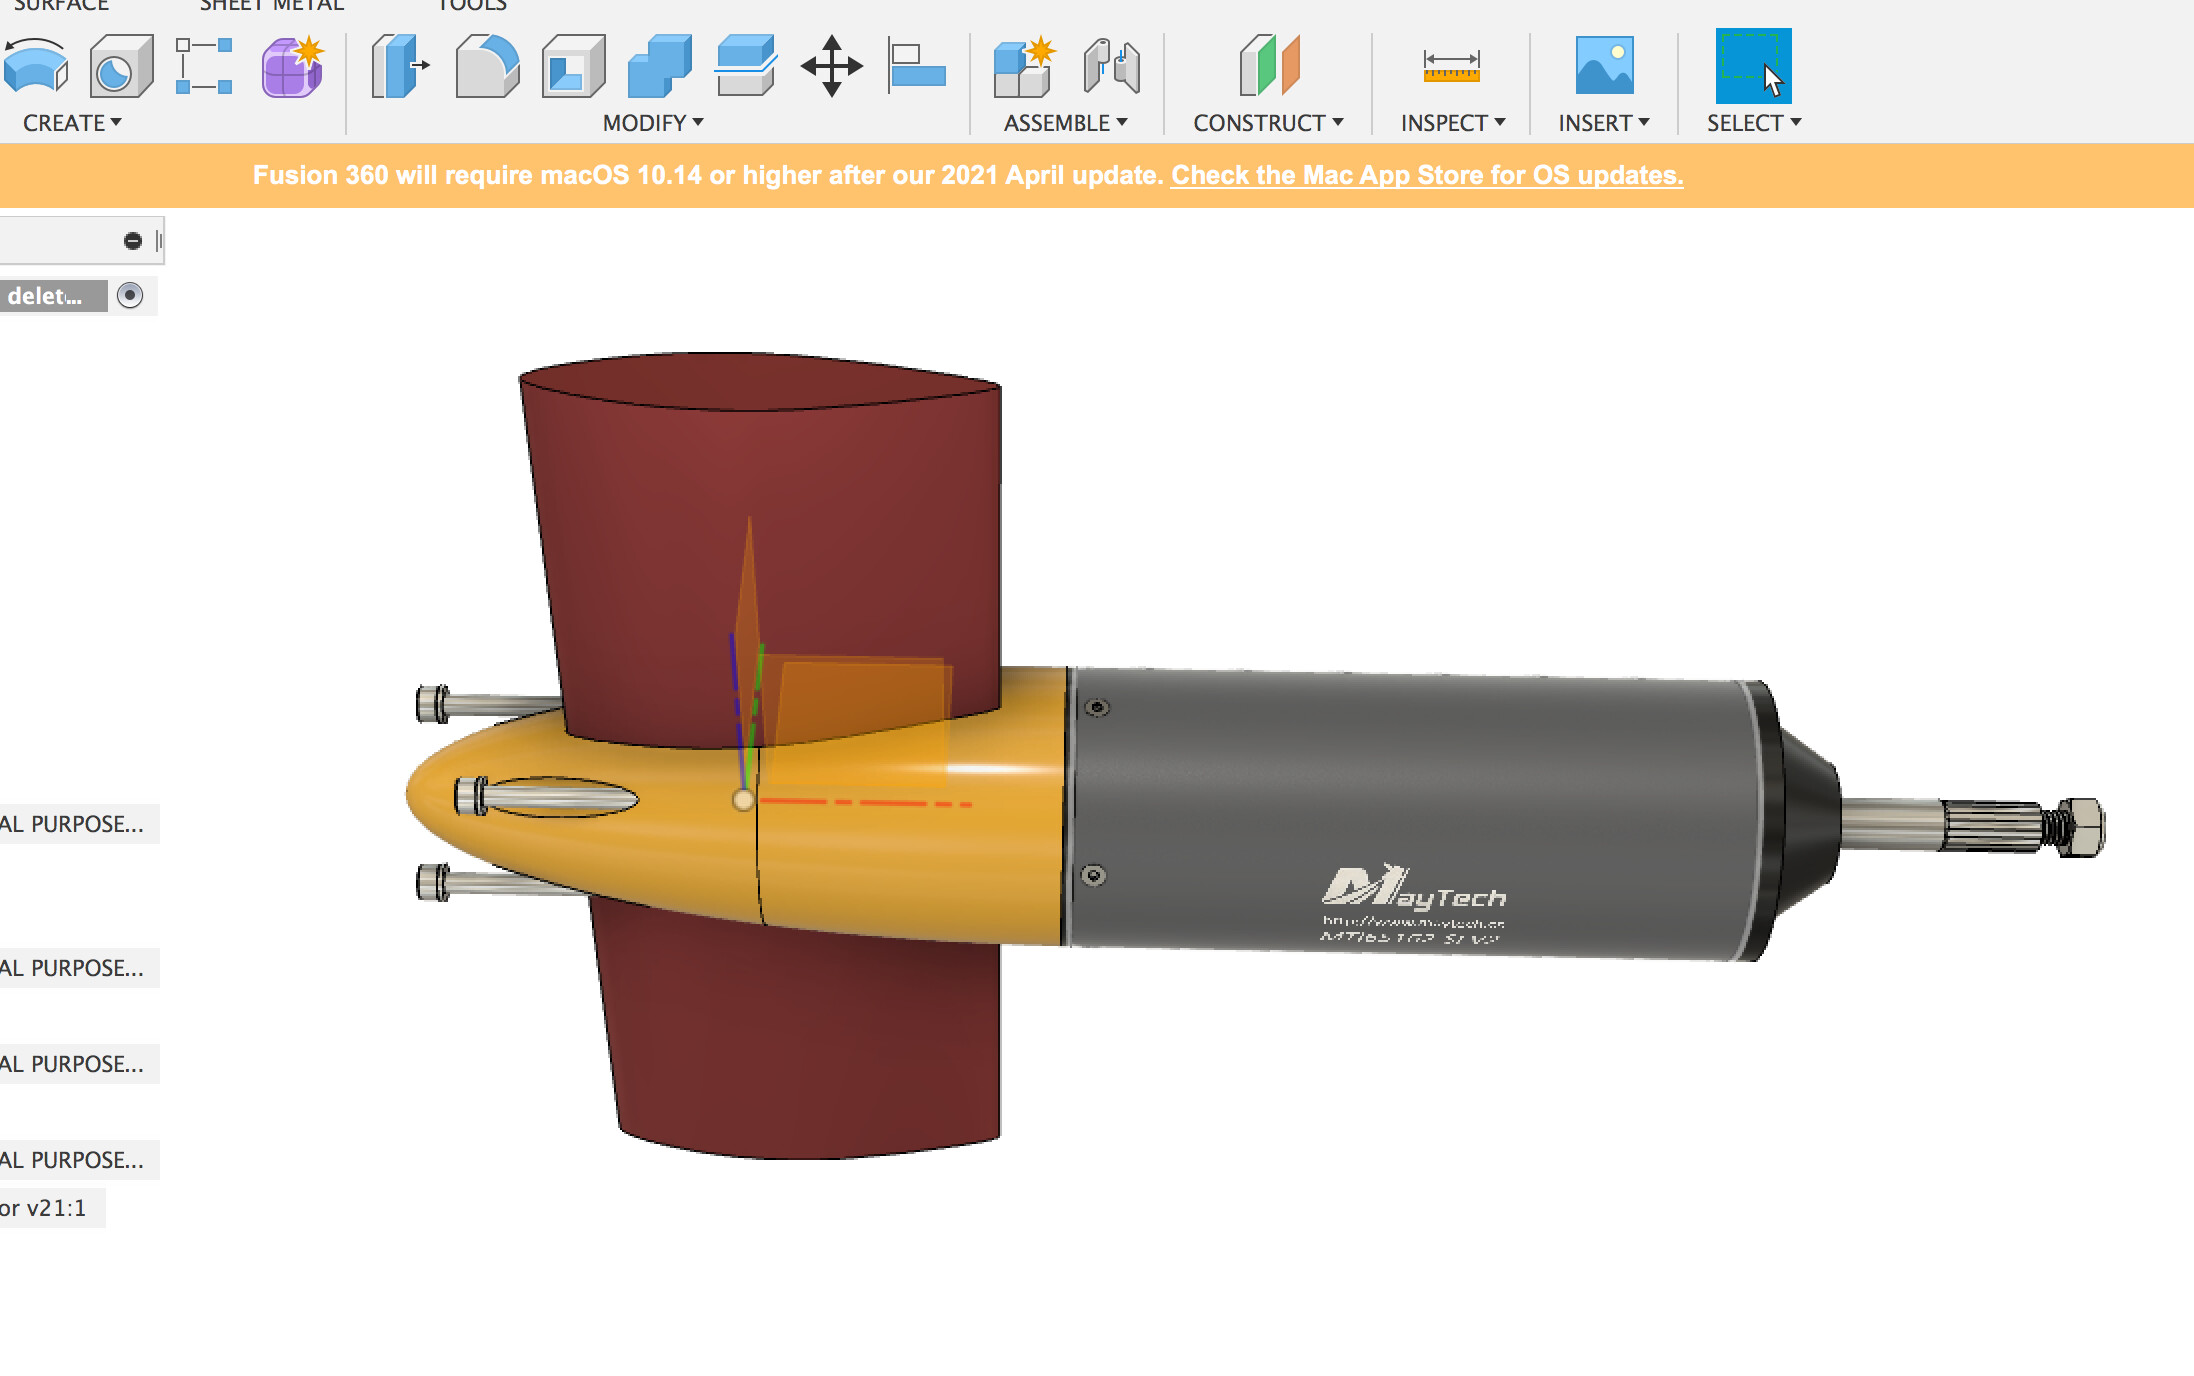
Motor Maytech MTI65162 100Kv
Why? it seemed reasonable and it was on sale over the holidays.
ESC: homemade by my husband
Why? To keep him busy and out of trouble. He’s relentlessly working on it as I type. Just walked by to say he’s stumped. Not good. But I have faith.
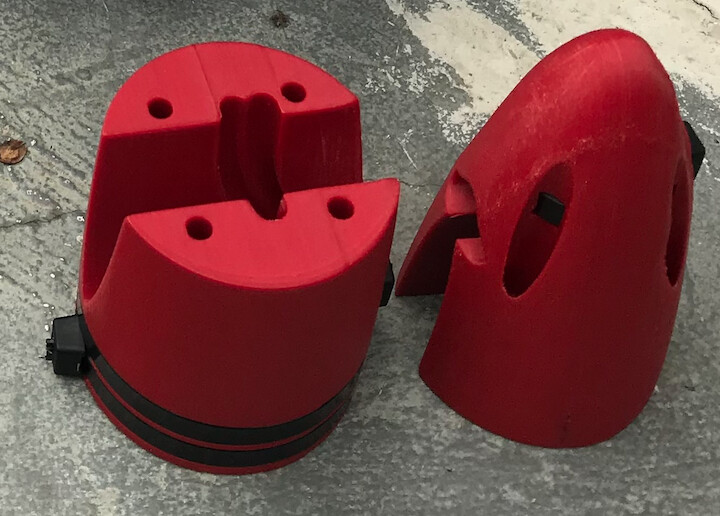
To get started, I printed the motor mast clamp, just because it seemed like something I could do.
Following the method used by YAHEF, I adapted the design to my mast and motor using fusion 360, and to make a long story short, ended up printing it in PETG with 100% fill.
QUESTION: has anybody used a PETG mast clamp without any additional processing (fiberglassing, epoxy filling, etc…)? I just reinforced mine with a couple of heavy duty (200lb) tie wraps around the circumference…
EDIT: after reading here about improving the strength of the print, i might reprint the clamp with:
PETG
layer height: 0.15mm
layer width: 0.56 mm (140% of nozzle width)
perimeters, top and base layers: 10
infill: 100% honeycomb (don’t know if patterns matters at that point)
Hi there. I 'm using my PETG mastclamp without additional reinforcement for over a year now, but with the lightweight-motor APS63100. If you like to use a printed clamp for the maytech motor i would recommend printing it with 0.6mm extrusion width (even with a 0.4mm nozzle) and placing it not vertical but 30degree tilted.
I’ve never heard of a “MTI54162”, are you shure or do you mean the 65162?
In my opinion the best way to mount a heavy motor is this way, @superlefax and i are using it on our latest build.
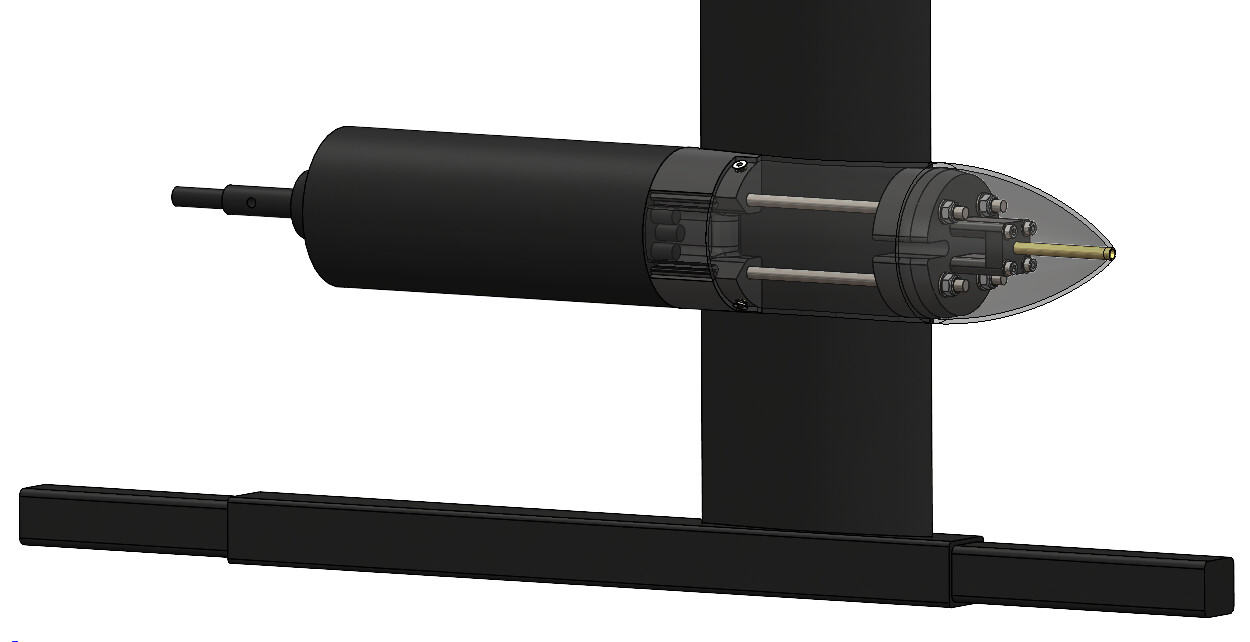
Here is my work in progress mount for FS65161 to Gong mast. It is quite similar to the one used in the rifle case eFoil. It comes with a water pass thru (brass tube) in the nosecone. As the design is still a work in progress, it should only be used as a reference. If someone decides to print it, I cannot guarantee fitment. I will be able to finish the mount when my Gong mast arrives, so I can properly reverse engineer the shape. This current shape is my best guesstimate based on some pictures and diagrams in the mast database.
My first Mast clamp I did 2 perimeter with 75% infill and noticed water dripping out while letting it dry. After I changed to a 6 Perimeter with 75% infill I haven’t had any issues either with durability and water tightness.
I can also recommend to print the traditional mast clamp with 0% infill and like 6 perimeter/wall. Afterwards fill the hollow clamp with epoxy. You can have a look in my build (Newcomer build)
There are some broken clamps which has been print only. Don’t ask me about the infill. I chose the epoxy because it’s more like a mold and strong in every direction.
Thanks for the feedback! I haven’t built my board yet, I am still waiting for a few parts such as the foil assy (ordered, on its way) and a board from Noahark. That should arrive in the near future. My friend lives and surfs in Santa Cruz so I’ll probably do most of my testing and learning there.
POWER and SPEED considerations
So the next step for me was to figure out how much power is required (even though I already bought the MTI65162 motor because it seemed like a good deal).
My assumptions:
total weight of rider+eFoil : 100kg / 220lb
foil and mast: old Liquid Force model
Using my friend’s java foiling simulator I determined that:
speed of least drag = 6 m/s (13.5 mph 21.5 km/h)
I am thinking of optimizing the propulsion design so I can have the longest ride possible at that speed. Does it make sense?