The only advice I would add is IF you are connecting a BMS to the pack full time you should consider the actual dimensions of that device so that you close the hatch.
I don’t have much personal knowledge about BMS but I think most come with the ability to handle a variety of S counts of the battery.
You will likely start with 10S but if for some reason you decide to change that to 12S etc it would be good to not have to buy another BMS.
Battery just delivered a few minutes ago. Did anyone happen save the picture from battery hookup that showed the balance wire lead numbers? I may not need it as I havent taken it apart yet just pre-paring incase.
I don’t recall seeing a picture like that with balance wire numbers. I haven’t taken off the BMS on my pack yet, but I was planning to reuse the existing balance wires and plug. It might have some glue on it, but I think it can be chipped off.
To get the wire numbers all you need is a multimeter. Set the multimeter to the appropriate DC voltage setting and place the leads on either end up of the balance plug. If it reads ~35V then the black multimeter lead is on battery negative and red is battery positive. If you get ~-35V then it’s the opposite, black lead is on battery positive. From there you can label wires
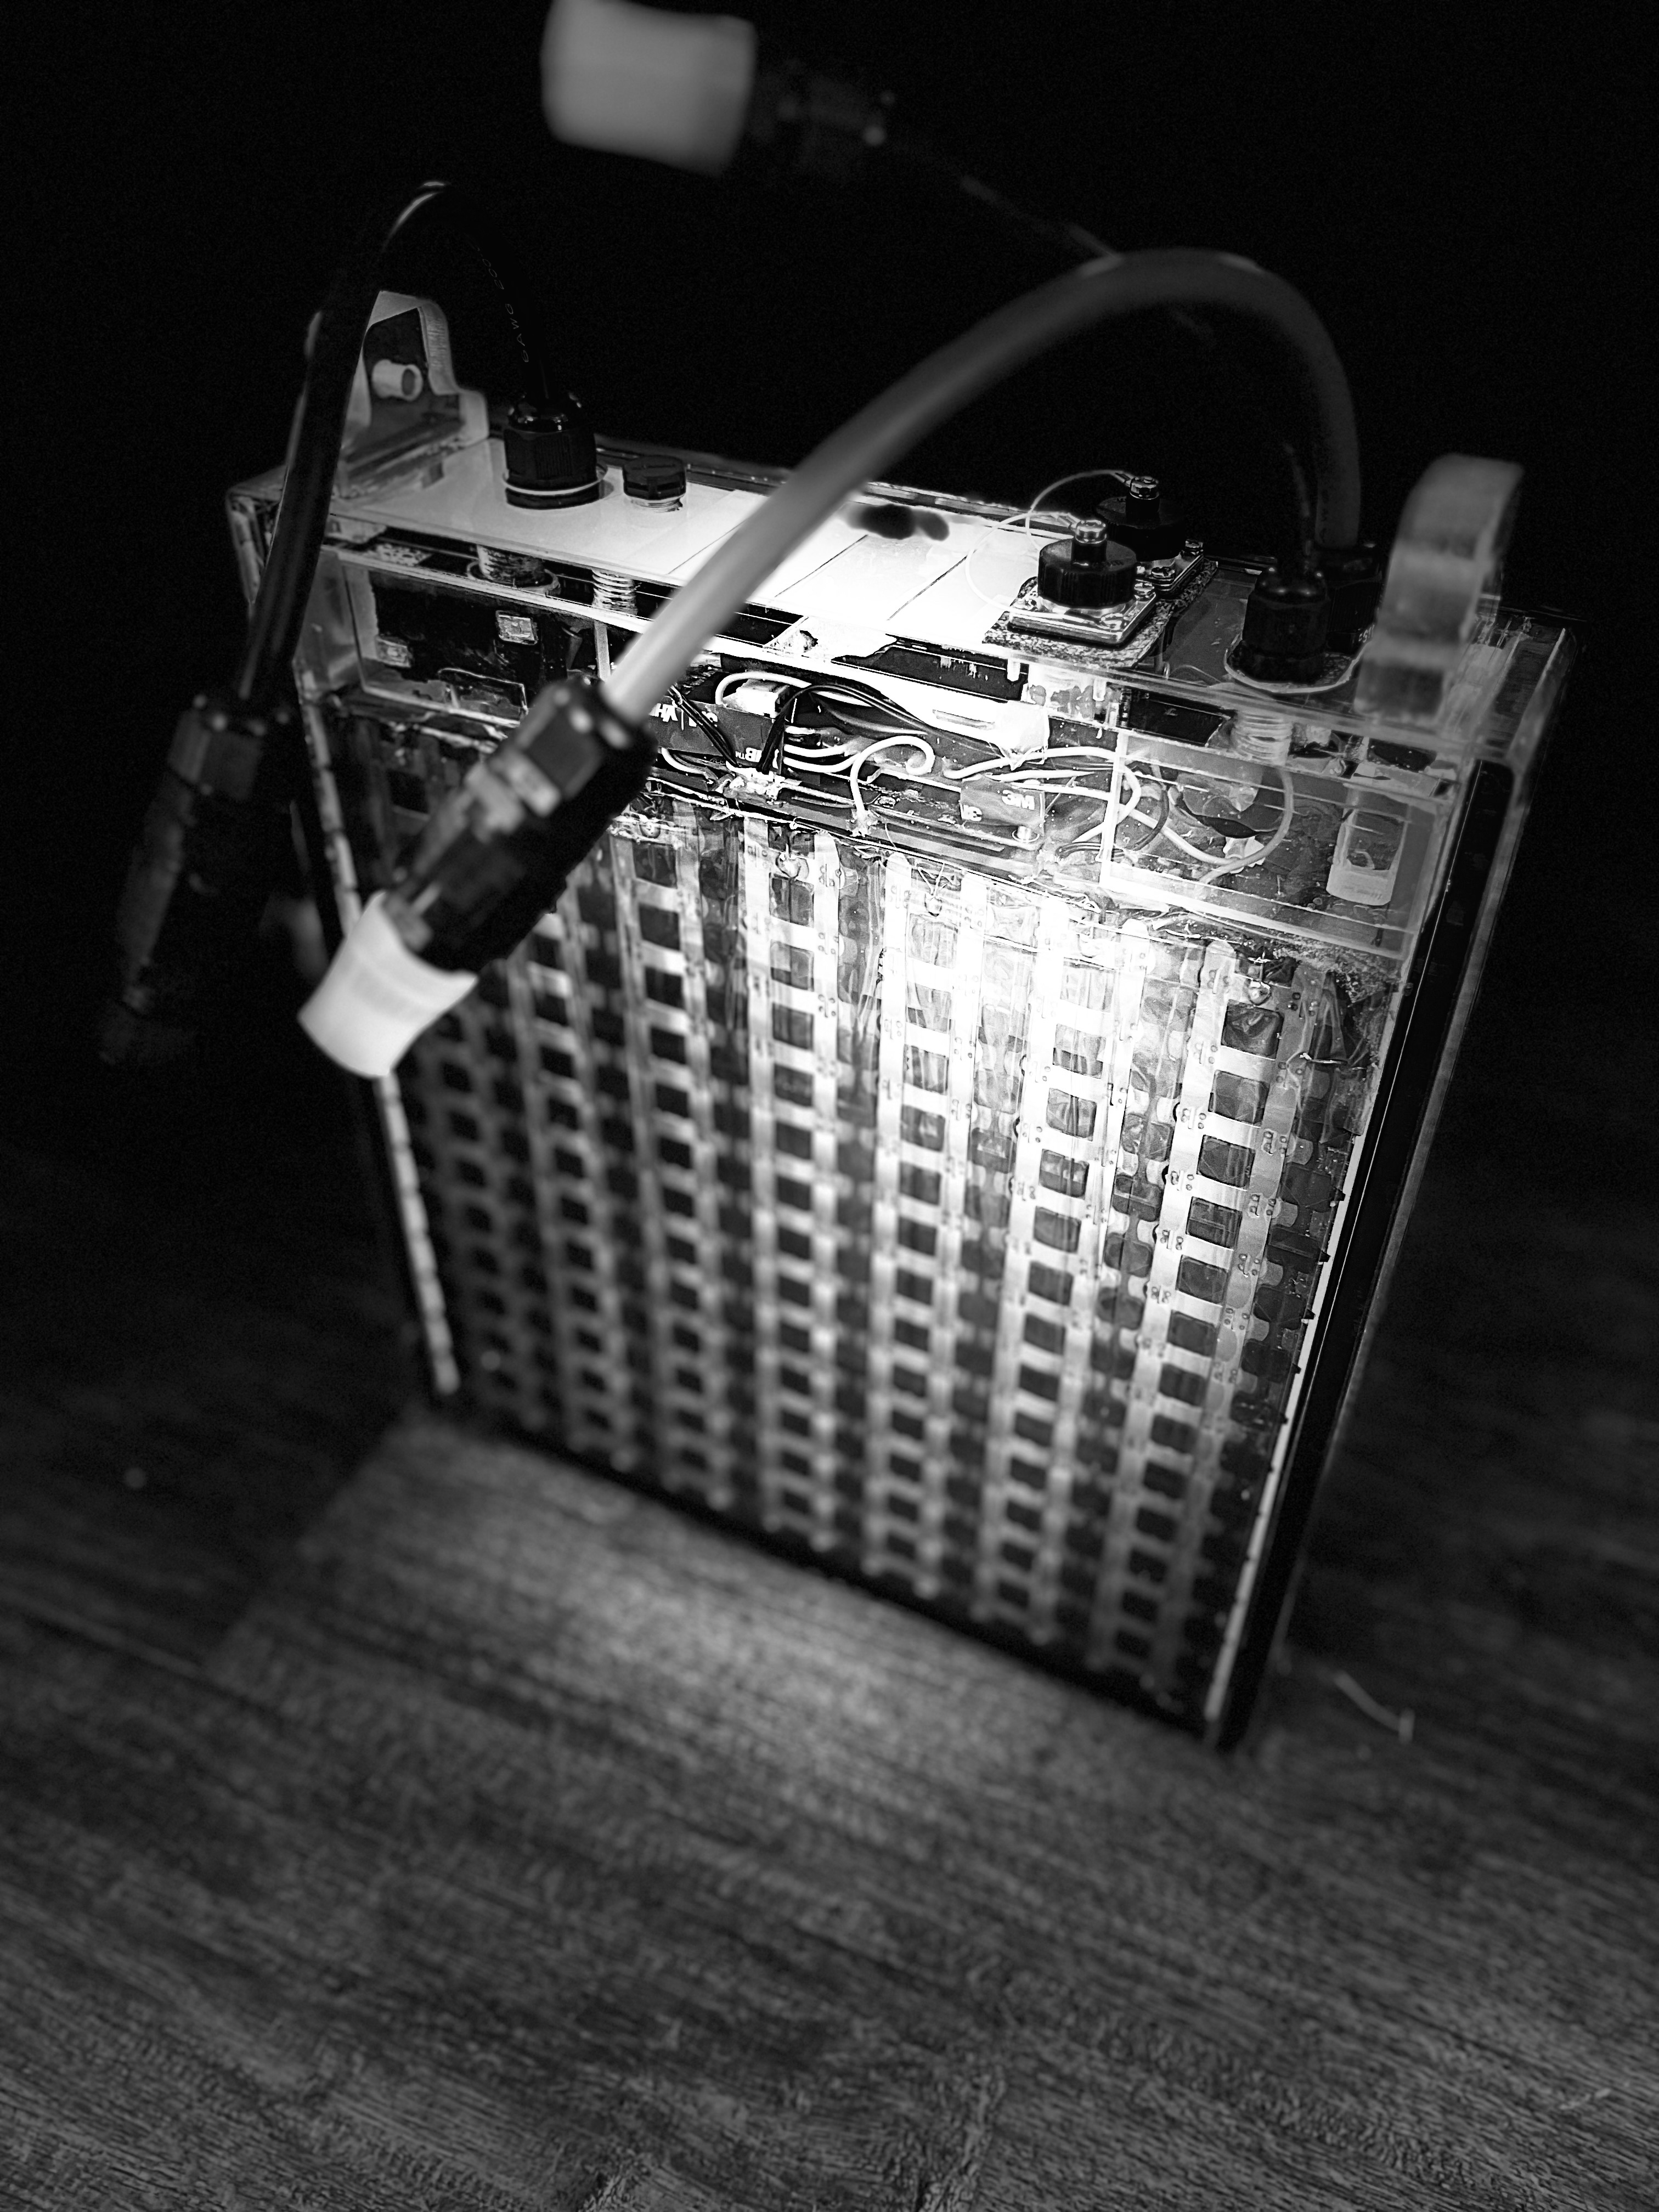
@S_Roger So I got the battery apart and I dont see why you couldnt use the existing balance plug on an balance expansion board. It looks the same but I wont know forsure until my charger arrives. Battery currently has 40.1v and the balance wires are all right within spec of each other. The only thing Im some what confused by is the on the balance plug the last two show the same voltage. Is this correct? Say there are 12 pins, pin 1 and pin 12 show 40v while pin 1 and pin 11 also show 40v
Interesting, I haven’t taken mine apart yet to look at this. Unfortunately I don’t know what that 12th wire would be off the top of my head. Maybe some sort of signal wire?
I still think the plug can be used. If you check Jehugarcia’s youtube channel he uses the plug to test the battery pack (about 1min in when he goes over his test setup):
quick update as I’m still waiting on few other parts. The balance lead from this battery does not plug into the balance board I have. I ended up cutting the connector off both my balance cable as well as the battery, extended the wires and soldered the working balance adapter to the battery. As far as the housing goes I havent made up my mind yet as to what I want to do. I kind of want to seal the metal case that way I can still use the straps/handles but haven’t test fitted yet. Waiting on some 8awg before re-assembly.
On a side note theres also a 150a fuse you can remove from the BMS if you’re needing a fuse instead of buying.
Happy to hear you are making progress. Nice tip about the fuse!
The original metal case the cells come in is too high to fit in the Fliteboard compartment or at least it was for mine. You might have to rethink using that case.
I’ve had similar thoughts about reusing the housing. It’s sturdy and shouldn’t be too hard to waterproof. It is very close to fitting and if the top cover is removed it does fit. I’ve been thinking about trying make a thinner polycarbonate lid or something. It only needs a few millimeters taken off the total height to fit
I’m hesitant to push that height limit as I want to preserve the hatch’s ability to completely compress the rubber seal. To me that means a few mm of space between the top of the battery and the bottom of the hatch.
The other thought I had for the metal case was to use it as a fire”proof”-“resistant” storage/transport case for the pack.
I do share concern about having those seals properly compressed and also not improperly stressing the hatch hinges.
A few months ago I was trying to figure out the actual internal height of the fliteboard battery compartment with the hatch closed. I ended up making a stack of something (forget what I used) and a sticky sheet of paper laying on top. I added height in small increments to the stack until the paper stuck to the inside of the hatch. I have since completely forgotten what number I came up with.
With the top cover off this big battery pack I tried the same sticky sheet of paper approach. Hatch closed like normal and the paper didn’t stick. Still, not sure how much clearance there is too work with.
I plan on placing a straight edge across the seal with the hatch open then press down until the seal is fully compressed then measuring the height of the straight edge. Theres also a then layer of plastic in the bottom of the hatch that could be removed for a tiny bit of extra clearance.
Thats length and width. Lid closed, seal compressed max height is the concern using the full metal oem housing of the battery. I’ll run downstairs in a few min and measure.
Have you got a Flite battery housing that you are using?
They can fit 21700 cells in their housing so I’d imagine they are using 4mm Alu plates which gives them 2mm for cell holders and nickel welding. So I’d hazard a guess that internally on the Flite housing there is 72mm.
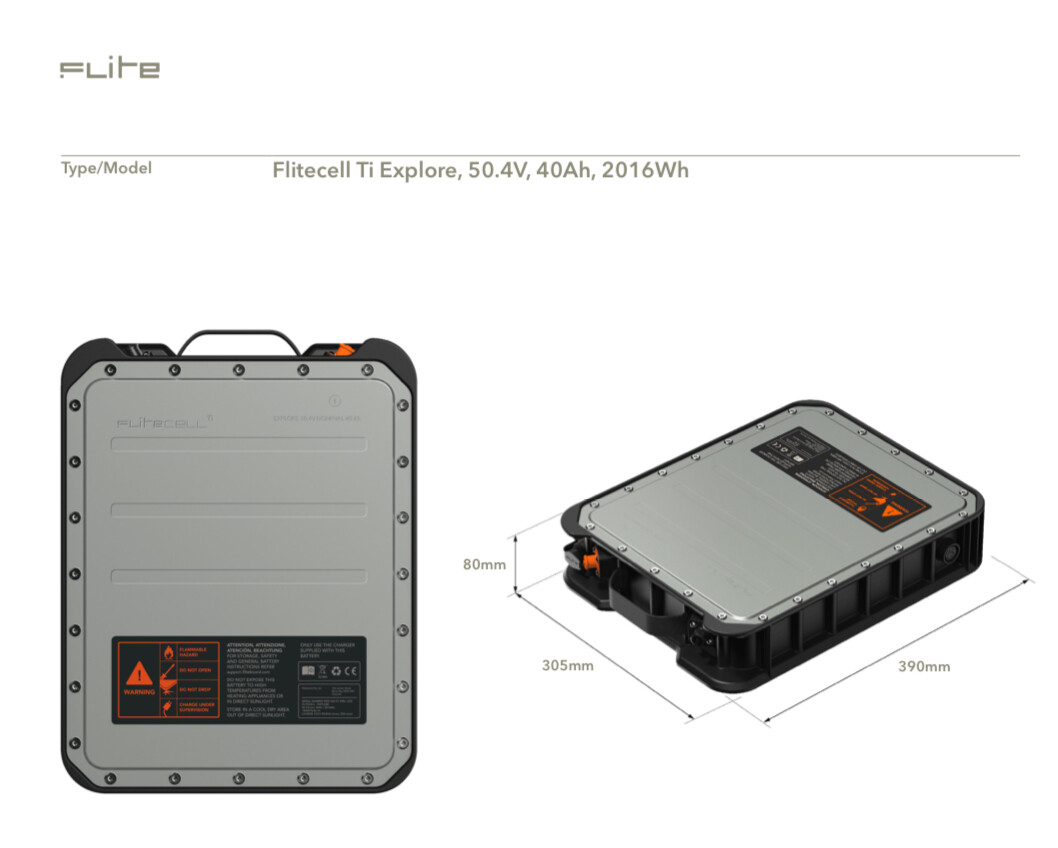
I think oem housing @stinkwhistle refers to is for this robot battery pack this thread has been discussing, not an oem fliteboard battery housing. The robot battery is ~83.5mm tall, so it may be close enough to modify and fit.
Thats correct. Its the metal housing from the robot battery above. Seal compressed you have 82.55mm However the lid isnt flush across and actutually protrudes out where it would sit on top of the battery 3-4mm. So with the image @Foilguy posted above I would say 80mm height is max. The metal enclosure measures 81mm. I need to measure the removeable plastic sheet in the bottom of the board. If its at least 1mm we should be good.
If it doesnt fit you can consider a fishtank approach, arcrylic enclosure, similar to what Flightjunkie used on his packs. Four edges and bottom are glued, 3M VHB poly lid. I was in a similar position as you fitting a pack into a Lift hull and ended up doing arcrylic.