Thanks mate ![]()
I got most of them from here:
https://uk.rs-online.com/mobile/search.html?searchTerm=Surlok
But sometimes they wouldn’t have the colour I wanted in stock so would get them form here as well.
Thanks mate ![]()
I got most of them from here:
https://uk.rs-online.com/mobile/search.html?searchTerm=Surlok
But sometimes they wouldn’t have the colour I wanted in stock so would get them form here as well.
amazing. which charger are you using? It’s one single raw 14S pack?
I was thinking of going two 7S9P pack 21700 P42 with an external dual 1-8S charger.
What is the stuff that you have in the middle of the pack, behind the handle?
Your not afraid of the carbon being conductive? some positives and negatives seems to be very close !
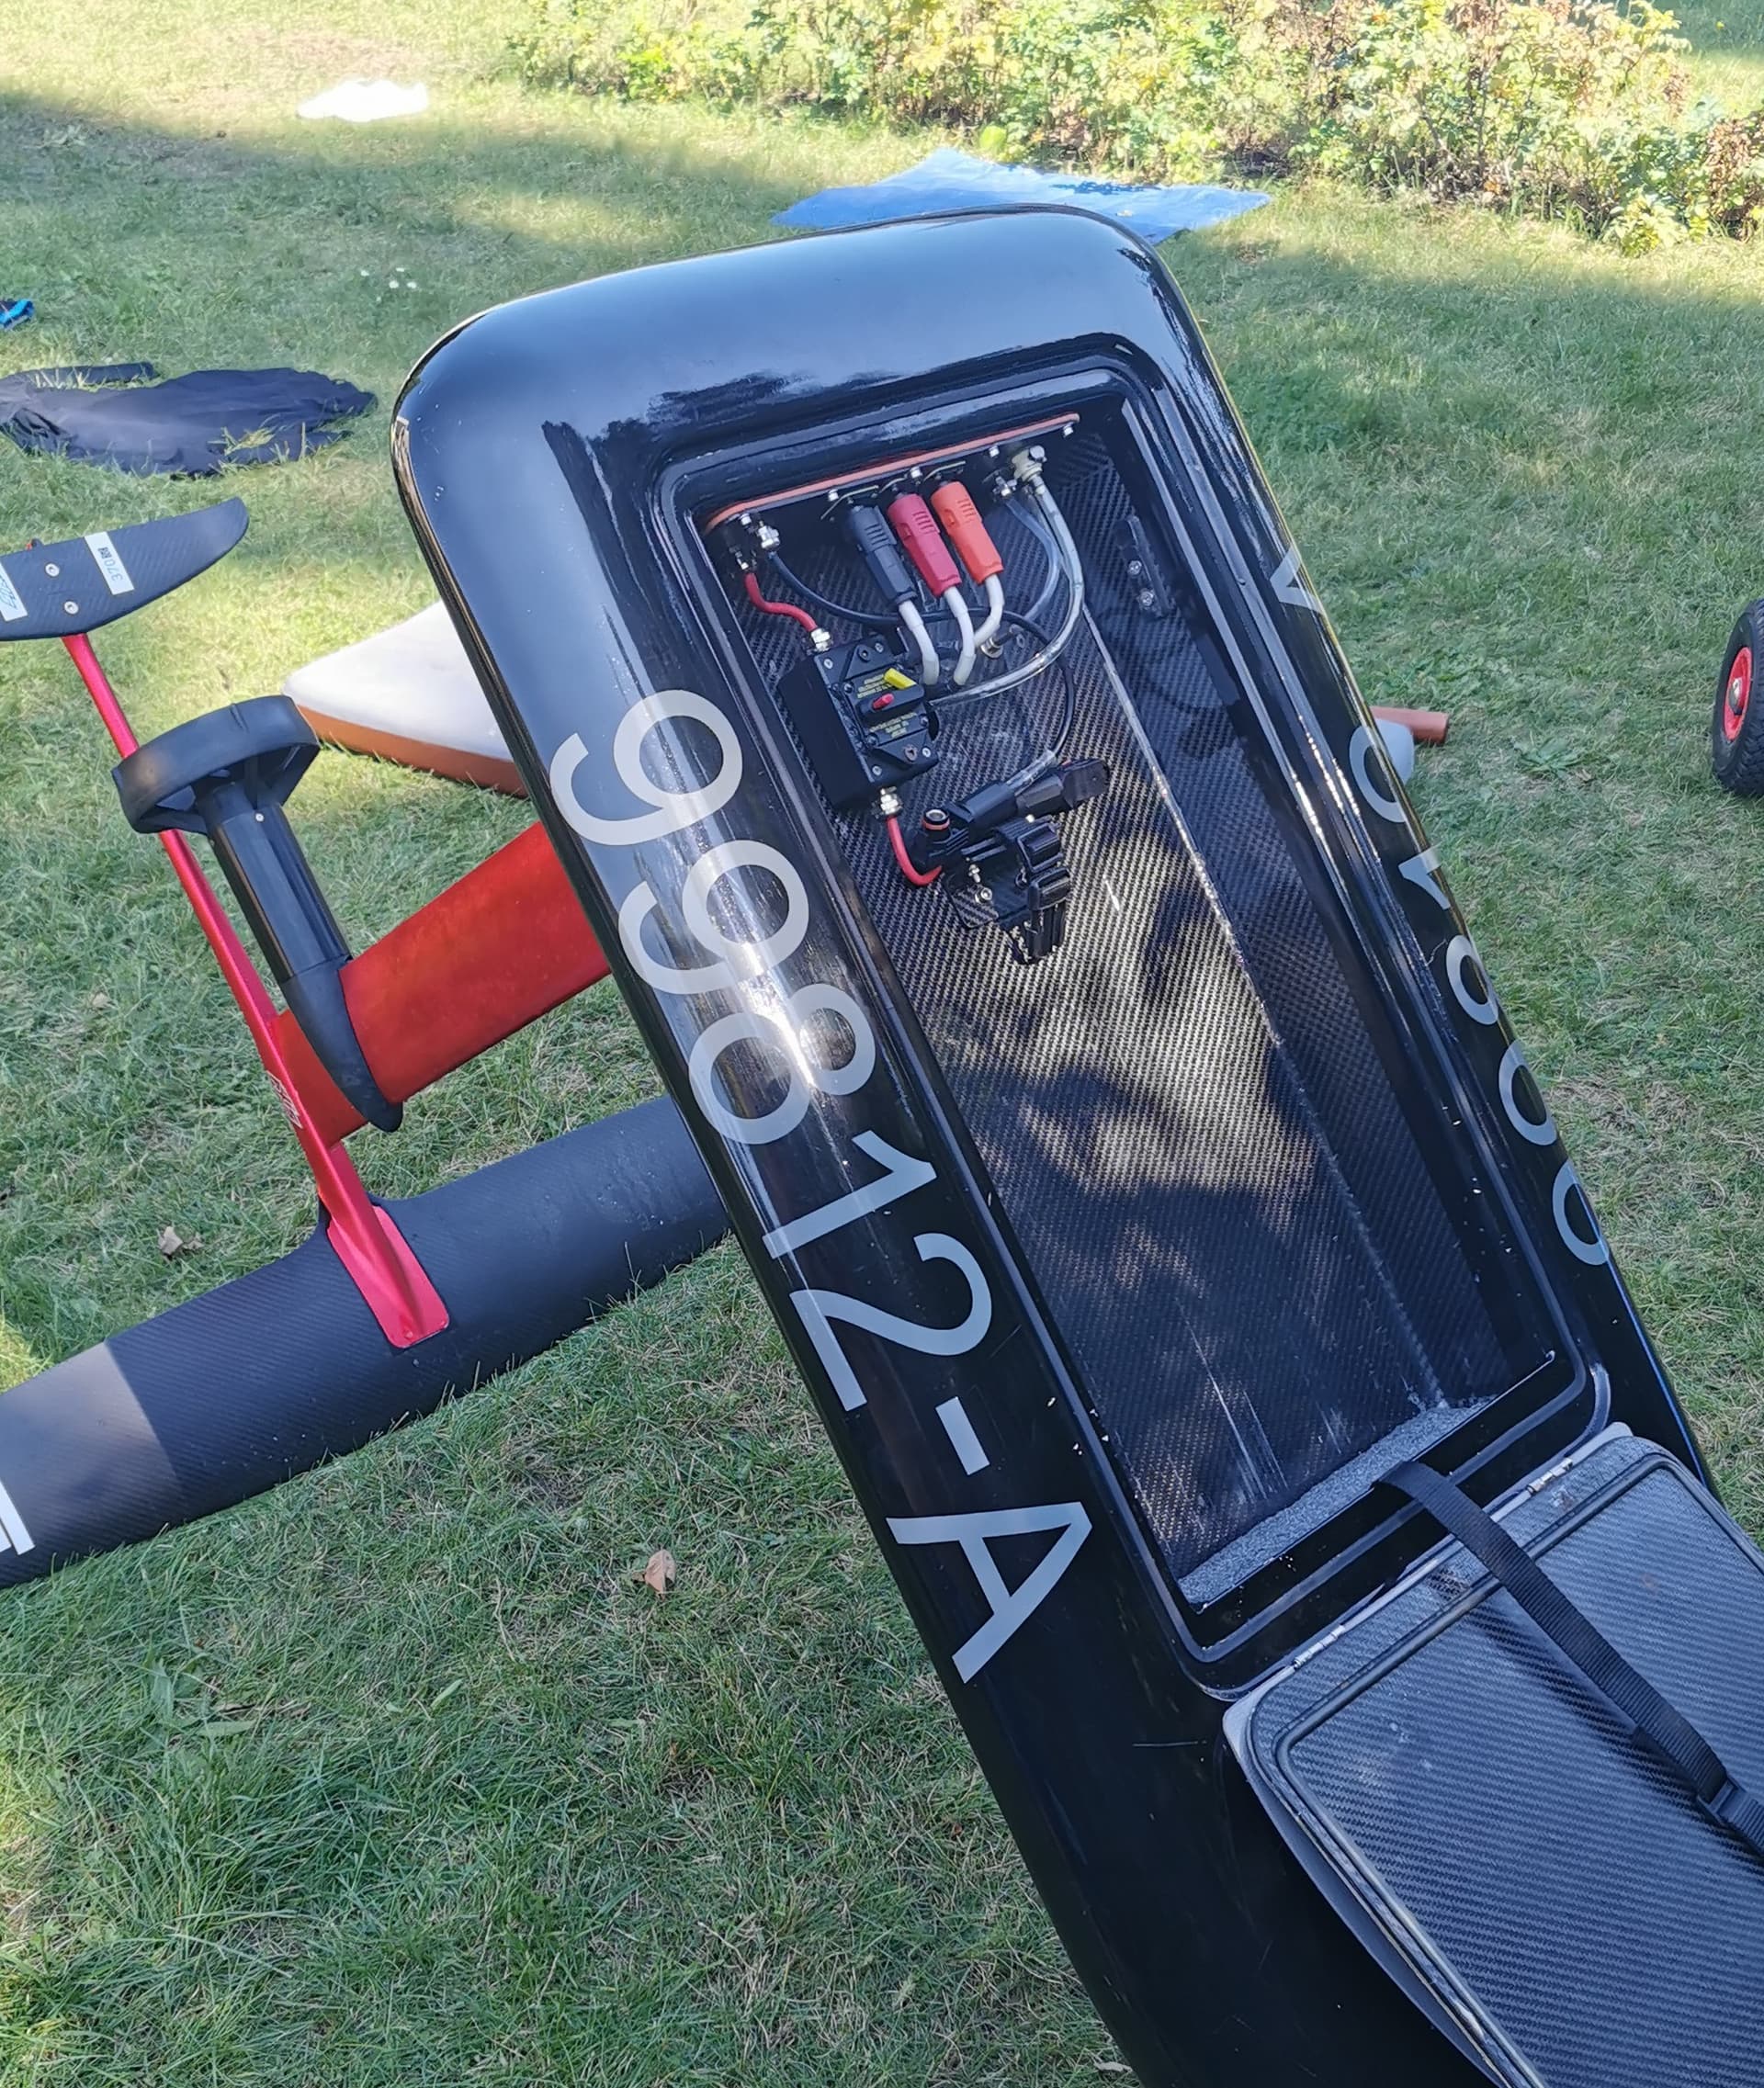
Yes, 1 raw 14s14p pack with a 180A fuse on the positive end. I’ve actually got over 300 30q’s sat in the garage waiting for me to build another pack when I get a spare minute.
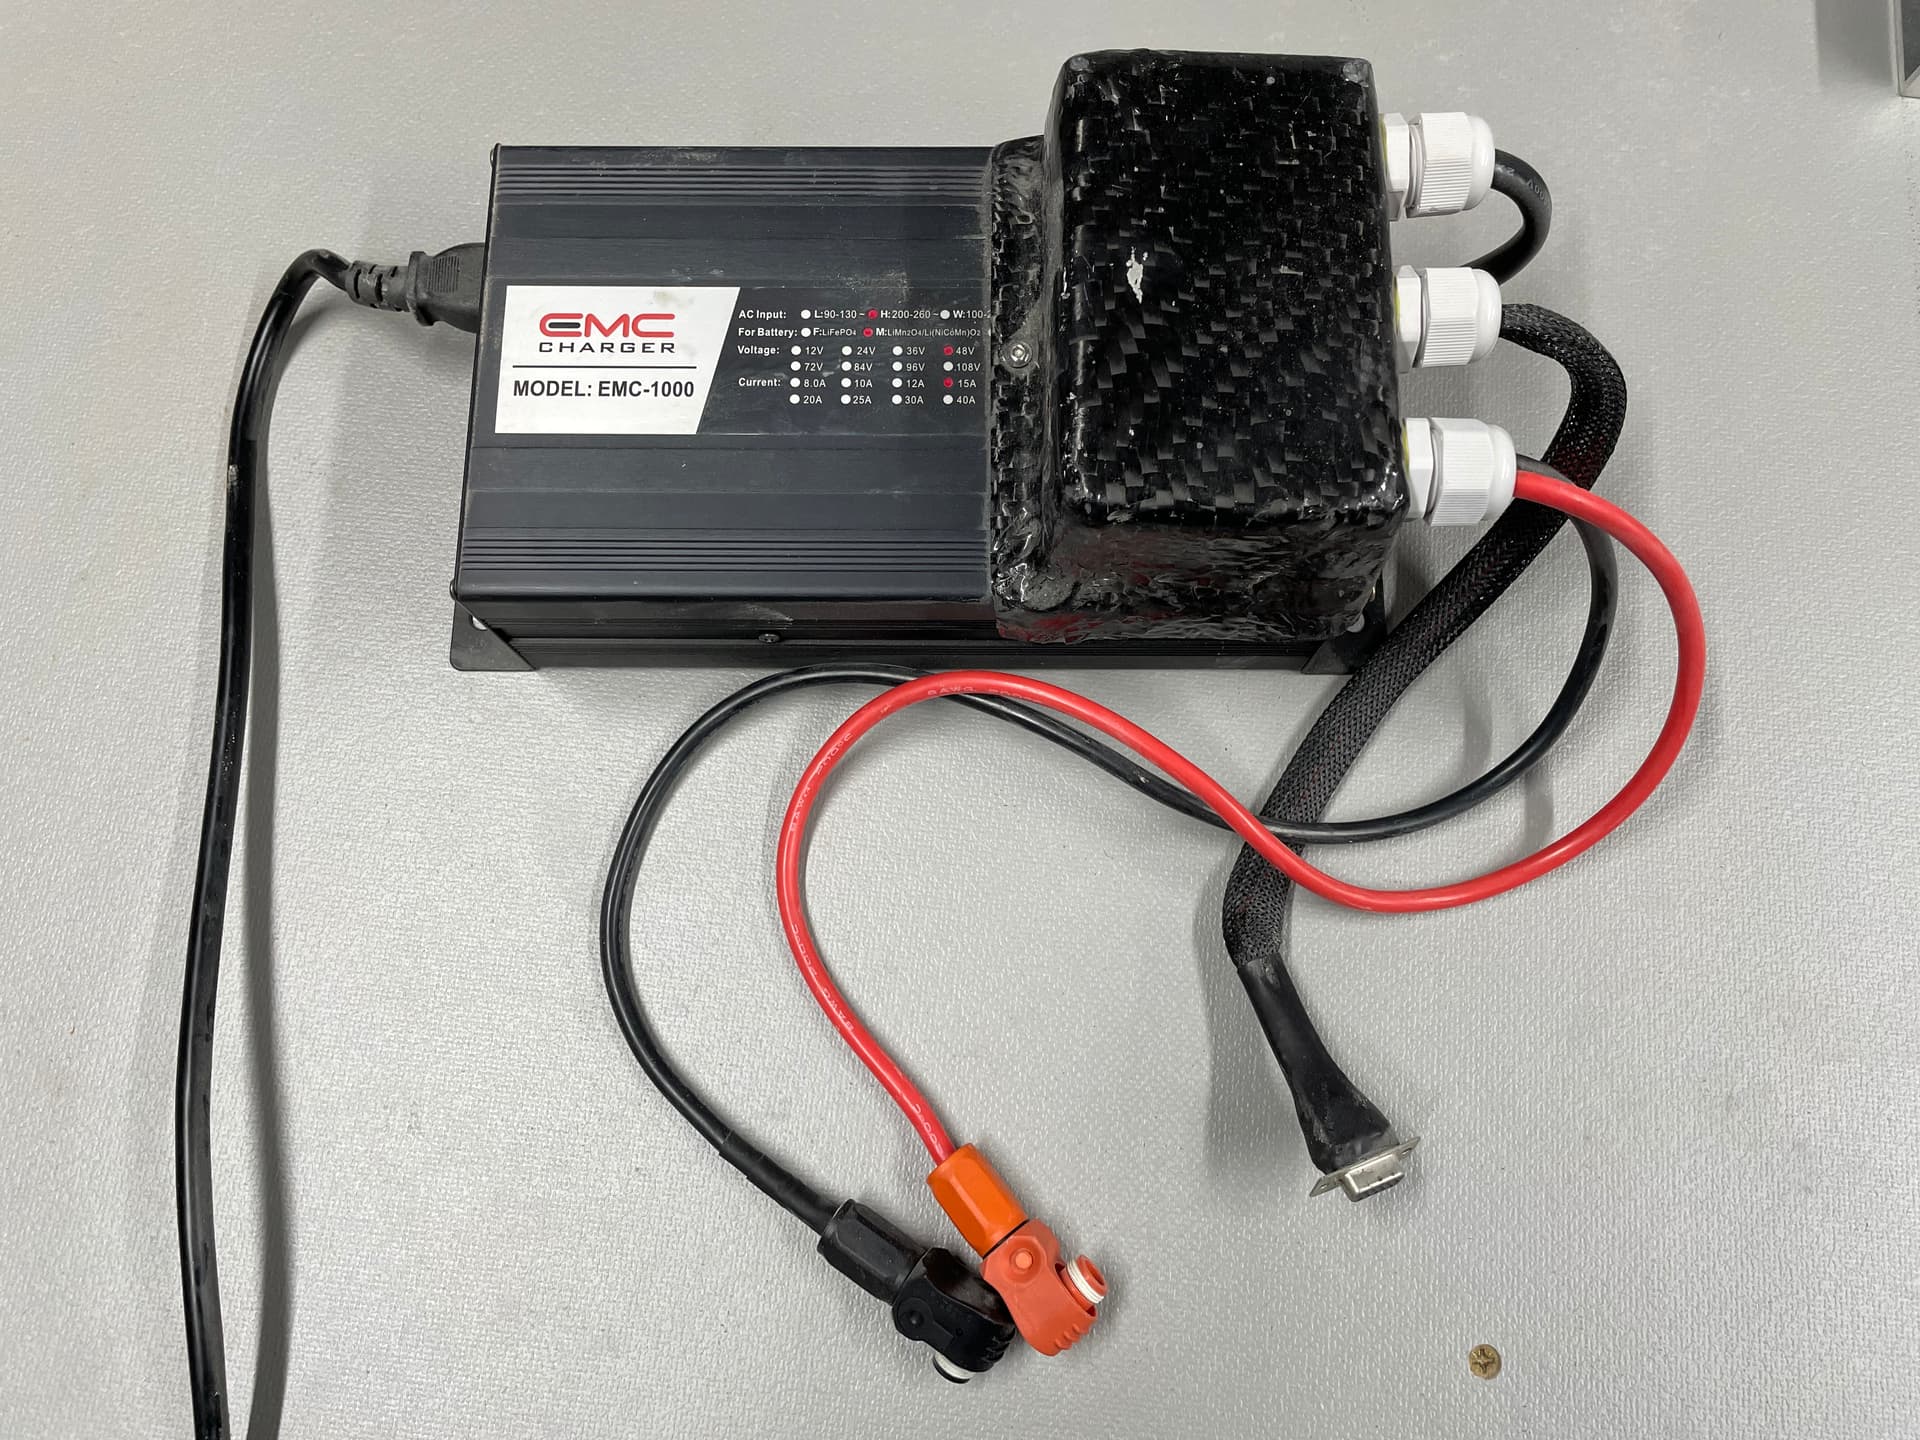
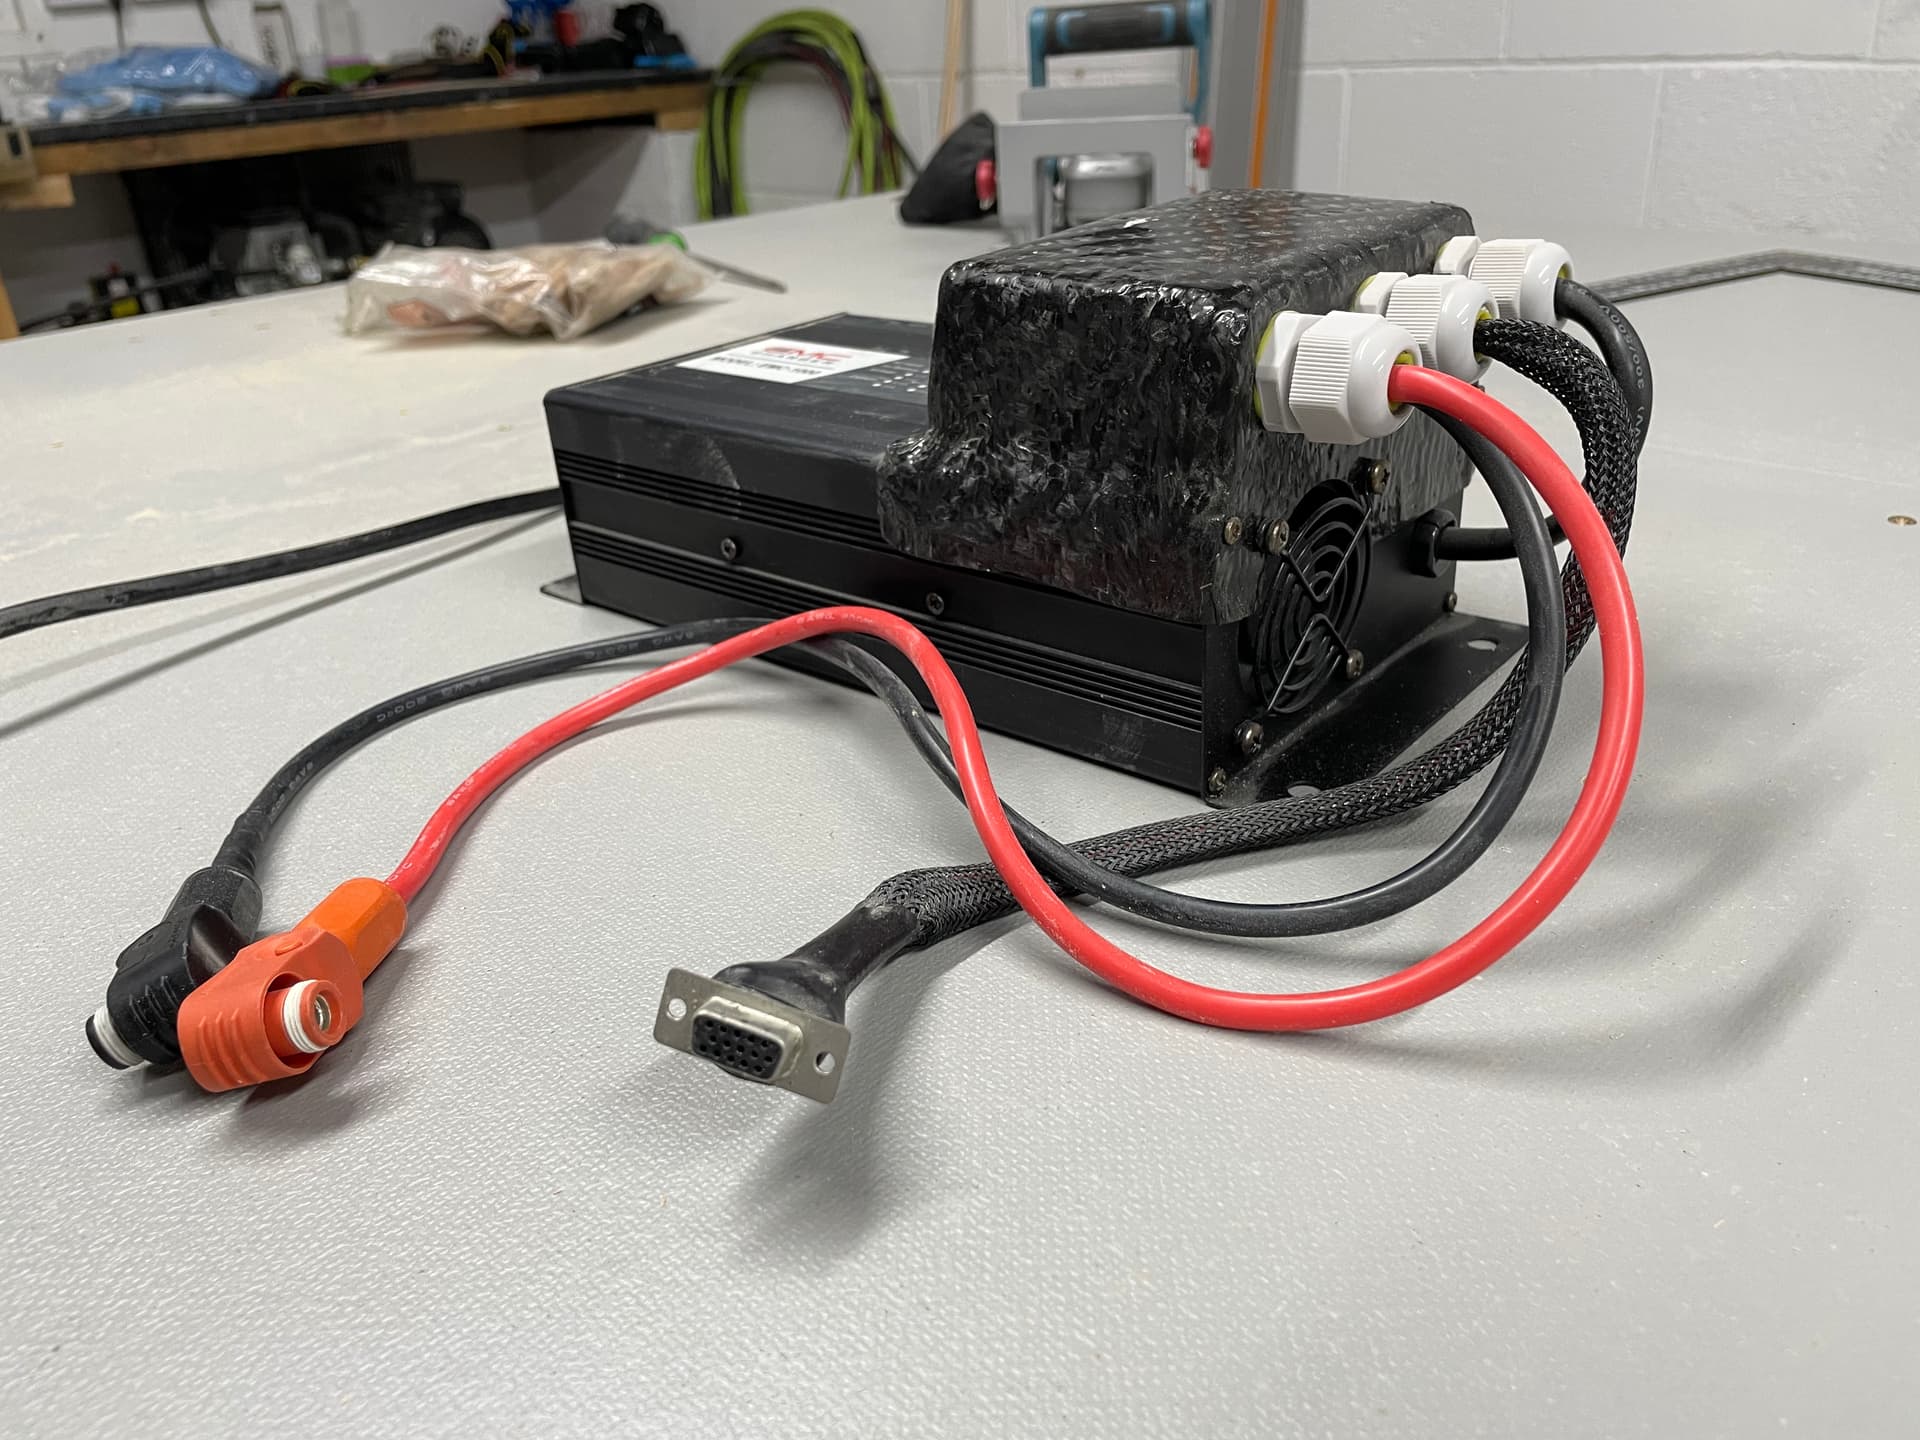
Here’s the charger I use, 48v 15A: $98 plus shipping I paid for it and have the BMS connected to it with 2 Amphenol connectors to connect straight to the battery along with the VGA connector for balance leads.
Behind the handle is just the 180A fuse and balance lead’s.
There’s no carbon fibre on the inside walls just the PETG. Plus, it has the high temp tape wrapped around it along with a blanket of 2.5mm rubber sheet for cushion/bumps and then the heat shrink around the lot. (Not great for heat build up but I don’t draw high amps) Which is then silicone’d in place so it can’t move. So ![]() it should be good. Well, so far so good
it should be good. Well, so far so good ![]() , I can connect to the BMS via Bluetooth and see each cell voltage and set parameters etc when charging.
, I can connect to the BMS via Bluetooth and see each cell voltage and set parameters etc when charging.
Ok got you so you basically “outsourced/located outside” a 14S BMS with a DC charger. got ya ! well done man this is very cool 
Thank you mete.
I’ll have a look now
you even CF the BMS. Your attention to detail is awesome. Good job man. How did you waterproof the VGA on the battery box side (on your board)
![]() it was the easiest way to mould something to the shape of the charger and BMS.
it was the easiest way to mould something to the shape of the charger and BMS.
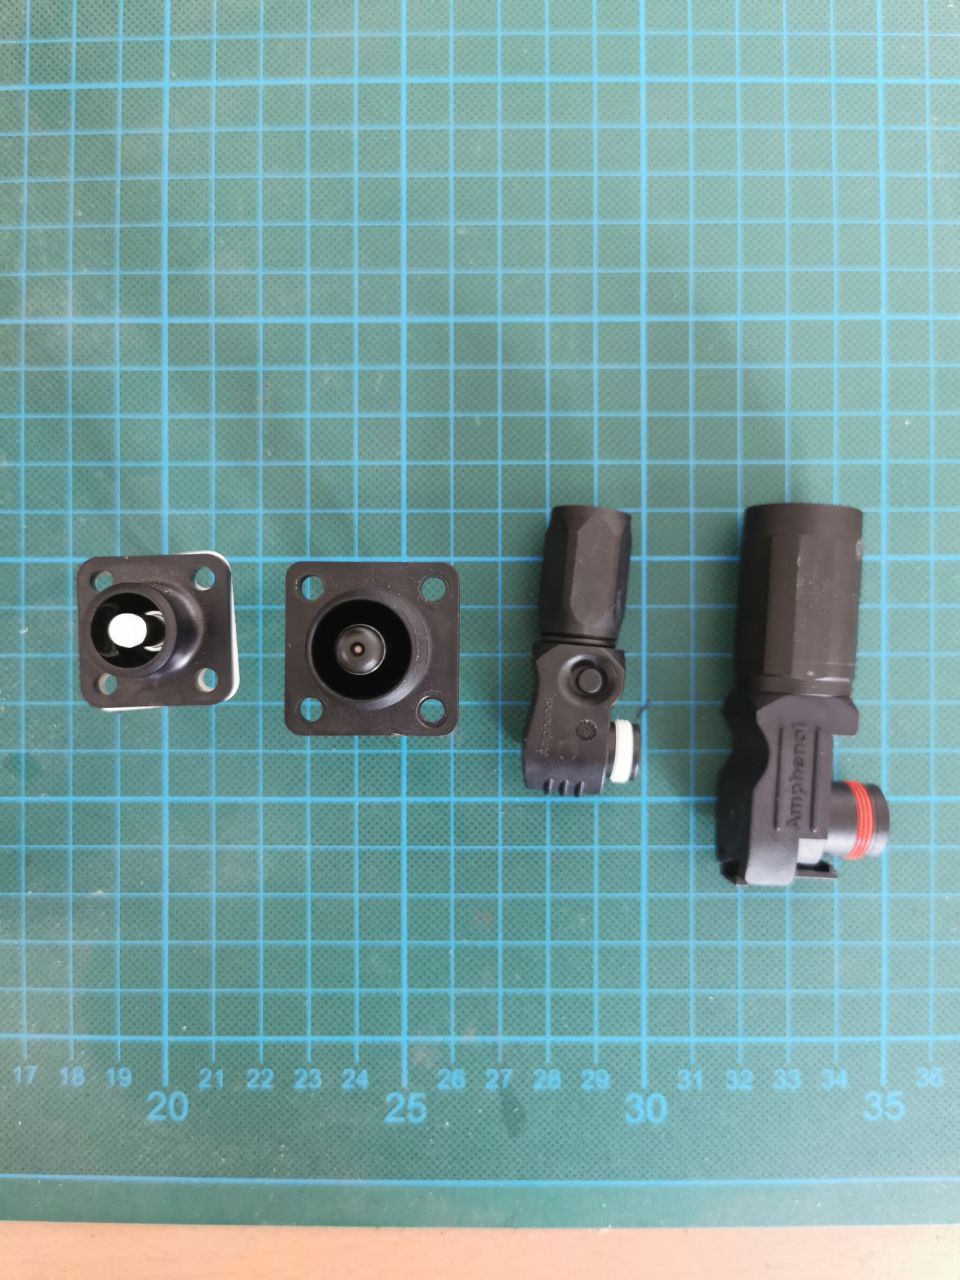
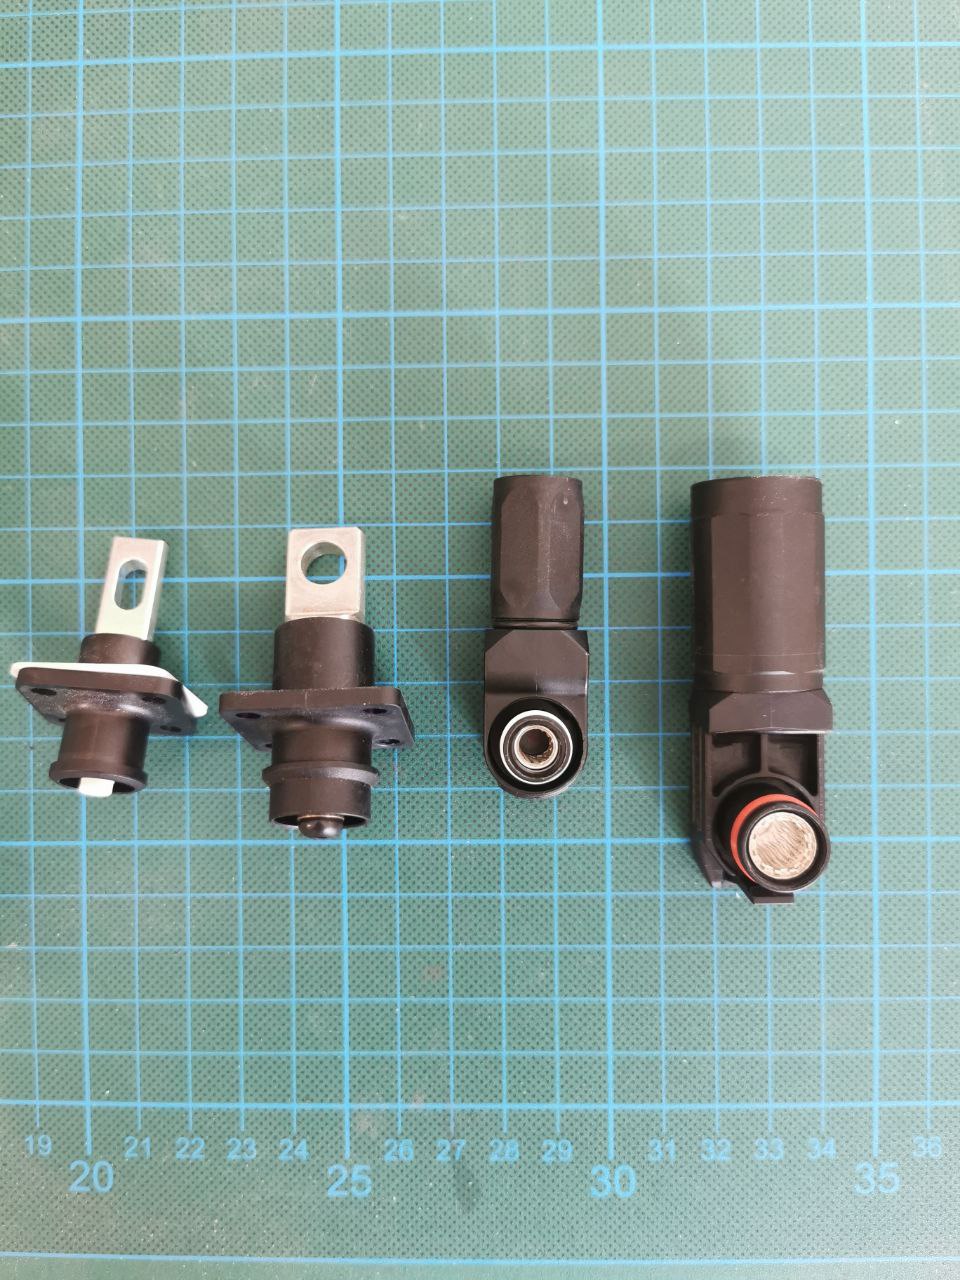
I used this connector and drilled out the centre for the VGA to fit then epoxied it in place.
well done. I will follow your lead.
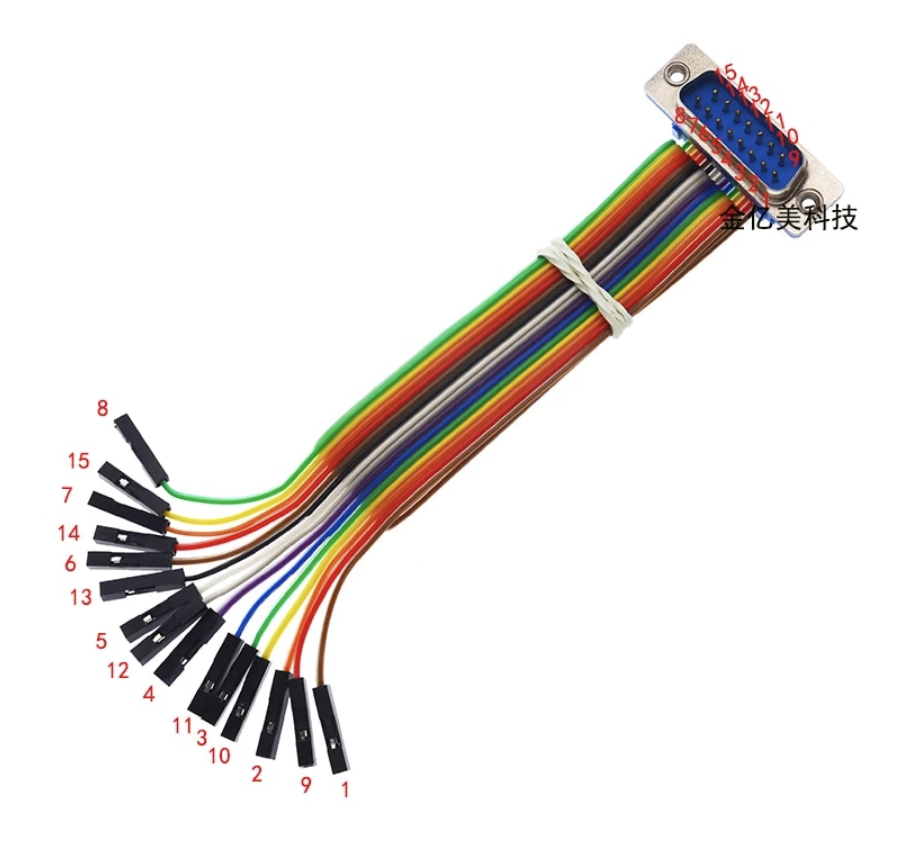
How did you manage to solder this so thin wires? which AWG did you went for?
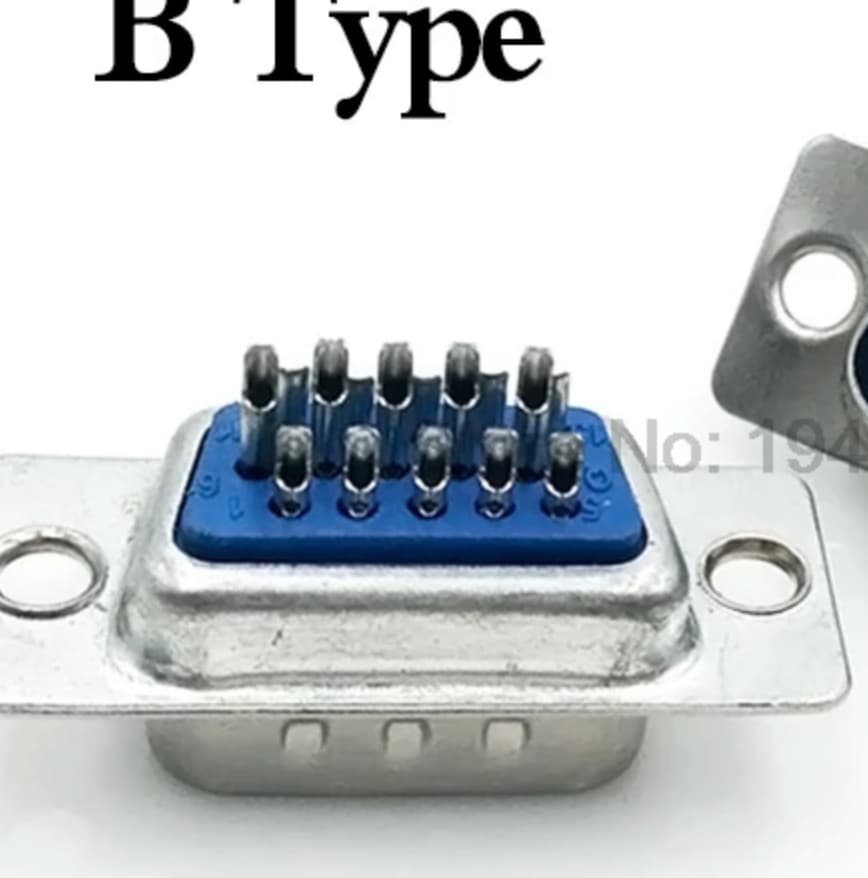
I found these 2 rows DB15 with the cabling already done, this would make the battery assembly a piece of cake but I will need to find a way to waterproof that connector which is bigger than your existing 3 rows DB15
I’m also going to buy the SURLOCK Amphenol connectors, man… they are expensive! did you go for 200A or 150A ?
They do look a little tricky but they’re not to bad once you get going with it. Once I completed a row of 5 I would put heat shrink over each joint just to make sure none were touching.
They’re pretty cheap so buy a couple spares in case you mess the first one up. I just used the balance leads that came with the BMS which are around 22 AWG I think.
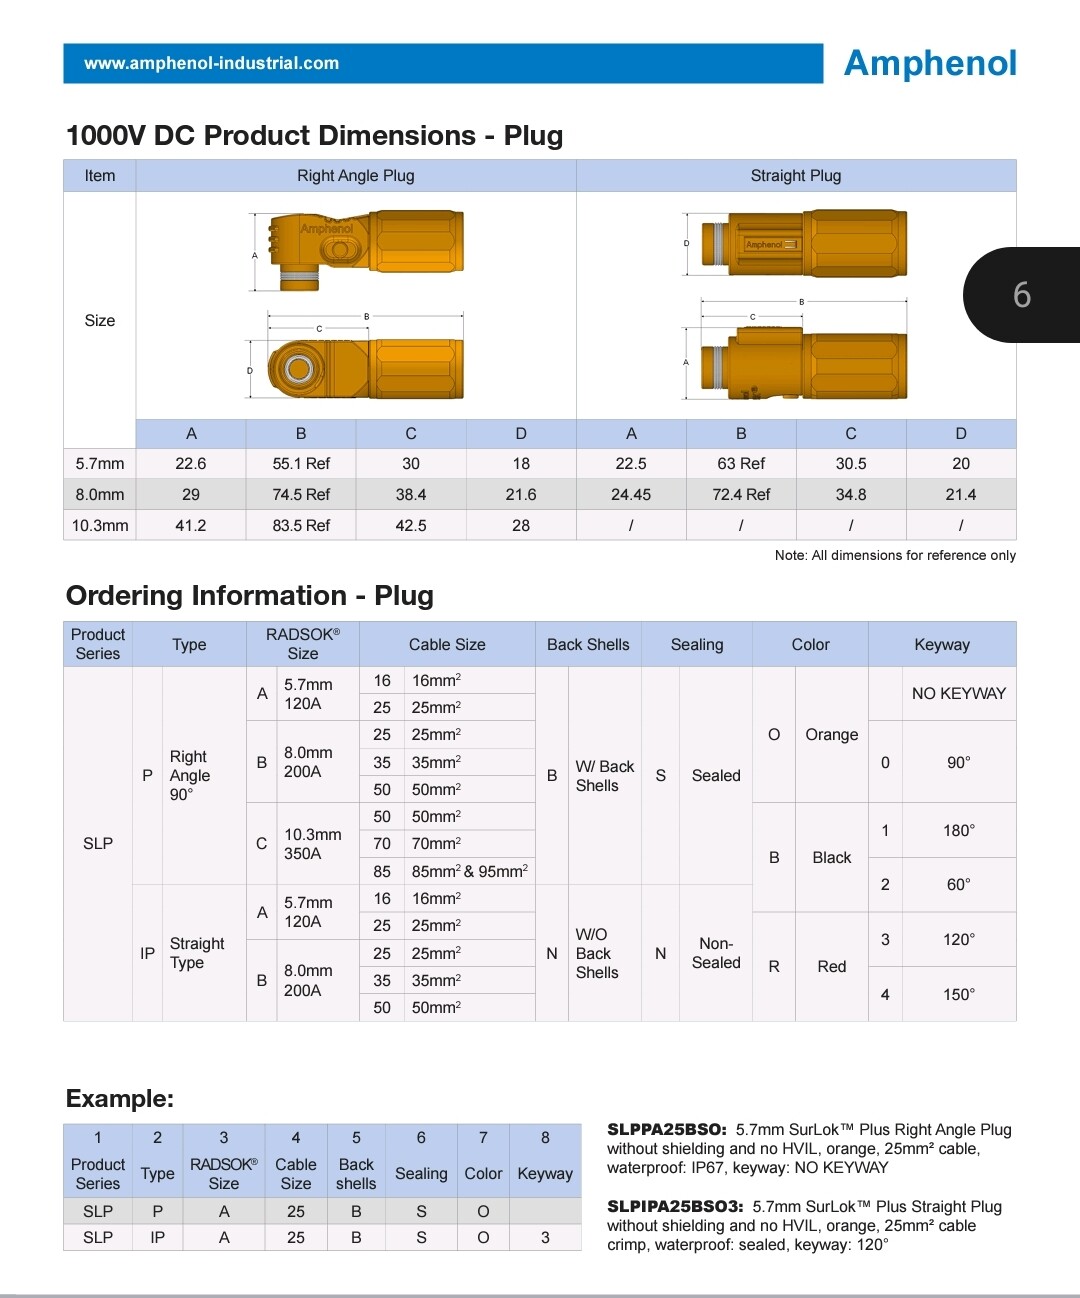
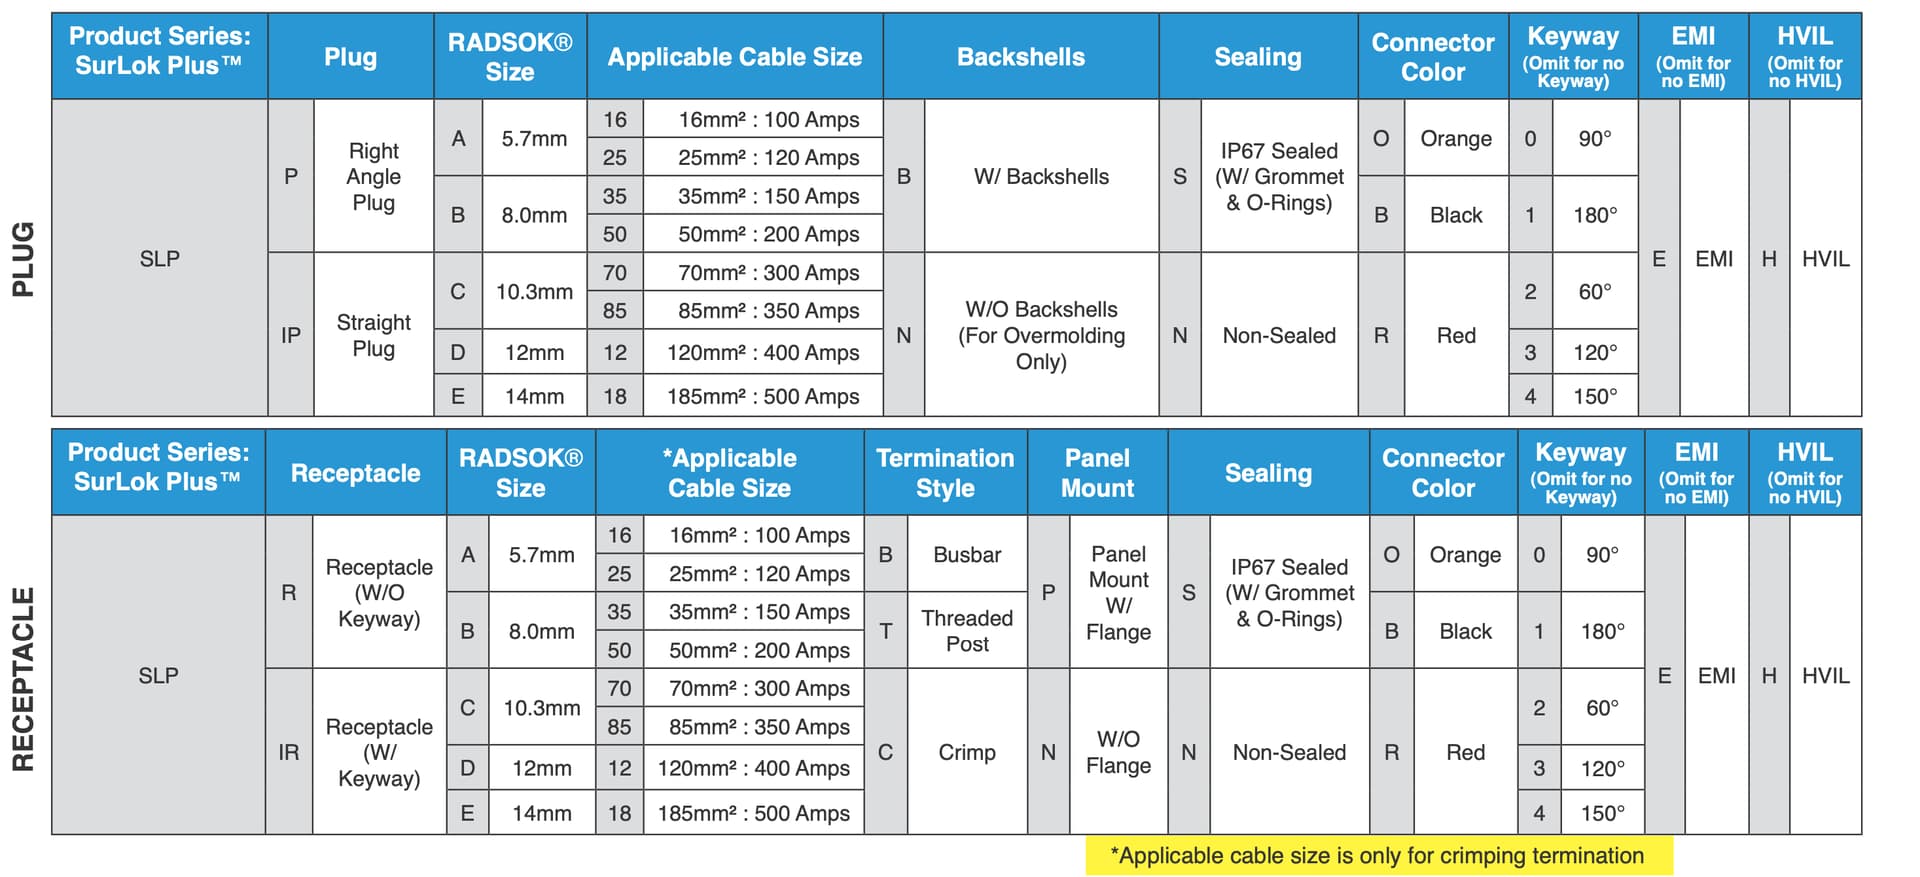
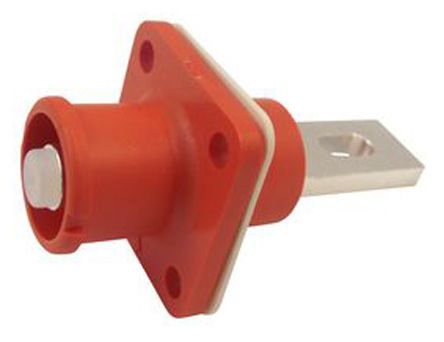
Yeah the Amphenol connectors aren’t cheap but they are good. You will also need a terminal crimper as well if you decide on them. I just used the cheapest ones, 5.7mm connectors. The 5.7mm are the same as what Fliteboard use and only come as a right angle connector. The 8mm ones are straight but more expensive, large and a bit overkill.
I’ve got good news, I’ve found the 5,7 amphenol ones also with straight connectors and have changed my setup:
This is the Mouser Code for the black one for example: SLPIPA16BSB
https://www.mouser.de/ProductDetail/Amphenol-Industrial/SLPIPA16BSB?qs=XeJtXLiO41RzXiFz6PjVLQ%3D%3D
I found them in the description pdf file:
Hello Wardy
first of all, bravo for your work, I have a quick question, is the seal well sealed with water, what space have you put between the hatch and the board to accommodate the seal, thank you
Thanks @philippe 
No water gets in at all. When I finish a ride and turn the latches to the open position and it remains compressed due to the vacuum it’s created and I have to tug on the latches to get it to open. This Alone I think demonstrates it’s waterproof, as if air were to get in then water would be able to also.
My hatch is around 14mm thick leaving a gap below of around 8-10mm. I purposely left a slightly larger gap as I thought it’s easier to reduce a gap. Apposed to increasing when complete as this just wouldn’t be possible without re doing all your hard work.
hey, before I pull the trigger @Wardy @tosh.jah … should I got for the 5.7 Amphenol or the 8mm? 8mm is 150A and 5.7mm are 100A rated
thanks!
5.7mm mate, you don’t need any bigger. They can handle more than 100A for short periods of time anyway. Typically you will be pulling around 30A-50A continuous when up and cruising (depending on your setup). Save your money and go for the 5.7mm mate
Plus the 8mm are huge, nearly 60mm long.
I disagree, really depend what you do with your efoil. If you want to ride above 40kmh or tow another foiler you will pull over 120A contious. Lift connectors are 8mm, on my setup the AS150 7mm are pretty warm after a run at good speed. If you just cruise then yes 5.7mm will do.
@Manufoil you’re right. Everything depends on setup and future use cases. For instance with 12S you’re more likely to draw more amps for same watts output. Cable diameter as well matters etc…
Mouser rated the 5,7mm for 120A, but I’m quite sure there’s a security tolerance included.
I haven’t noticed any extraordinary hot connectors after a run a higher speeds.
For my setup I’m happy with the 5,7mm…
From that chart it looks like the smallest size cable the 8mm will accommodate is 35mm2.
I use 6 AWG for battery cables which is roughly 16mm2. The motor cables come with 8AWG which I neatly wrapped copper wire round to increase the diameter where it’s to be crimped.
You will have to seriously beef up the end of your cables by wrapping copper wire around them or something in order to crimp them and them not be loose and a have a poor connection.
Food for thought.