You could add a foldable and removable 45-60 degree bevel to the bow.
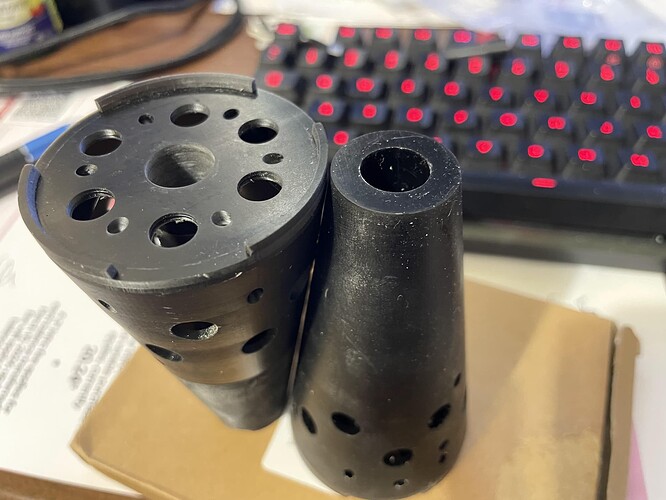
My solution to drilling out the bore of the flite prop to accept a 12mm shaft of the 65161. The 3d print keeps the drill and prop aligned. All you need is a 12mm drill bit, a battery drill and the print. Iv tested it in the water and it seems perfectly balanced. Mark the drill at 110mm and proceed slowly with the drill.
https://www.printables.com/model/583026-flite-prop-drill-guide
Why is it so difficult? I just drilled a 5mm hole in the shaft, 2 minutes of work and it fit perfectly!
Shaft is 11mm diameter from aluminium, that’s why I prefer a smaler hole than 5mm. No problem with a steel shaft. It might be a bit overengineered but it last for three seasons so far.
My pin sits in the shaft, I can‘t loose it.
The Flipsky 65161 motor has a steel shaft. Do you have a different motor?
Yes, 63100 with flanged shaft, as the original shaft of this outrunner was on the wrong side for our application. Cut the original shaft and made one from aluminium, see here: Daniels (un)geared inflatable (slowly built) - #55 by sat_be
Shaft of the outrunners can be pushed to either side you want it, you can mark and make a new circlip recess with a dremel grinding disc quite ok, i’ve done this on a few motors.
Yes but this still leaves you with a 10mm shaft, ok if you print your own props, bad for commercial efoil props with a 12mm hole.
You’re right. I thought about trying a shaft sleeve of 12x1mm for my motor, even found some on ebay but didn’t order. I 3D-printed an endcap with 4 screw holes and a recess for a standard M12 bolt instead. 5min solution that still works ![]()
Thank you so much! I just used your 3D model, and it works perfect.
I made it hollow to save polymer. First one was too small, and I printed another one a little bigger.
Old thread I know but it took all of maybe 1min to center the shaft of a 65161 and enlarge the hole to 5mm for the pin. Same with the prop, sit it flush on the press then drill with a 12mm bit making sure not to drill all the way through.
On a side note anyone have a prop guard for the flite prop and 65161?
Would you mind sharing the file as STEP? The hole is 100% perfect for a 12mm drill when printed on my Bambu Lab x1 carbon, but the claws holding the propeller are a bit to tight to accept the propeller.
I could draw the part in Inventor but since every thing fits so nicely except for the claws I wouldnt wanna change anything else ![]()
Updated the printables page!
Thank you very much! ![]()
Hey everyone,
I used 3d Scan of the Fliteboard Prop and adapted it for use with a standard threaded shaft for the Flipsky 65161 motor.
Hope it helps ![]()
Curious about why you made the pin retention slots in both directions?
Because it’s just a notch easier to assemble, as it snuggs in faster.
Curious if you have experience with both the printed and the actual. I am about to buy the actual one but wouldn’t mind printing if I can. Don’t even have my board yet but if you were able to get good results with the printed one I might hold off on ordering and give printed one a shot.
Hi, Did you ever mange to find a prop guard for the flite prop and 65161 motor? Thanks
I did. Wouldn’t recommend it though. I never could get it to “foil”. It was cavitating pretty bad.

