whos the Finnish guy? lol have you got a link please?
I also riding since August an Inflatable efoils.
I think to build a box, make them waterproof, fitting perfectly inside the hole of the inflatable is a complicate way.
But it works!
I print my box in two parts with an Anycubic Chiron.
I glued both ends together and laminate theme with CFK. I Mount on the bottom a aluminum plate and make the plate with one layer Glas and epoxy waterproof.
As top plate I used a Siebdruckplatte.
You can see all in my Build thread.
2 Likes
2 Likes
How much did you inflatable boards cost you? Without shipping and taxes?
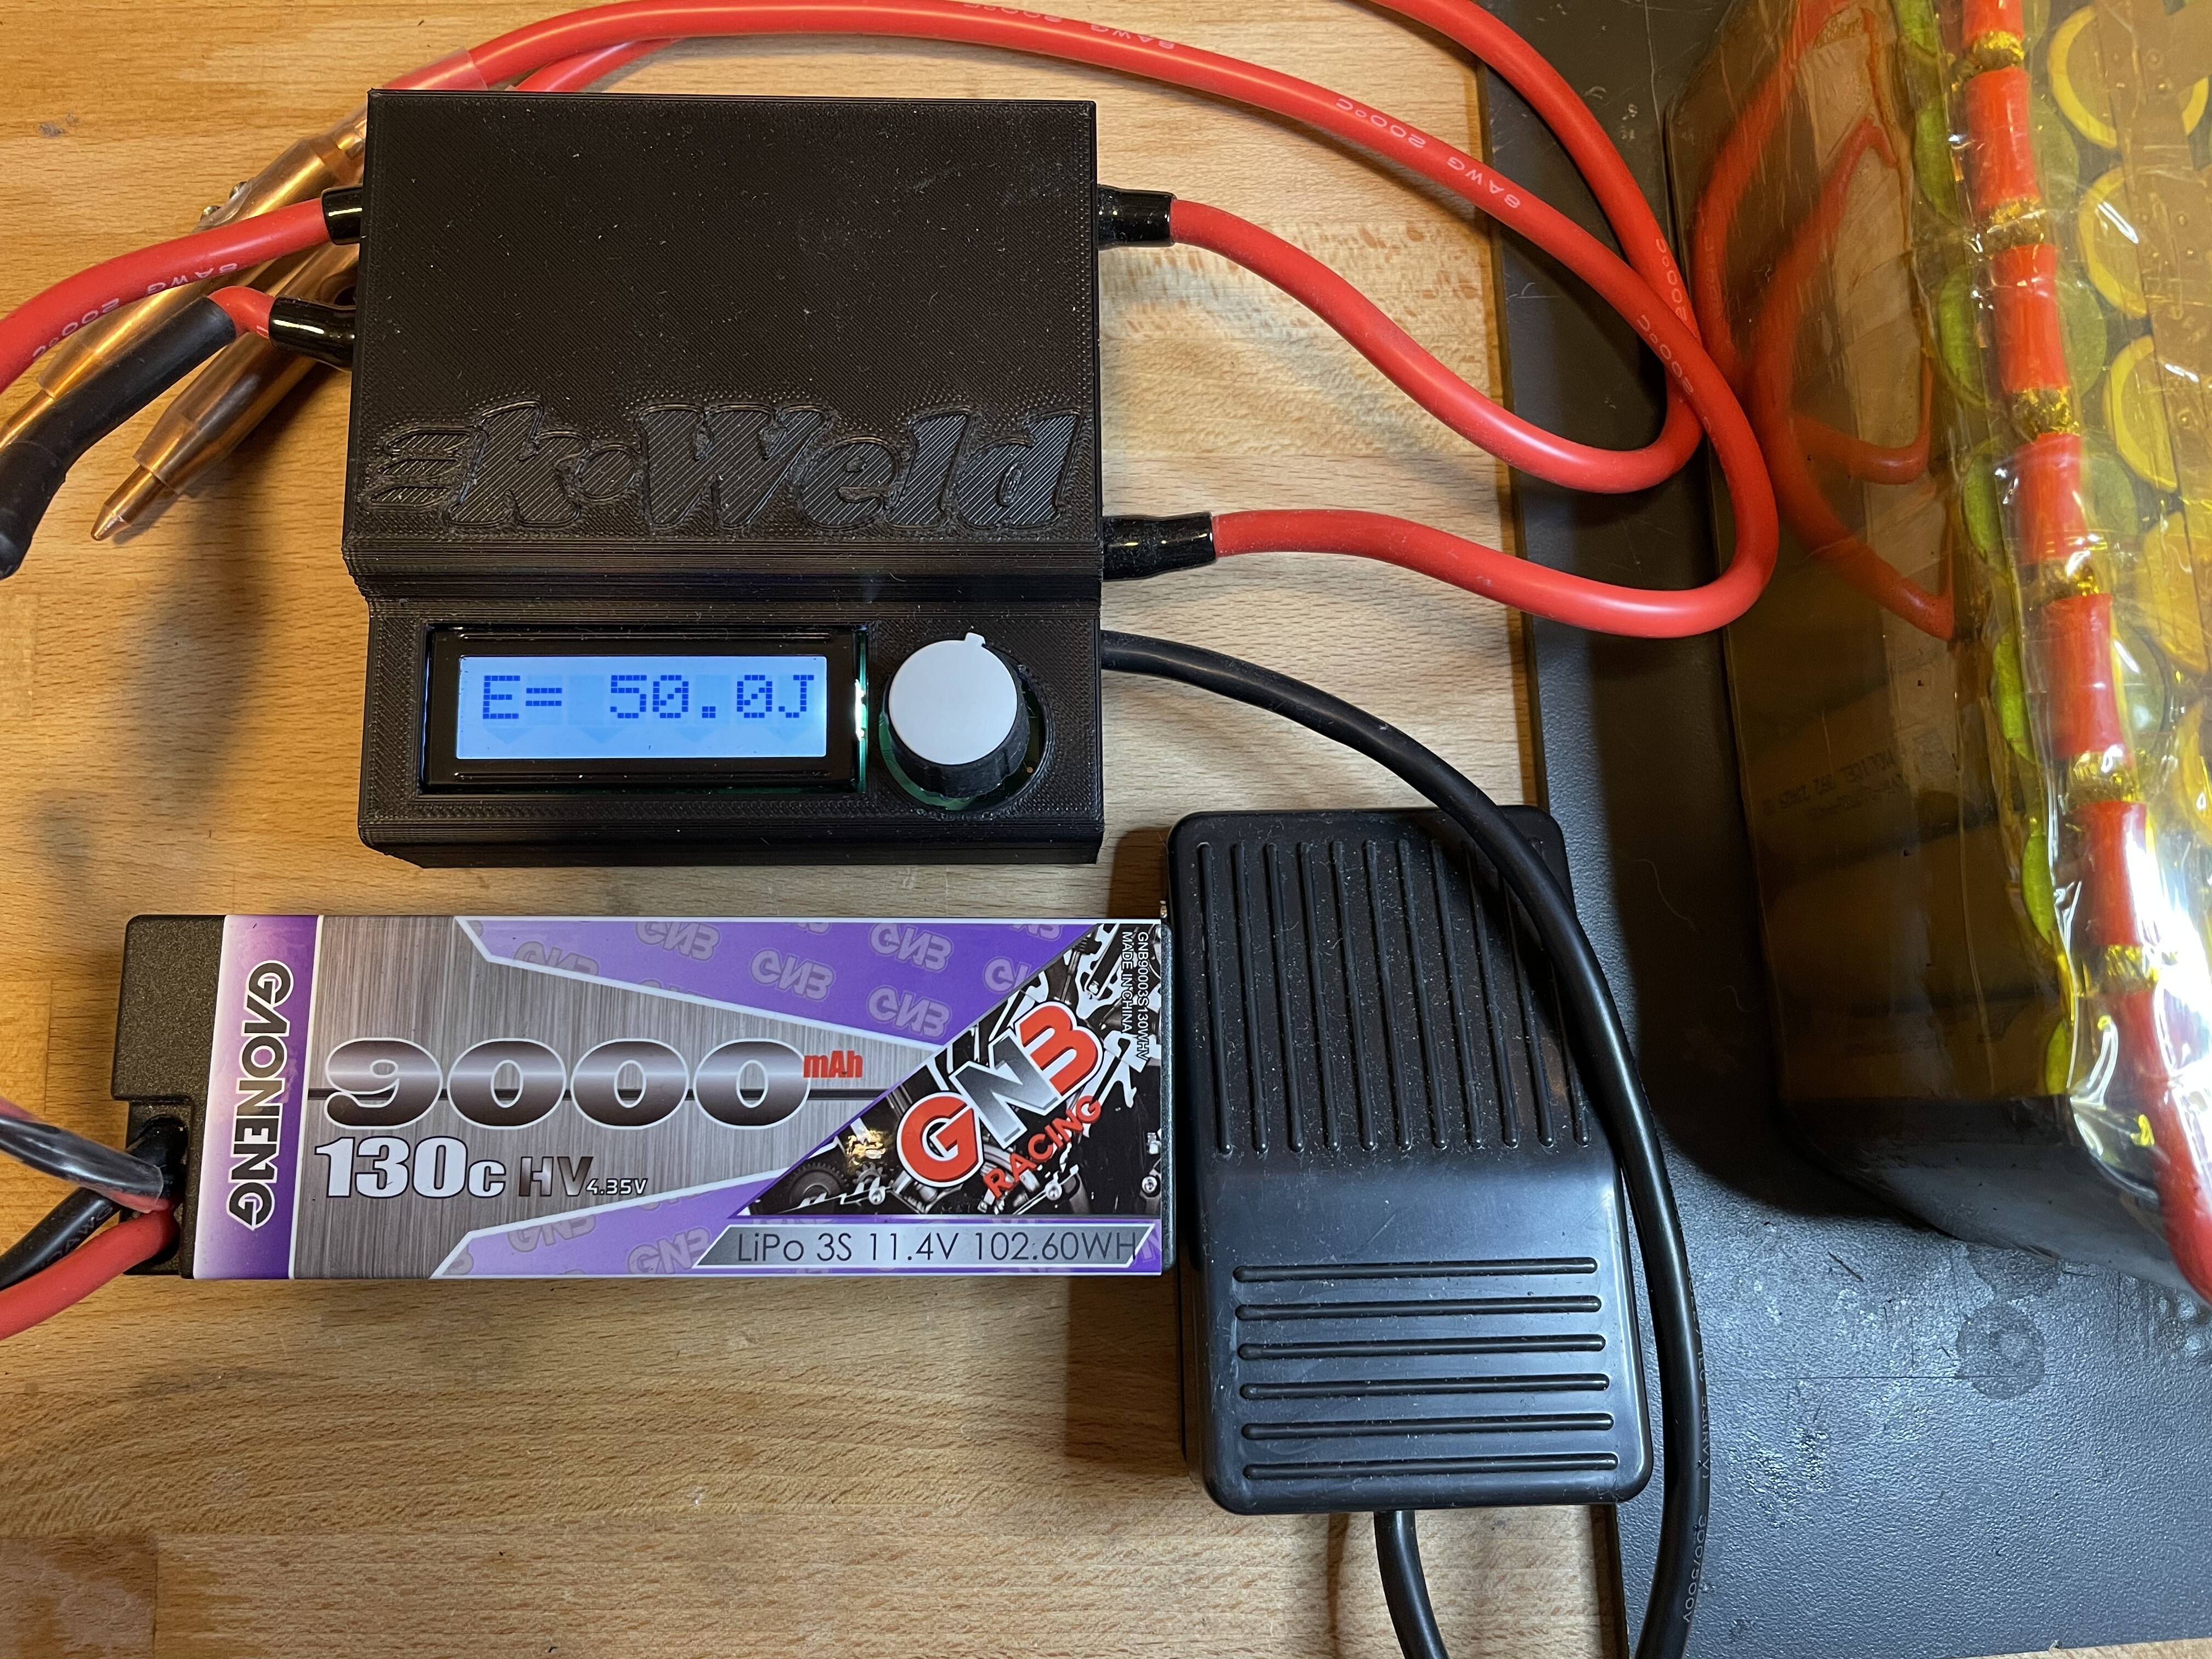
Update: Ungeared my setup!
After some trouble with a cold fused alu prop to the stainless steel shaft, I had to destroy parts of the geared motor pod. It worked well but was a bit long and heavy. I also did not want to bother about water ingress into the pod any longer, therefore I went for a 63100 run wet.
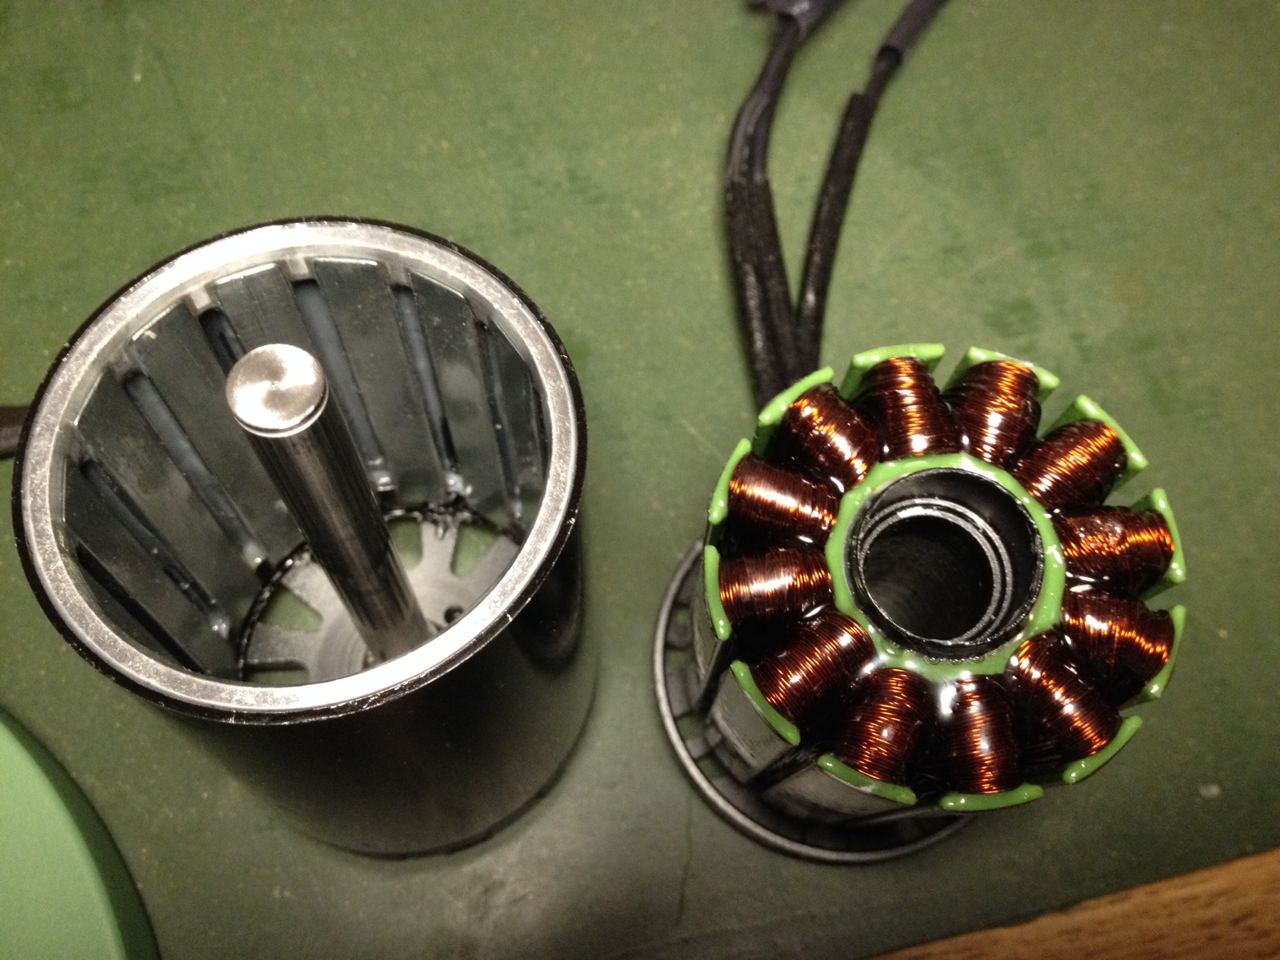
coated stator and rotor with epoxy

Also replaced the ESC, the Flier went up in smoke due to water ingress. The new one is a HGL-TECH 75200 and works well so far.
Changed the entry point of the phase wires, they enter from the top with cable glands, now the box is waterproof.
For the prop I first used a printed pla+ 2 blade prop from @V_S, it worked well. Now I use a Flite prop which is more robust.


thanks @Toto44 for the prop adapter
11 Likes
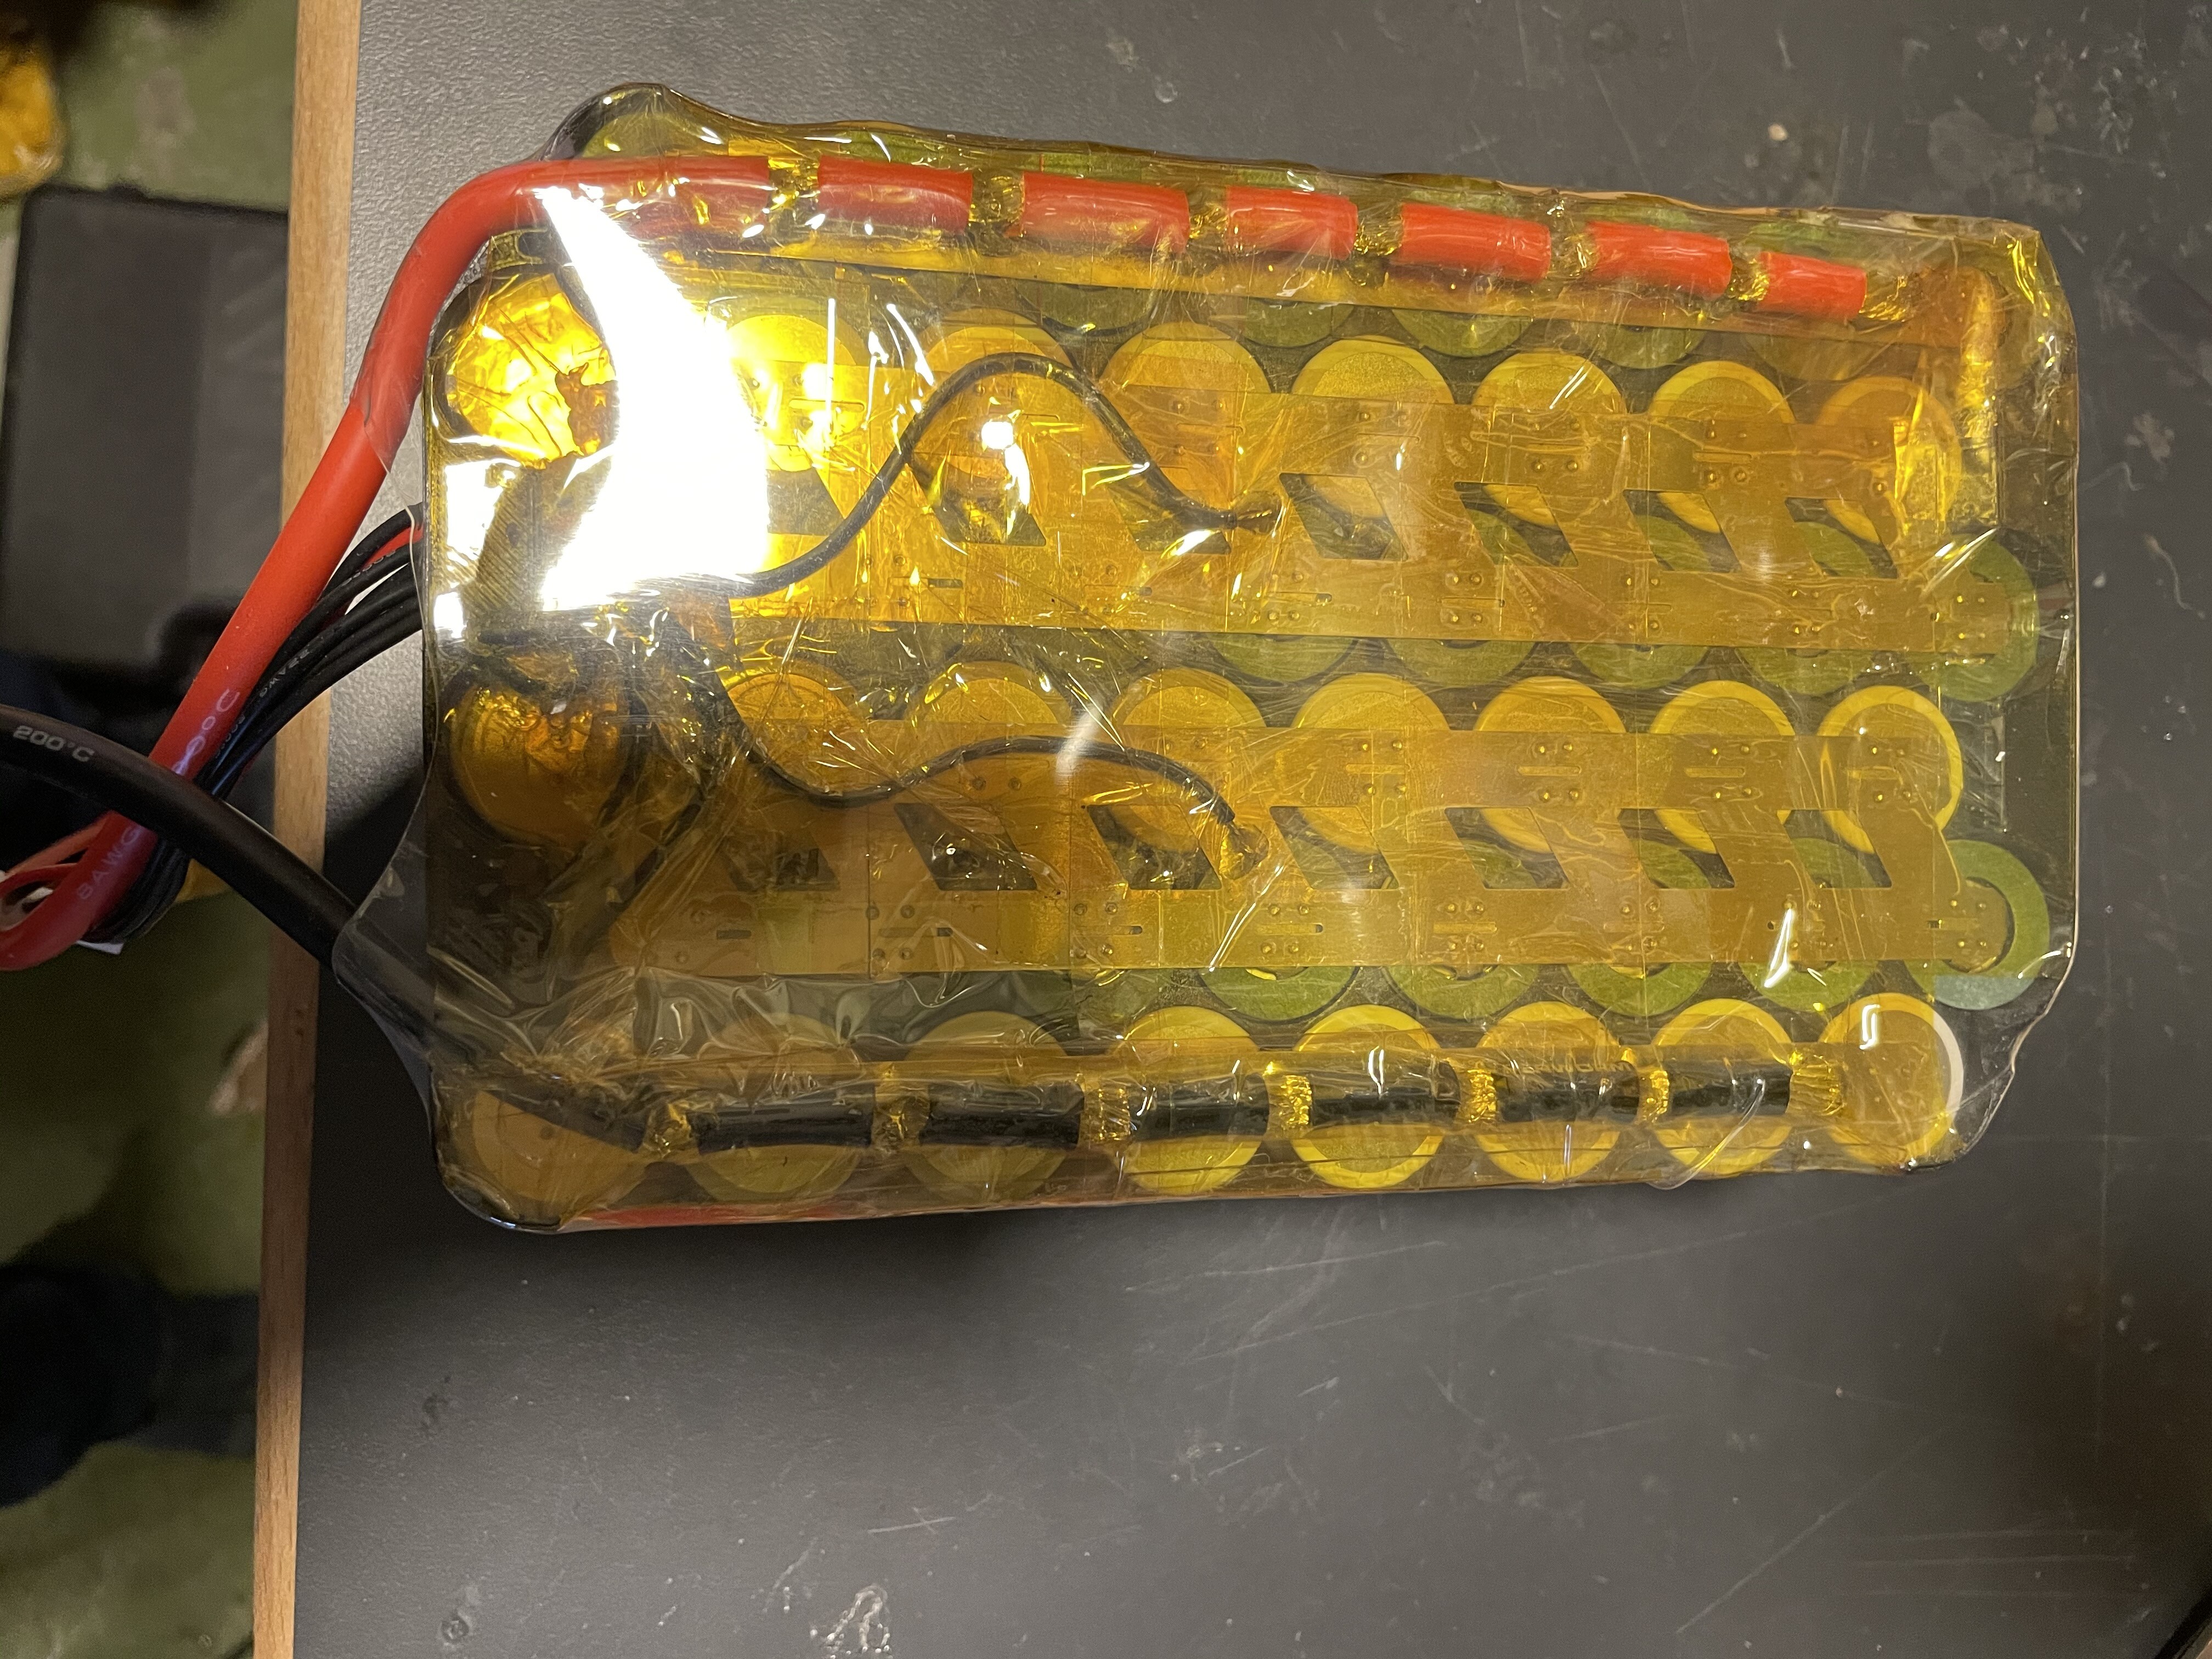
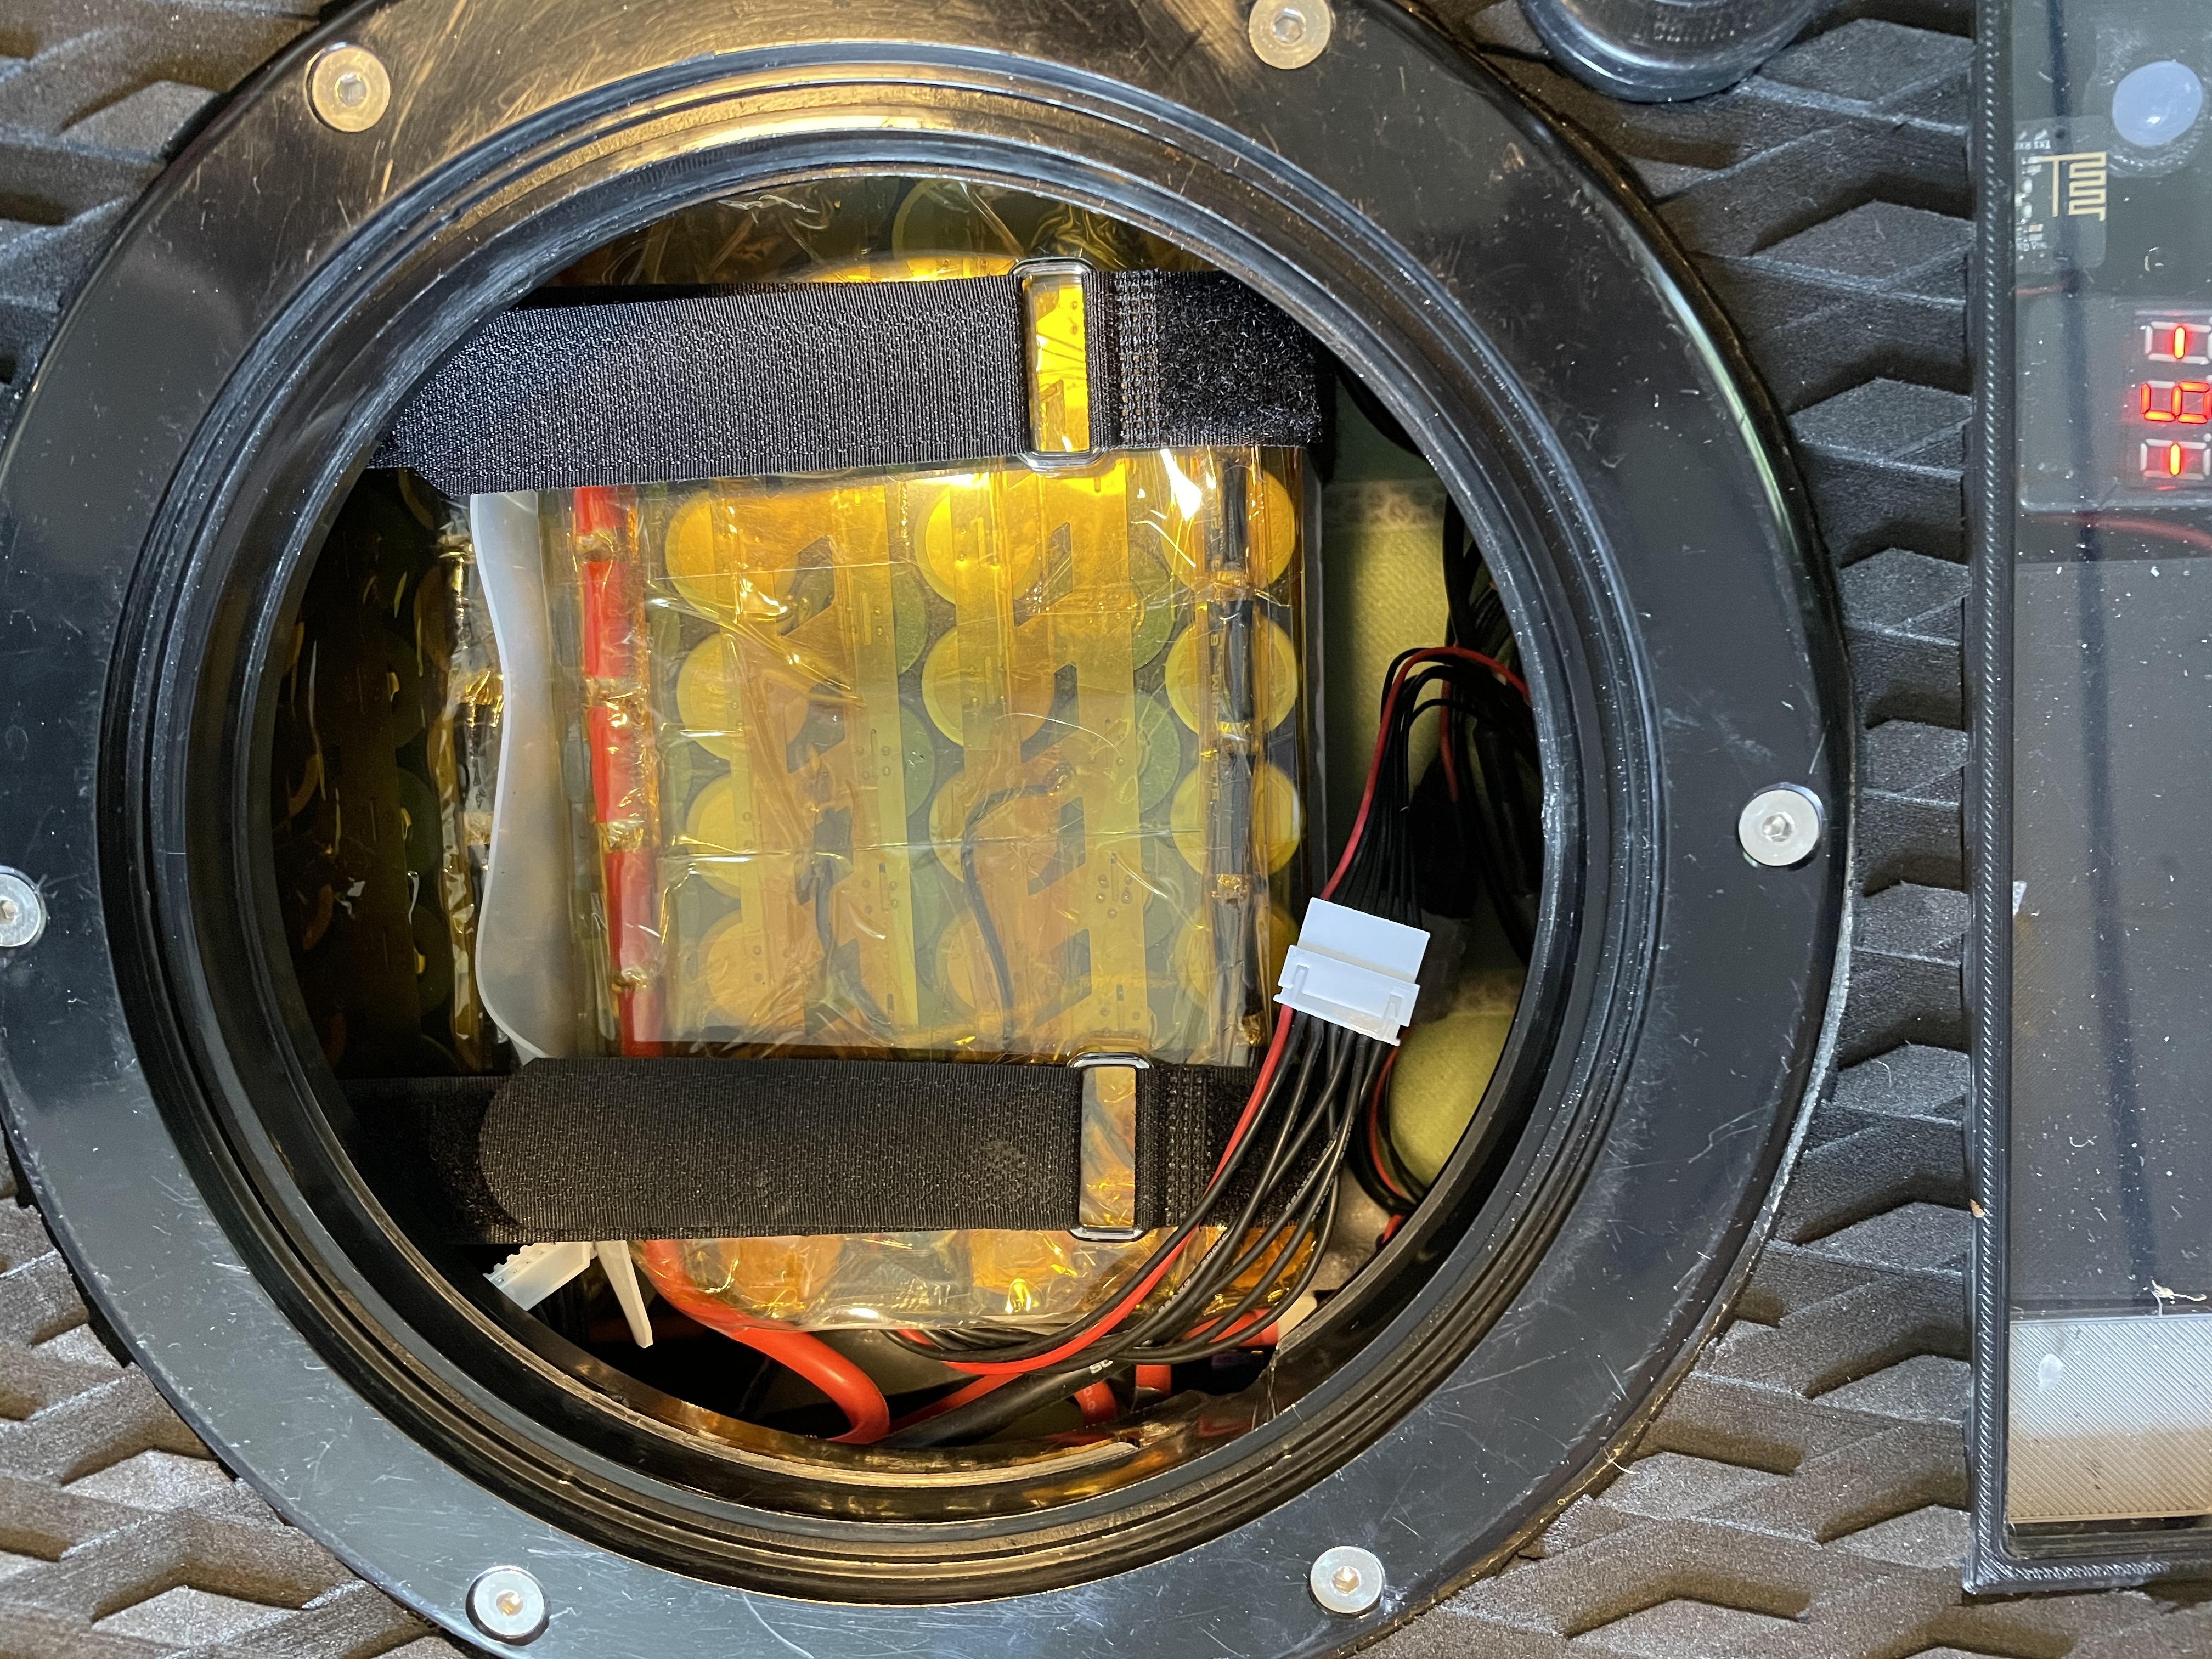
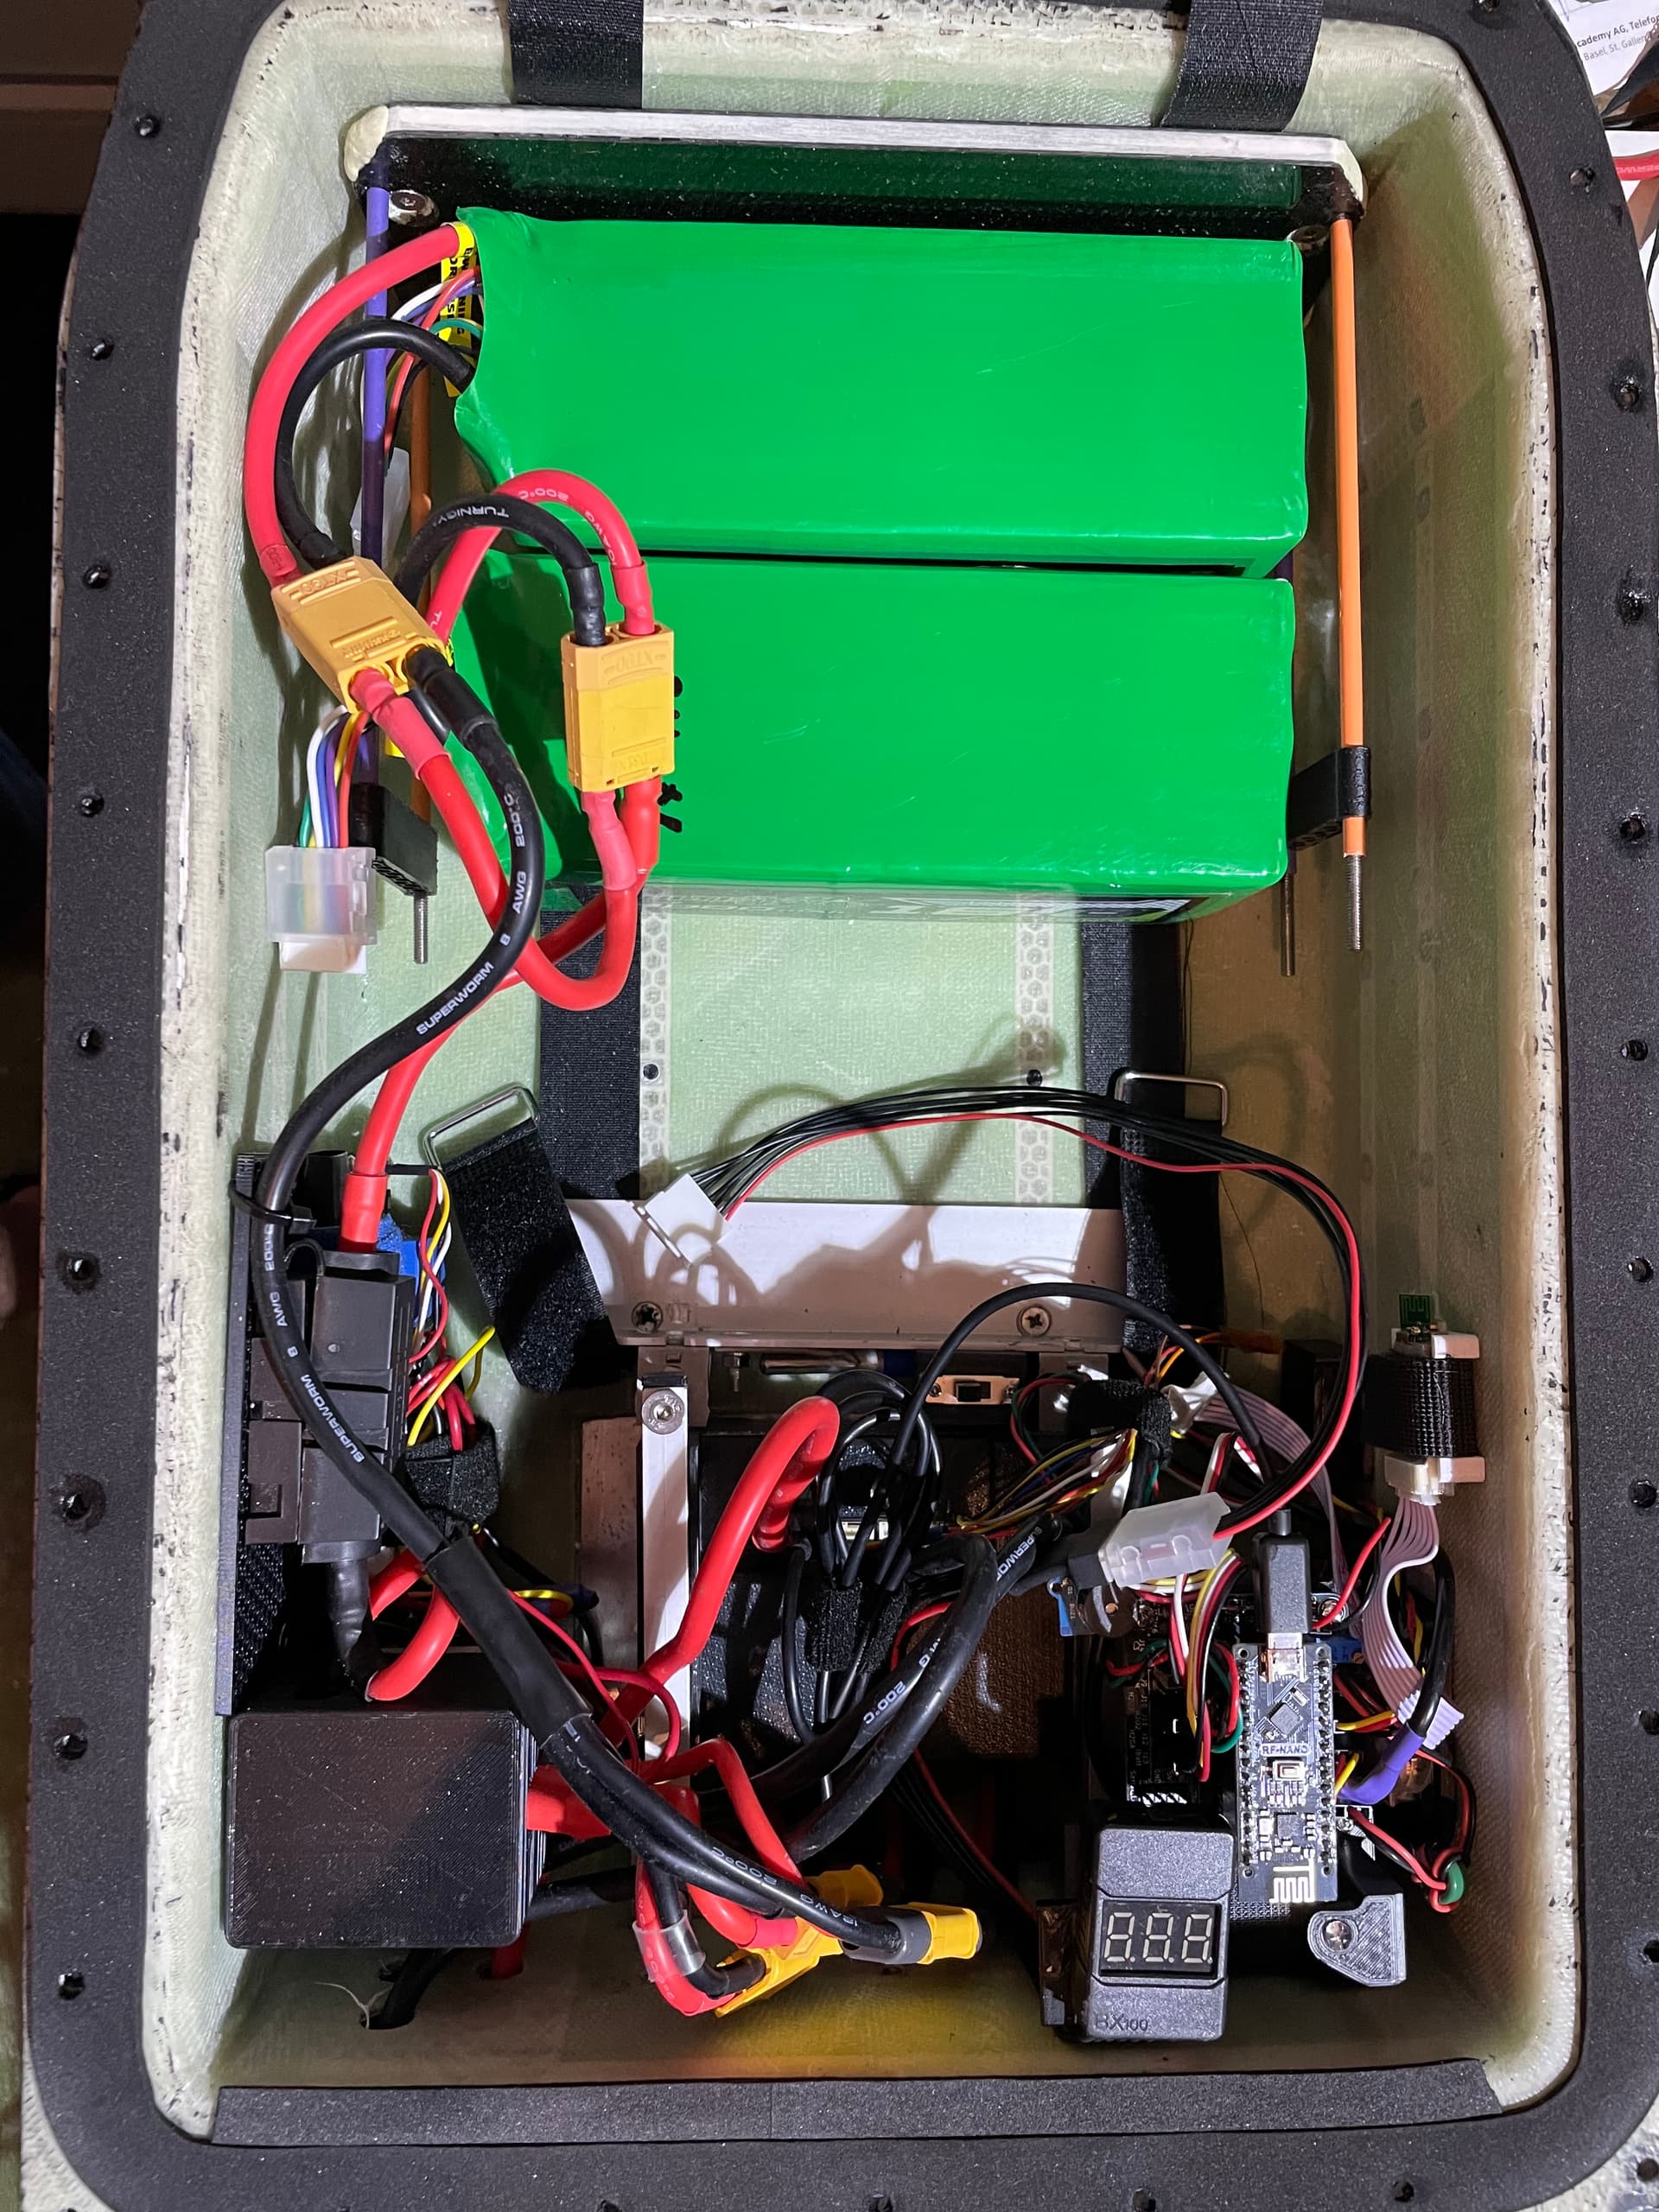
Also built LiIon packs as the Lipos started to loose capacity. As it is hard to get cells at the moment, I chose Molicel P42A 21700, they were available. The battery is split into two 6S packs to fit the hatch. Max I could fit in was 6S8P.


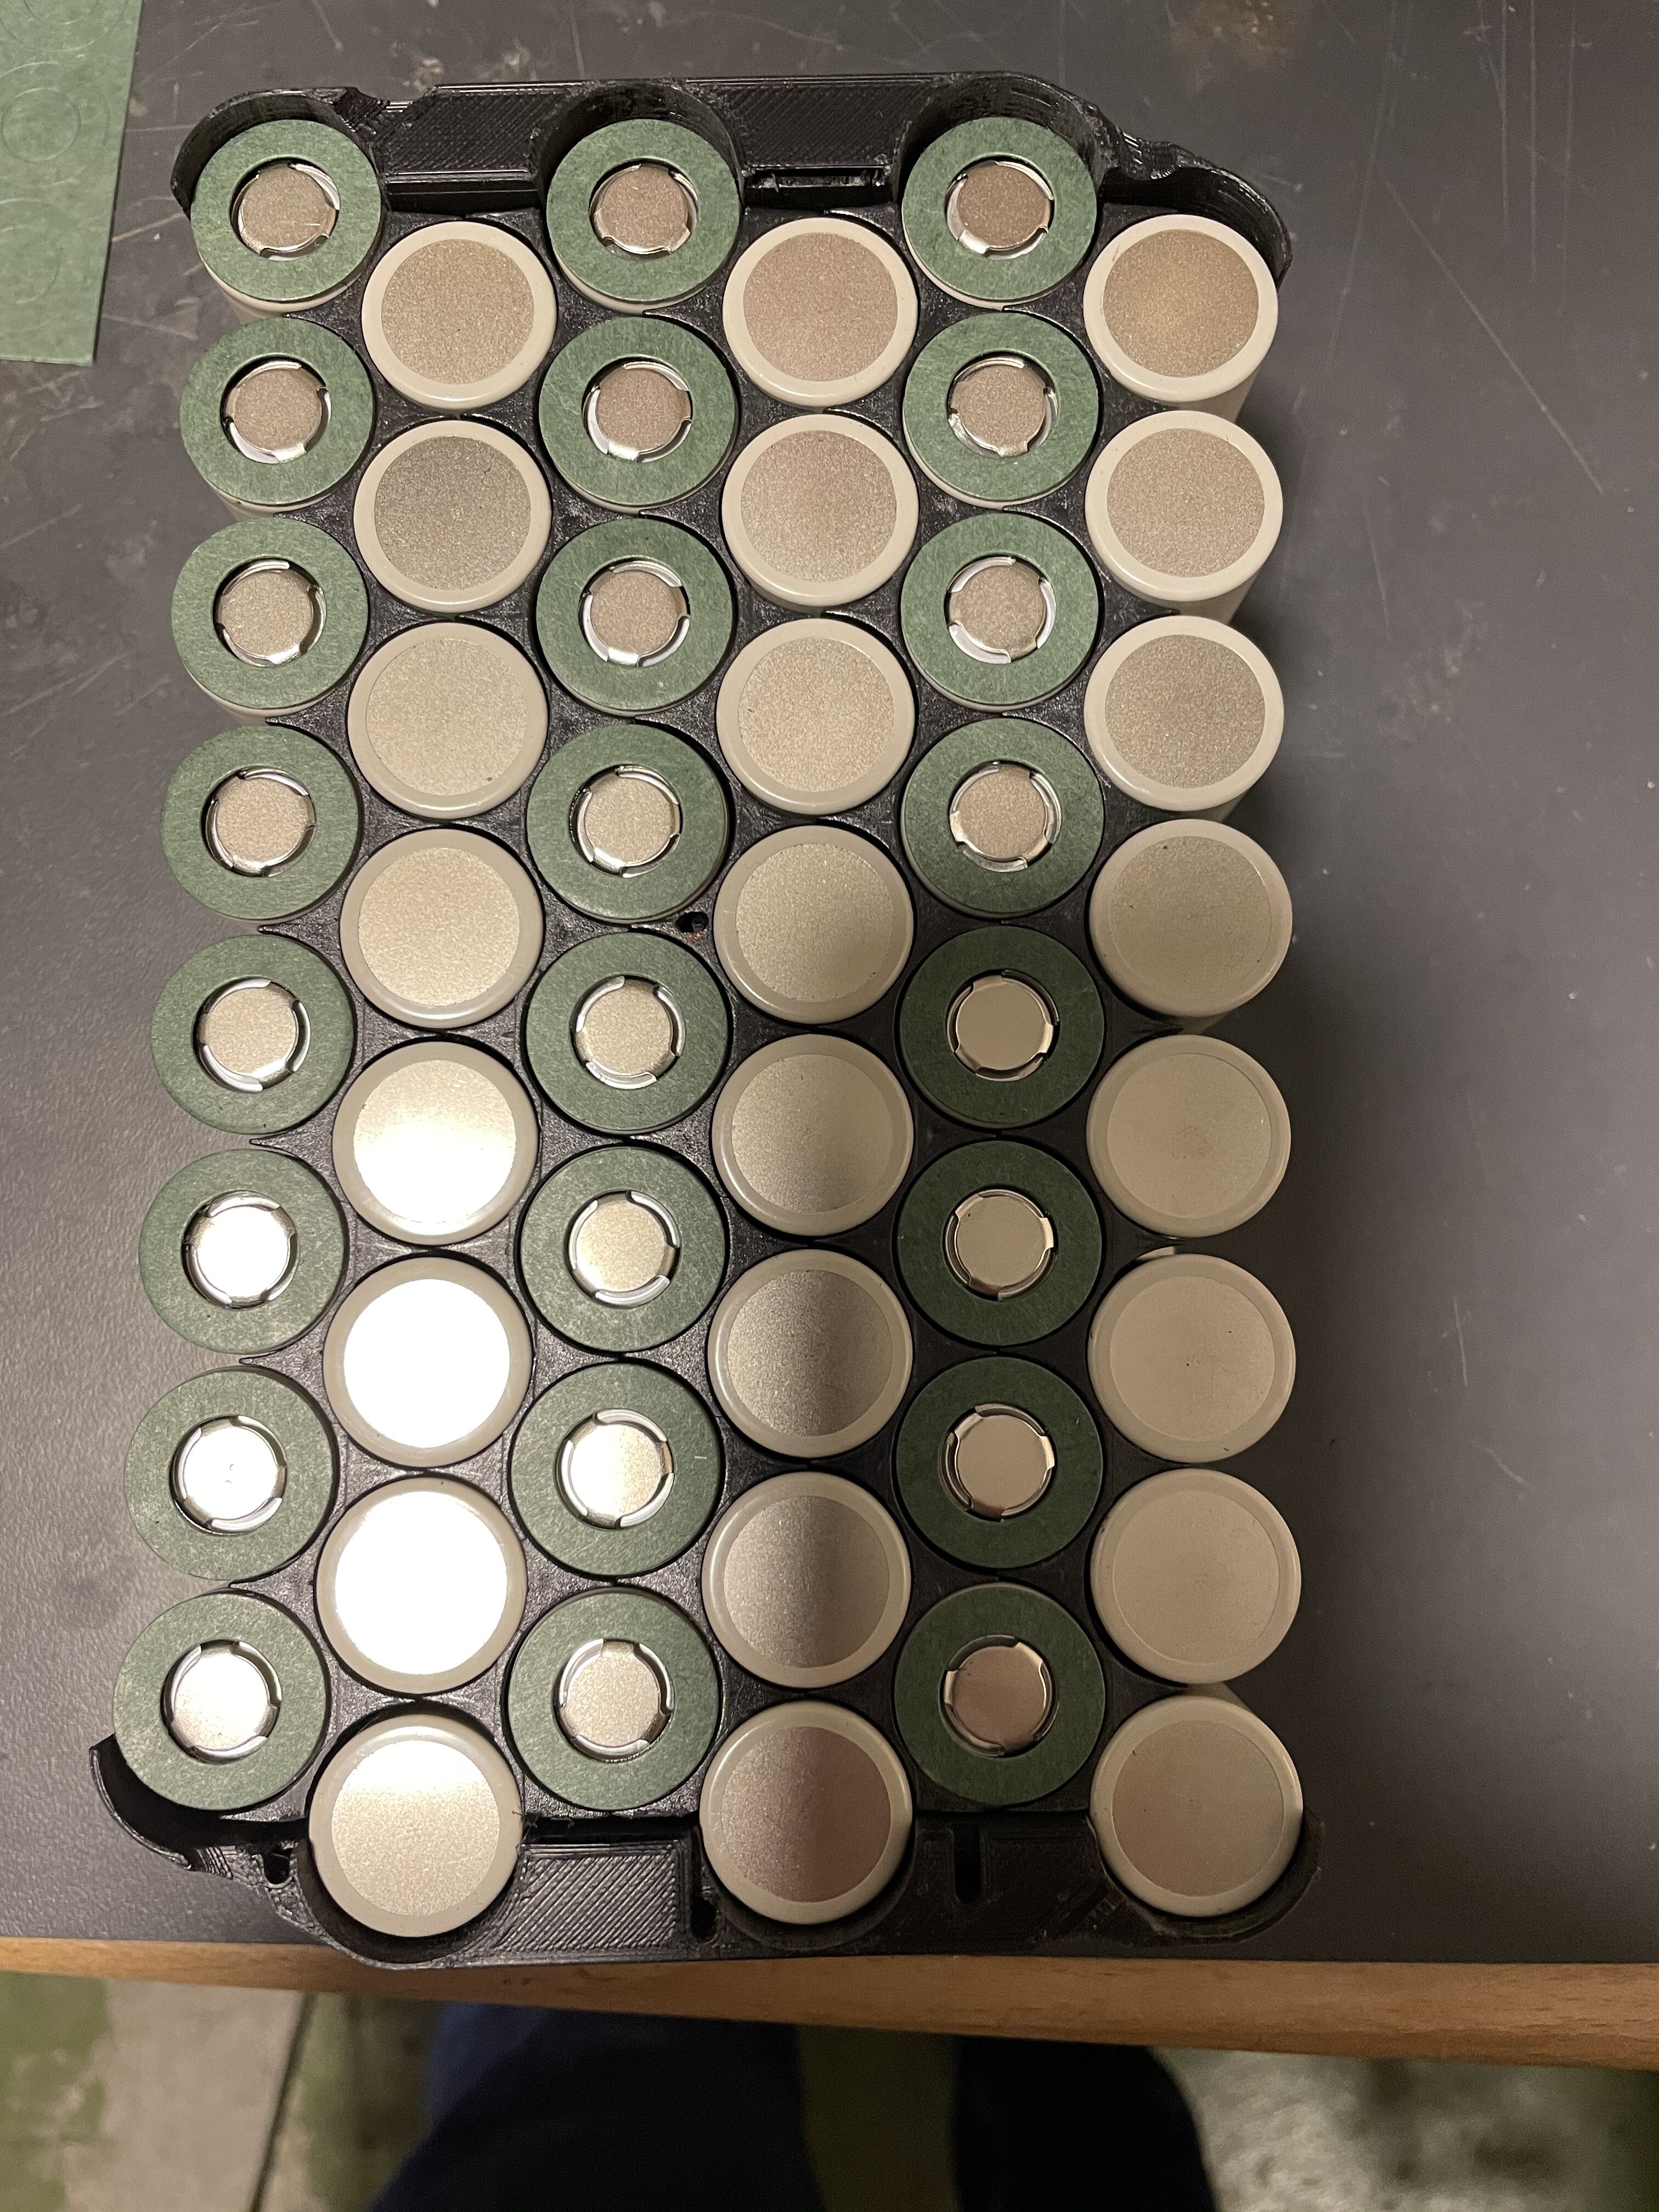
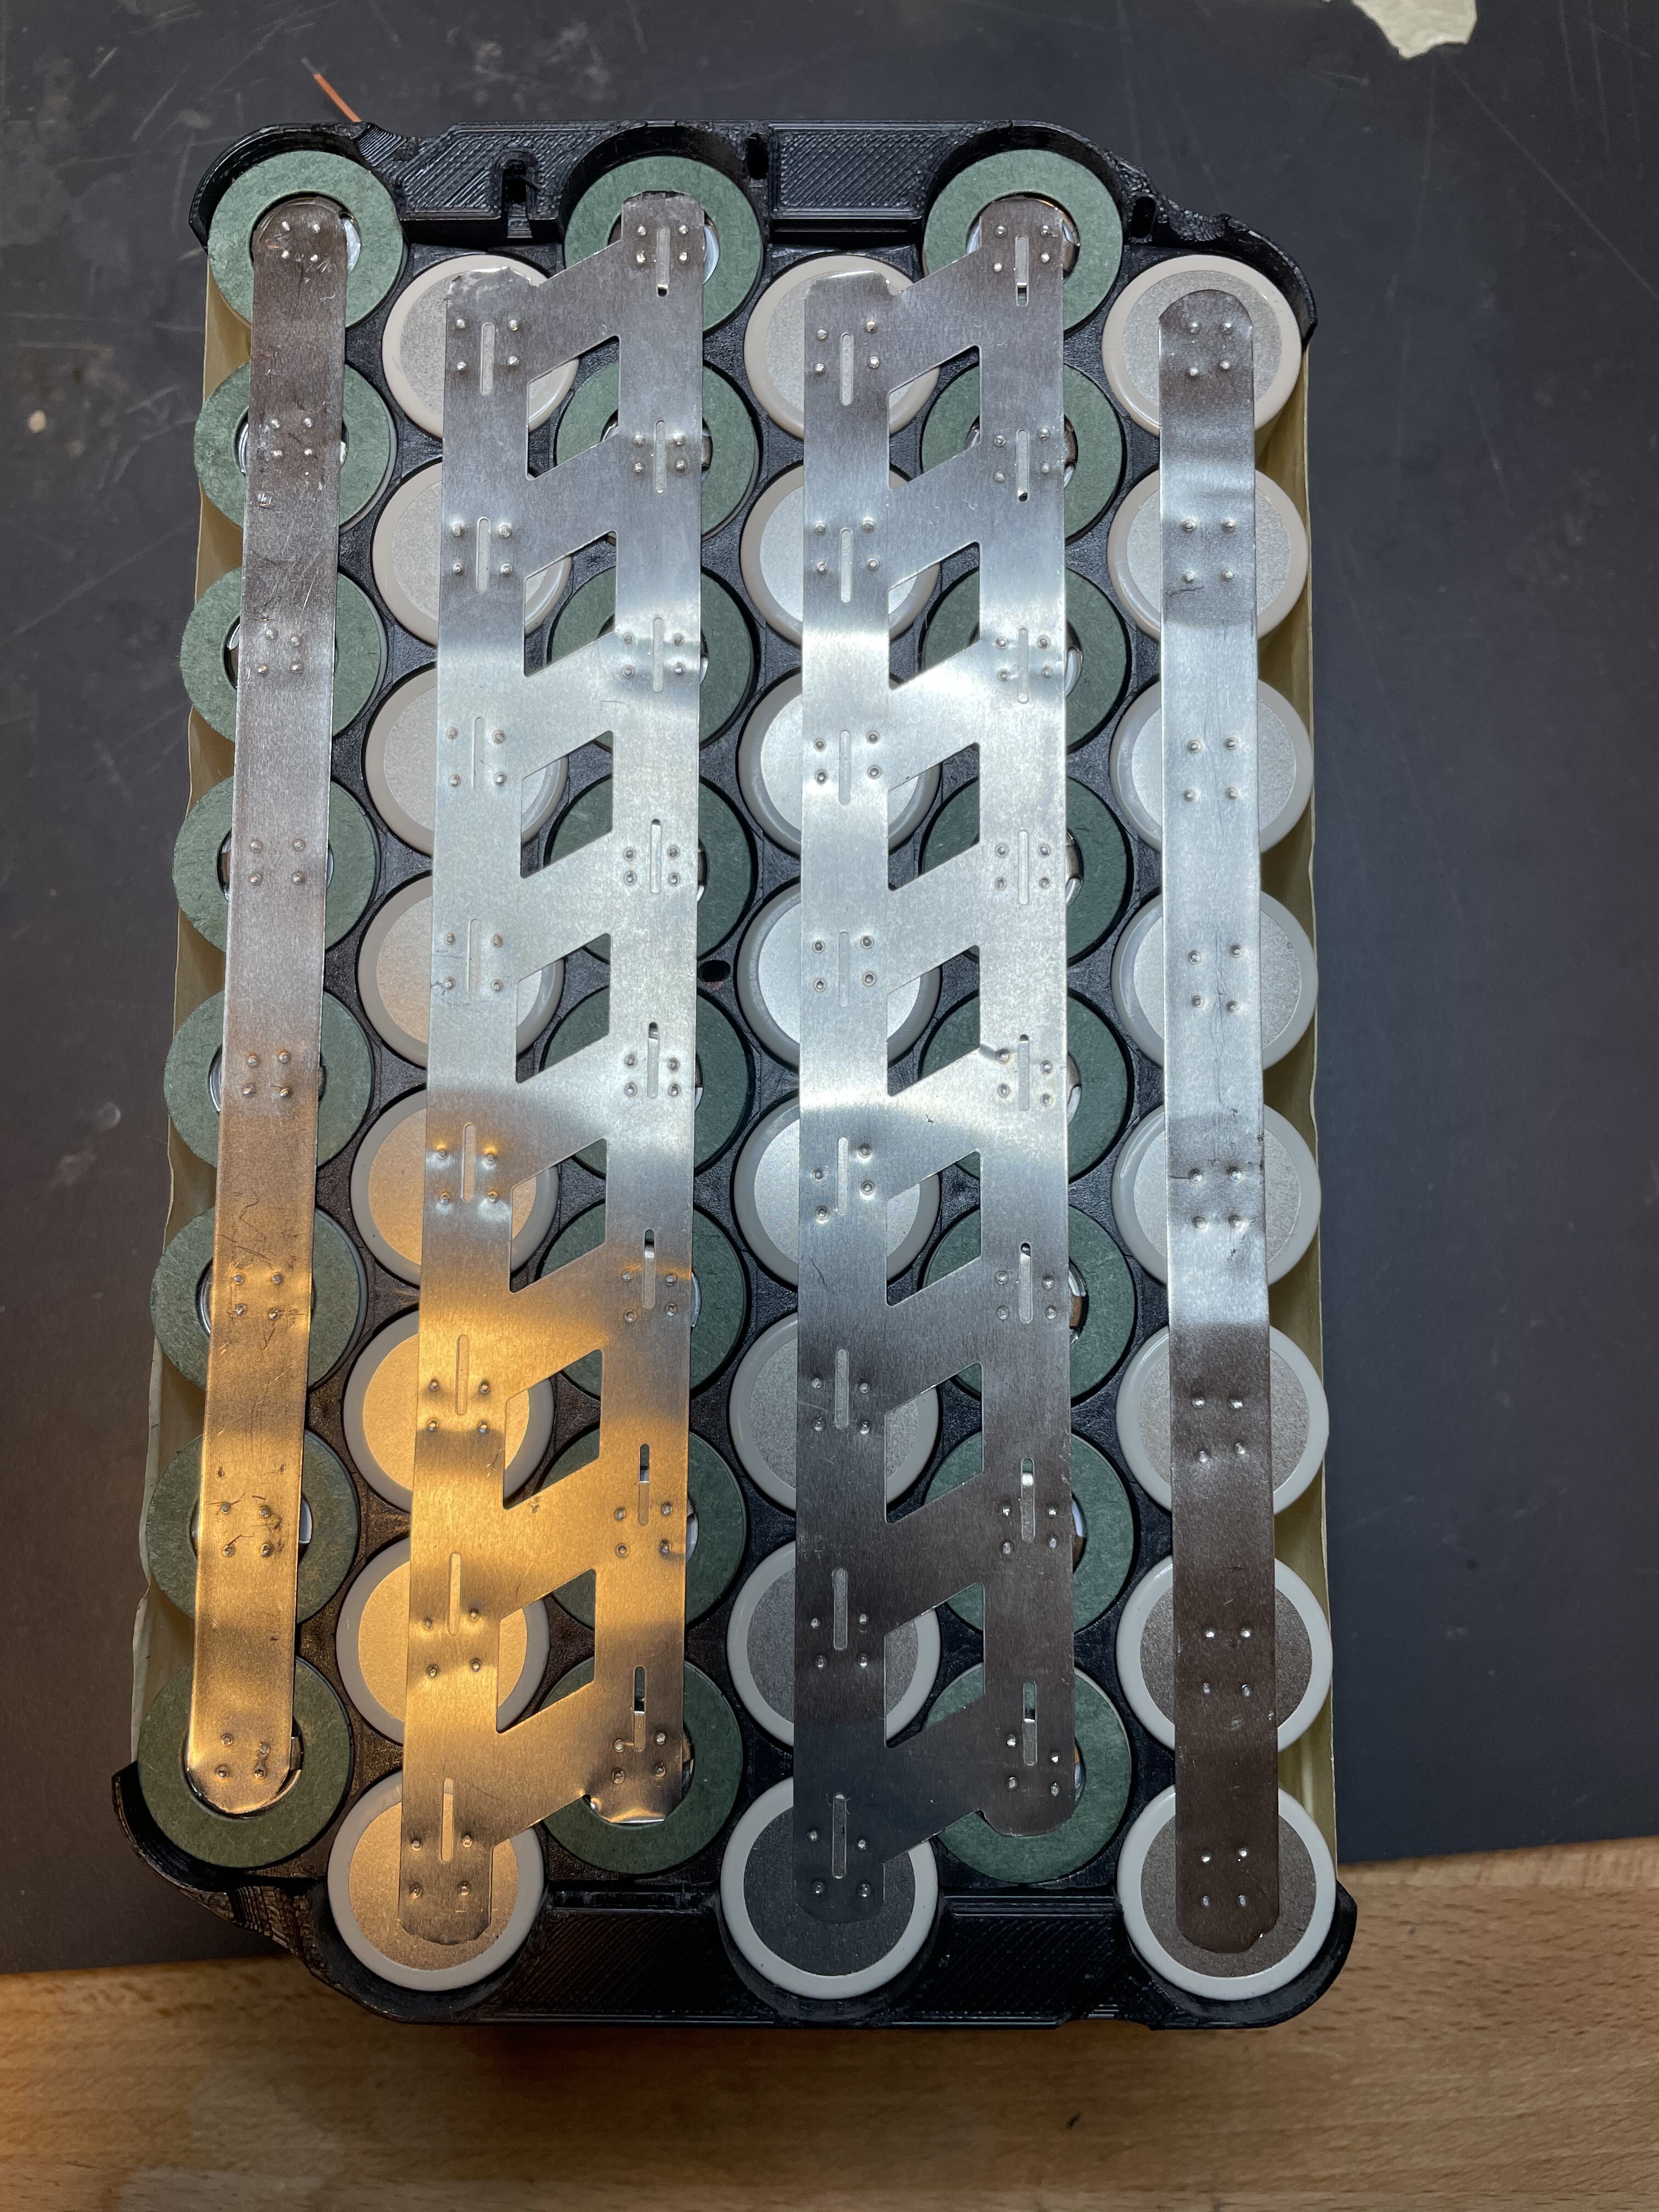
0.2mm nickel strips
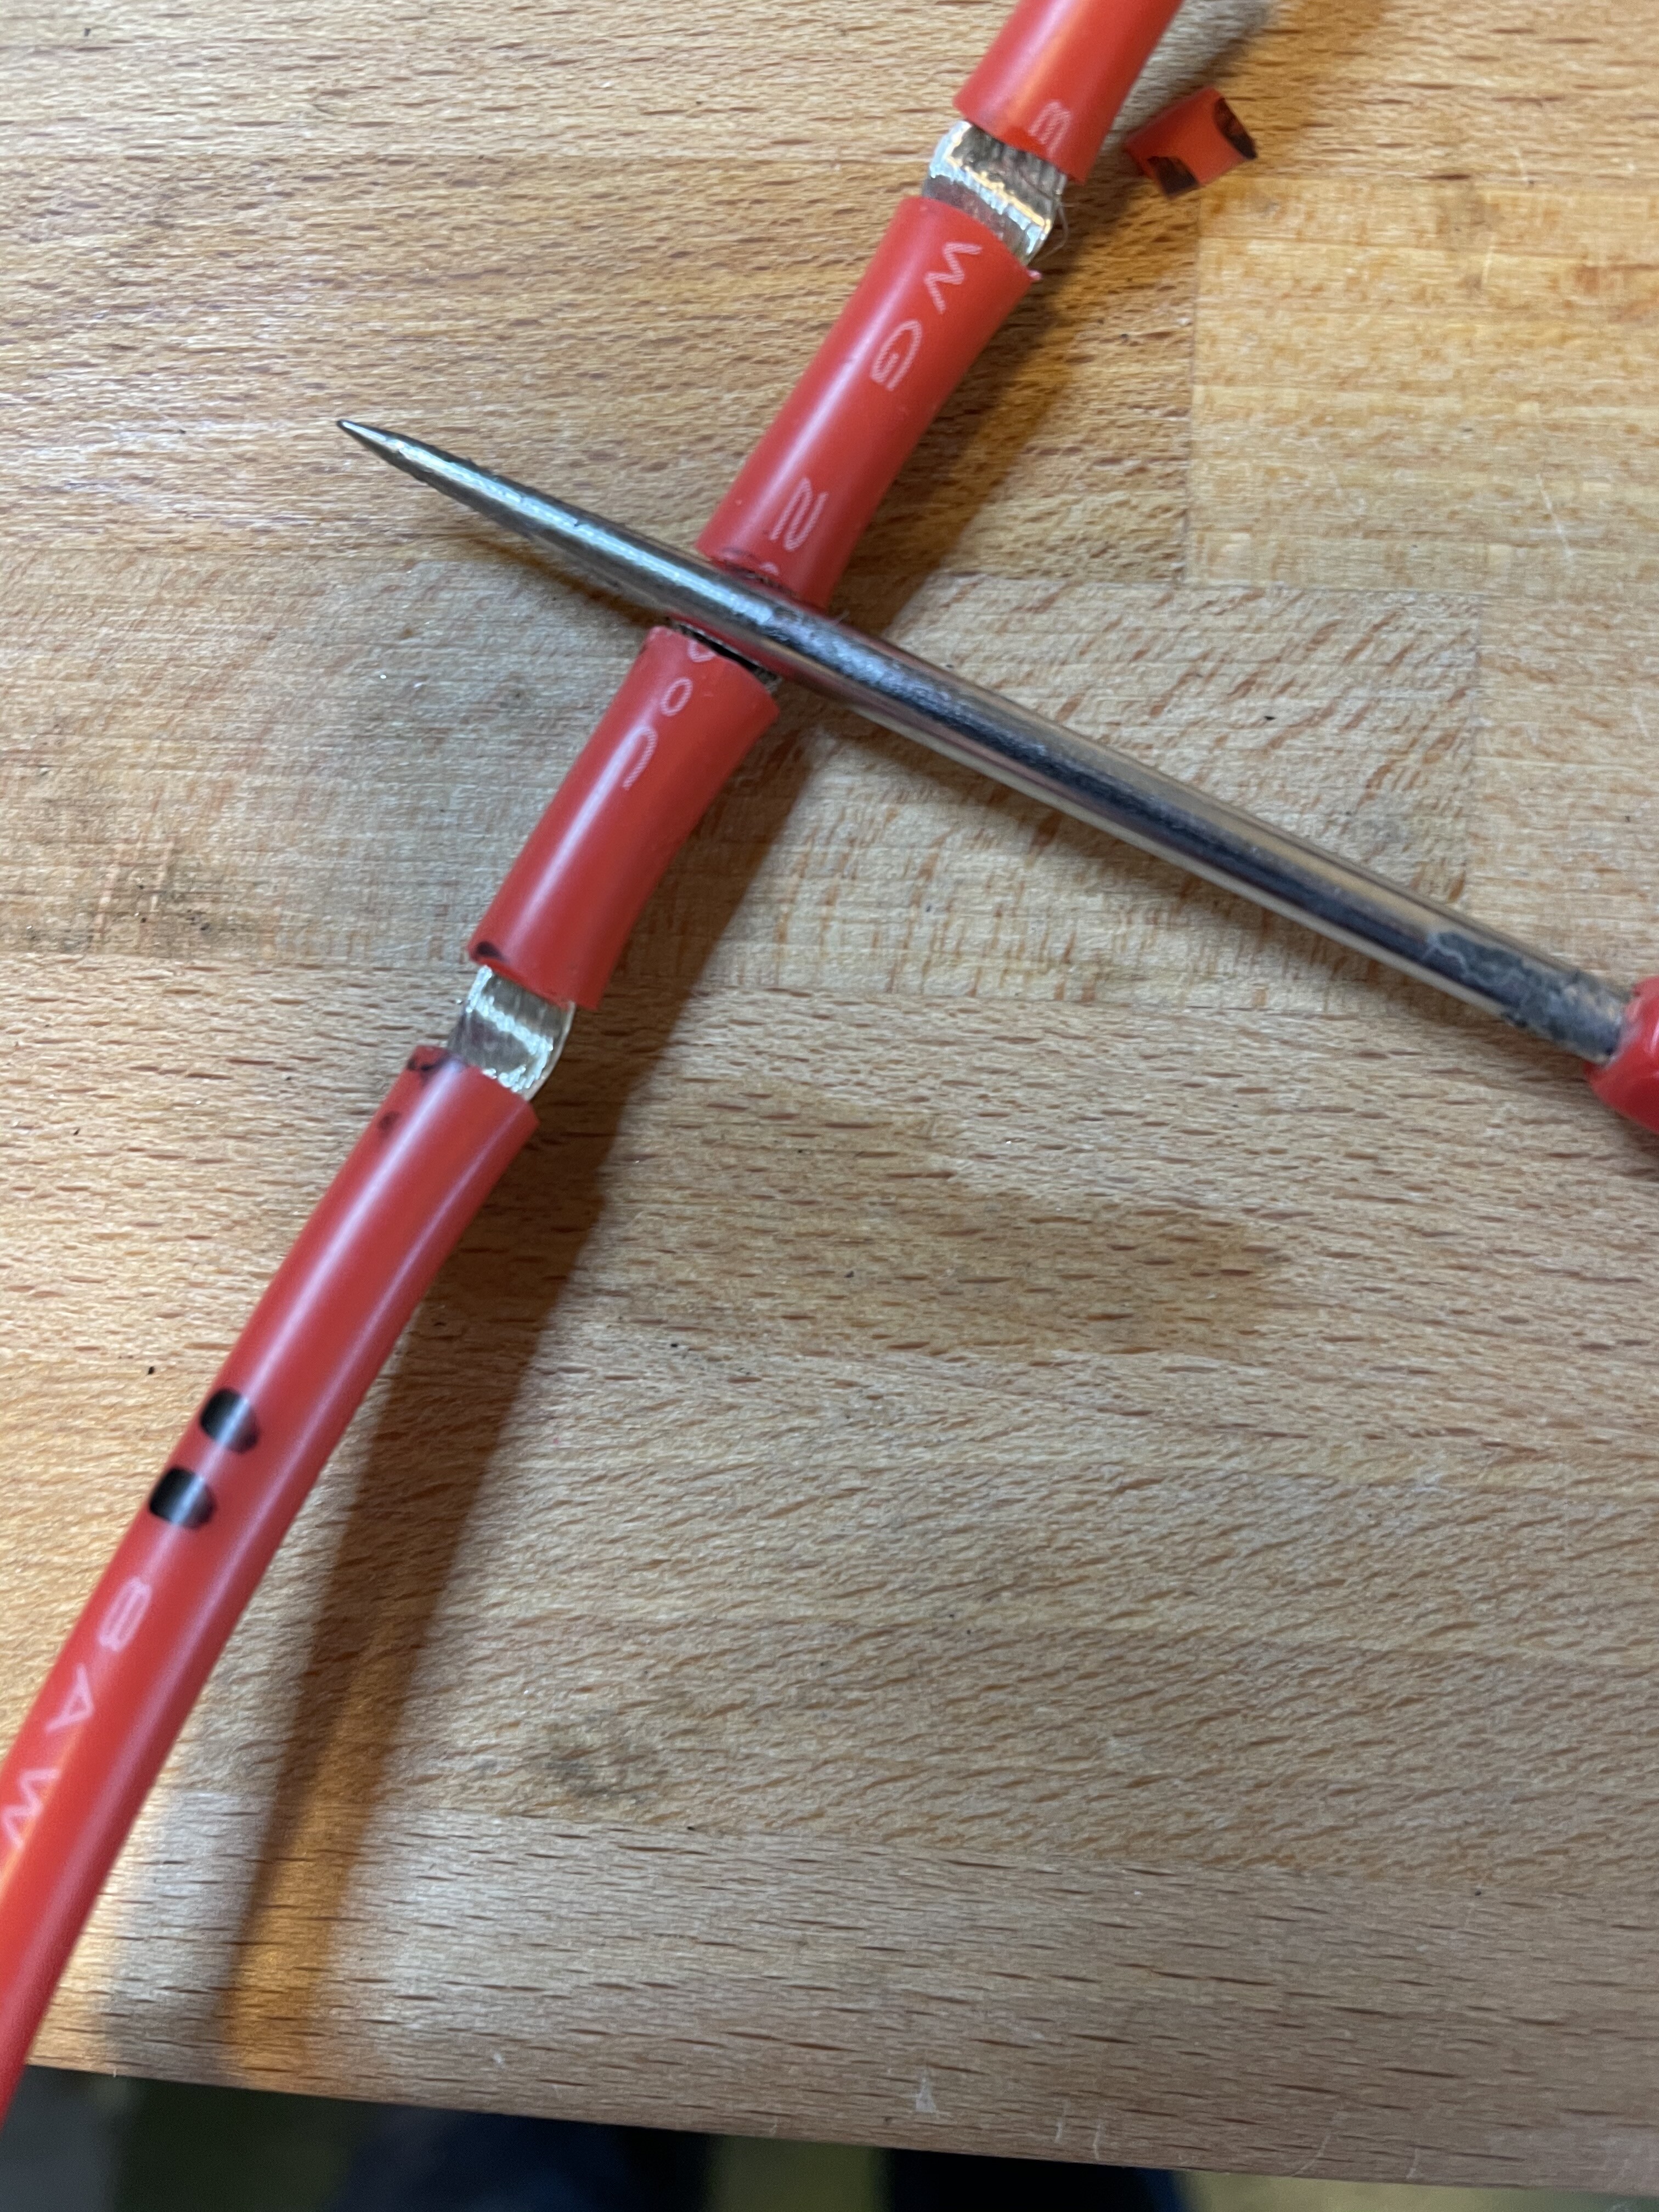

It was a bit tricky to solder the 8AWG wires to the strips (between the cells) but I had to minimise the size to fit them through the hatch.

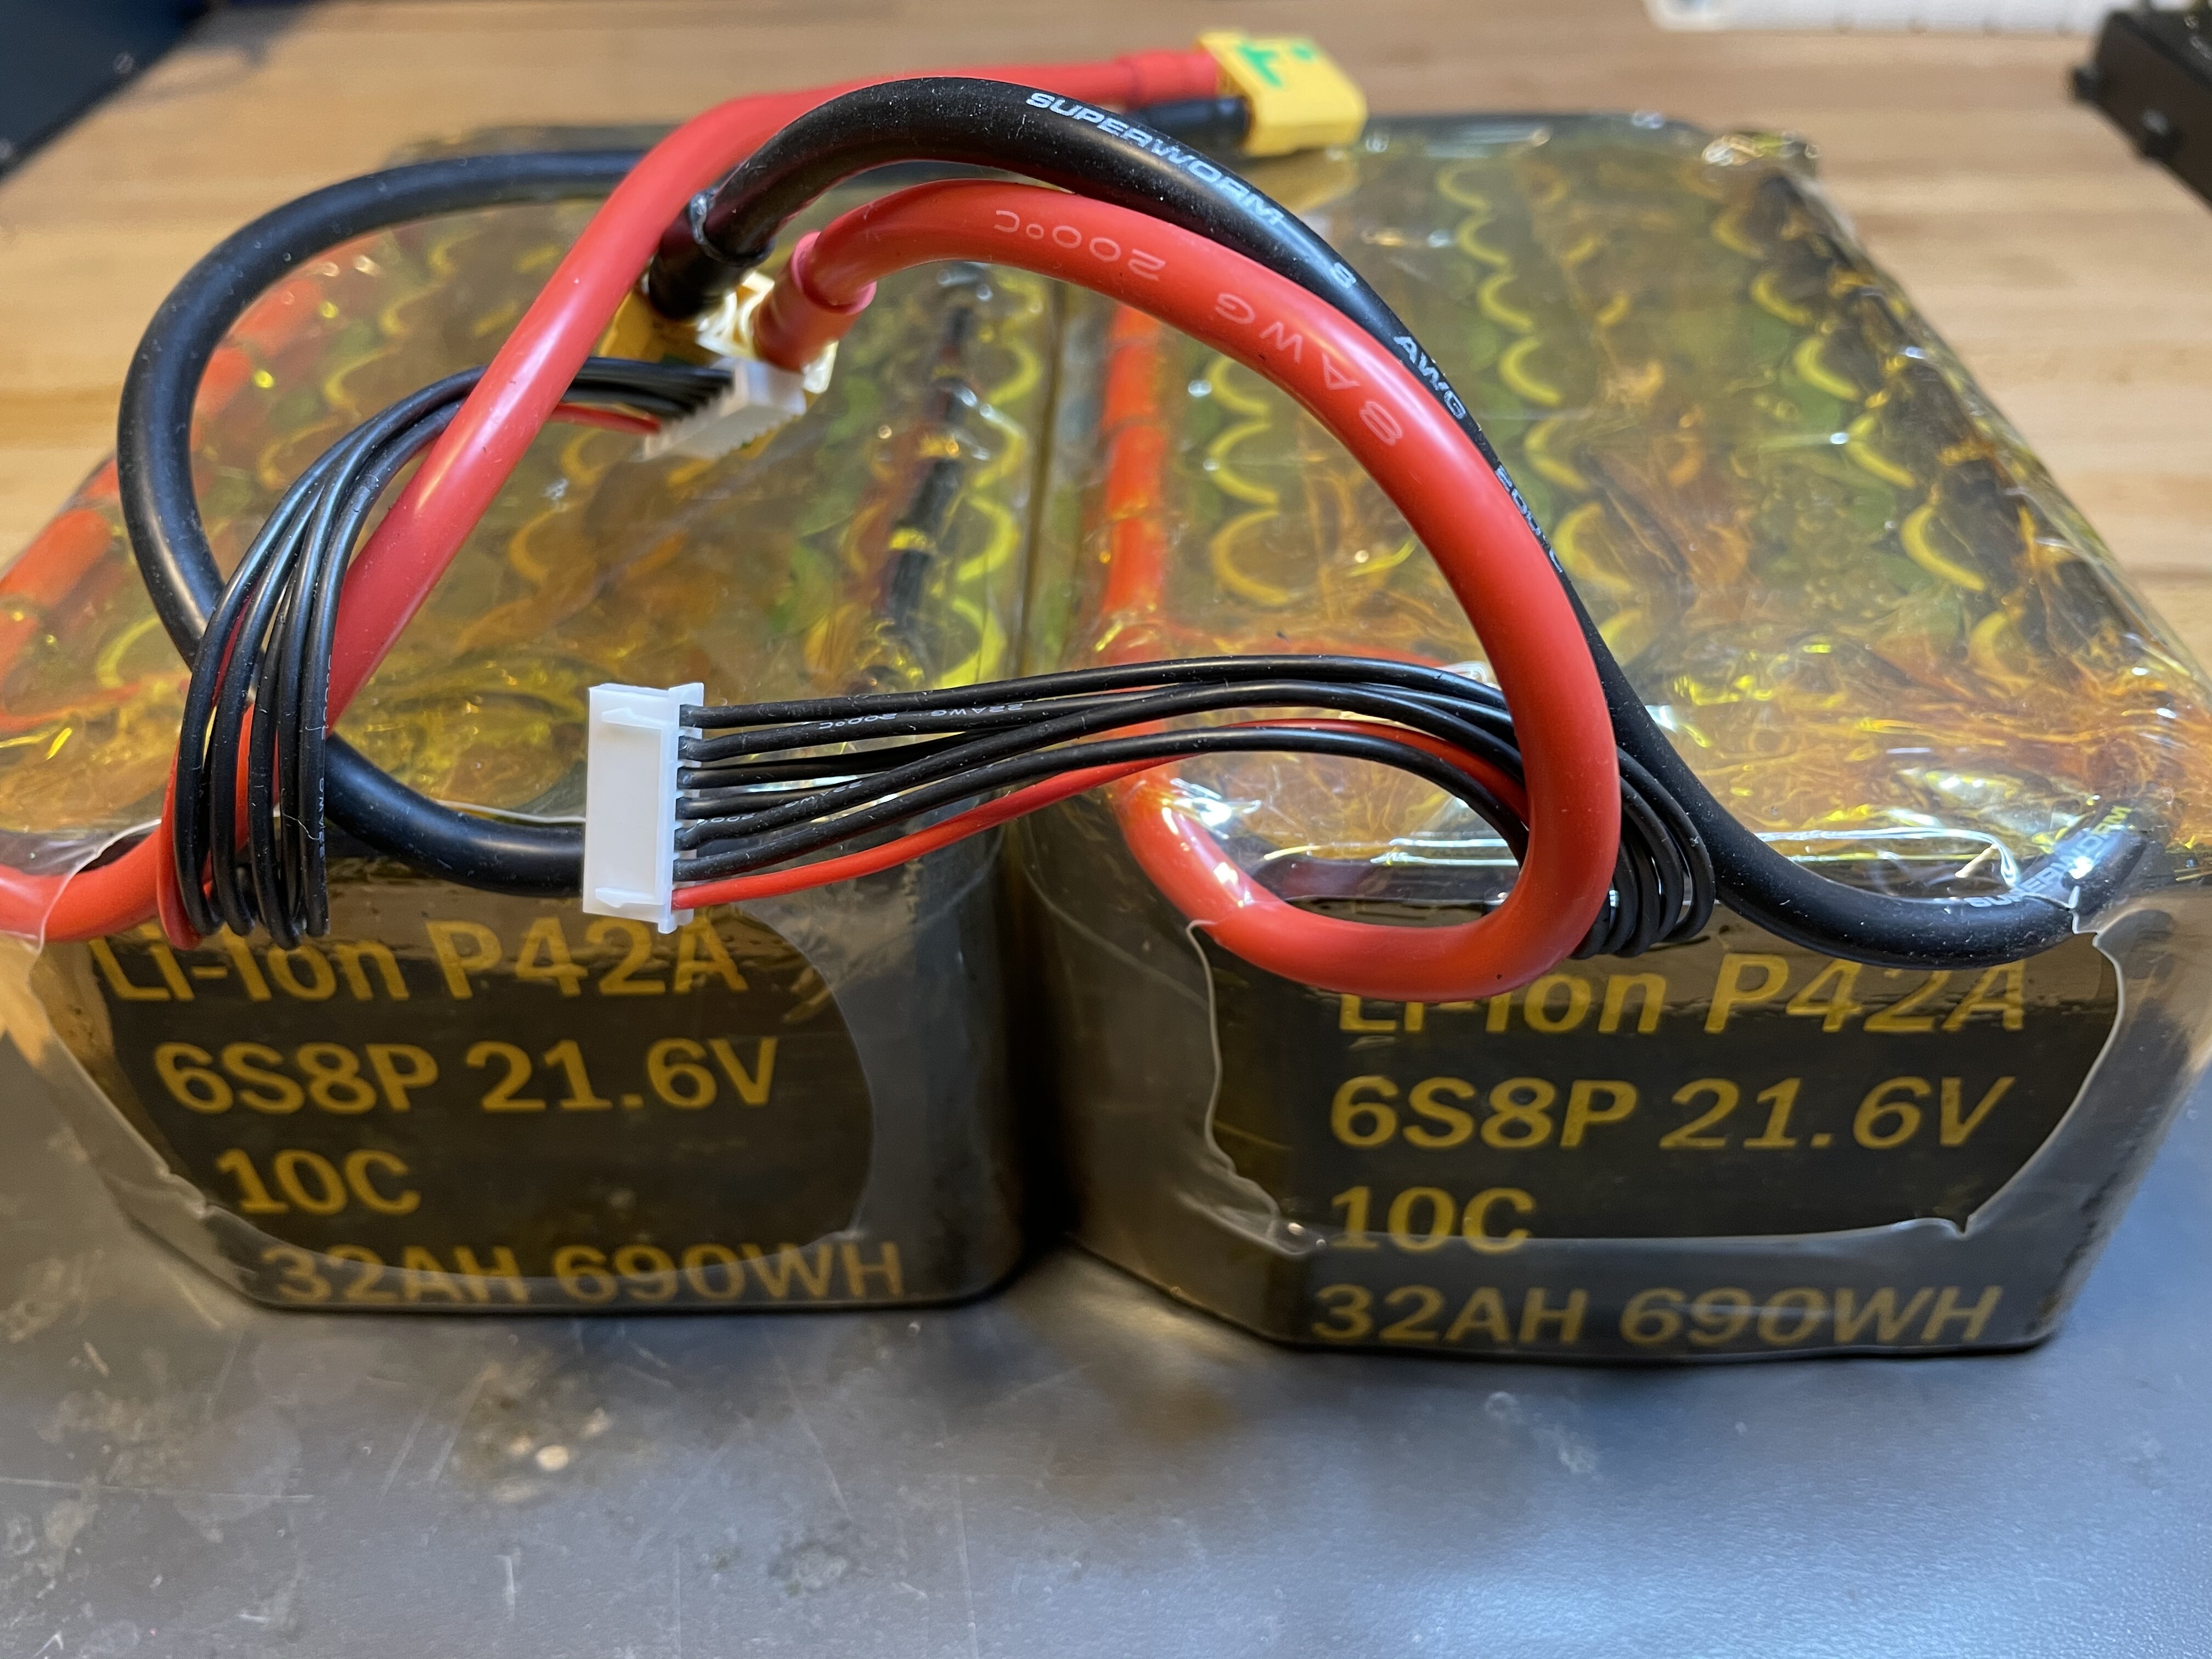
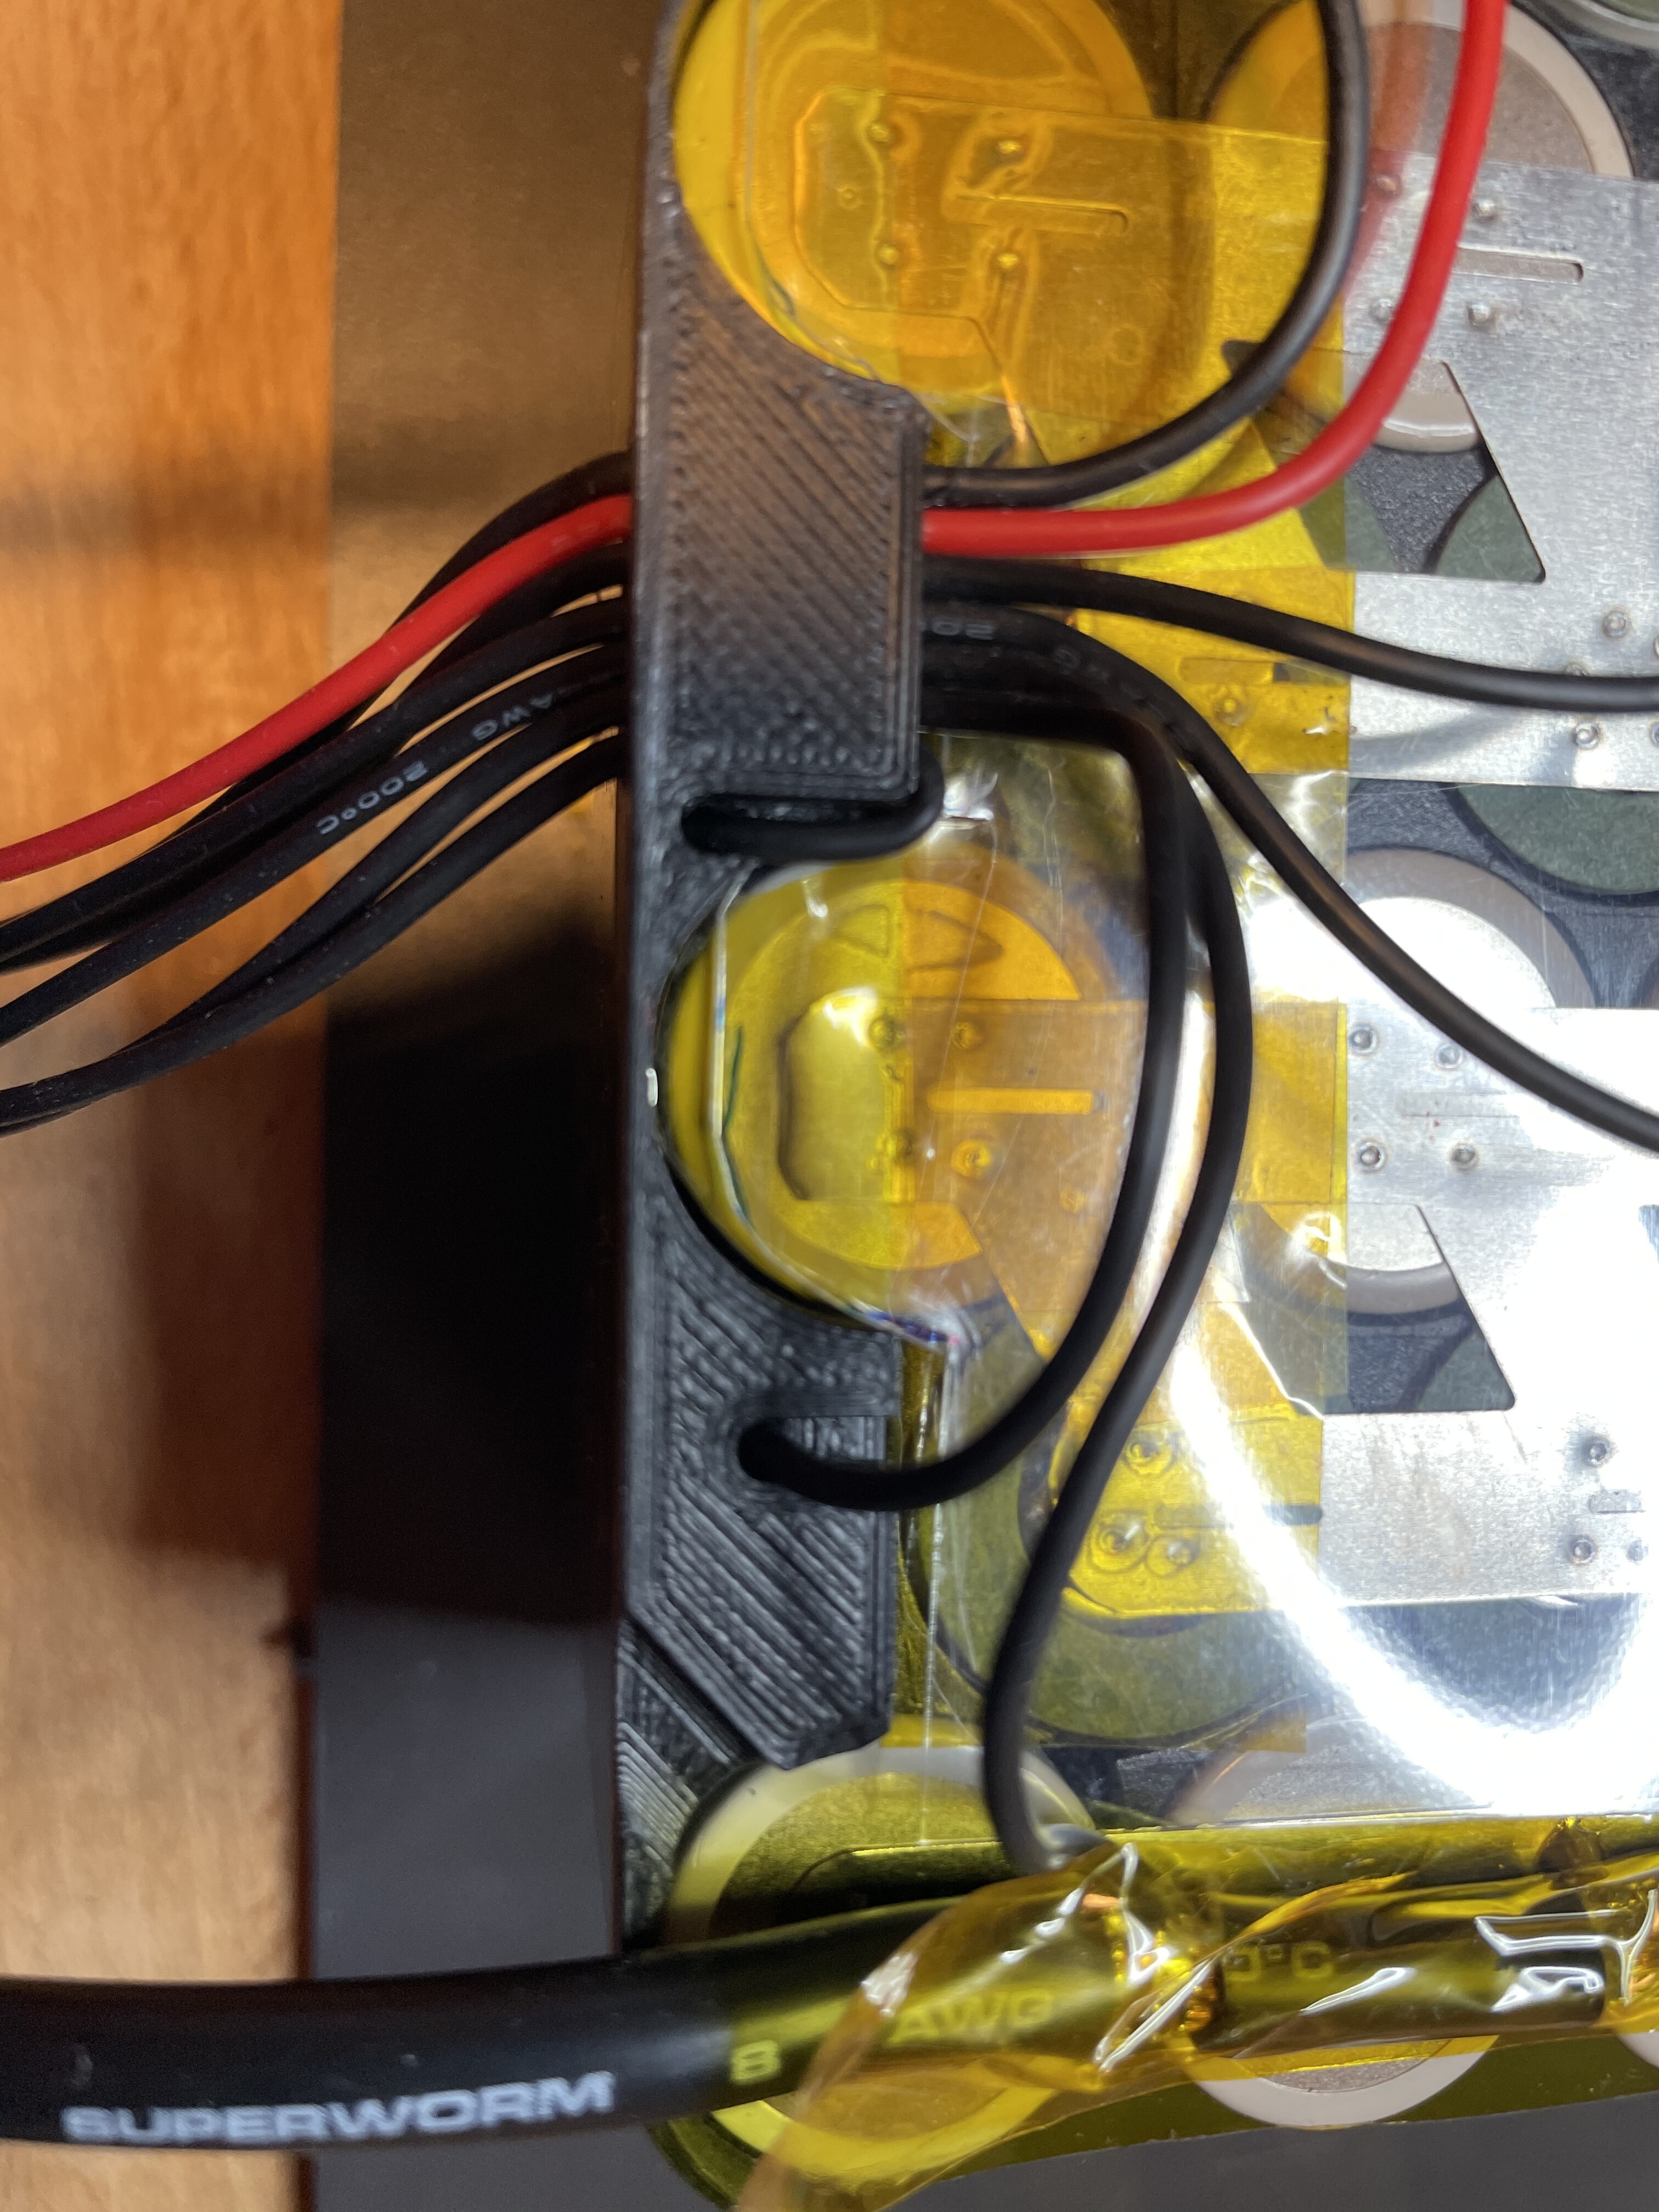
I tried to route the balancing cables in a way they do not cross each other or other P-rows as the ones they are attached to. Where I had to cross, I added extra insulation (0.3mm plastic sheet). Used holes in the end caps to route the balancing cables to the bottom to keep them away from cells.
Transparent shrinking for easy inspection.
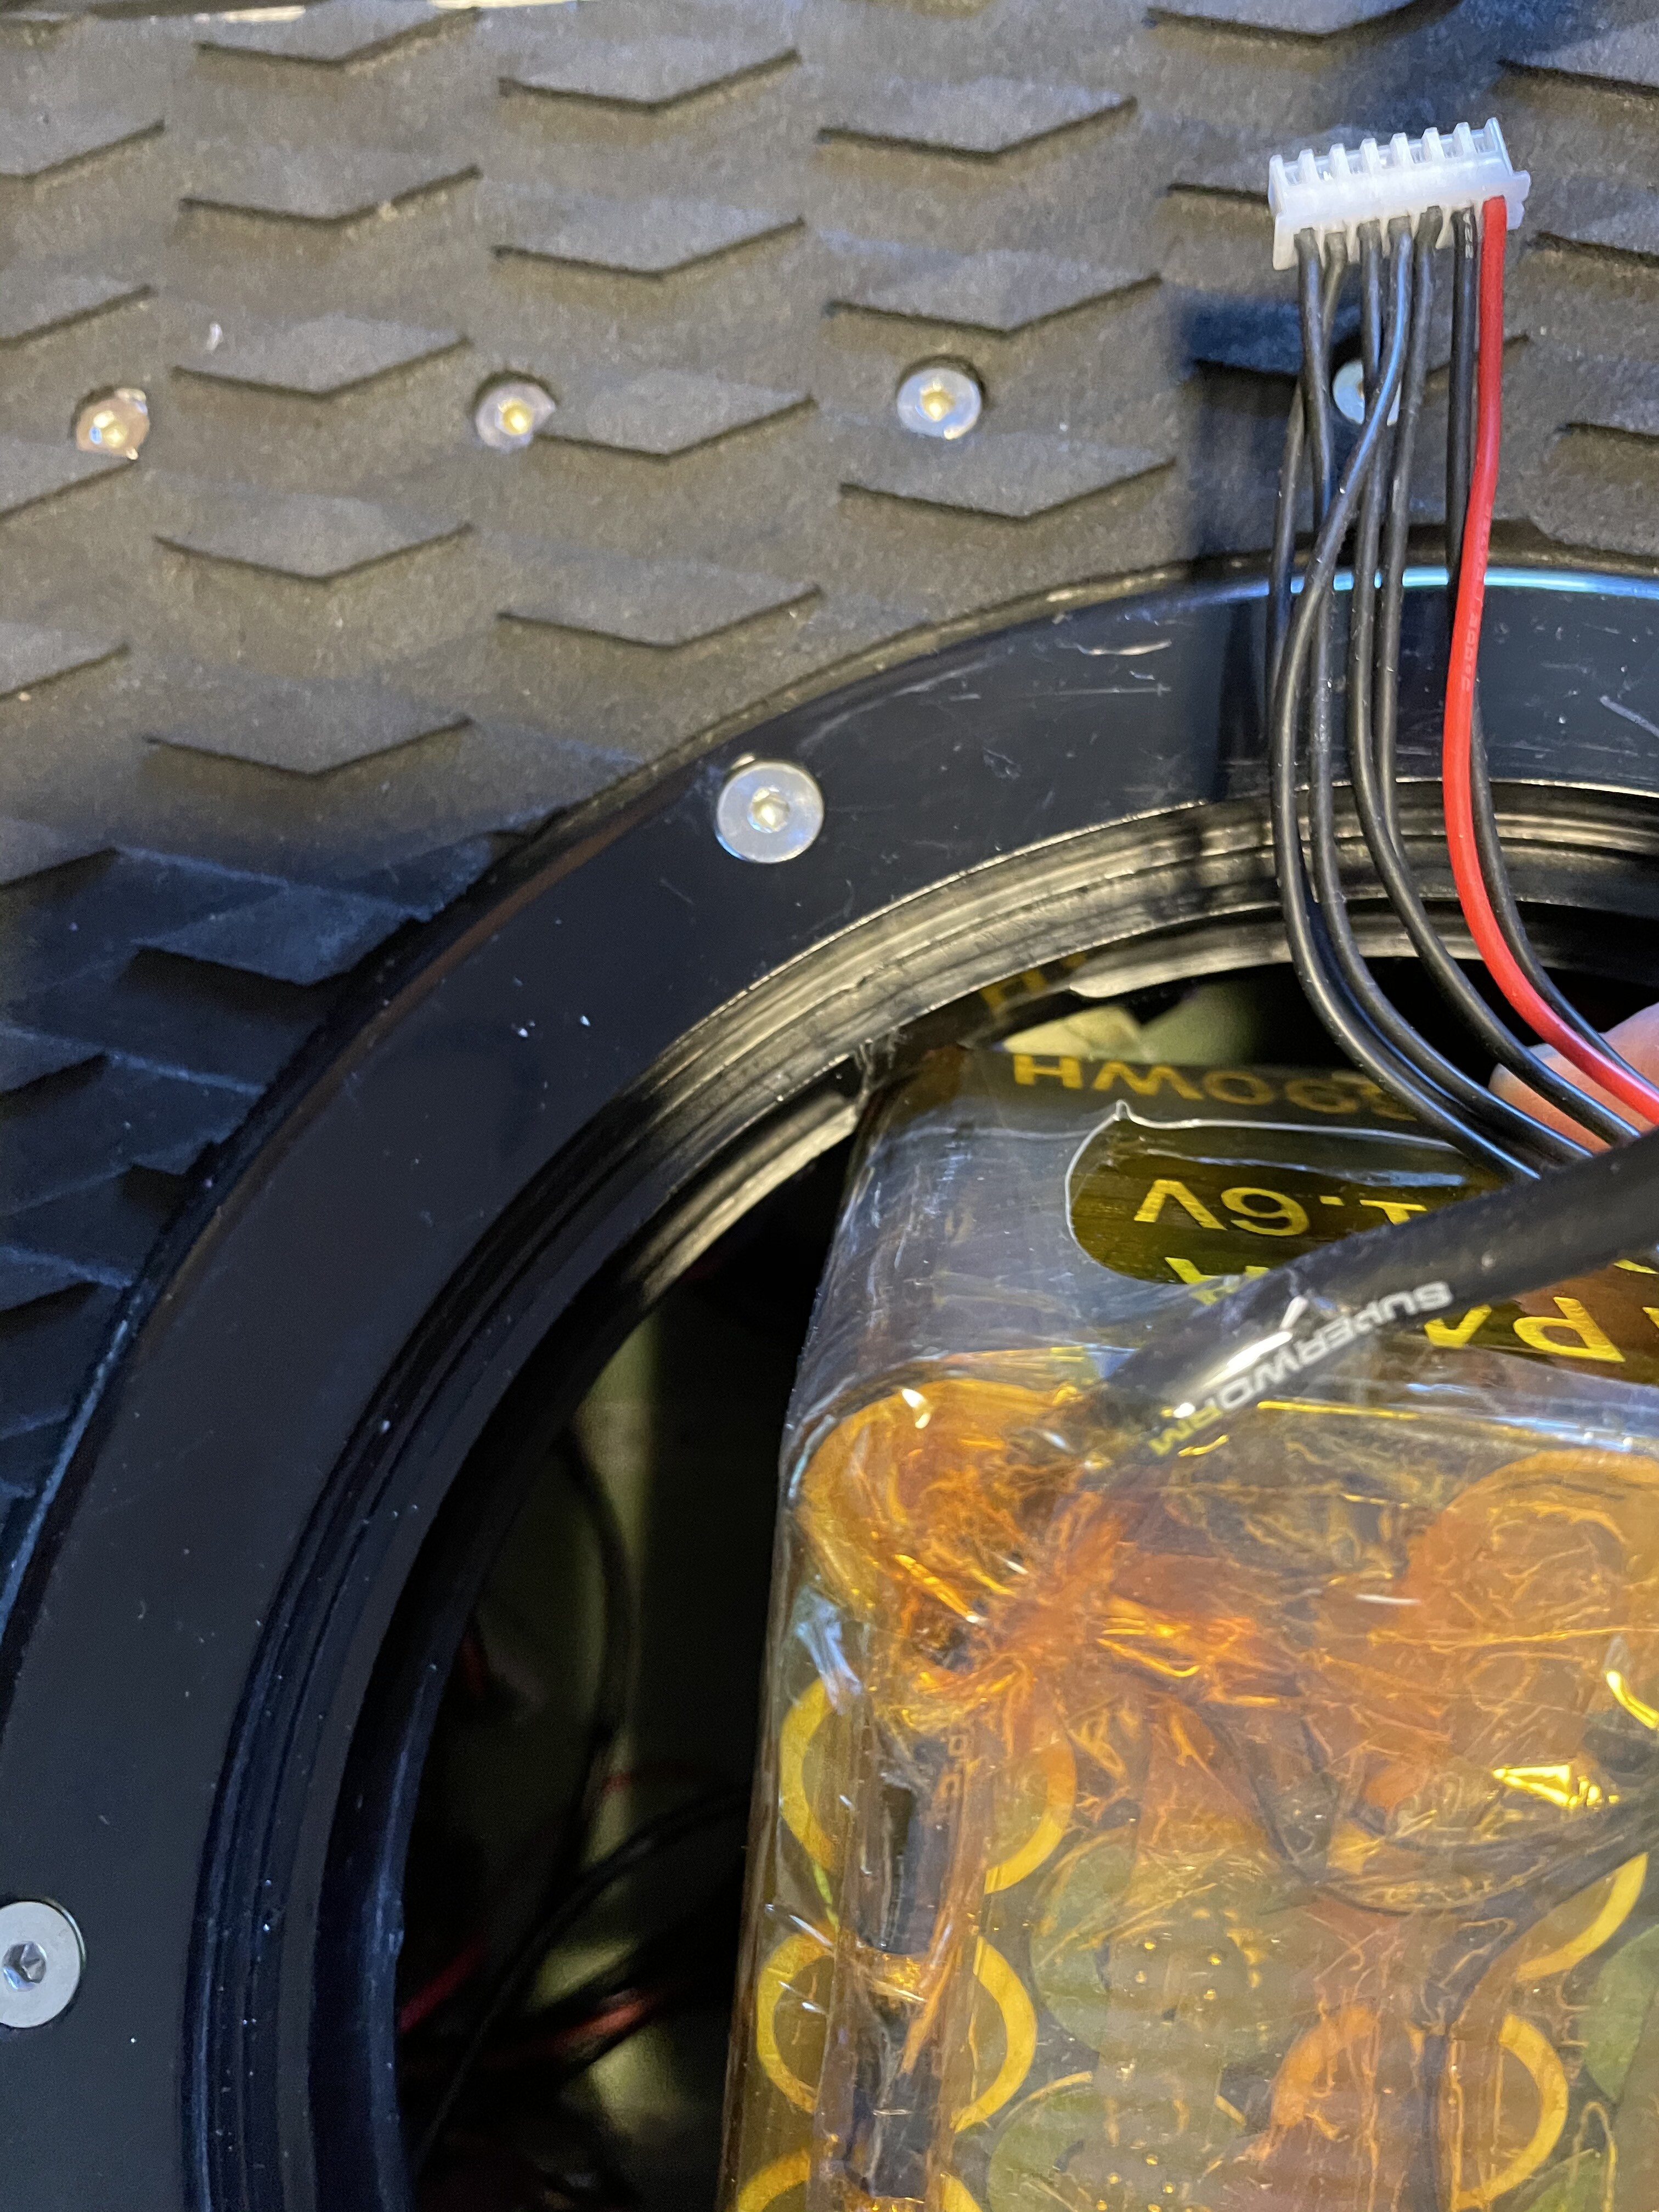
They just fit in.
Thanks @kotnascher for inspiration and advice
14 Likes
This is great!
20char
Nice! Did you mill it yourself basis Toto’s design?
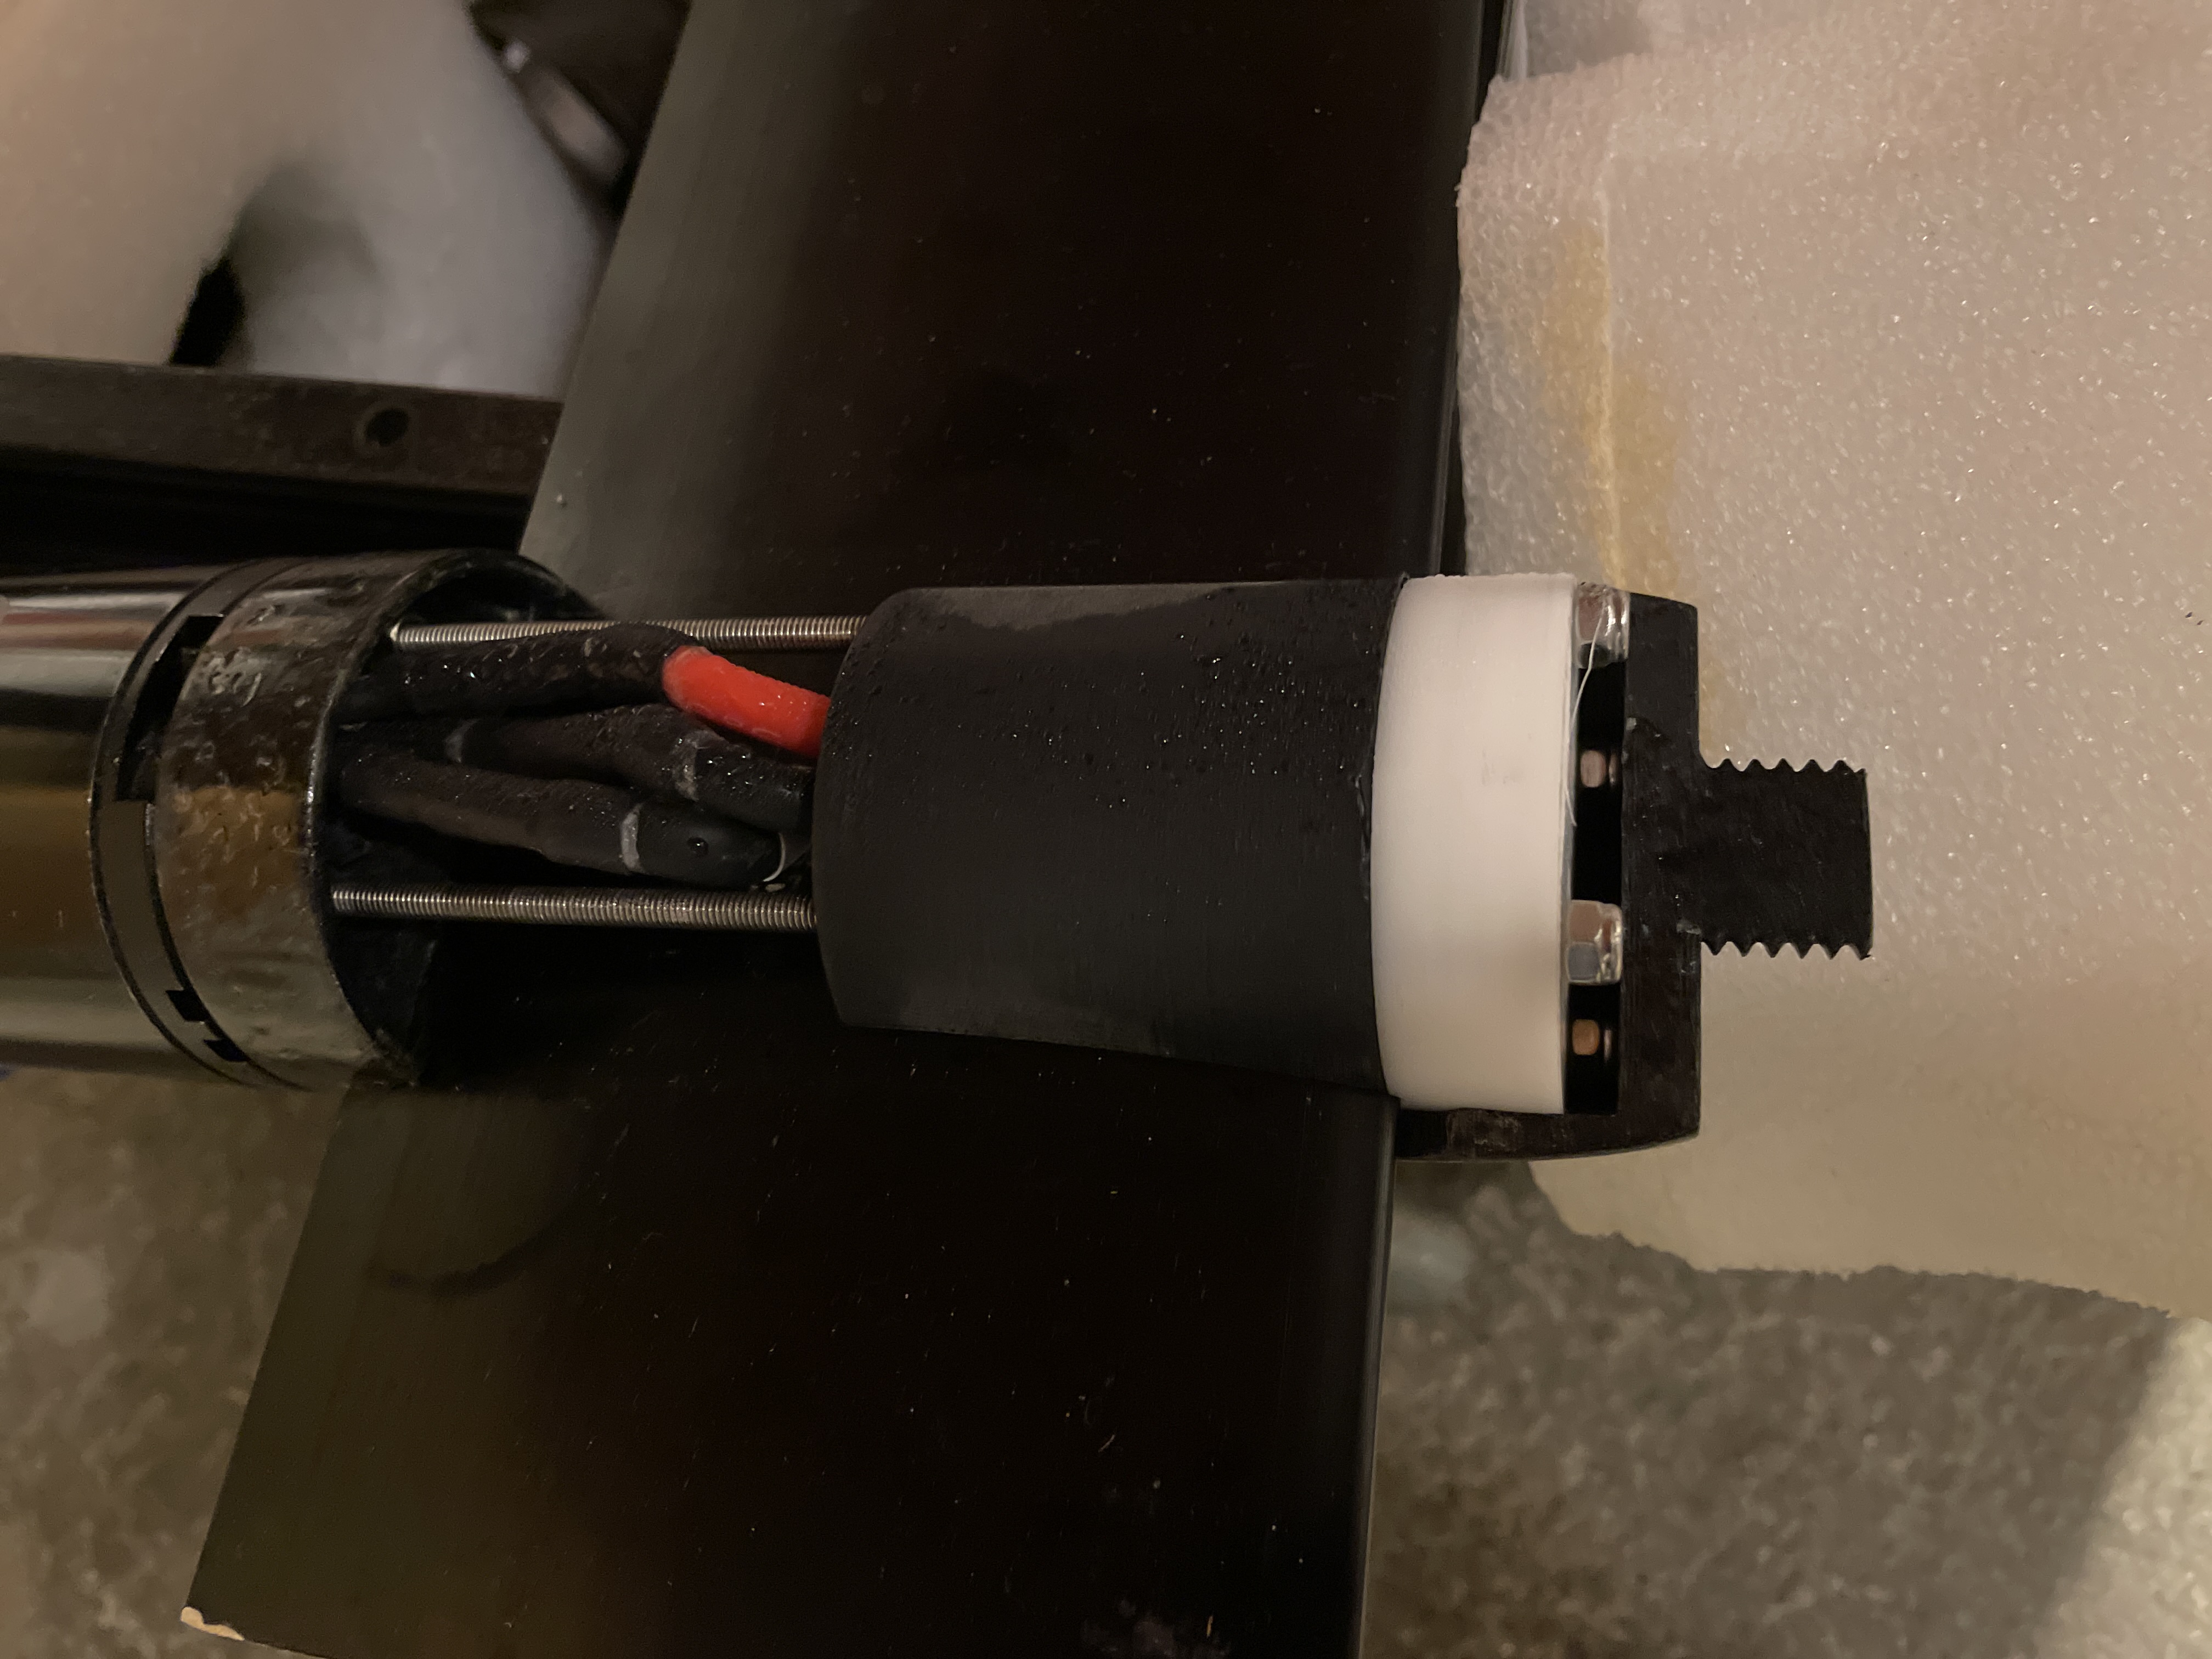
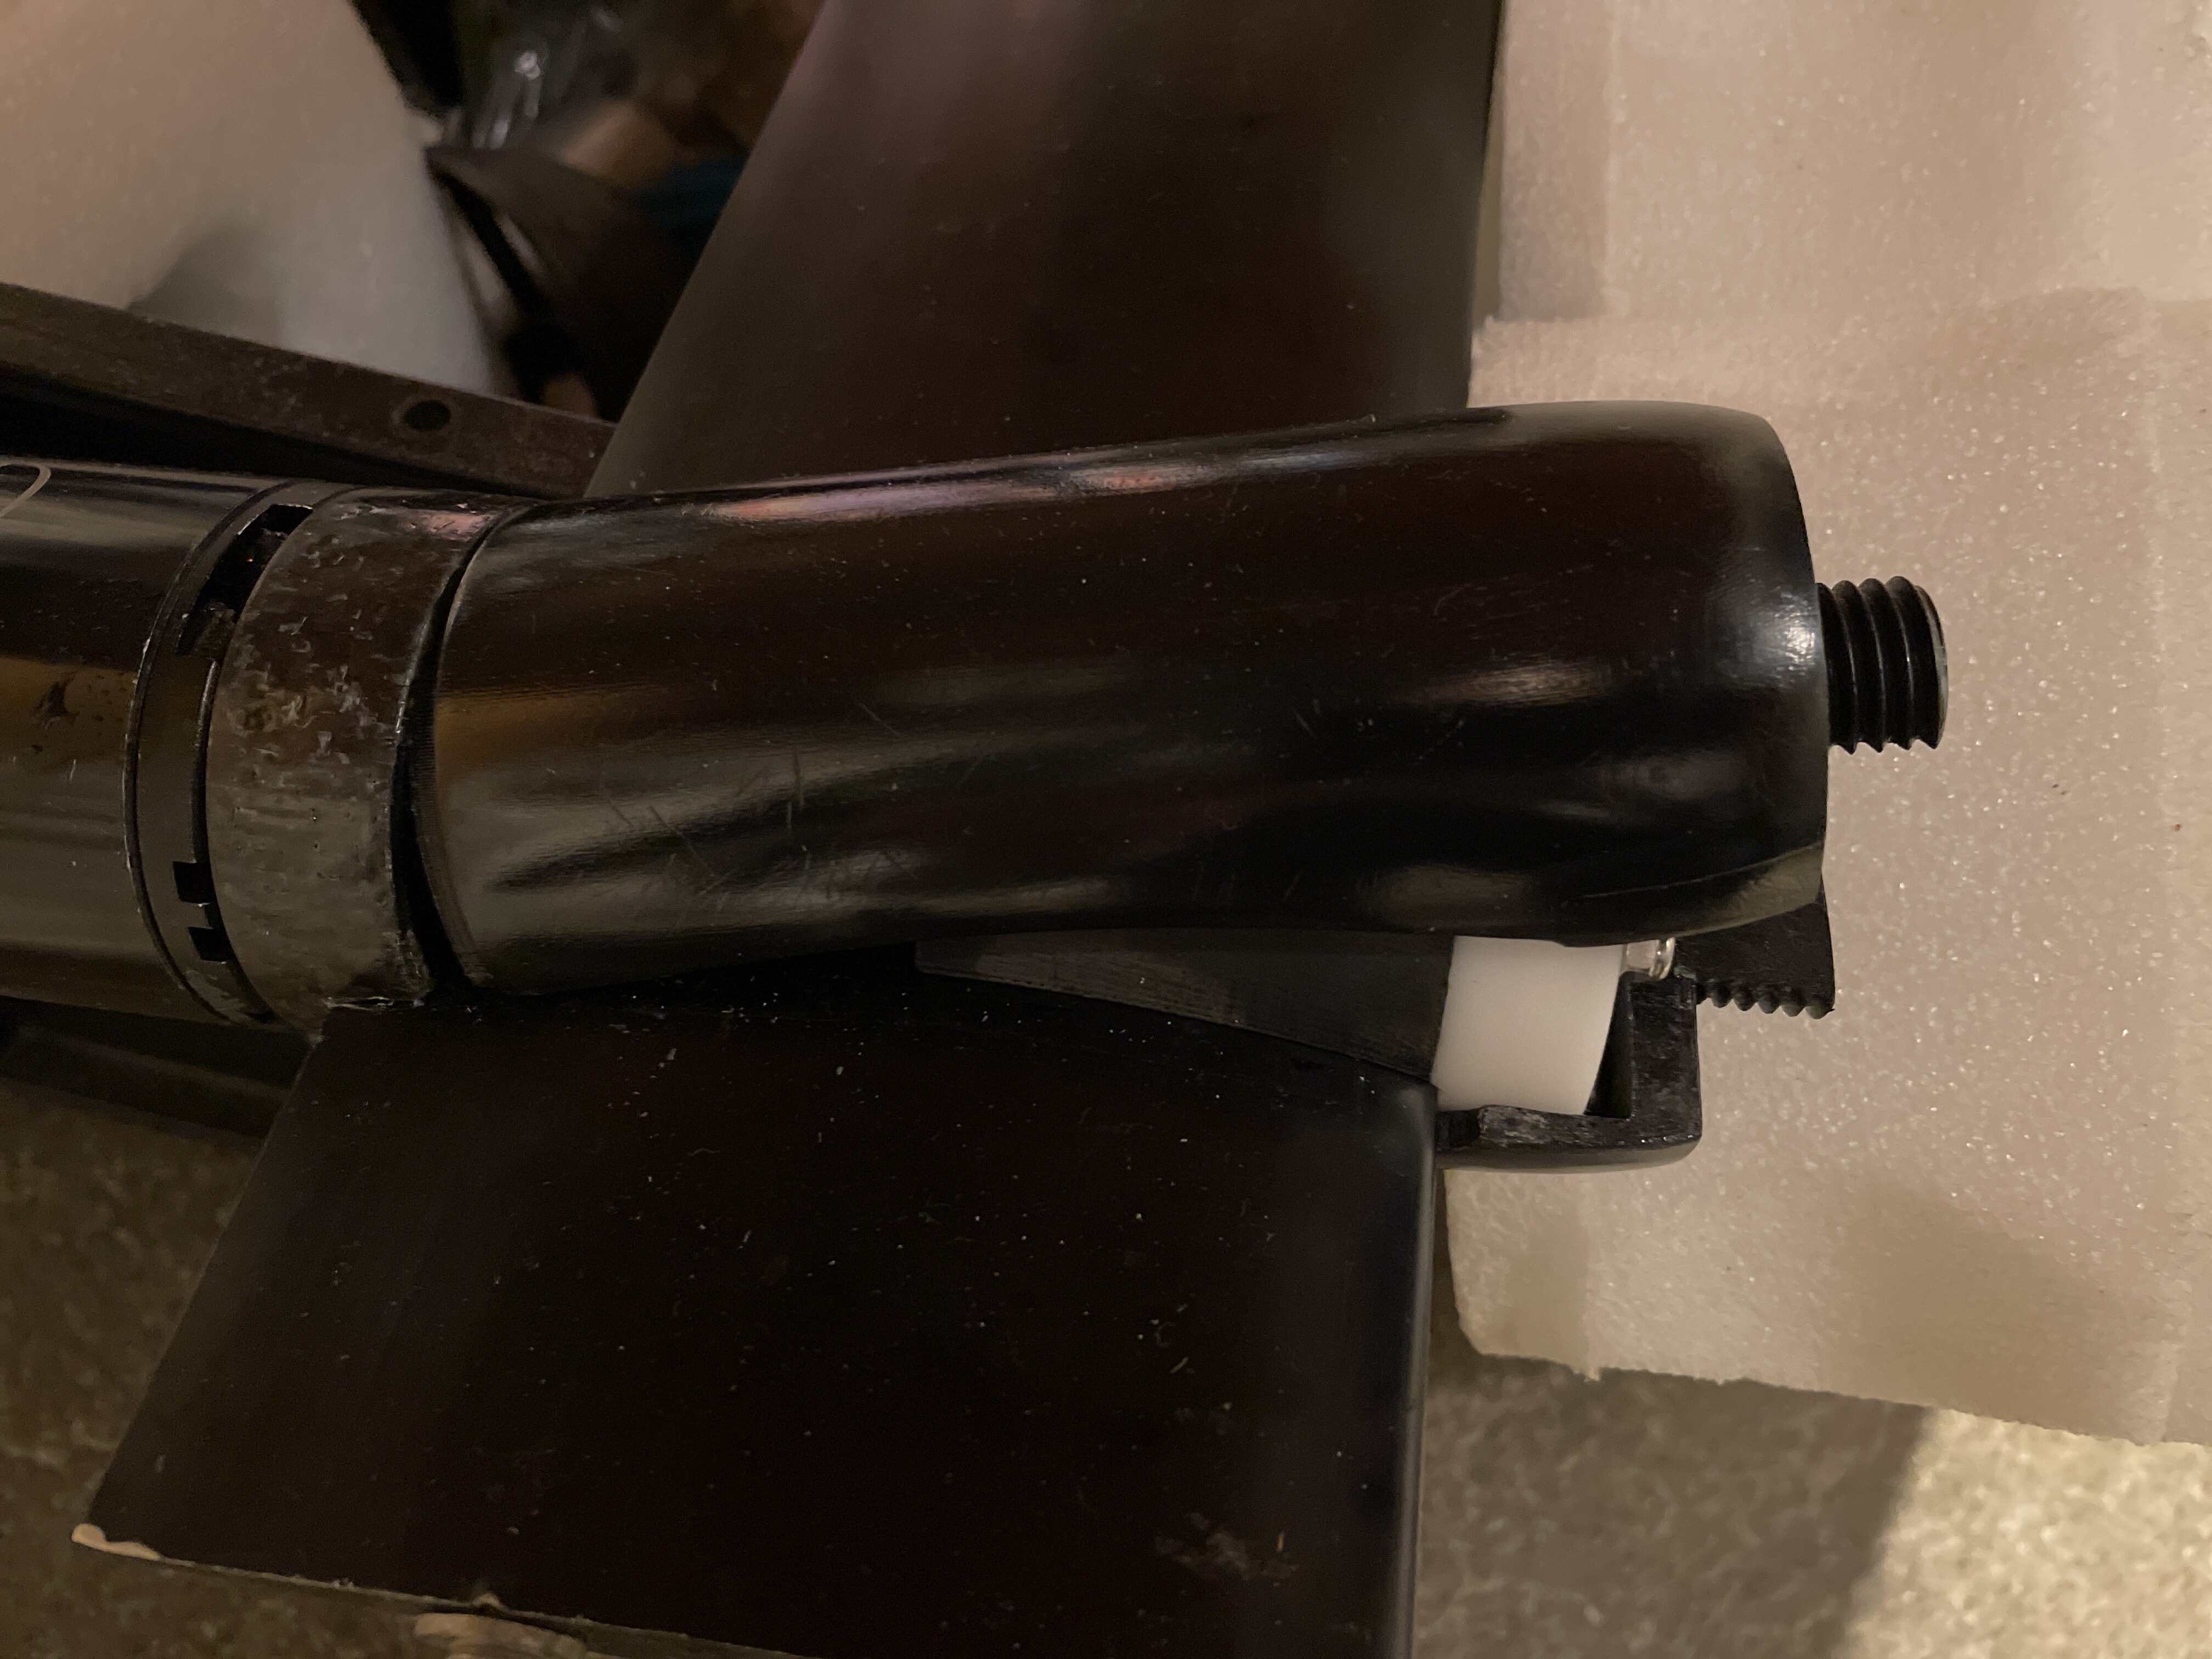
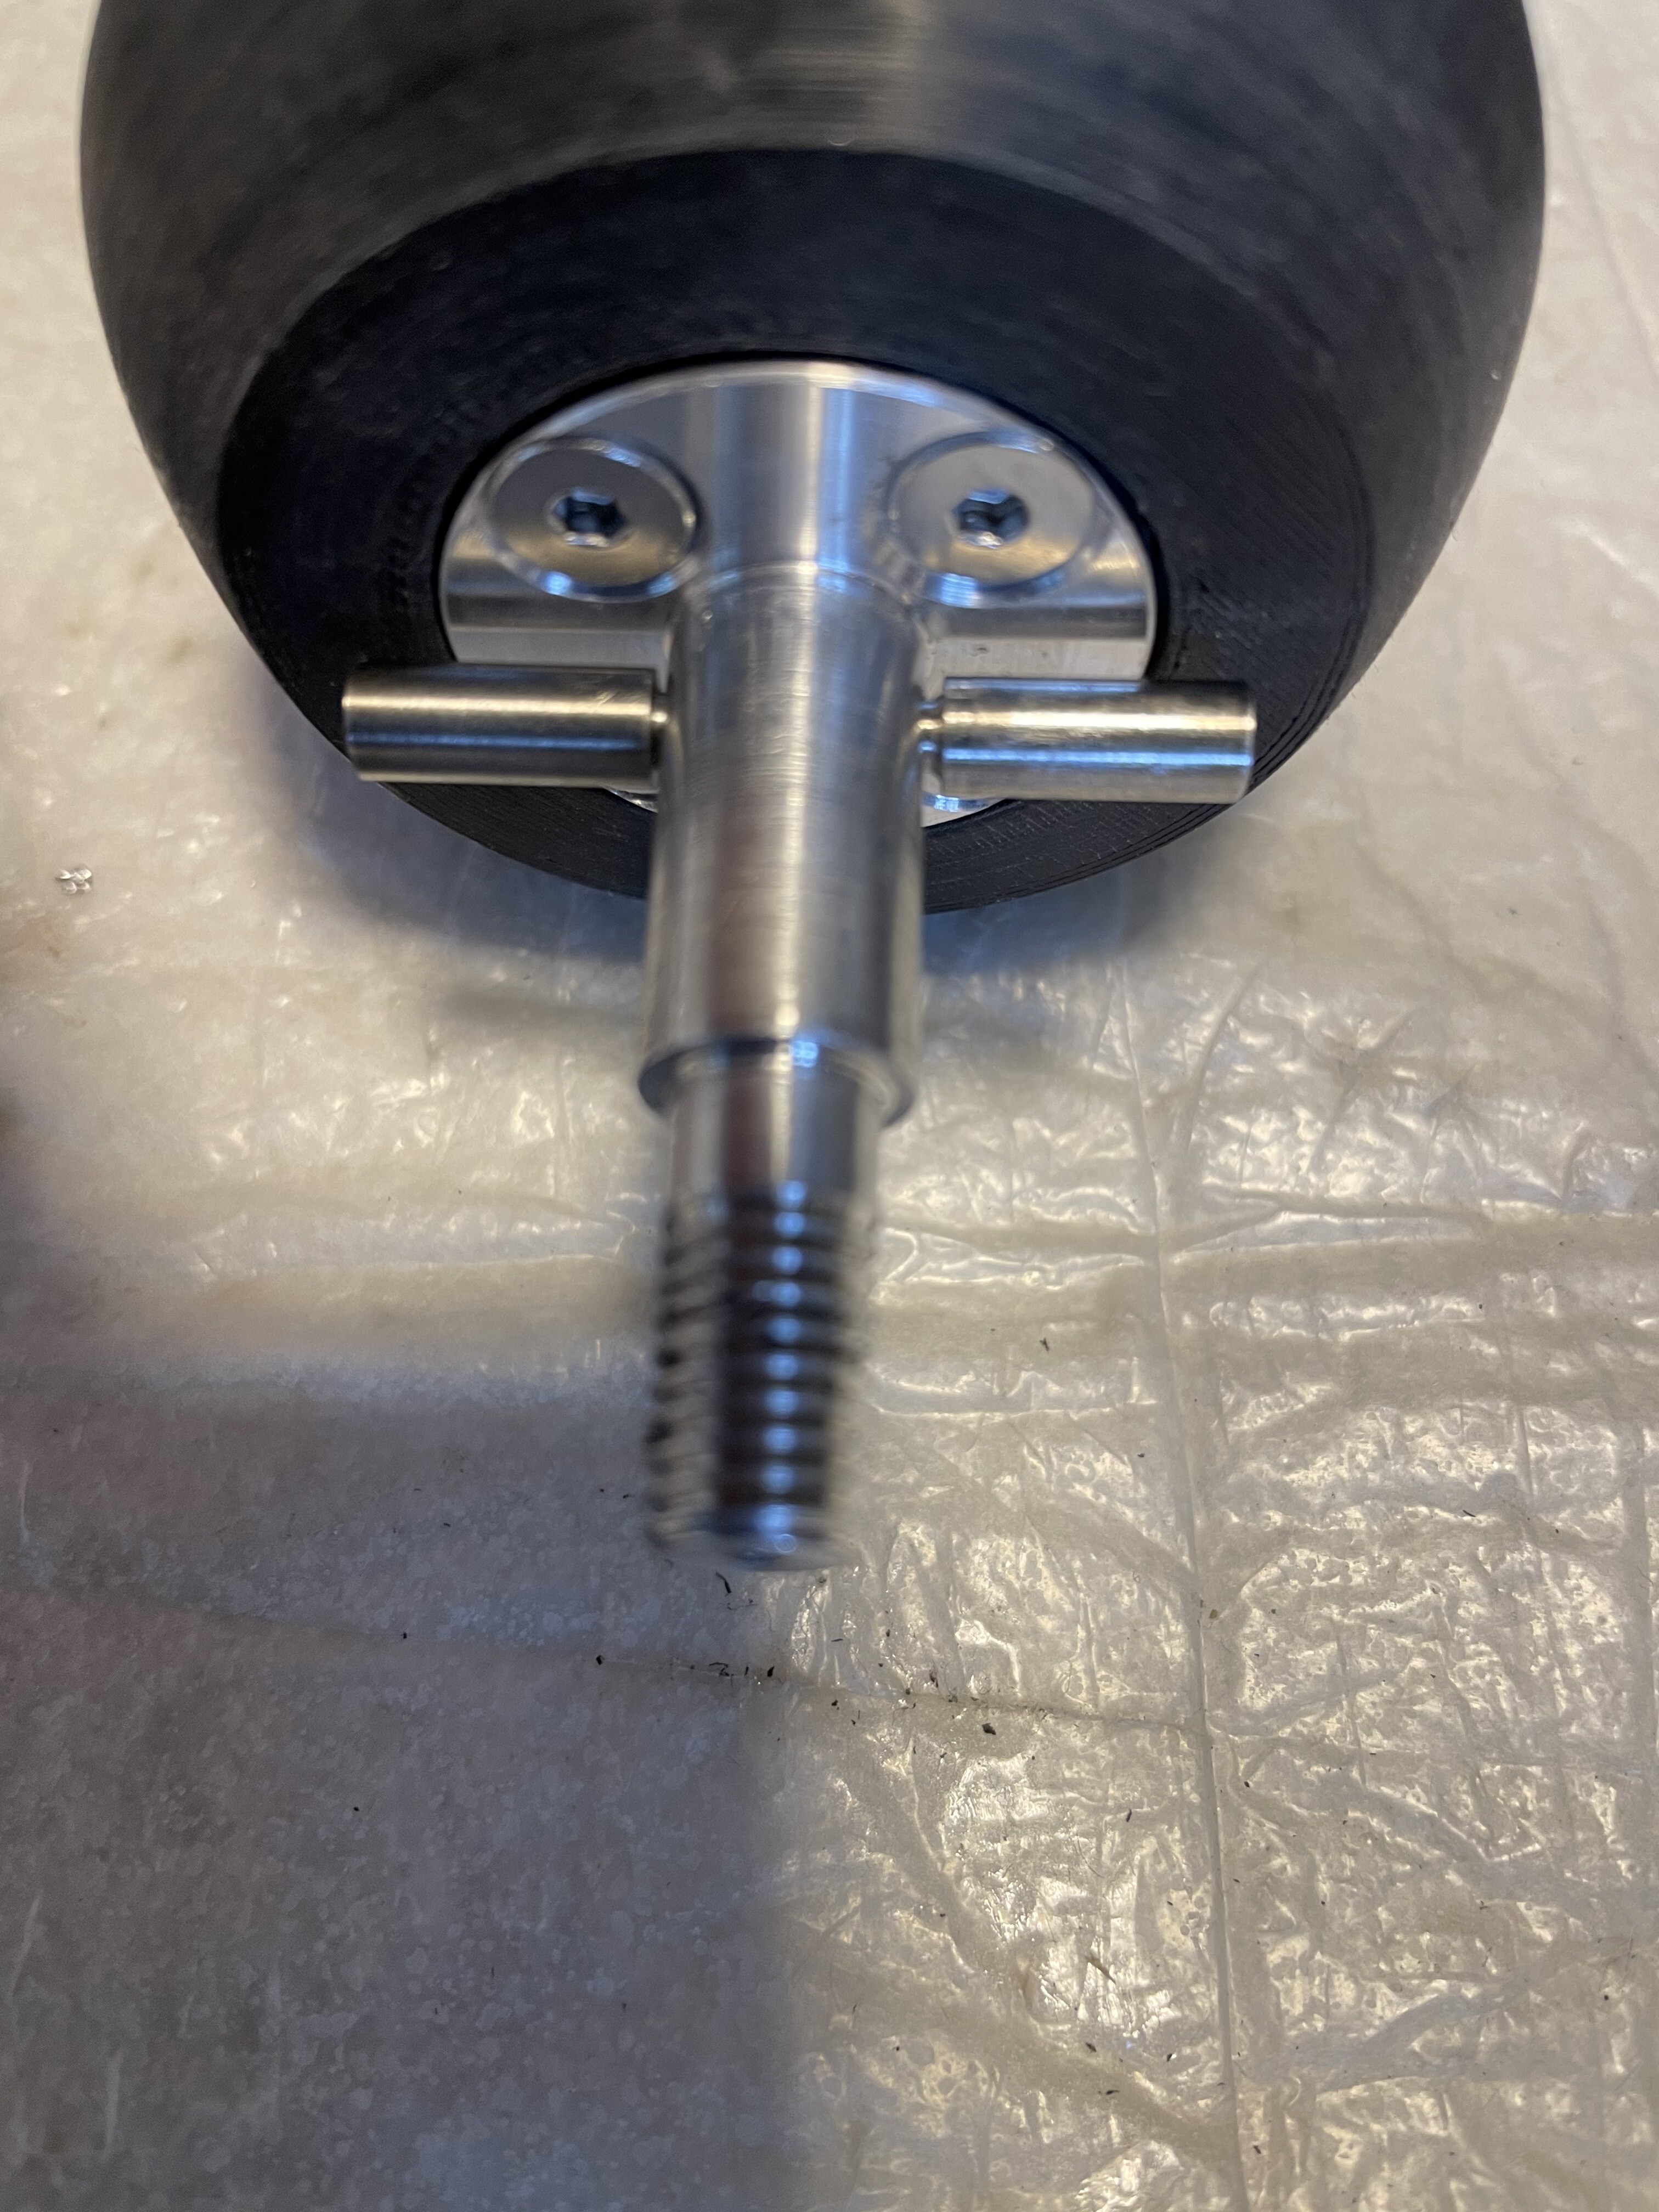
The black plastic cover/reducing adapter between the end of the motor bell and the prop was designed by @Toto44. There are a lot of slots to cover and this part perfetly fits, although it was initially designed for an SLA printer (printed it on an FDM printer with ASA-X). I lathed the shaft to attach the prop from aluminium based on a hand sketch.
1 Like
Hi Daniel thanks for the details! Would you mind sharing @Toto44 's design for the adapter?
Thanks, Marc
Hello Marc,
if you give me your email, I can send you the file. But this fits only the APS 63100 with the Endbell with lots of cooling slots.
1 Like
One important detail, the inner diameter of my adapter is 30mm, as I only had 30 or 60mm aluminium rods and I was too lazy to turn the larger one down from 60 to 32mm. With 30mm OD on the shaft piece, you only have 0.5mm wall thickness for the centering flange. It works but if you have the choice, go for 32mm (gives you 1.5mm wall thickness). Then you would need the original piece, @Toto44 has both versions.
1 Like
Thanks all clear. I am going to try it a bit different, by replacing the original 10mm shaft with a longer version protruding the bell and directly secure the prop to it. So in this case the hole of 30mm should be more than plenty, probably needs an modification to be screwed to the bell instead.
1 Like
Marc, I have sent the adapter by email. I changed it to 10mm bore for you.
1 Like
Incredible. What kind of weight will the inflated board keep afloat? I would like to have my board carry me in the water while stationary, butat the moment I’ve gotta get up to speed before it will support my entire weight.
It has around 110l of volume, it floats with me (75kg) on it but you need to launch lying in the back of it, accelerate to plane and then get on your feet. You can’t stand on it like on a SUP, when it stands still. I think it’s no problem to learn to efoil with this board, even if you weight more.
I would not go bigger.
1 Like
Awesome, good to know. thanks for the fast reply!
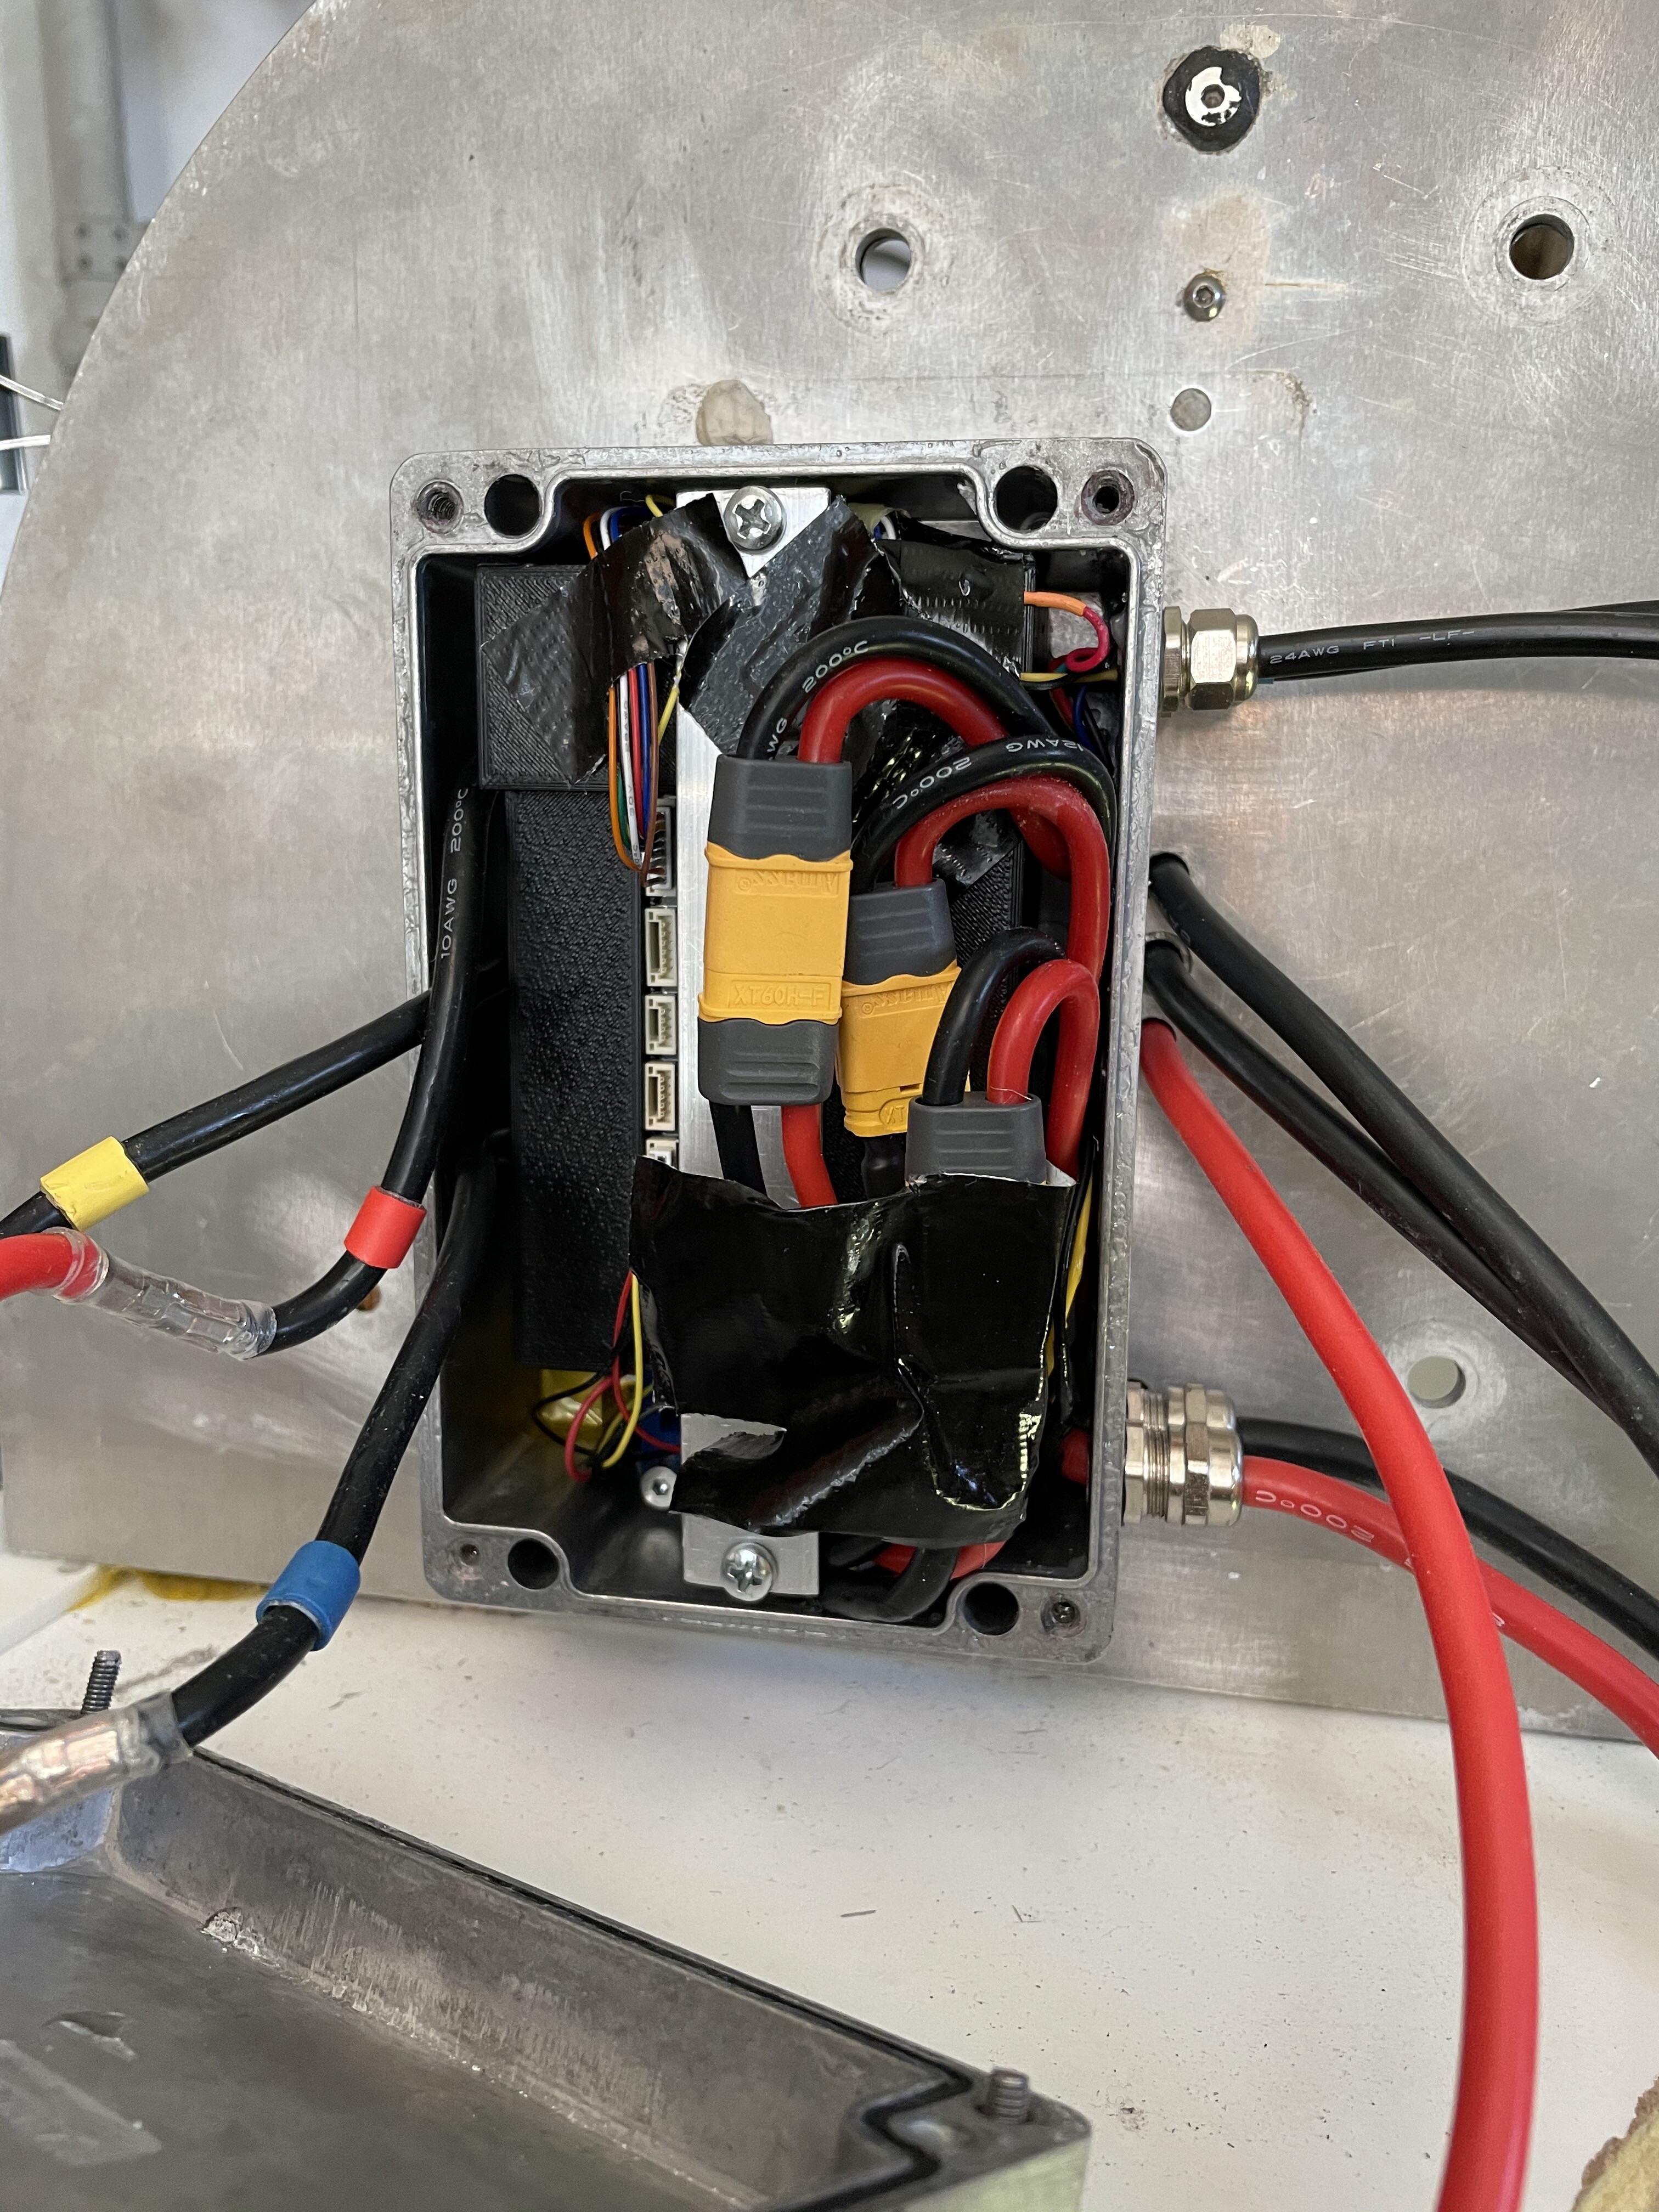
New Update
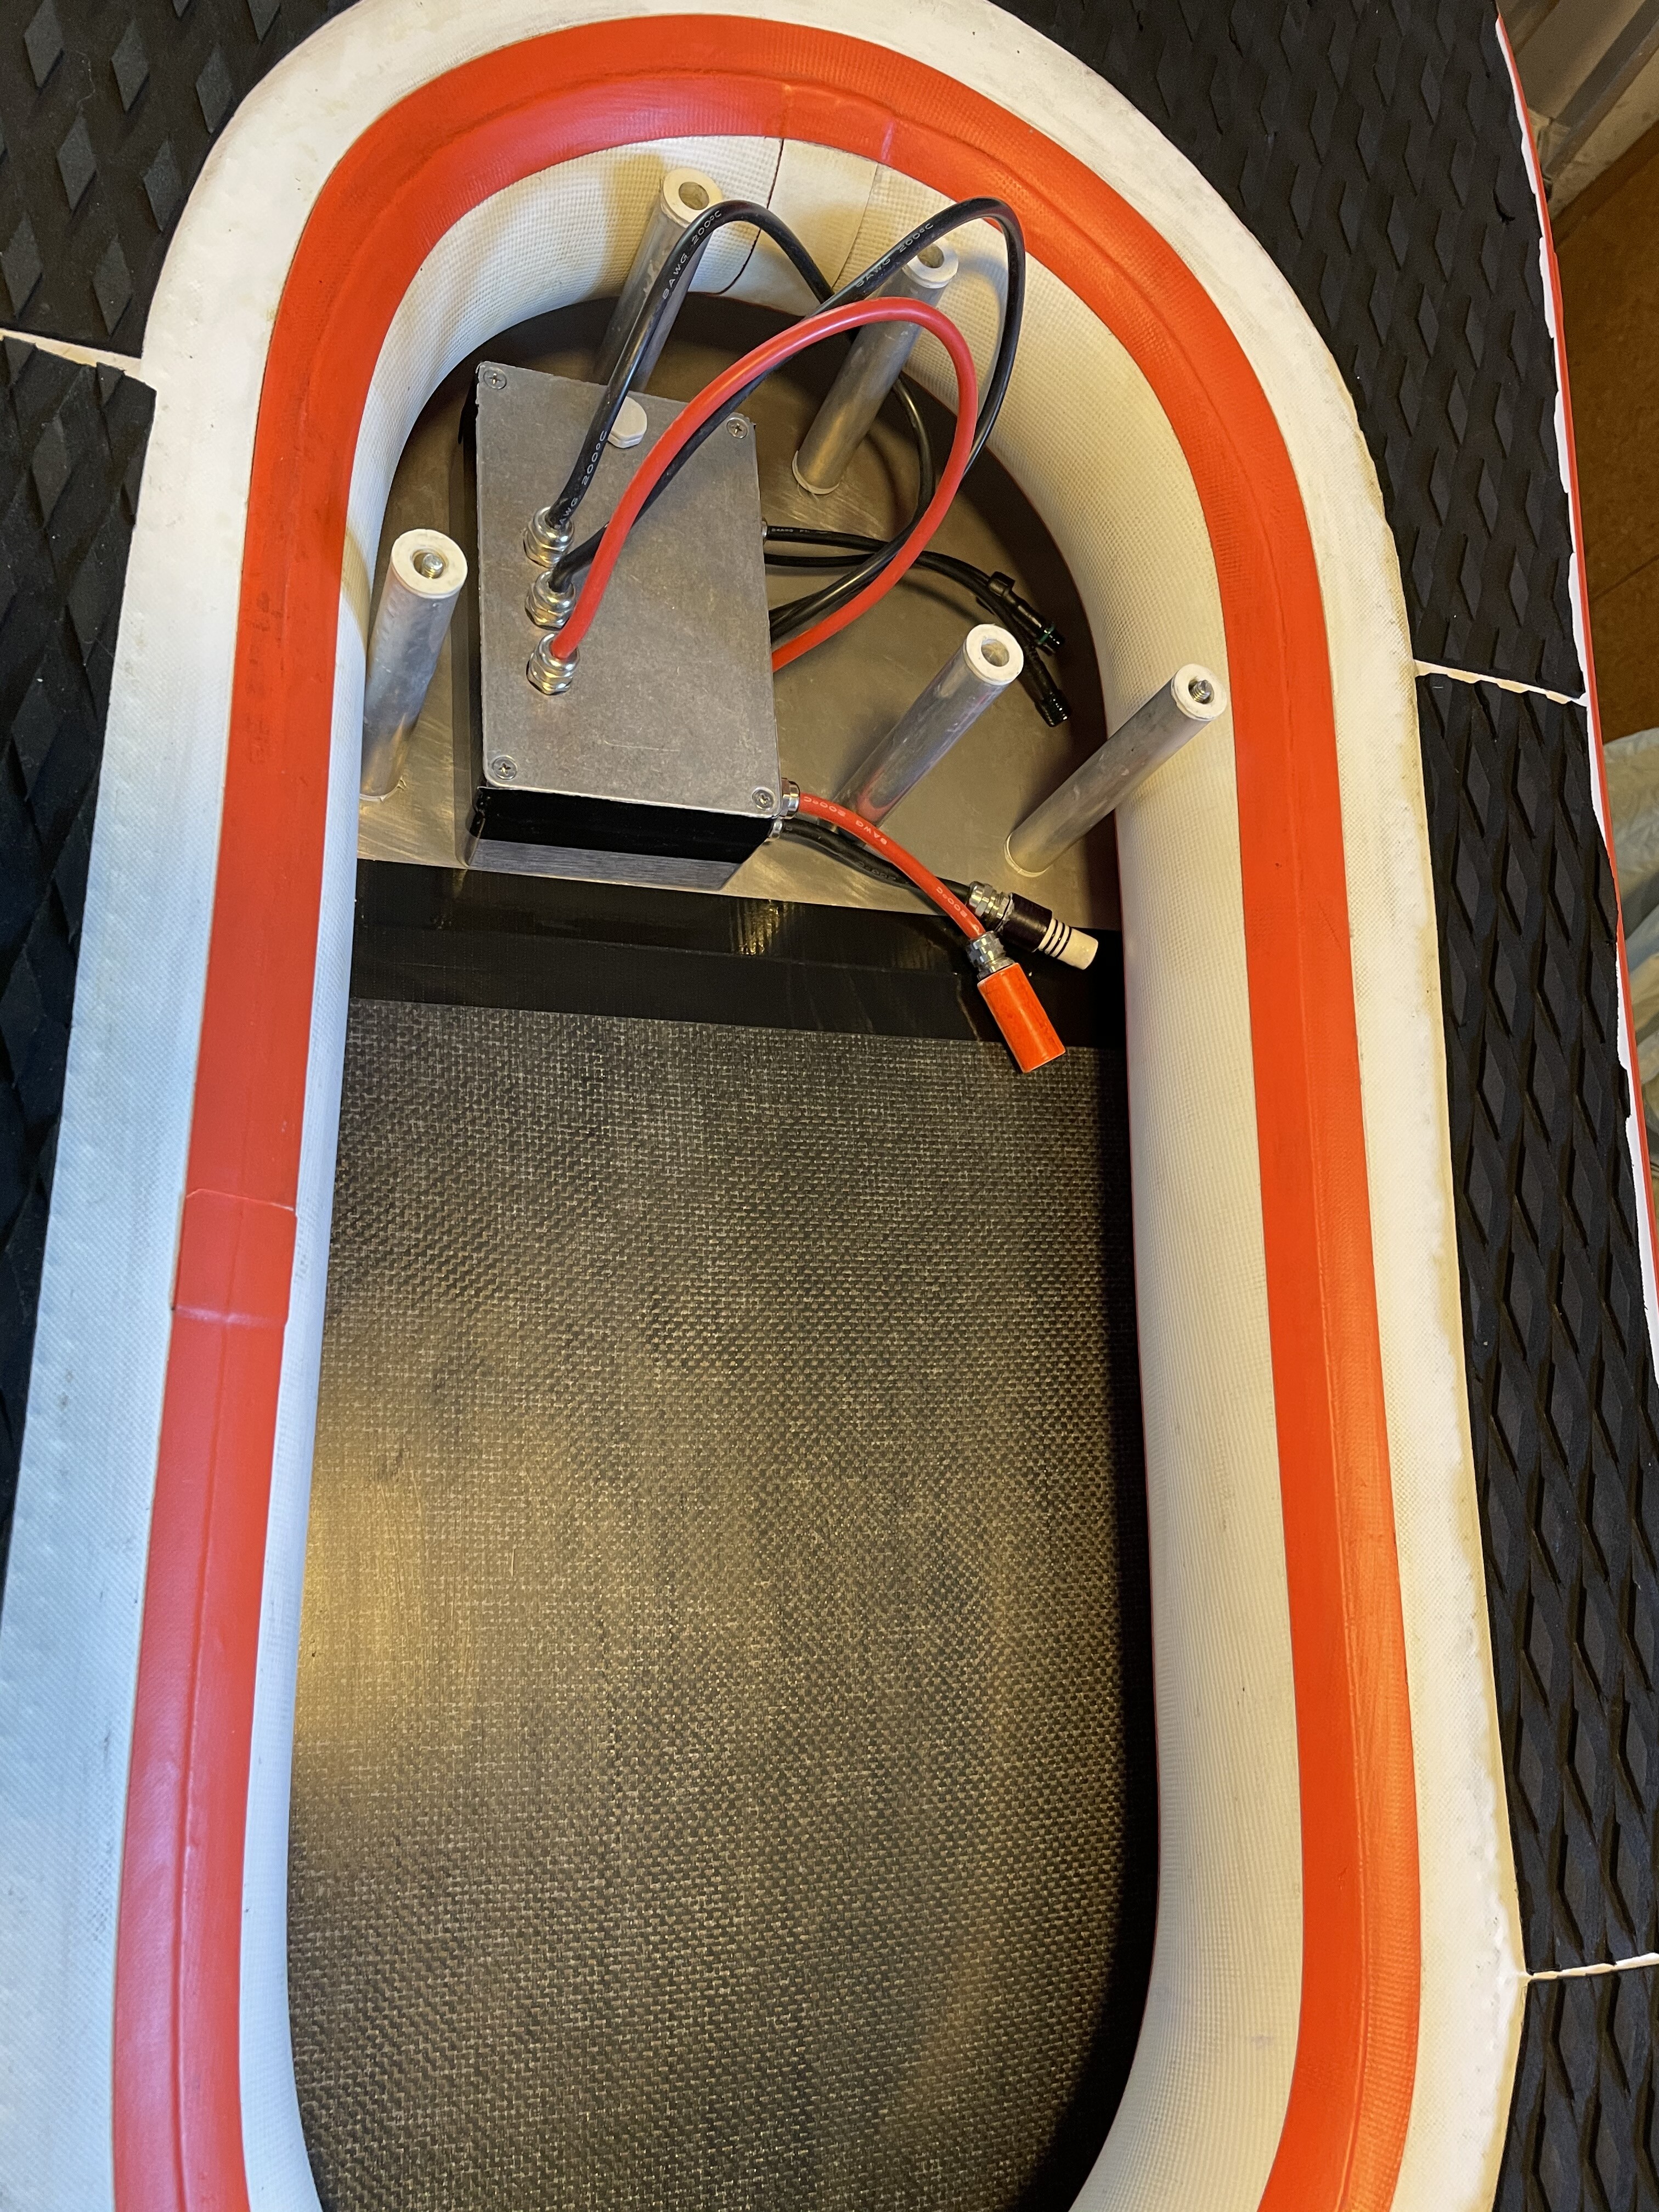
After water ingress (again) in the ESC box, I changed the concept and moved the VESC inside the dry battery box. As I don’t like water inside my box, the VESC is passively cooled through a heat sink laminated into the box. It is a tight fit with the additional VESC inside but it works quite well.
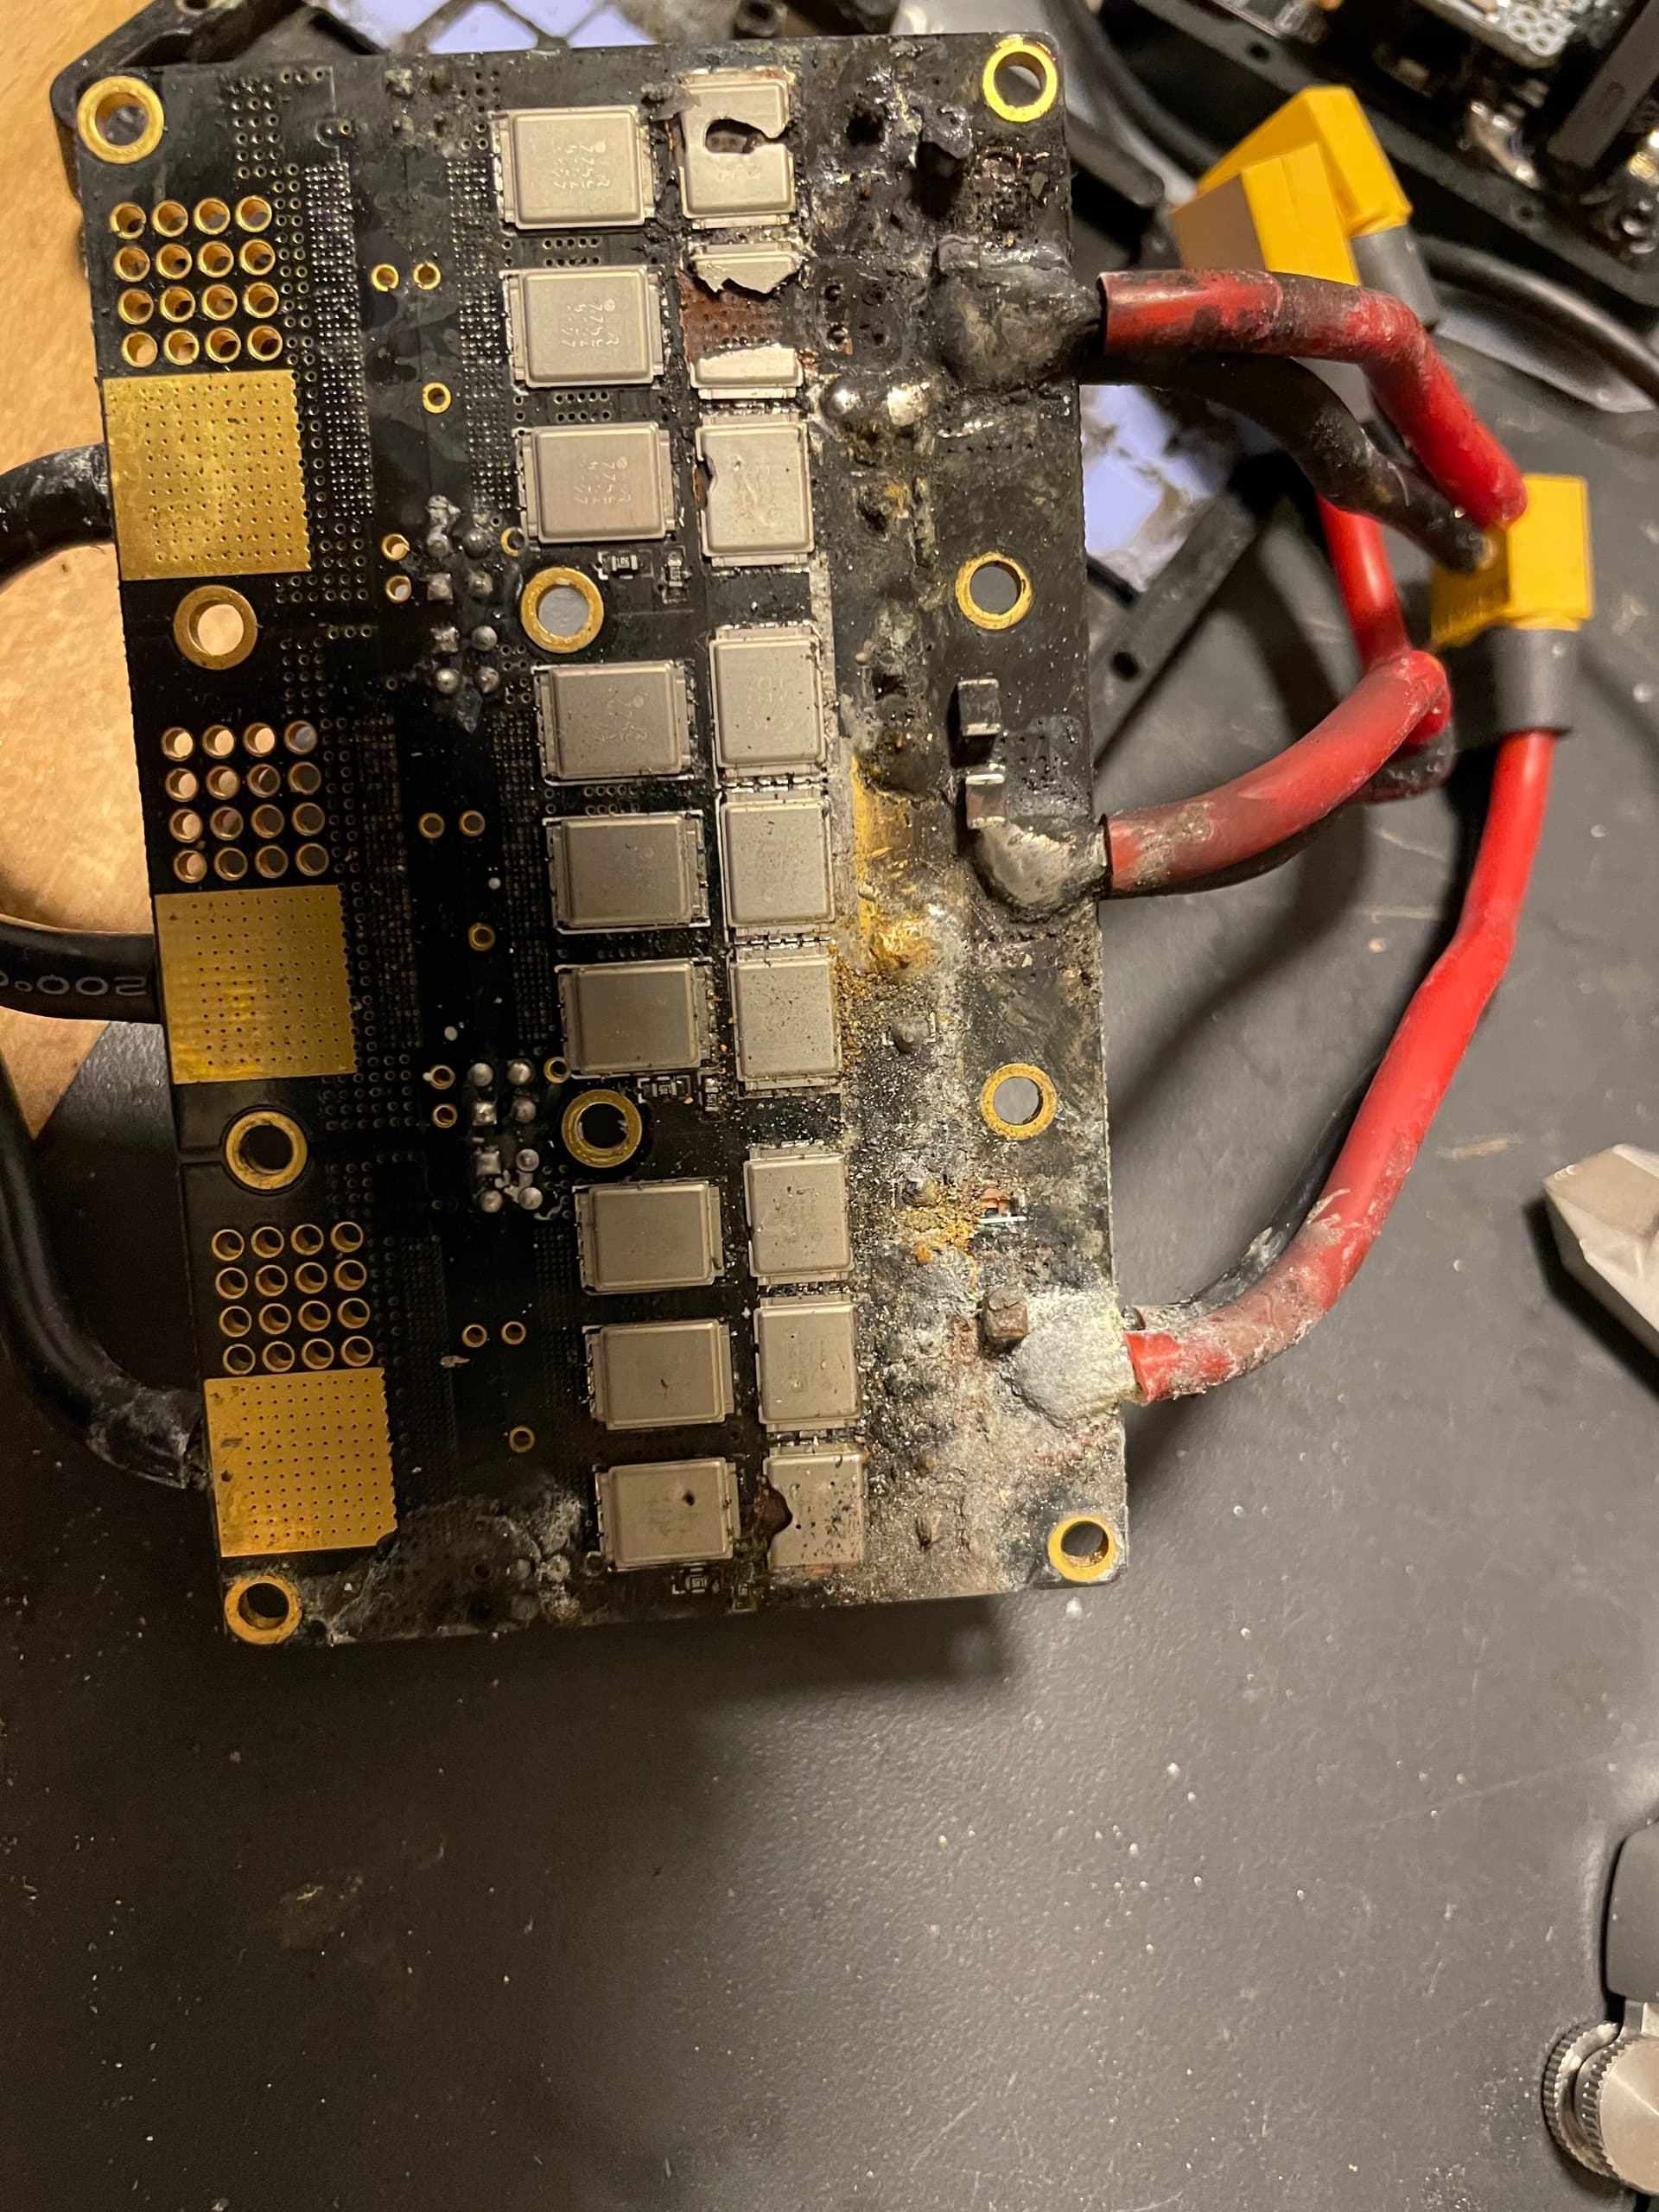
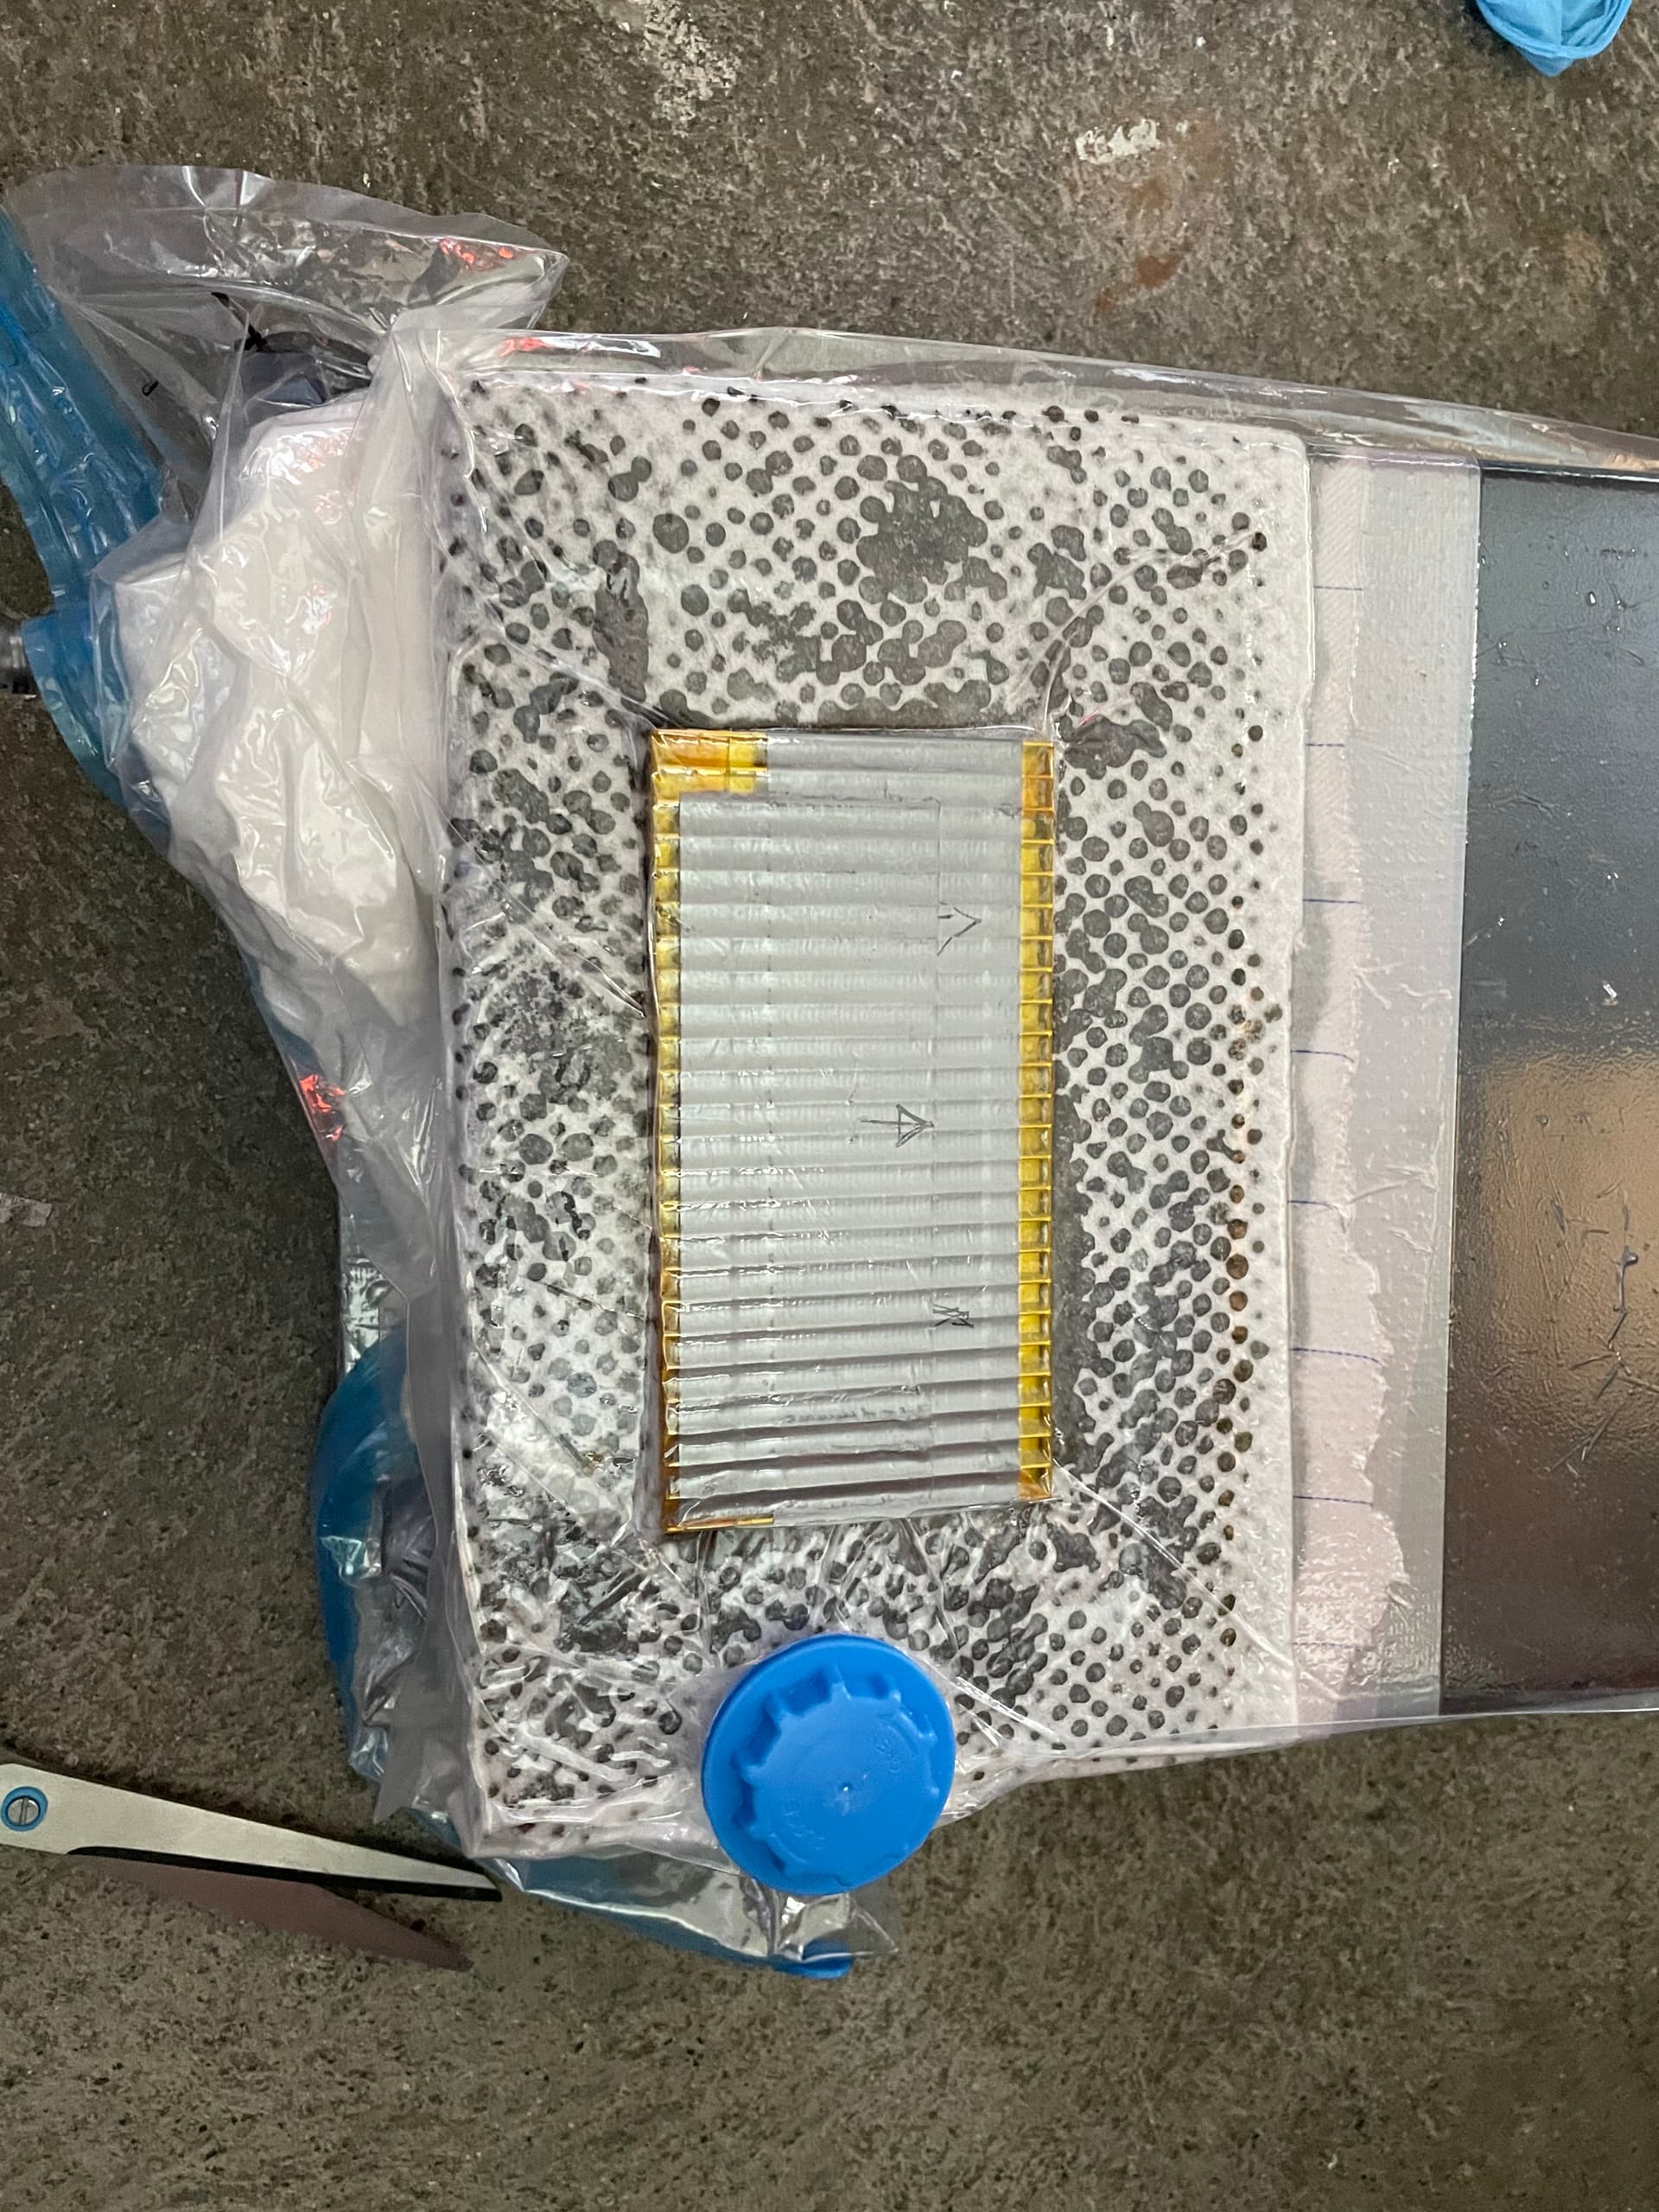
VESC 75200 after it got some drops of salt water
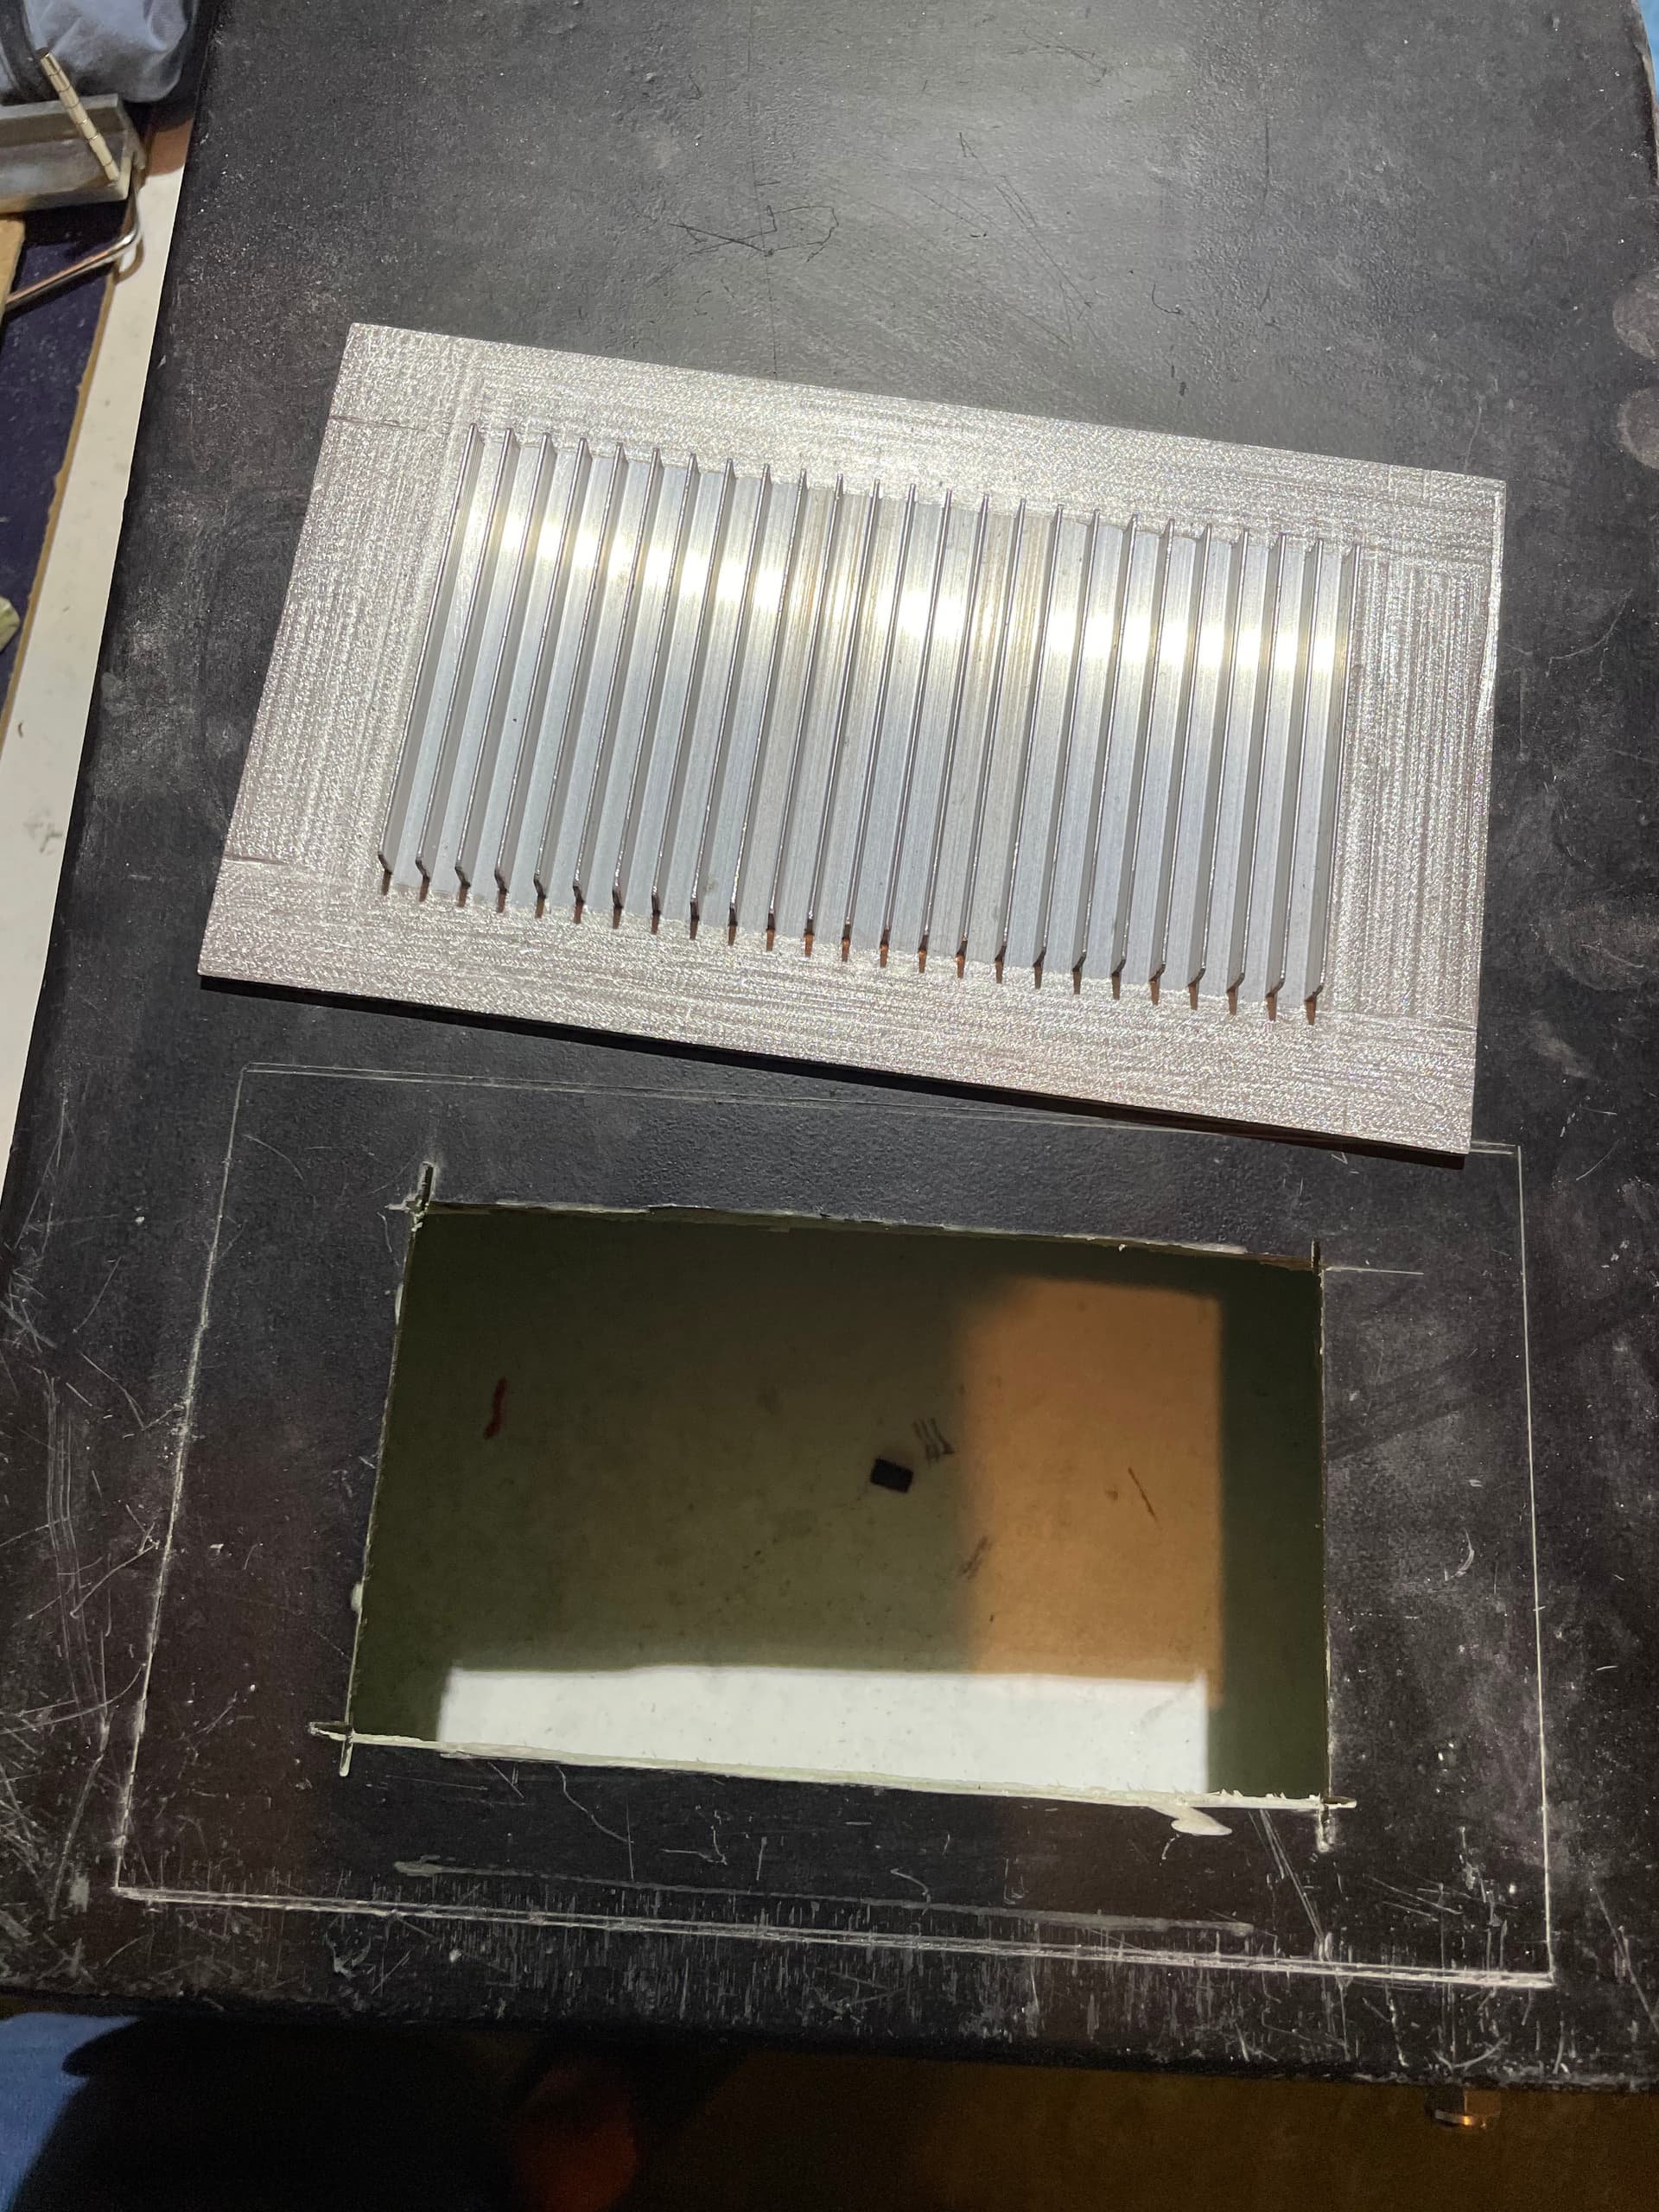

Cut the box with a dremel and fit a modified heat sink into the sandwich core. Made some 2mm holes for better bonding.

Laminated it in with 2 layers of carbon and one layer of glass and put it in a vacuum bag. Then coated with pigmented 2k polyurethane. For a good bond, the aluminum should be sanded just before laminating (<10min) as the oxide builds up fast.
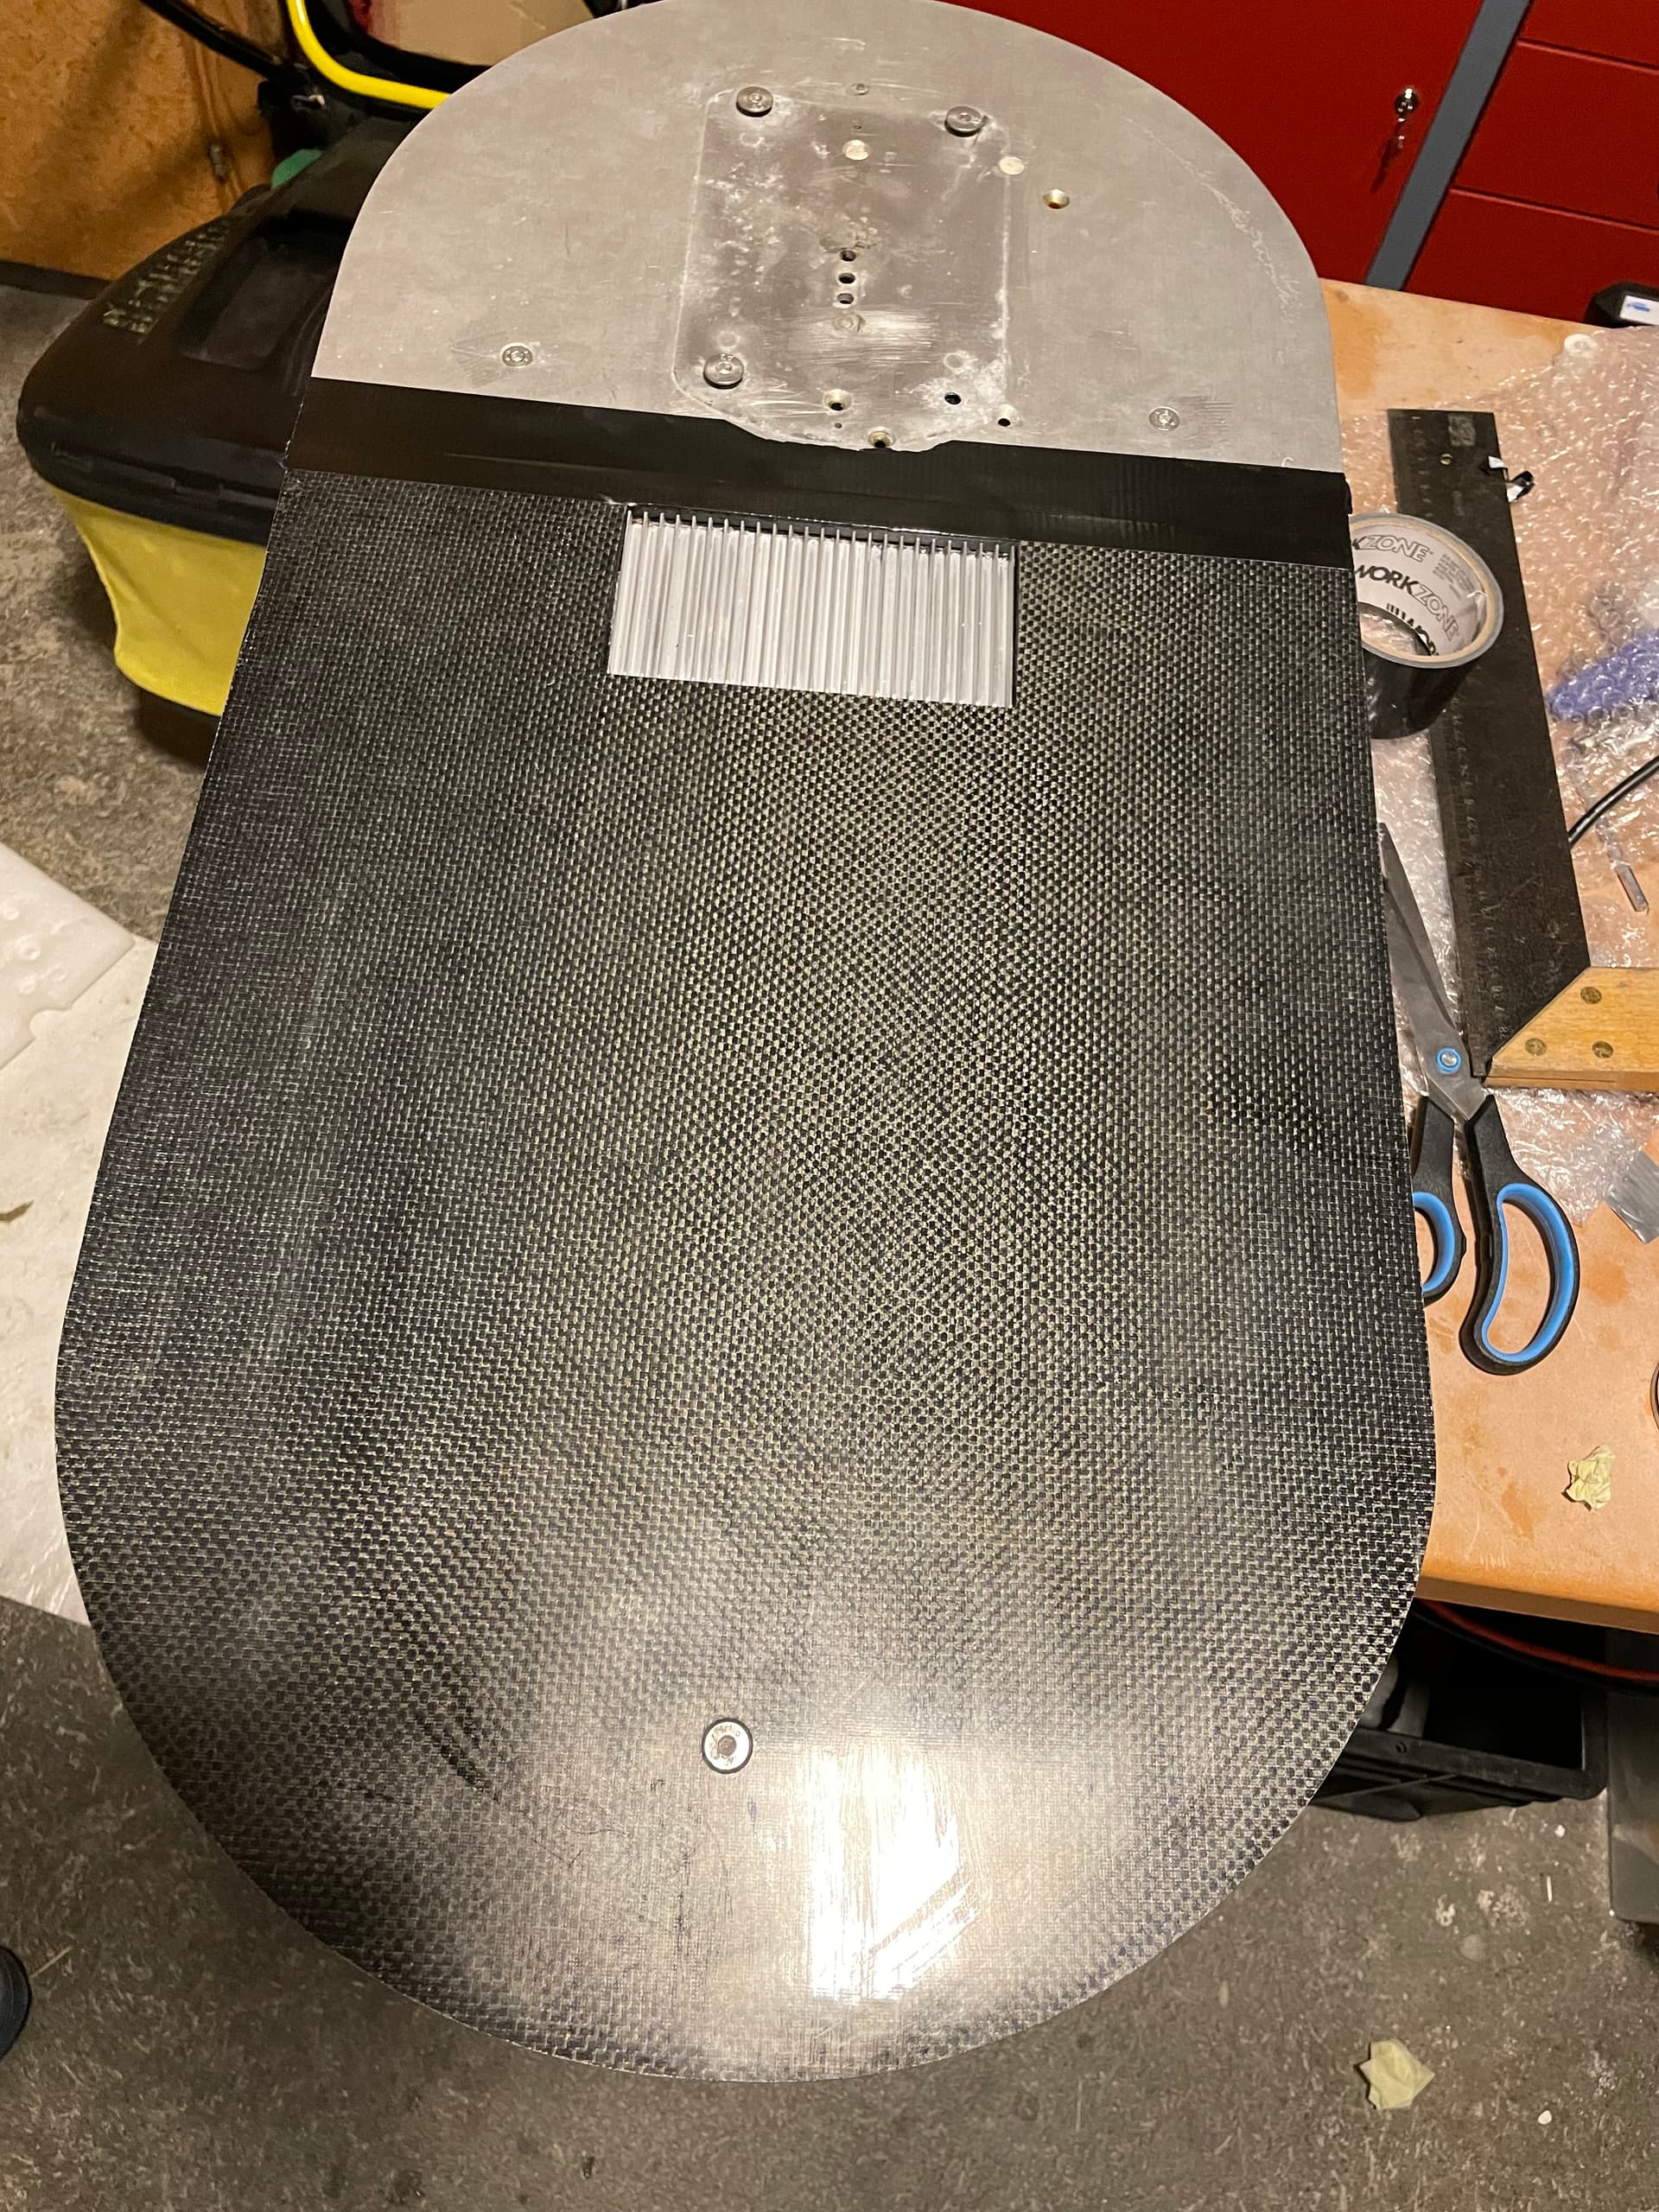
Had to cut out the bottom plate, the ribs are flush with the surface.
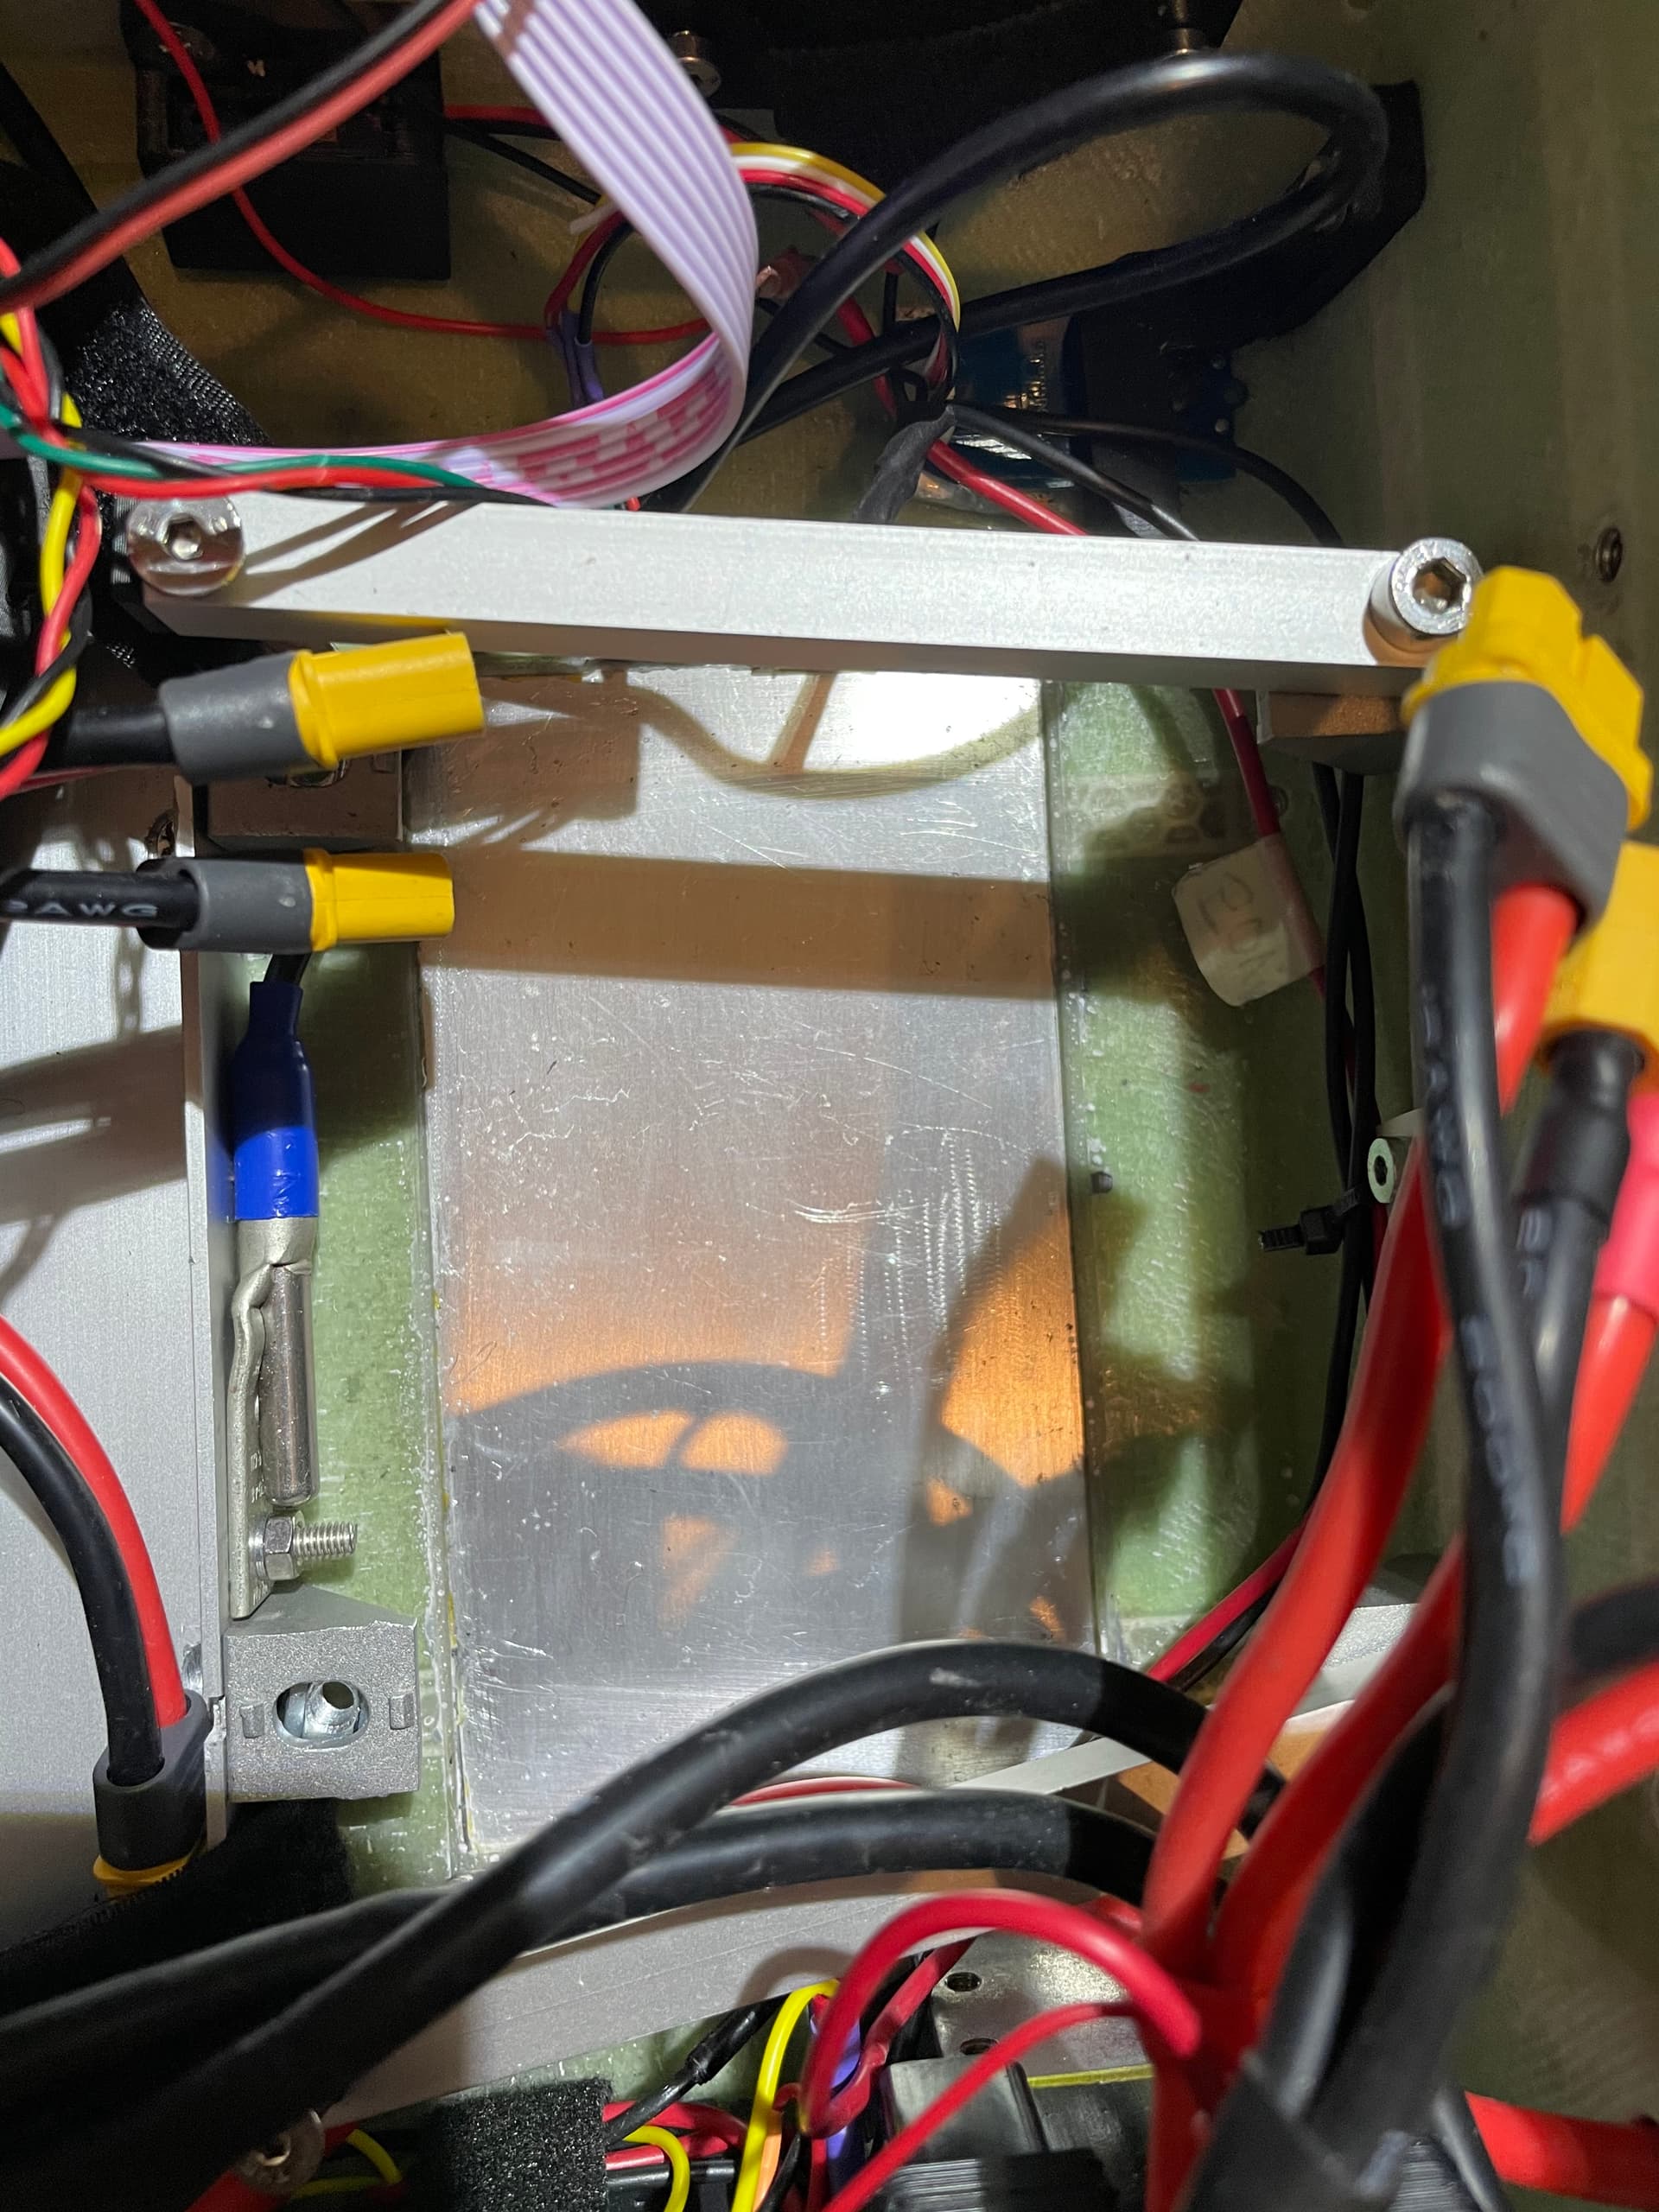
Inside the box
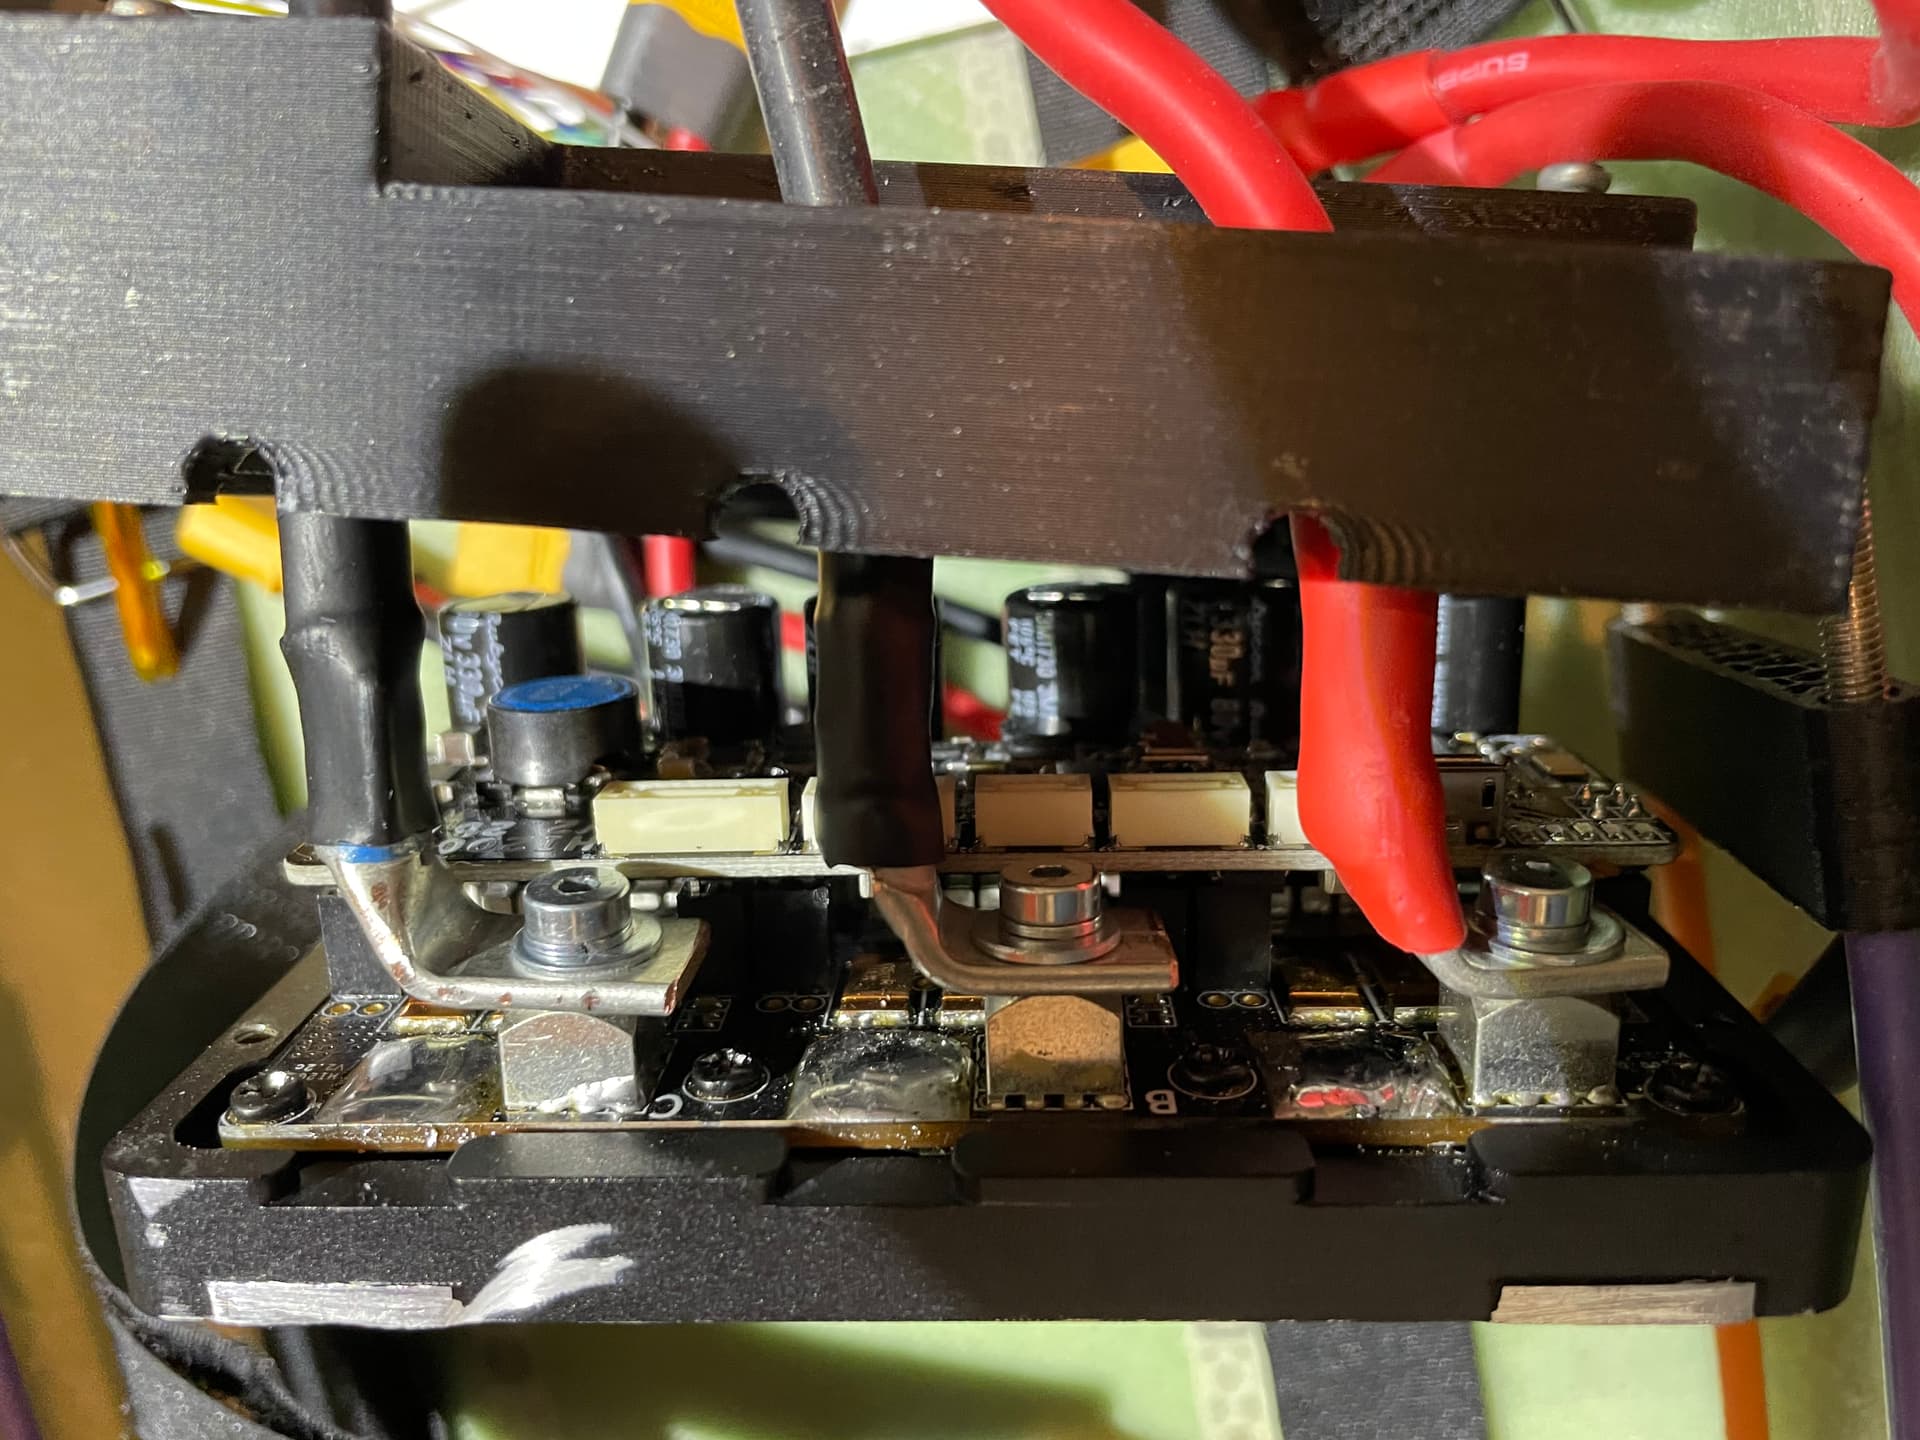
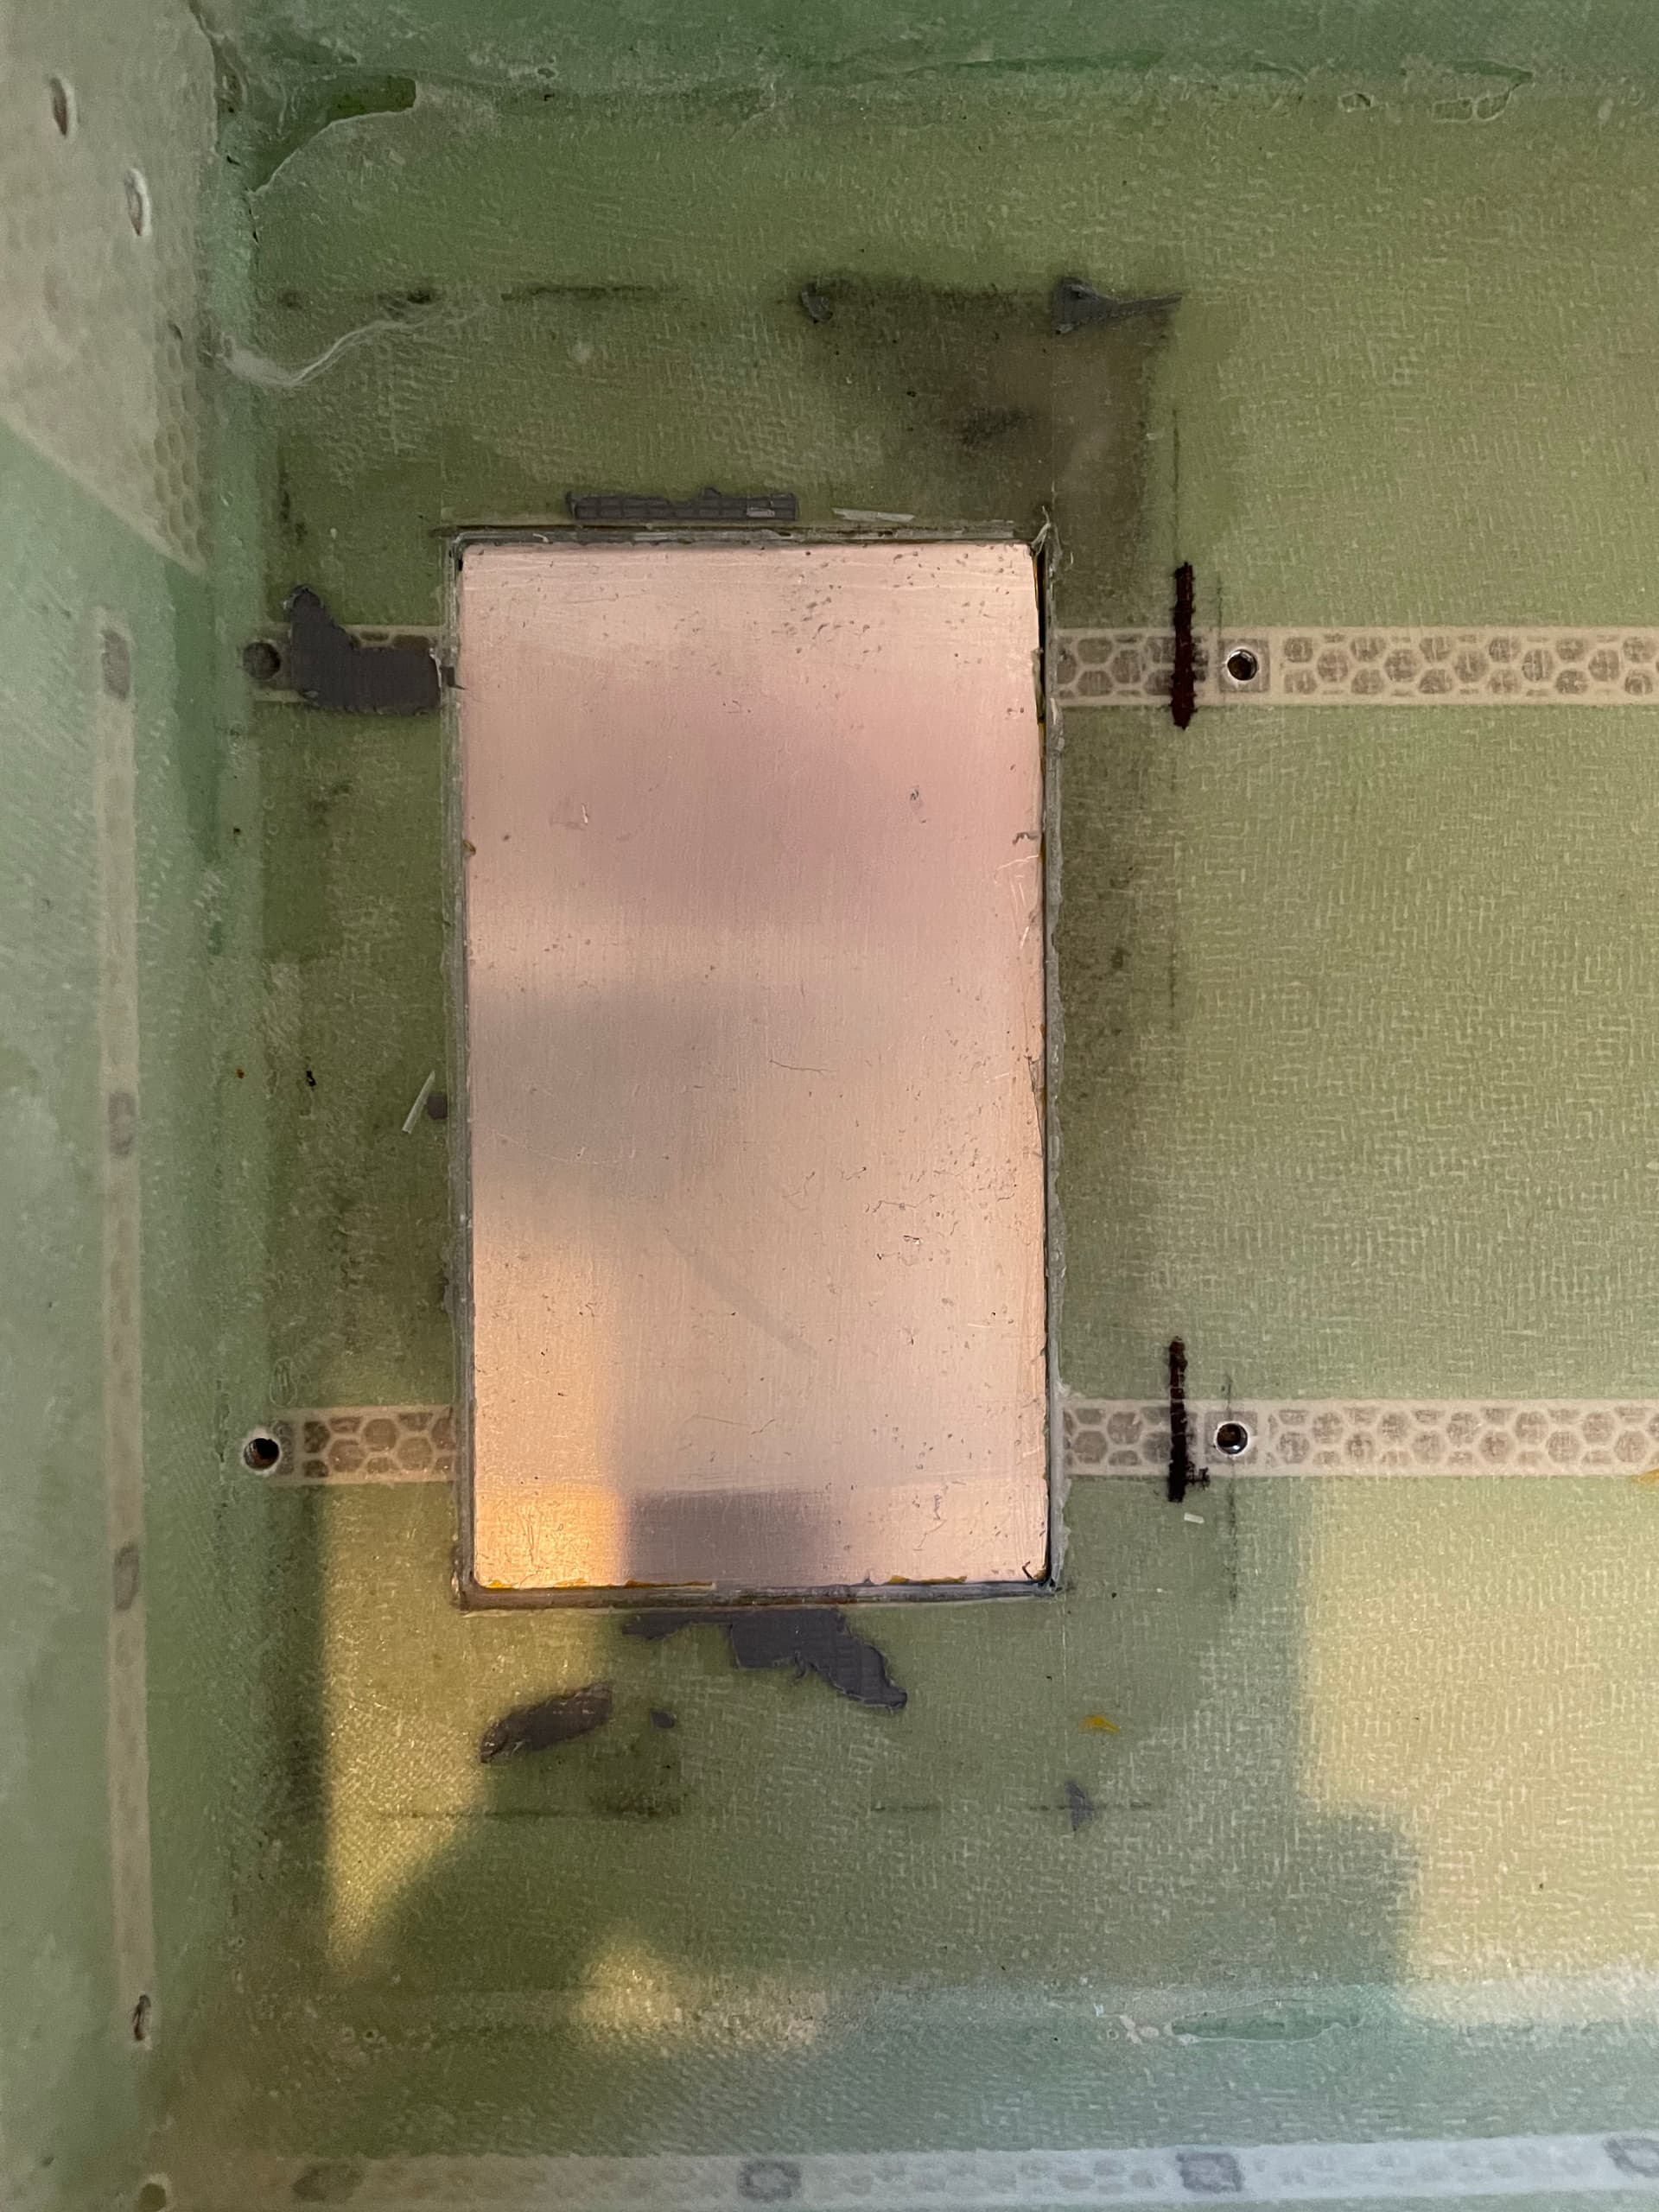
Added Würth screw terminals to the pcb
Clamped the 75200 VESC to the heat sink with a 0.5mm thermal pad in between

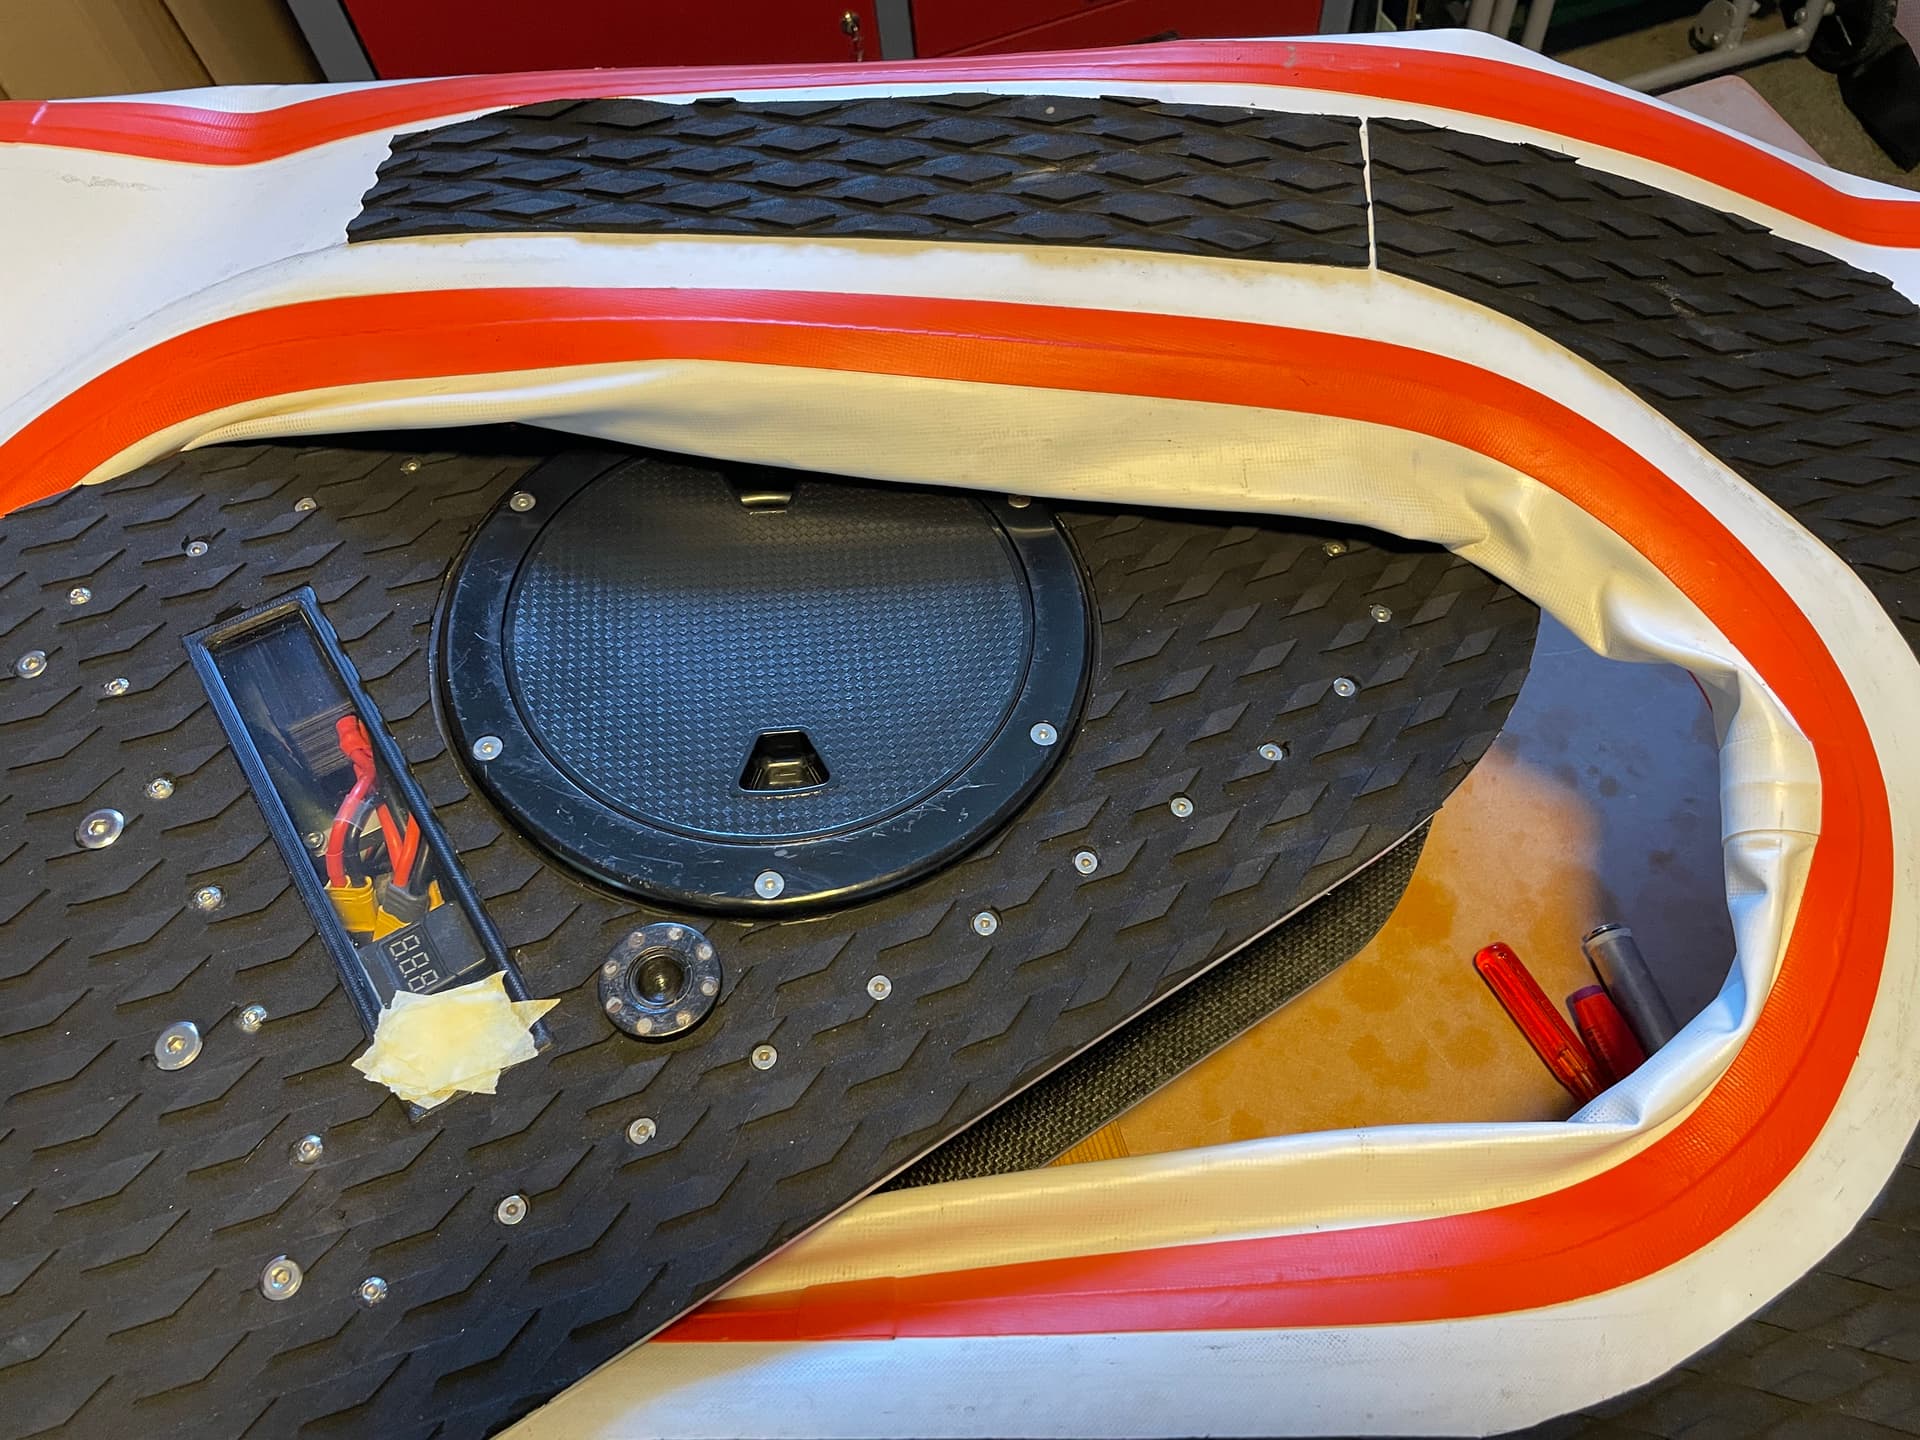
It’s easier to put it together, without the spacers in the back installed, the inflatable can be pulled over the box with the bottom plate installed. Once the inflatable is in place, the mast can be installed (including the spacers in the back), cables connected, then inflated.
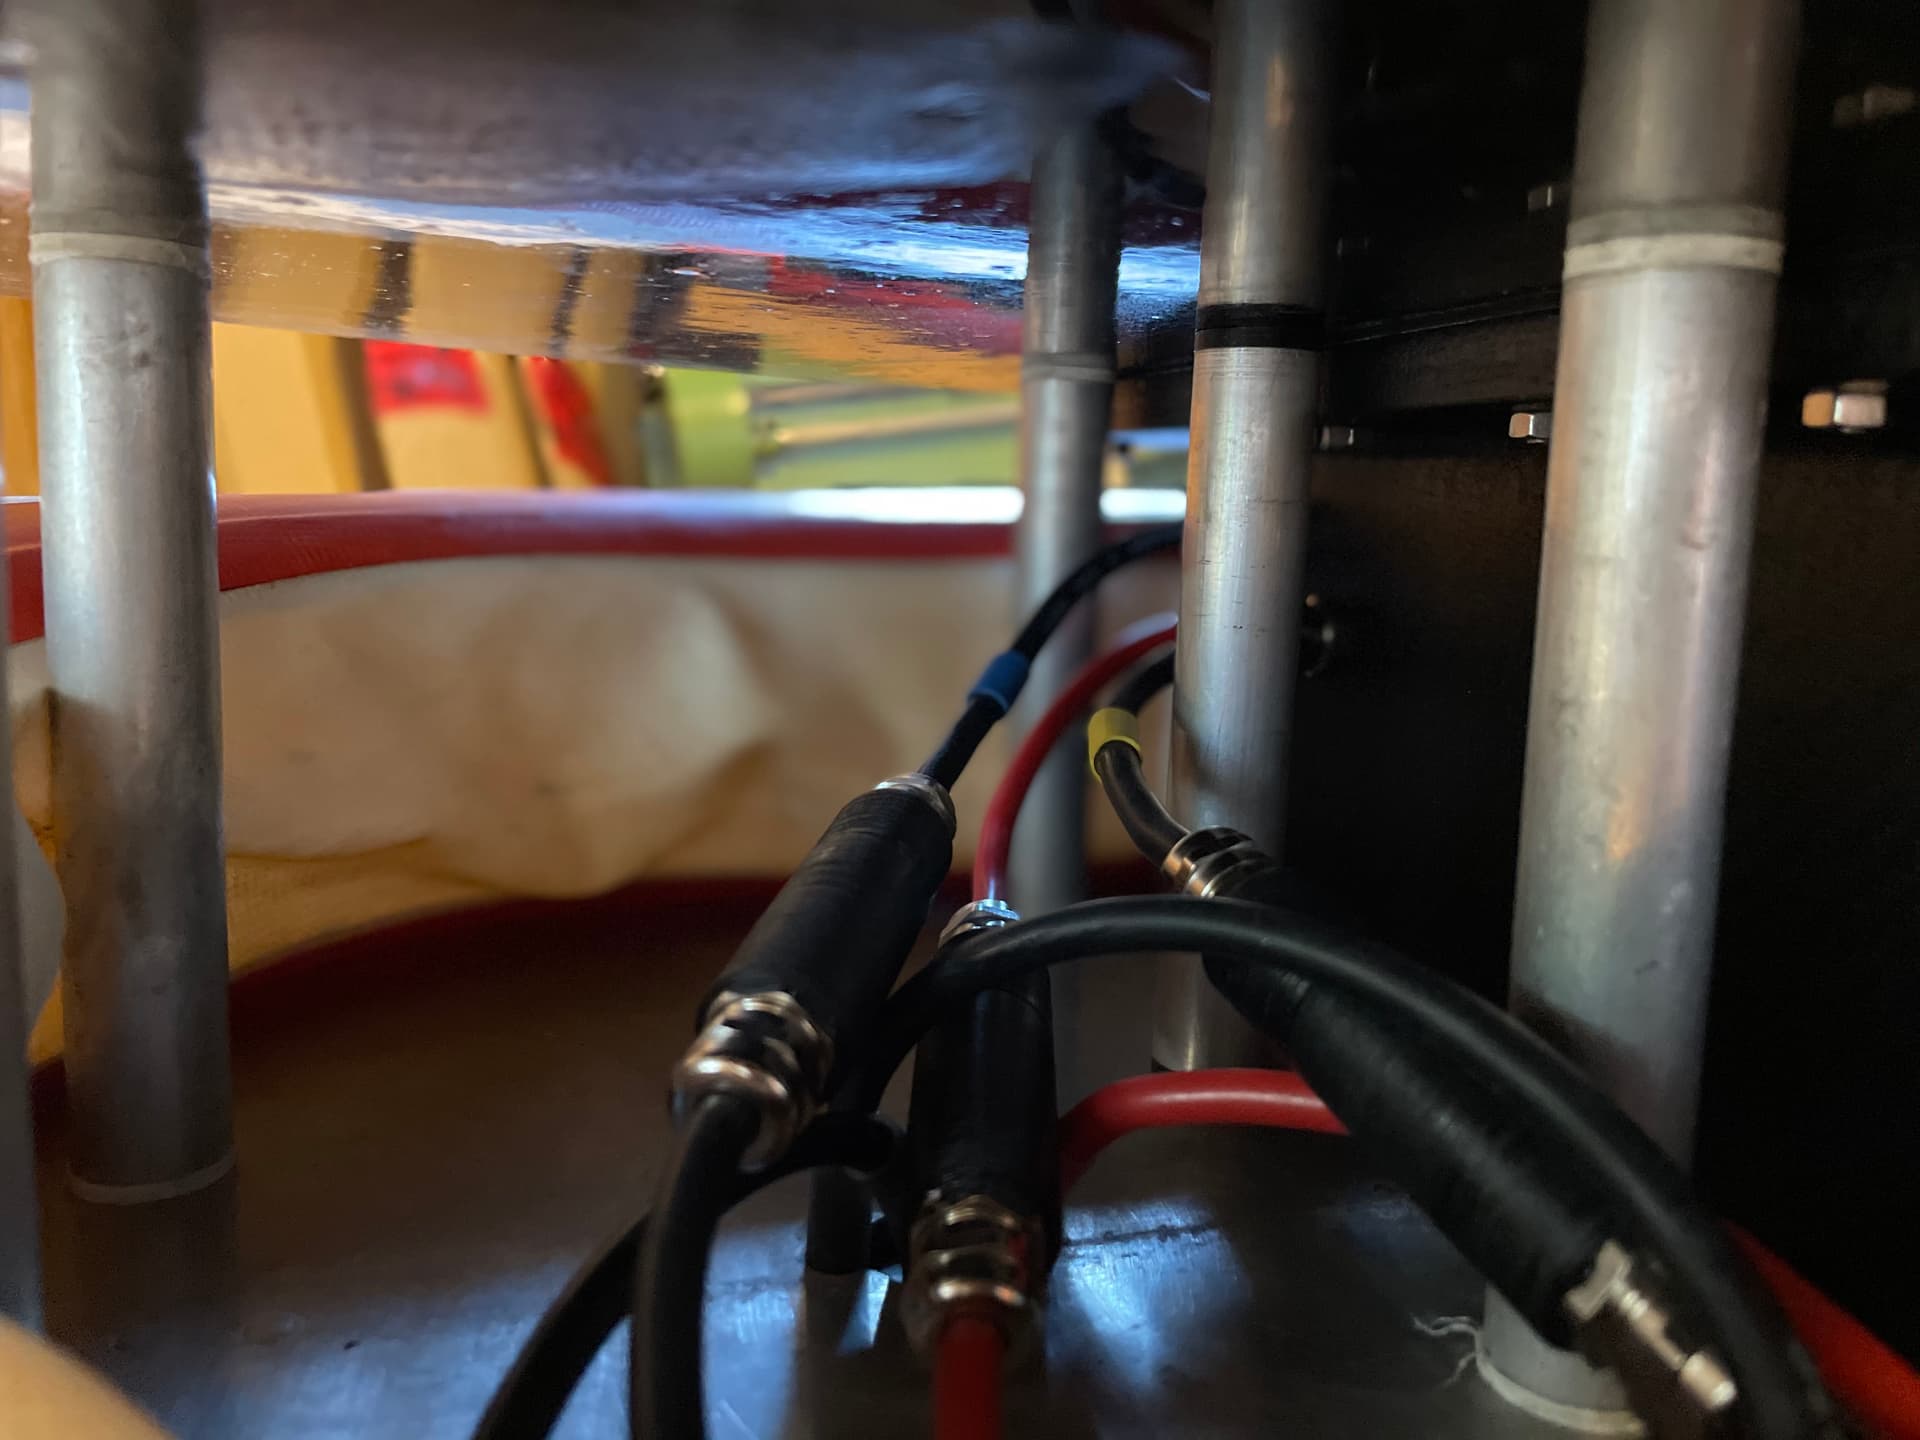

Passive cooling seems to work, did a couple of sessions, no issue. The heat pad is important, as thin as possible, 0.5mm 12-14 W/mk. I had a 6W/mk 1mm pad first, difference is about 10° in VESC temp.
17 Likes
Great looking build, interesting the way you’ve laminated alu plate into the housing. The Jaycar thermal tape I’m using for my vesc is 0.5mm, but only rated for 1.6w/m-k, nowhere near the values you mention. Maybe I should try thermal grease and make a clamp to hold it down solidly. My vesc quickly gets over 70 deg C when I’m towing someone behind me. The heat is going into the pelican case with the battery, so it’s a bit of a heat reservoir.