Most good cells have a degas cap and/or a shortcut pop cap
Meaning it is not a good idea to seal the all battery in epoxy for instant
Never seen a shortcut cap in action , but I have a few cells degas in my hand ( e-cigarette) , the cells got really hot , I had time to thrown them away and they never explosed , but that was max 2cells
Not really sure that the degas cap or vent cap works in both ways (?)
Last week I had my first dead 30Q cell , maybe + 1000cycle , IR was above 150 , and the cell just internaly shorted I guess, not heat , just went down to 0v in 2weeks
I will use it to run some test , to see if in // other cells can discharge in it …
I assume it would be a problem if it happens in a big pack and pretty hard to find out at the beginning, my only way is to check IR during charging …
Ps : all my degas cells came from external shortcut , and once it started it never stopped , the reaction was pretty high but can be handled if it’s a couple of cells … you have to do things if you allready know what to do …
Hi, i’ve slowly acquired most of the parts for my build, printer is running right now - DIY Foil Drive - Google Sheets
Last thing I need is a battery, can anyone help recommend one available ready to buy in Australia, I found a nice one on Hobbyking but the shipping was way too much when I went to buy it.
So after many hours of building I finally took my diy foil assist out for a spin today. A big thank you @nekitesurfing for his massive help getting me this far and patiently answering my many questions!
It worked well for 5minutes today and I experienced the potential…until I lost power and realised the motor had sheared off of the mast mount and I had lost everything…Battery box, motor and battery. I’m gutted! But not defeated, I will try again!
Next time I need to attach the battery box to the leash plug I think as a backup. Unfortunately I dont have footstraps plugs on the board as they would be an ideal secondary tie down point.
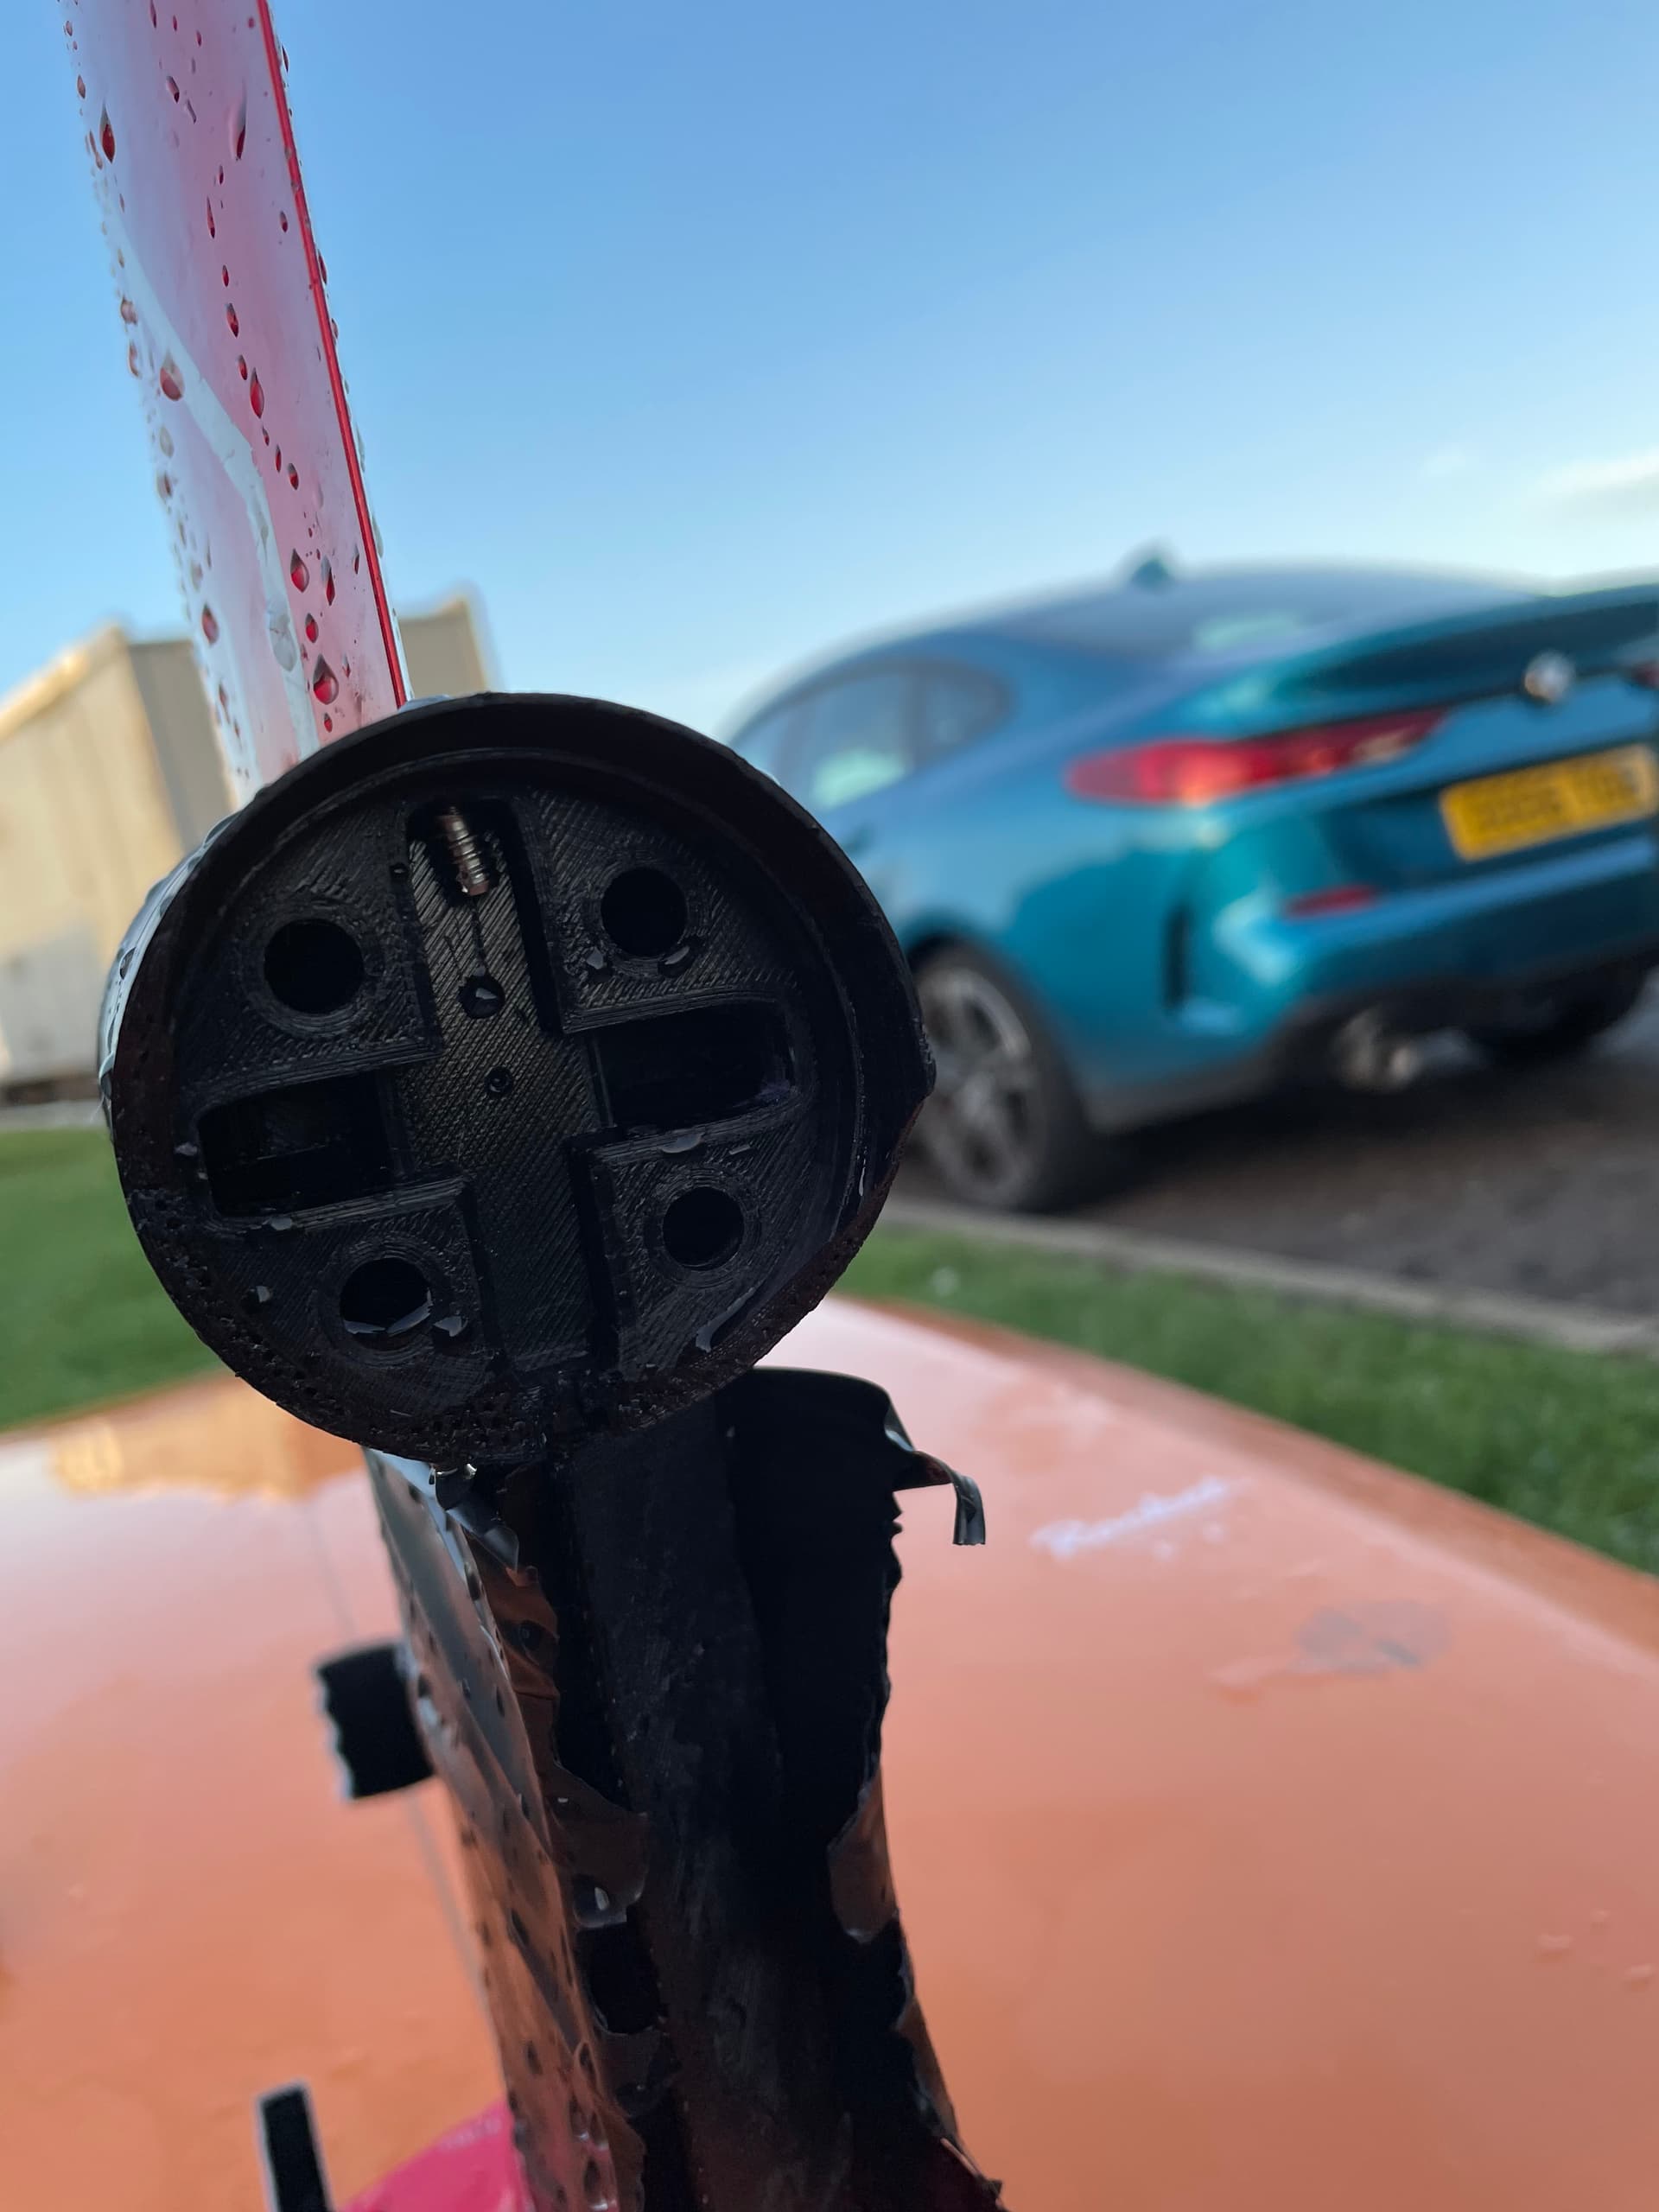
Has anyone else experienced a motor shearing off from the mount? I printed the pod at home using PETG with 80% infill. On reflection there is a lot of weight from the motor putting a lot of torsional force onto the end of the motor pod which is only thin plastic.
The photos below show the damaged motor pod after the session…
Hello
I am really sorry to hear about you loosing all your gear !
I experimented exactly the same type of rupture as you. Fortunately with less catastrophic results.
Could not get a strong bond on that junction. Either petg or pla. I think the structure is not strong enough in the long term.
I switched to an efoil pod in two parts. It still is conected with two bolts and is much more sturdy.
Although i modified the part to remove the nuts and screw directly in the motor part. Less chance for layer split
Sorry to hear that!!! I have printed all parts in polymaker PC and have had no breaks in close to a year of riding, including propeller blades. I ride mine at least once a week. Until using PC I would break the occasional blade or the mount would crack after 10 hours or so. I experimented with many different plastics including resin printing and the polymaker PC was the only one that lasted.
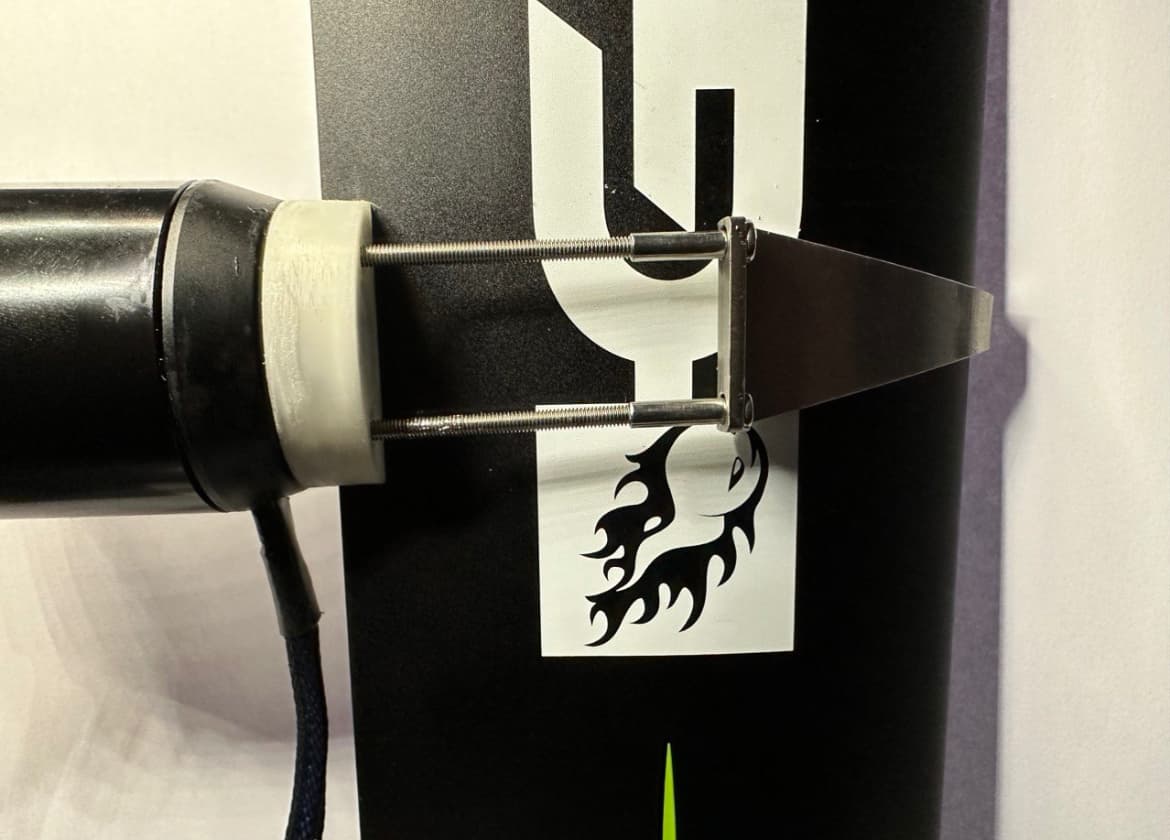
Sorry to hear. Many forum members had this problem and there are different ways to improve the motor mount. Some fill it with epoxy. I prefer a mount with no load on printed parts. It is a bit longer but i holds for over two years: Daniels (un)geared inflatable (slowly built) - #54 by sat_be
The 4 threaded stainless rods are directly attached to the 63100 outrunner and secured with medium loctite. The white part is from POM. Only the shells are 3d printed (and covered with one layer of cfk).
(Refers to the link above, not the picture below)
Even better for a sleeker design is a stainless steel clamp like this:
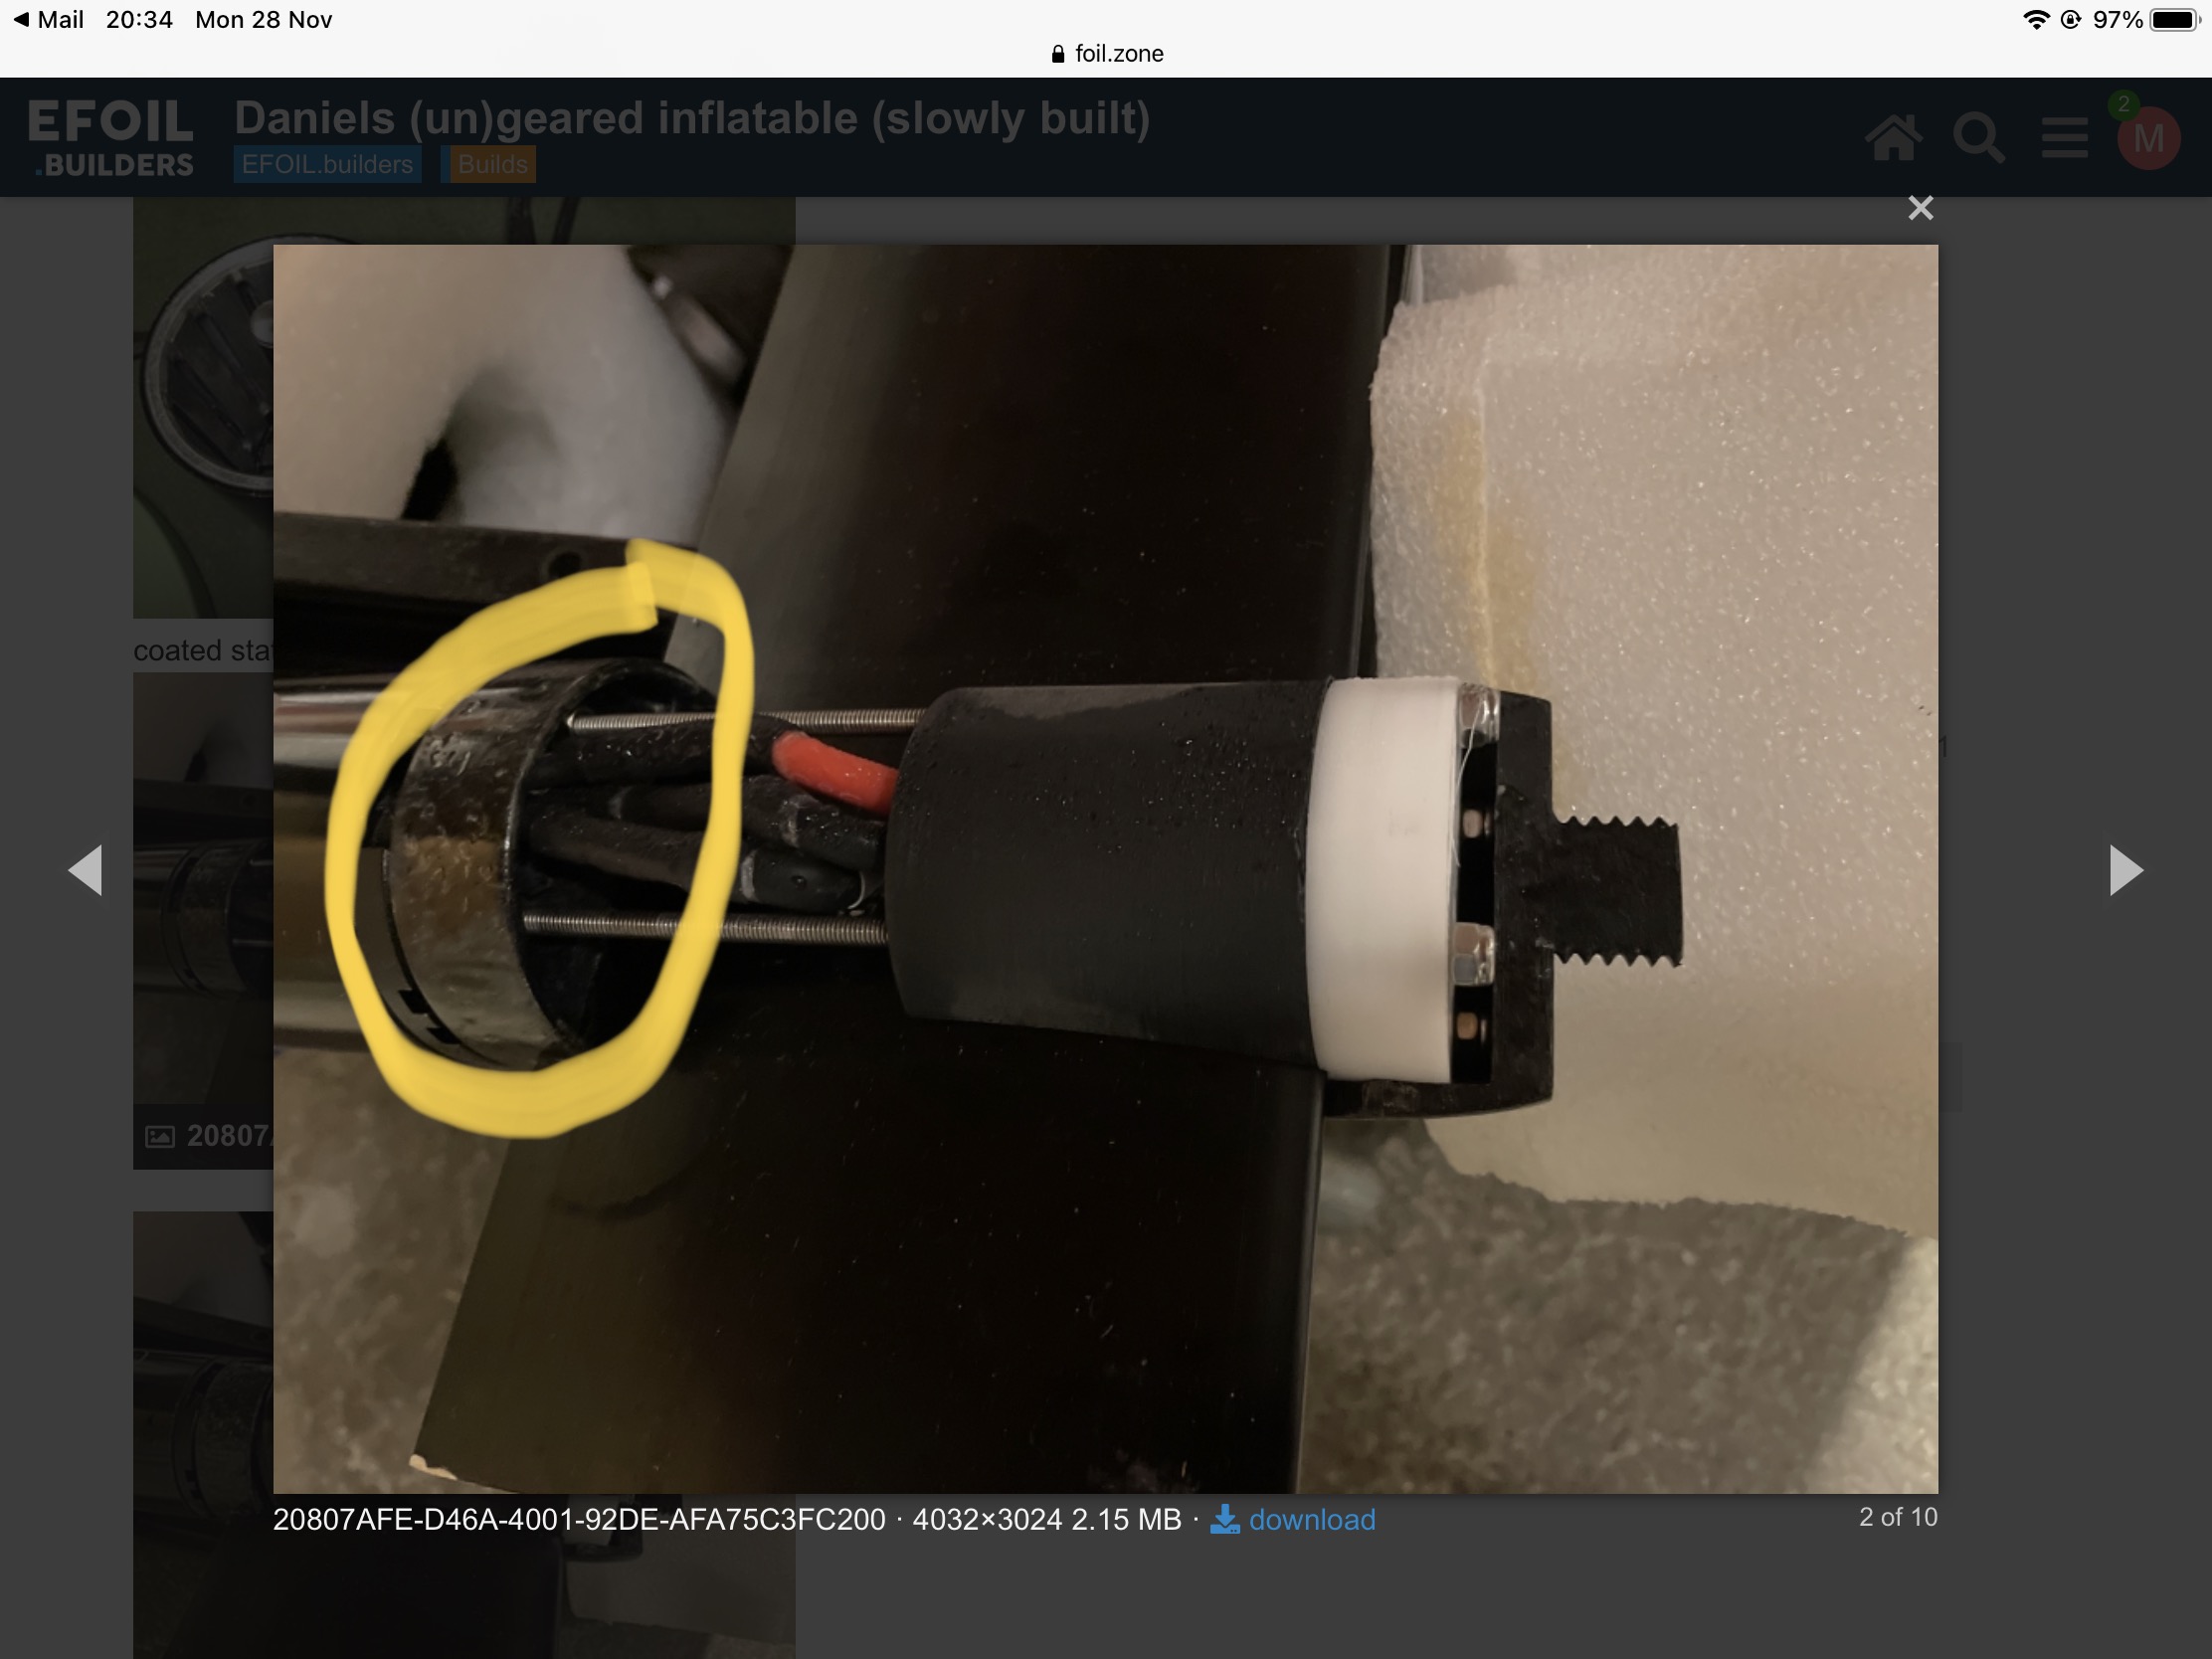
@sat_be thanks so much for the reply! Very helpful indeed. I like this design, looks strong and simple. What is “CPF” coating? Is the bit highlighted in yellow also made of POM material?
Sorry, it‘s a typo, should be CF (Carbon Fibre).
No, the part in the yellow circle is 3d printed from asa-x and coated with carbon (so still a bit of load on a printed part, but only presure. I coated the shells later.
@sat_be thanks for the feedback! I’ve nearly designed my own version. I’m still on mark 1 though .
How do you stop the covers sliding forward and falling off? Have you incorporated a taper in your cover design (so the diameter gets thicker towards the nose cone) to prevent them sliding off?
I see you have a black insert that buts up to the white puck at the front. Why did you have that? I don’t have any space between the rods and the mast for that.
The two shells are clamped under the motor holder on the trailing edge side of the mast. This holds the shells in place as they are adapted to the shape of the mast.
The purpose of the black inserts is to move the force that would bend the pom disk when tightening the nuts, towards the mast.
Happy to report that FINALLY, I was able to get my foil drive assist plus working. I went through 4 different ESC’s, 3 different battery configurations and 3 different motors to get to this point but I’m really happy with the result.
Pops up out of the water no problem.
Went with a VESC 6.7 and I’m pretty sure it’s the same setup foil drive is using
HI rttn, I m building almost the same foil drive setup, lipo 6S 20A, 63100 motor, twoblades folding propeller, gong veloce L. Did you manage to foil without waves on this setup ? what is your weight ?
(not sure if 6S is enough power to foil without waves to train to pump or catch waves mor easily)
Yep same one. You have to resolder the battery and the motor leads, and bend the capacitors up to get it to fit with this battery pack, but that’s what it looks like Foil Drive did too.
The default limit on the vesc is 85 C I think for the mosfets. I bumped it up to 110 C and was able to ride for about 10 min without any problems
4 experiments with foildrive on different boards.
Today I am excited to test the new FOILDRIVE Assist Plus system which lets you motorise your existing foil gear to get you flying and catch more waves!
In this video we will unbox the Foildrive, check what extras we might need, show you how to install it on your foiling gear, help you choose the foil boards, wings and masts to begin with and then we will test my different foil setups to see what works best for a heavy rider like Mike.
Let’s have some fun creating the lightest efoil in the industry and get it flying depowered in the waves!
on my epoxied 6384, the bell is becoming stuck due to the resin “expanding” wierdly beetween the stator wires. while running. I already scrapped the resin that came in contact with the bell, and got the motor stuck, but it quickly came back( as in the next time in the water).
i thought about corrosion under the resin, that would make it bloat or something, but my friend tried a brand new motor, with epoxy well mixed and cleanly poured, and it happened too, on the first try, so no time for corrosion to get in.
i have a spare new motor, but i’m tempted to just dip it in ACEF 50 in lieu of corrosionX.

 .
.