Enjoy ![]()
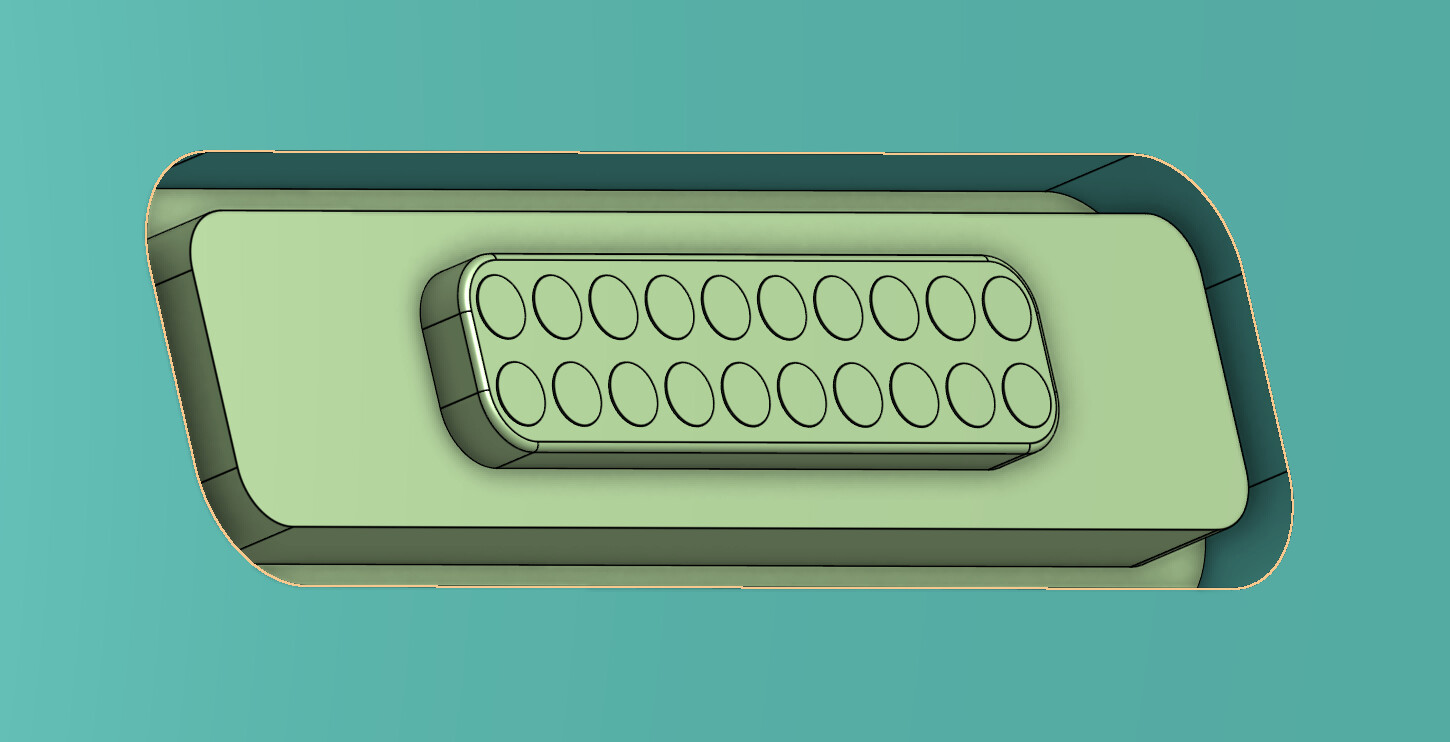
Pogopin magnetic connector model:
https://www.printables.com/model/993193-pogopin-magnetic-connector-13-20-pin
Enjoy ![]()
Pogopin magnetic connector model:
https://www.printables.com/model/993193-pogopin-magnetic-connector-13-20-pin
Interested if you found 13 pin drawing also ![]()
13 is same as 20
Just less pins on same space
I will correct the model name
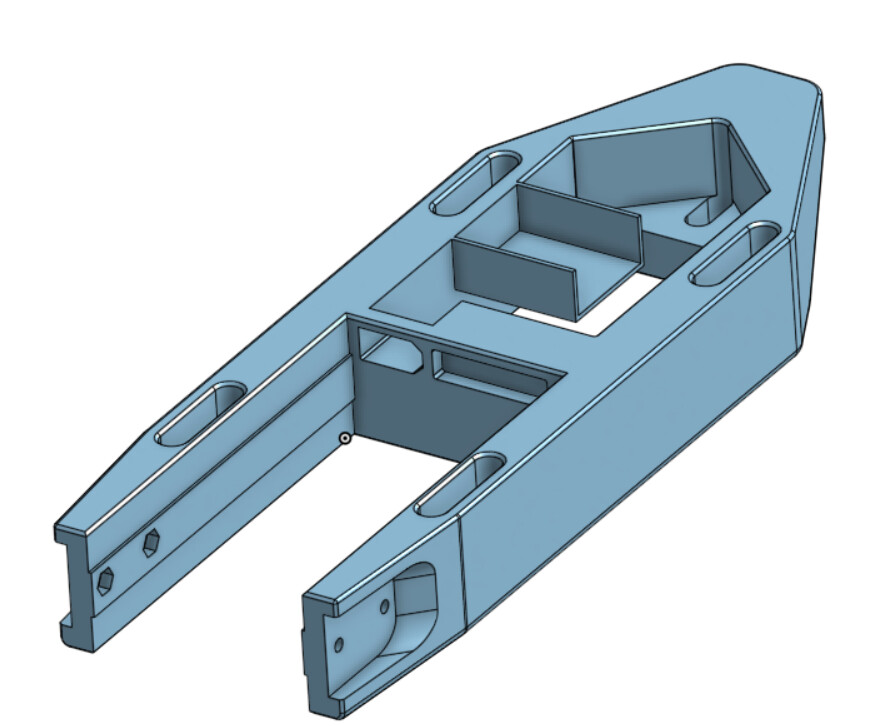
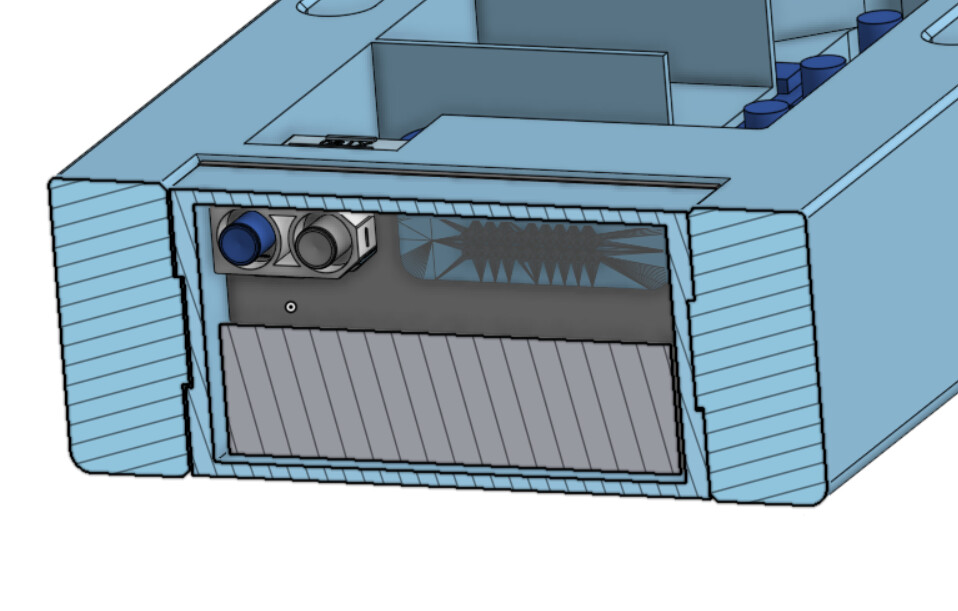
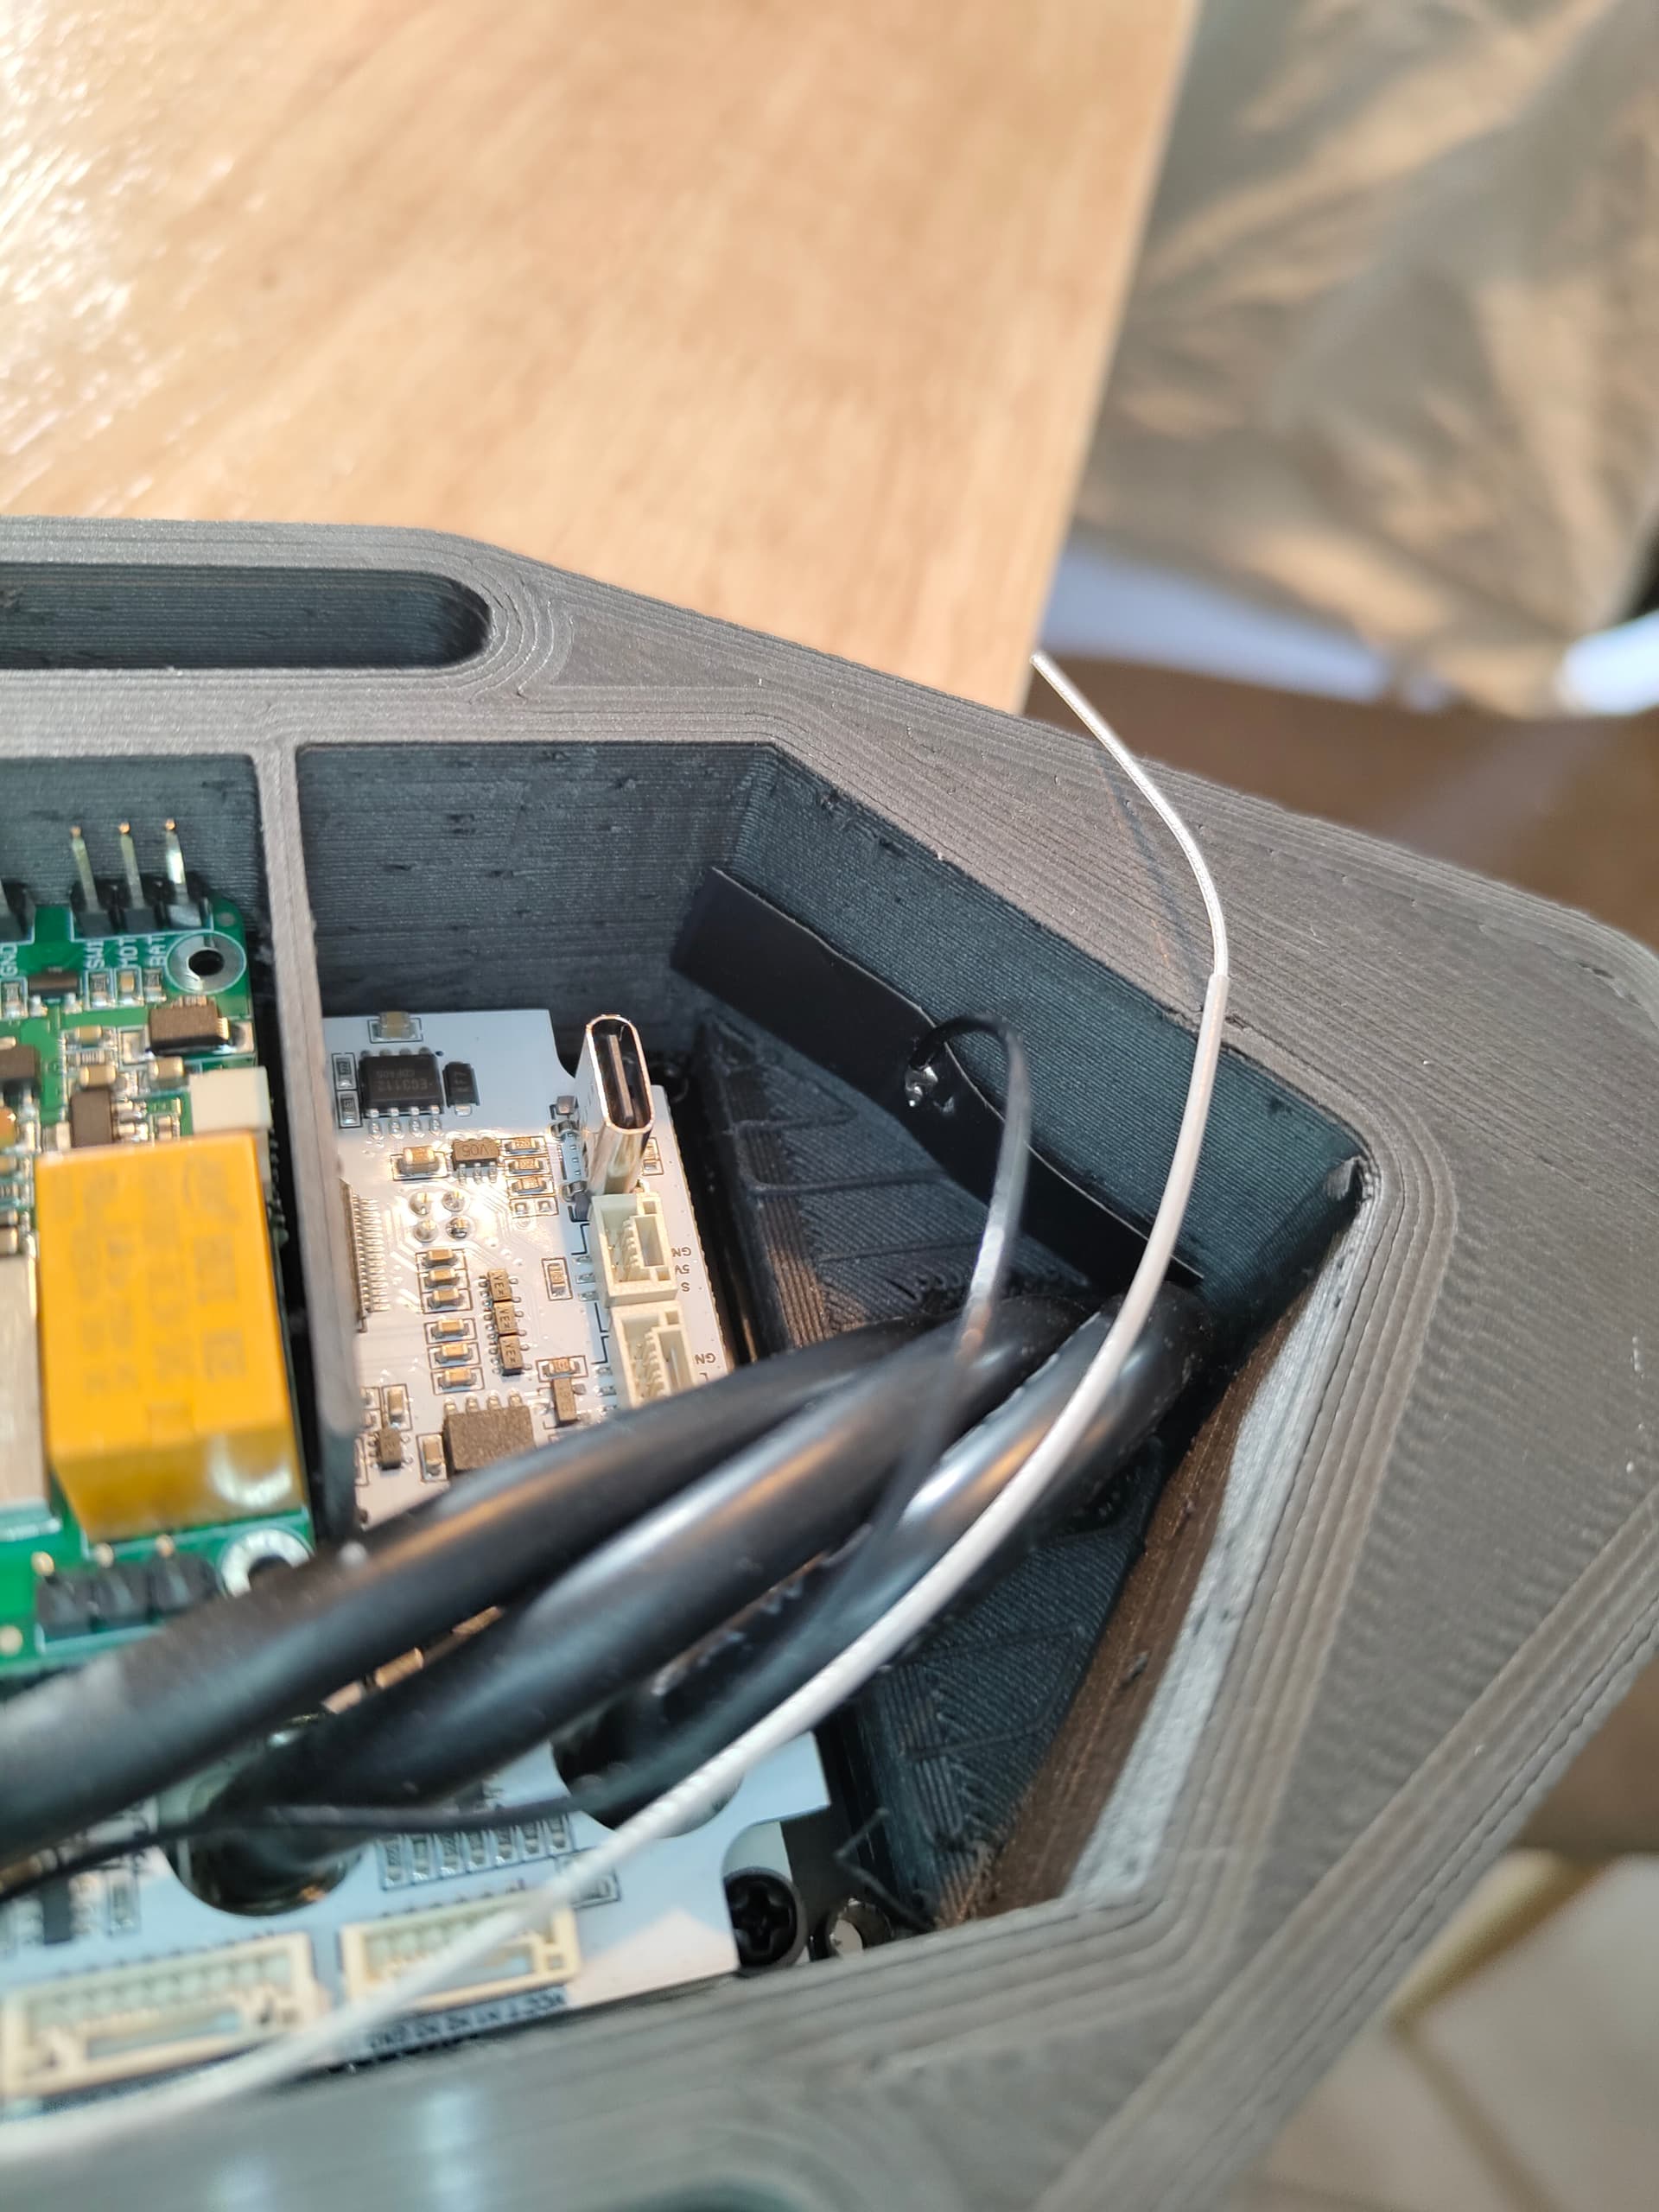
I place the antenna at the back of the box, on the lid. On the back of the lid there is a slot for installing an external antenna for a carbon board.
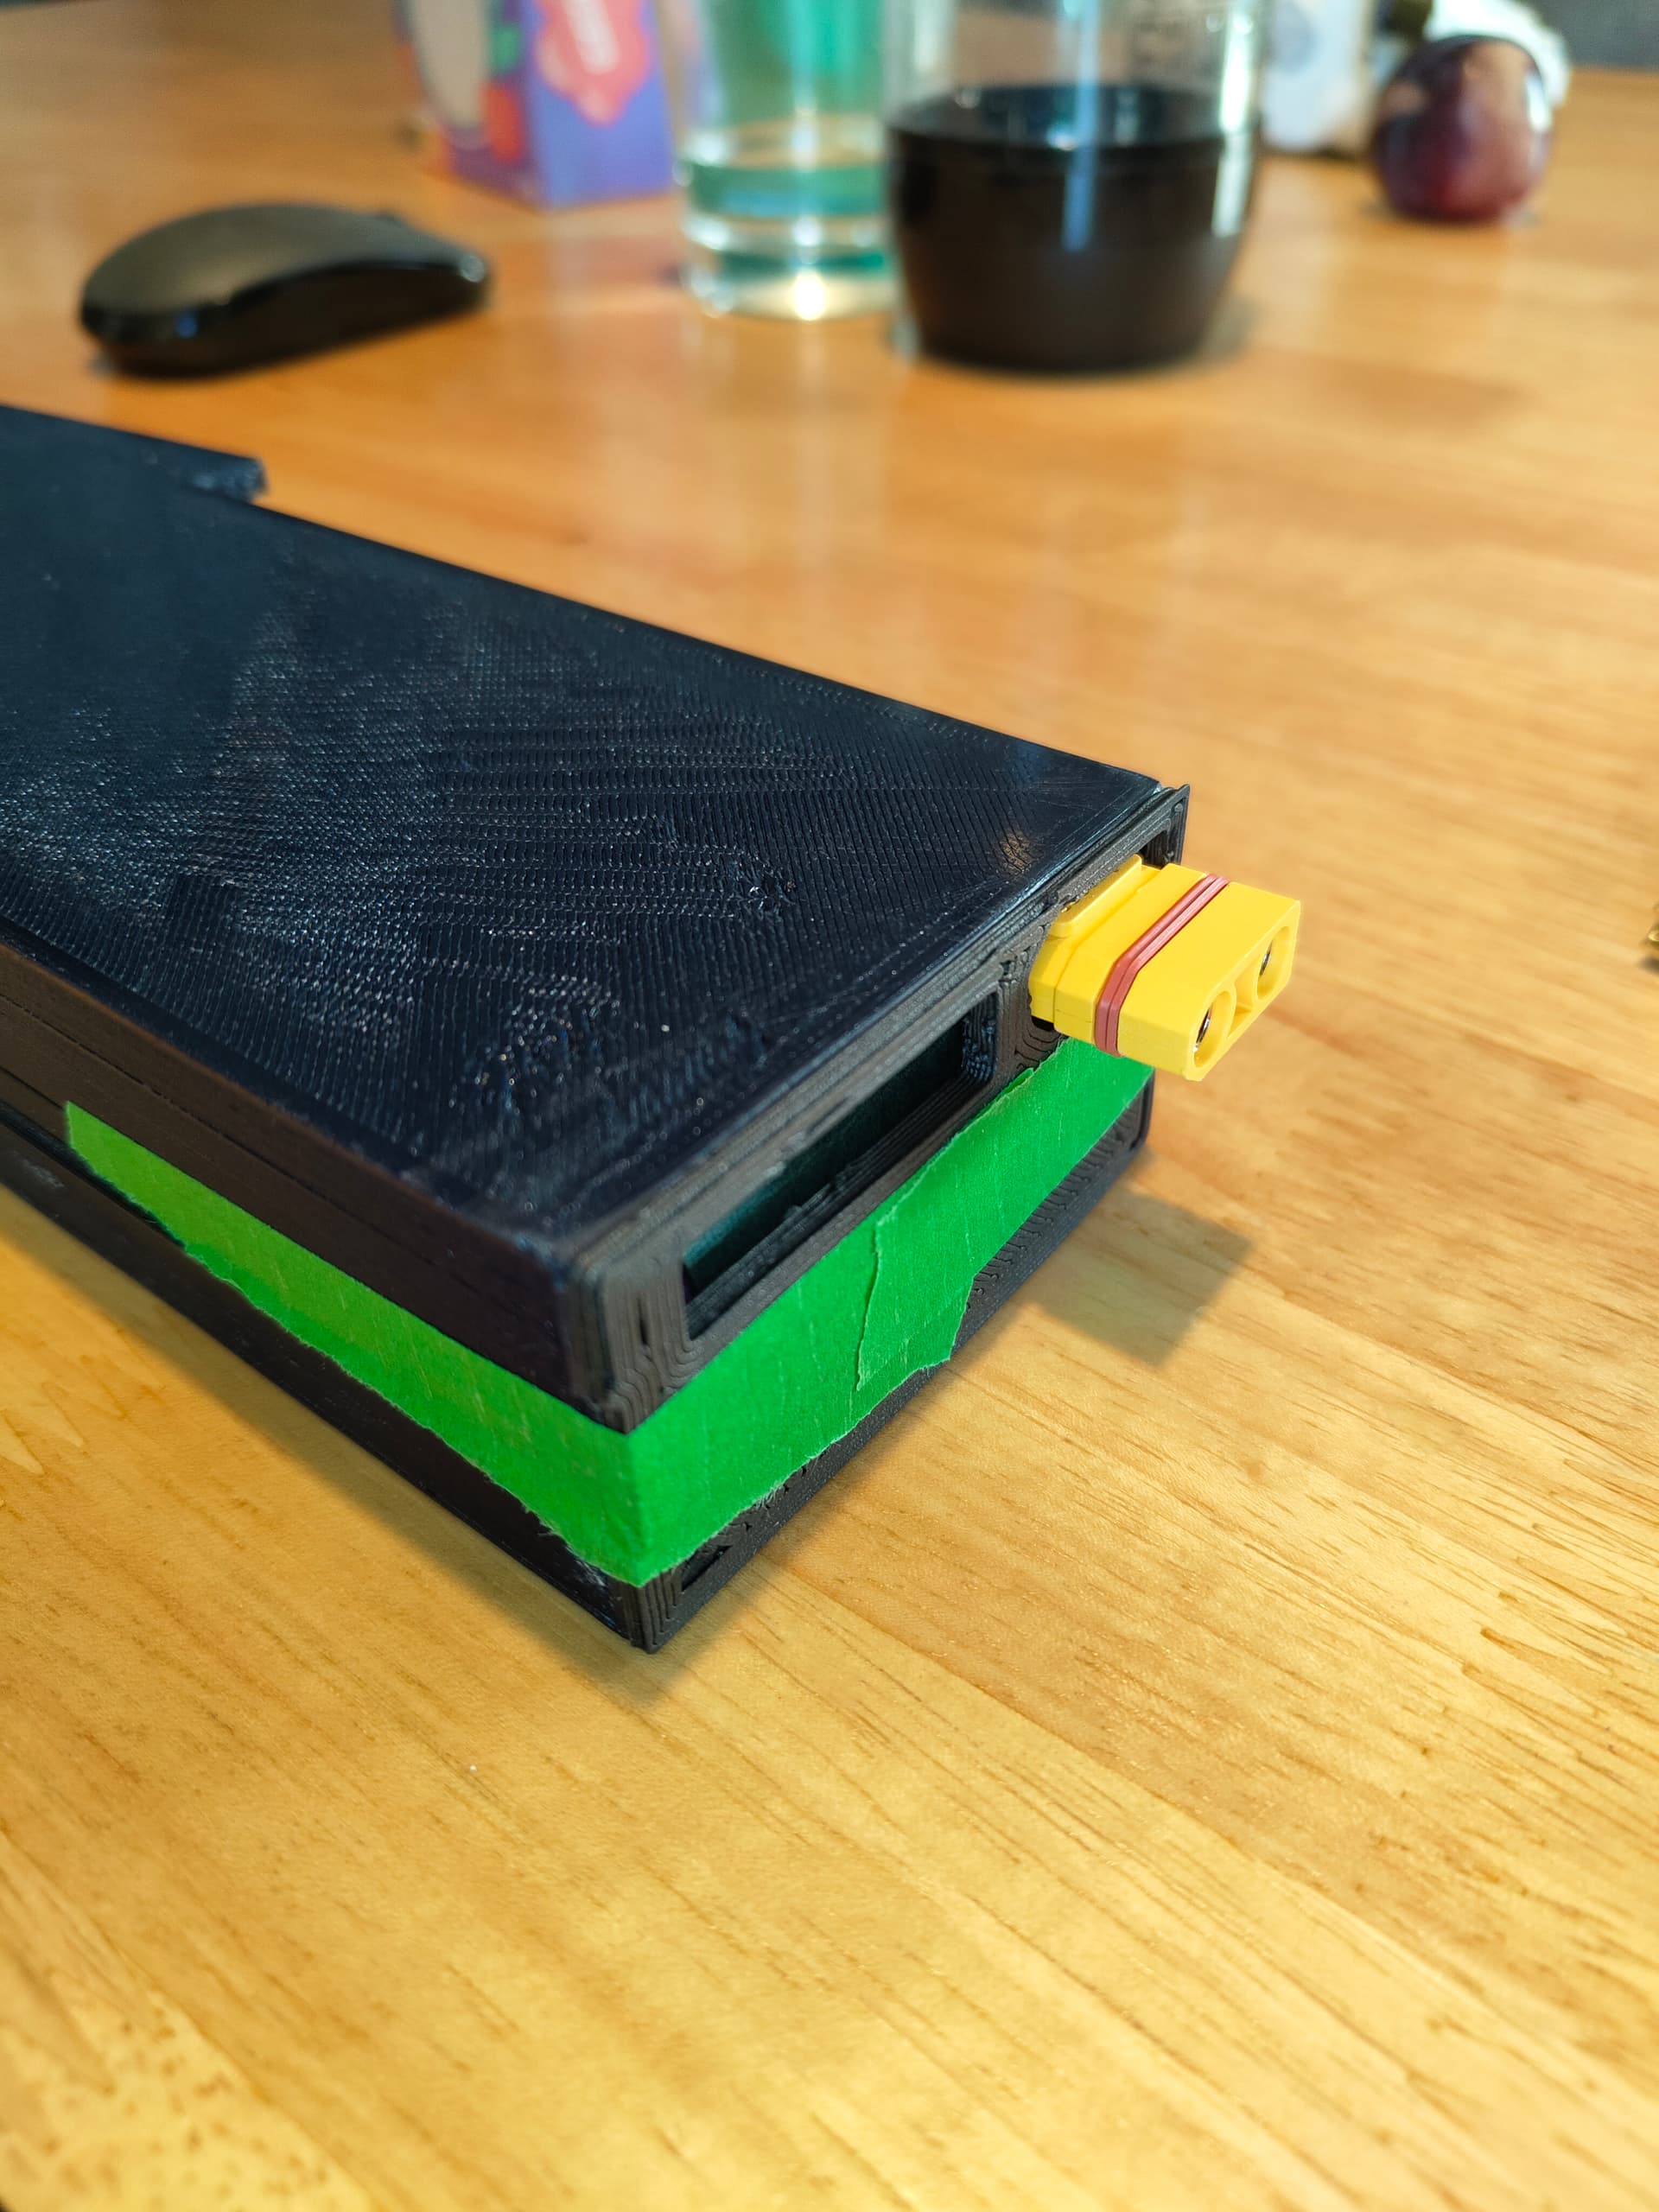
Great project. Can you share a link to the waterproof XT90 ?
Is the internal antenna and the external antenna turned for 90*? If yes, what is und reason for it?
The reason is simple - I didn’t want the wires to come out on the side.
Thanks for the model, it helped me rework the design to accomodate the XT90 and the pogo side by side on the area behind the cell. Saved me another print iteration ^^
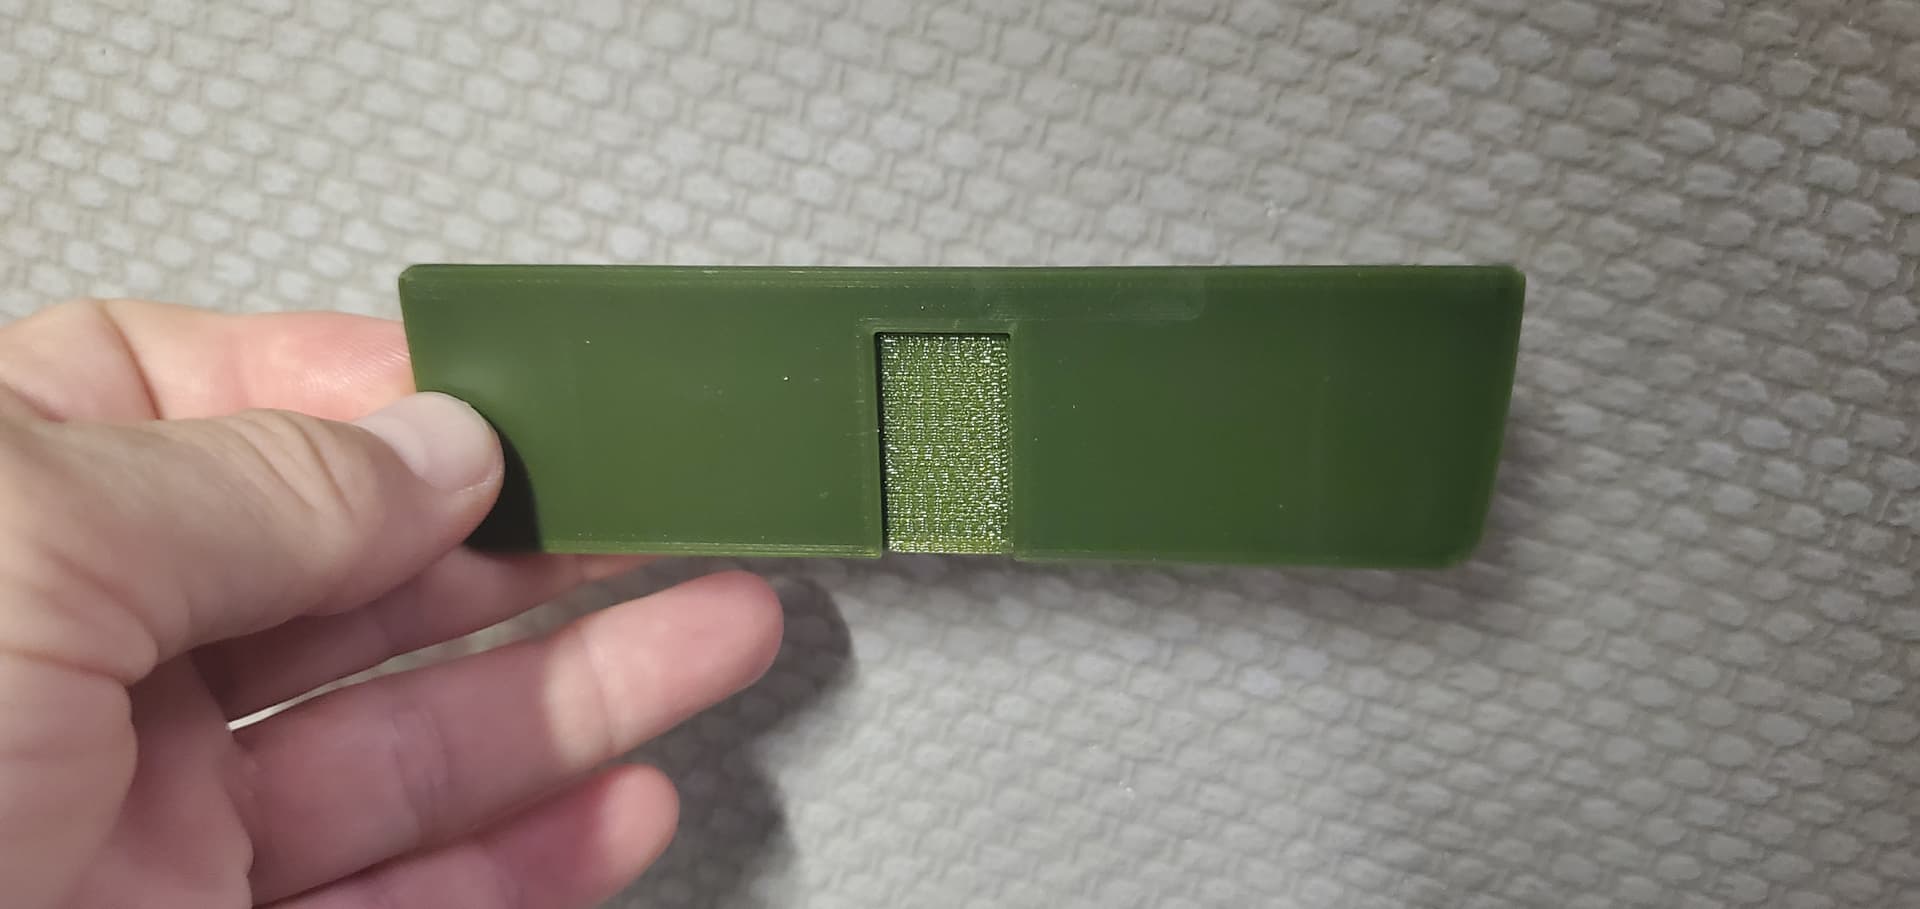
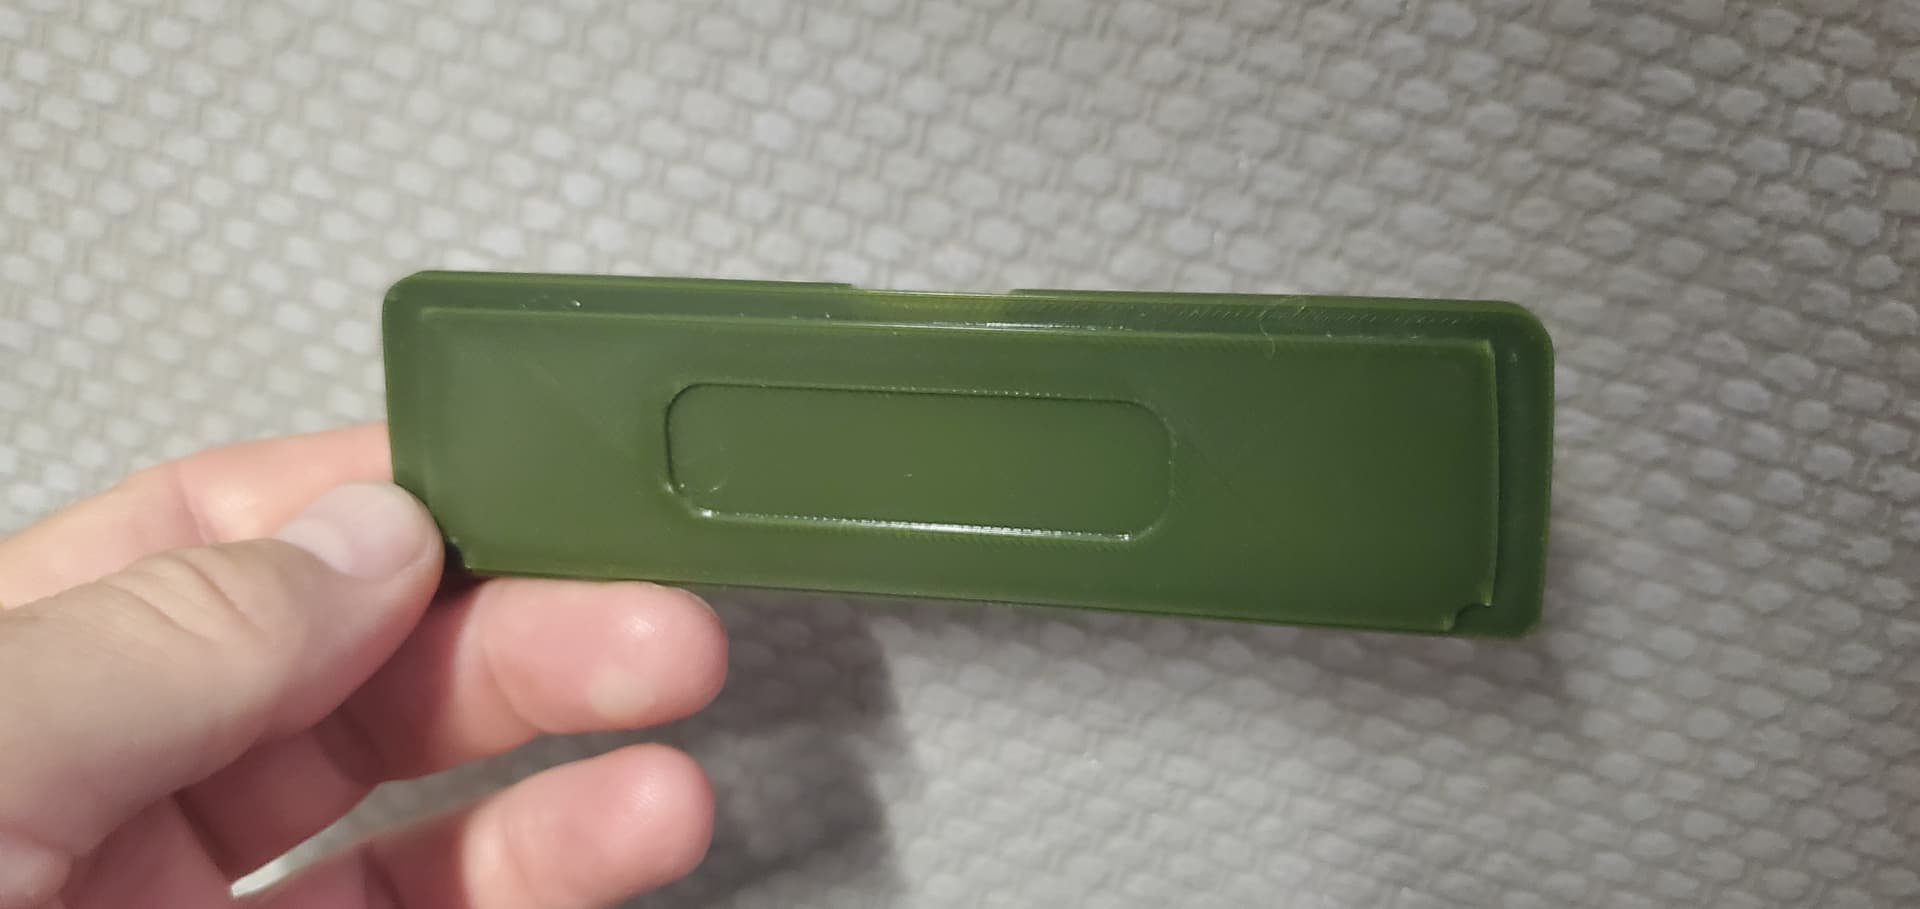
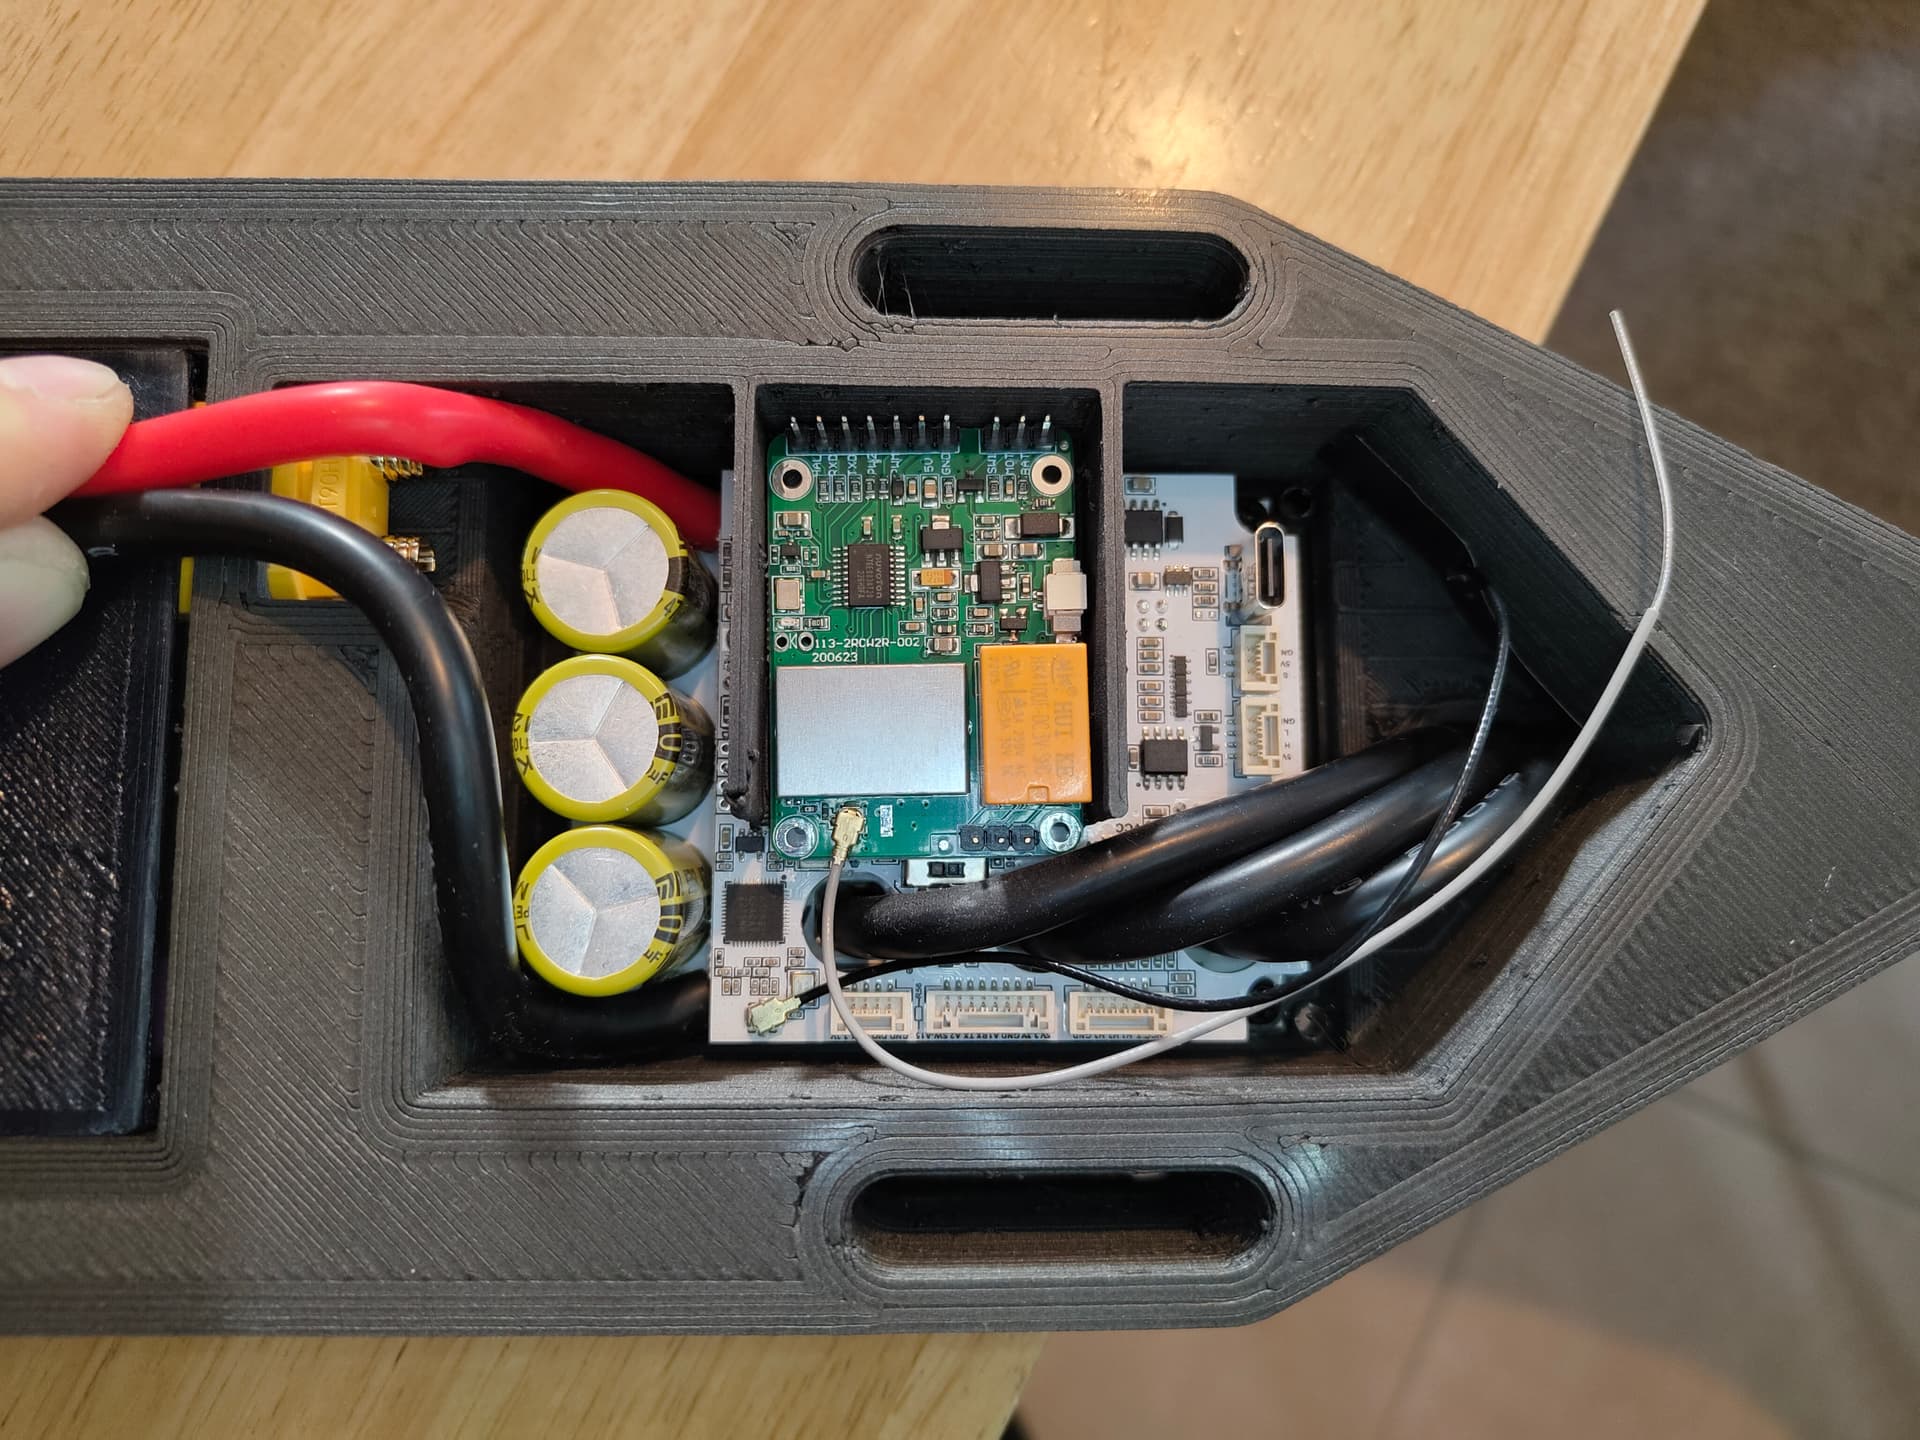
The square hole on the right will be filled by neoprene seal foam band, and covered in grease, that will make the seal on the pogo to prevent water causing shorts.
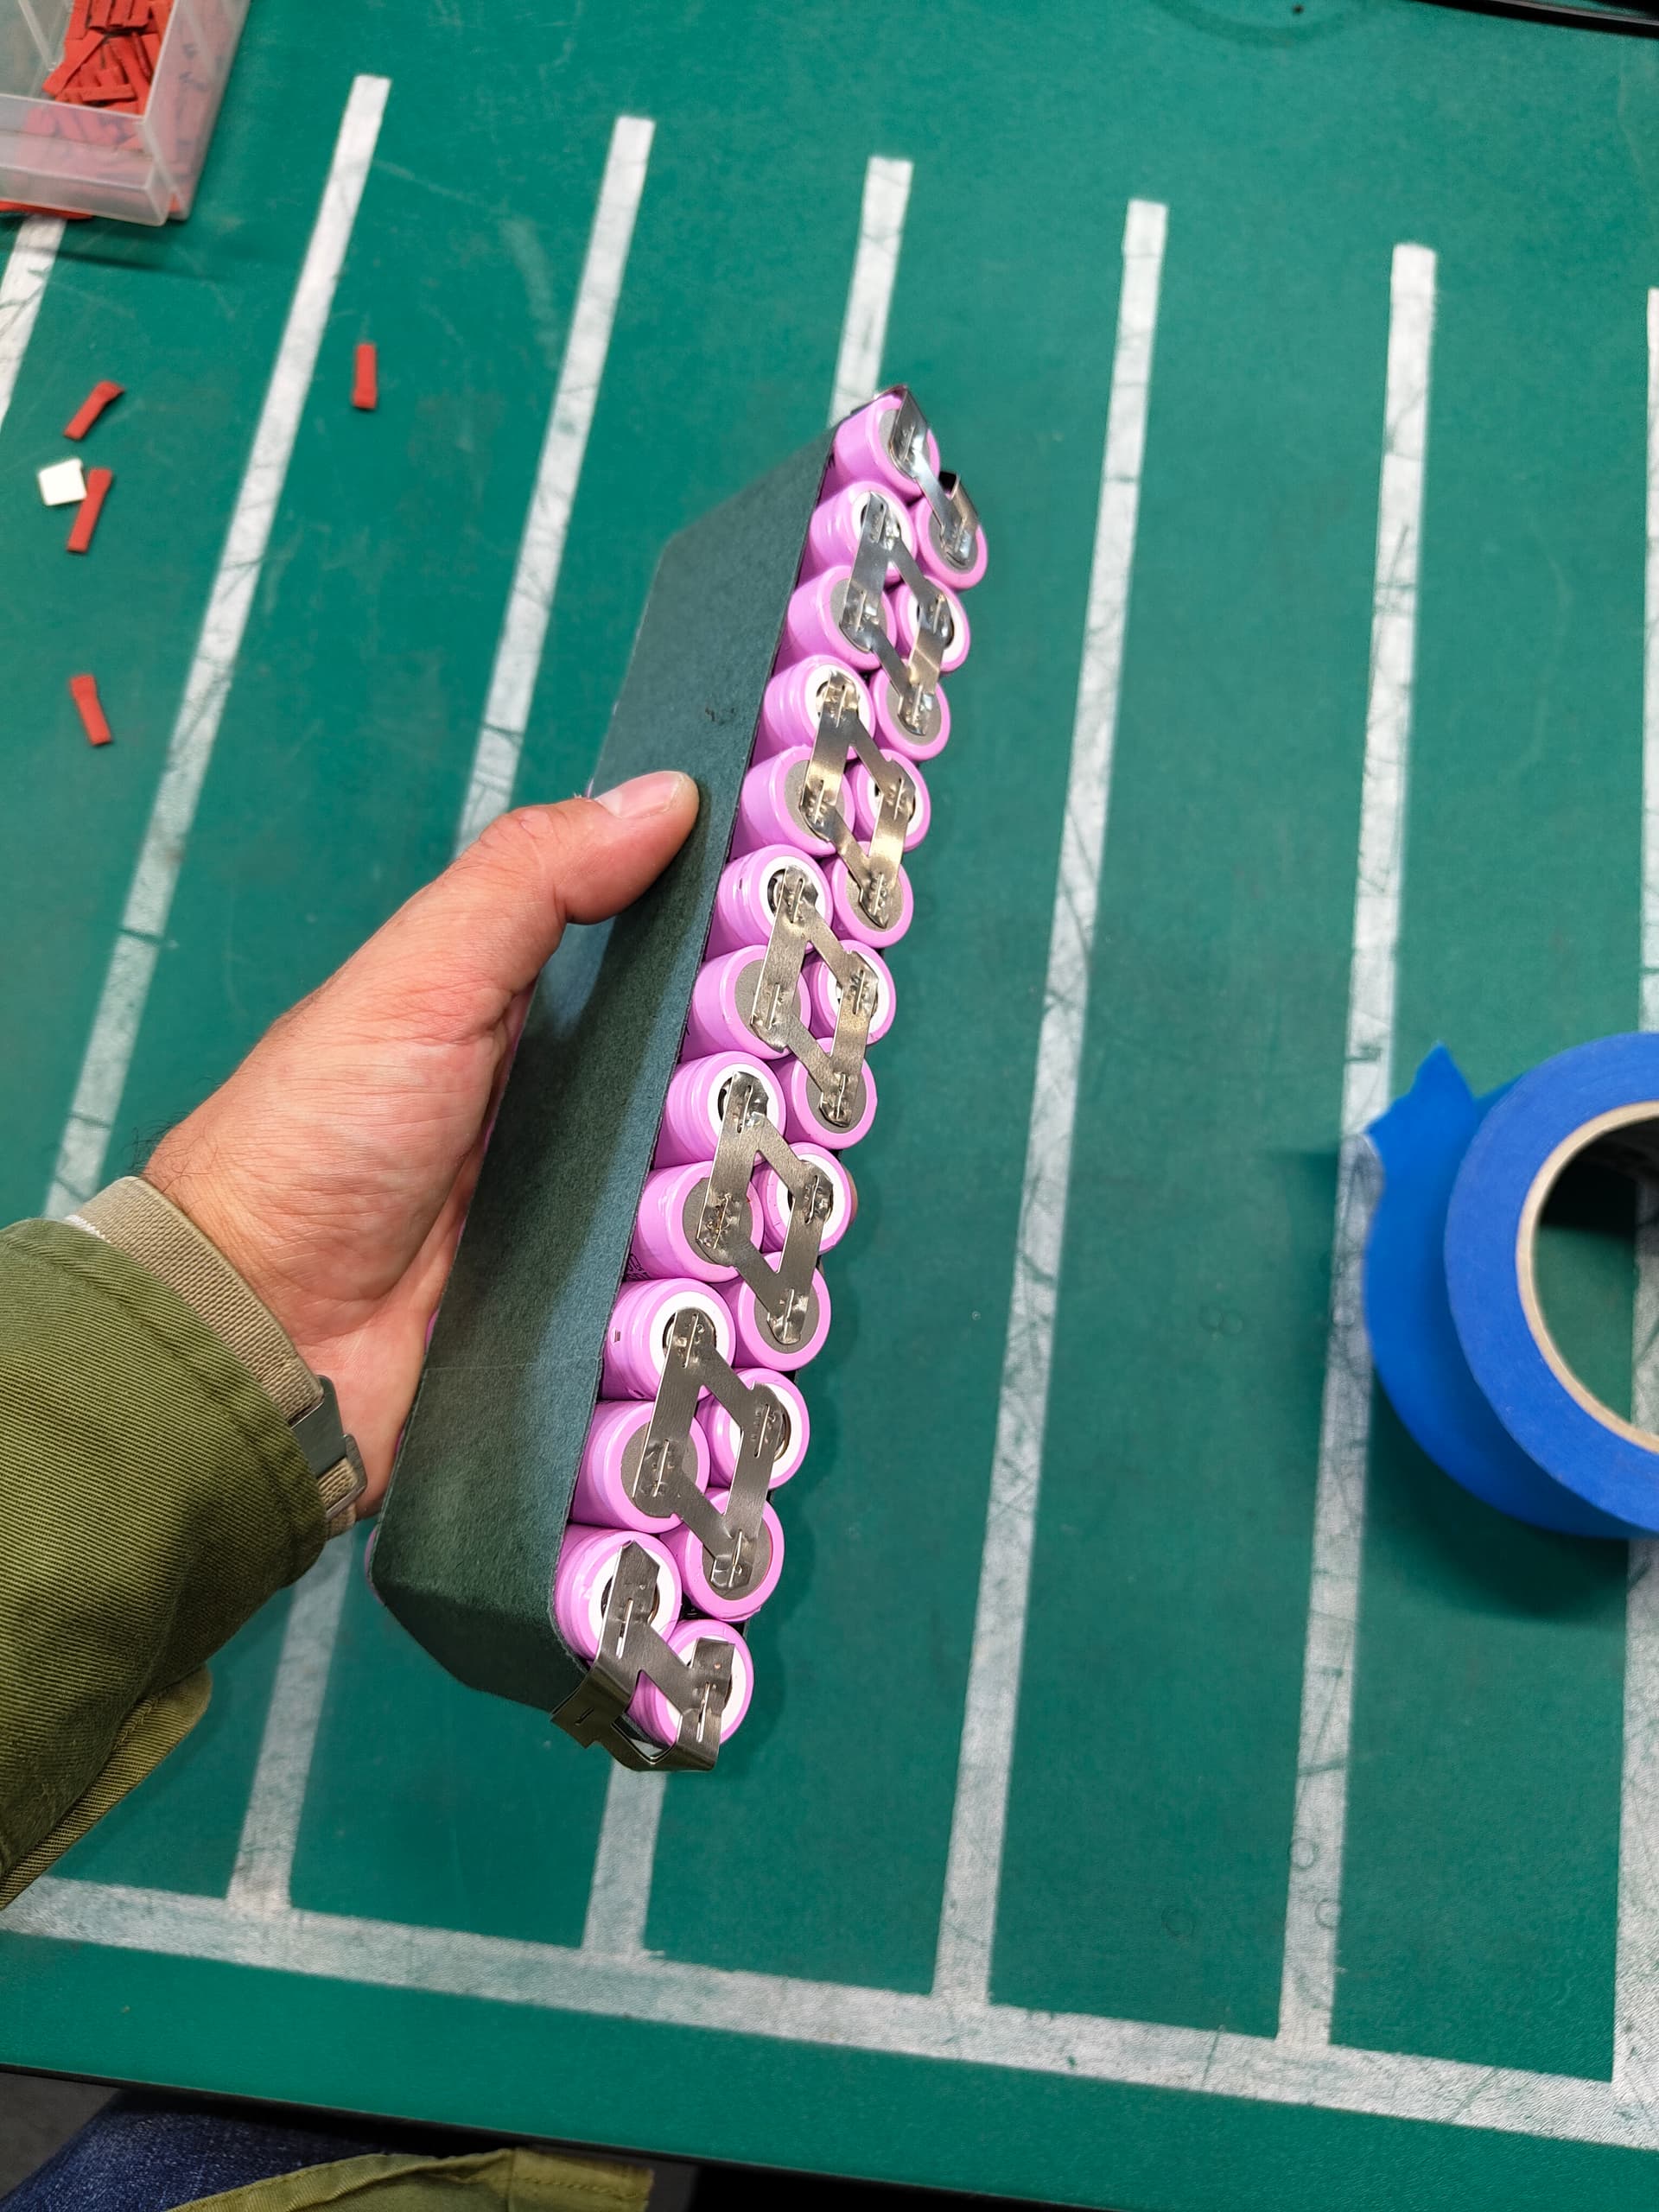
The battery build is gonna be tight to wire ![]()
At least the casting weight will be a small about of the total weight.
Why don’t you do proper seal using molded silicone or existing o-ring?
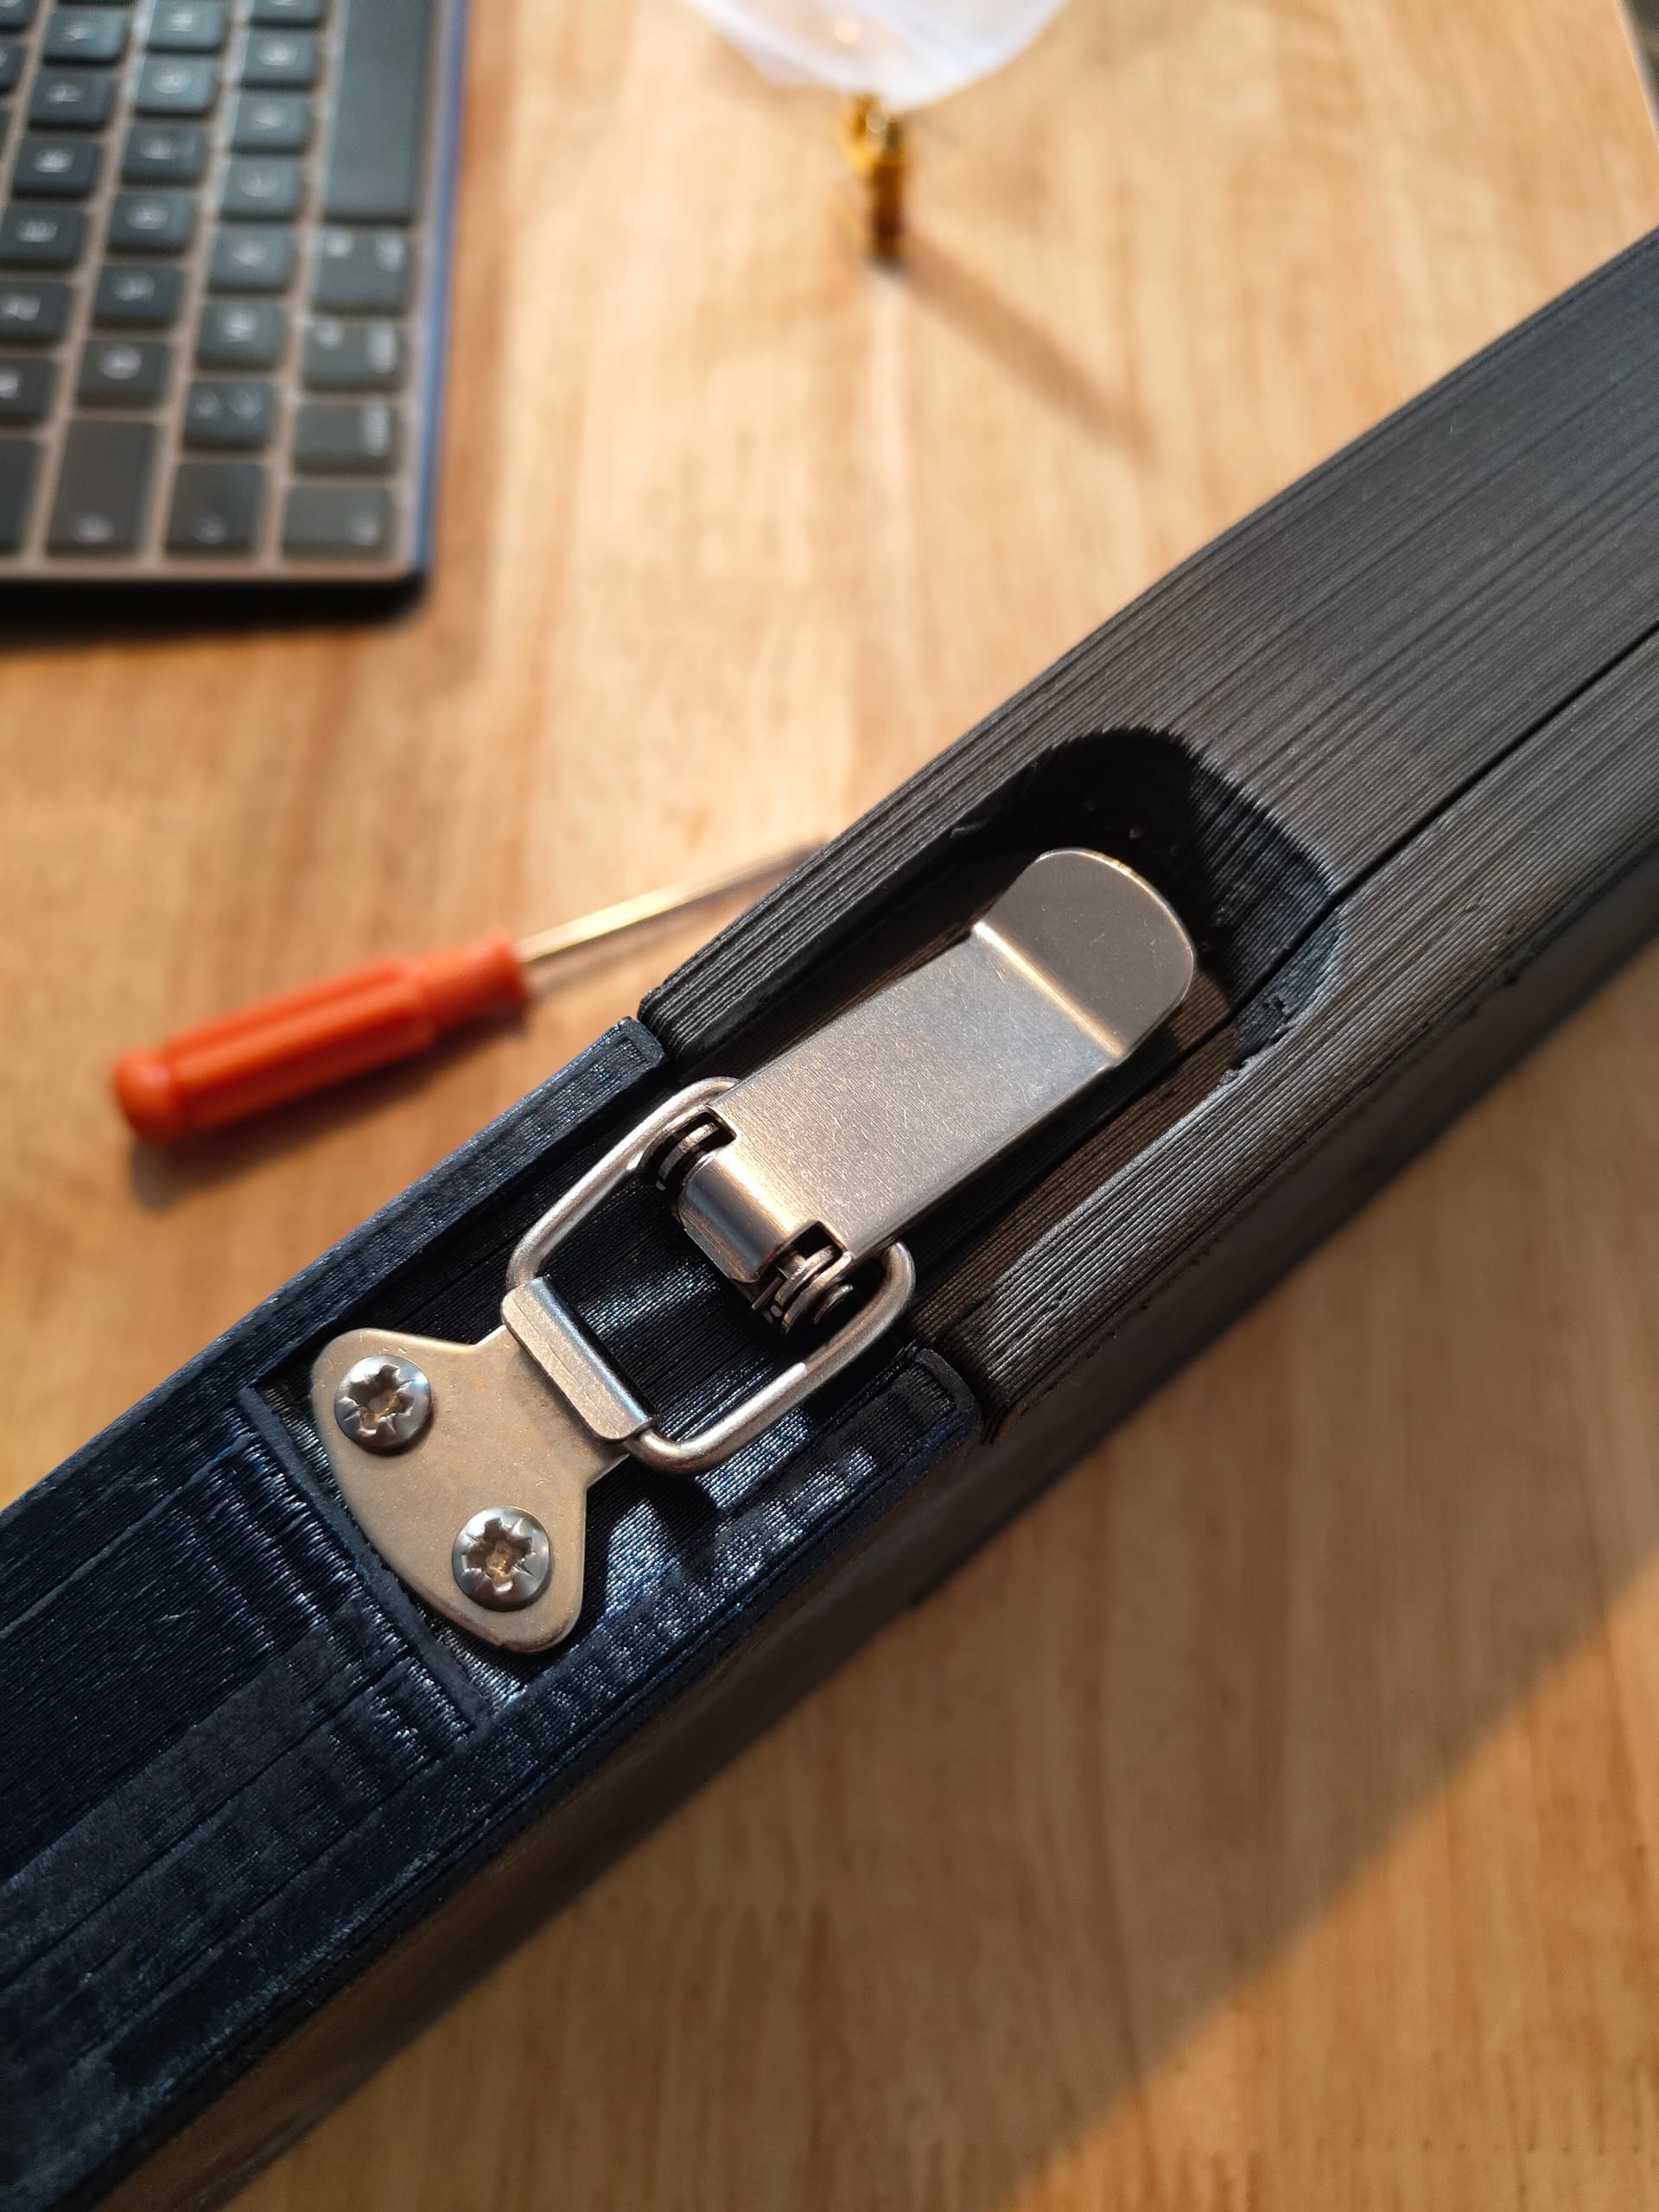
See this slot, I think to leave it for the cap. The idea is that this place will be covered at all times.
Why do you have only one XT90, don’t you use two bat in series ?
Search waterproof xt90 on ali, for example this
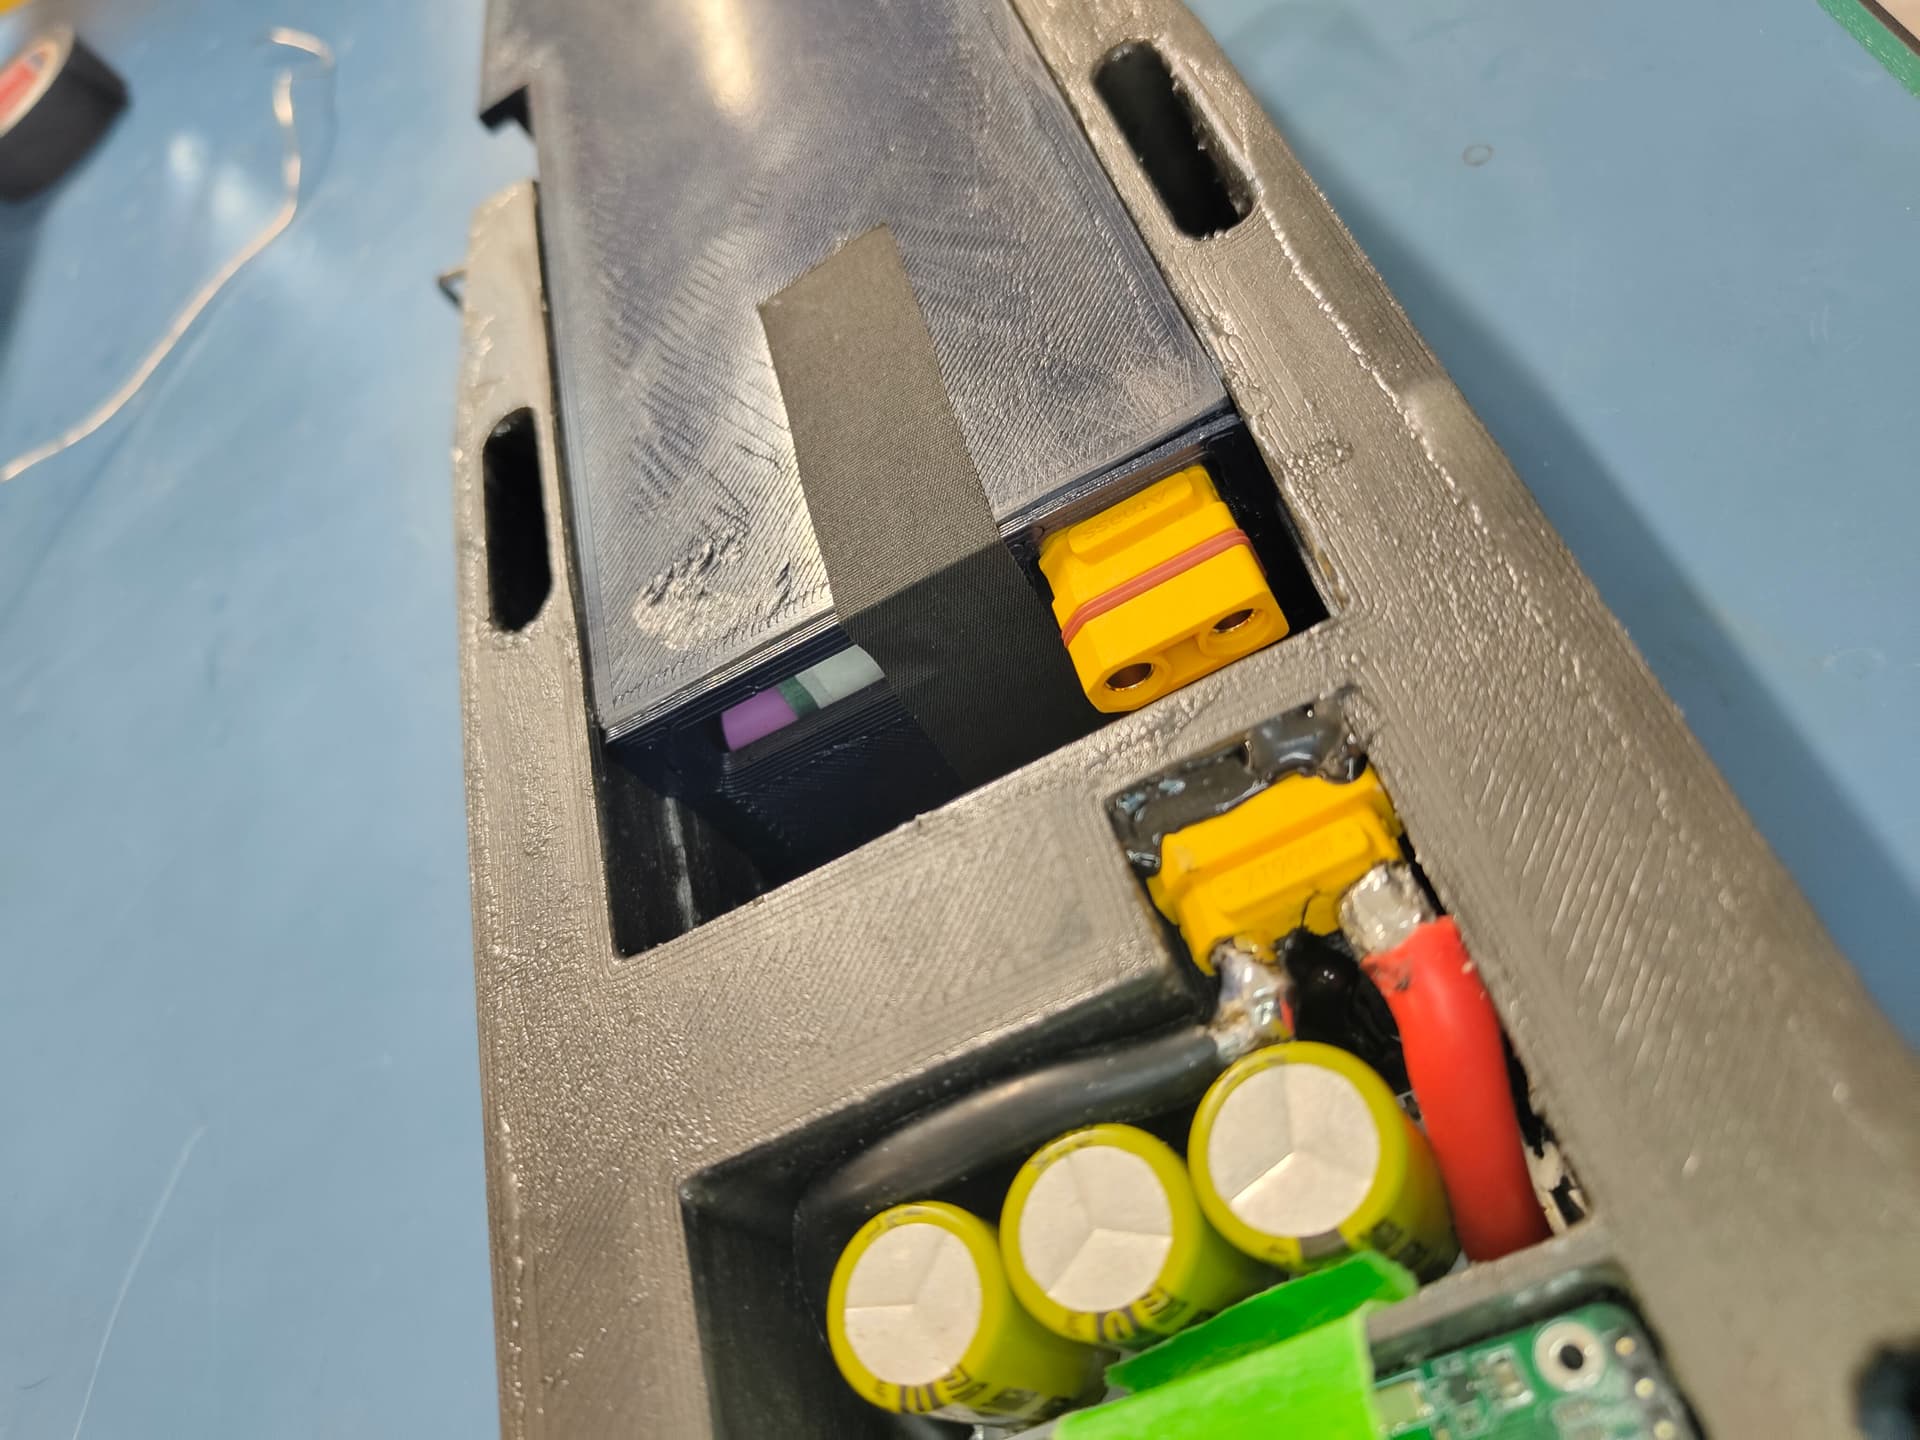
Only one connector, 24 cells connected as 12s2p.
For the seal silicon would also work, but an o-ring would be too stiff IMO.
The foam can compress much more and shape to the connector.
How are you sealing the ht90 into the printed body? Silicone or epoxy? Build looks great. Id go a bit wider to accommodate the mast foot to give better strength. Cheers
You mean XT90?
I plan to insert it with epoxy, why use silicone for that? Epoxy supposed to weld it to the body.
@Bzhwindtalker
How tight do you fit the XT90 - how much room to leave for the epoxy?
Yes I left 0.5mm all around the connector. Still undecided between epoxy/SILICON for the potting
Expoxy will hold for sure, maybe a bit too good. If you ever have to change it, you don’t get it out. I use / repair DIYS eFoils for 4Y and experienced many technical issues over time. It helps to consider maintenace when designing and building parts. Things will fail, it is only a matter of time.
Yes, this is why I wanted to get rid of the maytech remote and go directly BT remote. Then it is 80€, two connector and a print to replace the setup.
Add the rx, and some wiring, then that cost and Time gets higher…
Would you suggest glueing the box and connector with silicone? To add screws?
My box is split horizontally.
I suppose that silicone layer is thicker than epoxy, right?
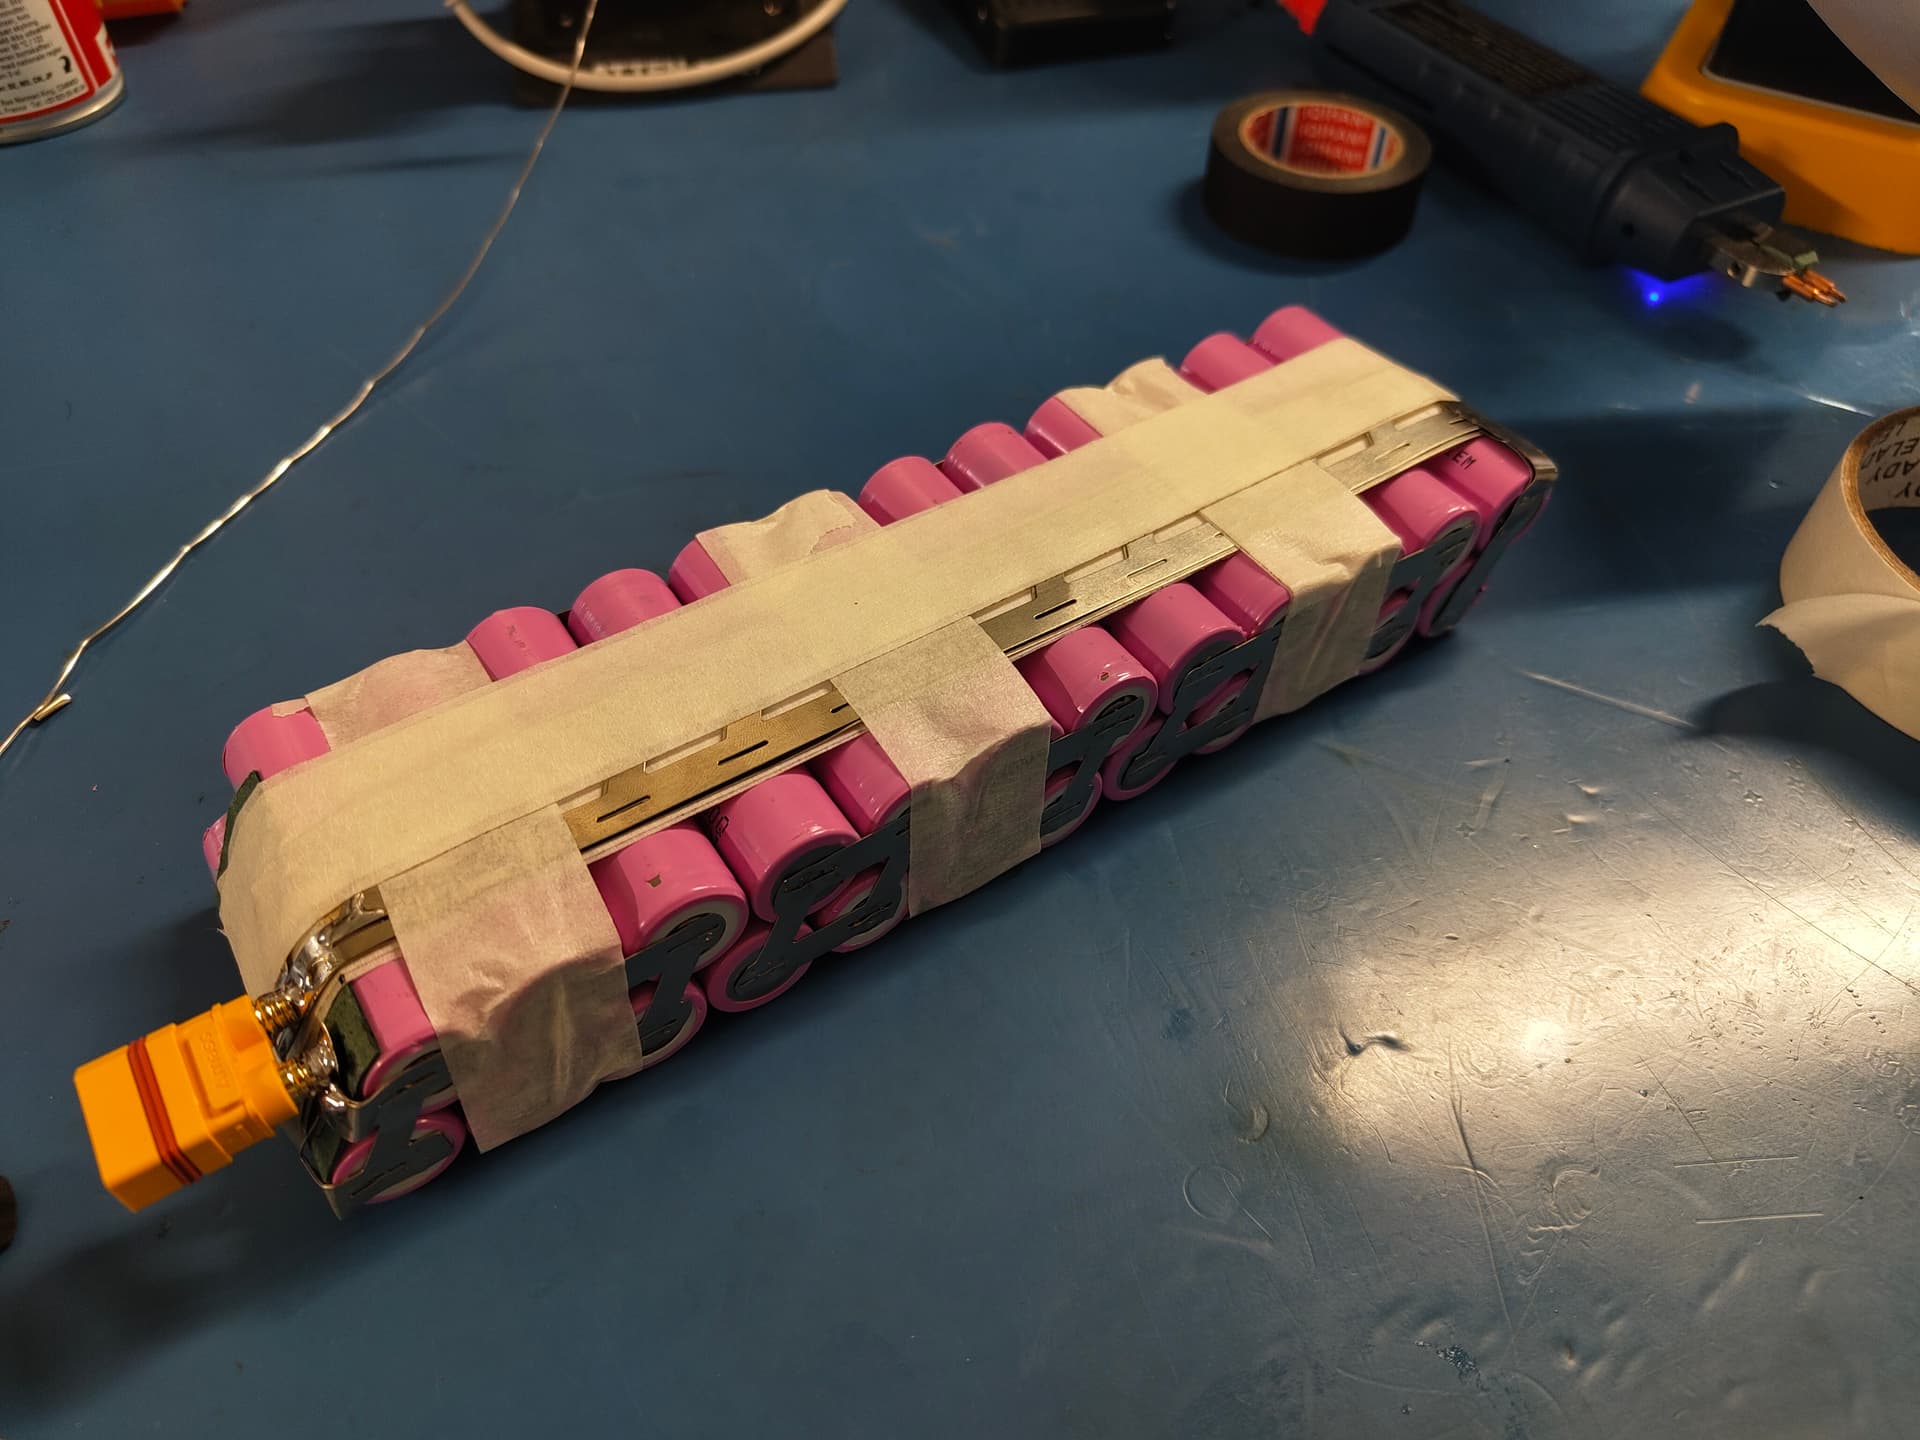
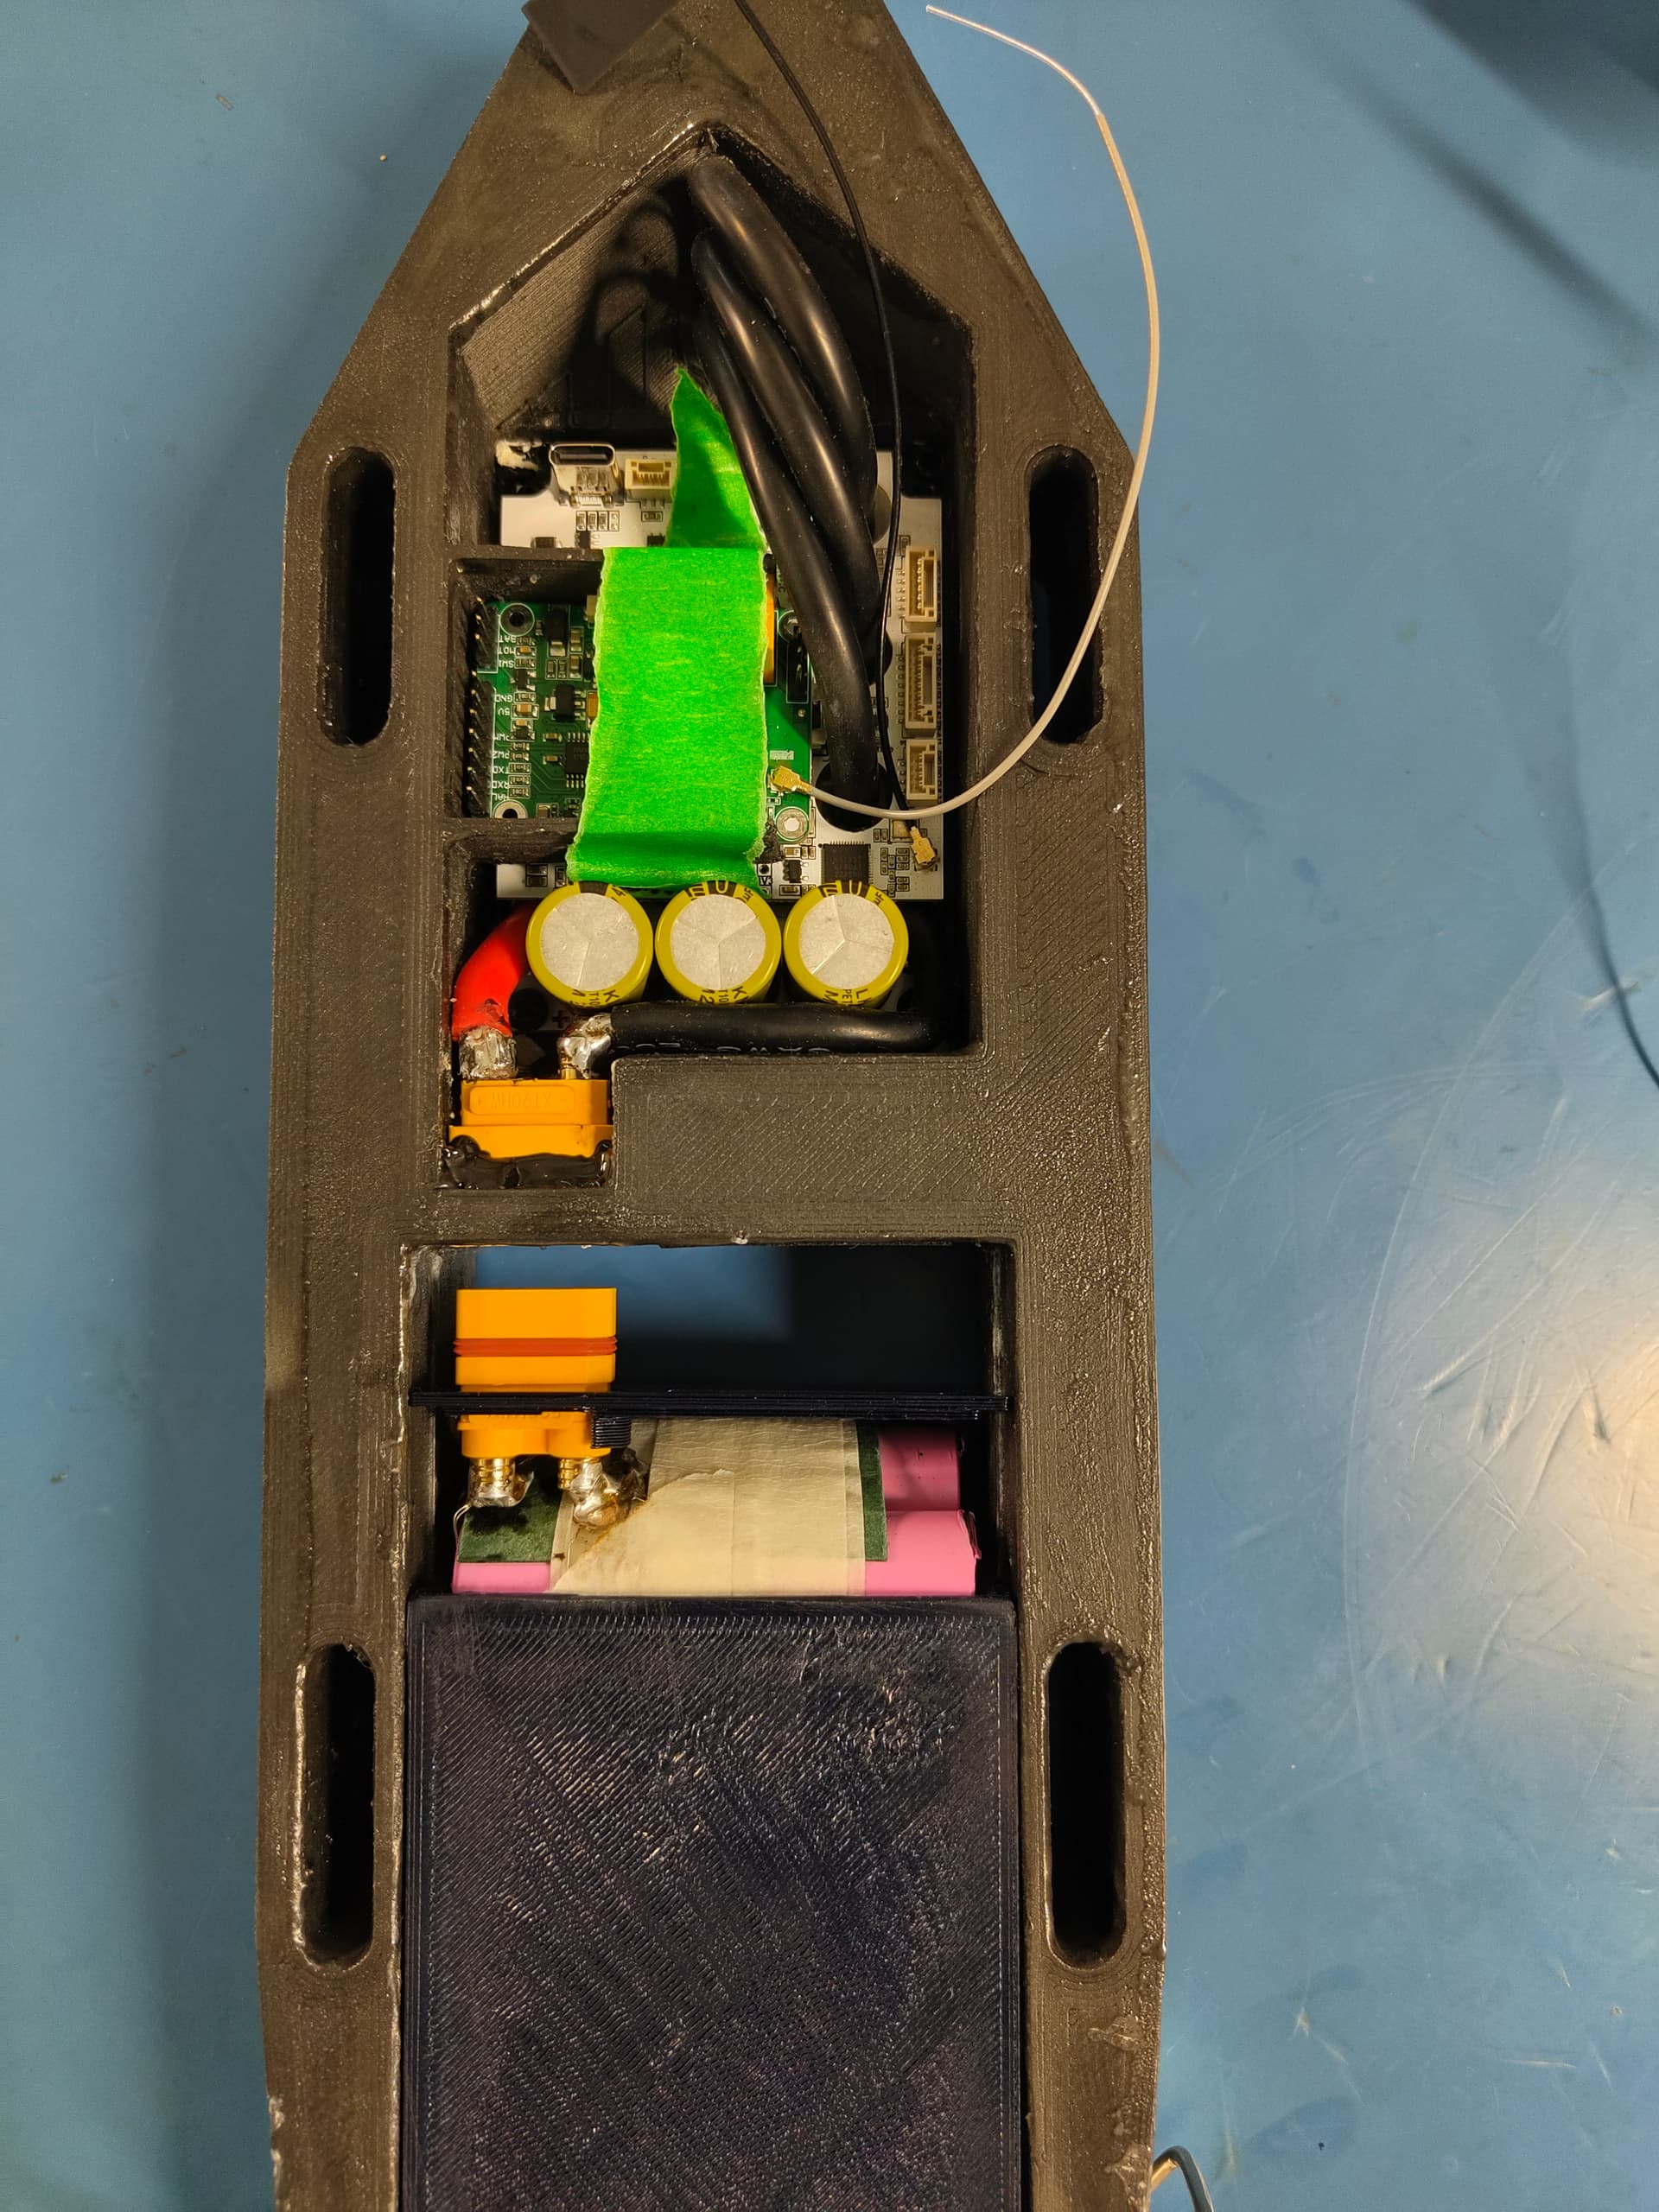
Fist battery build ongoing, have to double down all series conncetions, but first see if it fits the box
Those cells were tested a few years ago, they have some self discharge, so there I could not find 24 cells with matching voltage. Let’s say this is a “test” pack, I will balance them with an active (capaitive) balancer.
When the concept is validated, I will do another clean pack with new or matched cells.
Battery is all mega tight, was a little optimistic on the cell spacing.
had to remove the insulation paper (0.8mm each side) to have a chance to fit the balance and negative connection.
The second version of the CTRL box was printed with a clean 0.6 nozzle, and failed again (klipper shutdown due to PI overload), I could resume it, but the print is not perfect and will require a epoxy coat.
My current plan is epoxy for the battery for thermal and mechanical stability, and magic gel for the CTRL for future acces. there is very little free volume in the battery box, so I will start by filling the box, then inserting the battery, pushing exess resin out, as I fear I will have bubbles.
Still lots of work ahead and missing some parts now (connectors)
Receiving the axis art pro 1201, fuse and skinny 360/45 stab this week ![]()
Tested the one from a Friend the other day, it is a fast wing for pumping, it will make a sick combo with the small board. I just fear about the signal and the final weight of the setup.
Very excited for your epoxy cast. My first epoxy potting had a single cell dead after potting. Triple tested and measured ahead. Was so bummed I have not built another yet. I have not found the root cause. Other cells ok. Strips and cables also ok. Anyone had same issue?
Did a filled epoxy coat on the PA6 controller box.
Printed the battery cover
Reprinting the battery box with more clearance, both in lenght and width/height.
Finished wiring the battery power, left is to wire the balance.
Stopped to go much further until I receive the MR60 and the pogo.
@FoiledBySpoil sorry to hear. Zero volt cell could be few things in my experiance.