Maytech remote required modifications before use

Hi guys.

Unfortunately the Maytech remote is still our best option. I hope another company comes out with a truly waterproof remote soon. But, in the meantime most of us will be using this product.

Many forum members trusted that this remote was waterproof out of the box and found out the hard way that it is not! Then, to make matters worse they found out Maytech does not stand behind their product. For all practical purposes there is no warranty. Some have said they were sold another remote at a discounted price, and some were just strung along. That being said…do these modifications at your own risk. Unmodified this remote won’t last a month, so I’d say it’s worth the risk of modifying. And to answer your question about whether this will void your warranty, my reply is “What warranty?” :rofl:

I have put this guide together in hopes that it helps some of you keep your remotes alive as long as possible. This is a recap of the modifications I have made to my remote.

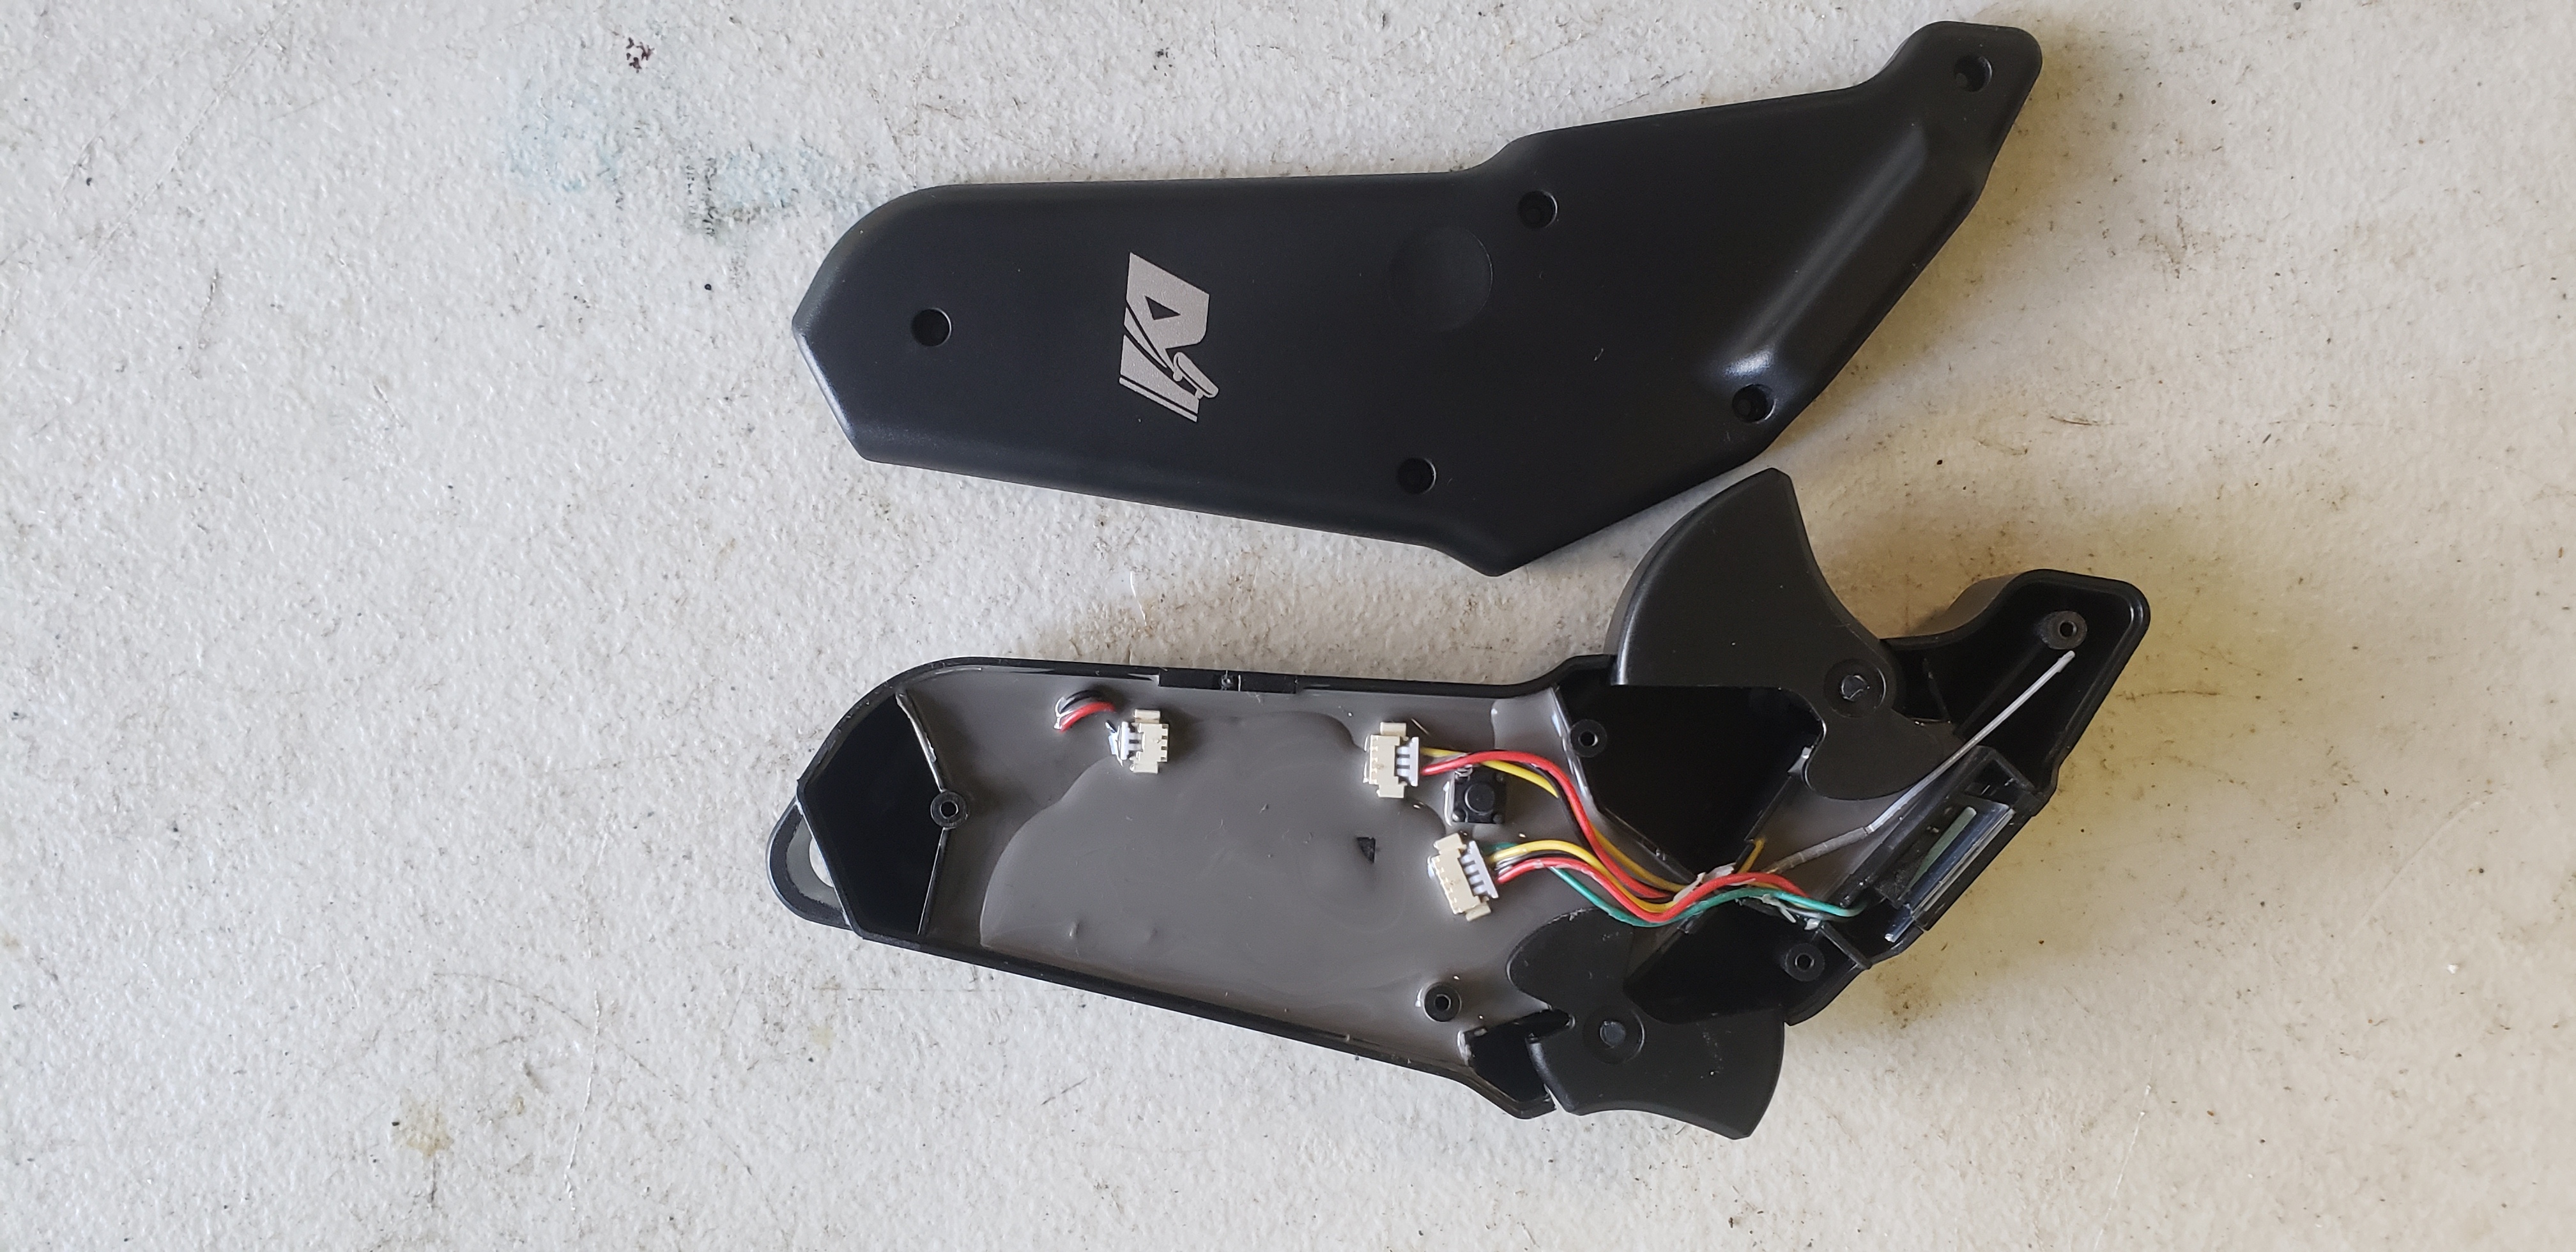
To start with. Do not get your remote wet untill you have opened it and inspected it. The quality control is terrible. I have a version 2 and my circuit board was potted, but some other users said their boards were not potted. In my opinion the boards should be coated with conformal coating and then potted in epoxy. So, open your remote and inspect it before getting it wet.

And second. Do not leave remote on charge. It will overcharge and kill the battery. I recommend only charging to 4.0v

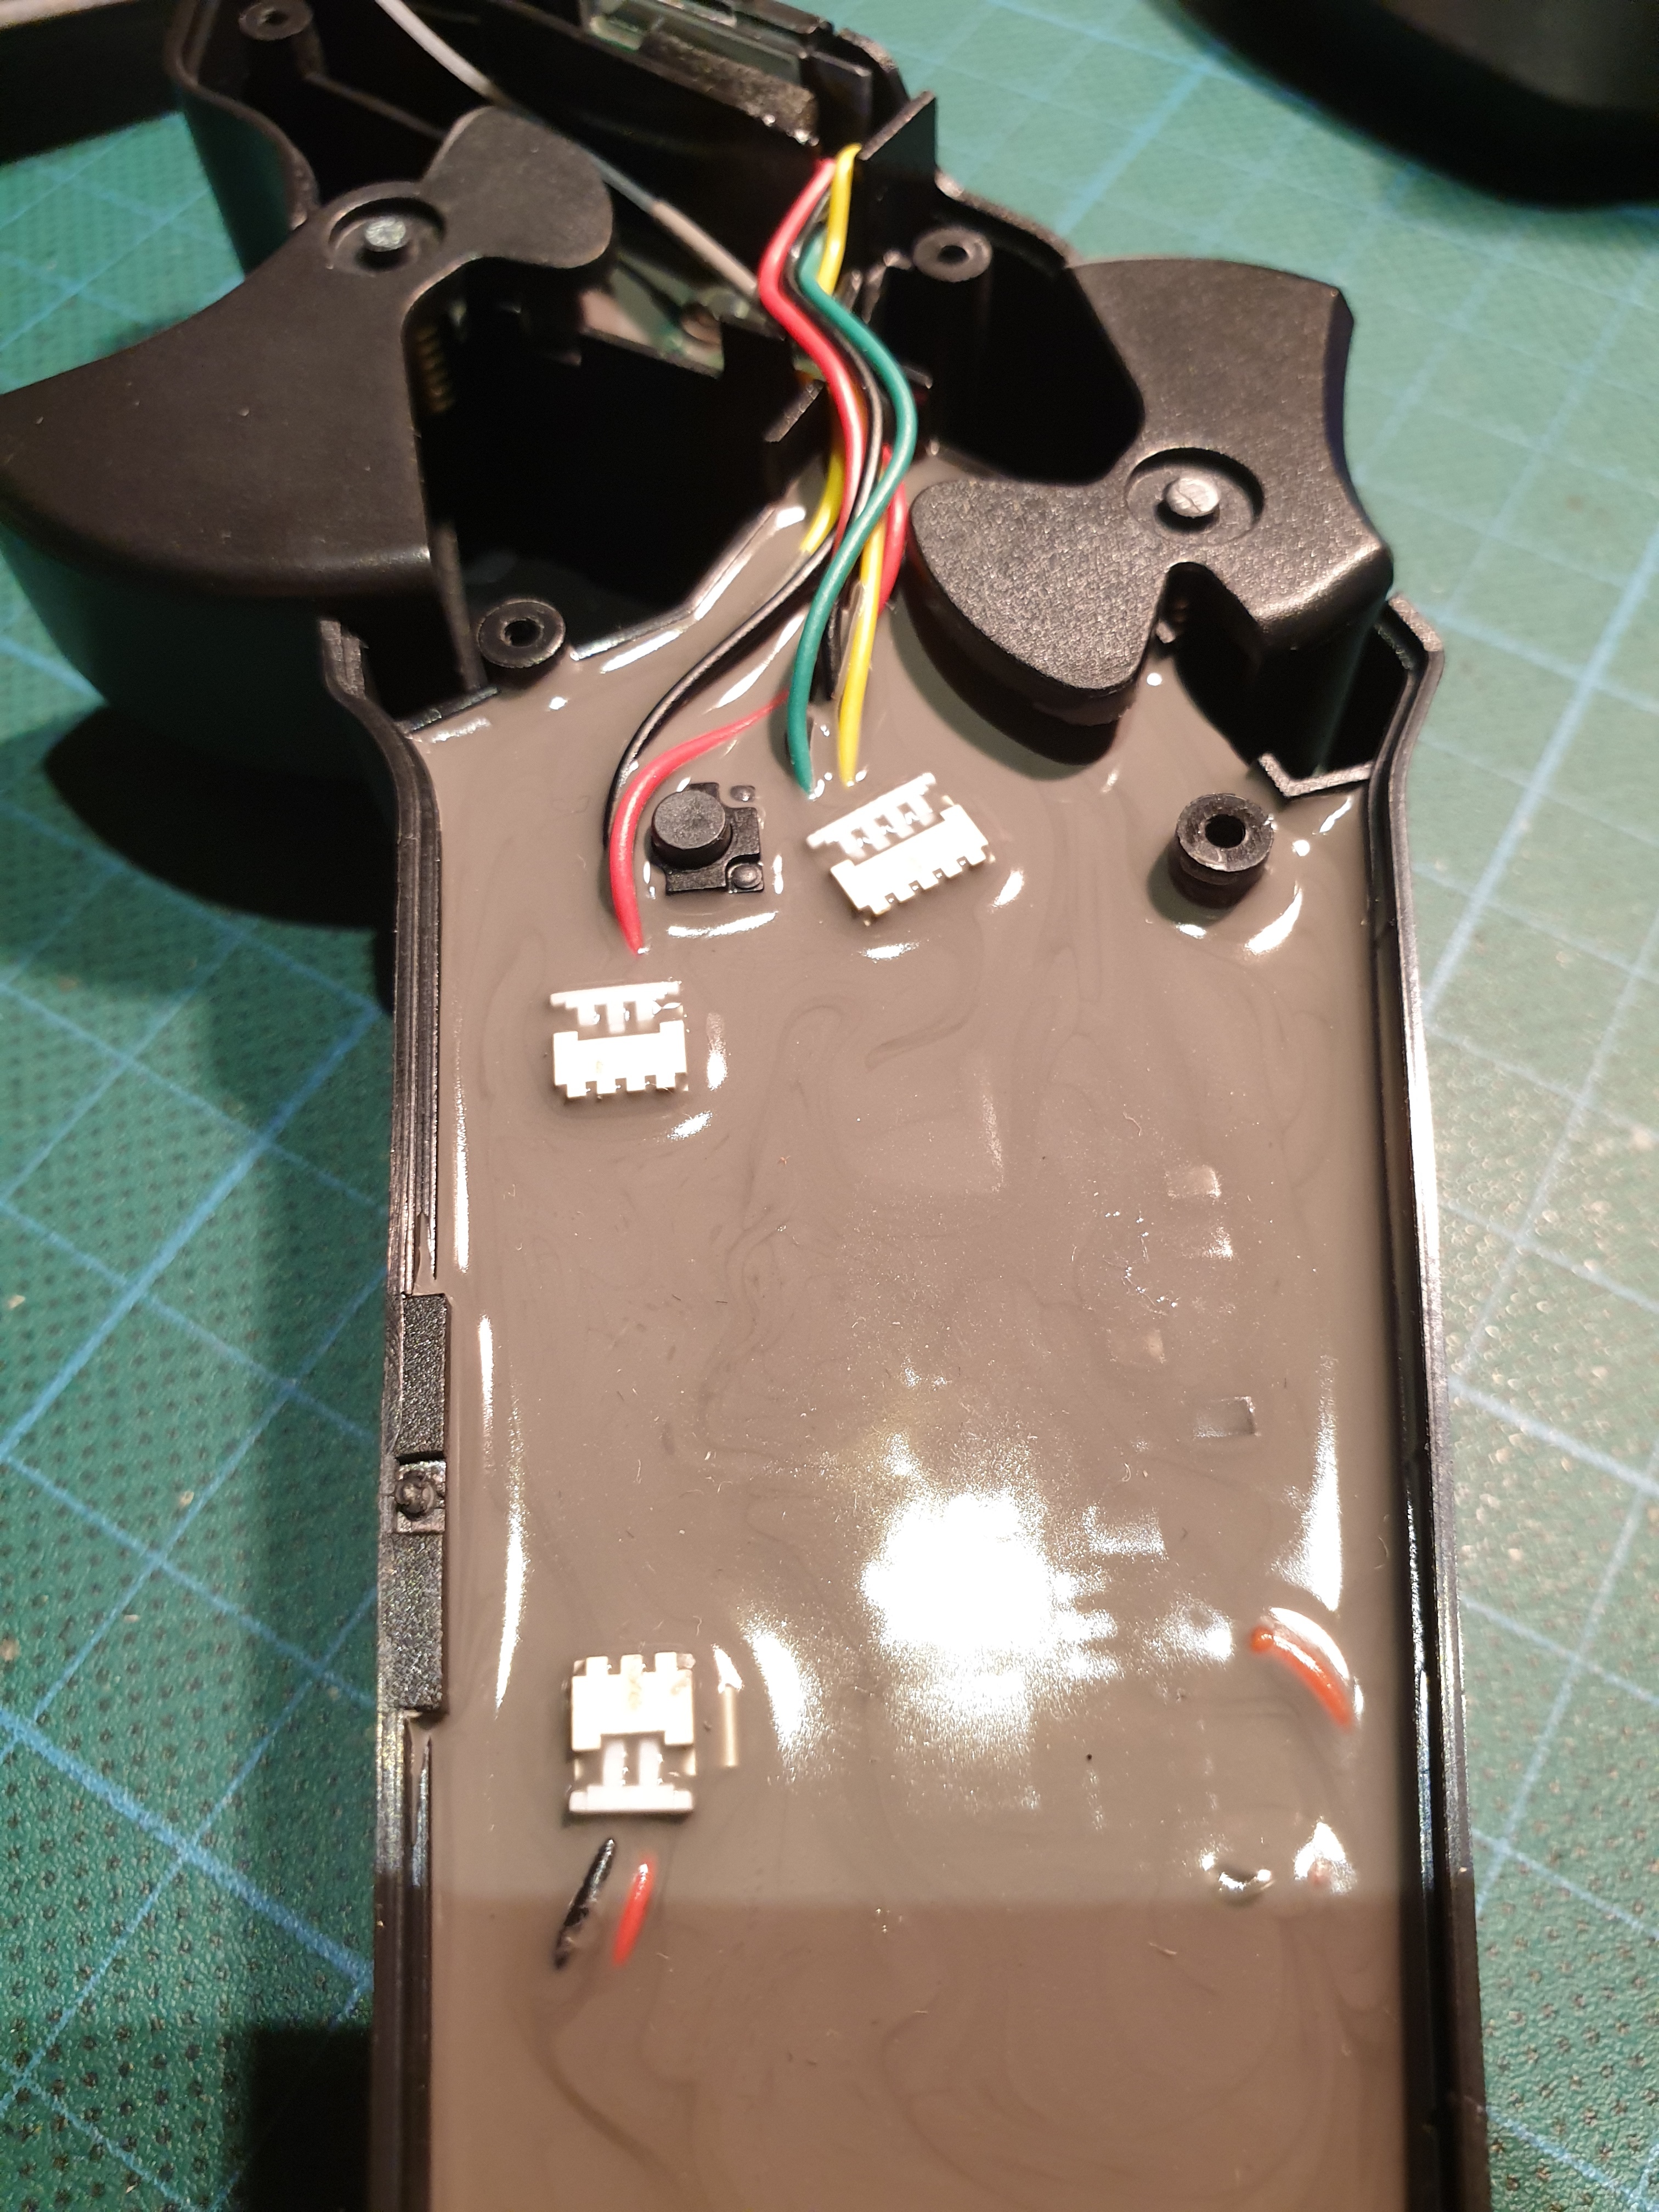
Step 1. Use silicone modified conformal coating to coated any areas water could leak in. I always do two coats. Then let dry.

Step 2. Soak remote in corrosionX for a few hours then hang it to drip dry. Make sure to get the corrosionX to soak into the switch. Then simply towel off the outside and allow the coating to remain on internal components.

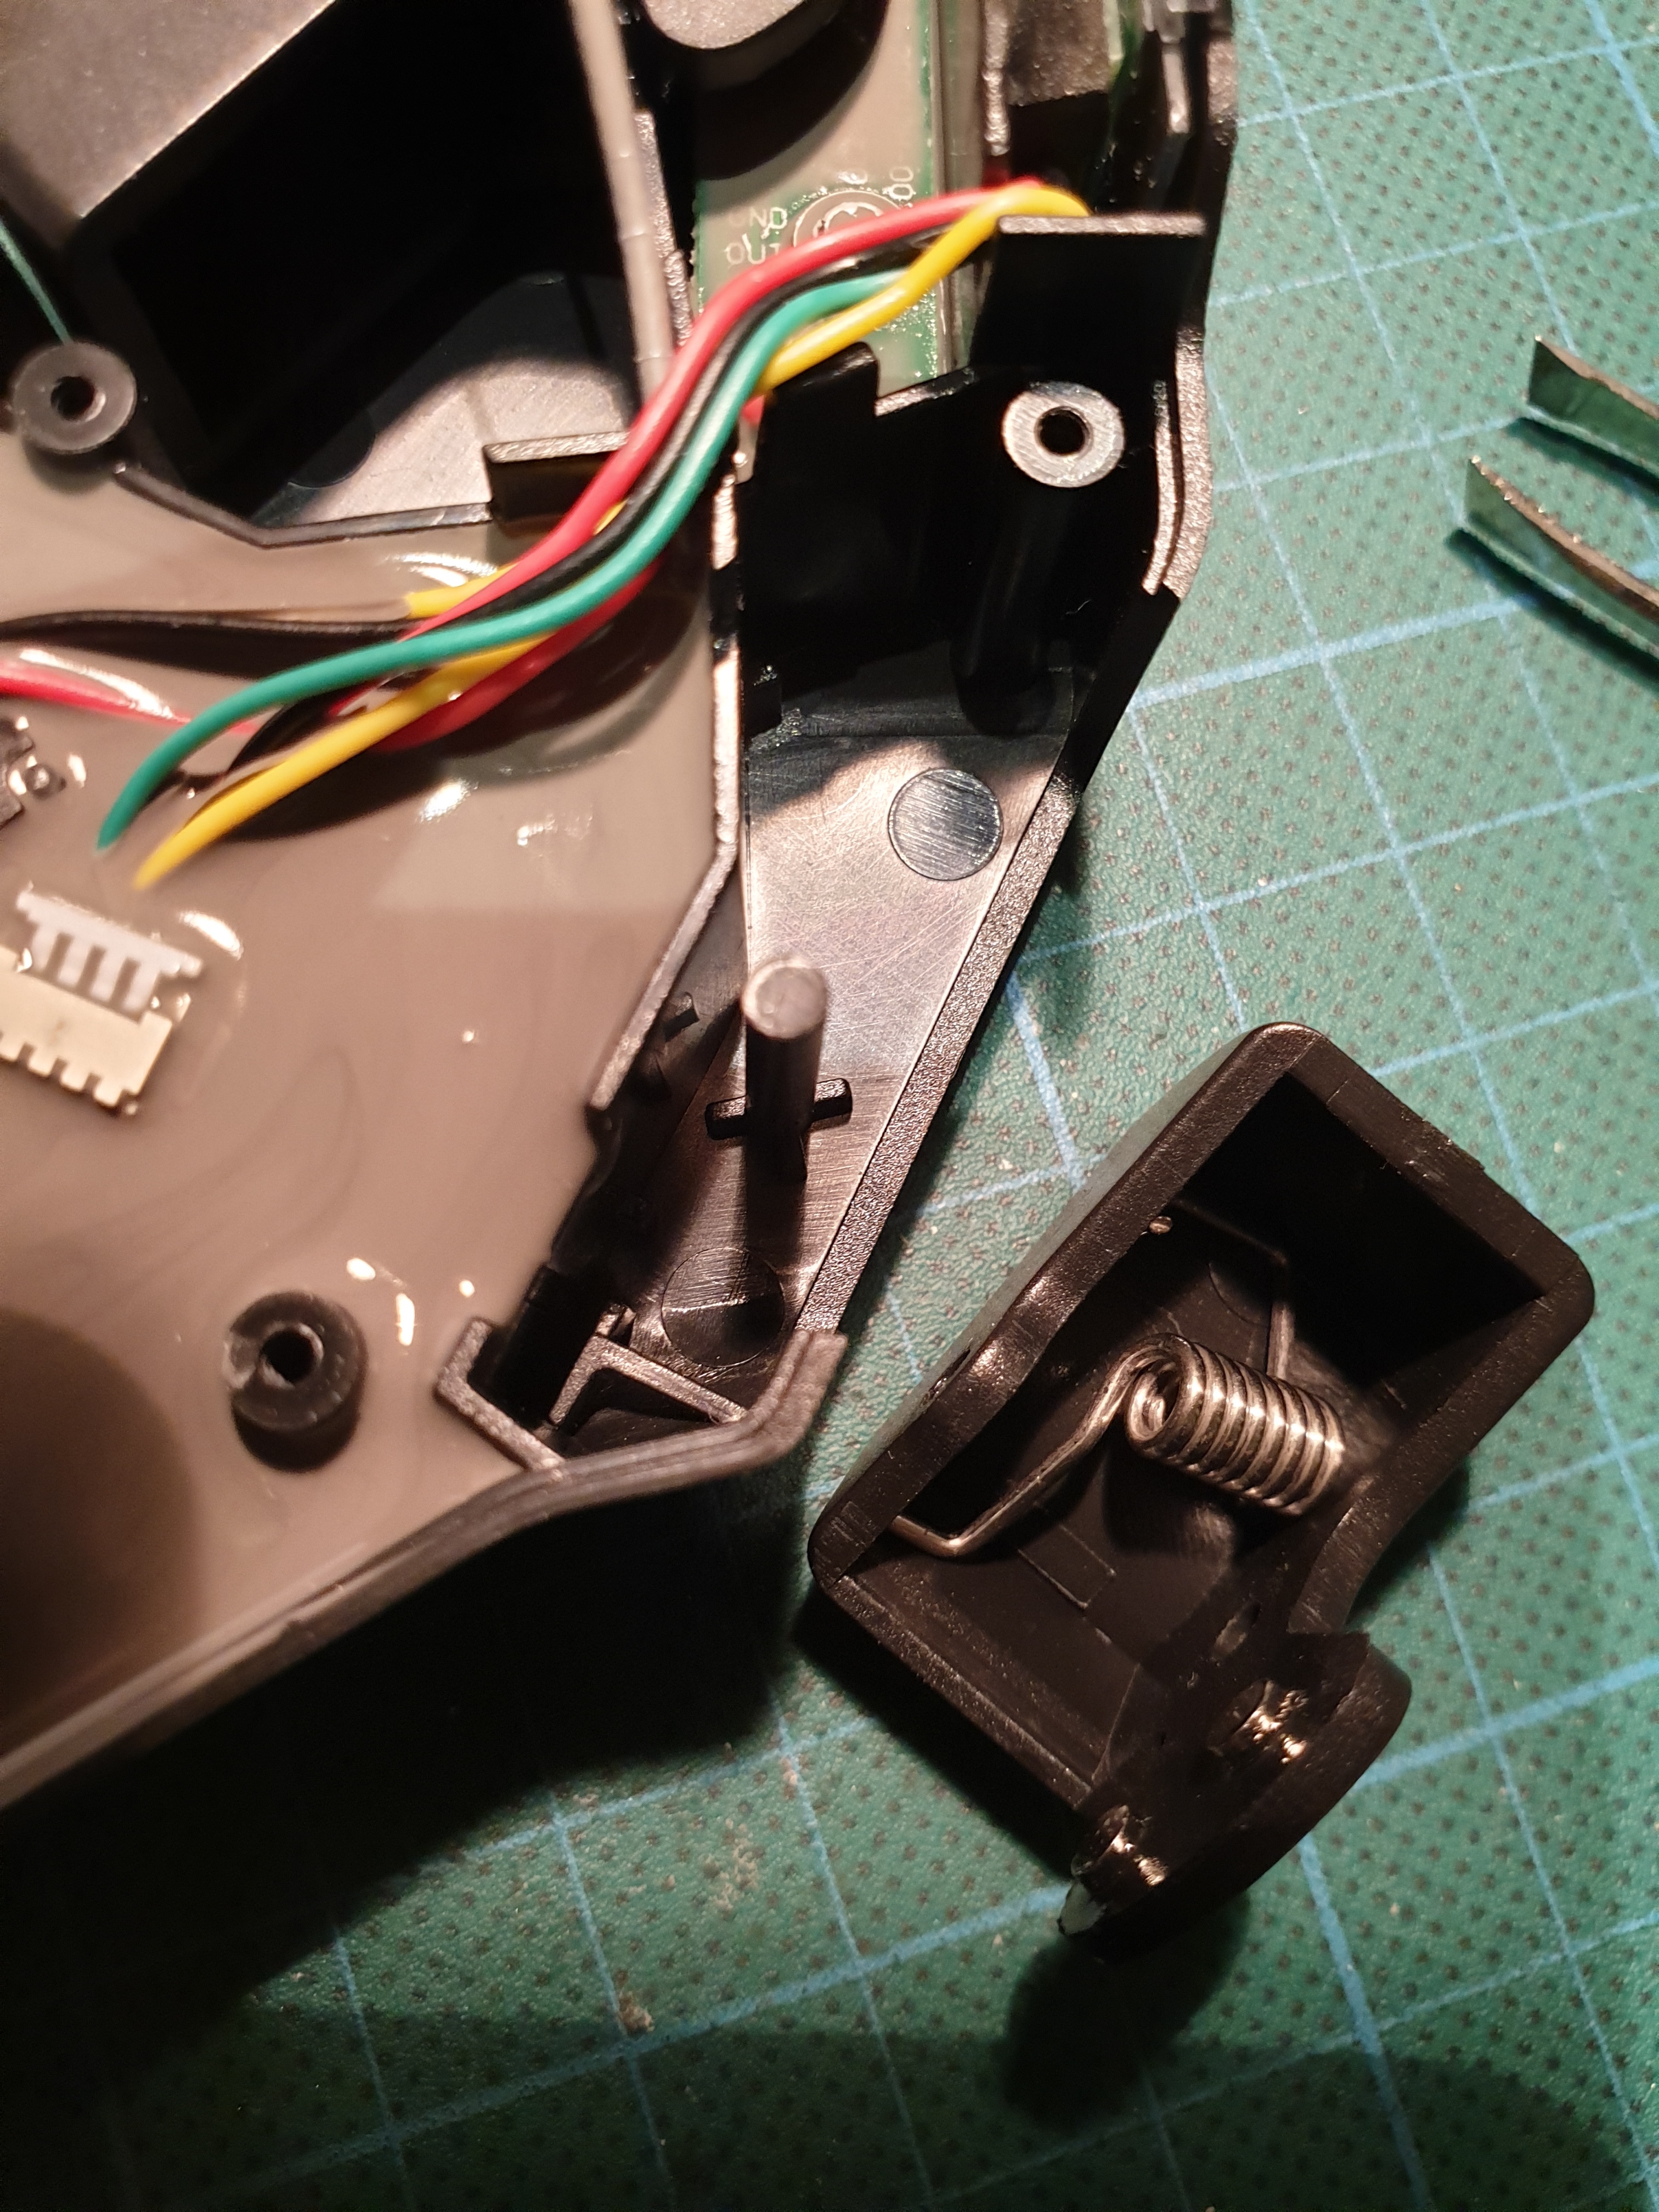
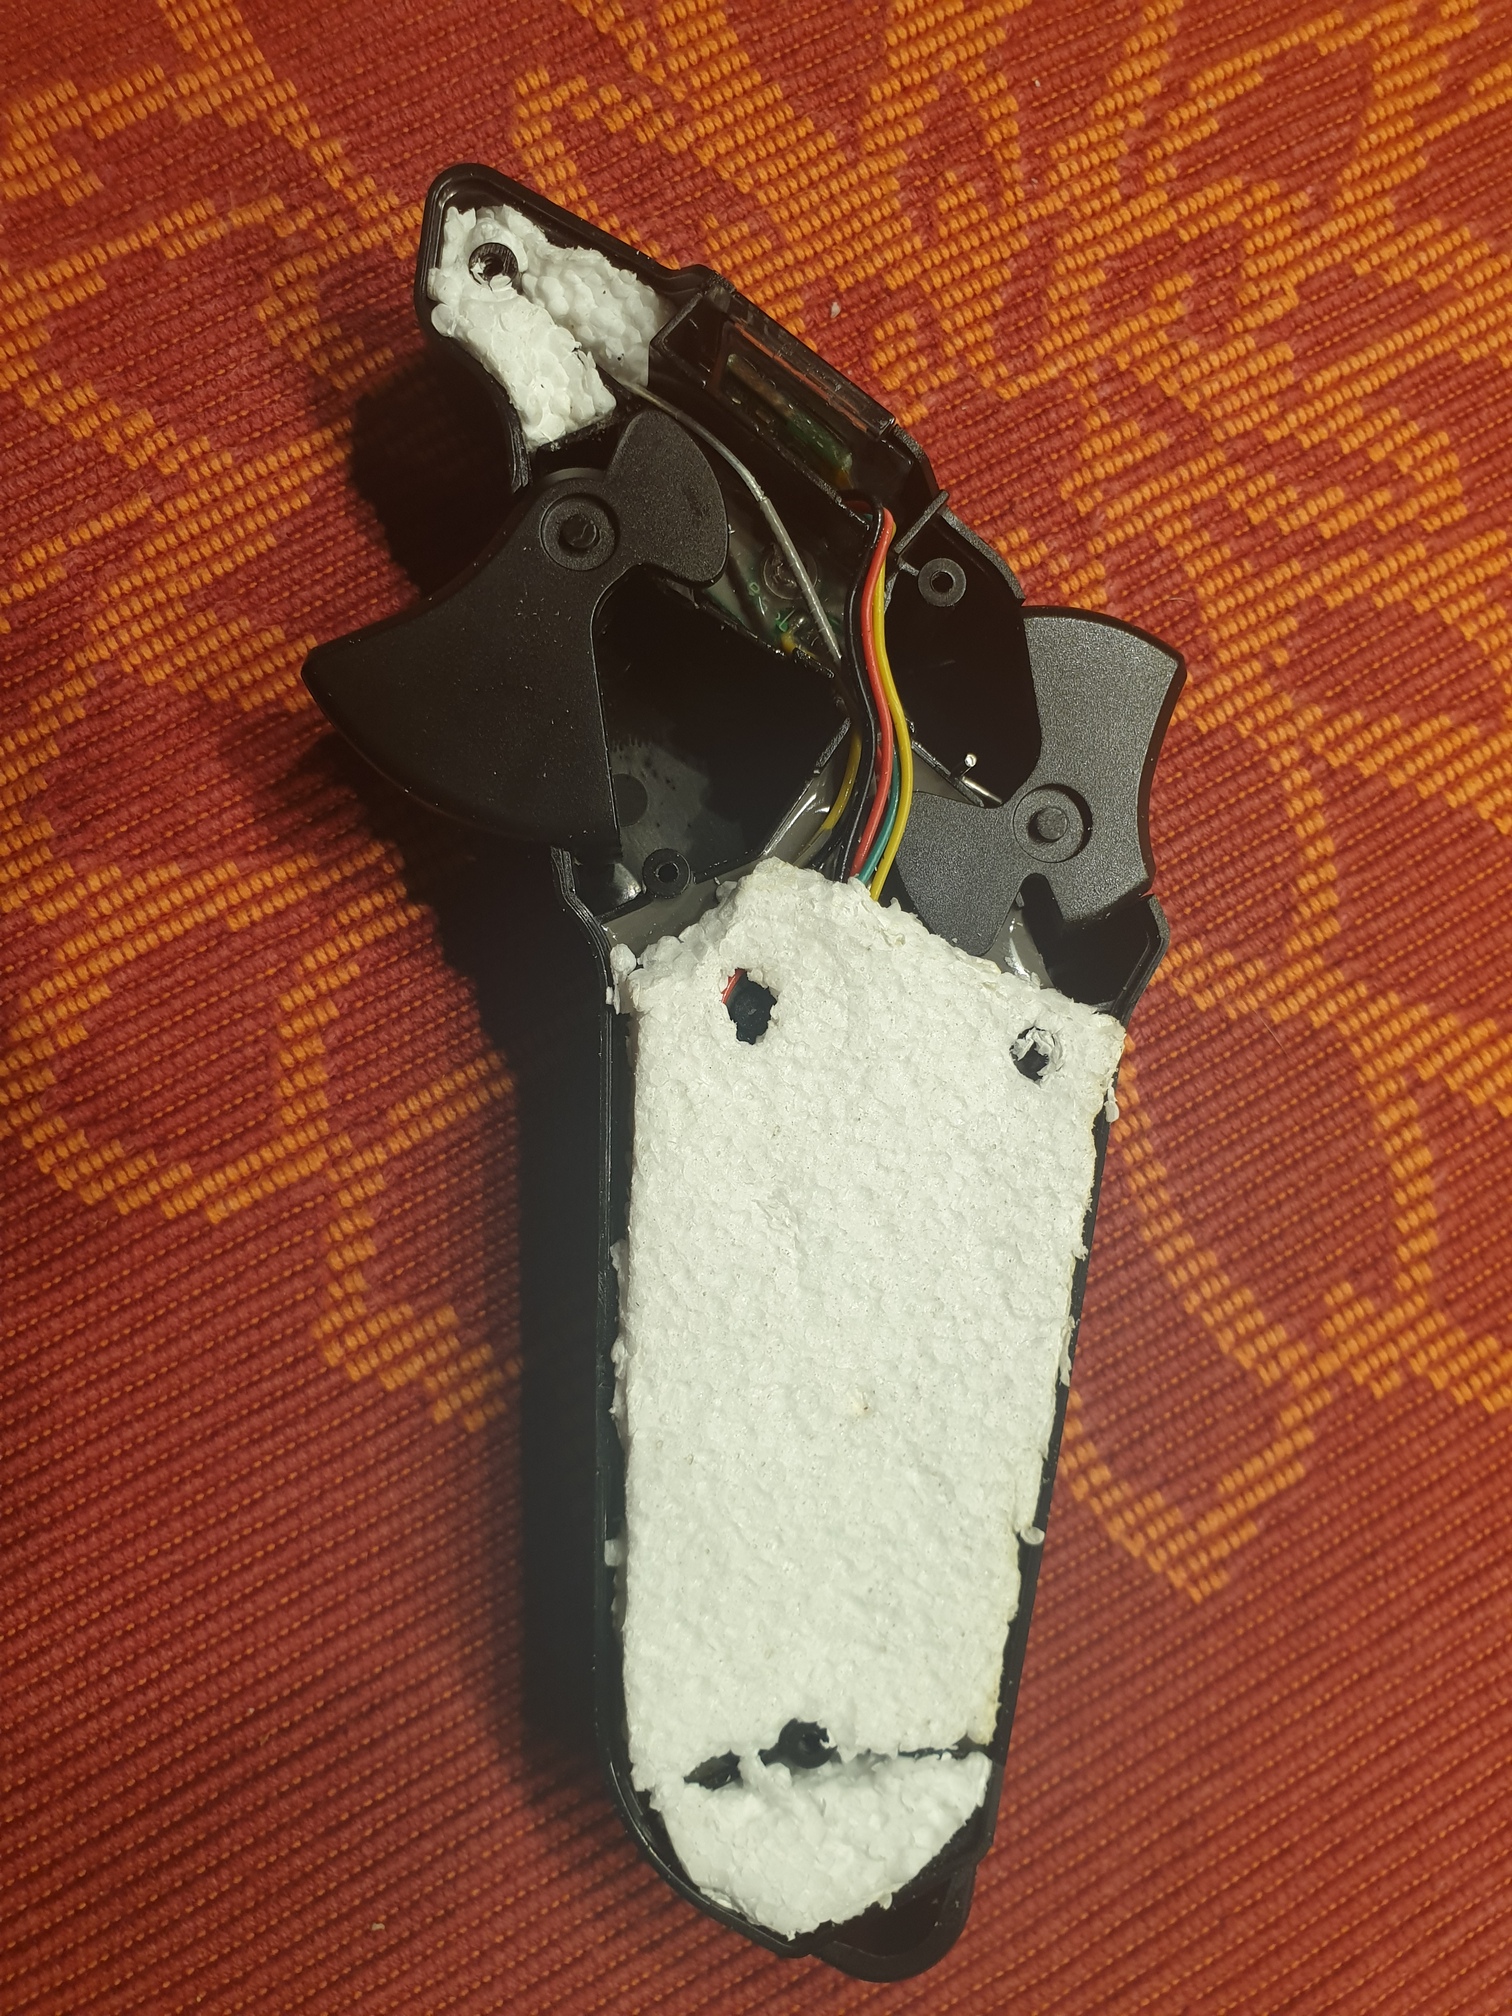
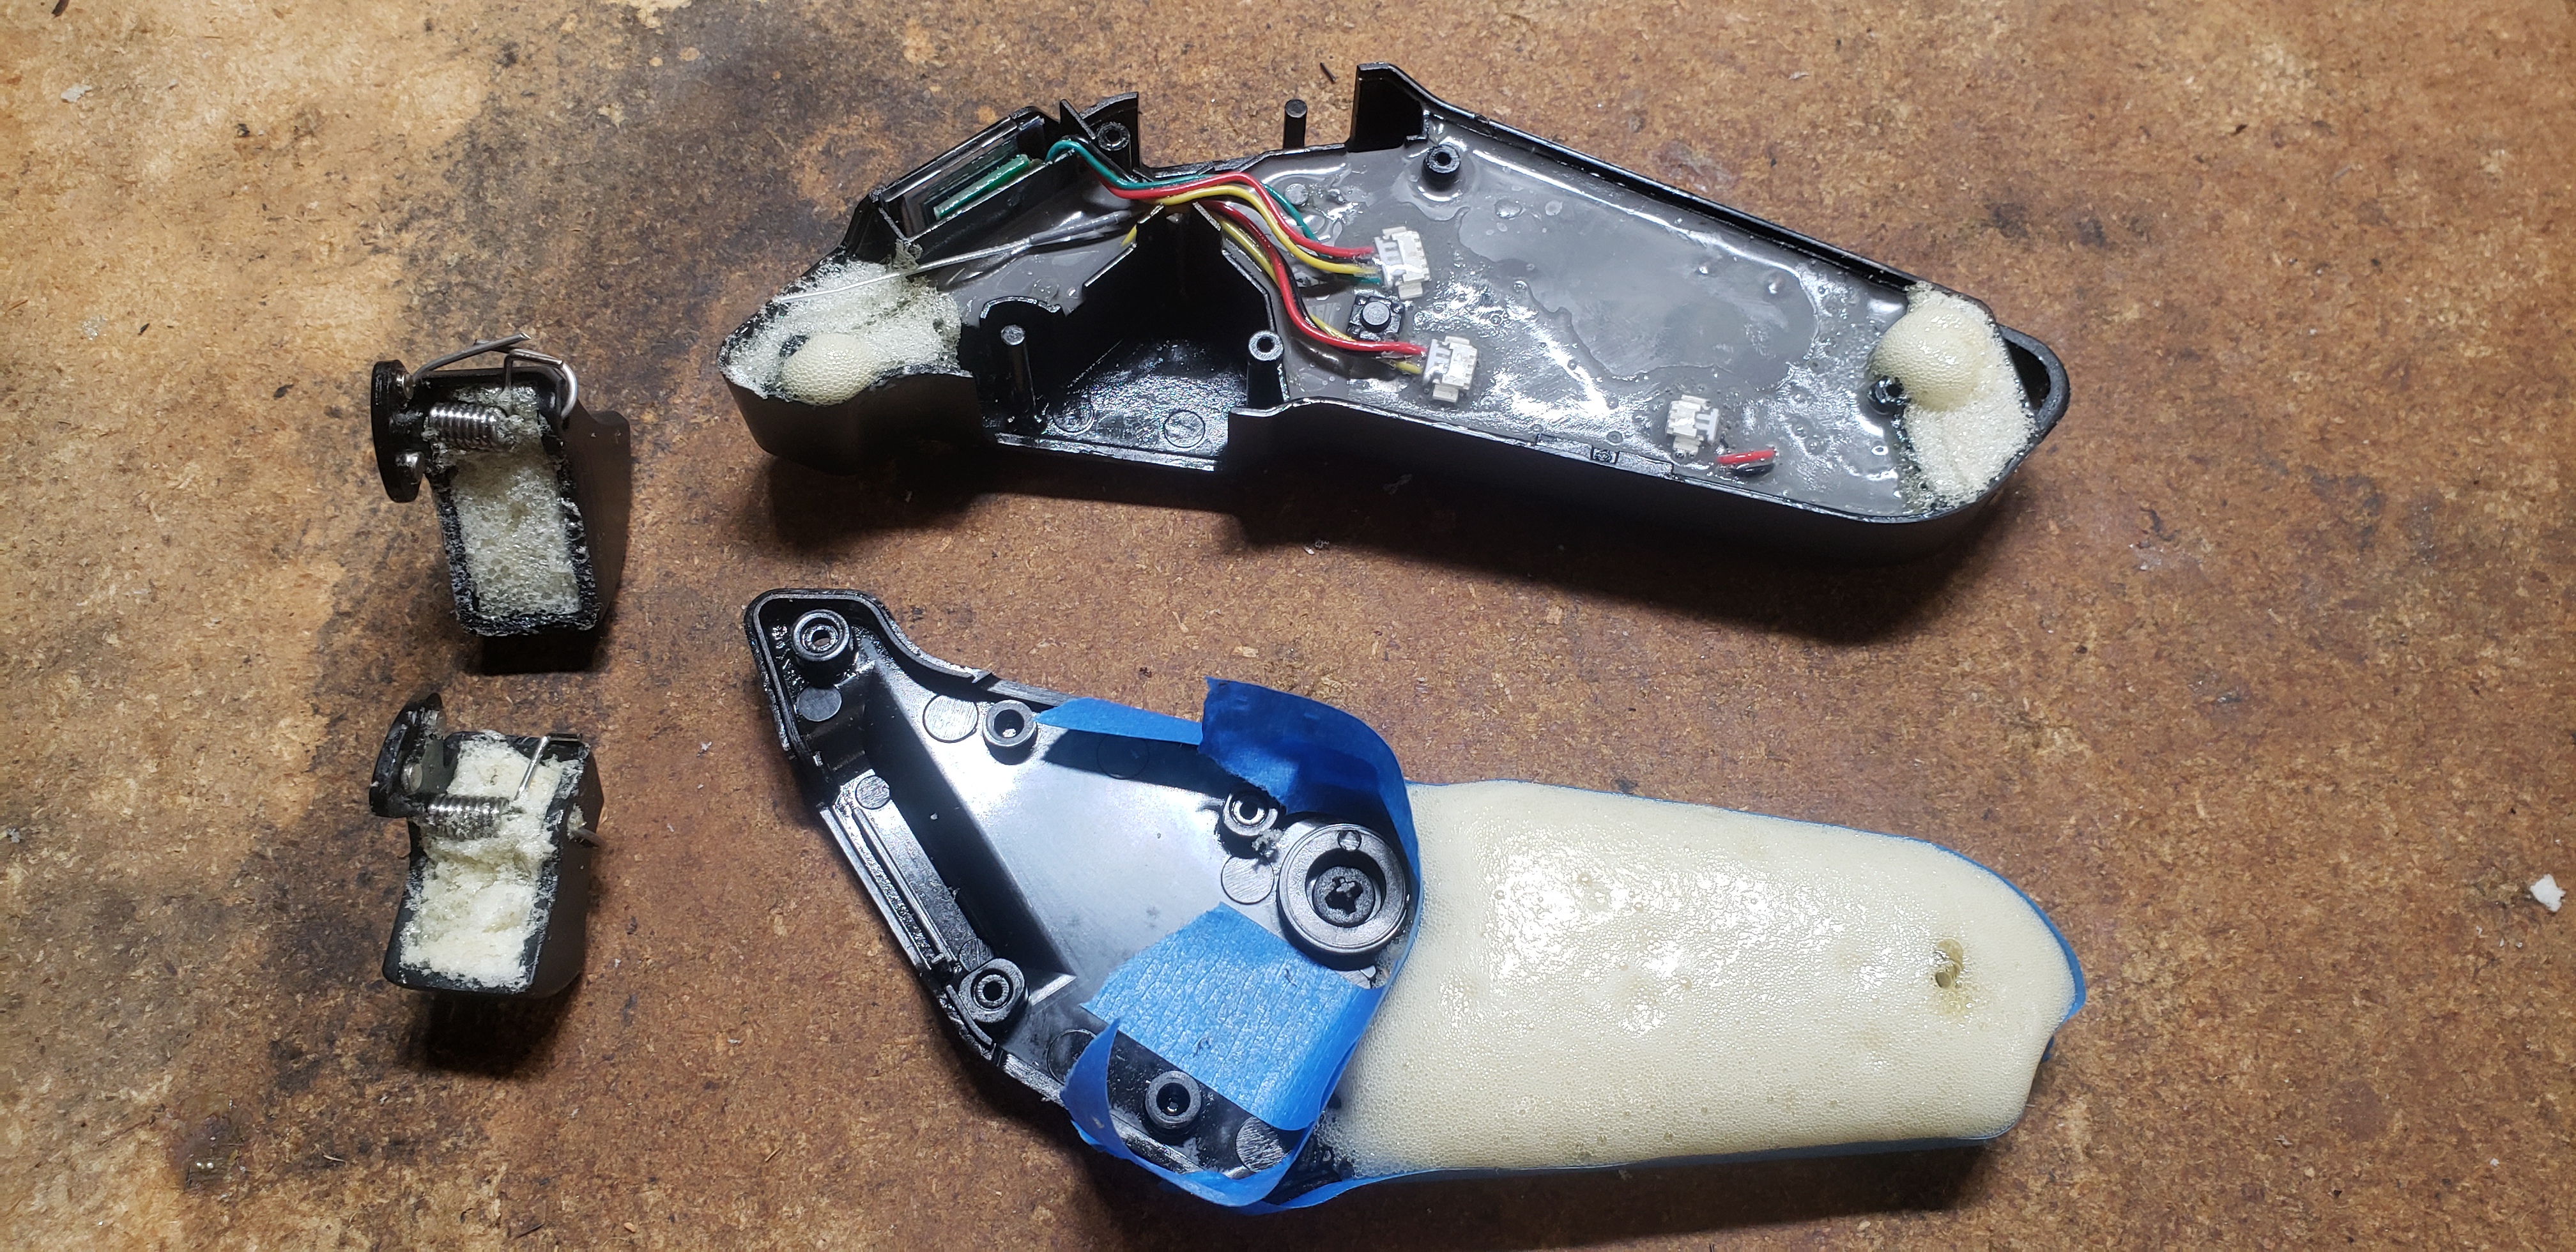
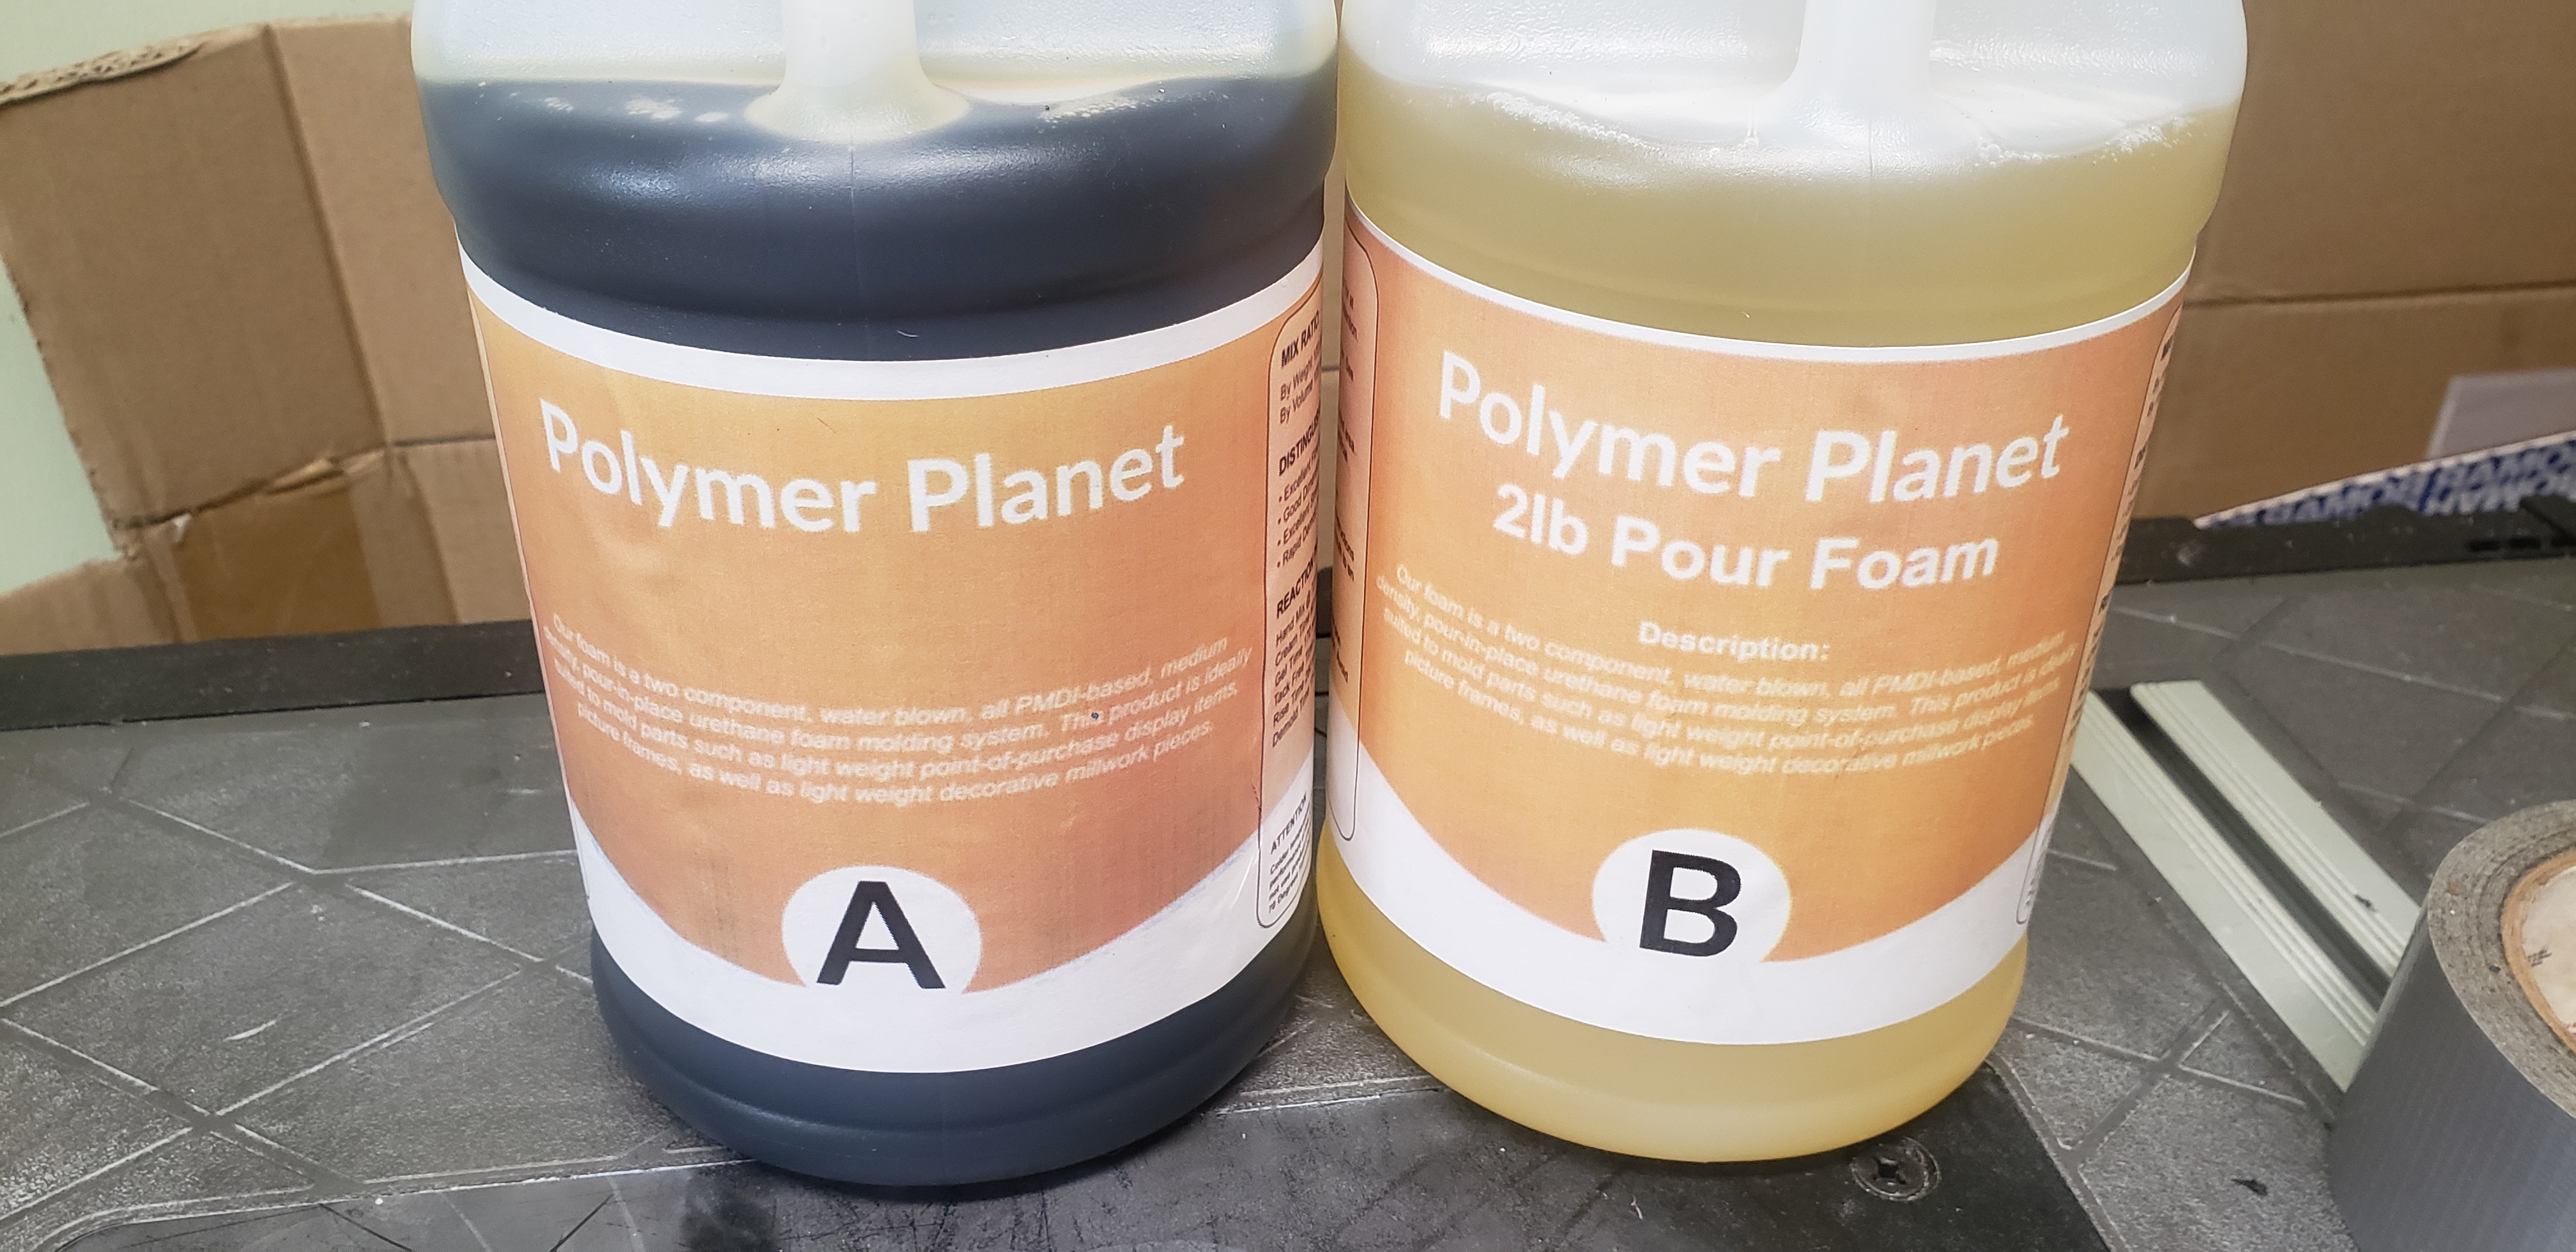
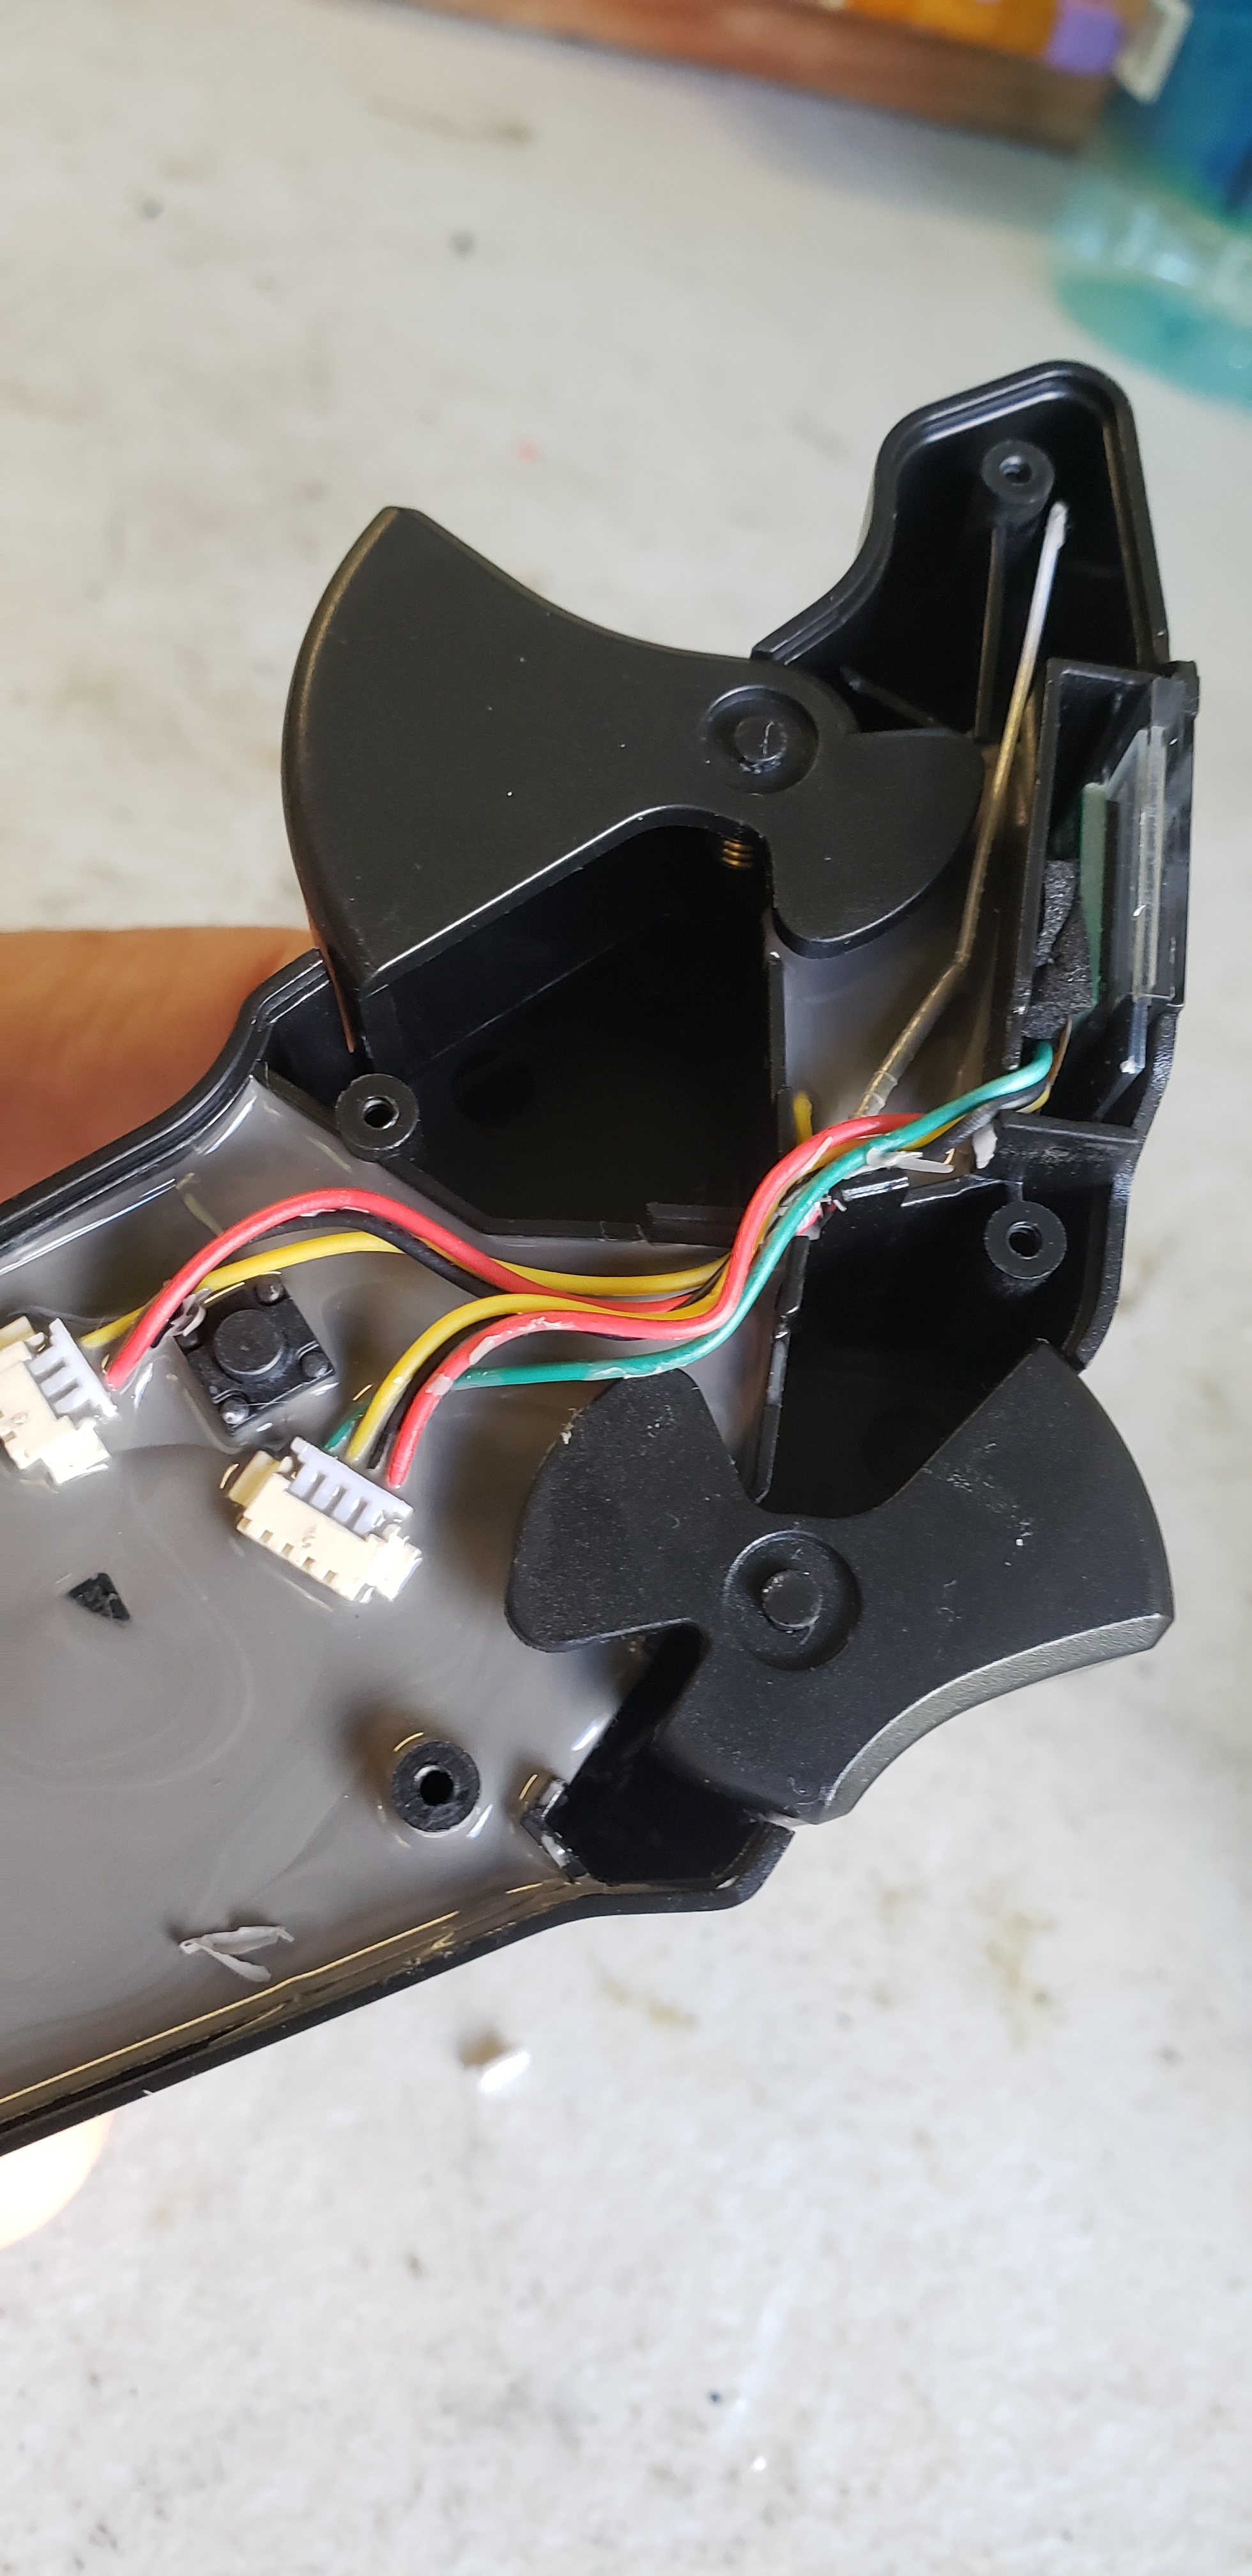
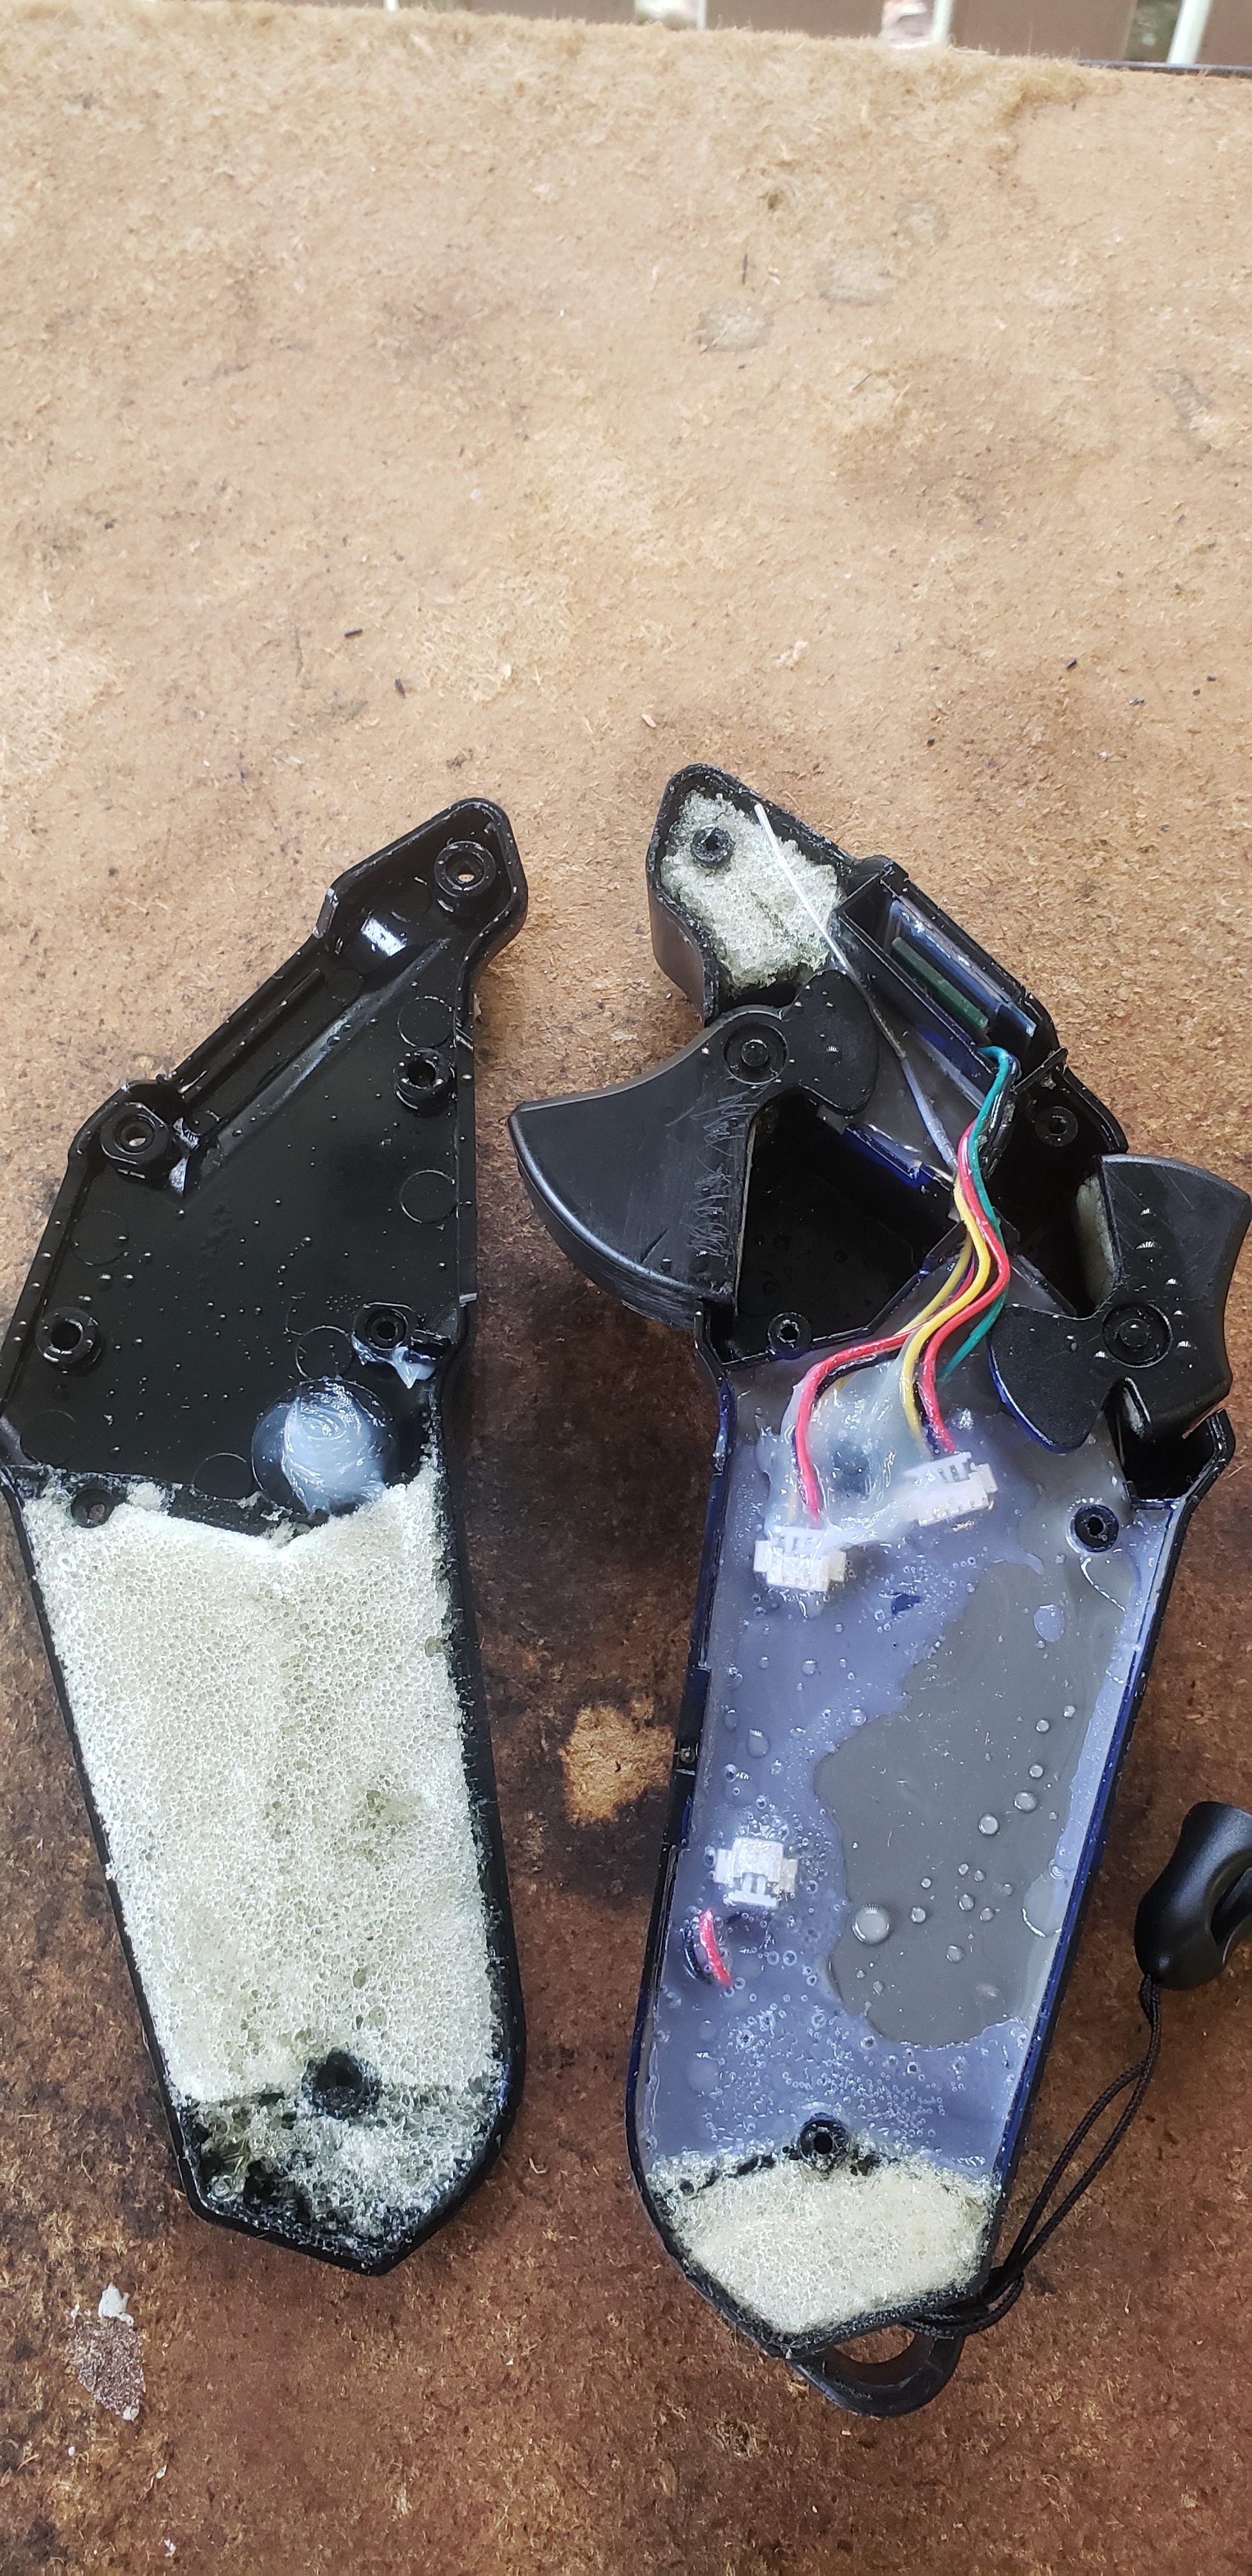
Step 3. I suggest using liquid foam to make your remote float. Clean off the corrosionX for the area the foam goes so it will stick. I fount that my remote floats really good once filling both triggers and the void in the top corner and bottom corner, and the backside of the cover. Caution. If you remove your triggers be extra careful how the spring goes and make sure you don’t break the plastic post the trigger pivots on.


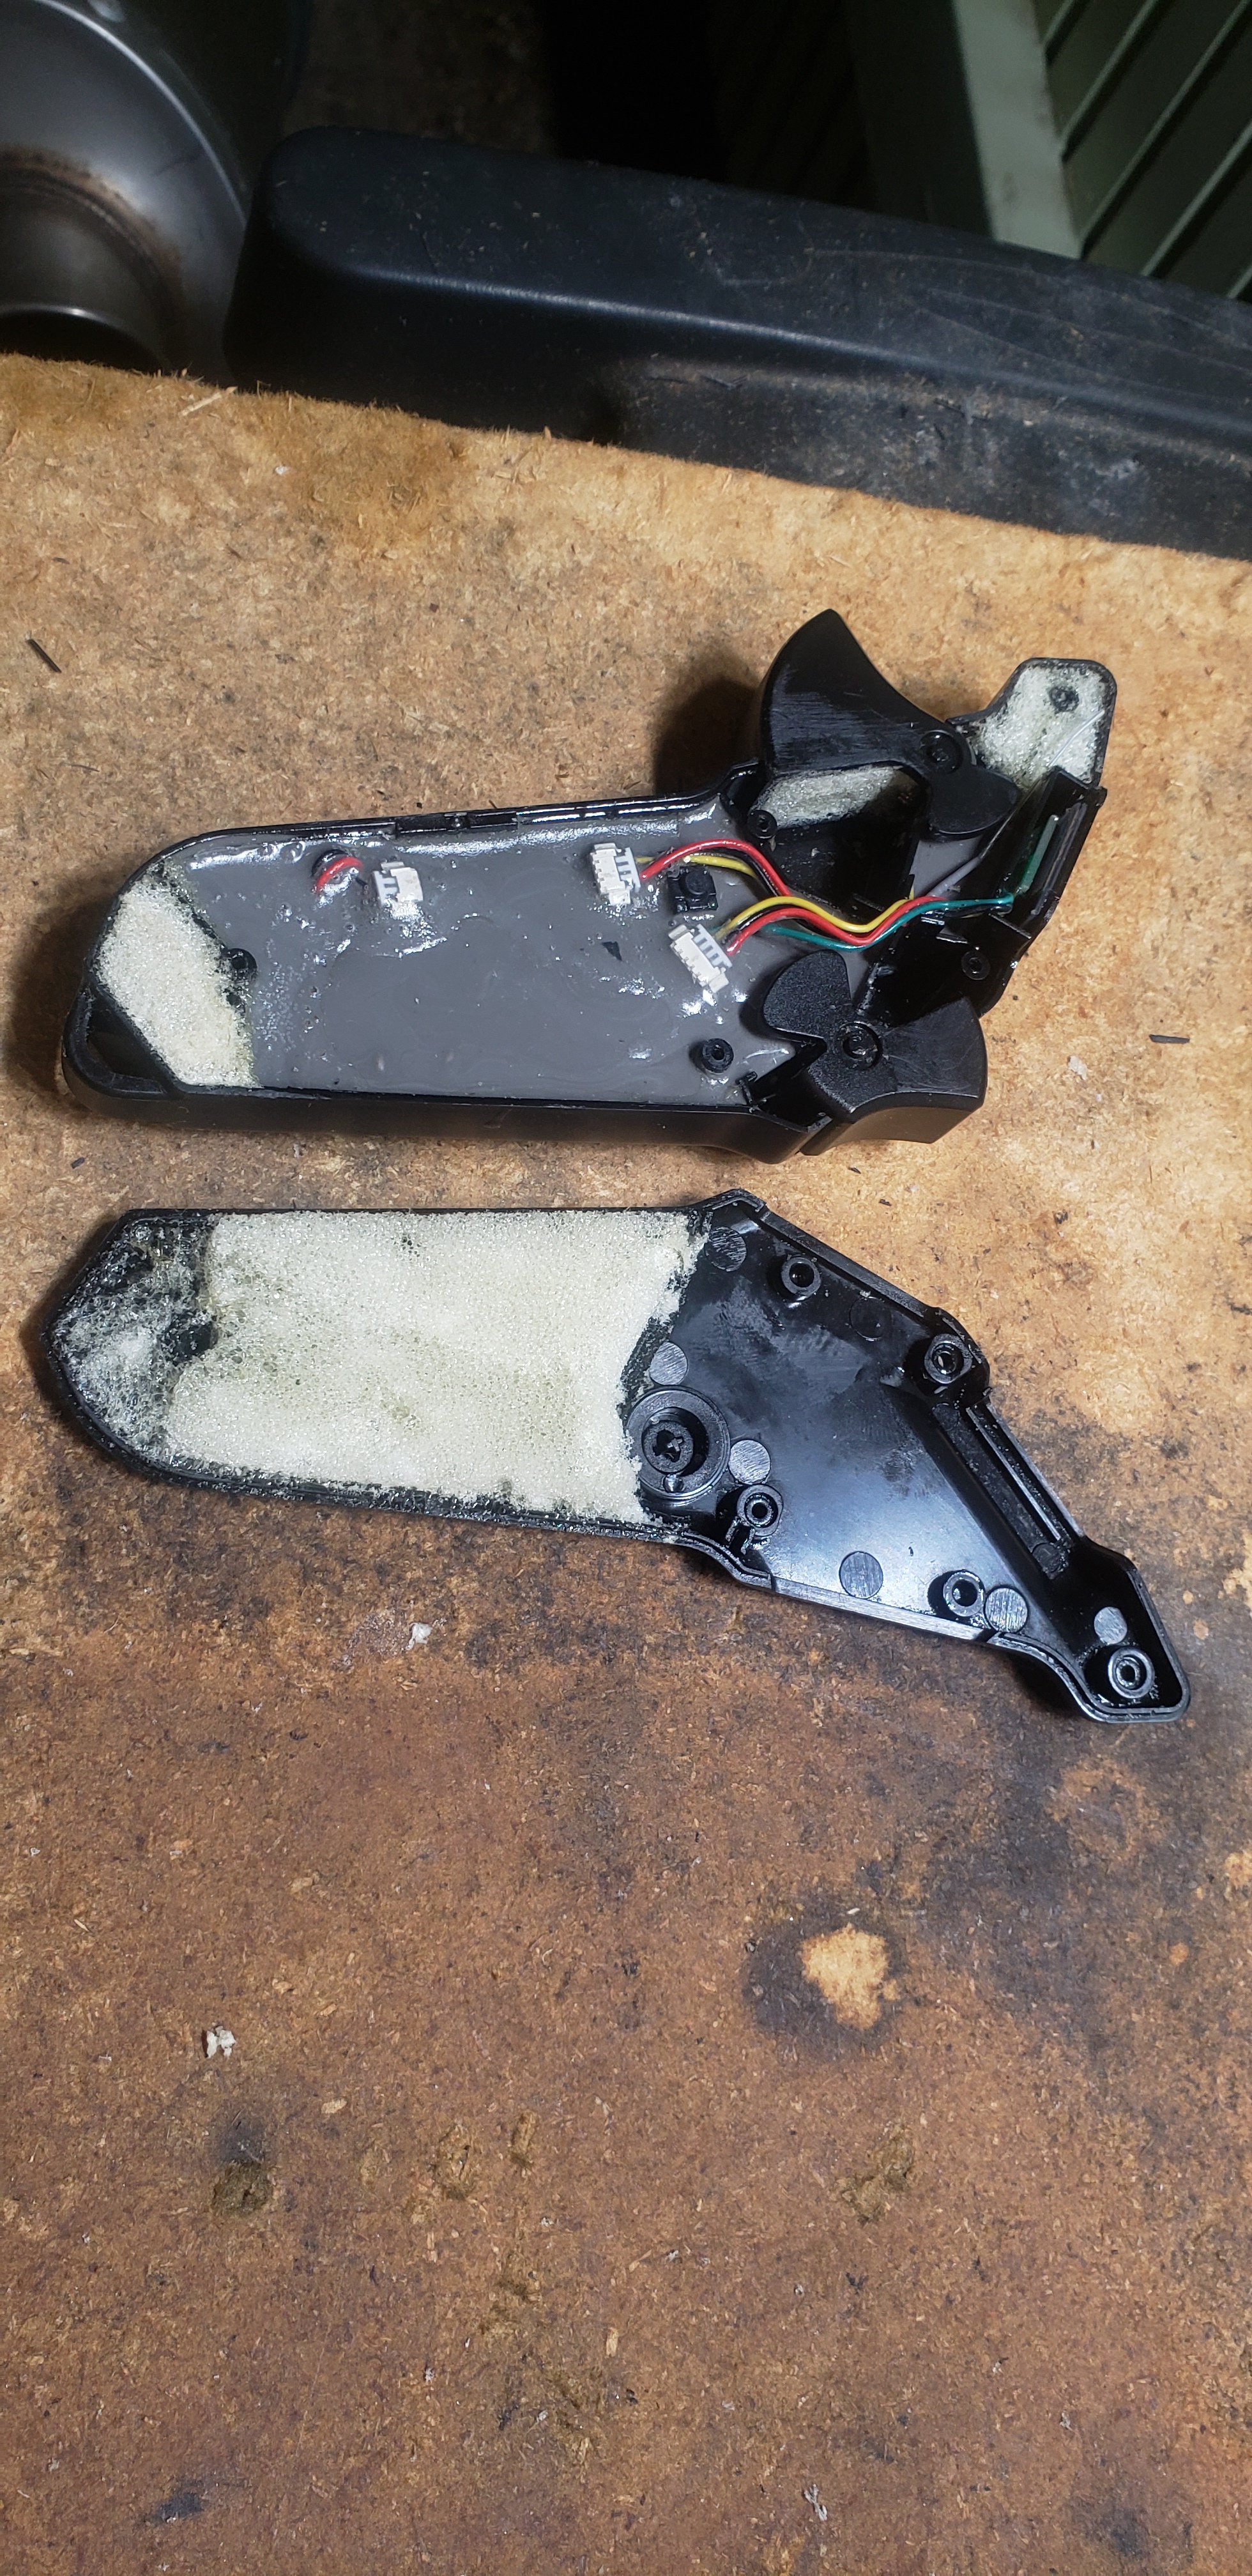
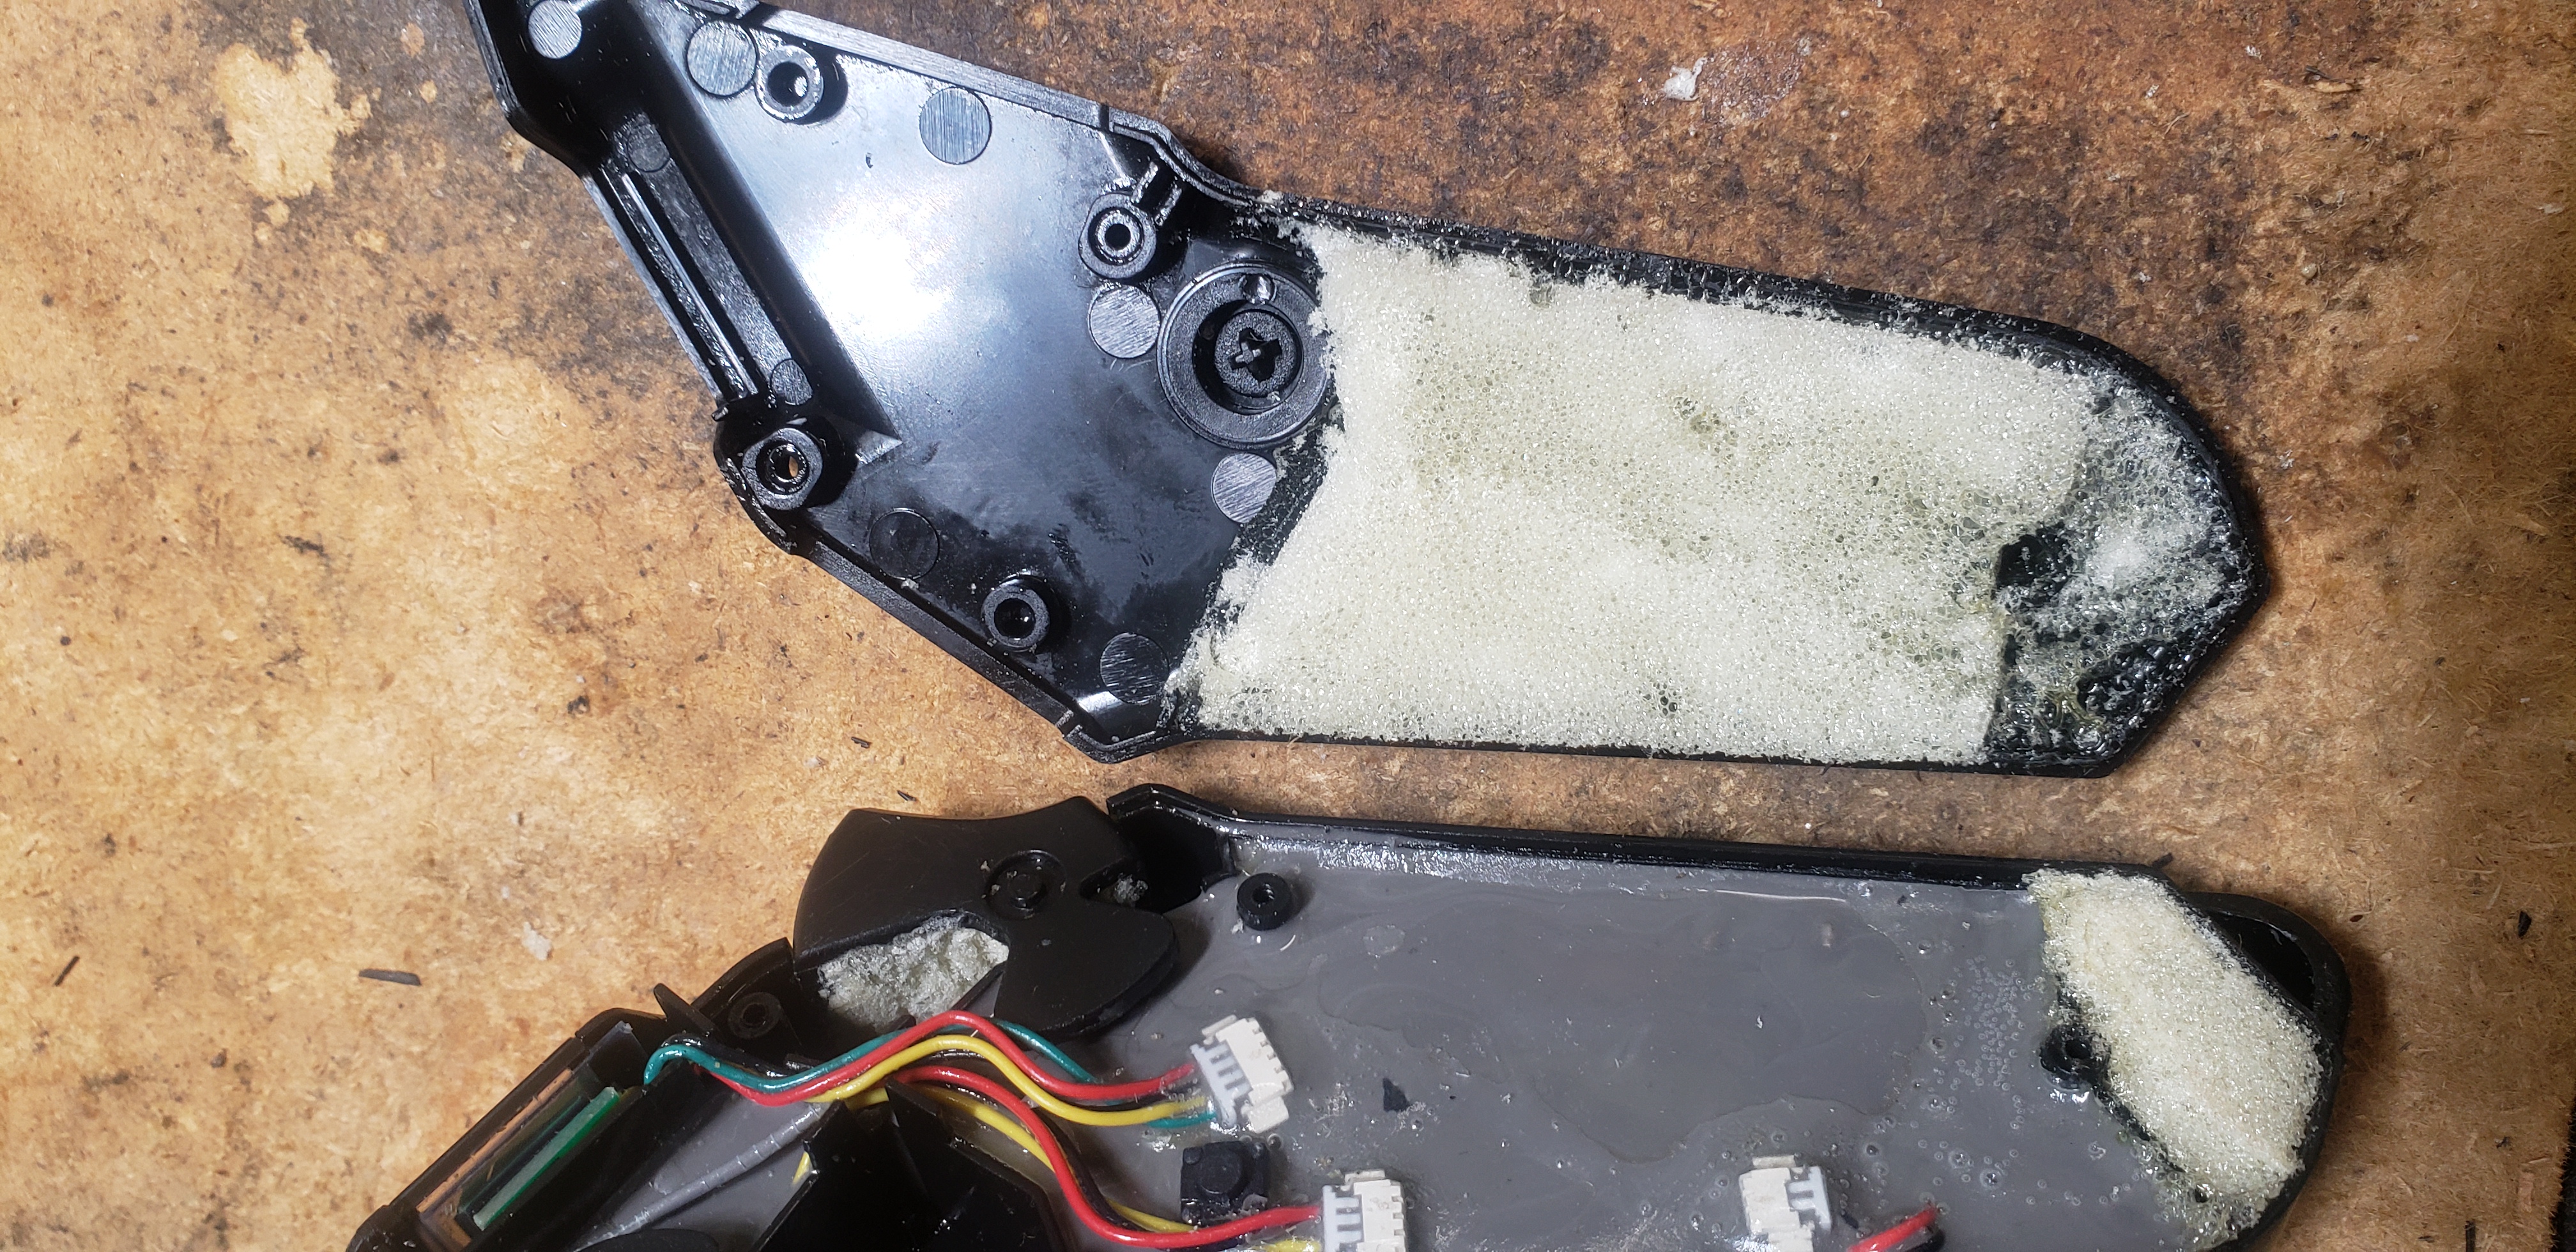
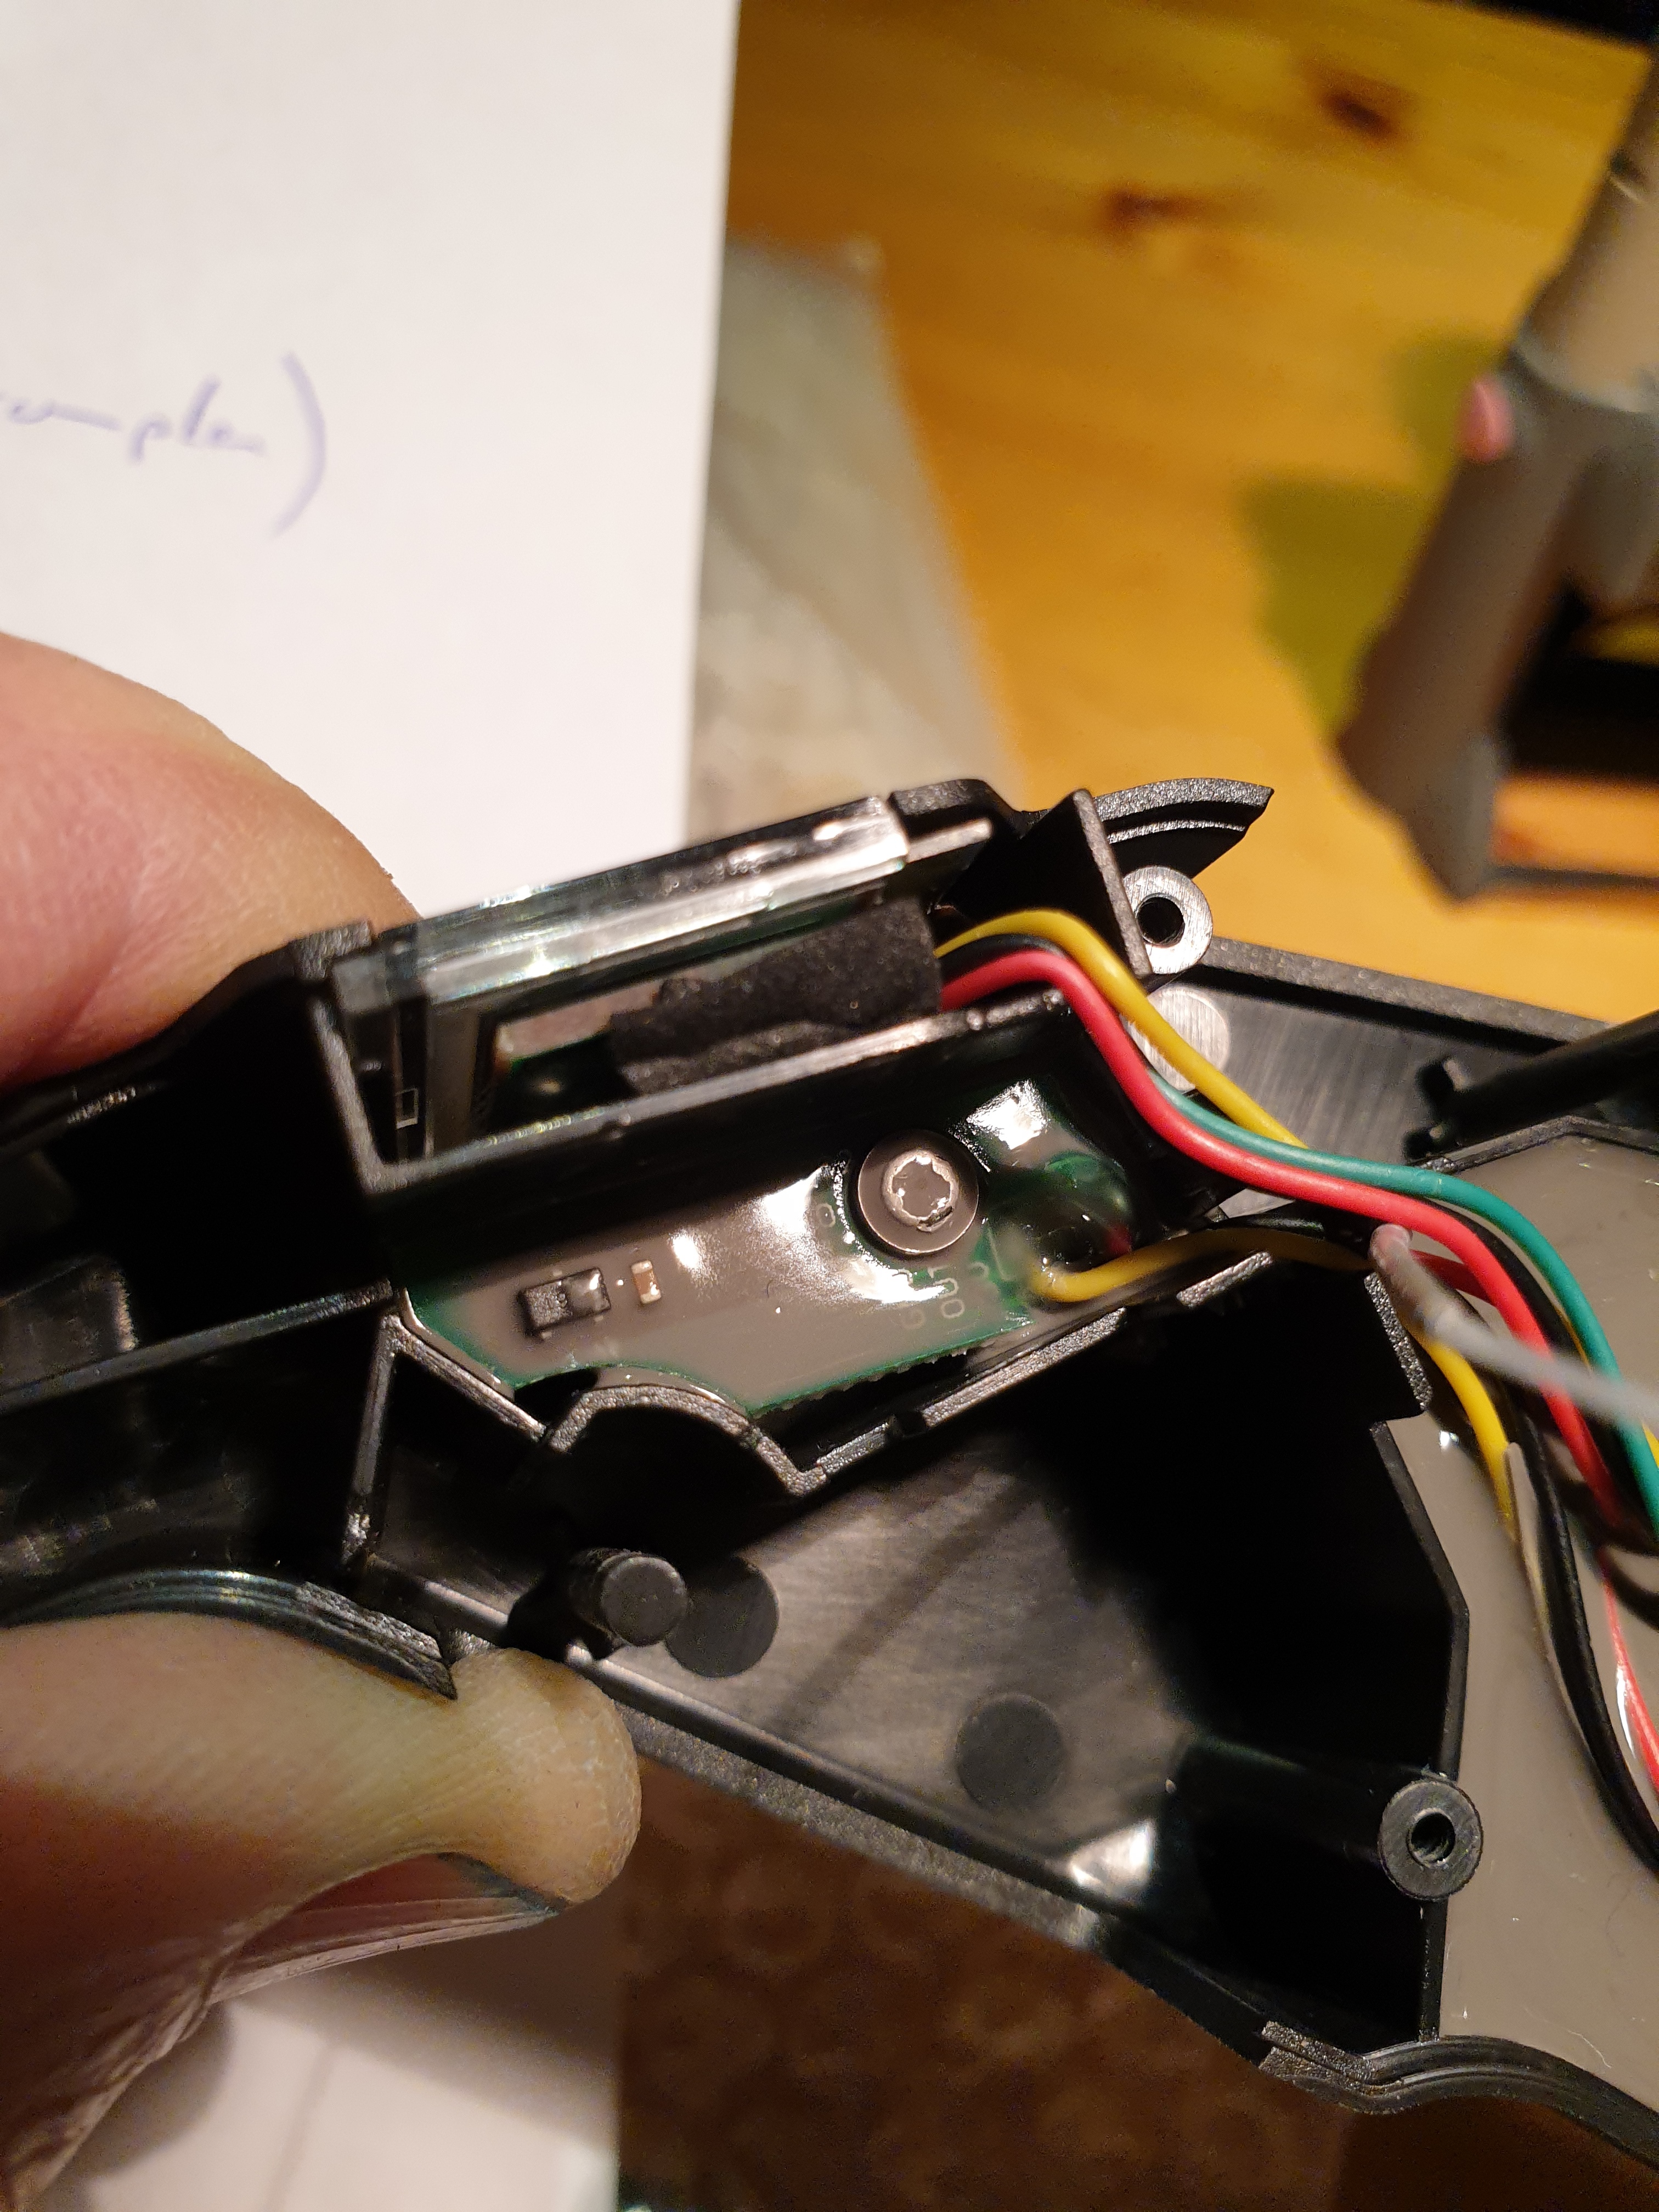
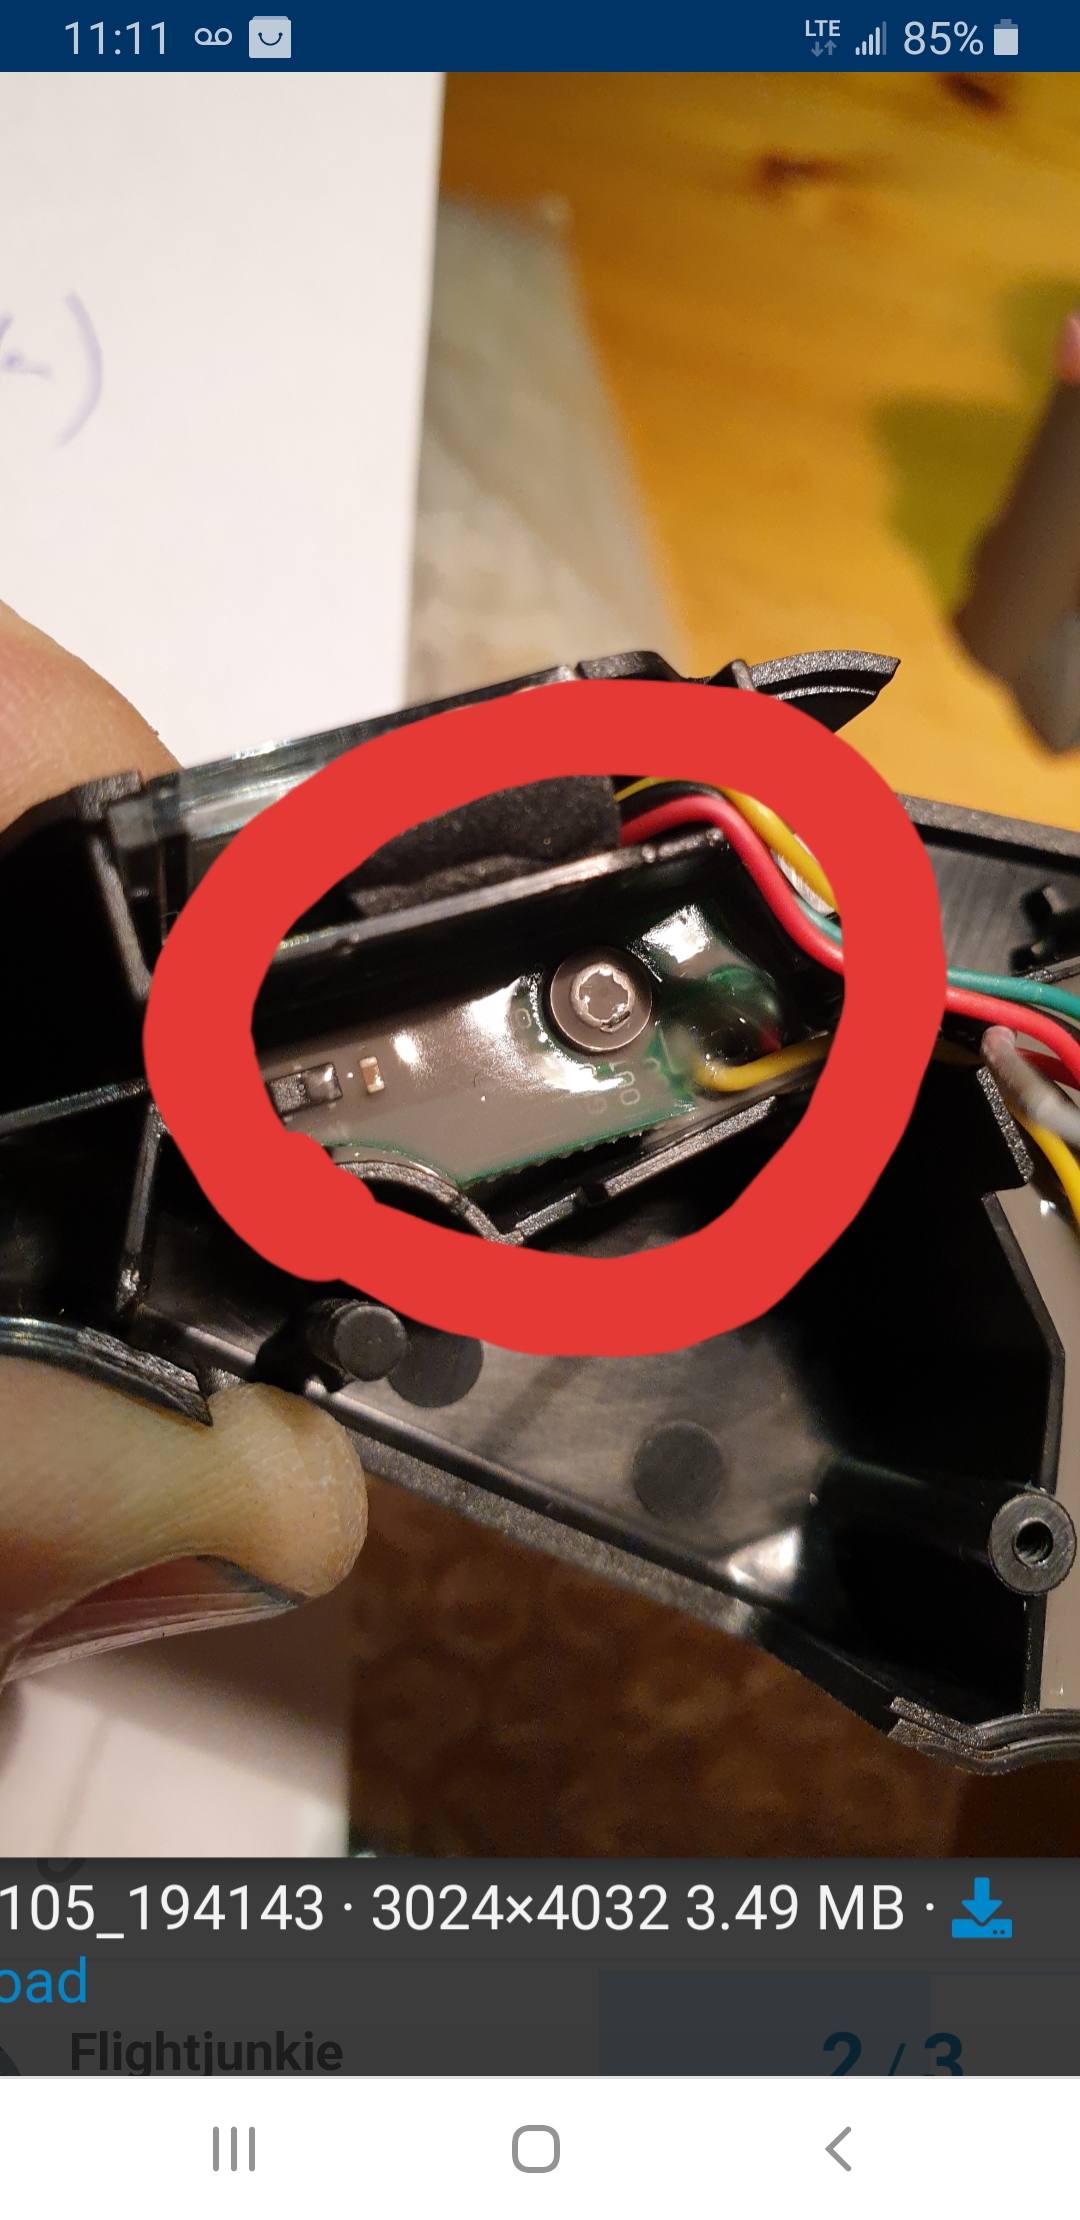
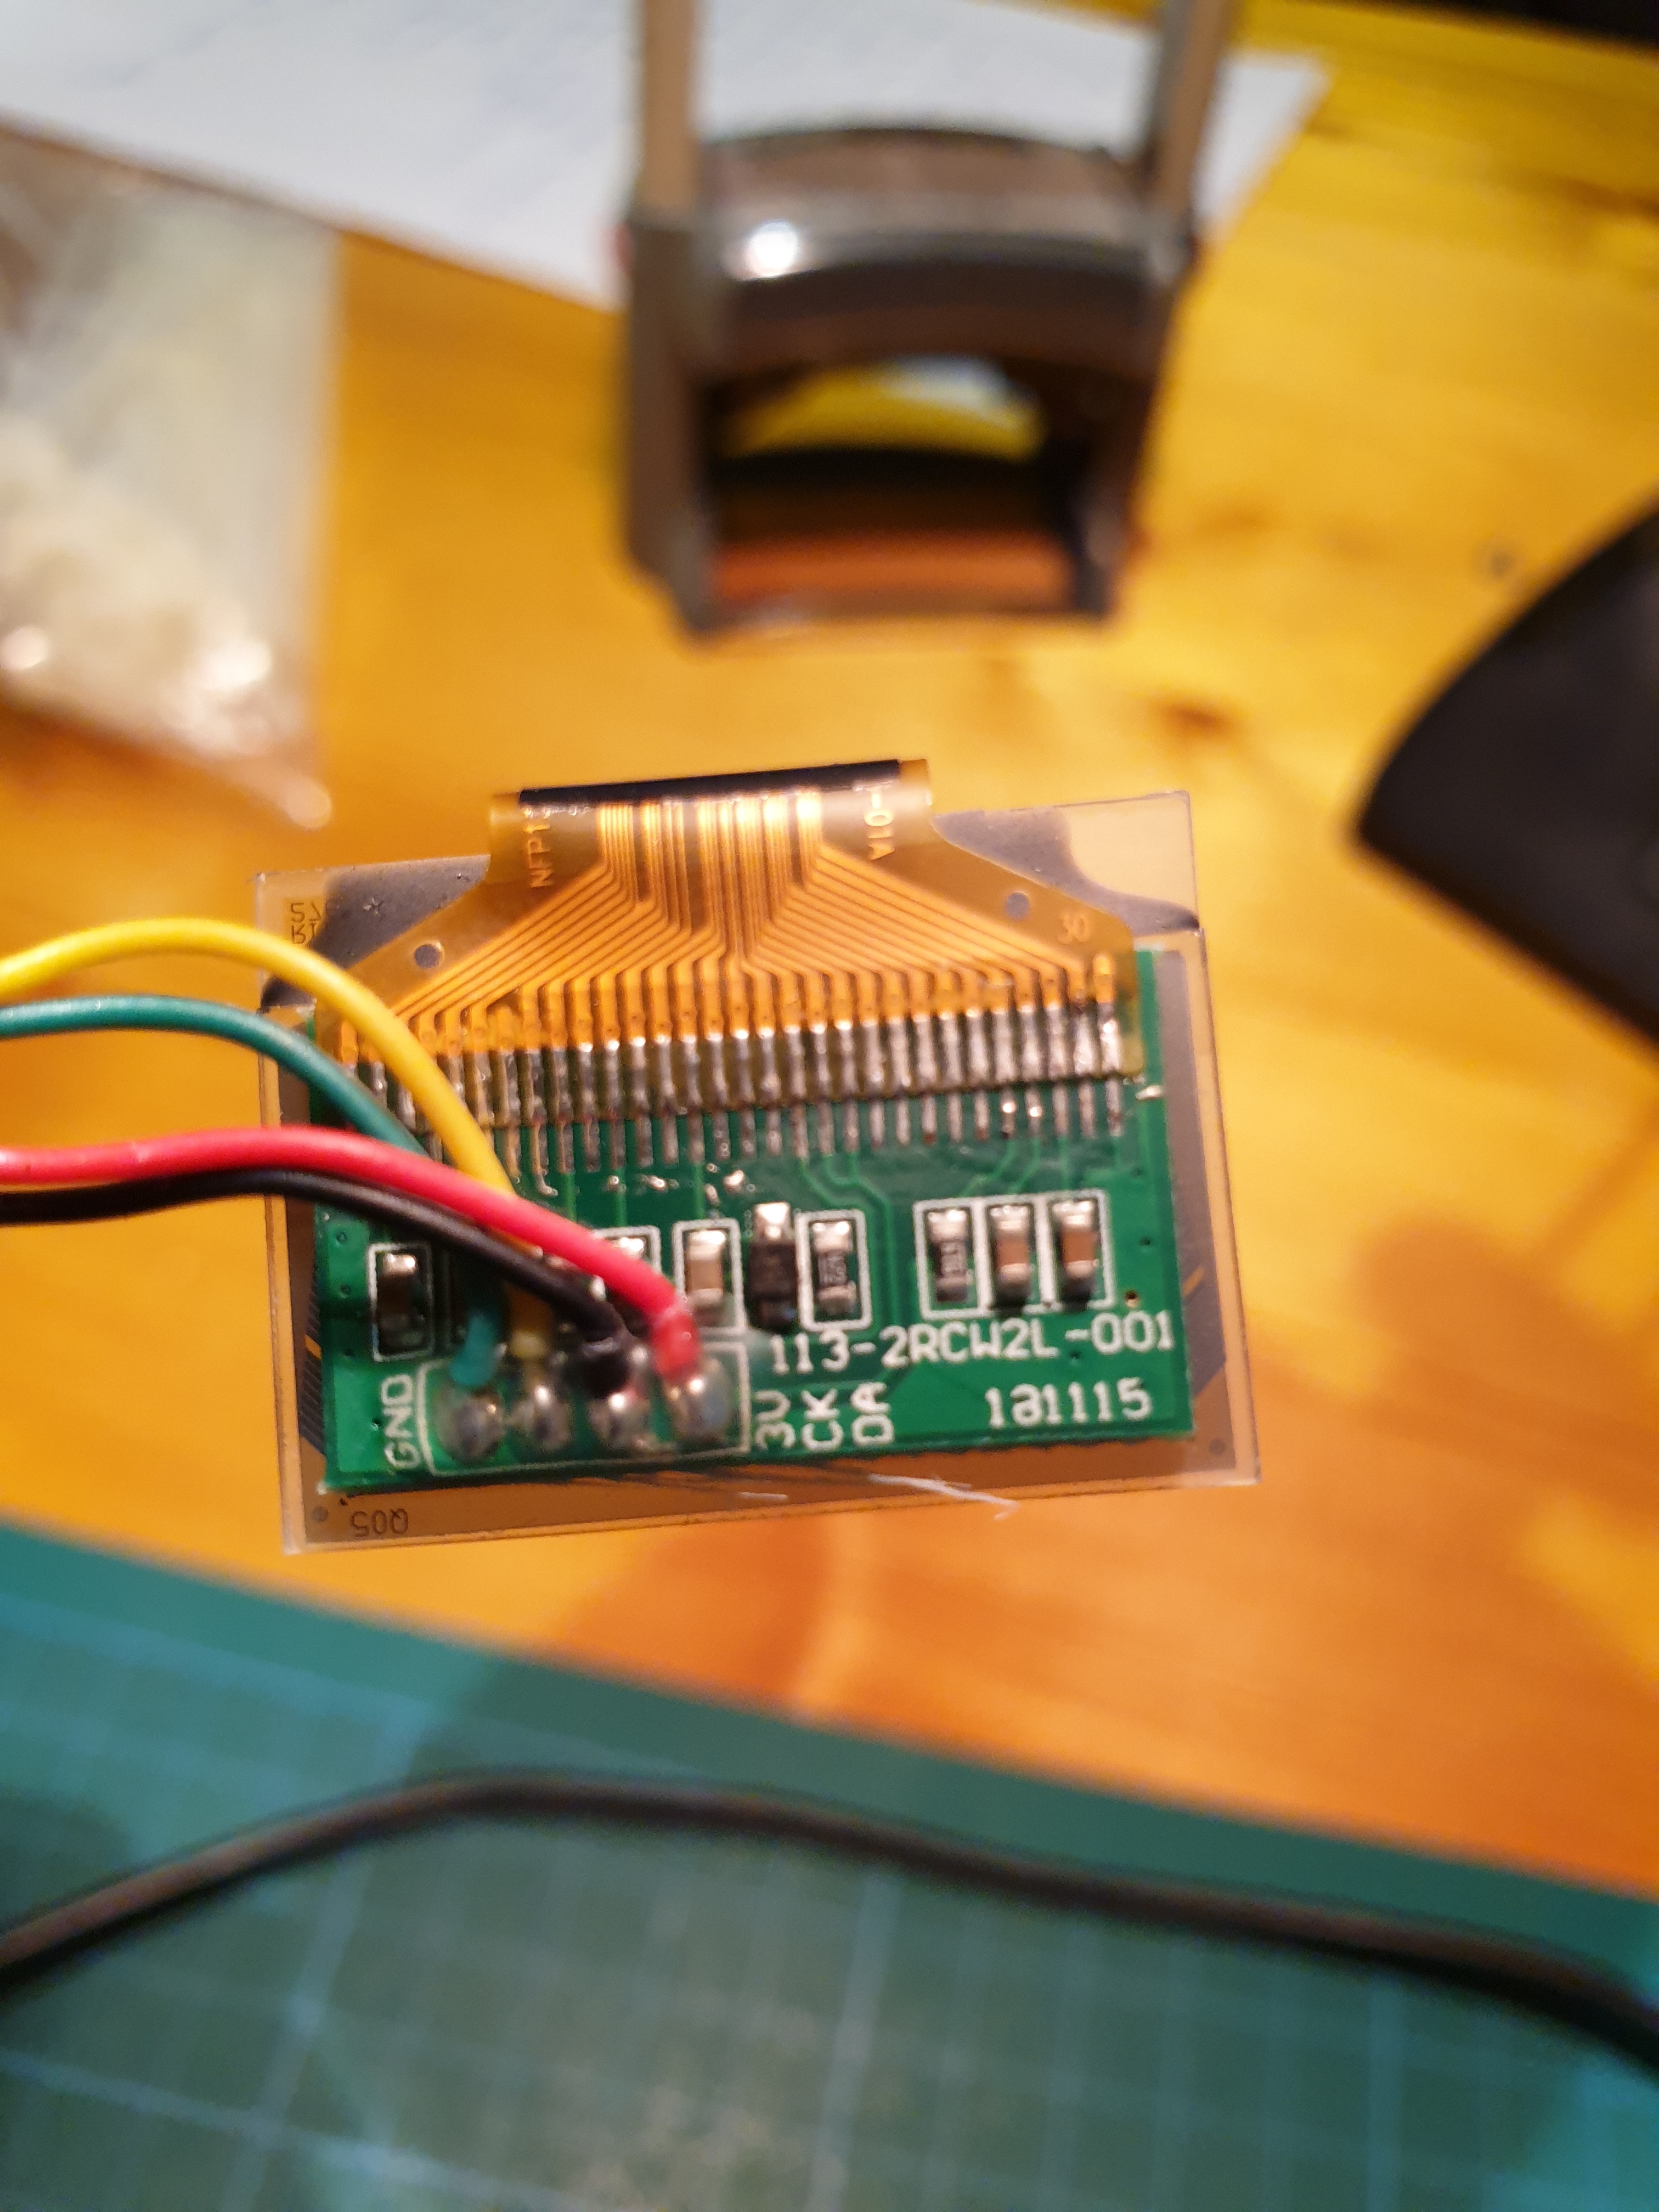
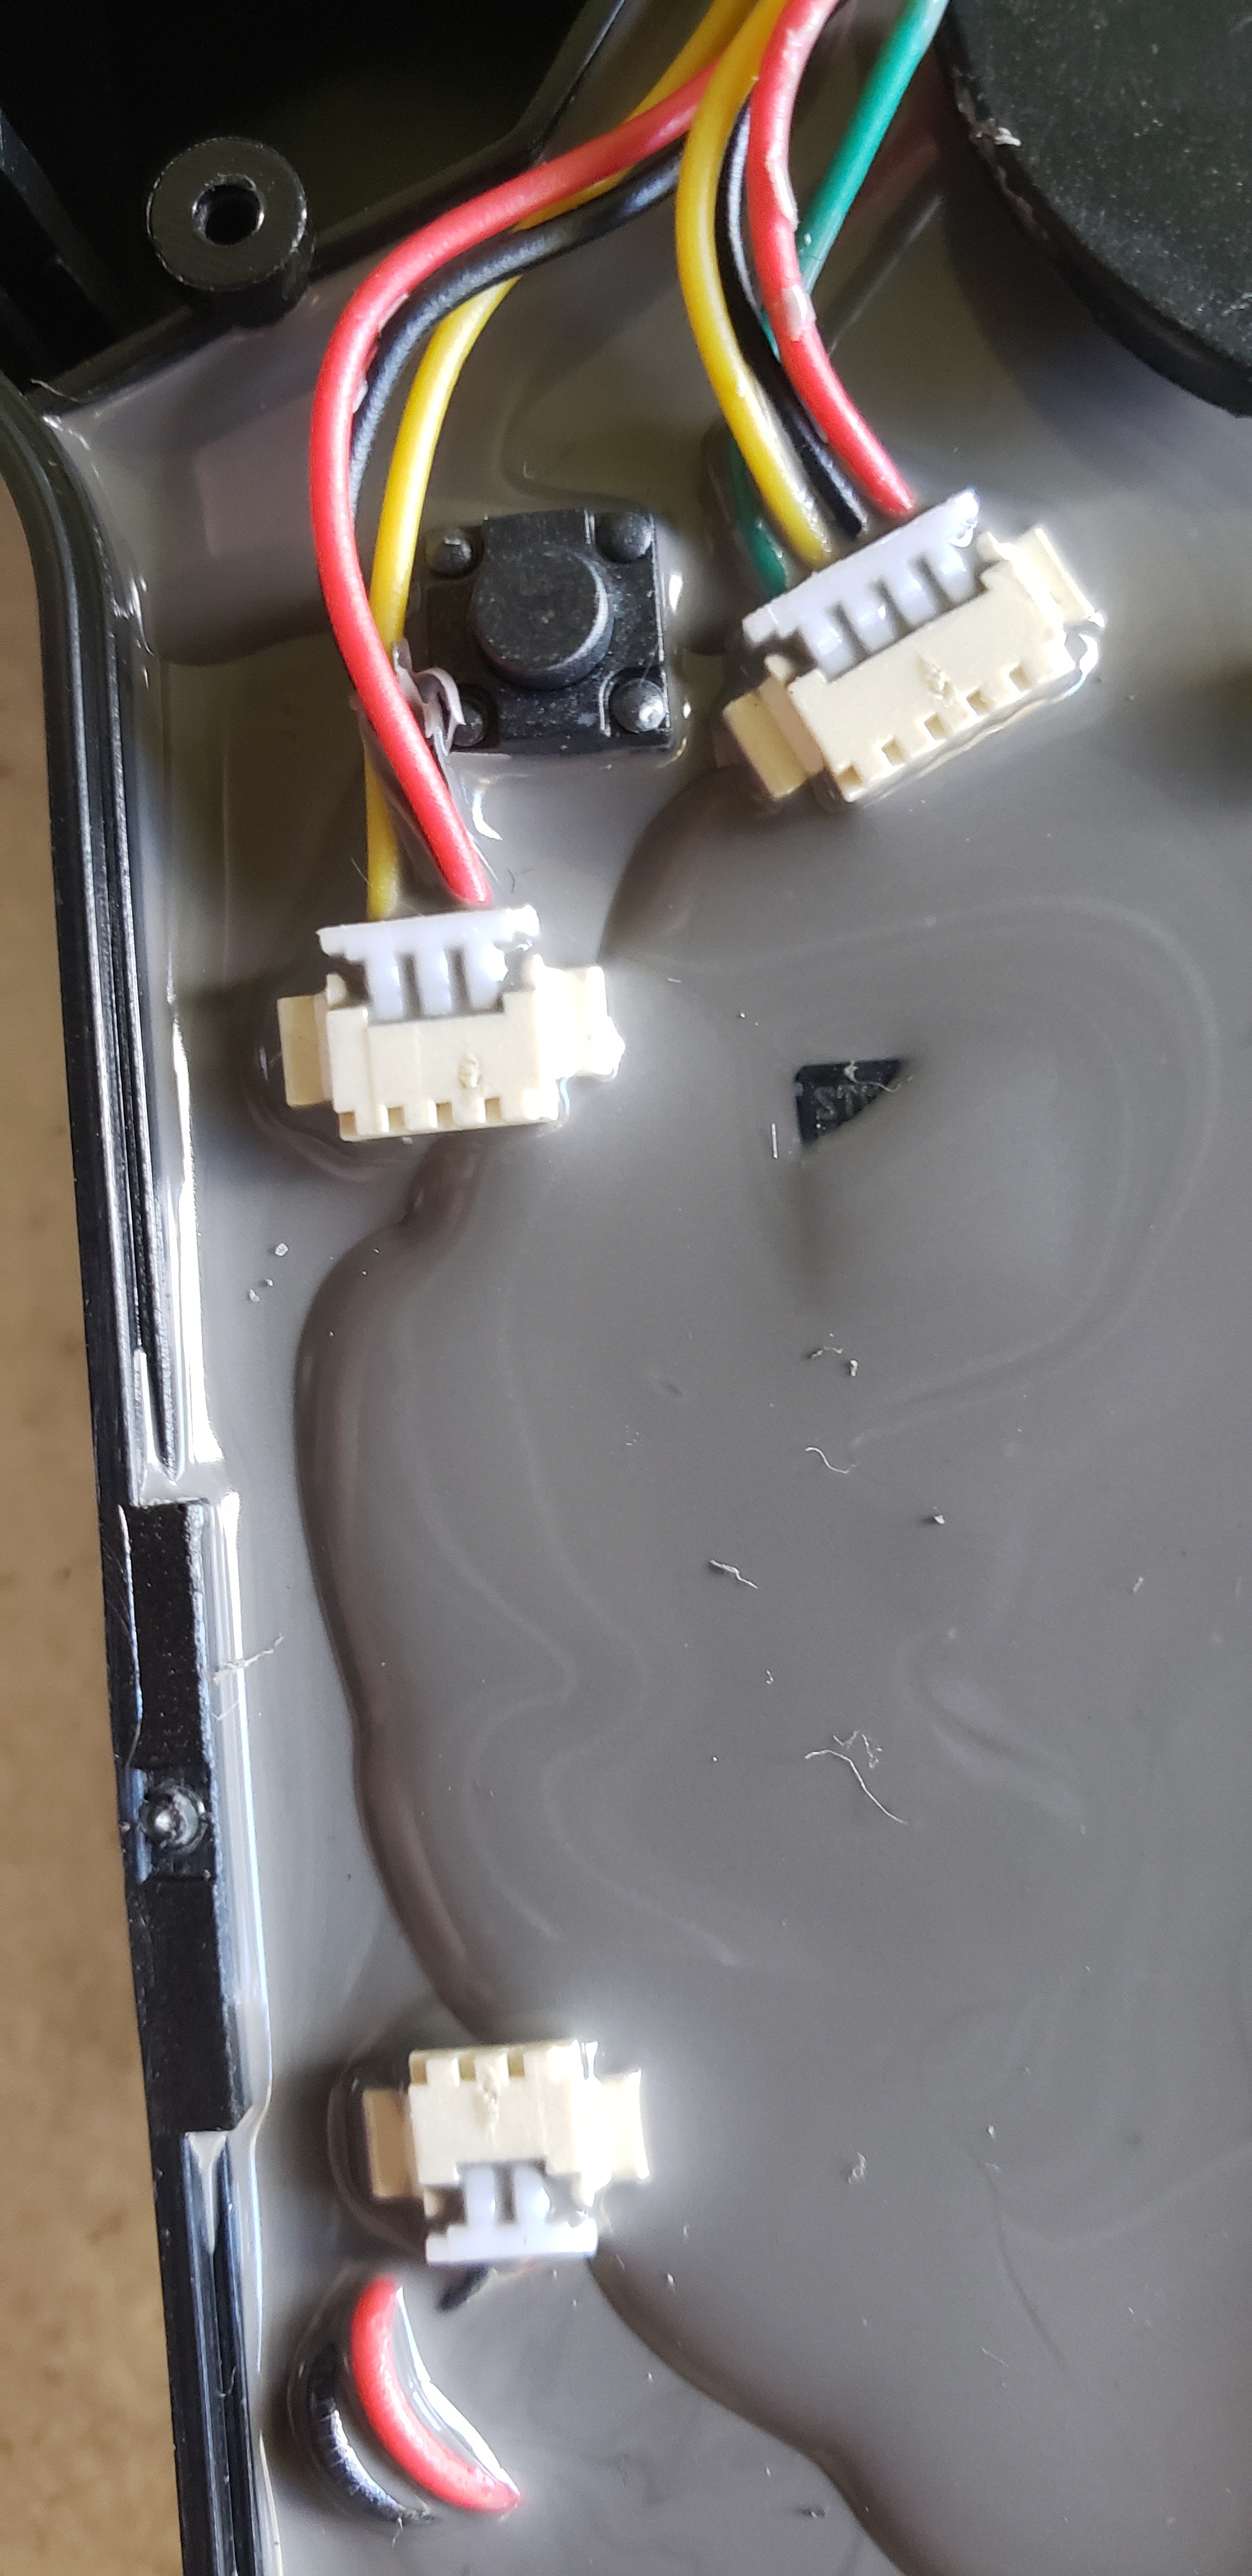
On my version 2 the potting was too thin. One of the circuit board chips was visible and the wire plugs were not coated. Clearly water would have leaked into the potting around the plugs and destroyed the board.

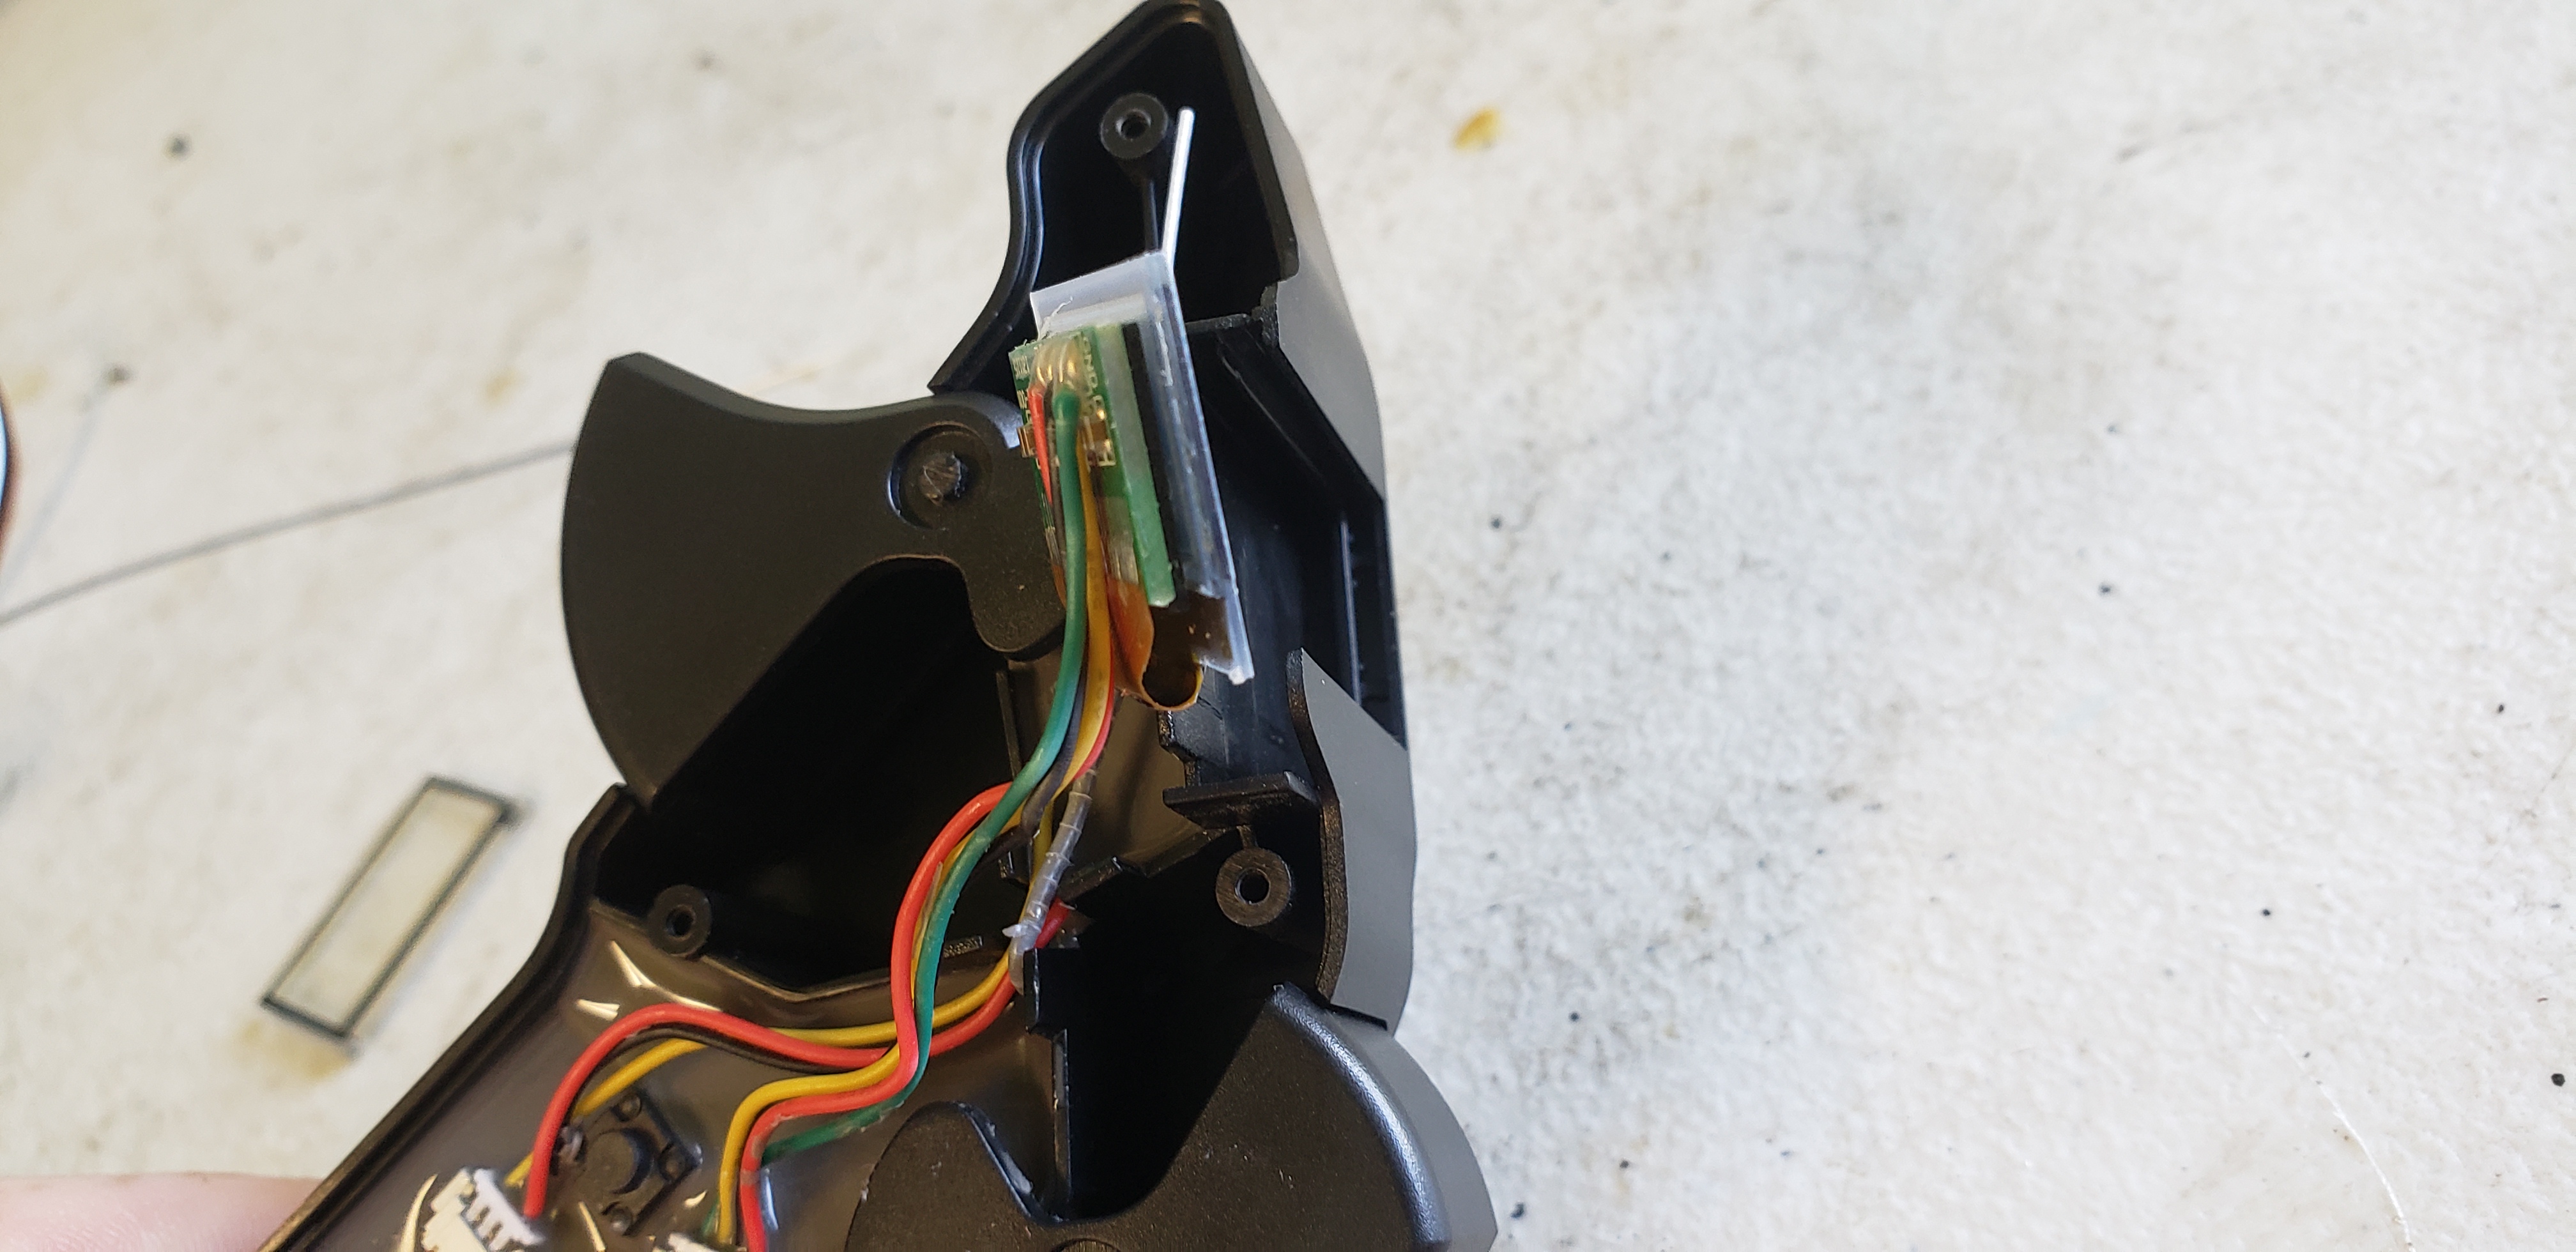
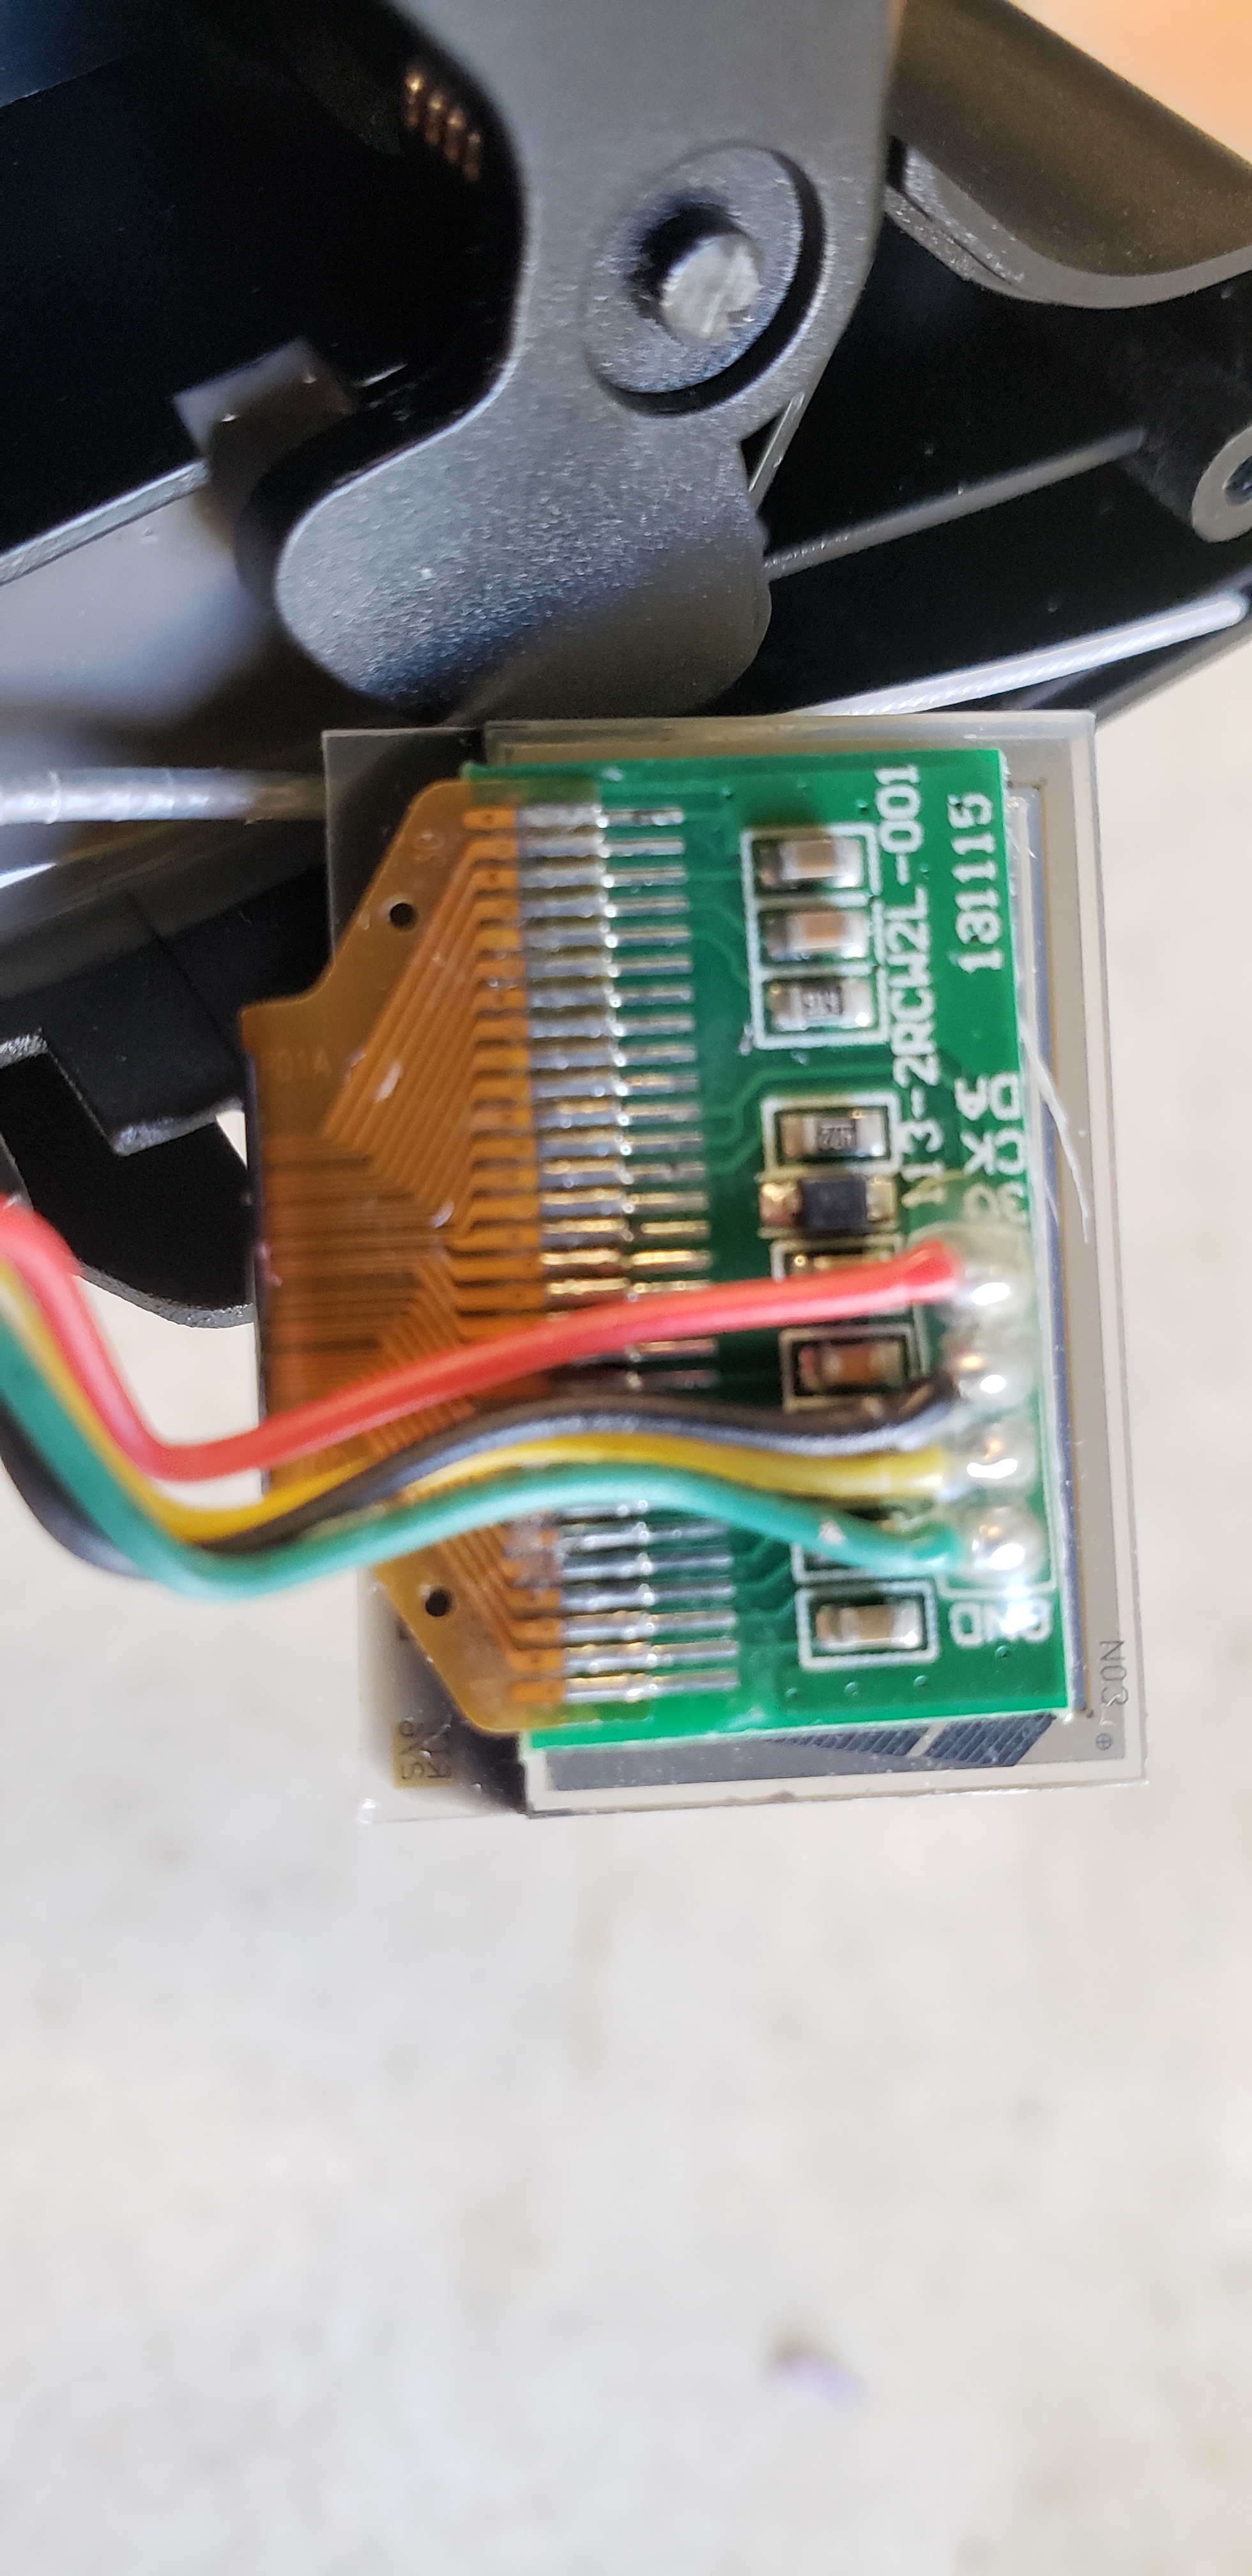
The screen did not look waterproof, but with closer inspection I see it was coated with conformal coating. However, I added two more coats.

Also, to prevent the look of water in the screen use silicone dielectric grease between the screen and screen cover.

I also use this dielectric grease to add a second waterproofing barrier to the switch.

I have learned a lot from this forum and I hope to help others by sharing my unconventional methods. :rofl::call_me_hand:

10 Likes

That looks great.
I opened mine and I think, it looks a little bit better.
What I don`t understand is the sequence. First you close the surface with silicone and than you fill it with corrosionX. Why not the other way around?


To take out the display I have to remove the one screw on the board in my last picture?

Hi.

Yes. Your remote looks better then mine did. But, the water will find it’s way into the circuit board a round your plugs and through the switch. And your screen might be poorly coated and corrode out quickly.

You don’t have to remove any screw to remove the screen. It just slides in. So, you can just slide it out carefully.

My waterproofing technique is one I learned years ago from the R/C car, boat, plane guys. And now days the drone guys, and eskate community. This tried and proven method to long term waterproof protection is what I have tried to describe.

The conformal coating dries to a hard waterproof coating. This alone will make the circuit board waterproof. But, if the coating chips or cracks then the barrier has failed.

The corrosionX used alone on a circuit board will also make the board waterproof. But, it never dries. It works by coating the board with a oily film that displaces the water. So, with time this coating will wear or wash off and no longer provide the protection.

So, the best course of action is to use both layers of protection. Obviously you can’t use the conformal coating over the corrosionX because is wouldn’t stick. So, this is the reason for the order. If the conformal coating cracks or chips the corrosionX will fill the imperfections and prevent you from having a failure. It’s a good idea to reapply the corrosionX from time to time and to areas that are corrosion prone, or cannot be coated with conformal coating like switches, buttons, and metal parts like springs.

The silicone dielectric grease I use for the button after the corrosionX because it is very thick and stays in place quite well.

This is an outline of the technique I have been using for years. I has served me well.

:call_me_hand:

The coating on your “throttle trigger board” is terrible. That would have died the first time you got it wet. Make sure to coat that nice and thick.

Does it make sense to cover the entire circuit board with silicone? Now only the contacts are protected.

Yes. I always coat the whole board.

okay, so I will buy silicone modified conformal coating for only 35,-€…

but I’ll use the belt and the braces …

2 Likes

Found this useful tutorial on how to waterproof drone electronics to paraphrase @Flightjunkie :

I have the Maytech V2. Will open it soon and follow the same steps. Will post some pics. Thx !

Also, I will add an overvoltage / overcurrent protection to the main board. It also allows for temperature protection :

1 Like

Maytech water-proof remote is still my best option.
No other remote is good as this one.
I bought one in March 2019, it still works well till now.

Hi.

Thanks for sharing your experience.

Did you do any modifications? Have you opened it up and inspected it? Their quality control it terrible. And yes, I’m talking about their new remote. The V2.

And if you don’t mind me asking. Are you using it in fresh water or salt water?

:call_me_hand:

Hi @Flightjunkie,

Seems like I cant find any seller to buy the MG chemicals silicon conformal coating to be delivered in Belgium. Any alternative to this one ?

I found another product of MG, seems the same, what do you think ?

https://www.amazon.fr/MG-Chemicals-Tropicalisation-Silicone-Modifié/dp/B008O9YGQI

Ok for the interested ones : this is exactly the same product in aerosol. Still the MG422B. Here is a list of other silicone conformal coatings :

Types of Silicone Conformal Coating

  • Humiseal 1C49
  • HumiSeal 1C49LV
  • HumiSeal 1C51
  • HumiSeal 1C55
  • Dow Corning 1-2577
  • Dow Corning 3-1753
  • Dow Corning 3-1765
  • Dow Corning 3-1744
  • Dow Corning 3-1953
  • Dow Corning 3-1965
  • Dow Corning 3-1944
  • MG Chemicals 422B
  • Peters DSL 1705 FLZ
  • Peters DSL 1706 FLZ
  • Electrolube SCC3
  • Electrolube SCC4
1 Like

I bought it in Poland for a good price and incl. delivering to germany for 22,50€

Praud Sp. z o.o.,
ul. Wałbrzyska 11 lok. 167

02-739 Warszawa
Polska

+48 881 375 742

leszek@praud.pl ,

www.praud.pl

1 Like

and I coated my electronic two times.
I am a little bit scaryed to put it together…
I don`t want to damage the monitor

You’ll be fine. Just don’t force it. Treat it like glass. Also, you do not need to use the foam part behind the screen if your remote had that. The plastic case holds the screen fine without that filler.

Yes. The spray is the same. You can even spray it into the cap and brush is on.

:call_me_hand:

Ok thanks @Subusi @Flightjunkie ! I am about to receive the overvoltage protection board and will open the remote as soon as I get the conformal coating & board :slight_smile:

I did it.

1 Like

4 Likes