My simple bolt-on build on Maui (VESC, 6384, 10s2p)

Hi,

I’ve been reading here for a while and recently completed my first build. Creating this thread to document my progress and lessons learned.

My goal for this build was to build something simple similar to Foil Drive Assist that I can use with different boards.
I’ll probably mostly use it to catch waves/swell, but I also want to do a little bit of efoiling.
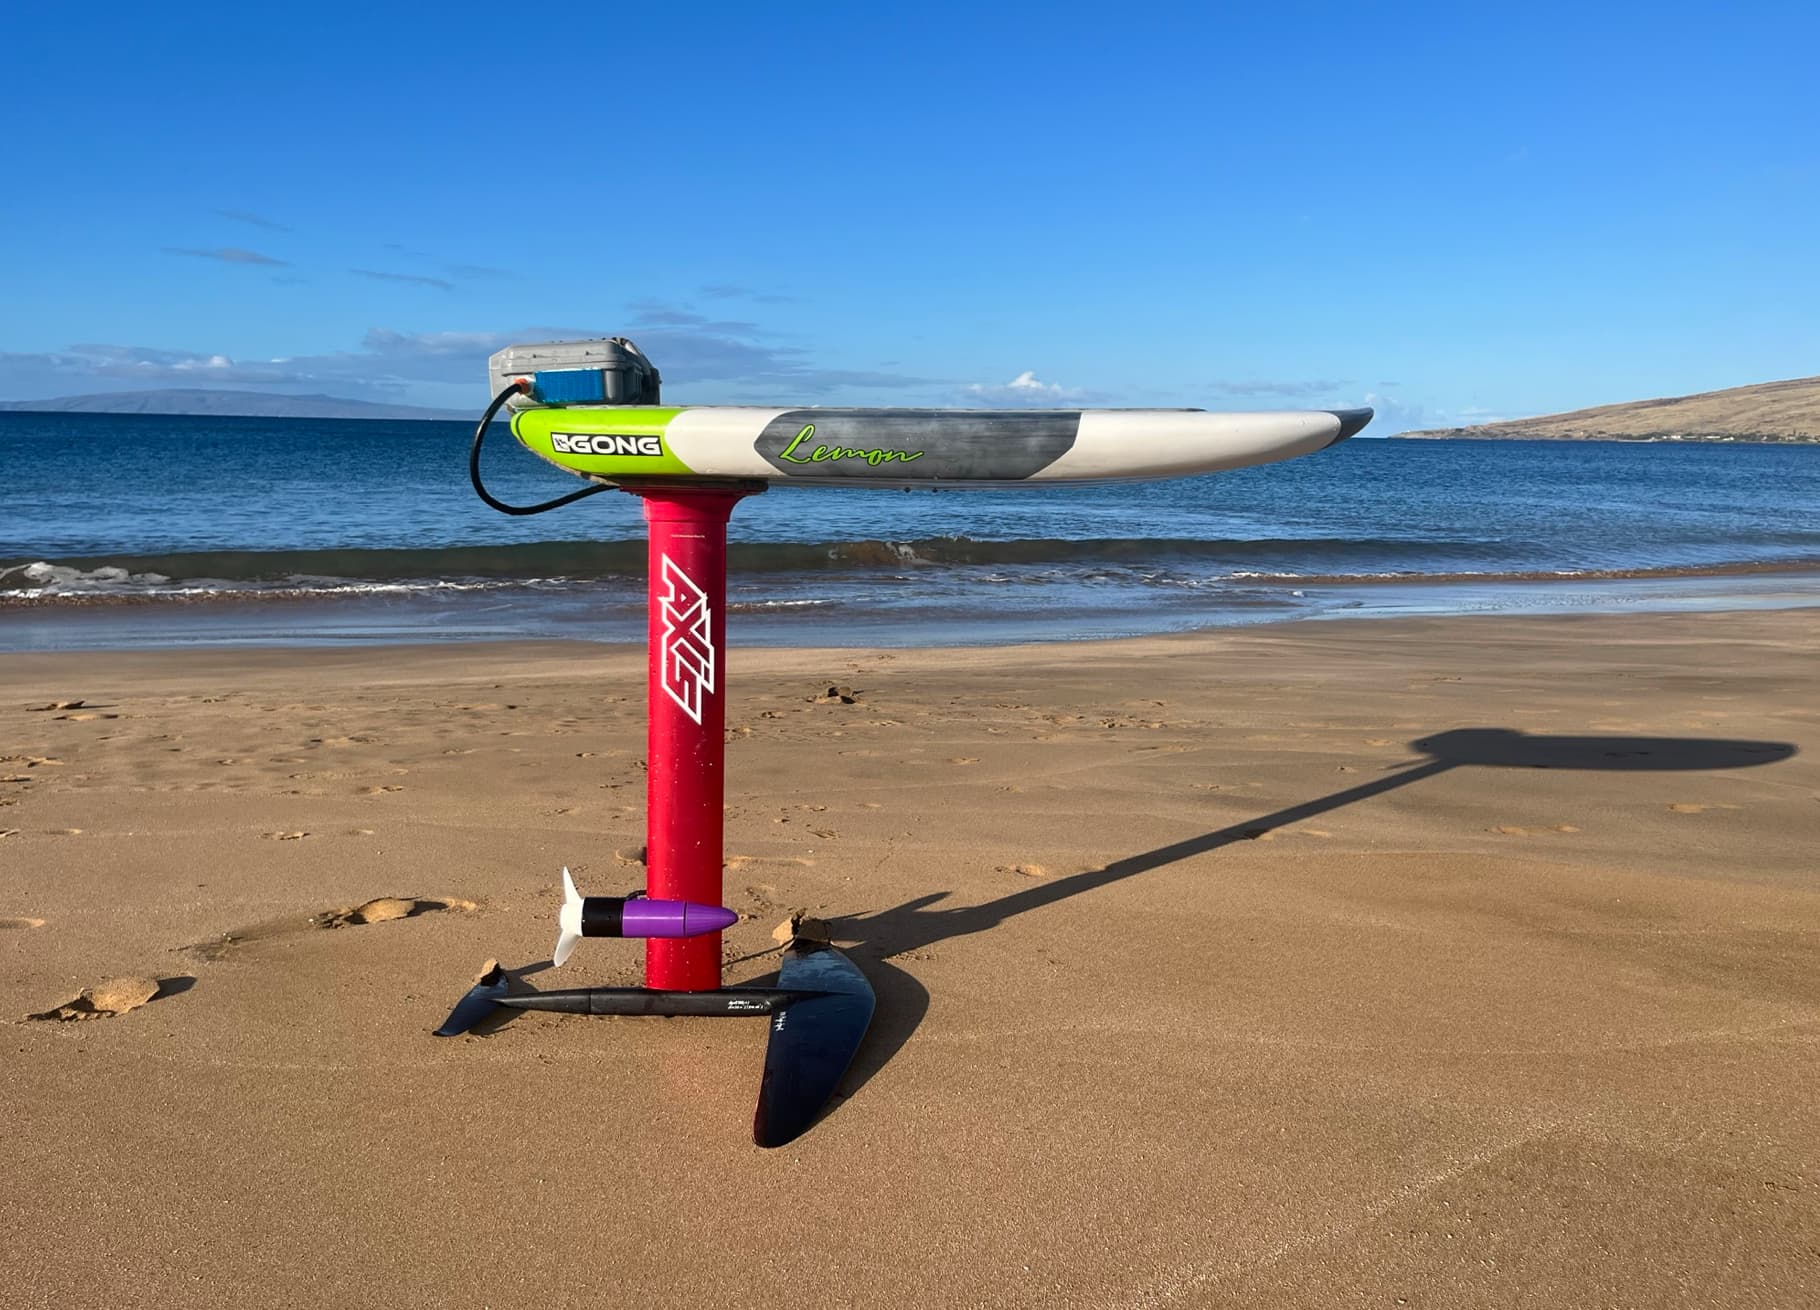
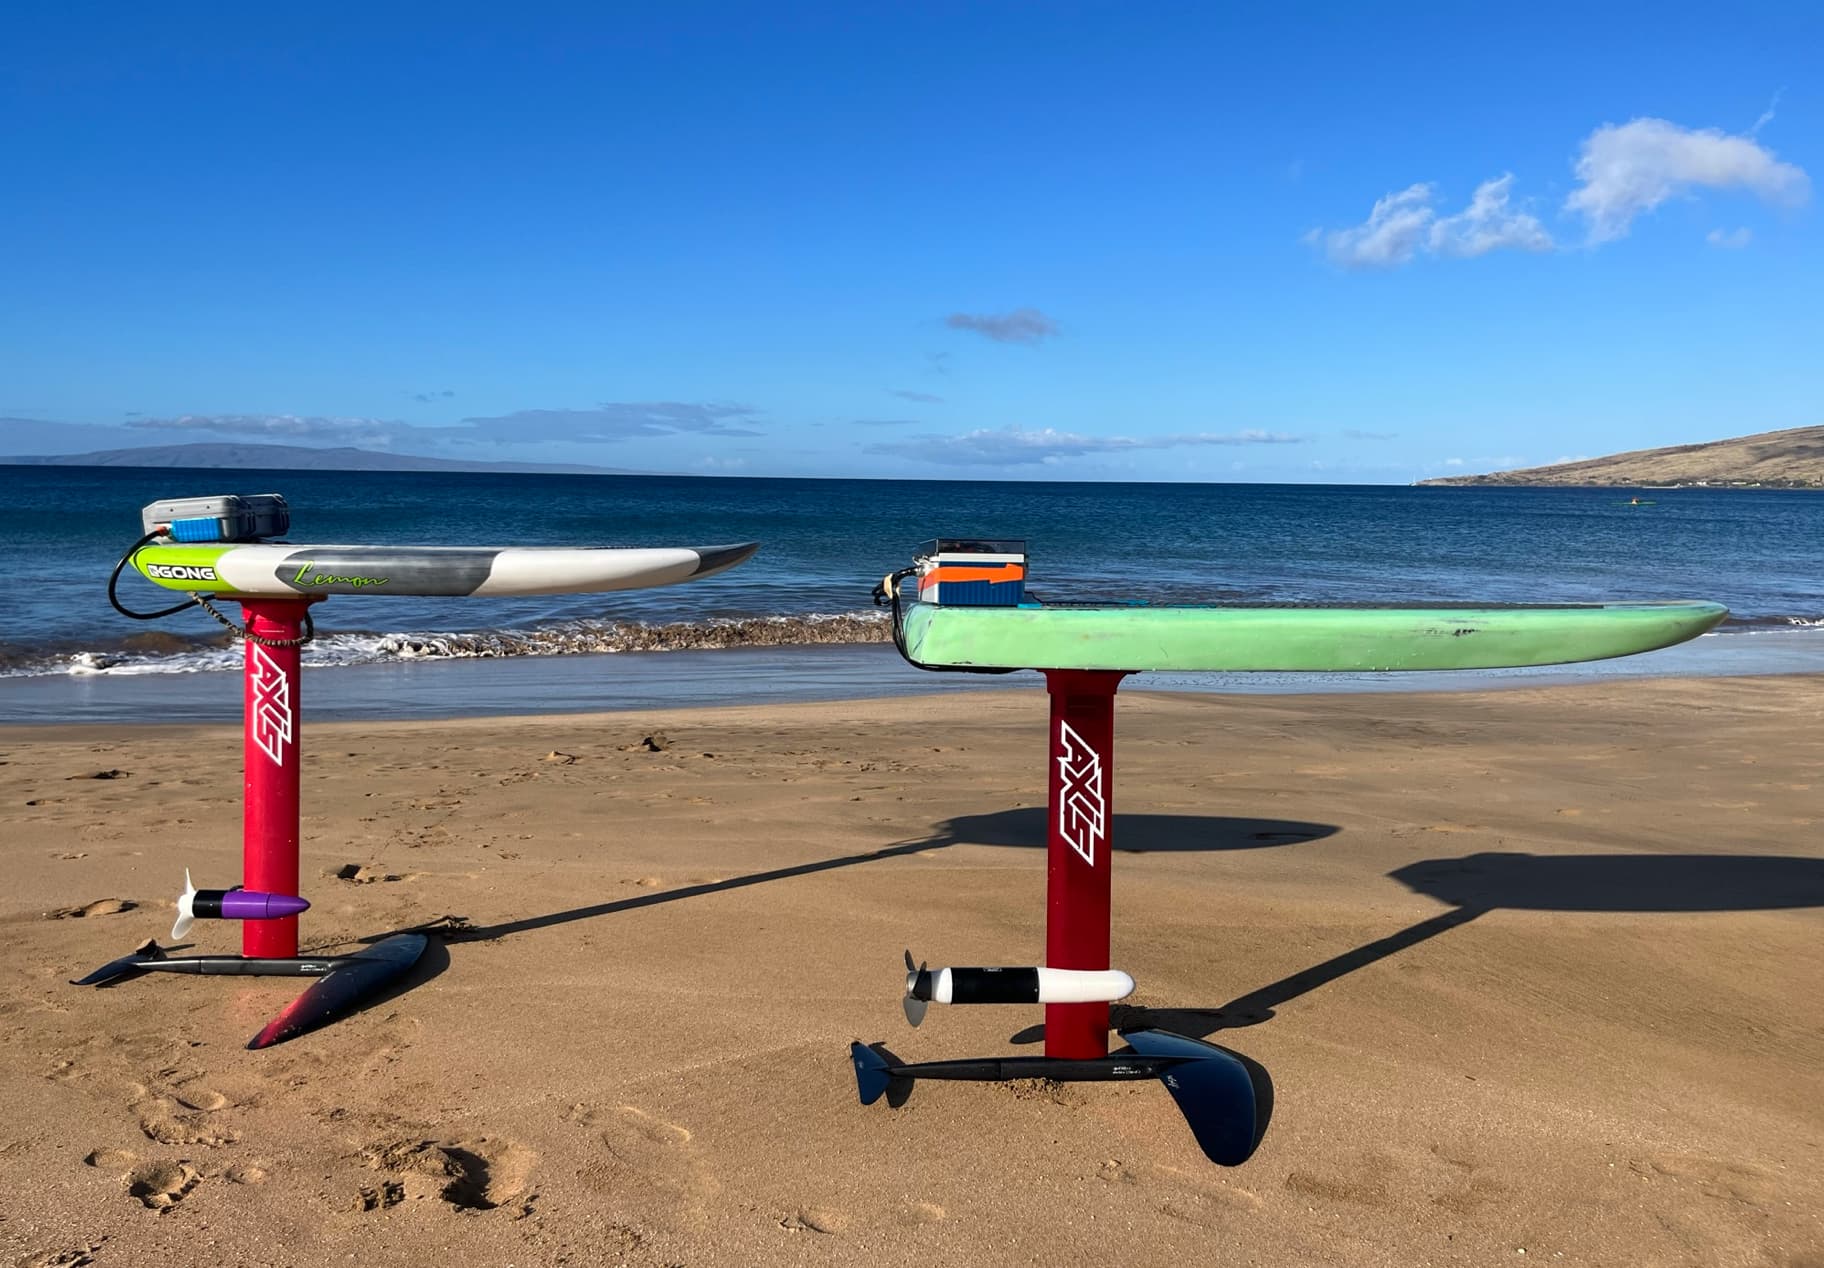
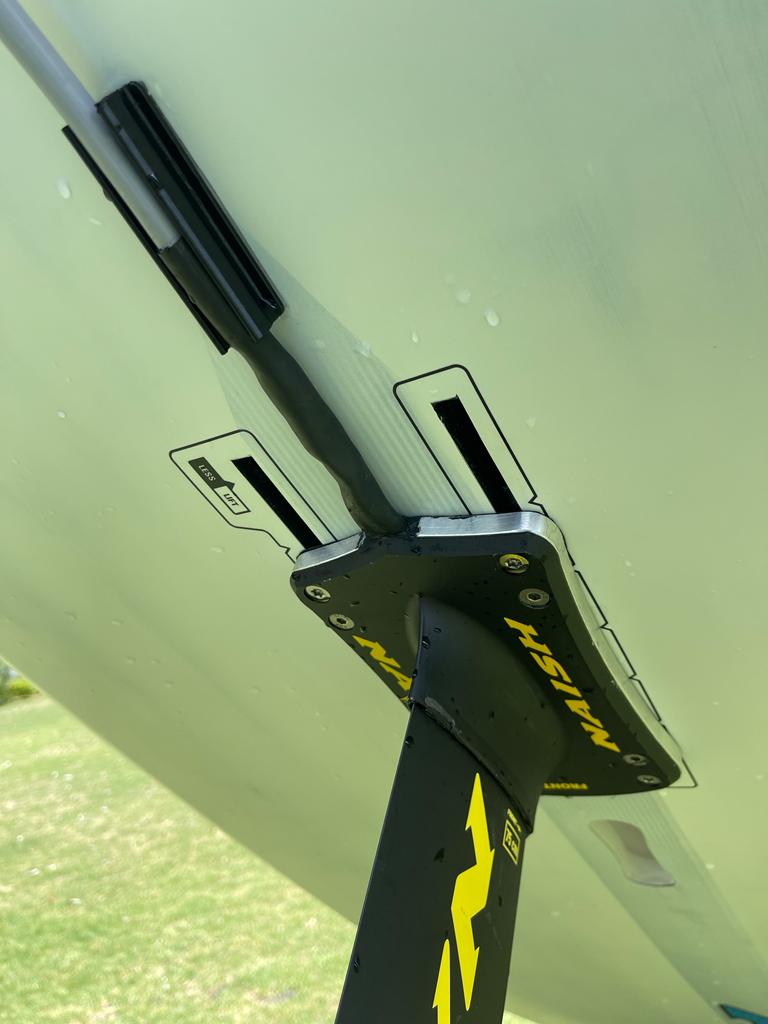
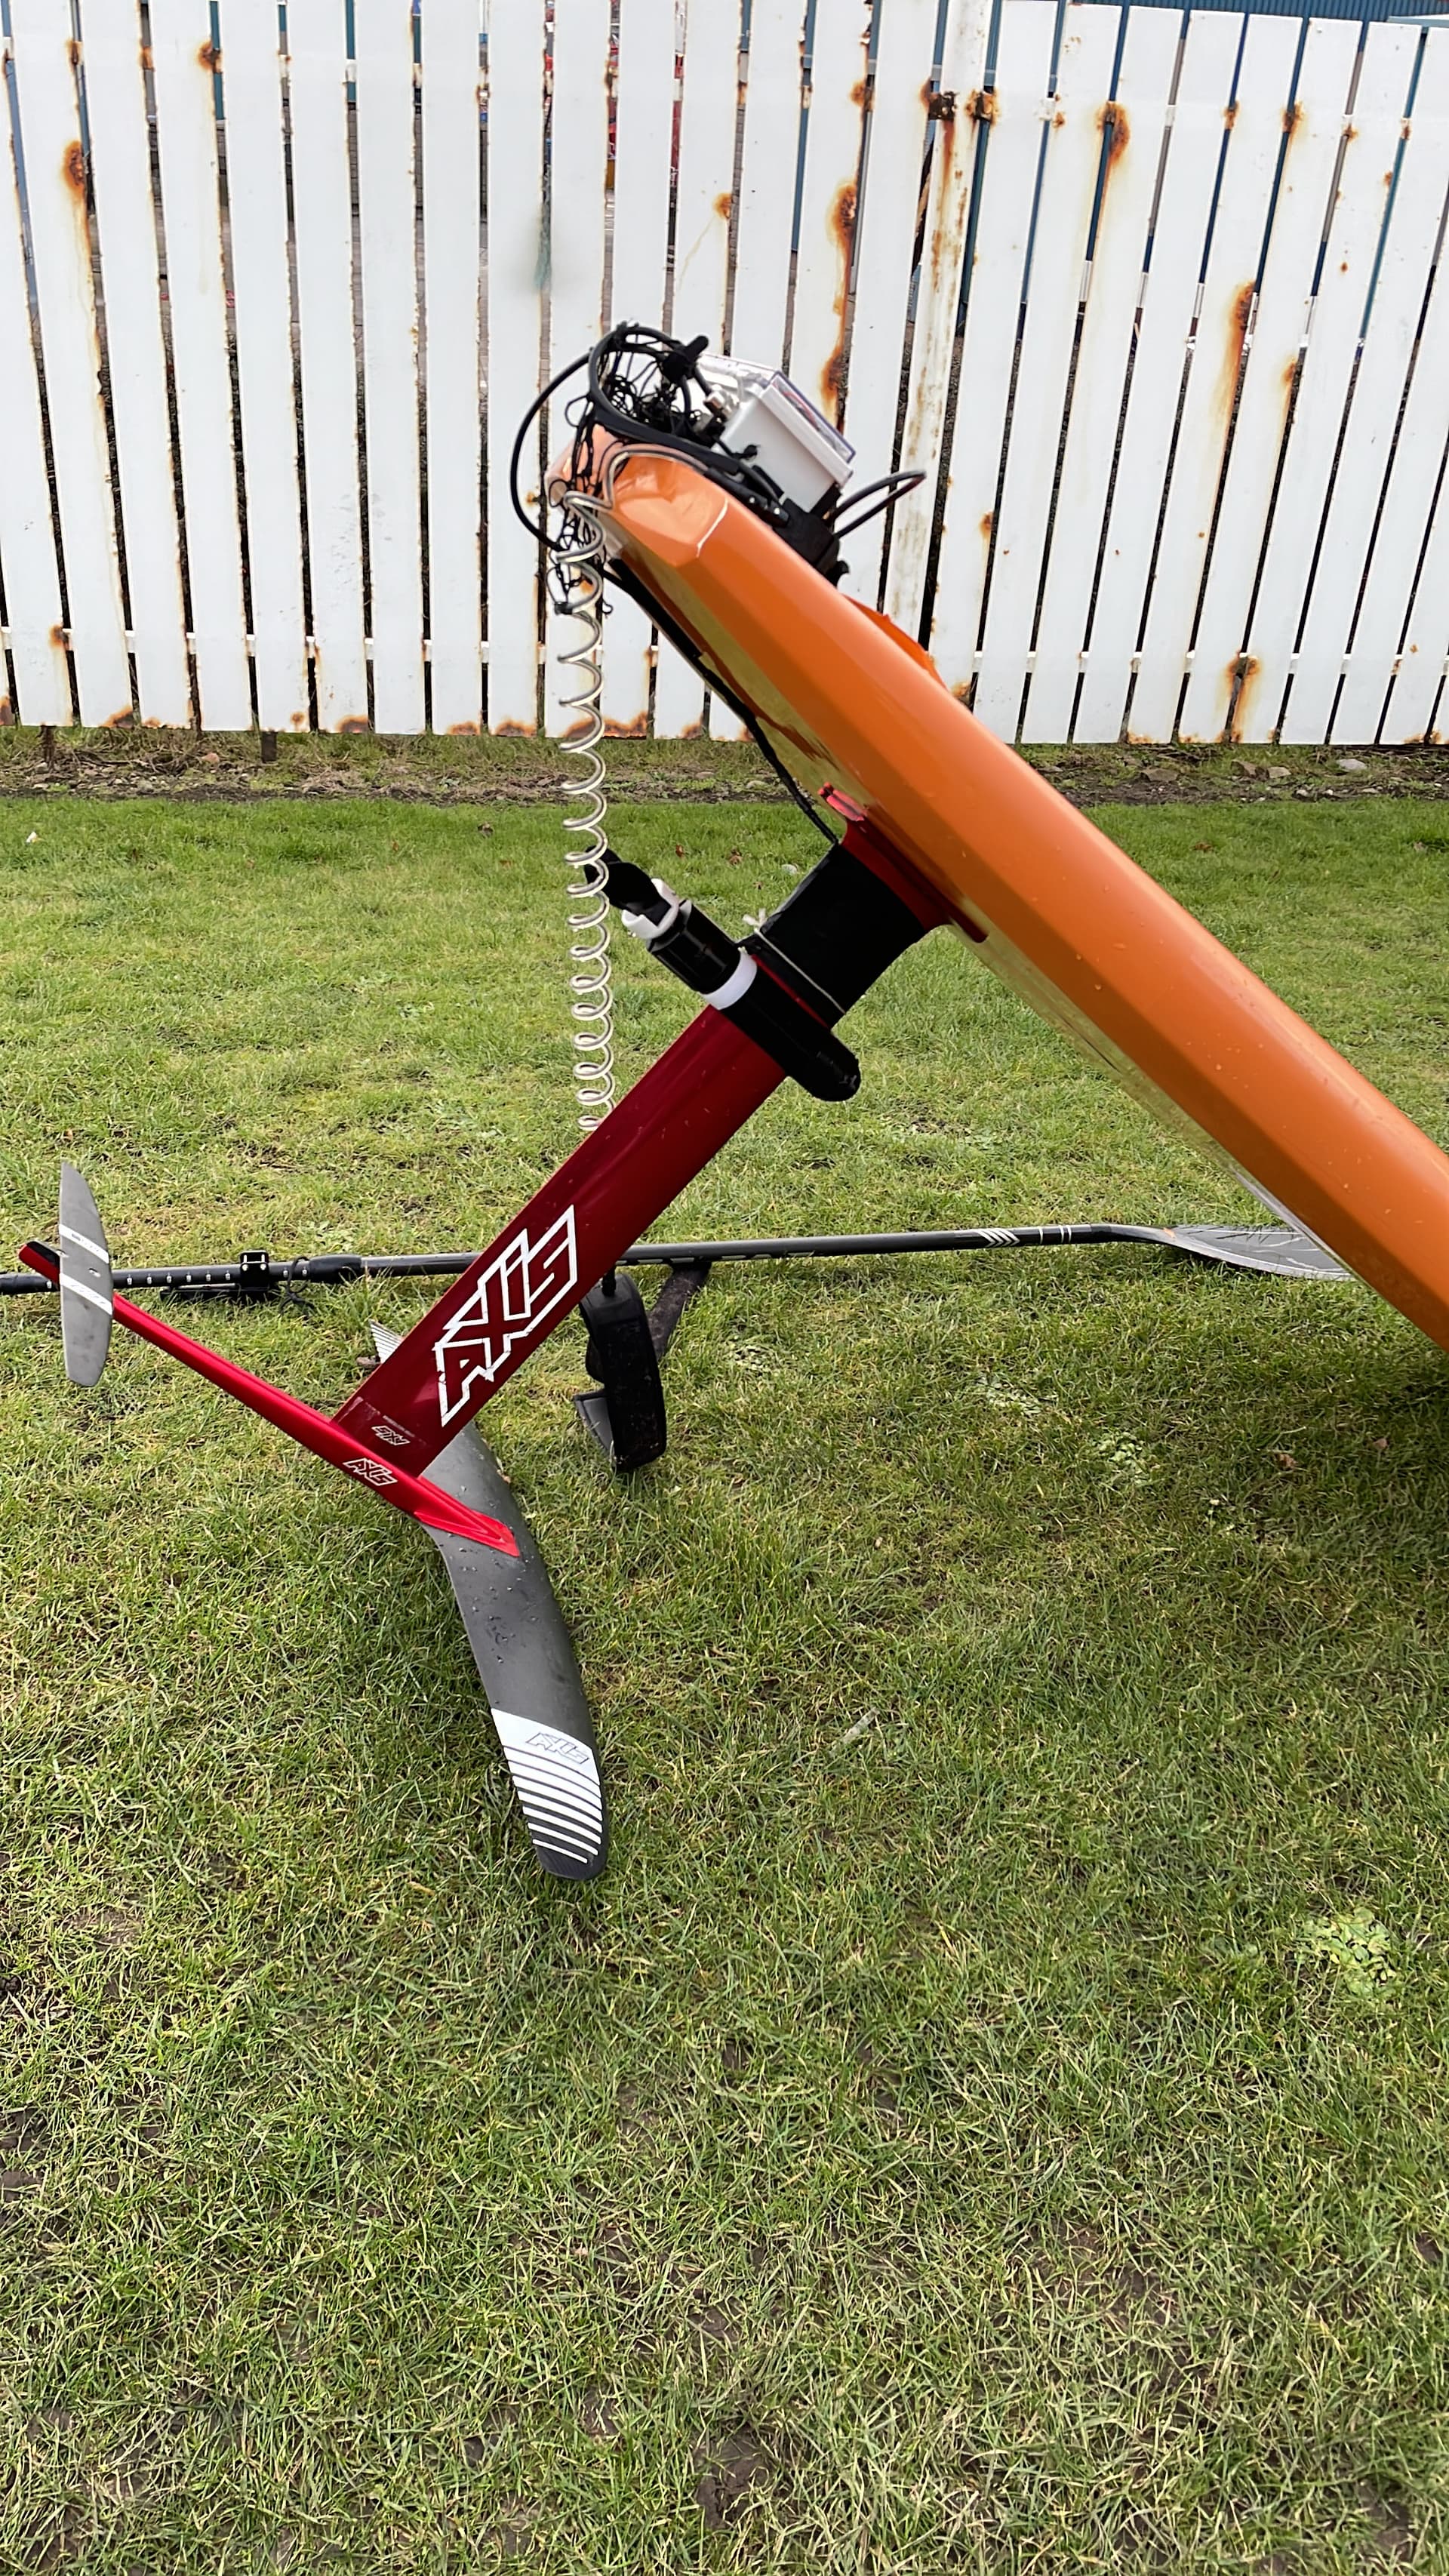
For efoiling, I’m using an Axis mast with the motor mounted closer to the fuselage. The motor cables are routed inside the mast.
For catching swell, I’m planning to use my Lift mast and mount the motor close to the board (like Foil Drive Assist).

Here are the specs of my current setup:

  • Controller: Flipsky 75100
  • Battery: 10s2p (42V, ~300Wh, P42A cells)
  • Motor: 6384 150KV (I also have a 120KV version which I haven’t tested yet)

Here is the full parts list: Parts list for DIY Foil Drive with 10s battery - Thomas - Google Sheets

Here is my mast setup for efoiling:

I was surprised that the motor is powerful enough to ride a Lift 120HA front wing (~775cm surface area I think).

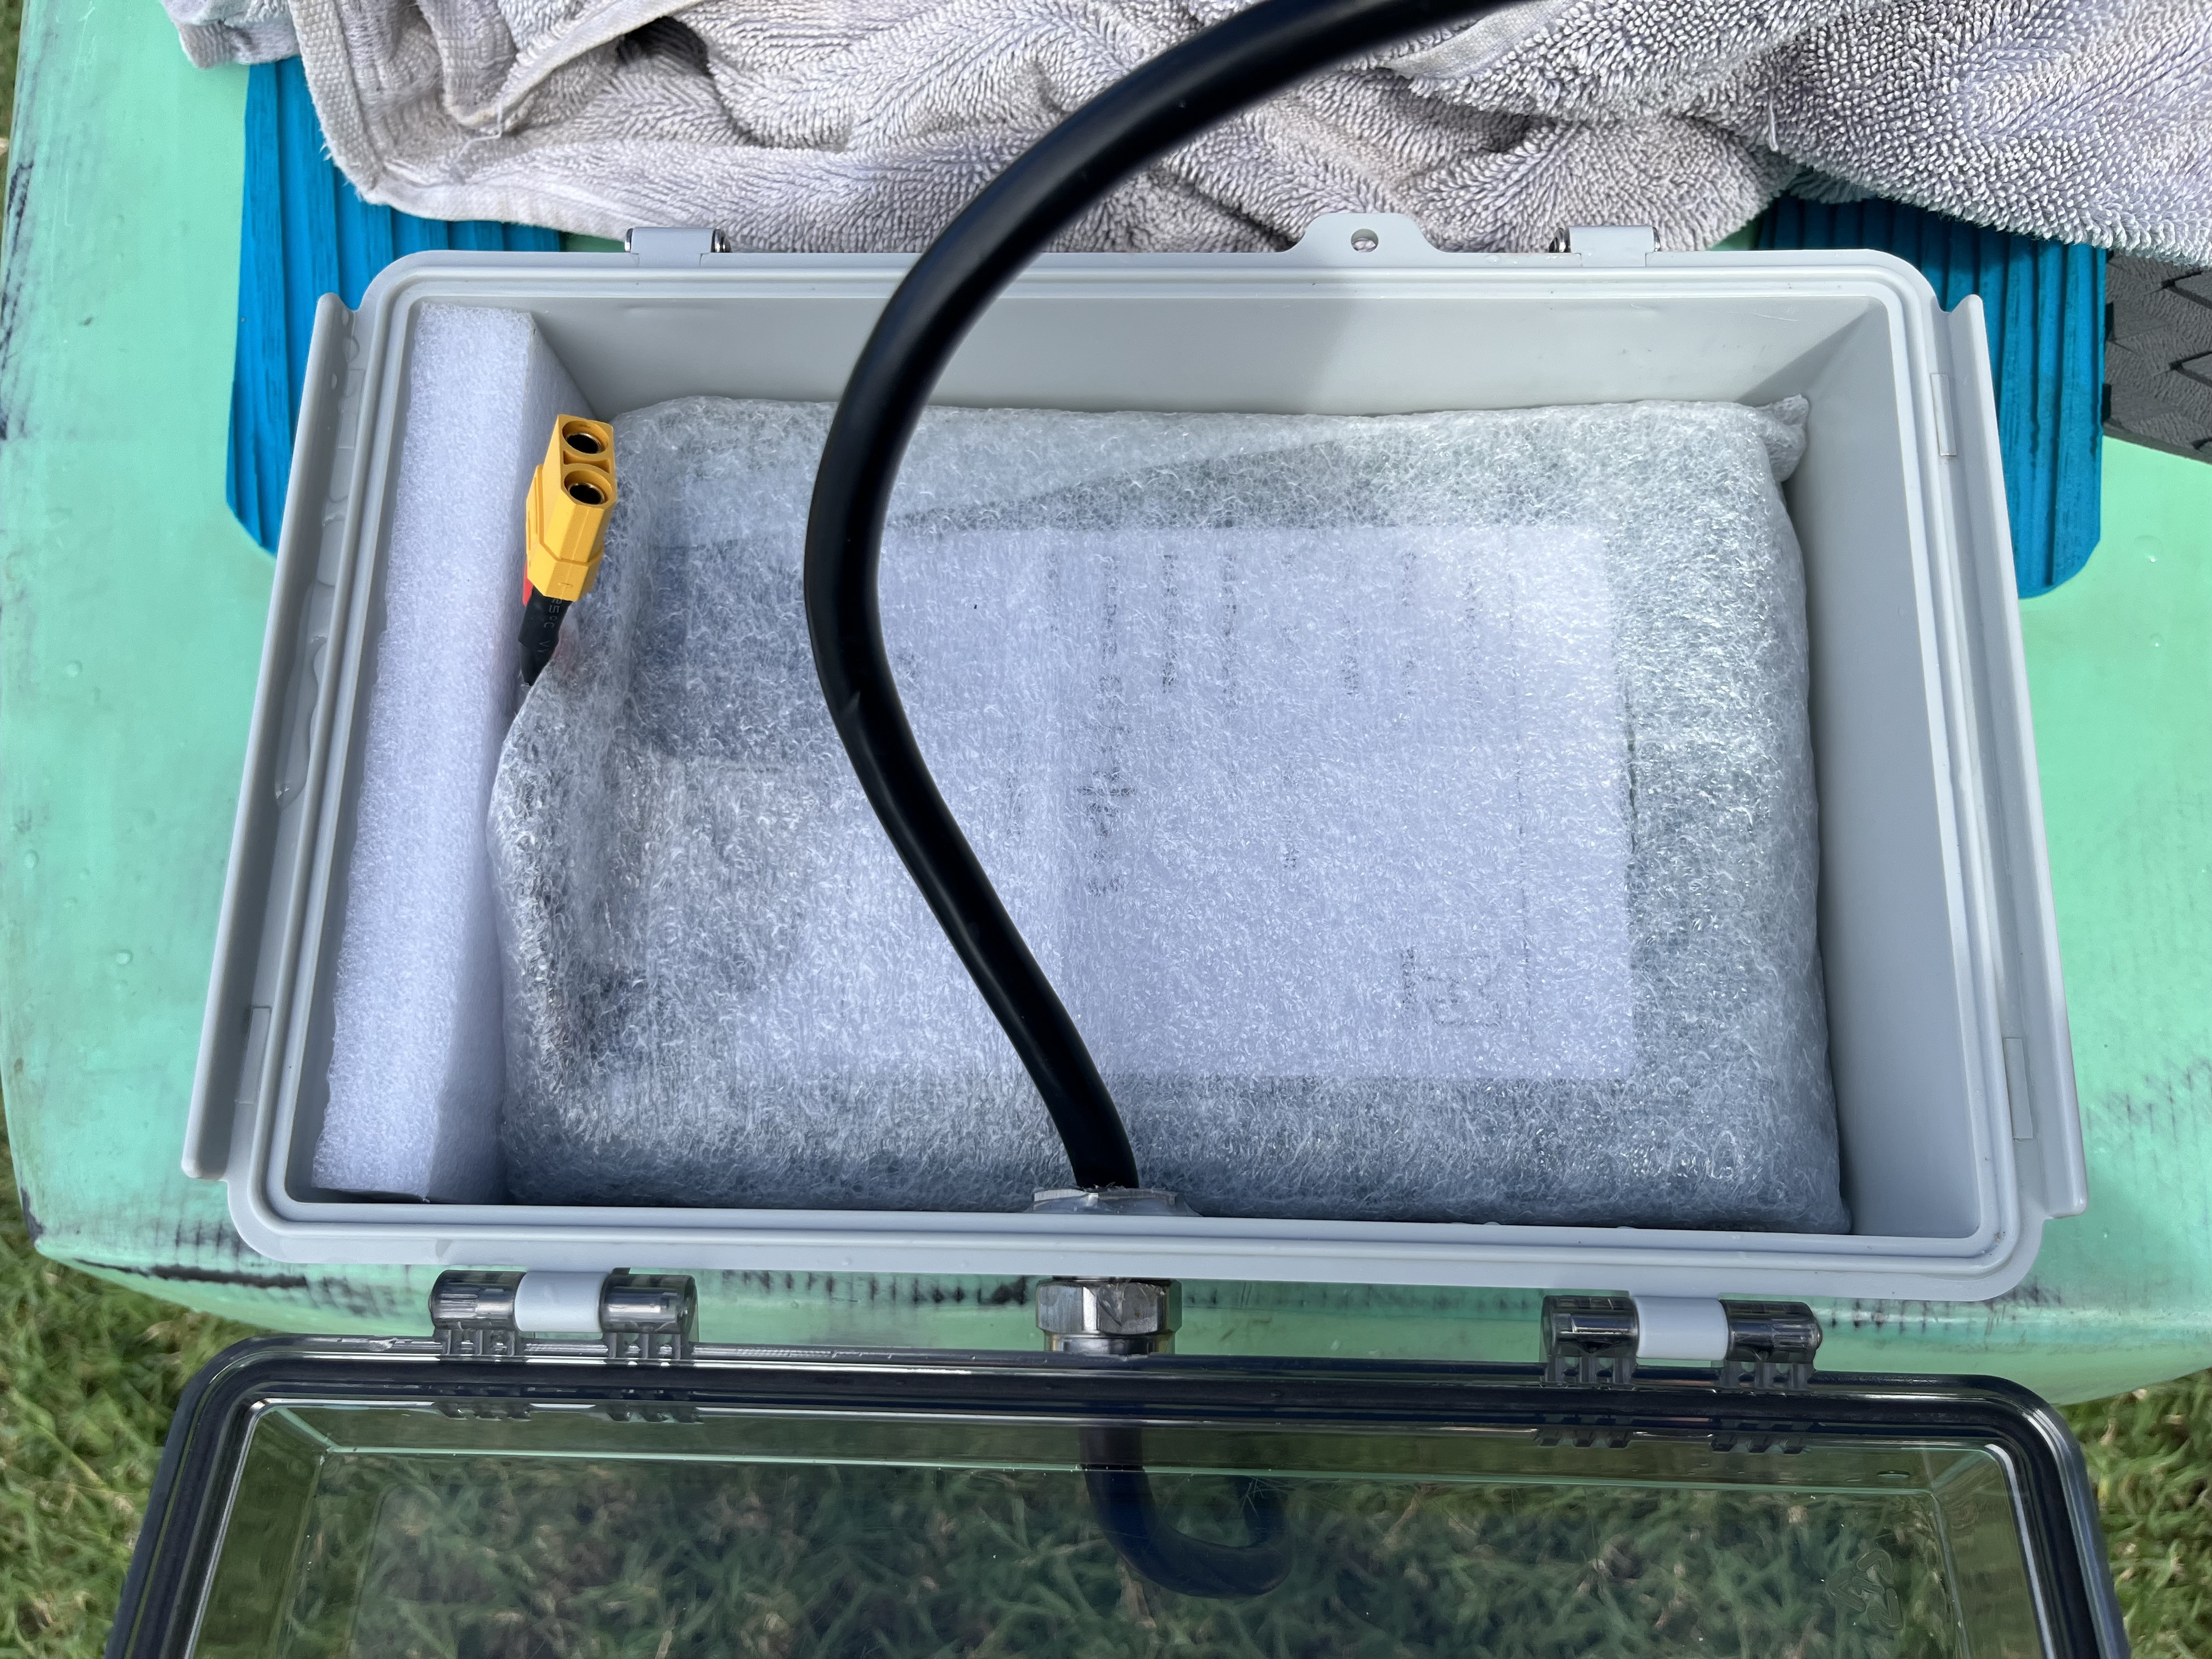
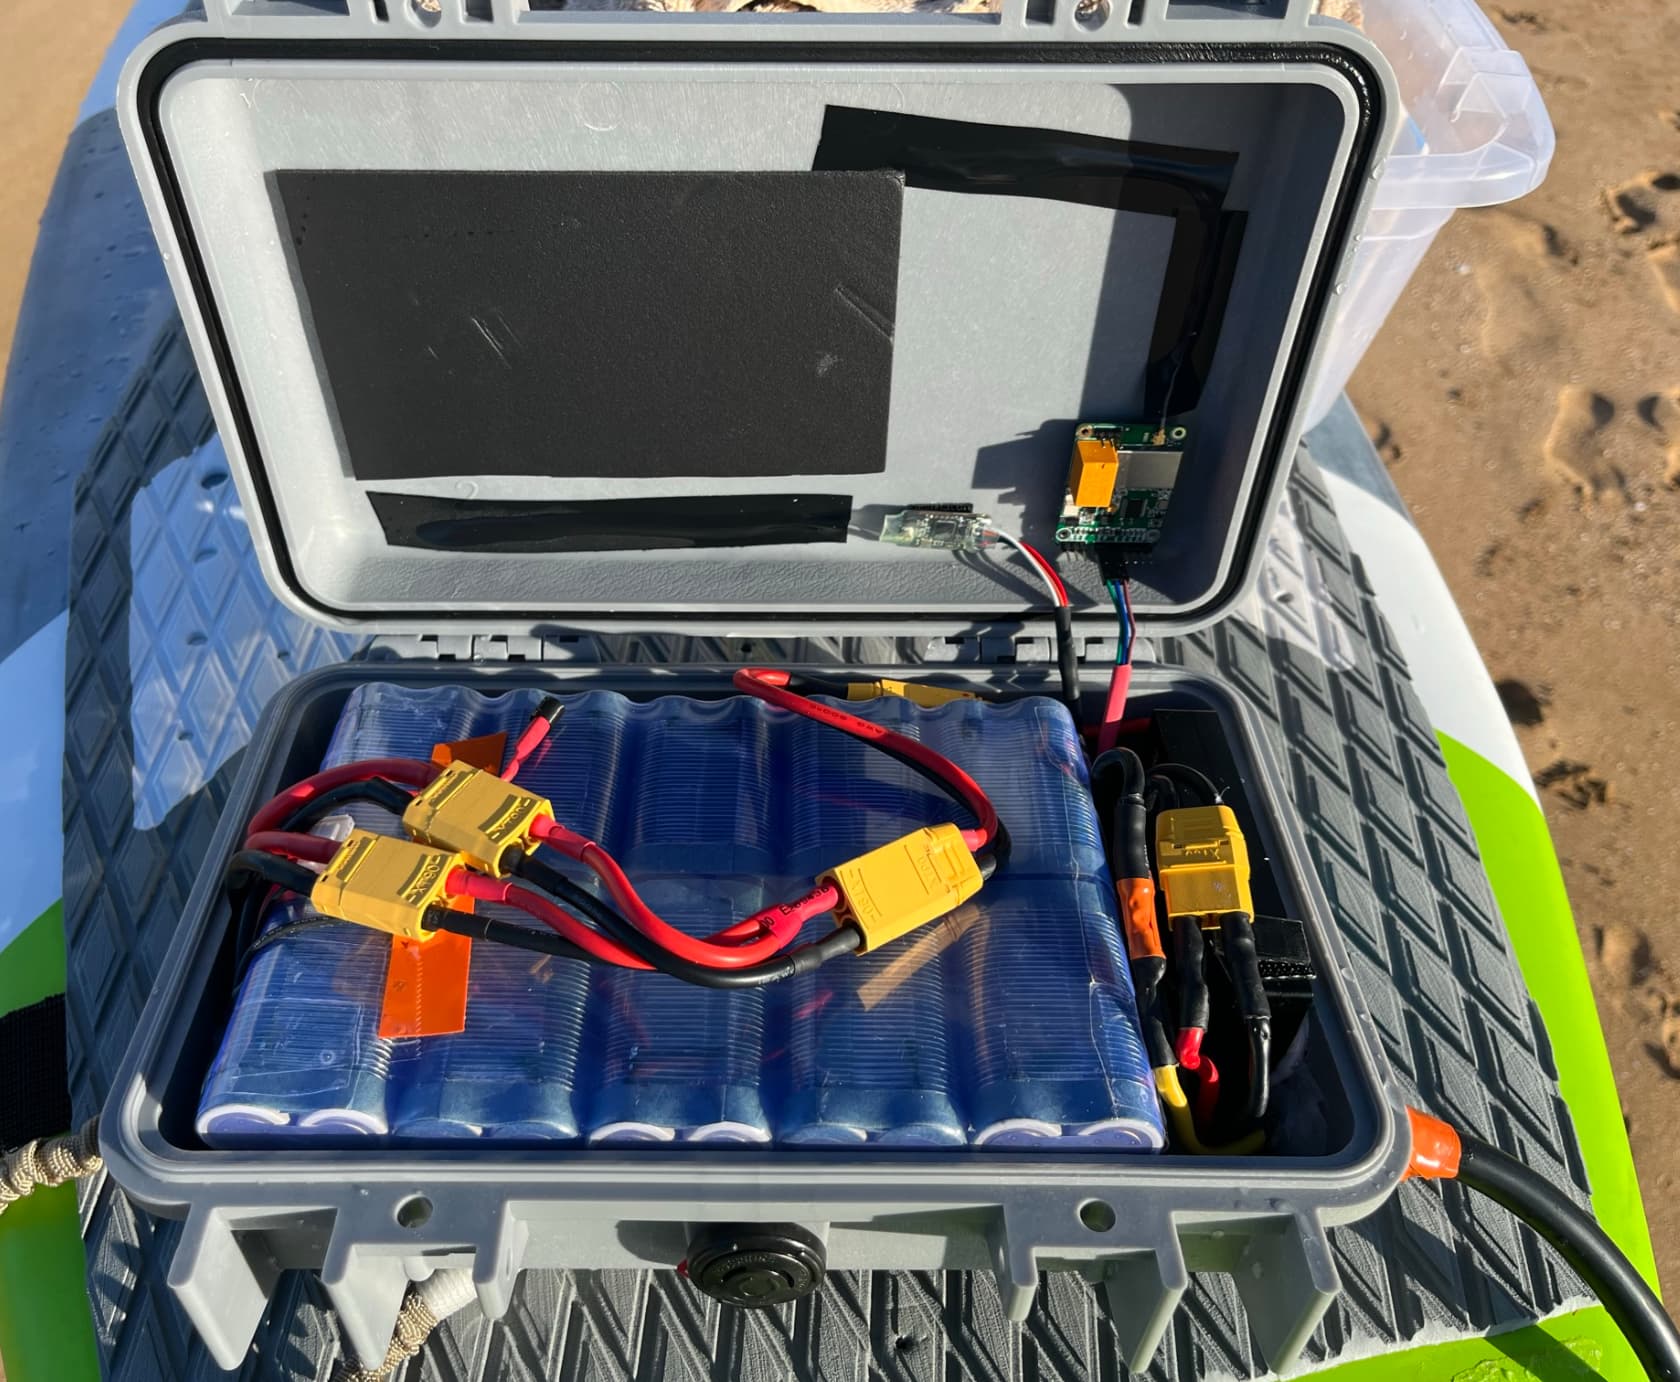
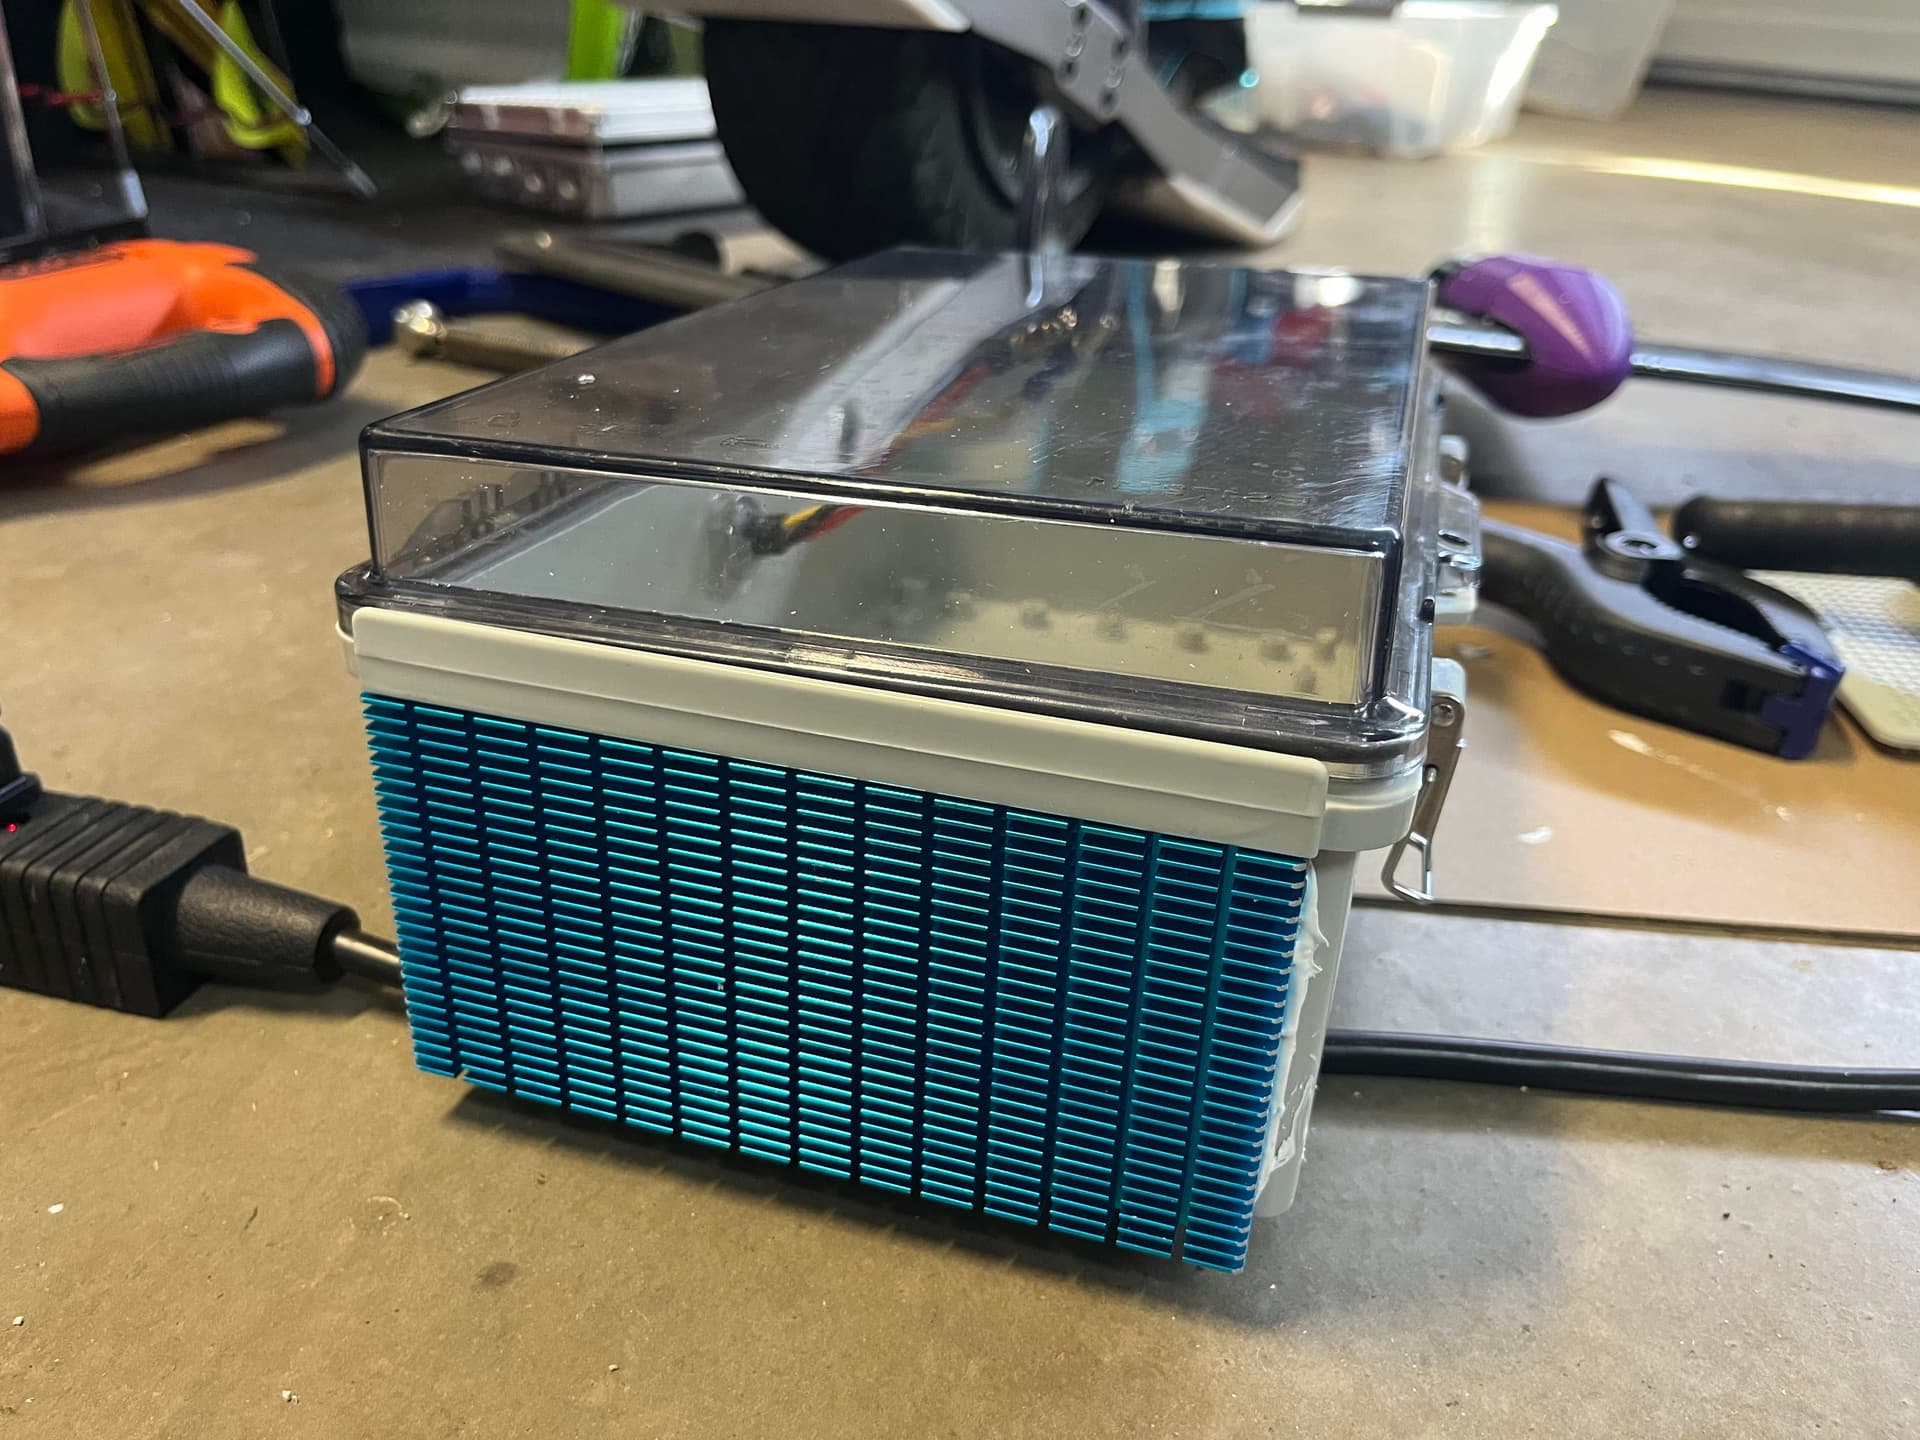
The photo above shows the 10s2p P42A battery inside the plastic box. With a bit of padding it fits almost perfectly. The box I’m using would be high enough to fit two of these batteries with the VESC on top.

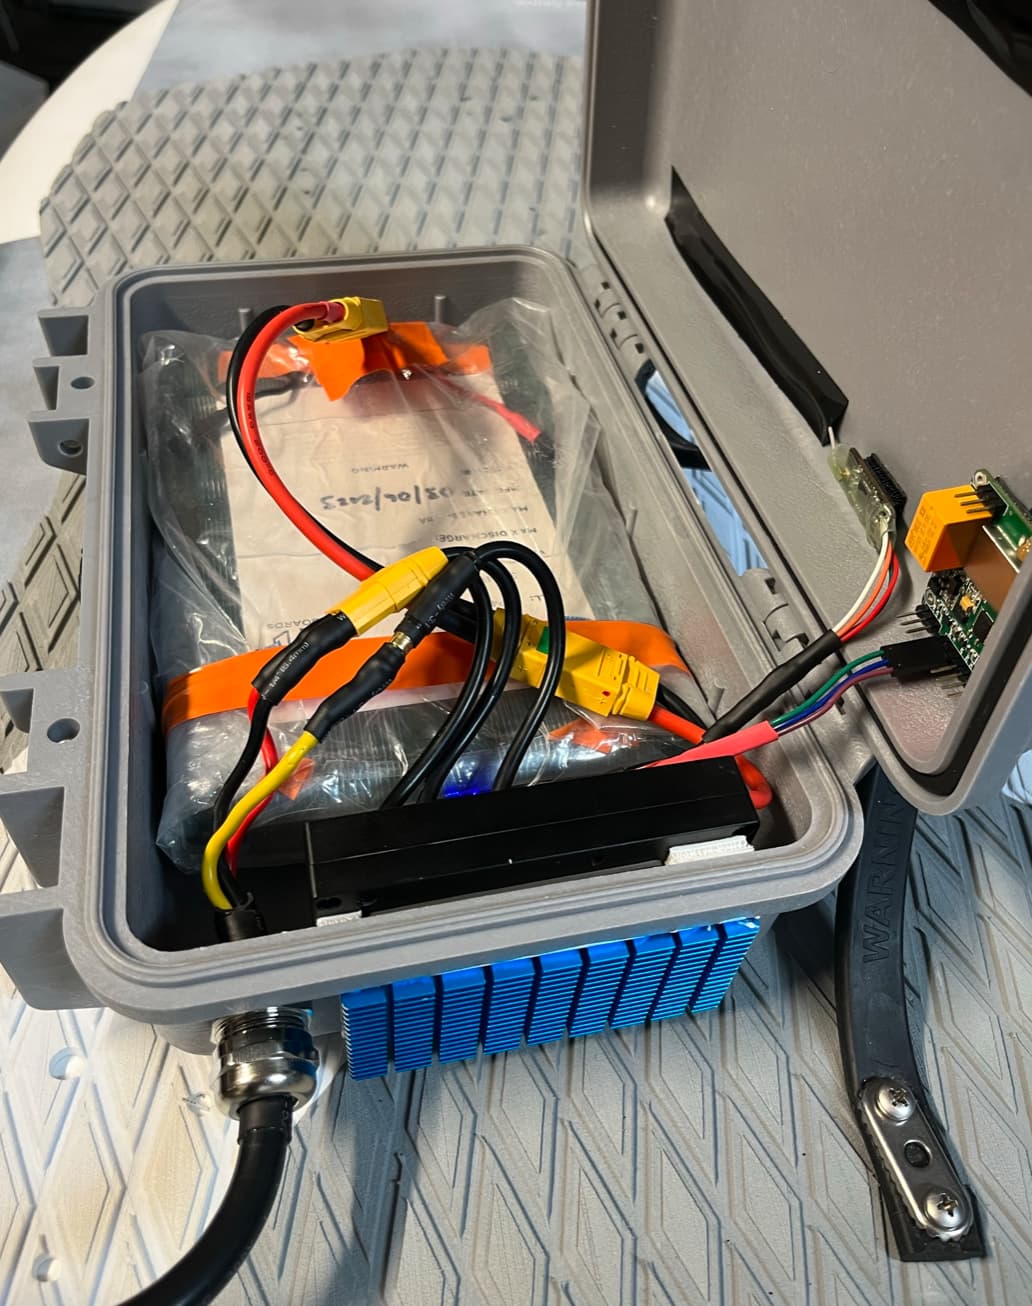
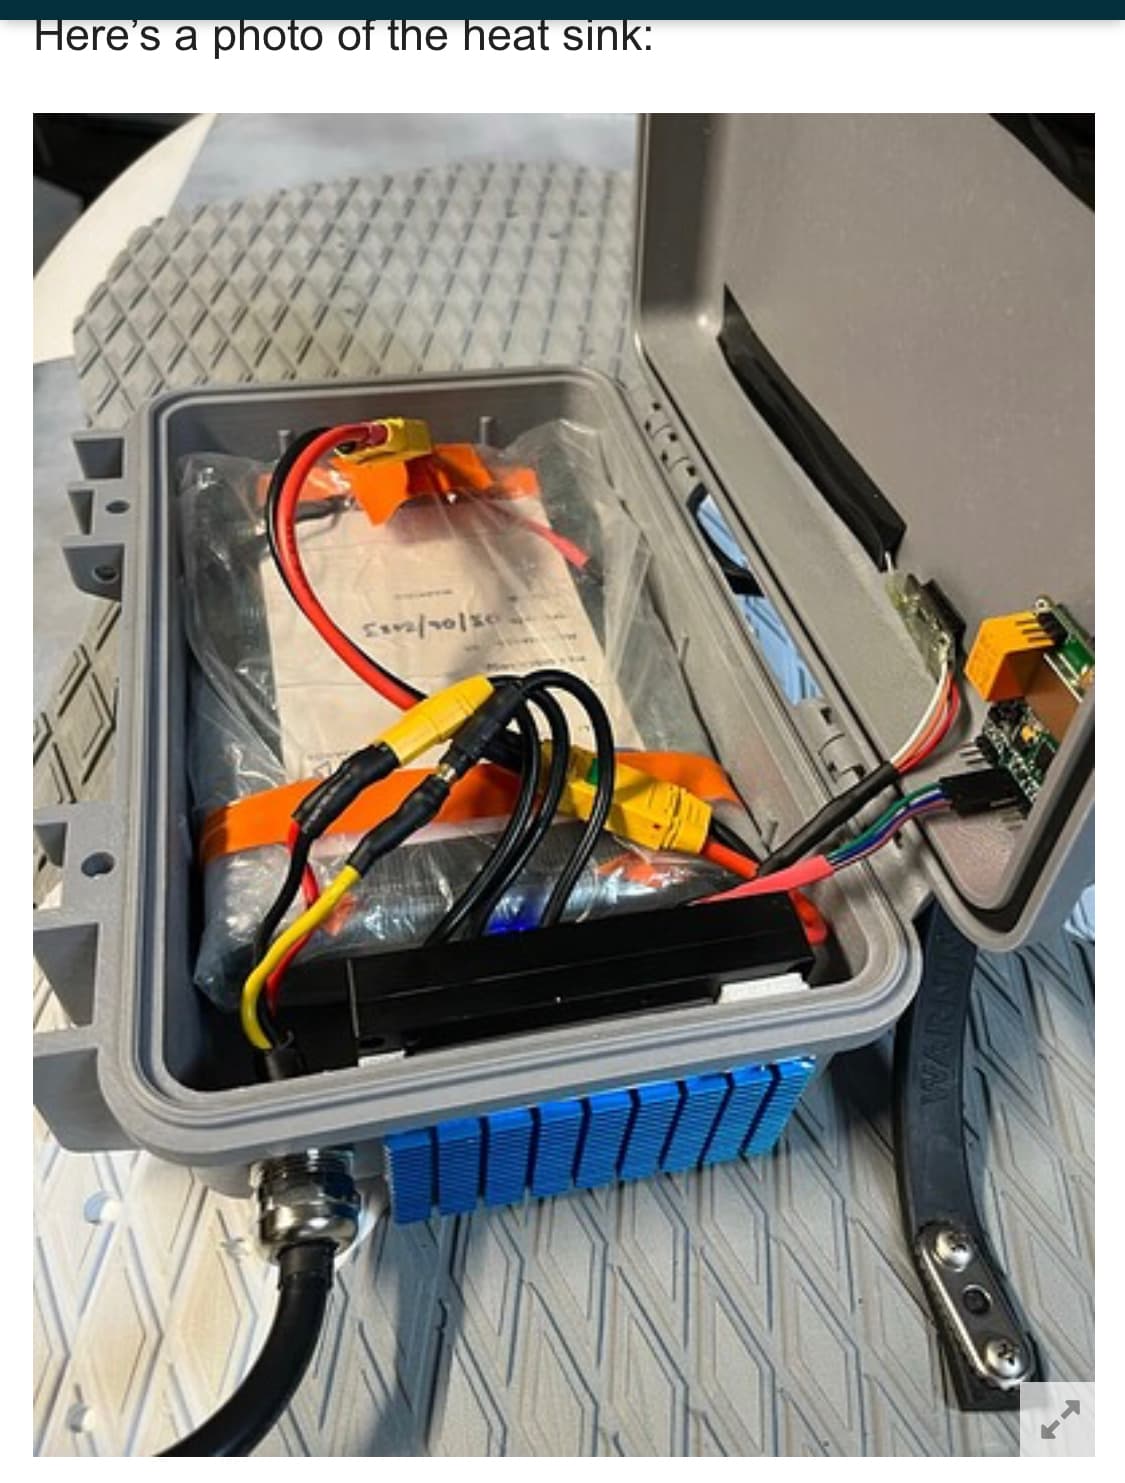
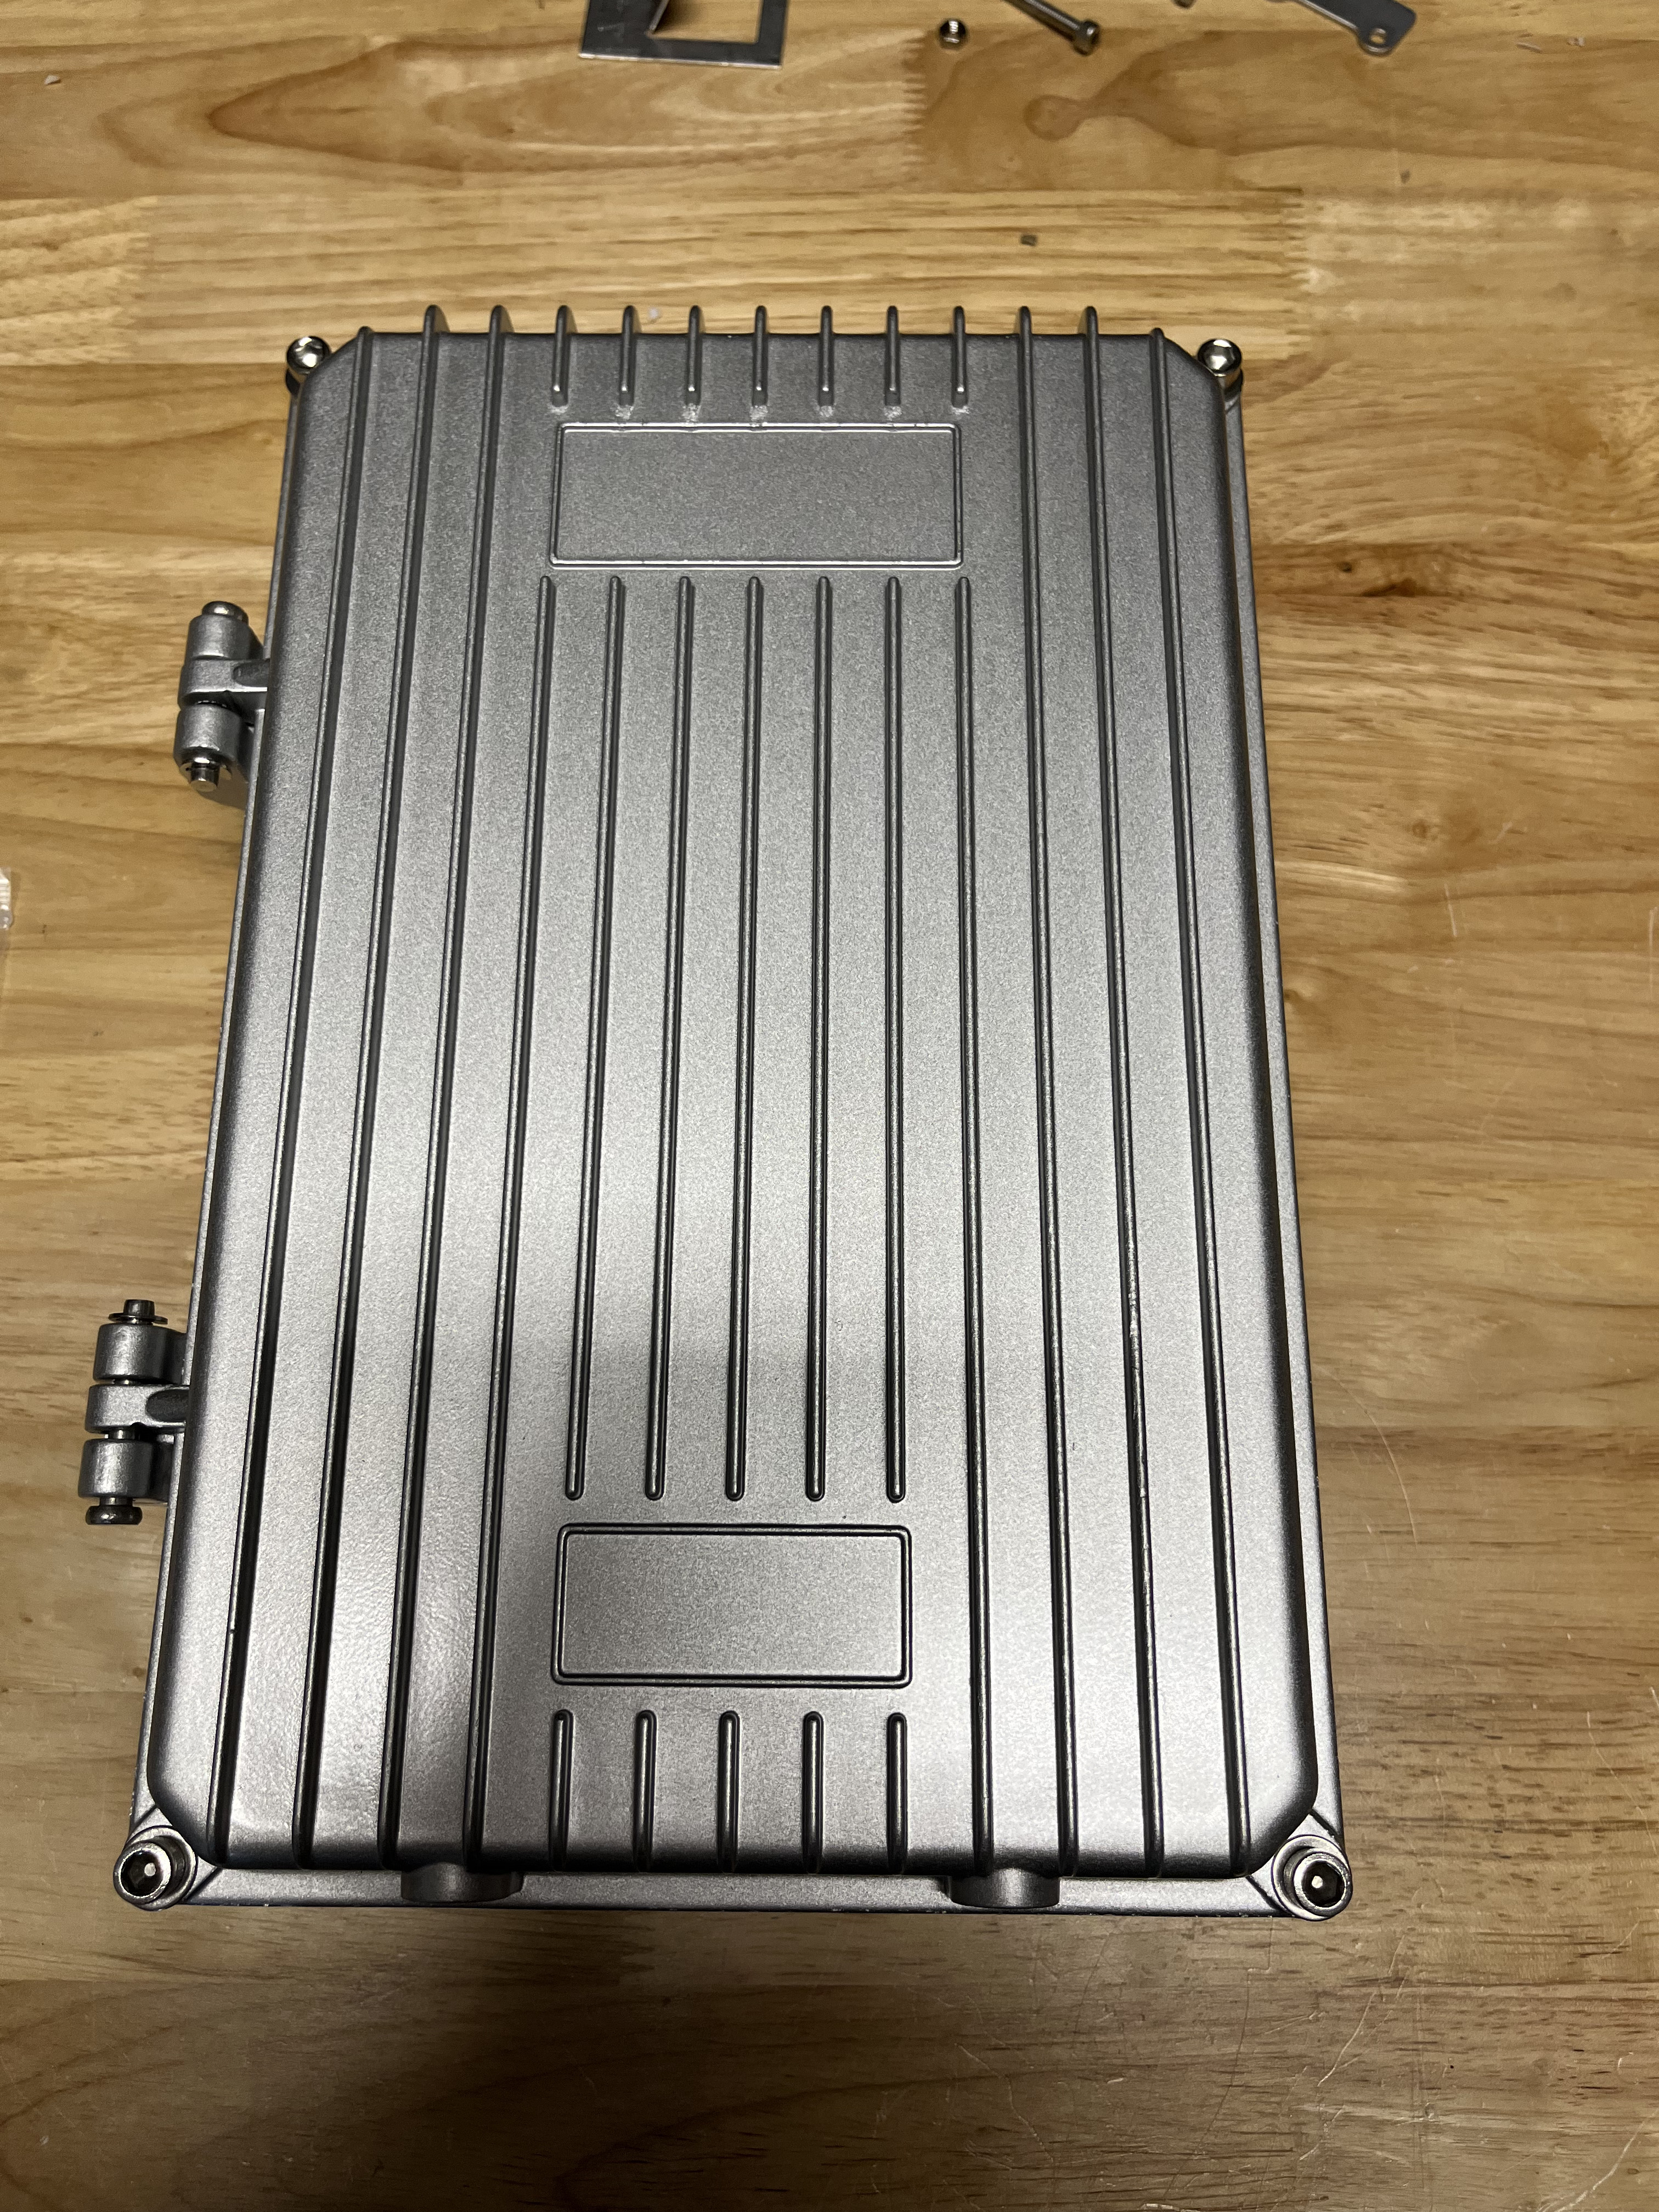
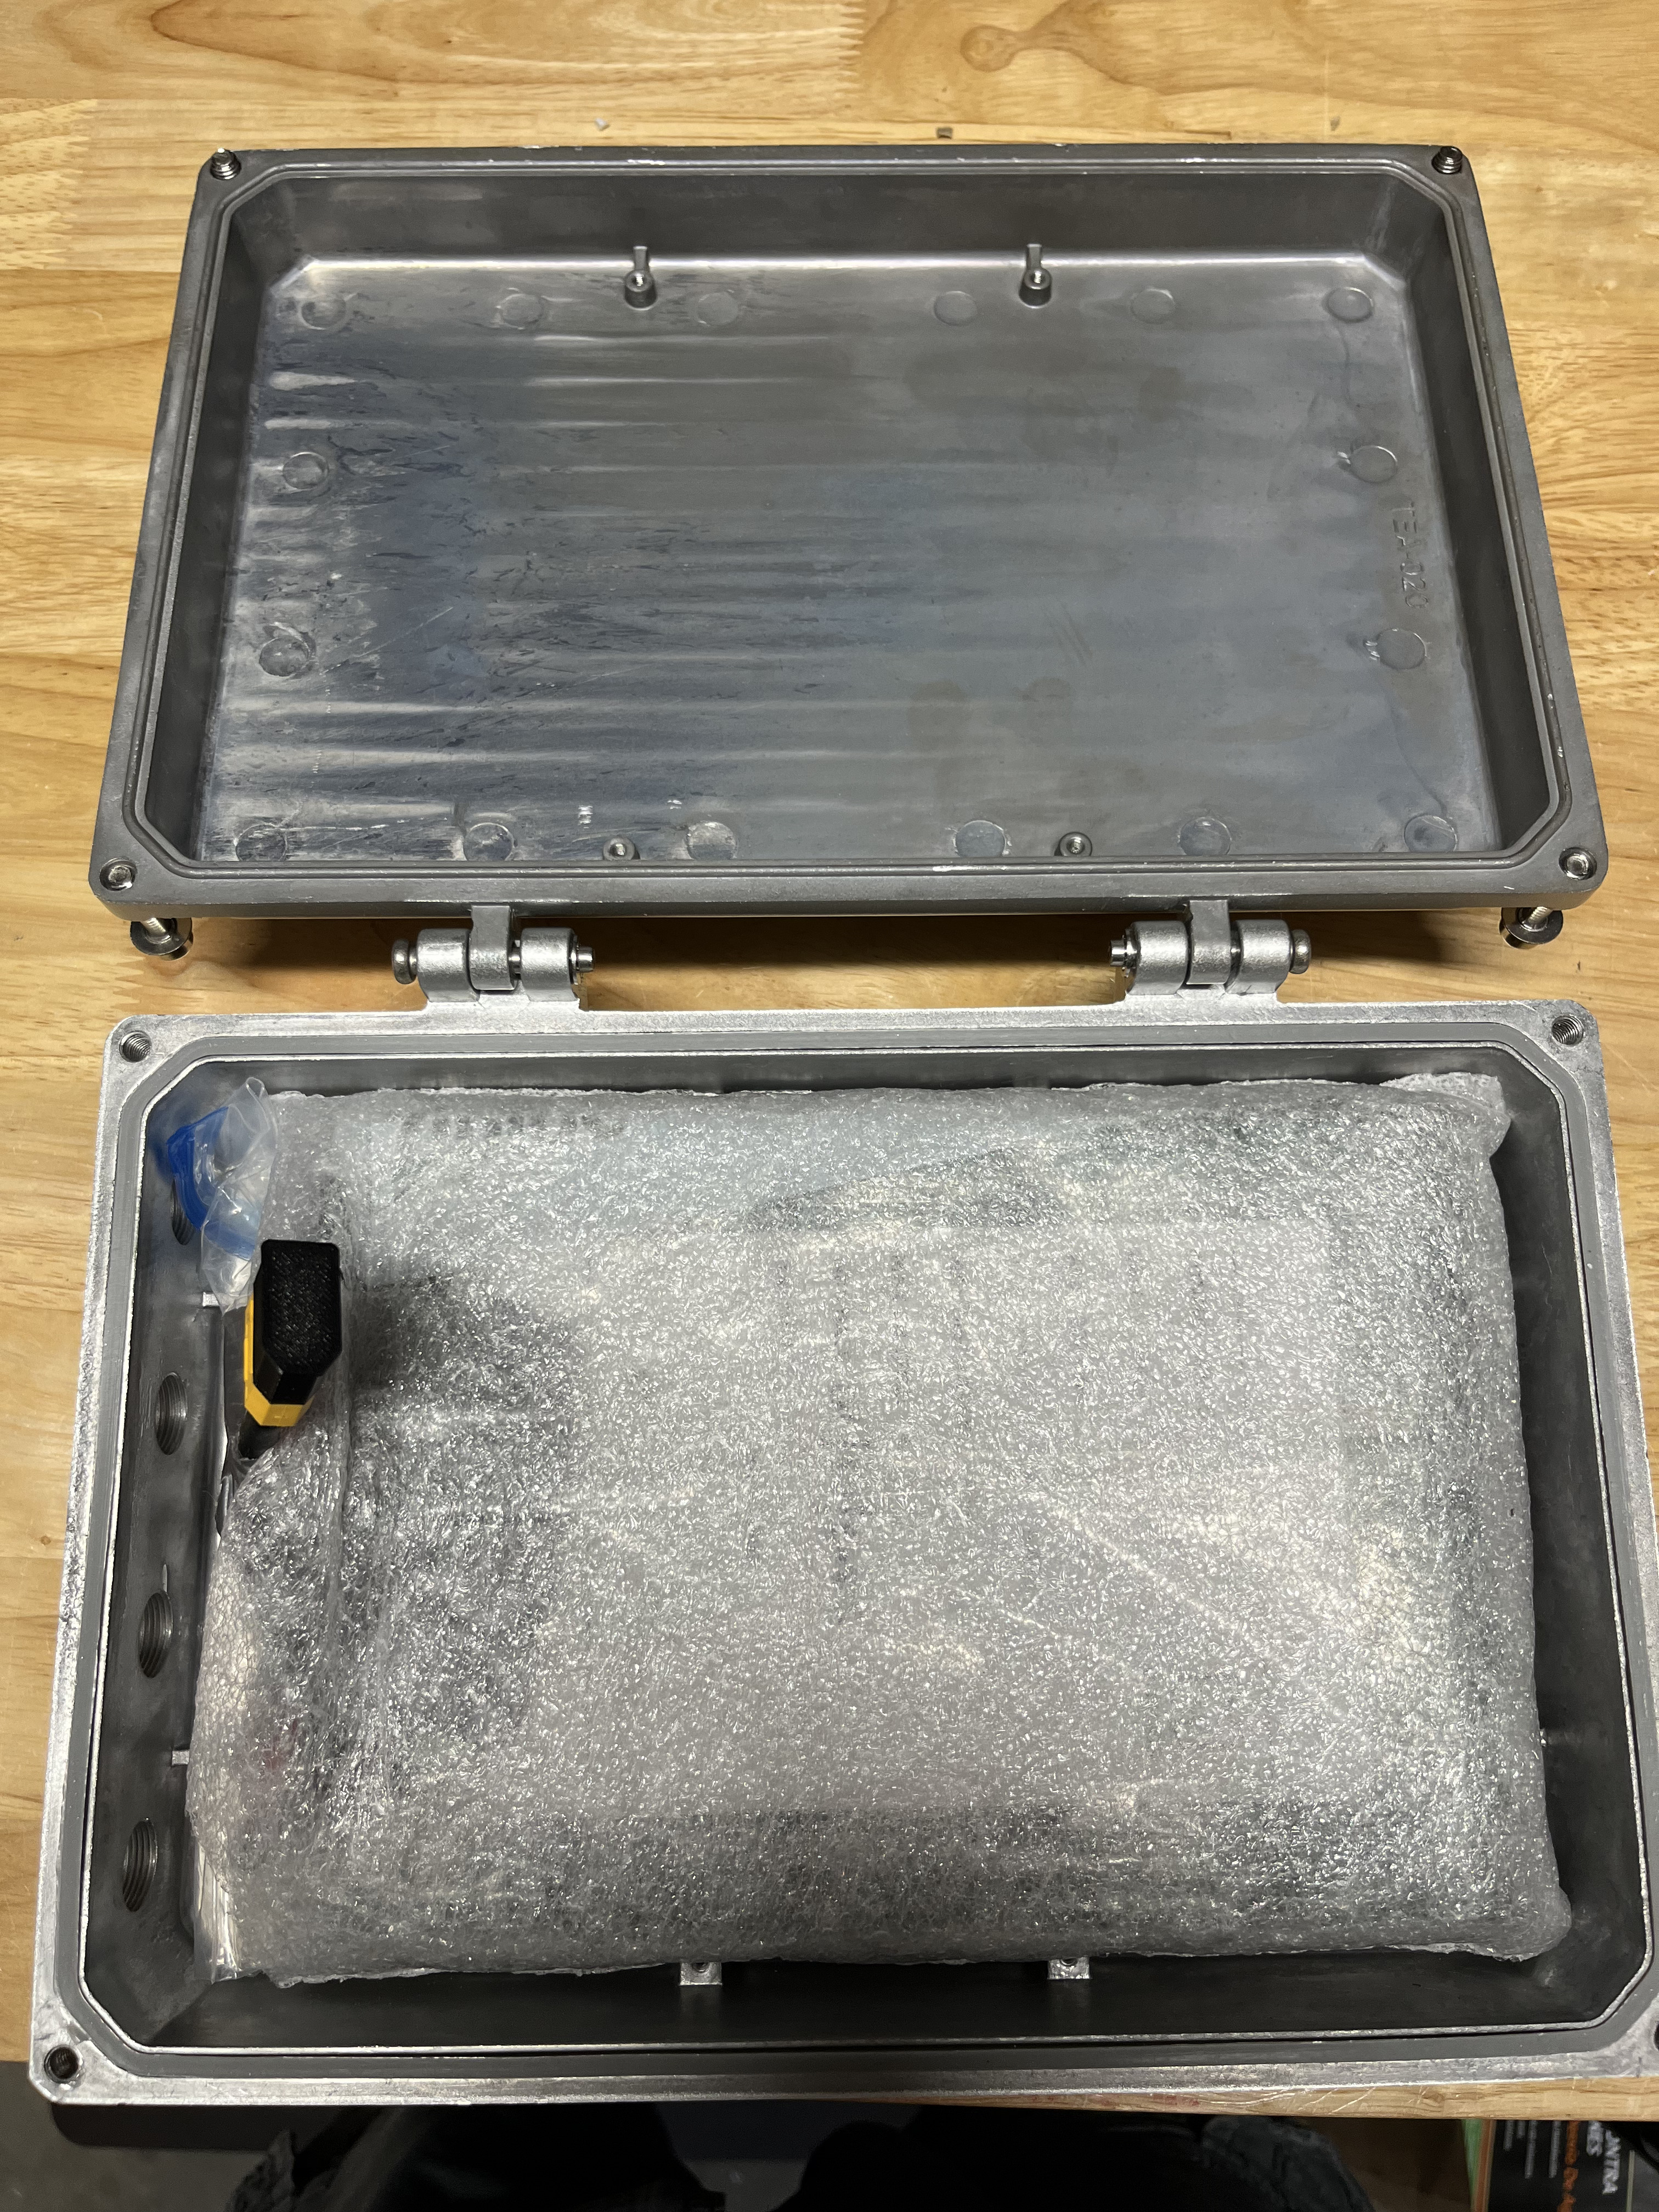
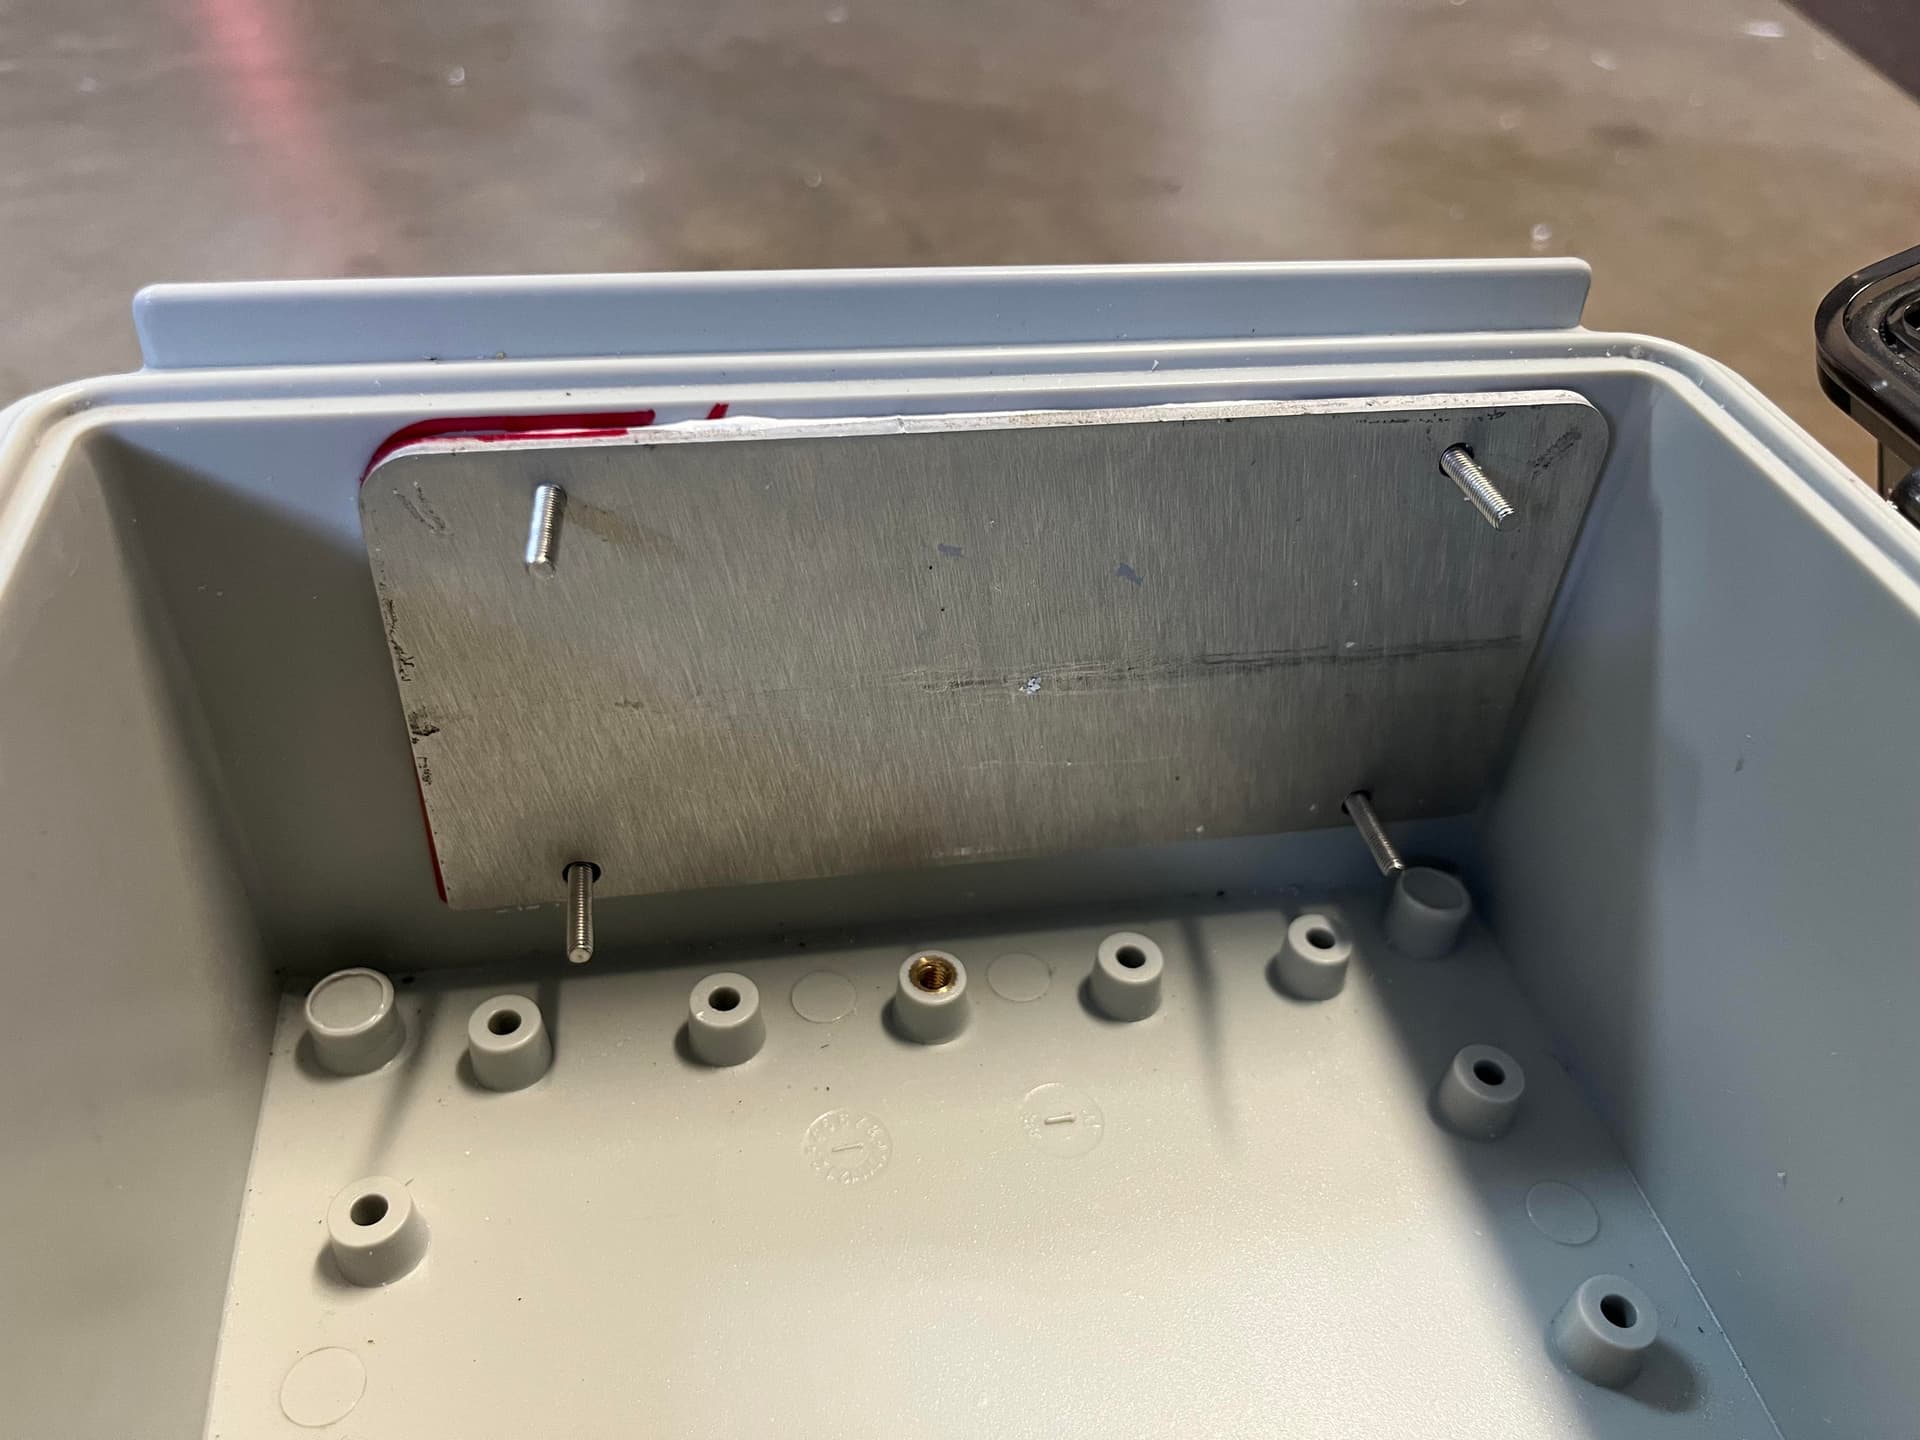
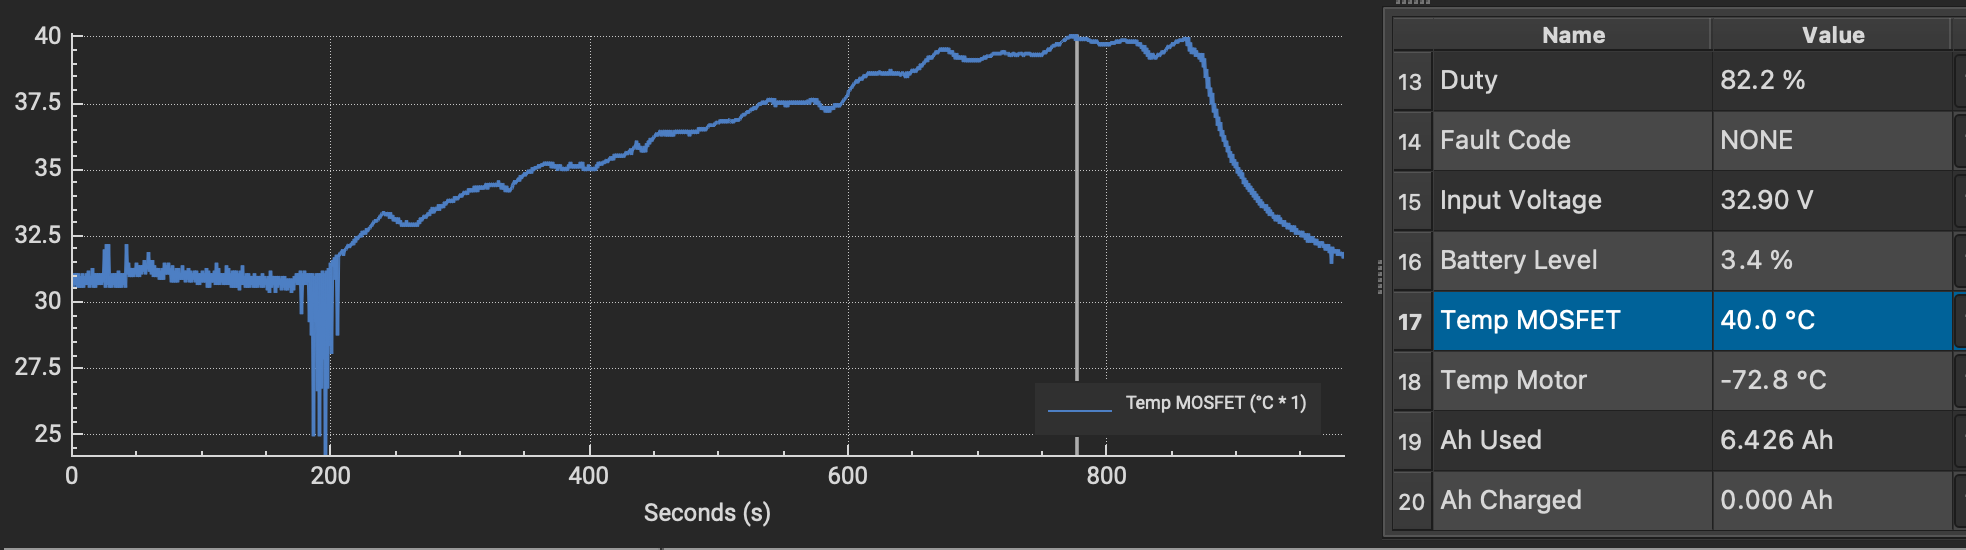
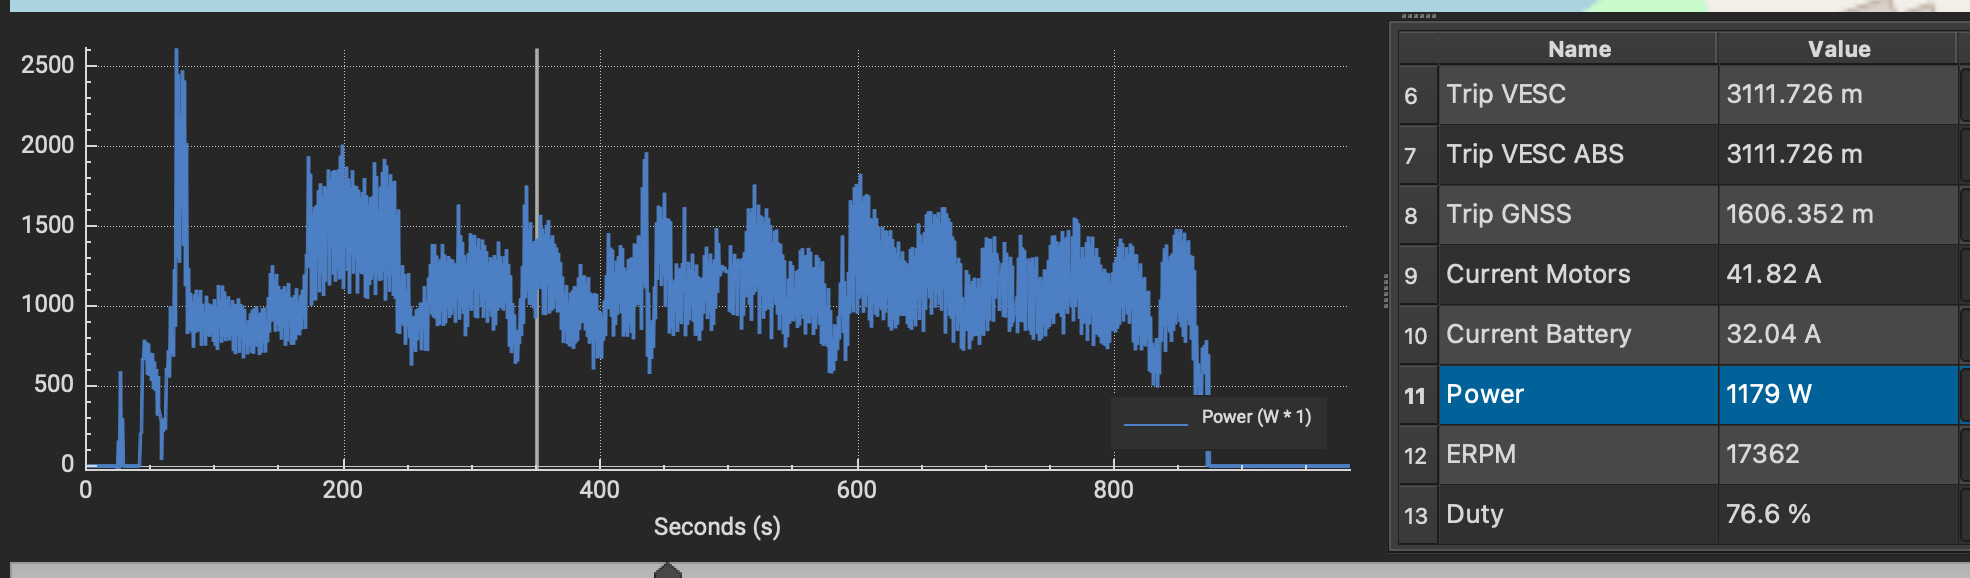
The photo below shows the VESC mounted on an aluminum plate (heat sink). I need to find a better solution for getting rid of the heat, because right now I can only ride for about 4-5 minutes before the VESC gets too hot and I need to take a break. I’ll probably have to cut a hole into the box and install a proper heat sink on the outside.

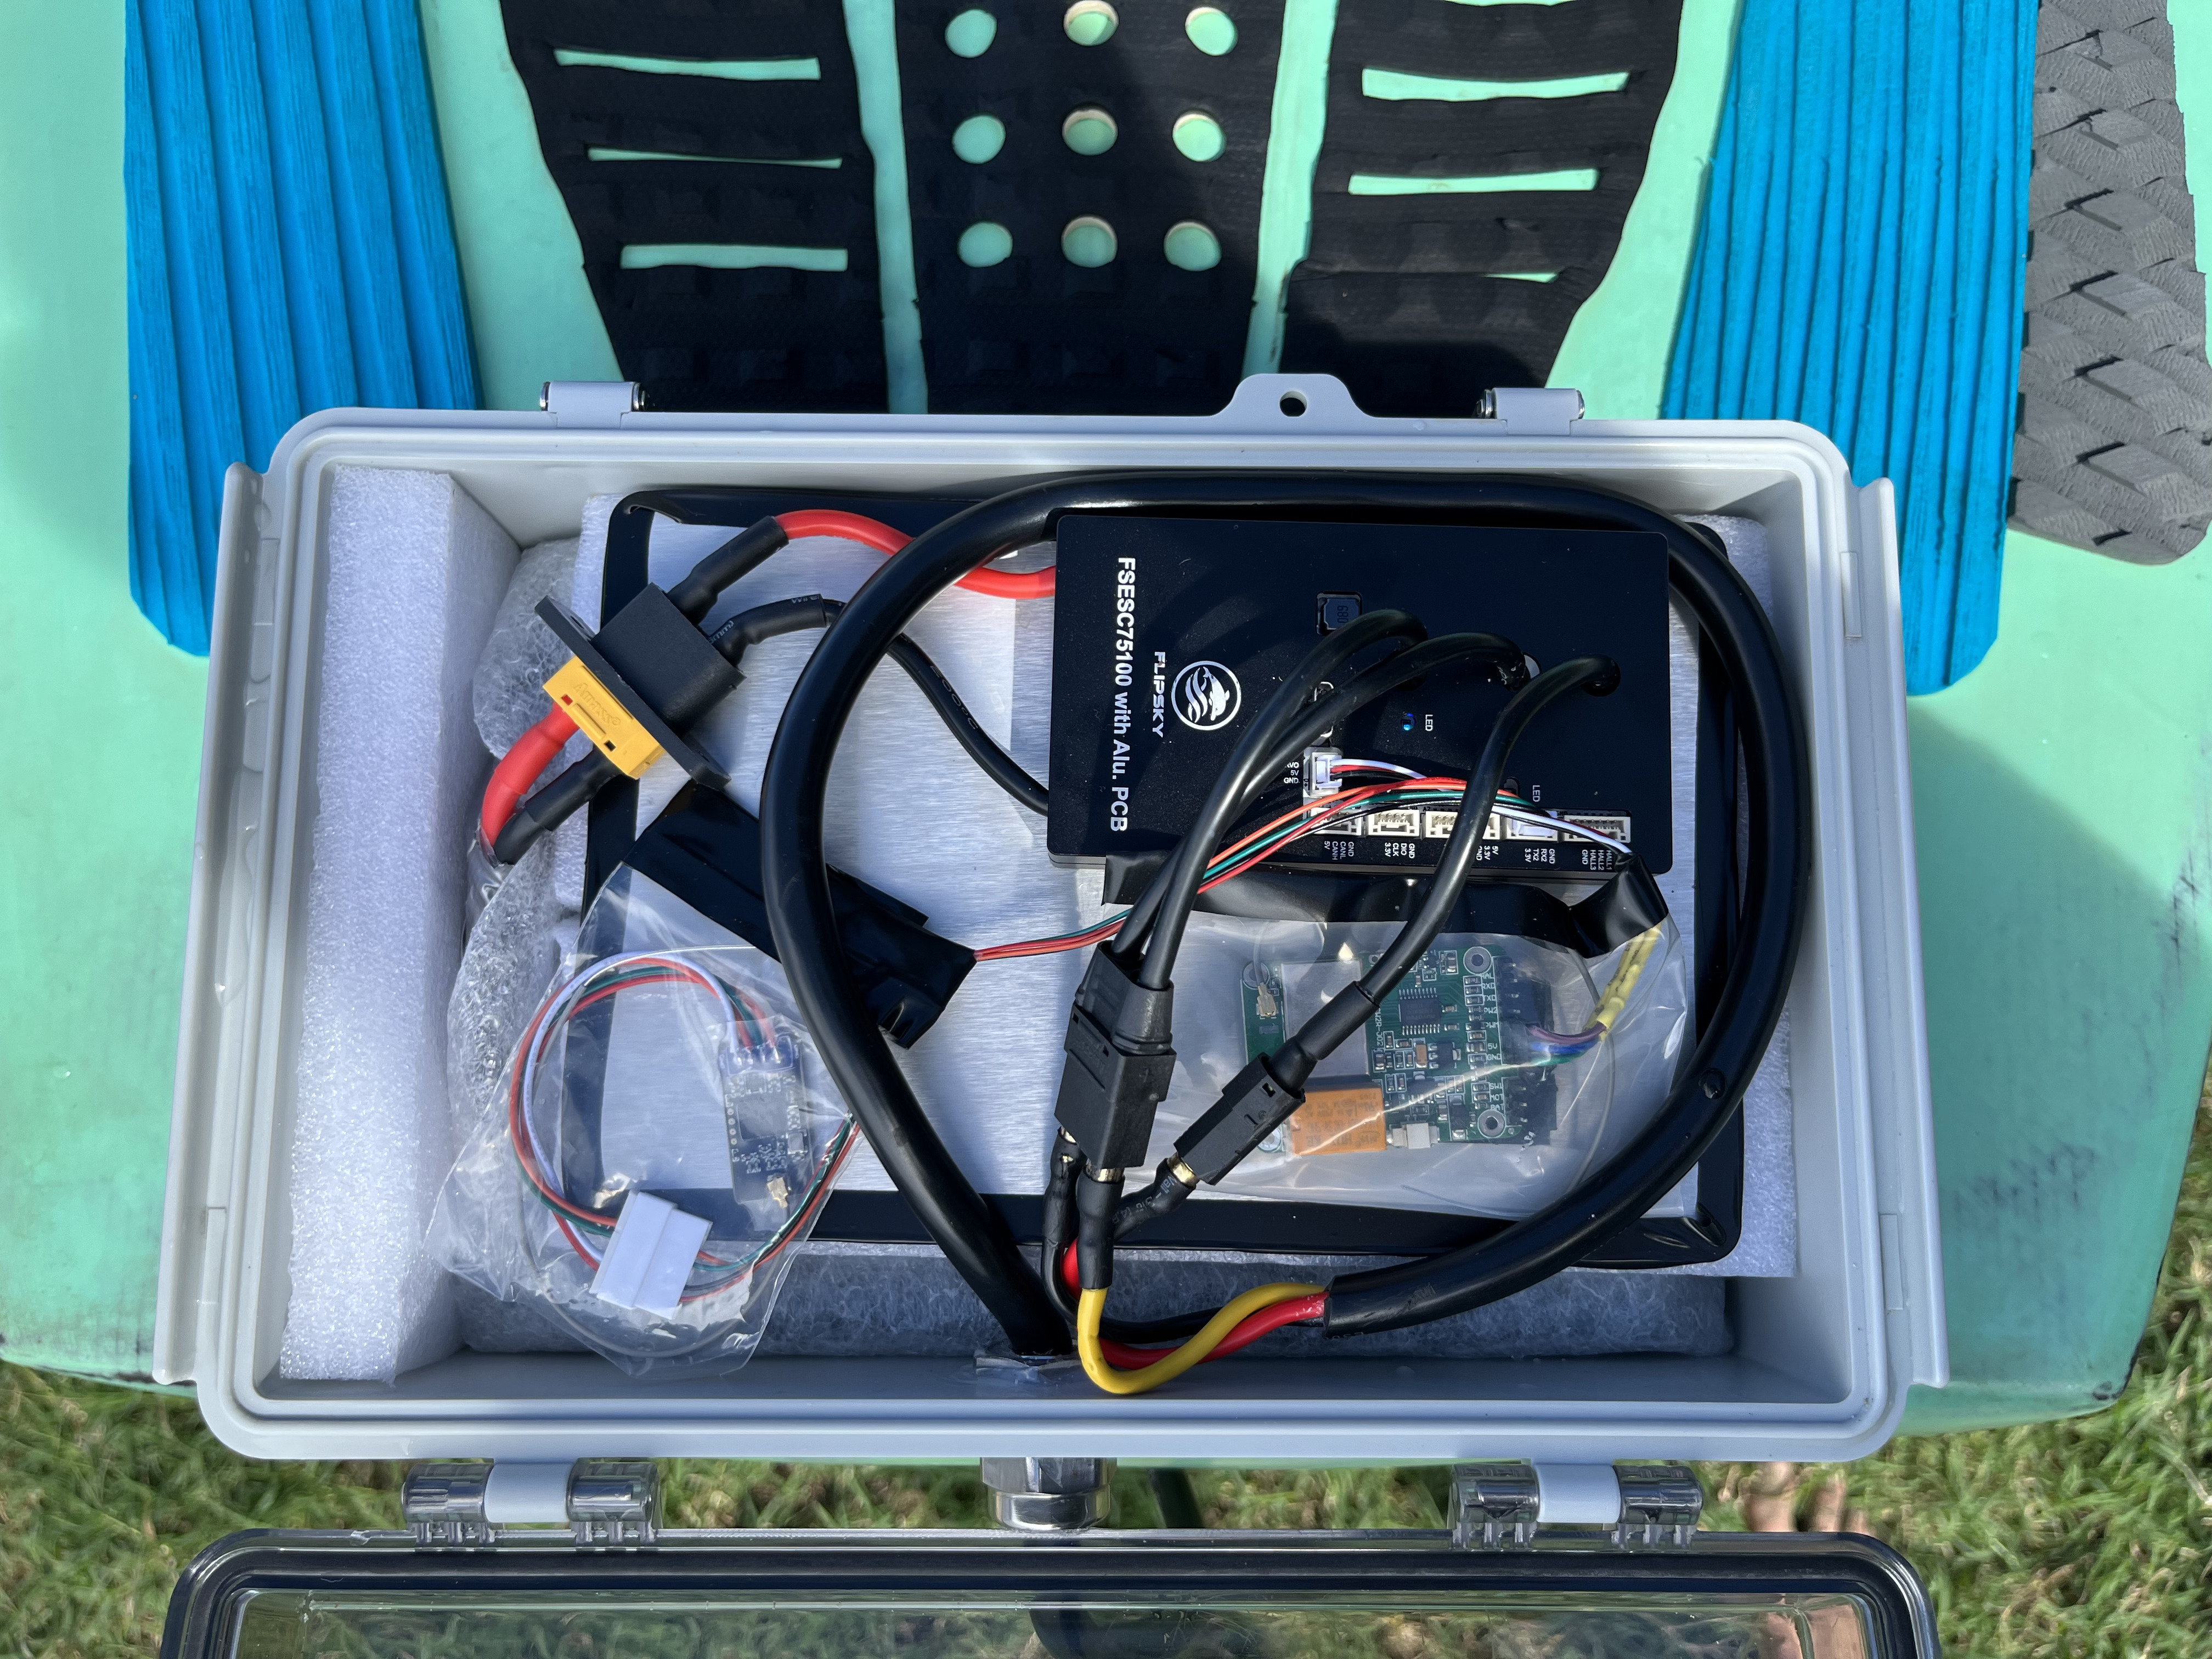
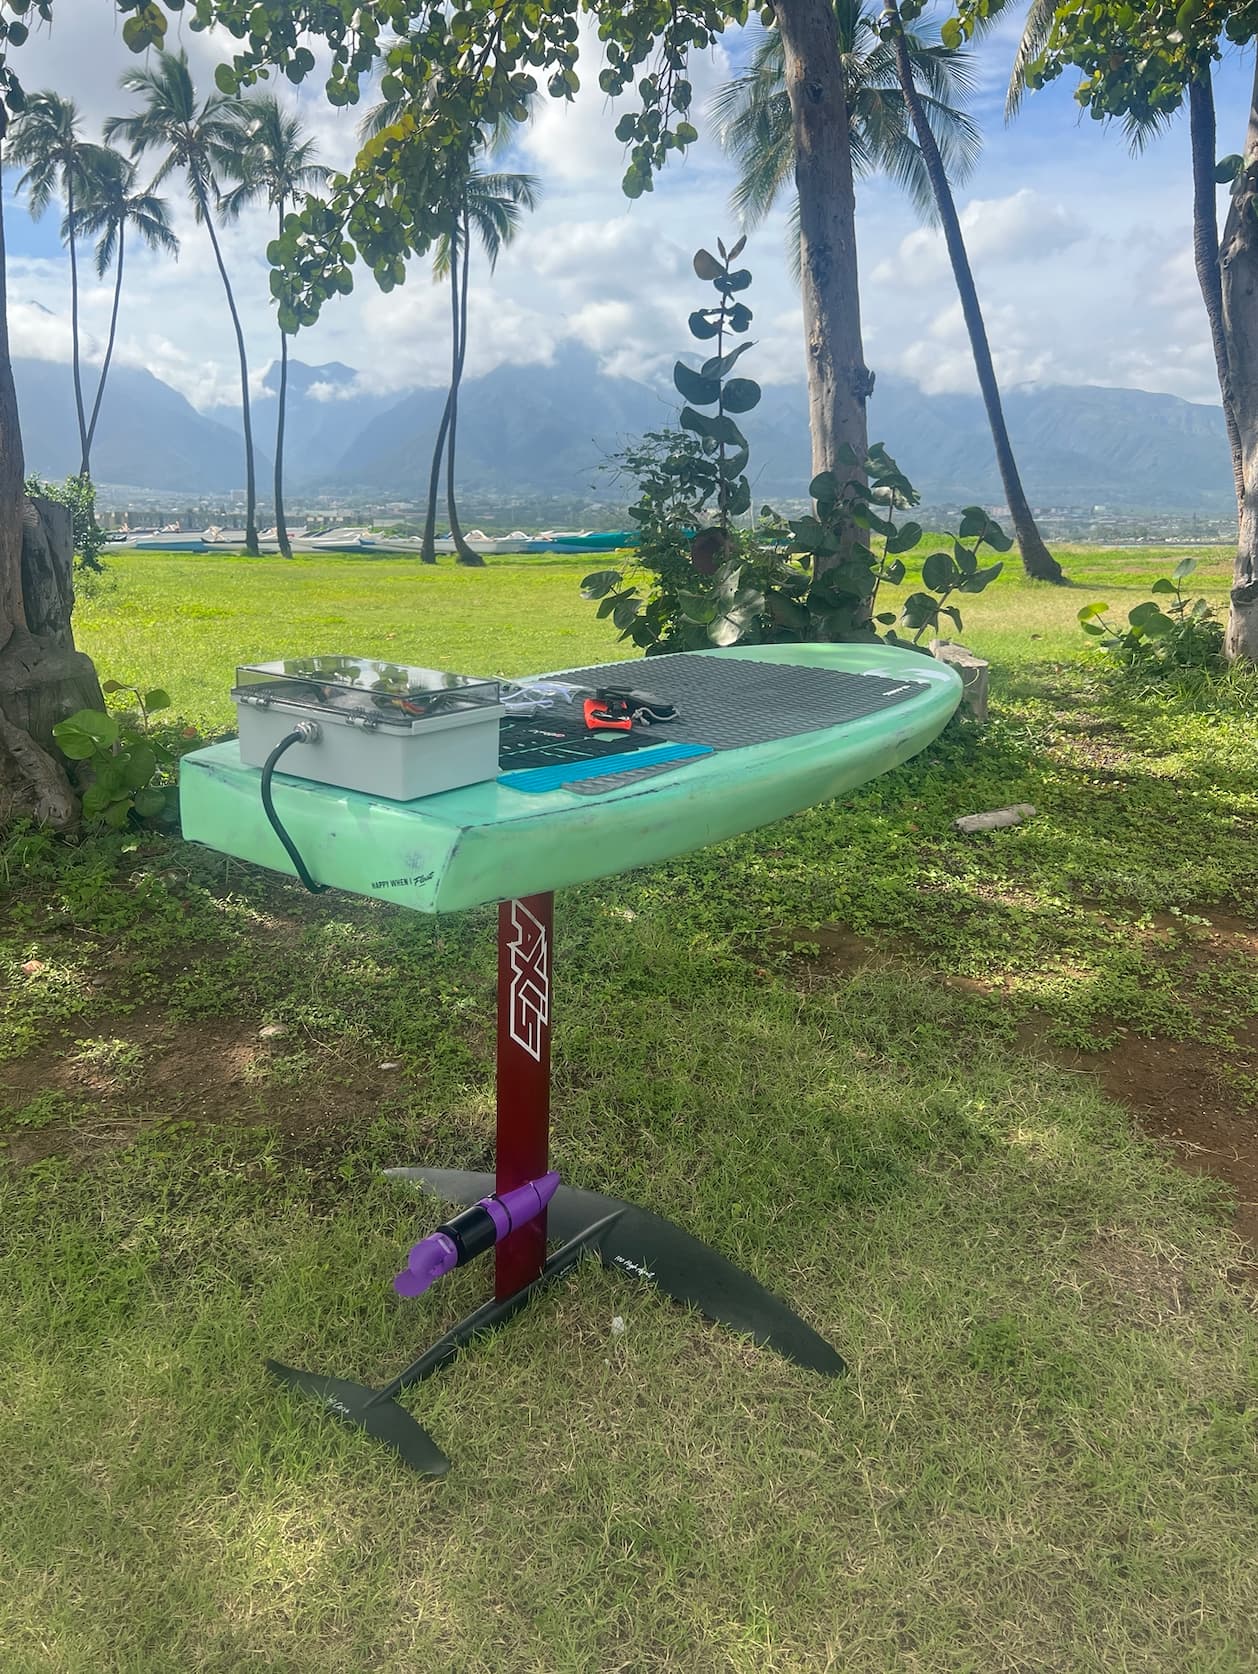
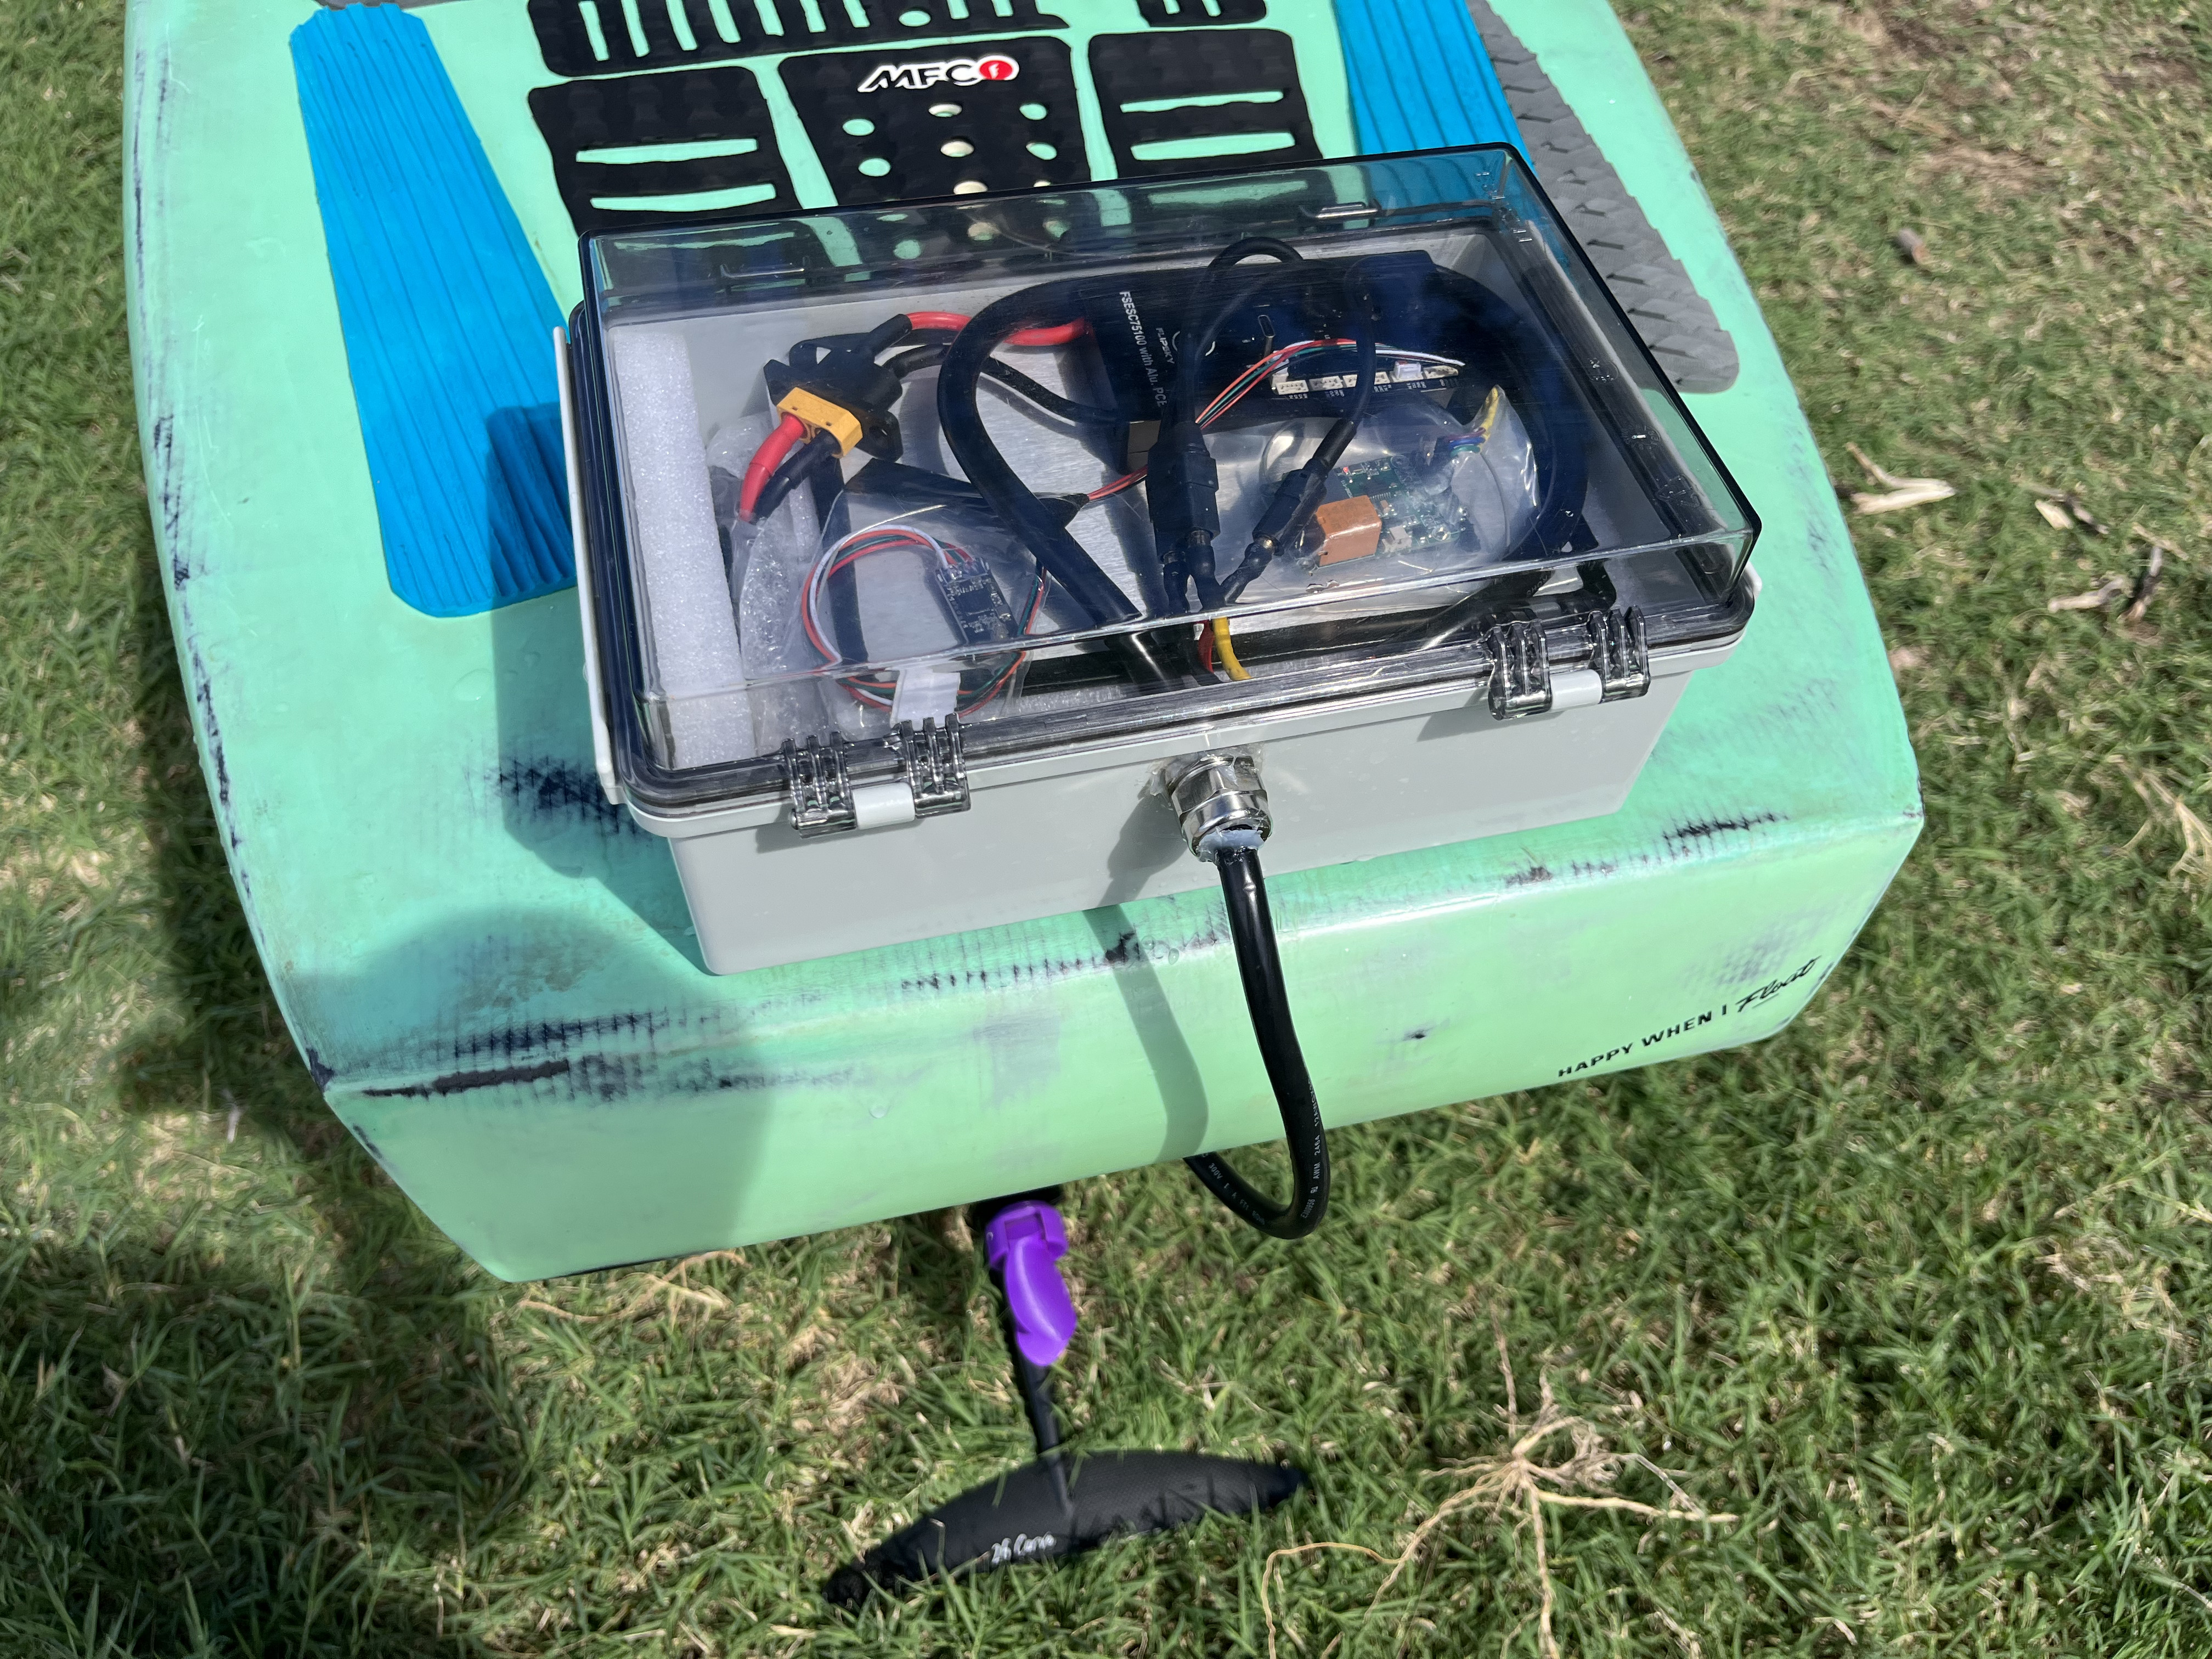
Below is a closer look at the current setup. The plastic box is mounted to the board with 3M dual lock (no issues so far). The cable setup in the box is still pretty messy, but I’m working on cleaning it up.

I replaced the motor bearings with stainless steel (thanks @Thaiguy for the info on what to buy) and soaked everything in CorrosionX. Hopefully that will keep it working for a while.

That’s it for now. I’ll update this thread when I make any improvements. Would appreciate any tips on how to improve this setup (especially the heat issue).

Special thanks to @Thaiguy, @3rd_ave_Lien, @dmitrynizh, Rick and all others who helped me with this build.

9 Likes

Thank you for sharing, could you please post your CAD data for folding prop, thank you.

Sure, send me a PM with your email and I’ll mail it to you.

I do not know who was the original author of that folding prop file (maybe someone on this forum?) so I don’t know if I’m allowed to post it publicly.

There’s also this folding prop on Thingiverse which seems to be a refined version of what I printed: Efoil 6384/63100 120kv-140kv folding prop by ThermikDreher - Thingiverse
I’m planning to test out that version soon.

2 Likes

Update on the overheating issue:

I just received this Aluminum box from Aliexpress: https://www.aliexpress.us/item/3256804067221120.html

My plan is to attach the VESC to the inside of the box with thermal adhesive. Hopefully this will conduct the heat to the outside allow longer rides without overheating.

It fits my battery pretty well:

This box has 4 circular cutouts on the side and came with some cable glands and plugs. Hopefully it will stay waterproof for a long time. I did a test to submerge the box in water for 24 hours and the inside remained dry.

One thing I need to figure out is how to route the antennas for Bluetooth and the Maytech receiver to the outside of the box.

1 Like

I usually use a piece of AWG 8 cable sheath, running the antenna cable through it. Then I fill the tube with silicone compound and insert it into the cable gland.

3 Likes

@t-dub-maui thanks so much for posting this. Looks great! I have made a similar build but had lots of trouble with the box falling off in wipeouts on waves, i’d recommend a back up leash as i’ve already lost one complete setup (battery, box and motor) to the sea floor!

Could you please share some more details on the bearing replacement please?

@MadAboutFoiling Sorry to hear about your lost setup, I’ll definitely use a leash when going into waves. Did you use 3M Dual Lock for attaching your box? It seems pretty strong to me.

The bearing replacement is pretty easy. @Thaiguy did it before and sent me instructions on how to do it and which bearings to buy (see my Google Sheet parts list linked above for purchase links to the bearings).
For replacing the bearings, simply separate the stator from the hub (just pull it off), then the bearings will be visible and you just swap in new ones. I heard some motors have the bearings glued in, but mine were pretty easy to get out. Let me know in case you run into any issues.

1 Like

I haven’t tried the aluminum box from the post above yet, but I have attached this 150x74 mm heat sink to the outside of the original plastic box.


To install it, I cut a 80x35 mm hole in the plastic and put in a small aluminum plate. Then glued the heat sink on the outside and another aluminum plate on the inside.
Put thermal paste where the aluminum plates touch.

It seems to be working really well. I rode for about 15 minutes with no break and the max temperature the Mosfets reached was 40C.


5 Likes

@t-dub-maui
I’m hoping you can answer a few questions for me.

Did you use any other method of securing the box to the board other than the 3M product?

Do you think the initial in box heat sink was partially effective but the air temp in the box just got too hot?

Thanks

I only used the 3M Dual Lock (link here). I haven’t had any issues yet, seems to be holding really well.

Regarding the heat sink question: The original heat sink plate wasn’t really effective since the hot air was trapped inside the box. The outside mounted heat sink works really well so far and I can foil continuously until the battery is empty without heat issues.

1 Like

Thanks. I have been debating installing a plate of aluminum under my 75200 as an alternative to the water cooling that it came with. Although I’m hesitant to intentionally put water INTO my watertight case :grinning: I am increasingly more convinced that it is the right thing to do.

In 2019-2020, before the ESC was placed above the mast for cooling purpose, PWRFoil had a closed-loop cooling circuit.

@SoEFoil

Thanks

Yes the “solutions” for cooling the ESC seem to be constantly evolving. I’m new to this so have only read about many of the various approaches. Water is the ideal coolant and it surrounds the environment we are playing in. Trick is to keep it out of areas it shouldn’t be in.

I had considered a closed/open loop where the rad was bathed in water rather than air cooled but it was overly complex. I strive to eventually adhere to the KISS principle and have sort of settled on a ram feed (no pump) into my “on deck” box to keep things at a reasonable operating temp.

I decided to cool just the box all the electronics were in so there was no directly exposed electrical component.

I just wanted to post a quick update since I made some more progress recently.

I have built a second setup so me and my girlfriend can efoil together.

The new build (code name: Pocket Rocket) uses a Pelican 1170 case and fits two 10s2p batteries in parallel for a total capacity of around 600Wh. I’m using the same Flipsky 75100 VESC like in the previous build. The heat sink is smaller and runs hotter than the other build with the bigger heat sink. The temperature goes up to around 65 degrees C after riding for about 30 minutes - compared to around 45C with the big heat sink.
The board I’m currently using with the Pelican case is a 58L Gong Lemon. With my weight of around 175lbs, the water start is definitely a bit challenging but I think I just have to work on my technique.
I’m still experimenting with different mounting positions for the Pelican case. Currently it’s mounted on the rear of the board, but I think I’ll try a position between front and back foot so there is less swing weight in the back.

Here’s a photo of the heat sink:

I also made some changes on the original build with the bigger board: The motor is now a 65161 with a Flying Rodeo 3 blade prop.

4 Likes

Great work t-dub! I’m about to do a build using the Axis mast. Would you be kind enough to detail how you brought the cable out through the mast and base plate where they exit under the board.

I recently did a build for a buddy with Naish gear and ended up using two aluminum 50 x 10mm plates shaped to match the outline of the base plate - left a cable width gap in the middle and printed a fill in block in the front. Bolted the plates on using the extra holes in the base. That technique seemed slightly less drastic than machining the base - certainly a little heavier though.

Thanks

4 Likes

@t-dub-maui
You have been busy! :grinning:

I am at a stage where I’m determining how I will mount the box to my board. You had mentioned before that you relied on the 3M product to hold it place but in this picture in the lower right corner it looks like there is a rubber strap. Is this an additional hold down you added?

Hey Jonathan,

my base plate adapter setup is similar to yours, but I used a piece of wood instead of an aluminum plate.
To get the cable out from the mast I had to drill a hole into the Axis baseplate. Then I traced the outline of the baseplate on a piece of wood that had about the same thickness as the motor cable. Then I cut the wood to the same shape as the baseplate using a jigsaw.
It’s a very low tech solution, but works great so far.

Also, the Axis mast has two plastic pieces glued on the inside channel for waterproofing. You can remove those by heating up the mast/adhesive and then hammering them out using a piece of metal that fits into the inner channel.

Hey Foilguy!
I’m still using the 3M Dual Lock for the initial build with the big board and it has been working really well!
The reason I’m using bungee/rubber straps on the small board is that I haven’t really decided on the final mounting position yet. Also, the Pelican Case is not flat on the bottom, so I can’t just stick on the 3M tape there like on the other box.

1 Like

If it’s not too much trouble can you post a photo of how you implemented the strap?