@MadAboutFoiling Sorry to hear about your lost setup, I’ll definitely use a leash when going into waves. Did you use 3M Dual Lock for attaching your box? It seems pretty strong to me.
The bearing replacement is pretty easy. @Thaiguy did it before and sent me instructions on how to do it and which bearings to buy (see my Google Sheet parts list linked above for purchase links to the bearings).
For replacing the bearings, simply separate the stator from the hub (just pull it off), then the bearings will be visible and you just swap in new ones. I heard some motors have the bearings glued in, but mine were pretty easy to get out. Let me know in case you run into any issues.
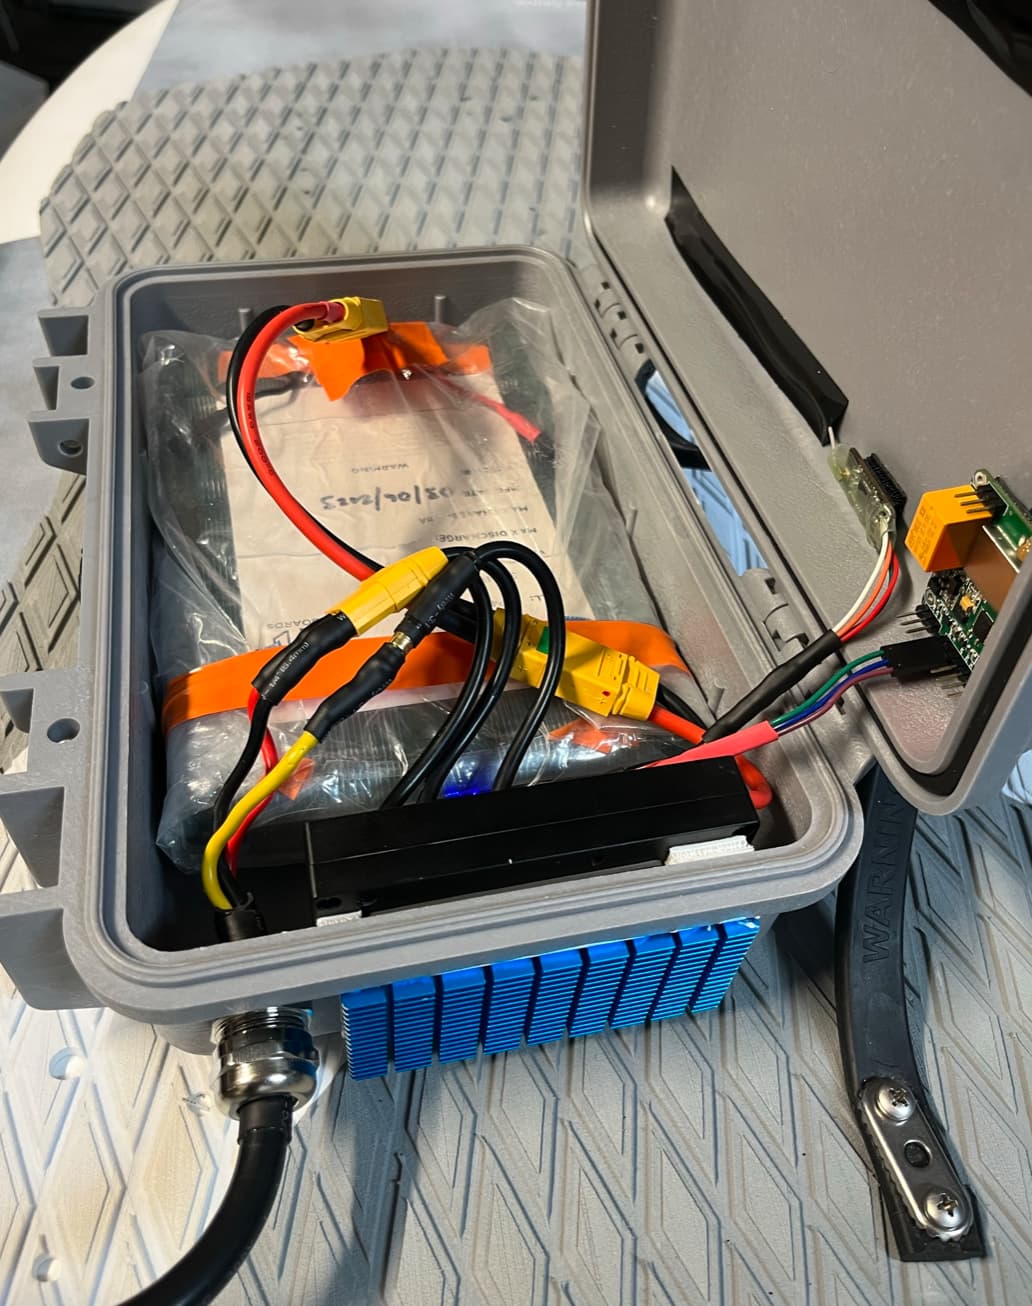
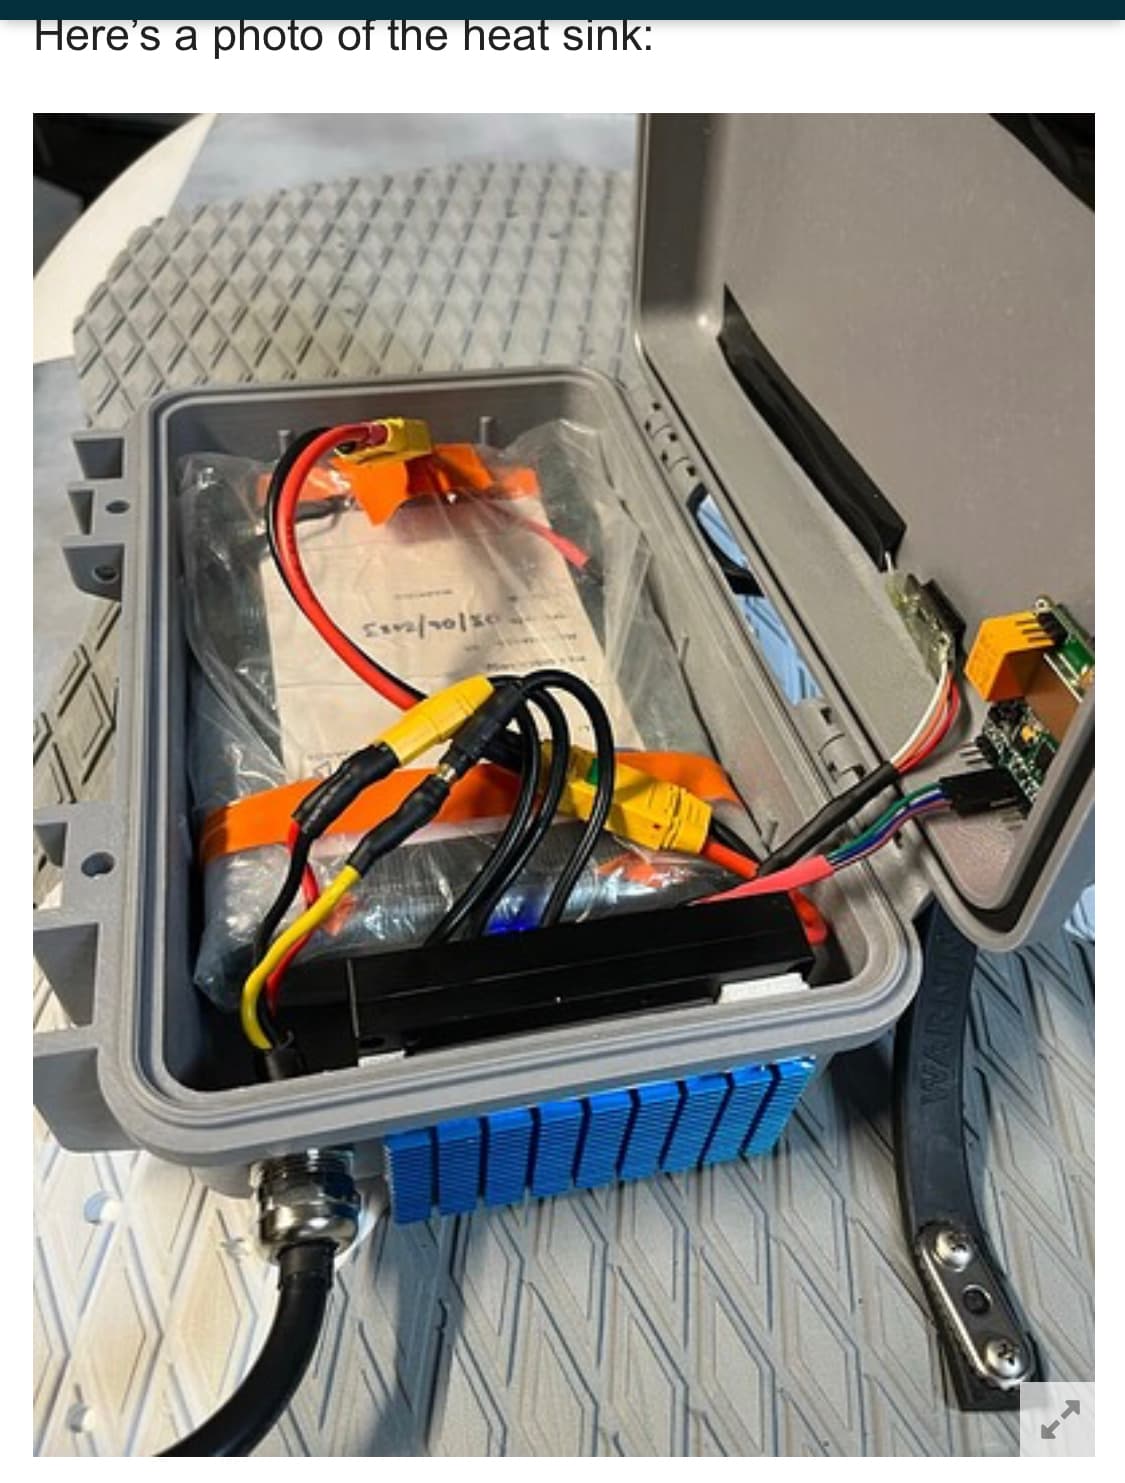
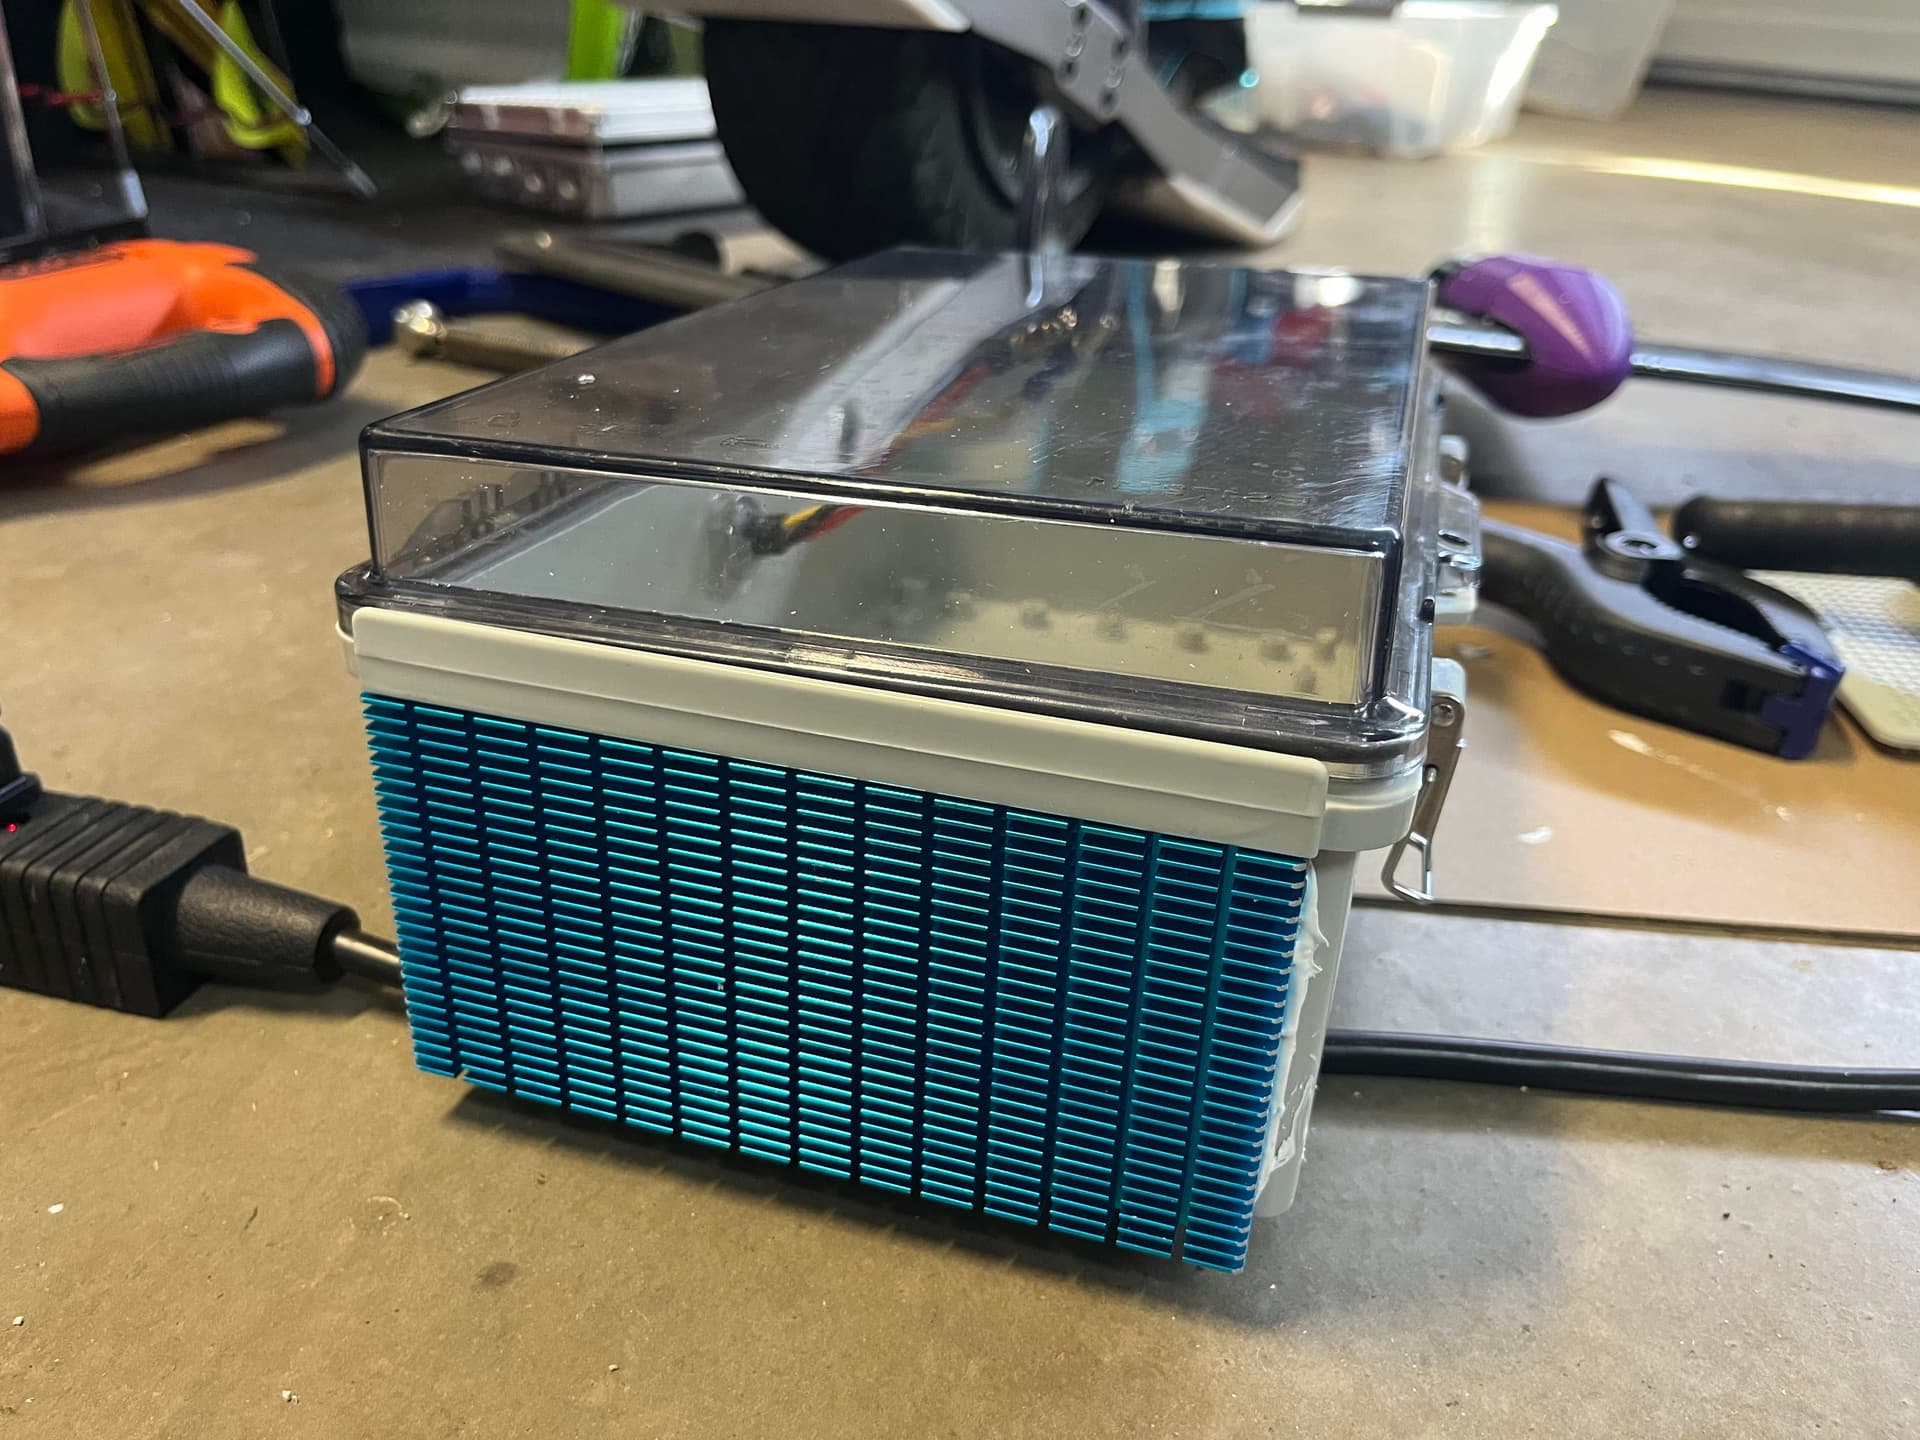
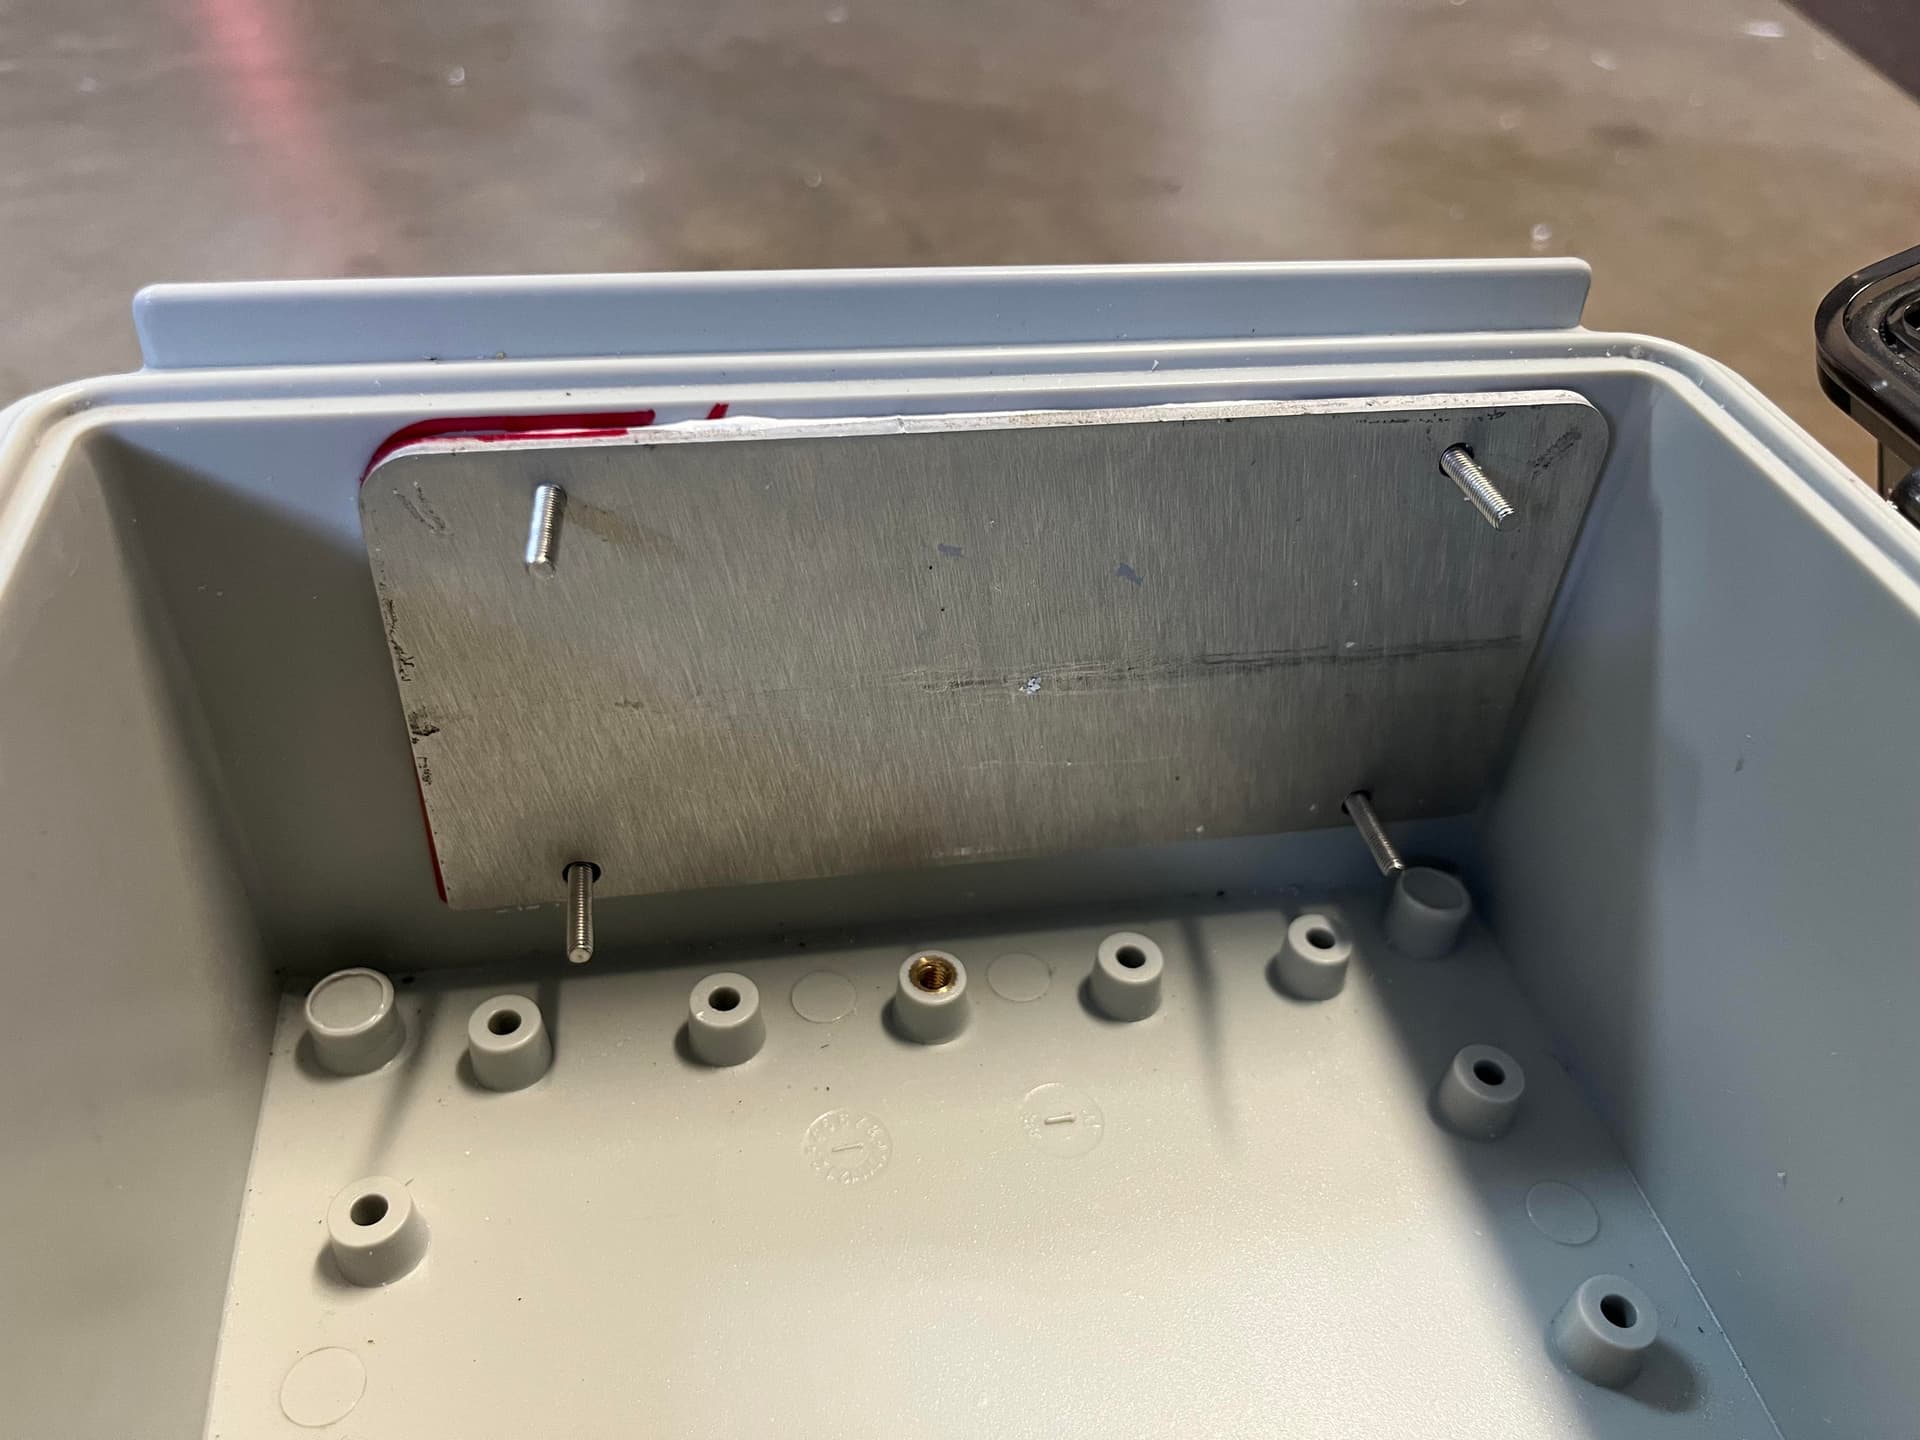
To install it, I cut a 80x35 mm hole in the plastic and put in a small aluminum plate. Then glued the heat sink on the outside and another aluminum plate on the inside.
Put thermal paste where the aluminum plates touch.
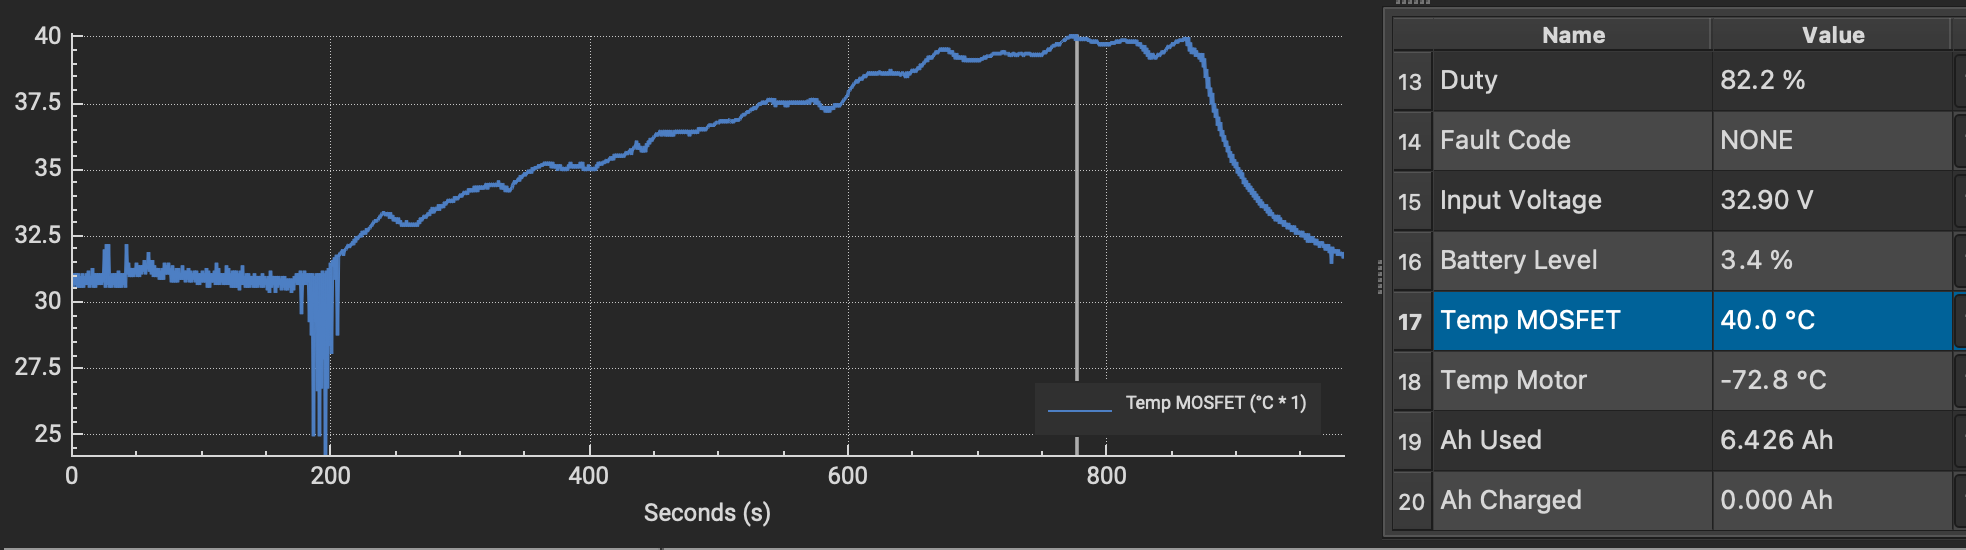
It seems to be working really well. I rode for about 15 minutes with no break and the max temperature the Mosfets reached was 40C.
I only used the 3M Dual Lock (link here). I haven’t had any issues yet, seems to be holding really well.
Regarding the heat sink question: The original heat sink plate wasn’t really effective since the hot air was trapped inside the box. The outside mounted heat sink works really well so far and I can foil continuously until the battery is empty without heat issues.
Thanks. I have been debating installing a plate of aluminum under my 75200 as an alternative to the water cooling that it came with. Although I’m hesitant to intentionally put water INTO my watertight case I am increasingly more convinced that it is the right thing to do.
Yes the “solutions” for cooling the ESC seem to be constantly evolving. I’m new to this so have only read about many of the various approaches. Water is the ideal coolant and it surrounds the environment we are playing in. Trick is to keep it out of areas it shouldn’t be in.
I had considered a closed/open loop where the rad was bathed in water rather than air cooled but it was overly complex. I strive to eventually adhere to the KISS principle and have sort of settled on a ram feed (no pump) into my “on deck” box to keep things at a reasonable operating temp.
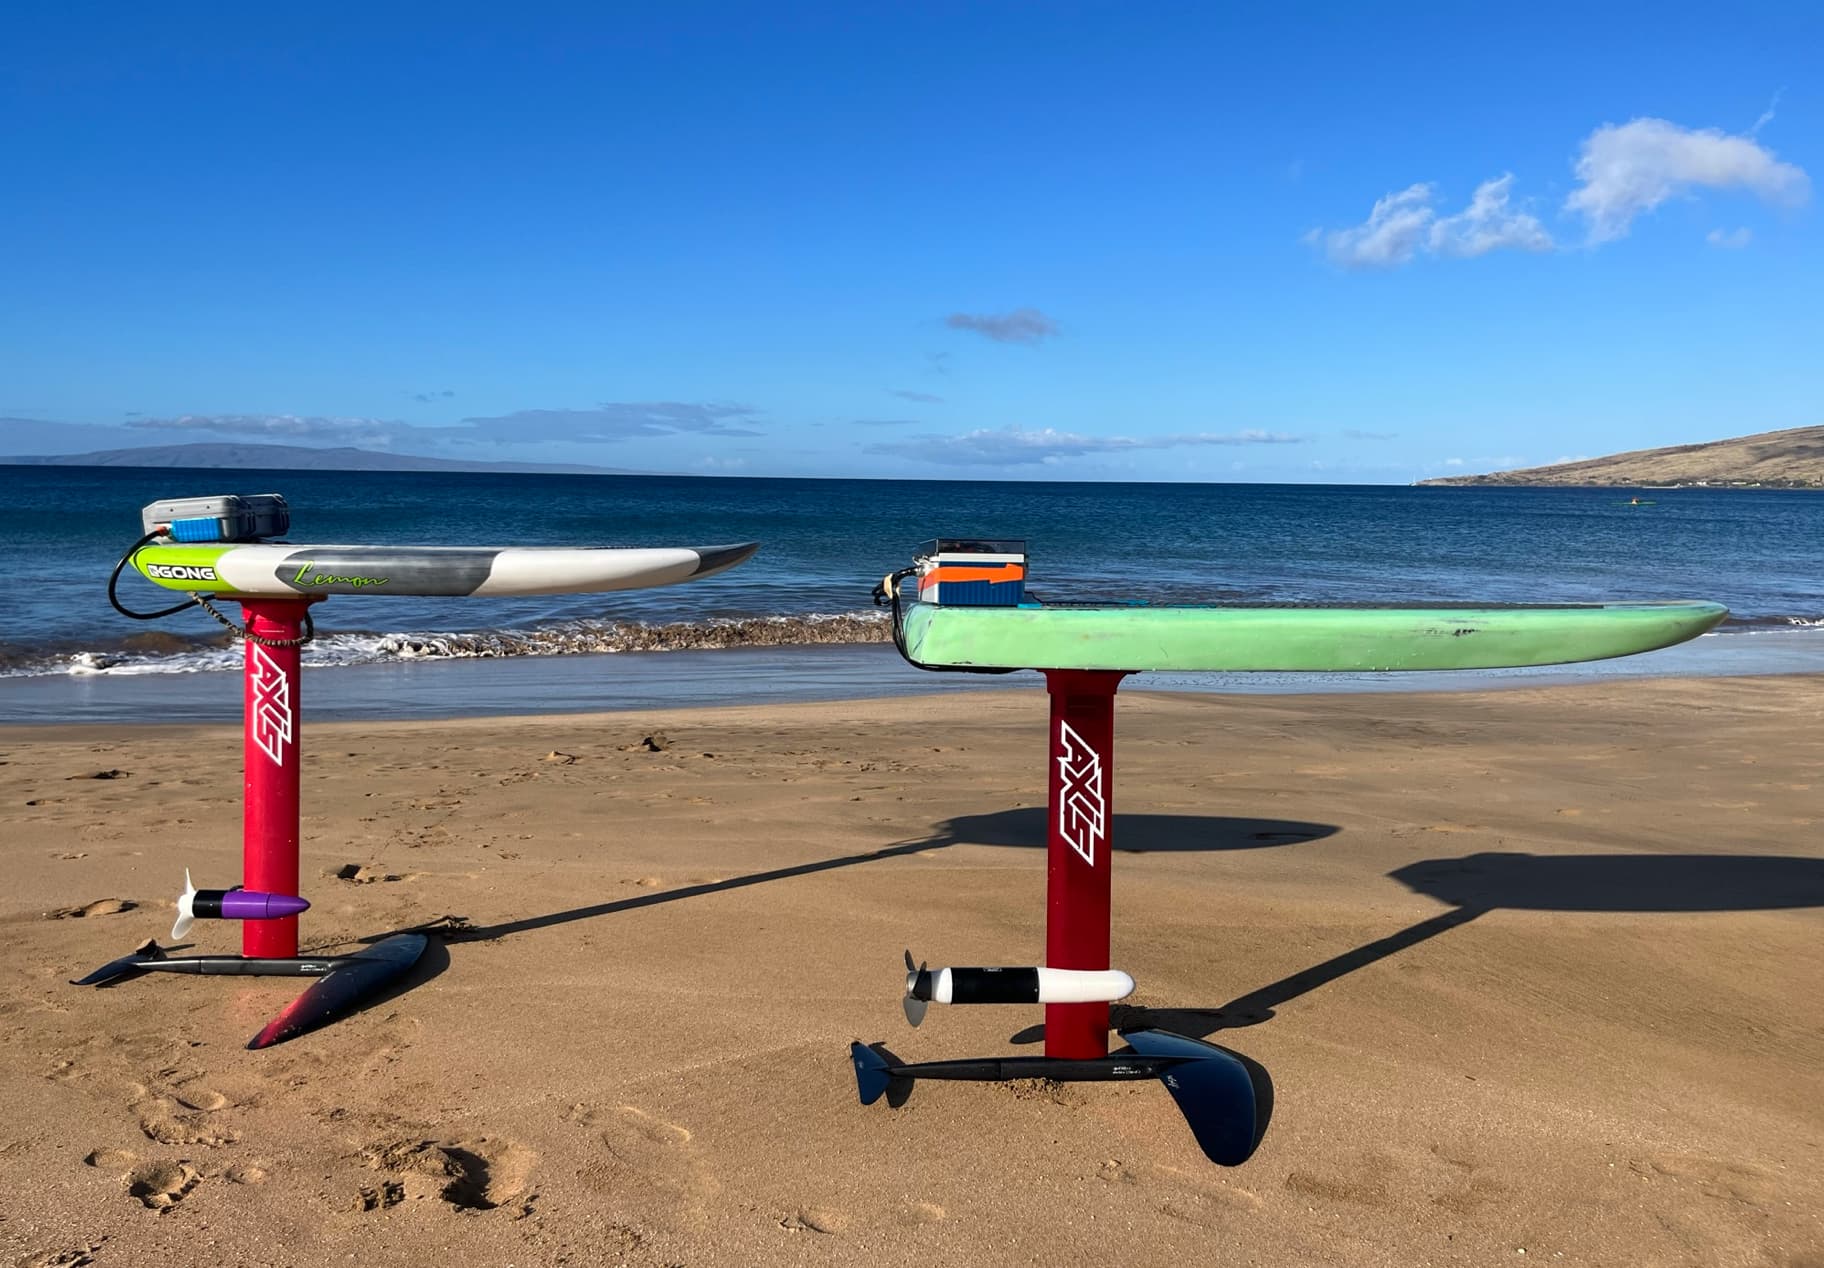
I just wanted to post a quick update since I made some more progress recently.
I have built a second setup so me and my girlfriend can efoil together.
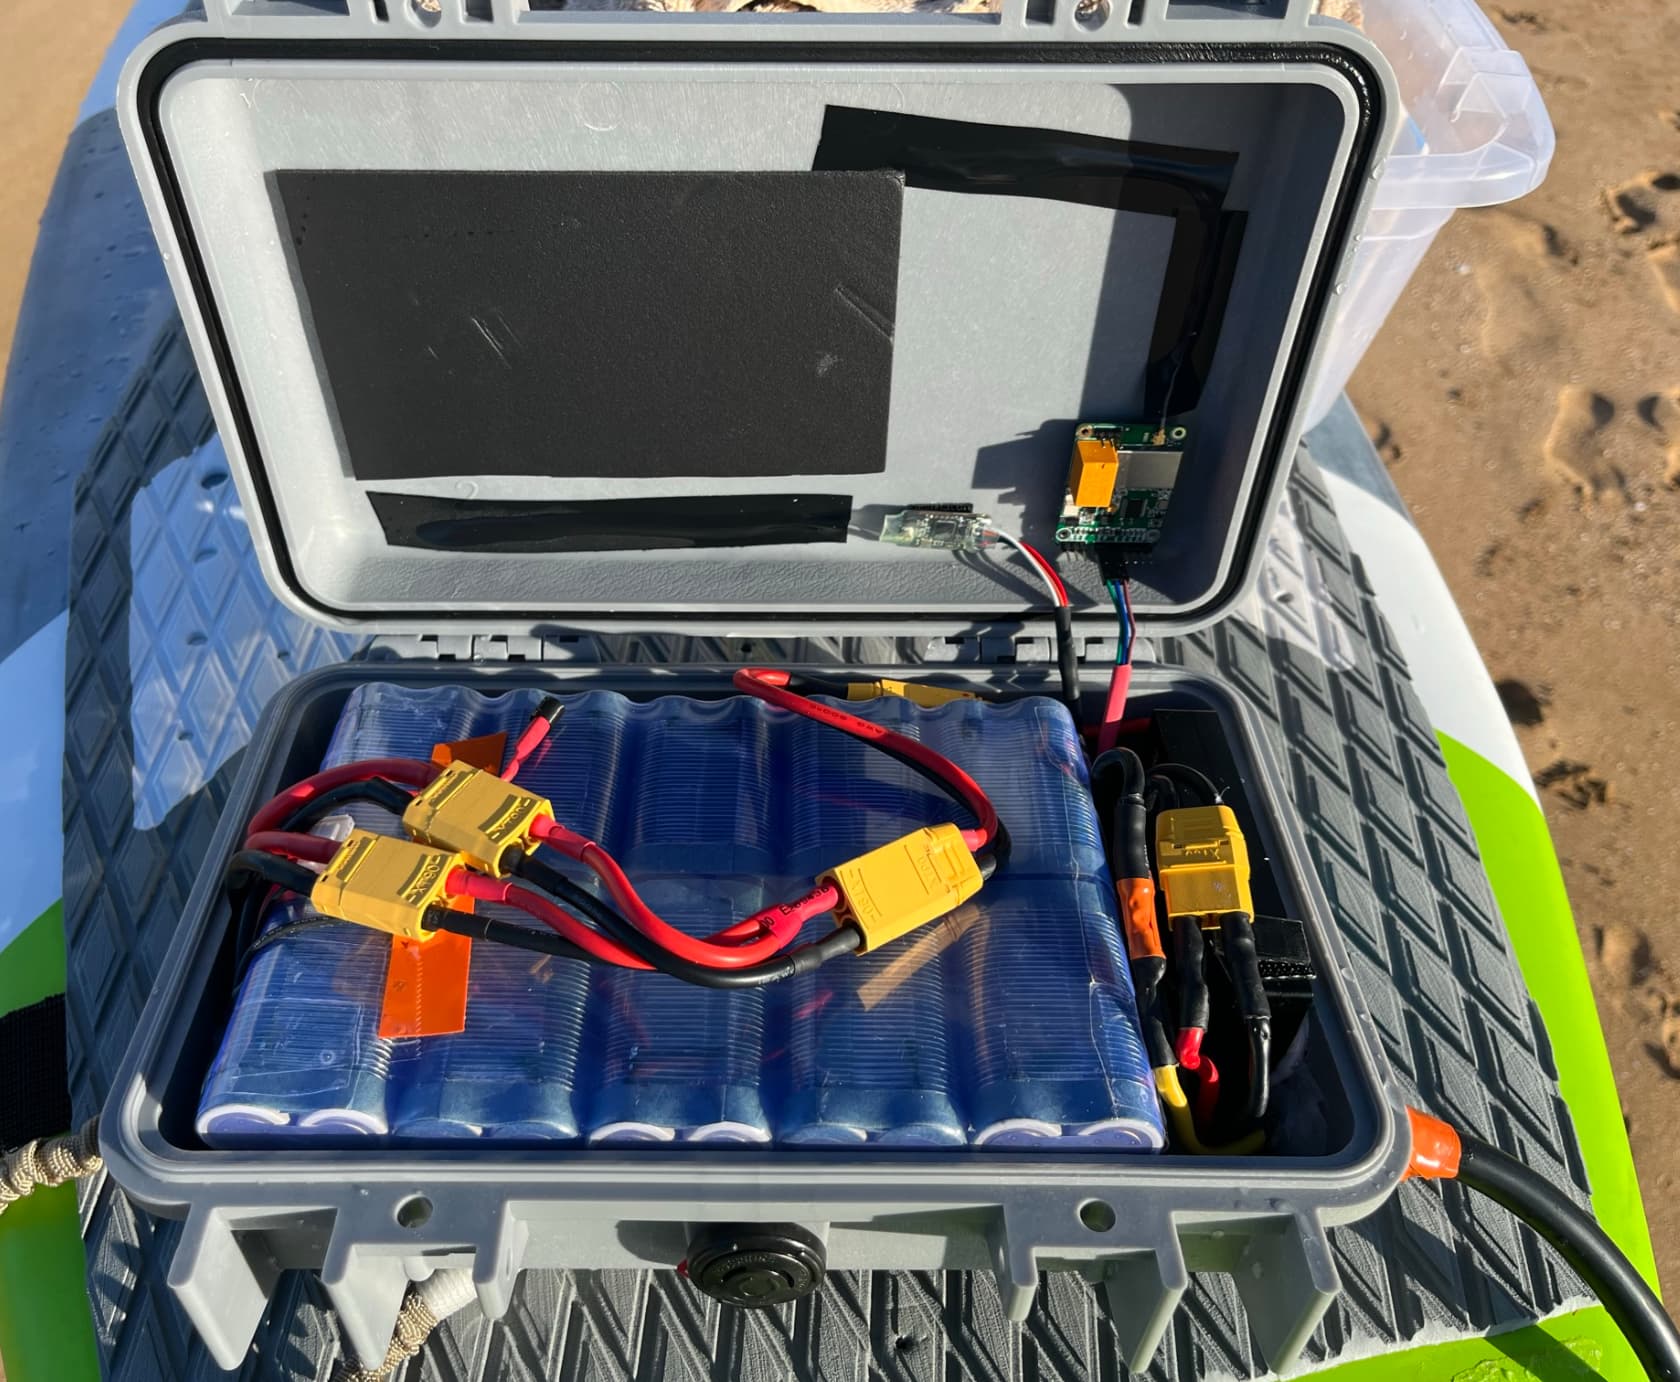
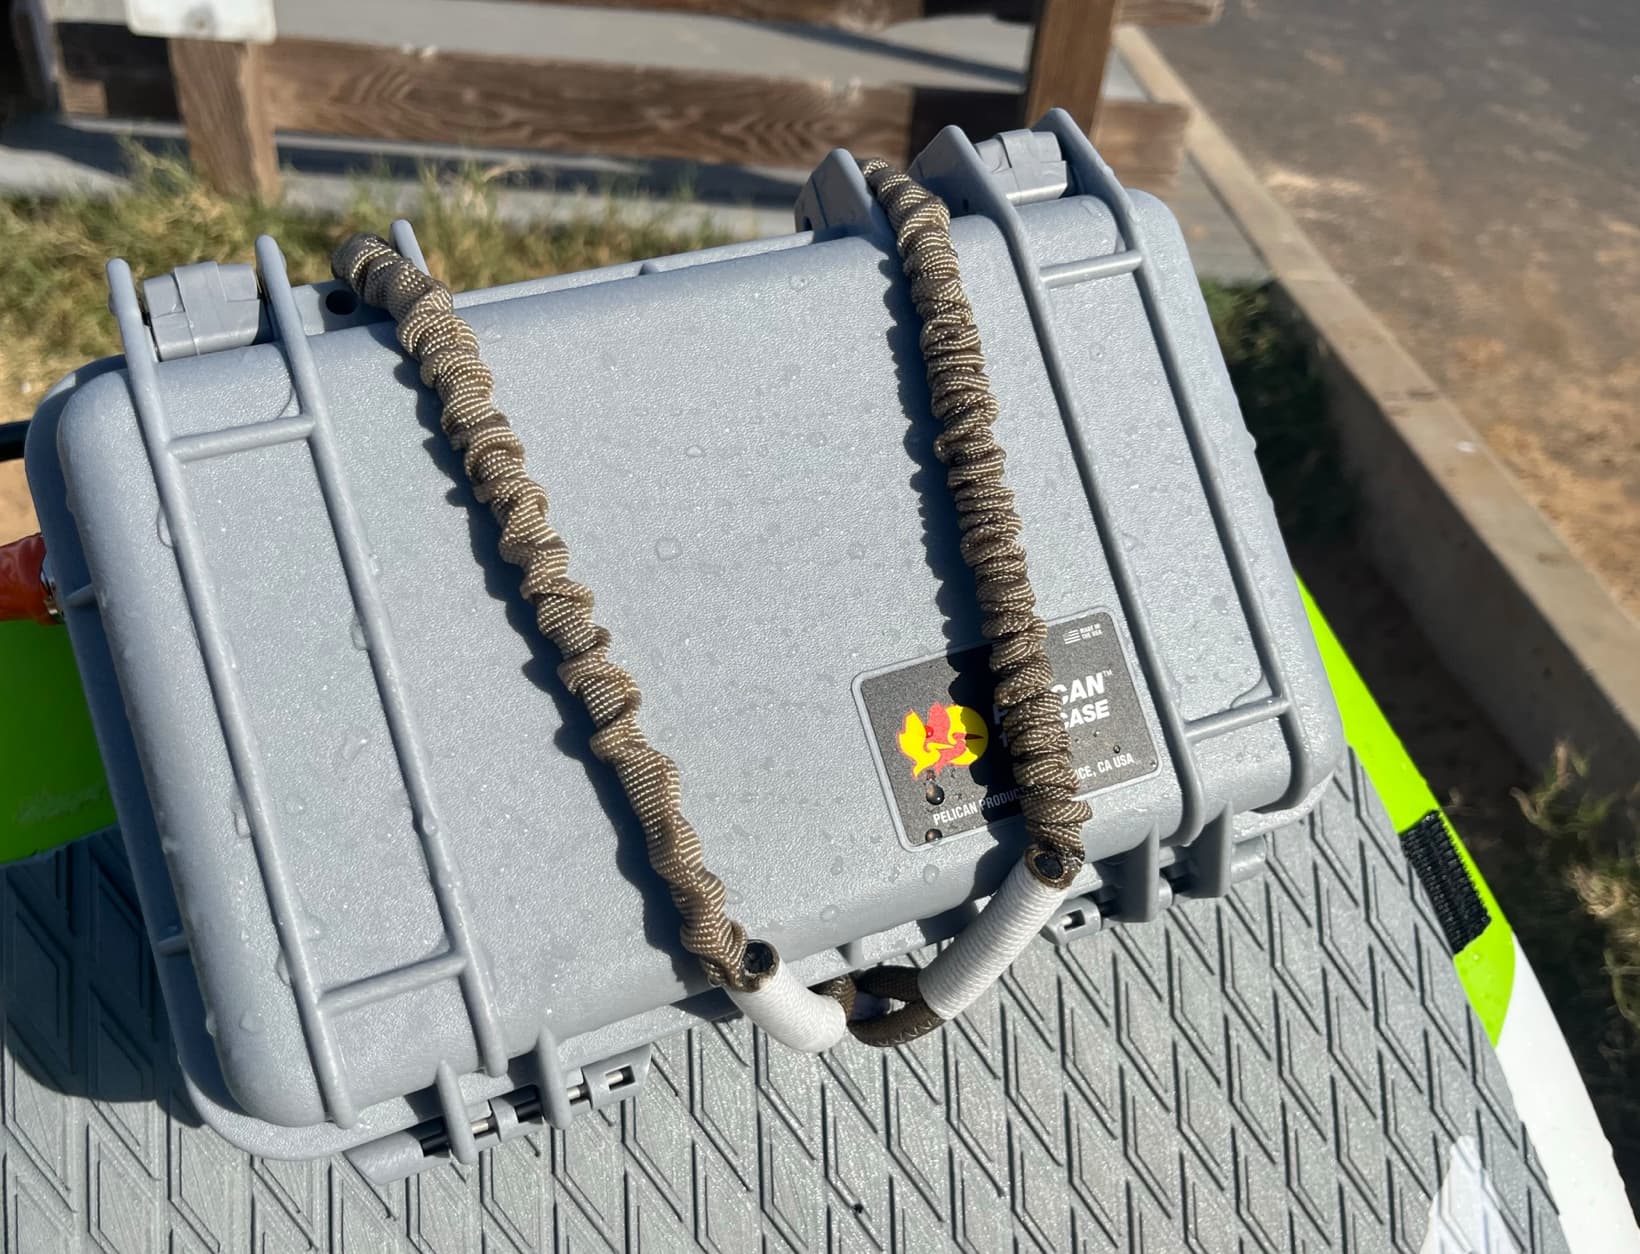
The new build (code name: Pocket Rocket) uses a Pelican 1170 case and fits two 10s2p batteries in parallel for a total capacity of around 600Wh. I’m using the same Flipsky 75100 VESC like in the previous build. The heat sink is smaller and runs hotter than the other build with the bigger heat sink. The temperature goes up to around 65 degrees C after riding for about 30 minutes - compared to around 45C with the big heat sink.
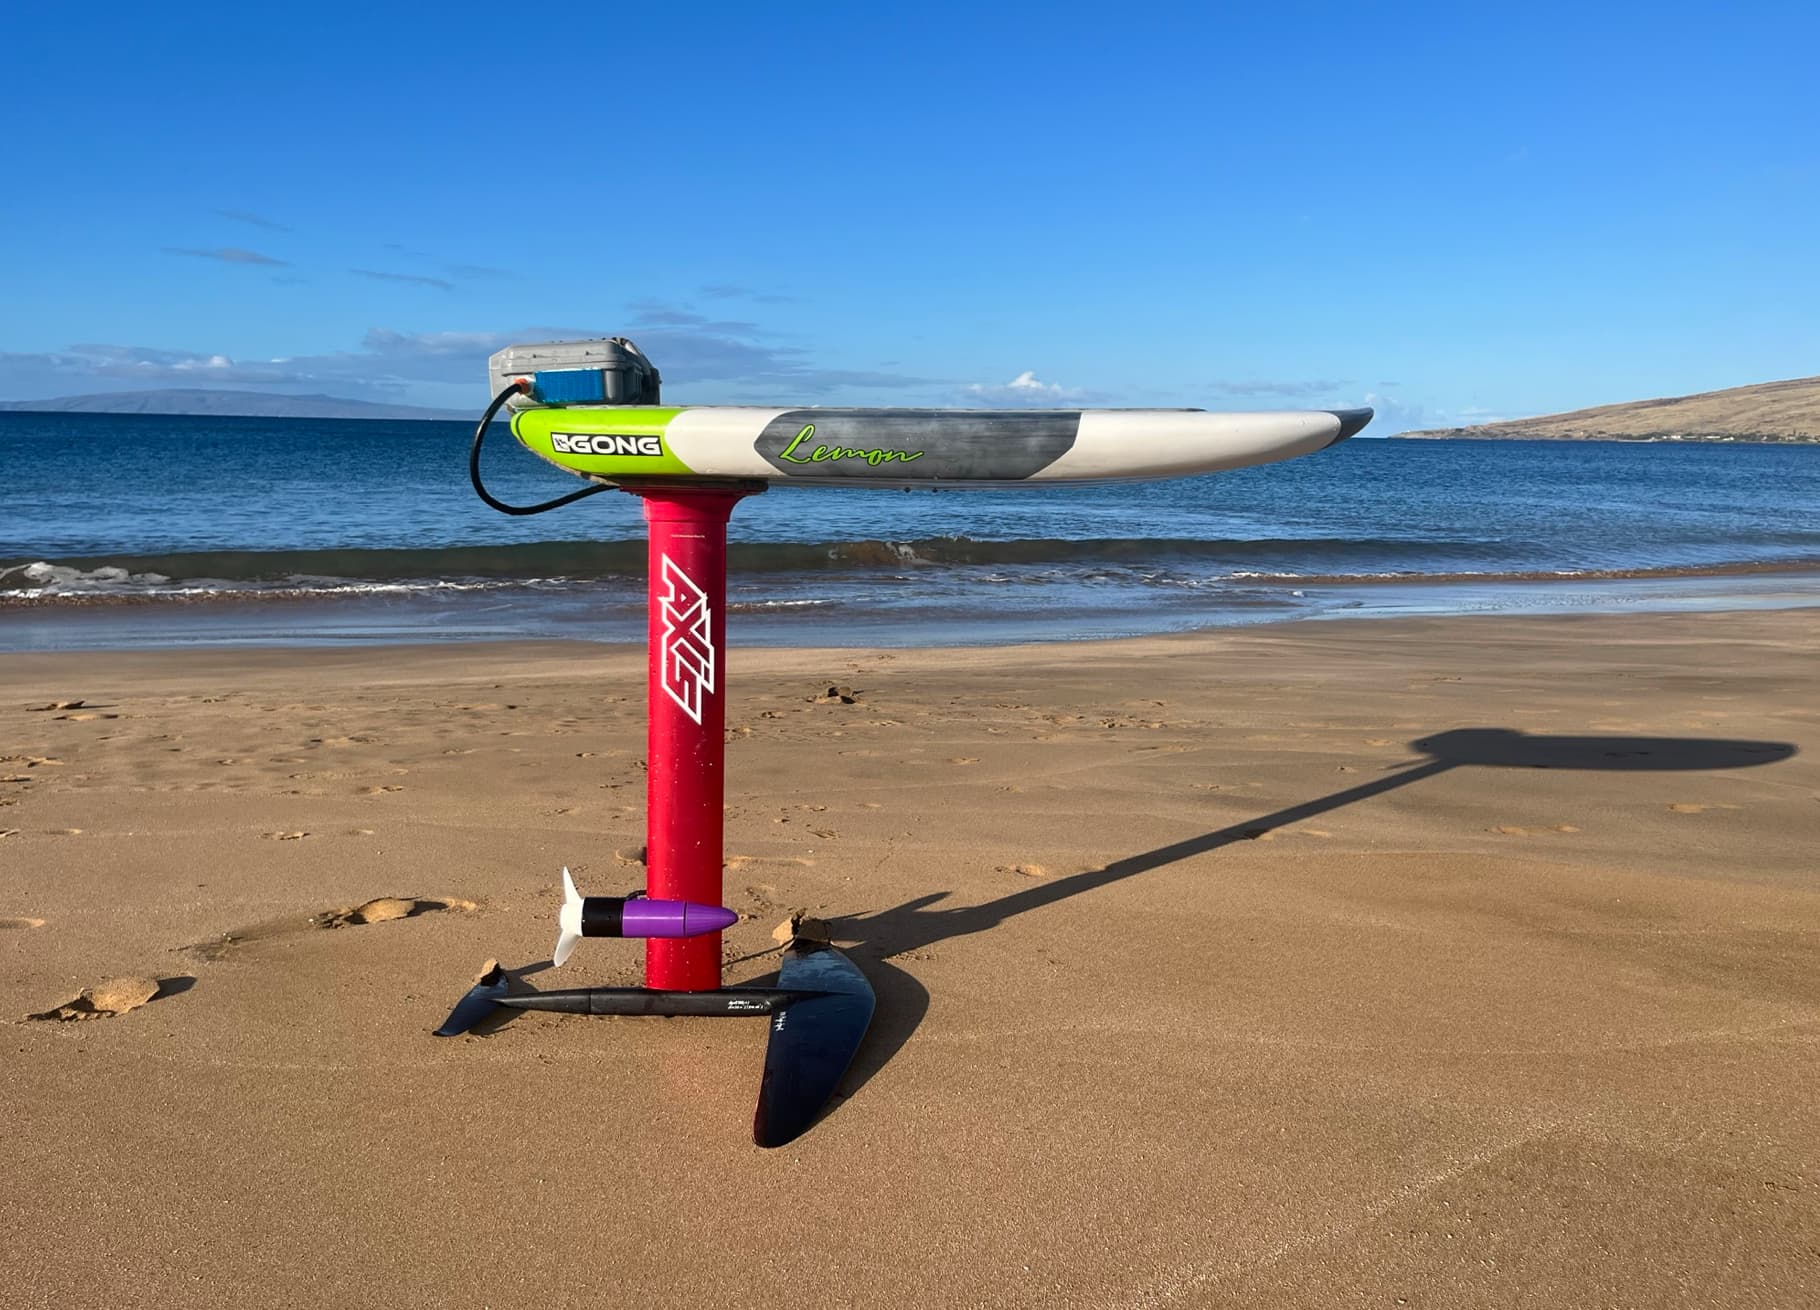
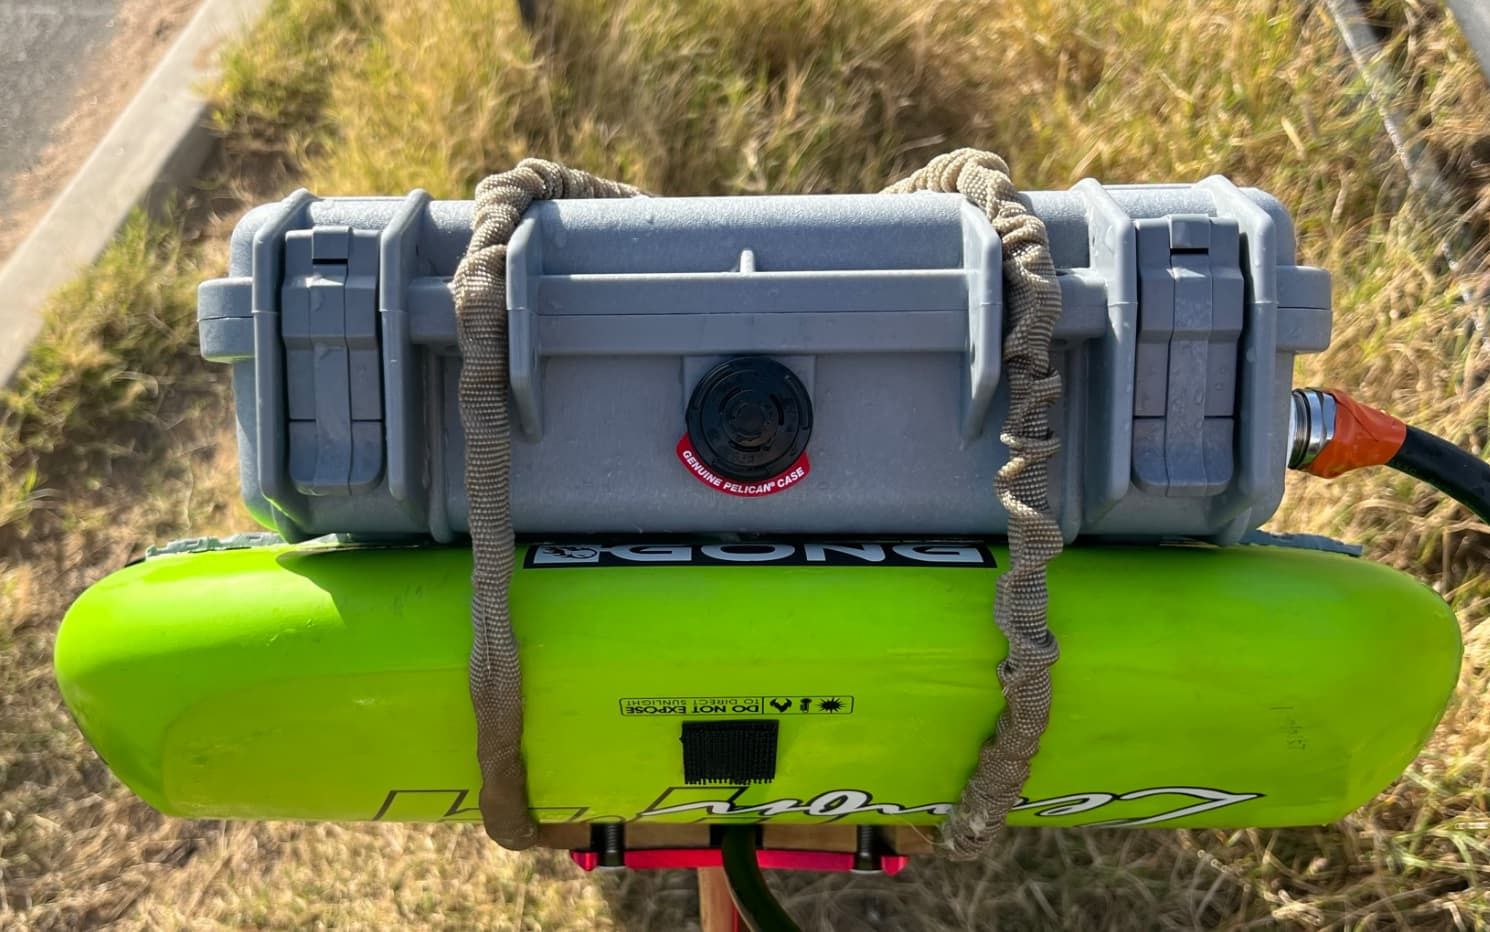
The board I’m currently using with the Pelican case is a 58L Gong Lemon. With my weight of around 175lbs, the water start is definitely a bit challenging but I think I just have to work on my technique.
I’m still experimenting with different mounting positions for the Pelican case. Currently it’s mounted on the rear of the board, but I think I’ll try a position between front and back foot so there is less swing weight in the back.
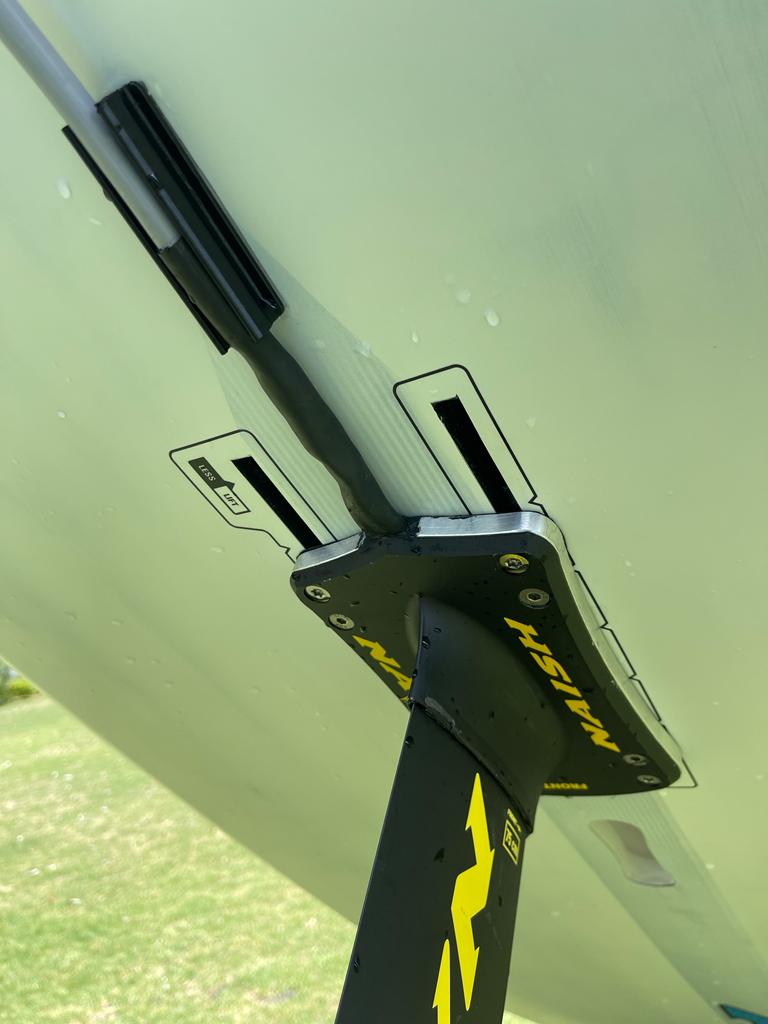
Great work t-dub! I’m about to do a build using the Axis mast. Would you be kind enough to detail how you brought the cable out through the mast and base plate where they exit under the board.
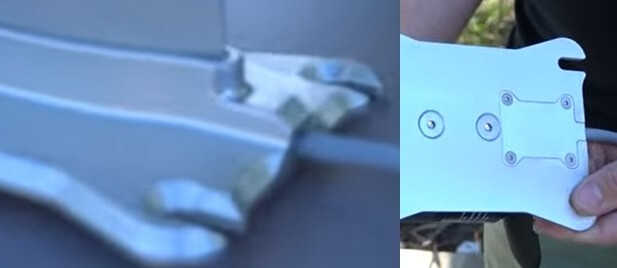
I recently did a build for a buddy with Naish gear and ended up using two aluminum 50 x 10mm plates shaped to match the outline of the base plate - left a cable width gap in the middle and printed a fill in block in the front. Bolted the plates on using the extra holes in the base. That technique seemed slightly less drastic than machining the base - certainly a little heavier though.
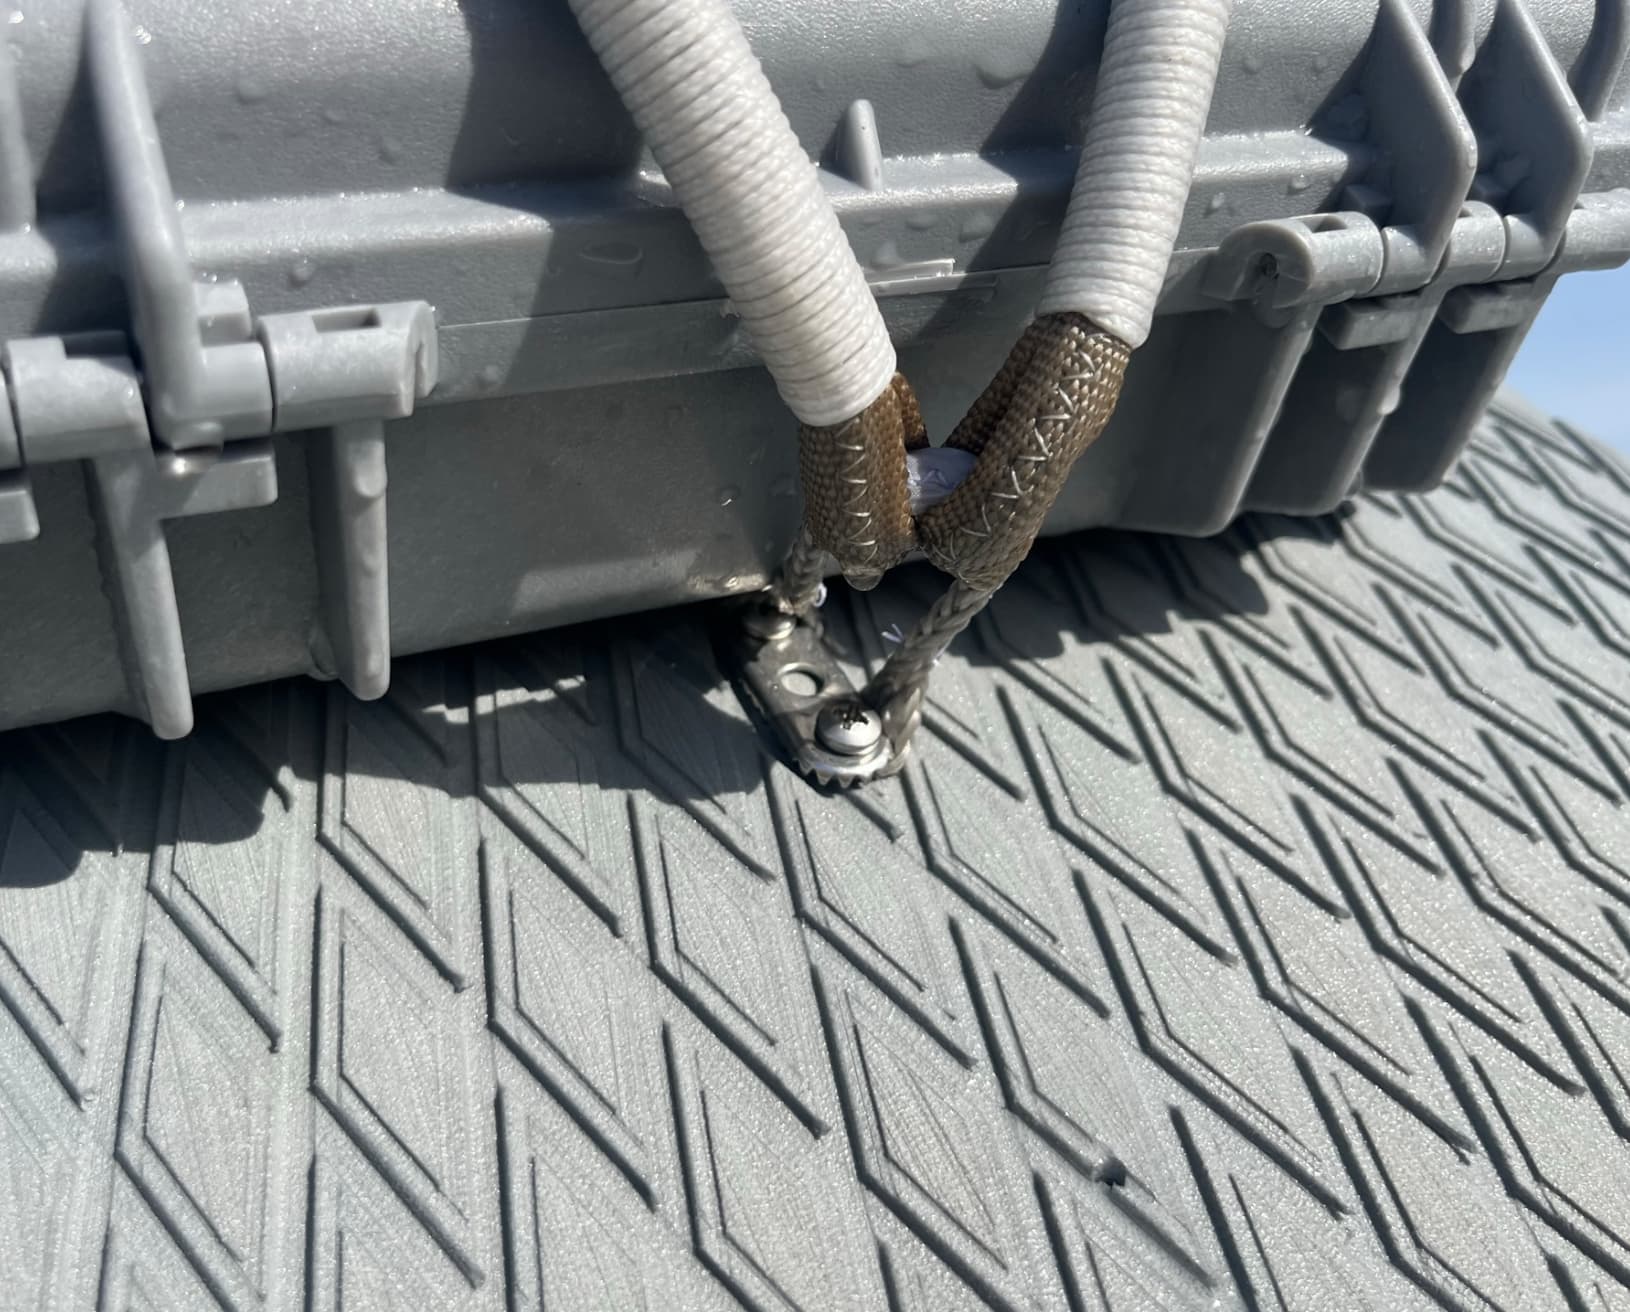
I am at a stage where I’m determining how I will mount the box to my board. You had mentioned before that you relied on the 3M product to hold it place but in this picture in the lower right corner it looks like there is a rubber strap. Is this an additional hold down you added?
my base plate adapter setup is similar to yours, but I used a piece of wood instead of an aluminum plate.
To get the cable out from the mast I had to drill a hole into the Axis baseplate. Then I traced the outline of the baseplate on a piece of wood that had about the same thickness as the motor cable. Then I cut the wood to the same shape as the baseplate using a jigsaw.
It’s a very low tech solution, but works great so far.
Also, the Axis mast has two plastic pieces glued on the inside channel for waterproofing. You can remove those by heating up the mast/adhesive and then hammering them out using a piece of metal that fits into the inner channel.
Hey Foilguy!
I’m still using the 3M Dual Lock for the initial build with the big board and it has been working really well!
The reason I’m using bungee/rubber straps on the small board is that I haven’t really decided on the final mounting position yet. Also, the Pelican Case is not flat on the bottom, so I can’t just stick on the 3M tape there like on the other box.
I have also bought a FR 7" prop for my 6384/10S efoil setup on a Gong Hipe 6’5, mainly to get more speed and efficiency than the 3D printed 2 blade I use (max 30km/h), which I will test in a few weeks now that winter is over, although not sure if it is too big for that motor and my weight at 100kg+. One thing that worries me is the knife sharp edges of this prop which will cause a nasty cut on any contact even not rotating. If it works on my setup, I will blunt this edge, and only use it in flat conditions. Since Maui is rarely flat, is this something you have considered as a risk?
Concerning the FR 7", have you any idea of the sweetspot speed range for this prop, in terms of efficiency? I know it is good for 50 km/h on 13/14S, so maybe not ideal for cruising speeds below 25 km/h?
I also have a somewhat domed board surface that doesn’t mate well with box. I have lots of strap inserts so attaching hold downs is not an issue.
Considering making a fibreglass platform to make things fit better. Curved on lower surface to fit board and bolted into footstrap inserts, shaped upper surface to fit box on snugly and either use 3M and/or straps to keep it in place. Removable if I want to use the board without the motor.

 I am increasingly more convinced that it is the right thing to do.