Hi!
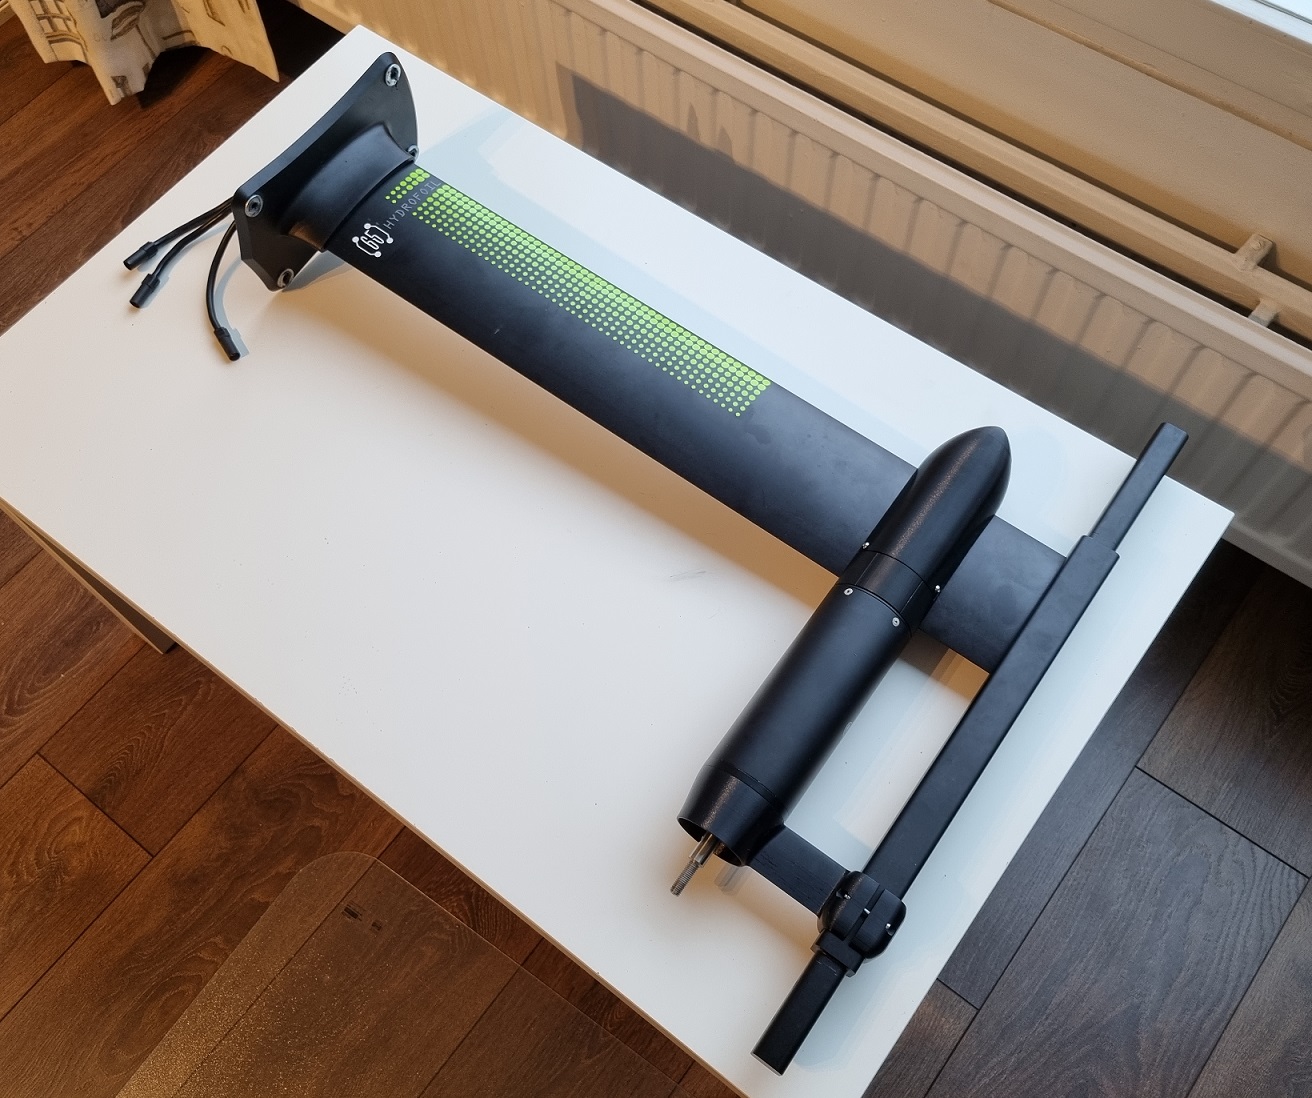
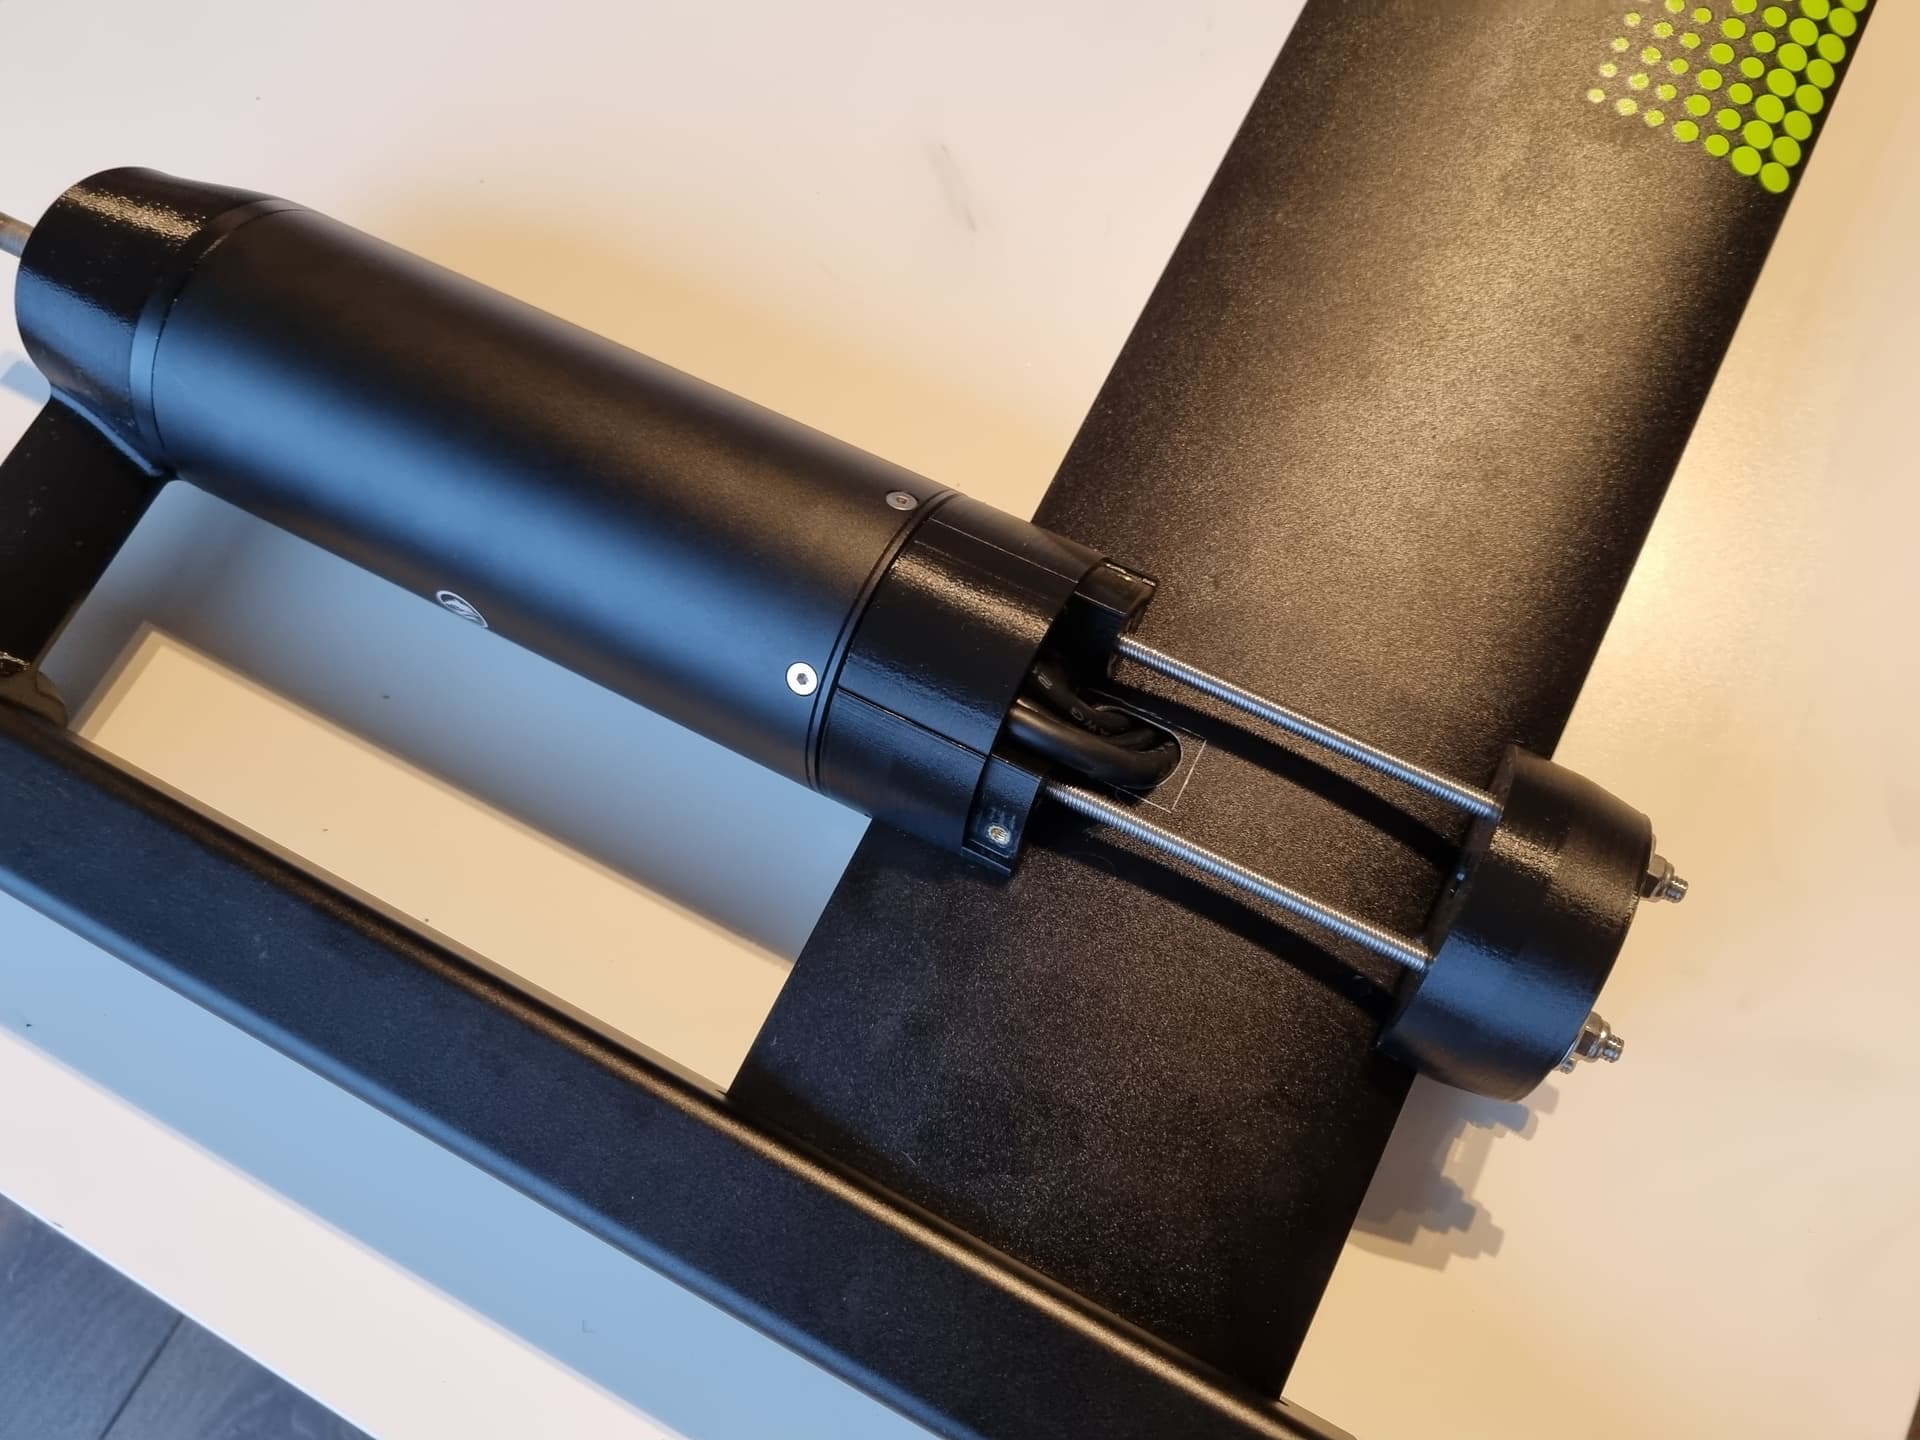
I would like to share my FS65161 motor mount for the Gong V1 mast, that I created for my own eFoil build. This motor mount can be assembled without removing the motor wires from the mast. It supports a few additional features, such as water cooling, reinforcements and ducts. More about those in the second post.
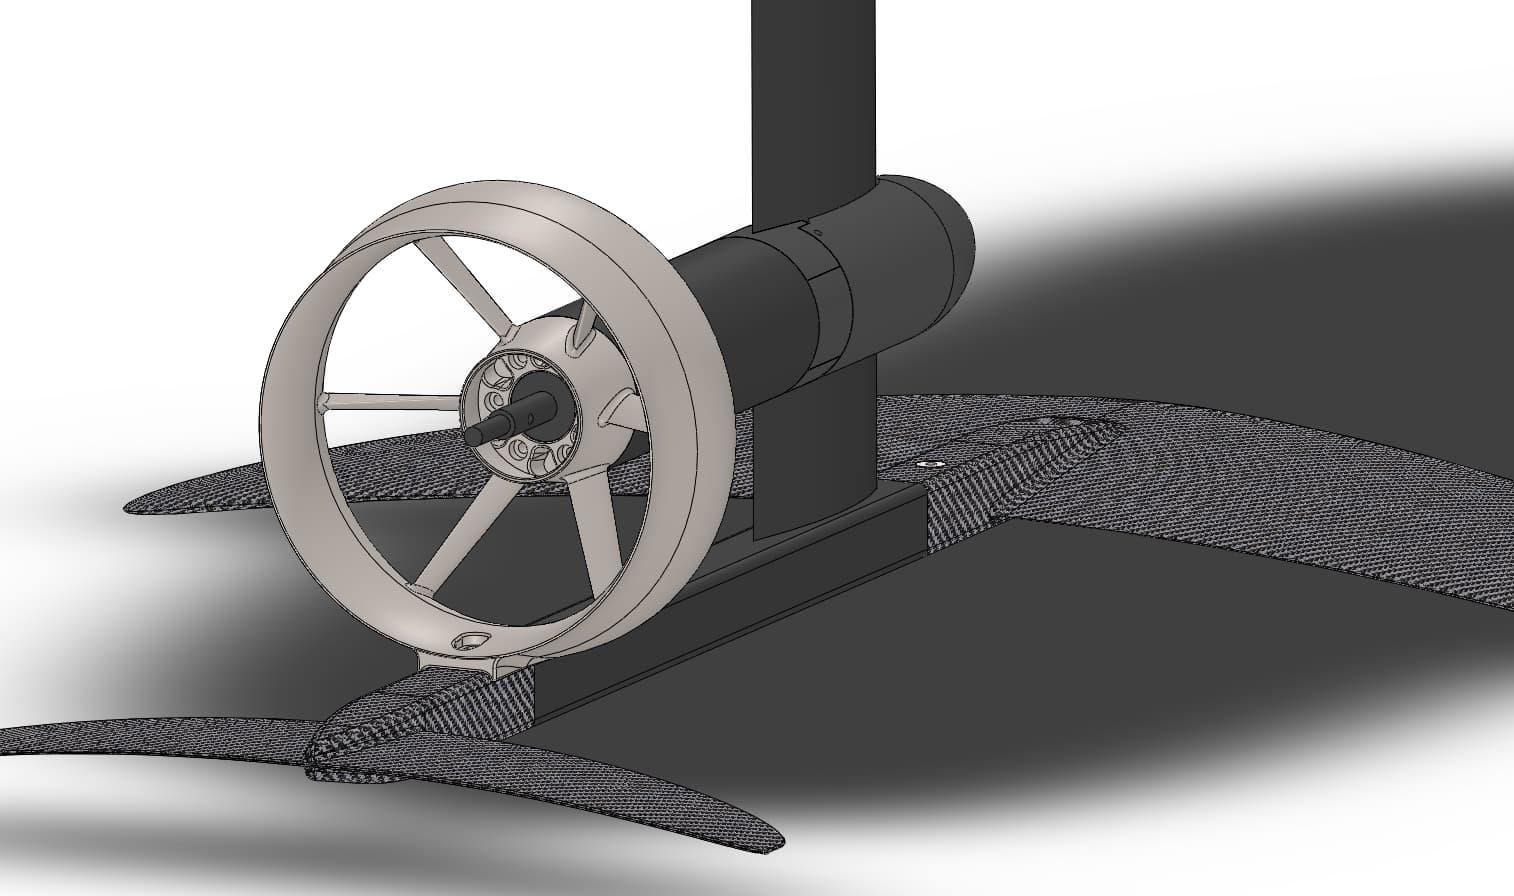
I have been running this base setup for the past summer, and it has worked great! It is absolutely solid, with excellent efficiency thanks to the smooth profile. I am using a 6" FR prop with it.

Here are the assembly instructions for anyone who would like to try it!
Download
The 3D print STL files and the reinforcement plate DXF are available here:
Thingiverse FS65161 Gong V1 mast motor mount
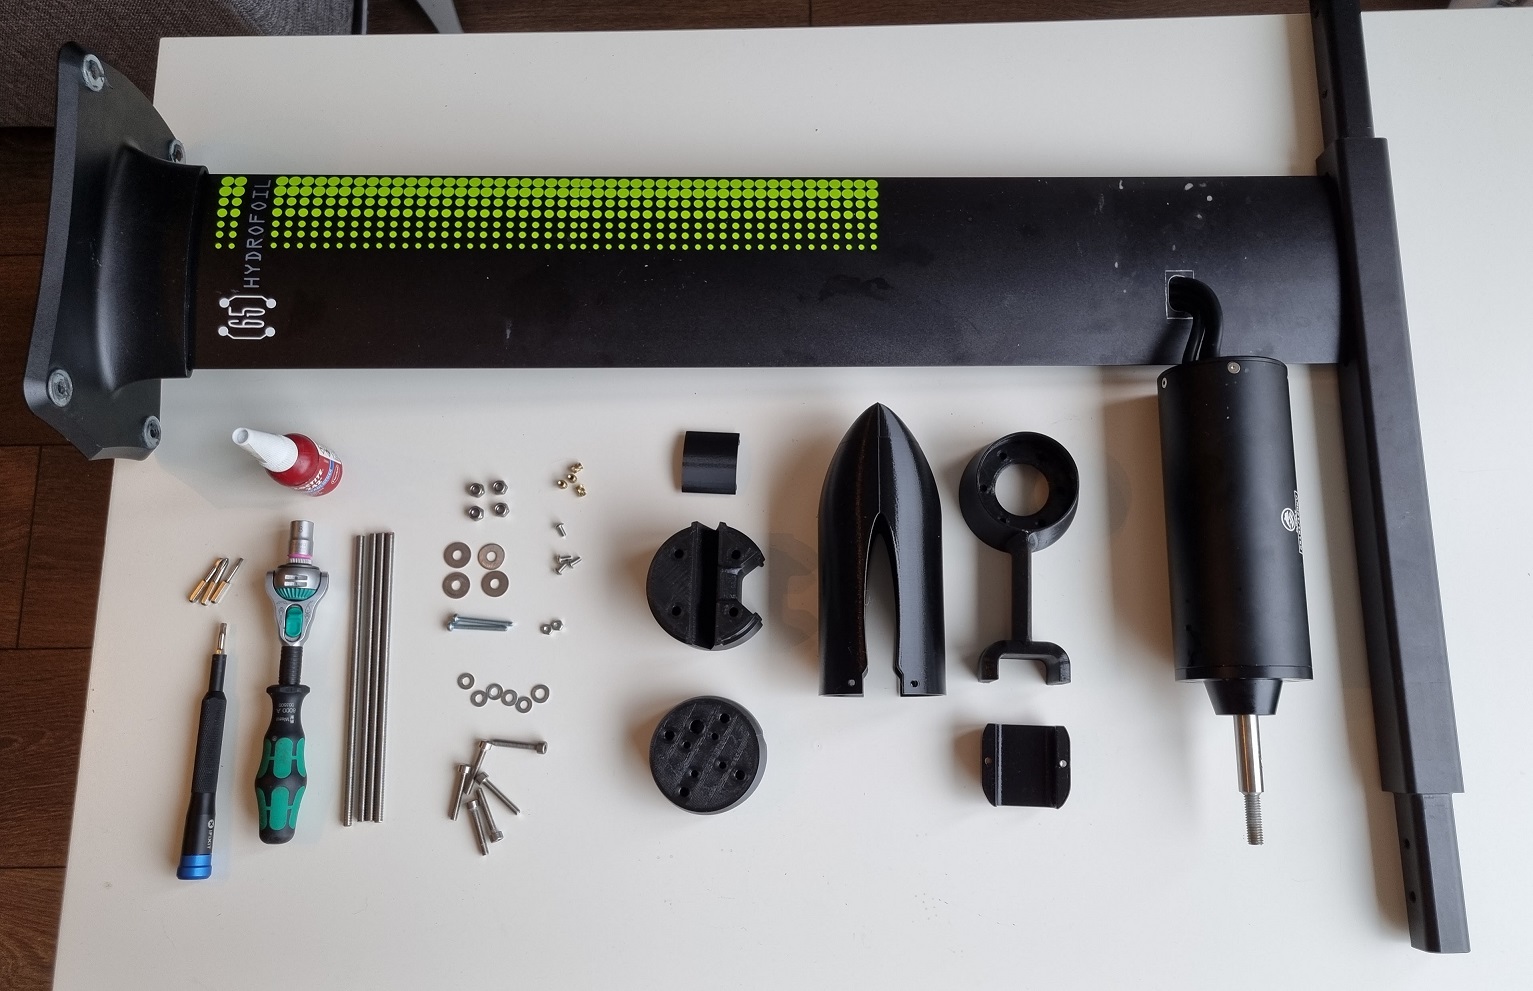
BOM
3D printed parts
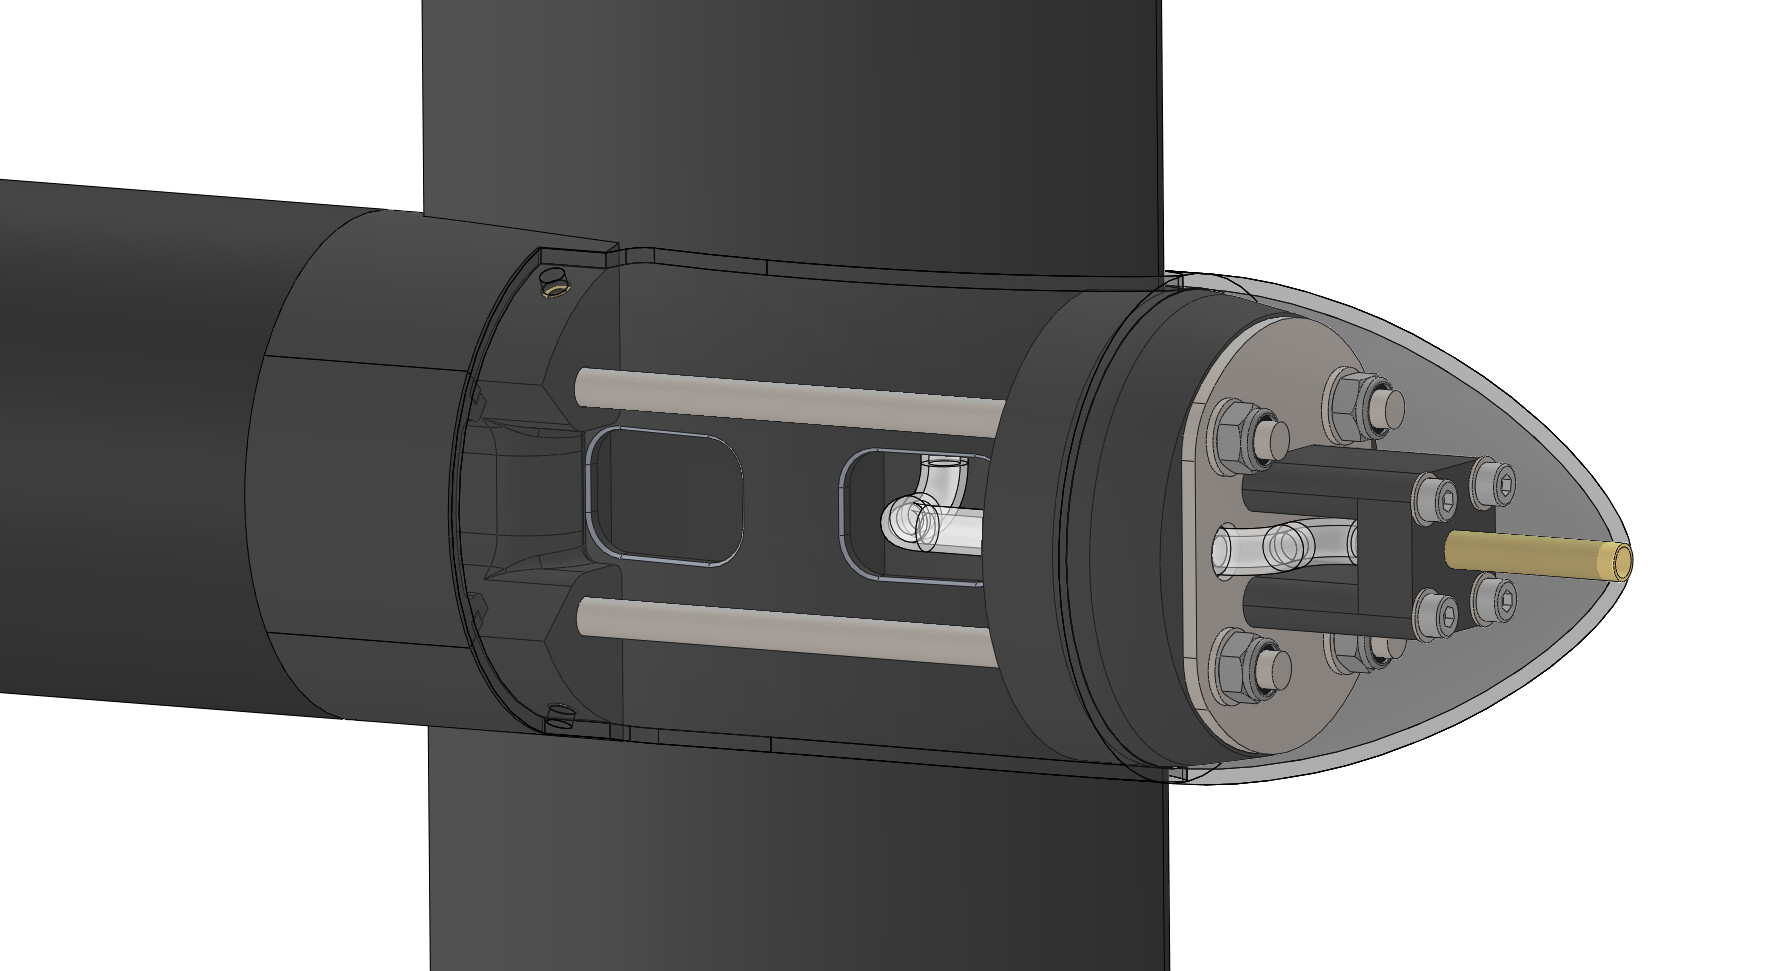
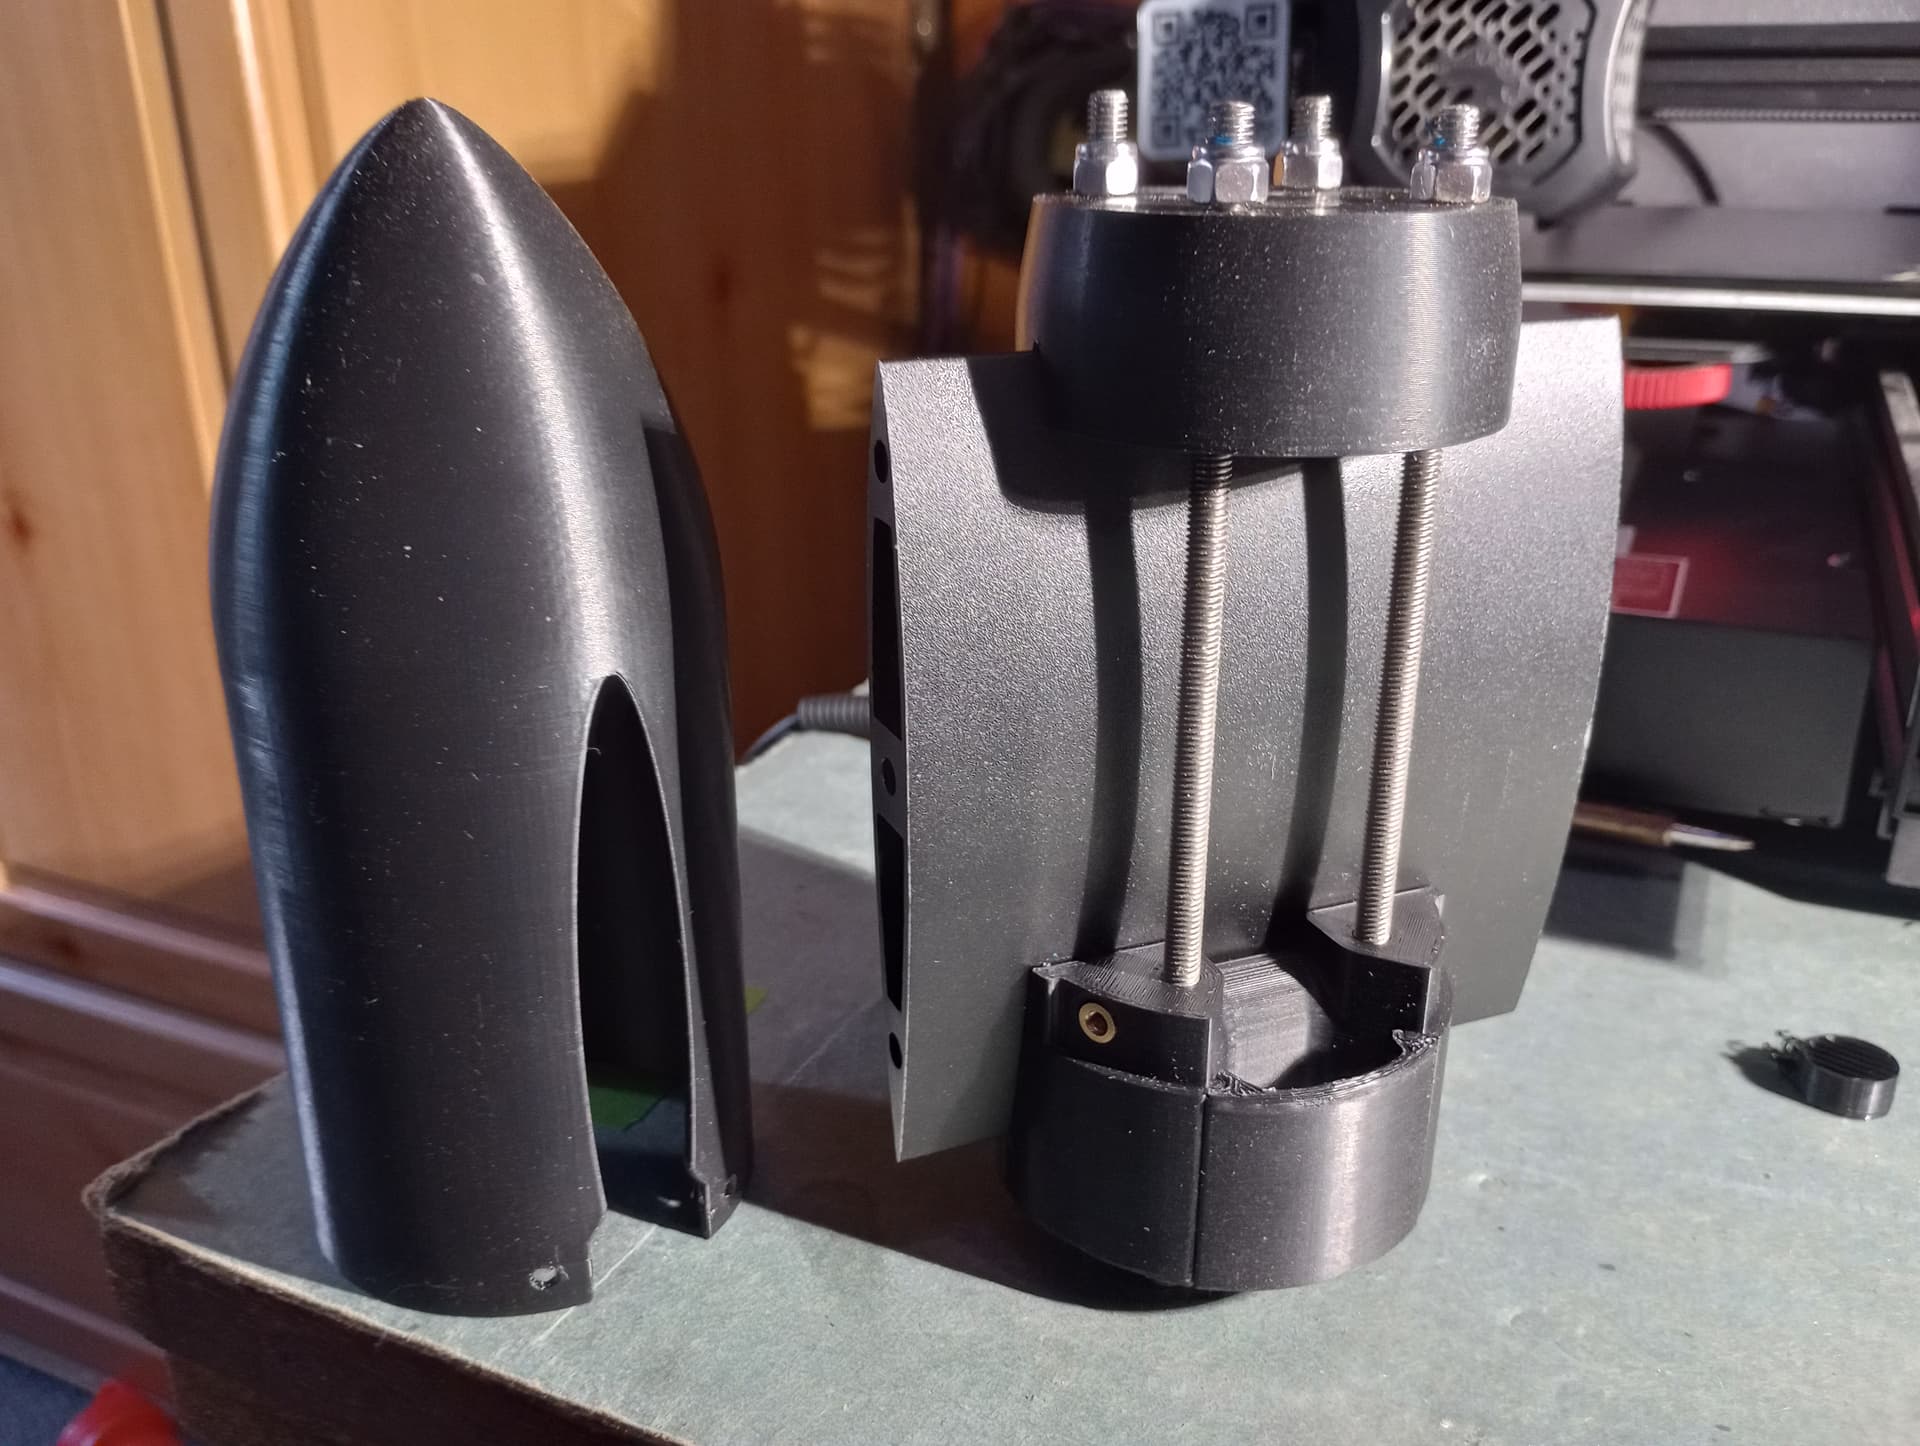
- 1x Nose cone
- 1x Fore mast clamp
- 1x Aft mast clamp
- 1x Tail support
- 1x Tail support clamp (tail support stl has this included)
Hardware for the motor foil mount
- 4x M5 nylock nut
- 4x M5 threaded rod cut to 155mm. Clean the threads with an M5 die or a needle file. Stainless likes to seize if it’s even a little bit off spec
- 4x M5 fender washers
- 4x M3x6 button head socket cap screws
- 4x M3 brass thread insert
Hardware for the motor back support
- 6x M4x25 socket head cap screws
- 6x M4 washers
- 2x M3x30 socket cap head screws
- 2x M3 nuts
Tools
- 8mm socket and driver, preferably with a straight handle to prevent overtightening the mount
- 3mm, 2.5mm and 2mm hex drivers
- Locktite 242 or equivalent
- Soldering iron (for threaded inserts)
- Needle file/utility knife/similar debur tool
Instructions
-
All of the screws should be stainless. The prints should be made from PETG, I used 0.25mm layer height, 5 perimeters, 3 top and bottom layers, 40% triangular infill. You can sand and paint the prints to optimize the water flow efficiency.
-
Make a cutout in the mast for the wires. Wires should be routed through the rear channel in the mast. Mock up with the foil mount parts to find the correct height for the cutout. Route the wires through the mast now or just before installing the nose cone. I prefer the latter. However, I am upgrading this motor mount for myself so I had the wires already routed at this point.
-
Overview
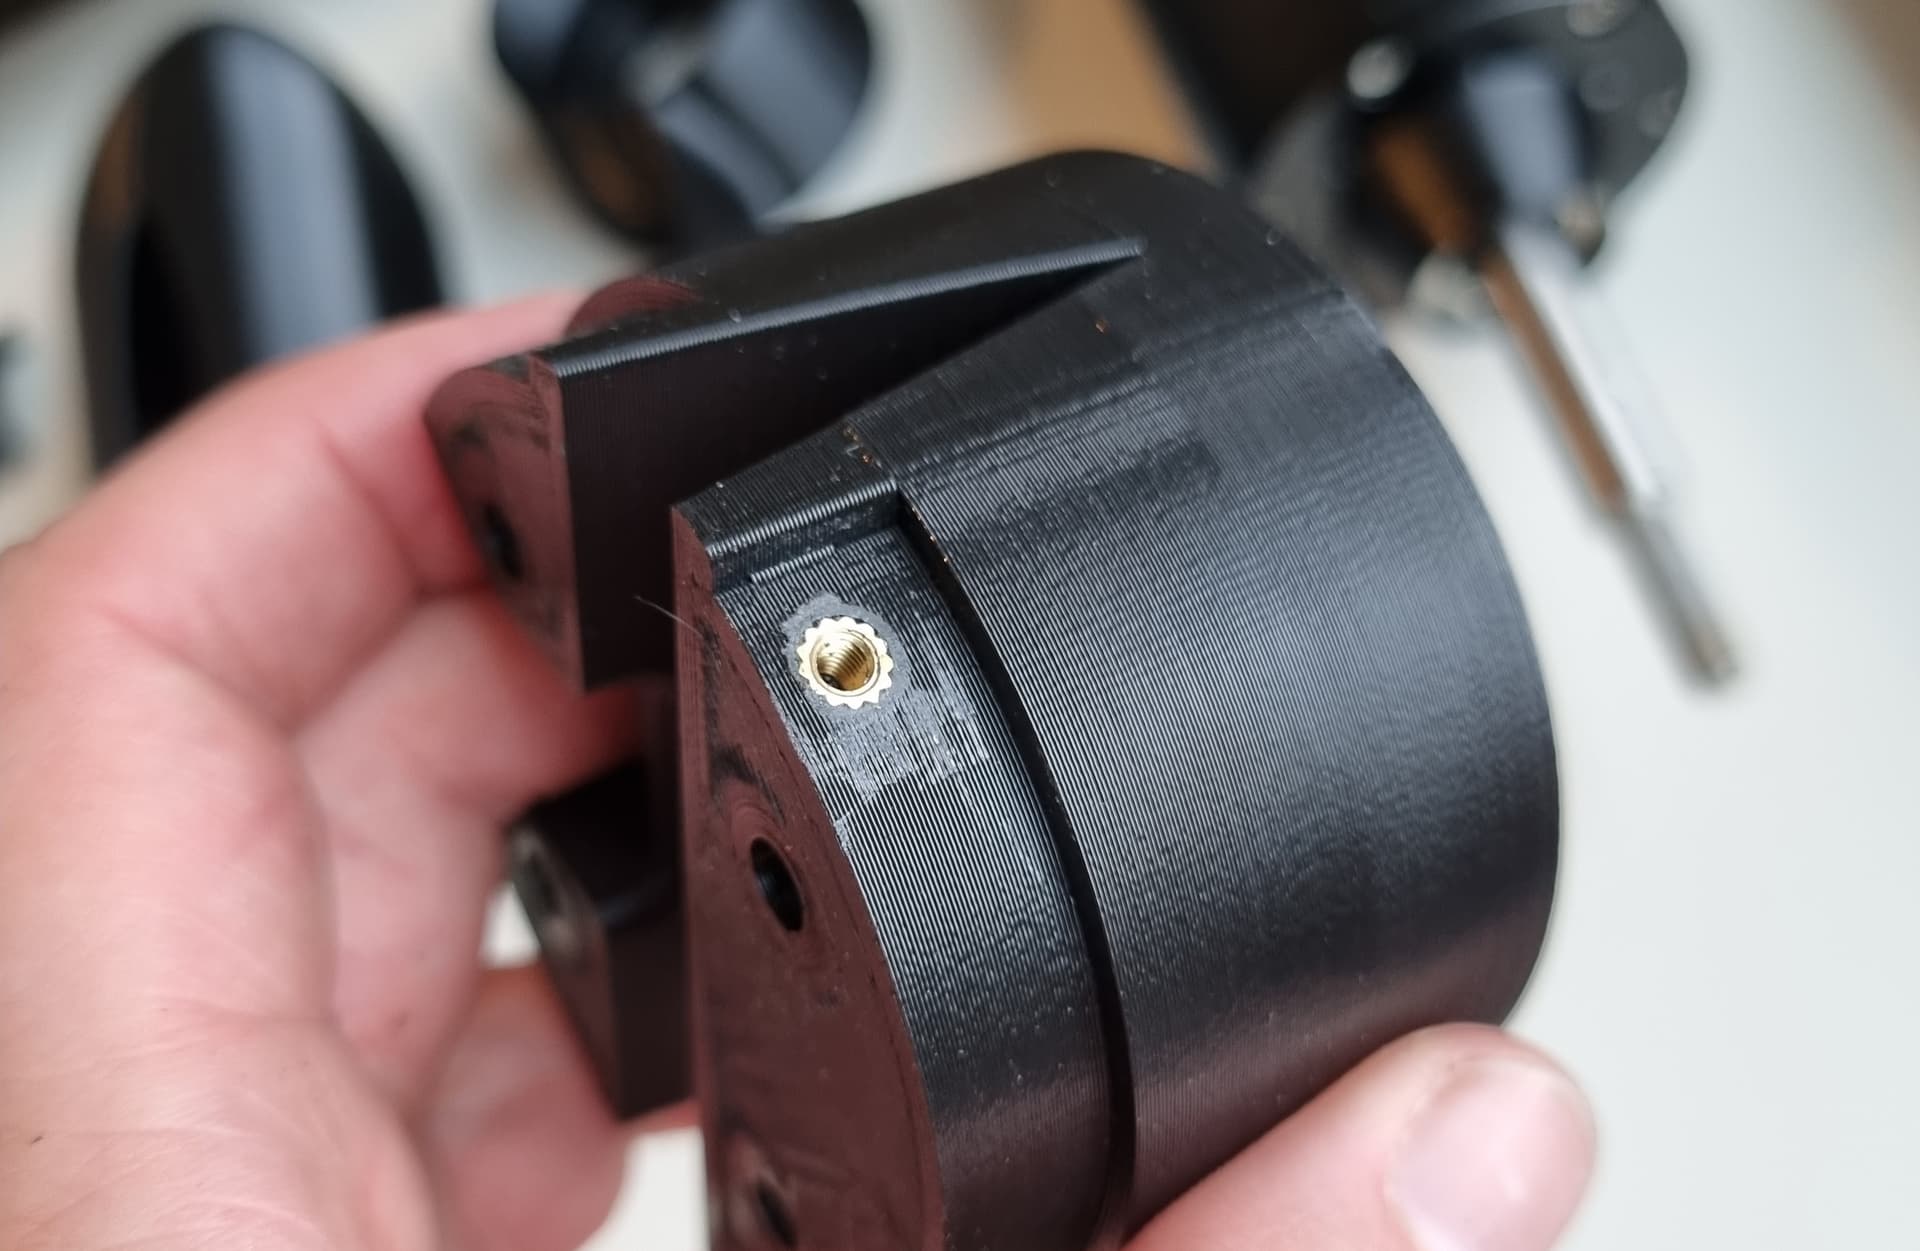
- Install the threaded inserts into the aft mast clamp. If you have an adjustable temp soldering iron, I prefer about 200c-250c. Insert installation often lifts a burr. Trim with a utility knife or a needle file.

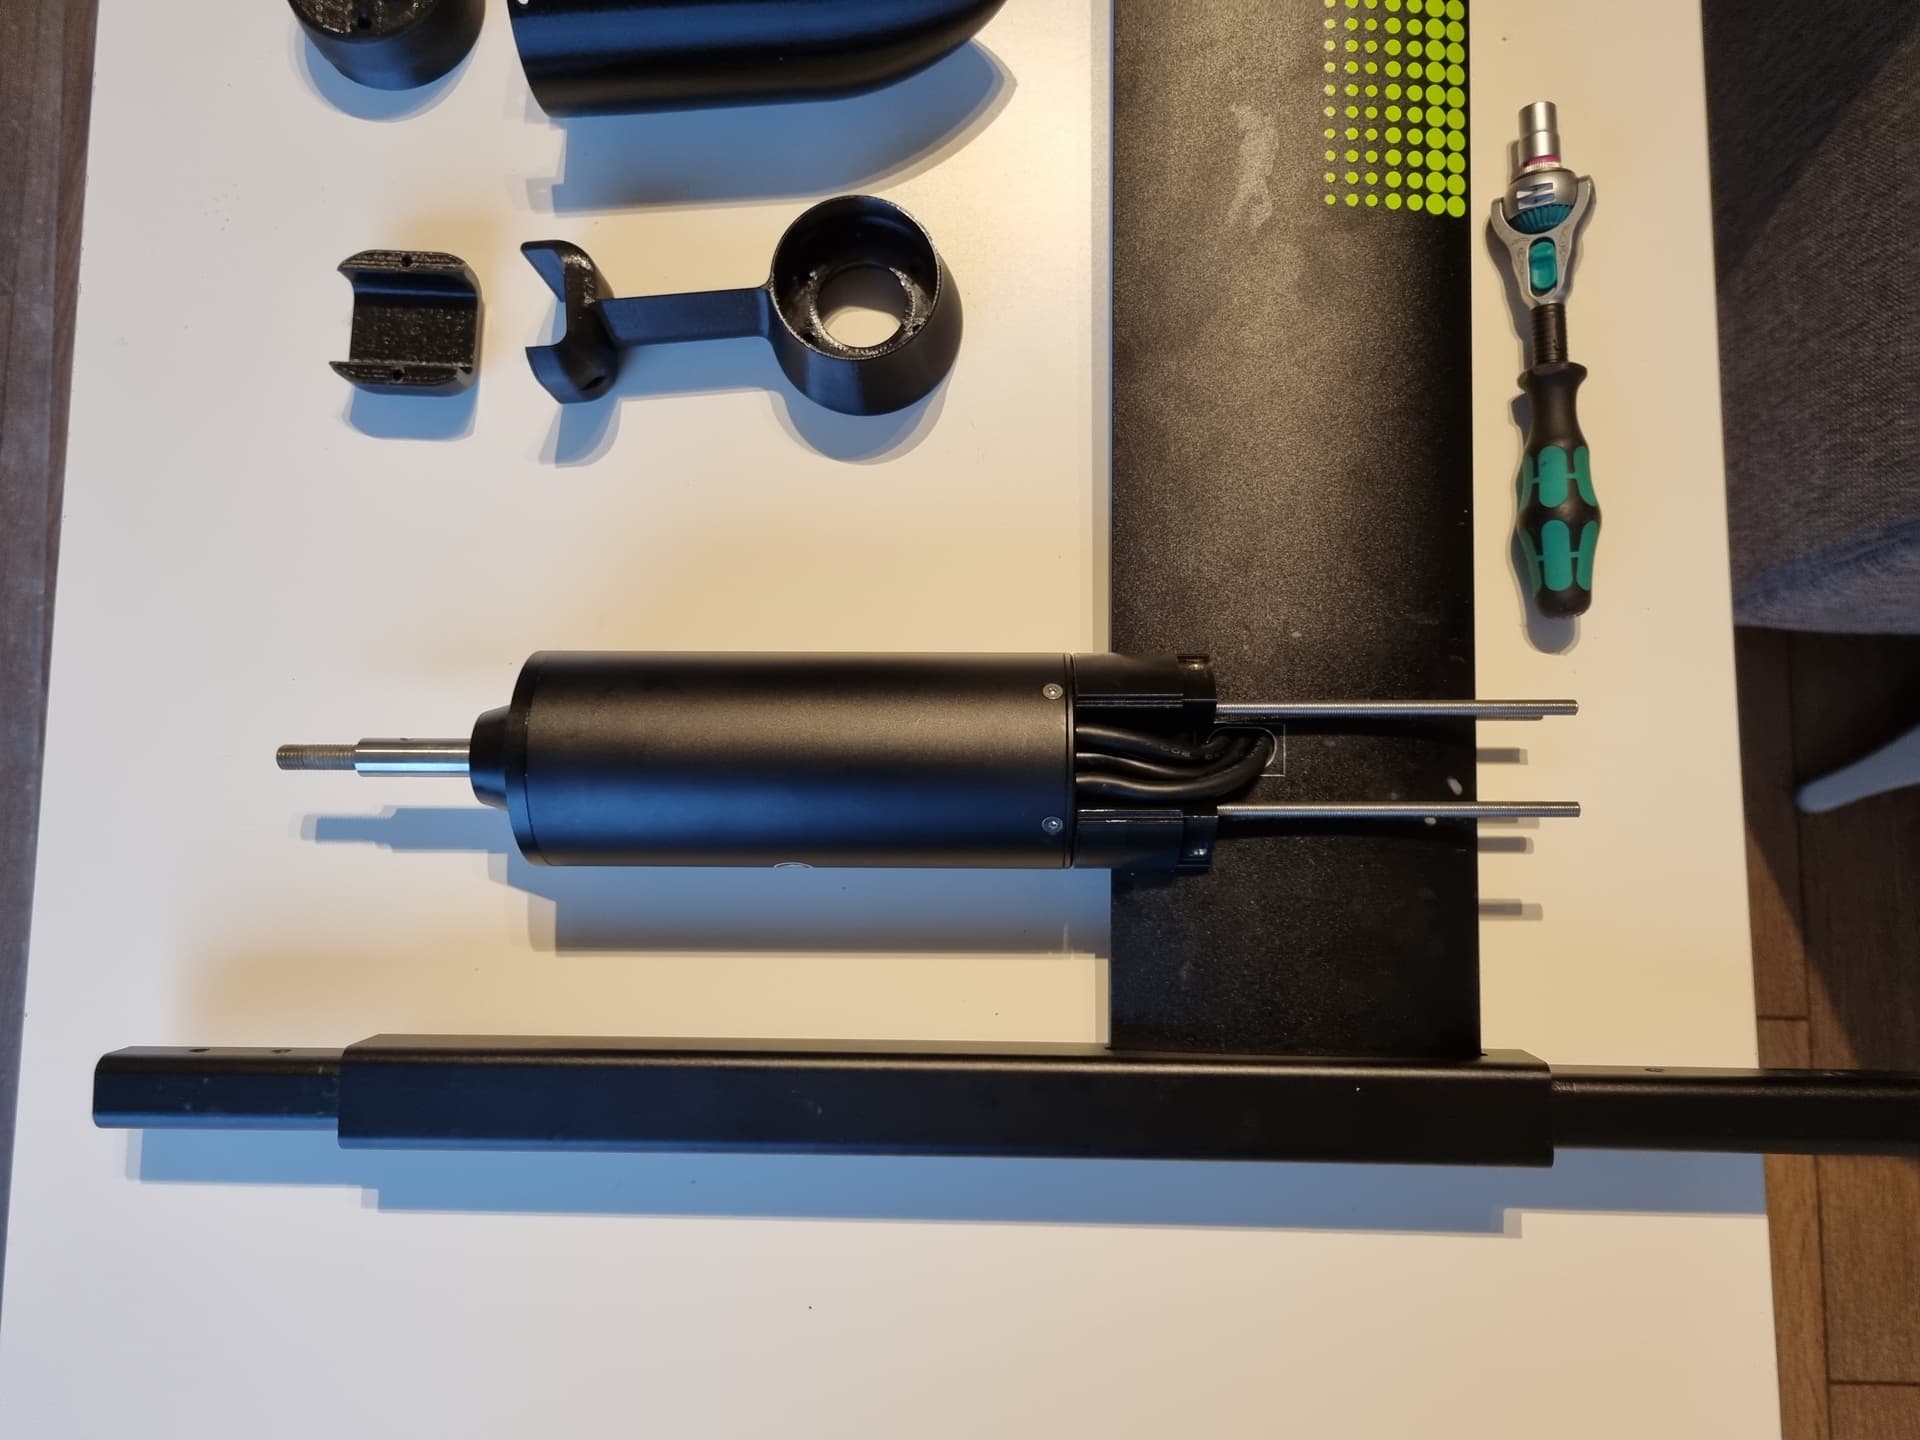
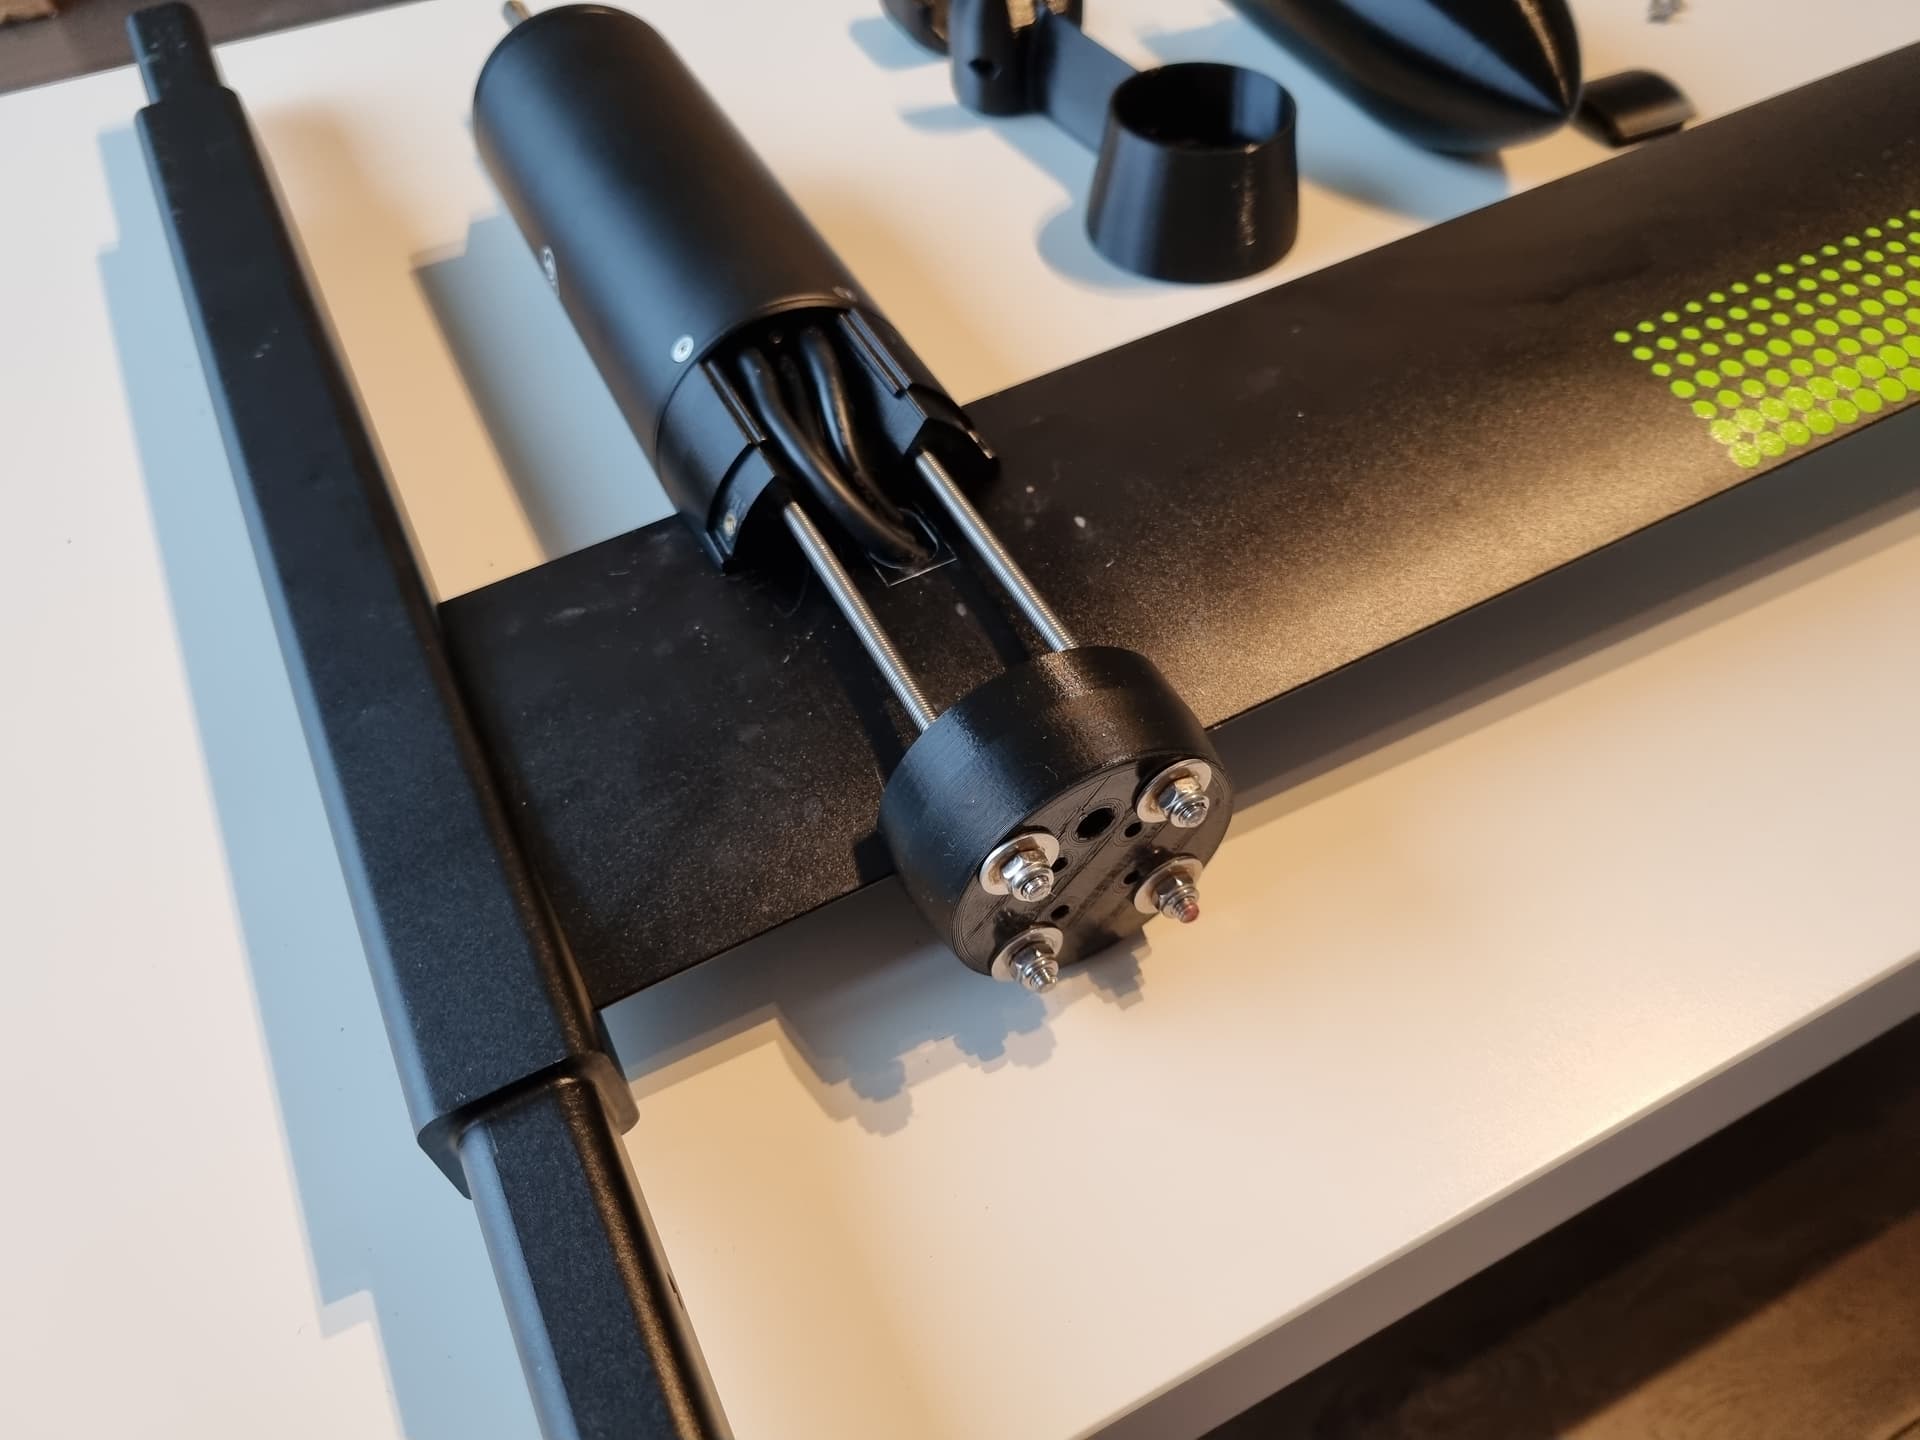
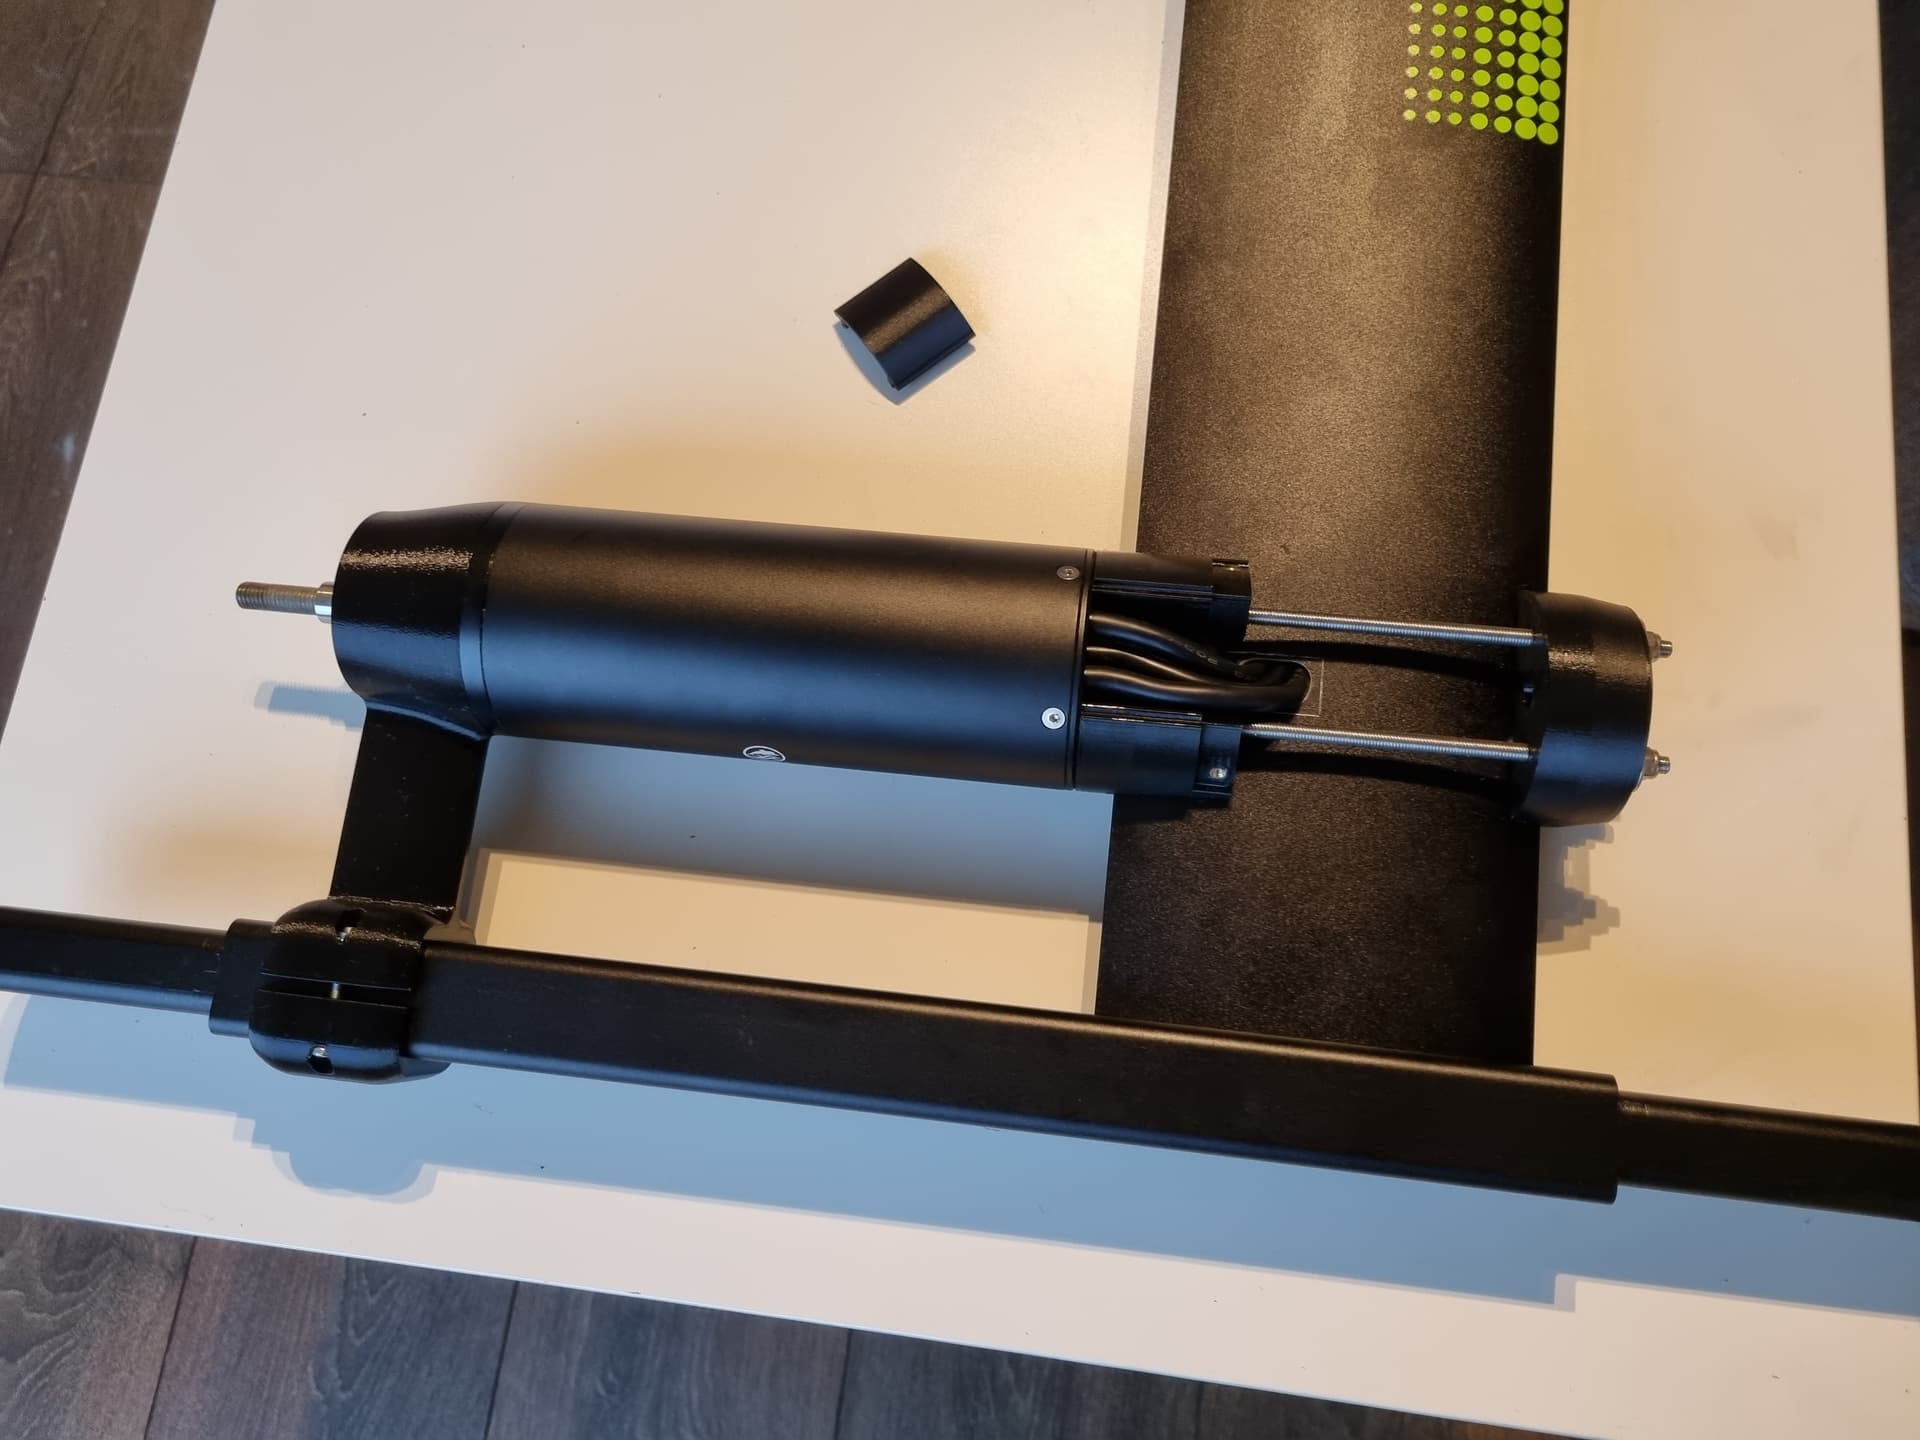
- Install the M5 threaded rods into the motor with locktite. Slip on the aft mast clamp as well, so that it’s captured by the threaded rods.
- Slip on the fore mast clamp and the M5 washers, secure LOOSELY with the M5 nylocks. The use of the reinforcement plate is optional, mount it between the front printed piece and the washers if you have it. If you plan to use water cooling, make sure that you put the silicone tube hole on the desired side. Either side will work.
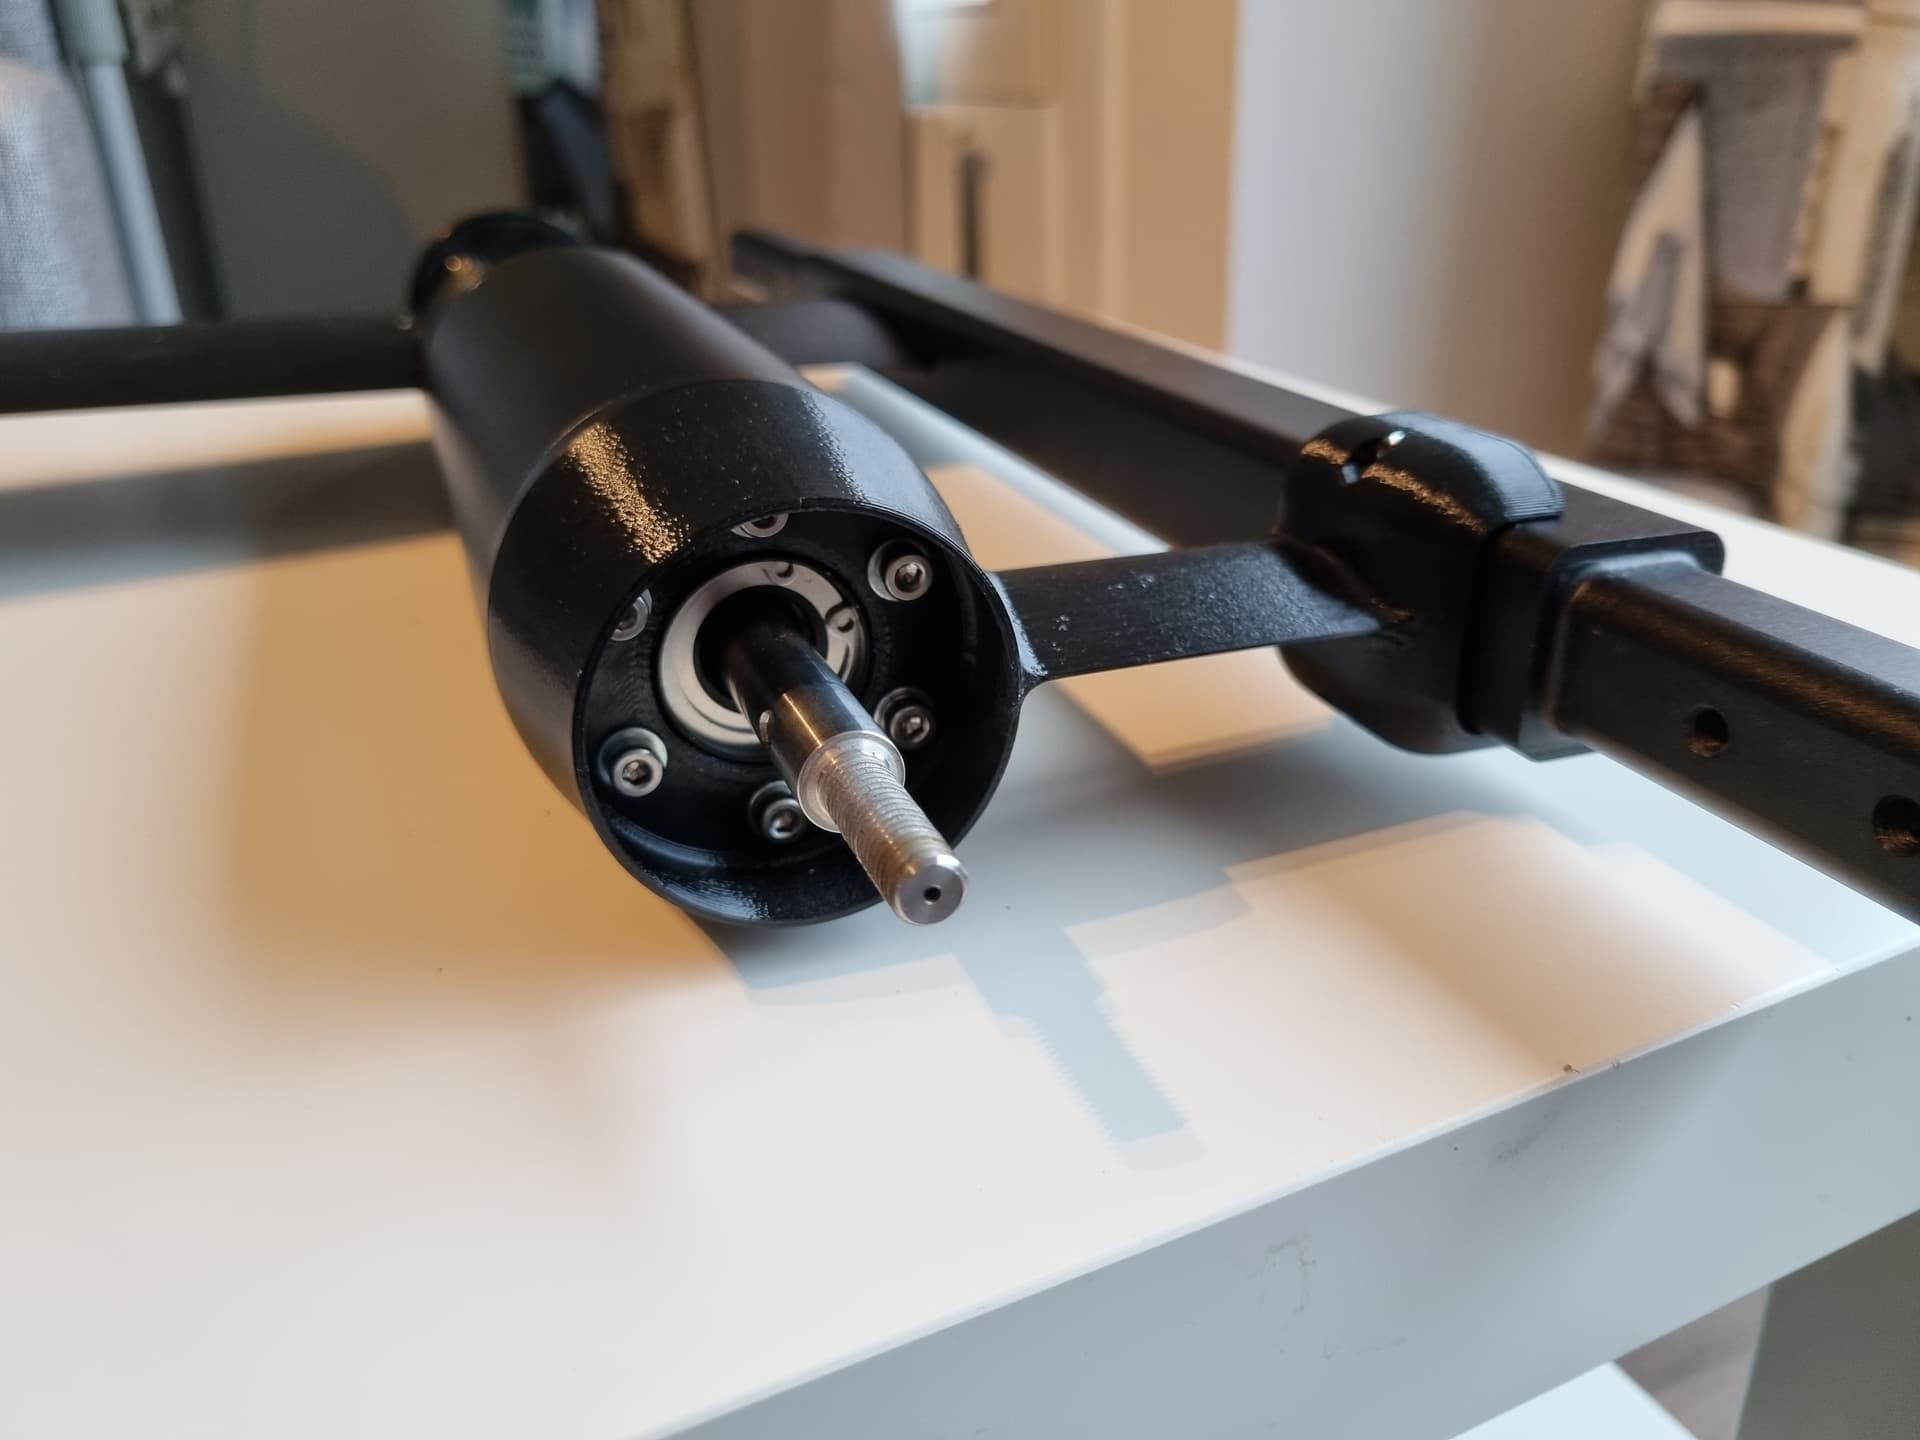
- Install the M3 nuts into the motor tail support. It is helpful to guide them in from the top by using one of the 30mm M3 bolts as shown.
- Install the motor tail support onto the back of the motor. Tighten in a cross pattern

-
Install the motor tail support U-clamp with the 30mm M3 bolts. Tighten only loosely at this point
-
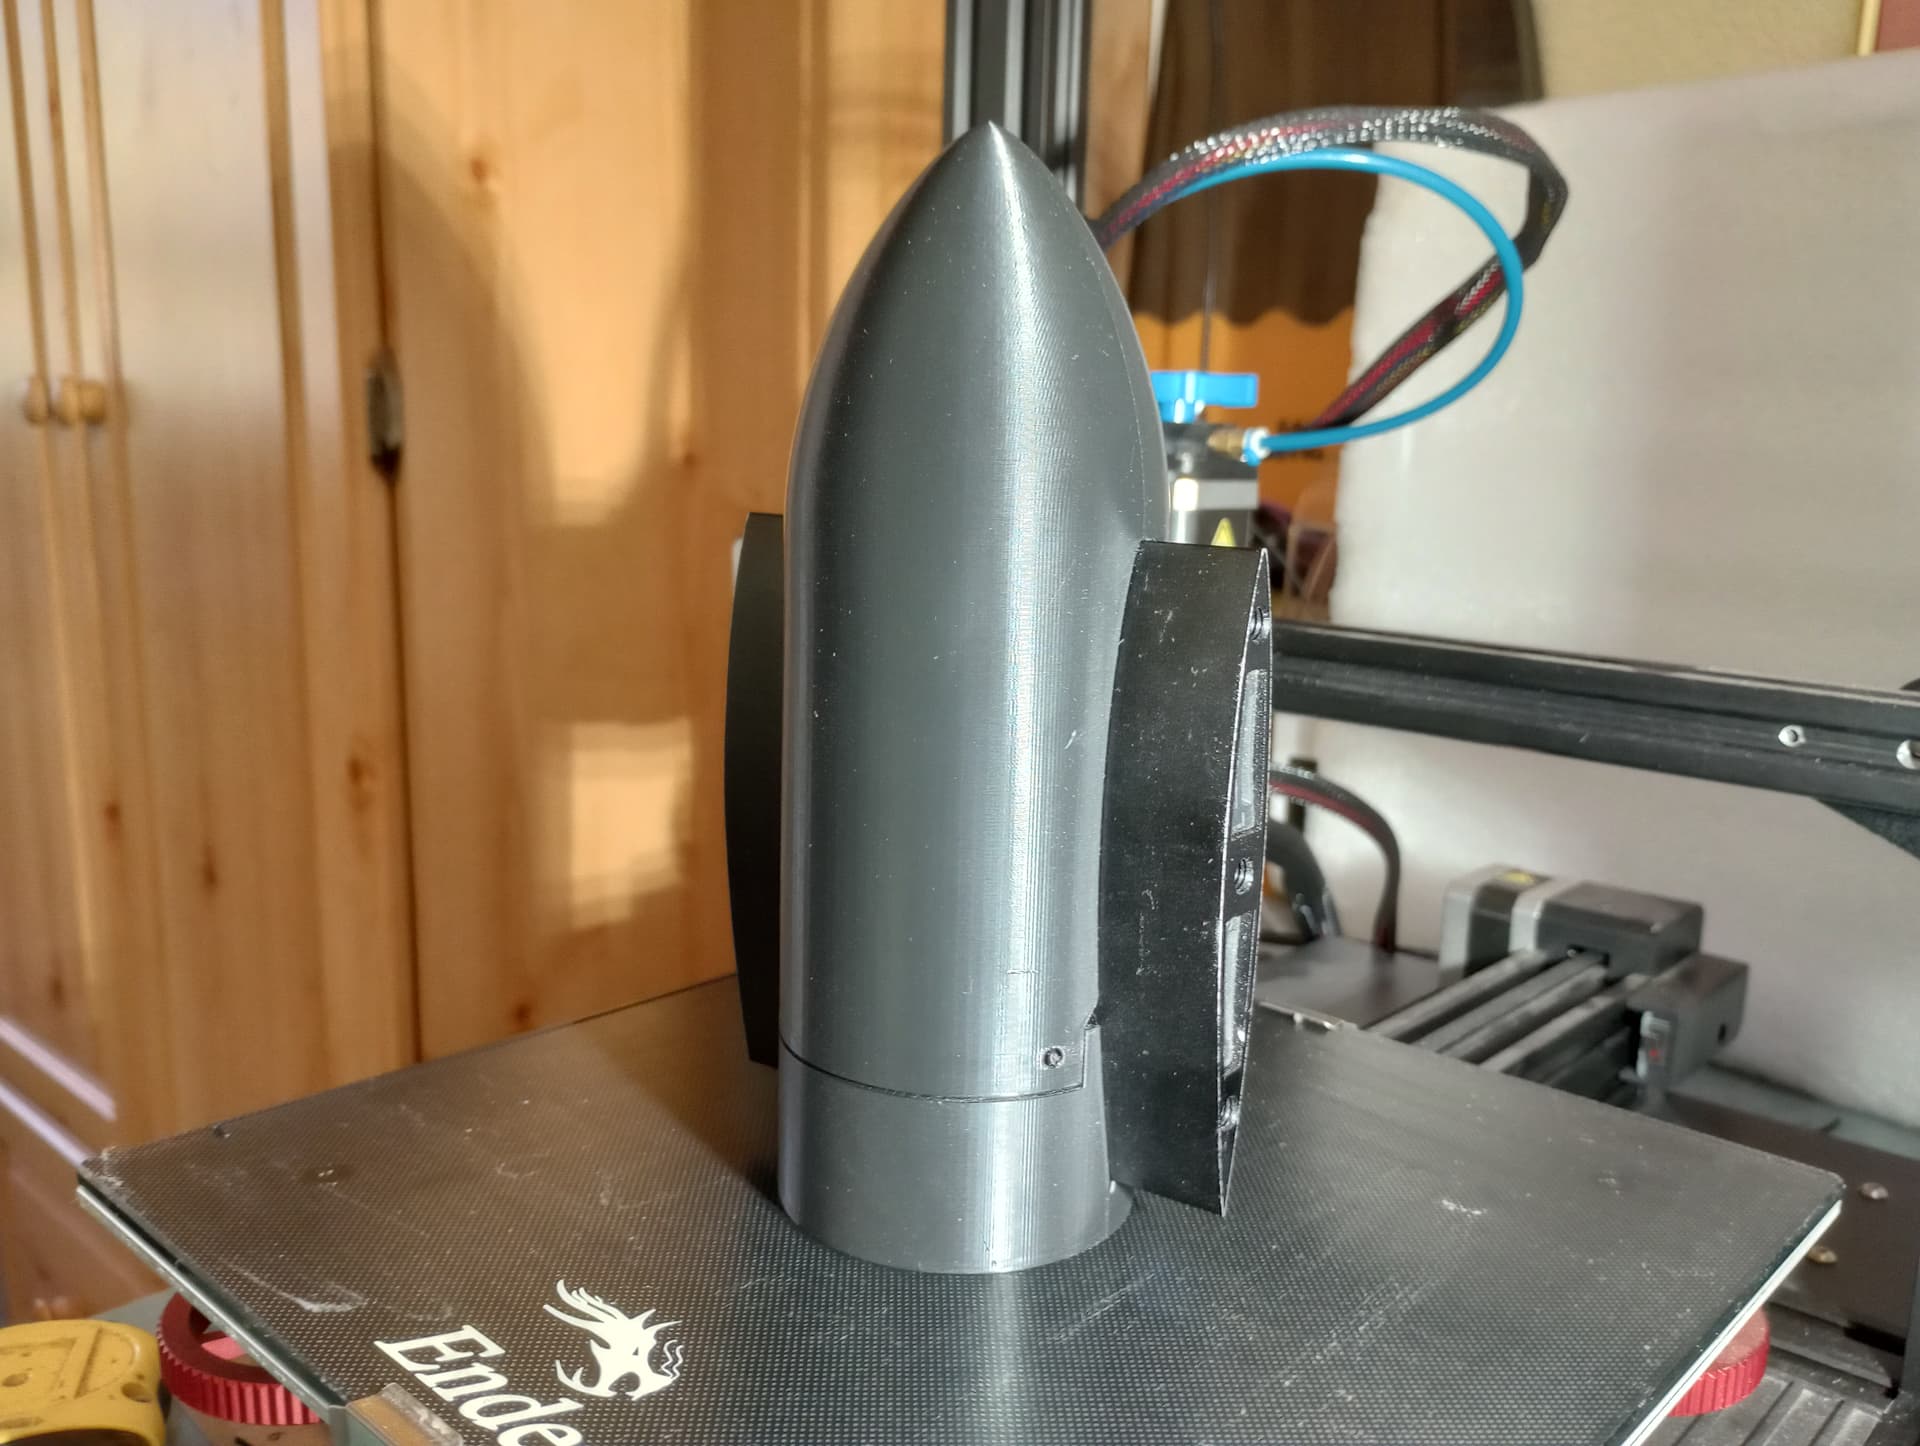
Finalize the motor alignment (make it parallel with the fuselage), tighten the front M5 nylocks and the tail support M3 bolts to secure the motor. The front M5 nuts should be snug, but not super tight. Tighten them in an even cross pattern.
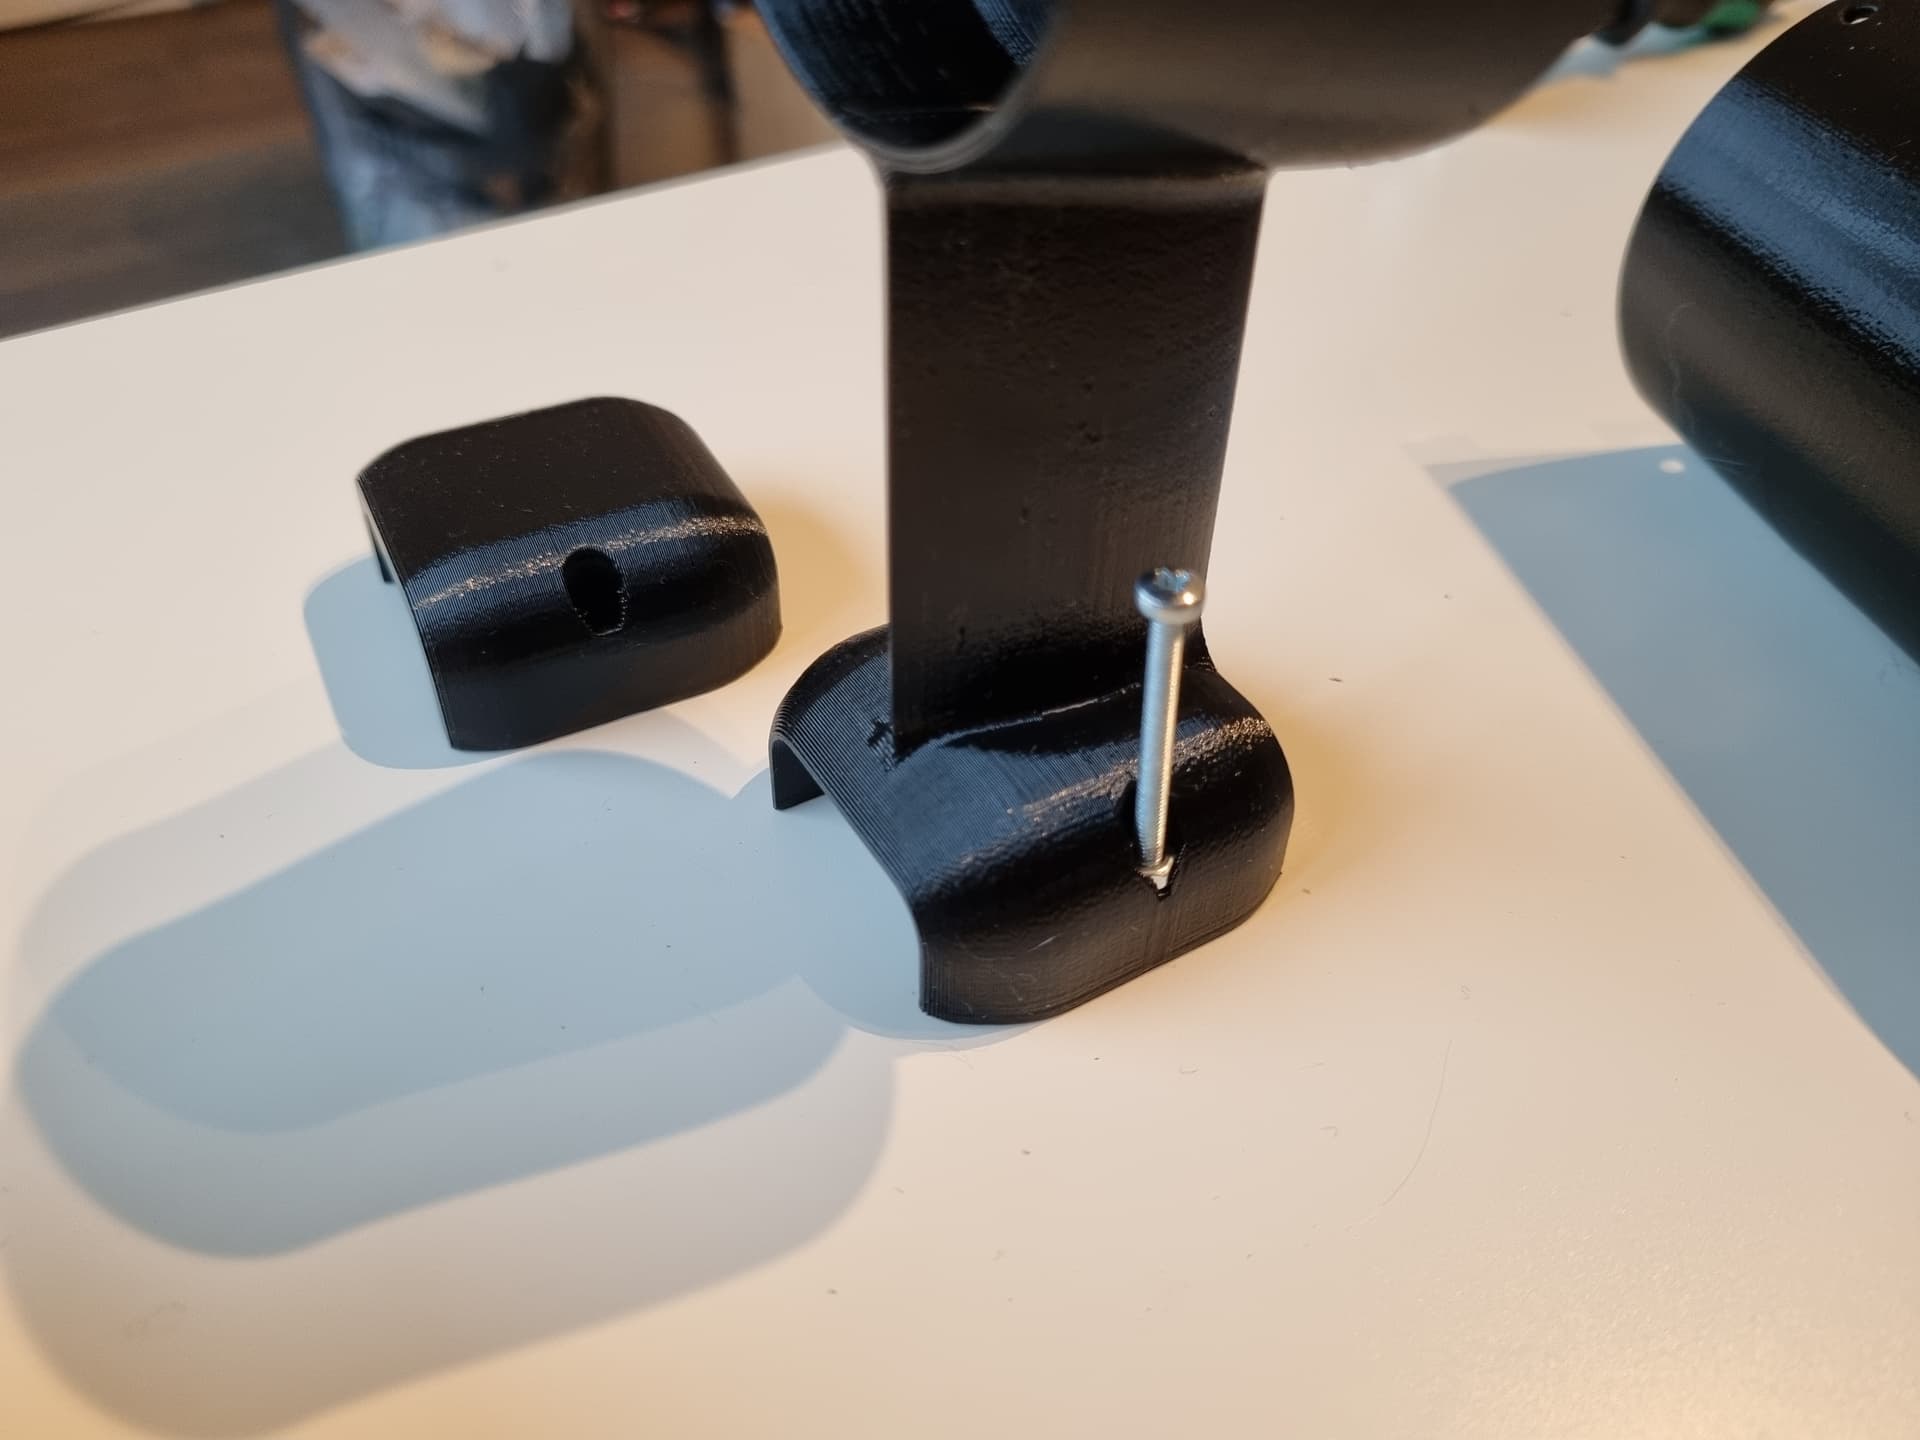
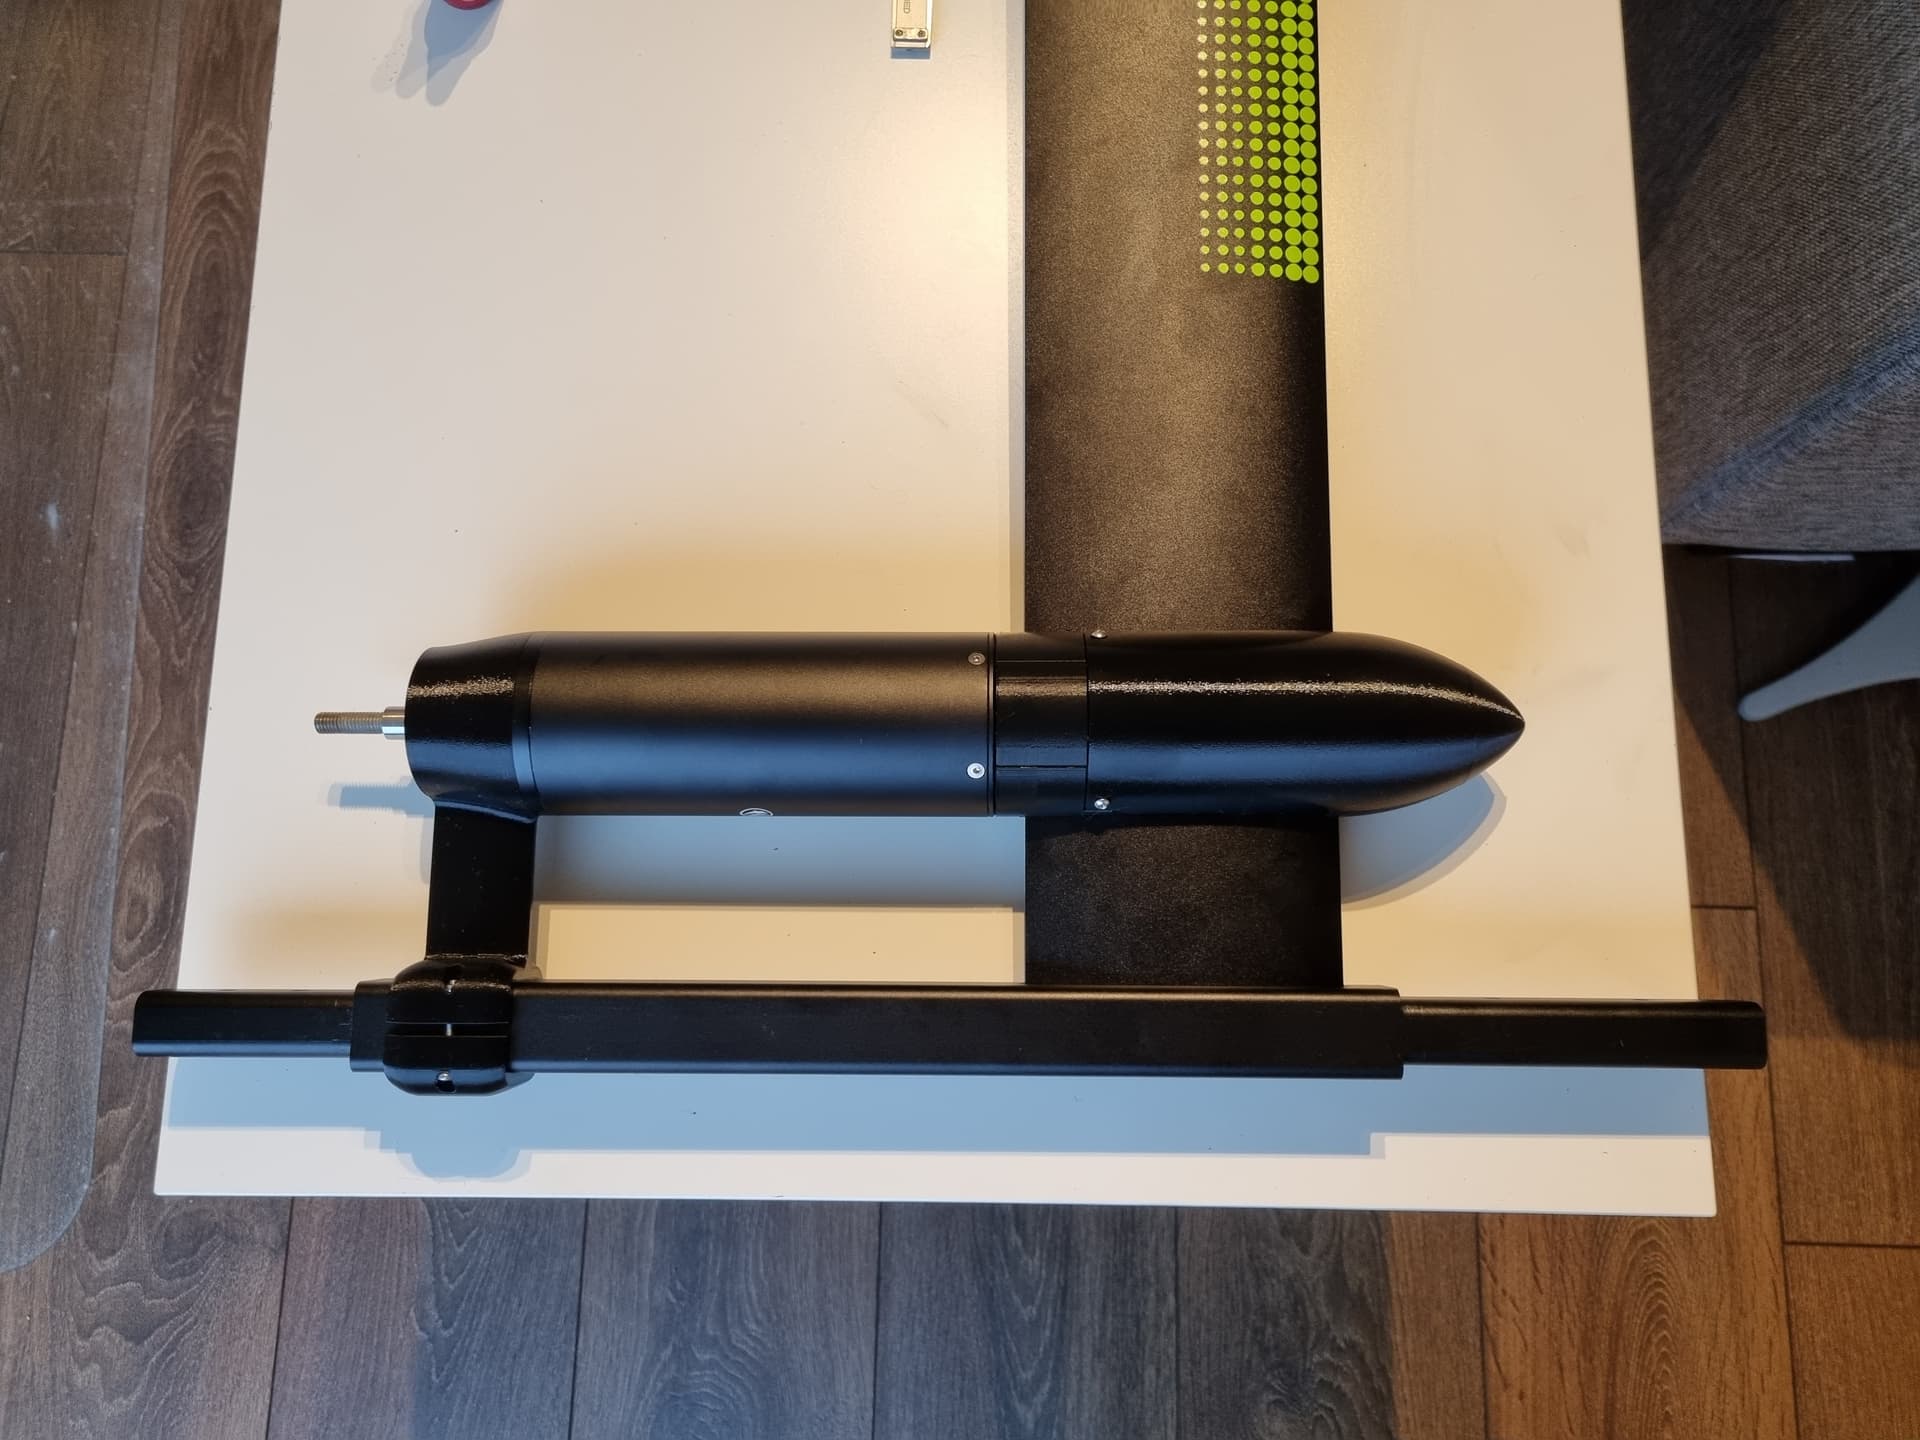
- Snap on the motor wire cover
- Mount the nose cone with the M3x6 screws. I skipped washers to keep the screws low profile for best efficiency.
-
Enjoy!
-
If you are happy with the motor mount, consider sending me some coffee money via PayPal Donate


 If you would not mind I would happily modify your design for a V2 version of the mount as well. Would that be ok with you?