I really like The new speed modes. Looking forward to be able to test it in practice when i fixed the remote.
You can program three different settings and decide what The max value shall be.
In The example i have put 31% and 58% as max values for profil 2 and 3.
It Will make The throttle more precise for the range the current driver needs.
Im making some in the futer, but dont be too excited. Im alone and its very much work to build 1 piece. However i will make some great updates in the next few days. Stay tuned
My remote is starting to give me trouble. Several of the vertical lines that make up the display are blank now. I can still read the display but its not as it should be.
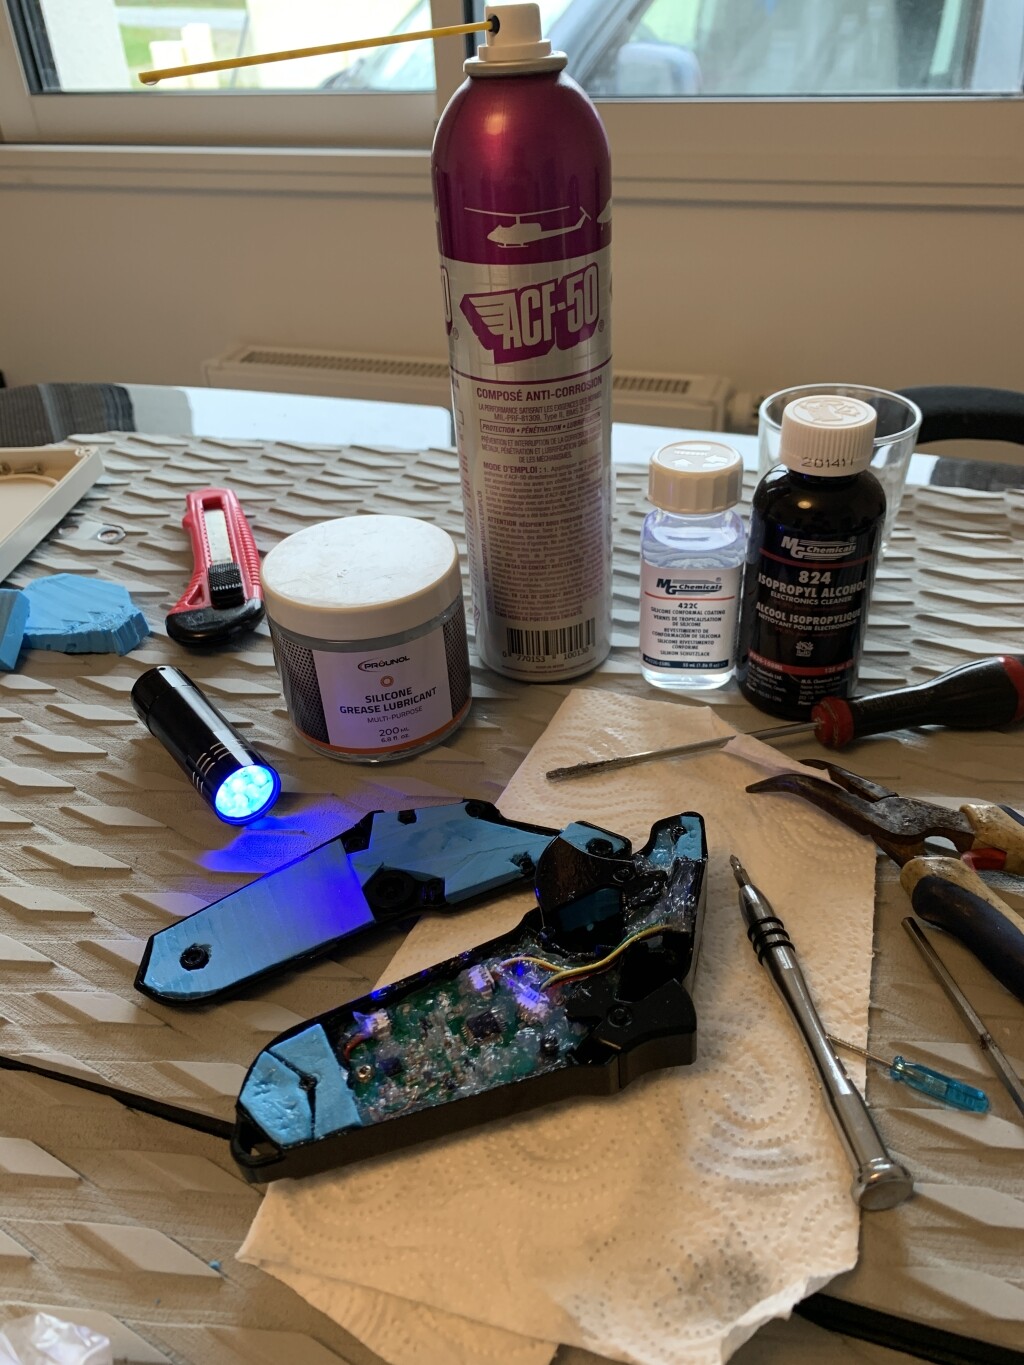
Today the board stalled 3 times during about a 35 minute ride. When it stalls you never expect it, so it throws you off. I think it was caused by the remote. I moved the remote into position so I could read the battery display. I could see the battery display bars blink erratically on and off. It was acting like it was loosing communication with the transmitter. I found that the potting material peals off very easily. I dried things out and applied silicone. The season is just about over. Hopefully by spring there will be other remotes available.
Finally not the worst option…
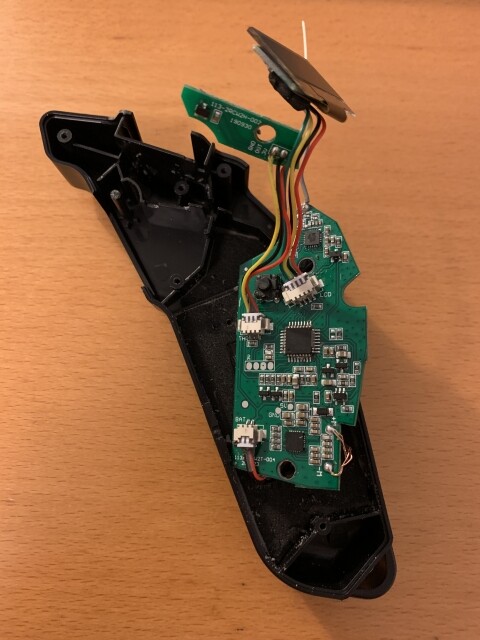
Around 70€ for MTSKR2005WF V2. Even if Maytech continues to claim an IP66 resistance, I have a strong doubt on its capacity to even be dust proof. LCD has no coating and glass protect is not sealed at all.
I did the same on the MTSKR2005WF V2. The three speed modes work exactly as I want them to where if you say set speed 1 to 50% then the new max trigger throw now = 50% throttle. This is a much better option if you plan to get into waves and need a higher granularity of throttle with just enough power to get up on foil. They sure are charging a lot for just a crappier firmware that only has cruise control for the e-surf MTSKR1905WF V2 version!
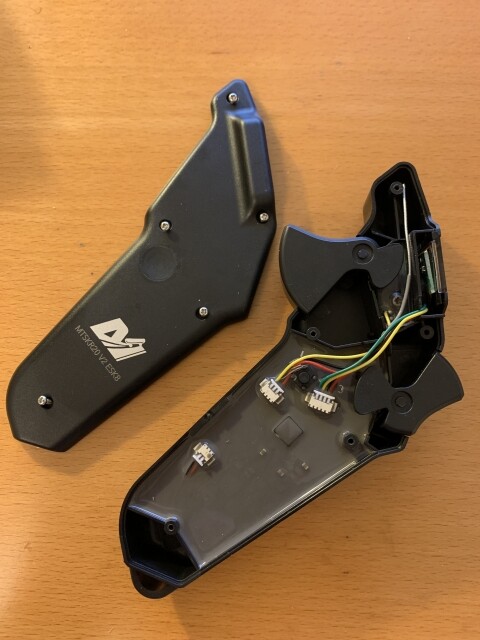
So after having to repair and redo the waterproofing on my V1 remote many times it finally called it quits and died. Still with no other alternatives I reluctantly purchase the new V2 esurf remote. After all it apparently has "double waterproofing for double the price. So before entering into the salt water with my expensive remote, I thought that I would open it to see whats different to the less waterproof V1 remote.
Well, what I found was no waterproofing at all on the LCD. This wouldn’t last five minutes in the salt water.
Oh… But i guess it must be my fault. Miss use.
Maytech you are such a pathetic company @Eileen
Get in on this one! @samisin is really close to having something way better. I am waterproofing the crap out of my enclosure I will use for this one now…
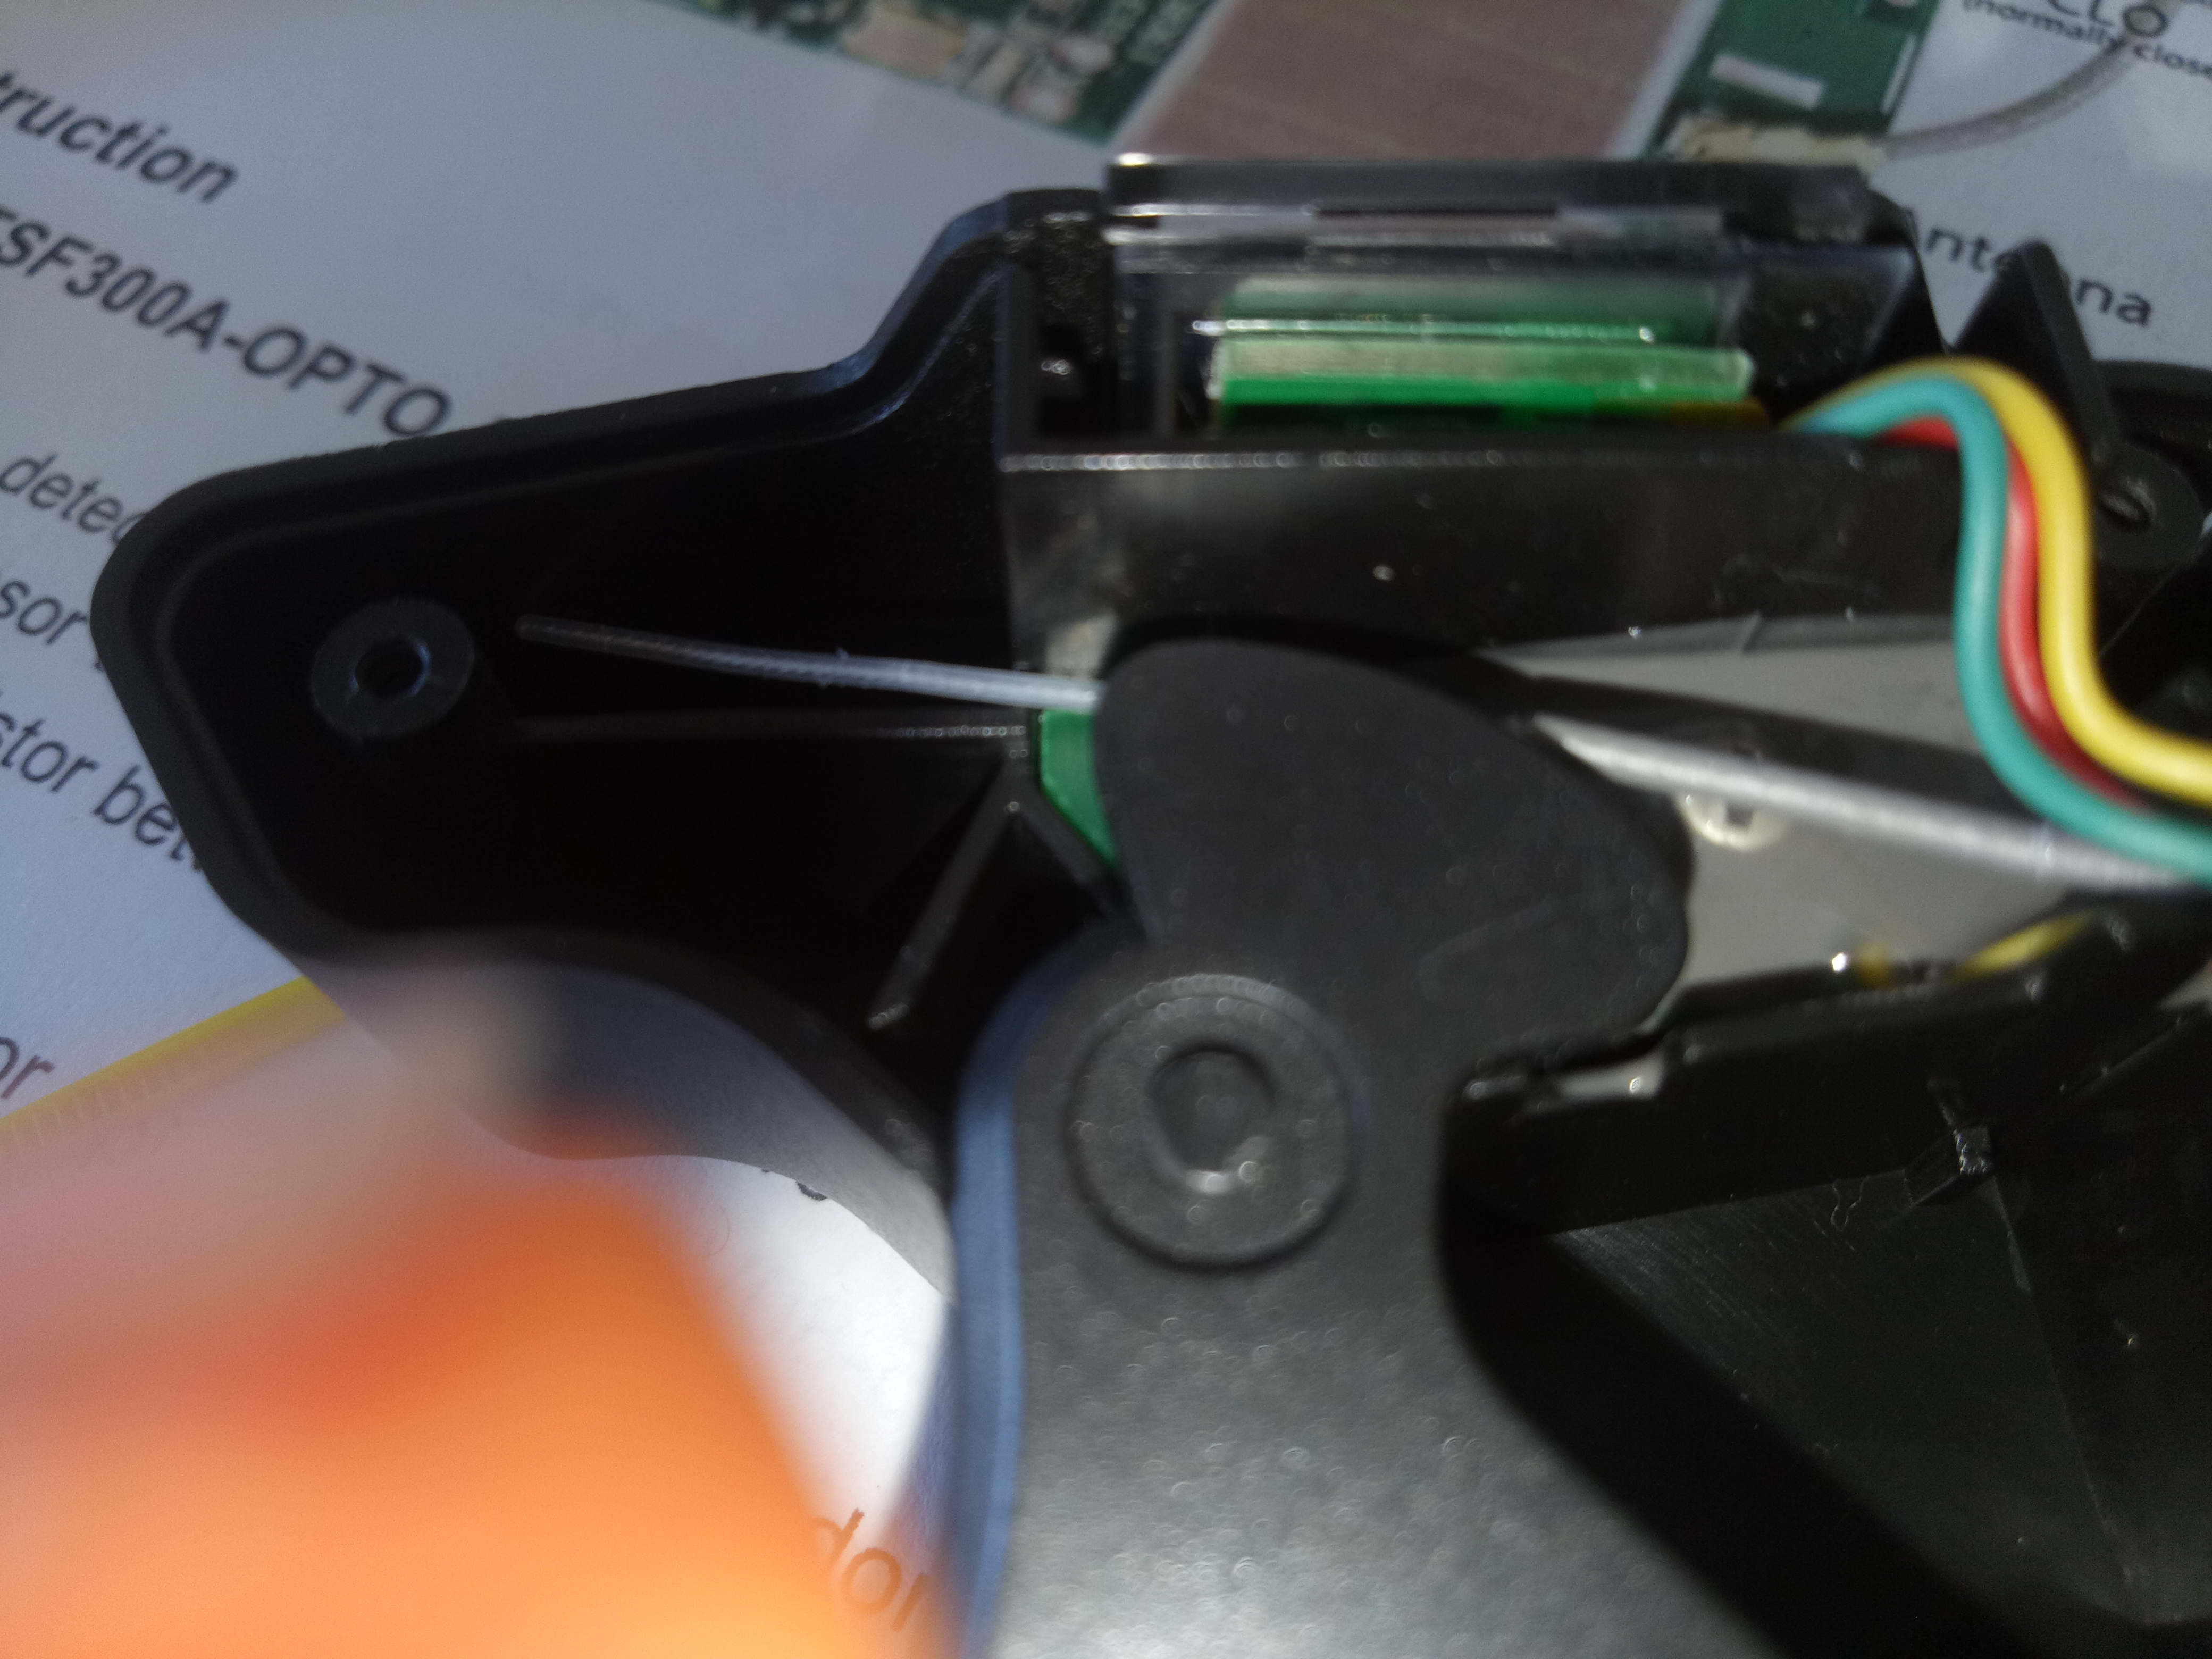
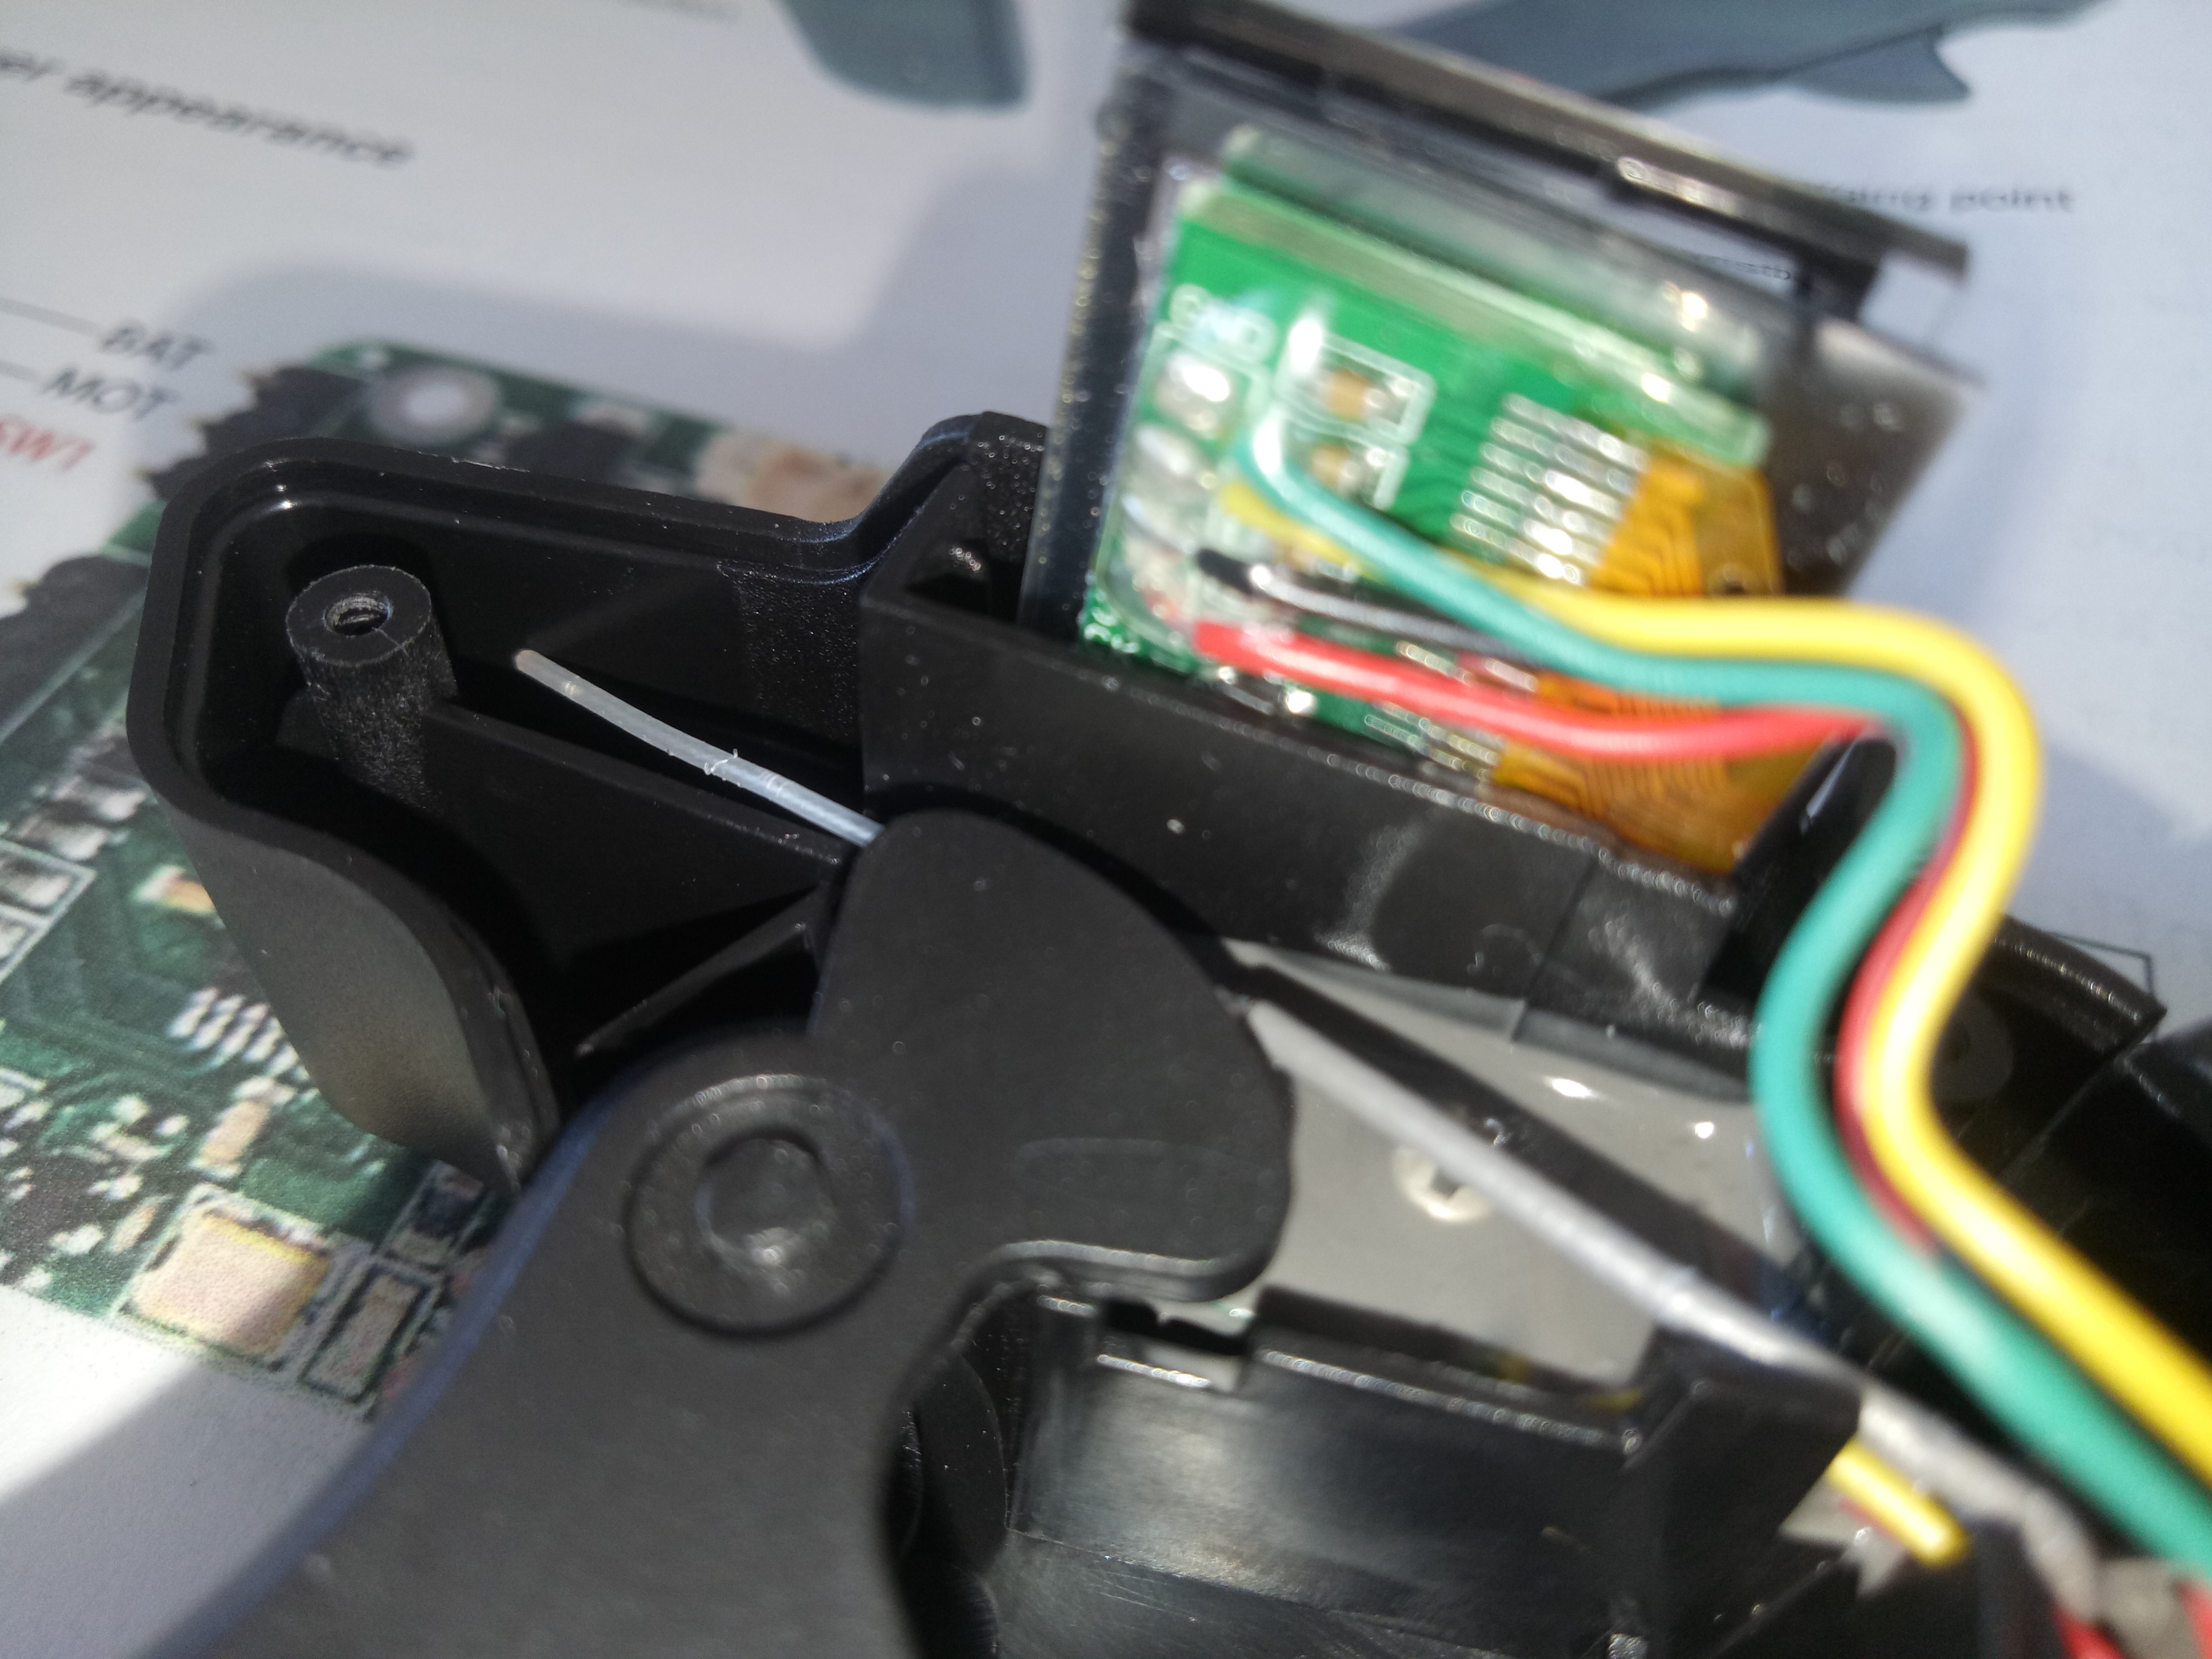
The remote PCB is sealed by waterproof nano-coating and double protected by glue.
The remote screen is sealed by waterproof nano-coating, not glue. When use it in water, water will get in between the outside and inside screens. It won’t influence using. When don’t use it, please put it in dry place and it will dry slowly. And when disasseble the remote screen, please make sure not to damage the nano-coating.
Thanks Flightjunkie, This is very helpful. Looks like Flipsky might have a better option after Chinese New Year. I will open it up and compare to your good work here.
yes grease is good too this silicon is like all other bicoponent you can find just different shore for different use…but work fine and no to much dry to come off with vibratíons it stick well👍