My suggestion would be to confirm the location of the leak first.
You could tape a garbage bag to the top surface of the opening, fill it with air via compressor or leaf blower (doesn’t require high air pressure) and spray soapy water on the outside bottom surface and look for bubbles.
From my experience 5200 is great adhesive (some people refer to it as devils glue😀) but not great as a sealant
hi there , would you mind to share the file to produce the board cutout? I also have bought a fliteboard with the same idea and now found your nice conversion. great work!
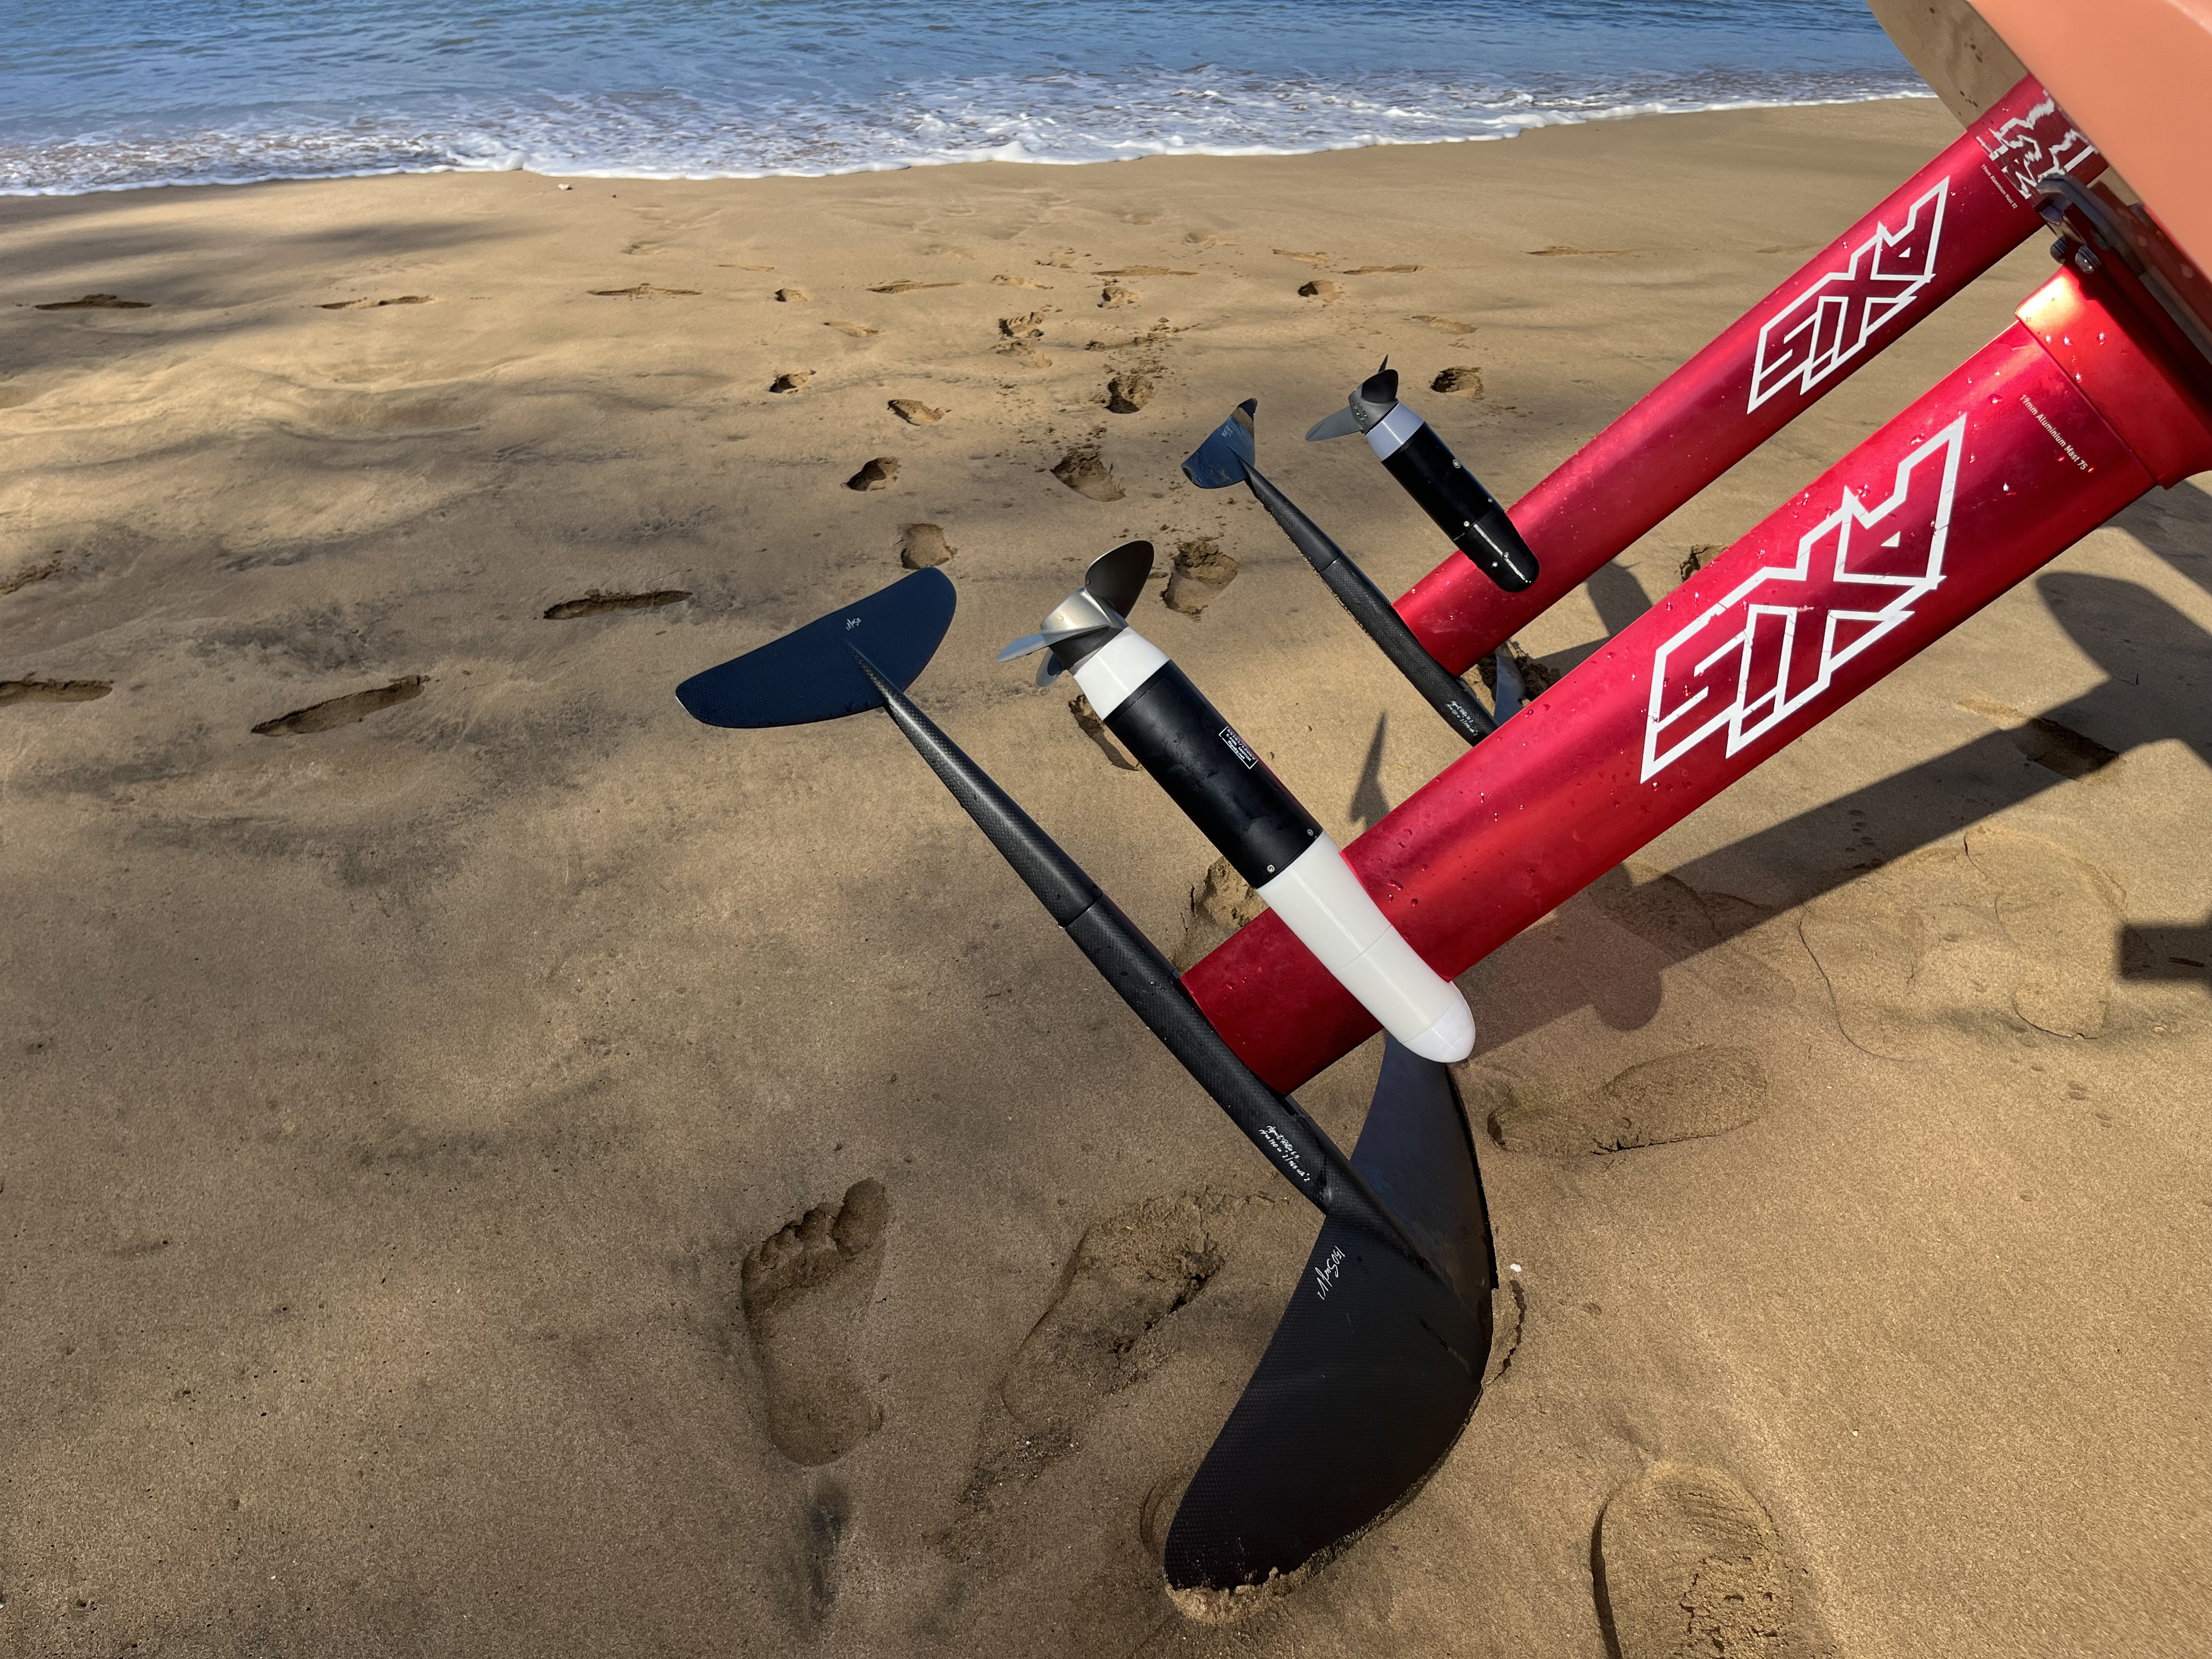
I solved the issue mentioned above with water getting into the black plastic box via the adapter plate hole for the motor wires. The solution was to fill the bottom of the box with silicone sealant and also put silicone inside the mast on the side of the baseplate:
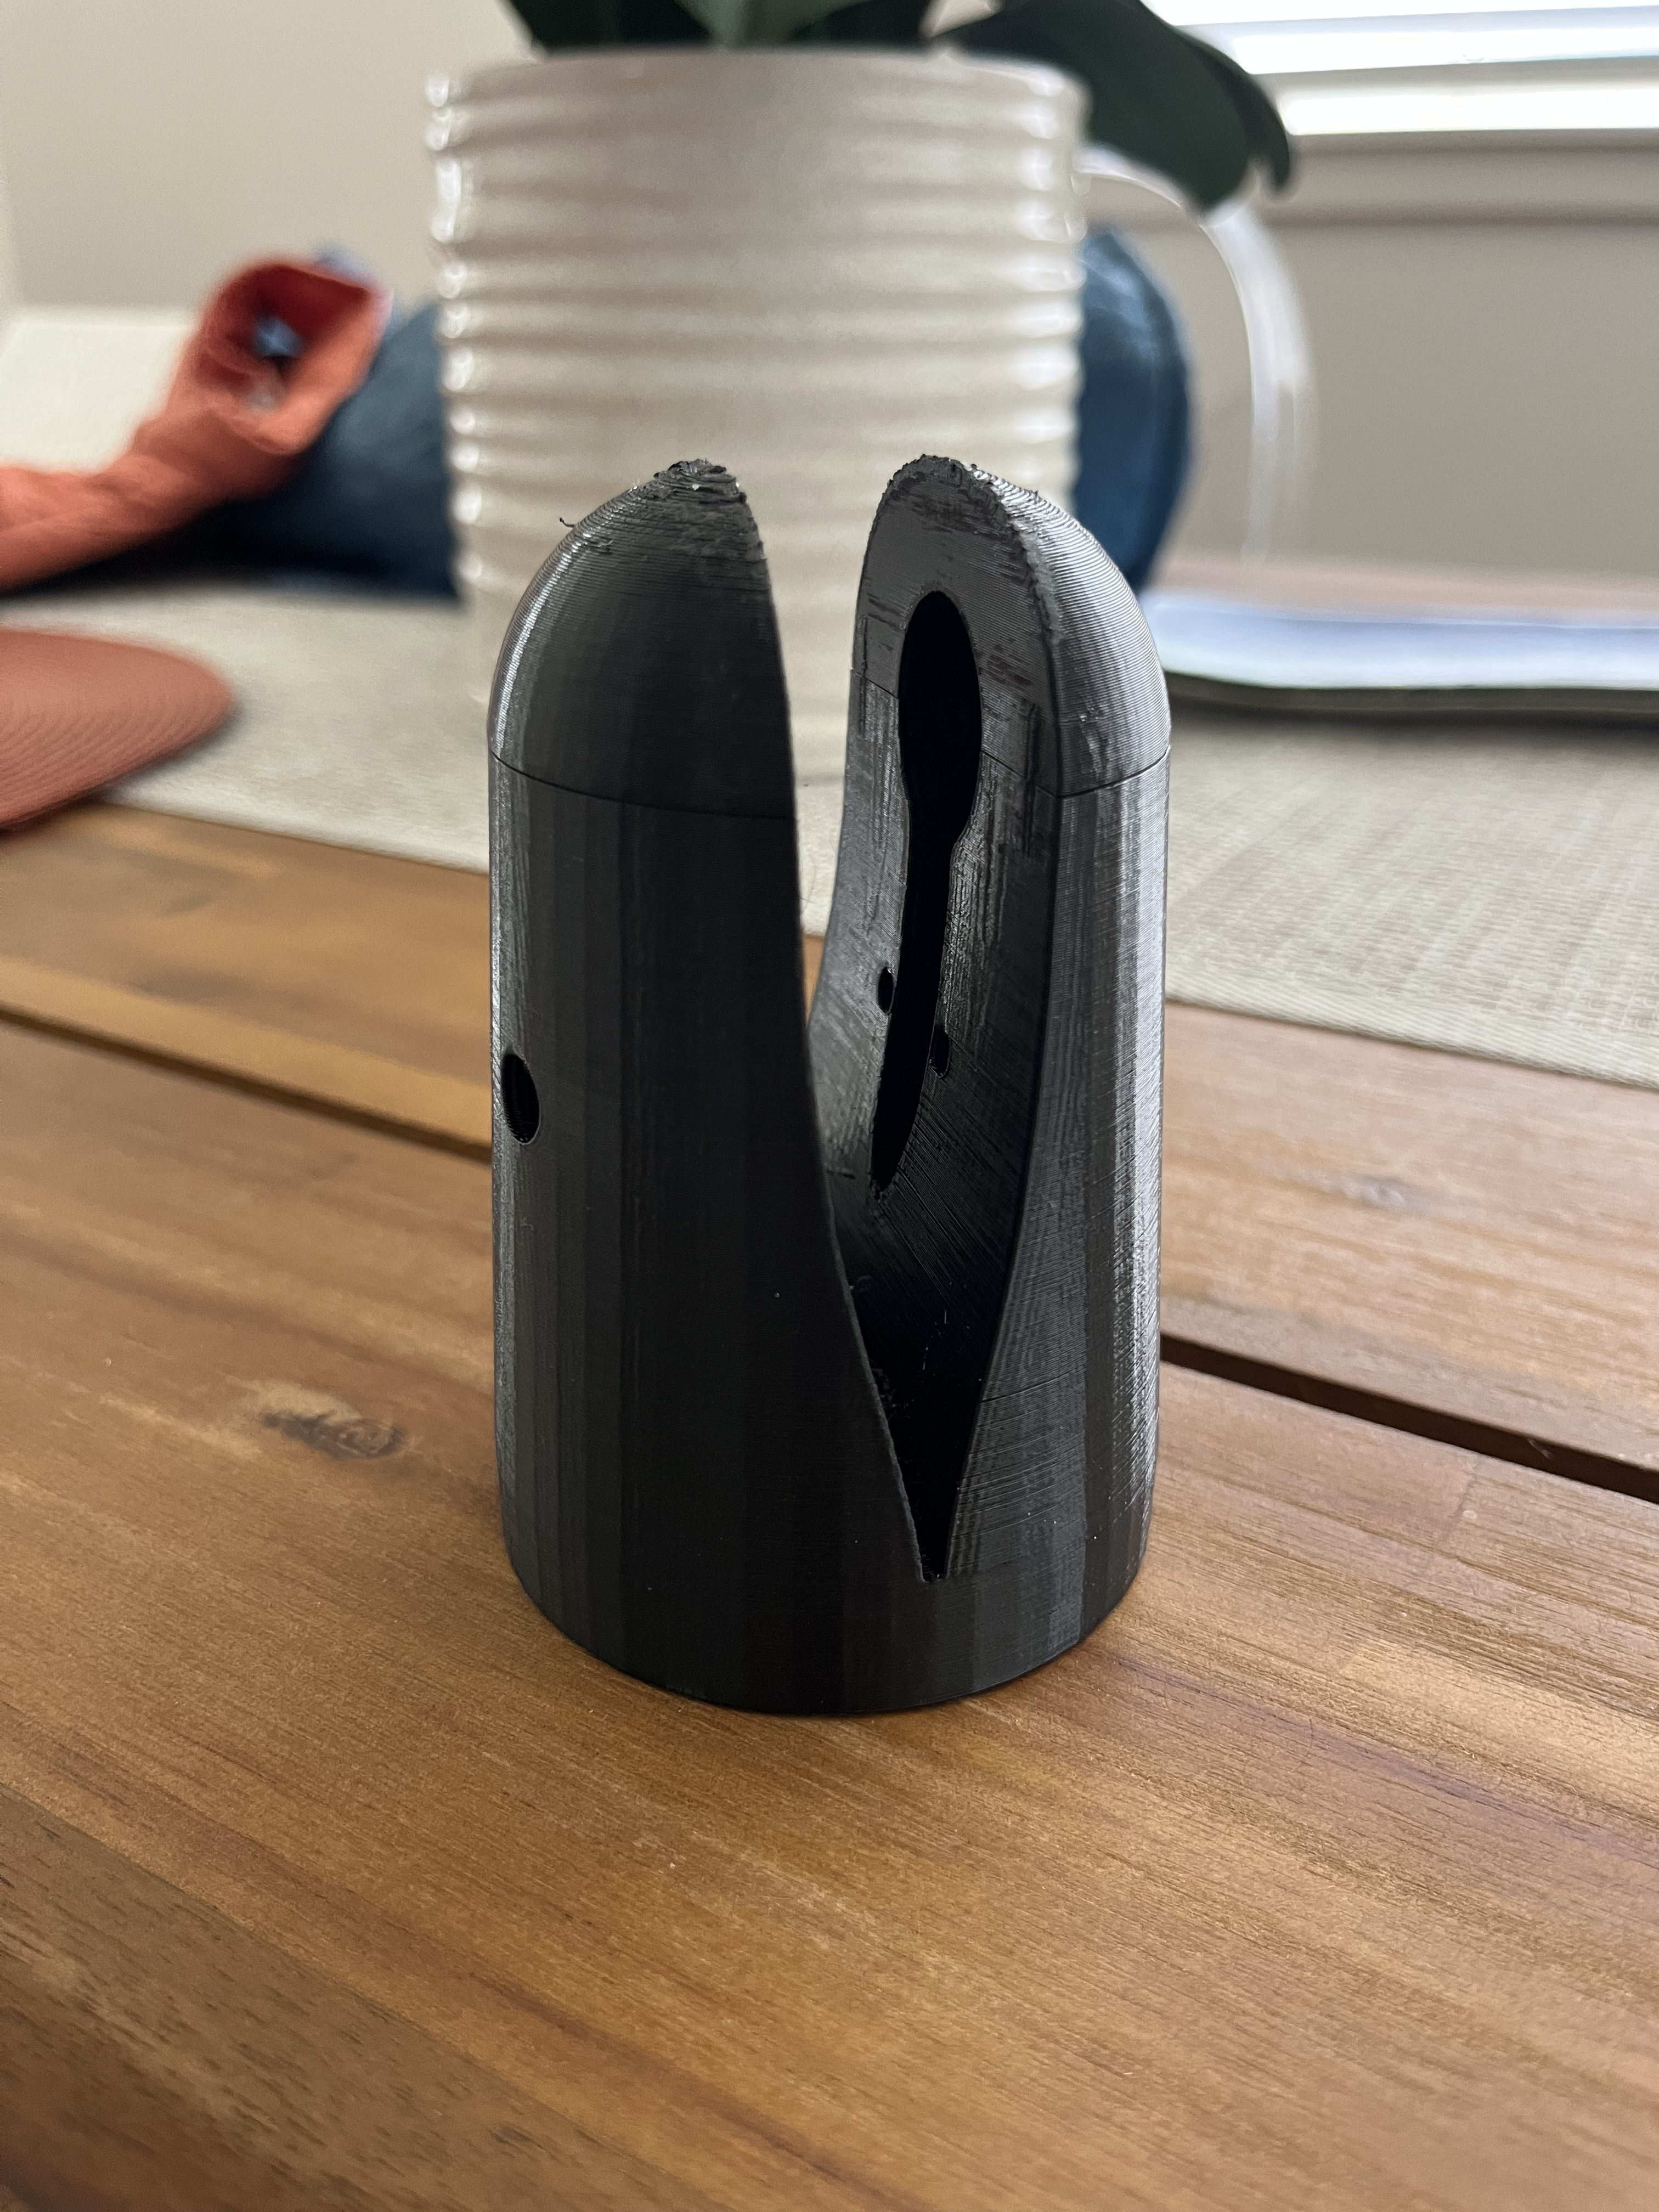
I’m using this motor clamp designed by @JonathanC (huge thanks!). Filled it with epoxy to make it more durable. The nose parts on each side can be removed and are held in place by magnets. This makes it possible to install everything without having to remove the phase wires from the mast.
It has less power but still totally fine for casual riding. The 65121 seems like a good alternative for lighter riders. I weigh around 80kg/175lbs, so a bit heavy for the small motor.
Hi @t-dub-maui!
I really like your build and want to do something similar since I alrady have a regular board and foil. I appreciate a lot for sharing your excel with all parts. It is very helpful!
Since I’m quite new in this, I might have some obvious questions:
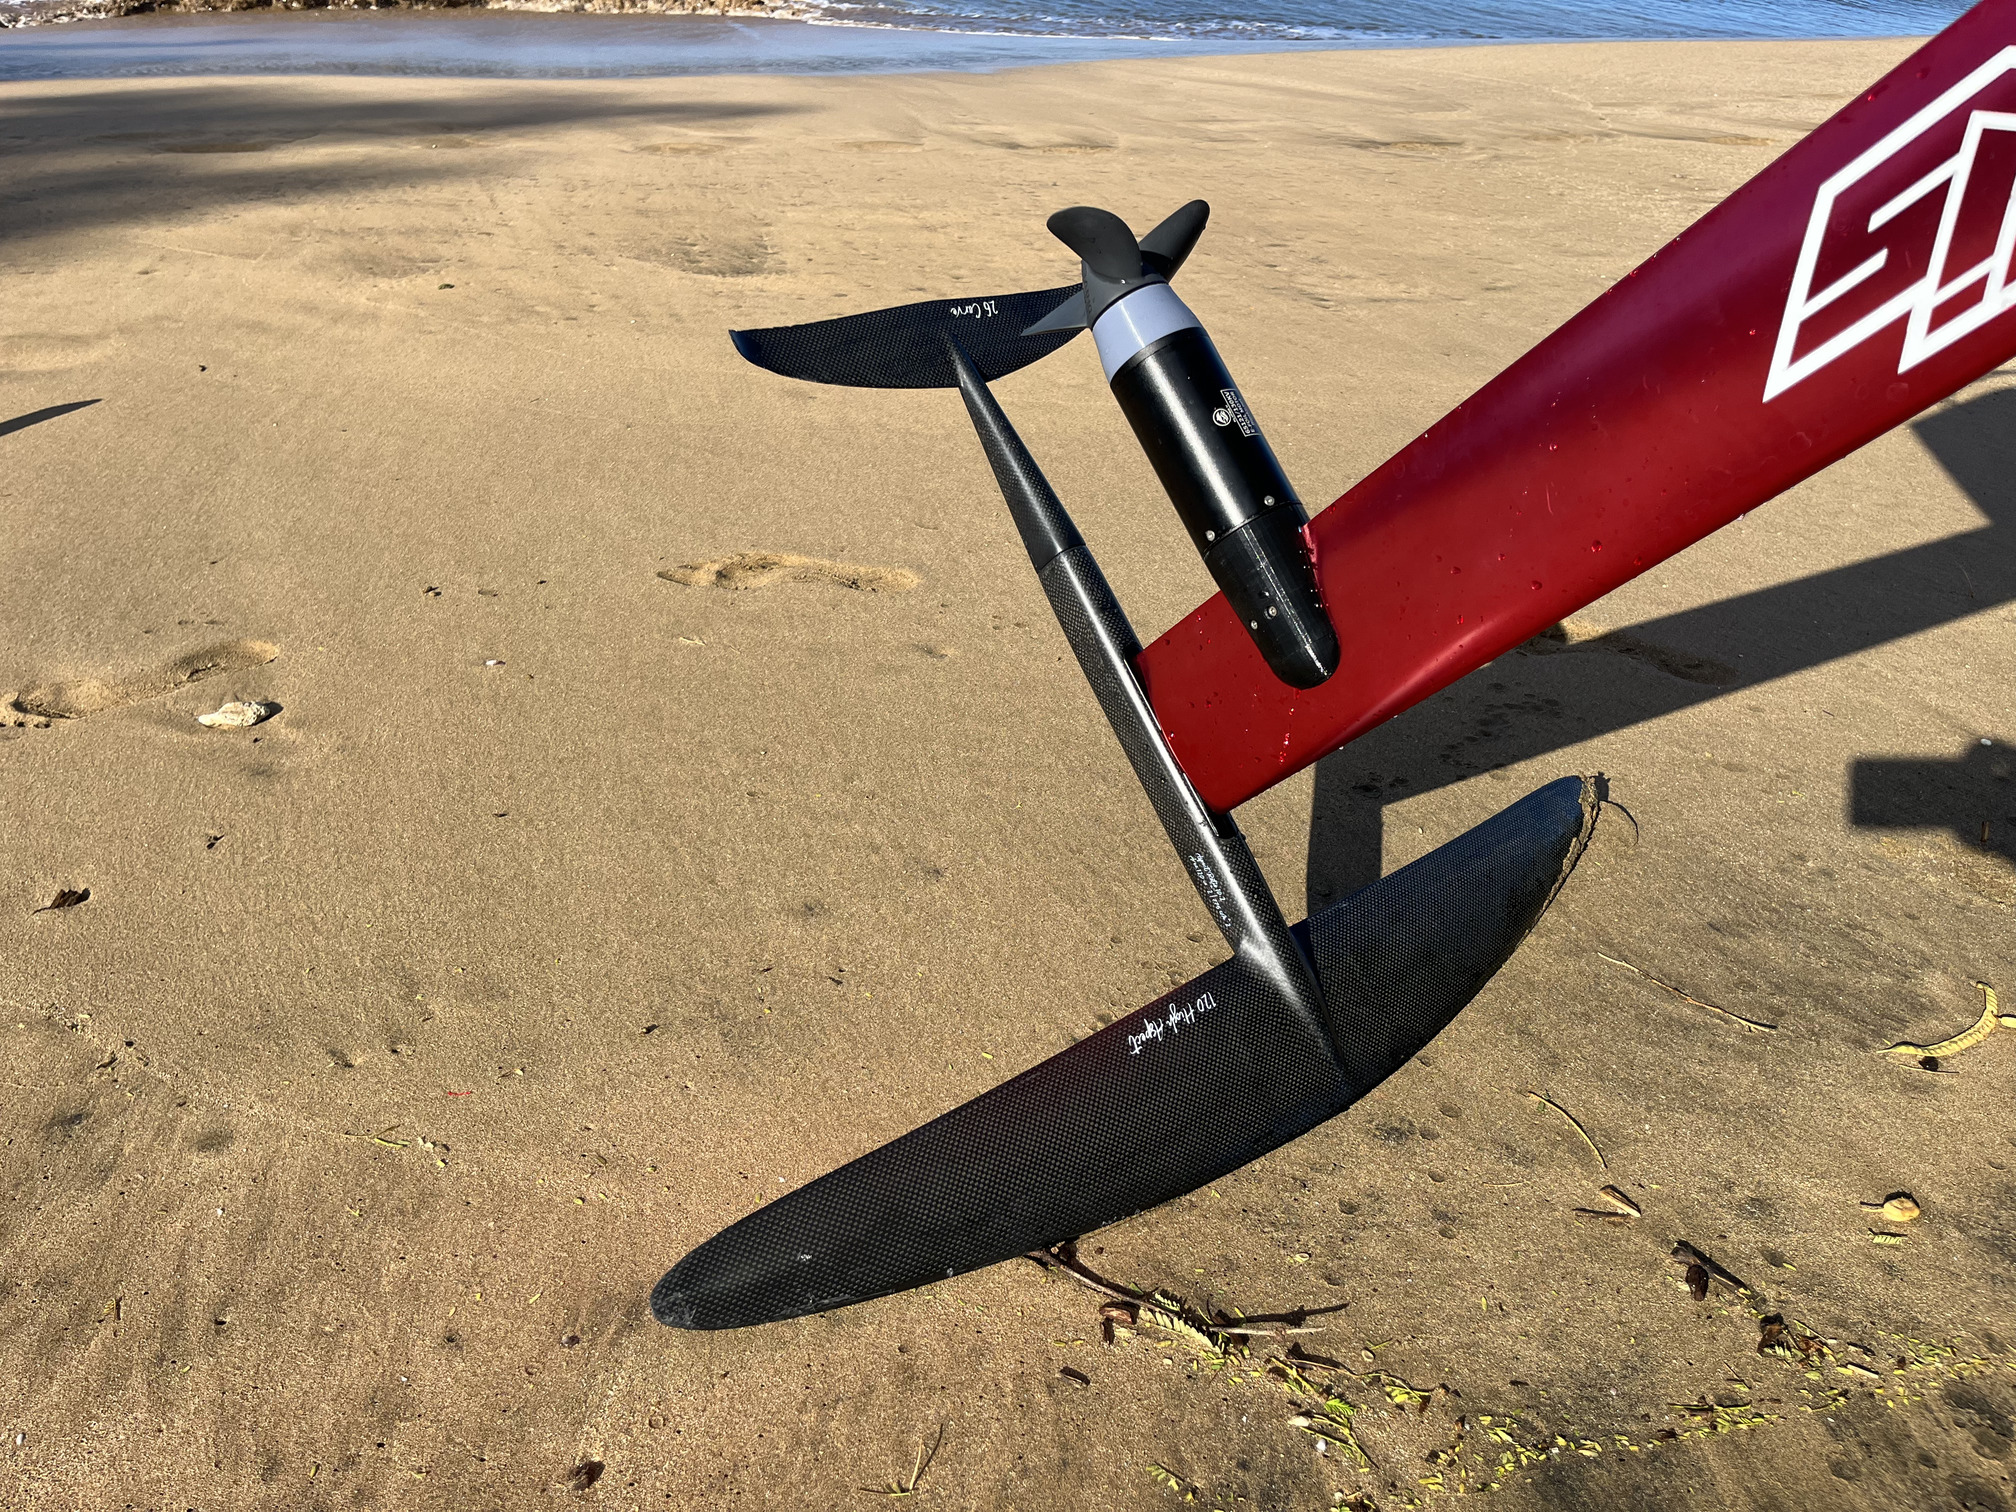
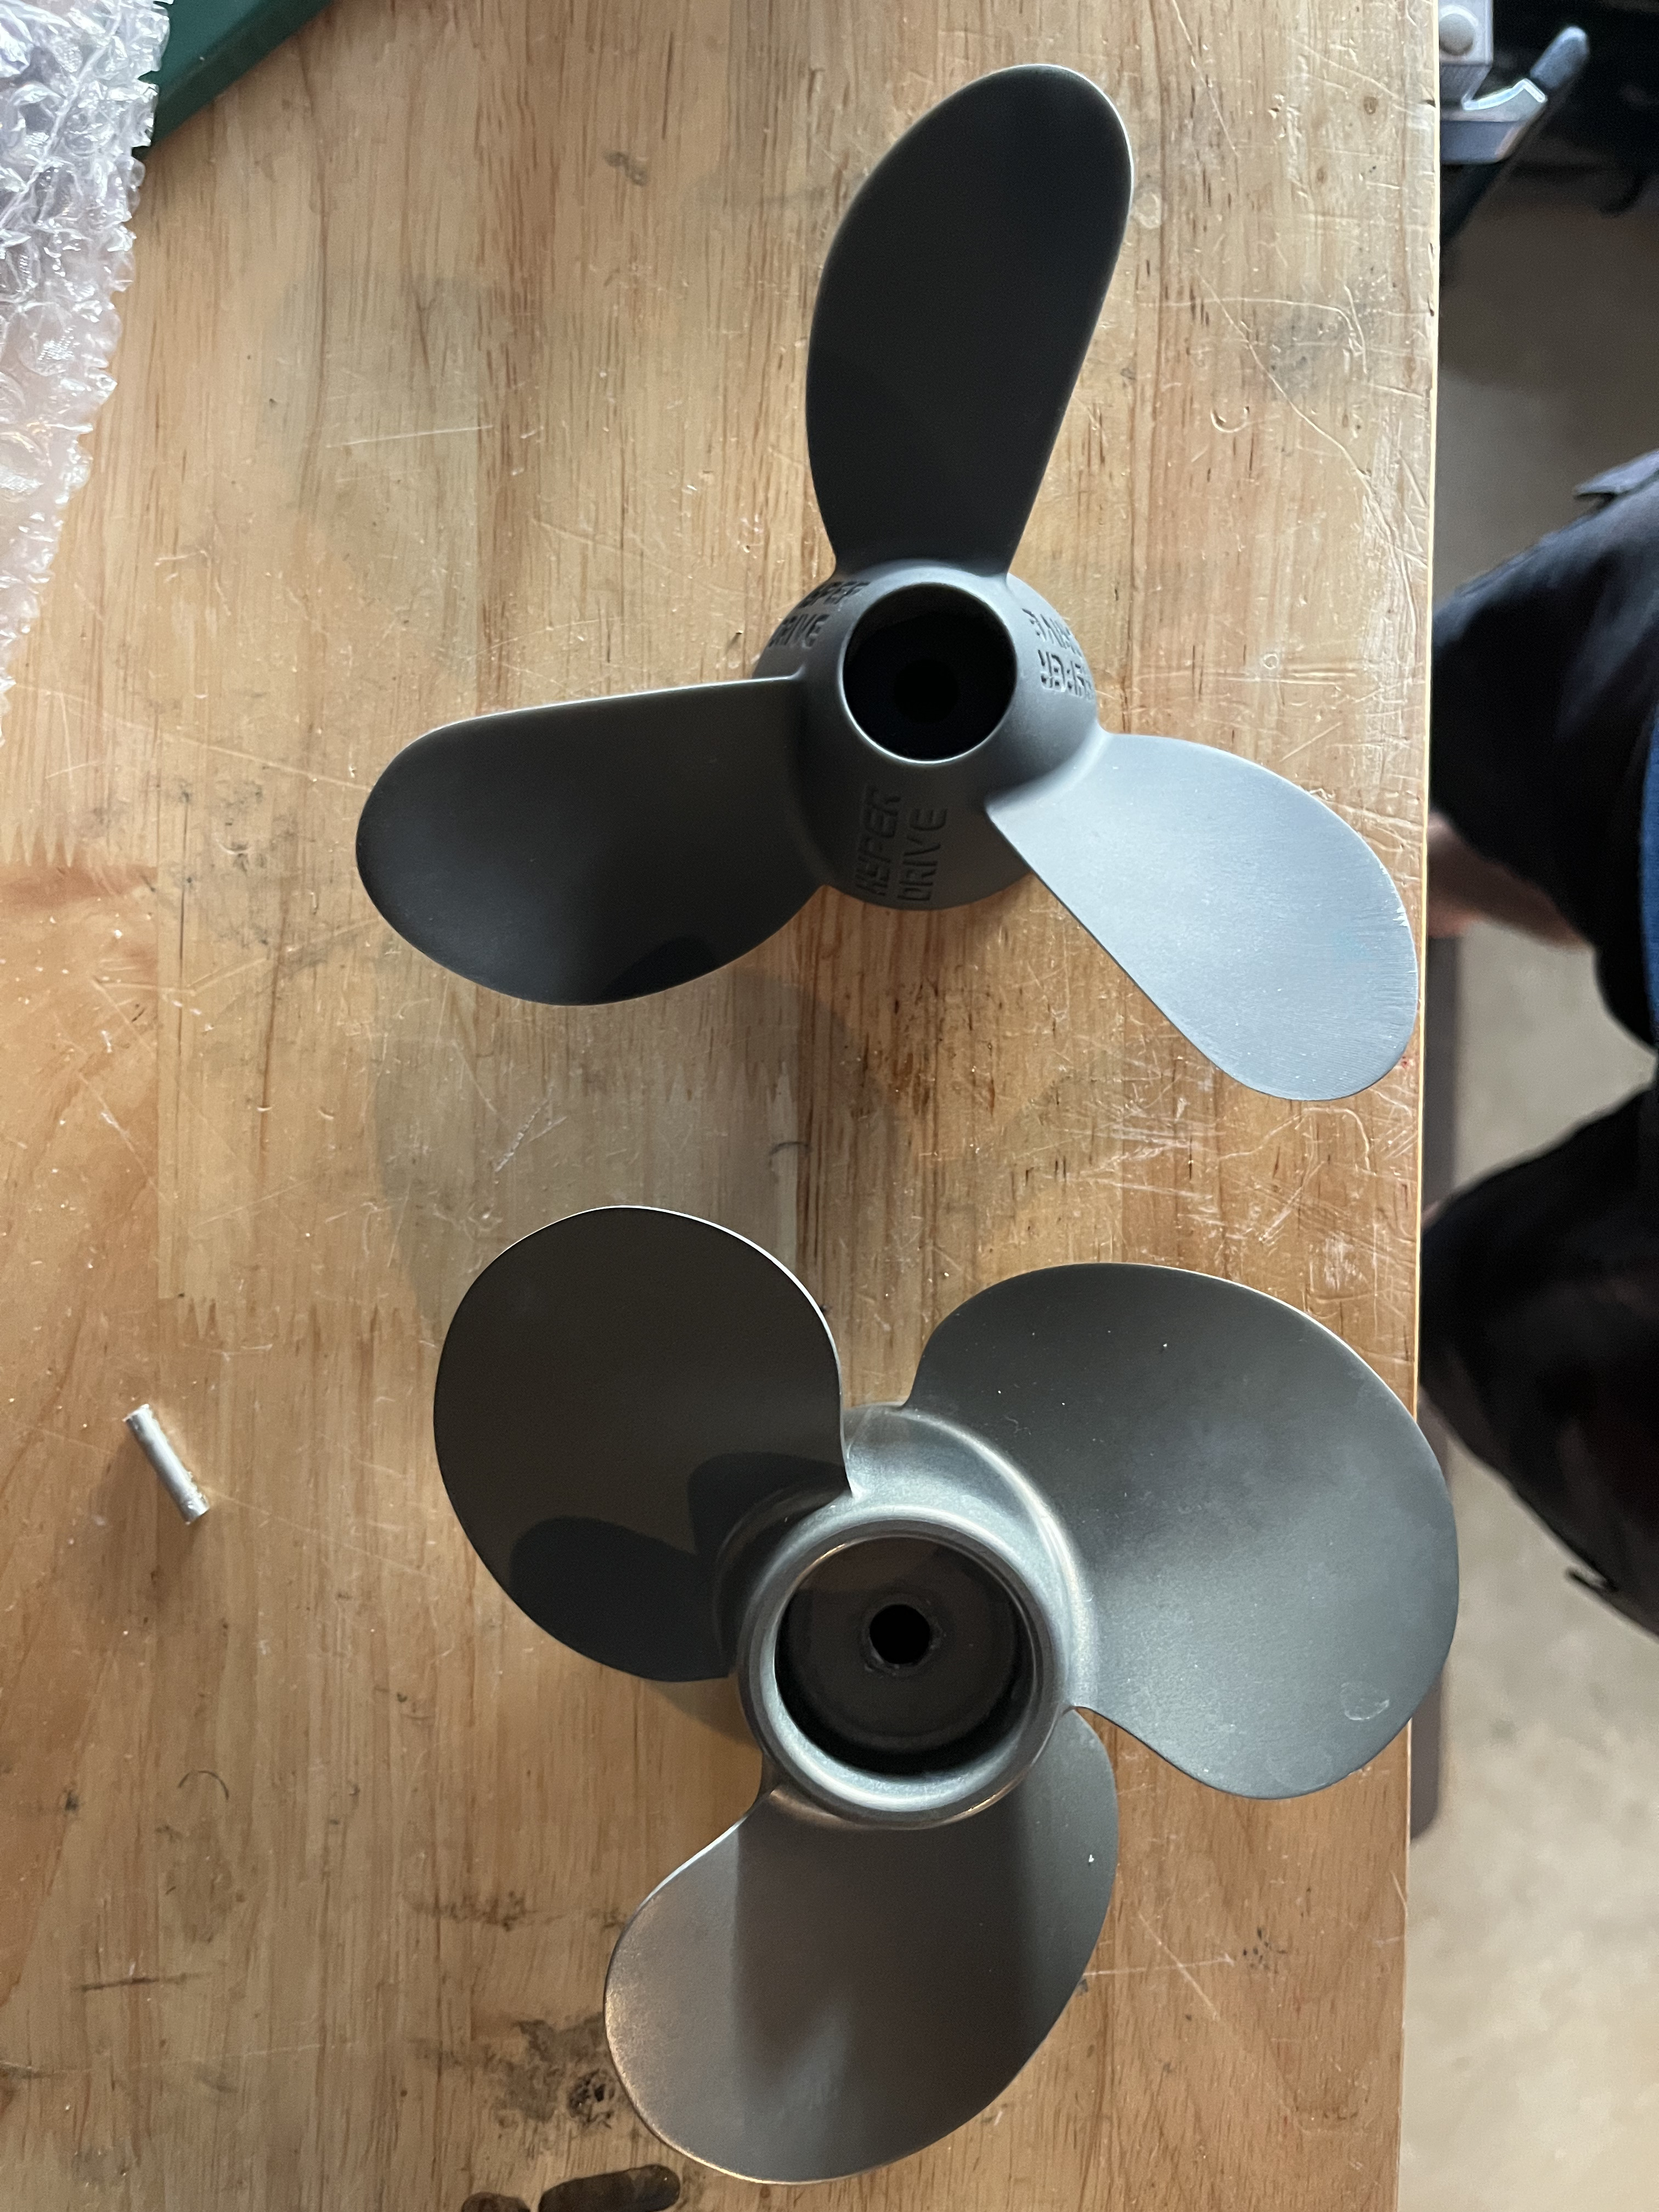
In one of previous photos i saw you had a propeller with foldable blades. I am also thinking to have similar because I’d like to use my board for foil pumping. Was it 3d printed?
On more recent photos I see you have a regular propeller. Why you decided to use it instead if foldable one?
I have a very primitive 3d printer and the details it can print are quite fragile and stuff like propeller will break immediately in use. What way would you recommend for me to get the printed parts? Are there reliable third party printing services which can print well?
In one of previous photos i saw you had a propeller with foldable blades. I am also thinking to have similar because I’d like to use my board for foil pumping. Was it 3d printed?
Yes, those were printed. They kept breaking though (my printer isn’t that good and I was using PLA+), so I stopped printing my own props.
On more recent photos I see you have a regular propeller. Why you decided to use it instead if foldable one?
I was testing the foldable props for my Foil Assist setup. Now that I built dedicated eFoils, regular props seem more suitable for the task.
I have a very primitive 3d printer and the details it can print are quite fragile and stuff like propeller will break immediately in use. What way would you recommend for me to get the printed parts? Are there reliable third party printing services which can print well?
I haven’t done it myself yet, but I think using a third party print service is a good idea since they can print with better materials. Maybe someone else here has a recommendation. I believe @JonathanC mentioned that he got some props printed.
Thanks for your answers @t-dub-maui. I have a bit more to ask:
You mentioned you use BMS only for charging. As per my understanding if you don’t use BMS for discharging the battery can quickly degradate when discharging it below limit. How do you protect it from excessive discharging?
Is ESC 75100 good enough for you? I’m just thinking if I should consider 75200?
You mentioned that you are able to continuously ride for about 30 minutes with your’s current setup while you wold like to increase power of the battery. I m also thinking of keeping a good balance between weight and power and maybe to have different battareys which you just replace after 30 minutes could be an option. What are yours thoughts on that? Or you want to increase power for higher speed dynamics?
You also mentioned aluminium box for overheat protection. Did you test it? How would you compare it with external radiator?
In the VESC I can configure things like minimum voltage and maximum current that can be pulled from the batteries. I set it to shut off once voltage per cell reaches 3.0V
The 75100 has been working great for me so far. I’m using it in two efoils and one foil assist setup.
75200 is probably better, but I don’t know anything about it.
I’m good on the power side of things. The main reason for building a bigger battery is to be able to ride for longer without having to change the battery. Maybe 1 hour of ride time would be good.
I dropped the aluminum box idea because the box is quite heavy and the external heat sink attached to the plastic box works great.
I use the flipsky 75200 and the settings for minimum voltage where is limits power all work as described. I also passive cool mine to aluminum plate inside board even through the carbon laminate never gets more than 35 after an hour ride. I would go for the 75200 as starts jump amps over 100 but riding along 30ish.
Hi @JonathanC@t-dub-maui, could you please share the motor clamp design and other 3d printed parts needed for the build? soon starting my build and this thread has been huge help! thank you in advance!
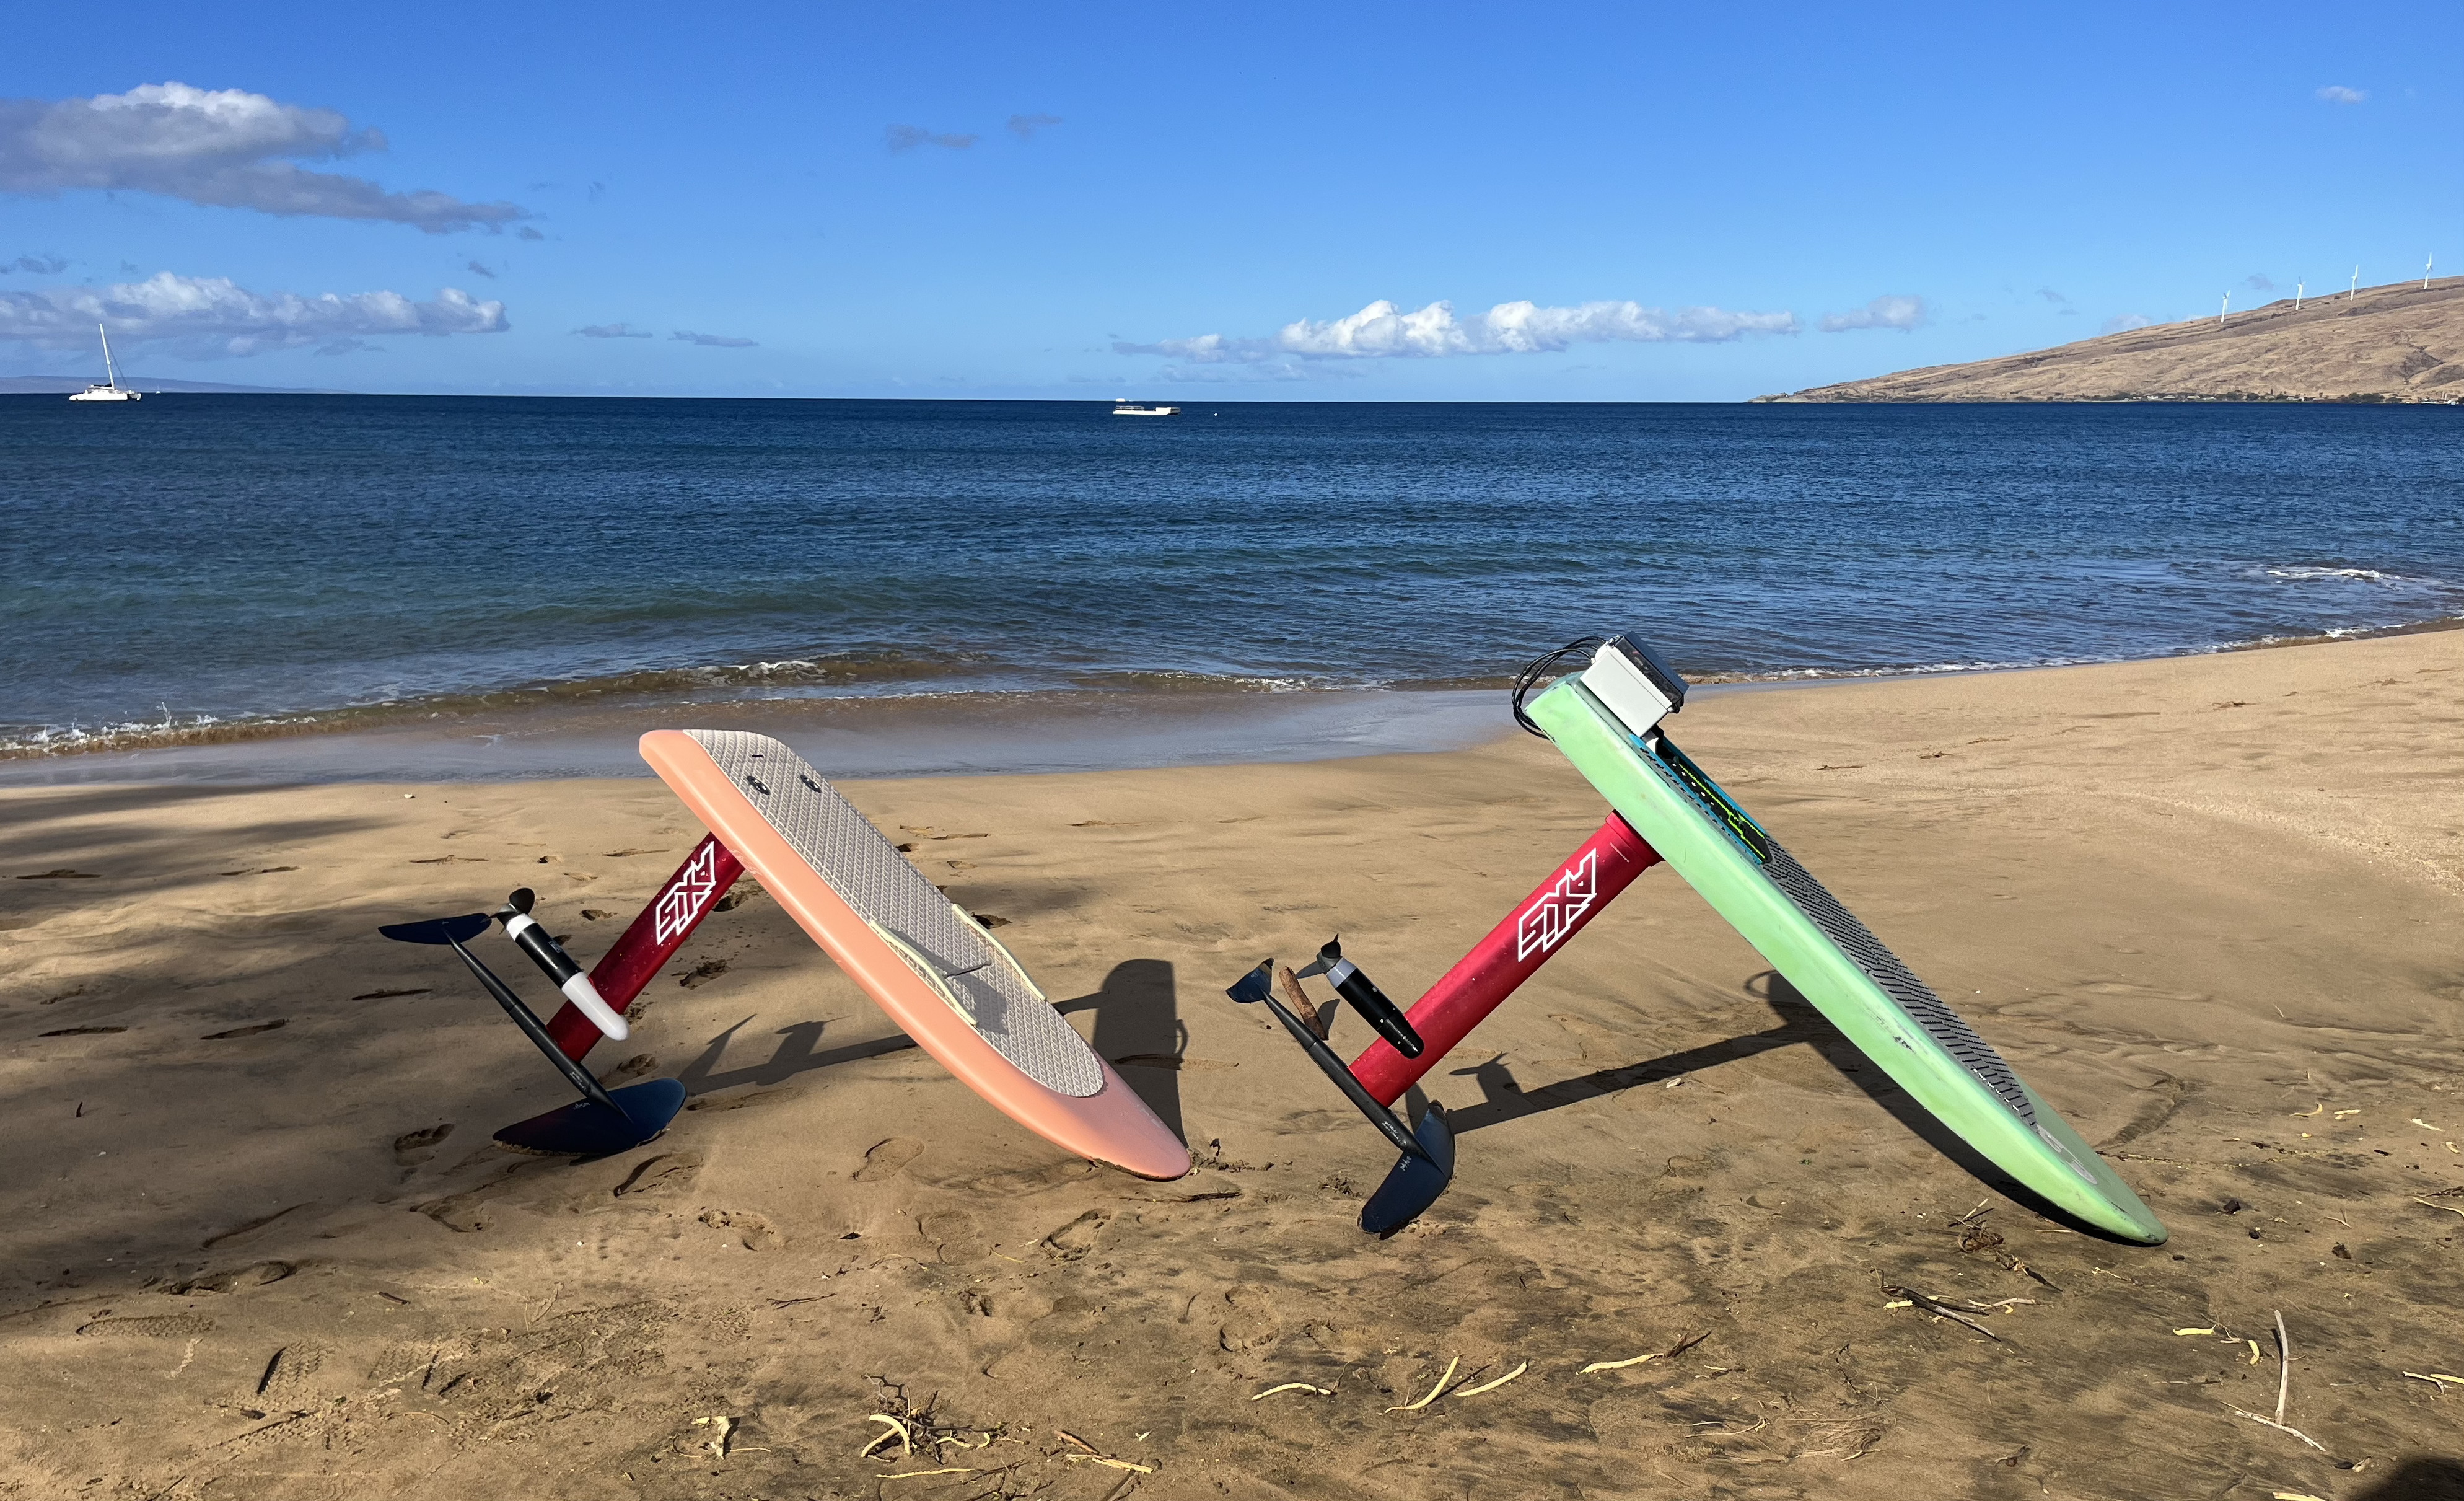
Hi @t-dub-maui, I picked up a flightboard last week and I’m planning to do one of these adapter plate e-foil builds. There are a couple builds like this kicking around the forum and a few versions of the adapter plate. Your version is simple (and cheaper!) since it’s just a flat piece of cut aluminum. I am curious about how you attached the Axis mast plate onto the adapter plate. Looking at your photos above, it seems you put two thru holes with bolts on the front. Then on the back it seems like two screws on each side. Are those thru holes as well or are they blind and tapped? For the thru holes did you take any steps to try and water proof them?
Here are some notes about my adapter plate and lessons learned:
The plate I got was 9.5mm thick to have depth to cut some threads into it. For my next version I would skip the plans for cutting threads in favor of using through-bolts and use a thinner plate instead. A thinner plate would save some weight and be flush with the bottom board surface.
The Axis baseplate has two holes in the center to attach the mast. I would also add these countersunk holes to the adapter plate and have the bolts go through both the adapter plate and Axis base plate into the mast. This should make the whole setup much more solid since these two bolts hold all 3 parts together. I think @3rd_ave_Lien went with that approach
I would put in four additional through-bolts around the perimeter to further bolt the aluminum plate and Axis baseplate together
I flooded the bottom of the plastic box (that sits on top of the aluminum plate) with silicone waterproof everything (phase wire holes and through bolt holes)